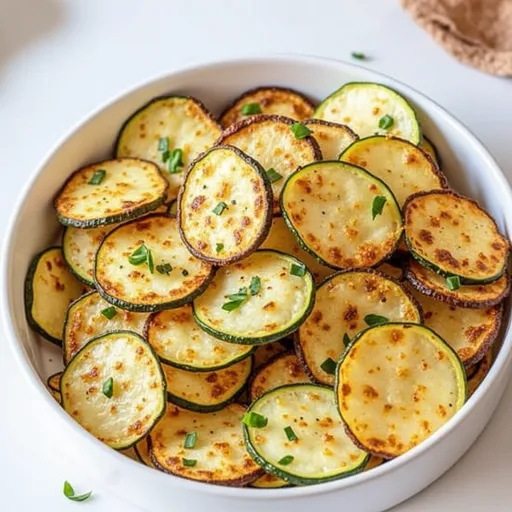
Why You’ll Love Crispy Zucchini Chips
If you’re on the hunt for a snack that’s not just delicious but also guilt-free, look no further than crispy zucchini chips. These golden delights are more than just a crunchy alternative to traditional chips; they embody a culinary adventure that speaks to your taste buds and your health. Imagine sinking your teeth into a chip that’s not only satisfying but also packed with nutrients, flavor, and a delightful crunch that can make even the most mundane movie night feel special.
Zucchini, often underappreciated, is a powerhouse of vitamins and minerals — rich in vitamins A, C, and K, as well as potassium and magnesium. Its low-calorie count makes it a staple for those seeking healthy snack options. But what sets crispy zucchini chips apart is their versatility. You can easily customize them with a variety of seasonings, transforming a simple vegetable into a vibrant and exciting treat. Whether you prefer them spicy, cheesy, or simply seasoned, these chips are the perfect canvas for your culinary creativity.
Ingredients You’ll Need
- 2 medium zucchinis
- 1–2 tablespoons of olive oil (or avocado oil for a healthier option)
- ½ teaspoon of sea salt
- ½ teaspoon of garlic powder
- ½ teaspoon of smoked paprika (optional for a little extra flavor)
- ¼ teaspoon of black pepper
- Grated parmesan (optional for added flavor and crunch)
Step-by-Step Instructions for Crispy Zucchini Chips
Step 1: Preheat Your Oven
Your journey to crispy perfection starts with preheating your oven to 250°F (120°C). This low temperature is crucial as it allows the zucchini slices to dehydrate slowly, ensuring they crisp up without burning. Think of it as creating a warm, inviting environment for your chips to transform.
Step 2: Prepare the Zucchini
Next, it’s time to give your zucchinis the attention they deserve. Wash and dry them thoroughly. Using a sharp knife or, even better, a mandoline slicer, slice the zucchinis into thin rounds, aiming for about 1/8-inch thickness. The thinner the slices, the crispier your chips will turn out. A mandoline slicer not only saves you time but also ensures uniformity, which is key to achieving that perfect crunch.
Step 3: Remove Excess Moisture
Zucchini is notorious for its high water content, and to achieve the ultimate crispiness, you must remove as much moisture as possible. Lay your zucchini slices on a paper towel and sprinkle them lightly with salt. Allow them to sit for about 10 minutes; this will help draw out excess water. Afterward, gently pat the slices with another paper towel to soak up the moisture. This simple step is critical and can make or break your chip-making experience!
Step 4: Season the Zucchini Slices
In a large bowl, toss the zucchini slices with olive oil until they’re evenly coated. This helps the seasonings stick and enhances the flavor. Add your sea salt, garlic powder, smoked paprika (if using), and black pepper to the mix. For those craving an extra cheesy crunch, this is the time to sprinkle in some grated parmesan. Toss the slices again to ensure every chip is coated in deliciousness.
Step 5: Arrange and Bake
Now we’re getting to the exciting part! Line a baking sheet with parchment paper to prevent sticking. Arrange the zucchini slices in a single layer, ensuring none overlap. Overlapping will lead to steaming rather than crisping, which is the opposite of what we want. If you have too many slices for one sheet, don’t hesitate to use two! Place the baking sheets in the oven and let them bake for about 1.5 to 2 hours. Flip the slices halfway through to ensure even crisping. Patience is key here — the low temperature allows the zucchini to dehydrate perfectly.
Step 6: Check for Crispiness
After about 90 minutes, it’s time for a little inspection. Your chips should be golden brown and crispy to the touch. If they still feel soft, give them a bit more time in the oven. Once they’re ready, remove them and let them cool for about 5 minutes. This cooling process helps them firm up even more, giving you that satisfying crunch you’re after.
Tips for Perfect Zucchini Chips
- Uniform Slices: Consistency is critical. Use a mandoline for even slices, ensuring that every chip cooks at the same rate.
- Avoid Overcrowding: Give your chips space to breathe! Overlapping will lead to soggy chips.
- Low and Slow: Embrace the low temperature for even crispiness. It’s a slow dance, not a sprint!
- Experiment with Flavors: Zucchini is a blank canvas. Add chili powder for some heat or nutritional yeast for a cheesy, vegan-friendly kick.
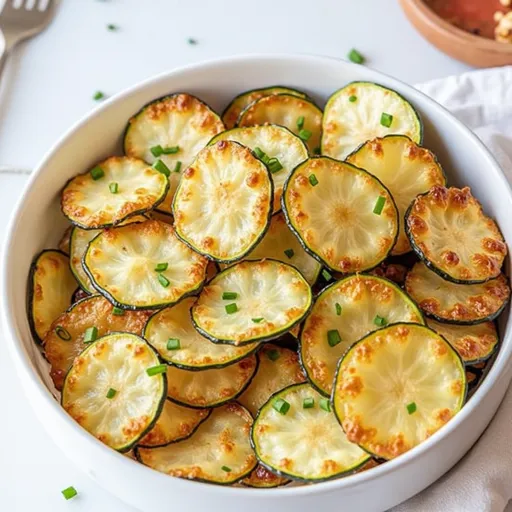
Serving Suggestions
These crispy zucchini chips are incredibly versatile and can be paired with a variety of dips. Serve them alongside hummus, guacamole, or a creamy Greek yogurt dip for an exciting appetizer. They also make a fantastic side for sandwiches and burgers or can be enjoyed solo as a light snack. Want to elevate your snacking game even further? Try serving them with other baked vegetable chips like sweet potato or kale for a colorful and nutritious platter.
Storage and Freezing
To keep your leftover zucchini chips fresh, store them in an airtight container at room temperature for up to 3 days. Avoid refrigerating them, as this can lead to sogginess. If your chips lose their crunch, simply pop them back in the oven for a few minutes to revive that delightful crispiness.
Variations and Substitutions
Feel free to customize your crispy zucchini chips to suit your palate! Here are a few ideas:
- Spicy Version: Add cayenne pepper or chili flakes for an extra kick.
- Herb-Infused: Experiment with dried herbs like oregano, thyme, or Italian seasoning for a Mediterranean twist.
- Cheesy Delight: Replace the parmesan with nutritional yeast for a dairy-free option that still packs a cheesy punch.
FAQs
Can I use other vegetables for this recipe?
Absolutely! Carrots, sweet potatoes, or even beets can be sliced and prepared in a similar manner to create your own vegetable chip medley.
How do I know when they’re done baking?
Look for a golden brown color and a firm texture. The chips should be crispy to the touch; if they’re still soft, they need more time in the oven.
Can I use a dehydrator instead of an oven?
Yes! If you have a dehydrator, that’s an excellent way to achieve crispy zucchini chips. Just follow the manufacturer’s instructions for dehydrating vegetables.
Troubleshooting
If your chips turn out soggy, it’s likely due to excess moisture. Ensure you slice them thinly and allow enough time for drying. If they’re burnt, lower the oven temperature and keep a closer eye on them during the last 30 minutes of baking.
Final Thoughts
Cooking is an adventure, and with this crispy zucchini chips recipe, you’re well on your way to discovering the joy of creating healthy snacks that don’t skimp on flavor. So grab your zucchini, embrace the kitchen, and let your creativity shine. With each bite, you’ll not only satisfy your cravings but also celebrate the vibrant flavors that come from cooking with passion. Whether you’re treating yourself or sharing with friends, these chips are sure to elevate your snack game. So go on, get crunchy, and enjoy the delicious journey ahead!

Crispy Zucchini Chips Recipe
Ingredients
Main
- 2 medium zucchinis (washed and dried)
- 1-2 tablespoons olive oil (or avocado oil)
- ½ teaspoon sea salt
- ½ teaspoon garlic powder
- ½ teaspoon smoked paprika (optional)
- ¼ teaspoon black pepper
- optional grated parmesan (for added flavor and crunch)
Instructions
- Preheat oven to 250°F (120°C). Slice zucchinis into 1/8-inch rounds.
- Lay slices on paper towels, sprinkle with salt, and let sit for 10 minutes. Pat dry.
- Toss zucchini slices with olive oil and season with salt, garlic powder, paprika, and black pepper. Add parmesan if desired.
- Arrange slices on parchment-lined baking sheets in a single layer. Bake for 1.5 to 2 hours, flipping halfway.
- Check for crispiness around 90 minutes. Cool for 5 minutes before serving.
Notes
Nutrition
Loved this recipe? Save it to your favorite Pinterest board so you can easily find it later! It’s the perfect way to keep all your sweet ideas in one place. ✨