Why You’ll Adore This Recipe
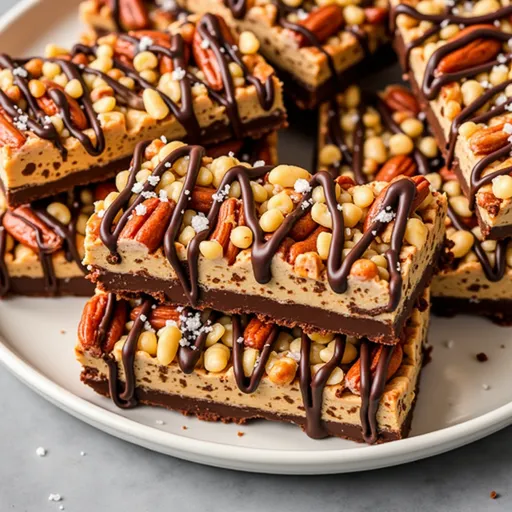
When it comes to satisfying cravings, few things can compete with the allure of a perfectly crafted nut bar. These Dark Chocolate Sea Salt Nut Bars are not only a feast for the senses, but they also strike that perfect balance between rich, indulgent chocolate and the satisfying crunch of mixed nuts. Picture this: a sweet, sticky base of dates and nuts, topped with a glossy layer of melted dark chocolate, all crowned with a sprinkle of sea salt. Each bite is a mini-adventure that invites you to savor the moment.
What’s more, these bars are incredibly versatile and packed with wholesome ingredients. They serve as a fantastic snack for busy days, a delightful addition to lunchboxes, or even a guilt-free dessert. With minimal effort, you can whip up these bars and indulge your sweet tooth while still feeling good about what you’re eating. So grab your apron; it’s time to dive into the delicious world of homemade nut bars!
Ingredients You’ll Need
Before we get started, let’s gather our ingredients. Here’s what you’ll need:
- 1 cup mixed nuts (almonds, walnuts, pecans)
- 1 cup pitted dates
- 1/2 cup dark chocolate chips
- 1/4 teaspoon sea salt
- 1 tablespoon coconut oil
- 1 teaspoon vanilla extract
These ingredients come together to create a treat that’s not only tasty but also packed with nutrients. Nuts offer healthy fats and protein, while dates provide natural sweetness and fiber. And let’s not forget about that luscious dark chocolate—rich in antioxidants and utterly divine!
Crafting Your Nut Bars: Step-by-Step Instructions
Now that we’ve got our ingredients ready, let’s transform them into something extraordinary. Follow these simple steps to create your nut bars:
- Preheat the oven: Start by preheating your oven to 350°F (175°C). This is the perfect temperature for toasting our nuts, enhancing their flavor.
- Prepare your pan: Line an 8×8 inch baking dish with parchment paper. This will ensure that your bars come out easily once they’re set.
- Blend the nuts and dates: In a food processor, combine the mixed nuts and pitted dates. Blend until the mixture is well combined and sticky—this will form the base of your bars.
- Press into the dish: Transfer the nut and date mixture into the prepared baking dish. Use your hands or a spatula to press it evenly into the bottom.
- Melt the chocolate: In a small saucepan, melt the dark chocolate chips and coconut oil over low heat. Stir continuously until smooth and creamy.
- Add flavor: Remove the melted chocolate from heat and stir in the vanilla extract and sea salt. This step adds depth to the chocolate, making it even more irresistible.
- Pour and spread: Pour the melted chocolate over the nut base and spread it evenly using a spatula. Make sure every inch is covered in that luscious chocolate goodness.
- Final touches: If you’re feeling extra indulgent, sprinkle a little more sea salt on top for a delightful contrast to the sweetness.
- Chill to set: Refrigerate the bars for at least 2 hours, allowing the chocolate to set and firm up.
- Slice and serve: Once set, lift the bars out of the dish using the parchment paper. Cut into squares and enjoy!
Tips for Perfect Bars
To make sure your nut bars turn out perfectly every time, keep these tips in mind:
- Choose the right nuts: Feel free to experiment with different nuts. Almonds, walnuts, and pecans are fantastic, but cashews or hazelnuts can also add a unique flavor.
- Use fresh dates: Ensure your dates are fresh and soft. If they’re a bit dry, soak them in warm water for about 10 minutes to soften before blending.
- Don’t rush the cooling: Allow the bars to chill for at least 2 hours. This will help the chocolate set properly, making slicing much easier.
- Work with melted chocolate: If you find melting chocolate a bit tricky, try adding a touch of coconut oil to help it smooth out. This will also create a beautiful sheen on your bars.
Variations to Try
One of the best parts about making your own nut bars is the freedom to customize them. Here are some tasty variations to consider:
- Flavor infusions: Add a dash of cinnamon or nutmeg for warmth and spice. A splash of almond or orange extract can also enhance the flavor profile.
- Mix in some fruit: Dried cranberries, apricots, or even chocolate-covered raisins can bring a new dimension to your nut bars.
- Nut butter twist: Swirl in a tablespoon of almond or peanut butter into the chocolate layer for added creaminess.
Substitutions You Can Make
If you find yourself missing an ingredient, don’t worry! Here are some substitutions you can use:
- Nuts: If you’re allergic to nuts or want to mix it up, use seeds like pumpkin or sunflower seeds.
- Sweeteners: While dates are a great natural sweetener, you can also use maple syrup or agave nectar to bind your bars together.
- Chocolate: If dark chocolate isn’t your favorite, feel free to use milk chocolate or even white chocolate for a sweeter taste.
Essential Equipment
To create these delightful nut bars, you’ll need a few handy tools:
- Food processor: A must-have for blending the nuts and dates into a sticky mixture.
- Baking dish: An 8×8 inch dish works perfectly for these bars.
- Parchment paper: Essential for easy removal and cleanup.
- Small saucepan: For melting the chocolate and coconut oil.
Storage and Freezing Tips
To keep your nut bars fresh and delicious, follow these storage tips:
- Airtight container: Store the bars in an airtight container at room temperature for up to a week.
- Refrigeration: If you want them to last longer, keep them in the fridge, where they’ll stay fresh for about two weeks.
- Freezing: For longer storage, you can freeze the bars. Just place them in an airtight container with parchment paper between layers to prevent sticking. They can last for several months in the freezer.
FAQs About Dark Chocolate Sea Salt Nut Bars
Got questions? Here are some common queries about this delightful recipe:
- Can I use nuts that are not roasted? Absolutely! Raw nuts can be used, but roasting them enhances their flavor and crunch.
- What if my bars are too crumbly? If your bars don’t hold together, try adding a little more melted chocolate or coconut oil to help bind them.
- Can I make these vegan? Yes! This recipe is naturally vegan as long as you use dairy-free chocolate.
Troubleshooting Common Issues
Even the best chefs encounter issues sometimes! Here’s how to solve a few common problems:
- Brittle bars: If your bars are too hard, it may be due to overbaking or not enough moisture from the dates. To remedy this, try adding a bit more sweetener next time.
- Chocolate not setting: Ensure you refrigerate your bars long enough for the chocolate to firm up properly. If it’s still soft, it may need a bit more time in the fridge.
Conclusion: Your Adventure Awaits!
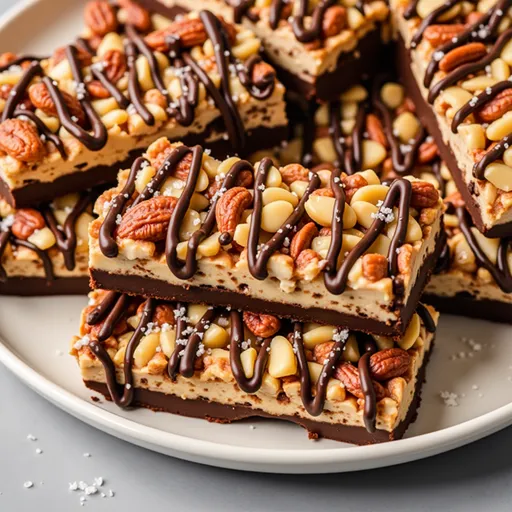
There you have it—a simple yet delectable recipe for Dark Chocolate Sea Salt Nut Bars that will tantalize your taste buds and spark your culinary creativity. The blend of rich chocolate and crunchy nuts creates an irresistible snack that’s both satisfying and nutritious. Whether you’re whipping these up for an afternoon treat, a hike, or just to indulge your sweet tooth, you’re in for a delightful experience.
So why wait? Grab those ingredients, fire up your food processor, and embark on a delicious adventure in your kitchen. Remember, cooking is all about exploration and having fun. So go ahead and add your spin to this recipe—experiment, taste, and enjoy every moment. Happy cooking!
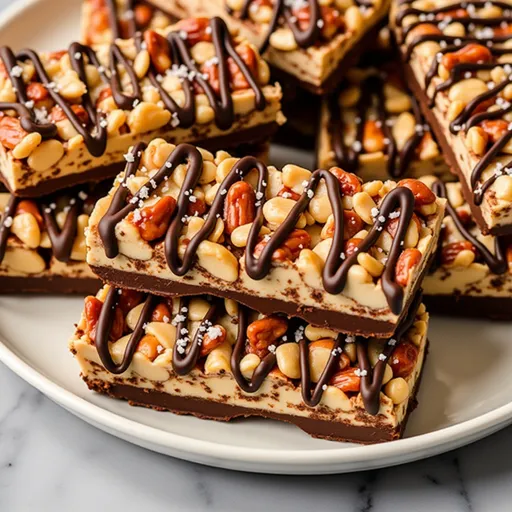
Dark Chocolate Sea Salt Nut Bars
Ingredients
Mixed Nuts and Dates
- 1 cup mixed nuts (almonds, walnuts, pecans)
- 1 cup pitted dates
Chocolate and Flavoring
- 1/2 cup dark chocolate chips
- 1/4 teaspoon sea salt
- 1 tablespoon coconut oil
- 1 teaspoon vanilla extract
Instructions
- Preheat oven to 350°F (175°C) and line an 8x8 inch dish with parchment.
- Blend nuts and dates until sticky, then press into dish.
- Melt chocolate with coconut oil over low heat, then stir in vanilla and salt.
- Pour chocolate over nut base and spread evenly, then refrigerate for 2 hours.
- Lift out of dish, cut into squares, and enjoy.
Notes
Nutrition
Loved this recipe? Save it to your favorite Pinterest board so you can easily find it later! It’s the perfect way to keep all your sweet ideas in one place. ✨