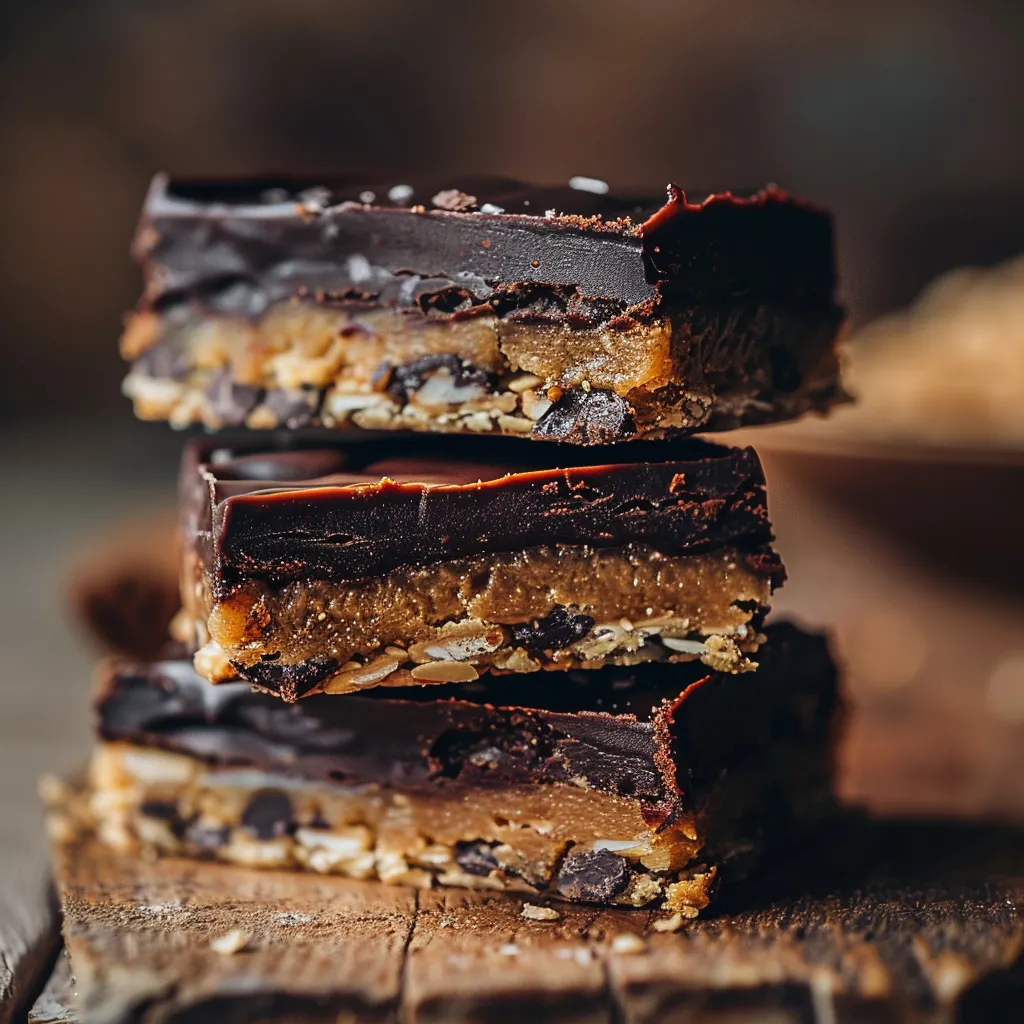
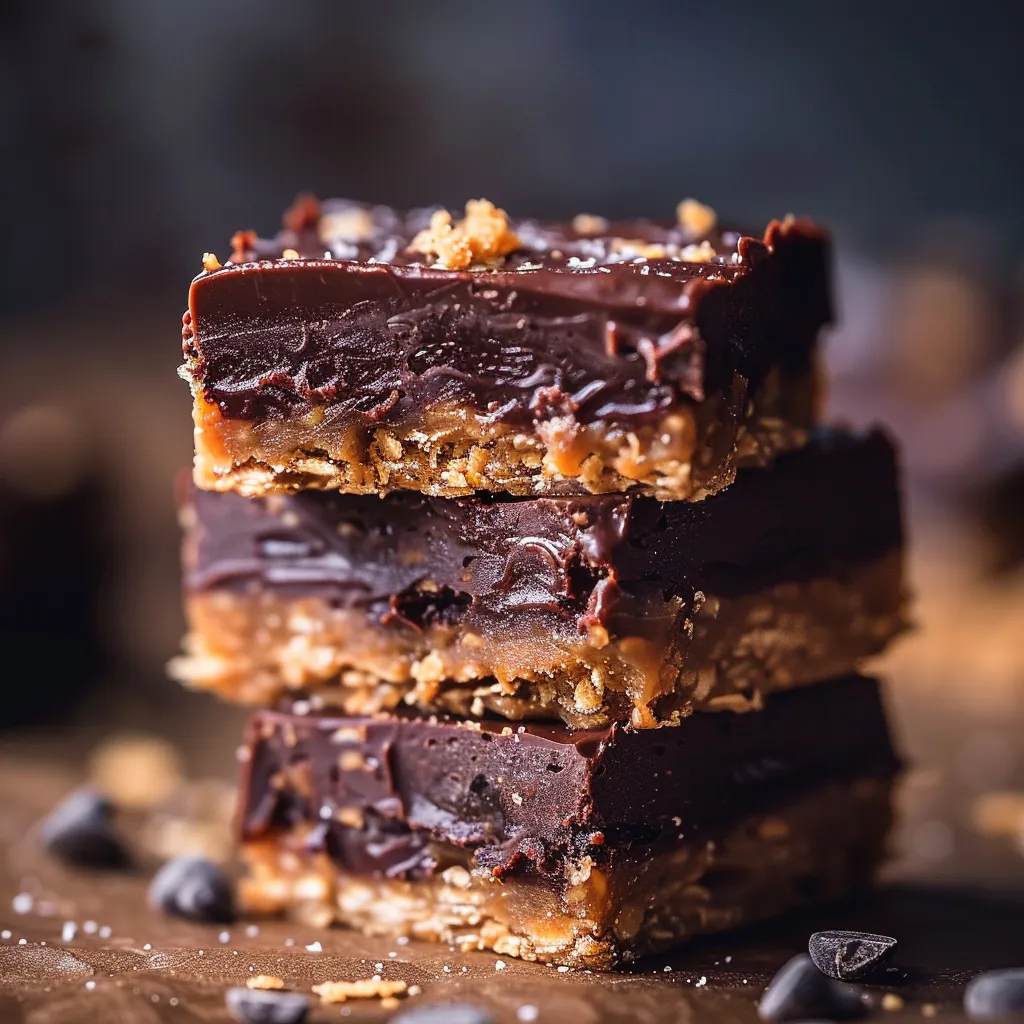
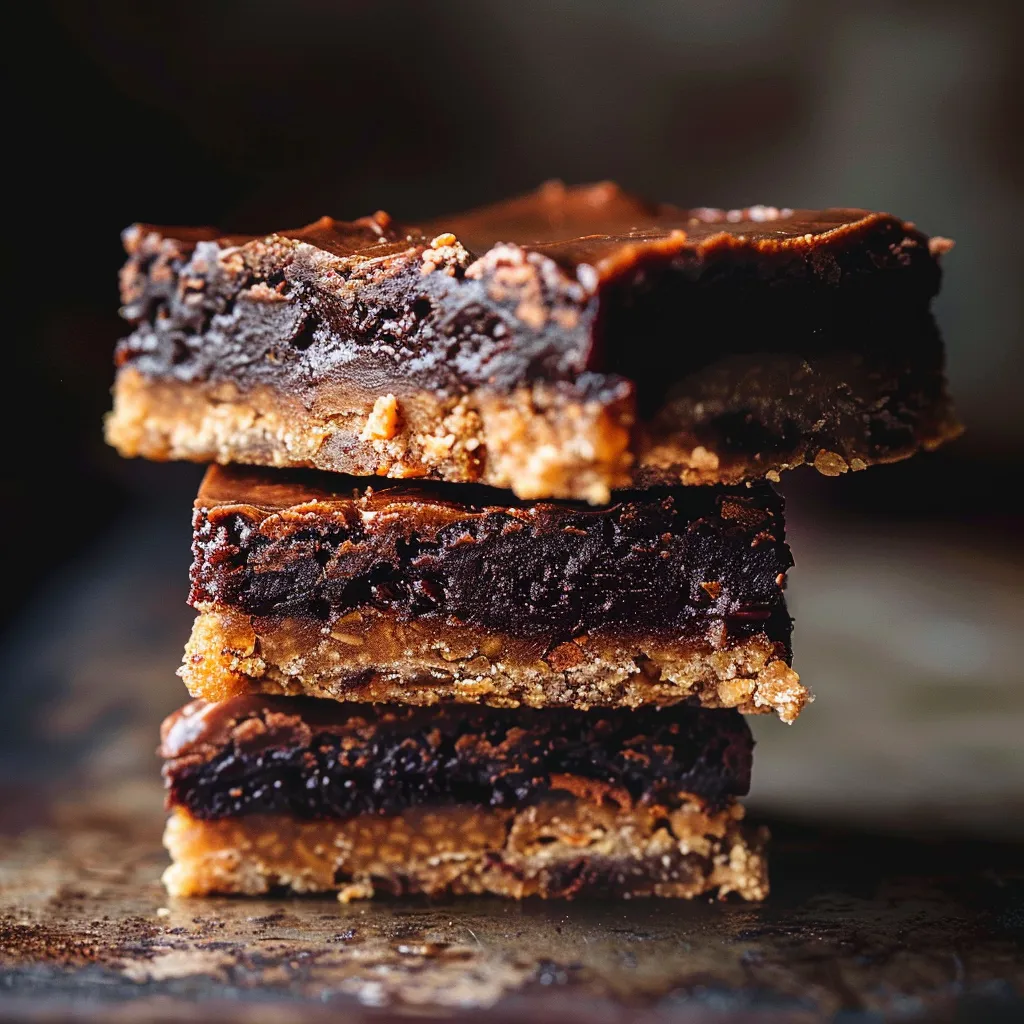
Welcome to a journey into the world of flavor with my Homemade Healthy Twix Bars! These delightful treats are not just a nostalgic nod to a beloved candy bar; they’re a guilt-free indulgence crafted with wholesome ingredients that bring together crunchy, chewy, and creamy textures. Imagine biting into a bar that is as satisfying as it is healthy — that’s exactly what you’ll get with this recipe. Gluten-free and packed with nutritious elements, let’s elevate your snacking experience and embrace the thrill of cooking with heat!
Why You’ll Love This Recipe
- Guilt-free indulgence: Satisfy your sweet tooth without compromising your health goals. These bars are made with wholesome ingredients that are both nourishing and delicious.
- Easy to make: This recipe is straightforward and perfect for both novice and seasoned chefs. In just a few simple steps, you can whip up a batch of these tasty bars.
- Customizable: Feel free to play with the ingredients! From nut butters to sweeteners, you can adapt this recipe to fit your taste preferences and dietary needs.
- Make-ahead goodness: Prepare these bars in advance for a quick snack or dessert. They store beautifully, making them perfect for meal prepping.
- Whole food ingredients: Using almond flour, medjool dates, and dark chocolate, these bars are packed with nutrients, making them a healthier option compared to traditional sweets.
Ingredient Breakdown
Here’s what you’ll need to create your own Homemade Healthy Twix Bars:
- 1 cup almond flour: A gluten-free alternative that provides a nutty flavor and a great texture.
- 1/4 cup coconut oil, melted: Acts as a binder and adds healthy fats. You can substitute with melted butter if preferred.
- 2 tablespoons maple syrup: A natural sweetener that adds depth to the flavor. Honey can also be used for a different taste.
- 1/4 teaspoon salt: Enhances the sweetness and balances flavors.
- 1 cup medjool dates, pitted: These provide natural sweetness and a chewy texture. If you don’t have dates, consider using dried figs or prunes.
- 1/4 cup natural peanut butter: Adds creaminess and flavor. Almond butter is a great alternative for a nut-free option.
- 1/4 cup dark chocolate chips: Choose high-quality chocolate for the best flavor. Dairy-free chips are available for a vegan option.
- 1 tablespoon unsweetened cocoa powder: Intensifies the chocolate flavor in the bars.
- 1 teaspoon vanilla extract: A must for enhancing the overall flavor profile.
Pro Tips for Success
- Use room temperature ingredients: This helps in mixing everything smoothly, especially the peanut butter.
- Don’t overbake the base layer: Keep an eye on it; you want it lightly golden to maintain a soft texture.
- Chill before cutting: Let the bars set in the fridge for at least an hour; this makes cutting easier and gives the bars a firmer texture.
- Experiment with toppings: Feel free to add nuts, seeds, or even a sprinkle of sea salt on top of the chocolate layer before chilling.
- Make it vegan: Substitute maple syrup and coconut oil for any non-vegan ingredients to cater to dietary restrictions.
- Storage is key: Store these bars in an airtight container to keep them fresh. They can last up to two weeks in the fridge or three months in the freezer.
- Layer correctly: Ensure each layer is even for the best texture and flavor distribution.
- Adjust sweetness to your liking: If you prefer sweeter bars, add more maple syrup or chocolate chips.
- Use quality chocolate: The type of chocolate can make a huge difference in the overall flavor of the bars.
Troubleshooting Common Mistakes
- Bars are too crumbly: This can happen if there’s not enough binding. Ensure the coconut oil is fully melted and the dates are blended well.
- Chocolate layer is too thick: If you find the chocolate too overpowering, reduce the amount of chocolate chips in the recipe next time.
- Base layer is hard: Overbaking can lead to a hard texture. Remove from the oven as soon as it’s golden.
- Too sweet: Adjust the maple syrup to your taste preference in future batches.
Variations to Try
- Nut-free version: Substitute peanut butter with sunflower seed butter and almond flour with oat flour for a nut-free treat.
- Raw version: Skip the baking step and press the mixture into a dish directly for a raw version of these bars.
- Chocolate coconut bars: Add shredded coconut to the chocolate layer for an added tropical twist.
- Spicy kick: Infuse some cayenne powder into the chocolate layer for a surprising heat that pairs well with sweetness.
Storage and Make-Ahead Instructions
These Healthy Twix Bars can be made ahead of time and stored for later enjoyment. Here’s how:
- In the fridge: Store in an airtight container for up to two weeks. This keeps them fresh while maintaining their deliciousness.
- In the freezer: For longer storage, wrap each bar individually in parchment paper and place them in a freezer-safe container. They can be frozen for up to three months.
- Thawing: When you’re ready to enjoy a frozen Twix Bar, simply transfer it to the fridge for a couple of hours to thaw gently.
Frequently Asked Questions
- Can I substitute almond flour with regular flour? Yes, but the bars will no longer be gluten-free.
- How do I make the caramel layer? Blend the medjool dates, peanut butter, and vanilla extract until smooth.
- Can I use a different sweetener? Absolutely! Honey or agave syrup work well as alternatives.
- What if my bars are too sticky? Ensure the mixture is well-chilled before cutting. Dust with cocoa powder if necessary.
- Are these bars vegan? They can be made vegan by using maple syrup and ensuring your chocolate is dairy-free.
- Can I add protein powder? Yes, just be mindful of the moisture content; you may need to adjust other ingredients accordingly.
- How do I know when the base layer is done baking? Look for a light golden color and a firm feel when gently pressed.
- What should I serve these bars with? They pair excellently with a cup of tea or coffee, or as a post-workout snack.
Nutritional Tips and Dietary Adaptations
These Homemade Healthy Twix Bars are not just a treat; they can fit into various dietary lifestyles:
- Gluten-free: Made with almond flour, these bars are perfect for those with gluten sensitivities.
- Dairy-free: Use dairy-free chocolate chips and coconut oil to keep these bars creamy without the dairy.
- High-fiber: Thanks to the medjool dates and almond flour, these bars are packed with fiber, aiding digestion.
- Low in refined sugars: Using natural sweeteners keeps the sugar content lower and the flavor high.
Essential Equipment
To make your Homemade Healthy Twix Bars, you’ll need:
- Mixing bowl: For combining the ingredients.
- Food processor: Essential for creating a smooth caramel layer from the dates.
- 8×8 inch baking dish: The perfect size for baking and setting the bars.
- Parchment paper: For lining the baking dish, ensuring easy removal of the bars.
- Microwave-safe bowl: For melting the chocolate smoothly and evenly.
Serving Suggestions
Serve your Homemade Healthy Twix Bars as a delectable snack, dessert, or fuel for your day:
- With a cup of coffee: Enjoy these bars alongside your morning brew for a delightful start to your day.
- As a post-workout snack: They’re perfect for replenishing energy after a hard workout, providing both carbs and protein.
- In a lunchbox: Pack these bars as a sweet treat for kids or adults alike; they’re a hit at any lunchtime gathering.
- On a dessert platter: Present them alongside fresh fruit or yogurt for a balanced dessert option.
Embrace the adventure that cooking brings, and let your kitchen become a canvas for flavors and creativity. With these Homemade Healthy Twix Bars, you’re not just making a snack; you’re crafting a story worth telling. So grab your skillet, ignite your spirit, and let’s cook with fire!
Homemade Healthy Twix Bars (Gluten-Free Recipe)
Ingredients
Base Layer
- 1 cup almond flour
- 1/4 cup coconut oil, melted
- 2 tablespoons maple syrup
- 1/4 teaspoon salt
Caramel Layer
- 1 cup medjool dates, pitted
- 1/4 cup natural peanut butter
Chocolate Topping
- 1/4 cup dark chocolate chips
- 1 tablespoon unsweetened cocoa powder
- 1 teaspoon vanilla extract
Instructions
- Preheat oven to 350°F (175°C), line an 8x8 inch dish with parchment.
- Mix almond flour, melted coconut oil, maple syrup, and salt; press into dish and bake 10-12 mins. Cool.
- Blend dates, peanut butter, and vanilla until smooth for caramel layer.
- Spread caramel over cooled base, melt chocolate chips with cocoa powder, then pour over caramel. Chill for 1 hour.
Notes
Nutrition
Loved this recipe? Save it to your favorite Pinterest board so you can easily find it later! It’s the perfect way to keep all your sweet ideas in one place. ✨