Author

Avery Collins

Browsing

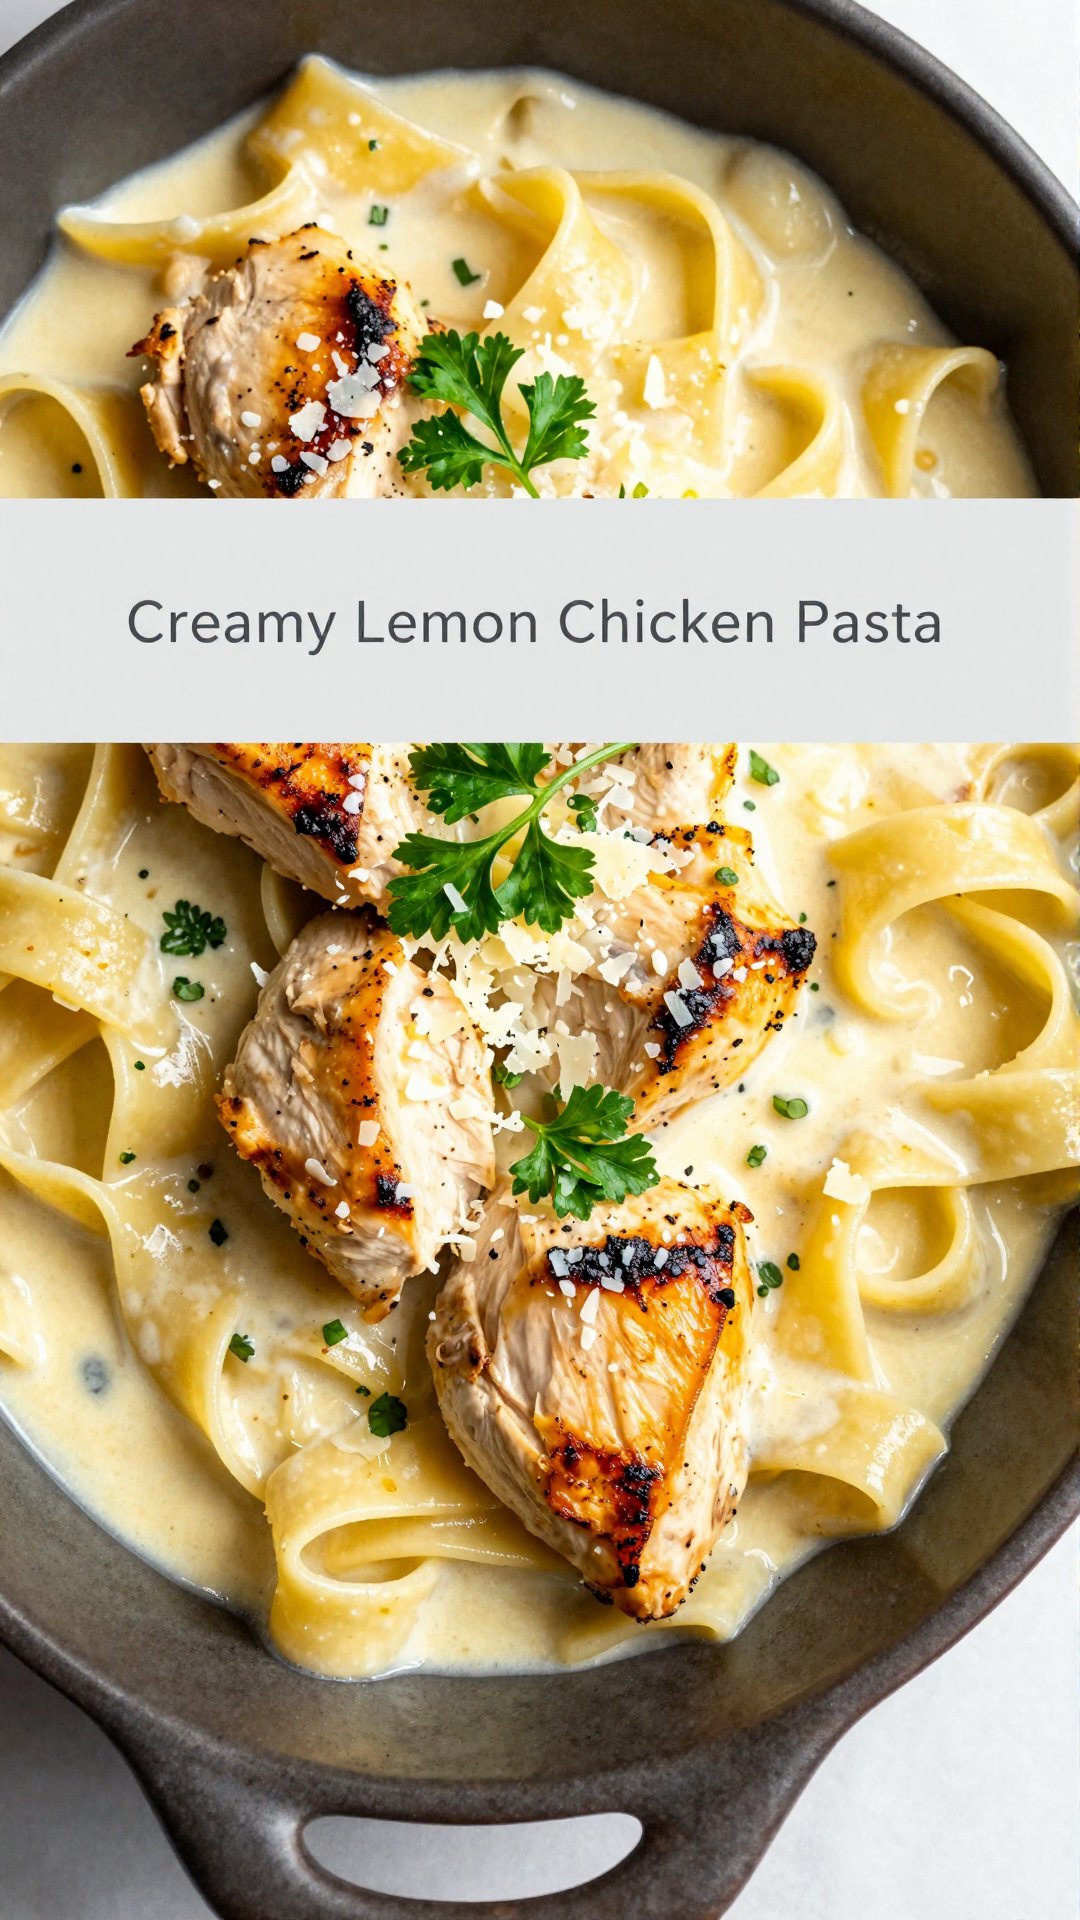
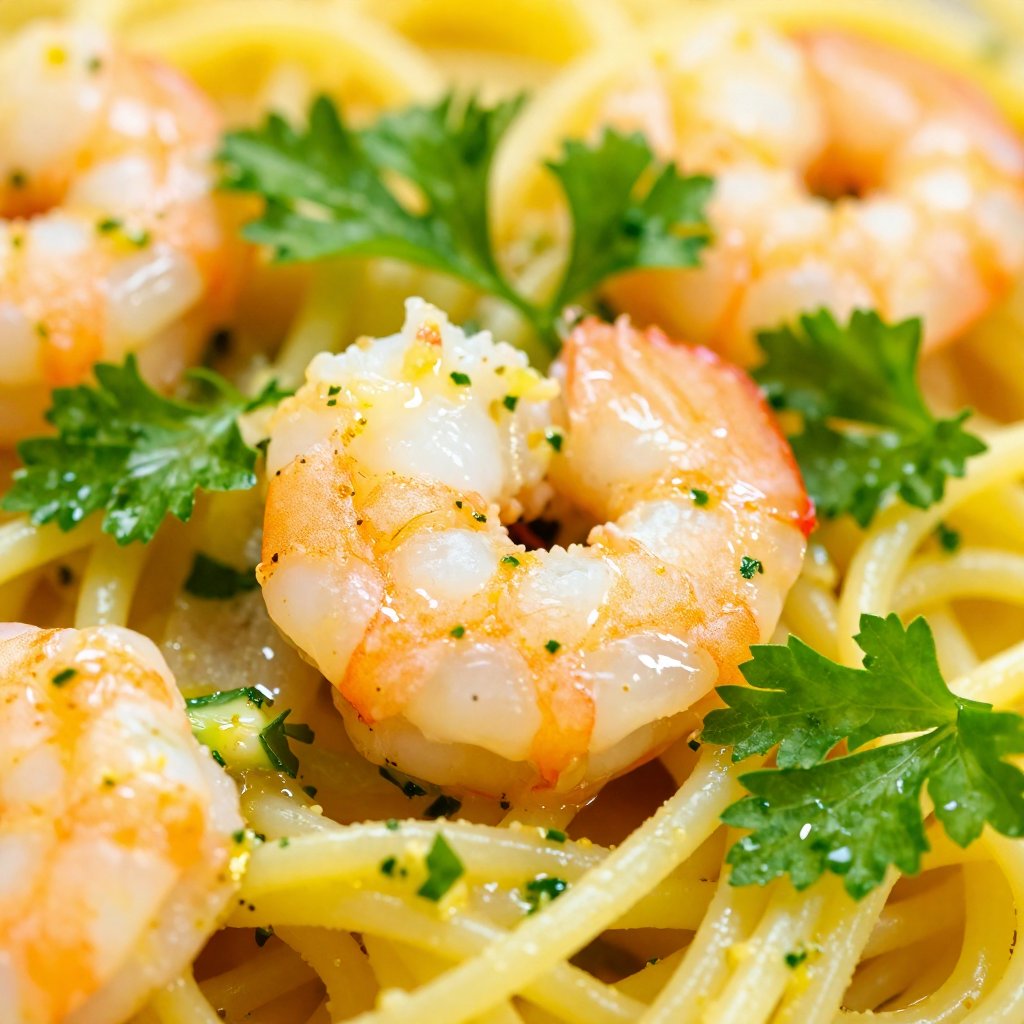
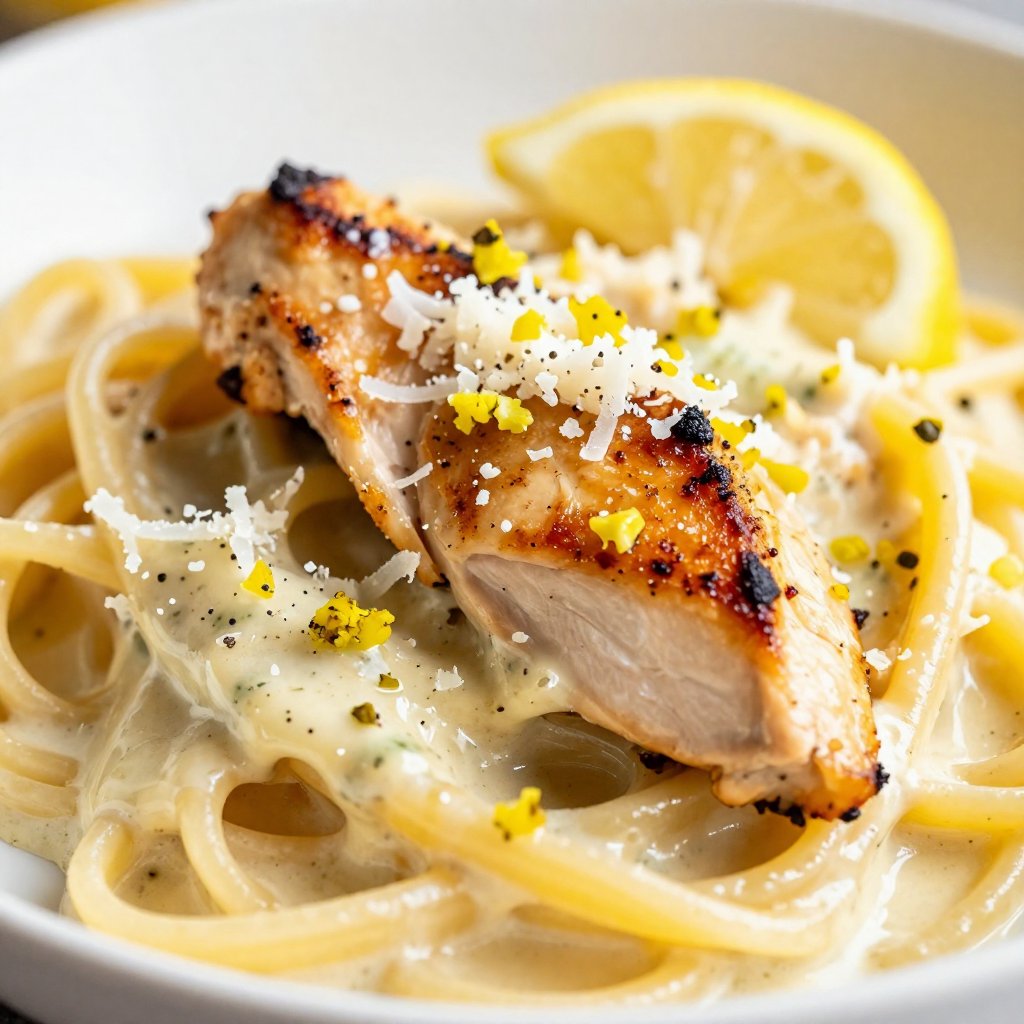
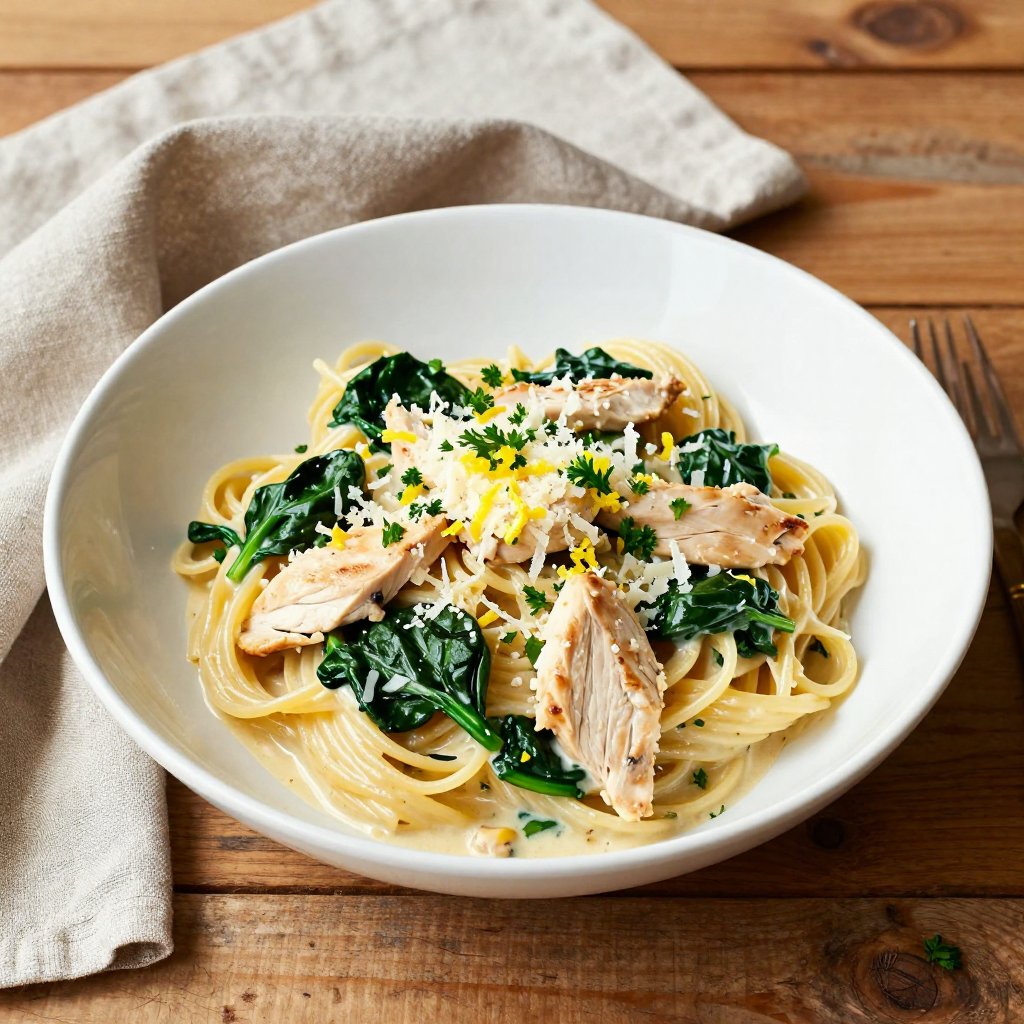
The rain is drumming a gentle rhythm against my kitchen window here in Portland, the air thick with that earthy-rosemary scent that always feels like coming home. And what better way to embrace a cozy evening than with a bowl of Creamy Lemon Chicken Pasta? This isn’t just a recipe; it’s a hug in a bowl, a vibrant celebration of simple ingredients that sings with flavor. It’s the kind of meal that makes you close your eyes for a moment after the first bite and think, “Yes, this is good.”

My journey into the world of healthy cooking wasn’t always paved with creamy lemon sauces and perfectly cooked pasta. It started with a wake-up call, a gentle (and not-so-gentle) nudge from my body that it was time to prioritize nourishment. I had to create a dish that would be both delicious and nutritious. This Creamy Lemon Chicken Pasta is a testament to that journey – proof that healthy eating can be both easy and incredibly satisfying. You can easily create a version that fits your needs.

So, grab your favorite apron, put on some music, and let’s get cooking! This recipe is forgiving, adaptable, and most importantly, delicious. It’s a guaranteed weeknight winner, perfect for those evenings when you crave comfort without sacrificing flavor or nutrition. This chicken pasta recipeis one of my favorite ways to create an easy and delicious meal. It’s a perfect pasta recipeis for beginners!

Why You’ll Love This Creamy Lemon Chicken Pasta

This isn’t just another chicken pasta recipe; it’s a flavor explosion that comes together in under 30 minutes! Here’s why you’ll be adding it to your regular rotation:

  • Quick & Easy: From prep to plate in just 30 minutes – perfect for busy weeknights.
  • Flavorful: The creamy lemon sauce is bright, tangy, and incredibly satisfying.
  • Versatile: Easily adaptable to your dietary needs and preferences. Swap the pasta, add veggies, or adjust the protein – the possibilities are endless.
  • Comfort Food: It’s the ultimate comfort food, but with a healthy twist.
  • Crowd-Pleaser: Everyone loves pasta, and this creamy lemon chicken version is guaranteed to be a hit with the whole family.

This dish is not only quick to prepare, but also delivers a burst of flavor that will tantalize your taste buds. The combination of creamy lemon sauce and tender chicken creates a symphony of flavors that is simply irresistible. It’s a dish that you’ll want to make again and again. The flavor of lemon is so refreshing!

Ingredients for Creamy Lemon Chicken Pasta

  • 8 ounces fettuccine or spaghetti
  • 1 pound boneless, skinless chicken breasts (cut into bite-sized pieces)
  • 2 tablespoons olive oil
  • 3 cloves garlic (minced)
  • 1 cup heavy cream
  • 1 cup chicken broth
  • 1 cup grated Parmesan cheese
  • 1 unit lemon (juice and zest)
  • Salt and pepper (to taste)
  • Fresh parsley (chopped, for garnish)
Recipe Image

How to Make Creamy Lemon Chicken Pasta: Step-by-Step

Follow these simple steps to create a restaurant-quality creamy lemon chicken pasta in your own kitchen:

  1. Prep the Chicken: Prepare the chicken by cutting it into bite-sized pieces and seasoning with salt and pepper.
  2. Cook the Chicken: Heat olive oil in a skillet over medium-high heat. Cook the chicken for 6-8 minutes until golden brown and cooked through. Remove from the skillet and set aside.
  3. Cook the Pasta: While the chicken is cooking, cook the pasta in salted boiling water according to package instructions until al dente, about 8-10 minutes. Drain, reserving ½ cup of pasta water.
  4. Make the Sauce: In the same skillet, sauté minced garlic for 1 minute until fragrant. Add chicken broth and simmer for 3-4 minutes, allowing it to reduce slightly. Stir in heavy cream, lemon juice, and lemon zest. Simmer for another 3-4 minutes, until the sauce has thickened.
  5. Combine: Combine the cooked chicken and drained pasta with the creamy lemon sauce, mixing well to coat. If the sauce is too thick, adjust the consistency with the reserved pasta water.
  6. Finish & Serve: Stir in grated Parmesan cheese. Adjust seasoning with salt and pepper to taste. Garnish with fresh parsley before serving.

And there you have it! A simple, yet elegant dish that’s perfect for any occasion. This creamy lemon chicken pasta is a testament to the fact that you don’t need complicated recipes or fancy ingredients to create a truly memorable meal. If you follow these steps you can make the best pasta recipe!

Pro Tips for the Best Creamy Lemon Chicken Pasta

Want to take your creamy lemon chicken pasta to the next level? Here are a few of my go-to tips:

  • Don’t Overcook the Chicken: Overcooked chicken is dry and tough. Cook it just until it’s cooked through and no longer pink inside.
  • Use Fresh Lemon Juice: Fresh lemon juice makes a huge difference in the flavor of the sauce. Avoid using bottled lemon juice, if possible.
  • Reserve Pasta Water: The starchy pasta water helps to thicken the sauce and create a silky smooth texture.
  • Grate Your Own Parmesan: Pre-grated Parmesan cheese often contains cellulose, which can prevent it from melting properly. Grating your own cheese ensures a smoother, creamier sauce.
  • Taste and Adjust: Taste the sauce as you go and adjust the seasoning to your liking. Don’t be afraid to add more lemon juice, salt, or pepper.

These little tweaks can elevate the dish from good to extraordinary. Remember, cooking is all about experimentation and finding what works best for you. Always taste as you go, and don’t be afraid to adjust the recipe to suit your preferences. The chicken is best when cooked perfectly.

Common Mistakes to Avoid

Even the simplest recipes can have their pitfalls. Here are a few common mistakes to avoid when making creamy lemon chicken pasta:

  • Not Salting the Pasta Water: Salting the pasta water is essential for seasoning the pasta from the inside out.
  • Overcooking the Pasta: Overcooked pasta is mushy and unpleasant. Cook the pasta until it’s al dente, which means “to the tooth” in Italian. It should be slightly firm and offer some resistance when you bite into it.
  • Burning the Garlic: Burnt garlic is bitter and can ruin the flavor of the sauce. Sauté the garlic over low heat and watch it carefully to prevent it from burning.
  • Adding Cold Cream: Adding cold cream to a hot sauce can cause it to curdle. Bring the cream to room temperature before adding it to the sauce.
  • Forgetting the Lemon Zest: The lemon zest adds a bright, citrusy aroma and flavor to the sauce that can’t be replicated with lemon juice alone.

By avoiding these common mistakes, you’ll be well on your way to creating a perfect creamy lemon chicken pasta every time. It’s all about paying attention to the details and taking your time. The pasta is the star of the show!

Variations and Add-Ins

One of the best things about this creamy lemon chicken pasta is how easily it can be customized to your liking. Here are a few variations and add-ins to try:

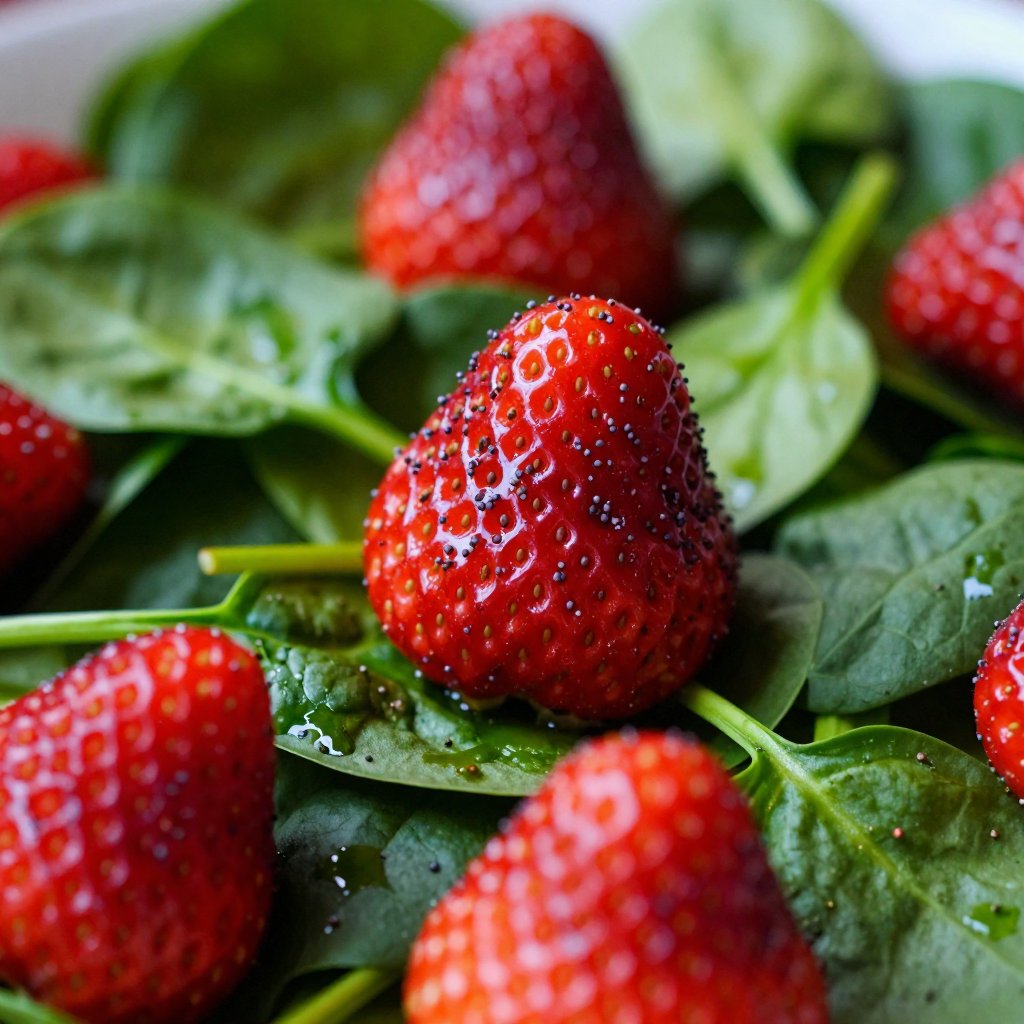
  • Vegetables: Add vegetables like spinach, asparagus, broccoli, or sun-dried tomatoes for extra nutrients and flavor.
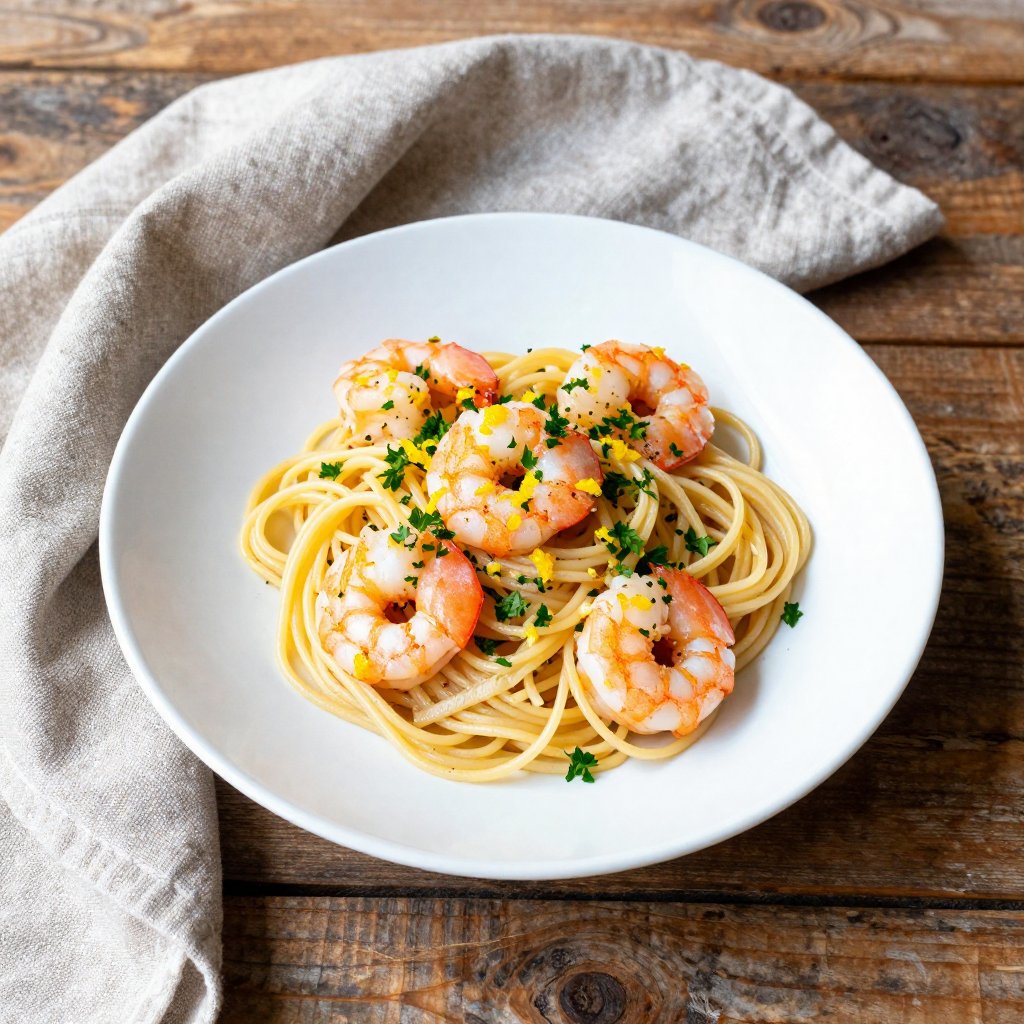
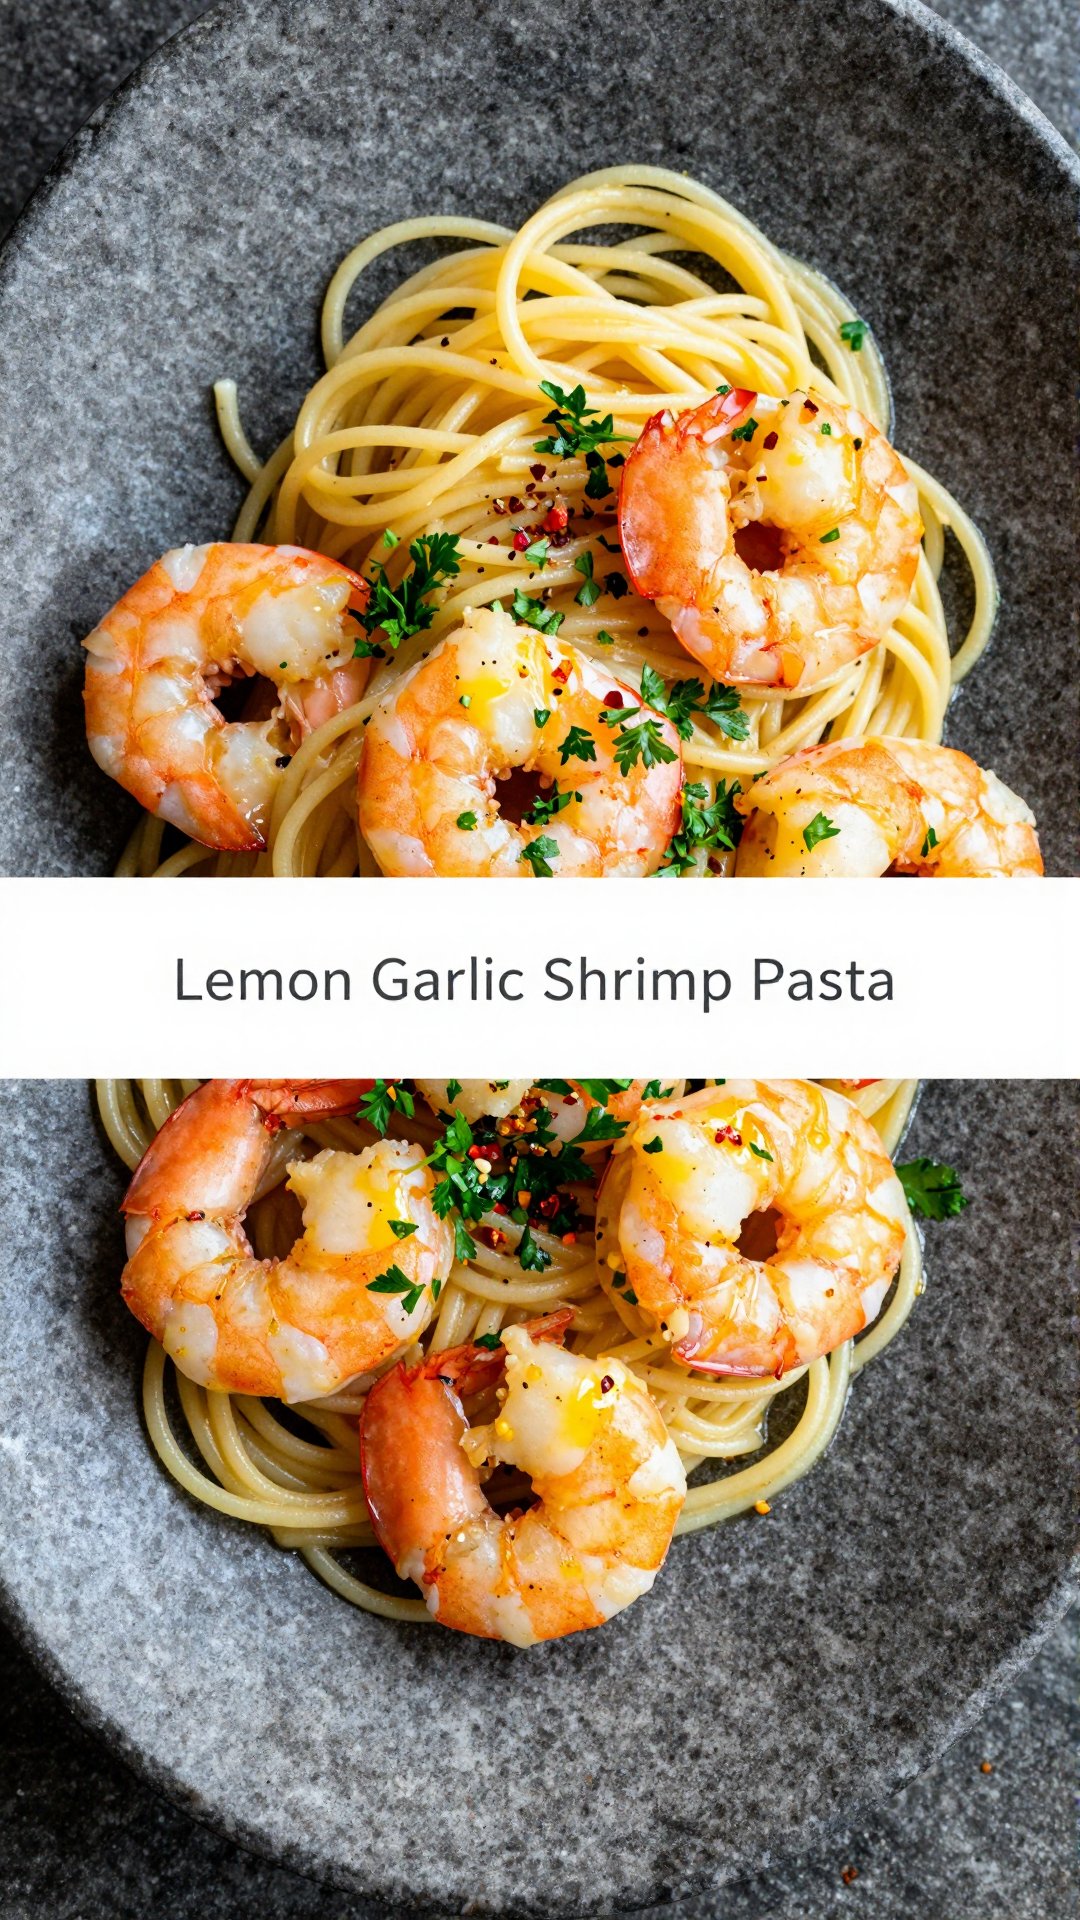
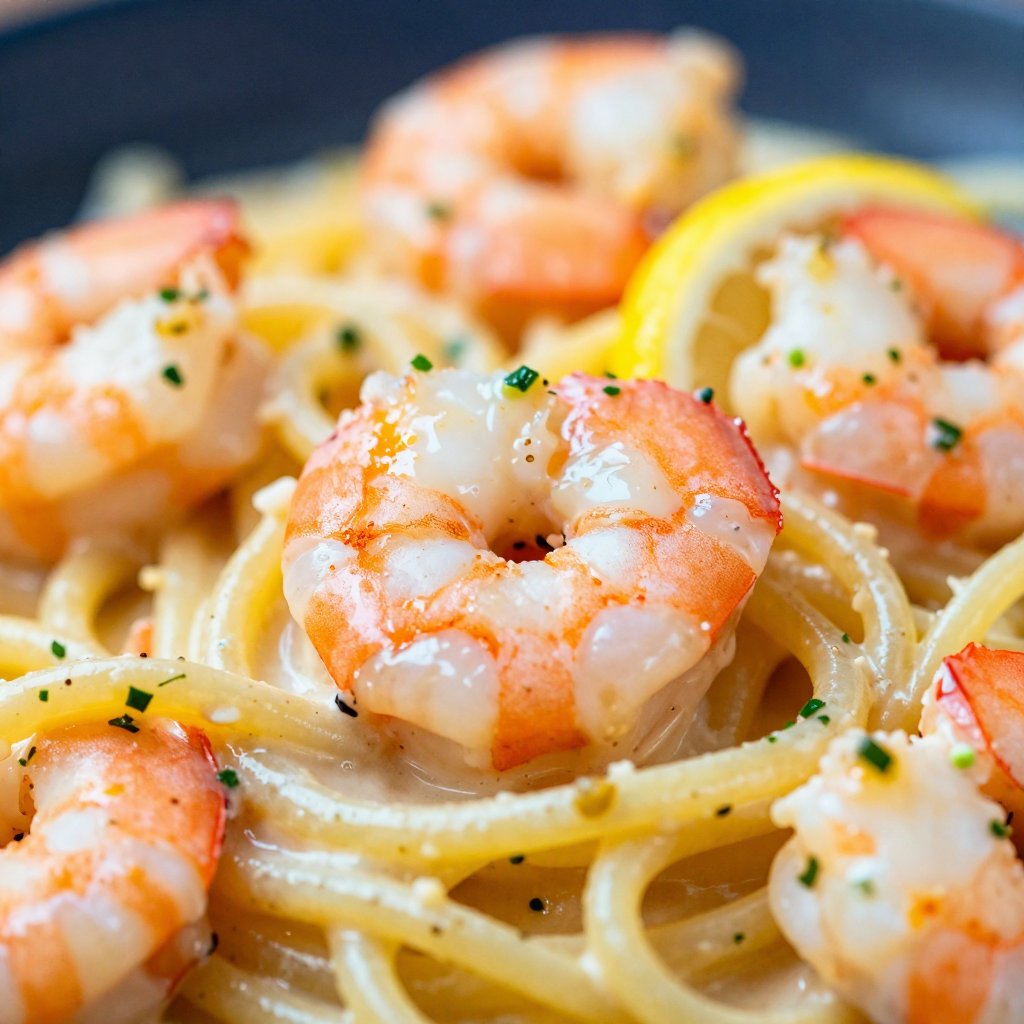
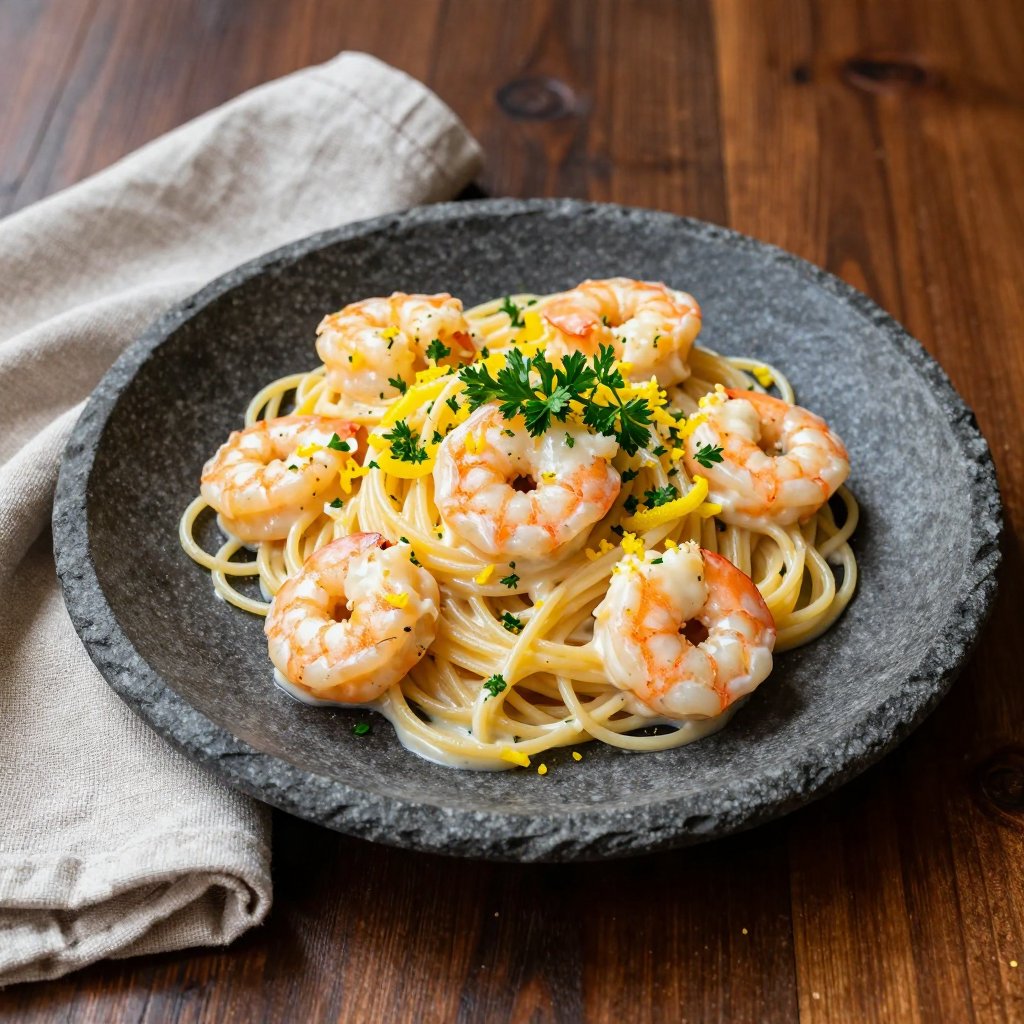
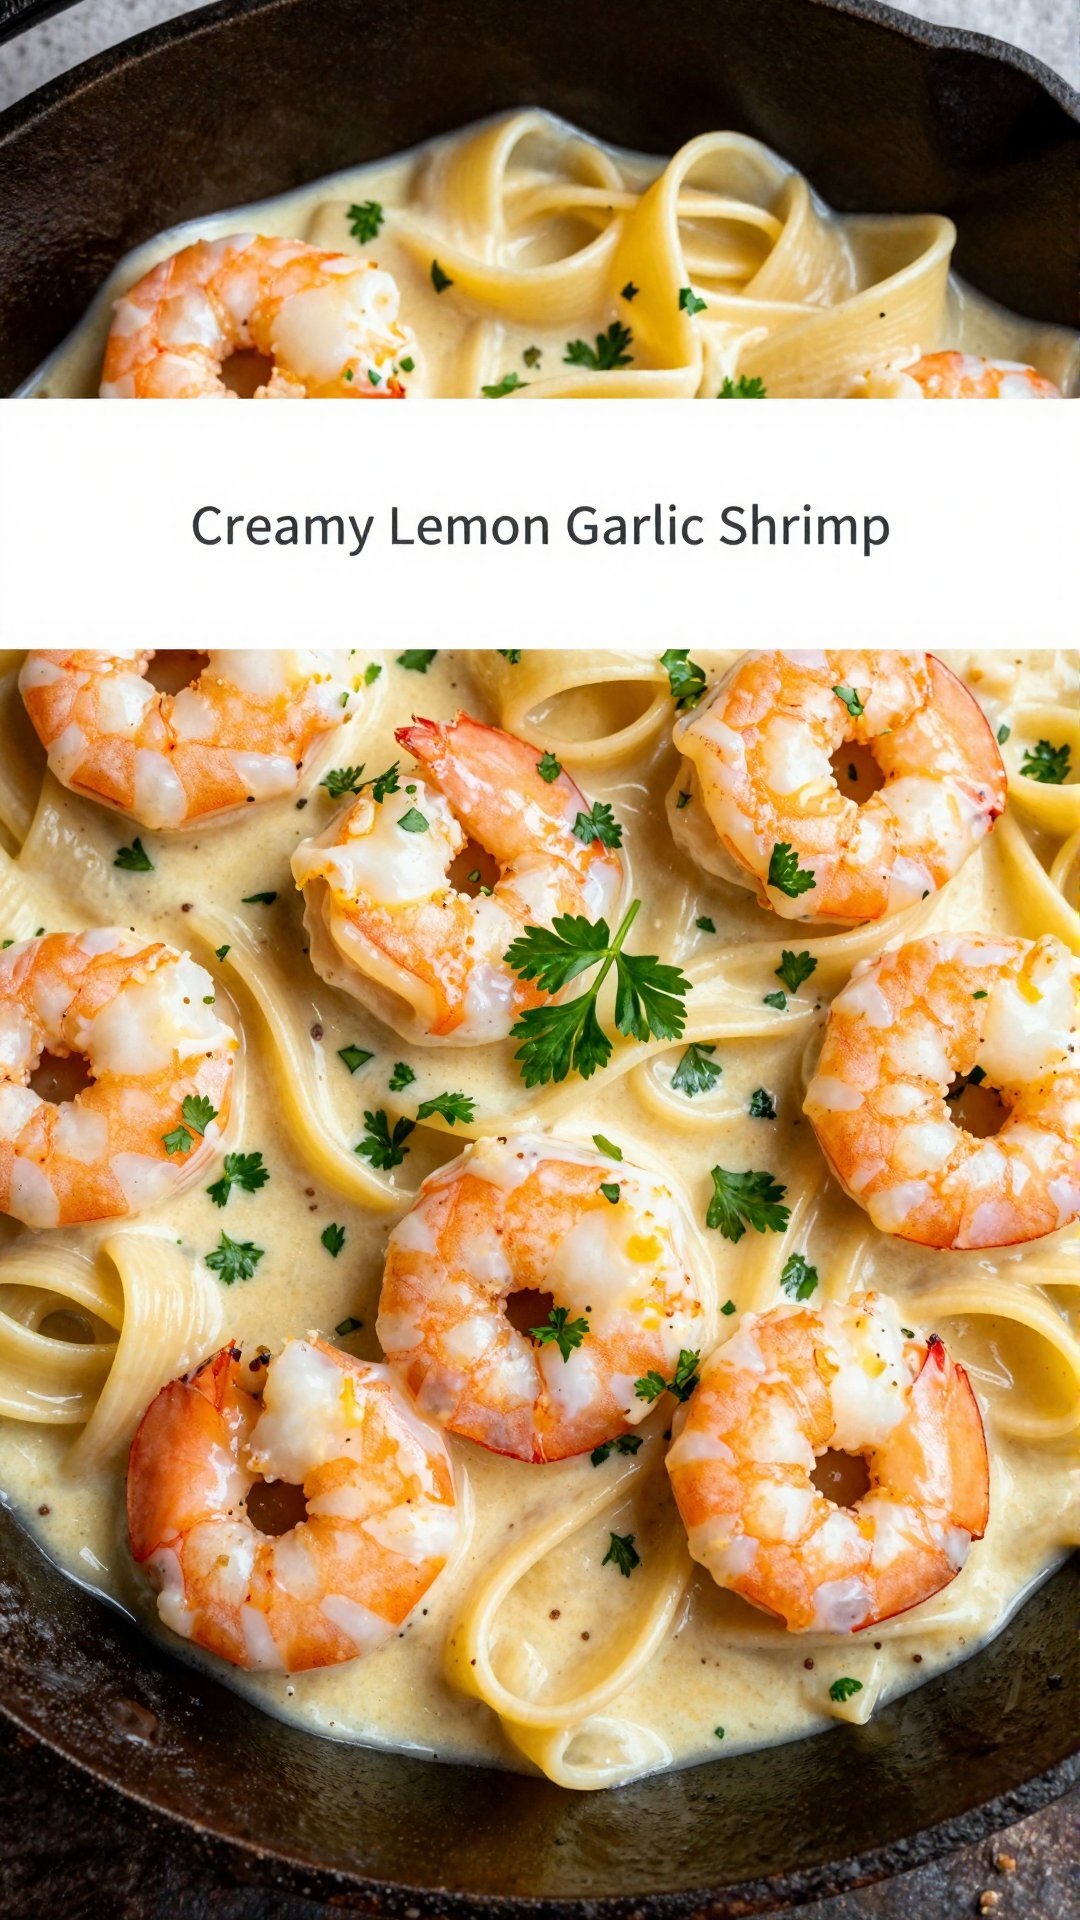
  • Protein: Substitute shrimp or tofu for the chicken.
  • Pasta: Use gluten-free pasta, whole wheat pasta, or a different shape of pasta, such as penne or rotini.
  • Cheese: Experiment with different types of cheese, such as Pecorino Romano or Asiago.
  • Herbs: Add fresh herbs like basil, oregano, or thyme for extra flavor.
  • Spice: Add a pinch of red pepper flakes for a touch of heat.

Don’t be afraid to get creative and experiment with different combinations of ingredients. The possibilities are endless! If you are looking for carb friendly recipes, try using zucchini noodles or spaghetti squash in place of traditional pasta. The sauce is versatile enough to pair with a variety of bases.

How to Store and Reheat Leftovers

Leftover creamy lemon chicken pasta can be stored in an airtight container in the refrigerator for up to 3 days. To reheat, simply microwave until heated through, or reheat in a skillet over medium heat, adding a splash of chicken broth or water to prevent it from drying out.

Keep in mind that the sauce may thicken as it sits, so you may need to add a little extra liquid to restore its creamy consistency. The pasta may also absorb some of the sauce, so it’s best to add a little extra sauce when you reheat it. This dish is best served fresh, but leftovers are still delicious!

Frequently Asked Questions (FAQ)

Here are some frequently asked questions about creamy lemon chicken pasta:

  • Can I use milk instead of heavy cream? While you can use milk, the sauce won’t be as creamy. For a richer flavor, I recommend using half-and-half or light cream.
  • Can I make this dish ahead of time? While the pasta is best served fresh, you can make the sauce ahead of time and store it in the refrigerator for up to 2 days. When you’re ready to serve, simply cook the pasta and combine it with the sauce.
  • Can I freeze this dish? I don’t recommend freezing creamy lemon chicken pasta, as the sauce may separate and become grainy when thawed.
  • Is this dish gluten-free? To make this dish gluten-free, simply use gluten-free pasta.
  • Is this dish dairy-free? To make this dish dairy-free, use a dairy-free cream alternative, such as coconut cream or cashew cream, and omit the Parmesan cheese.

I hope these FAQs have answered some of your questions. If you have any other questions, feel free to leave a comment below!

Serving Suggestions

Creamy lemon chicken pasta is a complete meal on its own, but it also pairs well with a variety of side dishes. Here are a few serving suggestions:

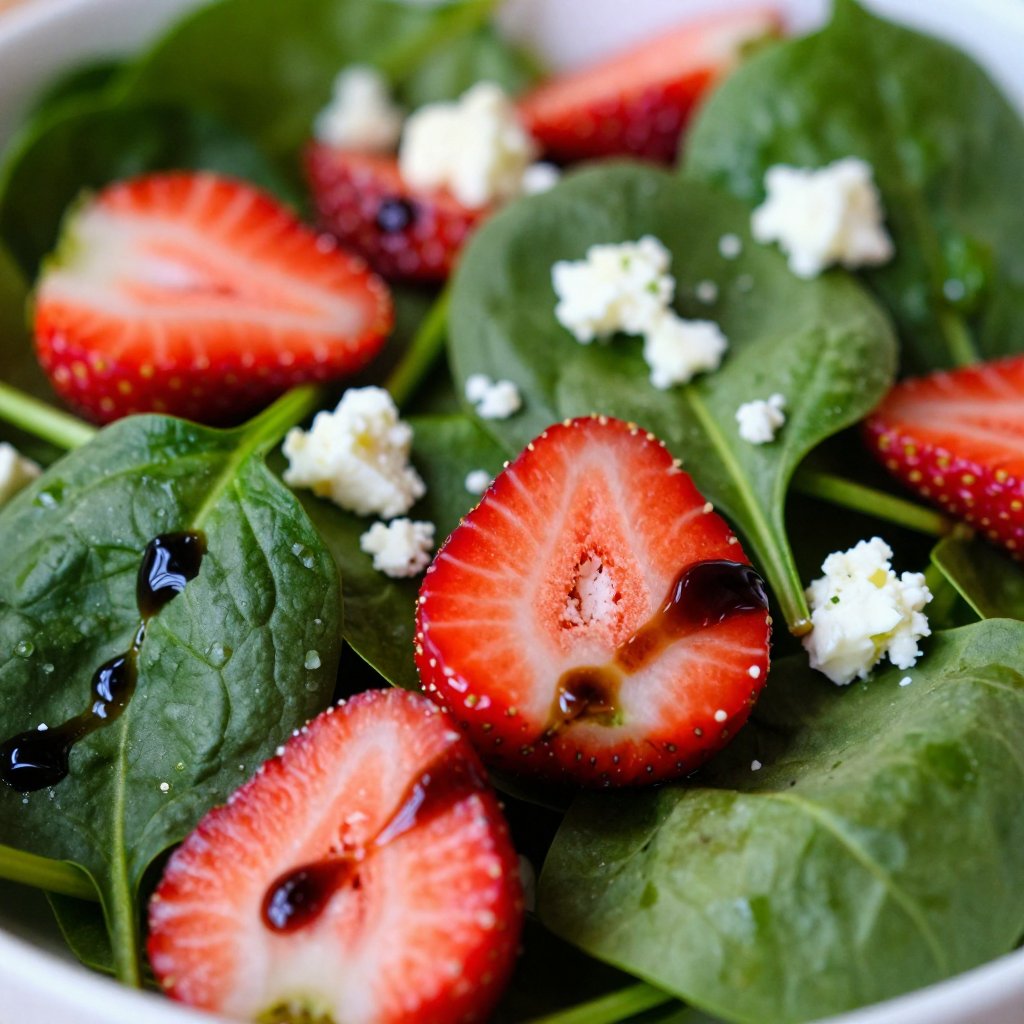
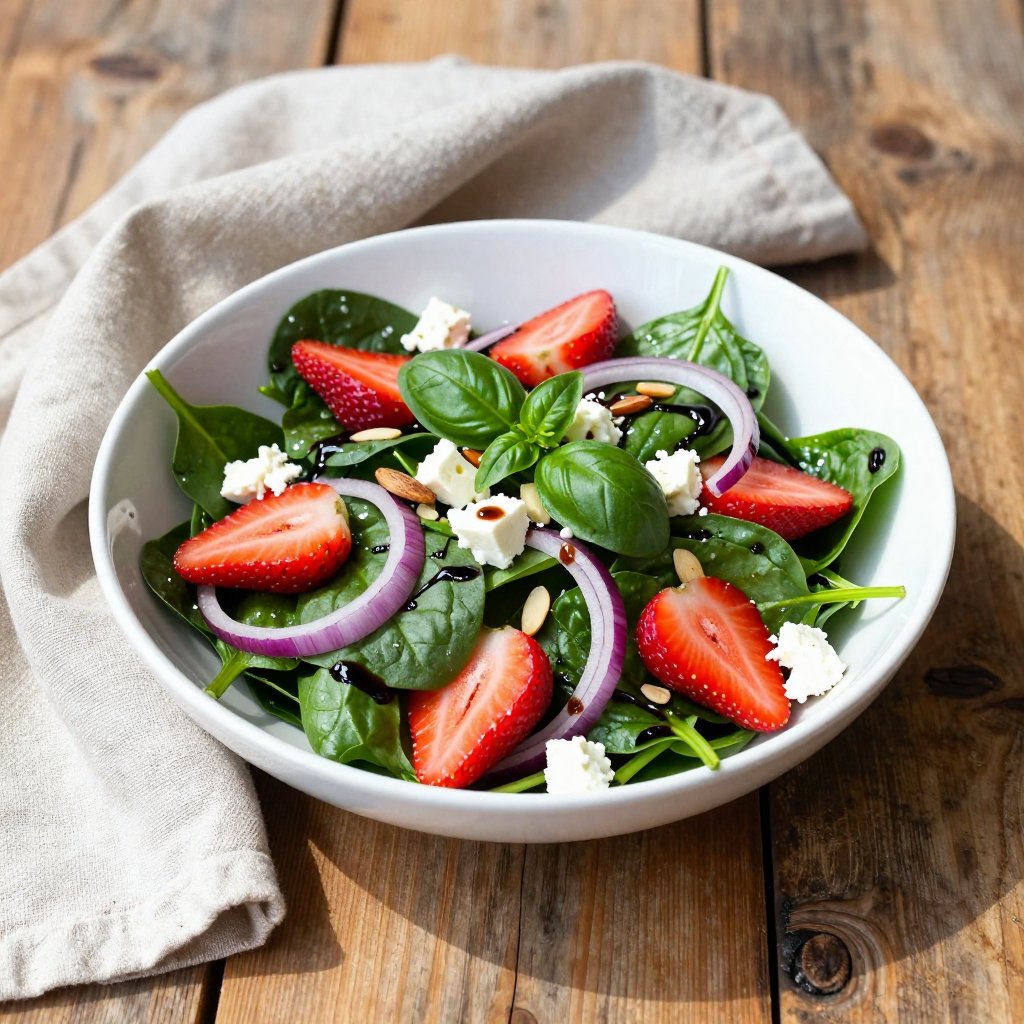
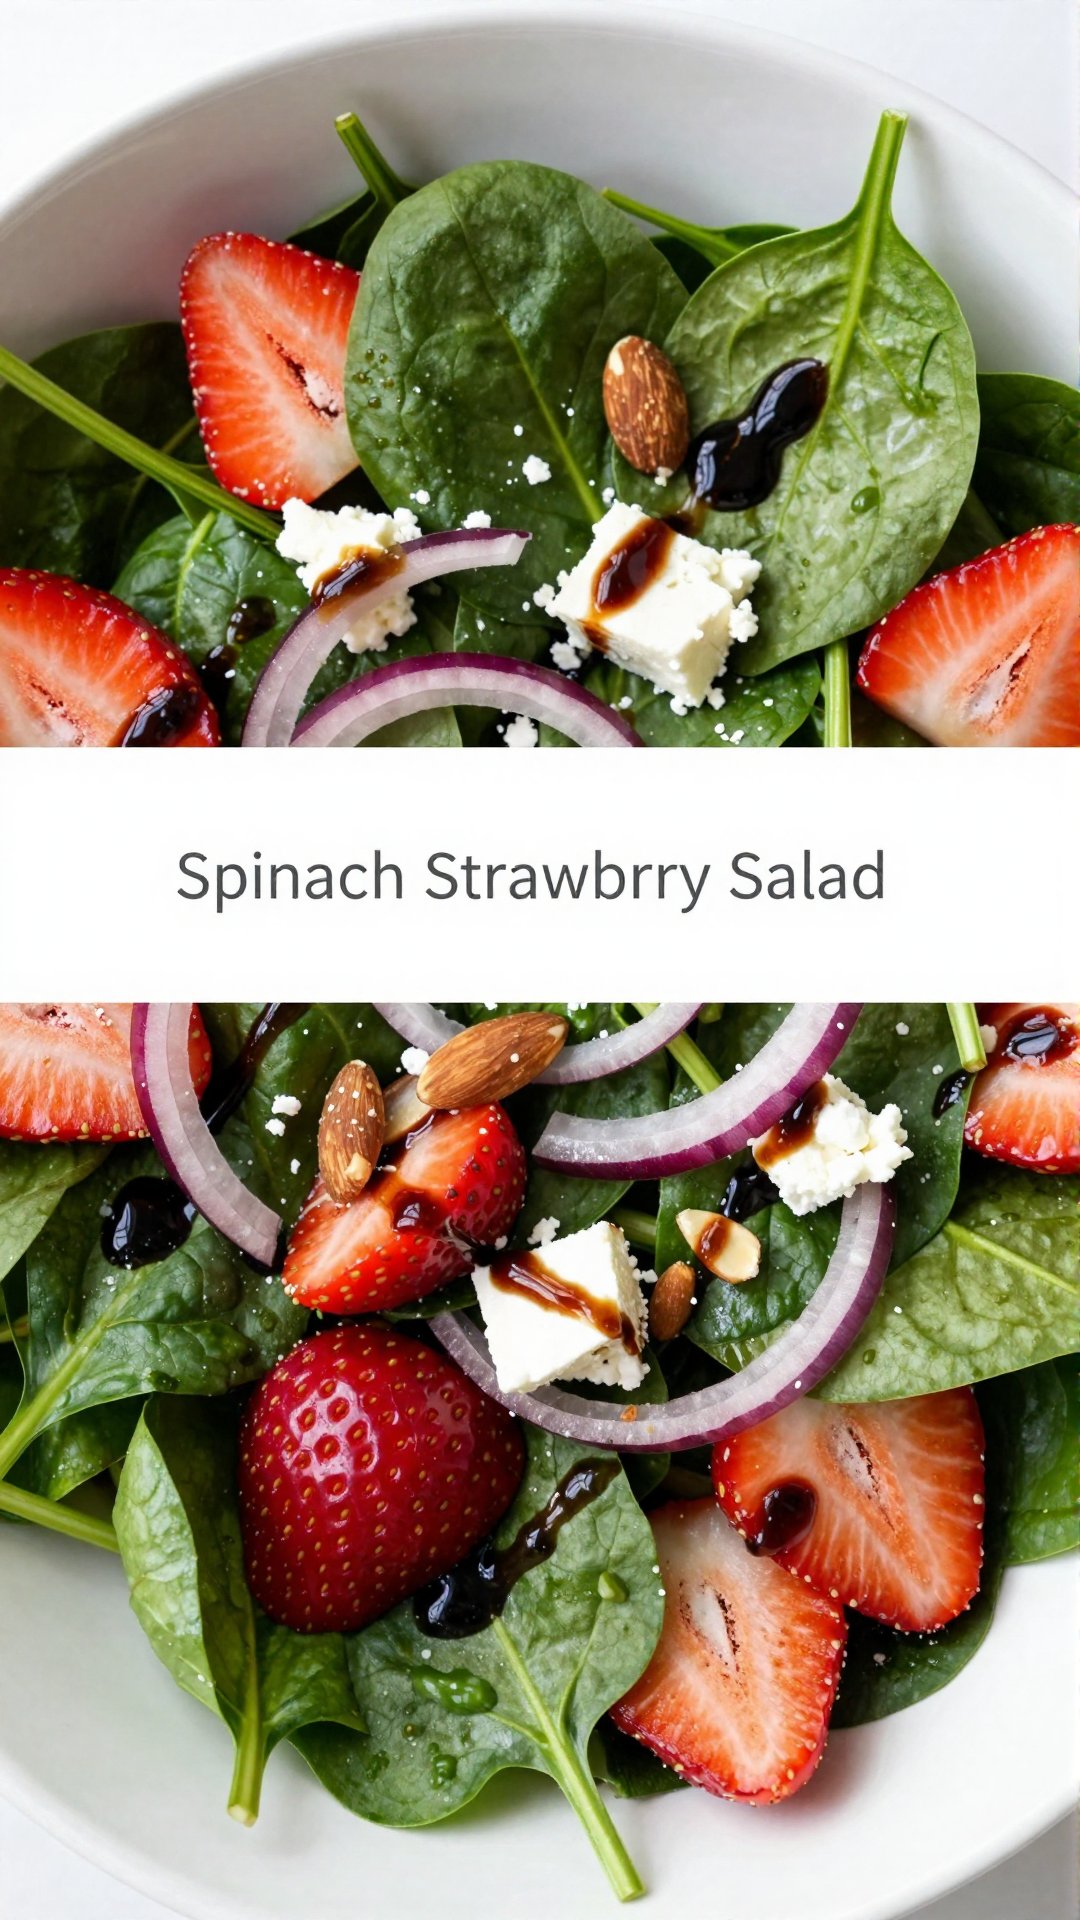
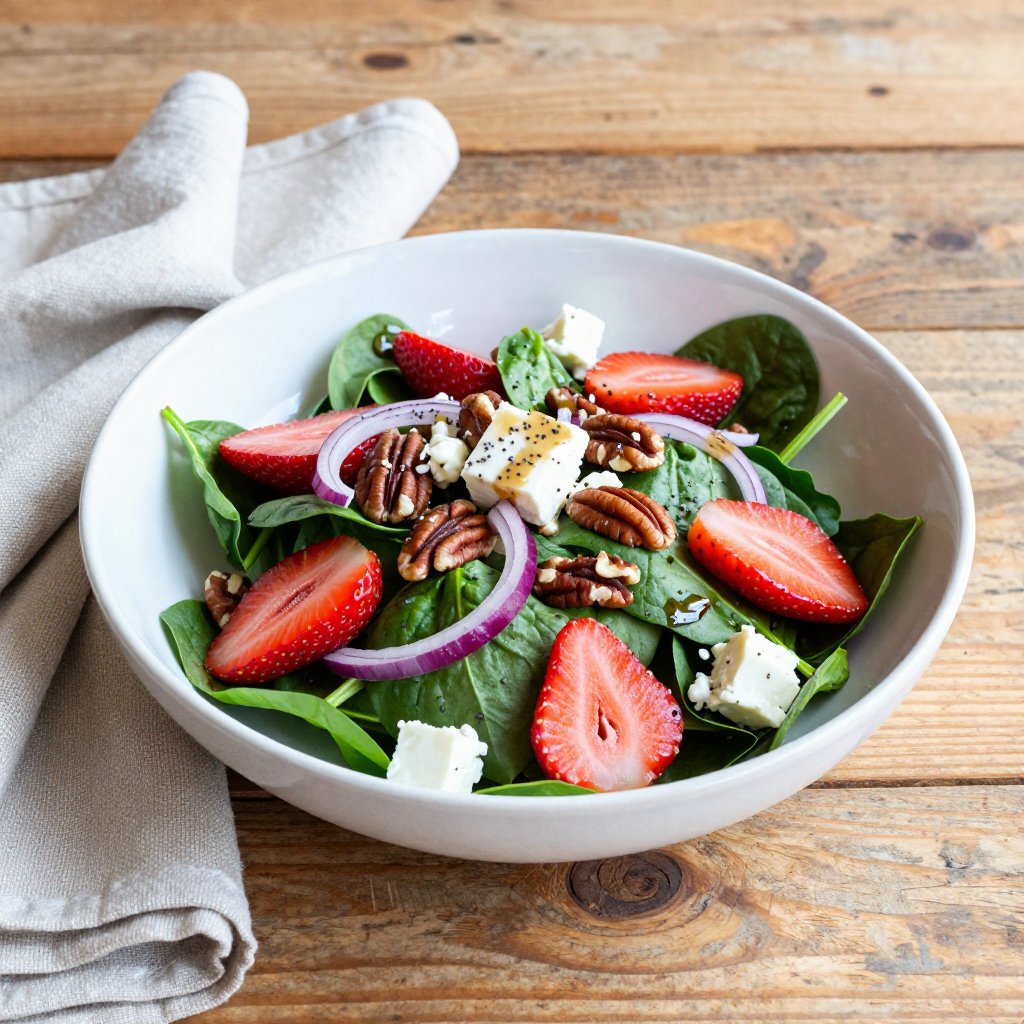
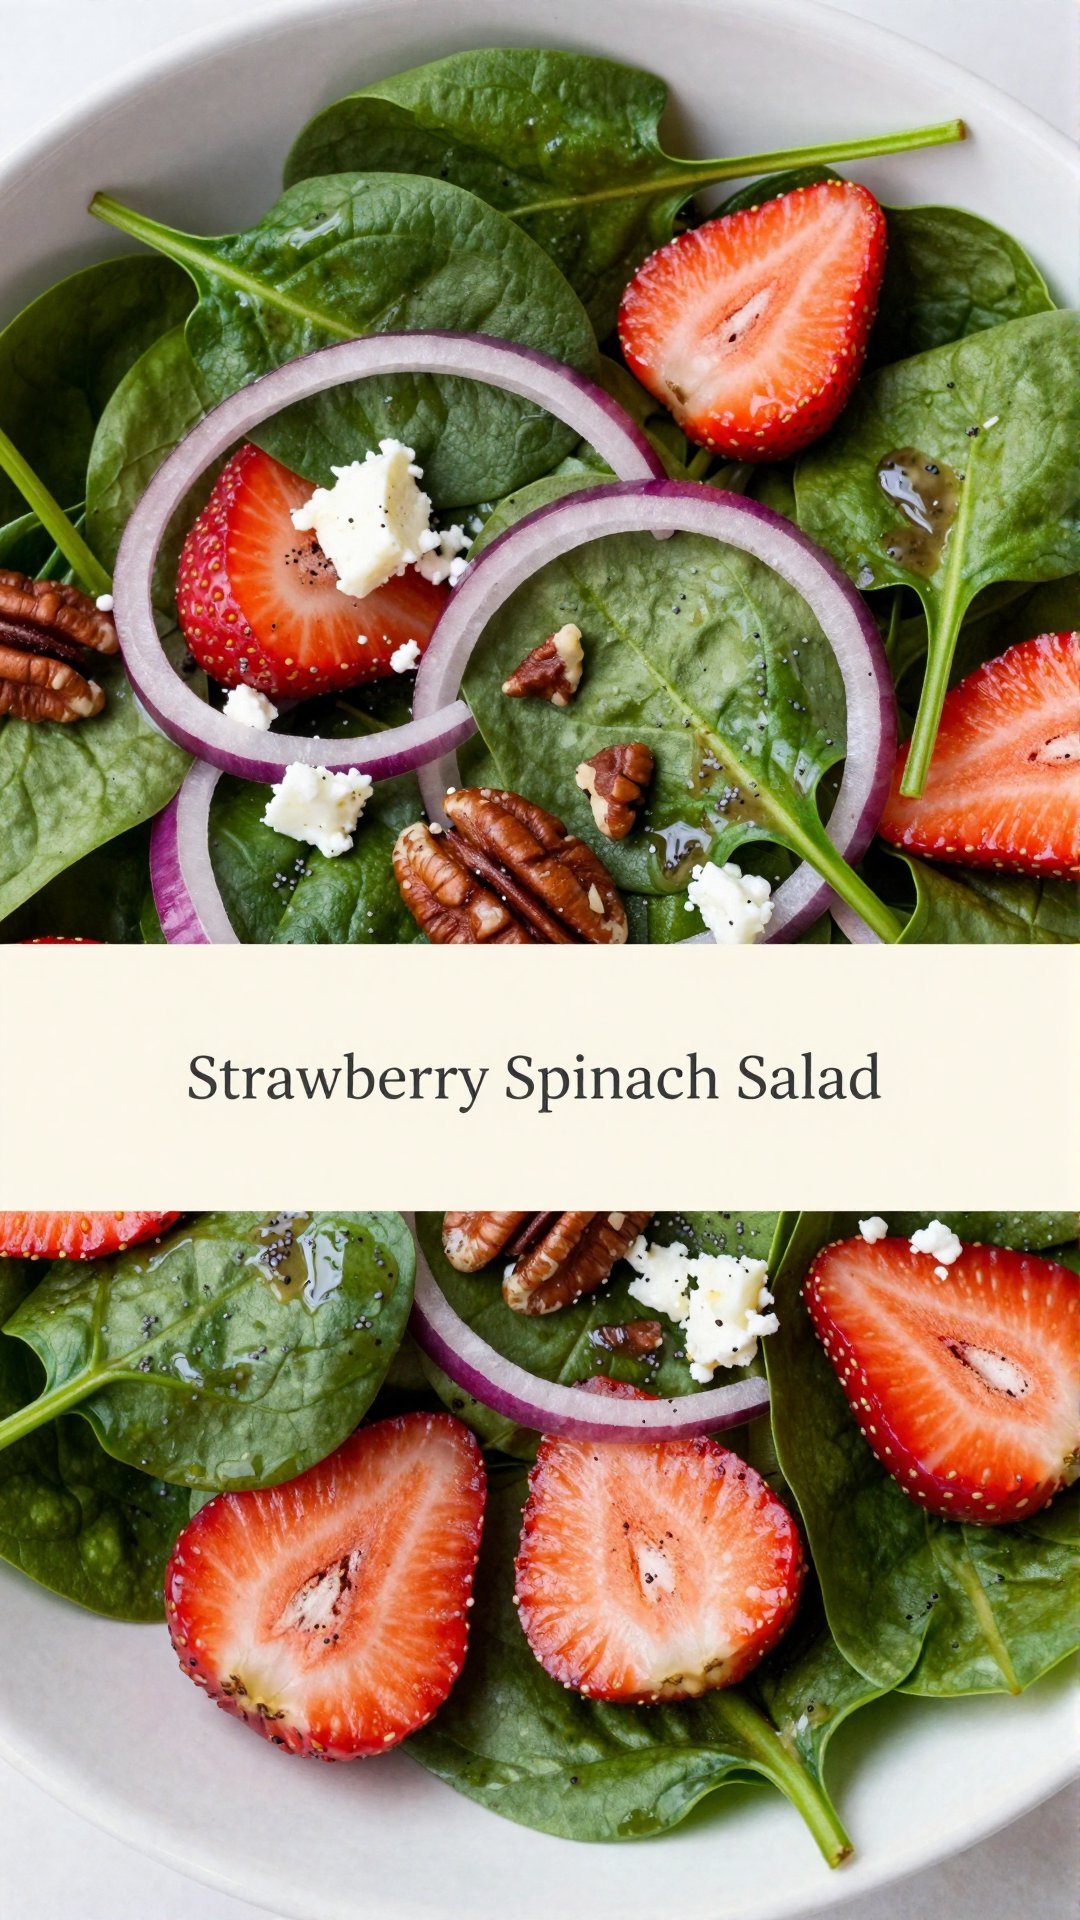
  • Salad: Serve with a simple green salad or a Caesar salad.
  • Bread: Serve with crusty bread for soaking up the delicious sauce.
  • Vegetables: Serve with roasted vegetables, such as asparagus, broccoli, or Brussels sprouts.
  • Wine: Pair with a crisp white wine, such as Sauvignon Blanc or Pinot Grigio.

No matter how you choose to serve it, creamy lemon chicken pasta is sure to be a hit. It’s a comforting, flavorful, and satisfying meal that’s perfect for any occasion. Enjoy!

From my cozy kitchen in Portland to yours, I hope this Creamy Lemon Chicken Pasta recipe brings you as much joy as it brings me. Remember, cooking is about more than just following a recipe; it’s about connecting with your food, nourishing your body, and creating memories that will last a lifetime. So, go ahead, get in the kitchen, and let’s create something beautiful together!

Happy cooking!

Creamy Lemon Chicken Pasta

Prep Time 10 minutes
Cook Time 25 minutes
Total Time 35 minutes
Servings 4 servings
Calories 650
A delightful pasta dish featuring tender chicken in a creamy lemon sauce. This recipe is quick, easy, and bursting with fresh flavors.

Ingredients

Pasta

  • 8 ounces fettuccine or spaghetti

Chicken

  • 1 pound boneless, skinless chicken breasts (cut into bite-sized pieces)

Sauce

  • 2 tablespoons olive oil
  • 3 cloves garlic (minced)
  • 1 cup heavy cream
  • 1 cup chicken broth
  • 1 cup grated Parmesan cheese
  • 1 unit lemon (juice and zest)
  • to taste Salt and pepper
  • Fresh parsley (chopped, for garnish)

Instructions 

  • Prepare chicken, season, and cook in olive oil for 6-8 minutes. Remove and set aside.
  • Cook pasta until al dente, drain, and reserve ½ cup of pasta water.
  • Sauté garlic, add chicken broth and simmer. Stir in cream, lemon juice, and zest; simmer until thickened.
  • Combine chicken, pasta, and sauce. Adjust consistency with pasta water if needed.
  • Stir in Parmesan, adjust seasoning, and garnish with parsley.

Notes

Add a pinch of red pepper flakes for a little heat.
Calories: 650kcal
Cost: $18
Course: Main Course
Cuisine: Italian
Keyword: chicken

Nutrition

Calories: 650kcal | Carbohydrates: 60g | Protein: 45g | Fat: 30g | Sodium: 400mg
pin

Hello, friend! It’s Avery here, from my little kitchen in Portland. Today, I’m sharing a recipe that’s near and dear to my heart: Easy Spinach Strawberry Salad. This isn’t just a salad; it’s a celebration of simple, vibrant flavors that remind me of sunny days at the farmer’s market.

My journey with food started as a necessity, a way to reclaim my health and well-being. And this salad? It’s the kind of recipe that makes healthy eating feel genuinely joyful. It’s light, refreshing, and packed with goodness. I think you’ll absolutely love it.

Why You’ll Love This Strawberry Spinach Salad

There are so many reasons why this strawberry spinach salad has become a staple in my kitchen. It’s more than just a collection of ingredients; it’s a harmonious blend of textures and tastes that dance on your palate.

  • Quick and Easy: Seriously, this salad comes together in minutes. It’s perfect for busy weeknights or when you need a last-minute dish to impress.
  • Healthy and Nutritious: Packed with vitamins, minerals, and antioxidants, this salad is a powerhouse of goodness. Spinach and strawberries are nutritional superstars!
  • Versatile: Feel free to customize this recipe to your liking. Add your favorite nuts, cheeses, or even grilled chicken for a heartier meal.
  • Delicious: The sweet strawberries, peppery spinach, tangy red onion, and creamy feta create a symphony of flavors that will leave you craving more.
  • Visually Appealing: Let’s be honest, this salad is gorgeous! The vibrant colors make it a feast for the eyes as well as the stomach.

This spinach strawberry salad is a starter that works well plated as a side dish, but it can easily be the main event with the right additions. It’s a great way to add more greens to your diet, and I’m excited to share the recipe with you!

Ingredients for Spinach Strawberry Salad

Here’s what you’ll need to create this delightful salad:

  • 6 ounces fresh spinach, washed and dried
  • 1 pound fresh strawberries, hulled and sliced
  • 1/4 cup sliced red onion
  • 1/4 cup crumbled feta cheese
  • 1/4 cup balsamic vinaigrette dressing
  • 1/4 cup slivered almonds (optional)
Recipe Image

How to Make Strawberry Spinach Salad: Step-by-Step

Making this salad is incredibly simple. Here’s a step-by-step guide to ensure perfect results every time:

  1. Prep the Ingredients: Wash and thoroughly dry the spinach. Slice the strawberries and red onion. Crumble the feta cheese.
  2. Combine: In a large bowl, gently combine the spinach, strawberries, and red onion.
  3. Add Cheese and Nuts: Sprinkle the feta cheese and slivered almonds (if using) over the salad.
  4. Dress: Pour the balsamic vinaigrette dressing over the salad.
  5. Toss: Gently toss the salad to combine, ensuring that all the ingredients are evenly coated with the dressing.
  6. Serve: Serve immediately and enjoy! Thank you for making this salad with me; I think you’ll find it’s a delightful addition to your table.

Pro Tips for the Best Spinach Strawberry Salad

To elevate your spinach strawberry salad from good to extraordinary, here are a few pro tips I’ve learned over the years:

  • Use Fresh, High-Quality Ingredients: The better the ingredients, the better the salad. Opt for organic spinach and ripe, juicy strawberries.
  • Dry the Spinach Thoroughly: Nobody likes a soggy salad. Use a salad spinner to remove excess water from the spinach.
  • Don’t Overdress: Start with a little dressing and add more as needed. Overdressing can make the salad heavy and less enjoyable.
  • Add Crunch: Slivered almonds, toasted pecans, or candied walnuts add a delightful crunch that complements the soft spinach and strawberries.
  • Chill the Ingredients: For an extra refreshing salad, chill the spinach and strawberries before assembling.

I’m always looking for ways to improve my recipes, and these tips have made a huge difference. When you make the salad, keep these tips in mind!

Common Mistakes to Avoid

Even with a simple recipe like this, it’s easy to make a few common mistakes. Here’s what to watch out for:

  • Using Wilted Spinach: Make sure your spinach is fresh and crisp. Wilted spinach will make the salad look unappetizing.
  • Adding Too Much Red Onion: Red onion can be overpowering. Use it sparingly, or soak it in cold water for a few minutes to mellow the flavor.
  • Overmixing: Gently toss the salad to avoid bruising the spinach and strawberries.
  • Dressing the Salad Too Far in Advance: The dressing will cause the spinach to wilt. Dress the salad just before serving.

Avoiding these mistakes will ensure your salad is perfect every time. It’s a simple recipe, but attention to detail makes all the difference.

Spinach Strawberry Salad Variations

One of the best things about this salad is how easily you can customize it. Here are a few variations to try:

  • With Chicken: Add grilled chicken for a heartier meal.
  • With Goat Cheese: Substitute feta with creamy goat cheese for a different flavor profile.
  • With Avocado: Add sliced avocado for extra creaminess and healthy fats.
  • With Blueberries: Combine strawberries with blueberries for a berry-packed salad.
  • Poppy Seed Dressing: Swap balsamic vinaigrette for a homemade poppy seed dressing for a sweeter taste. This spinach strawberry salad with balsamic poppyseed dressing is a crowd-pleaser!
  • Strawberry Spinach Salad With Rice: Add cooked wild rice or quinoa for a more substantial and filling salad.

These variations allow you to tailor the salad to your taste preferences. You can also use different salad ideas with spinach to create something unique!

How to Store Leftover Salad

If you have leftover salad, here’s how to store it properly:

  • Store Undressed: Store the salad undressed in an airtight container in the refrigerator.
  • Keep Dressing Separate: Store the dressing in a separate container.
  • Consume Within 24 Hours: The salad is best consumed within 24 hours to prevent the spinach from wilting.

Proper storage ensures that your salad stays fresh and delicious. I find that it’s best to only dress what you plan to eat immediately.

Frequently Asked Questions (FAQ)

Here are some common questions about spinach strawberry salad:

  • Can I use frozen strawberries? Yes, but thaw them completely and drain any excess liquid before adding them to the salad. Fresh strawberries are best, but frozen can work in a pinch.
  • Can I make this salad ahead of time? It’s best to assemble the salad just before serving to prevent the spinach from wilting. However, you can prep the ingredients ahead of time.
  • What other dressings can I use? Besides balsamic vinaigrette and poppy seed dressing, you can also use a lemon vinaigrette or a honey-mustard dressing.
  • Is this salad gluten-free? Yes, this salad is naturally gluten-free.
  • Is this salad vegan? To make it vegan, simply omit the feta cheese or use a vegan feta alternative.

I hope these FAQs are helpful! If you have any other questions, feel free to ask.

Serving Suggestions

This spinach strawberry salad is incredibly versatile and pairs well with a variety of dishes:

  • As a Side Dish: Serve it alongside grilled chicken, fish, or tofu.
  • As a Light Lunch: Add some protein, such as grilled shrimp or chickpeas, for a more filling meal.
  • At a BBQ: It’s the perfect refreshing side dish for a summer barbecue.
  • At a Potluck: This salad is always a hit at potlucks and gatherings.

No matter how you choose to serve it, this spinach strawberry salad is sure to be a crowd-pleaser. It’s the perfect way to bring a taste of spring to your table. I hope you enjoy this salad as much as I do! The recipe is simple, and the results are delicious. I think you’ll find that this spinach salad is a great way to enjoy fresh, healthy ingredients. It’s time to embrace the flavors of the season! I’m so happy to share this with you. Salad is always a good idea, and this one is especially delightful. I think it’s a great option for any occasion. When you try it, I’m sure you’ll agree that it’s a winner! You can easily adapt the recipe to your liking, and I hope you well enjoy the process. It’s a simple recipe to make, and it’s a great way to use fresh ingredients. I’m always excited to share new recipes with you, and this one is a particular favorite. It’s a perfect way to enjoy the flavors of spring and summer. Salad with strawberries is a delightful combination, and this recipe brings out the best in both ingredients. I hope you have a chance to try it soon! It’s a great way to add more fruits and vegetables to your diet, and it’s a delicious and satisfying meal. This spinach strawberry salad is a wonderful addition to any menu. I hope you enjoy it!

Spinach Strawberry Salad

Prep Time 15 minutes
Total Time 15 minutes
Servings 4 servings
Calories 200
A refreshing and vibrant salad combining the earthy flavors of spinach with the sweetness of strawberries. Perfect as a light lunch or a side dish.

Ingredients

Salad Ingredients

  • 6 ounces fresh spinach (washed and dried)
  • 1 pound fresh strawberries (hulled and sliced)
  • 1/4 cup sliced red onion
  • 1/4 cup crumbled feta cheese

Dressing

  • 1/4 cup balsamic vinaigrette dressing

Optional

  • 1/4 cup slivered almonds (optional)

Instructions 

  • In a large bowl, combine the spinach, strawberries, and red onion.
  • Add the feta cheese and slivered almonds (if using).
  • Pour the balsamic vinaigrette dressing over the salad.
  • Gently toss to combine.
  • Serve immediately.

Notes

For a sweeter salad, add a drizzle of honey or maple syrup to the dressing.
Calories: 200kcal
Cost: $8
Course: Salad
Cuisine: American
Keyword: Spinach

Nutrition

Calories: 200kcal | Carbohydrates: 15g | Protein: 8g | Fat: 12g | Sodium: 150mg
pin

Green Avocado Toast with Egg: A Recipe for Vitality

Hello, friends! Avery Collins here, from my little kitchen in Portland, where the aroma of rosemary hangs in the air after a good rain. Today, I want to share a recipe that’s become a staple in my life – Green Avocado Toast with Egg. It’s simple, nourishing, and, most importantly, it makes me feel fantastic from the inside out. This isn’t just about the ingredients; it’s about the feeling of creating something good for yourself. Think of it as a little act of self-love, one delicious bite at a time.

My journey with food started out of necessity. I wasn’t always the most conscious eater, and my body eventually made that clear. Cooking became my path to healing, and avocado toast, in its various forms, became a frequent flyer on my plate. This version, with its vibrant green hues and perfectly cooked egg, is my current obsession. It’s quick enough for a weekday breakfast, satisfying enough for a weekend brunch, and versatile enough to adapt to whatever you have on hand.

Why You’ll Love This Green Avocado Toast

This isn’t just any avocado toast recipe. It’s about feeling good, both mentally and physically. Here’s why I think you’ll adore it:

  • Quick and Easy: Ready in under 15 minutes, perfect for busy mornings.
  • Nutrient-Packed: The avocado provides healthy fats, the egg offers protein, and the whole grain bread delivers fiber.
  • Customizable: Easily adaptable to your preferences and dietary needs.
  • Delicious and Satisfying: The creamy avocado, runny egg, and crunchy toast create a symphony of textures and flavors.
  • Mood-Boosting: Seriously! The vibrant colors and fresh flavors are an instant pick-me-up.

Green Avocado Toast with Egg Ingredients

  • ‘2 slices whole grain bread’
  • ‘1 ripe avocado’
  • ‘1 teaspoon lemon juice’
  • ‘1/4 teaspoon sea salt’
  • ‘1/8 teaspoon black pepper’
  • ‘1 tablespoon chopped fresh chives (optional)’
  • ‘2 large eggs’
  • ‘1 tablespoon crumbled feta cheese (optional)’
  • ‘Pinch of red pepper flakes (optional)’
  • ‘Freshly ground black pepper, to taste’
Recipe Image

How to Make Green Avocado Toast with Egg: Step-by-Step

Let’s get started! This recipe is so simple, it’s almost meditative. Focus on the process, enjoy the smells, and let your creativity shine.

  1. Toast the bread: Toast the whole grain bread slices until golden and crisp. I like mine a little darker for extra crunch.
  2. Prepare the avocado mash: In a small bowl, mash the avocado with lemon juice, salt, black pepper, and fresh herbs like chives (if using) until creamy but slightly chunky. The lemon juice not only adds brightness but also prevents the avocado from browning. This is your avocado spread.
  3. Cook the eggs: Heat a nonstick skillet over medium heat. Crack in the eggs and cook to your liking (fried, poached, or soft-boiled). For fried eggs, cook 2–3 minutes for runny yolks or longer for firmer yolks. If you prefer poached eggs, bring a pot of water to a simmer, add a splash of vinegar, and gently crack the eggs into the water. Cook for 3–4 minutes for perfectly cooked poached eggs. Boiled eggs are also a fantastic option!
  4. Assemble the toast: Spread the mashed avocado evenly over the toasted grain bread.
  5. Top and serve: Top each avocado toast with a cooked egg. Sprinkle with feta cheese, red pepper flakes, and extra black pepper, if desired. Serve immediately.

Pro Tips for Perfect Avocado Toast

Here are a few secrets I’ve learned along the way to elevate your avocado toast game:

  • Use ripe avocados: The avocado should yield to gentle pressure but not be mushy.
  • Don’t over-mash: A little chunkiness in the avocado mash is a good thing! It adds texture and visual appeal.
  • Toast the bread properly: The toast should be crisp enough to hold the avocado without getting soggy.
  • Season generously: Don’t be afraid to experiment with different seasonings. Red pepper flakes add a nice kick, while everything bagel seasoning is a flavorful alternative.
  • Fresh herbs are your friend: Chives, cilantro, dill, or parsley all add a burst of freshness.

Common Mistakes to Avoid

Even the simplest recipes can have pitfalls. Here are a few common mistakes to watch out for:

  • Using underripe avocados: Hard avocados are difficult to mash and lack flavor.
  • Over-toasting the bread: Burnt toast is not a good foundation for anything.
  • Skipping the lemon juice: Lemon juice is crucial for preventing browning and adding brightness.
  • Under-seasoning: Avocado toast can be bland if not seasoned properly.
  • Letting the toast sit too long: Avocado toast is best enjoyed immediately after assembly.

Avocado Toast Variations: Spice It Up!

The beauty of avocado toast is its versatility. Here are a few variations to inspire you:

  • Smoked Salmon Avocado Toast: Top with smoked salmon for a protein-packed and flavorful twist.
  • Everything Bagel Avocado Toast: Sprinkle with everything bagel seasoning for a savory and crunchy topping.
  • Spicy Avocado Toast: Add a dash of hot sauce or a sprinkle of cayenne pepper for extra heat.
  • Caprese Avocado Toast: Top with sliced tomatoes, fresh mozzarella, and a drizzle of balsamic glaze.
  • Mediterranean Avocado Toast: Add crumbled feta cheese, Kalamata olives, and a drizzle of olive oil.
  • Sweet Potato Avocado Toast: Spread mashed sweet potato on the toast before adding the avocado for added nutrients and flavor.

How to Store Leftover Avocado

Avocado browns quickly once cut, but here’s how to keep it fresh for longer:

  • Lemon Juice: Brush the cut surface with lemon juice.
  • Wrap Tightly: Wrap tightly in plastic wrap, pressing the wrap directly onto the surface of the avocado.
  • Store in the Refrigerator: Store in the refrigerator for up to 2 days.

Frequently Asked Questions (FAQ)

  • Can I make avocado toast ahead of time? Avocado toast is best enjoyed immediately, but you can prepare the avocado mash ahead of time and store it in the refrigerator.
  • Is avocado toast healthy? Yes! Avocado toast is a healthy and nutritious meal when made with whole grain bread and topped with healthy ingredients. The avocado provides healthy fats, the bread offers fiber, and the egg adds protein.
  • Can I use gluten-free bread? Absolutely! Use your favorite gluten-free bread for a gluten-free version.
  • What kind of bread is best for avocado toast? Whole grain bread, sourdough, or multigrain bread are all great choices.
  • Can I add other toppings? Of course! Get creative and add your favorite toppings.

Serving Suggestions

Avocado toast is a versatile dish that can be enjoyed for breakfast, brunch, or a light lunch. Here are a few serving suggestions:

  • As is: Simply enjoy it as a quick and easy meal.
  • With a side salad: Serve with a side salad for a more complete meal.
  • With fruit: Pair with a bowl of fresh fruit for a light and refreshing breakfast.
  • With a smoothie: Enjoy alongside your favorite smoothie for a nutrient-packed start to the day.

And there you have it! My go-to Green Avocado Toast with Egg recipe. I hope this brings a little joy and nourishment to your day, as it does for me. Remember, cooking should be fun and forgiving. Don’t be afraid to experiment and make it your own. Happy cooking!

Green Avocado Toast Egg

Prep Time 5 minutes
Cook Time 5 minutes
Total Time 10 minutes
Servings 2 servings
Calories 350
Start your day with this healthy and delicious Green Avocado Toast Egg recipe. Creamy avocado and perfectly cooked eggs on whole grain toast make for a satisfying and nutritious breakfast.

Ingredients

Toast

  • 2 slices whole grain bread

Avocado Mash

  • 1 ripe avocado
  • 1 teaspoon lemon juice
  • 1/4 teaspoon sea salt
  • 1/8 teaspoon black pepper
  • 1 tablespoon chopped fresh chives (optional)

Eggs

  • 2 large eggs

Optional Toppings

  • 1 tablespoon crumbled feta cheese (optional)
  • Pinch red pepper flakes (optional)
  • to taste Freshly ground black pepper

Instructions 

  • Toast the bread slices until golden and crisp.
  • Mash avocado with lemon juice, salt, pepper, and chives (if using).
  • Cook eggs in a nonstick skillet to your liking.
  • Spread avocado evenly over the toasted bread.
  • Top with egg, feta, red pepper flakes, and pepper, if desired. Serve immediately.

Notes

For a vegan option, omit the egg and feta cheese. Add a sprinkle of nutritional yeast for a cheesy flavor.
Calories: 350kcal
Cost: $5
Course: Breakfast, Brunch
Cuisine: American
Keyword: Avocado

Nutrition

Calories: 350kcal | Carbohydrates: 30g | Protein: 15g | Fat: 22g | Sodium: 400mg
pin

Hello, friends! It’s Avery here, from my little kitchen in Portland. Today, I’m so excited to share one of my absolute favorite recipes: Fresh Strawberry Spinach Salad with Poppy Seed Dressing. This isn’t just a salad; it’s a celebration of flavors and textures, a vibrant reminder that healthy eating can be incredibly delicious and joyful. It’s the kind of dish that makes you feel good from the inside out, and it’s so simple to throw together, even on the busiest of days.

My journey into the kitchen started as a quest for well-being. This salad is a reflection of that journey: fresh, wholesome ingredients combined with a homemade dressing that’s both sweet and tangy. It’s a perfect example of how you can create something truly special with just a few simple components. I truly believe that food should nourish both the body and the soul, and this salad does just that.

Why You’ll Love This Strawberry Spinach Salad

There are so many reasons to fall in love with this strawberry spinach salad. Let me share a few:

  • Freshness: The combination of fresh spinach and sweet strawberries is incredibly refreshing, especially during warmer months.
  • Simplicity: This salad is quick and easy to make, perfect for a light lunch or a side dish at dinner.
  • Flavorful: The homemade poppy seed dressing adds a delightful sweetness and tang that complements the other ingredients perfectly.
  • Healthy: Packed with vitamins and nutrients from the spinach and strawberries, this salad is a healthy and delicious choice.
  • Versatile: You can easily customize this salad with your favorite toppings and ingredients.

This salad is not just about taste; it’s about the experience. It’s about taking a moment to appreciate the simple pleasures of fresh, whole foods. It’s about nourishing your body with ingredients that make you feel good. And it’s about creating a dish that brings joy to your table.

Ingredients You’ll Need

Here’s what you’ll need to make this delightful Fresh Strawberry Spinach Salad with Poppy Seed Dressing:

  • 4 cups fresh spinach leaves
  • 2 cups strawberries, sliced
  • 1/4 cup red onion, thinly sliced
  • 1/4 cup pecans, chopped
  • 1/4 cup feta cheese, crumbled
  • 1/4 cup poppy seed dressing

A quick note about the ingredients: I always recommend using fresh, high-quality ingredients whenever possible. The better the ingredients, the better the salad will taste. And don’t be afraid to experiment with different variations – more on that later!

Recipe Image

How to Make Fresh Strawberry Spinach Salad: Step-by-Step

Making this salad is incredibly easy. Here’s a step-by-step guide:

  1. In a large bowl, combine the spinach, strawberries, red onion, and pecans.
  2. Drizzle the poppy seed dressing over the salad.
  3. Toss gently to combine all ingredients.
  4. Top with crumbled feta cheese before serving.

That’s it! In just a few minutes, you’ll have a delicious and healthy salad that’s perfect for any occasion. Remember, the key is to toss gently so that you don’t bruise the spinach or strawberries.

Pro Tips for the Perfect Salad

Here are a few pro tips to help you make the best Strawberry Spinach Salad:

  • Wash and dry your spinach thoroughly: Nobody likes a soggy salad. Use a salad spinner to remove excess water.
  • Slice the strawberries evenly: This ensures that each bite has the perfect balance of flavors.
  • Toast the pecans for extra flavor: Toasting the pecans in a dry pan for a few minutes brings out their nutty flavor.
  • Make your own poppy seed dressing: Homemade dressing tastes so much better than store-bought. Plus, you can control the ingredients and sweetness.
  • Don’t overdress the salad: Start with a small amount of dressing and add more as needed. You can always add more, but you can’t take it away.

These tips are simple, but they can make a big difference in the overall taste and texture of your salad. Trust me, it’s worth the extra effort!

Common Mistakes to Avoid

Even though this salad is easy to make, there are a few common mistakes to avoid:

  • Using old or wilted spinach: Fresh spinach is key to a delicious salad.
  • Overdressing the salad: Too much dressing can make the salad soggy and overpowering.
  • Not toasting the nuts: Toasting the nuts adds a depth of flavor that you don’t want to miss.
  • Adding the feta cheese too early: The feta cheese can become soggy if it sits in the dressing for too long. Add it just before serving.
  • Skipping the red onion: The red onion adds a nice bite that balances the sweetness of the strawberries.

Avoiding these mistakes will help you create a salad that’s fresh, flavorful, and perfectly balanced. Remember, cooking is all about learning and experimenting. Don’t be afraid to make mistakes – that’s how you grow as a cook!

Delicious Variations and Additions

The beauty of this salad is that it’s so versatile. Here are a few variations and additions to try:

  • Add grilled chicken or shrimp: For a heartier meal, add some grilled chicken or shrimp.
  • Substitute goat cheese for feta cheese: Goat cheese adds a creamy tanginess that pairs well with the other ingredients.
  • Add avocado: Sliced avocado adds a creamy texture and healthy fats.
  • Use different nuts: Try walnuts, almonds, or sunflower seeds instead of pecans.
  • Add blueberries or raspberries: For an extra burst of berry flavor, add blueberries or raspberries.

Feel free to get creative and experiment with different combinations. The possibilities are endless! I often add a sprinkle of hemp seeds for an extra boost of nutrients and a subtle nutty flavor. This fresh strawberry spinach salad can become your own creation.

Making the Poppy Seed Dressing

While you can use store-bought poppy seed dressing, making your own is so much more rewarding. Here’s a simple recipe:

Ingredients:

  • 1/4 cup olive oil
  • 2 tablespoons apple cider vinegar
  • 2 tablespoons honey or maple syrup
  • 1 tablespoon poppy seeds
  • 1 teaspoon Dijon mustard
  • Salt and pepper to taste

Instructions:

  1. In a small bowl, whisk together the olive oil, apple cider vinegar, honey, poppy seeds, Dijon mustard, salt, and pepper.
  2. Taste and adjust the seasonings as needed.

This dressing is sweet, tangy, and perfectly complements the flavors of the salad. You can store it in an airtight container in the refrigerator for up to a week. It’s truly the best poppy seed dressing!

How to Store Leftover Salad

If you have any leftover salad, store it in an airtight container in the refrigerator. It’s best to store the dressing separately to prevent the salad from becoming soggy. The salad will keep for up to 24 hours, but it’s best enjoyed fresh.

Keep the salad in the fridge, and don’t leave it at room temperature for extended periods. It is important to maintain the freshness of the spinach and strawberries.

Frequently Asked Questions (FAQ)

Here are some frequently asked questions about this Strawberry Spinach Salad:

  • Can I make this salad ahead of time? Yes, you can prepare the ingredients ahead of time, but wait to dress the salad until just before serving.
  • Can I use frozen strawberries? Fresh strawberries are best, but you can use frozen strawberries if needed. Just be sure to thaw them completely and drain off any excess liquid.
  • Can I substitute the feta cheese? Yes, you can use goat cheese, blue cheese, or any other cheese you like.
  • Is this salad gluten-free? Yes, this salad is naturally gluten-free.
  • Can I add protein to this salad? Absolutely! Grilled chicken, shrimp, or tofu would be great additions.

If you have any other questions, feel free to ask in the comments below! I’m always happy to help.

Serving Suggestions

This Strawberry Spinach Salad is perfect as a light lunch, a side dish, or a starter. Here are a few serving suggestions:

  • Serve it with grilled chicken or fish for a complete meal.
  • Bring it to a potluck or barbecue.
  • Serve it as a side dish with your favorite pasta dish.
  • Enjoy it as a refreshing lunch on a hot day.

No matter how you choose to serve it, this salad is sure to be a hit. It’s a delightful way to enjoy fresh, seasonal ingredients and nourish your body from the inside out. This salad is a fantastic spinach salad with poppy seed dressing, and I know you will love it!

I hope you enjoy this Fresh Strawberry Spinach Salad with Poppy Seed Dressing as much as I do. It’s a simple, delicious, and healthy way to celebrate the flavors of the season. Happy cooking!

Fresh Strawberry Spinach Salad with Poppy Seed Dressing: A Deliciously Healthy Delight!

Prep Time 15 minutes
Total Time 15 minutes
Servings 4 servings
Calories 250
A refreshing and healthy salad featuring fresh spinach, sweet strawberries, and a tangy poppy seed dressing. Perfect as a light lunch or side dish.

Ingredients

Salad Ingredients

  • 4 cups fresh spinach leaves
  • 2 cups strawberries, sliced
  • 1/4 cup red onion, thinly sliced
  • 1/4 cup pecans, chopped
  • 1/4 cup feta cheese, crumbled

Dressing

  • 1/4 cup poppy seed dressing

Instructions 

  • In a large bowl, combine the spinach, strawberries, red onion, and pecans.
  • Drizzle the poppy seed dressing over the salad.
  • Toss gently to combine all ingredients.
  • Top with crumbled feta cheese before serving.

Notes

For a vegan option, omit the feta cheese or substitute with a plant-based alternative.
Calories: 250kcal
Cost: $12
Course: Salad
Cuisine: American
Keyword: Spinach

Nutrition

Calories: 250kcal | Carbohydrates: 20g | Protein: 8g | Fat: 15g | Sodium: 200mg
pin

Hey there, friend! Avery Collins here, coming to you from my cozy kitchen in Portland, where the scent of rosemary hangs in the air and the farmer’s markets are always calling my name. Today, I’m sharing a recipe that’s near and dear to my heart: Quick Lemon Garlic Shrimp Pasta for Two. This isn’t just a dish; it’s a little hug on a plate, perfect for those weeknights when you need something comforting, flavorful, and, most importantly, easy.

My journey into cooking started not from a love of fancy food, but from a need to feel better. After years of takeout and stress, my body basically staged a revolt. Learning to cook with fresh, whole ingredients was my way back to vitality, and this recipe embodies that journey. It’s simple, nourishing, and packed with flavor – everything I believe healthy eating should be.

Why You’ll Love This Lemon Garlic Shrimp Pasta

Honestly? Because it’s pure deliciousness without any fuss. This lemon garlic shrimp pasta recipe is one of my go-to’s for a reason. I find it incredibly satisfying and always look forward to it. Here’s why I think you’ll adore it too:

  • Quick & Easy: From start to finish, this dish is ready in about 20 minutes. Perfect for busy weeknights!
  • Flavor Explosion: The combination of lemon, garlic, and shrimp is simply magical. It’s bright, savory, and utterly irresistible.
  • Simple Ingredients: You probably have most of these ingredients in your pantry already. No need for a complicated shopping trip.
  • Customizable: Want to add some veggies? Go for it! Feel free to tweak this recipe to your liking.
  • Perfect for Two: This recipe is designed for two people, making it ideal for a romantic dinner or a cozy night in with a friend.

Ingredients for Your Shrimp Pasta

  • 6 ounces (170 grams) spaghetti or linguine, cooked al dente: I prefer spaghetti for this dish, but linguine works beautifully too.
  • 12 ounces (340 grams) raw shrimp, peeled and deveined (medium-sized preferred): Medium-sized shrimp cook quickly and evenly.
  • 2 tablespoons olive oil (extra virgin preferred): Extra virgin olive oil adds a lovely richness and flavor.
  • 3 cloves garlic, minced: Don’t skimp on the garlic! It’s the heart of this dish.
  • 1 medium lemon, juiced and zested: Fresh lemon juice and zest are essential for that bright, citrusy flavor.
  • 1/4 teaspoon red pepper flakes (optional): For a little kick! Adjust to your spice preference.
  • 2 tablespoons fresh parsley, chopped: Fresh parsley adds a pop of color and freshness.
  • Salt and black pepper to taste: Season generously!
  • 1 tablespoon butter (optional): A touch of butter adds richness and helps emulsify the sauce. I often make this dairy free, but if you’re not, it’s great!
Recipe Image

How to Make This Lemon Garlic Shrimp Pasta: Step-by-Step

Alright, let’s get cooking! Here’s how to bring this quick lemon garlic shrimp pasta to life:

  1. Cook the Pasta: Bring a large pot of salted water to a boil. Add the pasta and cook until al dente, about 8-10 minutes. Remember to reserve 1/2 cup of pasta water before draining! This starchy water is liquid gold for creating a creamy sauce.
  2. Prep the Shrimp: While the pasta is cooking, pat the shrimp dry with paper towels. This helps them get a nice sear. Season lightly with salt and black pepper.
  3. Sauté the Garlic: Heat olive oil in a large skillet over medium heat. Add the minced garlic and red pepper flakes (if using). Sauté for about 30 seconds, until fragrant but not browned. Be careful not to burn the garlic, or it will taste bitter.
  4. Cook the Shrimp: Add the shrimp to the skillet in a single layer. Cook for 1.5 to 2 minutes per side, until pink and opaque. Don’t overcook the shrimp, or they’ll become rubbery. Remove the shrimp from the skillet and set aside.
  5. Make the Sauce: Lower the heat and add butter (if using) to the skillet. Stir in the lemon zest and juice. Pour in about 1/4 cup of the reserved pasta water to loosen the sauce. The pasta water helps to create a silky, emulsified sauce.
  6. Combine Everything: Return the shrimp to the pan along with the drained pasta. Toss everything to coat evenly with the lemon garlic sauce. Add the chopped parsley and adjust the salt and pepper to taste. If the sauce is too thick, add more pasta water until you reach your desired consistency.
  7. Serve: Serve immediately, optionally drizzling with a good-quality olive oil for added richness. A sprinkle of extra parsley never hurts!

Pro Tips for Perfect Shrimp Pasta

Want to take your shrimp pasta to the next level? Here are a few of my favorite tips:

  • Don’t Overcook the Shrimp: Overcooked shrimp are tough and rubbery. Cook them just until they’re pink and opaque.
  • Use Fresh Lemon Juice and Zest: Bottled lemon juice simply doesn’t compare to the bright, fresh flavor of freshly squeezed lemon juice.
  • Reserve Pasta Water: This starchy water is essential for creating a creamy, emulsified sauce.
  • Taste as You Go: Adjust the seasoning to your liking. Don’t be afraid to add more lemon juice, garlic, or red pepper flakes.
  • Warm Your Serving Bowls: This helps keep the pasta warm while you eat.

Common Mistakes to Avoid

We all make mistakes in the kitchen! Here are a few common pitfalls to avoid when making this dish:

  • Burning the Garlic: Burnt garlic tastes bitter and can ruin the entire dish. Keep a close eye on it and sauté it over medium heat.
  • Overcooking the Pasta: Overcooked pasta is mushy and unappetizing. Cook it al dente, meaning “to the tooth.”
  • Not Seasoning Properly: Salt and pepper are essential for bringing out the flavors of the dish. Season generously!
  • Forgetting the Pasta Water: As I mentioned, this water is key to a creamy sauce. Don’t skip it!

Variations and Adaptations

One of the best things about this recipe is how easy it is to customize. Here are a few ideas to get you started:

  • Add Vegetables: Sauté some spinach, asparagus, or cherry tomatoes along with the garlic for added nutrients and flavor.
  • Spice It Up: Add more red pepper flakes or a pinch of cayenne pepper for extra heat.
  • Make It Creamy: Stir in a dollop of cream cheese or mascarpone cheese at the end for a richer, creamier sauce. If I’m making a dairy free version, sometimes I’ll use a cashew cream.
  • Add Herbs: Experiment with different herbs, such as basil, oregano, or thyme.
  • Use Different Pasta: Try using different types of pasta, such as fettuccine, penne, or even gluten-free pasta.

How to Store Leftovers

If you happen to have any leftovers (which is rare in my house!), here’s how to store them:

  • Refrigerate: Store the pasta in an airtight container in the refrigerator for up to 3 days.
  • Reheat: Reheat the pasta in the microwave or in a skillet over medium heat. Add a splash of water or broth to prevent it from drying out.

Frequently Asked Questions (FAQ)

  • Can I use frozen shrimp?: Yes, you can use frozen shrimp. Just make sure to thaw them completely before cooking.
  • Can I make this recipe ahead of time?: While you can cook the pasta ahead of time, I recommend making the sauce and shrimp fresh for the best flavor.
  • Can I double this recipe?: Absolutely! Simply double all of the ingredients.
  • Is this recipe gluten-free?: Not as written, but you can easily make it gluten-free by using gluten-free pasta.
  • I don’t have fresh parsley. Can I use dried parsley?: Yes, you can use dried parsley. Use about 1 teaspoon of dried parsley in place of 2 tablespoons of fresh parsley.

Serving Suggestions

This lemon garlic shrimp pasta is delicious on its own, but here are a few ideas to round out your meal:

  • Side Salad: A simple green salad with a lemon vinaigrette pairs perfectly with this dish.
  • Garlic Bread: Because who doesn’t love garlic bread?
  • Roasted Vegetables: Roasted asparagus, broccoli, or Brussels sprouts would be a delicious addition.
  • A Glass of White Wine: A crisp white wine, such as Sauvignon Blanc or Pinot Grigio, complements the flavors of the dish beautifully.

And there you have it! My quick lemon garlic shrimp pasta recipe. I hope this dish brings as much joy to your table as it does to mine. Remember, cooking is about more than just following a recipe; it’s about connecting with your food, nourishing your body, and enjoying the process. Happy cooking, friends!

P.S. If you try this recipe, I’d love to hear what you think! Leave a comment below and let me know how it turned out.

Quick Lemon Garlic Shrimp Pasta for Two

Prep Time 5 minutes
Cook Time 15 minutes
Total Time 20 minutes
Servings 2 servings
Calories 550
A flavorful and quick pasta dish featuring succulent shrimp, zesty lemon, and fragrant garlic. Perfect for a simple yet satisfying meal for two.

Ingredients

Pasta

  • 6 ounces spaghetti or linguine (cooked al dente)

Shrimp

  • 12 ounces raw shrimp (peeled and deveined (medium-sized preferred))

Sauce

  • 2 tablespoons olive oil (extra virgin preferred)
  • 3 cloves garlic (minced)
  • 1 medium lemon (juiced and zested)
  • 1/4 teaspoon red pepper flakes (optional)
  • 2 tablespoons fresh parsley (chopped)
  • to taste Salt and black pepper
  • 1 tablespoon butter (optional)

Instructions 

  • Cook pasta until al dente, reserving 1/2 cup pasta water.
  • Pat shrimp dry and season with salt and pepper.
  • Sauté garlic and red pepper flakes in olive oil until fragrant.
  • Cook shrimp until pink and opaque; set aside.
  • Lower heat, add butter (if using), lemon zest, and juice. Add pasta water.
  • Return shrimp and pasta to pan; toss with sauce. Add parsley, salt, and pepper. Add pasta water if needed.
  • Serve immediately, optionally drizzling with olive oil.

Notes

Adjust the amount of red pepper flakes to your spice preference. For a richer flavor, use homemade pasta.
Calories: 550kcal
Cost: $18
Course: Dinner
Cuisine: Italian
Keyword: shrimp

Nutrition

Calories: 550kcal | Carbohydrates: 55g | Protein: 40g | Fat: 20g | Sodium: 600mg
pin

Hello, friends! Avery here, from my little kitchen in Portland. Today, I’m sharing a recipe that’s become a staple in my life: Green Goddess Chicken Salad. This isn’t just any salad; it’s a vibrant, nourishing bowl that’s as good for your body as it is for your soul. It’s a dish born from my own journey toward wellness, a journey that started not with culinary aspirations but with a deep need to feel better. And trust me, this salad delivers.

I remember the days when my meals were dictated by convenience, not nourishment. Takeout menus and processed snacks were my norm, leaving me feeling sluggish and disconnected. Discovering the power of fresh, whole ingredients was transformative, and this Green Goddess Chicken Salad is a celebration of that transformation. It’s packed with flavor, incredibly easy to make, and completely adaptable to your own tastes and what’s available in your garden or at your local market. So, grab a cup of tea, and let’s dive in!

Why You’ll Love This Green Goddess Chicken Salad

This salad isn’t just about eating healthy; it’s about enjoying the process and savoring every bite. Here’s why I think you’ll absolutely adore it:

  • Flavor Explosion: The combination of juicy baked chicken, crunchy quinoa, fresh greens, and creamy Green Goddess Dressing is simply divine. Each bite is a burst of flavor!
  • Nutrient-Packed: From the protein-rich chicken to the vitamin-packed greens and healthy fats from the avocado, this salad is a powerhouse of nutrients.
  • Versatile and Customizable: Feel free to swap out ingredients based on what you have on hand or what you’re craving. Add different veggies, cheeses, or protein sources to make it your own.
  • Easy to Make: With a few simple steps, you can have this refreshing salad ready in no time. It’s perfect for a quick lunch, a light dinner, or meal prepping for the week.
  • A Refreshing Meal: It’s a light yet satisfying dish, ideal for warmer days or whenever you need a pick-me-up.

It’s more than just a salad; it’s a symphony of textures and tastes that will leave you feeling energized and satisfied. This salad is truly a celebration of fresh, whole ingredients.

Ingredients You’ll Need

Here’s what you’ll need to create this vibrant Green Goddess Chicken Salad:

  • 2 lbs organic chicken breasts
  • 2 tablespoons extra virgin olive oil
  • 1 teaspoon sea salt
  • 1 teaspoon black pepper
  • 1 teaspoon smoked paprika
  • 1 teaspoon Italian seasoning
  • 2 bunches kale and baby lettuce (roughly chopped)
  • 1 organic cucumber (peeled and chopped)
  • 1 green tomato (diced)
  • 2 cups crispy lemon herb quinoa
  • 1 Hass avocado (pitted and chopped into chunks)
  • 1 cup freshly grated parmesan cheese
  • 1 to 2 cups green goddess dressing
Recipe Image

How to Make Green Goddess Chicken Salad: Step-by-Step

Let’s get started! Here’s how to bring this Green Goddess Chicken Salad to life:

  1. Prepare the Oven: Preheat your oven to 400°F (200°C). Line a baking sheet with parchment paper. This ensures the chicken doesn’t stick and makes cleanup a breeze.
  2. Marinate the Chicken: Allow the marinated chicken to come to room temperature for 30-45 minutes. This helps it cook more evenly.
  3. Bake the Chicken: Place the chicken on the prepared baking sheet and bake for 30-35 minutes, or until fully cooked and the juices run clear. A meat thermometer inserted into the thickest part should read 165°F (74°C).
  4. Cool and Slice: Remove the chicken from the oven and let it cool slightly before slicing it into strips or chunks, as preferred.
  5. Prepare the Quinoa and Dressing: Prepare the crispy lemon herb quinoa and Green Goddess Dressing following their respective recipes. Having these ready ahead of time streamlines the salad assembly.
  6. Massage the Kale: Strip and roughly chop the kale leaves, discarding the tough stems. Place the kale in a large bowl and drizzle with 1-2 teaspoons of lemon juice or olive oil. Gently massage the kale with your hands for 2-3 minutes to soften it. This step is crucial for making the kale more palatable and easier to digest.
  7. Combine the Ingredients: In a large salad bowl, combine the massaged kale, chopped cucumber, diced green tomato, and avocado chunks.
  8. Add the Toppings: Top with crispy quinoa, sliced chicken, and grated Parmesan cheese. The crispy quinoa adds a delightful crunch, while the Parmesan provides a savory note.
  9. Dress and Serve: Drizzle the salad with Green Goddess Dressing and serve immediately. Toss gently to ensure everything is evenly coated.

And there you have it! A vibrant and delicious Green Goddess Chicken Salad, ready to nourish and delight. Enjoy!

Pro Tips for the Perfect Salad

Here are a few extra tips to elevate your Green Goddess Chicken Salad:

  • Chicken Prep: Ensure your chicken breasts are of uniform thickness for even cooking on a baking sheet and bake. You can pound them lightly with a meat mallet if necessary.
  • Massage Your Greens: Don’t skip the kale massage! It truly makes a difference in texture and digestibility.
  • Chill Your Chicken: For easier slicing, chill the baked chicken for about 15-20 minutes before cutting.
  • Fresh Herbs: Use the freshest herbs you can find for the Green Goddess Dressing. They’ll make a world of difference in flavor.
  • Add some crunch: Toasted nuts or seeds can add a satisfying crunch to this salad.
  • Taste as you go: Season the salad components separately before combining them to ensure each element is perfectly flavored.

Common Mistakes to Avoid

We all make mistakes in the kitchen – it’s part of the process! Here are a few common pitfalls to watch out for when making this salad:

  • Overcooking the Chicken: Dry chicken is a salad killer. Use a meat thermometer to ensure it’s cooked to 165°F (74°C) but not beyond.
  • Not Massaging the Kale: Raw kale can be tough and bitter. Massaging it with lemon juice or olive oil breaks down the fibers and makes it much more palatable.
  • Adding Too Much Dressing: Start with a little dressing and add more as needed. Over-dressing can make the salad soggy.
  • Using Dull Knives: Dull knives make chopping veggies a chore and can lead to uneven cuts. Keep your knives sharp for a smoother cooking experience.
  • Skipping the Taste Test: Always taste your salad before serving and adjust the seasoning as needed. A little extra salt, pepper, or lemon juice can make a big difference.

Variations to Try

One of the best things about this Green Goddess Chicken Salad is how adaptable it is. Here are a few variations to spark your creativity:

  • Vegetarian Option: Swap the chicken for grilled halloumi cheese or roasted chickpeas for a vegetarian-friendly version.
  • Dairy-Free Delight: Omit the Parmesan cheese or use a dairy-free alternative. Ensure your Green Goddess Dressing is also dairy-free.
  • Spicy Kick: Add a pinch of red pepper flakes to the chicken marinade or a drizzle of sriracha to the dressing for a spicy twist.
  • Mediterranean Flair: Add Kalamata olives, feta cheese, and sun-dried tomatoes for a Mediterranean-inspired salad.
  • Berry Bliss: Incorporate fresh berries like strawberries or blueberries for a touch of sweetness.
  • Grain Bowl Style: Serve the salad over a bed of brown rice, farro, or couscous for a heartier meal.

Feel free to experiment and create your own unique variations based on your preferences and what’s in season. This salad is a blank canvas for your culinary creativity!

How to Store Leftovers

If you have any leftovers (though I doubt you will!), here’s how to store them properly:

  • Dressing on the Side: Store the salad and dressing separately to prevent the salad from becoming soggy.
  • Airtight Container: Place the salad in an airtight container and refrigerate.
  • Best Within 2 Days: For optimal freshness, consume the salad within 1-2 days.
  • Avoid Freezing: Freezing is not recommended as it can alter the texture of the ingredients.

Frequently Asked Questions (FAQ)

Here are some common questions about making Green Goddess Chicken Salad:

  • Can I make this salad ahead of time?: Yes, you can prepare the individual components (chicken, quinoa, dressing, chopped veggies) ahead of time and assemble the salad just before serving.
  • Can I use rotisserie chicken?: Absolutely! Rotisserie chicken is a great shortcut for this recipe.
  • What if I don’t have green tomatoes?: You can substitute regular red tomatoes or cherry tomatoes.
  • Can I use a different type of cheese?: Yes, feel free to use your favorite cheese, such as goat cheese, feta, or mozzarella.
  • Is this salad gluten-free?: Yes, this salad is naturally gluten-free as long as your Green Goddess Dressing and other ingredients are gluten-free.

Serving Suggestions

This Green Goddess Chicken Salad is delicious on its own, but here are a few serving suggestions to make it even more special:

  • As a Main Course: Serve a generous portion of the salad as a light and refreshing main course for lunch or dinner.
  • In a Wrap: Wrap the salad in a whole-wheat tortilla or lettuce wrap for a portable and satisfying meal.
  • With a Side of Soup: Pair the salad with a cup of creamy tomato soup or a light vegetable broth for a complete meal.
  • On Toast: Serve the salad on toasted sourdough bread or crackers for an open-faced sandwich.
  • At a Picnic: Pack the salad in a container and take it with you on a picnic or outdoor adventure.

I hope you enjoy this Green Goddess Chicken Salad as much as I do. It’s a recipe that nourishes both body and soul, and I’m so happy to share it with you. Happy cooking!

Green Goddess Chicken Salad

Prep Time 20 minutes
Cook Time 35 minutes
Total Time 55 minutes
Servings 4 servings
Calories 650
A vibrant and healthy Green Goddess Chicken Salad packed with fresh greens, tender chicken, and a creamy green goddess dressing. Perfect for a light lunch or dinner!

Ingredients

Chicken

  • 2 lbs organic chicken breasts
  • 2 tablespoons extra virgin olive oil
  • 1 teaspoon sea salt
  • 1 teaspoon black pepper
  • 1 teaspoon smoked paprika
  • 1 teaspoon Italian seasoning

Salad

  • 2 bunches kale and baby lettuce (roughly chopped)
  • 1 organic cucumber (peeled and chopped)
  • 1 green tomato (diced)
  • 2 cups crispy lemon herb quinoa
  • 1 Hass avocado (pitted and chopped into chunks)
  • 1 cup freshly grated parmesan cheese
  • 1 to 2 cups green goddess dressing

Instructions 

  • Preheat oven to 400°F and line a baking sheet with parchment paper.
  • Allow marinated chicken to come to room temperature for 30-45 minutes.
  • Place chicken on prepared baking sheet and bake for 30-35 minutes until fully cooked and juices run clear.
  • Remove chicken from oven and slice into strips or chunks as preferred.
  • Prepare crispy lemon herb quinoa and green goddess dressing following their respective recipes.
  • Strip and roughly chop kale leaves, discarding stems.
  • Place kale in large bowl and drizzle with 1-2 teaspoons lemon juice or olive oil; massage gently with hands for 2-3 minutes to soften.
  • In a large salad bowl, combine massaged kale, chopped cucumber, diced green tomato, and avocado chunks.
  • Top with crispy quinoa, sliced chicken, and grated parmesan.
  • Drizzle salad with green goddess dressing and serve immediately.

Notes

For a vegetarian option, substitute the chicken with grilled halloumi cheese or chickpeas.
Calories: 650kcal
Cost: $25
Course: Dinner, Lunch, Main Course
Cuisine: American
Keyword: chicken

Nutrition

Calories: 650kcal | Carbohydrates: 45g | Protein: 55g | Fat: 30g | Sodium: 700mg
pin

Hey friends! Avery here, from rainy Portland. Today, we’re tackling a craving that hits us all – that delicious Dunkin’ Avocado Toast. Let’s be honest, those trips to Dunkin’ can add up. So, I’ve reverse-engineered their recipe to bring you a homemade version that’s just as satisfying, and way more budget-friendly.

My journey with food started out of necessity, not passion. After my health took a nosedive from stress and takeout, I started experimenting in the kitchen. It wasn’t always pretty, but it was grounding. Now, I believe healthy eating is about self-care, not deprivation. And this avocado toast? It’s pure self-care in every bite.

Why You’ll Love This Copycat Recipe

This recipe isn’t just about saving money; it’s about control. You control the ingredients, the quality, and the flavor. Plus, it’s incredibly simple. Even if your cooking skills are, shall we say, “developing,” you can nail this. Here’s why I think you’ll adore it:

  • Taste: It captures the essence of Dunkin’s avocado toast perfectly. Tangy, savory, and utterly addictive.
  • Simplicity: Minimal ingredients, minimal effort. This recipe is ready in minutes.
  • Customizable: Tweak it to your liking! Add a sprinkle of red pepper flakes for heat, or a squeeze of lime for extra zing.
  • Budget-Friendly: Making it at home significantly cuts down on costs.

Ingredients for Your Homemade Avocado Toast

Here’s what you’ll need to create this delightful toast. I always encourage using the best quality ingredients you can find; it truly makes a difference. Remember, this recipe is all about feeling good, so choose ingredients that bring you joy.

  • 2 slices thick-cut sourdough or hearty multigrain bread (about 1 ounce each)
  • Optional: 1–2 teaspoons butter or olive oil (for an extra-crisp toast)
  • 1 medium ripe Hass avocado
  • 1–1½ teaspoons lemon juice (fresh is best, bottled works)
  • ¼ teaspoon kosher salt (or to taste)
  • ⅛ teaspoon black pepper
  • ⅛ teaspoon garlic powder
  • ⅛ teaspoon onion powder (optional but adds nice flavor)
  • 1–2 teaspoons olive oil (for silky texture)
  • ½–1 teaspoon Everything Bagel seasoning
  • Optional garnish: a pinch of red pepper flakes for a little heat
Recipe Image

Step-by-Step: Making the Perfect Avocado Toast

Alright, let’s get cooking! This recipe is so straightforward, you’ll wonder why you ever bought avocado toast. Remember, cooking is about the process as much as the result. Put on some music, breathe deep, and enjoy the moment.

  1. Pick the Perfect Avocado: Choose a ripe Hass avocado. It should give slightly when you press it gently with your thumb but not feel mushy. The avocado is the star of this recipe, so it’s important to get it right.
  2. Prep the Avocado: Slice it in half carefully lengthwise, twist to open, and remove the pit. Scoop the avocado flesh into a small bowl using a spoon.
  3. Mash and Season: Add to the bowl with avocado: 1–1½ teaspoons lemon juice, ¼ teaspoon salt, ⅛ teaspoon black pepper, ⅛ teaspoon garlic powder, ⅛ teaspoon onion powder (if using), and 1–2 teaspoons olive oil. Use a fork to mash the avocado until it’s mostly smooth with just a few small chunks. Dunkin’s avocado is fairly smooth, not super chunky, so mash it more than you usually might.
  4. Taste and Adjust: This is where your personal touch comes in. More lemon = brighter, more tangy. More salt = more “Dunkin’ style” savory flavor.
  5. Toast the Bread: Toast the bread slices on medium to medium-high setting until they’re golden and crisp around the edges but still tender in the center. Lightly spread one side of each bread slice with butter or brush with olive oil. Heat a skillet over medium heat. Place bread oiled side down and toast 2–3 minutes, until golden and crunchy.
  6. Assemble Your Toast: Place the toasted bread slices on a plate or cutting board. Spoon the avocado mixture evenly onto both slices. Use the back of the spoon to spread the avocado all the way to the edges. Dunkin’ tends to cover the whole surface, not just the center.
  7. Season and Serve: Sprinkle each slice with: ¼–½ teaspoon Everything Bagel seasoning (or to taste) and an optional pinch of red pepper flakes. Avocado toast is best enjoyed immediately for the best color, texture, and taste. The toast will slowly soften under the avocado if it sits too long.

Pro Tips for the Best Avocado Toast

Here are a few secrets I’ve learned along the way to elevate your avocado toast game. These tips are all about maximizing flavor and texture.

  • Toast the Bread Properly: The foundation of good avocado toast is perfectly toasted bread. Aim for golden brown and crispy without being burnt.
  • Don’t Over-Mash: A little texture in the avocado is nice. Avoid turning it into a complete paste.
  • Quality Olive Oil Matters: A good olive oil adds richness and depth of flavor to this recipe.
  • Fresh Lemon Juice is Key: It brightens the avocado and prevents it from browning too quickly.
  • Taste as You Go: Adjust the seasoning to your liking. Don’t be afraid to experiment!

Common Mistakes to Avoid

Even with a simple recipe, it’s easy to make mistakes. Here are a few pitfalls to avoid:

  • Using Underripe Avocados: They’re hard to mash and lack flavor.
  • Over-Salting: Avocado is delicate, so be careful not to overdo the salt.
  • Letting the Toast Sit Too Long: The toast will get soggy. Eat it immediately!
  • Skipping the Lemon Juice: It prevents browning and adds essential flavor.

Variations to Spice Things Up

The beauty of avocado toast is its versatility. Here are a few ways to mix it up:

  • Add an Egg: Top with a fried or poached egg for extra protein.
  • Spicy Avocado Toast: Mix in some sriracha or chili flakes for heat.
  • Everything But the Bagel Avocado Toast: A generous sprinkle of everything bagel seasoning adds incredible flavor.
  • Tomato and Basil Avocado Toast: Add sliced tomatoes and fresh basil for a Mediterranean twist.

How to Store Leftover Avocado (If There Is Any!)

Avocado doesn’t store well once it’s cut, but here are a few tricks to minimize browning:

  • Lemon Juice: Coat the exposed surface with lemon juice.
  • Plastic Wrap: Press plastic wrap directly onto the surface of the avocado.
  • In Water: Submerge the avocado in a container of water (cut-side down).

These methods will help slow down the browning process, but it’s best to use the avocado as soon as possible.

Frequently Asked Questions

Here are some common questions I get about avocado toast:

  • Can I make this ahead of time?: It’s best enjoyed immediately, but you can mash the avocado ahead of time and store it properly.
  • What kind of bread is best?: Sourdough or multigrain are my favorites, but use whatever you enjoy!
  • Can I use frozen avocado?: Fresh is always best, but frozen will work in a pinch. Just be sure to thaw it completely and drain any excess water.
  • Is this recipe vegan?: Yes, as long as you use olive oil instead of butter.

Serving Suggestions for Your Avocado Toast

Avocado toast is a fantastic meal on its own, but here are a few ways to round it out:

  • Side Salad: A simple green salad with a light vinaigrette.
  • Fruit Salad: A refreshing mix of seasonal fruits.
  • Soup: A light soup, like tomato or vegetable.

This recipe is a celebration of simple ingredients and the joy of cooking. I hope you love it as much as I do! Remember, cooking is about feeling good, so embrace the process and enjoy every bite!

So there you have it – your very own copycat Dunkin’ Avocado Toast recipe! I hope this recipe is one of your new favorites. The next time you’re craving avocado toast by dunkin, remember this recipe is an amazing and easy way to have your avocado toast with everything bagel seasoning. I’m sure your avocado toast will come out perfect if you follow the steps. I’ve found that olive oil is the best for getting the perfect toast. I’m so glad I could share this this recipe is with you all. Remember, this recipe is not just a recipe; it’s a way to reconnect with yourself and your food.

Copycat Dunkin’ Avocado Toast

Prep Time 5 minutes
Cook Time 5 minutes
Total Time 10 minutes
Servings 2 slices
Calories 300
Recreate Dunkin's popular avocado toast at home with this simple and delicious recipe. Enjoy creamy avocado on perfectly toasted bread, seasoned to perfection.

Ingredients

Toast

  • 2 slices thick-cut sourdough or hearty multigrain bread (about 1 ounce each)
  • 1 -2 teaspoons butter or olive oil (optional, for an extra-crisp toast)

Avocado Mixture

  • 1 medium ripe Hass avocado
  • 1 -1½ teaspoons lemon juice (fresh is best, bottled works)
  • 0.25 teaspoon kosher salt (or to taste)
  • 0.125 teaspoon black pepper
  • 0.125 teaspoon garlic powder
  • 0.125 teaspoon onion powder (optional but adds nice flavor)
  • 1 -2 teaspoons olive oil (for silky texture)
  • 0.5 -1 teaspoon Everything Bagel seasoning
  • 1 pinch red pepper flakes (Optional garnish: a pinch of red pepper flakes for a little heat)

Instructions 

  • Pick a ripe Hass avocado.
  • Slice, twist, and remove the pit.
  • Scoop the avocado flesh into a bowl.
  • Add lemon juice, salt, pepper, garlic powder, onion powder (if using), and olive oil to the bowl.
  • Mash the avocado until mostly smooth.
  • Taste and adjust lemon and salt.
  • Toast the bread until golden and crisp.
  • Spread with butter or brush with olive oil.
  • Heat a skillet over medium heat.
  • Place bread oiled side down and toast 2–3 minutes, until golden and crunchy.
  • Place the toasted bread slices on a plate.
  • Spoon the avocado mixture evenly onto both slices.
  • Spread the avocado to the edges.
  • Sprinkle with Everything Bagel seasoning and red pepper flakes (optional).
  • Enjoy immediately.

Notes

For best results, use a ripe but firm avocado. The Everything Bagel seasoning adds a signature flavor, but you can substitute with other seasonings if desired.
Calories: 300kcal
Cost: $5
Course: Breakfast, Snack
Cuisine: American
Keyword: Avocado

Nutrition

Calories: 300kcal | Carbohydrates: 30g | Protein: 8g | Fat: 18g | Sodium: 400mg
pin

Hello, friends! It’s Avery here, coming to you from my cozy kitchen in Portland, where the scent of rosemary and rain is battling it out with the tantalizing aroma of…you guessed it…creamy lemon garlic shrimp pasta! I’m so excited to share this recipe with you. It’s one of those dishes that feels both indulgent and nourishing, perfect for a weeknight dinner or a special occasion. My goal is to help you reconnect with food and find joy in cooking, and this recipe is a fantastic place to start.

My journey into cooking started out of necessity, not passion. After years of neglecting my well-being, my body staged a rebellion. Cooking became my therapy, my way of reclaiming control and nourishing myself from the inside out. This creamy lemon garlic shrimp pasta is the kind of recipe I wish I’d had back then – simple, flavorful, and incredibly satisfying. It’s about using simple ingredients to create something truly special.

Why You’ll Love This Creamy Lemon Garlic Shrimp Pasta

Seriously, what’s not to love? This isn’t just another pasta dish; it’s an experience. It’s the kind of meal that makes you close your eyes and savor every bite. Here’s why I think you’ll be obsessed:

  • Ready in Minutes: From prep to plate, this dish comes together in under 30 minutes. Perfect for busy weeknights!
  • Incredibly Flavorful: The bright lemon, pungent garlic, and rich cream create a symphony of flavors that will dance on your taste buds.
  • Versatile: Easily adaptable to your dietary needs and preferences. Dairy-free? Gluten-free? No problem! I’ll share some easy substitutions below.
  • Comfort Food Elevated: It’s the ultimate comfort food, but with a touch of elegance. Perfect for impressing guests or treating yourself.
  • Simple Ingredients: You probably already have most of the ingredients in your pantry and refrigerator.

Ingredients for Creamy Lemon Garlic Shrimp Pasta

Here’s what you’ll need to create this culinary masterpiece. Remember, quality ingredients make all the difference, so choose the freshest you can find!

  • 8 oz Linguine or Fettuccine (gluten-free option available)
  • 1 lb Shrimp (fresh or thawed frozen, patted dry)
  • 2 tbsp Butter (or olive oil for dairy-free)
  • 4 cloves Garlic (minced)
  • 1 tbsp Lemon Zest
  • 2 tbsp Lemon Juice
  • 1 cup Half-and-half or Heavy Cream (or coconut milk for dairy-free)
  • 1 cup Chicken Broth (or vegetable broth for vegetarian)
  • 1/2 cup Parmesan Cheese (or nutritional yeast for dairy-free)
  • 2 tbsp Fresh Parsley (chopped)
  • 1 tbsp Cornstarch (optional for thickening)
Recipe Image

Pro Tips for Perfect Creamy Lemon Garlic Shrimp Pasta

Want to take your pasta game to the next level? Here are a few of my tried-and-true tips:

  • Don’t Overcook the Shrimp: Overcooked shrimp is rubbery and sad. Cook it just until it turns pink and opaque. It should only take a few minutes.
  • Use Fresh Lemon Juice: Bottled lemon juice just doesn’t compare to the bright, zesty flavor of fresh lemon juice. Trust me on this one!
  • Toast the Garlic: Don’t just throw the garlic into the pan. Sauté it in butter or olive oil until it’s fragrant and lightly golden. This will bring out its nutty sweetness.
  • Reserve Pasta Water: Before you drain the pasta, reserve about 1/2 cup of the starchy cooking water. This magical elixir will help the sauce cling to the pasta and create a luscious, creamy texture.
  • Season Generously: Don’t be afraid to season the sauce and shrimp with salt and pepper. Taste as you go and adjust accordingly.

Common Mistakes to Avoid

We all make mistakes in the kitchen, especially when we’re learning. Here are a few common pitfalls to watch out for:

  • Burning the Garlic: Burnt garlic is bitter and unpleasant. Keep a close eye on it and reduce the heat if necessary.
  • Adding Cold Cream: Adding cold cream to a hot pan can cause it to curdle. Warm the cream slightly before adding it to the sauce.
  • Overcooking the Pasta: Nobody likes mushy pasta. Cook it al dente, which means “to the tooth” in Italian. It should be firm but not crunchy.
  • Not Salting the Pasta Water: Salting the pasta water is essential for seasoning the pasta from the inside out. Use about 1 tablespoon of salt per gallon of water.
  • Forgetting the Lemon Zest: The lemon zest adds a bright, aromatic flavor that really elevates this dish. Don’t skip it!

Variations on Creamy Lemon Garlic Shrimp Pasta

One of the best things about this recipe is how easily it can be customized to your liking. Here are a few ideas to get you started:

  • Spicy Shrimp Pasta: Add a pinch of red pepper flakes to the sauce for a little kick.
  • Vegetable Shrimp Pasta: Toss in some sautéed vegetables like spinach, asparagus, or bell peppers.
  • Lemon Garlic Chicken Pasta: Substitute the shrimp with cooked chicken breast.
  • Dairy-Free Shrimp Pasta: Use olive oil instead of butter and coconut milk instead of cream. Nutritional yeast can be used in place of parmesan cheese.
  • Pesto Shrimp Pasta: Stir in a spoonful of pesto for a burst of fresh, herbaceous flavor.

How to Store Leftover Shrimp Pasta

If you’re lucky enough to have leftovers, store them in an airtight container in the refrigerator for up to 3 days. Reheat gently in a skillet or microwave. Note that the sauce may thicken as it sits, so you may need to add a splash of broth or water to thin it out.

Frequently Asked Questions (FAQ)

Got questions? I’ve got answers!

  • Can I use frozen shrimp? Yes, absolutely! Just make sure to thaw the shrimp completely before cooking. Pat them dry with paper towels to remove any excess moisture.
  • Can I make this recipe ahead of time? While the sauce is best when made fresh, you can prep some of the ingredients ahead of time. Mince the garlic, zest the lemon, and chop the parsley. Store them in separate containers in the refrigerator.
  • Can I use a different type of pasta? Of course! Feel free to use your favorite type of pasta. Penne, rotini, and bow ties would all work well.
  • Can I add more vegetables? Absolutely! Feel free to add any vegetables you like. Spinach, asparagus, and bell peppers would all be great additions.
  • Is this recipe gluten-free? It can be! Simply use gluten-free pasta.

Serving Suggestions for Creamy Lemon Garlic Shrimp Pasta

This pasta is delicious on its own, but it’s even better when paired with a few simple sides:

  • Garlic Bread: A classic pairing!
  • Side Salad: A simple green salad with a lemon vinaigrette.
  • Roasted Vegetables: Roasted asparagus or broccoli would be a delicious and healthy addition.
  • Crusty Bread: For soaking up all that delicious sauce!

And there you have it! My Irresistible Creamy Lemon Garlic Shrimp Pasta recipe. I truly hope you love it as much as I do. Remember, cooking should be fun and relaxing, so don’t be afraid to experiment and make it your own. Now, go forth and create something delicious! And don’t forget to let me know in the comments how it turns out. Happy cooking!

Irresistible Creamy Lemon Garlic Shrimp Pasta

Prep Time 10 minutes
Cook Time 20 minutes
Total Time 30 minutes
Servings 4 servings
Calories 450
A delightful pasta dish featuring succulent shrimp in a creamy lemon garlic sauce. This recipe is quick, easy, and bursting with flavor, perfect for a weeknight dinner.

Ingredients

Pasta

  • 8 oz Linguine or Fettuccine (gluten-free option available)

Shrimp

  • 1 lb Shrimp (fresh or thawed frozen, patted dry)

Sauce

  • 2 tbsp Butter (or olive oil for dairy-free)
  • 4 cloves Garlic (minced)
  • 1 tbsp Lemon Zest
  • 2 tbsp Lemon Juice
  • 1 cup Half-and-half or Heavy Cream (or coconut milk for dairy-free)
  • 1 cup Chicken Broth (or vegetable broth for vegetarian)
  • 1/2 cup Parmesan Cheese (or nutritional yeast for dairy-free)
  • 2 tbsp Fresh Parsley (chopped)
  • 1 tbsp Cornstarch (optional for thickening)

Notes

Adjust the amount of lemon juice and garlic to your preference. For a richer sauce, use heavy cream. Serve immediately for the best flavor.
Calories: 450kcal
Cost: $18
Course: Main Course
Cuisine: Italian
Keyword: shrimp

Nutrition

Calories: 450kcal | Carbohydrates: 40g | Protein: 35g | Fat: 20g | Sodium: 600mg
pin

Hey there, friend! Avery Collins here, from my little kitchen in Portland. Let’s be honest, life gets busy. And sometimes, the thought of cooking dinner feels… well, overwhelming. But what if I told you that you could have a vibrant, flavorful, and downright comforting meal on the table in just about 20 minutes? That’s where this Lemon Garlic Chicken Pasta comes in. It’s a dish that feels like a warm hug on a plate, and it’s simple enough for even the most hectic weeknight.

This recipe is born out of my own need for quick, healthy, and delicious meals. After years of takeout and feeling less than my best, I started experimenting in the kitchen. I wanted to create something that nourished my body and brought a little joy to my day. And let me tell you, the bright, zesty flavors of lemon and garlic combined with tender chicken and perfectly cooked pasta? It’s a winner every time.

Why You’ll Love This Lemon Garlic Chicken Pasta

Seriously, what’s not to love? But if you need convincing, here’s why this dish has become a staple in my rotation:

  • Quick & Easy: As the title says, this recipe is ready in about 20 minutes. Perfect for busy weeknights when you want a home-cooked meal without spending hours in the kitchen.
  • Flavor Explosion: The combination of lemon, garlic, and Parmesan cheese creates a bright, zesty, and savory flavor profile that’s absolutely irresistible.
  • Healthy & Balanced: Packed with protein from the chicken, fiber from the pasta, and vitamins from the spinach, this dish is a complete and nourishing meal.
  • Versatile: You can easily customize this recipe to your liking. Swap out the chicken for shrimp, add different vegetables, or use a different type of pasta. The possibilities are endless!
  • Comfort Food: There’s something incredibly comforting about a bowl of pasta, especially when it’s coated in a creamy, flavorful sauce. This dish is guaranteed to satisfy your cravings.

Ingredients You’ll Need

Here’s what you’ll need to whip up this delicious Lemon Garlic Chicken Pasta:

  • ‘8 oz (225g) linguine or fettuccine pasta’
  • ‘2 boneless, skinless chicken breasts, cut into bite-sized pieces’
  • ‘2 tbsp olive oil’
  • ‘3-4 cloves garlic, minced’
  • ‘1 cup fresh spinach, roughly chopped’
  • ‘1 cup heavy cream’
  • ‘1/2 cup grated Parmesan cheese, plus extra for garnish’
  • ‘Juice and zest of 1 large lemon (about 3 tbsp juice and 1 tsp zest)’
  • ‘Salt and freshly ground black pepper, to taste’
  • ‘Lemon slices, for garnish’
  • ‘Fresh parsley or basil, chopped, for garnish’
Recipe Image

Let’s Make Lemon Garlic Chicken Pasta: Step-by-Step

Ready to get cooking? Here’s how to make this easy and delicious pasta dish:

  1. Cook the Pasta:
    Start by bringing a large pot of salted water to a boil. Toss in the linguine or fettuccine and cook it according to the package instructions until it’s al dente. Once done, drain the pasta, but save about 1/2 cup of the pasta water for later. Set the drained pasta aside.
  2. Sauté the Chicken:
    While the pasta is cooking, heat the olive oil in a large skillet over medium-high heat. Add the bite-sized chicken pieces, season them with salt and pepper, and cook for about 5-7 minutes. You want them to be golden and cooked through. Once they’re ready, remove the chicken from the skillet and set it aside.
  3. Add the Garlic:
    In the same skillet, lower the heat to medium and add the minced garlic. Sauté it for about 1 minute until it becomes fragrant. Just be careful not to burn it—burnt garlic can taste bitter!
  4. Make the Cream Sauce:
    Now, pour in the heavy cream, lemon juice, and lemon zest to the skillet with garlic. Stir well and let the mixture simmer gently for about 2-3 minutes. This will help the flavors meld beautifully!
  5. Finish the Sauce:
    Add the grated Parmesan cheese to the sauce. Stir until it melts and becomes smooth. Then, toss in the chopped fresh spinach and cook until wilted.
  6. Combine Everything:
    Return the cooked chicken to the skillet and add the drained pasta, tossing everything together so that the pasta is well coated in that delicious sauce. If the sauce is too thick, add a bit of the reserved pasta water until you reach your desired consistency.
  7. Season and Serve:
    Taste a bit of your pasta and adjust the seasoning with more salt or pepper if needed. Serve immediately, garnished with lemon slices and extra Parmesan and topped with chopped parsley or basil for a fresh touch!

Pro Tips for the Perfect Pasta

Here are a few tips to ensure your Lemon Garlic Chicken Pasta turns out perfectly every time:

  • Don’t Overcook the Pasta: Al dente pasta is key for the best texture. It should be slightly firm to the bite.
  • Save the Pasta Water: The starchy pasta water is a secret weapon for creating a creamy, emulsified sauce. Don’t skip this step!
  • Use Fresh Ingredients: Fresh lemon juice, zest, and garlic will give you the best flavor.
  • Don’t Burn the Garlic: Burnt garlic can taste bitter and ruin the flavor of the dish. Keep a close eye on it and sauté it over medium heat until it’s fragrant but not browned.
  • Taste and Adjust: Always taste the sauce and adjust the seasoning to your liking. You may need to add more salt, pepper, or lemon juice.

Common Mistakes to Avoid

We all make mistakes in the kitchen! Here are a few common ones to watch out for:

  • Overcooking the Chicken: Dry, overcooked chicken is no fun. Cook the chicken until it’s just cooked through and still juicy.
  • Not Salting the Pasta Water: Salting the pasta water is essential for seasoning the pasta from the inside out.
  • Adding Cold Parmesan: Cold Parmesan cheese can clump up in the sauce. Let it come to room temperature before adding it.
  • Ignoring the Pasta Water: Forgetting to save the pasta water is a big mistake! It’s crucial for creating a creamy sauce.
  • Overcrowding the Pan: If you overcrowd the pan when sautéing the chicken, it will steam instead of brown. Cook the chicken in batches if necessary.

Lemon Garlic Chicken Pasta Variations

Want to mix things up? Here are a few variations you can try:

  • Shrimp: Substitute the chicken with shrimp for a seafood twist.
  • Vegetables: Add other vegetables like asparagus, broccoli, or bell peppers.
  • Herbs: Experiment with different herbs like oregano, thyme, or rosemary.
  • Spicy: Add a pinch of red pepper flakes for a little heat.
  • Creamy Tomato: Add a can of diced tomatoes and a splash of tomato paste for a creamy tomato sauce.

Storing and Reheating Leftovers

If you happen to have any leftovers (which is rare in my house!), here’s how to store and reheat them:

  • Storage: Store the pasta in an airtight container in the refrigerator for up to 3 days.
  • Reheating: Reheat the pasta in a skillet over medium heat, adding a splash of water or broth to prevent it from drying out. You can also reheat it in the microwave.

Frequently Asked Questions (FAQ)

Here are some common questions about this recipe:

  • Can I use a different type of pasta? Absolutely! Feel free to use your favorite type of pasta. Penne, rotini, and spaghetti all work well.
  • Can I use frozen chicken? Yes, you can use frozen chicken. Just make sure to thaw it completely before cooking.
  • Can I make this dish dairy-free? Yes, you can substitute the heavy cream with coconut milk or a dairy-free cream alternative. You can also use nutritional yeast instead of Parmesan cheese.
  • Can I add more vegetables? Of course! Feel free to add any vegetables you like.
  • Can I make this dish ahead of time? While it’s best served fresh, you can make the sauce ahead of time and store it in the refrigerator. Then, just cook the pasta and chicken when you’re ready to eat.

Serving Suggestions

This Lemon Garlic Chicken Pasta is delicious on its own, but here are a few serving suggestions to complete your meal:

  • Side Salad: Serve it with a simple green salad with a lemon vinaigrette.
  • Garlic Bread: Pair it with some warm garlic bread for dipping in the sauce.
  • Roasted Vegetables: Serve it alongside roasted vegetables like asparagus, broccoli, or Brussels sprouts.
  • Wine: Enjoy it with a crisp white wine like Sauvignon Blanc or Pinot Grigio.

And there you have it! A quick, easy, and delicious Lemon Garlic Chicken Pasta recipe that’s perfect for any night of the week. I hope you enjoy it as much as I do. Happy cooking!

Lemon Garlic Chicken Pasta

Prep Time 10 minutes
Cook Time 20 minutes
Total Time 30 minutes
Servings 4 people
Calories 550
A delightful pasta dish featuring tender chicken, a creamy lemon garlic sauce, and fresh spinach. This recipe is quick, easy, and perfect for a weeknight dinner.

Ingredients

Pasta

  • 8 oz linguine or fettuccine pasta

Chicken

  • 2 boneless, skinless chicken breasts (cut into bite-sized pieces)

Sauce

  • 2 tbsp olive oil
  • 3-4 cloves garlic (minced)
  • 1 cup fresh spinach (roughly chopped)
  • 1 cup heavy cream
  • 0.5 cup grated Parmesan cheese (plus extra for garnish)
  • 1 large lemon (Juice and zest of (about 3 tbsp juice and 1 tsp zest))
  • to taste Salt and freshly ground black pepper

Garnish

  • Lemon slices (for garnish)
  • Fresh parsley or basil (chopped, for garnish)

Instructions 

  • Cook pasta according to package instructions. Reserve 1/2 cup pasta water.
  • Sauté chicken with salt and pepper until golden and cooked through. Set aside.
  • Sauté minced garlic until fragrant (about 1 minute).
  • Add heavy cream, lemon juice, and lemon zest. Simmer gently for 2-3 minutes.
  • Add Parmesan cheese and stir until smooth. Add spinach and cook until wilted.
  • Return chicken and pasta to skillet. Toss with sauce, adding pasta water if needed.
  • Season with salt and pepper. Garnish with lemon slices, Parmesan, and parsley/basil.

Notes

For a lighter sauce, use half-and-half instead of heavy cream.
Calories: 550kcal
Cost: $18
Course: Main Course
Cuisine: Italian
Keyword: chicken

Nutrition

Calories: 550kcal | Carbohydrates: 50g | Protein: 35g | Fat: 25g | Sodium: 300mg
pin

Error: AI returned broken format. Expecting ‘,’ delimiter: line 2 column 3616 (char 3617)

Recipe Image

PantryAI - Food Stock

Servings 1 application
A comprehensive list of updates and improvements to the PantryAI application, along with related recipe management and planning tools. This stock helps users manage their food inventory and discover new recipes.

Ingredients

Updates and Related Apps

  • 1 version Small improvements and bug fixes.1.2.011/02/2025 (Update)
  • 1 version Small improvements and bug fixes.1.1.1010/21/2025 (Update)
  • 1 version Small bug fixes and improvements.1.1.910/16/2025 (Update)
  • 1 version Small improvements and bug fixes1.1.810/15/2025 (Update)
  • 1 version Small improvements and bug fixes1.1.710/13/2025 (Update)
  • 1 version Small updates and bug fixes1.1.610/10/2025 (Update)
  • 1 version Small improvements and bug fixes1.1.510/07/2025 (Update)
  • 1 version Small improvements and bug fixes1.1.410/04/2025 (Update)
  • 1 version Small improvements and bug fixes1.1.310/01/2025 (Update)
  • 1 version Small improvements and bug fixes1.109/30/2025 (Update)
  • 1 version Small improvements and bug fixes1.0109/28/2025 (Update)
  • 1 version 1.009/22/2025 (Update)
  • 1 application BeChef: Recipe ManagerCookbooks & Grocery ListView (Related App)
  • 1 application Honeydew: Capture RecipesSimplify groceries & planning.View (Related App)
  • 1 application Savor - Meal PlannerRecipe keeper and mannagerView (Related App)
  • 1 application EatStash - Meal Prep & GroceryRecipe Keeper & Dinner PlannerView (Related App)
  • 1 application Fresh: Your Personal ChefSmart Recipes from Your FridgeView (Related App)
  • 1 application CookFromFridgeDelicious meals, from fridgeView (Related App)
  • 1 application SuperCook Track Calorie RecipeScan, Track & Cook your MacrosView (Related App)
  • 1 application Food & Meal Planner: ReciBuddyMenu & Recipes by IngredientsView (Related App)
  • 1 application Pantry PilotLet them cookView (Related App)
  • 1 application Chefy - AI Cooking AssistantRecipe Generator & AssistantView (Related App)

Notes

Keep your PantryAI app updated for the best experience.
Cost: $0
Course: App
Cuisine: N/A
Keyword: Food Management
pin