Author

Avery Collins

Browsing

Hey friends, Avery here! Let’s be honest, sometimes the best meals are the ones that come together quickly, without a ton of fuss, but still deliver big on flavor. This Lemon Butter Shrimp Pasta is exactly that kind of dish. It’s a recipe I rely on when I need something satisfying and comforting, but I don’t want to spend hours in the kitchen. Think of it as a warm hug in a bowl – lemony, buttery, and oh-so-delicious. It’s a dish that reminds me that taking care of myself doesn’t have to be complicated.

This recipe came about on one of those rainy Portland evenings when the craving for something bright and flavorful struck. I rummaged through my fridge, found some shrimp, lemons, and pasta, and just started experimenting. The result was so good, I knew I had to share it with you all.

Why You’ll Love This Lemon Butter Shrimp Pasta

There are so many reasons to adore this Lemon Butter Shrimp Pasta, but let’s highlight a few:

  • Quick and Easy: Ready in under 30 minutes, it’s perfect for busy weeknights.
  • Flavorful: The lemon butter sauce is bright, zesty, and incredibly satisfying.
  • Versatile: You can easily customize it with your favorite vegetables or herbs.
  • Comforting: It’s a dish that feels like a warm hug, perfect for cozy nights in.
  • Simple Ingredients: Uses everyday ingredients you likely already have on hand.

Ingredients for Lemon Butter Shrimp Pasta Fast

  • 8 ounces spaghetti: The foundation of our delicious dish. Feel free to substitute with your favorite pasta shape.
  • 4 tablespoons unsalted butter divided: Essential for creating that rich, buttery sauce.
  • 1 pound large shrimp peeled deveined: The star of the show! Make sure they’re peeled and deveined for easy cooking.
  • 1/2 teaspoon salt: Enhances the flavors of all the other ingredients.
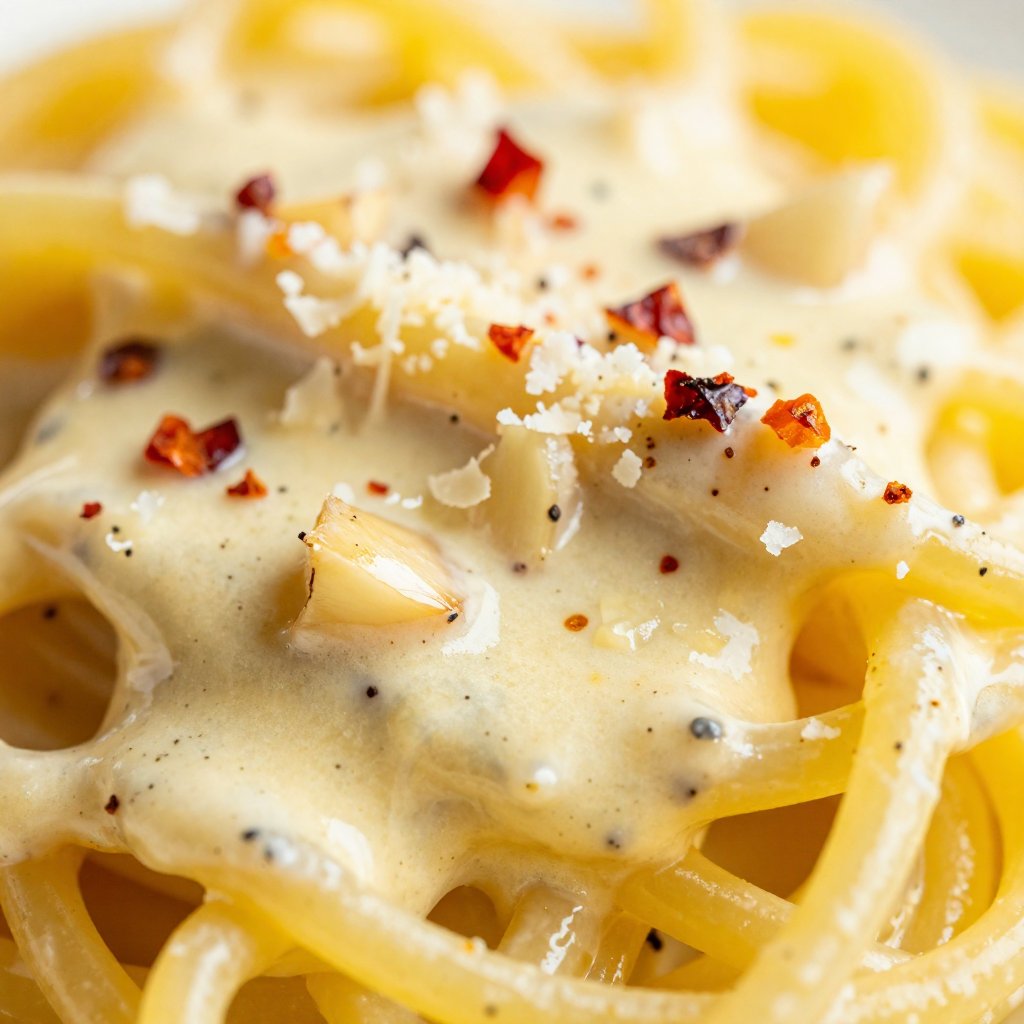
  • 1/2 teaspoon crushed red pepper: Adds a touch of heat and complexity. Adjust to your preference.
  • 4 cloves garlic minced: Provides a pungent, aromatic base for the sauce.
  • 1/4 cup freshly grated parmesan cheese: Adds a salty, cheesy depth to the sauce.
  • 2 tablespoons lemon juice: The key to that bright, zesty flavor. Freshly squeezed is always best!
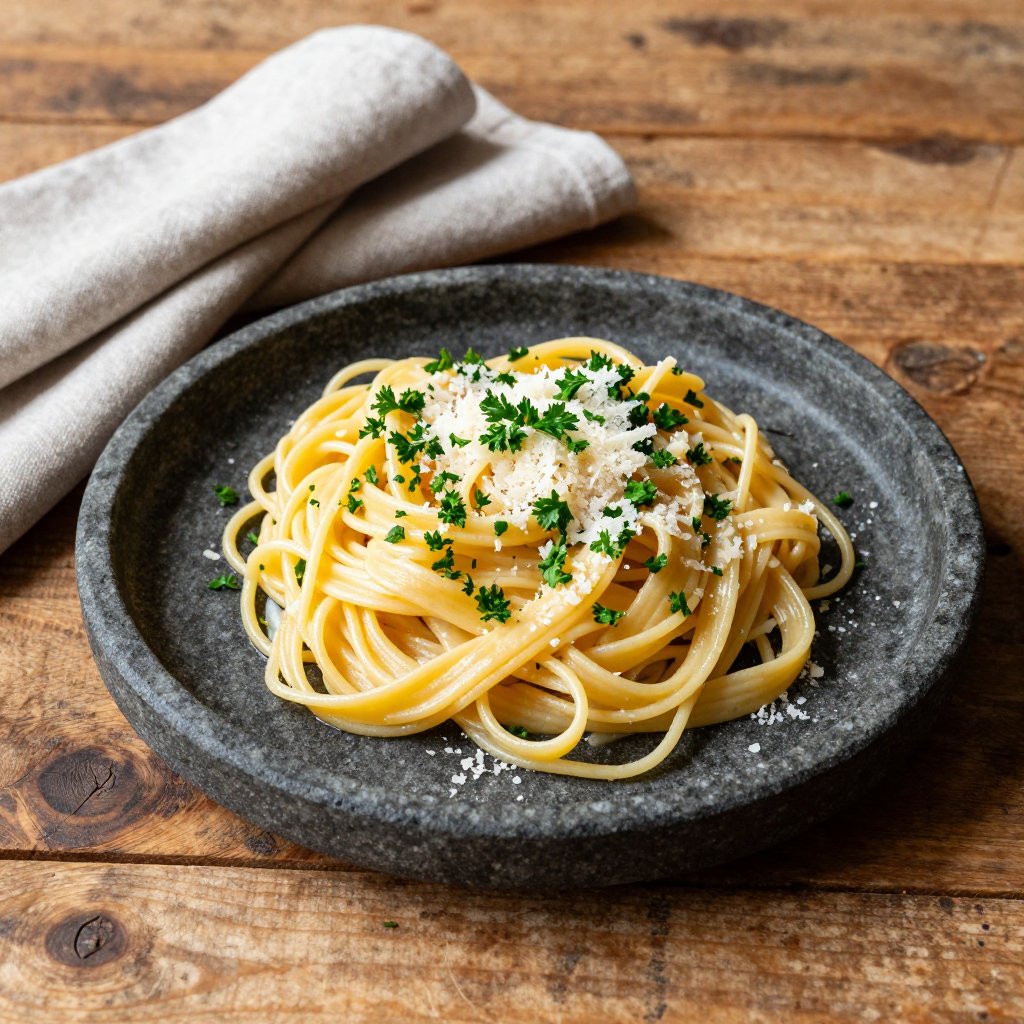
  • 2 tablespoons chopped parsley: Adds a fresh, herbaceous element to finish the dish.
Recipe Image

How to Make Lemon Butter Shrimp Pasta: Step-by-Step

Let’s walk through the process together. Don’t worry, it’s easier than you think!

  1. Cook the Pasta: Cook the spaghetti in a large pot of boiling salted water according to package instructions. Drain the pasta well, but don’t discard all the water! Reserve 1 cup of the pasta water – it’s liquid gold for creating a creamy sauce.
  2. Cook the Shrimp: Melt two tablespoons of butter in a large skillet over medium-high heat. Add the shrimp, salt, and crushed red pepper. Cook for 2 to 3 minutes per side, until the shrimp is opaque pink and cooked through. Don’t overcook them, or they’ll become rubbery! Remove the shrimp from the heat and set it aside on a plate.
  3. Make the Sauce: Lower the heat to medium. In the same skillet, add the remaining butter and minced garlic. Cook until the garlic is fragrant, about one minute. Be careful not to burn the garlic, or it will become bitter. Add the parmesan cheese, lemon juice, and pasta water. Stir to combine and create a luscious sauce. This is where the magic happens! That’s where the sauce comes in.
  4. Combine Everything: Transfer the cooked spaghetti to the skillet and toss it with the sauce. Make sure the pasta is evenly coated. Add the cooked shrimp on top and toss gently to combine everything.
  5. Garnish and Serve: Garnish with chopped parsley and serve immediately. Enjoy every delicious bite!

Pro Tips for the Best Lemon Butter Shrimp Pasta

Here are a few tricks I’ve learned over the years to make this dish even better:

  • Don’t Overcook the Shrimp: Overcooked shrimp are tough and rubbery. Cook them just until they turn pink and opaque.
  • Use Fresh Lemon Juice: It makes a big difference in the flavor. Bottled lemon juice just doesn’t compare.
  • Reserve Pasta Water: Pasta water is starchy and helps to create a creamy, emulsified sauce. It’s a game-changer!
  • Taste and Adjust: Taste the sauce and adjust the seasoning as needed. Add more lemon juice for extra zing, or more red pepper flakes for heat.
  • Warm Plates: Serve the pasta on warm plates to keep it hot for longer.

Common Mistakes to Avoid

Even with a simple recipe, it’s easy to make a few common mistakes. Here’s what to watch out for:

  • Overcooking the Pasta: Nobody likes mushy pasta! Cook it al dente, meaning it should be firm to the bite.
  • Burning the Garlic: Burnt garlic is bitter and can ruin the flavor of the sauce. Keep the heat low and watch it carefully.
  • Using Too Much Salt: Parmesan cheese is already salty, so be careful not to over-salt the dish.
  • Forgetting the Pasta Water: Don’t skip this crucial step! The pasta water is essential for creating a creamy sauce.
  • Adding Cold Shrimp: Ensure the shrimp is hot when adding it to the pasta.

Variations to Make It Your Own

One of the best things about this recipe is how easy it is to customize. Here are a few ideas to get you started:

  • Add Vegetables: Toss in some sauteed spinach, asparagus, or cherry tomatoes for extra nutrients and flavor.
  • Use Different Pasta: Try fettuccine, linguine, or even gluten-free pasta.
  • Add Herbs: Experiment with different herbs like basil, oregano, or thyme.
  • Make it Spicy: Add more crushed red pepper flakes or a pinch of cayenne pepper for extra heat.
  • Add Wine: Deglaze the pan with a splash of white wine after cooking the garlic for a richer flavor.

If you’re looking for a healthier twist, you can use whole wheat pasta or add some roasted vegetables. The possibilities are endless!

How to Store and Reheat Leftovers

Leftovers can be stored in an airtight container in the refrigerator for up to 3 days. To reheat, gently warm the pasta in a skillet over medium heat, adding a splash of water or broth to prevent it from drying out. You can also reheat it in the microwave, but be careful not to overcook the shrimp.

I don’t recommend freezing this dish, as the pasta and shrimp can become mushy when thawed.

Frequently Asked Questions (FAQ)

  • Can I use frozen shrimp? Yes, but make sure to thaw them completely and pat them dry before cooking.
  • Can I make this dish ahead of time? I recommend making it fresh for the best flavor and texture, but you can cook the pasta and shrimp separately ahead of time and combine them when you’re ready to serve.
  • Can I use a different type of cheese? Yes, you can substitute with Pecorino Romano or Asiago cheese.
  • What if I don’t have pasta water? You can use chicken broth or vegetable broth instead, but the sauce won’t be quite as creamy.
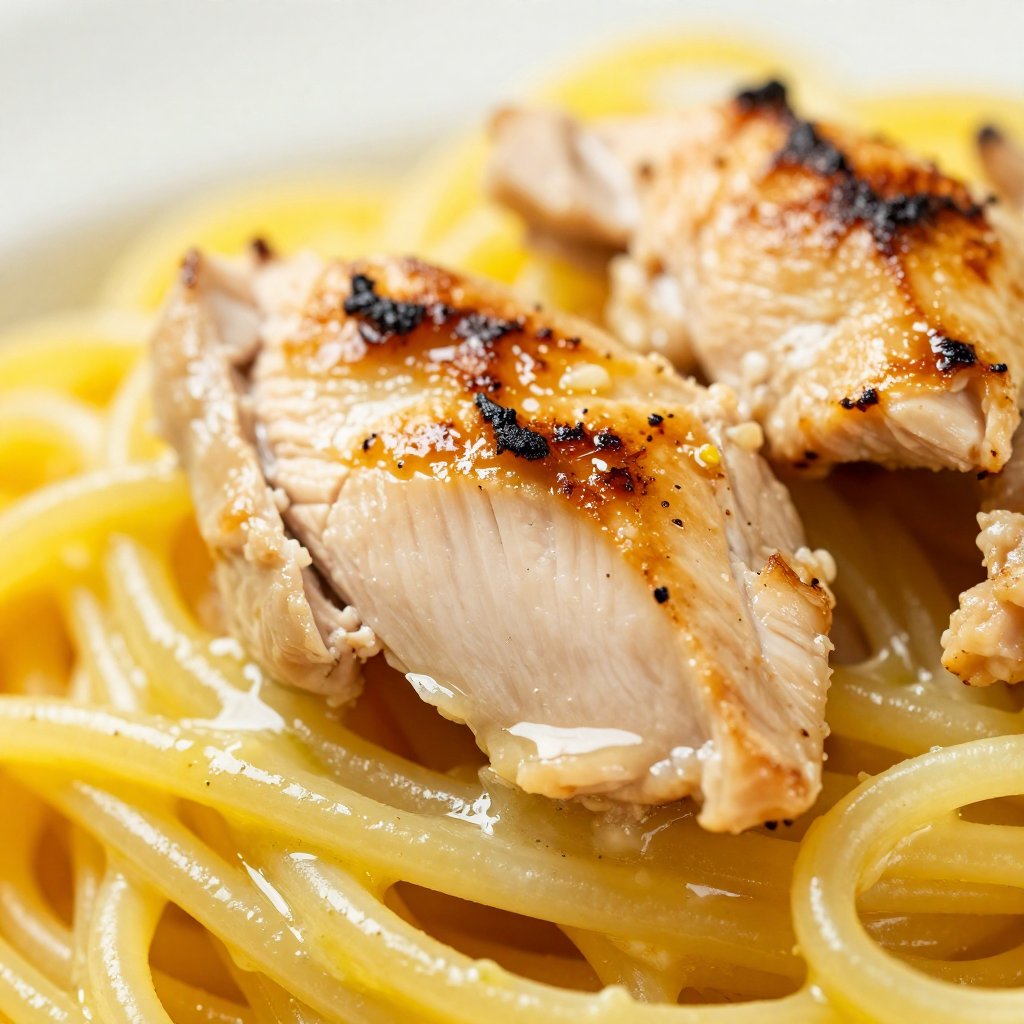
  • Thislemon butter shrimp is fantastic, but can I make this without shrimp? Absolutely! You can substitute chicken, tofu, or simply add more vegetables.

Serving Suggestions

This Lemon Butter Shrimp Pasta is delicious on its own, but it also pairs well with:

  • A simple side salad with a lemon vinaigrette
  • Garlic bread or crusty bread for soaking up the sauce
  • Roasted vegetables like asparagus or broccoli
  • A glass of crisp white wine

It’s the perfect dish for a romantic dinner, a family gathering, or a cozy night in. The shrimp pasta is always a crowd-pleaser!

So there you have it – my go-to recipe for Quick & Easy Lemon Butter Shrimp Pasta. I hope you love it as much as I do! Remember, cooking should be fun and relaxing, so don’t be afraid to experiment and make it your own. And if you re looking for more easy and delicious recipes, be sure to check out my other posts.

If you don’t want a Shrimp Pasta fast recipe, you can slow it down and make it a weekend dish! When you have the time to slow down, it just makes it all the more special.

Happy cooking, friends! And may your kitchen always smell like rosemary.

Lemon Butter Shrimp Pasta Fast

Prep Time 10 minutes
Cook Time 20 minutes
Total Time 30 minutes
Servings 4 servings
Calories 450
A quick and delicious Lemon Butter Shrimp Pasta recipe that's perfect for a weeknight meal. This dish combines succulent shrimp with a tangy lemon butter sauce, all tossed with perfectly cooked spaghetti.

Ingredients

Pasta

  • 8 ounces spaghetti

Sauce

  • 4 tablespoons unsalted butter (divided)
  • 1 pound large shrimp (peeled deveined)
  • 0.5 teaspoon salt
  • 0.5 teaspoon crushed red pepper
  • 4 cloves garlic (minced)
  • 0.25 cup freshly grated parmesan cheese
  • 2 tablespoons lemon juice
  • 2 tablespoons chopped parsley

Instructions 

  • Cook spaghetti according to package instructions, reserving 1 cup pasta water.
  • Cook shrimp with butter, salt, and red pepper until pink. Set aside.
  • Sauté garlic in remaining butter. Add parmesan, lemon juice, and pasta water to create sauce.
  • Toss spaghetti with sauce. Add shrimp and combine.
  • Garnish with parsley and serve.

Notes

Adjust the amount of red pepper flakes to your spice preference.
Calories: 450kcal
Cost: $20
Course: Main Course
Cuisine: Italian
Keyword: shrimp

Nutrition

Calories: 450kcal | Carbohydrates: 45g | Protein: 35g | Fat: 15g | Sodium: 700mg
pin

Hello, friends! Avery Collins here, from my cozy kitchen in Portland. Today, I’m so happy to share a recipe that’s become a weeknight staple in my home: Creamy Lemon Chicken Pasta. This dish is more than just a meal; it’s a hug in a bowl, a burst of sunshine on a cloudy day (and we get plenty of those here!). It’s quick, it’s easy, and it’s absolutely bursting with flavor. I think you’ll find that this recipe is a great addition to your cooking repertoire, and I’m happy to help you along the way. Thank you for being here!

My journey into healthy cooking started out of necessity, but it blossomed into a love affair with simple, nourishing ingredients. This Lemon Chicken Pasta recipe is a perfect example of that transformation – turning humble ingredients into something truly special.

Why You’ll Love This Lemon Chicken Pasta

This isn’t just another pasta dish; it’s a symphony of flavors and textures that will have you coming back for seconds (and thirds!). Here’s why I think you’ll absolutely love it:

  • Quick and Easy: Ready in under 30 minutes, it’s perfect for those busy weeknights when you need a delicious dinner on the table fast. It’s easy to make, and I think you’ll love how quickly it comes together.
  • Bursting with Flavor: The bright, zesty lemon sauce combined with savory chicken and creamy Parmesan is a flavor explosion in every bite.
  • Versatile: Use any pasta shape you like! Penne, spaghetti, rotini – they all work beautifully. It’s a great way to use what you have on hand.
  • Healthy and Satisfying: Packed with protein and wholesome ingredients, this pasta is both nutritious and incredibly satisfying.
  • Comfort Food with a Twist: It has all the comforting qualities of classic pasta dishes, but the lemon adds a fresh, vibrant twist.

Ingredients for the Best Lemon Chicken Pasta

Here’s what you’ll need to create this culinary masterpiece. I always encourage using the freshest ingredients possible – it truly makes a difference!

  • 8 ounces pasta (any shape)‘: Use your favorite pasta! I often opt for penne or rotini, but spaghetti or fettuccine work well too.
  • 4 thin-sliced boneless, skinless chicken breasts‘: Thinly sliced chicken cooks quickly and evenly, ensuring tender, juicy results. You may need to cut the chicken breasts in half to get them thin enough.
  • 1 teaspoon kosher salt‘: Salt enhances the flavors of all the other ingredients.
  • 1/2 teaspoon garlic powder‘: Adds a subtle garlicky note to the chicken.
  • fresh-ground black pepper‘: For a touch of spice and depth of flavor.
  • zest of 1 large lemon‘: The lemon zest is key to that bright, citrusy flavor.
  • 2 Tablespoons olive oil (divided)‘: Olive oil adds richness and helps to brown the chicken.
  • 2 Tablespoons butter (divided)‘: Butter adds a velvety texture and enhances the flavor of the sauce.
  • 3 cloves garlic (minced)‘: Fresh garlic is essential for a flavorful sauce.
  • 1/4 teaspoon red pepper flakes‘: For a touch of heat (adjust to your liking!).
  • 1/4 cup white grape juice‘: Adds a touch of sweetness and helps deglaze the pan.
  • 1/4 cup chicken broth‘: Adds depth and moisture to the sauce.
  • 2 Tablespoons lemon juice‘: The lemon juice provides the signature tangy flavor.
  • 3/4 teaspoon Italian seasoning‘: A blend of herbs that adds a lovely aromatic quality.
  • 1/4 cup grated Parmesan‘: Parmesan cheese adds a salty, savory richness to the sauce.
  • lemon wedges (fresh parsley or thyme, for serving)‘: For garnish and an extra burst of flavor.
Recipe Image

How to Make Creamy Lemon Chicken Pasta: Step-by-Step

Now, let’s get cooking! Here’s a simple, step-by-step guide to making this delicious Lemon Chicken Pasta.

  1. Cook the Pasta: Bring a large pot of water to a boil, add a generous pinch of salt, and cook the pasta to just shy of al dente, according to package directions. Drain and set aside.
  2. Season the Chicken: While the pasta cooks, lightly sprinkle the chicken on both sides with salt, pepper, garlic powder, and lemon zest.
  3. Sear the Chicken: In a large skillet over medium-high heat, add 1 Tablespoon each of olive oil and butter. When the pan is hot and the butter just melted, cook the chicken for 3-4 minutes per side, until golden brown and very nearly cooked through. Remove to a plate and set aside. The skillet is important here.
  4. Sauté the Garlic and Red Pepper Flakes: Reduce heat to medium, and add the remaining 1 Tablespoon each of olive oil and butter to the pan. Add garlic and red pepper flakes. Cook 30-60 seconds, just until fragrant.
  5. Make the Sauce: Pour in white grape juice and, as it bubbles, scrape the browned bits from the bottom of the pan to incorporate them into the sauce. Add broth, lemon juice, a bit more lemon zest, and Italian seasoning, then bring the sauce to a simmer. Let it bubble for about 1 minute. The sauce is what makes this recipe special.
  6. Combine Pasta and Sauce: Stir in the drained pasta, followed by the Parmesan. Toss well, sample, and add more salt and black or red pepper to taste.
  7. Finish the Dish: Nestle the chicken breasts back into the skillet among the pasta. Let cook for another 1-2 minutes, just until the chicken is fully cooked through. Garnish with lemon wedges and fresh parsley or thyme, plus an extra sprinkling of Parmesan as desired. Serve right away!

Pro Tips for Perfect Lemon Chicken Pasta

Here are a few extra tips to ensure your Lemon Chicken Pasta turns out perfectly every time:

  • Don’t Overcook the Pasta: Cooking the pasta to just shy of al dente ensures it doesn’t become mushy when you add it to the sauce.
  • Sear, Don’t Burn: Make sure the pan is hot enough to sear the chicken, but not so hot that it burns. You want a nice golden-brown crust.
  • Deglaze the Pan: Don’t skip the step of scraping the browned bits from the bottom of the pan. Those bits are packed with flavor!
  • Taste as You Go: Seasoning is key! Taste the sauce as you go and adjust the salt, pepper, and lemon juice to your liking.
  • Use Fresh Lemon: Fresh lemon juice and zest make a world of difference in this recipe. Avoid using bottled lemon juice if possible.

Common Mistakes to Avoid

We all make mistakes in the kitchen – it’s part of the learning process! Here are a few common pitfalls to watch out for when making Lemon Chicken Pasta:

  • Overcooking the Chicken: Overcooked chicken is dry and tough. Use a meat thermometer to ensure the chicken reaches an internal temperature of 165°F (74°C).
  • Not Salting the Pasta Water: Salting the pasta water is essential for flavoring the pasta from the inside out.
  • Adding Too Much Lemon Juice: Too much lemon juice can make the sauce overly tart. Start with the recommended amount and add more to taste.
  • Forgetting to Reserve Pasta Water: If the sauce is too thick, add a splash of reserved pasta water to thin it out.
  • Not Serving Immediately: This dish is best served right away, as the pasta can absorb the sauce over time.

Variations to Try

One of the best things about this recipe is how easily it can be customized to your liking. Here are a few variations to try:

  • Add Vegetables: Toss in some spinach, asparagus, or cherry tomatoes for added nutrients and flavor.
  • Make it Spicy: Add more red pepper flakes or a pinch of cayenne pepper for extra heat.
  • Use Different Herbs: Experiment with different herbs like basil, oregano, or thyme.
  • Add Cream: For an even creamier sauce, stir in a splash of heavy cream or half-and-half at the end.
  • Make it Gluten-Free: Use gluten-free pasta to make this dish suitable for those with gluten sensitivities.

How to Store and Reheat Leftovers

If you happen to have any leftovers (though I doubt you will!), here’s how to store and reheat them:

  • Storage: Store the Lemon Chicken Pasta in an airtight container in the refrigerator for up to 3 days.
  • Reheating: Reheat the pasta in a skillet over medium heat, adding a splash of broth or water to prevent it from drying out. You can also reheat it in the microwave, but be careful not to overcook it.

Frequently Asked Questions (FAQ)

Here are some common questions I get asked about this recipe:

  • Can I use frozen chicken breasts?: Yes, but be sure to thaw them completely before cooking.
  • Can I use bottled lemon juice?: Fresh lemon juice is best, but bottled lemon juice can be used in a pinch.
  • Can I make this recipe ahead of time?: This dish is best served immediately, but you can prepare the sauce ahead of time and cook the pasta and chicken just before serving.
  • Can I add other vegetables?: Absolutely! Feel free to add any vegetables you like.
  • Can I make this dairy-free?: Yes, you can omit the Parmesan cheese or use a dairy-free alternative.

Serving Suggestions

This Lemon Chicken Pasta is delicious on its own, but here are a few serving suggestions to round out your meal:

  • Side Salad: A simple green salad with a light vinaigrette is a perfect complement to this dish.
  • Garlic Bread: Crusty garlic bread is always a welcome addition to any pasta meal.
  • Roasted Vegetables: Roasted asparagus, broccoli, or Brussels sprouts are a healthy and flavorful side dish.
  • Wine Pairing: A crisp white wine like Sauvignon Blanc or Pinot Grigio pairs beautifully with the lemon and chicken flavors.

I hope you enjoy this Creamy Lemon Chicken Pasta recipe as much as I do! It’s a simple, satisfying meal that’s perfect for any occasion. If you try it, please let me know in the comments below – I’d love to hear from you! So happy you stopped by, and I can’t wait to hear that you loved it! Thank you for letting me share a little bit of my kitchen with you.

Happy cooking!

Lemon Chicken Pasta

Prep Time 10 minutes
Cook Time 20 minutes
Total Time 30 minutes
Servings 4 servings
Calories 450
A bright and flavorful Lemon Chicken Pasta dish that's quick and easy to make. Perfect for a weeknight dinner!

Ingredients

Pasta

  • 8 ounces pasta (any shape)

Chicken

  • 4 boneless, skinless chicken breasts (thin-sliced)
  • 1 teaspoon kosher salt
  • 0.5 teaspoon garlic powder
  • fresh-ground black pepper (to taste)
  • 1 lemon zest (of 1 large lemon)

Sauce

  • 2 Tablespoons olive oil (divided)
  • 2 Tablespoons butter (divided)
  • 3 cloves garlic (minced)
  • 0.25 teaspoon red pepper flakes
  • 0.25 cup white grape juice
  • 0.25 cup chicken broth
  • 2 Tablespoons lemon juice
  • 0.75 teaspoon Italian seasoning
  • 0.25 cup grated Parmesan
  • lemon wedges (fresh parsley or thyme, for serving)

Instructions 

  • Cook pasta to just shy of al dente. Drain and set aside.
  • Sprinkle chicken with salt, pepper, garlic powder, and lemon zest.
  • Cook chicken in olive oil and butter until golden brown. Remove and set aside.
  • Add garlic and red pepper flakes to the pan. Cook until fragrant.
  • Pour in white grape juice and scrape the browned bits. Add broth, lemon juice, lemon zest, and Italian seasoning. Simmer for 1 minute.
  • Stir in pasta and Parmesan. Toss well and season to taste.
  • Nestle chicken into the pasta. Cook until chicken is fully cooked. Garnish and serve.

Notes

Adjust the amount of red pepper flakes to your spice preference.
Calories: 450kcal
Cost: $18
Course: Main Course
Cuisine: Italian
Keyword: chicken

Nutrition

Calories: 450kcal | Carbohydrates: 45g | Protein: 35g | Fat: 18g | Sodium: 600mg
pin

Hey friends! Avery here, from my little kitchen in Portland. Today, I’m beyond excited to share a recipe that’s become a staple in my life – my Chickpea Arugula Quinoa Salad. This isn’t just another salad; it’s a vibrant, nourishing bowl of goodness that has carried me through countless busy weeks and sunny weekend picnics. It’s the kind of the salad that makes you feel good from the inside out, and trust me, it’s ridiculously easy to make.

My journey to this salad started, like many good things, with a bit of necessity. I needed something quick, healthy, and satisfying to combat the stress and takeout dinners that were taking a toll. And let me tell you, this salad delivered, and then some!

Why You’ll Love This Chickpea Arugula Quinoa Salad

Seriously, where do I even begin? This salad is a game-changer for so many reasons:

  • Versatility: It’s perfect as a light lunch, a hearty side dish, or even a complete dinner.
  • Nutrient-Packed: We’re talking protein, fiber, vitamins, and antioxidants galore!
  • Flavor Explosion: The peppery arugula, the juicy tomatoes, the tangy feta (if you choose!), and the zesty lemon dressing create a symphony of flavors that will have your taste buds singing.
  • Meal Prep Friendly: Make a big batch on Sunday, and you’ll have healthy lunches ready for the entire week.
  • Customizable: Easily adaptable to your preferences and what you have on hand. Swap out veggies, add different herbs, or use a different cheese – the possibilities are endless!

Ingredients You’ll Need

Here’s what you’ll need to create this amazing salad:

  • – 1 cup quinoa
  • – 2 cups water
  • – 1 can (15 oz) chickpeas, drained and rinsed
  • – 2 cups fresh arugula
  • – 1 cup cherry tomatoes, halved
  • – 1 cucumber, diced
  • – ¼ red onion, thinly sliced
  • – ¼ cup feta cheese, crumbled (optional)
  • – 3 tablespoons olive oil
  • – 2 tablespoons lemon juice
  • – Salt and pepper, to taste
Recipe Image

How to Make Chickpea Arugula Quinoa Salad: Step-by-Step

Creating this Chickpea Arugula Quinoa Salad is straightforward if you follow these simple steps:

  1. Rinse the Quinoa: Place the quinoa in a fine mesh strainer and rinse under cold water for about 2 minutes. This removes any bitterness and helps create a fluffier texture.
  2. Cook Quinoa: In a medium saucepan, combine rinsed quinoa and water. Bring to a boil, then reduce to a simmer. Cover and cook for about 15 minutes or until the quinoa is fluffy and the water is absorbed. Remove from heat and let it cool. Fluff the quinoa with a fork. The quinoa is done when each grain looks like it has a little tail.
  3. Prepare Vegetables: While the quinoa is cooking, chop the arugula, cherry tomatoes, cucumber, and red onion.
  4. Combine Ingredients: In a large mixing bowl, combine the cooked quinoa, chickpeas, arugula, tomatoes cucumber, and red onion.
  5. Make Dressing: In a small bowl, whisk together the olive oil, lemon juice, salt and pepper. Taste and adjust seasonings as needed. I usually add a pinch of red pepper flakes for a little kick!
  6. Dress the Salad: Pour the dressing over the salad and toss gently to combine, ensuring all ingredients are coated evenly.
  7. Add Feta: If using, sprinkle crumbled feta cheese over the top of the salad and give it a light toss.
  8. Serve or Chill: Serve immediately or refrigerate for about 30 minutes to allow flavors to meld. I find it tastes even better after it’s had a little time to sit!

Pro Tips for the Best Quinoa Salad

Here are a few extra tips to elevate your quinoa salad game:

  • Rinse the Quinoa Well: This is a non-negotiable step. Rinsing removes saponins, which can make the quinoa taste bitter.
  • Don’t Overcook the Quinoa: Overcooked quinoa will be mushy. Cook it until it’s just tender and fluffy.
  • Use Fresh, High-Quality Ingredients: The better the ingredients, the better the salad will taste!
  • Taste and Adjust the Dressing: Don’t be afraid to experiment with the dressing. Add more lemon juice for extra tang, or a touch of honey for sweetness.
  • Massage the Arugula: If you’re making the salad ahead of time, massage the arugula with a little olive oil to help it stay fresh and prevent it from wilting.

Common Mistakes to Avoid

We all make mistakes in the kitchen, but here are a few to watch out for with this salad:

  • Not Rinsing the Quinoa: I can’t stress this enough!
  • Overdressing the Salad: Start with a little dressing and add more as needed. You can always add more, but you can’t take it away.
  • Using Low-Quality Olive Oil: Opt for a good quality extra virgin olive oil for the best flavor.
  • Skipping the Seasoning: Salt and pepper are your friends! Don’t be afraid to season the salad generously.

Delicious Variations to Try

One of the best things about this salad is how easily you can customize it. Here are a few ideas to get you started:

  • Mediterranean Twist: Add Kalamata olives, sun-dried tomatoes, and swap the feta for goat cheese.
  • Spicy Kick: Add a pinch of red pepper flakes to the dressing, or toss in some chopped jalapeño.
  • Tropical Vibe: Add diced mango, avocado, and a squeeze of lime juice.
  • Hearty Additions: Add grilled chicken, shrimp, or tofu for extra protein.
  • Grain Variations: Swap the quinoa for farro, couscous, or brown rice.

How to Store Leftovers

This salad is best stored in an airtight container in the refrigerator. It will keep for about 3-4 days. If you’re making it ahead of time, I recommend storing the dressing separately and adding it just before serving to prevent the arugula from getting soggy.

Frequently Asked Questions (FAQ)

Let’s tackle some common questions about this salad:

  • Can I make this salad vegan? Absolutely! Simply omit the feta cheese or use a vegan feta alternative.
  • Can I use a different type of cheese? Of course! Goat cheese, mozzarella, or even a sharp cheddar would be delicious.
  • Can I add other vegetables? Definitely! Bell peppers, carrots, or broccoli would all be great additions.
  • Can I make this salad without arugula? Yes, you can substitute spinach, kale, or mixed greens.
  • Is this salad gluten-free? Yes, as long as you use certified gluten-free quinoa.

Serving Suggestions

This salad is incredibly versatile and can be served in so many ways:

  • As a light lunch: Enjoy a bowl of this salad on its own for a healthy and satisfying lunch.
  • As a side dish: Serve it alongside grilled chicken, fish, or tofu for a complete meal.
  • As a potluck dish: This salad is always a hit at potlucks and gatherings.
  • As a meal prep staple: Make a big batch on Sunday and enjoy it throughout the week.

Let’s Eat!

There you have it – my go-to Chickpea Arugula Quinoa Salad recipe! I hope you love it as much as I do. Remember, cooking should be fun and nourishing, so don’t be afraid to experiment and make it your own. And as always, I’m sending you lots of love from my kitchen to yours! Happy cooking!

P.S. Don’t forget to check out my other favorite salad recipe: potato-cucumber-salad!

Chickpea Arugula Quinoa Salad: An Incredible Ultimate Recipe

Prep Time 15 minutes
Cook Time 20 minutes
Total Time 35 minutes
Servings 4 servings
Calories 350
This Chickpea Arugula Quinoa Salad is a vibrant and healthy dish, perfect for a light lunch or side. It combines the nutty flavor of quinoa with fresh vegetables and a zesty lemon dressing.

Ingredients

Salad Ingredients

  • 1 cup quinoa
  • 2 cups water
  • 15 oz chickpeas (drained and rinsed)
  • 2 cups fresh arugula
  • 1 cup cherry tomatoes (halved)
  • 1 cucumber (diced)
  • 0.25 red onion (thinly sliced)
  • 0.25 cup feta cheese (crumbled (optional))

Dressing

  • 3 tablespoons olive oil
  • 2 tablespoons lemon juice
  • Salt and pepper (to taste)

Instructions 

  • Rinse quinoa under cold water for 2 minutes.
  • Combine quinoa and water in a saucepan. Bring to a boil, then simmer for 15 minutes. Let cool.
  • Chop arugula, tomatoes, cucumber, and red onion.
  • Combine cooked quinoa, chickpeas, arugula, tomatoes, cucumber, and red onion in a bowl.
  • Whisk together olive oil, lemon juice, salt, and pepper.
  • Pour dressing over salad and toss gently.
  • Sprinkle feta cheese over the salad (optional).
  • Serve immediately or chill for 30 minutes.

Notes

For a vegan option, omit the feta cheese. You can also add other vegetables like bell peppers or avocado for extra flavor and nutrients.
Calories: 350kcal
Cost: $8
Course: Salad
Cuisine: Mediterranean
Keyword: quinoa

Nutrition

Calories: 350kcal | Carbohydrates: 45g | Protein: 15g | Fat: 15g | Sodium: 150mg
pin

Hey there, friend! It’s Avery, and I’m so excited to share one of my absolute favorite weeknight dinners with you: Creamy Lemon Chicken Orzo. This dish is the perfect blend of comfort food and fresh flavors, and it’s a recipe that has saved me on countless busy evenings. Think tender chicken, perfectly cooked orzo pasta, and a luscious, creamy lemon sauce that will make your taste buds sing. It’s simple, satisfying, and, most importantly, brings a little bit of sunshine to your table.

Remember those early days in my kitchen, experimenting and often failing? Well, this recipe is a testament to how far I’ve come. It’s proof that you don’t need to be a gourmet chef to create something truly delicious and nourishing. So, grab your apron, and let’s get cooking!

Why You’ll Love This Creamy Lemon Chicken Orzo

This Creamy Lemon Chicken Orzo isn’t just a meal; it’s an experience. It’s the kind of dish that makes you feel good from the inside out. Here’s why I think you’ll fall in love with it:

  • Quick and Easy: This recipe is designed for busy weeknights. From start to finish, you can have dinner on the table in about 30 minutes.
  • One-Pot Wonder: Less dishes means more time to relax! This recipe is primarily made in one pot, making cleanup a breeze.
  • Flavor Explosion: The creamy lemon sauce is bright, tangy, and incredibly flavorful. It perfectly complements the tender chicken and perfectly cooked orzo.
  • Versatile: You can easily customize this recipe to your liking. Add your favorite vegetables, swap out the chicken for shrimp, or adjust the amount of lemon to suit your taste.
  • Comfort Food at its Finest: There’s something so comforting about creamy pasta dishes, and this one is no exception. It’s the perfect meal to warm you up on a chilly evening.

I genuinely believe this recipe will become a staple in your kitchen. It’s a dish that both kids and adults will love, and it’s a fantastic way to get a healthy and delicious meal on the table without spending hours in the kitchen.

Ingredients for Creamy Lemon Chicken Orzo

Here’s what you’ll need to create this delightful Creamy Lemon Chicken Orzo:

  • 1 tablespoon olive oil
  • 2 tablespoons butter
  • 1/2 medium onion (chopped)
  • 3 cloves garlic (minced)
  • 1/4 teaspoon Italian seasoning
  • 1 cup uncooked orzo pasta
  • 2 cups chicken broth
  • 2 tablespoons lemon juice
  • 1 cup heavy/whipping cream
  • 2 cups shredded chicken (cooked or rotisserie)
  • 1/2 cup parmesan cheese (freshly grated)
  • 2 cups fresh baby spinach (packed)
  • Salt (to taste)
  • Pepper (to taste)
  • Fresh parsley (chopped, for garnish)
  • Fresh lemon (for garnish)
  • Chili flakes (optional, for garnish)
Recipe Image

Step-by-Step Instructions: How to Make Creamy Lemon Chicken Orzo

Alright, let’s dive into the cooking process. Don’t worry, it’s simpler than it looks!

  1. Sauté the Aromatics: In a large pot or Dutch oven, heat the olive oil and butter over medium heat. Add the chopped onion and cook until softened, about 5 minutes. Add the minced garlic and Italian seasoning, and cook for another minute until fragrant.
  2. Toast the Orzo: Add the uncooked orzo pasta to the pot and stir to coat it with the oil and butter mixture. Toast the orzo for a minute or two, stirring constantly, until it starts to turn slightly golden. This step adds a nutty flavor to the dish.
  3. Add Broth and Simmer: Pour in the chicken broth and bring the mixture to a boil. Once boiling, reduce the heat to low, cover the pot, and simmer for 10-12 minutes, or until the orzo is cooked through and has absorbed most of the liquid. Stir occasionally to prevent sticking.
  4. Create the Creamy Lemon Sauce: Stir in the lemon juice and heavy cream. Bring the sauce to a simmer, stirring constantly, until it thickens slightly, about 2-3 minutes.
  5. Add Chicken and Parmesan: Stir in the shredded chicken and parmesan cheese. Cook until the chicken is heated through and the parmesan is melted and incorporated into the sauce, about 2-3 minutes.
  6. Wilt the Spinach: Add the fresh baby spinach to the pot and stir until it wilts, about 1-2 minutes.
  7. Season and Serve: Season with salt and pepper to taste. Garnish with fresh parsley, lemon wedges, and chili flakes (if using). Serve immediately and enjoy your creamy lemon chicken orzo!

Pro Tips for the Perfect Creamy Lemon Chicken Orzo

Here are a few tips and tricks I’ve learned along the way to help you achieve the best possible results:

  • Use High-Quality Chicken Broth: The flavor of your chicken broth will significantly impact the overall taste of the dish. Opt for a good-quality broth or, even better, homemade broth if you have it.
  • Don’t Overcook the Orzo: Overcooked orzo can become mushy. Keep a close eye on it while it’s simmering and test it for doneness after about 10 minutes. It should be al dente, with a slight bite.
  • Fresh Lemon is Key: Freshly squeezed lemon juice will provide the brightest and most vibrant flavor. Avoid using bottled lemon juice if possible.
  • Grate Your Own Parmesan: Freshly grated parmesan cheese melts more smoothly and has a richer flavor than pre-shredded cheese.
  • Add Spinach at the End: Adding the spinach at the very end ensures that it wilts but doesn’t become overcooked and mushy.
  • Taste and Adjust: Always taste the dish before serving and adjust the seasoning as needed. You may want to add more lemon juice, salt, or pepper to suit your preferences.
  • Consider adding lemon zest: A teaspoon of lemon zest adds a brightness to the dish that will make it sing.

Common Mistakes to Avoid When Making Creamy Lemon Chicken Orzo

We all make mistakes in the kitchen, but knowing what to watch out for can help you avoid common pitfalls:

  • Burning the Garlic: Burnt garlic can ruin the flavor of the entire dish. Keep the heat at medium and stir the garlic frequently to prevent it from burning.
  • Using Too Much Liquid: Adding too much chicken broth can result in a watery sauce. Start with the recommended amount and add more only if needed.
  • Overcooking the Chicken: Overcooked chicken can become dry and tough. If using pre-cooked chicken, add it towards the end of the cooking process to prevent it from drying out.
  • Forgetting to Season: Seasoning is crucial for bringing out the flavors of the dish. Don’t forget to season with salt and pepper to taste.
  • Not Stirring Frequently: Stirring the orzo occasionally while it simmers prevents it from sticking to the bottom of the pot and ensures even cooking.

Variations and Additions to Creamy Lemon Chicken Orzo

One of the best things about this recipe is that it’s incredibly versatile. Here are a few ideas for variations and additions to make it your own:

  • Vegetables: Add your favorite vegetables, such as asparagus, broccoli, peas, or sun-dried tomatoes.
  • Protein: Swap out the chicken for shrimp, sausage, or tofu.
  • Cheese: Experiment with different types of cheese, such as mozzarella, provolone, or goat cheese.
  • Herbs: Add fresh herbs like basil, thyme, or oregano for extra flavor.
  • Spices: Add a pinch of red pepper flakes for a little heat.
  • Dairy-Free: Substitute the heavy cream with coconut cream or cashew cream for a dairy-free version.

Feel free to get creative and experiment with different combinations of ingredients to create your own signature Creamy Lemon Chicken Orzo.

How to Store and Reheat Creamy Lemon Chicken Orzo

If you have leftovers, store them in an airtight container in the refrigerator for up to 3-4 days. To reheat, simply microwave or heat on the stovetop over medium heat until warmed through. You may need to add a splash of chicken broth or water to loosen the sauce.

While this dish is best enjoyed fresh, it still tastes great as leftovers. It’s perfect for meal prepping or packing for lunch.

Frequently Asked Questions (FAQ) About Creamy Lemon Chicken Orzo

  • Can I use brown orzo? While I prefer the taste and texture of regular orzo, you can use brown orzo if you prefer. Keep in mind that brown orzo may require a longer cooking time.
  • Can I make this recipe ahead of time? You can prepare the creamy lemon sauce ahead of time and store it in the refrigerator. When you’re ready to serve, cook the orzo and add the chicken and sauce.
  • Can I freeze this dish? I don’t recommend freezing this dish, as the sauce may separate and become watery when thawed.
  • Can I use rotisserie chicken? Absolutely! Rotisserie chicken is a great shortcut for this recipe. Simply shred the chicken and add it to the pot.
  • Can I make this recipe vegetarian? Yes, you can easily make this recipe vegetarian by omitting the chicken and adding more vegetables or tofu.
  • Is this dish gluten-free? No, orzo pasta is not gluten-free. However, you can substitute it with gluten-free orzo or another gluten-free pasta.

Serving Suggestions for Creamy Lemon Chicken Orzo

This Creamy Lemon Chicken Orzo is a complete meal on its own, but here are a few serving suggestions to elevate your dining experience:

  • Side Salad: Serve with a simple side salad with a light vinaigrette.
  • Garlic Bread: Pair with warm garlic bread for dipping into the creamy sauce.
  • Roasted Vegetables: Serve with roasted vegetables like asparagus, broccoli, or Brussels sprouts.
  • Lemon Wedges: Offer extra lemon wedges for those who like a little extra tang.
  • Wine Pairing: A crisp white wine like Sauvignon Blanc or Pinot Grigio would pair perfectly with this dish.

I hope you enjoy this Creamy Lemon Chicken Orzo as much as I do! It’s a recipe that’s close to my heart, and I’m thrilled to share it with you. Remember, cooking should be fun and enjoyable. Don’t be afraid to experiment and make it your own. And most importantly, savor every bite!

Happy cooking, friends! And remember, even on the rainiest Portland days, a little Creamy Lemon Chicken Orzo can bring a bit of sunshine to your soul. Enjoy!

This creamy lemon chicken orzo is truly a symphony of flavors, and it’s a dish that’s perfect for any occasion. Whether you’re looking for a quick and easy weeknight dinner or a comforting meal to share with friends and family, this recipe is sure to please. With its tender chicken, creamy sauce, and bright lemon flavor, it’s a dish that will leave you feeling satisfied and nourished. So, go ahead and give it a try – I promise you won’t be disappointed! This creamy lemon chicken orzo recipe will surely become a family favorite. Remember, your creamy lemon chicken is just a few steps away!

So, there you have it – my go-to Creamy Lemon Chicken Orzo recipe. I hope you find as much joy in making and eating it as I do. And remember, the best meals are those made with love and shared with good company. Happy cooking!

If you are looking for comforting meal recipes that are also easy to make, this chicken orzo fits the bill. It’s quick, delicious, and requires minimal cleanup. The steps for this chicken and orzo recipe are straightforward, making it ideal for even the busiest weeknights. If you’re seeking chicken orzo recipes that are also dairy-free, consider using coconut cream as a substitute for heavy cream. This one pot lemon chicken orzo is a game-changer, simplifying both cooking and cleanup. For those who prefer using chicken breast, this one pan lemon chicken and orzo recipe is equally delightful. Chicken tenderloin and orzo also make a fantastic pairing, offering a tender and flavorful combination. Finally, chicken breast and orzo recipes are versatile, allowing for various customizations to suit your taste. Enjoy creating your own version of this delightful dish!

Creamy Lemon Chicken Orzo

Prep Time 10 minutes
Cook Time 25 minutes
Total Time 35 minutes
Servings 6 servings
Calories 450
This Creamy Lemon Chicken Orzo is a comforting and flavorful dish, perfect for a weeknight meal. It combines tender chicken, orzo pasta, and a creamy lemon sauce for a delightful culinary experience.

Ingredients

Ingredients

  • 1 tablespoon olive oil
  • 2 tablespoons butter
  • 1/2 medium onion (chopped)
  • 3 cloves garlic (minced)
  • 1/4 teaspoon Italian seasoning
  • 1 cup uncooked orzo pasta
  • 2 cups chicken broth
  • 2 tablespoons lemon juice
  • 1 cup heavy/whipping cream
  • 2 cups shredded chicken (cooked or rotisserie)
  • 1/2 cup parmesan cheese (freshly grated)
  • 2 cups fresh baby spinach (packed)
  • Salt (to taste)
  • Pepper (to taste)
  • Fresh parsley (chopped, for garnish)
  • Fresh lemon (for garnish)
  • Chili flakes (optional, for garnish)

Notes

For a richer flavor, use homemade chicken broth. Adjust lemon juice to taste.
Calories: 450kcal
Cost: $18
Course: Main Course
Cuisine: Italian
Keyword: chicken

Nutrition

Calories: 450kcal | Carbohydrates: 40g | Protein: 35g | Fat: 20g | Sodium: 600mg
pin

Hey friends! Avery here, from my little corner of Portland. Today, we’re diving headfirst into a dish that sings of sunshine, even when the sky is grey. I’m talking about Lemon Basil Pesto Pasta. It’s vibrant, it’s quick, and it’s the kind of meal that makes you feel good from the inside out. This isn’t just a recipe; it’s an invitation to celebrate simple, fresh ingredients and to find joy in the process, not just the result. If you’re anything like me, you want something that’s both delicious and nourishing, without spending hours slaving away in the kitchen. This pasta is your answer.

My journey into the kitchen started out of necessity, not passion. Years ago, my body was screaming for a change. Cooking became my way of reconnecting with myself, and this Lemon Basil Pesto Pasta is a perfect example of that. It’s a dish that embraces the flavors of the season and nourishes both body and soul. It’s a great basil recipes pasta.

Why You’ll Love This Lemon Basil Pesto Pasta

Let’s be real, there are a million pasta recipes out there. So, why should you try this one? Well, beyond the fact that it tastes absolutely divine, here’s what makes this Lemon Basil Pesto Pasta a winner:

  • Freshness Over Everything: The bright, herbaceous flavor of fresh basil is the star. It’s like a little burst of summer in every bite.
  • Quick & Easy: Seriously, this comes together in under 20 minutes. Perfect for those weeknights when you’re short on time but still craving something delicious.
  • Customizable: Don’t have pine nuts? No problem! Use walnuts, almonds, or even sunflower seeds. This recipe is forgiving and encourages you to use what you have.
  • Plant-Forward Goodness: Packed with basil, garlic, and lemon, this pasta is a celebration of plant-based flavors that will leave you feeling energized and satisfied.
  • The Perfect Balance: The creamy pesto, the zesty lemon, the salty parmesan – it’s a symphony of flavors that just works. You’re eating something that tastes indulgent but is actually good for you.

Lemon Basil Pesto Pasta Ingredients

Here’s what you’ll need to whip up this little bowl of sunshine:

  • 2 cups fresh basil leaves
  • 1/3 cup pine nuts (or walnuts, or whatever’s cheapest, no shade)
  • 2 cloves garlic
  • 1/2 cup grated parmesan
  • 1/2 cup olive oil
  • Juice + zest of 1 lemon
  • Salt & pepper to taste
  • 8 oz pasta (fusilli, linguine, penne—dealer’s choice)
  • Extra lemon zest or parmesan for topping (if you’re extra like that)
Recipe Image

How to Make Lemon Basil Pesto Pasta: Step-by-Step

Alright, let’s get cooking! Here’s how to bring this Lemon Basil Pesto Pasta to life:

  1. Cook the pasta
  2. Boil pasta in salted water until al dente. Reserve a little pasta water before draining. Don’t forget this step unless you enjoy dry pasta and regret.

  3. Make the pesto
  4. Toss basil, nuts, garlic, lemon juice + zest, parmesan, salt, and pepper in a food processor. Pulse until chopped. Then, slowly stream in the olive oil while blending until smooth. If you don’t have a food processor, a blender works too. Worst case? Mortar and pestle + arm workout.

  5. Mix it up
  6. Toss the warm pasta with your fresh pesto. Add a splash of reserved pasta water to get that silky, glossy finish. Top with extra cheese, lemon zest, or a squeeze of juice if you like it super zippy.

  7. Serve or hoard
  8. This can be eaten warm, room temp, or cold straight out of the fridge the next day. Pesto doesn’t judge.

Pro Tips for the Best Lemon Basil Pesto Pasta

Want to take your pesto pasta to the next level? Here are a few of my tried-and-true tips:

  • Toast Your Nuts: Toasting the pine nuts (or whatever nuts you’re using) before adding them to the pesto enhances their flavor and adds a lovely depth. Just toss them in a dry pan over medium heat for a few minutes until golden and fragrant.
  • Don’t Skimp on the Salt: Salt is crucial for bringing out the flavors of the basil and parmesan. Don’t be afraid to season generously, both in the pesto and in the pasta water.
  • Pasta Water is Your Friend: That starchy pasta water is liquid gold! It helps to create a creamy, emulsified sauce that clings beautifully to the pasta. Always reserve some before draining.
  • Taste as You Go: Pesto is all about personal preference. Taste the pesto after blending and adjust the seasoning as needed. More lemon? More salt? It’s up to you!
  • Fresh is Best: While you can use pre-made pesto in a pinch, nothing beats the flavor of freshly made pesto. Trust me, it’s worth the extra effort.

Common Mistakes to Avoid

We all make mistakes in the kitchen, but here are a few common pitfalls to watch out for when making Lemon Basil Pesto Pasta:

  • Overcooking the Pasta: Mushy pasta is a major buzzkill. Cook your pasta al dente, which means “to the tooth” in Italian. It should be firm and slightly chewy.
  • Using Too Much Olive Oil: While olive oil is essential for pesto, using too much can make it greasy and heavy. Start with less and add more as needed until you reach the desired consistency.
  • Skipping the Lemon Zest: The lemon zest adds a brightness and aroma that really elevates the pesto. Don’t skip it!
  • Not Using Enough Basil: Basil is the star of the show, so don’t be shy! Use plenty of fresh basil leaves for the best flavor.
  • Forgetting to Reserve Pasta Water: Seriously, don’t do it! It’s the key to a creamy, dreamy sauce.

Lemon Basil Pesto Pasta Variations

One of the things I love most about this recipe is how versatile it is. Here are a few ways to mix things up and make it your own:

  • Add Veggies: Toss in some roasted vegetables like cherry tomatoes, zucchini, or bell peppers for added flavor and nutrients.
  • Protein Power: Add grilled chicken, shrimp, or chickpeas for a heartier meal.
  • Spice it Up: Add a pinch of red pepper flakes to the pesto for a little kick.
  • Nut-Free Pesto: Swap the pine nuts for sunflower seeds or hemp seeds for a nut-free option.
  • Vegan Pesto: Use nutritional yeast instead of parmesan cheese for a vegan pesto.

How to Store Lemon Basil Pesto Pasta

Got leftovers? Lucky you! Here’s how to store your Lemon Basil Pesto Pasta:

  • In the Fridge: Store leftover pasta in an airtight container in the refrigerator for up to 3 days.
  • Freezing Pesto: You can freeze pesto for longer storage. Portion it into ice cube trays and freeze. Once frozen, transfer the pesto cubes to a freezer bag. Thaw as needed.

Frequently Asked Questions (FAQ)

Got questions? I’ve got answers!

  • Can I use pre-made pesto? While fresh pesto is always best, you can use pre-made pesto in a pinch. Just be sure to taste it and adjust the seasoning as needed.
  • Can I make this recipe vegan? Yes! Simply substitute the parmesan cheese with nutritional yeast or a vegan parmesan alternative.
  • Can I use a different type of pasta? Absolutely! Feel free to use any type of pasta you like. I personally love fusilli, linguine, or penne.
  • How can I prevent the basil from turning black? To prevent the basil from oxidizing and turning black, blanch it in boiling water for a few seconds before adding it to the food processor. Then, immediately transfer it to an ice bath to stop the cooking process.
  • What if I don’t have a food processor? You can use a blender instead. Or, if you’re feeling ambitious, you can make the pesto by hand using a mortar and pestle.

Serving Suggestions

This Lemon Basil Pesto Pasta is delicious on its own, but here are a few serving suggestions to make it a complete meal:

  • Side Salad: Serve with a simple green salad with a lemon vinaigrette.
  • Garlic Bread: Pair with some crusty garlic bread for dipping.
  • Roasted Vegetables: Add a side of roasted vegetables like asparagus, broccoli, or Brussels sprouts.
  • Grilled Protein: Serve with grilled chicken, shrimp, or tofu for a protein-packed meal.

I hope you love this Lemon Basil Pesto Pasta as much as I do! It’s a simple, flavorful dish that’s perfect for any occasion. So, gather your ingredients, put on some music, and get cooking. And remember, the most important ingredient is love. Enjoy!

This creamy lemon basil pesto is the kind of dish that makes you feel like you’re eating something special, even if it’s just a quick weeknight meal. It’s the best kind of comfort food – bright, flavorful, and nourishing. And when you taste that first bite, I hope it makes you smile. Because that’s what cooking is all about, right? Sharing joy, one delicious dish at a time.

Happy cooking, friends! And may your days be filled with sunshine, even when it’s raining rosemary in Portland.

Lemon Basil Pesto Pasta

Prep Time 15 minutes
Cook Time 15 minutes
Total Time 30 minutes
Servings 4 servings
Calories 450
A vibrant and flavorful pasta dish featuring homemade lemon basil pesto. This recipe is quick, easy, and perfect for a light lunch or dinner.

Ingredients

Pesto

  • 2 cups fresh basil leaves
  • 1/3 cup pine nuts (or walnuts, or whatever’s cheapest, no shade)
  • 2 cloves garlic
  • 1/2 cup grated parmesan
  • 1/2 cup olive oil
  • 1 Juice + zest of 1 lemon
  • Salt & pepper to taste

Pasta

  • 8 oz pasta (fusilli, linguine, penne—dealer’s choice)

Topping

  • Extra lemon zest or parmesan (for topping (if you’re extra like that))

Instructions 

  • Cook the pasta
  • Boil pasta in salted water until al dente. Reserve pasta water before draining.
  • Make the pesto
  • Toss basil, nuts, garlic, lemon juice + zest, parmesan, salt, and pepper in a food processor. Pulse until chopped. Stream in the olive oil while blending until smooth.
  • Mix it up
  • Toss the warm pasta with your fresh pesto. Add a splash of reserved pasta water. Top with extra cheese, lemon zest, or a squeeze of juice.
  • Serve or hoard
  • This can be eaten warm, room temp, or cold.

Notes

Adjust the amount of lemon juice and zest to your preference for a more or less zesty flavor.
Calories: 450kcal
Cost: $12
Course: Main Course
Cuisine: Italian
Keyword: pasta

Nutrition

Calories: 450kcal | Carbohydrates: 50g | Protein: 15g | Fat: 25g | Sodium: 300mg
pin

Strawberry Spinach Salad with Balsamic Poppy Seed Dressing: A Symphony of Flavors

Hello, friends! Avery here, coming to you from my cozy kitchen in Portland. Today, I want to share a salad that’s not just a recipe; it’s a celebration of simple, vibrant ingredients. This Strawberry Spinach Salad with Balsamic Poppy Seed Dressing is a dish that I turn to again and again, especially when I need a burst of freshness and a reminder that healthy eating can be utterly delightful. This salad is the perfect balance of sweet and savory, crisp and tender, making it an absolute joy to eat. It’s one of those recipes that’s so easy to throw together, yet impressive enough to serve to guests.

My journey into the world of healthy cooking started out of necessity, not passion. I remember the days of takeout dinners and feeling completely disconnected from what I was putting into my body. But somewhere along the way, I discovered the magic of creating meals that nourish both the body and the soul. And this strawberry spinach salad? It’s a prime example of that magic.

Why You’ll Love This Strawberry Spinach Salad

There are so many reasons to adore this salad. It’s a crowd-pleaser, it’s incredibly versatile, and it’s packed with nutrients. But here are a few specific reasons why I think you’ll fall in love with it:

  • Flavor Explosion: The combination of sweet strawberries, peppery spinach, and tangy balsamic vinaigrette is simply irresistible.
  • Quick and Easy: From start to finish, this salad takes less than 15 minutes to prepare. Perfect for busy weeknights!
  • Nutrient-Rich: Spinach is a powerhouse of vitamins and minerals, while strawberries are loaded with antioxidants.
  • Versatile: Easily customizable with your favorite toppings and add-ins.
  • Beautiful Presentation: The vibrant colors of this salad make it a feast for the eyes as well as the palate.

The Star Ingredients

Let’s talk about the ingredients that make this salad so special. Each component plays a crucial role in creating a harmonious blend of flavors and textures:

  • Fresh Spinach: The base of our salad. Look for vibrant green leaves that are crisp and fresh. Baby spinach is my personal favorite for its tender texture.
  • Ripe Strawberries: The star of the show! Choose strawberries that are fragrant and plump.
  • Red Onion: Adds a touch of sharpness and bite. If you find red onion too strong, soak it in cold water for a few minutes to mellow the flavor.
  • Feta Cheese (Optional): Provides a creamy, salty counterpoint to the sweetness of the strawberries.
  • Walnuts or Pecans (Optional): Adds a satisfying crunch and nutty flavor. Toasting the nuts beforehand enhances their flavor even more.
  • Balsamic Vinaigrette: The perfect dressing to tie all the flavors together. It’s tangy, slightly sweet, and incredibly flavorful.
  • Poppy Seeds: Adds a delightful nutty flavor and pleasing texture.

Ingredients List

  • 6 ounces fresh spinach, washed and dried
  • 1 pint fresh strawberries, hulled and sliced
  • 1/4 cup red onion, thinly sliced
  • 1/4 cup crumbled feta cheese (optional)
  • 1/4 cup chopped walnuts or pecans (optional)
  • Balsamic Poppy Seed Vinaigrette Dressing:
  • 3 tablespoons balsamic vinegar
  • 1 tablespoon honey or maple syrup
  • 1/4 cup olive oil
  • 1/2 teaspoon Dijon mustard
  • 1 tablespoon poppy seeds
  • Salt and pepper to taste
Recipe Image

Step-by-Step: Making the Perfect Strawberry Spinach Salad

Alright, let’s get to the fun part: putting this salad together! Don’t worry, it’s incredibly simple. Here’s a step-by-step guide to ensure your strawberry spinach salad turns out perfectly every time:

  1. Prepare the Balsamic Poppy Seed Vinaigrette: In a small bowl, whisk together balsamic vinegar, honey (or maple syrup), olive oil, Dijon mustard, poppy seeds, salt, and pepper until well combined. Taste and adjust seasonings as needed. This dressing is what really makes this spinach salad pop.
  2. Combine the Salad Ingredients: In a large bowl, combine the spinach, sliced strawberries, and red onion.
  3. Add Optional Toppings: If using, add feta cheese and nuts to the salad.
  4. Dress the Salad: Pour the balsamic poppy seed vinaigrette over the salad and toss gently to coat. Be careful not to overdress; you want just enough to lightly coat the ingredients.
  5. Serve Immediately: For the best flavor and texture, serve the salad immediately.

Pro Tips for Salad Perfection

Want to take your strawberry spinach salad to the next level? Here are a few of my favorite pro tips:

  • Wash and Dry Spinach Thoroughly: Nobody likes a soggy salad! Use a salad spinner to remove excess water from the spinach.
  • Use High-Quality Balsamic Vinegar: The quality of your balsamic vinegar will greatly impact the flavor of the dressing. Look for a thick, syrupy balsamic vinegar for the best results.
  • Toast the Nuts: Toasting the walnuts or pecans before adding them to the salad enhances their nutty flavor and adds a delightful crunch.
  • Don’t Overdress the Salad: Overdressing can make the salad soggy. Start with a small amount of dressing and add more as needed.
  • Add a Touch of Fresh Herbs: A sprinkle of fresh basil or mint can add a burst of freshness to the salad.

Common Mistakes to Avoid

Even though this salad is super easy to make, there are a few common mistakes that can affect the final result. Here’s what to watch out for:

  • Using Wilted Spinach: Wilted spinach will make the salad look unappetizing. Choose fresh, crisp spinach for the best results.
  • Overripe Strawberries: Overripe strawberries can be mushy and detract from the overall texture of the salad. Choose ripe but firm strawberries.
  • Too Much Red Onion: Red onion can be overpowering if used in excess. Use a small amount and slice it thinly.
  • Pre-Made Dressing: While convenient, pre-made dressings often lack the fresh flavor of homemade. Take the extra few minutes to make your own balsamic vinaigrette; you won’t regret it!

Variations to Keep Things Interesting

One of the best things about this strawberry spinach salad is how easily it can be customized to suit your tastes. Here are a few variations to try:

  • Add Grilled Chicken or Shrimp: Turn this salad into a complete meal by adding grilled chicken or shrimp.
  • Include Avocado: Add sliced avocado for a creamy, healthy fat boost.
  • Swap the Feta for Goat Cheese: Goat cheese adds a tangy, slightly earthy flavor that pairs beautifully with strawberries and spinach.
  • Add Sunflower Seeds or Pumpkin Seeds: For a different type of crunch, try adding sunflower seeds or pumpkin seeds.
  • Use Different Greens: Mix spinach with other greens like arugula or mixed greens for a more complex flavor profile.

Storage Tips

If you have any leftover salad, here’s how to store it properly:

  • Store Undressed Salad Separately: If possible, store the undressed salad in an airtight container in the refrigerator. This will prevent the spinach from wilting.
  • Store Dressing Separately: Store the balsamic vinaigrette in a separate airtight container in the refrigerator.
  • Refrigerate for Up to 2 Days: The salad will keep in the refrigerator for up to 2 days, but it’s best enjoyed fresh.

Frequently Asked Questions (FAQ)

Here are some common questions I get asked about this strawberry spinach salad:

  • Can I make this salad ahead of time? While you can prepare the individual components ahead of time (wash and dry the spinach, slice the strawberries, make the dressing), it’s best to assemble the salad just before serving to prevent it from getting soggy.
  • Can I use frozen strawberries? I don’t recommend using frozen strawberries, as they can be mushy when thawed. Fresh strawberries are the best choice for this salad.
  • Is this salad gluten-free? Yes, this salad is naturally gluten-free.
  • Can I make this salad vegan? Yes, simply omit the feta cheese or substitute it with a vegan cheese alternative. Also, ensure that the honey is replaced with maple syrup in the dressing.
  • How can I make this salad more filling? Add grilled chicken, shrimp, or chickpeas for a protein boost. You can also add quinoa or farro for a heartier salad.

Serving Suggestions

This strawberry spinach salad is incredibly versatile and can be served in a variety of ways. Here are a few of my favorite serving suggestions:

  • As a Light Lunch: Enjoy a generous serving of this salad for a light and refreshing lunch.
  • As a Side Dish: Serve it as a side dish alongside grilled chicken, fish, or steak.
  • At a Brunch Gathering: This salad is a perfect addition to any brunch spread.
  • At a Picnic: Pack it in a container and take it along to your next picnic. Just remember to keep the dressing separate until you’re ready to serve.
  • As a Potluck Dish: This salad is always a hit at potlucks!

So there you have it, friends! My Strawberry Spinach Salad with Balsamic Poppy Seed Dressing. I hope you give it a try and that it brings as much joy to your table as it does to mine. Remember, cooking should be a celebration, not a chore. Embrace the process, experiment with flavors, and most importantly, have fun! Thanks for spending time with me today, and I’ll see you in the next recipe!

STRAWBERRY SPINACH SALAD with Balsamic Dressing

Prep Time 15 minutes
Total Time 15 minutes
Servings 4 servings
Calories 250
A refreshing and vibrant Strawberry Spinach Salad with a homemade balsamic dressing. This salad is a perfect blend of sweet and savory flavors, making it a delightful addition to any meal.

Ingredients

Salad

  • 6 ounces fresh spinach (washed and dried)
  • 1 pint fresh strawberries (hulled and sliced)
  • 1/4 cup red onion (thinly sliced)
  • 1/4 cup crumbled feta cheese (optional)
  • 1/4 cup chopped walnuts or pecans (optional)

Balsamic Vinaigrette Dressing

  • 3 tablespoons balsamic vinegar
  • 1 tablespoon honey or maple syrup
  • 1/4 cup olive oil
  • 1/2 teaspoon Dijon mustard
  • to taste Salt and pepper

Instructions 

  • Prepare the balsamic vinaigrette: Whisk together balsamic vinegar, honey (or maple syrup), olive oil, Dijon mustard, salt, and pepper.
  • Combine spinach, sliced strawberries, and red onion in a large bowl.
  • Add feta cheese and nuts to the salad, if using.
  • Pour the balsamic vinaigrette over the salad and toss gently.
  • Serve immediately.

Notes

For a vegan option, omit the feta cheese and use maple syrup instead of honey in the dressing.
Calories: 250kcal
Cost: $8
Course: Salad
Cuisine: American
Keyword: Spinach

Nutrition

Calories: 250kcal | Carbohydrates: 20g | Protein: 5g | Fat: 18g | Sodium: 150mg
pin

Hey there, friend! It’s Avery, and I’m so excited to share one of my absolute go-to recipes with you: a vibrant, nourishing Chopped Kale Salad with Quinoa. This isn’t just any salad; it’s a celebration of fresh flavors and textures, packed with goodness that will leave you feeling energized and satisfied. Whether you’re looking for a light lunch, a hearty side dish, or a complete vegan gluten-free meal, this salad is ready to deliver.

My journey with kale started a little rocky, I won’t lie. Raw kale? It can be…intimidating. But trust me, once you learn the secrets to preparing it right, it becomes a delightful canvas for all sorts of culinary adventures. And this chopped kale salad? It’s the perfect place to start. Let’s dive in!

Why You’ll Love This Chopped Kale Salad

Honestly, what *isn’t* there to love? This salad is more than just a bunch of greens thrown together. It’s a symphony of flavors and textures that dance on your tongue. But here’s a few specific reasons why this salad will become a staple:

  • Nutrient Powerhouse: Kale is a superstar, packed with vitamins, minerals, and antioxidants. Combined with the protein and fiber of quinoa, this salad is a nutritional goldmine.
  • Delicious & Satisfying: The sweetness of apple, the slight bite of red onion, the crunch of walnuts – every bite is an experience. Plus, the hearty quinoa keeps you feeling full and satisfied.
  • Easy to Customize: This recipe is a fantastic base that you can easily adapt to your liking. Swap out ingredients based on what you have on hand or what’s in season.
  • Perfect for Meal Prep: This salad holds up beautifully in the fridge, making it ideal for meal prepping. Make a big batch on Sunday and enjoy it throughout the week.
  • Gluten-Free and Vegan: This salad caters to many dietary needs. It’s naturally gluten-free and vegan, making it a crowd-pleaser for everyone.

Ingredients You’ll Need

Here’s what you’ll need to create this amazing chopped kale salad. Remember, fresh, high-quality ingredients make all the difference!

  • ‘1 bunch of dark leafy kale (about 4 cups chopped)’
  • ‘1 cup thinly sliced brussel sprouts’
  • ‘1 cup cooked quinoa – cooled’
  • ‘1 cup sliced apple’
  • ‘1/2 cup thinly sliced red onion’
  • ‘1/4 cup chopped walnuts’
  • ‘1/4 cup pumpkin seeds – optional’
  • ‘1/4 cup dried cranberries or pomegranate seeds’
  • ‘2 tablespoons dijon mustard’
  • ‘1 1/2 tablespoons apple cider vinegar’
  • ‘1 tablespoon freshly squeezed lemon juice’
  • ‘1 tablespoon maple syrup’
  • ‘1/4 teaspoon kosher salt’
  • ‘1/4 teaspoon ground black pepper’
  • ‘1/2 cup olive oil’
Recipe Image

How To Make This Chopped Kale Salad: Step-by-Step

Don’t let the word “kale” intimidate you. This salad is incredibly easy to make! Here’s how to bring it all together:

  1. Prepare the Kale: Start by rinsing it well then run it thought the salad spinner to remove any excess moisture. You can also place it in a clean kitchen towel and shake it over a bowl. Then roll it up in long bunches and slice through it so you get nice thin, long strands of kale. This makes it easier to eat and digest. Plus it is so pretty sliced thin. Place the kale into a large bowl, sprinkle it with lemon juice and a pinch of salt and massage it with your hands for 30-60 seconds to break it down.
  2. Make the Dressing: Add all dressing ingredients to a mason jar and shake well to fully emulsify.
  3. Combine Ingredients: Add the rest of the salad ingredients to the large bowl with the kale.
  4. Dress and Serve: Pour the dressing onto the salad and toss. Serve cold and enjoy!

Pro Tips for the Best Chopped Kale Salad

Want to take your kale salad to the next level? Here are a few of my tried-and-true tips:

  • Massage the Kale: This is the most important step! Massaging the kale with lemon juice and salt breaks down the tough fibers, making it tender and easier to digest. Don’t skip it!
  • Thinly Slice Everything: The key to a great chopped salad is uniform pieces. Thinly slice the kale, brussel sprouts, apple, and red onion for the best texture.
  • Use Cooked and Cooled Quinoa: Make sure your quinoa is cooked according to package directions and cooled completely before adding it to the salad. This will prevent the salad from becoming soggy. Fluffy quinoa is best!
  • Taste and Adjust the Dressing: The dressing is the heart of this salad. Taste it and adjust the seasonings to your liking. Add more maple syrup for sweetness, lemon juice for tanginess, or salt and pepper to taste.
  • Let it Sit: If you have time, let the salad sit for about 15-20 minutes after dressing it. This allows the flavors to meld together and the kale to soften even more.

Common Mistakes to Avoid

Even the simplest recipes can have pitfalls. Here are a few common mistakes to avoid when making this chopped kale salad:

  • Not Massaging the Kale Enough: This is the biggest mistake! If you don’t massage the kale, it will be tough and bitter.
  • Overdressing the Salad: Start with a little dressing and add more as needed. You can always add more, but you can’t take it away!
  • Using Warm Quinoa: Warm quinoa will wilt the kale and make the salad soggy. Make sure it’s cooled completely.
  • Adding Ingredients That Are Too Large: Big chunks of apple or red onion can be overwhelming. Thinly slice everything for the best texture.
  • Not Tasting As You Go: Taste the salad after adding each ingredient and adjust the seasonings as needed. This will ensure that the flavors are balanced.

Variations to Try

The beauty of this salad is its versatility. Here are a few variations to get your creative juices flowing:

  • Add Protein: Grilled chicken, chickpeas, or tofu would all be delicious additions.
  • Swap the Fruit: Use pears, berries, or oranges instead of apples.
  • Change the Nuts: Pecans, almonds, or sunflower seeds would all work well.
  • Add Cheese: Crumbled feta or goat cheese would add a tangy flavor.
  • Spice it Up: Add a pinch of red pepper flakes to the dressing for a little heat.
  • Seasonal Twist: Consider this salad a spring salad with the addition of strawberries.

How to Store Leftovers

This salad is great for meal prep! Store leftovers in an airtight container in the refrigerator for up to 3 days. The kale may soften slightly over time, but the flavors will only get better. If you know you’ll have leftovers, consider storing the dressing separately and adding it just before serving.

Frequently Asked Questions (FAQ)

Got questions? I’ve got answers!

  • Can I make this salad ahead of time? Yes! This salad is perfect for meal prep. Just store the dressing separately and add it just before serving.
  • Can I freeze this salad? I don’t recommend freezing this salad. The kale will become mushy when thawed.
  • Is this salad gluten-free? Yes, this salad is naturally gluten-free.
  • Is this salad vegan? Yes, this salad is vegan.
  • Can I use a different type of kale? Yes, you can use any type of kale you like. Just be sure to massage it well to break down the tough fibers.

Serving Suggestions

This chopped kale salad is incredibly versatile and can be served in so many ways. Here are a few ideas:

  • As a Main Course: Add a source of protein, such as grilled chicken, chickpeas, or tofu, and serve as a complete meal.
  • As a Side Dish: Serve alongside grilled fish, roasted vegetables, or a hearty soup.
  • In a Wrap: Stuff the salad into a whole-wheat wrap for a quick and easy lunch.
  • At a Potluck: This salad is always a crowd-pleaser at potlucks and gatherings.
  • Pair with Soup: This salad is the perfect addition to soup and salad.

I hope you love this chopped kale salad as much as I do! It’s a simple, healthy, and delicious way to nourish your body and soul. And remember, cooking should be fun and forgiving. Don’t be afraid to experiment and make it your own. Happy cooking, friend!

Must Make Chopped Kale Salad With Quinoa

Prep Time 20 minutes
Cook Time 20 minutes
Total Time 40 minutes
Servings 4 servings
Calories 350
A vibrant and nutritious kale salad featuring quinoa, apple, and a tangy dijon vinaigrette. Perfect as a light lunch or side dish!

Ingredients

Salad

  • 1 bunch dark leafy kale (about 4 cups chopped)
  • 1 cup thinly sliced brussel sprouts
  • 1 cup cooked quinoa (cooled)
  • 1 cup sliced apple
  • 0.5 cup thinly sliced red onion
  • 0.25 cup chopped walnuts
  • 0.25 cup pumpkin seeds (optional)
  • 0.25 cup dried cranberries or pomegranate seeds

Dressing

  • 2 tablespoons dijon mustard
  • 1.5 tablespoons apple cider vinegar
  • 1 tablespoon freshly squeezed lemon juice
  • 1 tablespoon maple syrup
  • 0.25 teaspoon kosher salt
  • 0.25 teaspoon ground black pepper
  • 0.5 cup olive oil

Instructions 

  • Rinse kale, remove excess moisture, and slice thinly. Massage with lemon juice and salt.
  • Add dressing ingredients to a mason jar and shake well.
  • Add salad ingredients to the bowl with kale.
  • Pour dressing onto the salad and toss. Serve cold.

Notes

Massaging the kale helps to tenderize it, making it easier to digest and more enjoyable to eat.
Calories: 350kcal
Cost: $12
Course: Salad
Cuisine: American
Keyword: Kale

Nutrition

Calories: 350kcal | Carbohydrates: 30g | Protein: 8g | Fat: 25g | Sodium: 200mg
pin

The rain is drumming a gentle rhythm against my kitchen window here in Portland, and the air smells faintly of wet earth and rosemary. It’s the kind of day that begs for something bright, fresh, and nourishing. And what could be better than a Spring Strawberry Chicken Salad? This isn’t just a recipe; it’s a little burst of sunshine on a plate. It’s the kind of meal that makes you feel good from the inside out, a celebration of simple ingredients and joyful flavors.

My journey to healthy eating started out of necessity. Feeling run down and disconnected, I craved vitality. This salad is a reflection of that journey – a testament to how simple, whole foods can transform how you feel. It is a celebration of spring’s vibrant flavors and a reminder that taking care of yourself can be delicious.

Why You’ll Love This Strawberry Chicken Salad

This strawberry chicken salad isn’t your average salad. It’s a symphony of textures and tastes, a perfect balance of sweet and savory. It’s one of my go-to healthy family dinners.

  • Quick and Easy: Ready in under 30 minutes, it’s perfect for busy weeknights or a quick lunch.
  • Healthy and Nourishing: Packed with protein, vitamins, and antioxidants, it’s a meal that fuels your body.
  • Versatile: Customize it with your favorite greens, nuts, or cheeses. You can easily adapt it to your dietary needs and preferences.
  • Delicious Flavors: The combination of sweet strawberries, savory chicken, and tangy dressing is simply irresistible.
  • Refreshing: This salad is perfect for warm weather, offering a light and satisfying meal.

This salad is a delightful way to incorporate fresh, seasonal ingredients into your diet. It’s a recipe I often turn to when I want something that feels both indulgent and wholesome. It’s a testament to how simple ingredients, when combined thoughtfully, can create a truly memorable meal. The vibrant colors and fresh flavors are guaranteed to brighten your day. This strawberry chicken salad is a winner!

Ingredients for the Perfect Strawberry Chicken Salad

  • 2 cups cooked chicken, shredded or diced
  • 1 cup fresh strawberries, sliced
  • 1/2 cup celery, diced
  • 1/4 cup red onion, finely diced
  • 1/4 cup toasted slivered almonds
  • 1/4 cup mayonnaise
  • 2 tablespoons plain Greek yogurt
  • 1 tablespoon lemon juice
  • 1 teaspoon honey
  • Salt and pepper to taste
  • Optional: Lettuce or croissants for serving
Recipe Image

Step-by-Step Instructions: Making Your Strawberry Chicken Salad

Making this strawberry chicken salad is incredibly simple. It’s all about combining the right ingredients in the right way to create a harmonious blend of flavors and textures. Follow these easy steps and you’ll have a delicious and satisfying meal in no time.

  1. In a large bowl, combine the cooked chicken, sliced strawberries, diced celery, and red onion.
  2. In a small bowl, whisk together the mayonnaise, Greek yogurt, lemon juice, honey, salt, and pepper. This is the dressing that brings everything together.
  3. Pour the dressing over the chicken mixture and stir gently to combine. Be careful not to overmix, as you want to keep the strawberries intact.
  4. Stir in the toasted almonds. These add a wonderful crunch and nutty flavor.
  5. Taste and adjust seasonings as needed. Don’t be afraid to add a little more honey for sweetness or lemon juice for tanginess.
  6. Serve immediately or chill for later. Serve on lettuce or in croissants.

Pro Tips for the Best Strawberry Chicken Salad

Here are a few tips and tricks to elevate your strawberry chicken salad from good to great:

  • Use High-Quality Ingredients: The better the ingredients, the better the salad will taste. Opt for fresh, ripe strawberries and good-quality chicken.
  • Toast the Almonds: Toasting the almonds enhances their flavor and adds a delightful crunch.
  • Don’t Overdress the Salad: Add the dressing gradually, so the salad doesn’t become soggy.
  • Chill Before Serving: Chilling the salad for at least 30 minutes allows the flavors to meld together.
  • Add Fresh Herbs: A sprinkle of fresh basil or mint can add a burst of freshness.

These tips are based on years of experimenting in my kitchen. Using good ingredients, and paying attention to the details can make all the difference. Remember, cooking should be enjoyable, so don’t be afraid to experiment and find what works best for you. The flavors and textures should complement each other, creating a truly satisfying experience.

Common Mistakes to Avoid When Making Strawberry Chicken Salad

Even the simplest recipes can have pitfalls. Here are a few common mistakes to avoid when making strawberry chicken salad:

  • Using Underripe Strawberries: Underripe strawberries will be tart and lack sweetness.
  • Overcooking the Chicken: Overcooked chicken will be dry and tough.
  • Not Dicing the Celery and Red Onion Finely Enough: Large chunks of celery and red onion can overpower the other flavors.
  • Using Too Much Dressing: Too much dressing will make the salad soggy.
  • Forgetting to Season: Seasoning with salt and pepper is essential for bringing out the flavors of the other ingredients.

I’ve made all of these mistakes myself! The key is to learn from them and not be afraid to try again. Cooking is a journey, and every mistake is an opportunity to learn and grow. The goal is to create a salad that is both delicious and enjoyable to eat. This strawberry salad is a perfect example of how simple ingredients can come together to create something truly special.

Strawberry Chicken Salad Variations

One of the things I love most about this recipe is how versatile it is. You can easily customize it to suit your tastes and preferences. Here are a few variations to try:

  • Add Cheese: Crumbled feta, goat cheese, or blue cheese would be delicious additions. Cheese or no cheese, it is up to you!
  • Use Different Nuts: Pecans, walnuts, or cashews can be substituted for the almonds.
  • Add Avocado: Diced avocado will add creaminess and healthy fats.
  • Use Different Greens: Spinach, mixed greens, or arugula can be used instead of lettuce.
  • Make it a Grain Bowl: Serve the salad over quinoa, farro, or rice.
  • Strawberry Spinach Salad: Combine baby spinach, sliced strawberries, and grilled chicken tenders for a healthy meal.

Don’t be afraid to get creative and experiment with different combinations. The possibilities are endless! The most important thing is to create a salad that you love. I often swap out ingredients based on what I have on hand or what’s in season. This recipe is a great starting point, but feel free to make it your own. Adding grilled chicken takes it to the next level. The bright and fresh flavors make this salad a perfect choice.

How to Store Strawberry Chicken Salad

If you have leftovers, store them in an airtight container in the refrigerator. It’s best to store the dressing separately to prevent the salad from becoming soggy.

  • Refrigerate Promptly: Store the salad in the refrigerator within two hours of making it.
  • Store Dressing Separately: Keep the dressing in a separate container to prevent the salad from becoming soggy.
  • Use an Airtight Container: This will help keep the salad fresh and prevent it from absorbing odors from the refrigerator.
  • Consume Within 2-3 Days: The salad is best consumed within 2-3 days for optimal flavor and texture.

Proper storage is essential for maintaining the quality and safety of the salad. By following these simple tips, you can enjoy leftovers for several days. However, keep in mind that the salad may become slightly softer over time, so it’s best to eat it as soon as possible. It’s a great way to keep the strawberry chicken fresh.

Frequently Asked Questions About Strawberry Chicken Salad

Here are some frequently asked questions about strawberry chicken salad:

  • Can I use frozen strawberries?: Fresh strawberries are best, but you can use frozen strawberries in a pinch. Just be sure to thaw them completely and drain off any excess liquid.
  • Can I make this salad ahead of time?: Yes, you can make the salad ahead of time, but it’s best to add the dressing just before serving to prevent it from becoming soggy.
  • Can I use rotisserie chicken?: Yes, rotisserie chicken is a great shortcut. Just be sure to remove the skin and shred or dice the chicken.
  • Is this salad gluten-free?: Yes, this salad is naturally gluten-free.
  • Is this salad dairy-free?: To make this salad dairy-free, use dairy-free mayonnaise and yogurt alternatives.

I hope these answers are helpful! If you have any other questions, feel free to ask in the comments below. I’m always happy to help. I have found that a mixed salad with this recipe is always a hit.

Serving Suggestions for Your Strawberry Chicken Salad

This strawberry chicken salad is delicious on its own, but it can also be served in a variety of other ways:

  • On Lettuce Cups: Serve the salad on crisp lettuce cups for a light and refreshing meal.
  • In Croissants: Stuff the salad into croissants for a decadent treat.
  • On Toast: Spread the salad on toast for a quick and easy lunch.
  • With Crackers: Serve the salad with crackers for a simple appetizer.
  • As a Side Dish: Serve the salad as a side dish with grilled chicken or fish.

No matter how you choose to serve it, this strawberry chicken salad is sure to be a hit. It’s a versatile and delicious meal that’s perfect for any occasion. The vibrant colors and fresh flavors make it a feast for the eyes as well as the palate. This salad is a true celebration of spring, and I hope you enjoy it as much as I do. It’s a refreshing food that can be enjoyed anytime. The dressing is the key to this salad’s success. The chicken is the protein that makes it a satisfying meal. This strawberry chicken salad is a perfect example of how simple ingredients can come together to create something truly special. This salad is a great way to enjoy the flavors of spring and summer. Enjoy this bright and flavorful salad!

Spring Strawberry Chicken Salad Recipe

Prep Time 15 minutes
Total Time 15 minutes
Servings 4 servings
Calories 350
A refreshing and flavorful chicken salad perfect for spring! This recipe combines juicy strawberries, tender chicken, and a tangy dressing for a delightful meal.

Ingredients

Salad

  • 2 cups cooked chicken, shredded or diced
  • 1 cup fresh strawberries, sliced
  • 1/2 cup celery, diced
  • 1/4 cup red onion, finely diced
  • 1/4 cup toasted slivered almonds

Dressing

  • 1/4 cup mayonnaise
  • 2 tablespoons plain Greek yogurt
  • 1 tablespoon lemon juice
  • 1 teaspoon honey
  • to taste Salt and pepper
  • Lettuce or croissants for serving (Optional)

Instructions 

  • Combine chicken, strawberries, celery, and red onion in a bowl.
  • Whisk together mayonnaise, yogurt, lemon juice, honey, salt, and pepper.
  • Pour dressing over chicken mixture and stir gently.
  • Stir in toasted almonds.
  • Taste and adjust seasonings.
  • Serve immediately or chill. Serve on lettuce or in croissants.

Notes

For a lighter version, use light mayonnaise and more Greek yogurt.
Calories: 350kcal
Cost: $12
Course: Dinner, Lunch
Cuisine: American
Keyword: chicken, strawberry

Nutrition

Calories: 350kcal | Carbohydrates: 20g | Protein: 30g | Fat: 18g | Sodium: 200mg
pin

Error: AI returned broken format. Expecting ‘,’ delimiter: line 2 column 9985 (char 9986)

Recipe Image

Lemon Butter Garlic Pasta Sauce Pasta Al Limone

Prep Time 5 minutes
Cook Time 15 minutes
Total Time 20 minutes
Servings 4 servings
Calories 450
A simple yet flavorful pasta dish featuring a creamy lemon butter garlic sauce. This Pasta Al Limone is quick to make and perfect for a weeknight meal.

Ingredients

Pasta

  • 1 pound pasta (spaghetti, linguine, or fettuccine) (your choice)

Sauce

  • 1/2 cup butter
  • 4 cloves garlic, minced
  • 1/4 cup lemon juice, freshly squeezed
  • 1/4 cup grated Parmesan cheese (plus more for serving)
  • 2 tablespoons chopped fresh parsley
  • to taste Salt and black pepper
  • optional Red pepper flakes

Instructions 

  • Cook pasta until al dente, reserving 1 cup pasta water.
  • Melt butter in a skillet over medium heat.
  • Add garlic and cook until fragrant (1 minute).
  • Stir in lemon juice and simmer.
  • Add pasta to skillet and toss.
  • Add Parmesan and parsley, toss with pasta water for desired consistency.
  • Season with salt, pepper, and red pepper flakes (if using).
  • Serve with extra Parmesan and parsley.

Notes

Adjust the amount of lemon juice and Parmesan cheese to your liking for a personalized flavor.
Calories: 450kcal
Cost: $12
Course: Main Course
Cuisine: Italian
Keyword: pasta

Nutrition

Calories: 450kcal | Carbohydrates: 60g | Protein: 18g | Fat: 18g | Sodium: 350mg
pin

Hey there, friend! It’s Avery here, from my cozy kitchen in Portland. Today, I want to share a recipe that’s near and dear to my heart: Creamy Lemon Chicken Pasta with Broccoli. This isn’t just another pasta dish; it’s a celebration of fresh flavors, a comforting bowl of goodness, and a reminder that healthy eating can be both easy and incredibly satisfying. This dish is sure to become a weeknight staple in your home, just like it has in mine.

My journey with food started out of necessity, a way to reclaim my health and find balance amidst the chaos. This recipe embodies that journey. It’s vibrant, nourishing, and brings a little sunshine to even the rainiest Portland day. So, grab your apron, and let’s get cooking!

Why You’ll Love This Creamy Lemon Chicken Pasta

This Creamy Lemon Chicken Pasta with Broccoli isn’t just delicious; it’s a complete package. It’s the kind of meal that makes you feel good from the inside out. Here’s why you’ll absolutely adore it:

  • Quick and Easy: Ready in under 30 minutes, perfect for busy weeknights.
  • Fresh Flavors: The bright lemon, savory chicken, and tender broccoli create a symphony of taste.
  • Comforting and Creamy: The light creamy sauce is rich without being heavy.
  • Versatile: Easily customizable to your liking – swap veggies, add spices, make it your own!
  • Healthy and Nourishing: Packed with protein, vitamins, and wholesome goodness.

It’s a dish that brings together the best of both worlds: healthy eating and pure comfort food. The lemon chicken and broccoli combination is a winner every time!

Ingredients You’ll Need

Here’s what you’ll need to create this culinary delight. Don’t worry if you don’t have everything on hand; feel free to make substitutions based on what you have available. The beauty of cooking is in the improvisation!

  • For the Pasta:
  • 8 oz penne or spaghetti pasta: Any short or long pasta will work.
  • 2 cups broccoli florets: Fresh or frozen, both are great.
  • 2 tablespoons olive oil: For sautéing the chicken.
  • 1 lb boneless, skinless chicken breasts, cut into bite-sized pieces: Thighs work too!
  • Salt and black pepper, to taste: Season generously.
  • 3 cloves garlic, minced: Fresh garlic is key.
  • 1/2 teaspoon red pepper flakes (optional, for a bit of heat): Adjust to your spice preference.
  • Zest of 1 lemon: Adds a burst of citrus.
  • 1/4 cup fresh lemon juice (about 1 large lemon): Freshly squeezed is best!
  • 1 cup heavy cream or half-and-half: For the creamy sauce.
  • 1/2 cup grated Parmesan cheese: Adds richness and flavor.
  • Fresh parsley, chopped (for garnish): For a pop of freshness.
Recipe Image

Step-by-Step Instructions

Ready to get cooking? Here’s how to bring this delicious Creamy Lemon Chicken Pasta with Broccoli to life. Don’t be intimidated by the steps; it’s all easier than it looks, I promise!

  1. Cook the Pasta and Broccoli:

    In a large pot of salted boiling water, cook the pasta according to package directions until al dente. About 3 minutes before the pasta is done, add the broccoli florets to the pot. This ensures the broccoli is tender-crisp. Drain the pasta and broccoli together and set aside. Remember to reserve some pasta water – it’s liquid gold for creating a smooth sauce!

  2. Cook the Chicken:

    In a large skillet, heat the olive oil over medium-high heat. Season the chicken pieces with salt and black pepper. Add the chicken to the skillet and cook for about 5-6 minutes, or until golden brown and cooked through. Remove the chicken from the skillet and set aside. Make sure not to overcrowd the pan; cook in batches if necessary to get a good sear.

  3. Prepare the Lemon Cream Sauce:

    In the same skillet, add the minced garlic and red pepper flakes (if using), and sauté for about 1 minute until fragrant. Be careful not to burn the garlic! Add the lemon zest, lemon juice, and heavy cream to the skillet. Stir well to combine and bring the sauce to a gentle simmer. Cook for 2-3 minutes until it begins to thicken. The lemon juice will help to slightly thicken the sauce.

  4. Combine and Serve:

    Add the cooked pasta, broccoli, and chicken back into the skillet with the lemon sauce. Toss everything together to coat well. Stir in the grated Parmesan cheese until melted and the sauce is creamy. Add a splash of the reserved pasta water if the sauce is too thick. Adjust salt and pepper to taste. This is where the magic happens – all the flavors come together in perfect harmony!

  5. Garnish and Serve:

    Garnish with fresh parsley and additional Parmesan, if desired. Serve warm. A final sprinkle of lemon zest can also brighten the dish. Enjoy every bite!

Pro Tips for Perfect Pasta

Want to take your Creamy Lemon Chicken Pasta with Broccoli to the next level? Here are a few pro tips I’ve learned over the years:

  • Salt Your Pasta Water: This is crucial for flavorful pasta. The water should taste like the sea!
  • Don’t Overcook the Broccoli: You want it to be tender-crisp, not mushy. Adding it to the pasta water in the last few minutes is key.
  • Use Fresh Lemon Juice and Zest: The flavor is far superior to bottled juice.
  • Reserve Pasta Water: This starchy water helps to create a silky, emulsified sauce.
  • Don’t Overcook the Chicken: Overcooked chicken is dry and tough. Use a meat thermometer to ensure it’s cooked through but still juicy.

Common Mistakes to Avoid

We all make mistakes in the kitchen – it’s part of the learning process! Here are a few common pitfalls to avoid when making this dish:

  • Burning the Garlic: Burnt garlic is bitter and unpleasant. Keep the heat low and watch it carefully.
  • Overcooking the Pasta: Mushy pasta is a no-go. Cook it al dente, meaning “to the tooth.”
  • Forgetting to Season: Season every layer of the dish – the pasta water, the chicken, the sauce.
  • Adding Cold Cream to a Hot Pan: This can cause the cream to curdle. Warm the cream slightly before adding it to the skillet.
  • Not Tasting as You Go: Adjust the seasoning as needed to suit your taste.

Variations to Try

One of the best things about this recipe is how easily you can customize it. Here are a few variations to inspire you:

  • Vegetarian Version: Skip the chicken and add more vegetables, such as mushrooms, bell peppers, or spinach.
  • Spicy Version: Add more red pepper flakes or a pinch of cayenne pepper to the sauce.
  • Seafood Version: Substitute the chicken with shrimp or scallops.
  • Different Cheese: Try using Pecorino Romano or Asiago cheese instead of Parmesan.
  • Add Herbs: Fresh basil, oregano, or thyme would all be delicious additions.

How to Store and Reheat

Got leftovers? Lucky you! Here’s how to store and reheat your Creamy Lemon Chicken Pasta with Broccoli:

  • Storage: Store the pasta in an airtight container in the refrigerator for up to 3 days.
  • Reheating: Reheat the pasta in a skillet over medium heat, adding a splash of water or cream to loosen the sauce. You can also microwave it, but the texture may not be as good.

Please note that the sauce may slightly separate upon reheating, but it will still taste delicious!

Frequently Asked Questions

Here are some common questions about this recipe:

  • Can I use frozen broccoli?: Yes, you can. Just add it to the pasta water as directed.
  • Can I use milk instead of cream?: Yes, but the sauce will be less creamy. Consider adding a tablespoon of butter for richness.
  • Can I make this gluten-free?: Yes, use gluten-free pasta.
  • Can I make this dairy-free?: Yes, use a dairy-free cream alternative and nutritional yeast instead of Parmesan cheese.
  • Can I prepare this in advance?: You can cook the pasta and chicken ahead of time, but I recommend making the sauce fresh for the best flavor.

Serving Suggestions

This Creamy Lemon Chicken Pasta with Broccoli is a complete meal on its own, but here are a few serving suggestions to elevate your dining experience:

  • Side Salad: A simple green salad with a lemon vinaigrette complements the pasta perfectly.
  • Garlic Bread: For soaking up all that delicious sauce!
  • Roasted Vegetables: Asparagus, Brussels sprouts, or carrots would be great additions.
  • Crusty Bread: For dipping in the sauce.
  • A Glass of White Wine: A crisp Sauvignon Blanc or Pinot Grigio would pair well with the lemon flavors.

And there you have it – my Creamy Lemon Chicken Pasta with Broccoli recipe. I hope you enjoy making and eating it as much as I do. Remember, cooking is about more than just following a recipe; it’s about creating something with love and sharing it with the people you care about. Happy cooking, friends!

This dish, with its pasta and vibrant broccoli, is a testament to how simple ingredients can create something truly special. The chicken pasta with broccoli is a crowd-pleaser, and the creamy and fresh flavors are sure to delight. The pasta with broccoli is a great way to incorporate more greens into your diet, and the lemon chicken pasta is a light and refreshing alternative to heavier pasta dishes. The light creamy and flavorful sauce is a perfect complement to the chicken and broccoli. The broccoli is a nutritional powerhouse, and the chicken is a great source of protein. The chicken and broccoli lemon sauce ties everything together, making this dish a complete and satisfying meal. It’s a pasta dish that you can feel good about eating! Remember, you can always adjust the amount of lemon juice to your liking. The remaining ingredients are flexible too, so feel free to experiment with different vegetables or herbs. This chicken and pasta recipe is a blank canvas, so let your creativity shine! The chicken and pasta is a classic combination for a reason – it’s delicious and satisfying. This pasta and vibrant broccoli dish is a must-try for any pasta lover. The with broccoli is a healthy and delicious addition to the dish. Pasta with broccoli is a great way to get your daily dose of greens. With broccoli is a simple way to elevate the flavor of the dish. This chicken pasta is a dish that is easy to adapt to your preferences.

Lemon Chicken Pasta with Broccoli Recipe

Prep Time 15 minutes
Cook Time 20 minutes
Total Time 35 minutes
Servings 4 people
Calories 550
A delightful and easy-to-make Lemon Chicken Pasta with Broccoli. This dish combines tender chicken, perfectly cooked pasta, and fresh broccoli in a creamy lemon sauce.

Ingredients

For the Pasta:

  • 8 oz penne or spaghetti pasta
  • 2 cups broccoli florets

For the Chicken and Sauce:

  • 2 tablespoons olive oil
  • 1 lb boneless, skinless chicken breasts, cut into bite-sized pieces
  • to taste Salt and black pepper
  • 3 cloves garlic, minced
  • 0.5 teaspoon red pepper flakes (optional, for a bit of heat)
  • Zest of 1 lemon
  • 0.25 cup fresh lemon juice (about 1 large lemon)
  • 1 cup heavy cream or half-and-half
  • 0.5 cup grated Parmesan cheese
  • Fresh parsley, chopped (for garnish)

Instructions 

  • Cook pasta and broccoli in boiling salted water until pasta is al dente, adding broccoli 3 minutes before draining.
  • Cook chicken pieces in olive oil over medium-high heat until golden brown and cooked through; set aside.
  • Sauté garlic and red pepper flakes (if using) in the same skillet. Add lemon zest, lemon juice, and heavy cream; simmer until thickened.
  • Add pasta, broccoli, and chicken to the skillet with lemon sauce. Toss to coat. Stir in Parmesan cheese until melted and creamy; adjust seasoning.
  • Garnish with fresh parsley and Parmesan, if desired. Serve warm.

Notes

Adjust the amount of red pepper flakes to control the level of spiciness. For a lighter sauce, use half-and-half instead of heavy cream.
Calories: 550kcal
Cost: $18
Course: Main Course
Cuisine: Italian
Keyword: chicken

Nutrition

Calories: 550kcal | Carbohydrates: 55g | Protein: 40g | Fat: 25g | Sodium: 300mg
pin