Author

Avery Collins

Browsing

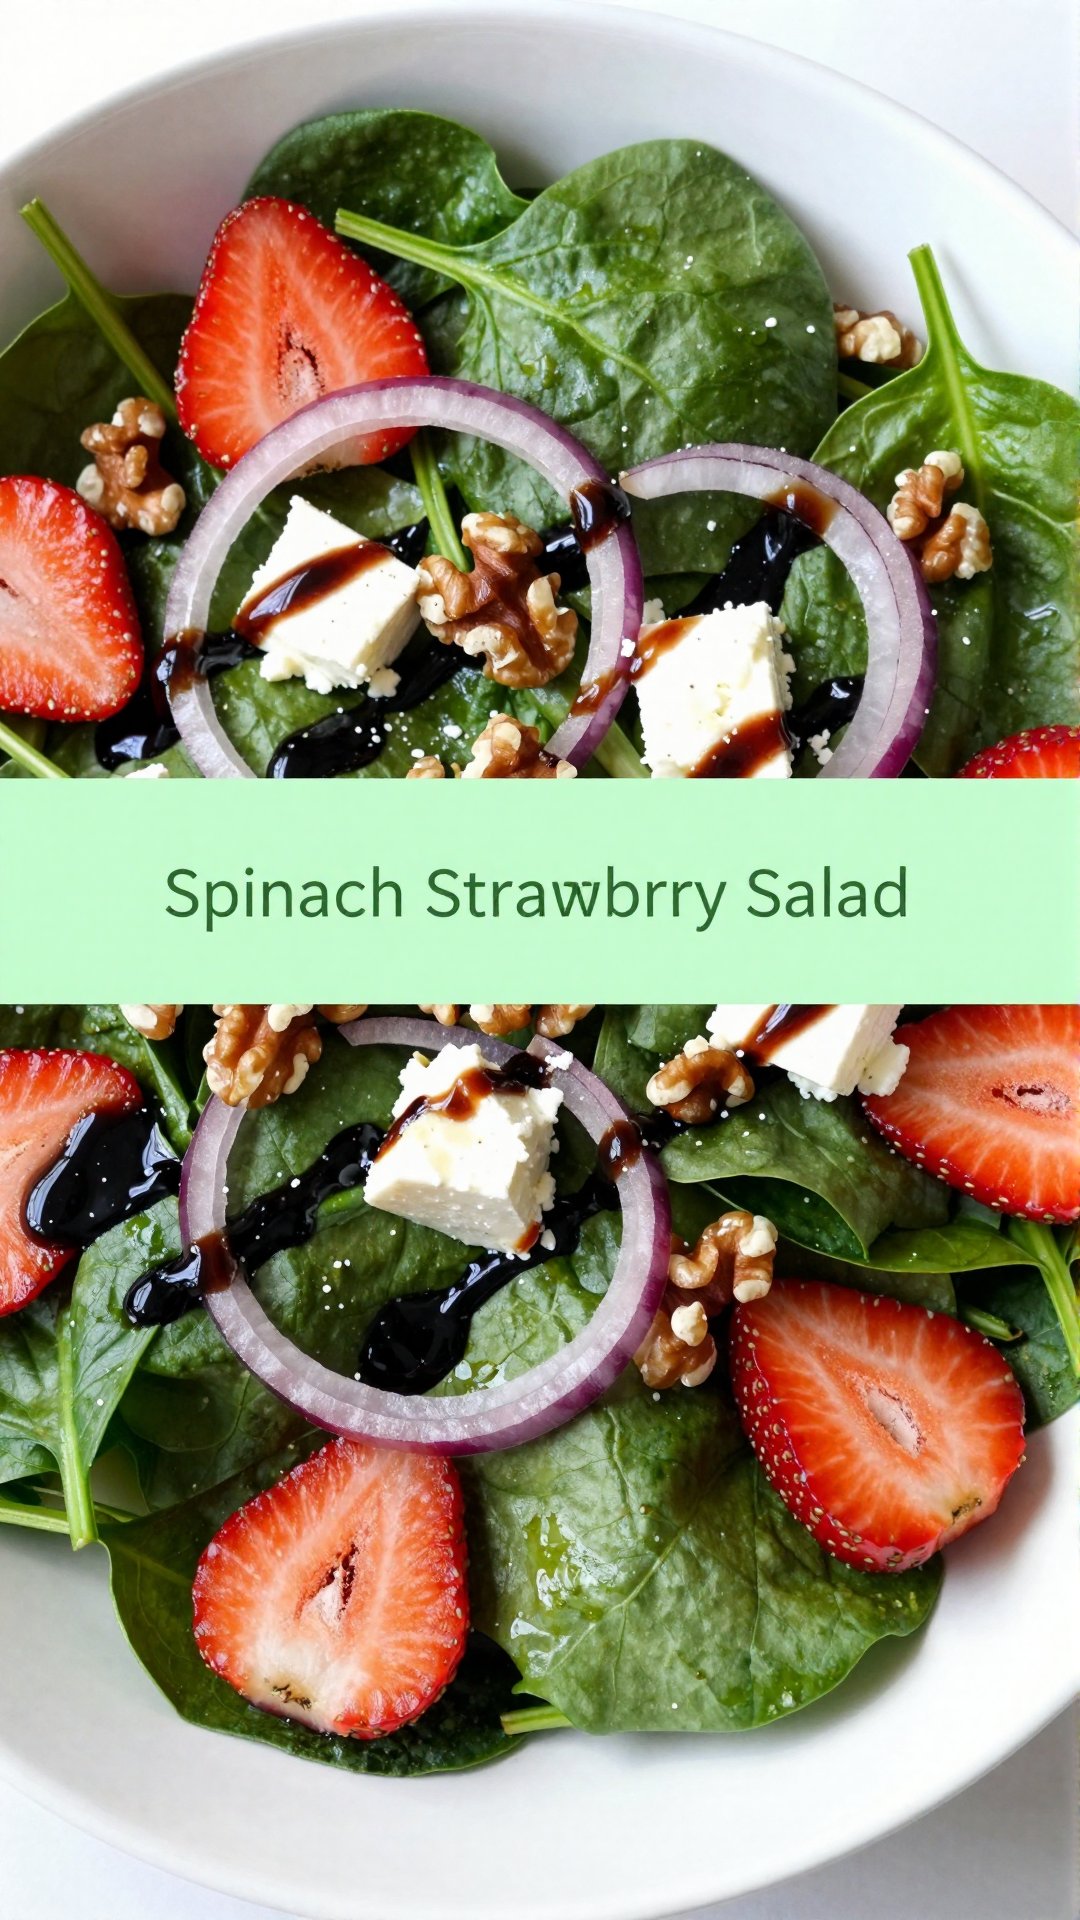
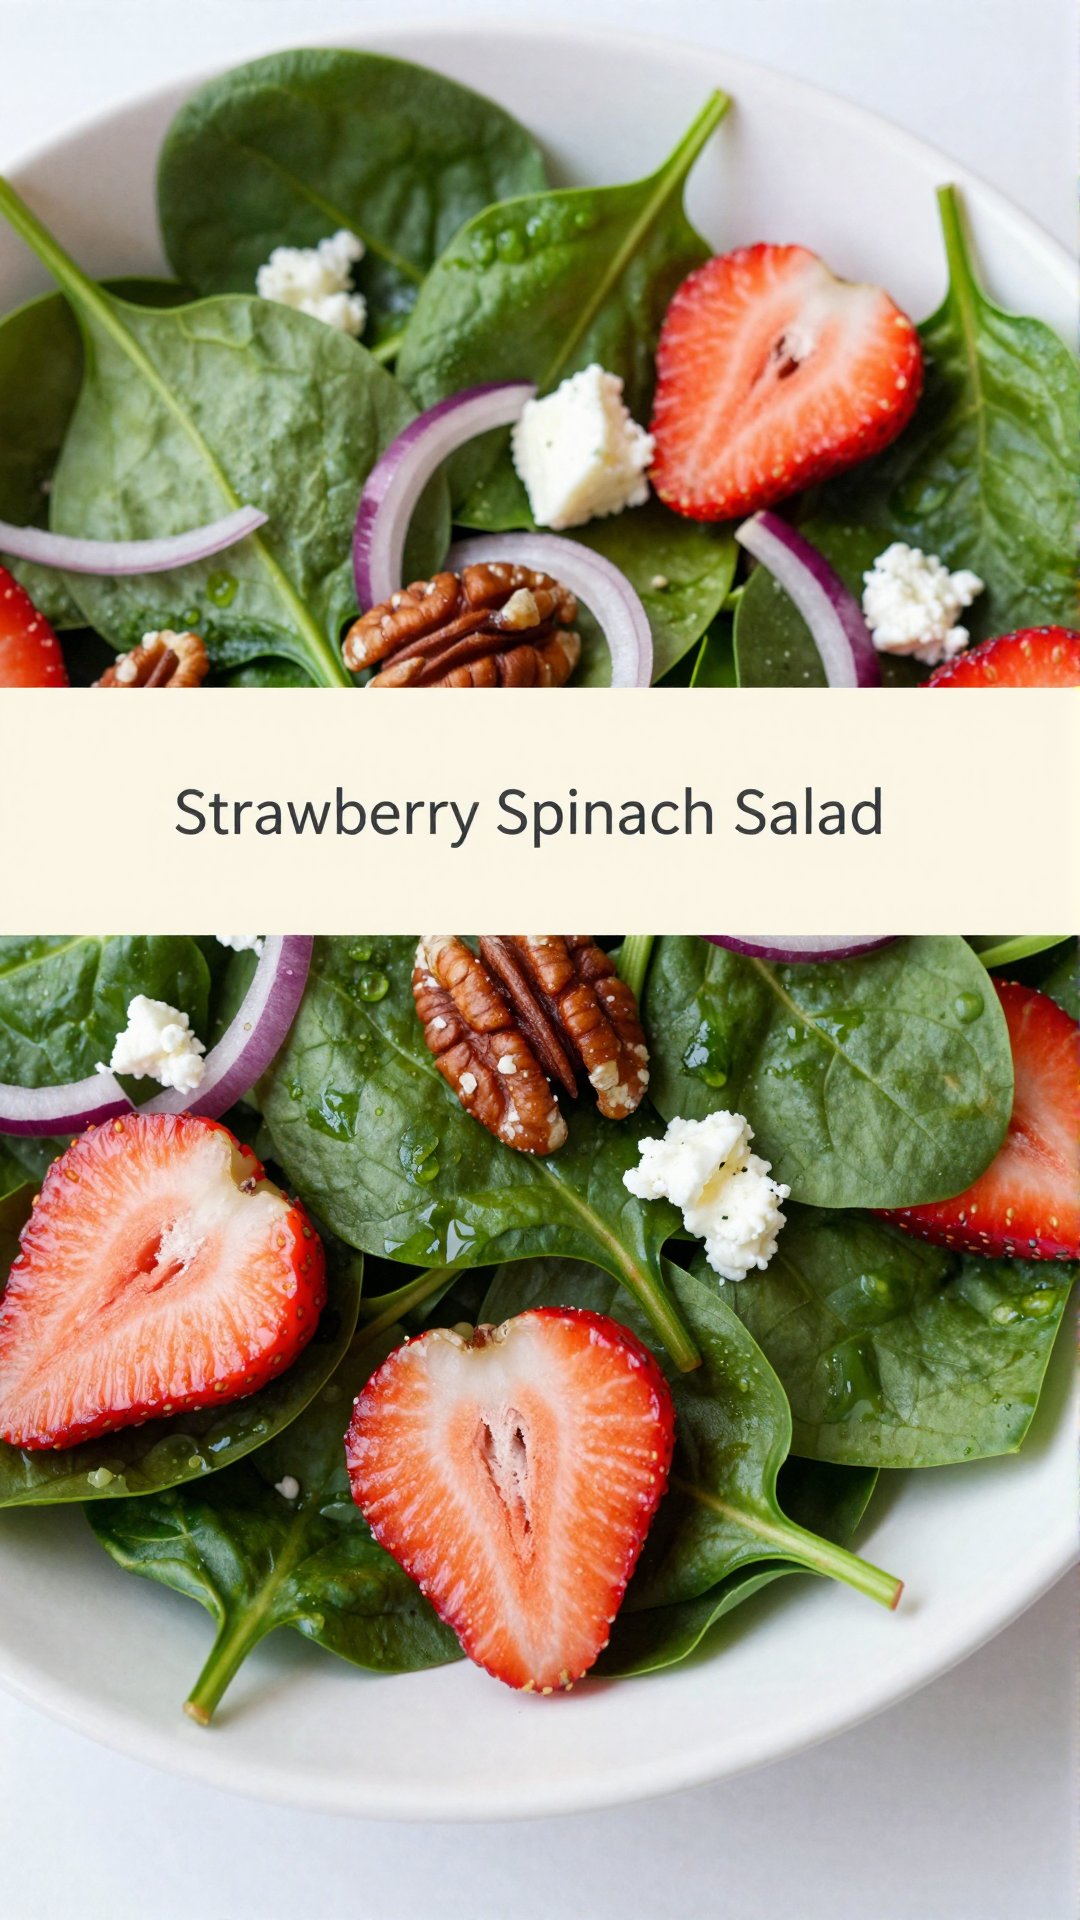
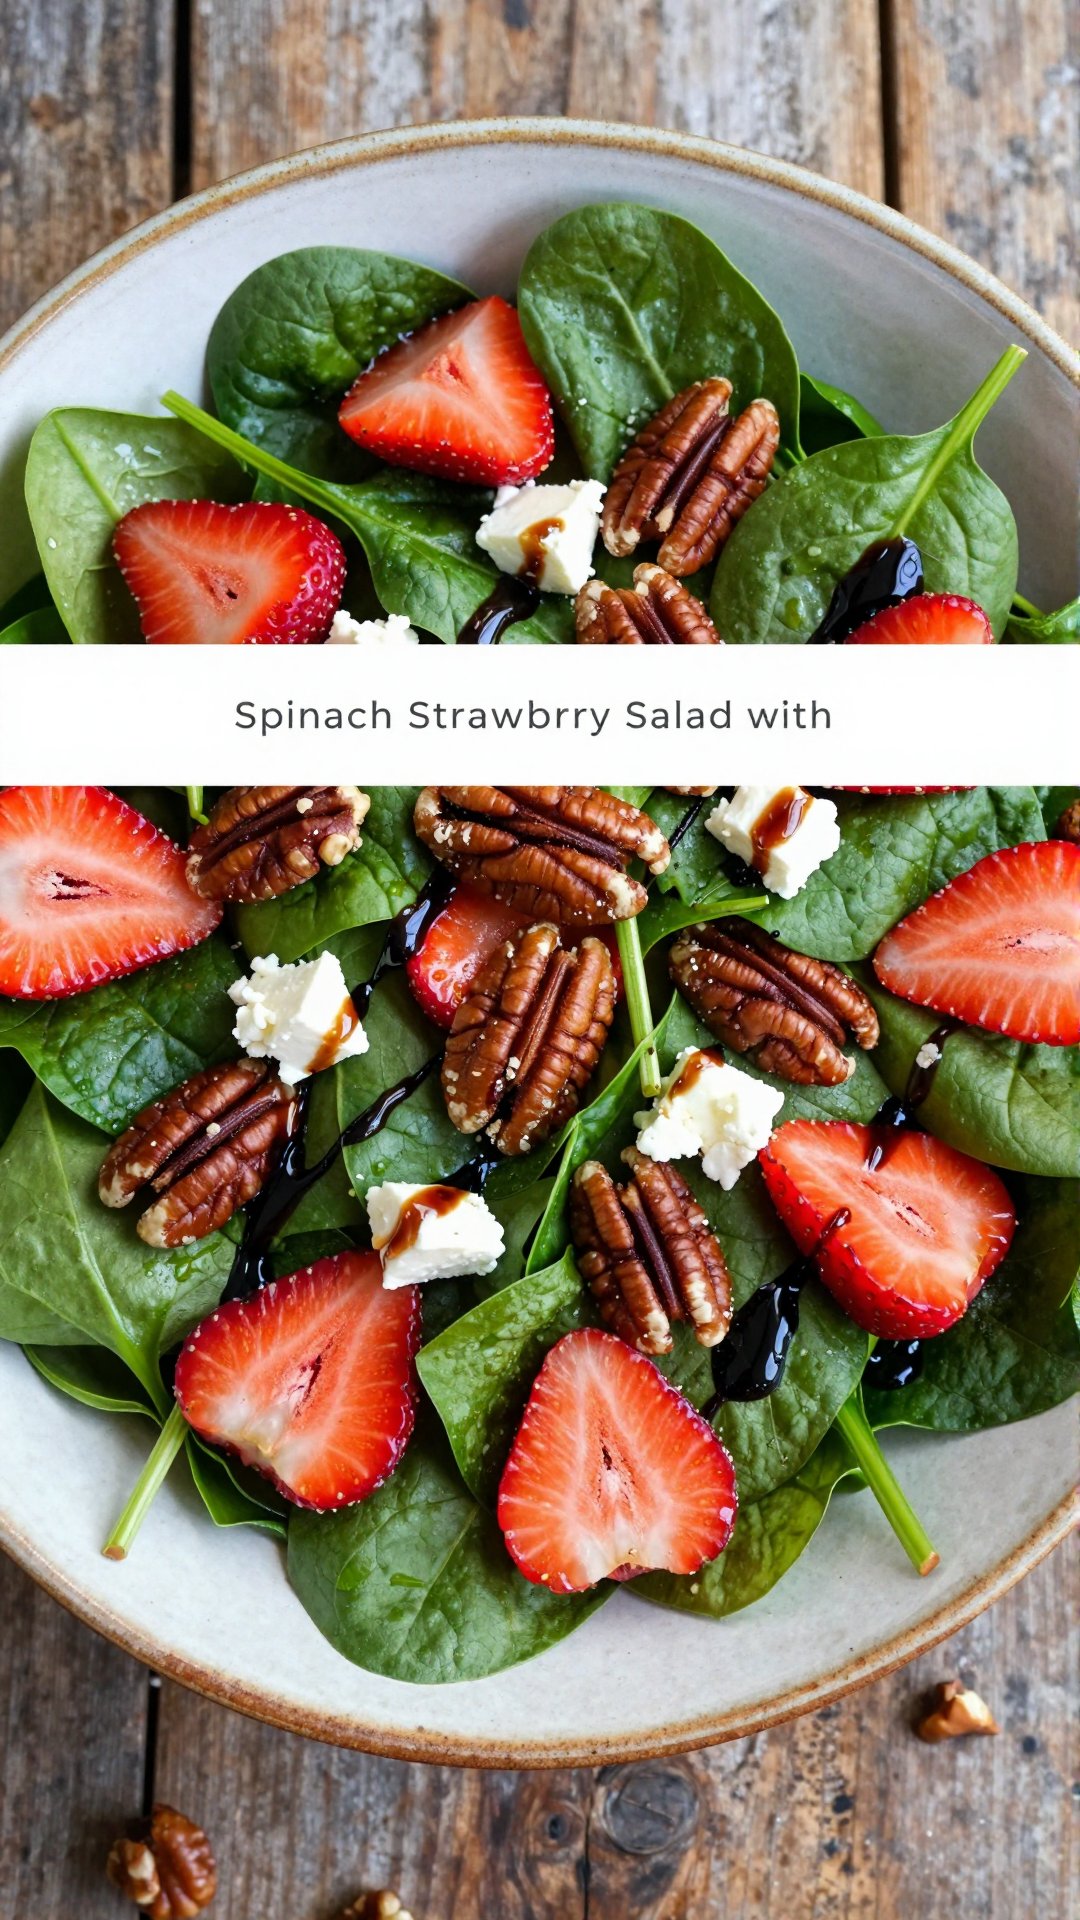
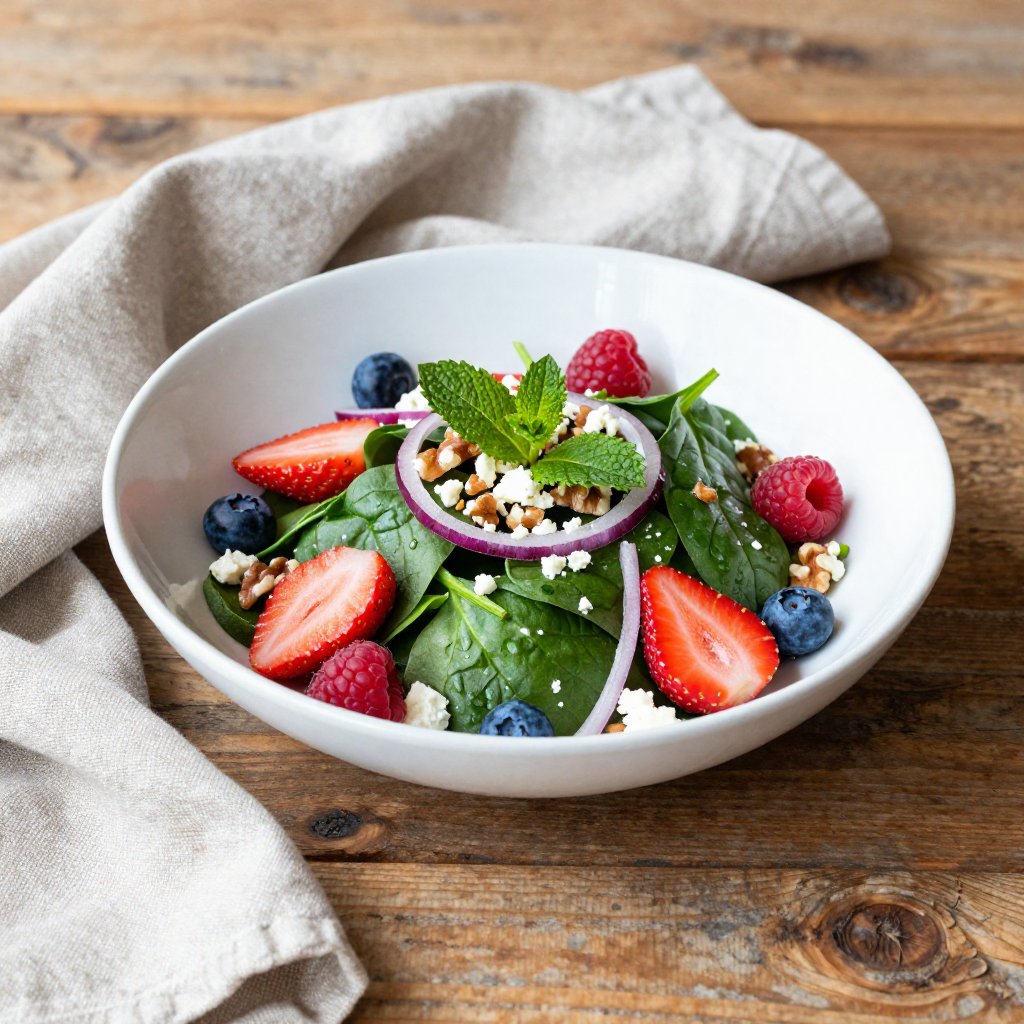
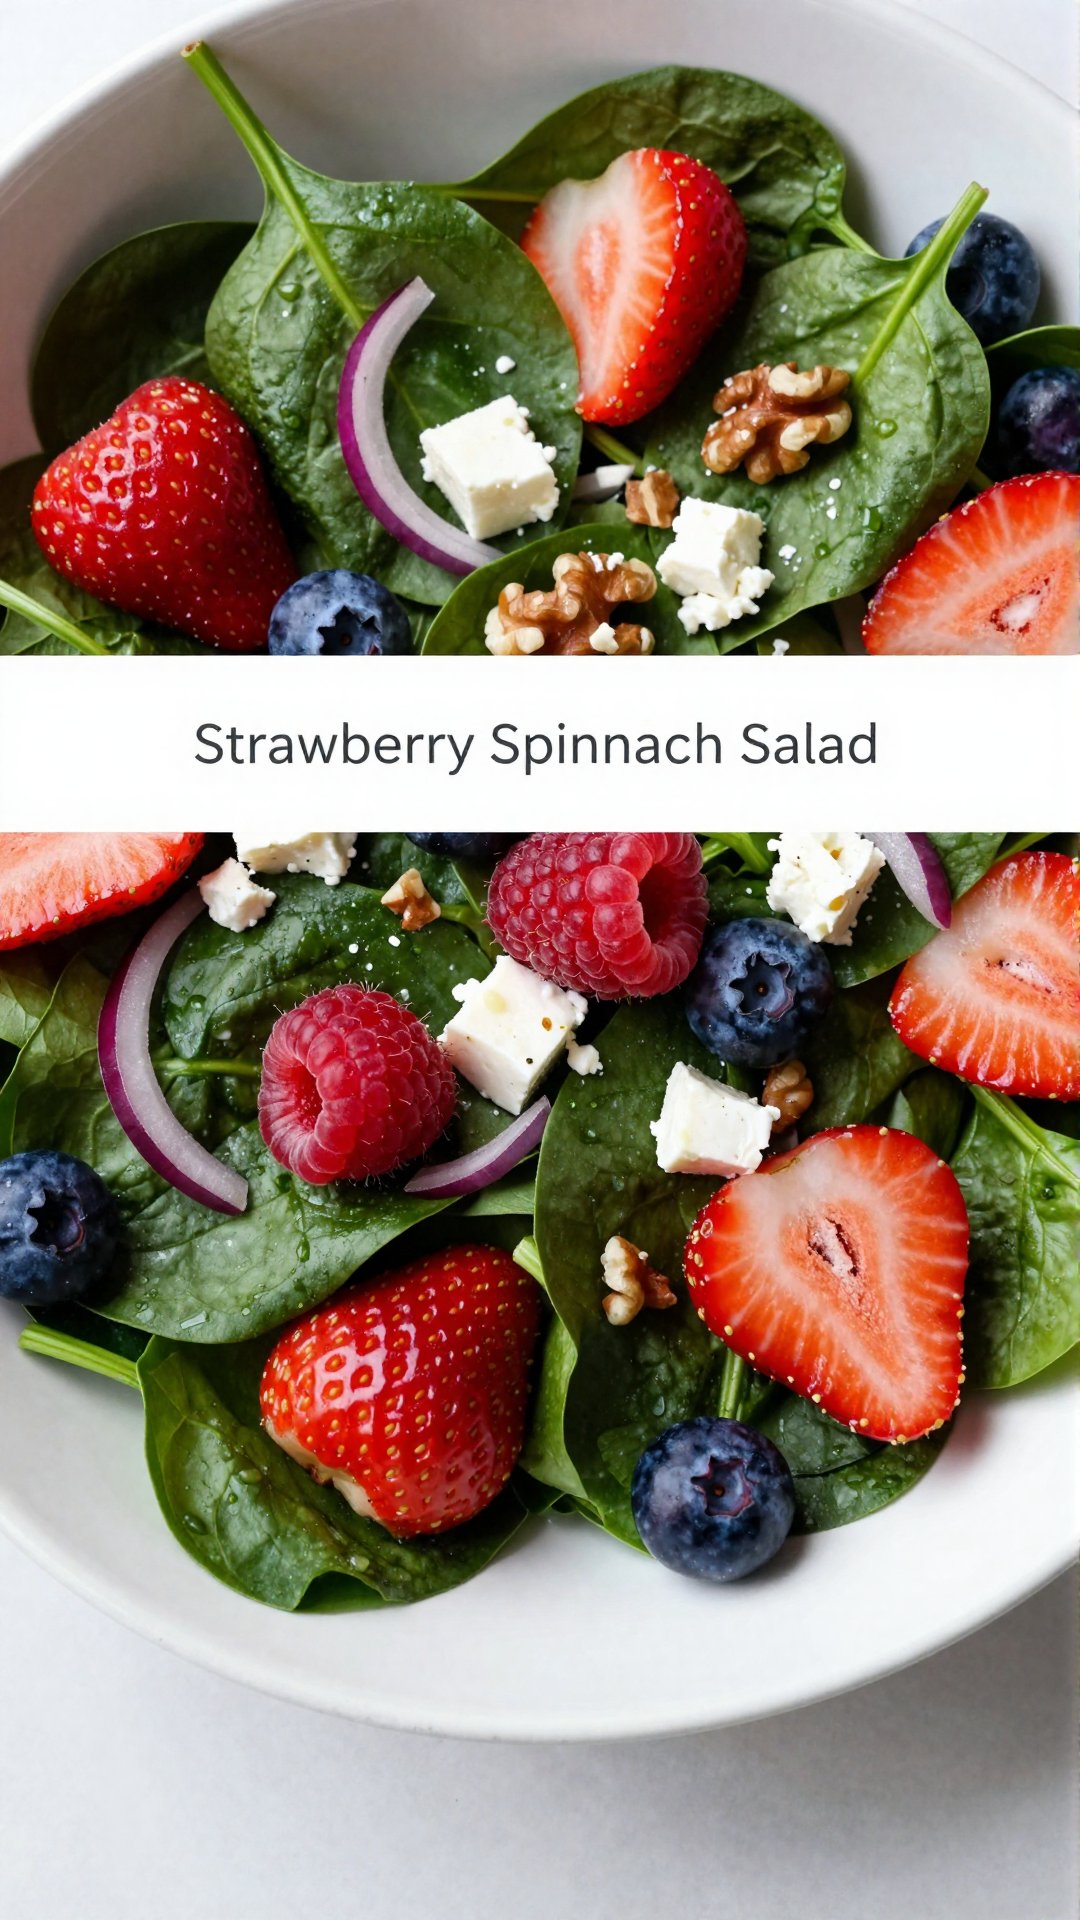
Easy Spinach Strawberry Salad with Balsamic Dressing: A Taste of Portland Sunshine

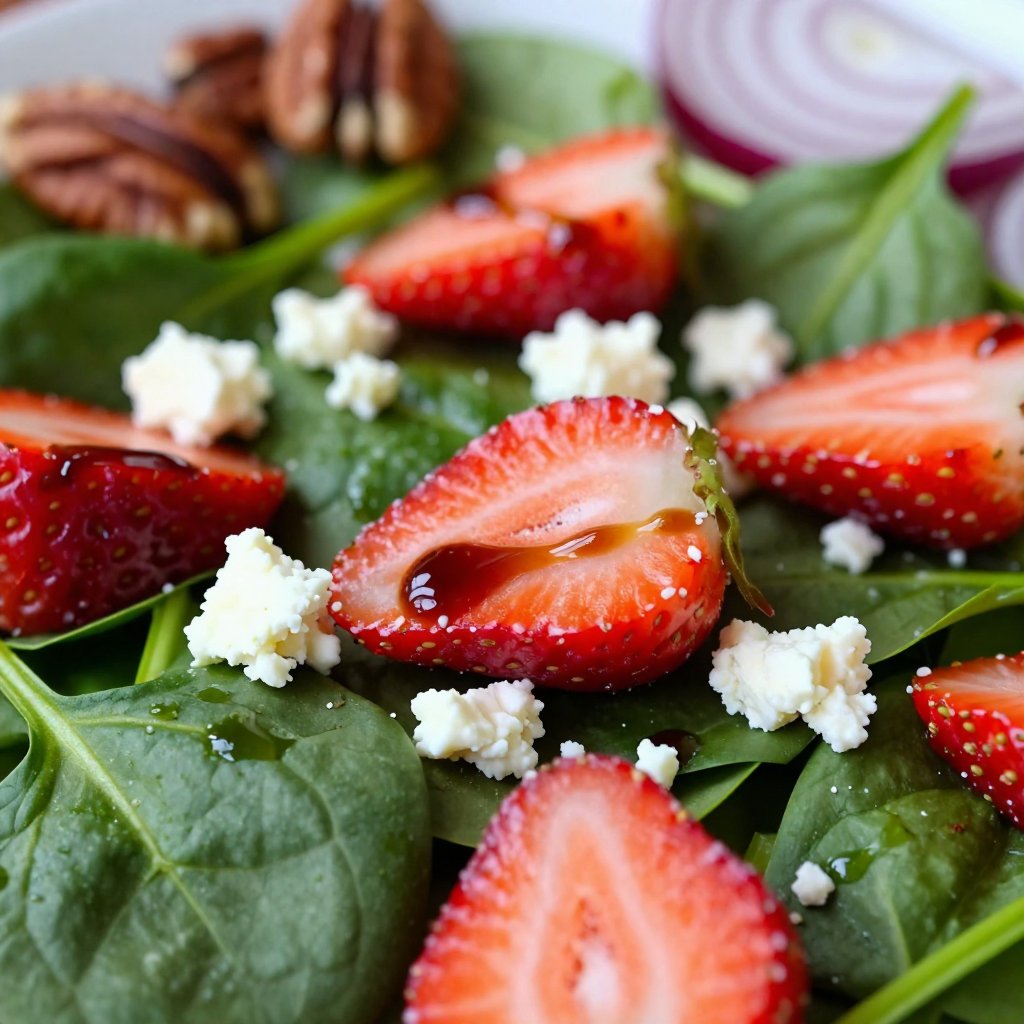
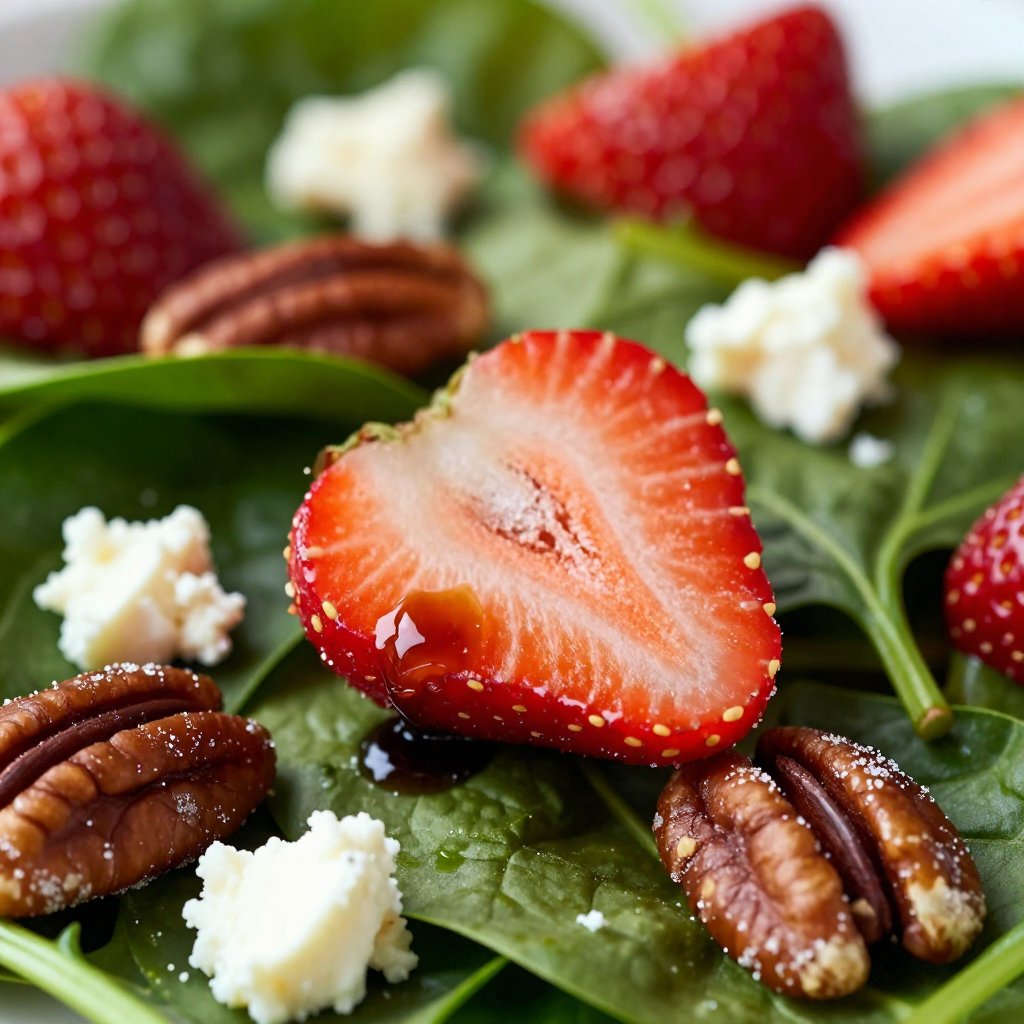
Hello, friends! Avery here, from my little kitchen in Portland. Today, I want to share a recipe that sings of spring (or summer, or honestly, any time you need a little sunshine on your plate): Easy Spinach Strawberry Salad with Balsamic Dressing. This isn’t just a salad; it’s a celebration of fresh, vibrant ingredients that come together in perfect harmony. Think sweet strawberries, peppery spinach, a touch of tangy red onion, and a drizzle of homemade balsamic dressing that will make your taste buds sing. Trust me, this will become a staple in your kitchen, just like it is in mine.

Why You’ll Absolutely Love This Strawberry Spinach Salad

In my journey back to health, I learned that food should nourish both the body and the soul. This spinach strawberry salad does exactly that. It’s quick, it’s easy, and it’s bursting with flavor and nutrients. But beyond the health benefits, it’s simply delicious! Here’s why I know you’ll adore it:

  • Speedy Prep: From start to finish, this salad comes together in under 15 minutes. Perfect for busy weeknights or a quick lunch.
  • Flavor Explosion: The combination of sweet strawberries, spicy red onion, and tangy balsamic dressing is a flavor sensation. It’s a dish that truly excites the palate.
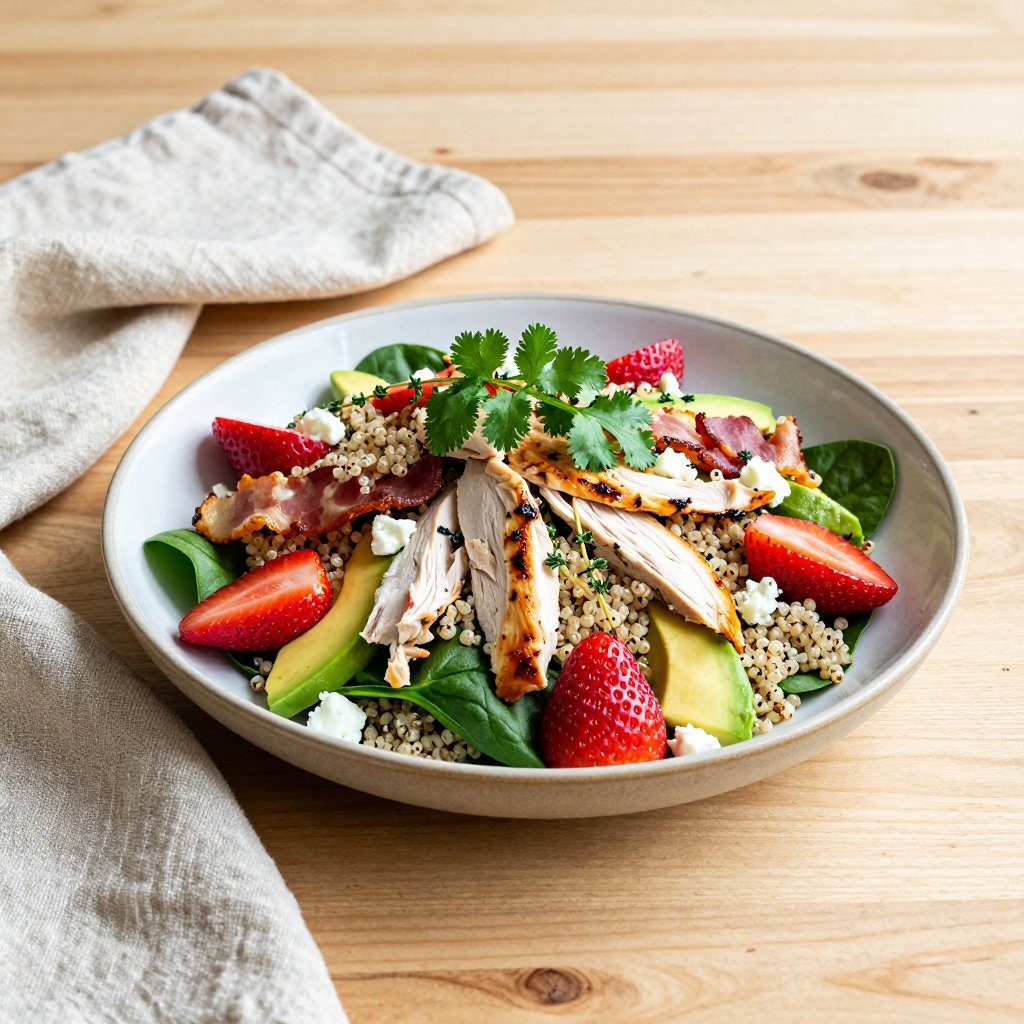
  • Versatile: This salad is fantastic as a light lunch, a side dish, or even a base for adding grilled chicken or fish for a more substantial meal. You can easily adapt it to your liking.
  • Healthy and Nutritious: Packed with vitamins, minerals, and antioxidants, this salad is a powerhouse of goodness. Plus, it’s naturally gluten-free and vegetarian.
  • That Homemade Dressing: Seriously, the balsamic dressing is a game-changer. Once you taste it, you’ll never want to buy store-bought again.

This *salad is* more than just a bunch of ingredients thrown together; it’s an experience. *This salad* is a reminder that healthy eating can be easy, enjoyable, and incredibly satisfying.

Ingredients: Your Palette of Flavors

Here’s what you’ll need to create this culinary masterpiece. Don’t worry if you don’t have everything on hand; feel free to substitute based on what you have and what you love. Remember, cooking should be fun and forgiving!

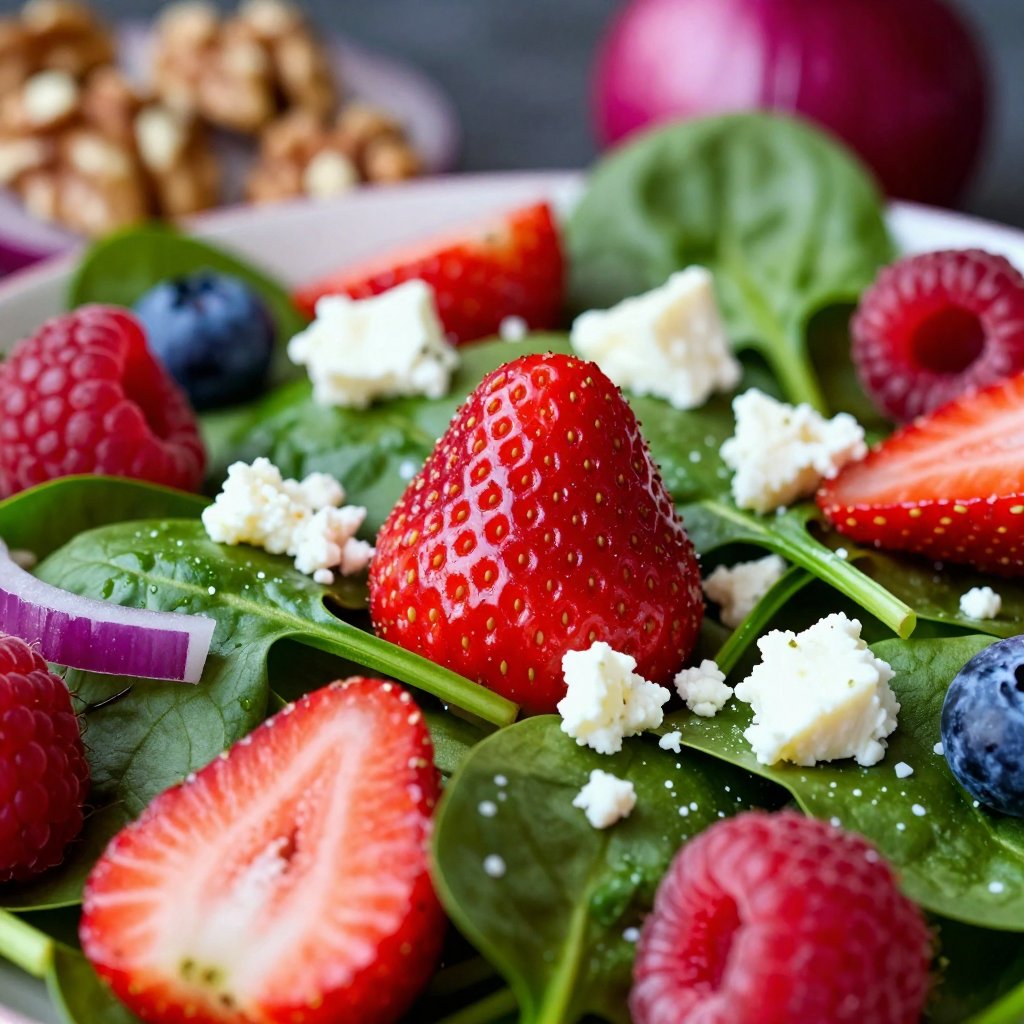
  • 6 cups fresh *baby spinach*
  • 2 cups strawberries, hulled and sliced
  • 1/2 cup red onion, thinly sliced
  • 1/2 cup crumbled feta cheese (optional)
  • 1/4 cup walnuts, chopped (or pecans)
  • 1/4 cup *balsamic vinegar*
  • 1/2 cup *olive oil*
  • 1 teaspoon honey or maple syrup
  • Salt and pepper to taste
Recipe Image

Let’s Make Magic: Step-by-Step Instructions

*You can* practically taste the sunshine already, right? Here’s how to bring *this spinach strawberry salad* to life:

  1. Prep the Greens and Berries: Rinse and dry the *baby spinach* thoroughly. Hull and slice the strawberries, and thinly slice the red onion. A salad spinner is your best friend for getting the spinach perfectly dry.
  2. Whisk the Dressing: In a small bowl, whisk together *balsamic vinegar*, *olive oil*, honey (or maple syrup), salt, and pepper. Taste and adjust the seasoning as needed. If *you re* using good quality balsamic, the dressing will be thick and rich.
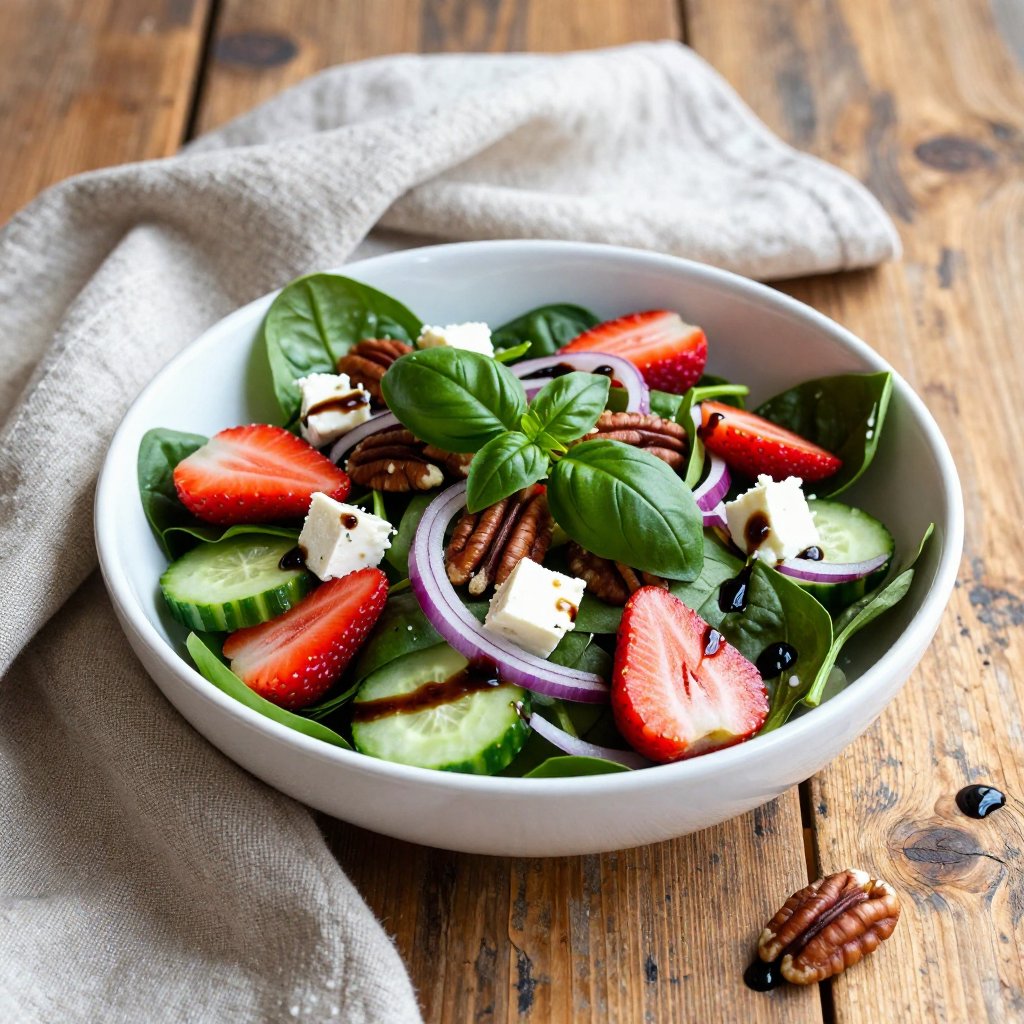
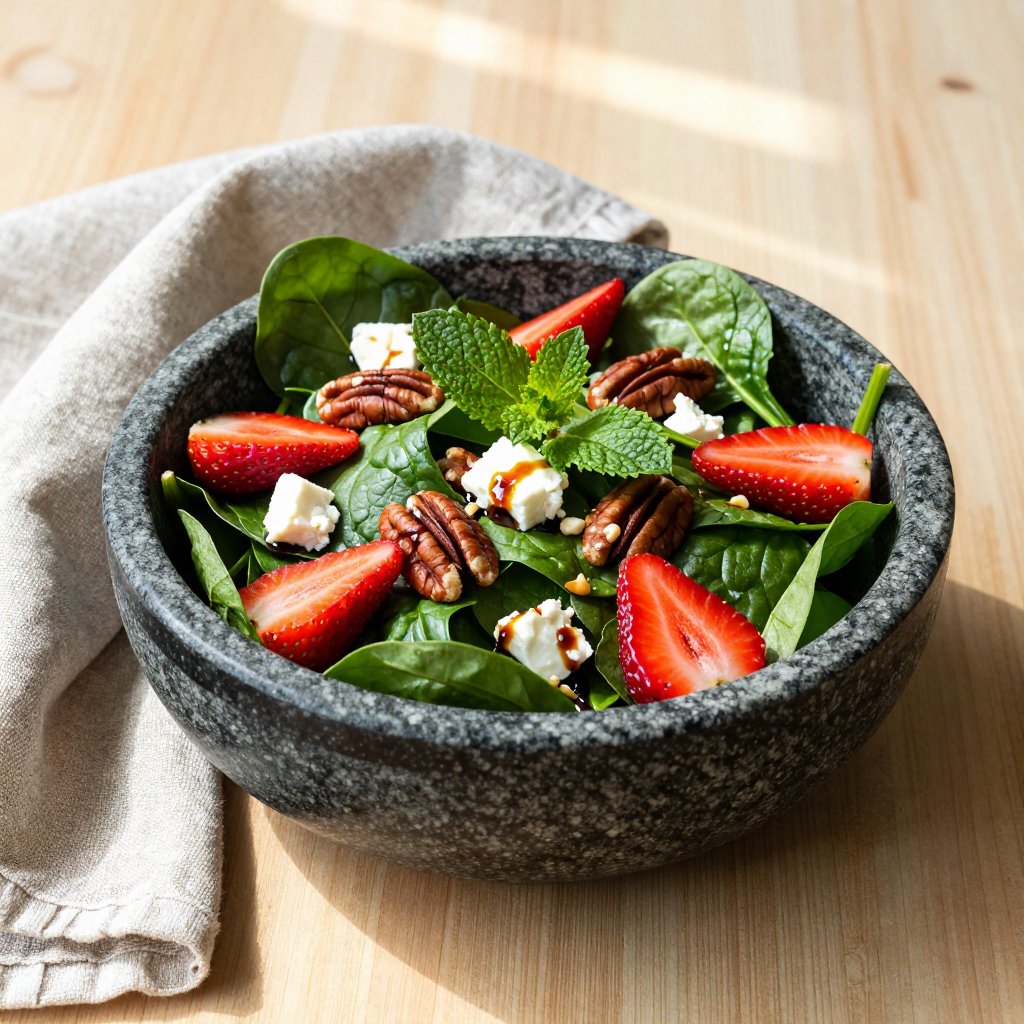
  3. Assemble the Salad: In a large bowl, combine *spinach*, strawberries, red onion, walnuts, and feta (if using). Drizzle with the dressing and mix gently. Be careful not to overdress the salad, as it can become soggy.
  4. Serve and Enjoy: Serve immediately, or refrigerate *without dressing* until ready to eat. This *strawberry spinach salad* is best enjoyed fresh, so *serve it* soon after assembling.

*It’s* really that simple! In just a few minutes, *you can* have a vibrant and delicious salad ready to enjoy.

Avery’s Pro Tips for the Perfect Salad

Over the years, I’ve learned a few tricks to elevate this salad from good to extraordinary. Here are some of my insider tips:

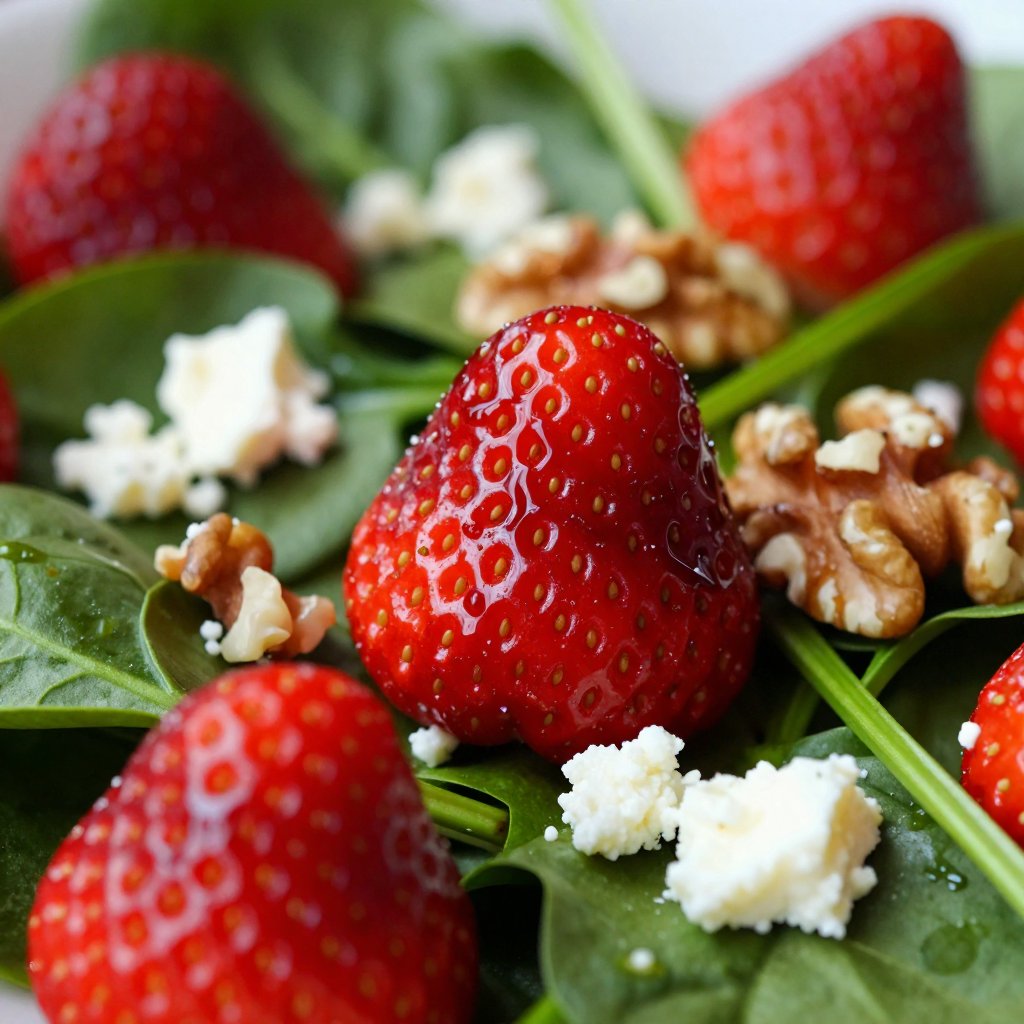
  • Quality Ingredients Matter: Use the freshest *baby spinach* and ripest strawberries you can find. The better the ingredients, the better the salad.
  • Toast Your Nuts: Toasting the walnuts or pecans before adding them to the salad enhances their flavor and adds a satisfying crunch. Simply toast them in a dry skillet over medium heat for a few minutes, until fragrant.
  • Thinly Slice the Red Onion: No one wants a mouthful of raw onion. Thinly slicing the red onion mellows its flavor and makes it more palatable. You can even soak the sliced onion in cold water for a few minutes to further reduce its sharpness.
  • Don’t Overdress: Add the *balsamic dressing* gradually, tossing gently until the salad is lightly coated. Too much dressing will make the salad soggy.
  • Make it Ahead (Sort Of): *You can* prep all the ingredients ahead of time, but wait to dress the salad until just before serving. This will prevent the spinach from wilting.

Common Mistakes to Avoid

Even the simplest recipes can have pitfalls. Here’s what to watch out for when making *strawberry spinach salad*:

  • Wet Spinach: Make sure the *baby spinach* is completely dry before assembling the salad. Wet spinach will make the salad soggy and dilute the flavor of the dressing.
  • Overripe Strawberries: Avoid using overly ripe or mushy strawberries, as they will make the salad mushy. Choose firm, ripe strawberries with a vibrant red color.
  • Pre-Made Dressing: While convenient, store-bought *balsamic dressing* often contains added sugar and preservatives. Making your own *homemade balsamic dressing* is quick, easy, and tastes so much better.
  • Skipping the Seasoning: Don’t forget to season the dressing with salt and pepper. A little seasoning goes a long way in enhancing the flavors of the salad.

Variations: Make It Your Own

The beauty of this salad is that *you can* easily customize it to your liking. Here are a few variations to inspire you:

  • Add Protein: Top the salad with grilled chicken, salmon, or tofu for a more substantial meal.
  • Swap the Cheese: If you’re not a fan of feta, try goat cheese, blue cheese, or Parmesan cheese.
  • Add Other Fruits: Blueberries, raspberries, or blackberries would be delicious additions to this salad.
  • Use Different Nuts: Pecans, almonds, or sunflower seeds would be great alternatives to walnuts.
  • Make it Vegan: Omit the feta cheese or use a vegan feta alternative. Substitute maple syrup for honey in the dressing.
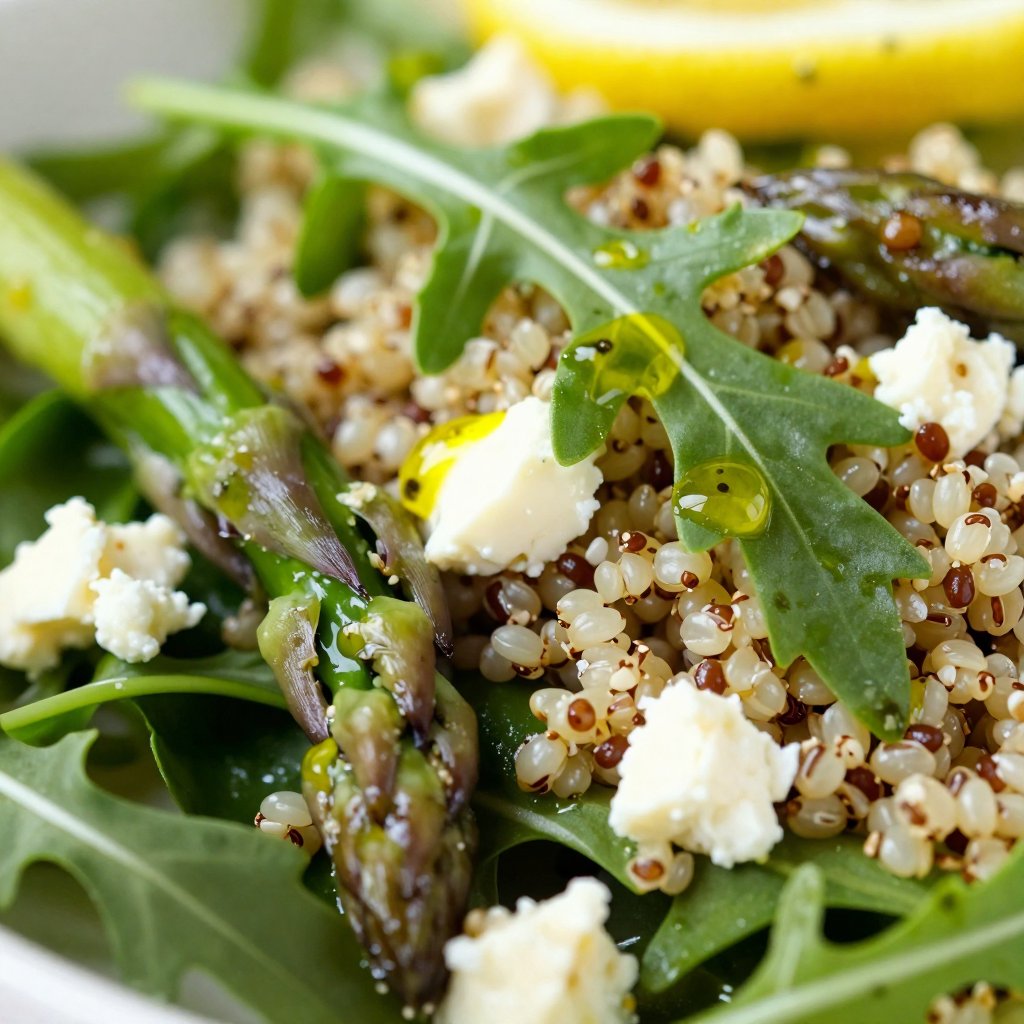
  • Change the Greens: While *baby spinach* is my go-to, *you can* also use mixed greens or arugula.

Feel free to get creative and experiment with different combinations of ingredients. The possibilities are endless!

Storage Tips

This *strawberry spinach salad* is best enjoyed fresh, but *you can* store it for a short period of time if needed.

  • Store the salad *without dressing* in an airtight container in the refrigerator for up to 24 hours. Add the dressing just before serving.
  • Store the *balsamic dressing* in a separate airtight container in the refrigerator for up to a week.

Frequently Asked Questions (FAQ)

  • Can I make this salad ahead of time? Yes, *you can* prep all the ingredients ahead of time, but wait to dress the salad until just before serving.
  • Can I use frozen strawberries? Fresh strawberries are best, but *you can* use frozen strawberries in a pinch. Thaw them completely and drain off any excess liquid before adding them to the salad.
  • What kind of *balsamic vinegar* should I use? Use a good quality *balsamic vinegar* for the best flavor. Look for a *balsamic vinegar* that is thick and syrupy.
  • Can I use a different type of oil in the dressing? Yes, *you can* use any type of oil you like. *Olive oil* is my favorite, but avocado oil or grapeseed oil would also work well.

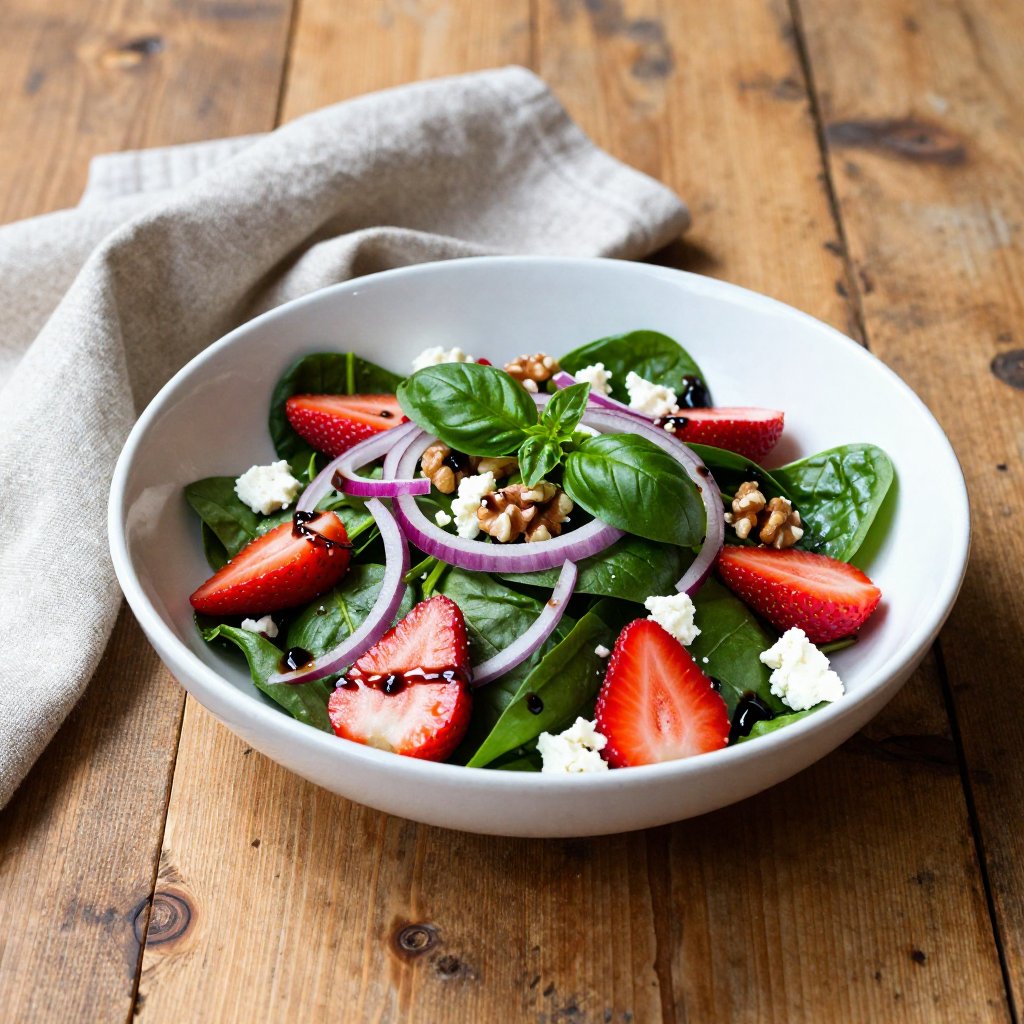
Serving Suggestions: The Perfect Presentation

This *dish that* is the *strawberry spinach salad* is incredibly versatile and can be enjoyed in many ways. Here are a few ideas:

  • Lunch: Enjoy it as a light and refreshing lunch, perhaps with a side of whole-wheat bread or crackers.
  • Side Dish: *Serve it* as a side dish alongside grilled chicken, fish, or steak.
  • Potluck: Bring it to *your next* potluck or barbecue. It’s always a crowd-pleaser.
  • Brunch: Add it to your brunch spread for a healthy and delicious option.
  • Salad Bar: Include all the components of the salad in your salad bar, allowing guests to create their own custom creations.

No matter how *you* choose to *meal serve* *this salad*, I hope it brings a little joy and sunshine to your day. Remember, cooking is an act of self-care. Embrace the process, experiment with flavors, and most importantly, have fun! From my Portland kitchen to yours, happy cooking!

The *flavor profile* of this *strawberry salad* is one that is sure to please. The *dressing is* the perfect complement to the fruit and *baby spinach*. *Spinach salad with* strawberries is a treat!

Easy Spinach Strawberry Salad with Balsamic Dressing

Prep Time 15 minutes
Total Time 15 minutes
Servings 4 servings
Calories 250
A refreshing and vibrant salad combining the sweetness of strawberries with the earthy flavor of spinach, topped with a tangy balsamic dressing. Perfect as a light lunch or a side dish for any occasion.

Ingredients

Salad

  • 6 cups fresh baby spinach
  • 2 cups strawberries (hulled and sliced)
  • 1/2 cup red onion (thinly sliced)
  • 1/2 cup crumbled feta cheese (optional)
  • 1/4 cup walnuts (chopped (or pecans))

Dressing

  • 1/4 cup balsamic vinegar
  • 1/2 cup olive oil
  • 1 teaspoon honey or maple syrup
  • to taste Salt and pepper

Instructions 

  • Rinse and dry spinach. Hull and slice strawberries and red onion.
  • Whisk balsamic vinegar, olive oil, honey, salt, and pepper in a bowl.
  • Combine spinach, strawberries, red onion, walnuts, and feta. Drizzle with dressing and mix gently.
  • Serve immediately or refrigerate without dressing.

Notes

For best results, add the dressing just before serving to prevent the spinach from wilting.
Calories: 250kcal
Cost: $8
Course: Salad
Cuisine: Mediterranean
Keyword: Spinach

Nutrition

Calories: 250kcal | Carbohydrates: 15g | Protein: 5g | Fat: 20g | Sodium: 100mg
pin

Hello, friends! Avery Collins here, from my cozy kitchen in Portland. Let’s be honest, sometimes the craving for a comforting bowl of pasta hits hard, and you need something quick, delicious, and soul-satisfying. This Creamy Roast Garlic and Lemon Pasta Sauce is *it*. It’s the kind of recipe that makes you feel like you’ve spent hours slaving away, when really, it’s ready in under 30 minutes. I promise, this will become a staple in your weeknight rotation. This **pasta sauce is** incredible!

My journey to this recipe started, as many of my kitchen adventures do, with a need for something that felt good from the inside out. I remember those early days of trying to navigate healthy eating – the bland tofu, the grassy smoothies. But somewhere along the way, I discovered the magic of simple ingredients, prepared with love and intention. And that’s exactly what this recipe embodies.

Why You’ll Love This Creamy Roast Garlic and Lemon Pasta Sauce

Seriously, what’s not to love? This sauce is:

  • Quick and Easy: From start to finish, you’re looking at under 30 minutes. **Perfect for** busy weeknights.
  • Packed with Flavor: The combination of sweet, mellow **roasted garlic**, bright lemon, and creamy Parmesan is simply divine.
  • Versatile: This **sauce is** amazing with any type of pasta, and you can easily add protein or veggies to make it a complete meal.
  • Comforting: There’s something about a creamy pasta dish that just feels like a warm hug.
  • Customizable: Adjust the lemon, garlic, or spice levels to suit your taste.

**This creamy roast** garlic and lemon pasta sauce is truly a winner. **You’re** going to absolutely love it!

Ingredients for Creamy Roast Garlic and Lemon Pasta Sauce

  • 2 whole garlic bulbs
  • 1 cup heavy cream
  • 1 lemon, juice and zest
  • 1/2 cup Parmesan cheese, finely grated
  • 2 tablespoons butter
  • Salt, to taste
  • Black pepper, to taste
  • 1/4 teaspoon red pepper flakes (optional)
  • 1 tablespoon fresh thyme or parsley, for garnish
Recipe Image

How to Make Creamy Roast Garlic and Lemon Pasta Sauce: Step-by-Step

Alright, let’s get cooking! Here’s how to bring this deliciousness to life:

Step 1: Roast the Garlic

Preheat your oven to 400°F (200°C). Slice the tops off the **garlic** bulbs (about 1/4 inch). Drizzle each bulb with a little olive oil, wrap them in aluminum foil, and roast for 35-40 minutes, or until the cloves are golden brown and very soft. The **roasted garlic** aroma alone is worth the effort!

Step 2: Sauté the Garlic

While the **garlic and** lemon are working their magic in the oven, melt the butter in a saucepan over medium heat. Once the **roasted garlic** is cool enough to handle, squeeze the cloves out of their skins and mash them with a fork. Add the mashed **garlic** to the melted butter and sauté for 1-2 minutes, until fragrant. Be careful not to burn **the garlic**!

Step 3: Create the Creamy Sauce

Pour in the heavy cream and stir to combine with **the garlic** and butter. Simmer for 3-4 minutes, allowing the cream to thicken slightly. Now, add the lemon **juice and** zest. Stir gently to incorporate all that bright, citrusy flavor.

Step 4: Finish the Sauce

Add the grated Parmesan cheese and stir until it’s melted and **the sauce is** smooth and luscious. Season with salt, black pepper, and red pepper flakes (if you like a little kick). Taste and adjust the seasonings as needed. This **creamy roast garlic and lemon** pasta sauce is coming together beautifully!

Step 5: Toss with Pasta

While **the sauce** is simmering, cook your favorite pasta according to package directions. Drain the pasta, reserving about 1/2 cup of the pasta water. Toss the drained pasta into the **creamy** sauce, adding a splash of pasta water if needed to help the sauce cling to the noodles. Stir gently to coat the pasta evenly.

Step 6: Serve and Garnish

Plate the pasta and garnish with fresh thyme or parsley, extra Parmesan cheese, and a sprinkle of red pepper flakes, if desired. Serve immediately and enjoy this **creamy roast garlic and lemon pasta**!

Pro Tips for the Best Creamy Roast Garlic and Lemon Pasta Sauce

  • Roast the Garlic Properly: Don’t skimp on the roasting time! The garlic should be very soft and golden brown for the best flavor.
  • Use Fresh Lemon Juice and Zest: Bottled lemon juice just doesn’t compare to the bright, vibrant flavor of fresh lemon.
  • Don’t Overcook the Sauce: Simmering the sauce for too long can cause it to become too thick or separate.
  • Reserve Pasta Water: The starchy pasta water is a secret weapon for creating a perfectly emulsified sauce.
  • Taste and Adjust: Taste the sauce at each stage and adjust the seasonings to your liking.

Common Mistakes to Avoid

  • Burning the Garlic: Keep a close eye on the garlic while it’s sautéing, as burned garlic can taste bitter.
  • Overcooking the Pasta: Nobody likes mushy pasta! Cook it al dente for the best texture.
  • Adding Cold Cheese: Make sure your Parmesan cheese is at room temperature for easier melting.
  • Using Low-Fat Cream: The higher fat content of heavy cream is essential for creating a truly creamy sauce.
  • Forgetting to Season: Salt and pepper are key to bringing out the flavors of the sauce.

Variations on Creamy Roast Garlic and Lemon Pasta Sauce

Want to mix things up a bit? Here are some delicious variations on this recipe:

  • Add Protein: Toss in grilled chicken, shrimp, or sausage for a heartier meal.
  • Add Veggies: Sauté some spinach, asparagus, or mushrooms and add them to the sauce.
  • Make it Spicy: Increase the amount of red pepper flakes, or add a pinch of cayenne pepper.
  • Use Different Cheese: Try Pecorino Romano or Asiago cheese instead of Parmesan.
  • Add Herbs: Fresh basil, oregano, or rosemary would all be delicious additions to this sauce.

How to Store Leftover Creamy Roast Garlic and Lemon Pasta Sauce

Store leftover sauce in an airtight container in the refrigerator for up to 3 days. Reheat gently over low heat, adding a splash of milk or cream if needed to thin it out. This **creamy roast garlic and lemon pasta** is even great the next day!

Frequently Asked Questions (FAQ)

  • Can I use pre-minced garlic instead of roasting whole bulbs? While you *can*, I highly recommend roasting the garlic for the best flavor. The roasting process mellows the garlic and brings out its sweetness.
  • Can I make this sauce dairy-free? You could try using a plant-based cream alternative, but be aware that it may affect the taste and texture of the sauce. Nutritional yeast can add a cheesy flavor if you omit the Parmesan.
  • Can I freeze this sauce? I don’t recommend freezing creamy sauces, as they can sometimes separate upon thawing.
  • What kind of pasta is best with this sauce? Any type of pasta will work, but I especially love it with linguine, spaghetti, or fettuccine.
  • Is this recipe gluten-free? No, unless you use gluten-free pasta. The sauce itself is naturally gluten-free.

Serving Suggestions for Creamy Roast Garlic and Lemon Pasta Sauce

This **lemon pasta sauce** is delicious on its own, but here are some ideas to elevate your meal:

  • Serve with a side of crusty bread for soaking up the sauce.
  • Pair with a simple green salad.
  • Top with toasted pine nuts or breadcrumbs for added texture.
  • Add a squeeze of fresh lemon juice right before serving to brighten the flavors.

And there you have it, friends! A simple, satisfying, and utterly delicious Creamy Roast **Garlic and Lemon Pasta Sauce** that’s sure to become a favorite in your home. I hope you enjoy it as much as I do! Happy cooking!

This **garlic and lemon pasta** is a great way to enjoy a quick and easy meal.

Remember that **this sauce** is all about balance. Feel free to adjust the ingredients to your liking. The key is to have fun and enjoy the process!

I often find that the best meals are the ones that are made with love and shared with good company. This **lemon pasta sauce** is perfect for both!

Until next time, happy cooking and may your kitchen always smell like rosemary and garlic!

Creamy Roast Garlic and Lemon Pasta Sauce

Prep Time 10 minutes
Cook Time 45 minutes
Total Time 55 minutes
Servings 4 servings
Calories 450
Indulge in a rich and flavorful pasta sauce featuring roasted garlic, zesty lemon, and creamy Parmesan. This sauce is perfect for a quick and satisfying meal.

Ingredients

Ingredients

  • 2 whole garlic bulbs
  • 1 cup heavy cream
  • 1 lemon, juice and zest
  • 1/2 cup Parmesan cheese, finely grated
  • 2 tablespoons butter
  • to taste Salt
  • to taste Black pepper
  • 1/4 teaspoon red pepper flakes (optional)
  • 1 tablespoon fresh thyme or parsley, for garnish

Instructions 

  • Preheat oven to 400°F (200°C). Roast garlic bulbs for 35-40 minutes until soft.
  • Melt butter in a saucepan. Sauté mashed roasted garlic for 1-2 minutes.
  • Pour in heavy cream and simmer for 3-4 minutes. Add lemon juice and zest.
  • Add Parmesan cheese and stir until melted. Season with salt, pepper, and red pepper flakes (if using).
  • Toss cooked pasta into the sauce.
  • Garnish with herbs, extra Parmesan, and red pepper flakes if desired. Serve immediately.

Notes

For a richer flavor, use freshly grated Parmesan cheese.
Calories: 450kcal
Cost: $8
Course: Main Course
Cuisine: Italian
Keyword: garlic

Nutrition

Calories: 450kcal | Carbohydrates: 30g | Protein: 15g | Fat: 32g | Sodium: 300mg
pin

Hey there, friend! It’s Avery, from my cozy kitchen in Portland. Let’s talk about comfort food that feels good, okay? I’m sharing my Easy Lemon Chicken Pasta recipe – the kind of dish that brightens even the rainiest Oregon day. This isn’t just food; it’s a hug in a bowl. It’s the perfect blend of zesty lemon, savory chicken, and comforting pasta – a symphony of flavors that comes together in minutes. Trust me, this will become a weeknight staple.

Why You’ll Love This Lemon Chicken Pasta

This recipe isn’t just about a quick dinner; it’s about creating a moment of joy and nourishment. I want you to feel good about what you’re eating, and excited about the process!

  • Quick & Easy: Ready in under 30 minutes – perfect for busy weeknights.
  • Flavorful: The bright lemon sauce perfectly complements the savory chicken and pasta.
  • Versatile: Easily customizable with your favorite pasta and vegetables.
  • Comforting: A dish that feels like a warm hug on a chilly evening.
  • Uses Simple Ingredients: You probably have most of these items in your pantry already.

When I first started cooking, I was intimidated by fancy recipes. This Lemon Chicken Pasta is the opposite of that. It’s forgiving, adaptable, and guaranteed to bring a smile to your face. It’s the kind of recipe that makes you feel like a kitchen wizard, even if you’re just starting out. And honestly, who doesn’t love a little kitchen magic?

Ingredients for Lemon Chicken Pasta

Here’s what you’ll need to create this little masterpiece. I always encourage you to use the best quality ingredients you can find. It truly makes a difference in the final dish! Remember, cooking is about celebrating the ingredients, not just following instructions.

  • 1 pound boneless, skinless chicken breasts, cut into bite-sized pieces
  • 1 pound pasta (spaghetti, fettuccine, or penne)
  • 2 tablespoons olive oil
  • 2 cloves garlic, minced
  • 1/2 cup chicken broth
  • 1/4 cup lemon juice
  • 2 tablespoons butter
  • 1/4 cup grated Parmesan cheese
  • 2 tablespoons chopped fresh parsley
  • Salt and pepper to taste
  • Lemon zest (optional, for garnish)
Recipe Image

How to Make Lemon Chicken Pasta: Step-by-Step

Alright, let’s get cooking! Don’t worry if you’re not a pro; this recipe is practically foolproof. Remember, cooking should be fun, so don’t stress about perfection. Turn on some music, pour yourself a glass of wine (or tea!), and let’s create something delicious.

  1. Cook the pasta: Cook pasta according to package directions. Reserve about 1/2 cup of the pasta water before draining. The pasta water is key to a creamy sauce!
  2. Sauté the chicken: While the pasta is cooking, heat olive oil in a large skillet over medium-high heat. Add the chicken and cook until browned and cooked through. Make sure the chicken is cooked all the way through.
  3. Add garlic: Add garlic to the skillet and cook for about 30 seconds until fragrant. Be careful not to burn the garlic!
  4. Make the sauce: Pour in chicken broth and lemon juice. Bring to a simmer and cook for a few minutes, allowing the sauce to reduce slightly. This will concentrate the flavors.
  5. Finish the sauce: Stir in butter and Parmesan cheese until melted and smooth. This creates a luscious, creamy texture.
  6. Combine everything: Add the cooked pasta to the skillet with the chicken and lemon sauce. Toss to coat. Make sure all the pasta is coated in the delicious lemon sauce.
  7. Adjust consistency: If the sauce is too thick, add a little of the reserved pasta water until desired consistency is reached. This is where that reserved pasta water comes in handy!
  8. Season: Season with salt and pepper to taste. Don’t be afraid to taste and adjust as needed.
  9. Garnish: Garnish with fresh parsley and lemon zest (if using). Fresh herbs always add a pop of flavor and color.
  10. Serve: Serve immediately and enjoy!

Avery’s Pro Tips for Perfect Lemon Chicken Pasta

Okay, friend, let’s talk about a few insider secrets to take this dish from good to absolutely amazing. These are the little things I’ve learned over time that make a big difference.

  • Don’t Overcook the Chicken: Overcooked chicken can be dry and tough. Cook it until it’s just cooked through for the most tender results.
  • Use Fresh Lemon Juice: Bottled lemon juice just doesn’t compare to the bright, zesty flavor of fresh lemon juice. Trust me on this one!
  • Salt Your Pasta Water: This is crucial for flavorful pasta. Add a generous amount of salt to the boiling water before adding the pasta.
  • Reserve Pasta Water: Don’t skip this step! The starchy pasta water helps to create a creamy, emulsified sauce.
  • Taste and Adjust: Don’t be afraid to taste the sauce and adjust the seasoning as needed. Add more lemon juice for extra tang, or more Parmesan for extra richness.
  • Editor’s tip: This recipe can be doubled or tripled easily for a crowd.

Common Mistakes to Avoid

We all make mistakes in the kitchen – it’s part of the learning process! Here are a few common pitfalls to watch out for when making Lemon Chicken Pasta:

  • Burning the Garlic: Burnt garlic tastes bitter and can ruin the whole dish. Keep a close eye on it and cook it over medium heat.
  • Using Too Much Lemon Juice: Too much lemon juice can make the sauce overly acidic. Start with the recommended amount and add more to taste.
  • Not Cooking the Pasta Al Dente: Overcooked pasta will become mushy in the sauce. Cook it al dente, which means “to the tooth” – slightly firm to the bite.
  • Forgetting to Season: Seasoning is key to bringing out the flavors of the dish. Don’t forget to season both the chicken and the sauce with salt and pepper.

My mom always said that cooking is an art, not a science. And while I believe that, these little tips can help you navigate the process with more confidence!

Lemon Chicken Pasta Variations

One of the best things about this recipe is how easily it can be customized to your liking. Here are a few ideas to get you started:

  • Add Vegetables: Toss in some spinach, asparagus, broccoli, or sun-dried tomatoes for extra nutrients and flavor.
  • Use Different Pasta: Experiment with different types of pasta, such as whole wheat pasta, gluten-free pasta, or even ravioli.
  • Add Herbs: In addition to parsley, try adding dill, basil, or oregano for a different flavor profile.
  • Make it Spicy: Add a pinch of red pepper flakes for a little heat.
  • Creamy Version: Stir in a splash of heavy cream or crème fraîche for an extra-rich and creamy sauce.
  • Lemon Chicken and Pasta: You can also grill the chicken breasts and then slice them over the finished pasta.

The possibilities are endless! Feel free to get creative and make this recipe your own. Remember, the best recipes are the ones that reflect your personal taste and preferences.

Storing and Reheating Lemon Chicken Pasta

Got leftovers? Lucky you! Here’s how to store and reheat your Lemon Chicken Pasta:

  • Storage: Store the pasta in an airtight container in the refrigerator for up to 3 days.
  • Reheating: Reheat the pasta in a skillet over medium heat, adding a splash of chicken broth or water to prevent it from drying out. You can also reheat it in the microwave, but be careful not to overcook it.

I find that leftovers are a great way to enjoy this dish all over again. It’s the perfect lunch for a busy day, or a quick and easy dinner when you don’t feel like cooking.

Frequently Asked Questions (FAQ)

Got questions? I’ve got answers! Here are some of the most common questions I get about this recipe:

  • Can I use frozen chicken? Yes, but make sure to thaw it completely before cooking.
  • Can I use dried herbs instead of fresh? Yes, but use about half the amount, as dried herbs are more potent.
  • Can I make this recipe ahead of time? You can cook the pasta and chicken ahead of time, but I recommend making the sauce just before serving for the best flavor and texture.
  • Can I freeze this recipe? I don’t recommend freezing this recipe, as the pasta can become mushy when thawed.
  • The chicken and pasta are sticking together, what do I do? Toss the pasta with a little olive oil before storing it to prevent sticking.

If you have any other questions, feel free to leave a comment below! I’m always happy to help.

Serving Suggestions for Lemon Chicken Pasta

This Lemon Chicken Pasta is delicious on its own, but here are a few ideas to complete the meal:

  • Side Salad: A simple green salad with a lemon vinaigrette is the perfect complement to this dish.
  • Garlic Bread: Crusty garlic bread is always a welcome addition to any pasta meal.
  • Roasted Vegetables: Roasted asparagus, broccoli, or Brussels sprouts are a healthy and flavorful side dish.
  • Wine Pairing: A crisp white wine, such as Sauvignon Blanc or Pinot Grigio, pairs beautifully with the lemon flavors in this dish.

Ultimately, the best way to serve this dish is with a smile and a grateful heart. Food is meant to be shared and enjoyed, so gather your loved ones, set the table, and create a memorable meal together.

So there you have it – my Easy Lemon Chicken Pasta recipe. I hope you love it as much as I do! Remember, cooking is about more than just following instructions; it’s about creating something with love and intention. It’s about nourishing your body and soul. And most importantly, it’s about having fun in the kitchen. Now, go forth and create something delicious! I know you can.

Easy Lemon Chicken Pasta

Prep Time 10 minutes
Cook Time 20 minutes
Total Time 30 minutes
Servings 4 servings
Calories 550
A quick and flavorful lemon chicken pasta recipe perfect for a weeknight dinner. This dish combines tender chicken, al dente pasta, and a bright lemon sauce for a delightful meal.

Ingredients

Ingredients

  • 1 pound boneless, skinless chicken breasts (cut into bite-sized pieces)
  • 1 pound pasta ((spaghetti, fettuccine, or penne))
  • 2 tablespoons olive oil
  • 2 cloves garlic (minced)
  • 0.5 cup chicken broth
  • 0.25 cup lemon juice
  • 2 tablespoons butter
  • 0.25 cup grated Parmesan cheese
  • 2 tablespoons chopped fresh parsley
  • to taste Salt and pepper
  • Lemon zest (optional, for garnish)

Instructions 

  • Cook pasta according to package directions, reserving 1/2 cup pasta water.
  • Cook chicken in olive oil until browned and cooked through.
  • Add garlic and cook until fragrant (about 30 seconds).
  • Pour in chicken broth and lemon juice; simmer to reduce slightly.
  • Stir in butter and Parmesan until melted and smooth.
  • Add pasta to skillet and toss to coat.
  • Add pasta water if sauce is too thick.
  • Season with salt and pepper to taste.
  • Garnish with parsley and lemon zest (optional).
  • Serve immediately.

Notes

Adjust the amount of lemon juice to your preference for a tangier flavor.
Calories: 550kcal
Cost: $18
Course: Main Course
Cuisine: Italian
Keyword: chicken

Nutrition

Calories: 550kcal | Carbohydrates: 60g | Protein: 40g | Fat: 20g | Sodium: 400mg
pin

Strawberry BBQ Chicken Spinach and Quinoa Salad: A Taste of Portland Sunshine

Hello, friend! Avery Collins here, from my little kitchen in Portland, where even on the rainiest days, we find ways to bring sunshine to our plates. Today, I’m sharing a recipe that’s become a staple in my house, especially during the warmer months: Strawberry BBQ Chicken Spinach and Quinoa Salad. It’s vibrant, it’s healthy, and it’s bursting with flavors that will make your taste buds sing. Think sweet, smoky, savory, and fresh all in one delightful bite. This isn’t just a salad; it’s a celebration of seasonal ingredients and a testament to the joy of cooking for yourself.

My journey into healthy eating started out of necessity, not passion. Years ago, I was stressed, overworked, and relying too much on takeout. My body finally rebelled, and I knew I needed to make a change. Cooking became my way back to health, both physical and mental. This salad is a reflection of that journey – simple, nourishing, and full of love.

Why You’ll Absolutely Love This Strawberry BBQ Chicken Spinach and Quinoa Salad

Seriously, get ready to fall in love! This salad isn’t just good for you; it’s incredibly delicious. It’s the kind of meal that makes you feel energized and satisfied. Here’s why I think you’ll adore it:

  • Flavor Explosion: The combination of sweet strawberries, smoky BBQ chicken, creamy avocado, tangy goat cheese, and salty bacon creates a symphony of flavors that will tantalize your taste buds.
  • Nutrient-Packed: This salad is loaded with vitamins, minerals, and antioxidants from the spinach, quinoa, strawberries, and avocado. It’s a powerhouse of goodness!
  • Easy to Customize: Feel free to swap out ingredients based on what you have on hand or your personal preferences. More on variations later!
  • Perfect for Meal Prep: Make a big batch on Sunday and enjoy it for lunch throughout the week. The quinoa and chicken hold up well, and the flavors meld together beautifully.
  • A Crowd-Pleaser: Whether you’re hosting a backyard BBQ or a casual weeknight dinner, this salad is always a hit.

I love how versatile this salad is! It’s perfect for a light lunch or a satisfying dinner. Plus, it’s a great way to use up leftover grilled chicken or that rogue avocado that’s perfectly ripe. It’s a great alternative to a chicken club salad.

Ingredients: Your Shopping List for Salad Bliss

Here’s what you’ll need to create this culinary masterpiece. Don’t worry if you don’t have everything on hand; feel free to get creative and substitute as needed!

  • 1 cup quinoa, well rinsed
  • 1 1/2 cups water
  • 2 cups baby spinach
  • 1 cup cooked chicken, shredded or diced
  • 1 cup strawberries, sliced
  • 1 cup avocado, diced
  • 1/4 cup goat cheese, crumbled
  • 4 strips turkey bacon, cooked and crumbled
  • 1/4 cup roasted strawberry BBQ sauce
  • 2 green onions, sliced
  • Cilantro to taste, chopped
Recipe Image

How to Make Strawberry BBQ Chicken Spinach and Quinoa Salad: Step-by-Step Instructions

Ready to get cooking? Here’s how to bring this delicious salad to life. Don’t be intimidated; it’s easier than it looks!

  1. Cook the Quinoa: Bring the water and quinoa to a boil in a medium saucepan. Reduce the heat to low, cover, and simmer until the quinoa is tender and has absorbed all the water, about 15 minutes. Remove from heat and let it sit, covered, for 5 minutes. Fluff with a fork.
  2. Prep the Ingredients: While the quinoa is cooking, slice the strawberries, dice the avocado, and slice the green onions. Crumble the cooked turkey bacon and goat cheese.
  3. Assemble the Salad: In a large bowl, combine the cooked quinoa, baby spinach, shredded chicken, strawberries, avocado, goat cheese, turkey bacon, green onions, and cilantro.
  4. Dress and Serve: Drizzle the strawberry BBQ sauce over the salad and gently toss to combine. Serve immediately and enjoy!

And there you have it! A vibrant, flavorful salad that’s perfect for any occasion. This salad with grilled chicken is simply divine!

Pro Tips for the Perfect Salad Every Time

Want to take your salad game to the next level? Here are a few of my favorite tips:

  • Rinse the Quinoa: This helps remove the saponins, which can give the quinoa a bitter taste.
  • Don’t Overcook the Quinoa: Overcooked quinoa can be mushy. Cook it until it’s tender but still has a slight bite.
  • Use Ripe but Firm Strawberries: This will ensure that they hold their shape and don’t get too mushy in the salad.
  • Wait to Add the Avocado: If you’re making the salad ahead of time, wait to add the avocado until just before serving to prevent it from browning.
  • Toast the Quinoa: For a nuttier flavor, toast the uncooked quinoa in a dry skillet over medium heat for a few minutes before cooking.

These tips will help you create a salad that’s both delicious and visually appealing. The chicken strawberry salad is one that will be requested again and again.

Common Mistakes to Avoid

We all make mistakes in the kitchen, but here are a few common ones to watch out for when making this salad:

  • Using Underripe or Overripe Strawberries: Underripe strawberries will be tart and flavorless, while overripe strawberries will be mushy.
  • Adding Too Much Dressing: A little bit of strawberry BBQ sauce goes a long way. Start with a small amount and add more to taste.
  • Not Rinsing the Quinoa: As mentioned earlier, rinsing the quinoa is crucial to remove the bitter saponins.
  • Overcooking the Chicken: Dry, overcooked chicken will ruin the texture of the salad. Use leftover grilled chicken or poach it gently for best results.

Learning from our mistakes is part of the cooking process! Don’t be afraid to experiment and find what works best for you. This strawberry bbq chicken salad is very forgiving.

Variations: Make It Your Own!

The beauty of this salad is that it’s incredibly versatile. Feel free to swap out ingredients based on your preferences or what you have on hand.

  • Add Different Greens: Instead of spinach, try using mixed greens, kale, or arugula.
  • Swap the Cheese: Feta cheese, blue cheese, or even a vegan cheese alternative would be delicious in this salad.
  • Use Different Nuts or Seeds: Add some crunch with toasted almonds, pecans, or pumpkin seeds.
  • Add More Vegetables: Cucumber, bell peppers, or red onion would be great additions. This salad is almost like a quinoa salad with peppers if you make this addition.
  • Make it Vegetarian: Omit the chicken and bacon for a vegetarian version. Add chickpeas or lentils for extra protein.
  • Change the Dressing: Use a balsamic vinaigrette, poppy seed dressing, or even a simple lemon-herb vinaigrette instead of the strawberry BBQ sauce.

Get creative and have fun with it! There are endless possibilities when it comes to customizing this salad. If you are looking for something new to try, this is it!

Storage Instructions

This salad is best enjoyed fresh, but it can be stored in the refrigerator for up to 3 days. Here are a few tips for storing it properly:

  • Store the Dressing Separately: This will prevent the salad from getting soggy.
  • Use an Airtight Container: This will help keep the salad fresh.
  • Add the Avocado Just Before Serving: As mentioned earlier, avocado tends to brown when exposed to air.

The quinoa salad with vegetables and cheese stays fresh for a few days. This salad is couscous lunch-worthy!

Frequently Asked Questions (FAQ)

Got questions? I’ve got answers! Here are some of the most common questions I get about this salad:

  • Can I make this salad ahead of time? Yes, you can! Just store the dressing separately and add the avocado just before serving.
  • Is this salad gluten-free? Yes, as long as you use gluten-free BBQ sauce.
  • Can I use frozen strawberries? Fresh strawberries are best, but you can use frozen strawberries if needed. Just thaw them completely and drain off any excess liquid before adding them to the salad.
  • Can I grill the strawberries? Yes, grilled strawberries add a wonderful smoky sweetness to the salad! Simply grill them for a few minutes per side until they are slightly softened and caramelized.

If you have any other questions, feel free to leave them in the comments below! I’m always happy to help. You can even try grilled strawberries on their own.

Serving Suggestions: Complete the Meal

This Strawberry BBQ Chicken Spinach and Quinoa Salad is delicious on its own, but here are a few ideas for serving it as part of a complete meal:

  • Serve it with Grilled Bread: A slice of crusty bread is perfect for soaking up the delicious dressing.
  • Add a Side of Fruit: A bowl of fresh berries or a slice of watermelon would complement the salad perfectly.
  • Pair it with a Light Soup: A chilled cucumber soup or a simple tomato soup would be a refreshing addition. This is not unlike couscous cucumber salad.
  • Serve it as a BBQ Side Dish: This salad is a great alternative to traditional potato salad or coleslaw at a BBQ.

No matter how you choose to serve it, I hope you enjoy this salad as much as I do! It’s a little taste of Portland sunshine, no matter where you are. This the salad for you!

Strawberry BBQ Chicken Spinach and Quinoa Salad with Bacon, Avocado and Goat Cheese

Prep Time 15 minutes
Cook Time 20 minutes
Total Time 35 minutes
Servings 4 people
Calories 450
A vibrant and flavorful salad combining the sweetness of strawberries with savory BBQ chicken, creamy avocado, and tangy goat cheese. This quinoa salad is a healthy and satisfying meal.

Ingredients

Salad Ingredients

  • 1 cup quinoa (well rinsed)
  • 1.5 cups water
  • 2 cups baby spinach
  • 1 cup cooked chicken (shredded or diced)
  • 1 cup strawberries
  • 1 cup avocado
  • 0.25 cup goat cheese (crumbled)
  • 4 strips turkey bacon (cooked and crumbled)
  • 0.25 cup roasted strawberry BBQ sauce
  • 2 green onions
  • to taste cilantro

Instructions 

  • Bring the water and quinoa to a boil, reduce the heat and simmer, covered, until the quinoa is tender and has absorbed the water, about 15 minutes, remove from heat and let sit for 5 minutes, covered.
  • Meanwhile, slice the strawberries, dice the avocado and slice the green onions.
  • Mix everything and enjoy.

Notes

Adjust the amount of BBQ sauce to your liking for desired sweetness and smokiness.
Calories: 450kcal
Cost: $18
Course: Dinner, Lunch
Cuisine: American
Keyword: chicken, quinoa, strawberry

Nutrition

Calories: 450kcal | Carbohydrates: 40g | Protein: 30g | Fat: 22g | Sodium: 350mg
pin

Easy Strawberry Spinach Salad Recipe: A Symphony of Flavors

Hello, friends! Avery here, from my little kitchen in rainy Portland. Today, I want to share a recipe that feels like sunshine on a plate: my Easy Strawberry Spinach Salad. This isn’t just a salad; it’s a celebration of fresh, vibrant ingredients and a reminder that healthy eating can be both simple and deeply satisfying. This spinach salad is a perfect lunch bowl.

My journey into the kitchen started with a need to nourish my body, and this salad is a direct reflection of that. It’s packed with nutrients, bursting with flavor, and incredibly easy to throw together. It’s the kind of meal that makes you feel good from the inside out.

Why You’ll Love This Strawberry Spinach Salad

Honestly? Because it’s delicious! But beyond that, there are so many reasons to fall in love with this salad:

  • Quick and Easy: From start to finish, this salad comes together in under 15 minutes. Perfect for busy weeknights or a quick lunch. It’s easy to make!
  • Nutrient-Packed: Spinach is a powerhouse of vitamins and minerals, while strawberries are loaded with antioxidants. Add in the healthy fats from the nuts and the protein from the feta, and you’ve got a nutritional superstar.
  • Flavor Explosion: The combination of sweet strawberries, tangy feta, crunchy pecans, and a bright balsamic vinaigrette is simply irresistible. The salad is just amazing.
  • Versatile: This salad can be customized to your liking. Add grilled chicken or chickpeas for extra protein, swap out the nuts for seeds, or use a different type of cheese.
  • Beautiful: Let’s be honest, presentation matters! The vibrant colors of this salad make it a feast for the eyes as well as the palate. It’s one of those colorful salads.

I truly believe that the best recipes are the ones that are both good for you and enjoyable to eat. This strawberry spinach salad ticks all the boxes. I made it for a potluck last week, and everyone was coming back for seconds!

Ingredients for Strawberry Spinach Salad

Here’s what you’ll need to create this delightful dish. Remember, fresh, high-quality ingredients will always yield the best results. I encourage you to visit your local farmer’s market for the freshest spinach and strawberries possible.

  • 6 cups fresh baby spinach, washed and thoroughly dried
  • 1 ½ cups fresh strawberries, hulled and sliced into quarters
  • ½ small red onion, thinly sliced into half-moons
  • ½ cup crumbled feta cheese
  • ½ cup roasted pecans or walnuts, roughly chopped
  • ¼ cup sliced cucumber (optional)
  • 3 tablespoons extra-virgin olive oil
  • 2 tablespoons balsamic vinegar
  • 1 teaspoon Dijon mustard
  • 1 teaspoon honey or pure maple syrup
  • Salt and freshly ground black pepper to taste
Recipe Image

How to Make Strawberry Spinach Salad: Step-by-Step

Now for the fun part! This recipe is so simple, even a beginner cook can master it. Trust me, if I can do it, you can too.

  1. Prep the Salad: Place spinach, strawberries, red onion, feta cheese, nuts, and cucumber (if using) in a large salad bowl. Arrange ingredients evenly for visual appeal.
  2. Make the Dressing: Whisk together olive oil, balsamic vinegar, Dijon mustard, honey (or maple syrup), salt, and pepper in a small bowl or jar. Continue whisking until mixture is fully emulsified and slightly thickened. This will create a tangy dressing in a matter of moments.
  3. Dress and Serve: Drizzle balsamic vinaigrette evenly over salad immediately before serving. Use salad tongs to toss ingredients gently, ensuring all components are lightly coated.
  4. Enjoy: Transfer salad to individual serving plates or present family-style in the bowl. Serve promptly while spinach remains crisp and strawberries retain freshness.

That’s it! In just a few simple steps, you’ve created a delicious and nutritious meal that will nourish your body and delight your taste buds. The most important thing is to enjoy the process. The dressing in a balsamic base is a great addition.

Pro Tips for the Perfect Spinach Salad

Here are a few tricks I’ve learned over the years to elevate this salad from good to great:

  • Dry Your Spinach: This is crucial! Excess water will dilute the dressing and make the salad soggy. Use a salad spinner or gently pat the spinach dry with paper towels.
  • Use Fresh Strawberries: Frozen strawberries will release too much water and make the salad mushy. Fresh, ripe strawberries are the way to go. Strawberries and spinach are a great combo.
  • Toast Your Nuts: Toasting the pecans or walnuts enhances their flavor and adds a delightful crunch. Simply spread them on a baking sheet and bake at 350°F (175°C) for 5-7 minutes, or until fragrant. These crunchy pecans are amazing in this recipe.
  • Don’t Overdress: A little dressing goes a long way. Start with a small amount and add more to taste. You want the dressing to complement the salad, not drown it.
  • Serve Immediately: This salad is best enjoyed fresh. The spinach will wilt if it sits in the dressing for too long.

Common Mistakes to Avoid

We all make mistakes in the kitchen, and that’s okay! Here are a few common pitfalls to watch out for when making this salad:

  • Using Wilted Spinach: Choose fresh, vibrant spinach with crisp leaves. Avoid spinach that is yellowing or slimy.
  • Adding Too Much Red Onion: Red onion can be overpowering if used in excess. A little goes a long way. I prefer to soak the sliced red onion in ice water for 10 minutes to mellow its flavor.
  • Skipping the Dijon Mustard: Dijon mustard adds a subtle tang and helps emulsify the dressing. Don’t skip it!
  • Forgetting to Season: Salt and pepper are essential for bringing out the flavors of the salad. Don’t be afraid to season generously.

Strawberry Spinach Salad Variations

One of the best things about this salad is how easily it can be adapted to your liking. Here are a few variations to get you started:

  • Add Protein: Grilled chicken, shrimp, chickpeas, or hard-boiled eggs all make excellent additions. This will transform the salad into a more substantial meal. Add some light proteins to the mix.
  • Swap the Cheese: Goat cheese, blue cheese, or Parmesan cheese can be used in place of feta. Each cheese will add a unique flavor profile.
  • Experiment with Fruit: Blueberries, raspberries, or blackberries can be added alongside the strawberries.
  • Add Avocado: Avocado adds a creamy texture and healthy fats.
  • Use a Different Dressing: Poppy seed dressing, raspberry vinaigrette, or lemon vinaigrette are all delicious alternatives.

How to Store Leftover Salad

This salad is best enjoyed fresh, but leftovers can be stored in an airtight container in the refrigerator for up to 24 hours. However, keep in mind that the spinach will wilt and the strawberries may release some liquid. It is a spinach strawberry salad that is best when fresh.

To prevent the salad from becoming soggy, store the dressing separately and add it just before serving.

Frequently Asked Questions (FAQ)

  • Can I make this salad ahead of time? While it’s best served immediately, you can prep the ingredients ahead of time. Wash and dry the spinach, slice the strawberries, and make the dressing. Store everything separately and combine just before serving.
  • Can I use frozen strawberries? I don’t recommend using frozen strawberries, as they will release too much water and make the salad mushy.
  • Can I use a different type of nut? Absolutely! Almonds, walnuts, or sunflower seeds would all be delicious in this salad.
  • Is this salad gluten-free? Yes, this salad is naturally gluten-free.
  • Is this salad vegetarian? Yes, this salad is vegetarian. To make it vegan, simply omit the feta cheese or use a vegan feta alternative.

Serving Suggestions for Strawberry Spinach Salad

This salad is incredibly versatile and can be served in a variety of ways:

  • As a Light Lunch: Enjoy a generous portion of this salad for a satisfying and healthy lunch.
  • As a Side Dish: Serve it alongside grilled chicken, fish, or tofu for a complete meal.
  • At a Potluck or BBQ: This salad is always a crowd-pleaser and is perfect for sharing.
  • As a Starter: Serve a small portion of this salad as a refreshing starter before a larger meal.

No matter how you choose to serve it, this Strawberry Spinach Salad is sure to be a hit. It’s a celebration of fresh, vibrant flavors and a reminder that healthy eating can be both simple and delicious. I hope you enjoy it as much as I do! This salad is one of my favorite spinach salad recipes easy to make.

So, gather your ingredients, put on some music, and get ready to create a little sunshine in your kitchen. And remember, cooking should be fun and forgiving. Don’t be afraid to experiment and make it your own. Happy cooking!

This strawberry spinach salad is a delight, and I know you’ll be coming back for seconds. The combination of the fresh spinach and sweet strawberries is simply irresistible. Enjoy!

Strawberry Spinach Salad

Prep Time 15 minutes
Total Time 15 minutes
Servings 4 people
Calories 250
A refreshing and vibrant salad combining the sweetness of strawberries with the earthy flavor of spinach. Perfect as a light lunch or a side dish for any occasion.

Ingredients

Salad

  • 6 cups fresh baby spinach (washed and thoroughly dried)
  • 1.5 cups fresh strawberries (hulled and sliced into quarters)
  • 0.5 small red onion (thinly sliced into half-moons)
  • 0.5 cup crumbled feta cheese
  • 0.5 cup roasted pecans or walnuts (roughly chopped)
  • 0.25 cup sliced cucumber (optional)

Dressing

  • 3 tablespoons extra-virgin olive oil
  • 2 tablespoons balsamic vinegar
  • 1 teaspoon Dijon mustard
  • 1 teaspoon honey or pure maple syrup
  • to taste Salt and freshly ground black pepper

Instructions 

  • Place spinach, strawberries, red onion, feta cheese, nuts, and cucumber in a large salad bowl. Arrange ingredients evenly.
  • Whisk together olive oil, balsamic vinegar, Dijon mustard, honey, salt, and pepper in a small bowl until emulsified.
  • Drizzle balsamic vinaigrette evenly over salad immediately before serving. Toss gently.
  • Transfer salad to serving plates. Serve promptly.

Notes

For a vegan option, omit the feta cheese and use maple syrup instead of honey.
Calories: 250kcal
Cost: $12
Course: Salad
Cuisine: American
Keyword: Spinach

Nutrition

Calories: 250kcal | Carbohydrates: 15g | Protein: 8g | Fat: 18g | Sodium: 200mg
pin

Hey friends! Avery here, from my cozy, often-chaotic kitchen in Portland. Today, I’m sharing a recipe that’s become a staple in our house: One-Pot Lemon Pasta. It’s a dish born out of busy weeknights and a craving for something bright, comforting, and, most importantly, EASY. This isn’t just about throwing ingredients into a pot; it’s about creating a simple, satisfying meal that nourishes both body and soul. If you’re anything like me, you’ll appreciate a recipe that minimizes cleanup without sacrificing flavor. This one-pot wonder delivers on all fronts!

My journey into healthy-ish cooking started when my body decided it had enough of my less-than-stellar lifestyle. I needed quick, easy, and nourishing meals. Let me tell you, the early days involved some real kitchen disasters. But I learned, adapted, and discovered the joy of simple, flavorful food. And that’s exactly what this One-Pot Lemon Pasta embodies. It’s a forgiving recipe that’s perfect for beginners and seasoned cooks alike.

Why You’ll Love This One-Pot Lemon Pasta

Seriously, where do I even begin? This recipe is a game-changer for so many reasons. Beyond being incredibly delicious, it’s also:

  • Quick & Easy: From start to finish, you’re looking at about 20-25 minutes. Perfect for those nights when you’re short on time but still want a home-cooked meal.
  • Minimal Cleanup: Only one pot to wash! Enough said.
  • Flavorful & Bright: The lemon brightens up the dish, while the Parmesan and butter create a creamy, comforting sauce. It’s a perfect balance of flavors.
  • Versatile: This recipe is a blank canvas. Add your favorite veggies, protein, or herbs to customize it to your liking.
  • Budget-Friendly: Using pantry staples like pasta, chicken broth, and Parmesan cheese, this dish is easy on the wallet.

Honestly, I find myself craving this pasta all the time. It’s the perfect pick-me-up on a rainy day or a light and refreshing meal on a warm evening. It’s a dish that reminds me that healthy eating doesn’t have to be complicated or restrictive. It can be joyful, flavorful, and deeply satisfying.

Ingredients for the Best Lemony Pasta

Here’s what you’ll need to make this magic happen. Don’t worry if you don’t have everything on hand – this recipe is very forgiving. Remember, cooking should be fun and stress-free!

  • 1 pound pasta (spaghetti, fettuccine, or linguine)
  • 1 tablespoon olive oil
  • 2 cloves garlic, minced
  • 4 cups chicken broth
  • 1 cup water
  • 1/2 cup grated Parmesan cheese
  • 1/4 cup lemon juice
  • 2 tablespoons lemon zest
  • 2 tablespoons butter
  • Salt and pepper to taste
  • Optional: fresh parsley, chopped
Recipe Image

How To Make One-Pot Lemon Pasta: Step-by-Step

Ready to get cooking? Here’s how to make this delicious One-Pot Lemon Pasta:

  1. In a large pot or Dutch oven, combine pasta, olive oil, garlic, chicken broth, and water.
  2. Bring to a boil, then reduce heat and simmer, stirring occasionally, until pasta is cooked through and liquid is mostly absorbed (about 15-20 minutes).
  3. Stir in Parmesan cheese, lemon juice, lemon zest, and butter.
  4. Season with salt and pepper to taste.
  5. Garnish with fresh parsley, if desired.
  6. Serve immediately.

See? I told you it was easy! The key is to keep stirring occasionally so that the pasta doesn’t stick to the bottom of the pot and to ensure even cooking.

Pro Tips for Perfect One-Pot Lemon Pasta

Want to take your One-Pot Lemon Pasta to the next level? Here are a few of my favorite tips:

  • Use Quality Ingredients: The better the ingredients, the better the flavor. Opt for good quality Parmesan cheese and fresh lemons.
  • Don’t Overcook the Pasta: Keep a close eye on the pasta as it cooks. You want it to be al dente, not mushy.
  • Adjust the Lemon Juice: If you like a tangier flavor, add a little more lemon juice. Taste as you go and adjust to your liking.
  • Reserve Some Pasta Water: If the sauce is too thick, add a splash of pasta water to thin it out. The starch in the pasta water will help to create a creamy emulsion.
  • Grate Your Own Parmesan: Pre-grated Parmesan cheese often contains cellulose, which can prevent it from melting properly. Grating your own ensures a smoother, creamier sauce.

These little tweaks can make a big difference in the final result. Don’t be afraid to experiment and find what works best for you. After all, cooking is all about having fun and creating something delicious!

Common Mistakes to Avoid When Making One-Pot Lemon Pasta

Even though this recipe is super easy, there are a few common mistakes that people make. Here’s what to watch out for:

  • Not Stirring Enough: This can lead to the pasta sticking to the bottom of the pot and burning. Stir frequently to prevent this.
  • Using Too Much Water: Adding too much water can result in a watery sauce. Stick to the recommended amount and adjust as needed.
  • Overcooking the Garlic: Burnt garlic can make the dish taste bitter. Sauté the garlic gently until it’s fragrant but not browned.
  • Adding the Lemon Juice Too Early: Adding the lemon juice too early can prevent the pasta from absorbing the broth properly. Add it towards the end of cooking for the best flavor.
  • Forgetting to Season: Salt and pepper are essential for bringing out the flavors of the dish. Don’t forget to season to taste!

By avoiding these common pitfalls, you’ll be well on your way to making perfect One-Pot Lemon Pasta every time.

Variations on One-Pot Lemon Pasta

This One-Pot Lemon Pasta is delicious as is, but it’s also a great base for adding your own personal touch. Here are a few variations to try:

  • Add Veggies: Toss in some spinach, asparagus, peas, or cherry tomatoes for added nutrients and flavor.
  • Add Protein: Grilled chicken, shrimp, or tofu would all be delicious additions.
  • Make it Spicy: Add a pinch of red pepper flakes for a little heat.
  • Use Different Herbs: Try adding fresh basil, oregano, or thyme instead of parsley.
  • Add a Splash of Cream: For an extra creamy sauce, stir in a tablespoon or two of heavy cream at the end.

Feel free to get creative and experiment with different combinations. The possibilities are endless!

How to Store and Reheat Leftover Lemon Pasta

If you happen to have any leftovers (which is rare in our house!), here’s how to store and reheat them:

  • Storage: Store leftover pasta in an airtight container in the refrigerator for up to 3 days.
  • Reheating: Reheat the pasta in a skillet over medium heat, adding a splash of chicken broth or water to prevent it from drying out. You can also microwave it, but it may not be as creamy.

Leftover pasta is great for lunch the next day or as a quick and easy dinner. It’s also a good way to reduce food waste and save money.

Frequently Asked Questions About Lemon Pasta

Here are some common questions I get asked about this recipe:

  • Can I use a different type of pasta? Absolutely! Spaghetti, fettuccine, linguine, or even penne would all work well.
  • Can I use vegetable broth instead of chicken broth? Yes, you can. Just keep in mind that it will slightly alter the flavor of the dish.
  • Can I make this recipe vegan? Yes! Use vegetable broth, vegan Parmesan cheese, and olive oil instead of butter.
  • Can I add other vegetables? Definitely! Spinach, asparagus, peas, and cherry tomatoes are all great additions.
  • How can I make the sauce creamier? Add a tablespoon or two of heavy cream or mascarpone cheese at the end.

If you have any other questions, feel free to ask in the comments below. I’m always happy to help!

Serving Suggestions for One-Pot Lemon Pasta

This One-Pot Lemon Pasta is delicious on its own, but it also pairs well with a variety of sides. Here are a few serving suggestions:

  • Side Salad: A simple green salad with a lemon vinaigrette is a perfect complement to the pasta.
  • Garlic Bread: Crusty garlic bread is always a welcome addition.
  • Roasted Vegetables: Roasted asparagus, broccoli, or Brussels sprouts would all be delicious.
  • Grilled Chicken or Shrimp: Add some protein to make it a more substantial meal.
  • A Glass of White Wine: A crisp Sauvignon Blanc or Pinot Grigio would pair perfectly with the lemon flavors.

Ultimately, the best way to serve this pasta is with a smile and good company. Food is meant to be shared and enjoyed!

I truly hope you love this One-Pot Lemon Pasta as much as I do. It’s a simple, flavorful, and comforting dish that’s perfect for any occasion. So go ahead, gather your ingredients, put on some music, and get cooking! And remember, don’t be afraid to experiment and make it your own. Happy cooking!

And for those who are curious, this pasta is a wonderful way to use up that extra chicken stock. The creamy, lemony sauce will fall over you as you take your first bite. This pasta recipe is a great way to make the pasta in just minutes. I think you can make this recipe any night. This pasta is so great. To make it even better, add some shrimp!

One pot Lemon pasta

Prep Time 5 minutes
Cook Time 20 minutes
Total Time 25 minutes
Servings 4 servings
Calories 450
This one-pot lemon pasta is a simple and delicious meal that's perfect for a quick weeknight dinner. It's packed with flavor and easy to clean up!

Ingredients

Ingredients

  • 1 pound pasta (spaghetti, fettuccine, or linguine)
  • 1 tablespoon olive oil
  • 2 cloves garlic, minced
  • 4 cups chicken broth
  • 1 cup water
  • 1/2 cup grated Parmesan cheese
  • 1/4 cup lemon juice
  • 2 tablespoons lemon zest
  • 2 tablespoons butter
  • to taste Salt and pepper
  • Optional fresh parsley, chopped

Instructions 

  • Combine pasta, olive oil, garlic, chicken broth, and water in a pot.
  • Bring to a boil, then simmer until pasta is cooked and liquid absorbed (15-20 minutes).
  • Stir in Parmesan cheese, lemon juice, lemon zest, and butter.
  • Season with salt and pepper.
  • Garnish with parsley, if desired.
  • Serve immediately.

Notes

Add some cooked chicken or shrimp for extra protein.
Calories: 450kcal
Cost: $8
Course: Main Course
Cuisine: Italian
Keyword: pasta

Nutrition

Calories: 450kcal | Carbohydrates: 65g | Protein: 25g | Fat: 15g | Sodium: 700mg
pin

Hey there, friend! Avery Collins here, from my little kitchen in Portland, where the aroma of rosemary hangs in the air almost as often as the rain. Today, I’m so excited to share one of my absolute go-to recipes: Creamy Lemon Chicken Pasta. It’s a dish that has rescued countless busy weeknights and brought a little sunshine to even the greyest of days. This isn’t just about throwing ingredients together; it’s about creating a moment of comfort, a hug in a bowl, if you will. So, grab your apron, and let’s get cooking!

My journey to this recipe, like many of my kitchen adventures, started with a need. After years of neglecting my well-being, my body practically screamed for nourishment. I craved something that was both wholesome and satisfying, something that wouldn’t take hours to prepare. That’s how this Creamy Lemon Chicken Pasta was born – a simple yet flavorful dish that nourishes the body and soothes the soul. It’s perfect for those evenings when you need something quick, delicious, and comforting. Every bite of this chicken pasta is sure to bring a smile to your face.

Why You’ll Love This Creamy Lemon Chicken Pasta

This isn’t just another pasta recipe; it’s a life-saver! Here’s why you’ll find yourself making it again and again:

  • Quick & Easy: Ready in under 30 minutes, it’s perfect for busy weeknights.
  • Flavor Explosion: The creamy lemon sauce is bright, tangy, and incredibly satisfying.
  • Simple Ingredients: You probably have most of these ingredients in your pantry already.
  • Versatile: Easily adaptable to your preferences and dietary needs. You can add vegetables, swap the pasta, or use a different protein.
  • Comfort Food: It’s the ultimate comfort food that feels both indulgent and wholesome.

This creamy lemon chicken pasta has become a staple in my home because it perfectly balances ease and flavor. It’s a dish that my family always enjoys, and I love knowing that I can whip it up without spending hours in the kitchen. The combination of the creamy sauce and the tender chicken is simply irresistible. This is a dish that not only tastes great but also makes you feel good from the inside out. If you re looking for a recipe that delivers on both flavor and convenience, you ll absolutely love this creamy lemon chicken pasta.

Creamy Lemon Chicken Pasta Ingredients

  • 1 pound boneless, skinless chicken breasts: Cut into bite-sized pieces for quick cooking.
  • 8 ounces pasta (fettuccine or penne): I prefer fettuccine, but penne works great too.
  • 1 cup heavy cream: For that luscious, creamy texture.
  • Juice of 2 fresh lemons: Freshly squeezed is key for the best flavor.
  • 1/2 cup freshly grated Parmesan cheese: Adds a salty, savory depth to the sauce.
  • 3 cloves garlic, minced: Essential for that aromatic, garlicky flavor.
  • Salt and pepper to taste: To season the chicken and the sauce.
  • 2 tablespoons olive oil: For sautéing the chicken and garlic.
Recipe Image

How to Make Creamy Lemon Chicken Pasta: Step-by-Step Instructions

Here’s how to bring this delightful dish to life:

  1. Cook the pasta: Cook the pasta according to package instructions until al dente, reserving about 1/2 cup of the pasta water before draining. The pasta water is crucial for achieving the perfect sauce consistency.
  2. Sauté the chicken: In a large skillet, heat olive oil over medium-high heat. Season the chicken with salt and pepper, then sauté until golden brown and cooked through, about 5-7 minutes. Make sure the chicken is cooked evenly for the best flavor.
  3. Make the creamy lemon sauce: Lower the heat to medium and add the minced garlic to the skillet, cooking until fragrant, about 30 seconds. Be careful not to burn the garlic. Stir in the heavy cream and lemon juice, bringing the mixture to a simmer. Then, mix in the Parmesan cheese until it’s melted and the sauce is smooth and creamy.
  4. Combine everything: Add the drained pasta and cooked chicken to the skillet with the sauce. Toss gently to coat everything evenly. If the sauce is too thick, add a little of the reserved pasta water until you reach your desired consistency.
  5. Serve and enjoy: Serve immediately, garnished with extra Parmesan cheese and a sprinkle of fresh parsley, if desired.

This creamy lemon chicken pasta recipe is truly a game-changer. The combination of the al dente pasta, tender chicken breast, and the luscious creamy lemon sauce is simply divine. It’s a dish that not only satisfies your taste buds but also nourishes your body with wholesome ingredients. Your creamy lemon chicken pasta is ready to be enjoyed!

Pro Tips for the Best Creamy Lemon Chicken Pasta

Want to take your Creamy Lemon Chicken Pasta to the next level? Here are a few tips I’ve learned along the way:

  • Use fresh lemon juice: Bottled lemon juice just doesn’t compare to the brightness and flavor of fresh lemons.
  • Don’t overcook the pasta: Al dente pasta holds its shape better and absorbs the sauce beautifully.
  • Reserve pasta water: This starchy water is your secret weapon for creating a perfectly emulsified sauce.
  • Grate your own Parmesan: Pre-grated Parmesan often contains cellulose, which can prevent it from melting smoothly.
  • Taste and adjust: Season the sauce to your liking with salt, pepper, and a little extra lemon juice if needed.

These simple tips can make a world of difference in your creamy lemon chicken pasta. By using fresh ingredients and paying attention to the details, you’ll create a dish that’s bursting with flavor and perfectly balanced. Remember, the key to great cooking is to taste as you go and adjust the seasonings to your liking. This creamy lemon chicken pasta is a dish that you re sure to make again and again.

Common Mistakes to Avoid

We all make mistakes in the kitchen! Here are a few common pitfalls to watch out for when making Creamy Lemon Chicken Pasta:

  • Burning the garlic: Burnt garlic is bitter and unpleasant. Keep the heat low and stir frequently.
  • Overcooking the chicken: Dry, rubbery chicken is no fun. Cook it just until it’s cooked through.
  • Adding cold cream: Cold cream can curdle when added to hot sauce. Bring it to room temperature first.
  • Not seasoning enough: Lemon juice can mellow out flavors, so don’t be afraid to season generously with salt and pepper.
  • Skipping the pasta water: It’s essential for creating a smooth, emulsified sauce.

Avoiding these common mistakes will help you create a creamy lemon chicken pasta that’s both delicious and visually appealing. Remember, cooking is a learning process, so don’t be discouraged if you don’t get it perfect the first time. The most important thing is to have fun and enjoy the process! This creamy lemon chicken pasta is a dish that you can easily master with a little practice.

Variations on Creamy Lemon Chicken Pasta

Want to mix things up? Here are a few fun variations to try:

  • Add vegetables: Sauté some spinach, asparagus, or broccoli with the garlic for extra nutrients and flavor.
  • Use different pasta: Try linguine, spaghetti, or even gluten-free pasta.
  • Add herbs: Fresh basil, parsley, or thyme add a lovely aroma and flavor.
  • Make it spicy: Add a pinch of red pepper flakes for a little heat.
  • Use a different protein: Shrimp or tofu would be delicious in this sauce.
  • Make it lighter: Use half-and-half instead of heavy cream for a lighter sauce.

These variations allow you to customize the creamy lemon chicken pasta to your liking. Whether you’re looking to add more vegetables, change the protein, or adjust the sauce, there are endless possibilities to explore. Don’t be afraid to experiment and create your own unique version of this classic dish. This creamy lemon chicken pasta is a blank canvas for your culinary creativity.

How to Store and Reheat Creamy Lemon Chicken Pasta

Got leftovers? Here’s how to store and reheat them:

  • Storage: Store the pasta in an airtight container in the refrigerator for up to 3 days.
  • Reheating: Reheat gently in a skillet over low heat, adding a splash of milk or cream to loosen the sauce. You can also microwave it in short intervals, stirring in between, until heated through.

Proper storage and reheating will ensure that your creamy lemon chicken pasta remains delicious even after a few days. Be sure to store it in an airtight container to prevent it from drying out. When reheating, add a little liquid to keep the sauce creamy and prevent the pasta from sticking together. This creamy lemon chicken pasta is a dish that’s just as good the next day.

Frequently Asked Questions (FAQ)

  • Can I use frozen chicken? Yes, just make sure to thaw it completely before cooking.
  • Can I make this dairy-free? Yes, use coconut cream or cashew cream instead of heavy cream and nutritional yeast instead of Parmesan cheese.
  • Can I make this ahead of time? The sauce can be made ahead of time, but it’s best to cook the pasta and chicken just before serving.
  • Can I add wine to the sauce? Yes, a splash of dry white wine would be a delicious addition. Add it after the garlic and let it reduce for a minute before adding the cream.
  • Can I use chicken thighs instead of chicken breasts? Absolutely! Chicken thighs will add a richer flavor to the dish.

These frequently asked questions address some common concerns and provide helpful tips for making creamy lemon chicken pasta. Whether you’re wondering about ingredient substitutions or make-ahead options, these answers will help you create the perfect dish every time. This creamy lemon chicken pasta is a recipe that’s easy to adapt to your specific needs and preferences.

Serving Suggestions

Here are a few ideas for serving your Creamy Lemon Chicken Pasta:

  • Side salad: A simple green salad with a lemon vinaigrette complements the richness of the pasta.
  • Garlic bread: Perfect for soaking up all that delicious sauce.
  • Roasted vegetables: Asparagus, broccoli, or Brussels sprouts are great choices.
  • Crusty bread: For mopping up every last bit of sauce.
  • A glass of white wine: A crisp Sauvignon Blanc or Pinot Grigio pairs beautifully with the lemon and cream.

These serving suggestions will help you create a complete and satisfying meal around your creamy lemon chicken pasta. Whether you’re serving it as a weeknight dinner or a special occasion, these sides and accompaniments will enhance the overall dining experience. This creamy lemon chicken pasta is a dish that’s sure to impress your family and friends.

And there you have it, friend! My Creamy Lemon Chicken Pasta recipe, straight from my kitchen to yours. I hope you enjoy making and eating it as much as I do. Remember, cooking is about joy, connection, and nourishing yourself from the inside out. So, go ahead, get in the kitchen, and create something delicious! If you try this recipe, be sure to let me know what you think. I love hearing from you! Happy cooking!

Creamy Lemon Chicken Pasta Recipe for Dinner

Prep Time 10 minutes
Cook Time 20 minutes
Total Time 30 minutes
Servings 4 people
Calories 550
Indulge in a delightful Creamy Lemon Chicken Pasta, a perfect blend of zesty lemon, tender chicken, and creamy sauce. This easy-to-make dish is sure to become a family favorite!

Ingredients

Ingredients

  • 1 pound boneless, skinless chicken breasts (cut into bite-sized pieces)
  • 8 ounces pasta (fettuccine or penne) (your choice)
  • 1 cup heavy cream
  • 2 fresh lemons (juiced)
  • 0.5 cup freshly grated Parmesan cheese
  • 3 cloves garlic, minced
  • to taste Salt and pepper
  • 2 tablespoons olive oil

Instructions 

  • Cook pasta until al dente, reserving cooking water before draining.
  • Heat olive oil in a skillet. Sauté seasoned chicken until golden and cooked through, about 5-7 minutes.
  • Lower heat, add garlic until fragrant. Stir in heavy cream and lemon juice, then mix in Parmesan until melted.
  • Combine drained pasta and chicken into the sauce, tossing gently to coat. Adjust consistency with reserved pasta water if needed.

Notes

Garnish with fresh parsley for added flavor and visual appeal.
Calories: 550kcal
Cost: $18
Course: Dinner
Cuisine: Italian
Keyword: chicken

Nutrition

Calories: 550kcal | Carbohydrates: 45g | Protein: 40g | Fat: 25g | Sodium: 300mg
pin

Hey friends! Avery here, from my little kitchen in Portland. Today, I want to share a recipe that’s become a staple in my life, especially during these warmer months: Spinach Strawberry Salad with Pecans. It’s more than just a recipe; it’s a celebration of fresh, vibrant ingredients and a reminder that healthy eating can be both easy and incredibly satisfying.

This salad is a symphony of flavors and textures. The earthiness of the spinach, the sweetness of the strawberries, the salty tang of feta, and the satisfying crunch of candied pecans – it all comes together in perfect harmony. It’s a dish that embodies my philosophy of balance: nourishing your body while delighting your senses.

I discovered this delightful dish that helped me reconnect with food. It wasn’t about dieting or restriction, but about celebrating the abundance of flavors and textures that nature provides. I hope this salad will inspire you to do the same.

Why You’ll Love This Spinach Strawberry Salad

This isn’t just another salad recipe; it’s a bowl full of reasons to smile. Here’s why I think you’ll absolutely adore it:

  • Freshness Overload: The combination of spinach and juicy strawberries creates a burst of freshness that’s hard to resist. It’s like a mini vacation in your mouth!
  • Easy to Make: Seriously, this salad comes together in minutes. Perfect for busy weeknights or a quick lunch.
  • Versatile: You can easily customize this salad to your liking. Add grilled chicken or shrimp for extra protein, swap out the feta for goat cheese, or use different nuts.
  • Healthy and Delicious: Packed with vitamins, antioxidants, and healthy fats, this salad is as good for you as it tastes.
  • Perfect for Any Occasion: Whether you’re hosting a backyard barbecue, packing a picnic, or simply craving a light and refreshing meal, this salad is always a winner.

This salad is perfect for bringing a little bit of sunshine to your plate, no matter the weather outside.

Spinach Strawberry Salad with Pecans Ingredients

Here’s what you’ll need to create this culinary masterpiece. I always encourage using the freshest ingredients you can find. It truly makes a difference!

  • 5 oz spinach (or baby kale): The base of our salad, providing a healthy dose of vitamins and minerals.
  • 1 lb strawberries (hulled and sliced): The star of the show, adding sweetness and vibrant color.
  • 1/2 cup feta cheese (crumbled): For a salty, tangy counterpoint to the sweetness of the strawberries.
  • 1/4 cup candied pecans: Adding crunch and a touch of sweetness. You can use plain pecans if you prefer a less sweet option.
  • 1/4 cup balsamic glaze: A drizzle of balsamic glaze adds depth and complexity to the dressing.
  • 1/4 cup extra virgin olive oil: The foundation of our dressing, providing healthy fats and richness.
  • 1 tablespoon honey: A touch of sweetness to balance the acidity of the balsamic glaze.
  • 1 teaspoon Dijon mustard: Adds a subtle tang and helps to emulsify the dressing.
  • Salt and pepper to taste: To enhance the flavors of all the ingredients.
Recipe Image

How to Make Spinach Strawberry Salad: Step-by-Step Instructions

Ready to get started? Here’s how to make this delicious salad:

  1. Prep the Ingredients: Wash and dry the spinach. Hull and slice the strawberries. Crumble the feta cheese. Measure out the pecans.
  2. Make the Dressing: In a separate bowl, whisk together balsamic glaze, olive oil, honey, Dijon mustard, salt, and pepper. Make sure it’s well combined. This salad is only as good as the dressing!
  3. Assemble the Salad: In a large mixing bowl, combine the spinach, sliced strawberries, and crumbled feta.
  4. Dress the Salad: Pour the dressing over the salad and toss gently until evenly coated. Be careful not to overdress; you want the salad to be lightly coated, not swimming in dressing.
  5. Add the Pecans: Top with candied pecans for added flavor and crunch.
  6. Serve Immediately: Enjoy! This salad is best served fresh.

Pro Tips for the Perfect Spinach Strawberry Salad

Want to take your salad to the next level? Here are a few of my favorite pro tips:

  • Use Fresh, High-Quality Ingredients: The better the ingredients, the better the salad. Opt for organic spinach and locally grown strawberries whenever possible.
  • Don’t Overdress the Salad: A little dressing goes a long way. Start with a small amount and add more as needed.
  • Toast the Pecans: Toasting the pecans before adding them to the salad enhances their flavor and adds extra crunch.
  • Chill the Strawberries: Chilling the strawberries before slicing them helps them hold their shape and prevents them from becoming mushy.
  • Make the Dressing Ahead of Time: You can make the dressing up to a day in advance and store it in the refrigerator. This allows the flavors to meld together and saves you time when you’re ready to assemble the salad.

These little tweaks can make a big difference in the final result. The pecans is a great addition to this salad!

Common Mistakes to Avoid

We all make mistakes in the kitchen, but here are a few common ones to watch out for when making this salad:

  • Using Wilted Spinach: Make sure your spinach is fresh and crisp. Wilted spinach will make the salad soggy and unappetizing.
  • Overdressing the Salad: As mentioned before, less is more when it comes to dressing. Overdressing will make the salad heavy and soggy.
  • Adding the Pecans Too Early: If you add the pecans too early, they will lose their crunch. Add them just before serving.
  • Using Underripe Strawberries: Make sure your strawberries are ripe and sweet. Underripe strawberries will be tart and won’t add the desired sweetness to the salad.
  • Skipping the Salt and Pepper: Salt and pepper are essential for enhancing the flavors of all the ingredients. Don’t skip them!

Avoiding these mistakes will help you create a salad that’s both delicious and visually appealing. This salad is something you can be proud of.

Spinach Strawberry Salad Variations

One of the best things about this salad is how easy it is to customize. Here are a few variations to try:

  • Add Protein: Grilled chicken, shrimp, or tofu make a great addition to this salad.
  • Swap the Cheese: Goat cheese, blue cheese, or mozzarella are all delicious alternatives to feta.
  • Use Different Nuts: Walnuts, almonds, or pistachios can be used in place of pecans.
  • Add Avocado: Sliced avocado adds creaminess and healthy fats.
  • Make it Vegan: Omit the feta cheese and use maple syrup instead of honey in the dressing.

Feel free to experiment and create your own unique version of this salad. The possibilities are endless! The sweetness of strawberries and balsamic is what makes this salad so good.

How to Store Spinach Strawberry Salad

This salad is best served immediately, but if you have leftovers, here’s how to store them:

  • Store the Dressing Separately: If possible, store the dressing separately from the salad. This will prevent the salad from becoming soggy.
  • Refrigerate in an Airtight Container: Store the salad in an airtight container in the refrigerator for up to 24 hours.
  • Add the Pecans Just Before Serving: As mentioned before, add the pecans just before serving to maintain their crunch.

Keep in mind that the salad will be best on the first day. The longer it sits, the more likely it is to become soggy. It’s something that is best enjoyed fresh!

Frequently Asked Questions (FAQ)

Here are some common questions about this salad:

  • Can I make this salad ahead of time? While it’s best served immediately, you can prep the ingredients ahead of time and assemble the salad just before serving.
  • Can I use frozen strawberries? Fresh strawberries are best, but you can use frozen strawberries in a pinch. Just make sure to thaw them completely and pat them dry before adding them to the salad.
  • Can I use a different type of vinegar in the dressing? Yes, you can use red wine vinegar or apple cider vinegar in place of balsamic glaze.
  • Is this salad gluten-free? Yes, this salad is naturally gluten-free.
  • Can I add other fruits to this salad? Absolutely! Blueberries, raspberries, or blackberries would all be delicious additions.

If you have any other questions, feel free to ask in the comments below! You can really make this salad your own.

Serving Suggestions

This salad is delicious on its own, but here are a few serving suggestions to make it a complete meal:

  • Serve with Grilled Chicken or Fish: A simple grilled protein pairs perfectly with this salad.
  • Add a Side of Crusty Bread: For soaking up the delicious dressing.
  • Pair with a Light Soup: Such as tomato soup or vegetable soup.
  • Serve as a Side Dish: At a barbecue or potluck.
  • Enjoy for Lunch: Pack it in a container for a healthy and satisfying lunch.

However you choose to serve it, I hope you enjoy this refreshing and delicious salad as much as I do! Strawberry spinach salad is a perfect combination of flavors. The salad with pecans is really the best part!

Spinach Strawberry Salad with Pecans

Prep Time 15 minutes
Total Time 15 minutes
Servings 4 servings
Calories 320
A refreshing and vibrant salad combining the sweetness of strawberries with the earthy flavor of spinach and the crunch of pecans. Perfect as a light lunch or a side dish.

Ingredients

Salad

  • 5 oz spinach (or baby kale)
  • 1 lb strawberries (hulled and sliced)
  • 1/2 cup feta cheese (crumbled)
  • 1/4 cup candied pecans

Dressing

  • 1/4 cup balsamic glaze
  • 1/4 cup extra virgin olive oil
  • 1 tablespoon honey
  • 1 teaspoon Dijon mustard
  • to taste Salt and pepper

Instructions 

  • Combine spinach, strawberries, and feta in a bowl.
  • Whisk together balsamic glaze, olive oil, honey, Dijon, salt, and pepper in a separate bowl.
  • Pour dressing over salad and toss gently.
  • Top with candied pecans. Serve immediately.

Notes

For a vegan option, omit the feta cheese or substitute with a plant-based alternative.
Calories: 320kcal
Cost: $12
Course: Salad
Cuisine: American
Keyword: Spinach

Nutrition

Calories: 320kcal | Carbohydrates: 30g | Protein: 8g | Fat: 20g | Sodium: 250mg
pin

Hello, friends! Avery here, from my cozy kitchen in Portland. Today, I’m so excited to share one of my absolute favorite spring recipes: a vibrant Spring Arugula and Quinoa Salad with a zesty lemon dressing. This salad isn’t just a meal; it’s a celebration of fresh, seasonal ingredients and a reminder that healthy eating can be both delicious and deeply satisfying. This is one of those salads where the flavors just sing, and it’s so versatile – perfect as a light lunch, a side dish, or even a complete dinner.

My journey into healthy eating wasn’t always smooth. Like many of you, I struggled with finding balance and joy in my meals. But I discovered that the key is to focus on whole, nourishing ingredients and to approach cooking with a sense of gratitude and playfulness. This salad embodies that philosophy perfectly.

Why You’ll Love This Spring Arugula and Quinoa Salad

This isn’t just another salad recipe. It’s a symphony of textures and flavors that will leave you feeling energized and nourished. Here’s why I think you’ll fall in love with it:

  • Fresh and vibrant: The peppery arugula, tender asparagus, and zesty lemon dressing create a bright and refreshing flavor profile that’s perfect for spring.
  • Nutrient-packed: This salad is loaded with vitamins, minerals, and antioxidants from the quinoa, arugula, asparagus, and chickpeas.
  • Satisfying and filling: The quinoa and chickpeas provide plant-based protein and fiber, keeping you full and satisfied for hours.
  • Easy to customize: Feel free to add your favorite veggies, nuts, or seeds to make it your own.
  • Versatile: Serve it as a light lunch, a side dish, or a complete dinner. It’s also great for meal prepping.

If you want to make a salad with incredible flavor, this is it!

Ingredients You’ll Need

Here’s what you’ll need to create this delightful salad:

  • ½ cup dry quinoa
  • 1 bunch asparagus (ends trimmed & then cut into ~2″ pieces)
  • 1 can chickpeas ((15oz), drained & rinsed)
  • cooking spray (or olive oil)
  • kosher salt (to taste)
  • black pepper (to taste)
  • ½ cup crumbled feta ((regular or vegan))
  • ¼ cup diced red onion (or shallot)
  • 2 oz baby arugula ((about 2 packed cups))
  • 2 tbsp olive oil
  • 2 tbsp fresh lemon juice
  • 1 tsp lemon zest
  • 1 tsp maple syrup (or honey)
  • ½ tsp dijon mustard
  • 1 garlic clove (minced)
  • kosher salt (to taste)
Recipe Image

How to Make Spring Arugula and Quinoa Salad: Step-by-Step

The process is simple and straightforward. Here’s how to bring this salad to life:

  1. Roast the Chickpeas: Preheat oven to 425F. Optionally, rub the chickpeas dry between a thin dish towel or paper towel and discard any skins that come off. Then, transfer the chickpeas to a baking sheet, spray with cooking spray (or a little olive oil) and season with kosher salt. Toss to coat and then spread them out evenly on the pan and transfer to the oven to bake for 20 minutes. Roasting the chickpeas is key to getting them nice and crispy.
  2. Cook the Quinoa: While the chickpeas are roasting, cook your quinoa according to package directions. For extra flavor, cook it in chicken broth or chicken bone broth. It should yield about 1.5 cups after being cooked. This is also a good time to prep the asparagus and red onion.
  3. Roast the Asparagus: Once the chickpeas have roasted for 20 minutes, remove the pan from the oven and use a spatula to push the chickpeas towards the outside edges of the pan. Then, add the chopped asparagus to the middle of the pan, spray with cooking spray (or a little olive oil) and season with kosher salt & black pepper. Toss to coat and then spread it out evenly on the pan so nothing is overlapping. Return to the oven to cook for 10-12 more minutes until the asparagus is tender and chickpeas are golden and crispy. Using the oven to roast the asparagus brings out its natural sweetness.
  4. Make the Lemon Dressing: Allow the roasted asparagus, crispy chickpeas and cooked quinoa to cool down for several minutes. Meanwhile, add all lemon dressing ingredients to a small bowl or jar. Stir or shake until emulsified. The lemon dressing is what really ties all the flavors together.
  5. Assemble the Salad: Finally, add all of the salad ingredients to a large bowl, pour the dressing over top and toss with tongs until coated. Enjoy this spring arugula and quinoa salad!

Pro Tips for the Best Salad

Here are a few tips to ensure your salad turns out perfectly every time:

  • Crispy Chickpeas: Make sure the chickpeas are dry before roasting them. This will help them get extra crispy. The pan should allow the chickpeas to spread and not overlap.
  • Perfectly Cooked Quinoa: Rinse the quinoa before cooking it to remove any bitterness. For a flavorful quinoa salad, cook it in broth instead of water.
  • Fresh Ingredients: Use the freshest arugula and asparagus you can find. The better the ingredients, the better the salad will taste.
  • Don’t Overdress: Start with a little dressing and add more as needed. You don’t want the salad to be soggy.

Common Mistakes to Avoid

Let’s talk about some common pitfalls and how to avoid them:

  • Overcooked Quinoa: Mushy quinoa can ruin the texture of the salad. Follow package directions carefully and avoid overcooking.
  • Soggy Arugula: Dress the salad right before serving to prevent the arugula from wilting.
  • Bland Chickpeas: Don’t skimp on the salt and olive oil when roasting the chickpeas. They need to be well-seasoned to add flavor to the salad.

Variations to Try

This salad is incredibly versatile. Feel free to experiment with different ingredients and flavors. Here are a few ideas:

  • Add Protein: Grilled chicken, shrimp, or tofu would be delicious additions.
  • Swap the Cheese: Try goat cheese, parmesan, or a vegan cheese alternative.
  • Add Nuts or Seeds: Toasted almonds, pecans, or pumpkin seeds would add a nice crunch.
  • Different Veggies: Add roasted bell peppers, zucchini, or cherry tomatoes.
  • Spice it Up: Add a pinch of red pepper flakes to the dressing for a little heat.

How to Store Leftovers

This salad is best enjoyed fresh, but leftovers can be stored in an airtight container in the refrigerator for up to 2 days. The arugula may wilt slightly, but the salad will still taste delicious. It’s best to store the dressing separately and add it right before serving.

Frequently Asked Questions

  • Can I make this salad ahead of time? Yes, you can cook the quinoa and roast the chickpeas and asparagus ahead of time. Store them separately in the refrigerator and assemble the salad right before serving.
  • Can I use frozen asparagus? Fresh asparagus is best, but you can use frozen asparagus in a pinch. Just be sure to thaw it completely and pat it dry before roasting.
  • Is this salad vegan? Yes, if you use a vegan feta alternative.
  • Can I use a different type of vinegar in the dressing? Yes, you can substitute the lemon juice with apple cider vinegar or white wine vinegar.

Serving Suggestions

This Spring Arugula and Quinoa Salad is delicious on its own, but it also pairs well with a variety of dishes:

  • Grilled fish or chicken
  • Vegetarian burgers
  • Soup or sandwiches
  • As a side dish at a potluck or barbecue

This spring arugula and quinoa salad is also a perfect make-ahead lunch or dinner option. It’s light, yet satisfying, and packed with nutrients to keep you feeling your best. The chickpeas add a wonderful crunch, and the lemon dressing brightens up the whole dish. If you are looking for a vibrant and healthy meal, this salad is the perfect choice.

Enjoy this delicious and healthy Spring Arugula and Quinoa Salad! It’s a simple way to bring a little bit of sunshine to your day. From my kitchen to yours, happy cooking!

Spring Arugula and Quinoa Salad with Lemon Dressing

Prep Time 15 minutes
Cook Time 32 minutes
Total Time 47 minutes
Servings 4 people
Calories 350
A vibrant and healthy salad featuring quinoa, asparagus, and chickpeas, tossed in a zesty lemon dressing. Perfect for a light lunch or side dish!

Ingredients

Salad

  • 0.5 cup dry quinoa
  • 1 bunch asparagus (ends trimmed & then cut into ~2" pieces)
  • 15 oz chickpeas (drained & rinsed)
  • cooking spray (or olive oil)
  • to taste kosher salt
  • to taste black pepper
  • 0.5 cup crumbled feta (regular or vegan)
  • 0.25 cup diced red onion (or shallot)
  • 2 oz baby arugula (about 2 packed cups)

Lemon Dressing

  • 2 tbsp olive oil
  • 2 tbsp fresh lemon juice
  • 1 tsp lemon zest
  • 1 tsp maple syrup (or honey)
  • 0.5 tsp dijon mustard
  • 1 clove garlic clove (minced)
  • to taste kosher salt

Instructions 

  • Preheat oven to 425F. Roast chickpeas for 20 minutes.
  • Cook quinoa according to package directions.
  • Add asparagus to the pan with chickpeas and roast for 10-12 more minutes.
  • Allow the roasted vegetables and quinoa to cool.
  • Make the lemon dressing.
  • Combine all salad ingredients in a bowl, add dressing, and toss.

Notes

For a heartier salad, add grilled chicken or salmon.
Calories: 350kcal
Cost: $12
Course: Salad
Cuisine: Mediterranean
Keyword: quinoa

Nutrition

Calories: 350kcal | Carbohydrates: 45g | Protein: 15g | Fat: 15g | Sodium: 300mg
pin

Hey there, friend! Avery Collins here, coming to you from my little kitchen in Portland, where the air smells like rain and the farmers’ markets are overflowing with inspiration. Today, I’m sharing a recipe that’s become a staple in my life – my Yummy Strawberry Spinach Salad with Maple Syrup Dressing. This isn’t just a salad; it’s a celebration of fresh, vibrant ingredients and a reminder that healthy eating can be joyful and utterly delicious. It’s a dish that nourishes both body and soul, and I can’t wait for you to experience it.

My journey to this salad, like many things in my life, wasn’t exactly planned. It started with a need to feel better, to reconnect with what I was putting into my body. I remember my early attempts at healthy eating – they were, shall we say, less than inspiring. But the more I experimented, the more I realized that cooking from scratch was an act of self-care. And this salad? It’s the perfect embodiment of that philosophy. It’s simple, adaptable, and bursting with flavor.

Why You’ll Love This Strawberry Spinach Salad

Let’s be honest, salads sometimes get a bad rap. They can be boring, bland, and feel like a chore to eat. But this strawberry spinach salad? It’s anything but. Here’s why you’ll fall in love with it:

  • Flavor Explosion: The sweetness of the strawberries, the slight tang of the red onion, the creamy feta, and the nutty crunch of walnuts – it’s a symphony of flavors that dance on your tongue.
  • Easy to Make: Seriously, this salad comes together in minutes. Perfect for busy weeknights or when you need a quick and healthy lunch.
  • Versatile: You can easily adapt this recipe to suit your taste and what you have on hand. Swap out the berries, add different nuts or cheeses – the possibilities are endless.
  • Healthy and Nourishing: Packed with vitamins, minerals, and antioxidants, this salad is a powerhouse of goodness. It’s a great way to get your daily dose of greens and fruits.
  • That Maple Syrup Dressing: Oh, the maple syrup dressing! It’s the star of the show, adding a touch of sweetness and a delightful complexity that ties all the flavors together. It’s light, flavorful, and so much better than anything you can buy in a bottle.

Ingredients You’ll Need

Here’s what you’ll need to create this masterpiece:

  • 4 cups spinach, cleaned and dried
  • 1/4 red onion, sliced thin
  • 3/4 cup mixed berries (sliced strawberries, raspberries, or blueberries), washed and dried
  • 1/3 cup chopped walnuts or pecans (can be glazed if desired)
  • 1/4 cup crumbled feta cheese (if using)

For the Maple Syrup Dressing:

  • 3 tablespoons pure maple syrup
  • 2 tablespoons apple cider vinegar
  • 4 tablespoons olive oil
  • 1/2 teaspoon dijon mustard
  • Salt to taste
Recipe Image

How to Make This Strawberry Spinach Salad: Step-by-Step

Making this salad is incredibly simple. Here’s how to do it:

  1. Prepare the Dressing: In a small bowl, whisk together the maple syrup, apple cider vinegar, olive oil, Dijon mustard, and salt. Taste and adjust seasonings as needed. This is where you can really personalize the dressing to your liking. If you prefer a tangier dressing, add a splash more vinegar. If you like it sweeter, add a touch more maple syrup.
  2. Assemble the Salad: In a large bowl, combine the spinach, red onion, berries, walnuts (or pecans), and feta cheese (if using).
  3. Dress the Salad: Pour the maple syrup dressing over the salad and toss gently to combine. Be careful not to overdress the salad, as this can make the spinach soggy. It’s always better to start with less dressing and add more as needed.
  4. Serve Immediately: For the best flavor and texture, serve the salad immediately. If you’re making it ahead of time, wait to add the dressing until just before serving.

And that’s it! You now have a delicious and healthy Strawberry Spinach Salad with Maple Syrup Dressing. Enjoy!

Pro Tips for the Perfect Salad

Here are a few tips to take your salad to the next level:

  • Use Fresh, High-Quality Ingredients: The better the ingredients, the better the salad will taste. Look for fresh, vibrant spinach, ripe berries, and good-quality maple syrup.
  • Dry the Spinach Thoroughly: Nobody likes a soggy salad. Make sure to wash and dry the spinach thoroughly before assembling the salad. A salad spinner is your best friend here.
  • Slice the Red Onion Thinly: Raw red onion can be overpowering. Slicing it thinly helps to mellow out the flavor. You can also soak the sliced red onion in ice water for a few minutes to further reduce its sharpness.
  • Toast the Nuts: Toasting the walnuts or pecans enhances their flavor and adds a nice crunch to the salad. You can toast them in a dry skillet over medium heat for a few minutes, or in the oven at 350°F for 5-7 minutes. Keep a close eye on them, as they can burn easily.
  • Don’t Overdress the Salad: As I mentioned before, it’s always better to start with less dressing and add more as needed. Overdressed salad is a sad salad.

Common Mistakes to Avoid

Even the simplest recipes can have pitfalls. Here’s what to watch out for:

  • Using Pre-Washed Spinach That’s Still Wet: Even if the spinach is labeled “pre-washed,” it’s still a good idea to give it a rinse and dry it thoroughly. Excess moisture will make the salad soggy.
  • Using Artificial Maple Syrup: Real maple syrup is a must for this recipe. The artificial stuff just doesn’t compare in terms of flavor and quality. Plus, real maple syrup has some health benefits, too!
  • Adding the Dressing Too Far in Advance: The dressing will cause the spinach to wilt, so it’s best to add it just before serving.
  • Skipping the Taste Test: Always taste the dressing and adjust the seasonings as needed. Everyone’s taste buds are different, so what tastes good to me might not taste good to you.

Variations to Try

One of the best things about this salad is how easy it is to customize. Here are a few variations to try:

  • Add Grilled Chicken or Salmon: Turn this salad into a complete meal by adding grilled chicken or salmon. The protein will help keep you feeling full and satisfied.
  • Swap the Berries: Use whatever berries are in season. Blackberries, blueberries, and raspberries all work well. You could even add some sliced peaches or nectarines in the summer.
  • Try Different Cheeses: If you’re not a fan of feta, try goat cheese, blue cheese, or even a sharp cheddar.
  • Add Avocado: Avocado adds a creamy texture and healthy fats to the salad.
  • Spice it Up: Add a pinch of red pepper flakes to the dressing for a little kick.

How to Store Leftovers

If you have any leftover salad, store it in an airtight container in the refrigerator. It’s best to store the dressing separately to prevent the spinach from wilting. The salad will keep for up to 24 hours, but it’s best eaten as soon as possible.

Frequently Asked Questions

Here are some common questions I get about this salad:

  • Can I make this salad ahead of time? Yes, you can prepare the salad ahead of time, but wait to add the dressing until just before serving.
  • Can I use frozen berries? Yes, you can use frozen berries, but make sure to thaw them completely and drain off any excess liquid before adding them to the salad.
  • Is this salad gluten-free? Yes, this salad is naturally gluten-free.
  • Is this salad vegetarian? Yes, this salad is vegetarian, as long as you use a vegetarian-friendly cheese.
  • Can I make this salad vegan? Yes, you can make this salad vegan by omitting the feta cheese and using a vegan-friendly alternative.

Serving Suggestions

This Strawberry Spinach Salad is incredibly versatile and pairs well with a variety of dishes. Here are a few of my favorite serving suggestions:

  • As a Side Dish: Serve it alongside grilled chicken, fish, or tofu for a complete and balanced meal.
  • As a Light Lunch: Enjoy it on its own for a light and refreshing lunch.
  • At a Picnic or Potluck: This salad is perfect for picnics and potlucks. Just be sure to keep it chilled until serving.
  • With Soup: Pair it with a warm bowl of soup for a comforting and satisfying meal.

So there you have it – my Yummy Strawberry Spinach Salad with Maple Syrup Dressing. I hope you love it as much as I do. Remember, healthy eating is about finding joy in the process and nourishing your body with delicious, wholesome foods. Happy cooking!

Remember, it’s about finding what works for you and enjoying the process. This salad is my go-to because it’s quick, easy, and makes me feel amazing. I hope it does the same for you!

This salad is truly one of the best ways to enjoy fresh, seasonal ingredients. The combination of sweet berries, tangy red onion, and crunchy walnuts is simply irresistible. And the maple dressing? It’s the perfect finishing touch.

If you’re looking for a salad that’s both healthy and delicious, you’re in the right place. This Strawberry Spinach Salad with Maple Syrup Dressing is the perfect choice. It’s easy to make, packed with flavor, and sure to become a new favorite.

So go ahead, give this recipe a try. I promise you won’t be disappointed. And as always, feel free to adapt it to your liking. Cooking should be fun, so don’t be afraid to experiment and make it your own!

This fresh and vibrant salad is a testament to the fact that healthy eating can be both delicious and satisfying. The spinach and berries provide a wealth of vitamins and antioxidants, while the maple dressing adds a touch of sweetness and complexity.

To ensure the best possible flavor, be sure to use fresh, high-quality ingredients. The prepared salad is best served immediately, but can be stored in the fridge for a short period of time if necessary. When you’re ready to eat, simply toss the salad with the dressing and enjoy.

If you’re looking for a simple and delicious salad dressing recipe with maple syrup, this is it. The maple syrup adds a touch of sweetness and depth of flavor that perfectly complements the other ingredients. It’s a great alternative to traditional salad dressings and is sure to become a new favorite.

Yummy Strawberry Spinach Salad with Maple Syrup Dressing

Prep Time 15 minutes
Total Time 15 minutes
Servings 4 servings
Calories 250
A refreshing and healthy spinach salad with sweet strawberries and a tangy maple syrup dressing. Perfect for a light lunch or side dish!

Ingredients

Salad

  • 4 cups spinach (cleaned and dried)
  • 1/4 red onion (sliced thin)
  • 3/4 cup mixed berries ((sliced strawberries, raspberries, or blueberries), washed and dried)
  • 1/3 cup chopped walnuts or pecans ((can be glazed if desired))
  • 1/4 cup crumbled feta cheese ((if using))

Dressing

  • 3 tablespoons pure maple syrup
  • 2 tablespoons apple cider vinegar
  • 4 tablespoons olive oil
  • 1/2 teaspoon dijon mustard
  • Salt (to taste)

Notes

Add grilled chicken or fish for a heartier meal.
Calories: 250kcal
Cost: $8
Course: Salad
Cuisine: American
Keyword: Spinach

Nutrition

Calories: 250kcal | Carbohydrates: 20g | Protein: 5g | Fat: 18g | Sodium: 100mg
pin