Author

Avery Collins

Browsing

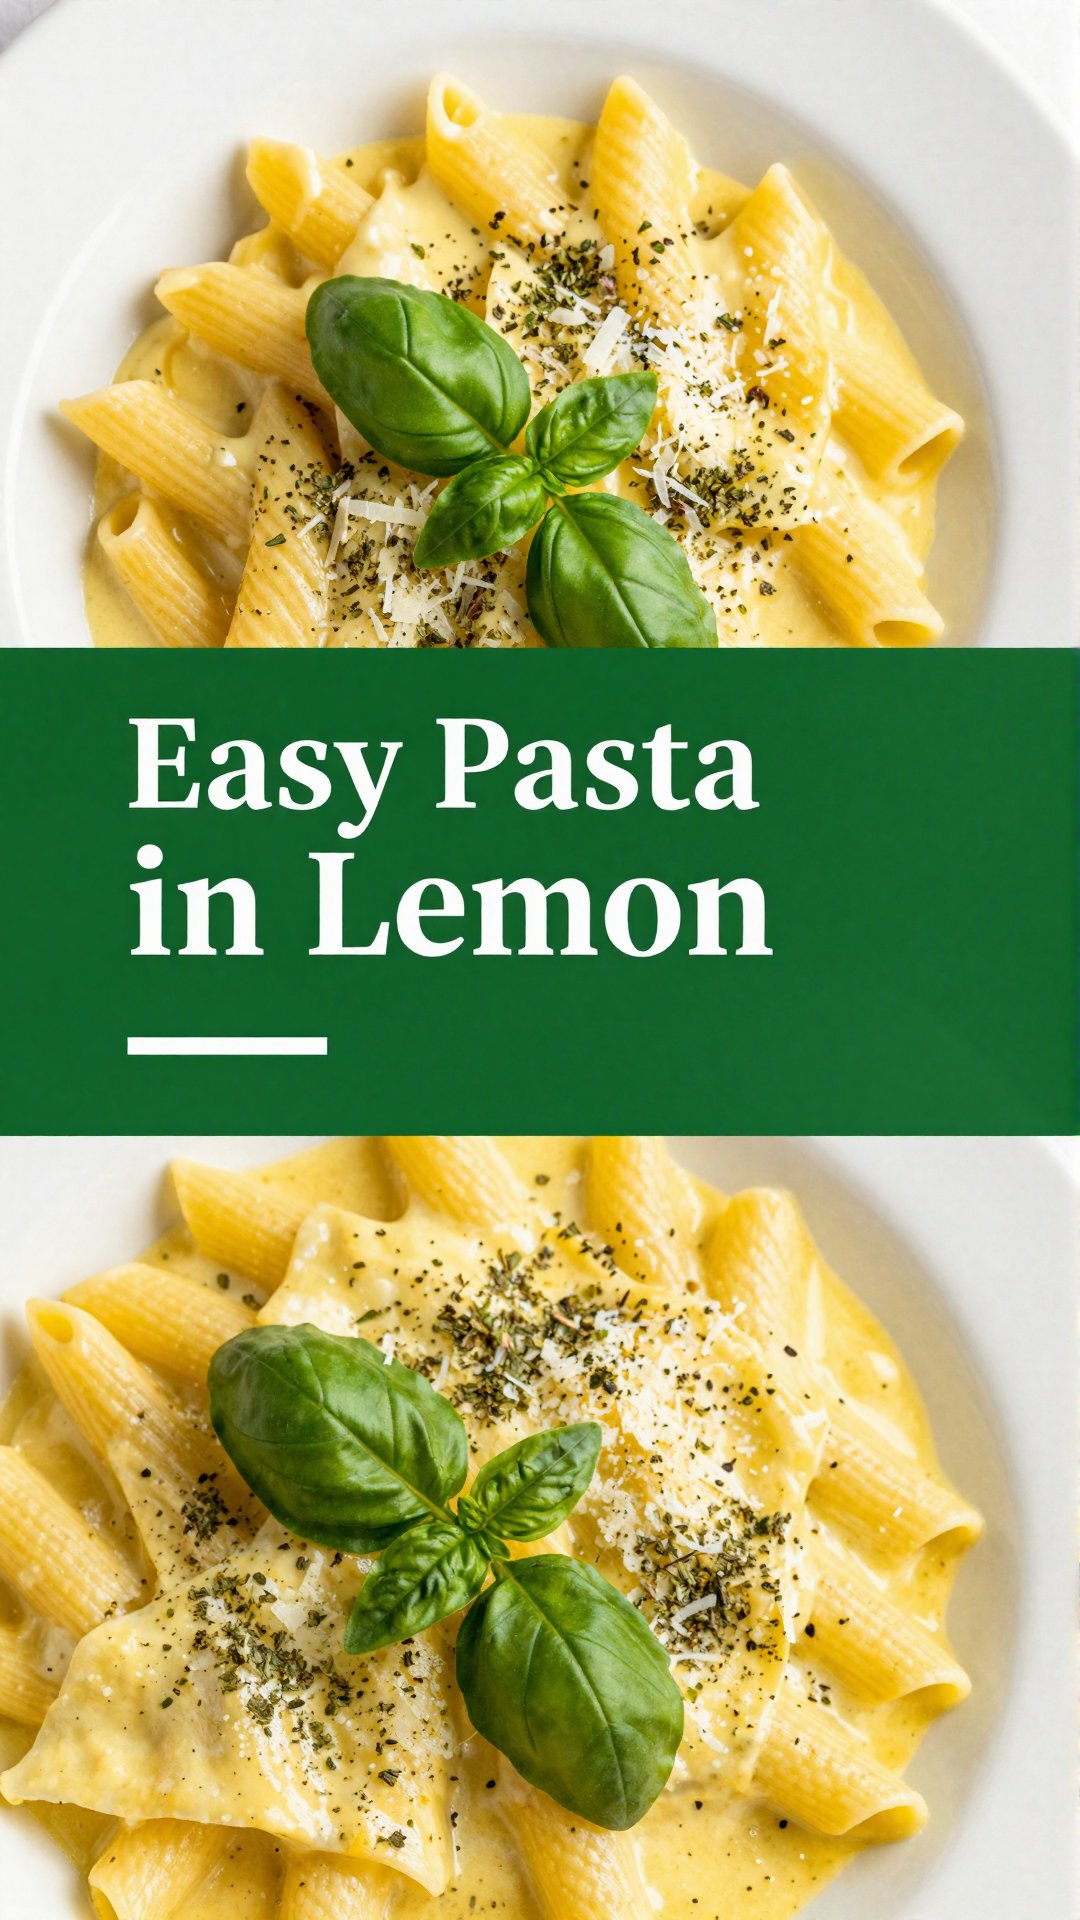
Quick & Easy Lemon Pasta: A Burst of Sunshine on Your Plate

Hey there, friend! Avery Collins here, from my cozy kitchen in Portland. Today, I want to share a recipe that’s become a staple in our home – a vibrant, quick, and utterly delicious Lemon Pasta. It’s one of those dishes that feels like a warm hug on a rainy day, and it’s ready in mere minutes. I’m a fan of recipes that don’t require a culinary degree or hours in the kitchen, and this one definitely fits the bill. If you are looking for a simple, bright, and satisfying meal, you’ve come to the right place. This lemon pasta recipe is a testament to the fact that healthy, flavorful food doesn’t have to be complicated.

My journey into cooking was born out of necessity, a need to reclaim my well-being after years of neglecting it. And trust me, I’ve had my share of kitchen disasters! But amidst the chaos, I discovered the joy of creating something nourishing with my own hands. This Lemon Pasta is a reflection of that journey – simple, forgiving, and full of life.

Why You’ll Absolutely Love This Lemon Pasta

This isn’t just another pasta recipe; it’s a celebration of simple ingredients and bright flavors. Here’s why I think you’ll fall head-over-heels for it:

  • Speed Demon: Ready in under 20 minutes – perfect for those busy weeknights when you’re craving something delicious but don’t have hours to spend in the kitchen.
  • Pantry-Friendly: Uses ingredients you likely already have on hand – pasta, lemons, garlic, olive oil, and a few herbs.
  • Versatile: Easily customizable to your liking. Add veggies, protein, or different cheeses to make it your own.
  • Bright and Flavorful: The lemon sauce is zesty, refreshing, and adds a delightful tang to the pasta.
  • Nourishing: Focuses on whole ingredients and simple preparations, making it a healthy and satisfying meal.

The Magic Ingredients for This Lemon Pasta

Let’s talk ingredients! The beauty of this dish lies in its simplicity. Each component plays a crucial role in creating a symphony of flavors.

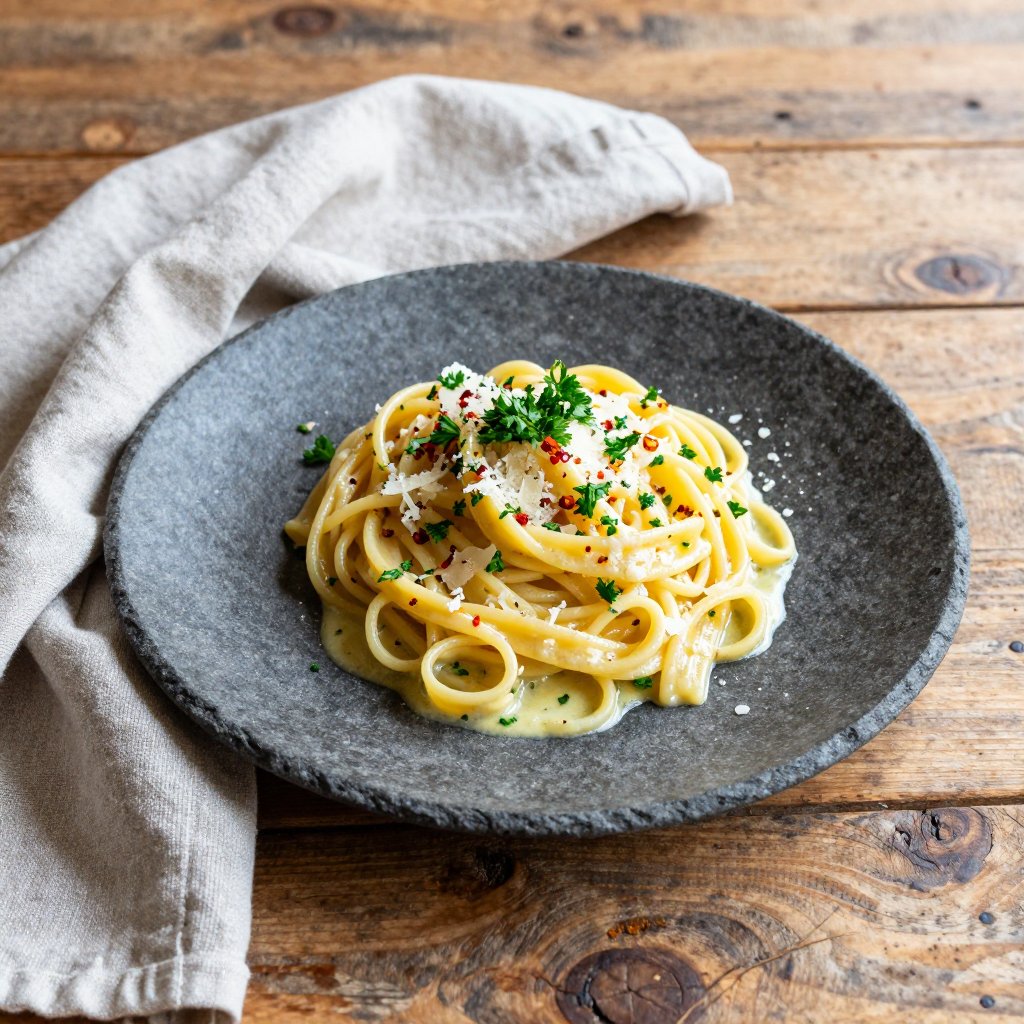
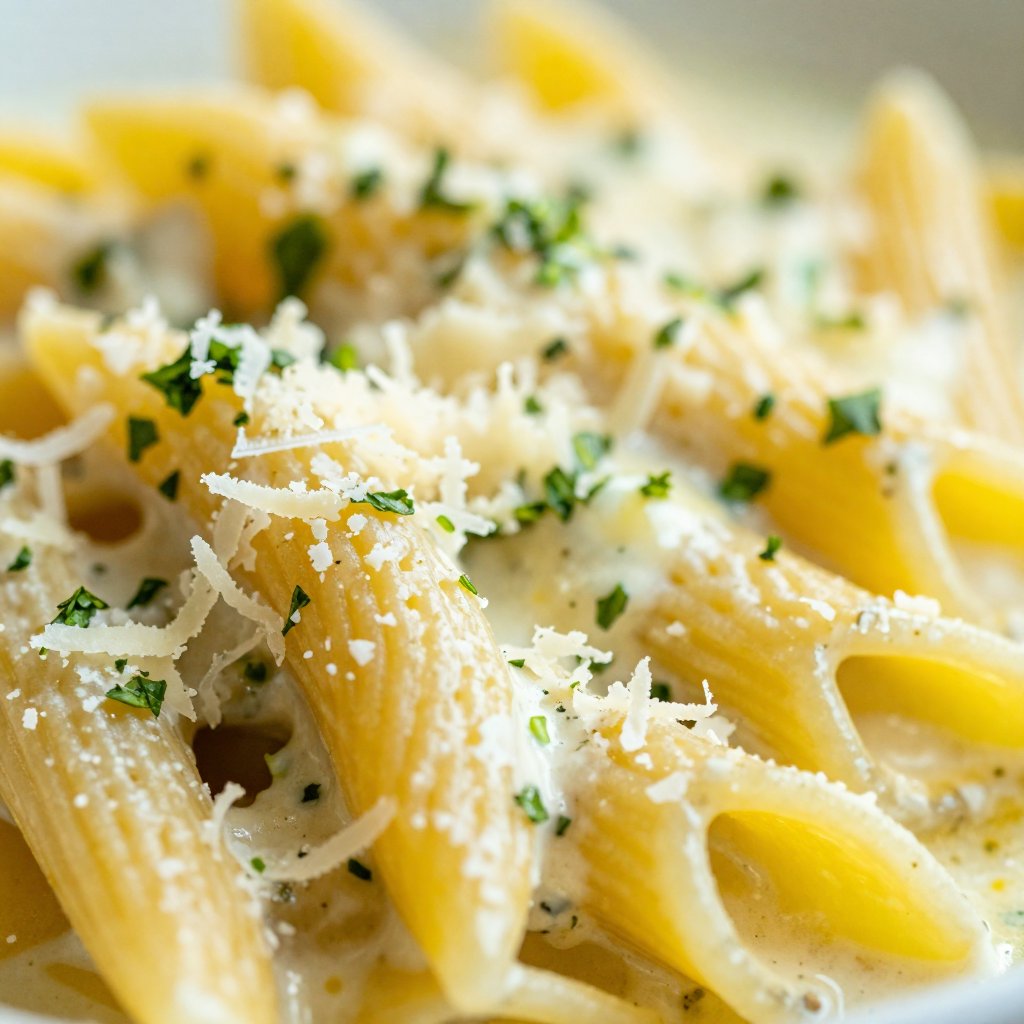
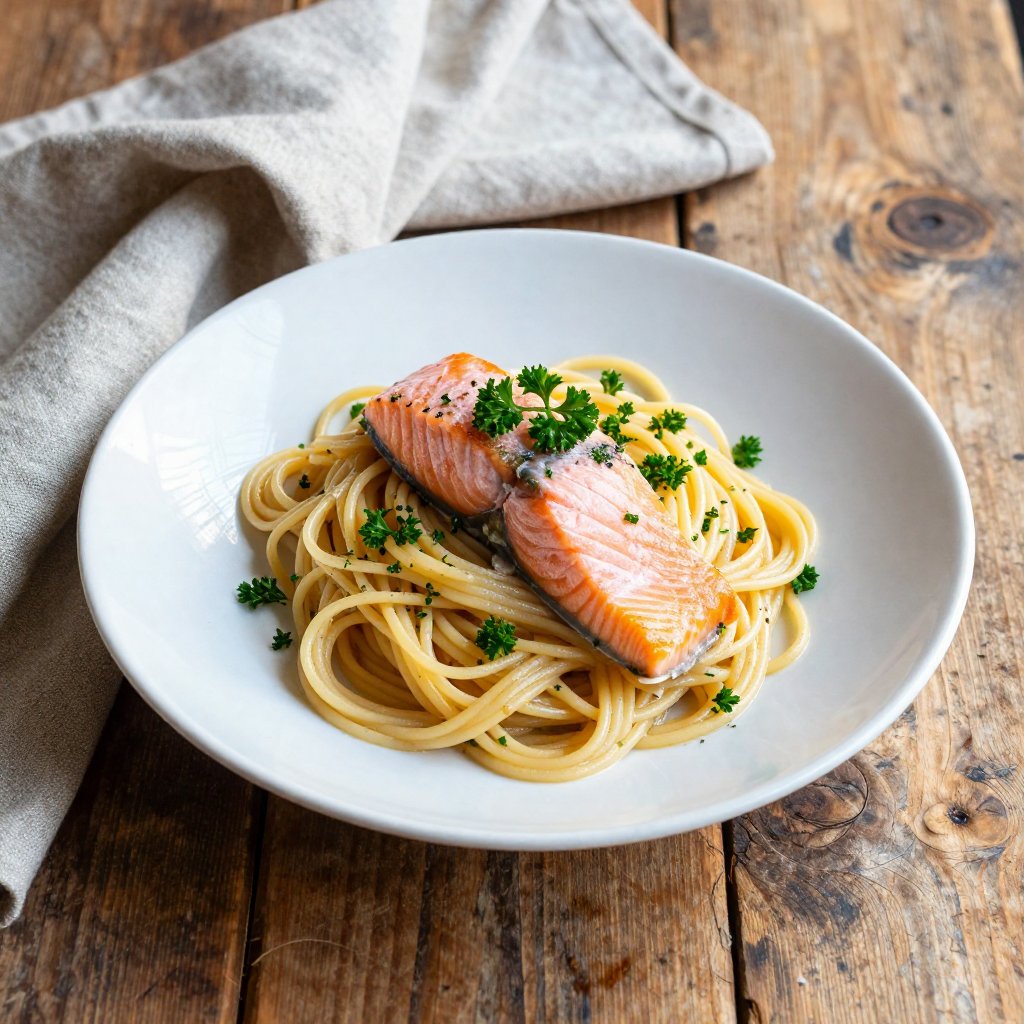
  • Pasta (one pound cooked according to the directions on the package. That is in most cases one box of pasta.): I often use spaghetti or linguine, but feel free to experiment with your favorite shape. A shorter noodle such hasfarfalle works great too.
  • Olive Oil – 1/2 cup divided.: Use good quality extra virgin olive oil for the best flavor. It adds richness and depth to the sauce.
  • Broth– 1/2 cup. Any flavor is fine. Alternatively (you can use leftover water used to boil your water in.): Pasta water is liquid gold! It helps to create a creamy, emulsified sauce.
  • Lemon Juice– 2 -3 tablespoons. That is about one- two average sized lemon juiced. You could increase this up to 1/2 cup depending on how fond you are of lemons.: Freshly squeezed lemon juice is key! It provides the signature tang and brightness of this dish. This lemon is the star of this pasta!
  • Minced Garlic – 1 teaspoon. That is about one clove.: Garlic adds a subtle savory note that complements the lemon beautifully.
  • Chopped Herbs- 1/4 cup. Such as basil and or oregano.: Fresh herbs elevate the dish with their aromatic and vibrant flavors. Basil and oregano are my favorites, but feel free to use what you have on hand.
  • Seasonings as desired. This can include Italian Seasonings (Salt, and/or Pepper.): Season generously to enhance the flavors of the other ingredients.
  • Grated Parmesan Cheese– 1/2 cup. Can omit.: Parmesan cheese adds a salty, savory finish to the dish.
Recipe Image

Let’s Make This Lemon Pasta – Step by Step

Alright, let’s get cooking! This recipe is so easy; even a beginner can nail it. Follow these simple steps, and you’ll have a delicious Lemon Pasta on the table in no time.

  1. Cook the Pasta: Start by cooking the pasta as directed on the package or to your preferences. Drain and toss the pasta in a quarter cup of the olive oil. Reserve a cup of the pasta water for possible later use. Transfer the pasta to a large bowl.
  2. Make the Sauce: For the sauce, over medium heat in a small or medium saucepan, combine together the remaining olive oil, broth, lemon juice, minced garlic, and any seasoning as desired. Heat this for 10 minutes or as needed to heat, adding additional liquid if desired to thin it out.
  3. Combine and Serve: Toss the pasta in the heated sauce, adding the sauce in small amounts at a time (1/4-1/3 cup at a time) until you reach your desired consistency for serving. You do not have to use up all of the sauce.
  4. Garnish and Enjoy: Top with the herbs and cheese and serve.

Avery’s Pro Tips for the Best Lemon Pasta

Here are a few of my tried-and-true tips to ensure your Lemon Pasta is a resounding success:

  • Salt Your Pasta Water: This is crucial for seasoning the pasta from the inside out. Add a generous pinch of salt to the boiling water before adding the pasta.
  • Don’t Overcook the Pasta: Aim for al dente – slightly firm to the bite. Overcooked pasta will become mushy in the sauce.
  • Use Freshly Squeezed Lemon Juice: Bottled lemon juice just doesn’t compare to the bright, vibrant flavor of fresh lemon juice.
  • Emulsify the Sauce with Pasta Water: The starchy pasta water helps to create a creamy, emulsified sauce that clings to the pasta beautifully. Add a little at a time until you reach your desired consistency.
  • Taste and Adjust Seasoning: Before serving, taste the pasta and adjust the seasoning as needed. You may want to add more salt, pepper, or lemon juice to suit your preferences.

Common Mistakes to Avoid

We all make mistakes in the kitchen – it’s part of the learning process! Here are a few common pitfalls to avoid when making Lemon Pasta:

  • Overcooking the Garlic: Burnt garlic can ruin the flavor of the sauce. Cook it gently over medium heat until it’s fragrant but not browned.
  • Using Too Much Lemon Juice: Too much lemon juice can make the sauce overly acidic. Start with a smaller amount and add more to taste.
  • Not Using Enough Pasta Water: Pasta water is essential for creating a creamy sauce. Don’t be afraid to add it liberally until you reach your desired consistency.

Lemon Pasta Variations to Spice Things Up

The beauty of this recipe is its versatility. Feel free to experiment with different ingredients and flavors to create your own unique Lemon Pasta masterpiece. Here are a few ideas to get you started:

  • Add Veggies: Toss in some sautéed spinach, asparagus, or zucchini for added nutrients and flavor.
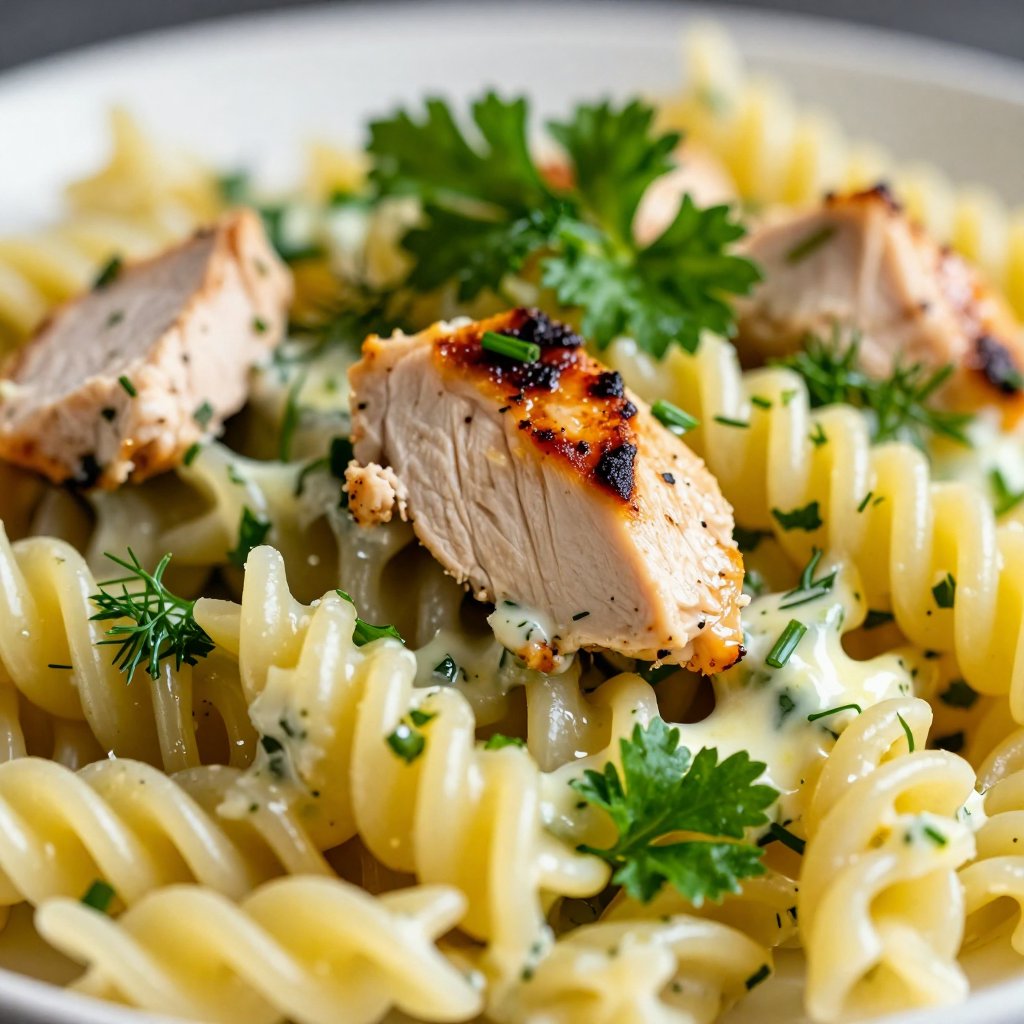
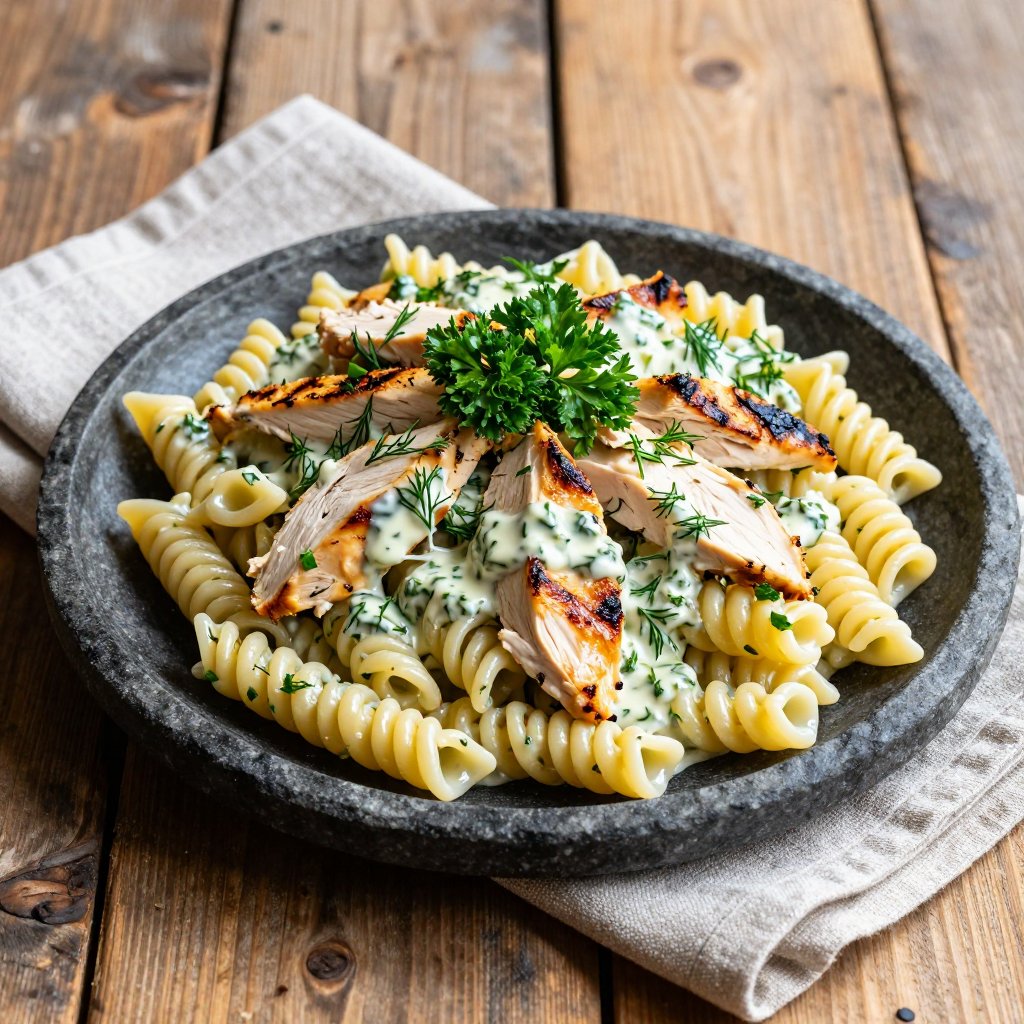
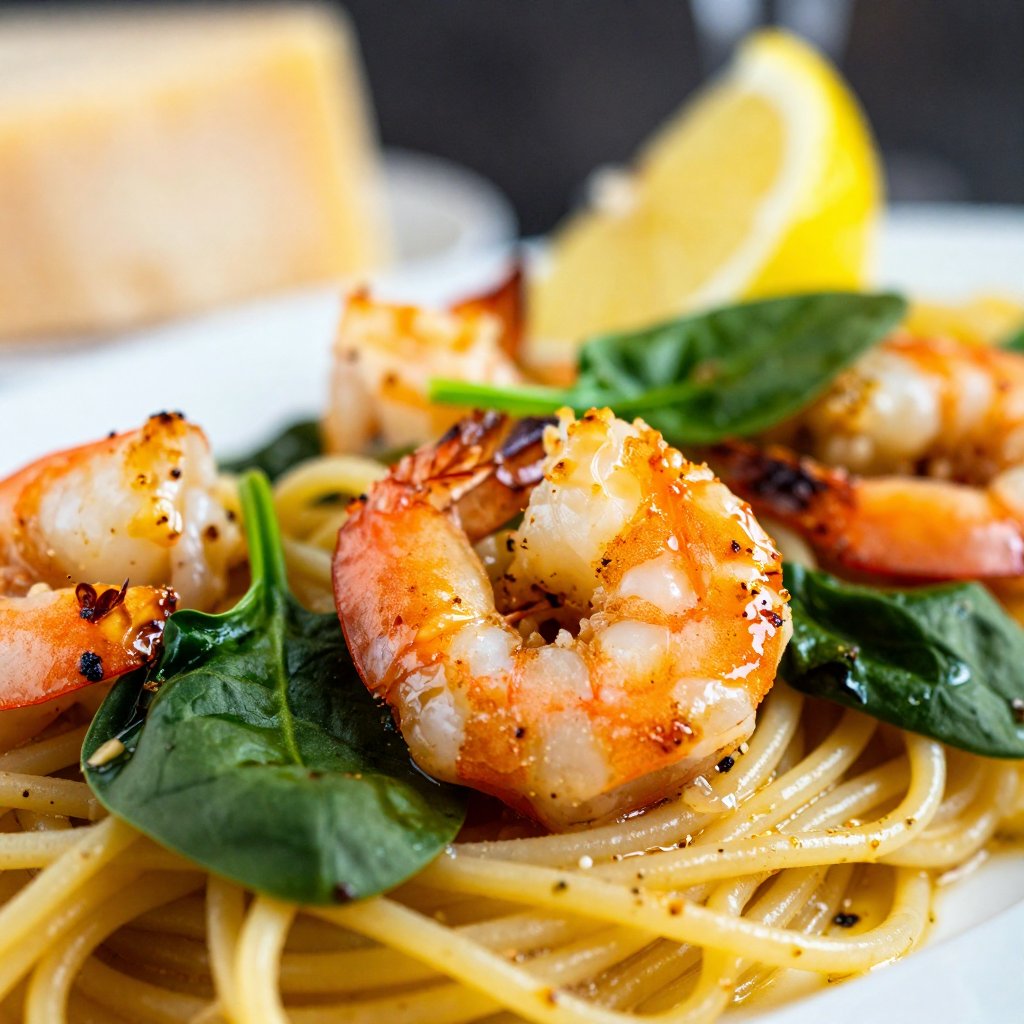
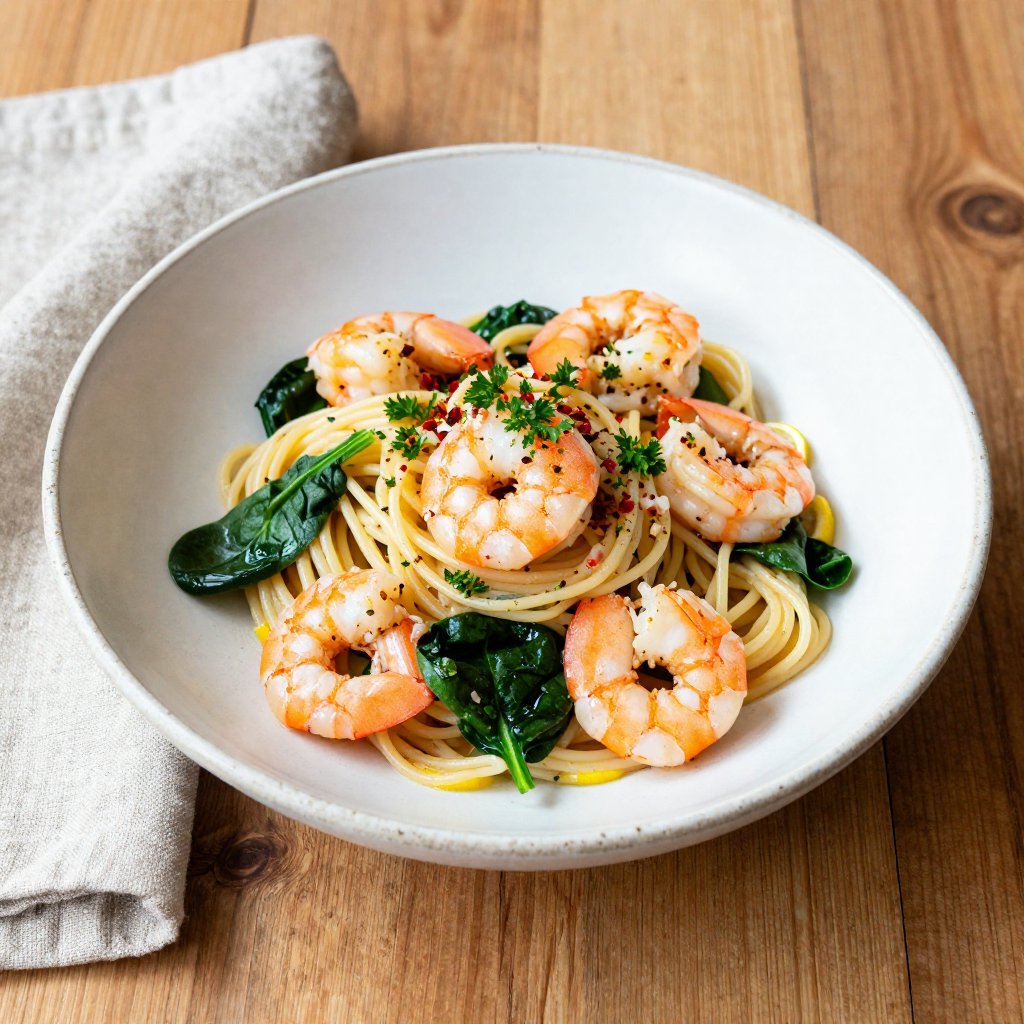
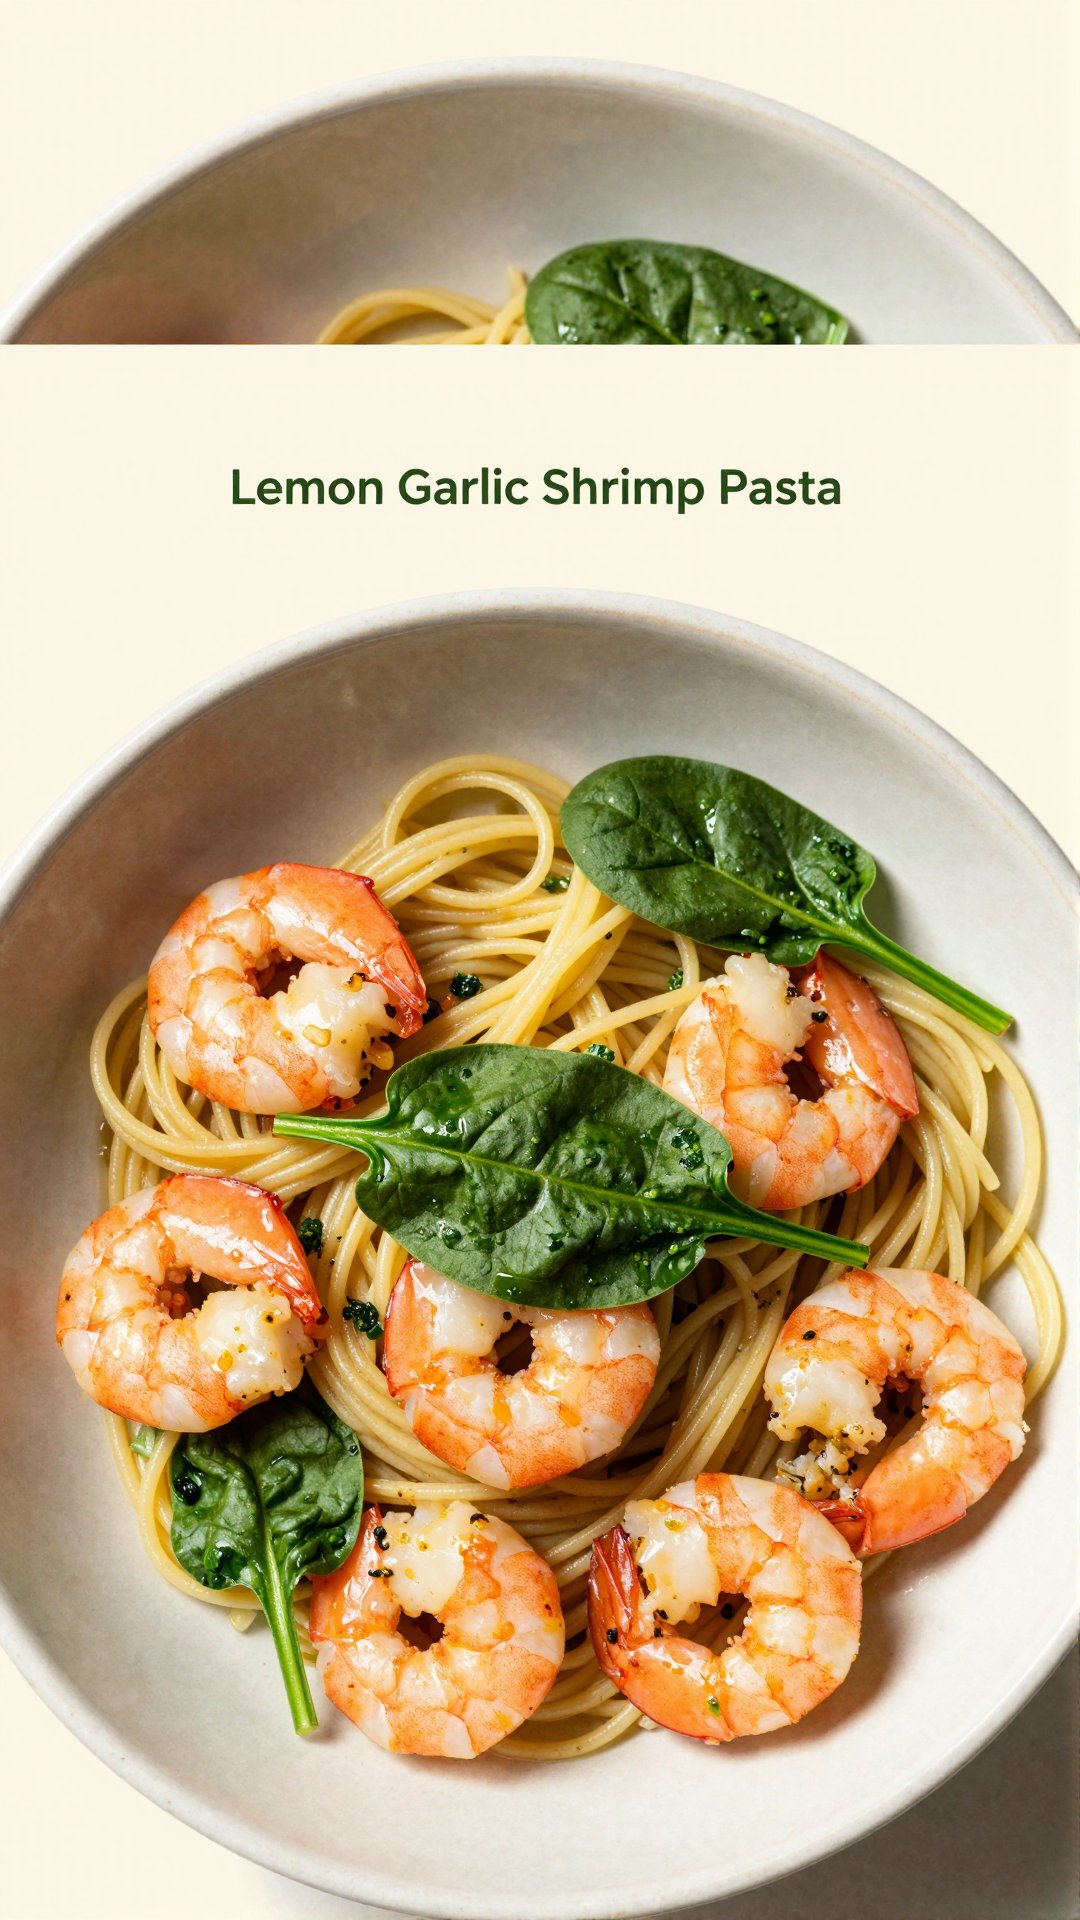
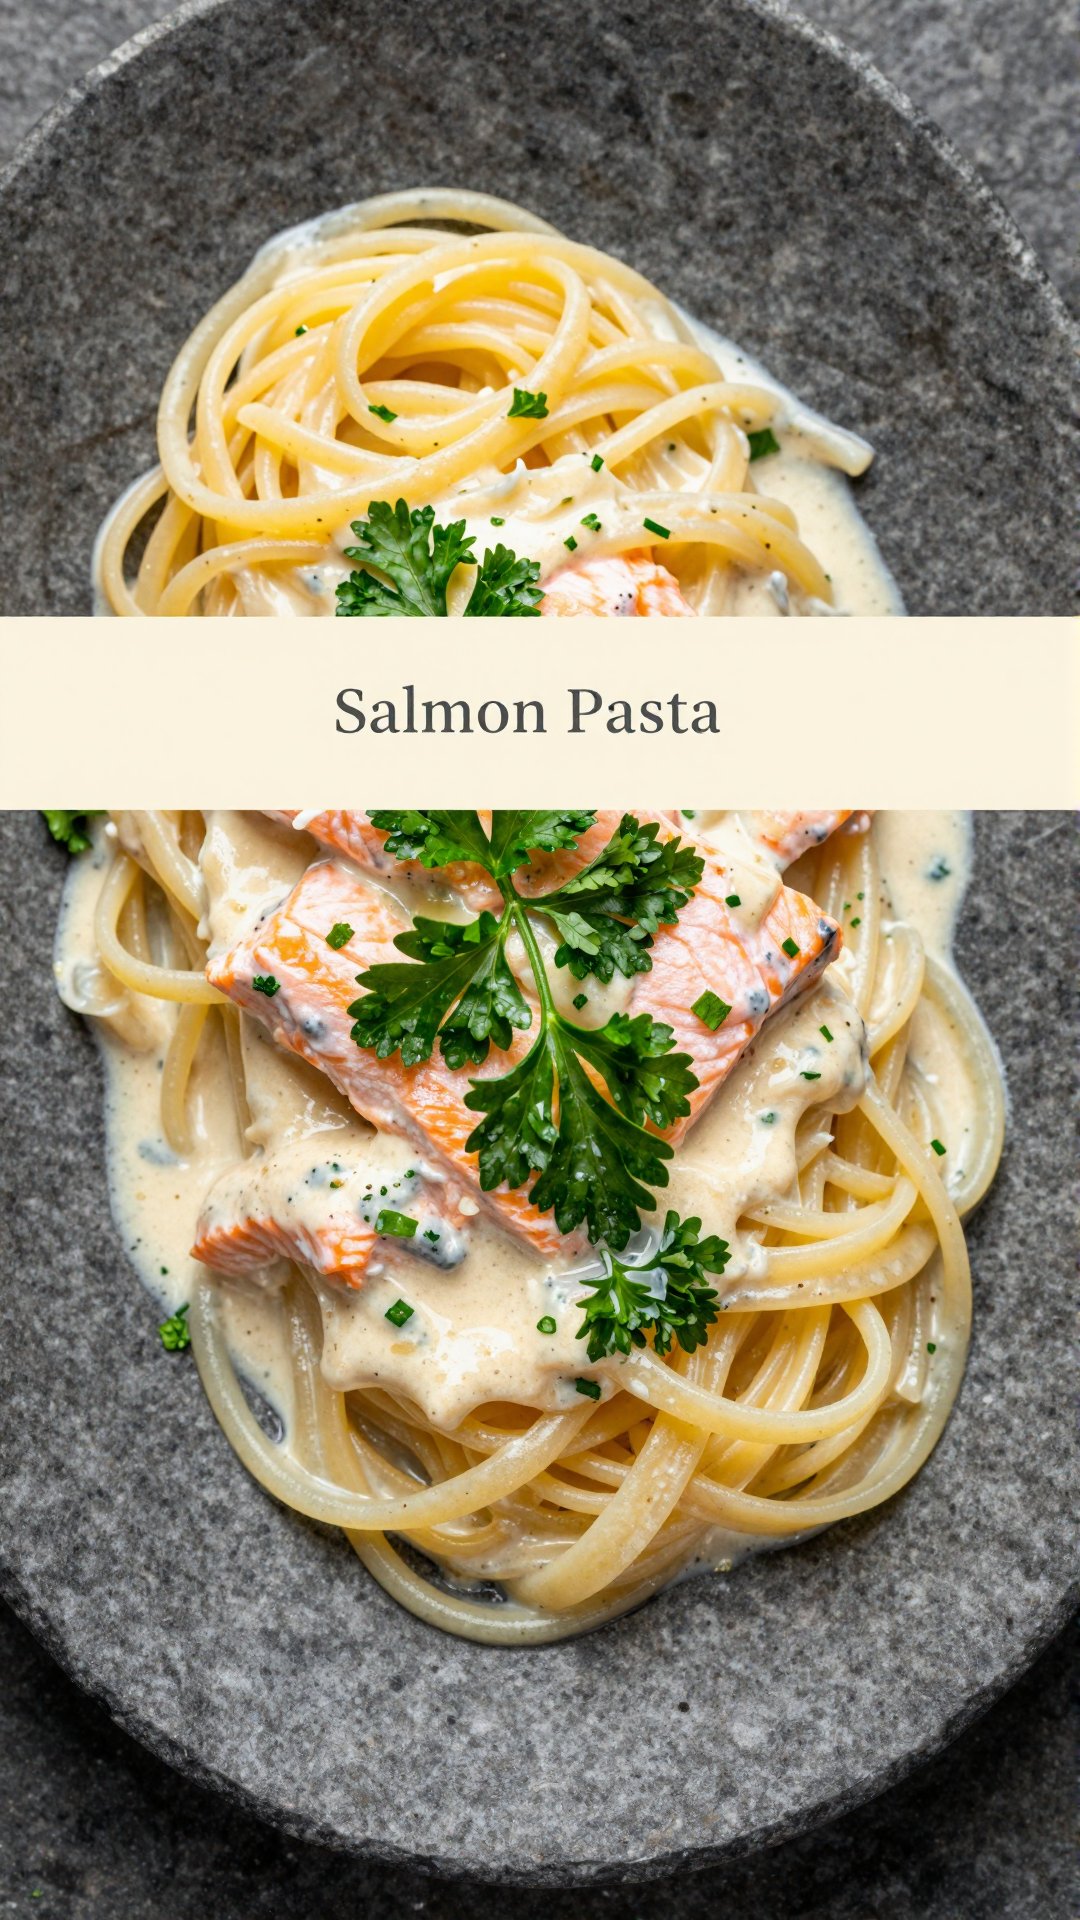
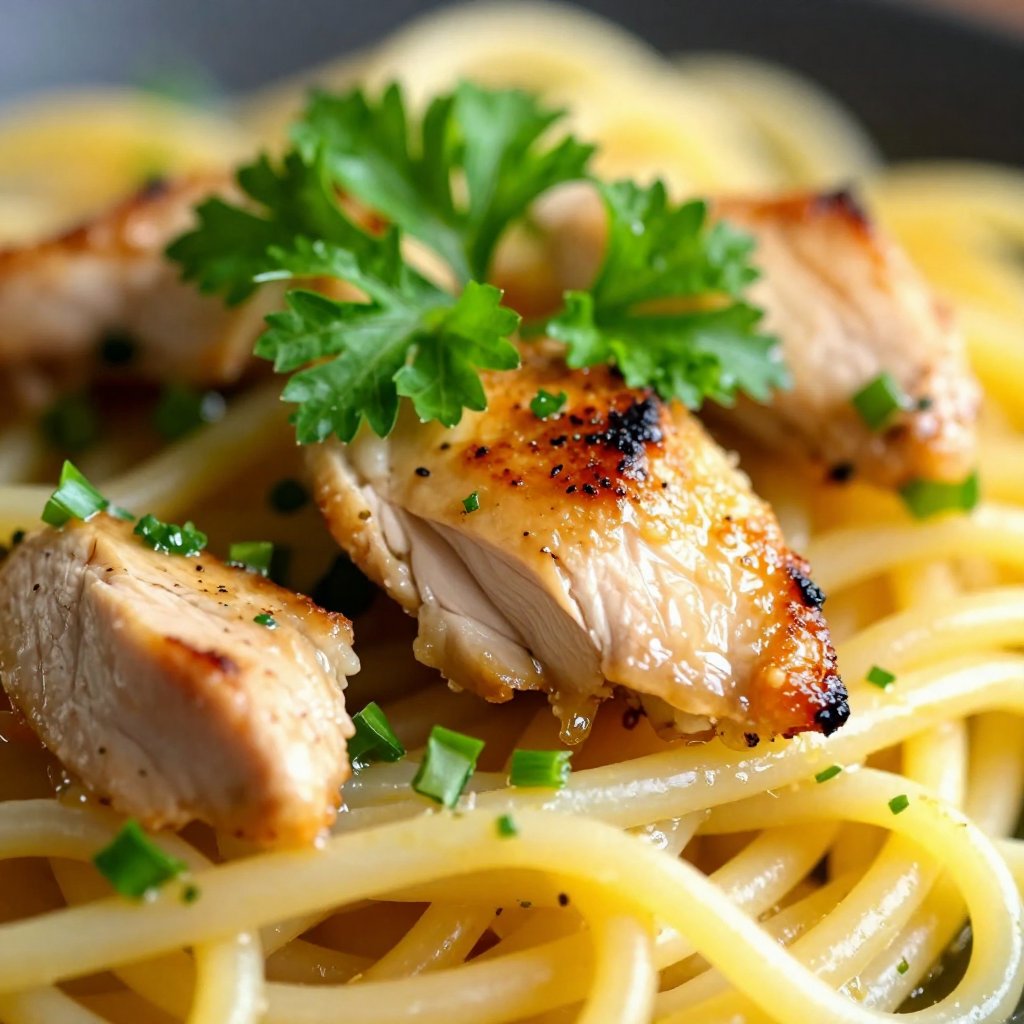
  • Add Protein: Grilled chicken, shrimp, or chickpeas would all be delicious additions.
  • Add Red Pepper Flakes: For a touch of heat, add a pinch of red pepper flakes to the sauce.
  • Use Different Cheeses: Try using ricotta, goat cheese, or feta instead of Parmesan.
  • Make it Creamy: Stir in a dollop of mascarpone cheese or heavy cream for a richer, more decadent sauce.

Storing and Reheating Your Lemon Pasta

If you have leftovers (which is unlikely!), store them in an airtight container in the refrigerator for up to 3 days. Reheat gently in a saucepan over medium heat, adding a splash of broth or water to prevent it from drying out.

Frequently Asked Questions About Lemon Pasta

Got questions? I’ve got answers! Here are a few of the most common questions I get asked about this recipe:

  • Can I use gluten-free pasta? Absolutely! Use your favorite gluten-free pasta for this recipe.
  • Can I make this vegan? Yes! Simply omit the Parmesan cheese or use a vegan Parmesan alternative.
  • Can I use dried herbs instead of fresh? Yes, but use half the amount called for in the recipe. Dried herbs are more potent than fresh.
  • Can I make this ahead of time? I don’t recommend making the entire dish ahead of time, as the pasta can become mushy. However, you can prepare the sauce ahead of time and store it in the refrigerator for up to 2 days.

Serving Suggestions for Your Lemon Pasta

This Lemon Pasta is delicious on its own, but it also pairs well with a variety of side dishes. Here are a few of my favorite serving suggestions:

  • A Simple Salad: A light and refreshing salad with mixed greens, cherry tomatoes, and a vinaigrette dressing is the perfect complement to the rich and flavorful pasta.
  • Garlic Bread: Crusty garlic bread is always a welcome addition to any pasta dish.
  • Roasted Vegetables: Roasted asparagus, broccoli, or Brussels sprouts would all be delicious alongside this Lemon Pasta.
  • Grilled Chicken or Fish: For a heartier meal, serve the pasta with grilled chicken or fish.

So there you have it – my go-to recipe for Quick & Easy Lemon Pasta. I hope you love it as much as I do! Remember, cooking should be a joy, not a chore. Don’t be afraid to experiment, have fun, and make this recipe your own. And most importantly, savor every bite!

Easy Pasta in Lemon Sauce

Prep Time 5 minutes
Cook Time 15 minutes
Total Time 20 minutes
Servings 4 servings
Calories 450
A simple and flavorful pasta dish featuring a bright lemon sauce. Perfect for a quick and satisfying meal.

Ingredients

Pasta

  • 1 pound Pasta (cooked according to package directions)

Sauce Ingredients

  • 0.5 cup Olive Oil (divided)
  • 0.5 cup Broth (any flavor)
  • 2 tablespoons Lemon Juice (to taste)
  • 1 teaspoon Minced Garlic (about one clove)
  • 0.25 cup Chopped Herbs (basil and/or oregano)
  • Seasonings (as desired (Salt, Pepper, Italian Seasonings))
  • 0.5 cup Grated Parmesan Cheese (optional)

Instructions 

  • Cook pasta, drain, and toss with 1/4 cup olive oil. Reserve pasta water. Transfer to a large bowl.
  • Combine remaining olive oil, broth, lemon juice, garlic, and seasonings in a saucepan. Heat for 10 minutes, adding liquid to thin if needed.
  • Toss pasta with sauce gradually until desired consistency is reached.
  • Top with herbs and cheese and serve.

Notes

Adjust the amount of lemon juice to your preference. For a richer sauce, use heavy cream instead of broth.
Calories: 450kcal
Cost: $8
Course: Main Course
Cuisine: Italian
Keyword: pasta

Nutrition

Calories: 450kcal | Carbohydrates: 60g | Protein: 15g | Fat: 20g | Sodium: 300mg
pin

Hey there, friends! Avery Collins here, straight from my cozy Portland kitchen. Today, we’re whipping up something that’s both incredibly satisfying and surprisingly quick: Lemon Garlic Shrimp Pasta with Spinach. This dish is a staple in my house because it’s packed with flavor, comes together in under 30 minutes, and is a fantastic way to sneak in some extra greens. Seriously, even my pickiest eaters gobble this one up!

My journey into healthy cooking started out of necessity, not passion. But over time, I discovered the joy of transforming simple ingredients into something nourishing and delicious. And trust me, this recipe is a testament to that philosophy. It’s not about perfection; it’s about finding pleasure in the process and feeding both your body and your soul. So, grab your apron, and let’s get cooking!

Why You’ll Love This Lemon Garlic Shrimp Pasta

Okay, let’s be real: there are a million pasta recipes out there. So, what makes this one so special? Well, here’s why I think you’re going to fall head-over-heels for this Lemon Garlic Shrimp Pasta:

  • Quick & Easy: From start to finish, this dish is ready in under 30 minutes. Perfect for busy weeknights!
  • Flavor Explosion: The combination of zesty lemon, pungent garlic, and savory shrimp is simply irresistible.
  • Hidden Veggies: Sneaking in spinach adds a boost of nutrients without sacrificing flavor.
  • Versatile: You can easily customize this recipe to your liking by adding different vegetables, herbs, or spices.
  • Healthy-ish: While it’s pasta, it’s also loaded with protein and vitamins, making it a well-rounded and satisfying meal.

Honestly, what’s not to love? This recipe is a winner in my book. I think you’ll agree that it’s the perfect balance of comfort food and healthy eating.

Lemon Garlic Shrimp Pasta with Spinach Ingredients

Here’s what you’ll need to gather from your pantry and fridge:

  • 1 pound shrimp, peeled and deveined
  • 1 pound pasta (linguine or spaghetti)
  • 5 ounces fresh spinach
  • 4 cloves garlic, minced
  • 1/4 cup olive oil
  • 1/4 cup lemon juice
  • 2 tablespoons butter
  • 1/4 cup grated Parmesan cheese
  • Salt and pepper to taste
  • Red pepper flakes (optional)
Recipe Image

How To Make Lemon Garlic Shrimp Pasta: Step-by-Step Instructions

Alright, let’s get down to business. Here’s how to bring this delicious Lemon Garlic Shrimp Pasta to life:

  1. Cook the Pasta: Cook your pasta according to the package directions. This is a crucial step, so don’t skip it! Make sure to reserve about 1 cup of pasta water before draining. This starchy water is liquid gold and will help create a luscious sauce.
  2. Sauté the Garlic: While the pasta is cooking, heat olive oil in a large skillet over medium heat. Add the minced garlic and red pepper flakes (if using) and cook until fragrant, about 1 minute. Be careful not to burn the garlic, as it can become bitter.
  3. Cook the Shrimp: Add the shrimp to the skillet and cook until pink and opaque, about 3-5 minutes, flipping halfway through. Don’t overcook the shrimp, or they’ll become rubbery. You want them to be juicy and tender.
  4. Make the Sauce: Stir in the lemon juice, butter, salt, and pepper. This is where the magic happens! The lemon juice brightens the dish, while the butter adds richness and creaminess.
  5. Wilt the Spinach: Add the spinach to the skillet and cook until wilted, about 1-2 minutes. Spinach cooks down quickly, so keep a close eye on it.
  6. Combine Everything: Add the cooked pasta to the skillet with the shrimp and spinach mixture. Toss to combine, adding pasta water as needed to create a sauce. The pasta water will help emulsify the sauce and make it cling to the noodles.
  7. Add Parmesan: Stir in the Parmesan cheese. This adds a salty, nutty flavor that complements the lemon and garlic perfectly.
  8. Serve Immediately: Serve your Lemon Garlic Shrimp Pasta immediately. Garnish with extra Parmesan cheese and red pepper flakes, if desired.

And there you have it! A quick, easy, and incredibly delicious meal that’s sure to become a new favorite. I always love seeing your creations; let me know how it turns out!

Pro Tips for the Perfect Lemon Garlic Shrimp Pasta

Want to take your Lemon Garlic Shrimp Pasta to the next level? Here are a few of my go-to pro tips:

  • Use Fresh Ingredients: This recipe relies on simple ingredients, so it’s important to use the freshest ones possible. Fresh garlic, lemon juice, and spinach will make a world of difference.
  • Don’t Overcook the Shrimp: Overcooked shrimp is tough and rubbery. Cook the shrimp just until they’re pink and opaque.
  • Reserve Pasta Water: Pasta water is a secret weapon for creating a creamy, emulsified sauce. Don’t skip this step!
  • Taste and Adjust: Taste the sauce as you go and adjust the seasoning to your liking. Add more lemon juice for extra zing, more red pepper flakes for heat, or more Parmesan cheese for saltiness.
  • Serve Immediately: Pasta is best served immediately, while it’s still hot and the sauce is creamy.

These little tweaks can elevate your dish from good to great. As a dietitian, I don’t believe in restricting flavor, so don’t be shy about experimenting!

Common Mistakes to Avoid

Even the simplest recipes can have pitfalls. Here are a few common mistakes to avoid when making Lemon Garlic Shrimp Pasta:

  • Burning the Garlic: Burnt garlic is bitter and can ruin the entire dish. Keep a close eye on the garlic and cook it over medium heat until fragrant, about 1 minute.
  • Overcooking the Shrimp: As mentioned earlier, overcooked shrimp is a no-no. Cook the shrimp just until they’re pink and opaque.
  • Not Salting the Pasta Water: Salting the pasta water is essential for seasoning the pasta from the inside out. Add a generous pinch of salt to the boiling water before adding the pasta.
  • Forgetting the Lemon: The lemon juice is what gives this dish its signature zing. Don’t forget to add it!
  • Adding Too Much Pasta Water: Start with a small amount of pasta water and add more as needed until the sauce reaches your desired consistency.

By avoiding these common mistakes, you’ll be well on your way to making a perfect plate of Lemon Garlic Shrimp Pasta.

Variations & Add-ins

One of the best things about this recipe is how versatile it is. Here are a few variations and add-ins to try:

  • Vegetables: Add other vegetables like cherry tomatoes, bell peppers, or zucchini.
  • Herbs: Experiment with different herbs like basil, oregano, or parsley.
  • Cheese: Try using different cheeses like Pecorino Romano or Asiago.
  • Spice: Add a pinch of smoked paprika or chili flakes for extra heat and depth of flavor.
  • Cream: Stir in a splash of heavy cream for an even richer sauce.

Don’t be afraid to get creative and experiment with different flavors and textures. This recipe is a blank canvas, so make it your own!

How to Store Leftovers

If you happen to have any leftovers (which is rare in my house!), here’s how to store them:

  • Refrigerate: Store the leftover pasta in an airtight container in the refrigerator for up to 3 days.
  • Reheat: Reheat the pasta in a skillet over medium heat, adding a splash of water or broth to prevent it from drying out. You can also reheat it in the microwave, but it may not be as good as new.

Note that the shrimp may become a bit rubbery when reheated, but it will still be delicious.

Frequently Asked Questions (FAQ)

Got questions? I’ve got answers! Here are a few frequently asked questions about Lemon Garlic Shrimp Pasta:

  • Can I use frozen shrimp? Yes, you can use frozen shrimp. Just make sure to thaw them completely before cooking.
  • Can I use gluten-free pasta? Absolutely! Use your favorite gluten-free pasta.
  • Can I make this recipe dairy-free? Yes, you can make this recipe dairy-free by omitting the butter and Parmesan cheese. Use olive oil instead of butter and nutritional yeast instead of Parmesan cheese.
  • Can I add more vegetables? Of course! Feel free to add any vegetables you like.
  • Can I make this recipe ahead of time? I don’t recommend making this recipe ahead of time, as the pasta can become mushy and the shrimp can become rubbery. It’s best served immediately.

If you have any other questions, feel free to ask in the comments below!

Serving Suggestions

Looking for the perfect side dish to accompany your Lemon Garlic Shrimp Pasta? Here are a few of my favorites:

  • Garlic Bread: A classic pairing!
  • Side Salad: A simple green salad with a light vinaigrette.
  • Roasted Vegetables: Roasted asparagus, broccoli, or Brussels sprouts.
  • Caprese Salad: Fresh mozzarella, tomatoes, and basil.

This Lemon Garlic Shrimp Pasta is also delicious on its own, so don’t feel like you need to add anything at all! Thislemon garlic shrimp recipe is one of my favorites. I hope you enjoyed learning to make garlic shrimp with me today!

Lemon Garlic Shrimp Pasta Spinach

Prep Time 10 minutes
Cook Time 20 minutes
Total Time 30 minutes
Servings 4 servings
Calories 450
A quick and flavorful pasta dish featuring succulent shrimp, fresh spinach, and a zesty lemon garlic sauce. Perfect for a weeknight dinner!

Ingredients

Ingredients

  • 1 pound shrimp (peeled and deveined)
  • 1 pound pasta (linguine or spaghetti)
  • 5 ounces fresh spinach
  • 4 cloves garlic (minced)
  • 1/4 cup olive oil
  • 1/4 cup lemon juice
  • 2 tablespoons butter
  • 1/4 cup grated Parmesan cheese
  • to taste Salt and pepper
  • optional Red pepper flakes

Instructions 

  • Cook pasta, reserving 1 cup pasta water.
  • Heat olive oil in skillet over medium heat.
  • Add garlic and red pepper flakes, cook until fragrant (1 min).
  • Add shrimp, cook until pink and opaque (3-5 min).
  • Stir in lemon juice, butter, salt, and pepper.
  • Add spinach, cook until wilted (1-2 min).
  • Add pasta to skillet with shrimp and spinach.
  • Toss, adding pasta water as needed.
  • Stir in Parmesan cheese.
  • Serve immediately.

Notes

Adjust the amount of red pepper flakes to your spice preference.
Calories: 450kcal
Cost: $20
Course: Main Course
Cuisine: Italian
Keyword: shrimp

Nutrition

Calories: 450kcal | Carbohydrates: 50g | Protein: 35g | Fat: 15g | Sodium: 600mg
pin

Hello, friend! Avery here, from my cozy Portland kitchen. Today, I’m so excited to share one of my absolute go-to recipes: Creamy Lemon Garlic Sauce. This isn’t just a sauce; it’s a hug in a bowl. It’s the kind of recipe that transforms simple ingredients into something truly special, perfect for a weeknight meal or a weekend gathering. Remember those early cooking experiments of mine? Well, this is one I perfected over time, and I can’t wait for you to try it!

This sauce is a testament to how a few simple ingredients, when treated with a little love, can create magic. It’s bright, it’s comforting, and it’s incredibly versatile. Whether you’re tossing it with your favorite pasta, drizzling it over grilled chicken, or even using it as a dip for crusty bread, this lemon garlic sauce is sure to become a family favorite.

Why You’ll Love This Creamy Lemon Garlic Sauce

Let me tell you, there are countless reasons to adore this sauce. Beyond the incredible flavor, it’s the ease and adaptability that truly make it shine. This recipe is more of a guide, a starting point for your own culinary adventures. Here’s why I think you’ll fall in love:

  • Quick & Easy: Ready in under 30 minutes! Perfect for busy weeknights.
  • Versatile: Delicious with pasta, chicken, seafood, or vegetables.
  • Flavorful: The bright lemon and savory garlic create a delightful balance.
  • Customizable: Easily adjust the thickness and richness to your liking.
  • Budget-Friendly: Uses simple, affordable ingredients.

Ingredients for Creamy Lemon Garlic Sauce

Here’s what you’ll need to whip up this delightful sauce. Don’t worry if you don’t have everything on hand; I’ll share some substitutions and variations later on.

  • 3 tablespoons butter
  • 1 small shallot, finely chopped
  • 4 cloves garlic, minced
  • ½ teaspoon dried thyme or Italian seasoning
  • ½ cup low-sodium chicken broth
  • 1 medium lemon, juiced and zested
  • 1 cup whole milk, half-and-half, or cream, warmed
Recipe Image

How to Make Creamy Lemon Garlic Sauce: Step-by-Step

Alright, let’s get cooking! This recipe is so straightforward, even on the busiest days, you can have a beautiful, home-cooked meal on the table. Remember, cooking should be joyful. Don’t be afraid to experiment and adjust to your own taste.

  1. Heat a large pan over medium-high heat and melt the butter.
  2. Add the chopped shallot and lemon zest and sauté for 2 minutes until translucent and golden. The shallot adds a delicate sweetness that complements the garlic beautifully.
  3. Add the garlic and sauté for 30 seconds until fragrant. Be careful not to burn the garlic! Burnt garlic can make the sauce bitter.
  4. Pour in the chicken broth and lemon juice and stir to combine. The lemon juice adds a bright, tangy flavor that cuts through the richness of the butter and cream.
  5. Add the warmed milk, half-and-half, or cream and stir. Warming the dairy helps prevent it from curdling when added to the hot pan.
  6. Bring the mixture to a simmer and add the thyme or Italian seasoning. Thyme adds an earthy, herbaceous note to the sauce.
  7. Reduce heat to medium-low, cover, and simmer for 10 minutes. Simmering allows the flavors to meld together and the sauce to thicken slightly.
  8. Check thickness. For a thicker sauce, simmer uncovered for 5 more minutes or add a cornstarch slurry. A cornstarch slurry is simply a mixture of cornstarch and cold water.
  9. Stir and simmer for 5 more minutes until it reaches desired consistency. Keep stirring the sauce to prevent it from sticking to the bottom of the pan.
  10. Serve over pasta, chicken, vegetables, or seafood.

Pro Tips for the Best Lemon Garlic Sauce

Over the years, I’ve picked up a few tricks that take this sauce from good to truly exceptional. These little details can make a big difference!

  • Use Fresh Ingredients: Fresh lemon juice and zest make a huge difference in flavor.
  • Don’t Burn the Garlic: Burnt garlic is bitter. Keep a close eye on it and reduce the heat if necessary.
  • Warm the Dairy: Warming the milk, half-and-half, or cream helps prevent curdling.
  • Adjust the Thickness: Simmer uncovered for a thicker sauce, or add a cornstarch slurry.
  • Taste and Adjust: Taste the sauce throughout the cooking process and adjust the seasoning as needed. Add more lemon juice for tanginess, salt for flavor, or pepper for a little kick.
  • Pasta Water is Key: If you are serving this sauce with pasta, reserve some of the pasta water. Adding a little pasta water to the sauce helps it cling to the pasta and creates a creamier texture.

Common Mistakes to Avoid

We all make mistakes in the kitchen! Here are a few common pitfalls to watch out for when making this lemon garlic sauce:

  • Burning the Garlic: As I mentioned earlier, burnt garlic is a flavor killer.
  • Using Cold Dairy: Adding cold milk, half-and-half, or cream directly to the hot pan can cause it to curdle.
  • Overcooking the Sauce: Overcooking can cause the sauce to become too thick or even separate.
  • Not Seasoning Properly: Taste and adjust the seasoning throughout the cooking process.
  • Forgetting the Lemon Zest: The lemon zest adds a bright, aromatic flavor that is essential to this sauce. Don’t skip it!

Lemon Garlic Sauce Variations

The beauty of this recipe is how easily you can customize it to your liking. Here are a few variations to inspire you:

  • Spicy Lemon Garlic Sauce: Add a pinch of red pepper flakes for a little heat.
  • Herbaceous Lemon Garlic Sauce: Add fresh herbs like parsley, basil, or oregano.
  • Cheesy Lemon Garlic Sauce: Stir in grated Parmesan cheese or Pecorino Romano cheese.
  • Vegan Lemon Garlic Sauce: Use plant-based butter, broth, and milk. Nutritional yeast can add a cheesy flavor.
  • Lemon Garlic Chicken Sauce: If you are making this as a chicken sauce, you can sauté the chicken in the same pan before making the sauce. This adds extra flavor to the sauce.

If you prefer a richer sauce that is still creamy, you can use heavy cream or creme fraiche. Add the warmed cream and half to the recipe. If you want to add more lemon juice, you can. Make sure to add the lemon garlic to the sauce.

How to Store Leftover Lemon Garlic Sauce

Store leftover lemon garlic sauce in an airtight container in the refrigerator for up to 3 days. Reheat gently over low heat, stirring occasionally. You may need to add a splash of broth or water to thin it out.

Frequently Asked Questions (FAQ)

Here are some common questions I get about this recipe:

  • Can I use olive oil instead of butter? Yes, you can use olive oil. However, butter adds a richness and flavor that olive oil doesn’t quite replicate.
  • Can I use bottled lemon juice? Fresh lemon juice is always best, but bottled lemon juice can be used in a pinch.
  • Can I freeze this sauce? I don’t recommend freezing this sauce, as the dairy may separate upon thawing.
  • How do I thicken the sauce without cornstarch? You can simmer the sauce uncovered for longer to reduce the liquid and thicken it naturally.
  • Can I add protein to this sauce? Absolutely! Grilled chicken, shrimp, or salmon would be delicious additions.

Serving Suggestions

This creamy lemon garlic sauce is incredibly versatile. Here are a few of my favorite ways to serve it:

  • With Pasta: Toss it with your favorite pasta shape, such as spaghetti, linguine, or fettuccine.
  • Over Chicken: Drizzle it over grilled or pan-fried chicken breasts.
  • With Seafood: Serve it with grilled shrimp, scallops, or salmon.
  • With Vegetables: Toss it with roasted vegetables like broccoli, asparagus, or Brussels sprouts.
  • As a Dip: Serve it as a dip for crusty bread or vegetables.

I hope you enjoy this Creamy Lemon Garlic Sauce as much as I do! Remember, cooking is an act of self-care, a way to nourish your body and soul. So, gather your ingredients, put on some music, and let’s get cooking! And if you do try the recipe, let me know how it goes!

Creamy Lemon Garlic Sauce for Pasta or Chicken

Prep Time 5 minutes
Cook Time 20 minutes
Total Time 25 minutes
Servings 4 servings
Calories 250
This creamy lemon garlic sauce is perfect for pasta, chicken, vegetables, or seafood. It's quick, easy, and full of flavor!

Ingredients

Ingredients

  • 3 tablespoons butter
  • 1 small shallot (finely chopped)
  • 4 cloves garlic (minced)
  • 0.5 teaspoon dried thyme or Italian seasoning
  • 0.5 cup low-sodium chicken broth
  • 1 medium lemon (juiced and zested)
  • 1 cup whole milk, half-and-half, or cream (warmed)

Instructions 

  • Heat butter in a pan.
  • Add shallot and lemon zest; sauté for 2 minutes.
  • Add garlic; sauté for 30 seconds.
  • Pour in chicken broth and lemon juice.
  • Add warmed milk, half-and-half, or cream.
  • Bring to a simmer; add thyme or Italian seasoning.
  • Reduce heat, cover, and simmer for 10 minutes.
  • Check thickness; simmer uncovered or add cornstarch slurry if needed.
  • Stir and simmer for 5 more minutes until desired consistency.
  • Serve over pasta, chicken, vegetables, or seafood.

Notes

Adjust the amount of lemon juice and zest to your liking for a more or less intense lemon flavor.
Calories: 250kcal
Cost: $8
Course: Sauce
Cuisine: Italian
Keyword: lemon

Nutrition

Calories: 250kcal | Carbohydrates: 15g | Protein: 8g | Fat: 18g | Sodium: 150mg
pin

Hey there, friend! It’s Avery here, from my cozy kitchen in Portland. Today, I’m sharing a recipe that’s near and dear to my heart: Gourmet Salmon Pasta with Lemon Cream Sauce. This isn’t just any pasta dish; it’s a hug in a bowl, a burst of sunshine on a rainy day, and a testament to the fact that healthy, delicious food doesn’t have to be complicated or time-consuming. I started making this dish years ago when I was trying to reclaim my health and find joy in cooking again. It’s been a staple ever since, and I can’t wait to share it with you.

This recipe is all about balance – the richness of the salmon, the tang of the lemon, and the comforting creaminess of the sauce. It’s the kind of meal that makes you feel good from the inside out. And the best part? You can have it on the table in just 30 minutes. Perfect for those busy weeknights when you need something quick, satisfying, and nourishing.

Why You’ll Love This Salmon Pasta Recipe

Let’s be honest, there are a million pasta recipes out there. So, why should you try this one? Here are a few reasons why this salmon pasta with lemon cream sauce is a winner:

  • Quick & Easy: As I mentioned, this dish comes together in just 30 minutes. That’s faster than ordering takeout!
  • Flavor Explosion: The combination of creamy sauce, flaky salmon, and bright lemon is simply divine. It’s a symphony of flavors that will dance on your taste buds.
  • Healthy & Nourishing: Salmon is packed with omega-3 fatty acids, protein, and essential nutrients. Paired with whole wheat pasta and a light cream sauce, this meal is both satisfying and good for you.
  • Versatile: You can easily customize this recipe to suit your taste and dietary needs. More on that later!
  • Impressive: This dish looks and tastes like it came from a fancy restaurant. It’s perfect for impressing guests or treating yourself to a little something special.

Ingredients for Lemon Cream Salmon Pasta

Here’s what you’ll need to create this delightful salmon pasta:

  • 8 oz Linguine Pasta: (Feel free to substitute with spaghetti or fettuccine.)
  • 1 lb Salmon Fillet: (Use Atlantic or King salmon for the best moisture.)
  • 2 tbsp Olive Oil: (Essential for searing.)
  • 1 tsp Kosher Salt: (Enhances flavor.)
  • 1 tsp Fresh Ground Black Pepper: (Season salmon before cooking.)
  • 4 tbsp Unsalted Butter: (Adds creaminess and richness.)
  • 2 cloves Garlic: (Minced for extra flavor.)
  • 1 cup Heavy Cream: (Do not substitute with low-fat versions.)
  • 1 cup Chicken Broth: (Can be partially replaced with dry white grape juice.)
  • 2 tbsp Fresh Lemon Juice: (Necessary for a vibrant flavor.)
  • 1/2 cup Parmesan Cheese: (Finely shredded for easy blending.)
  • 1/4 cup Chopped Parsley: (Adds color and freshness.)
Recipe Image

Step-by-Step Instructions to Perfect Salmon Pasta

Alright, let’s get cooking! Here’s how to make this creamy salmon pasta with lemon cream sauce:

  1. Cook the Pasta: Cook the linguine according to package directions until al dente. Reserve about 1 cup of pasta water before draining.
  2. Prepare the Salmon: While the pasta is cooking, pat the salmon fillet dry with paper towels. Season with salt and pepper.
  3. Sear the Salmon: Heat olive oil in a large skillet over medium-high heat. Sear the salmon for 3-4 minutes per side, or until cooked through and flaky. Remove from skillet and set aside.
  4. Make the Lemon Cream Sauce: In the same skillet, melt butter over medium heat. Add minced garlic and cook for about 1 minute, until fragrant.
  5. Add Liquids: Pour in heavy cream and chicken broth (or white grape juice). Bring to a simmer, then reduce heat and let it simmer for about 5 minutes, or until the sauce has thickened slightly.
  6. Incorporate Lemon & Cheese: Stir in lemon juice and Parmesan cheese. Continue to simmer for another 2-3 minutes, until the cheese is melted and the sauce is smooth.
  7. Combine Everything: Add the cooked pasta to the skillet with the lemon cream sauce. Toss to coat. If the sauce is too thick, add a splash of reserved pasta water to loosen it up.
  8. Flake the Salmon: Gently flake the cooked salmon into bite-sized pieces and add it to the pasta.
  9. Garnish & Serve: Garnish with chopped parsley and serve immediately.

Pro Tips for the Best Salmon Pasta

Want to take your salmon pasta to the next level? Here are a few pro tips:

  • Don’t Overcook the Salmon: Overcooked salmon is dry and rubbery. Aim for a perfectly cooked fillet that’s flaky and moist. A digital thermometer can be your best friend here; aim for an internal temperature of 145°F (63°C).
  • Reserve Pasta Water: This starchy water is liquid gold! It helps to thicken the sauce and create a creamy, emulsified texture. Always reserve some before draining the pasta.
  • Fresh Lemon Juice is Key: Bottled lemon juice simply doesn’t compare to the bright, zesty flavor of fresh lemon juice. Trust me, it makes a huge difference.
  • Use High-Quality Parmesan: Invest in a good-quality Parmesan cheese. The flavor will be much richer and more complex than the pre-shredded stuff.
  • Taste and Adjust: The most important tip of all! Taste the sauce as you go and adjust the seasonings to your liking. Need more lemon? Add a splash! Want more garlic? Go for it!

Common Mistakes to Avoid When Making Salmon Pasta

We all make mistakes in the kitchen, but here are a few common ones to avoid when making salmon pasta:

  • Using Low-Fat Cream: This is not the time to skimp on the fat. Low-fat cream won’t thicken properly and will result in a watery sauce. Stick with heavy cream for the best results.
  • Overcooking the Garlic: Burnt garlic is bitter and unpleasant. Sauté the garlic over medium heat and watch it carefully. It should be fragrant but not browned.
  • Adding Cold Pasta to the Sauce: Cold pasta will cool down the sauce and prevent it from clinging properly. Make sure to add the pasta to the sauce while it’s still hot.
  • Forgetting to Season: Salt and pepper are your friends! Don’t be afraid to season the salmon, the sauce, and the pasta water generously.
  • Not Serving Immediately: This dish is best served immediately. The pasta will continue to absorb the sauce as it sits, resulting in a dry and clumpy mess.

Variations on Salmon Pasta with Lemon Cream Sauce

One of the best things about this recipe is how easy it is to customize. Here are a few variations to try:

  • Gluten-Free Salmon Pasta: Use gluten-free pasta to make this dish suitable for those with gluten sensitivities. There are many great gluten-free pasta options available these days, so experiment and find one you like.
  • Vegetarian Salmon Pasta: Okay, this might sound odd, but you can add other veggies to the dish. Asparagus, peas, or sun-dried tomatoes would be delicious additions.
  • Spicy Salmon Pasta: Add a pinch of red pepper flakes to the sauce for a little kick.
  • Seafood Medley: Add shrimp, scallops, or mussels to the pasta for an extra-special seafood feast.
  • Different Herbs: Experiment with different herbs. Dill, thyme, or chives would all be lovely additions to the sauce.

How to Store and Reheat Salmon Pasta

If you have leftovers (which is rare in my house!), here’s how to store and reheat them:

  • Storage: Store the salmon pasta in an airtight container in the refrigerator for up to 2 days.
  • Reheating: Reheat the pasta in a skillet over medium heat, adding a splash of milk or cream to loosen the sauce. You can also reheat it in the microwave, but be careful not to overcook the salmon.

Keep in mind that the pasta may dry out slightly upon reheating, so you may need to add a little extra liquid to restore its creamy consistency.

Frequently Asked Questions About Lemon Cream Salmon Pasta

Here are some common questions I get asked about this recipe:

  • Can I use frozen salmon? Yes, you can use frozen salmon. Just make sure to thaw it completely before cooking.
  • Can I make this recipe ahead of time? While you can cook the pasta ahead of time, I don’t recommend making the entire dish in advance. The pasta will absorb the sauce and become mushy.
  • Can I use a different type of pasta? Absolutely! Feel free to use any type of pasta you like. Penne, rotini, or farfalle would all work well.
  • Can I add vegetables to this dish? Yes, you can add vegetables to this dish. Asparagus, peas, spinach, or sun-dried tomatoes would all be delicious additions.
  • Can I freeze this dish? I don’t recommend freezing this dish. The cream sauce may separate upon thawing, and the pasta may become mushy.

Serving Suggestions for Salmon Pasta

This salmon pasta is delicious on its own, but here are a few serving suggestions to round out your meal:

  • Side Salad: A simple green salad with a light vinaigrette is the perfect complement to this rich pasta dish.
  • Garlic Bread: Crusty garlic bread is always a welcome addition to any pasta meal.
  • Roasted Vegetables: Roasted asparagus, broccoli, or Brussels sprouts would be a healthy and delicious side dish.
  • White Wine: A crisp, dry white wine like Sauvignon Blanc or Pinot Grigio pairs beautifully with salmon pasta.
  • Lemon Wedges: Serve with extra lemon wedges for those who like an extra burst of citrus flavor.

There you have it – my go-to recipe for Gourmet Salmon Pasta with Lemon Cream Sauce! I hope you love it as much as I do. Remember, cooking should be fun and relaxing, so don’t be afraid to experiment and make this recipe your own. And if you do, be sure to share your creations with me! I can’t wait to see what you come up with. Happy cooking!

Gourmet Salmon Pasta with Lemon Cream Sauce in 30 Minutes

Prep Time 10 minutes
Cook Time 20 minutes
Total Time 30 minutes
Servings 4 servings
Calories 650
A quick and delicious salmon pasta dish featuring a creamy lemon sauce. Ready in just 30 minutes, it's perfect for a weeknight dinner.

Ingredients

Pasta

  • 8 oz Linguine Pasta (Feel free to substitute with spaghetti or fettuccine.)

Salmon

  • 1 lb Salmon Fillet (Use Atlantic or King salmon for the best moisture.)

Seasoning

  • 2 tbsp Olive Oil (Essential for searing.)
  • 1 tsp Kosher Salt (Enhances flavor.)
  • 1 tsp Fresh Ground Black Pepper (Season salmon before cooking.)

Sauce

  • 4 tbsp Unsalted Butter (Adds creaminess and richness.)
  • 2 cloves Garlic (Minced for extra flavor.)
  • 1 cup Heavy Cream (Do not substitute with low-fat versions.)
  • 1 cup Chicken Broth (Can be partially replaced with dry white grape juice.)
  • 2 tbsp Fresh Lemon Juice (Necessary for a vibrant flavor.)
  • 0.5 cup Parmesan Cheese (Finely shredded for easy blending.)
  • 0.25 cup Chopped Parsley (Adds color and freshness.)

Notes

Adjust the amount of lemon juice to your taste preference.
Calories: 650kcal
Cost: $22
Course: Dinner
Cuisine: Italian
Keyword: Salmon

Nutrition

Calories: 650kcal | Carbohydrates: 45g | Protein: 40g | Fat: 35g | Sodium: 500mg
pin

Hello, friend! Avery here, from my little corner of Portland. Today, I’m so excited to share one of my absolute favorite recipes: a Strawberry Chicken Spinach Salad. This isn’t just any salad; it’s a vibrant, nourishing bowl of goodness that I turn to time and again when I need something that’s both delicious and good for me. It’s a celebration of fresh ingredients and simple flavors, perfect for those evenings when you want a light yet satisfying meal.

My journey with this salad started years ago when I was searching for ways to incorporate more whole foods into my diet without sacrificing taste. I wanted something that felt like a treat, not a chore. And let me tell you, this Strawberry Chicken Spinach Salad definitely fits the bill. It’s a symphony of textures and tastes – the tender chicken, the crisp spinach, the juicy strawberries, the salty feta, and the crunchy almonds, all drizzled with a tangy balsamic vinaigrette. Trust me, this is a salad you’ll actually crave!

Why You’ll Love This Strawberry Chicken Spinach Salad

There are so many reasons why this salad has become a staple in my kitchen. Here are just a few:

  • It’s Packed with Nutrients: This salad is a powerhouse of vitamins and minerals. Spinach is rich in iron and vitamins A and C, while strawberries are loaded with antioxidants. Chicken provides lean protein, and almonds offer healthy fats.
  • It’s Incredibly Flavorful: The combination of sweet strawberries, savory chicken, and salty feta is simply divine. The balsamic vinaigrette ties everything together with a tangy kick.
  • It’s Quick and Easy to Make: This salad comes together in just minutes, making it perfect for busy weeknights. You can even prep some of the ingredients ahead of time to save even more time.
  • It’s Guilt-Free: You can indulge in this salad without any guilt. It’s packed with wholesome ingredients and free from processed foods.
  • It’s Versatile: Feel free to customize this salad to your liking. You can swap out the chicken for tofu or chickpeas, add different fruits or vegetables, or use a different type of cheese.

Ingredients

  • ‘6 oz grilled chicken breast, sliced’
  • ‘5 oz fresh spinach’
  • ‘1 cup fresh strawberries, sliced’
  • ‘1/4 cup crumbled feta cheese’
  • ‘1/4 cup sliced almonds’
  • ‘2 tablespoons balsamic vinaigrette dressing’
  • ‘1 tablespoon olive oil’
  • ‘Salt and pepper to taste’
Recipe Image

How to Make Strawberry Chicken Spinach Salad: Step-by-Step

Alright, let’s get to the fun part – making the salad! Here’s a simple, step-by-step guide to creating this delicious dish:

  1. Prepare the Spinach: Wash and dry the fresh spinach thoroughly. Nobody likes a soggy salad! A salad spinner works wonders here.
  2. Combine Ingredients: In a large bowl, gently combine the fresh spinach, sliced strawberries, crumbled feta cheese, and sliced almonds.
  3. Add the Chicken: Add the sliced grilled chicken breast to the salad. If you’re short on time, pre-cooked chicken from the store works just fine.
  4. Make the Dressing: In a small bowl, whisk together the balsamic vinaigrette, olive oil, salt, and pepper. This simple dressing really elevates the salad.
  5. Dress and Serve: Drizzle the dressing over the salad and toss gently to combine. Be careful not to overdress the salad, as it can become soggy. Serve immediately and enjoy!

Pro Tips for the Perfect Salad

Here are a few tips and tricks I’ve learned over the years to make this salad even better:

  • Use Fresh, High-Quality Ingredients: The better the ingredients, the better the salad. Opt for organic spinach and locally grown strawberries if possible.
  • Grill Your Own Chicken: Grilling the chicken yourself adds a delicious smoky flavor to the salad. Simply season the chicken with salt, pepper, and a little olive oil before grilling.
  • Toast the Almonds: Toasting the almonds enhances their flavor and adds a satisfying crunch to the salad. Simply spread the almonds on a baking sheet and toast them in a 350°F oven for 5-7 minutes, or until golden brown.
  • Make Your Own Dressing: While store-bought balsamic vinaigrette is convenient, making your own dressing is easy and allows you to control the ingredients. Simply whisk together balsamic vinegar, olive oil, Dijon mustard, honey, salt, and pepper to taste.
  • Don’t Overdress: Overdressing the salad can make it soggy and ruin the flavor. Start with a little dressing and add more as needed.

Common Mistakes to Avoid

Even the simplest recipes can have their pitfalls. Here are a few common mistakes to avoid when making this Strawberry Chicken Spinach Salad:

  • Using Wet Spinach: Make sure the spinach is completely dry before adding it to the salad. Wet spinach will make the salad soggy and dilute the flavor.
  • Overcooking the Chicken: Overcooked chicken will be dry and tough. Cook the chicken until it is just cooked through, and then let it rest for a few minutes before slicing.
  • Adding Too Much Dressing: As mentioned earlier, adding too much dressing can make the salad soggy. Start with a little dressing and add more as needed.
  • Not Using Fresh Strawberries: Fresh strawberries are essential for this salad. Frozen strawberries will be mushy and lack the sweetness of fresh berries.

Variations to Try

One of the best things about this salad is how versatile it is. Here are a few variations to try:

  • Add Blueberries or Raspberries: In addition to or instead of strawberries, try adding blueberries or raspberries for a different burst of sweetness.
  • Swap the Feta for Goat Cheese: Goat cheese adds a tangy and creamy element to the salad.
  • Add Avocado: Sliced avocado adds a creamy texture and healthy fats to the salad.
  • Use a Different Type of Nut: Instead of almonds, try using walnuts, pecans, or sunflower seeds.
  • Make it Vegetarian: Swap the chicken for grilled tofu or chickpeas for a vegetarian-friendly option.
  • Add a Grain: Add quinoa or farro to make it a heartier salad.

How to Store Leftovers

If you have any leftovers, store them in an airtight container in the refrigerator. It’s best to store the dressing separately and add it just before serving to prevent the salad from becoming soggy. The salad will keep for up to 2 days, although it’s best enjoyed fresh.

Frequently Asked Questions (FAQ)

Here are a few frequently asked questions about this Strawberry Chicken Spinach Salad:

  • Can I make this salad ahead of time? Yes, you can prep some of the ingredients ahead of time. Wash and dry the spinach, slice the strawberries, and grill the chicken. Store the ingredients separately in the refrigerator and combine them just before serving.
  • Can I use frozen strawberries? While fresh strawberries are best, you can use frozen strawberries in a pinch. Just make sure to thaw them completely and drain off any excess liquid before adding them to the salad.
  • Can I use a different type of dressing? Absolutely! Feel free to use your favorite type of dressing. A poppy seed dressing or a honey mustard dressing would also be delicious.
  • Is this salad gluten-free? Yes, this salad is naturally gluten-free.
  • Is this salad dairy-free? To make this salad dairy-free, simply omit the feta cheese or use a dairy-free alternative.

Serving Suggestions

This Strawberry Chicken Spinach Salad is delicious on its own as a light lunch or dinner. Here are a few other serving suggestions:

  • Serve it as a side dish: This salad makes a great side dish for grilled fish, chicken, or steak.
  • Add a slice of crusty bread: Serve the salad with a slice of crusty bread for dipping in the dressing.
  • Pair it with a soup: This salad pairs well with a light soup, such as tomato soup or vegetable soup.
  • Make it a picnic: Pack this salad for a picnic or potluck. Just be sure to store the dressing separately and add it just before serving.

And there you have it – my go-to Strawberry Chicken Spinach Salad recipe! I hope you love this salad as much as I do. It’s a perfect example of how healthy eating can be both delicious and satisfying. Remember, cooking should be a joyful experience, so don’t be afraid to experiment and make this recipe your own. Until next time, happy cooking! If you’re looking for more healthy dinner recipes, this salad is a great start. The sweet strawberries, tender chicken, and fresh spinach create a symphony of flavors that’s both refreshing and satisfying. When you’re craving a light yet fulfilling meal, this chicken spinach salad is the answer. This salad is a perfect combination of flavors and textures, making it a delightful addition to your meal plan. If you’re looking to incorporate more spinach and healthy ingredients into your diet, this salad is a fantastic choice. It’s a dish that combines the sweetness of strawberries with the savory chicken and the fresh greens, creating a balanced and nutritious meal. Let’s talk about the olive oil. A good quality olive oil can really elevate the salad. Here’s to healthy eating and happy cooking!

Healthy Dinner Recipes Refreshing Strawberry Chicken Spinach Salad for a Guilt-Free Meal

Prep Time 10 minutes
Cook Time 15 minutes
Total Time 25 minutes
Servings 2 servings
Calories 350
Enjoy a refreshing and guilt-free meal with this Strawberry Chicken Spinach Salad. It's packed with protein, vitamins, and delicious flavors!

Ingredients

Salad Ingredients

  • 6 oz grilled chicken breast, sliced (sliced)
  • 5 oz fresh spinach
  • 1 cup fresh strawberries, sliced (sliced)
  • 1/4 cup crumbled feta cheese
  • 1/4 cup sliced almonds

Dressing

  • 2 tablespoons balsamic vinaigrette dressing
  • 1 tablespoon olive oil
  • to taste Salt and pepper

Instructions 

  • Wash and dry the spinach thoroughly.
  • Combine spinach, strawberries, feta, and almonds in a bowl.
  • Add the sliced grilled chicken to the salad.
  • Whisk together balsamic vinaigrette, olive oil, salt, and pepper.
  • Drizzle dressing over salad and toss gently.
  • Serve immediately and enjoy!

Notes

For a vegetarian option, omit the chicken and add more feta cheese or chickpeas.
Calories: 350kcal
Cost: $12
Course: Dinner, Salad
Cuisine: American
Keyword: chicken, Spinach, strawberry

Nutrition

Calories: 350kcal | Carbohydrates: 25g | Protein: 35g | Fat: 15g | Sodium: 300mg
pin

Healthy Garlic Lemon Chicken Pasta: A Bowlful of Sunshine

Hello, friends! It’s Avery here, from my cozy Portland kitchen, where the aroma of rosemary often mingles with the scent of lemon and garlic. Today, I want to share a recipe that’s close to my heart: Healthy Garlic Lemon Chicken Pasta. This isn’t just a meal; it’s a story of how I rediscovered joy in cooking and found a way to nourish my body and soul. If you’re like me and crave meals that are both vibrant and comforting, you’re in the right place.

My journey into healthy eating started out of necessity. Long hours, stress, and too much takeout left me feeling depleted. Cooking became my lifeline, a way to reconnect with myself and the simple pleasure of wholesome ingredients. And this lemon chicken pasta? It’s a reflection of that journey – a dish that’s both easy to make and deeply satisfying.

This recipe is all about balance. We’re using whole wheat pasta (or gluten-free, if that’s your preference), lean chicken breast, and a vibrant lemon garlic sauce that’s bursting with flavor. It’s the kind of meal that makes you feel good from the inside out, without sacrificing taste or satisfaction.

Why You’ll Love This Healthy Garlic Lemon Chicken Pasta

Let’s be honest, we all want meals that are delicious, quick, and good for us. This recipe ticks all those boxes! But beyond that, there are so many reasons to fall in love with this dish:

  • Quick and Easy: From start to finish, this meal comes together in about 30 minutes. Perfect for busy weeknights!
  • Flavor Explosion: The combination of lemon, garlic, and herbs creates a bright and zesty flavor that will wake up your taste buds.
  • Versatile: You can easily customize this recipe to suit your preferences and dietary needs. Swap the chicken for shrimp, add your favorite veggies, or use a different type of pasta.
  • Healthy and Nourishing: This dish is packed with protein, fiber, and vitamins. It’s a complete meal that will leave you feeling satisfied and energized.
  • Comfort Food with a Twist: It has all the comforting qualities of pasta, but with a lighter, healthier twist.

Ingredients You’ll Need

Here’s what you’ll need to create this sunshine-in-a-bowl:

  • For the Chicken:
    • 2 boneless, skinless chicken breasts (about 1 lb)
    • 1 tbsp olive oil
    • Salt and pepper, to taste
    • 1/2 tsp garlic powder
    • 1/2 tsp dried oregano (optional)
  • For the Pasta:
    • 8 oz whole wheat or gluten-free spaghetti (or any pasta you prefer)
  • For the Lemon Garlic Sauce:
    • 3 tbsp olive oil
    • 4 cloves garlic, minced (the more garlic, the better!)
    • 1/4 tsp red pepper flakes (optional, for a little kick)
    • Zest and juice of 1 large lemon
    • 1/2 cup low-sodium chicken broth (or vegetable broth for a vegetarian option)
    • 1/2 cup fresh spinach or arugula (optional, for extra greens)
    • Salt and pepper, to taste
    • 1/4 cup grated Parmesan cheese (optional, for richness)
    • 2 tbsp fresh parsley, chopped (for garnish)
Recipe Image

How to Make Healthy Garlic Lemon Chicken Pasta: Step-by-Step

Ready to get cooking? Here’s how to bring this delicious dish to life:

  1. Cook the Pasta: Bring a large pot of salted water to a boil. Add the pasta and cook according to package instructions (usually around 8-10 minutes for whole wheat spaghetti). Once cooked, drain the pasta, reserving about 1/2 cup of the pasta water for later use. The pasta is the base of this amazing recipe.
  2. Prepare the Chicken: While the pasta cooks, heat 1 tbsp of olive oil in a large skillet over medium heat. Season the chicken breasts with salt, pepper, garlic powder, and dried oregano (if using). Add the chicken breasts to the skillet and cook for about 6-7 minutes per side, until golden brown and cooked through (internal temperature should reach 165°F). Once cooked, remove the chicken from the skillet and set aside to rest for a few minutes. Slice the chicken into thin strips. The chicken should be cooked to perfection.
  3. Make the Lemon Garlic Sauce: In the same skillet, add 3 tbsp of olive oil over medium heat. Add the minced garlic and cook for 1-2 minutes until fragrant, being careful not to burn it. Add the red pepper flakes (if using), lemon zest, and lemon juice. Stir to combine. Pour in the chicken broth, scraping up any browned bits from the bottom of the pan. Let the sauce simmer for 2-3 minutes to reduce slightly. This garlic lemon sauce is the key to this dish.
  4. Combine the Pasta and Chicken: Add the drained pasta to the skillet with the lemon garlic sauce. Toss to coat the pasta evenly. If the sauce looks too thick, add a bit of the reserved pasta water to loosen it up. Add the sliced chicken and toss again to combine. If using spinach or arugula, stir it in now and let it wilt slightly in the hot sauce. This is where the magic happens, chicken and pasta combined.
  5. Finish and Serve: Taste the pasta and adjust the seasoning with salt, pepper, or extra lemon juice if needed. Stir in the Parmesan cheese (if using) for added creaminess. Serve immediately, garnished with fresh parsley and extra lemon slices if desired. You can add more lemon if you like it extra zesty.

Pro Tips for Perfect Lemon Chicken Pasta

Here are a few tricks I’ve learned along the way to ensure your lemon chicken pasta is a success:

  • Don’t Overcook the Garlic: Burnt garlic can ruin the entire dish. Keep a close eye on it and cook it over medium heat until fragrant, but not brown.
  • Reserve Pasta Water: The starchy pasta water is a secret weapon for creating a creamy and emulsified sauce. Don’t skip this step!
  • Use Fresh Lemon: The flavor of fresh lemon juice and zest is far superior to bottled. Trust me, it makes a difference.
  • Season Generously: Don’t be afraid to season your chicken and sauce with salt and pepper. Taste as you go and adjust as needed.
  • Add Greens: A handful of spinach or arugula adds a boost of nutrients and a pop of color.

Common Mistakes to Avoid

We all make mistakes in the kitchen, but here are a few common ones to watch out for when making this recipe:

  • Overcooking the Chicken: Dry, overcooked chicken is a no-no. Use a meat thermometer to ensure it reaches an internal temperature of 165°F.
  • Not Salting the Pasta Water: Salting the pasta water seasons the pasta from the inside out. It makes a big difference in the overall flavor of the dish.
  • Adding Too Much Lemon Juice: Start with a small amount of lemon juice and add more to taste. Too much lemon can make the sauce sour.
  • Forgetting to Reserve Pasta Water: This is a crucial step for creating a creamy sauce. Don’t forget to reserve some before draining the pasta!

Variations to Make It Your Own

One of the best things about this recipe is how easy it is to customize. Here are a few ideas to get you started:

  • Shrimp instead of Chicken: Swap the chicken for shrimp for a seafood twist.
  • Add Vegetables: Broccoli, asparagus, bell peppers, or zucchini would all be delicious additions.
  • Different Pasta: Use your favorite type of pasta, such as penne, fettuccine, or rotini.
  • Make it Creamy: Add a splash of heavy cream or half-and-half to the sauce for extra richness.
  • Spice it Up: Add more red pepper flakes or a pinch of cayenne pepper for a spicier kick.
  • Dairy-Free: Skip the Parmesan cheese or use a dairy-free alternative.

How to Store Leftovers

This pasta is just as delicious the next day! Store leftovers in an airtight container in the refrigerator for up to 3 days. Reheat gently in a skillet or microwave, adding a splash of chicken broth or water if needed to loosen the sauce. This dish is great for meal prep. It’s time to get cooking!

Frequently Asked Questions

  • Can I use frozen chicken? Yes, but make sure to thaw it completely before cooking.
  • Can I make this recipe vegetarian? Absolutely! Simply omit the chicken and use vegetable broth instead of chicken broth. You can also add some chickpeas or white beans for extra protein.
  • Can I make this recipe ahead of time? You can cook the pasta and chicken ahead of time and store them separately in the refrigerator. When you’re ready to eat, simply reheat them and toss with the lemon garlic sauce.
  • Is this recipe gluten-free? Yes, if you use gluten-free pasta.
  • Can I freeze this pasta? I don’t recommend freezing this pasta, as the sauce may separate upon thawing.

Serving Suggestions

This Healthy Garlic Lemon Chicken Pasta is a complete meal on its own, but here are a few ideas to round out your meal:

  • Side Salad: A simple green salad with a light vinaigrette.
  • Garlic Bread: To soak up all that delicious sauce.
  • Roasted Vegetables: Asparagus, broccoli, or Brussels sprouts.
  • Dessert: A light and refreshing fruit salad or a slice of lemon cake.

I hope you enjoy this recipe as much as I do! It’s a reminder that healthy eating can be both delicious and satisfying. Remember, cooking is a journey, not a destination. Don’t be afraid to experiment, have fun, and most importantly, listen to your body. Until next time, happy cooking!

Healthy Garlic Lemon Chicken Pasta Recipe

Prep Time 10 minutes
Cook Time 20 minutes
Total Time 30 minutes
Servings 4 servings
Calories 450
A flavorful and healthy pasta dish featuring tender chicken, a zesty lemon garlic sauce, and your favorite pasta. This recipe is quick, easy, and perfect for a weeknight meal.

Ingredients

For the Chicken:

  • 2 boneless, skinless chicken breasts (about 1 lb)
  • 1 tbsp olive oil
  • Salt and pepper (to taste)
  • 0.5 tsp garlic powder
  • 0.5 tsp dried oregano (optional)

For the Pasta:

  • 8 oz whole wheat or gluten-free spaghetti (or any pasta you prefer)

For the Lemon Garlic Sauce:

  • 3 tbsp olive oil
  • 4 cloves garlic, minced (the more garlic, the better!)
  • 0.25 tsp red pepper flakes (optional, for a little kick)
  • 1 large lemon (Zest and juice of)
  • 0.5 cup low-sodium chicken broth (or vegetable broth for a vegetarian option)
  • 0.5 cup fresh spinach or arugula (optional, for extra greens)
  • Salt and pepper (to taste)
  • 0.25 cup grated Parmesan cheese (optional, for richness)
  • 2 tbsp fresh parsley, chopped (for garnish)

Instructions 

  • Cook pasta according to package instructions, reserving 1/2 cup pasta water.
  • Season and cook chicken in olive oil until golden brown and cooked through. Slice into thin strips.
  • Sauté garlic in olive oil, add red pepper flakes, lemon zest, and juice. Pour in chicken broth and simmer.
  • Add pasta to sauce, toss to coat. Add pasta water if needed. Add chicken and spinach/arugula if using.
  • Season to taste, stir in Parmesan cheese if using. Garnish with parsley and lemon slices.

Notes

Adjust the amount of red pepper flakes to your spice preference. For a creamier sauce, add a splash of heavy cream at the end.
Calories: 450kcal
Cost: $18
Course: Main Course
Cuisine: Italian
Keyword: chicken

Nutrition

Calories: 450kcal | Carbohydrates: 50g | Protein: 35g | Fat: 15g | Sodium: 250mg
pin

Hey there, friends! Avery here, from my little kitchen in Portland. Today, I’m sharing one of my absolute go-to recipes: Easy Lemon Pasta. When life gets hectic (and let’s be honest, it often does!), this is the dish I turn to. It’s quick, it’s comforting, and it’s bursting with bright, lemony flavor. And the best part? It’s ready in just 20 minutes and doesn’t require any heavy cream! This recipe is a testament to the fact that healthy, delicious food doesn’t have to be complicated or time-consuming. I’m so happy you are here to try it!

My journey into cooking started as a necessity, a way to reclaim my health and well-being. And I discovered that the simple act of creating a meal, of transforming humble ingredients into something nourishing and delicious, was incredibly grounding. This lemon pasta recipe embodies that philosophy perfectly. It’s about savoring simple pleasures and finding joy in the process. I hope you love it as much as I do!

Why You’ll Love This Lemon Pasta

Seriously, what’s not to love? This lemon pasta recipe is a winner for so many reasons. It’s become one of my favorite recipes dinner options when time is short, and the craving for something comforting hits hard.

  • Quick & Easy: As the title suggests, it’s ready in just 20 minutes! Perfect for busy weeknights.
  • No Cream Needed: It achieves a creamy texture without any heavy cream, making it a lighter and healthier option.
  • Bright & Flavorful: The combination of lemon zest, lemon juice, garlic, and chili creates a vibrant and irresistible flavor profile.
  • Versatile: It’s easily customizable with your favorite vegetables or protein.
  • Plant Based Friendly: Omit the parmesan cheese and use a plant-based alternative to make this a completely plant based meal.

Ingredients for the Best Lemon Pasta

Here’s what you’ll need to whip up this delightful dish. Each ingredient plays a crucial role in creating the perfect balance of flavors.

  • 12 ounces spaghetti (or another long pasta)
  • 4 tablespoons extra virgin olive oil
  • 2 cloves garlic (grated or minced)
  • 1 spicy red chili (chopped – or red pepper flakes)
  • 1 large lemon (the grated zest and the juice (about 4 tablespoons or 60 ml))
  • 1 cup reserved cooking pasta water (scoop it out just before draining the pasta)
  • ½ cup parsley (chopped)
  • ½ cup grated parmesan (or more to taste)
  • ½ teaspoon salt (+ black pepper to taste)
Recipe Image

How to Make Lemon Pasta: Step-by-Step Instructions

Let’s get cooking! Follow these simple steps, and you’ll have a delicious bowl of lemon pasta in no time. Remember, cooking is about experimentation and having fun. Don’t be afraid to adjust the seasonings to your liking.

  1. Cook the pasta: Boil 12 ounces spaghetti in salted water, 2 minutes less than package time. This ensures the pasta is perfectly al dente.
  2. Make the sauce: Sauté 2 cloves garlic, grated lemon zest, and 1 spicy red chili in 4 tablespoons extra virgin olive oil on low heat for 30–60 seconds. Be careful not to burn the garlic; we want it to infuse the oil with its flavor.
  3. Add lemon juice: Turn off the heat and stir in the juice from 1 large lemon. The heat is off so the lemon juice stays bright and fresh.
  4. Combine: Save 2 cups pasta water. Drain the pasta, add it to the skillet with 1 cup of the reserved cooking pasta water. Cook for 1 minute while stirring to release starch and make it creamy. The pasta water is the secret ingredient to a luscious, cream-free sauce!
  5. Finish: Turn off the heat. Stir in ½ cup parsley and ½ cup grated parmesan (if using). Adjust salt and add more pasta water if the sauce is too dry.
  6. Serve hot: Top with extra lemon zest and a sprinkle of parmesan (if using). Enjoy this light, creamy, and flavorful dish!

Pro Tips for the Perfect Lemon Pasta

Here are a few tricks I’ve learned over the years to elevate this recipe to the next level:

  • Use Fresh Ingredients: The flavor of fresh lemon zest and juice is unbeatable. Avoid using bottled lemon juice if possible.
  • Don’t Overcook the Garlic: Burnt garlic can ruin the entire dish. Keep the heat low and watch it carefully.
  • Reserve Enough Pasta Water: Pasta water is liquid gold! It helps create a creamy sauce that clings to the pasta. Save at least 2 cups.
  • Taste and Adjust: Taste the sauce and adjust the seasonings to your liking. Add more lemon juice for extra tang, or more chili for a spicier kick.
  • Grate the Parmesan Finely: Finely grated parmesan melts more easily into the sauce, creating a smoother texture.

Common Mistakes to Avoid

Even the simplest recipes can have pitfalls. Here are a few common mistakes to avoid when making lemon pasta:

  • Using Too Much Lemon Juice: Too much lemon juice can make the pasta taste sour. Start with less and add more to taste.
  • Forgetting to Salt the Pasta Water: Salting the pasta water seasons the pasta from the inside out.
  • Overcooking the Pasta: Overcooked pasta will be mushy and won’t hold the sauce well. Cook it al dente.
  • Draining the Pasta Completely: Leaving a little bit of water clinging to the pasta helps the sauce adhere better.

Variations & Add-Ins

One of the things I love most about this recipe is how versatile it is. Feel free to experiment with different ingredients and make it your own!

  • Add Vegetables: Sautéed spinach, asparagus, zucchini, or cherry tomatoes would be delicious additions.
  • Add Protein: Grilled chicken, shrimp, or tofu would make this a more substantial meal.
  • Use Different Herbs: Try adding fresh basil, oregano, or thyme instead of parsley.
  • Add a Pinch of Red Pepper Flakes: For an extra kick of heat.
  • Make it Vegan: Substitute the parmesan cheese with nutritional yeast or a plant-based parmesan alternative.

How to Store & Reheat Lemon Pasta

If you have leftovers (which is rare in my house!), here’s how to store and reheat them:

  • Storage: Store the pasta in an airtight container in the refrigerator for up to 3 days.
  • Reheating: Reheat the pasta in a skillet over low heat, adding a splash of water or broth to prevent it from drying out. You can also microwave it, but be careful not to overcook it.

Frequently Asked Questions (FAQ)

Here are some common questions I get asked about this recipe:

  • Can I use dried herbs instead of fresh? Yes, you can, but fresh herbs will provide a brighter flavor. Use about 1 teaspoon of dried herbs for every tablespoon of fresh herbs.
  • Can I use bottled lemon juice? Fresh lemon juice is always best, but bottled lemon juice can be used in a pinch.
  • Can I make this recipe ahead of time? The sauce can be made ahead of time and stored in the refrigerator for up to 2 days. Cook the pasta just before serving.
  • Can I freeze lemon pasta? I don’t recommend freezing lemon pasta, as the texture of the pasta and sauce may change.

Serving Suggestions

This lemon pasta is delicious on its own, but it also pairs well with a variety of sides:

  • Salad: A simple green salad with a light vinaigrette.
  • Bread: Crusty bread for soaking up the delicious sauce.
  • Roasted Vegetables: Roasted asparagus, broccoli, or Brussels sprouts.

And there you have it! My Easy Lemon Pasta recipe, ready in just 20 minutes. I hope you enjoy making and eating it as much as I do. Remember, cooking is about more than just following a recipe. It’s about connecting with your food, nourishing your body, and finding joy in the process. Thank you for stopping by! If you try this pasta recipe, leave a comment below and let me know what you think. I’m happy you’re here! And if you’re looking for more easy healthy and delicious pasta recipes, be sure to check out our blog!

Easy Lemon Pasta (No Cream!)

Prep Time 5 minutes
Cook Time 15 minutes
Total Time 20 minutes
Servings 4 people
Calories 350
A bright and flavorful lemon pasta dish that's quick to make and doesn't require any cream. Perfect for a light lunch or dinner!

Ingredients

Pasta

  • 12 ounces spaghetti (or another long pasta)

Sauce

  • 4 tablespoons extra virgin olive oil
  • 2 cloves garlic (grated or minced)
  • 1 spicy red chili (chopped - or red pepper flakes)
  • 1 large lemon (the grated zest and the juice (about 4 tablespoons or 60 ml))
  • 1 cup reserved cooking pasta water (scoop it out just before draining the pasta)
  • 0.5 cup parsley (chopped)
  • 0.5 cup grated parmesan (or more to taste)
  • 0.5 teaspoon salt (+ black pepper to taste)

Instructions 

  • Cook Pasta: Boil spaghetti in salted water, 2 minutes less than package time.
  • Make Sauce: Sauté garlic, lemon zest, and chili in olive oil on low heat for 30–60 seconds.
  • Add Lemon Juice: Turn off heat and stir in the lemon juice.
  • Combine: Save pasta water. Drain pasta, add to skillet with 1 cup reserved water. Cook 1 minute while stirring.
  • Finish: Turn off heat. Stir in parsley and parmesan. Adjust salt and add more water if dry.
  • Serve hot: topped with lemon zest.

Notes

Adjust the amount of chili to your spice preference. For a richer flavor, add a knob of butter along with the parmesan.
Calories: 350kcal
Cost: $8
Course: Main Course
Cuisine: Italian
Keyword: lemon

Nutrition

Calories: 350kcal | Carbohydrates: 50g | Protein: 15g | Fat: 12g | Sodium: 300mg
pin

Hey there, friends! Avery here, from my cozy kitchen in Portland. Today, I’m so excited to share a recipe that’s become a staple in our home: Creamy Lemon Orzo with Chicken. This isn’t just a meal; it’s a hug in a bowl—comforting, flavorful, and surprisingly simple to make. If you are looking for a weeknight dinner that feels special but doesn’t keep you chained to the stove, you’ve come to the right place.

My journey with food started out of necessity. After years of neglecting my health, I found solace and healing in the kitchen. This Creamy Lemon Orzo with Chicken is a reflection of that journey—a dish that nourishes both body and soul.

Why You’ll Love This Creamy Lemon Chicken Orzo

Let’s face it, life is busy. We need meals that are quick, easy, and satisfying. This Creamy Lemon Orzo with Chicken ticks all those boxes and more! Here’s why you’ll absolutely adore it:

  • One-Pan Wonder: Fewer dishes mean more time for you. Everything cooks together in one skillet, making cleanup a breeze.
  • Ready in Under 30 Minutes: From start to finish, this dish comes together in a flash. Perfect for those hectic weeknights.
  • Incredibly Flavorful: The combination of lemon, garlic, and parmesan creates a bright, zesty flavor that’s irresistible.
  • Customizable: Feel free to add your favorite veggies or swap out the chicken for shrimp or tofu. The possibilities are endless.
  • Comfort Food with a Healthy Twist: The creamy sauce is made with Greek yogurt, adding a boost of protein and tanginess without all the extra fat.

This creamy lemon chicken orzo is truly a dish that delivers on flavor and convenience. It’s a recipe you’ll find yourself making again and again.

Ingredients for Creamy Lemon Orzo

Here’s what you’ll need to create this culinary masterpiece. I always encourage using the freshest ingredients you can find. It truly makes a difference in the final flavor!

  • 1½ lb boneless, skinless chicken breast
  • 1 Tbsp extra-virgin olive oil
  • ½ yellow onion
  • 3 cloves garlic
  • 1 tsp paprika
  • 1 tsp dried oregano
  • 1 tsp garlic powder
  • ½ tsp kosher salt
  • ¼ tsp black pepper
  • 2 cups chicken broth
  • 1 cup orzo pasta, dry
  • 2 cups baby spinach
  • ¼ cup Greek yogurt
  • ½ cup grated parmesan cheese
  • 2-4 Tbsp lemon juice
  • 1 tsp lemon zest
Recipe Image

How to Make Creamy Lemon Orzo with Chicken: Step-by-Step

Now, let’s get cooking! Here’s how to bring this delicious dish to life:

  1. Prep the Ingredients: Cut the chicken into bite-sized pieces. Dice the onion and mince the garlic.
  2. Sauté the Aromatics: Heat a large skillet over medium heat. Add the olive oil and heat until it shimmers. Add the onion. Sauté for 3-4 minutes until translucent.
  3. Cook the Chicken: Add the chicken, garlic, and seasonings. Make sure the chicken is coated in the seasonings. Cook for 3-4 minutes on one side, undisturbed. Flip and cook another 3-4 minutes until fully cooked to an internal temperature of 165℉ (75°C).
  4. Simmer the Orzo: Add the orzo pasta and chicken broth to the cooked chicken. Give it a good stir and bring to a boil. Lower heat and cover. Simmer on low heat for 12 minutes, stirring occasionally to prevent the orzo from sticking to the bottom of the pan.
  5. Finish the Dish: Remove the lid and simmer another 2-4 minutes uncovered until orzo is cooked. Cook time will vary a bit based on your pan and stovetop. At the end of cooking, stir in the spinach until it wilts. Turn off heat and stir in the Greek yogurt, parmesan, lemon juice, and lemon zest. Give it a taste and add more salt as needed.

And there you have it! A creamy, lemony, chicken-y delight ready to be devoured. It’s a simple recipe that gives you a lot of flavor and satisfaction.

Pro Tips for the Best Lemon Chicken Orzo

Here are a few tricks I’ve learned along the way to ensure your Creamy Lemon Orzo with Chicken is a total success:

  • Don’t Overcook the Chicken: Overcooked chicken is dry and tough. Use a meat thermometer to ensure it reaches 165℉ (75°C) without overcooking.
  • Toast the Orzo: For a nuttier flavor, toast the orzo in the skillet with the onion before adding the chicken broth.
  • Use Fresh Lemon Juice: Bottled lemon juice just doesn’t compare to the bright, zesty flavor of fresh lemon juice.
  • Grate Your Own Parmesan: Pre-grated parmesan cheese often contains cellulose, which can prevent it from melting properly. Grate your own for a smoother, creamier sauce.
  • Stir Frequently: Stirring the orzo while it simmers prevents it from sticking to the bottom of the pan and ensures even cooking.

These pro tips will help you elevate this creamy lemon chicken orzo from good to great. If you are looking for an amazing dish, these tips will help you get there!

Common Mistakes to Avoid

We all make mistakes in the kitchen! Here are a few common pitfalls to watch out for when making Creamy Lemon Orzo with Chicken:

  • Using Too Much Liquid: Adding too much chicken broth can result in a soupy dish. Start with the recommended amount and add more only if needed.
  • Not Seasoning Properly: Seasoning is key to bringing out the flavors in this dish. Don’t be afraid to add salt, pepper, and other seasonings to taste.
  • Overcooking the Orzo: Overcooked orzo is mushy and unappetizing. Cook it until it’s al dente, with a slight bite.
  • Adding the Greek Yogurt Too Early: Adding the Greek yogurt while the dish is still hot can cause it to curdle. Stir it in at the very end, after turning off the heat.

Avoiding these mistakes will help you create a perfectly creamy and flavorful Lemon Chicken Orzo every time.

Variations and Substitutions

One of the best things about this recipe is how easily you can customize it to your liking. Here are a few ideas to get you started:

  • Protein: Swap the chicken for shrimp, tofu, or sausage.
  • Vegetables: Add your favorite veggies, such as broccoli, asparagus, peas, or sun-dried tomatoes.
  • Cheese: Experiment with different cheeses, such as mozzarella, provolone, or feta.
  • Herbs: Add fresh herbs, such as basil, parsley, or thyme, for extra flavor.
  • Spice: Add a pinch of red pepper flakes for a little heat.

Feel free to get creative and make this dish your own! The possibilities are endless.

How to Store and Reheat

Leftovers can be stored in an airtight container in the refrigerator for up to 3 days. To reheat, simply microwave until heated through or warm in a skillet over medium heat, adding a splash of chicken broth if needed to loosen the sauce. The dish does tend to thicken as it sits, so adding a little liquid when reheating helps restore its creamy consistency.

Frequently Asked Questions (FAQ)

  • Can I use brown rice or another pasta instead of orzo? Yes, you can! Just be sure to adjust the cooking time accordingly. Brown rice will take longer to cook than orzo.
  • Can I make this dish ahead of time? While it’s best served fresh, you can prepare the chicken and vegetables ahead of time and store them in the refrigerator. When you’re ready to cook, simply add them to the skillet with the orzo and chicken broth.
  • Can I freeze this dish? I don’t recommend freezing it, as the orzo can become mushy when thawed.
  • Is this dish gluten-free? No, orzo pasta contains gluten. However, you can use gluten-free orzo or another gluten-free pasta substitute.

Serving Suggestions

This Creamy Lemon Orzo with Chicken is delicious on its own, but it also pairs well with a variety of side dishes. Here are a few of my favorites:

  • Garlic Bread: Perfect for soaking up all that creamy sauce.
  • Roasted Vegetables: Broccoli, asparagus, or Brussels sprouts make a healthy and flavorful side.
  • Side Salad: A simple green salad with a lemon vinaigrette complements the flavors of the orzo perfectly.

However you choose to serve it, I hope this Creamy Lemon Orzo with Chicken brings as much joy to your table as it does to mine. Happy cooking!

Creamy Lemon Orzo with Chicken

Prep Time 10 minutes
Cook Time 25 minutes
Total Time 35 minutes
Servings 4 servings
Calories 450
This Creamy Lemon Orzo with Chicken is a quick and easy weeknight meal. The bright lemon flavor and creamy sauce make it a family favorite.

Ingredients

Ingredients

  • 1.5 lb boneless, skinless chicken breast (cut into bite-sized pieces)
  • 1 Tbsp extra-virgin olive oil
  • 0.5 yellow onion (diced)
  • 3 cloves garlic (minced)
  • 1 tsp paprika
  • 1 tsp dried oregano
  • 1 tsp garlic powder
  • 0.5 tsp kosher salt
  • 0.25 tsp black pepper
  • 2 cups chicken broth
  • 1 cup orzo pasta, dry
  • 2 cups baby spinach
  • 0.25 cup Greek yogurt
  • 0.5 cup grated parmesan cheese
  • 2-4 Tbsp lemon juice
  • 1 tsp lemon zest

Instructions 

  • Cut the chicken into bite-sized pieces. Dice the onion and mince the garlic.
  • Heat a large skillet over medium heat. Add the olive oil and saute the onion for 3-4 minutes until translucent.
  • Add the chicken, garlic, and seasonings. Cook for 3-4 minutes on one side, flip and cook another 3-4 minutes until fully cooked.
  • Add the orzo pasta and chicken broth. Bring to a boil, then lower heat, cover, and simmer for 12 minutes, stirring occasionally.
  • Remove the lid and simmer another 2-4 minutes uncovered until orzo is cooked.
  • Stir in the spinach until it wilts. Turn off heat and stir in the Greek yogurt, parmesan, lemon juice, and lemon zest. Season with salt as needed.

Notes

Add a pinch of red pepper flakes for a little heat.
Calories: 450kcal
Cost: $18
Course: Main Course
Cuisine: Italian
Keyword: chicken

Nutrition

Calories: 450kcal | Carbohydrates: 45g | Protein: 40g | Fat: 15g | Sodium: 600mg
pin

Hey friends! Avery here, from my little kitchen in Portland. Let’s talk salad, but not just any salad. We’re diving headfirst into a Strawberry Bacon Salad that’s about to rock your world. If you’re anything like me, you crave that perfect balance of sweet and savory. This salad? It’s a symphony of flavors and textures that will have you coming back for seconds, and maybe even thirds. It’s one of my go-to recipes when I want something light, refreshing, and utterly satisfying. It’s more than just a salad; it’s an experience.

My journey into healthy eating started with a simple need to feel better. And trust me, this salad is a testament to how delicious and joyful healthy eating can be. So, grab your favorite cutting board, put on some music, and let’s get started!

Why You’ll Love This Strawberry Bacon Salad

Seriously, what’s not to love? This salad is a powerhouse of deliciousness, and it’s incredibly versatile. You can easily adjust the ingredients to suit your taste or what you have on hand. There’s something magical about the combination of strawberries and bacon. This one is a family favorite and always a hit at potlucks.

  • Flavor Explosion: The sweetness of the strawberries perfectly complements the salty, smoky bacon.
  • Texture Paradise: From the crispness of the spinach to the crunch of the almonds, it’s a textural delight.
  • Quick & Easy: Ready in under 20 minutes – perfect for busy weeknights.
  • Versatile: Adaptable to your preferences and dietary needs.
  • Crowd-Pleaser: Always a hit at gatherings and potlucks.

Ingredients You’ll Need

Here’s what you’ll need to whip up this delightful salad:

  • 2 cups fresh strawberries, sliced
  • 6 slices thick-cut turkey bacon, cooked and chopped
  • 4 cups baby spinach or spring mix
  • 1/2 red onion, thinly sliced
  • 1/4 cup crumbled goat cheese or feta
  • 1/4 cup sliced almonds or pecans
  • 1/3 cup balsamic vinaigrette or poppyseed dressing
Recipe Image

How to Make Strawberry Bacon Salad: Step-by-Step

Making this salad is as easy as 1-2-3! Here’s a simple guide:

  1. Prep the Strawberries: Wash and slice the strawberries.
  2. Cook the Bacon: Cook turkey bacon until crispy, then chop.
  3. Assemble the Salad: In a large bowl, combine greens, strawberries, onions, cheese, and nuts.
  4. Add Bacon: Top with chopped turkey bacon.
  5. Dress & Toss: Drizzle with dressing and toss lightly before serving.

Pro Tips for the Perfect Salad

Want to take your Strawberry Bacon Salad to the next level? Here are a few of my favorite tips:

  • Bacon Perfection: For extra crispy bacon, cook it in the oven at 400°F (200°C) for 15-20 minutes.
  • Strawberry Selection: Choose ripe, fragrant strawberries for the best flavor.
  • Dressing Lightly: Don’t overdress the salad; a light drizzle is all you need. The goal is to enhance the flavors, not drown them.
  • Chill Out: Chill the salad for about 15 minutes before serving to let the flavors meld together.
  • Toast the Nuts: Toasting the almonds or pecans adds a deeper, nuttier flavor.

Common Mistakes to Avoid

Even the simplest recipes can have pitfalls. Here are a few common mistakes to watch out for:

  • Soggy Greens: Make sure your greens are completely dry before assembling the salad.
  • Overcooked Bacon: Burnt bacon can ruin the whole salad. Keep a close eye on it while cooking.
  • Too Much Dressing: Overdressing can make the salad soggy and mask the other flavors.
  • Ignoring Quality Ingredients: Using subpar ingredients will affect the overall taste. Opt for fresh, high-quality ingredients whenever possible.

Variations to Try

One of the best things about this salad is how easy it is to customize! Here are a few variations to inspire you:

  • Grilled Chicken: Add grilled chicken for a heartier meal.
  • Avocado: Creamy avocado slices add a rich, healthy fat.
  • Blue Cheese: Swap goat cheese for blue cheese for a bolder flavor. If you’ve never tried it, give it a shot!
  • Different Greens: Use arugula for a peppery kick or mixed greens for a variety of textures.
  • Maple Bacon: Use maple-flavored bacon for an extra touch of sweetness.
  • Vegan Option: Use tempeh bacon or mushroom bacon and vegan feta to make this salad entirely plant-based.

How to Store Leftovers

If you happen to have leftovers (though I doubt you will!), here’s how to store them properly:

  • Separate Components: Store the dressed salad, bacon, and strawberries separately to prevent sogginess.
  • Airtight Containers: Use airtight containers to keep everything fresh.
  • Refrigerate: Store in the refrigerator for up to 2 days.
  • Reassemble: When ready to eat, combine the ingredients and enjoy.

Frequently Asked Questions (FAQ)

Got questions? I’ve got answers!

  • Can I make this salad ahead of time?: Yes, you can prep the ingredients ahead of time, but wait to assemble and dress the salad until just before serving.
  • Can I use regular bacon instead of turkey bacon?: Absolutely! Use whatever type of bacon you prefer.
  • What other dressings would work well with this salad?: Poppyseed, honey mustard, or even a simple lemon vinaigrette would be delicious.
  • Is this salad gluten-free?: Yes, as long as your dressing is gluten-free.
  • Can I add other fruits to this salad?: Yes, blueberries, raspberries, or blackberries would be great additions.

Serving Suggestions

This Strawberry Bacon Salad is incredibly versatile and pairs well with a variety of dishes:

  • Grilled Chicken or Fish: Serve it as a side dish with grilled chicken or fish for a complete meal.
  • Sandwiches or Wraps: It’s a great accompaniment to sandwiches or wraps for lunch.
  • BBQ: Perfect for summer BBQs and picnics.
  • Light Dinner: Enjoy it as a light and refreshing dinner on a warm evening.

This salad is so much more than just a dish; it’s a celebration of flavors, textures, and the joy of cooking. It’s s a reminder that healthy eating can be both delicious and satisfying. The Strawberry Bacon Salad is something special.

So, what are you waiting for? Give this recipe a try and let me know what you think! I’m confident you’ll love the blend of sweet and savory, the crispness and the creaminess. If you’ve never considered strawberries and bacon together, you’re in for a treat. This salad is a game-changer, and I can’t wait for you to experience it. It’s just a delicious, vibrant dish that brings a little bit of sunshine to your day. Enjoy!

Strawberry Bacon Salad: A Sweet & Savory Game-Changer You’ll Crave

Prep Time 15 minutes
Cook Time 10 minutes
Total Time 25 minutes
Servings 4 servings
Calories 250
This Strawberry Bacon Salad is a delightful mix of sweet and savory flavors. Fresh strawberries, crispy bacon, and creamy goat cheese combine for a salad you'll crave.

Ingredients

Salad Ingredients

  • 2 cups fresh strawberries (sliced)
  • 6 slices thick-cut turkey bacon (cooked and chopped)
  • 4 cups baby spinach or spring mix
  • 1/2 red onion (thinly sliced)
  • 1/4 cup crumbled goat cheese or feta
  • 1/4 cup sliced almonds or pecans

Dressing

  • 1/3 cup balsamic vinaigrette or poppyseed dressing

Instructions 

  • Wash and slice the strawberries.
  • Cook turkey bacon until crispy, then chop.
  • In a large bowl, combine greens, strawberries, onions, cheese, and nuts.
  • Top with chopped turkey bacon.
  • Drizzle with dressing and toss lightly before serving.

Notes

For a vegetarian option, omit the bacon and add avocado.
Calories: 250kcal
Cost: $12
Course: Salad
Cuisine: American
Keyword: strawberry

Nutrition

Calories: 250kcal | Carbohydrates: 15g | Protein: 12g | Fat: 18g | Sodium: 300mg
pin

Hey friends! Avery here, from my little kitchen in Portland. Today, I’m sharing a recipe that’s become a staple in my life: Herby Lemon Chicken Pasta Salad. It’s a vibrant, flavorful dish that’s perfect for those days when you crave something light, refreshing, and satisfying. This isn’t just a recipe; it’s a hug in a bowl, a burst of sunshine on a cloudy day, and a reminder that healthy eating can be incredibly delicious.

My own journey with food started with a desire to feel better, and this salad embodies that ethos. It’s packed with wholesome ingredients and bursting with flavors that make you feel good from the inside out. It’s the kind of dish that makes you want to grab a fork, sit in the sun, and savor every bite.

Why You’ll Love This Herby Lemon Chicken Pasta Salad

Honestly, there are so many reasons to adore this recipe. It’s more than just a meal; it’s a versatile dish that fits seamlessly into any occasion. Here’s why I think you’ll fall in love with it:

  • Quick and Easy: This recipe comes together in under 30 minutes, making it perfect for busy weeknights or impromptu gatherings.
  • Bursting with Flavor: The combination of fresh herbs, zesty lemon, and savory chicken creates a symphony of flavors that will tantalize your taste buds.
  • Healthy and Nutritious: Packed with lean protein, whole grains, and fresh vegetables, this salad is a guilt-free indulgence.
  • Versatile: Enjoy it as a light lunch, a satisfying dinner, or a crowd-pleasing side dish. It works for meal prep, too!
  • Customizable: Feel free to swap out ingredients to suit your preferences and dietary needs. The possibilities are endless!

This salad is truly a chameleon. If you are looking for a reliable recipe, you’ve found it. And if you’re anything like me, always craving something delicious and easy, this herby lemon chicken pasta salad recipe will quickly become a go-to favorite.

Ingredients for Your Herby Lemon Chicken Pasta Salad

Here’s what you’ll need to create this culinary masterpiece. Remember, the quality of your ingredients will shine through in the final dish, so opt for the freshest produce and best-quality chicken you can find.

  • 1 pound pasta (rotini, penne, or farfalle)
  • 1.5 pounds boneless, skinless chicken breasts
  • 2 tablespoons olive oil
  • 1 teaspoon salt
  • 1/2 teaspoon black pepper
  • 1/2 cup mayonnaise
  • 1/4 cup lemon juice (freshly squeezed)
  • 2 tablespoons chopped fresh parsley
  • 2 tablespoons chopped fresh dill
  • 1 tablespoon chopped fresh chives
  • 1 clove garlic, minced
  • 1/4 cup grated Parmesan cheese
  • 1/2 cup chopped celery
  • 1/4 cup chopped red onion
Recipe Image

How to Make Herby Lemon Chicken Pasta Salad: Step-by-Step

Ready to get cooking? Here’s how to bring this delicious salad to life:

  1. Cook the Pasta: Cook pasta according to package directions. Drain and rinse with cold water. Set aside. This step is crucial; rinsing the pasta stops the cooking process and prevents it from becoming mushy.
  2. Prepare the Chicken: Season chicken breasts with salt and pepper. Heat olive oil in a large skillet over medium heat. Add chicken and cook for 6-8 minutes per side, or until cooked through. Let cool slightly, then dice or shred. Alternatively, you can use rotisserie chicken for an even quicker option.
  3. Make the Dressing: In a large bowl, whisk together mayonnaise, lemon juice, parsley, dill, chives, garlic, and Parmesan cheese. This herby lemon dressing is the heart and soul of the salad. Make sure to taste and adjust the seasonings to your liking.
  4. Combine Everything: Add cooked pasta, chicken, celery, and red onion to the bowl with the dressing. Toss to combine, ensuring that every strand of pasta and piece of chicken is coated in the flavorful dressing.
  5. Chill and Serve: Refrigerate for at least 30 minutes before serving to allow flavors to meld. Serve chilled and enjoy!

Pro Tips for the Perfect Pasta Salad

Here are a few of my favorite tricks to elevate your pasta salad game:

  • Don’t Overcook the Pasta: The pasta should be cooked al dente, meaning it should be firm to the bite. Overcooked pasta will become mushy and unappetizing in the salad.
  • Use Fresh Herbs: Fresh herbs make a world of difference in this recipe. Their vibrant flavors will brighten up the salad and add a delightful aroma.
  • Taste and Adjust: Don’t be afraid to taste the dressing and adjust the seasonings to your liking. Add more lemon juice for a tangier flavor, or more herbs for a more herbaceous profile.
  • Chill Thoroughly: Chilling the salad for at least 30 minutes allows the flavors to meld together and enhances the overall taste.
  • Add a Crunch: Consider adding toasted nuts or seeds for a satisfying crunch.

The chicken breasts are a key component; make sure they are cooked through but not dry. The chicken, combined with the fresh herbs, creates a symphony of flavors.

Common Mistakes to Avoid

Even the simplest recipes can have their pitfalls. Here are a few common mistakes to watch out for:

  • Using Too Much Dressing: Overdressing the salad can make it soggy and heavy. Start with less dressing and add more as needed.
  • Not Salting the Pasta Water: Salting the pasta water seasons the pasta from the inside out and enhances its flavor.
  • Adding Warm Pasta to the Dressing: Adding warm pasta to the dressing can cause it to break down and become oily. Always rinse the pasta with cold water before adding it to the dressing.
  • Skipping the Chilling Time: Chilling the salad is essential for allowing the flavors to meld together. Don’t skip this step!

Variations to Make It Your Own

This recipe is a blank canvas for your culinary creativity. Here are a few variations to inspire you:

  • Mediterranean Twist: Add Kalamata olives, feta cheese, and sun-dried tomatoes for a Mediterranean-inspired flavor.
  • Spicy Kick: Add a pinch of red pepper flakes or a dash of hot sauce for a spicy kick.
  • Vegetarian Option: Replace the chicken with chickpeas or grilled vegetables for a vegetarian-friendly version.
  • Add More Veggies: Include chopped bell peppers, cucumbers, or cherry tomatoes for added nutrients and flavor.
  • Different Pasta Shapes: Experiment with different pasta shapes like shells, ditalini, or orecchiette.

If you’re feeling adventurous, try using grilled chicken for a smoky flavor. The pasta salad is incredibly versatile, so don’t be afraid to experiment!

How to Store Herby Lemon Chicken Pasta Salad

This salad is a meal-prep dream! Store it in an airtight container in the refrigerator for up to 3-4 days. The flavors will actually improve over time as they meld together.

Keep in mind that the mayonnaise-based dressing may become slightly thinner after a few days. If this happens, simply give the salad a good stir before serving.

Frequently Asked Questions (FAQ)

  • Can I use rotisserie chicken? Absolutely! Rotisserie chicken is a great shortcut for this recipe.
  • Can I make this salad ahead of time? Yes, this salad is perfect for making ahead of time. In fact, it tastes even better after the flavors have had a chance to meld together.
  • Can I freeze this salad? I don’t recommend freezing this salad, as the mayonnaise-based dressing may separate and become watery upon thawing.
  • Can I use dried herbs instead of fresh herbs? While fresh herbs are preferred for their vibrant flavor, you can use dried herbs in a pinch. Use about 1 teaspoon of dried herbs for every 1 tablespoon of fresh herbs.
  • Is this salad gluten-free? To make this salad gluten-free, simply use gluten-free pasta.

Don’t be afraid to experiment with the recipe! If you don’t have fresh chives, you can substitute with green onions. The salad is forgiving and adaptable.

Serving Suggestions

This Herby Lemon Chicken Pasta Salad is delicious on its own, but it also pairs well with a variety of other dishes. Here are a few serving suggestions:

  • As a side dish: Serve it alongside grilled chicken, fish, or vegetables.
  • As a light lunch: Enjoy it on its own for a quick and satisfying lunch.
  • At a picnic or potluck: This salad is a crowd-pleaser and travels well, making it perfect for picnics and potlucks.
  • In a wrap or sandwich: Stuff it into a pita bread or wrap for a portable and delicious meal.

The olive oil in the dressing adds a richness that complements the fresh herbs. Remember, this salad is all about balance and flavor!

So, there you have it – my go-to Herby Lemon Chicken Pasta Salad recipe. I hope you love it as much as I do. Remember, cooking should be fun and nourishing, not stressful. Embrace the process, experiment with flavors, and most importantly, enjoy every bite! Happy cooking, friends!

Herby Lemon Chicken Pasta Salad

Prep Time 20 minutes
Cook Time 25 minutes
Total Time 45 minutes
Servings 6 servings
Calories 450
A refreshing and flavorful pasta salad featuring tender chicken, vibrant herbs, and a zesty lemon dressing. Perfect for a light lunch or a summer gathering.

Ingredients

Pasta Salad

  • 1 pound pasta (rotini, penne, or farfalle)
  • 1.5 pounds boneless, skinless chicken breasts
  • 2 tablespoons olive oil
  • 1 teaspoon salt
  • 1/2 teaspoon black pepper
  • 1/2 cup mayonnaise
  • 1/4 cup lemon juice (freshly squeezed)
  • 2 tablespoons chopped fresh parsley
  • 2 tablespoons chopped fresh dill
  • 1 tablespoon chopped fresh chives
  • 1 clove garlic, minced
  • 1/4 cup grated Parmesan cheese
  • 1/2 cup chopped celery
  • 1/4 cup chopped red onion

Instructions 

  • Cook pasta, drain, and rinse with cold water. Set aside.
  • Season chicken with salt and pepper.
  • Heat olive oil in a skillet. Cook chicken for 6-8 minutes per side. Let cool and dice.
  • Whisk together mayonnaise, lemon juice, parsley, dill, chives, garlic, and Parmesan cheese.
  • Add pasta, chicken, celery, and red onion to the dressing. Toss to combine.
  • Refrigerate for at least 30 minutes before serving.

Notes

For a tangier flavor, add a bit more lemon juice to the dressing.
Calories: 450kcal
Cost: $20
Course: Main Course, Salad
Cuisine: American, Italian
Keyword: chicken, lemon, pasta

Nutrition

Calories: 450kcal | Carbohydrates: 45g | Protein: 35g | Fat: 20g | Sodium: 500mg
pin