Why You’ll Love This Recipe
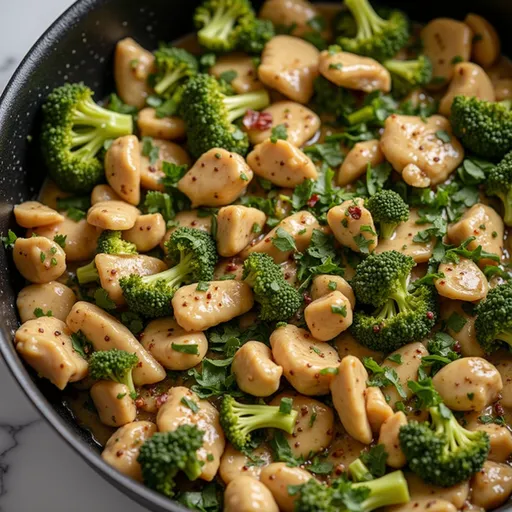
When it comes to weeknight dinners, we all want something that’s not only quick to prepare but also bursting with flavor. The Easy 15 Minute Keto Garlic Chicken with Broccoli and Spinach delivers just that—zesty, hearty, and satisfying! Imagine tender chicken breasts sautéed to golden perfection, nestled beside vibrant broccoli and fresh spinach, all brought together by the aromatic allure of garlic. This recipe is more than just a meal; it’s a celebration of wholesome ingredients that can transform your evenings into culinary adventures.
This dish is not only keto-friendly but also incredibly versatile, making it perfect for families who want to eat healthy without sacrificing taste. In just 15 minutes, you can create a dish that’s both nutritious and indulgent, ensuring that dinner is something everyone will look forward to. Let’s dive into the details of what makes this recipe a must-try!
Ingredients You’ll Need
Before we get our cooking groove on, let’s gather our ingredients. Here’s what you’ll need for this vibrant dish:
- 2 boneless, skinless chicken breasts
- 2 cups broccoli florets
- 2 cups fresh spinach
- 3 tablespoons olive oil
- 4 cloves garlic, minced
- Salt and pepper to taste
- 1 teaspoon Italian seasoning
- 1 tablespoon lemon juice
- Grated parmesan cheese (optional, for serving)
Each ingredient plays a crucial role, from the tender chicken that serves as the protein powerhouse to the fresh greens that add a burst of nutrition and color. And let’s not forget the garlic—because what’s a great dish without a little aromatic magic?
How to Make Easy 15 Minute Keto Garlic Chicken with Broccoli and Spinach
Step 1: Sear the Chicken
Start your culinary adventure by heating 1 tablespoon of olive oil in a large skillet over medium heat. While that oil warms, season your chicken breasts generously with salt, pepper, and Italian seasoning. Once the oil is shimmering, add the chicken to the skillet. Cook for about 4-5 minutes on each side, or until the chicken is cooked through and no longer pink in the center. This step is crucial; it locks in all those flavorful juices and gives your chicken that beautiful golden crust that’s absolutely irresistible.
Step 2: Add the Garlic
Once your chicken is perfectly seared, remove it from the skillet and set it aside. In the same skillet, add the remaining olive oil and toss in the minced garlic. Sauté the garlic for about 30 seconds until it becomes fragrant, but be careful not to let it burn—burnt garlic can turn your dish bitter and ruin all that deliciousness you’ve created!
Step 3: Incorporate Vegetables and Cheeses
Now it’s time to bring in the stars of the show: the vegetables! Add the broccoli florets to the skillet and cook for about 3-4 minutes until they turn bright green and tender-crisp. Next, stir in the fresh spinach, cooking for an additional 1-2 minutes until it wilts down into the mix. Finally, return the chicken to the skillet, drizzle with lemon juice, and give everything a good stir to combine the flavors. If you want to indulge a bit more, sprinkle some grated parmesan cheese on top before serving—because who can resist extra cheese?
How to Serve This Flavorful Dish
Now that your meal is ready, let’s talk about presentation and serving. Here are some ideas to elevate your dining experience:
Garnishes
Garnishing can make a dish feel special. A sprinkle of freshly chopped parsley or basil not only adds a pop of color but also enhances the flavor profile beautifully. If you’ve opted for parmesan, a few extra shavings on top can create a lovely, indulgent finish.
Side Dishes
This dish pairs wonderfully with a variety of sides. For a keto-friendly option, consider serving it over cauliflower rice or zucchini noodles. If you’re not strictly following keto, you can also complement it with steamed rice or buttery mashed potatoes to soak up that creamy goodness!
Creative Ways to Present
Feeling adventurous? Try portioning the chicken and vegetables into small ramekins, sprinkle with extra cheese, and broil them for a minute to create a bubbly, golden topping. It’s a fun twist that’s sure to impress!
Make Ahead and Storage
One of the best things about this recipe is its adaptability for meal prep. Here’s how to manage leftovers or prepare it in advance:
Storing Leftovers
Any leftovers can be stored in an airtight container in the refrigerator for up to 3 days. This makes for a quick, satisfying meal the next day without any extra work involved.
Freezing
If you want to prepare this dish ahead of time, you can freeze it! Place the cooled chicken and vegetable mixture in a freezer-safe container or bag, removing as much air as possible. It will keep well for up to 2 months, making it an excellent option for busy weeks.
Reheating
When you’re ready to enjoy your frozen meal, thaw it overnight in the fridge. Reheat gently on the stovetop over medium-low heat, stirring occasionally to ensure the chicken remains tender and the sauce doesn’t separate. You can also microwave it in short bursts, stirring in between, until heated through.
FAQs
Can I use frozen broccoli and spinach for this recipe?
Absolutely! Frozen veggies are a convenient shortcut and still deliver great flavor and nutrition. Just make sure to thaw and drain any excess water before cooking to avoid a watery dish.
Is this dish suitable for other low-carb diets besides keto?
Yes, it fits well into most low-carb eating plans since it focuses on protein, healthy fats, and non-starchy vegetables. Just adjust the cheese or cream cheese to your preference.
Can I substitute the chicken breasts with another protein?
Definitely! Chicken thighs, turkey, or even shrimp can be used instead. Just keep an eye on cooking times to ensure your protein is cooked through without drying out.
What can I use instead of cream cheese?
If you don’t have cream cheese on hand, Greek yogurt or mascarpone are great substitutes that maintain creaminess while adding a little tang or richness.
Is this recipe dairy-free friendly?
The standard recipe includes cheese and cream cheese, but you can make it dairy-free by omitting or substituting with vegan cheese alternatives and using coconut cream instead of cream cheese.
Tips for Success
Cooking is all about experimenting and finding what works best for you. Here are some additional tips to help you perfect this dish:
- Use Fresh Ingredients: Fresh garlic and vegetables will always deliver the best flavor and texture.
- Don’t Overcrowd the Skillet: If your skillet is too crowded, the chicken will steam instead of sear. Cook in batches if necessary.
- Adjust the Seasoning: Feel free to tweak the seasonings based on your preferences. A pinch of red pepper flakes can add extra warmth!
Final Thoughts
This Easy 15 Minute Keto Garlic Chicken with Broccoli and Spinach is such a joy to make and even more satisfying to eat. It captures everything you want in a quick, easy, nourishing meal without sacrificing flavor or texture. Whether you’re new to keto or simply love wholesome, delicious dinners, this recipe is sure to brighten your dinner table and warm your heart. Grab your skillet, unleash your inner chef, and let’s make this culinary magic happen in your kitchen!

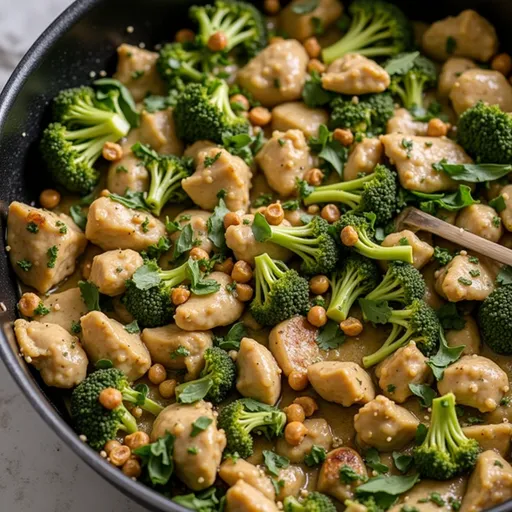
Easy 15 Minute Keto Garlic Chicken with Broccoli and Spinach
Ingredients
Protein
- 2 pieces boneless, skinless chicken breasts
Vegetables
- 2 cups broccoli florets
- 2 cups fresh spinach
Fats & Oils
- 3 tablespoons olive oil
Garlic & Herbs
- 4 cloves garlic, minced
- 1 teaspoon italian seasoning
- 1 tablespoon lemon juice
Cheese (Optional)
- grated parmesan cheese grated parmesan cheese (optional, for serving)
Instructions
- Heat 1 tablespoon of olive oil in a skillet over medium heat.
- Season chicken with salt, pepper, and Italian seasoning; cook 4-5 minutes per side until cooked through.
- Remove chicken; sauté garlic in the same skillet for 30 seconds.
- Add broccoli; cook 3-4 minutes, then stir in spinach and cook 1-2 minutes until wilted.
- Return chicken, drizzle with lemon juice, and serve with optional Parmesan cheese.
Notes
Nutrition
Loved this recipe? Save it to your favorite Pinterest board so you can easily find it later! It’s the perfect way to keep all your sweet ideas in one place. ✨