Author

Avery Collins

Browsing

Hello, friends! Avery here, from my cozy kitchen in rainy Portland. Today, I want to share a recipe that’s been a staple in my life since I first started cooking: Classic Potato Salad. This isn’t just any potato salad; it’s the kind that evokes memories of summer picnics, family gatherings, and that unmistakable feeling of comfort. It’s a dish that feels like a warm hug, and I’m so excited to share my version with you.

My journey into healthy cooking started out of necessity, a need to reclaim my well-being. This potato salad recipe, while not necessarily ‘health food,’ represents a balanced approach to enjoying the simple pleasures in life. It’s about using good ingredients, savoring each bite, and sharing it with people you love. It’s a celebration of simple, honest flavors.

Why You’ll Love This Recipe

Let me tell you why this potato salad recipe is special. It’s more than just a side dish; it’s a conversation starter, a memory maker, and a guaranteed crowd-pleaser. Here’s what makes it so irresistible:

  • Classic Flavors: It’s a traditional potato salad with that perfect balance of creamy, tangy, and slightly sweet.
  • Easy to Make: No complicated steps or fancy techniques. Just simple ingredients and straightforward instructions.
  • Crowd-Pleasing: This recipe is always a hit at potlucks, BBQs, and picnics. It’s the kind of dish that disappears quickly!
  • Make-Ahead Friendly: You can make it ahead of time, which makes it perfect for entertaining. In fact, the flavors meld together even better when it sits in the fridge for a few hours.
  • Versatile: It’s a great base recipe that you can customize with your favorite add-ins. More on that later!

I love how easy this recipe is to adapt. It’s a blank canvas for your culinary creativity. And the best part? It’s a dish that everyone enjoys, from kids to adults. I’m telling you, this recipe is a winner!
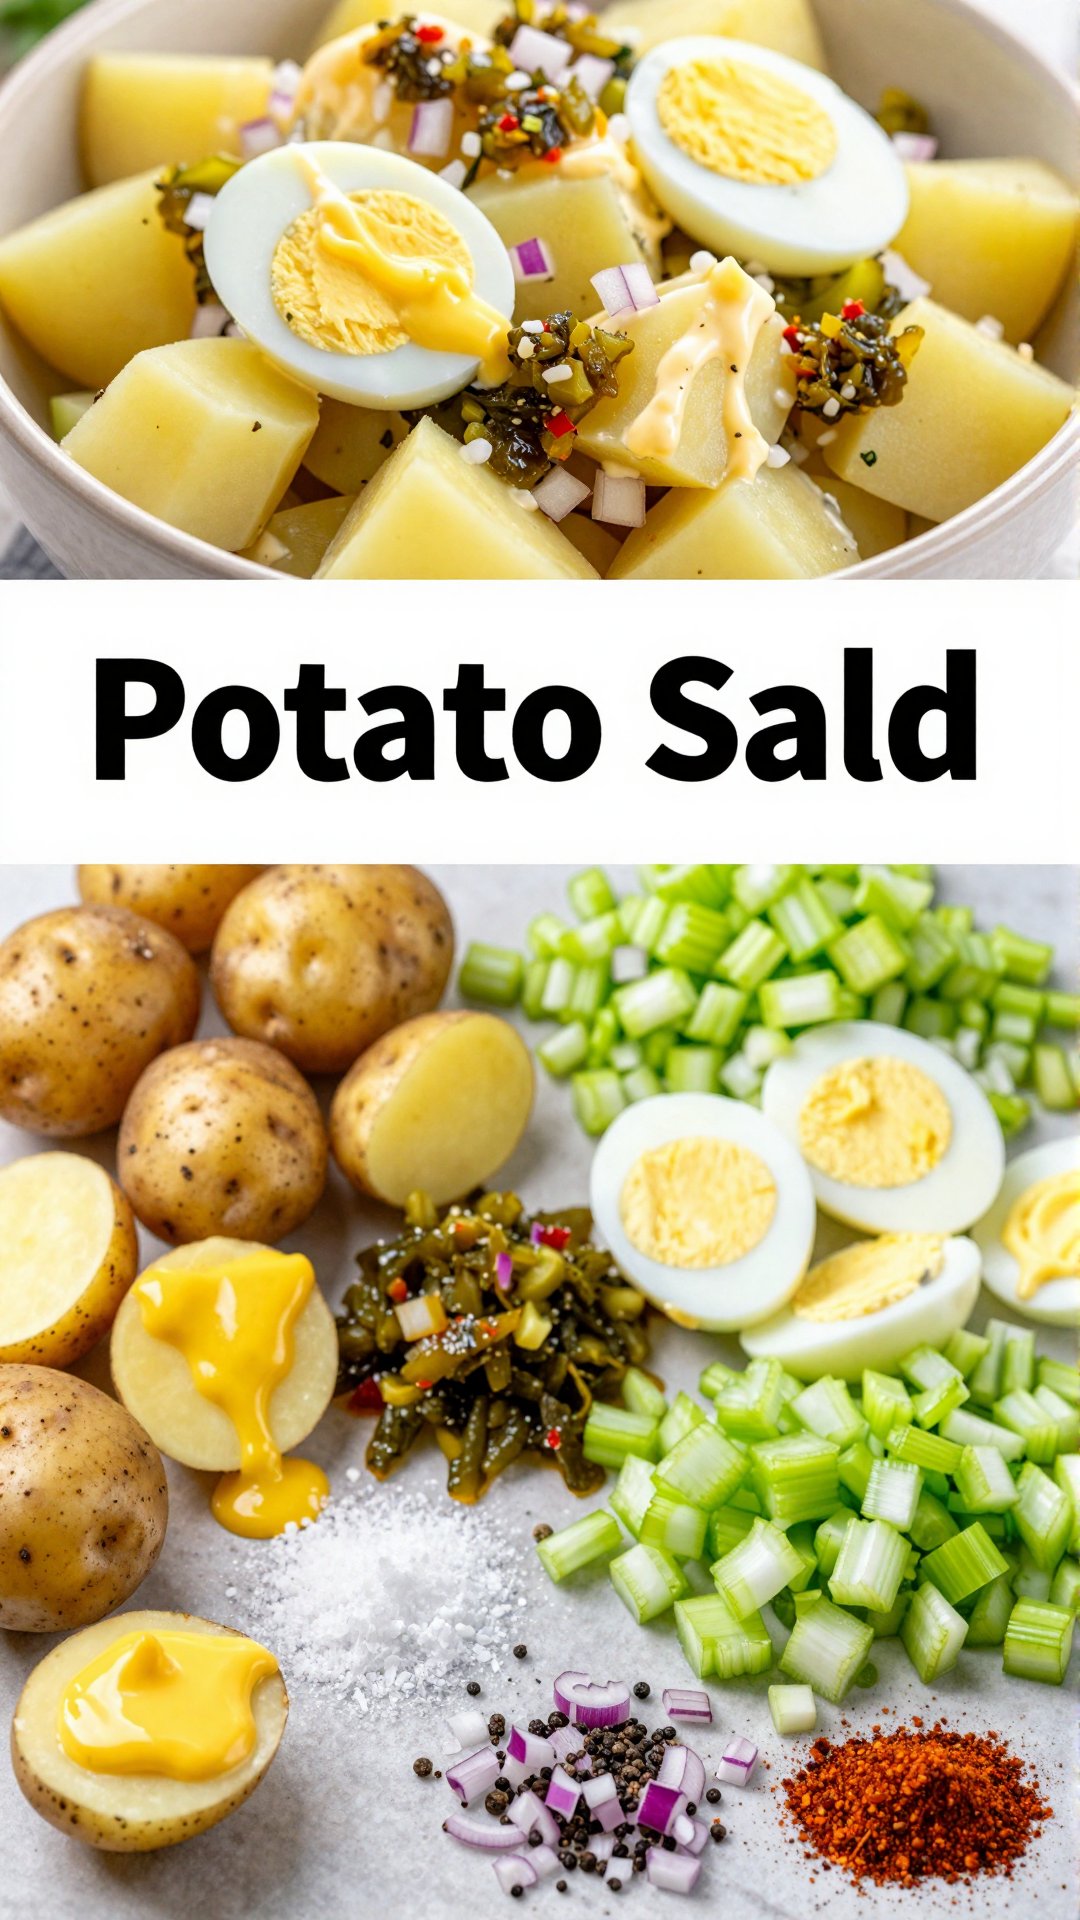
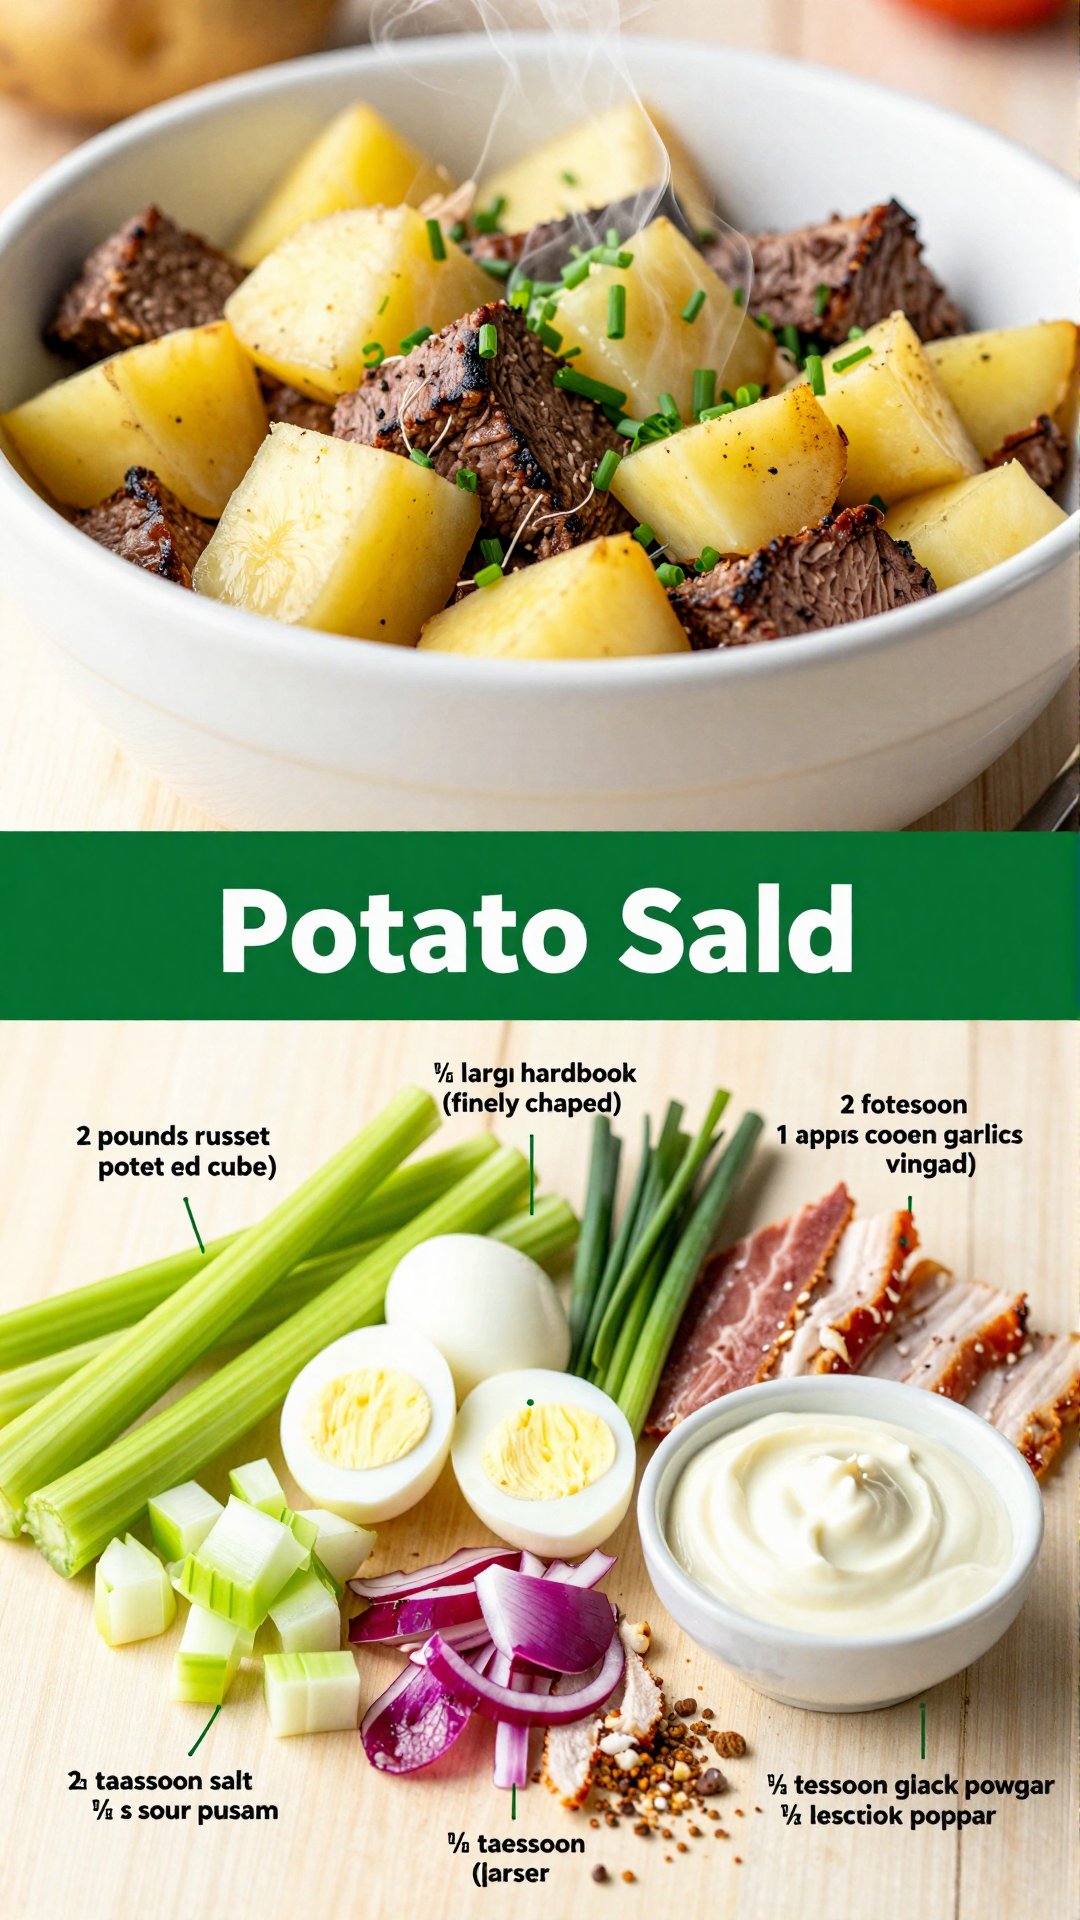
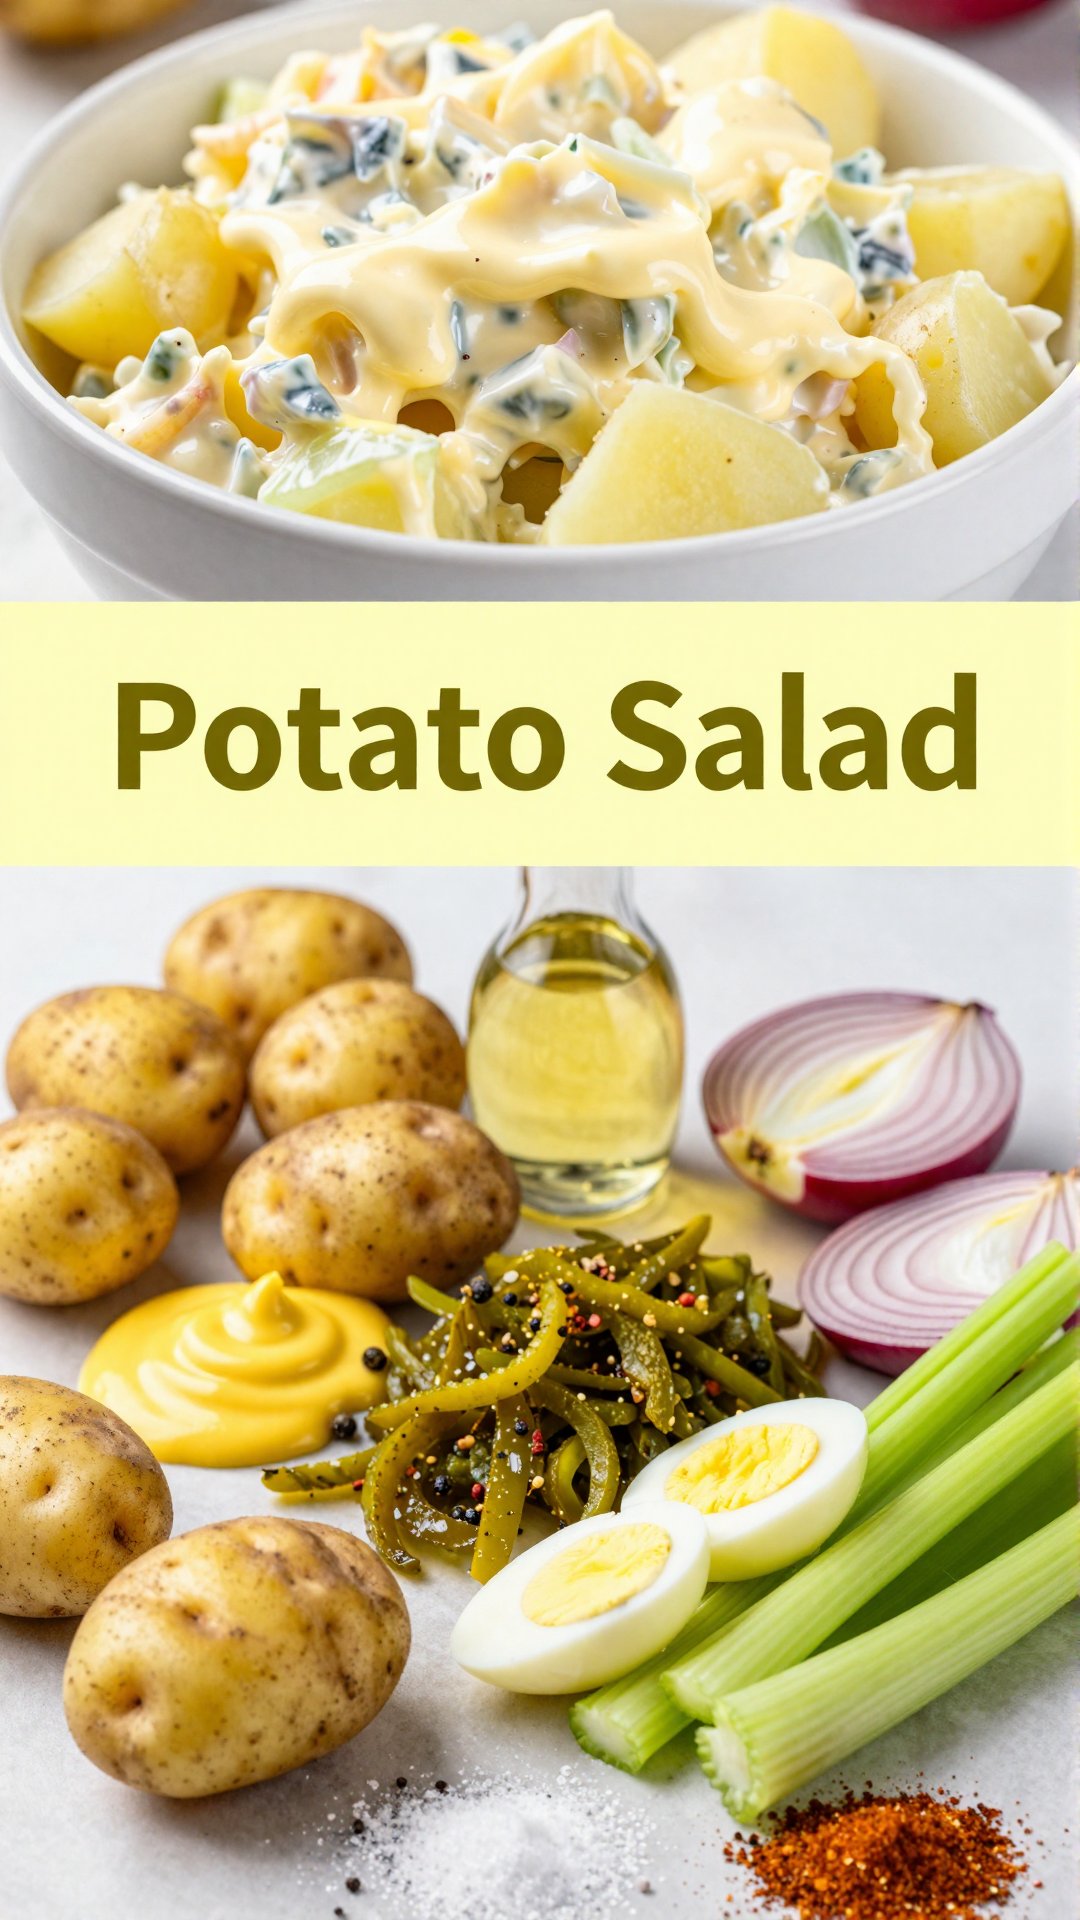
Ingredients

  • 2 pounds Yukon Gold potatoes, peeled and cubed
  • 1 cup mayonnaise
  • 1/4 cup yellow mustard
  • 1/4 cup sweet pickle relish
  • 2 hard-boiled eggs, chopped
  • 1/4 cup celery, finely chopped
  • 1/4 cup red onion, finely chopped
  • 1 tablespoon apple cider vinegar
  • 1 teaspoon salt
  • 1/2 teaspoon black pepper
  • Paprika for garnish (optional)
Recipe Image

How To Make Potato Salad: Step-by-Step

Alright, let’s get into the nitty-gritty of making this delicious potato salad. Don’t worry, it’s super simple!

  1. Cook the Potatoes: Place the cubed potatoes in a large pot and cover with cold water. Bring to a boil and cook until they are tender but not mushy, about 12-15 minutes. You should be able to easily pierce them with a fork. Drain the potatoes well and let them cool slightly.
  2. Make the Dressing: While the potatoes are cooling, prepare the dressing. In a large bowl, whisk together the mayonnaise, yellow mustard, sweet pickle juice relish, apple cider vinegar, salt, and pepper.
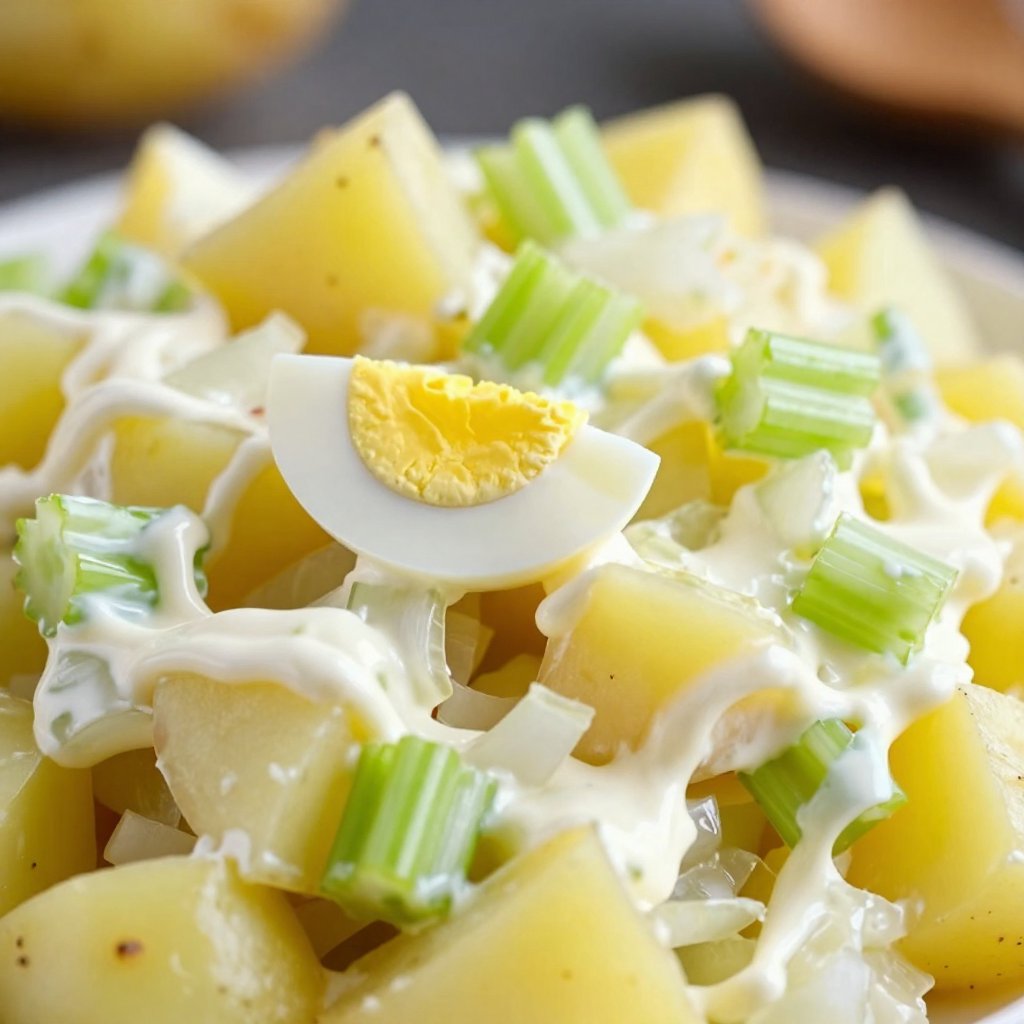
  3. Combine Everything: Gently fold in the slightly cooled potatoes, chopped hard-boiled eggs, celery, and red onion into the dressing. Be careful not to mash the potatoes too much; you want them to retain their shape.
  4. Mix Well: Mix everything together until well combined. Taste and adjust seasonings as needed. Maybe you want a little more salt, or a touch more vinegar for tang.
  5. Chill: Cover the bowl and refrigerate for at least 2 hours before serving. This allows the flavors to meld together beautifully. I can’t stress enough how important this step is!
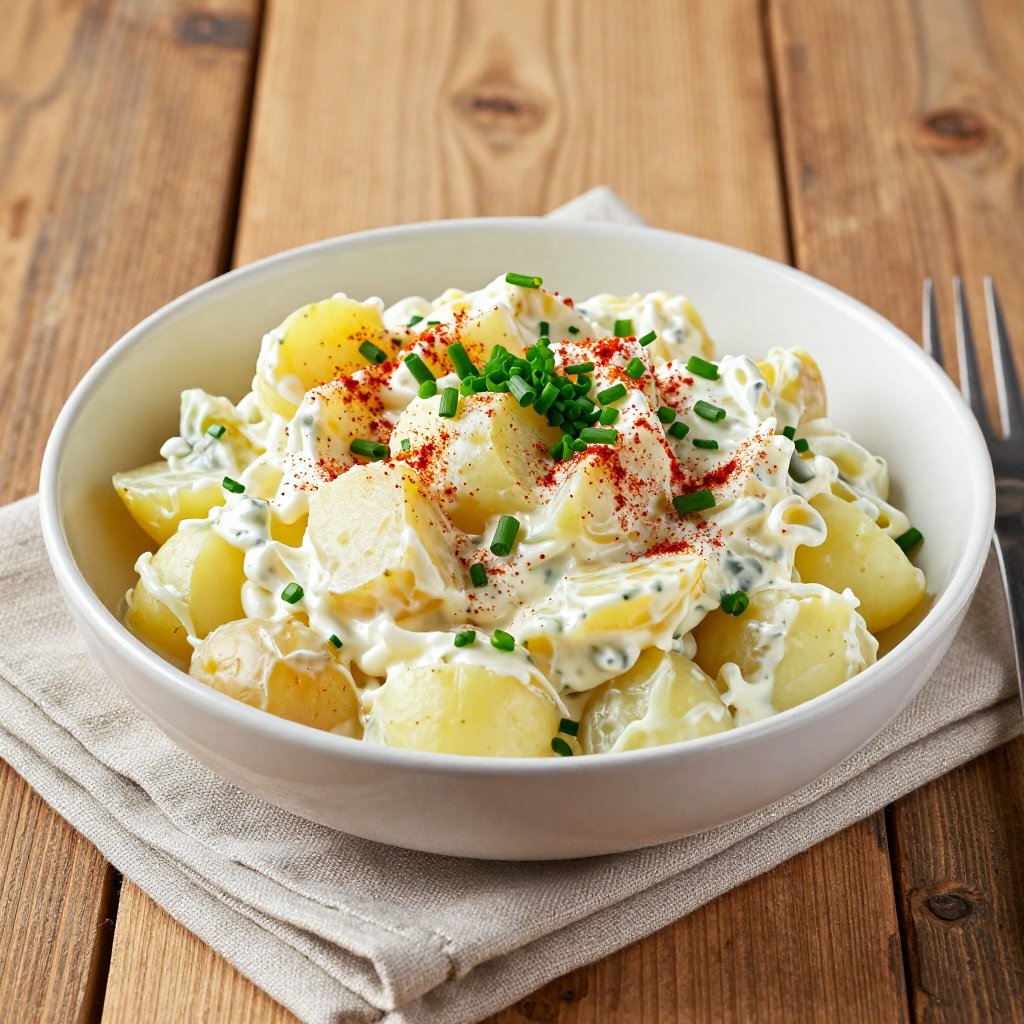
  6. Garnish and Serve: Just before serving, garnish with a sprinkle of paprika, if you desire. This adds a pop of color and a subtle smoky flavor.

And there you have it! A classic potato salad that’s ready to serve and sure to impress. I make it all the time for my friends and family, and it’s always a hit.

Pro Tips for the Best Potato Salad

Here are a few extra tips to take your potato salad to the next level:

  • Potato Choice: Yukon Gold potatoes are my go-to because they have a creamy texture and hold their shape well. Red potatoes also work great. Avoid russet potatoes, as they can become too mushy.
  • Don’t Overcook: Overcooked potatoes will turn into mush when you mix them with the dressing. Test for doneness by piercing with a fork. They should be tender but not falling apart.
  • Cool Slightly: Let the potatoes cool slightly before adding them to the dressing. This prevents the dressing from becoming too runny.
  • Taste and Adjust: Don’t be afraid to taste and adjust the seasonings to your liking. Add more salt, pepper, vinegar, or mustard as needed.
  • Make Ahead: Potato salad tastes even better when made ahead of time. The flavors have time to meld together, creating a more cohesive and delicious dish.

Common Mistakes to Avoid

Even though this recipe is simple, there are a few common mistakes to watch out for:

  • Overcooking the Potatoes: This is the biggest mistake! Mushy potatoes are not ideal for potato salad.
  • Using Too Much Mayonnaise: Start with less mayonnaise and add more as needed. You want the potatoes to be coated, not swimming in mayo.
  • Not Seasoning Enough: Don’t be shy with the salt and pepper! They are essential for bringing out the flavors of the other ingredients.
  • Serving Too Soon: Give the potato salad at least 2 hours in the fridge to allow the flavors to meld.

Potato Salad Variations

One of the best things about potato salad is how versatile it is. Here are a few variations to try:

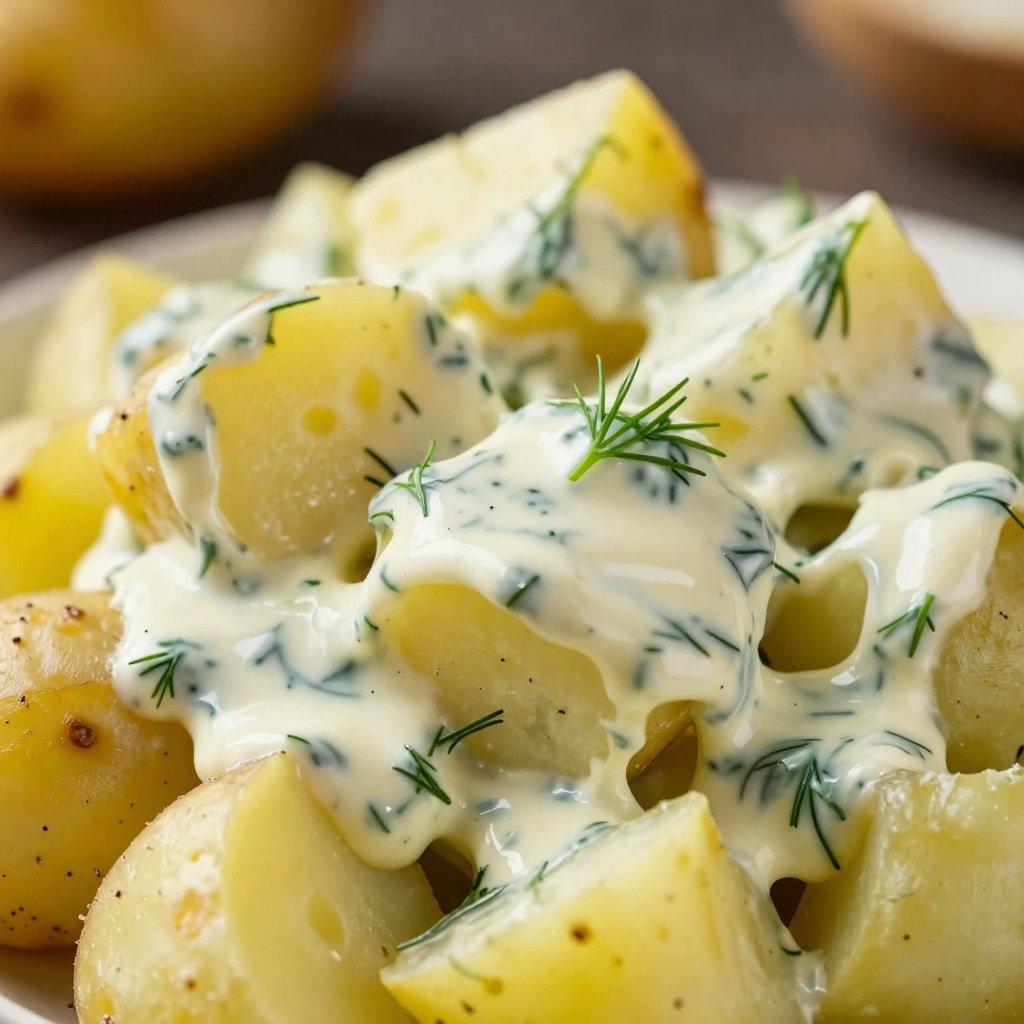
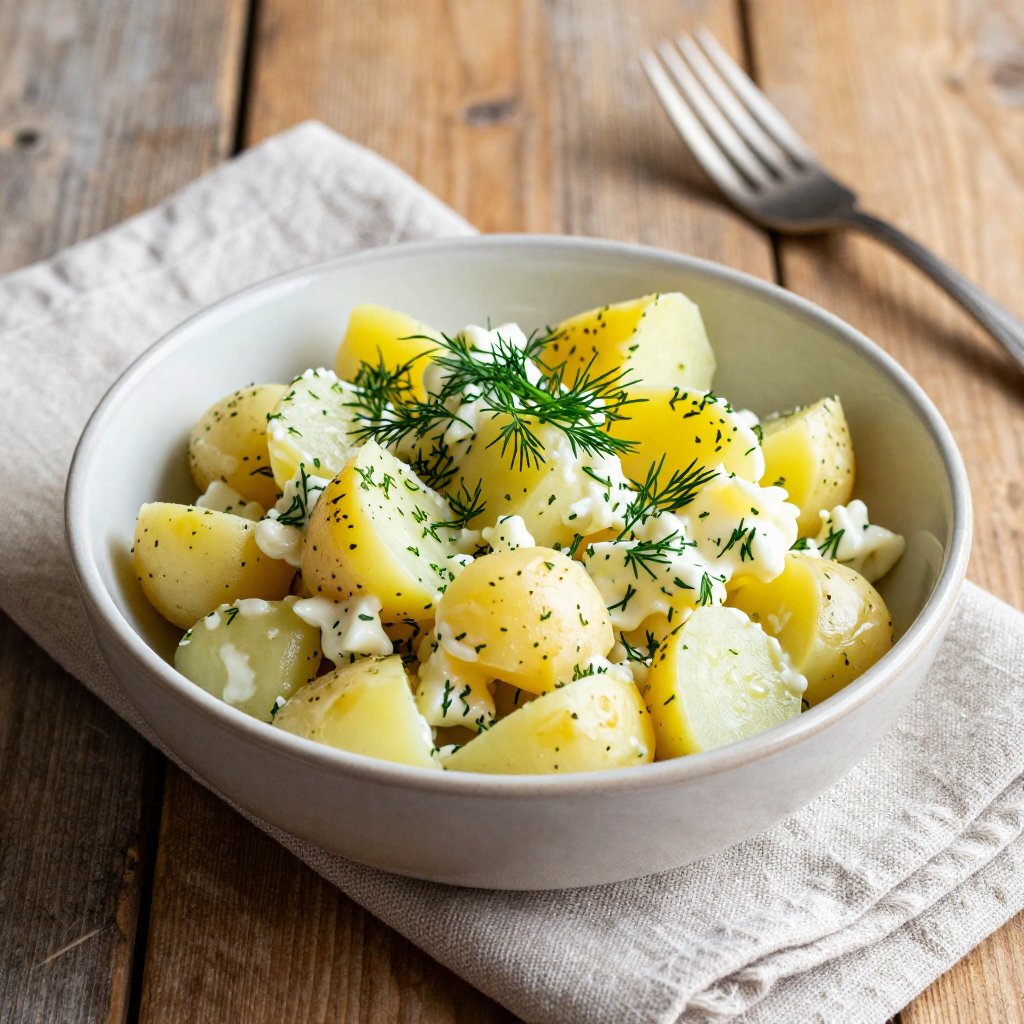
  • Dill Pickle Potato Salad: Add chopped dill pickles and a splash of dill pickle brine to the dressing for a tangy twist.
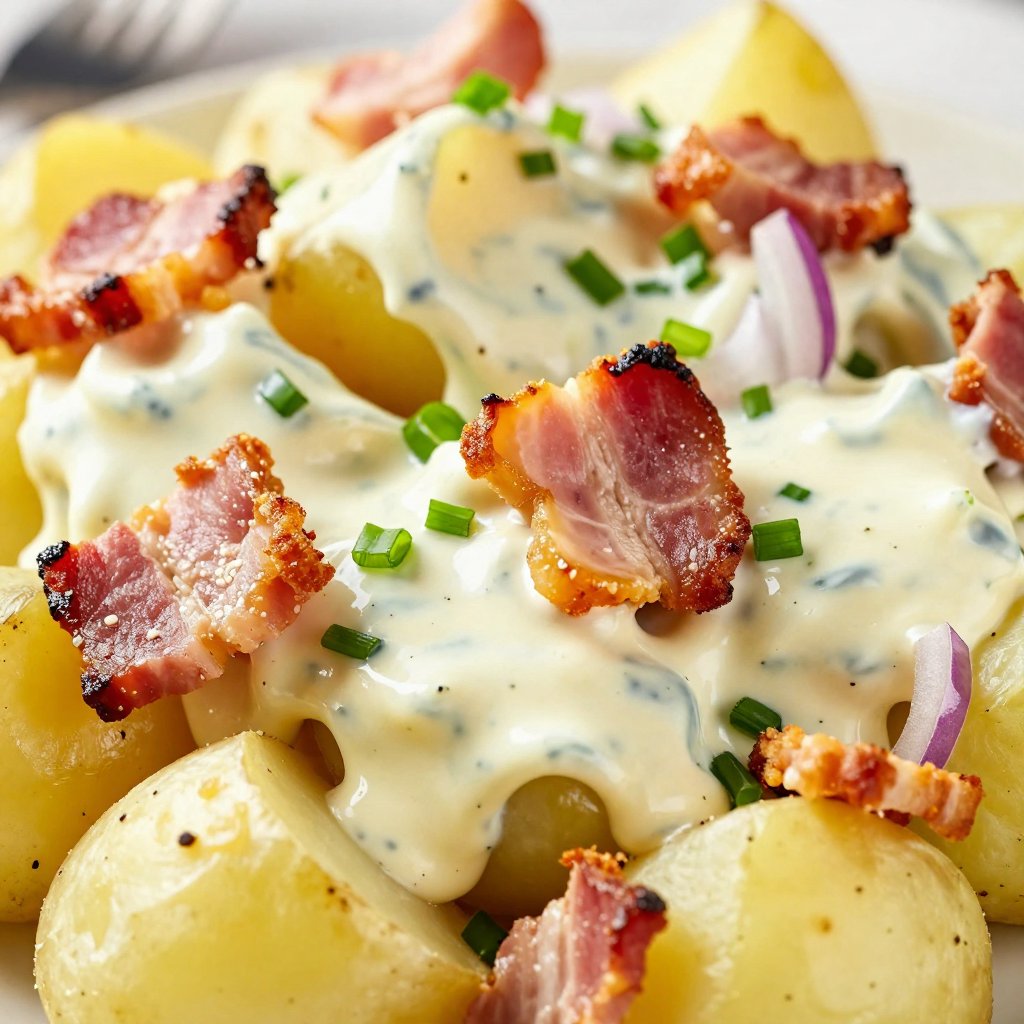
  • Bacon Ranch Potato Salad: Mix in crispy bacon bits and ranch dressing for a smoky, creamy flavor.
  • Jalapeño Cheddar Potato Salad: Add diced jalapeños and shredded cheddar cheese for a spicy, cheesy kick.
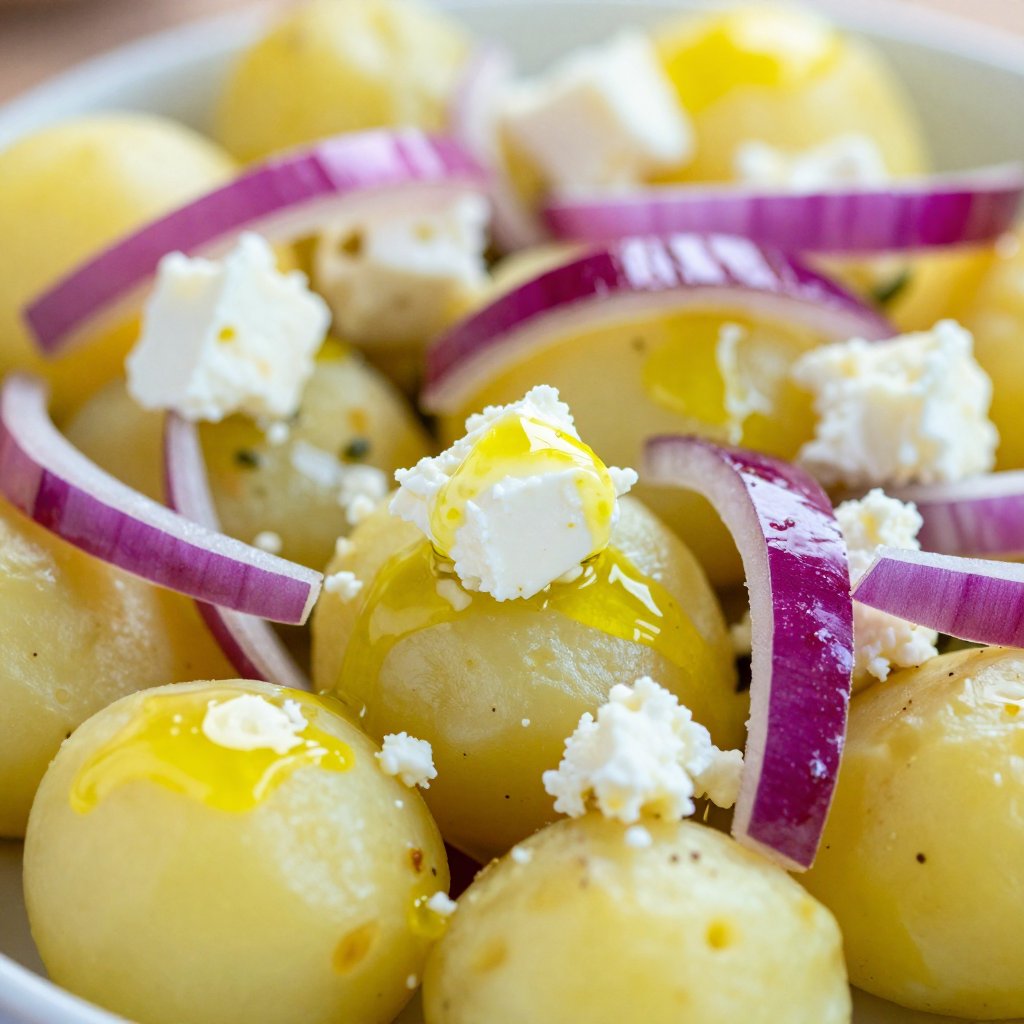
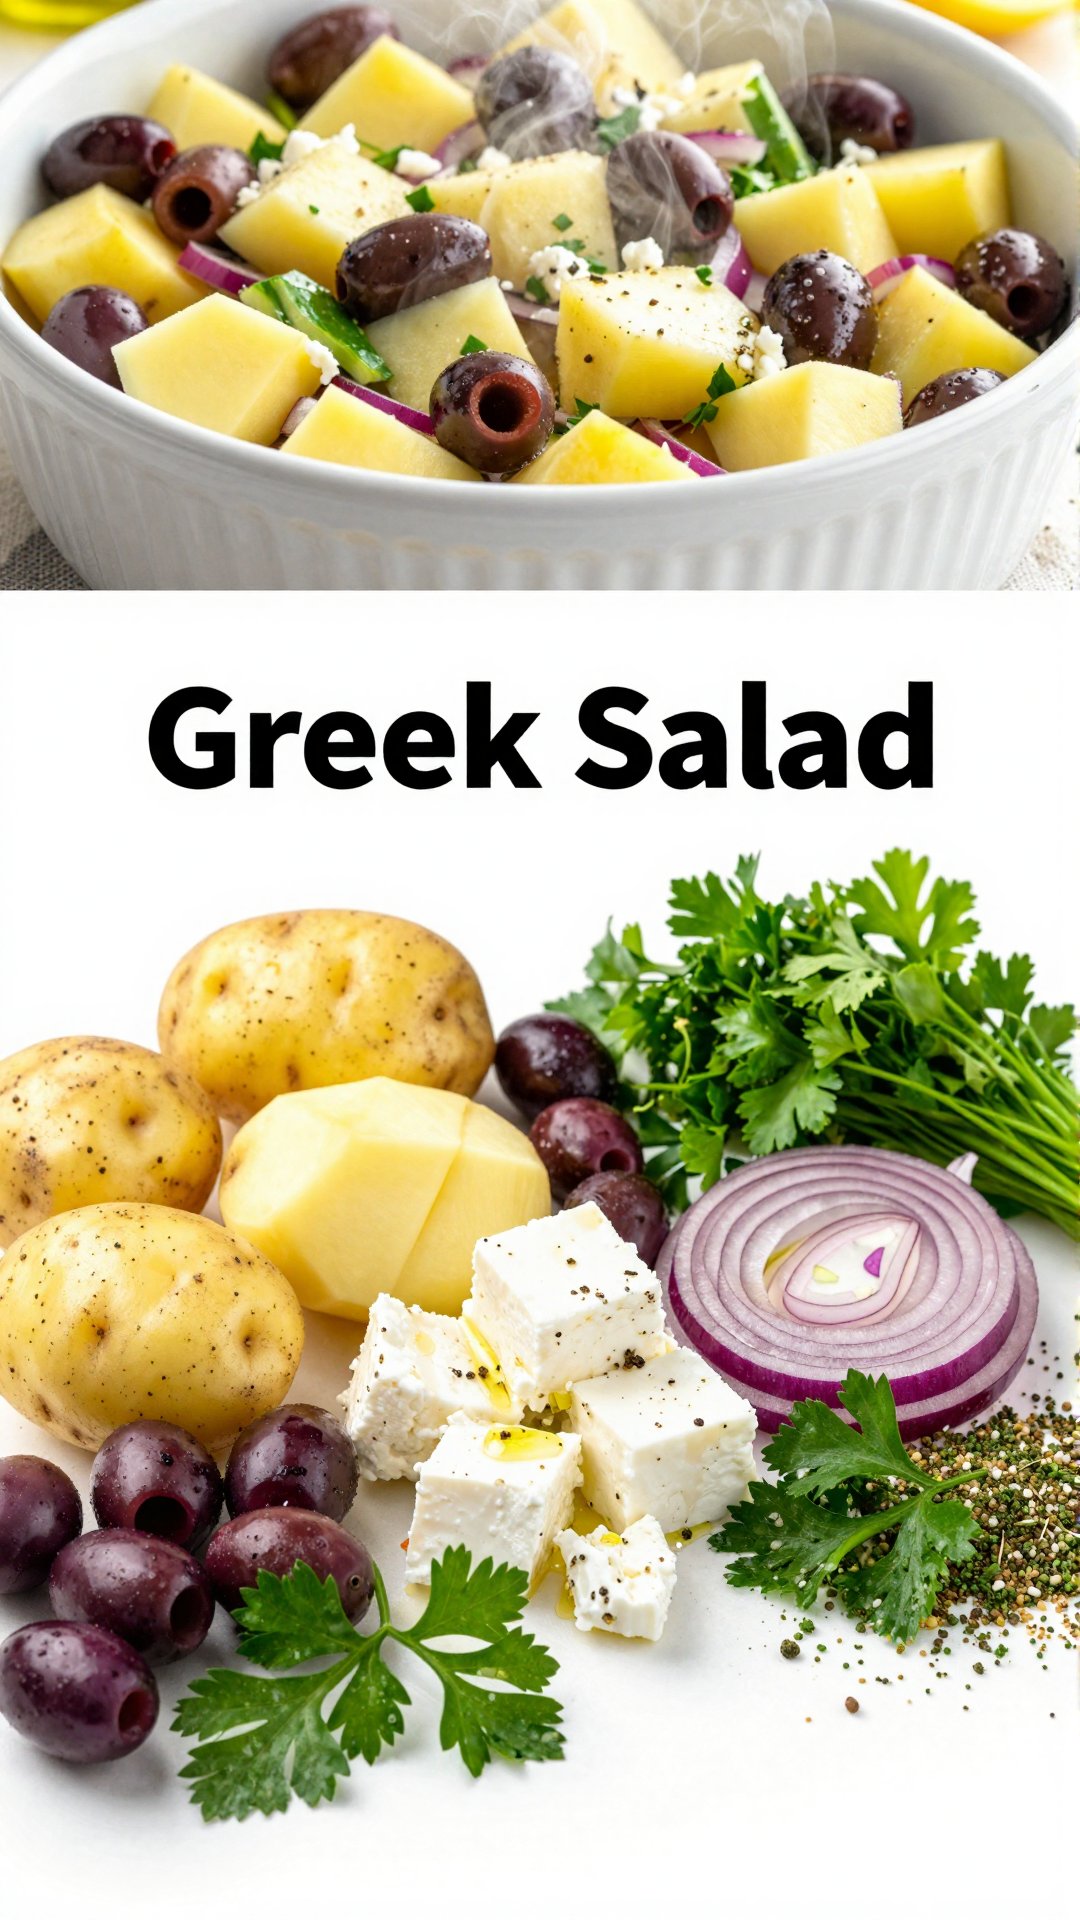
  • Mediterranean Potato Salad: Toss in Kalamata olives, feta cheese, and a lemon-herb vinaigrette for a fresh, vibrant flavor.
  • Sweet Potato Salad: Use roasted sweet potatoes instead of Yukon Golds for a sweeter, earthier flavor.

If you are feeling adventurous, try adding a touch of sriracha for a little heat! I’m always experimenting with new flavors.

How to Store Potato Salad

Potato salad should be stored in an airtight container in the refrigerator. It will keep for 3-4 days. Be sure to label the container with the date so you know when it was made.

I can tell you from experience, it’s best enjoyed fresh, but it still tastes great the next day!

Frequently Asked Questions (FAQ)

  • Can I make potato salad ahead of time? Yes! In fact, I make it a day in advance for the best flavor.
  • Can I freeze potato salad? I don’t recommend freezing potato salad, as the texture can change and become watery.
  • How long can potato salad sit out at room temperature? Potato salad should not sit out at room temperature for more than 2 hours. After that, bacteria can start to grow.
  • Can I use a different type of mayonnaise? Yes, you can use your favorite type of mayonnaise. I love a good avocado mayo for a healthier option.
  • What can I add to potato salad for extra flavor? The possibilities are endless! Try adding fresh herbs, spices, or other vegetables to customize the flavor to your liking.

Serving Suggestions

Potato salad is the perfect side dish for so many meals. Here are a few of my favorite ways to serve it:

  • BBQs and Cookouts: It’s a classic pairing with grilled burgers, hot dogs, and ribs.
  • Picnics: Pack it in a cooler with sandwiches, fruit, and drinks for a perfect picnic spread.
  • Potlucks: This recipe has always making it a hit! Bring it to your next potluck and watch it disappear.
  • Weeknight Dinners: Serve it alongside grilled chicken, fish, or tofu for a complete and satisfying meal.
  • Sandwiches and Wraps: Add a scoop of potato salad to your favorite sandwich or wrap for an extra layer of flavor and texture.

My family absolutely adores this salad recipe, and I make it every chance I can! I hope you love it as much as we do. This is truly the best potato salad recipe I know!

So, there you have it – my go-to classic potato salad recipe. I hope you give it a try and that it makes a splash at your next gathering. Remember, cooking should be joyful, so don’t be afraid to experiment and make it your own. Happy cooking, friends!

Traditional Potato Salad

Prep Time 20 minutes
Cook Time 15 minutes
Total Time 35 minutes
Servings 6 servings
Calories 320
A classic and creamy potato salad perfect for picnics and barbecues. This recipe features tender potatoes, hard-boiled eggs, and a tangy dressing.

Ingredients

Ingredients

  • 2 pounds Yukon Gold potatoes (peeled and cubed)
  • 1 cup mayonnaise
  • 1/4 cup yellow mustard
  • 1/4 cup sweet pickle relish
  • 2 hard-boiled eggs (chopped)
  • 1/4 cup celery (finely chopped)
  • 1/4 cup red onion (finely chopped)
  • 1 tablespoon apple cider vinegar
  • 1 teaspoon salt
  • 1/2 teaspoon black pepper
  • Paprika (for garnish (optional))

Instructions 

  • Boil potatoes until tender, about 12-15 minutes. Drain and cool slightly.
  • Whisk together mayonnaise, mustard, relish, vinegar, salt, and pepper.
  • Fold in potatoes, eggs, celery, and red onion.
  • Mix well, being careful not to mash the potatoes.
  • Refrigerate for at least 2 hours.
  • Garnish with paprika before serving, if desired.

Notes

For a tangier flavor, add a bit more apple cider vinegar or a squeeze of lemon juice.
Calories: 320kcal
Cost: $8
Course: Side Dish
Cuisine: American
Keyword: potato

Nutrition

Calories: 320kcal | Carbohydrates: 25g | Protein: 5g | Fat: 23g | Sodium: 450mg
pin

Hello, friends! Avery Collins here, coming to you from my cozy Portland kitchen, where the rain is drumming a gentle rhythm against the windowpanes. Today, we’re diving into a classic comfort food that’s near and dear to my heart: potato salad. But not just any potato salad – Dreamy Creamy Potato Salad. This isn’t your grandma’s dry, bland version (no offense, Grandma!). This is a vibrant, flavorful, and utterly irresistible side dish that will have everyone asking for seconds. I believe that food should nourish not just our bodies, but also our souls. And this creamy potato salad? It’s soul food at its finest.

For me, a good potato salad is more than just potatoes and mayonnaise. It’s about creating a symphony of flavors and textures that dance on your tongue. It’s about that creamy, tangy, slightly sweet, and savory combination that just makes you feel good. And trust me, this recipe delivers on all fronts.

Why You’ll Love This Creamy Potato Salad

What makes this creamy potato salad so special? Let me count the ways! This recipe isn’t just thrown together; it’s been carefully crafted to achieve the perfect balance of flavors and textures. Forget those gluey, bland potato salads of the past. This is a recipe you’ll want to make again and again. I promise.

  • Perfect Texture: The Yukon Gold potatoes are cooked to tender perfection, but they still hold their shape, preventing a mushy mess.
  • Flavor Explosion: The combination of mayonnaise, sour cream, Dijon mustard, and apple cider vinegar creates a tangy, creamy, and slightly sweet flavor profile that’s simply irresistible.
  • Freshness Boost: The addition of celery, red onion, and fresh dill adds a delightful crunch and herbaceousness that elevates this potato salad to gourmet status.
  • Easy to Make: Despite its complex flavor, this recipe is surprisingly simple to make. With just a few basic ingredients and easy-to-follow steps, you can whip up a batch of this dreamy potato salad in no time.
  • Versatile: This potato salad is the perfect side dish for potlucks, BBQs, picnics, or any occasion where you want to impress your friends and family with your culinary skills.
  • Nostalgia Factor: It’s a classic comfort food that evokes memories of summer gatherings and happy times.

Dreamy Creamy Potato Salad Ingredients

  • 2 pounds Yukon Gold potatoes, peeled and cut into 1-inch cubes
  • 1 cup mayonnaise
  • 1/2 cup sour cream
  • 1/4 cup finely chopped celery
  • 1/4 cup finely chopped red onion
  • 2 tablespoons chopped fresh dill
  • 1 tablespoon Dijon mustard
  • 1 tablespoon apple cider vinegar
  • 1 teaspoon salt
  • 1/2 teaspoon black pepper
Recipe Image

Let’s Make Dreamy Creamy Potato Salad: Step-by-Step

Alright, let’s get down to business! Here’s how to create this amazing potato salad, step-by-step. Don’t worry, it’s easier than it looks!

  1. Step 1: Cook the Potatoes: Place the cubed potatoes in a large pot and cover with cold water. Add a pinch of salt. Bring to a boil, then reduce heat and simmer until the potatoes are fork-tender, about 10-15 minutes. The key here is to avoid overcooking the potatoes, or you will end up with mush.
  2. Step 2: Drain and Cool: Drain the potatoes well and let them cool completely. This step is crucial! Warm potatoes will absorb too much of the dressing and become soggy. You want them cool to the touch before moving on.
  3. Step 3: Make the Dressing: In a large bowl, whisk together mayonnaise, sour cream, celery, red onion, dill, Dijon mustard, apple cider vinegar, salt, and pepper. Taste and adjust seasonings as needed. This is where you can really customize the flavor to your liking. Want it tangier? Add a splash more vinegar. Prefer it sweeter? Add a tiny pinch of sugar.
  4. Step 4: Combine: Add the cooled potatoes to the dressing mixture.
  5. Step 5: Gently Fold: Gently fold until the potatoes are evenly coated. Be careful not to mash the potatoes. You want them to remain in distinct pieces.
  6. Step 6: Chill: Cover the bowl and refrigerate for at least 1 hour before serving. This allows the flavors to meld together and the potato salad to chill properly.
  7. Step 7: Serve and Enjoy: Serve chilled and enjoy! Garnish with extra fresh dill, if desired.

Pro Tips for the Best Potato Salad Ever

Want to take your potato salad to the next level? Here are a few of my favorite pro tips:

  • Choose the Right Potatoes: Yukon Gold potatoes are my go-to for potato salad because they have a creamy texture and hold their shape well when cooked. Red potatoes are also a good option. Avoid russet potatoes, as they tend to be too starchy and can become mushy.
  • Don’t Overcook the Potatoes: The potatoes should be fork-tender, but not falling apart. Overcooked potatoes will result in a mushy potato salad.
  • Cool the Potatoes Completely: As mentioned earlier, cooling the potatoes completely before adding the dressing is crucial to prevent a soggy potato salad.
  • Use Fresh Herbs: Fresh dill adds a bright, herbaceous flavor that elevates this potato salad. If you don’t have fresh dill, you can substitute dried dill, but use half the amount.
  • Make it Ahead: Potato salad tastes even better when it’s made ahead of time, as the flavors have a chance to meld together. I recommend making it at least 1 hour before serving, or even the day before.
  • Taste and Adjust: Taste the potato salad after it has chilled and adjust the seasonings as needed. You may need to add more salt, pepper, or vinegar to achieve the perfect balance of flavors.
  • Use high-quality mayonnaise and sour cream: It makes a big difference!

Common Mistakes to Avoid

We all make mistakes in the kitchen, but here are a few common pitfalls to avoid when making potato salad:

  • Overcooking the potatoes: This is the most common mistake. Keep a close eye on the potatoes while they’re simmering and test them frequently with a fork.
  • Adding warm potatoes to the dressing: This will result in a soggy potato salad. Make sure the potatoes are completely cool before adding the dressing.
  • Using too much dressing: Start with the recommended amount of dressing and add more as needed. You can always add more, but you can’t take it away!
  • Not tasting and adjusting the seasonings: Taste the potato salad after it has chilled and adjust the seasonings as needed.
  • Skipping the refrigeration step: Refrigerating the potato salad for at least 1 hour allows the flavors to meld together and the potato salad to chill properly.
  • Using old or stale ingredients: Fresh ingredients are key to making a delicious potato salad.

Potato Salad Variations to Try

The beauty of potato salad is that it’s incredibly versatile. Here are a few variations to try:

  • Bacon Potato Salad: Add crispy cooked bacon to the potato salad for a smoky, savory flavor.
  • Deviled Egg Potato Salad: Add chopped hard-boiled eggs to the potato salad for a richer, creamier texture.
  • Sweet Potato Salad: Substitute sweet potatoes for Yukon Gold potatoes for a sweeter, more vibrant potato salad.
  • Spicy Potato Salad: Add a pinch of cayenne pepper or a dash of hot sauce to the dressing for a spicy kick.
  • Vegan Potato Salad: Use vegan mayonnaise and sour cream alternatives to make a vegan-friendly potato salad.
  • German Potato Salad: Omit the mayonnaise and sour cream and use a vinegar-based dressing with bacon and onions for a tangy, savory potato salad.
  • Add-ins: Feel free to add other vegetables, such as bell peppers, pickles, or olives, to the potato salad for added flavor and texture.

How to Store Leftover Potato Salad

Leftover potato salad can be stored in an airtight container in the refrigerator for up to 3-4 days. Be sure to stir it before serving, as the dressing may separate slightly. It’s important to note that potato salad should not be left at room temperature for more than 2 hours, as it can become a breeding ground for bacteria.

Frequently Asked Questions (FAQ)

  • Can I make this potato salad ahead of time? Absolutely! In fact, I highly recommend it. The flavors meld together even better when the potato salad has time to chill in the refrigerator.
  • Can I freeze potato salad? I don’t recommend freezing potato salad, as the texture can change and become watery when thawed.
  • How long does potato salad last in the refrigerator? Potato salad can be stored in the refrigerator for up to 3-4 days.
  • Can I use a different type of potato? Yes, you can use red potatoes or even sweet potatoes. Just be sure to adjust the cooking time accordingly.
  • Can I add other ingredients? Absolutely! Feel free to add other vegetables, such as celery, pickles, or olives, to the potato salad for added flavor and texture.
  • Is it safe to eat potato salad that has been left out at room temperature? No, potato salad should not be left at room temperature for more than 2 hours, as it can become a breeding ground for bacteria.

Serving Suggestions

This Dreamy Creamy Potato Salad is the perfect side dish for so many occasions. Here are a few serving suggestions:

  • BBQs: Serve it alongside grilled burgers, hot dogs, chicken, or ribs.
  • Potlucks: Bring it to your next potluck and watch it disappear!
  • Picnics: Pack it in a cooler for a delicious and refreshing picnic lunch.
  • Sandwiches: Serve it as a side dish with sandwiches or wraps.
  • Salads: Add a scoop to a bed of greens for a heartier salad.
  • Comfort Food Meal: Enjoy it as a comforting side dish with fried chicken or meatloaf.
  • Snack: Honestly, sometimes I just eat a bowl of this potato salad as a snack!

I hope you enjoy this Dreamy Creamy Potato Salad as much as I do! It’s a recipe that’s near and dear to my heart, and I know it will become a staple in your kitchen as well. So, gather your ingredients, put on some music, and get ready to create a little bit of kitchen magic. And remember, cooking should be fun and relaxing, so don’t be afraid to experiment and make it your own. Happy cooking, friends! And as always, may your kitchen be filled with laughter and delicious aromas.

Dreamy Creamy Potato Salad: 7 Steps to Pure Bliss

Prep Time 15 minutes
Cook Time 15 minutes
Total Time 30 minutes
Servings 6 servings
Calories 350
This potato salad is the perfect side dish for any occasion. Creamy, flavorful, and easy to make, it's sure to be a crowd-pleaser.

Ingredients

Ingredients

  • 2 pounds Yukon Gold potatoes (peeled and cut into 1-inch cubes)
  • 1 cup mayonnaise
  • 0.5 cup sour cream
  • 0.25 cup finely chopped celery
  • 0.25 cup finely chopped red onion
  • 2 tablespoons chopped fresh dill
  • 1 tablespoon Dijon mustard
  • 1 tablespoon apple cider vinegar
  • 1 teaspoon salt
  • 0.5 teaspoon black pepper

Instructions 

  • Place potatoes in a pot, cover with water, add salt.
  • Bring to a boil, simmer until fork-tender (10-15 minutes).
  • Drain potatoes and let cool completely.
  • Whisk together mayonnaise, sour cream, celery, red onion, dill, Dijon, vinegar, salt, and pepper.
  • Add cooled potatoes to the dressing.
  • Gently fold until evenly coated.
  • Refrigerate for at least 1 hour before serving.

Notes

For a tangier flavor, add a splash of lemon juice.
Calories: 350kcal
Cost: $8
Course: Side Dish
Cuisine: American
Keyword: potato

Nutrition

Calories: 350kcal | Carbohydrates: 30g | Protein: 5g | Fat: 25g | Sodium: 400mg
pin

Hello, friend! It’s Avery here, from my cozy kitchen in Portland. Today, I’m sharing a recipe that’s close to my heart – a vibrant, flavor-packed Greek Potato Salad that’s as easy to make as it is delicious. This isn’t your average mayo-laden potato salad; this is a celebration of fresh Mediterranean flavors, a dish that sings with sunshine and simple goodness. It’s a reminder that healthy eating can be both satisfying and joyful.

I remember the first time I tasted a true Greek potato salad. I was at a small taverna on the island of Crete, overlooking the Aegean Sea. The potatoes were tender, the feta was creamy and salty, and the herbs were so fragrant. It was a revelation. I knew I had to recreate that magic in my own kitchen.

Why You’ll Love This Greek Potato Salad

This recipe is more than just a side dish; it’s an experience. Here’s why you’ll fall in love with it:

  • Fresh Flavors: The combination of Kalamata olives, feta cheese, red onion, and fresh parsley creates a symphony of Mediterranean tastes.
  • Healthy and Light: No heavy mayonnaise here! We use a light olive oil and red grape juice vinegar dressing that lets the flavors of the ingredients shine.
  • Easy to Make: This recipe comes together in under 30 minutes, making it perfect for busy weeknights or casual gatherings.
  • Versatile: Serve it as a side dish, a light lunch, or even as a topping for grilled fish or chicken.
  • Adaptable: Feel free to customize it to your liking by adding other vegetables like cucumber or bell peppers.

Ingredients

  • 2 pounds Yukon Gold potatoes, peeled and cubed
  • 1/2 cup Kalamata olives, pitted and halved
  • 1/2 cup crumbled feta cheese
  • 1/4 cup red onion, thinly sliced
  • 1/4 cup fresh parsley, chopped
  • 2 tablespoons olive oil
  • 2 tablespoons red grape juice vinegar
  • 1 tablespoon lemon juice
  • 1 teaspoon dried oregano
  • 1/2 teaspoon salt
  • 1/4 teaspoon black pepper
Recipe Image

How to Make Greek Potato Salad: Step-by-Step

Let’s get started! This Greek potato salad recipe is very simple.

Step 1: Cook the Potatoes

First, place the potatoes in a large pot. Cover them with cold, salted water. Bring the pot to a boil and cook the potatoes until they are tender, about 15-20 minutes. You’ll know they’re ready if you can easily pierce them with a fork. Drain the potatoes and let them cool slightly. I find that cooling them slightly helps them absorb the dressing better without becoming mushy. If you’re using larger potatoes, make sure to cut them into uniform sizes so they cook evenly.

Step 2: Prepare the Salad Base

While the potatoes are cooking, prepare the rest of the salad. In a large bowl, combine the Kalamata olives, feta cheese, red onion, and fresh parsley. The feta cheese adds a wonderful salty and creamy element, while the red onion provides a nice bite. If you prefer a milder onion flavor, you can soak the sliced red onion in cold water for a few minutes to remove some of the sharpness. The herbs and olives provide a fresh, aromatic touch that really elevates this greek potato salad.

Step 3: Make the Dressing

In a small bowl, whisk together the olive oil, red grape juice vinegar, lemon juice, dried oregano, salt, and pepper. This dressing is the key to the bright and tangy flavor of this Greek potato salad. The lemon juice i use is always fresh – it makes a world of difference. Be sure to taste and adjust the seasonings to your liking.

Step 4: Assemble the Salad

Once the potatoes are slightly cooled, add them to the bowl with the other ingredients. Pour the dressing over the potato mixture and toss gently to combine. Be careful not to overmix, as you don’t want to mash the potatoes. Ensure that all the ingredients are evenly coated with the dressing.

Step 5: Serve and Enjoy!

Serve the Greek potato salad immediately or chill it for later. Chilling it allows the flavors to meld together even more. I personally love it both ways! It’s the best served as a side dish to grilled meats, fish, or vegetables. It’s also great on its own as a light lunch.

Pro Tips for the Best Greek Potato Salad

Here are a few of my favorite tips for making the absolute best Greek potato salad:

  • Use Yukon Gold Potatoes: These potatoes have a creamy texture and hold their shape well when cooked.
  • Don’t Overcook the Potatoes: Overcooked potatoes will become mushy and fall apart. Cook them until they are just tender.
  • Use High-Quality Olive Oil: The flavor of the olive oil will shine through in the dressing, so use a good quality extra virgin olive oil.
  • Fresh Herbs are Key: Fresh parsley and oregano add a bright and aromatic flavor to the salad.
  • Taste and Adjust: Taste the salad and adjust the seasonings to your liking. You may want to add more lemon juice or salt, depending on your preference.

Common Mistakes to Avoid

Even the simplest recipes can have pitfalls. Here’s what to watch out for:

  • Overcooking the Potatoes: As mentioned before, overcooked potatoes will ruin the texture of the salad.
  • Using Too Much Dressing: Too much dressing can make the salad soggy. Start with a small amount and add more as needed.
  • Not Letting the Salad Chill: Chilling the salad allows the flavors to meld together and enhances the overall taste.
  • Skipping the Fresh Herbs: Fresh herbs are essential for the bright and vibrant flavor of this salad. Don’t skip them!

Variations to Try

Want to mix things up? Here are a few variations to try:

  • Add Cucumber: Add diced cucumber for a refreshing crunch.
  • Add Bell Peppers: Add diced bell peppers (red, yellow, or orange) for a pop of color and sweetness.
  • Add Cherry Tomatoes: Add halved cherry tomatoes for a burst of juicy flavor.
  • Use Different Herbs: Try using fresh dill, mint, or basil in addition to or instead of parsley and oregano.
  • Add Chickpeas: Add cooked chickpeas for a boost of protein and fiber.

How to Store Greek Potato Salad

Store leftover Greek potato salad in an airtight container in the refrigerator for up to 3 days. The flavors will continue to meld together as it sits, making it even more delicious the next day. Note that the potatoes may absorb some of the dressing over time, so you may want to add a little extra olive oil or lemon juice before serving.

Frequently Asked Questions (FAQ)

Here are some common questions about this recipe:

  • Can I make this salad ahead of time? Yes, you can make this salad ahead of time. In fact, it tastes even better after it has had a chance to chill for a few hours.
  • Can I use baby potatoes? Absolutely! Baby potatoes are a great option for this salad. Just halve or quarter them before cooking.
  • Can I use red potatoes? Yes, red potatoes will work well in this salad. They have a slightly waxy texture and hold their shape well when cooked.
  • Is this salad gluten-free? Yes, this salad is naturally gluten-free.
  • Is this salad vegetarian? Yes, this salad is vegetarian.

Serving Suggestions

This Greek potato salad is incredibly versatile and pairs well with a variety of dishes. Here are a few serving suggestions:

  • Grilled Meats: Serve it alongside grilled chicken, steak, or lamb.
  • Grilled Fish: It’s a perfect accompaniment to grilled salmon, tuna, or swordfish.
  • Vegetarian Dishes: Serve it with grilled halloumi cheese, falafel, or vegetable skewers.
  • Picnics and Potlucks: It’s a great dish to bring to picnics and potlucks.
  • Light Lunch: Enjoy it on its own as a light and refreshing lunch.

I truly hope you enjoy this recipe as much as I do. It’s a simple, honest dish that celebrates the flavors of the Mediterranean. And remember, cooking should be a joy, not a chore. So, put on some music, pour yourself a glass of wine, and have fun in the kitchen! From my Portland kitchen to yours, happy cooking!

GREEK POTATO SALAD

Prep Time 10 minutes
Cook Time 20 minutes
Total Time 30 minutes
Servings 6 servings
Calories 250
A flavorful and refreshing Greek Potato Salad with Yukon Gold potatoes, Kalamata olives, feta cheese, and a tangy dressing. Perfect as a side dish or light meal.

Ingredients

Salad Ingredients

  • 2 pounds Yukon Gold potatoes (peeled and cubed)
  • 1/2 cup Kalamata olives (pitted and halved)
  • 1/2 cup feta cheese (crumbled)
  • 1/4 cup red onion (thinly sliced)
  • 1/4 cup fresh parsley (chopped)

Dressing

  • 2 tablespoons olive oil
  • 2 tablespoons red grape juice vinegar
  • 1 tablespoon lemon juice
  • 1 teaspoon dried oregano
  • 1/2 teaspoon salt
  • 1/4 teaspoon black pepper

Instructions 

  • Boil potatoes until tender. Drain and cool.
  • Combine potatoes, olives, feta, red onion, and parsley in a bowl.
  • Whisk together olive oil, vinegar, lemon juice, oregano, salt, and pepper.
  • Pour dressing over potato mixture and toss gently.
  • Serve immediately or chill.

Notes

For a creamier salad, add a tablespoon of Greek yogurt to the dressing.
Calories: 250kcal
Cost: $12
Course: Salad, Side Dish
Cuisine: Greek
Keyword: potato

Nutrition

Calories: 250kcal | Carbohydrates: 30g | Protein: 8g | Fat: 12g | Sodium: 400mg
pin

Steakhouse Potato Salad: A Classic Side Dish That Steals the Show

The rain is drumming a gentle rhythm against the windows here in Portland, the kind of day that begs for comfort food. And what’s more comforting than a creamy, flavorful potato salad? But not just any potato salad. Today, we’re making a Steakhouse Potato Salad – the kind that makes you want to skip the steak and go straight for the sides. This isn’t your grandma’s bland potato salad (though I love you, Grandma!). This is a flavor explosion, loaded with smoky bacon, tangy Dijon, and a creamy dressing that will have everyone begging for the recipe.

My journey with potato salad started like most things in my kitchen: with a need to feel good. Store-bought versions always left me wanting more – more flavor, more texture, more *oomph*. So, I started experimenting, tweaking, and tasting until I landed on this masterpiece. And trust me, it’s worth every single bite.

Why You’ll Love This Steakhouse Potato Salad Recipe

This isn’t just another potato salad recipe; it’s a flavor experience. It’s the perfect balance of creamy, tangy, and smoky, with a satisfying bite from the celery and red onion. Here’s why this Steakhouse Potato Salad will become your new go-to:

  • Flavor Explosion: The combination of Dijon mustard, apple cider vinegar, and crumbled bacon creates a symphony of flavors that dance on your tongue.
  • Perfect Texture: The creamy dressing coats perfectly cooked potatoes, tender hard-boiled eggs, crisp celery and red onion, and crunchy bacon.
  • Crowd-Pleaser: This salad is always a hit at potlucks, BBQs, and family gatherings. It’s a guaranteed crowd-pleaser that will have everyone asking for seconds.
  • Easy to Make: With just a few simple steps and readily available ingredients, you can whip up this delicious potato salad in no time.
  • Versatile: Serve it as a side dish with grilled steak, burgers, chicken, or even as a light lunch on its own.

If you’re looking for the perfect side dish to impress your friends and family, this Steakhouse Potato Salad is it. It’s creamy, flavorful, and oh-so-satisfying. This potato salad is so good, it might just upstage the main course!

Steakhouse Potato Salad Ingredients

Here’s what you’ll need to make this delectable Steakhouse Potato Salad:

  • 2 pounds russet potatoes (peeled and cubed)
  • 4 large hard-boiled eggs (chopped)
  • 2 celery stalks (diced)
  • ¼ cup red onion (finely chopped)
  • 6 slices cooked turkey bacon (crumbled)
  • 2 tablespoons fresh chives (chopped)
  • 1 cup mayonnaise
  • ½ cup sour cream
  • 1 tablespoon Dijon mustard
  • 1 tablespoon apple cider vinegar
  • ½ teaspoon salt
  • ¼ teaspoon black pepper
  • ¼ teaspoon garlic powder
  • ¼ teaspoon paprika
Recipe Image

How To Make Steakhouse Potato Salad: Step-by-Step Instructions

Making this Steakhouse Potato Salad is easier than you might think! Just follow these simple steps, and you’ll have a delicious side dish ready in no time:

  1. Cook the potatoes: Place 2 lbs of cubed russet potatoes in a large pot, cover with cold salted water, and boil for 15-20 minutes until fork-tender. Drain well in a colander and let cool. The potatoes are the base, so don’t overcook them.
  2. Make the dressing: While the potatoes cook, whisk together 1 c mayonnaise, ½ c sour cream, 1 tbsp Dijon mustard, 1 tbsp apple cider vinegar, and all seasonings in a small bowl until smooth. The dressing is what brings it all together.
  3. Combine the salad: In a large bowl, gently mix the cooled potatoes, 4 chopped hard-boiled eggs, 2 diced celery stalks, ¼ c red onion, 6 slices of crumbled turkey bacon, and 2 tbsp of chives.
  4. Dress and chill: Pour the dressing over the potato mixture and gently fold until everything is evenly coated. Cover and refrigerate for at least 1 hour to allow the flavors to meld. This is important for the flavors to fully develop.

Pro Tips for the Best Steakhouse Potato Salad

Want to take your Steakhouse Potato Salad to the next level? Here are a few pro tips to help you achieve potato salad perfection:

  • Don’t Overcook the Potatoes: The potatoes should be fork-tender but not mushy. Overcooked potatoes will result in a mushy salad.
  • Cool the Potatoes Completely: Make sure the potatoes are completely cooled before adding the dressing. Warm potatoes will absorb too much dressing and make the salad soggy.
  • Use High-Quality Mayonnaise: The mayonnaise is the base of the dressing, so use a good-quality brand for the best flavor. I prefer mayonnaise made with olive oil.
  • Don’t Be Afraid to Adjust the Seasoning: Taste the salad and adjust the seasoning to your liking. Add more salt, pepper, or Dijon mustard as needed.
  • Let It Chill: Chilling the salad for at least an hour allows the flavors to meld together and creates a more cohesive and delicious dish.

If you want to elevate this potato salad, consider adding a pinch of smoked paprika to the dressing. It complements the bacon beautifully.

Common Mistakes to Avoid When Making Potato Salad

Even though potato salad is relatively simple to make, there are a few common mistakes that can ruin the final product. Here’s what to watch out for:

  • Using the Wrong Type of Potato: Russet potatoes are ideal for this recipe because they hold their shape well when cooked. Avoid using waxy potatoes like red potatoes, as they can become mushy.
  • Adding Too Much Dressing: Start with less dressing than you think you need, and add more as needed. It’s always easier to add more dressing than to take it away.
  • Not Seasoning Properly: Seasoning is key to a flavorful potato salad. Don’t be afraid to add salt, pepper, garlic powder, and paprika to taste.
  • Serving It Too Soon: As mentioned earlier, chilling the salad is crucial for allowing the flavors to meld together. Don’t serve it immediately after making it.
  • Skipping the Fresh Herbs: Fresh chives add a pop of flavor and freshness to the salad. Don’t skip them!

When I first started making potato salad, I definitely made the mistake of overcooking the potatoes. It resulted in a mushy mess that was far from appealing. Learning from that experience, I now make sure to keep a close eye on the potatoes while they’re boiling to achieve that perfect fork-tender consistency.

Steakhouse Potato Salad Variations

One of the best things about potato salad is that it’s so versatile! Here are a few variations to try:

  • Spicy Potato Salad: Add a pinch of cayenne pepper or a dash of hot sauce to the dressing for a spicy kick.
  • Loaded Potato Salad: Add shredded cheddar cheese, green onions, and a dollop of sour cream for a loaded potato salad experience.
  • Pickle Potato Salad: Add diced dill pickles or pickle relish to the salad for a tangy twist.
  • Deviled Egg Potato Salad: Mash some of the hard-boiled eggs into the dressing for a creamier, deviled egg-inspired flavor.
  • Red Potato Salad: While I recommend russets, you can use red potatoes if you prefer a slightly different texture and flavor. Just be careful not to overcook them.

If you’re looking to lighten up the recipe, you can substitute Greek yogurt for some of the sour cream. It adds a tangy flavor and reduces the calorie count.

How to Store Steakhouse Potato Salad

Store leftover Steakhouse Potato Salad in an airtight container in the refrigerator for up to 3-4 days. The salad may become slightly watery as it sits, so you may need to drain off any excess liquid before serving.

It’s not recommended to freeze potato salad, as the mayonnaise can separate and the potatoes can become mushy when thawed.

Frequently Asked Questions (FAQ) About Steakhouse Potato Salad

  • Can I make this potato salad ahead of time? Yes, you can make this potato salad a day or two in advance. In fact, it tastes even better after the flavors have had time to meld together.
  • Can I use a different type of bacon? Absolutely! Feel free to use regular bacon, maple bacon, or even vegetarian bacon crumbles.
  • Can I add other vegetables? Yes, you can add other vegetables such as bell peppers, corn, or peas.
  • Is this potato salad gluten-free? Yes, this potato salad is naturally gluten-free.
  • Can I make this vegan? To make this vegan, use vegan mayonnaise, vegan sour cream, and vegan bacon crumbles.

When I think about potato salad, I remember summer picnics and family gatherings. This Steakhouse Potato Salad brings back those nostalgic feelings while adding a modern twist.

Serving Suggestions for Steakhouse Potato Salad

Steakhouse Potato Salad is a versatile side dish that pairs well with a variety of main courses. Here are a few serving suggestions:

  • Grilled Steak: Serve it alongside a juicy grilled steak for a classic steakhouse experience.
  • Burgers: It’s the perfect complement to juicy burgers, whether they’re beef, turkey, or veggie burgers.
  • BBQ Chicken: Pair it with BBQ chicken for a delicious and satisfying summer meal.
  • Pulled Pork Sandwiches: It adds a creamy and tangy element to pulled pork sandwiches.
  • Chili Con Carne: A scoop of this creamy salad can balance the heat in Chili Con Carne.
  • As a Light Lunch: Enjoy it on its own as a light and refreshing lunch.

Ultimately, this Steakhouse Potato Salad isn’t just a recipe; it’s an invitation to connect. Connect with good food, with loved ones, and with the simple joy of creating something delicious. So, grab your potatoes, gather your ingredients, and let’s get cooking! I hope you enjoy this recipe as much as I do. Happy cooking!

Steakhouse Potato Salad

Prep Time 15 minutes
Cook Time 20 minutes
Total Time 35 minutes
Servings 6 servings
Calories 350
A creamy and flavorful potato salad with a steakhouse twist, featuring bacon, chives, and a tangy dressing. Perfect as a side dish for barbecues or potlucks.

Ingredients

Ingredients

  • 2 pounds russet potatoes (peeled and cubed)
  • 4 large hard-boiled eggs (chopped)
  • 2 celery stalks (diced)
  • ¼ cup red onion (finely chopped)
  • 6 slices cooked turkey bacon (crumbled)
  • 2 tablespoons fresh chives (chopped)
  • 1 cup mayonnaise
  • ½ cup sour cream
  • 1 tablespoon Dijon mustard
  • 1 tablespoon apple cider vinegar
  • ½ teaspoon salt
  • ¼ teaspoon black pepper
  • ¼ teaspoon garlic powder
  • ¼ teaspoon paprika

Instructions 

  • Cook the potatoes: Boil cubed potatoes until fork-tender. Drain and cool.
  • Make the dressing: Whisk together mayonnaise, sour cream, Dijon mustard, vinegar, and seasonings.
  • Combine the salad: Mix cooled potatoes, eggs, celery, onion, bacon, and chives.
  • Dress and chill: Pour dressing over the mixture and refrigerate for at least 1 hour.

Notes

For a richer flavor, use full-fat mayonnaise and sour cream.
Calories: 350kcal
Cost: $12
Course: Side Dish
Cuisine: American
Keyword: potato

Nutrition

Calories: 350kcal | Carbohydrates: 30g | Protein: 8g | Fat: 24g | Sodium: 400mg
pin

Hello, friends! Avery Collins here, from my cozy kitchen in Portland. Today, I want to share something incredibly close to my heart (and often requested at every potluck I attend): my recipe for what I truly believe is the best potato salad in the world. This isn’t just any potato salad; it’s a symphony of flavors and textures, a comforting classic elevated with a few simple secrets. I didn’t always love potato salad, but after years of experimenting, I finally crafted a recipe that hits all the right notes. It’s creamy, tangy, a little sweet, and utterly irresistible. And trust me, if you’re looking for a dish that will disappear in minutes, this is it. It’s the dish everyone asks for – I promise!

My journey with potato salad started, like many of my food adventures, with a desire to feel better. Store-bought versions always left me feeling heavy and unsatisfied. So, I decided to take matters into my own hands, aiming for a salad that was both delicious and nourishing. After countless tweaks and taste tests (my friends and family were very patient!), I landed on this version. It’s a recipe that honors the humble potato while adding layers of flavor that will surprise and delight you. This potato salad is a testament to the fact that simple ingredients, when combined with care, can create something truly extraordinary.

Why You’ll Love This Potato Salad

So, what makes this potato salad so special? It’s not just one thing, but a combination of factors that create a truly unforgettable experience. Here’s why I think you’ll absolutely adore this recipe:

  • Creamy Perfection: The balance of mayonnaise and a touch of mustard creates a luscious, creamy texture that coats every potato perfectly.
  • Flavor Explosion: The sweet pickle relish adds a delightful tang, while the celery and red onion provide a satisfying crunch. The apple cider vinegar brightens everything up, ensuring the flavors pop.
  • Easy to Make: Don’t let the deliciousness fool you; this recipe is incredibly simple to make. With just a few steps, you’ll have a crowd-pleasing dish ready to go. You will find it so easy to make.
  • Versatile: This potato salad is the perfect side dish for barbecues, picnics, potlucks, or even a simple weeknight dinner. It pairs well with grilled meats, sandwiches, and so much more.
  • Nostalgic Comfort: There’s something about potato salad that evokes a sense of nostalgia and comfort. This recipe captures that feeling perfectly, reminding you of sunny days and happy gatherings.

I truly believe that this potato salad is the best. I can say that with confidence because it’s a recipe born out of love and a desire to create something truly special. It’s a salad that brings people together, sparks conversations, and leaves everyone feeling satisfied. If you want a potato salad that will impress your friends and family, this is it!

Ingredients

  • 2 lbs Yukon Gold potatoes, peeled and cubed: Yukon Golds are my go-to for potato salad because they hold their shape well and have a naturally creamy texture.
  • 1 cup mayonnaise: Use your favorite brand of mayonnaise. I prefer a full-fat variety for the best flavor and texture.
  • 1/4 cup yellow mustard: Yellow mustard adds a tangy kick that balances the richness of the mayonnaise.
  • 1/4 cup sweet pickle relish: Sweet pickle relish provides a delightful sweetness and tang that complements the other flavors.
  • 2 hard-boiled eggs, chopped: Hard-boiled eggs add a creamy richness and protein to the salad. These are things made with eggs that you can enjoy!
  • 1/4 cup finely chopped celery: Celery adds a refreshing crunch and subtle flavor.
  • 1/4 cup finely chopped red onion: Red onion provides a sharp, pungent flavor that adds depth to the salad.
  • 2 tablespoons apple cider vinegar: Apple cider vinegar brightens the flavors and adds a touch of acidity.
  • 1 teaspoon salt: Salt enhances the flavors of all the ingredients.
  • 1/2 teaspoon black pepper: Black pepper adds a touch of spice and warmth.
  • 1/4 teaspoon paprika (for garnish): Paprika adds a beautiful color and subtle smoky flavor.
Recipe Image

How to Make the Best Potato Salad: Step-by-Step

Alright, let’s get into the nitty-gritty. Here’s how to bring this incredible potato salad to life. Don’t worry, it’s easier than you might think!

  1. Cook the Potatoes: Place the cubed potatoes in a large pot and cover them generously with cold water. Bring the water to a boil over medium-high heat. Once boiling, reduce the heat slightly and let the potatoes simmer until they are fork-tender. This usually takes about 12-15 minutes. Be careful not to overcook them, or they’ll become mushy. Drain the potatoes well in a colander and let them cool slightly.
  2. Make the Dressing: While the potatoes are cooling, prepare the dressing. In a large bowl, whisk together the mayonnaise, yellow mustard, sweet pickle relish, apple cider vinegar, salt, and black pepper until everything is well combined and smooth. This creamy potato salad starts with a great dressing.
  3. Combine Ingredients: Gently fold the slightly cooled potatoes into the dressing. Be careful not to mash the potatoes; you want them to retain their shape. Add the chopped hard-boiled eggs, celery, and red onion. Gently stir everything together until all the ingredients are evenly coated with the dressing.
  4. Chill and Serve: Cover the bowl tightly with plastic wrap or transfer the potato salad to an airtight container. Refrigerate for at least 2 hours, or preferably longer, to allow the flavors to meld together. Before serving, give the potato salad a gentle stir and garnish with a sprinkle of paprika.

Pro Tips for Potato Salad Perfection

Here are a few extra tips and tricks to take your potato salad to the next level:

  • Don’t Overcook the Potatoes: This is crucial! Overcooked potatoes will result in a mushy salad. Aim for fork-tender potatoes that still hold their shape.
  • Cool the Potatoes Slightly: Adding the dressing to slightly cooled potatoes allows them to absorb the flavors without becoming soggy.
  • Don’t Skip the Chilling Time: Chilling the potato salad for at least 2 hours allows the flavors to meld together and creates a more cohesive and delicious salad.
  • Taste and Adjust Seasoning: Before serving, taste the potato salad and adjust the seasoning as needed. You may want to add a little more salt, pepper, or apple cider vinegar to suit your taste.
  • Use High-Quality Mayonnaise: The mayonnaise is a key ingredient in potato salad, so use a high-quality brand that you enjoy.

Common Mistakes to Avoid

Even the best cooks make mistakes sometimes! Here are a few common pitfalls to avoid when making potato salad:

  • Using the Wrong Potatoes: Starchy potatoes like Russets tend to fall apart when boiled, making them a poor choice for potato salad. Stick with Yukon Golds or red potatoes for the best results.
  • Adding Too Much Dressing: Overdoing the dressing can result in a soggy, gloppy salad. Start with the recommended amount and add more as needed, a little at a time.
  • Not Draining the Potatoes Properly: Excess water can dilute the flavor of the salad. Make sure to drain the potatoes thoroughly after boiling.
  • Forgetting to Season: Salt and pepper are essential for bringing out the flavors of the other ingredients. Don’t forget to season your potato salad properly.
  • Serving Too Soon: As I mentioned before, chilling the potato salad is crucial for allowing the flavors to meld. Don’t skip this step!

If you avoid these common mistakes, you’ll be well on your way to potato salad perfection! The potatoes are the star, so treat them well!

Potato Salad Variations

The beauty of potato salad is that it’s incredibly versatile. Feel free to experiment with different ingredients and flavors to create your own unique version. Here are a few ideas to get you started:

  • Potato Salad Recipe With Bacon: Add crispy cooked bacon for a smoky, savory twist.
  • Spicy Potato Salad: Add a pinch of cayenne pepper or a dash of hot sauce to the dressing for a little heat.
  • Dill Potato Salad: Stir in fresh dill for a bright, herbaceous flavor.
  • Mediterranean Potato Salad: Add Kalamata olives, feta cheese, and a drizzle of olive oil for a Mediterranean-inspired version.
  • Avocado Potato Salad: Replace some of the mayonnaise with mashed avocado for a creamy, healthy twist.

Don’t be afraid to get creative and experiment with different flavors and textures. The possibilities are endless!

How to Store Potato Salad

Proper storage is essential for keeping your potato salad fresh and delicious. Here are a few tips:

  • Refrigerate Promptly: Potato salad should be refrigerated within 2 hours of making it.
  • Use an Airtight Container: Store the potato salad in an airtight container to prevent it from drying out and absorbing odors from the refrigerator.
  • Consume Within 3-4 Days: Potato salad is best consumed within 3-4 days of making it.
  • Don’t Freeze: Freezing potato salad is not recommended, as it can alter the texture and flavor.

Frequently Asked Questions (FAQ)

Got questions? I’ve got answers! Here are a few frequently asked questions about potato salad:

  • Can I make potato salad ahead of time? Absolutely! In fact, I recommend making it at least a few hours ahead of time to allow the flavors to meld. You can even make it a day in advance.
  • Can I use different types of potatoes? Yes, you can! Yukon Gold and red potatoes are my favorites, but you can also use other types of potatoes, such as fingerling potatoes or baby potatoes. What to make with baby potatoes? Potato salad, of course!
  • Can I add other vegetables? Of course! Feel free to add other vegetables, such as bell peppers, cucumbers, or green onions.
  • Can I make this recipe vegan? Yes, you can! Simply replace the mayonnaise with a vegan mayonnaise alternative and omit the hard-boiled eggs.
  • How long does potato salad last? Potato salad will last for 3-4 days in the refrigerator.

Serving Suggestions

This potato salad is the perfect side dish for a variety of meals. Here are a few serving suggestions:

  • Barbecues and Picnics: Potato salad is a classic barbecue and picnic side dish. It pairs well with grilled meats, burgers, and hot dogs. It’s easy delicious party food!
  • Sandwiches and Wraps: Serve potato salad alongside your favorite sandwiches and wraps for a complete and satisfying meal.
  • Salads: Add a scoop of potato salad to your green salads for a boost of flavor and texture.
  • Weeknight Dinners: Potato salad is a quick and easy side dish for weeknight dinners. It pairs well with roasted chicken, fish, or pork.

And there you have it – my secret recipe for the best potato salad in the world! I truly hope you enjoy this recipe as much as I do. Remember, cooking should be a joyful and creative experience. Don’t be afraid to experiment and make this recipe your own. Happy cooking!

I would love to hear if you liked this review c! Thanks so much for reading, and please let me know what you think! I love love to hear from you!

The Best Potato Salad In The World

Prep Time 20 minutes
Cook Time 15 minutes
Total Time 35 minutes
Servings 6 servings
Calories 350
This potato salad is creamy, tangy, and packed with flavor. It's the perfect side dish for any occasion!

Ingredients

Ingredients

  • 2 lbs Yukon Gold potatoes (peeled and cubed)
  • 1 cup mayonnaise
  • 1/4 cup yellow mustard
  • 1/4 cup sweet pickle relish
  • 2 hard-boiled eggs (chopped)
  • 1/4 cup finely chopped celery
  • 1/4 cup finely chopped red onion
  • 2 tablespoons apple cider vinegar
  • 1 teaspoon salt
  • 1/2 teaspoon black pepper
  • 1/4 teaspoon paprika (for garnish)

Instructions 

  • Boil potatoes until tender, about 12-15 minutes. Drain and cool.
  • Whisk together mayonnaise, mustard, relish, vinegar, salt, and pepper.
  • Fold in potatoes, eggs, celery, and red onion.
  • Refrigerate for at least 2 hours.
  • Garnish with paprika before serving.

Notes

For a tangier flavor, add a bit more apple cider vinegar.
Calories: 350kcal
Cost: $8
Course: Side Dish
Cuisine: American
Keyword: potato

Nutrition

Calories: 350kcal | Carbohydrates: 30g | Protein: 5g | Fat: 25g | Sodium: 400mg
pin

Easy Vegan Potato Salad Recipe: A Flavorful Twist on a Classic

Hello, friends! Avery here, from my little kitchen in Portland, where the scent of rosemary hangs in the air after a good rain. Today, we’re diving into a recipe that’s close to my heart: a vibrant, easy vegan potato salad. This isn’t your grandma’s potato salad – unless your grandma was a secret vegan chef with a penchant for fresh herbs and zesty flavors! It’s quick, it’s simple, and it’s absolutely bursting with goodness. Whether you’re planning a picnic, firing up the grill for a BBQ, or just looking for a satisfying side dish, this potato salad is sure to be a hit. I promise, even the most dedicated mayo-loving traditionalists will be asking for seconds.

My journey into healthier eating started out of necessity, a desperate attempt to reclaim my well-being after years of ignoring my body’s signals. And while I now embrace plant-forward meals, I also believe in balance and joy in food. This potato salad embodies that philosophy perfectly. It’s packed with wholesome ingredients, yet it’s undeniably delicious and satisfying. So, grab your potatoes and let’s get cooking!

Why You’ll Love This Vegan Potato Salad

This potato salad isn’t just a recipe; it’s an experience. It’s the taste of summer, the joy of sharing good food with good company, and the satisfaction of knowing you’re nourishing your body with wholesome ingredients. Here’s why I think you’ll absolutely adore it:

  • It’s incredibly easy to make: Seriously, if I can do it, you can do it. This recipe is perfect for beginner cooks and busy weeknights.
  • It’s packed with flavor: We’re talking creamy, tangy, savory goodness in every bite. The combination of potatoes, fresh herbs, and a zesty dressing is simply irresistible.
  • It’s vegan (and easily adaptable): Whether you’re fully plant-based or just looking to incorporate more vegan meals into your diet, this recipe is a winner. Plus, it’s easy to customize with your favorite add-ins.
  • It’s perfect for any occasion: From picnics and potlucks to BBQs and weeknight dinners, this potato salad is a crowd-pleaser.
  • It’s a healthier twist on a classic: By using a vegan mayonnaise and loading up on fresh vegetables and herbs, we’re creating a potato salad that’s both delicious and good for you.

Ingredients for the Best Vegan Potato Salad

Here’s what you’ll need to create this masterpiece:

  • Potatoes (of course 😅): About 2 pounds. I prefer Yukon Gold or red potatoes for their creamy texture, but russets will also work in a pinch.
  • Onions: Half of a medium yellow onion, finely chopped.
  • Chives/Spring Onions/Dhania: (I used spring onions) A handful, chopped. The fresh, mild onion flavor is key.
  • Red Onions: About ¼ cup, finely diced. Adds a nice bite and color.
  • Bell Peppers: (I used red and yellow) About ½ cup, diced. Adds sweetness and crunch.
  • Mayonnaise: 1 cup of your favorite vegan mayonnaise. There are so many great options available these days!
  • Mustard: 2 tablespoons of Dijon mustard. Adds a tangy kick.
  • Honey/Sugar: 1 tablespoon (optional). A touch of sweetness balances the flavors. I prefer honey, but maple syrup or agave also work well. You can use sugar if you prefer.
  • Vinegar: 1 tablespoon of apple cider vinegar. Adds brightness and acidity.
  • Salt and Pepper: To taste. Don’t be shy!
  • Optional Add-ins: Celery, pickles, fresh dill, smoked paprika. Get creative!
Recipe Image

How to Make Easy Vegan Potato Salad: Step-by-Step

Alright, let’s get down to business! Here’s how to make this delicious vegan potato salad:

  1. Boil the Potatoes: Place the potatoes in a large pot and cover with cold water. Add a generous pinch of salt, fresh garlic and fresh rosemary to mine while boiling to make them more flavourful. Bring to a boil and cook until fork-tender, about 15-20 minutes. Be careful not to overcook them, or they’ll become mushy. Fork tender ensures you don’t overcook them.
  2. Drain and Cool: Drain the potatoes and let them cool slightly. Once they’re cool enough to handle, cut them into bite-sized pieces.
  3. Prepare the Dressing: In a large bowl, whisk together the vegan mayonnaise, mustard, honey (or sugar), vinegar, salt, and pepper. Taste and adjust seasonings as needed. This is where you can really customize the flavor to your liking.
  4. Combine Ingredients: Add the cooked potatoes, chopped onion, red onion, bell peppers, and chives (or spring onions) to the bowl with the dressing. Gently toss everything together until well combined.
  5. Chill and Serve: Cover the bowl and refrigerate for at least 30 minutes to allow the flavors to meld. This step is crucial! The salad tastes even better after it’s had time to chill.
  6. Optional: Add a protein. Add your boiled eggs or turkey bacon (or both) to the mixture. Mix again then serve.

Pro Tips for the Perfect Potato Salad

Want to take your potato salad to the next level? Here are a few of my favorite pro tips:

  • Don’t Overcook the Potatoes: This is the cardinal rule of potato salad. Overcooked potatoes will turn to mush, and nobody wants that. Aim for fork-tender – they should be easily pierced with a fork, but still hold their shape.
  • Season the Potatoes While They’re Hot: Adding salt to the potatoes while they’re still warm helps them absorb the flavor better.
  • Don’t Be Afraid to Experiment with Flavors: This recipe is a blank canvas! Feel free to add your favorite herbs, spices, and vegetables to create a potato salad that’s uniquely yours. I used a teaspoon of paprika,garlic powder,onion powder and mixed herbs.
  • Make it Ahead of Time: Potato salad tastes even better the next day, after the flavors have had time to meld. I often make it a day ahead of time.
  • Use High-Quality Vegan Mayonnaise: The mayonnaise is the foundation of the dressing, so it’s worth investing in a good one. Look for brands that use simple, wholesome ingredients.

Common Mistakes to Avoid

Even with a simple recipe like this, it’s easy to make a few common mistakes. Here’s what to watch out for:

  • Using the Wrong Type of Potato: Starchy potatoes like russets can become dry and crumbly in potato salad. Opt for waxy varieties like Yukon Gold or red potatoes.
  • Overdressing the Salad: Start with a smaller amount of dressing and add more as needed. You can always add more, but you can’t take it away.
  • Not Allowing Enough Time for Chilling: Chilling the potato salad is essential for allowing the flavors to meld and the salad to firm up. Don’t skip this step!
  • Adding Warm Ingredients: Make sure all of your ingredients are cooled before combining them. Adding warm ingredients can cause the mayonnaise to separate.

Variations and Add-Ins

One of the best things about potato salad is that it’s so versatile. Here are a few ideas for variations and add-ins:

  • Spicy Potato Salad: Add a pinch of cayenne pepper or a dash of hot sauce to the dressing.
  • Mediterranean Potato Salad: Add chopped Kalamata olives, sun-dried tomatoes, and feta cheese (or vegan feta).
  • Dill Pickle Potato Salad: Add chopped dill pickles and a splash of pickle juice to the dressing.
  • Everything Bagel Potato Salad: Sprinkle everything bagel seasoning over the top before serving.
  • Roasted Vegetable Potato Salad: Roast the potatoes and other vegetables (like bell peppers and onions) before adding them to the salad. This adds a smoky, caramelized flavor.

How to Store Vegan Potato Salad

Store leftover potato salad in an airtight container in the refrigerator for up to 3-4 days. Be sure to consume it within this time frame for the best flavor and texture. If you’re making the salad ahead of time, you can store it in the refrigerator for up to 24 hours before serving. I m always doing that because it allows the flavors to meld together even more. It’s easy to make.

Frequently Asked Questions (FAQ)

  • Can I make this potato salad ahead of time? Absolutely! In fact, I highly recommend it. The flavors meld together beautifully as it sits in the refrigerator.
  • Can I freeze potato salad? I don’t recommend freezing potato salad, as the texture can change and become watery.
  • How long does potato salad last in the refrigerator? Potato salad will last for up to 3-4 days in the refrigerator.
  • Can I use a different type of vinegar? Yes, you can substitute apple cider vinegar with white vinegar, red wine vinegar, or even lemon juice.
  • What if I don’t have vegan mayonnaise? You can use regular mayonnaise if you’re not vegan.
  • Can I add eggs or boiled eggs or turkey bacon? Yes, add them to the mixture after you have combined all ingredients.

Serving Suggestions

This vegan potato salad is the perfect side dish for so many meals! Here are a few of my favorite ways to serve it:

  • With grilled veggie burgers: A classic pairing!
  • Alongside BBQ tofu: The creamy potato salad complements the smoky tofu perfectly.
  • As part of a picnic spread: Pack it up with sandwiches, fruit, and other picnic favorites.
  • With a simple green salad: A light and refreshing meal.
  • Straight from the bowl: Sometimes, you just need a spoonful (or two) of potato salad!

I hope you enjoy this easy vegan potato salad as much as I do! It’s a reminder that healthy eating can be both delicious and satisfying. Remember, cooking is an act of self-care, so don’t be afraid to experiment, have fun, and create something that nourishes both your body and your soul. Happy cooking! I used all of the ingredients I have in my kitchen to make this tasty recipe. I think you ll enjoy it too. It s the best potato salad.

Vegan Potato Salad 🥗

Prep Time 15 minutes
Cook Time 20 minutes
Total Time 35 minutes
Servings 6 servings
Calories 250
A delicious and easy-to-make vegan potato salad perfect for any occasion. This recipe is packed with flavor and customizable to your liking.

Ingredients

Salad Ingredients

  • potatoes (of course 😅)
  • onions
  • chives/spring onions/dhania (I used spring onions)
  • red onions
  • a protein (boiled eggs or turkey bacon) I used boiled eggs but you either or even both)
  • bell peppers (I used red and yellow)
  • mayonnaise
  • 2 tbsp mustard
  • 1 tbsp honey/sugar
  • 1 tbsp vinegar

Instructions 

  • Mix all the ingredients in a bowl, taste, then adjust accordingly.
  • Boil potatoes until fork tender with salt, fresh garlic, and fresh rosemary.
  • Drain the water and set aside.
  • Add boiled potatoes to a bowl and season with paprika, garlic powder, onion powder, and mixed herbs.
  • Add onions, chives, and peppers.
  • Mix then add salad dressing.
  • Mix till everything is well combined then add turkey bacon/boiled eggs or both.
  • Mix again then serve.

Notes

Adjust seasoning to your preference for a personalized flavor.
Calories: 250kcal
Cost: $8
Course: Side Dish
Cuisine: American
Keyword: potato

Nutrition

Calories: 250kcal | Carbohydrates: 30g | Protein: 5g | Fat: 12g | Sodium: 300mg
pin

Hello, friends! Avery Collins here, from my cozy Portland kitchen. Today, I want to share a recipe that’s been a constant source of joy and nourishment in my life: Strawberry Spinach Salad with Goat Cheese. This isn’t just a salad; it’s a celebration of fresh, vibrant ingredients and a reminder that healthy eating can be both easy and utterly delicious. This strawberry spinach salad is the perfect balance of sweet, savory, and tangy, making it a delightful addition to any meal.

My journey into healthy cooking started out of necessity. Years ago, I was burned out, stressed, and eating way too much takeout. My body was telling me something had to change. I started experimenting in the kitchen, and while my early attempts were… let’s just say, not always successful, I discovered a newfound appreciation for whole foods and the magic that happens when you combine simple ingredients.

This salad embodies that journey. It’s quick to throw together, packed with nutrients, and bursting with flavor. It’s the kind of meal that makes you feel good from the inside out, and that’s what healthy eating is all about, right?

Why You’ll Love This Strawberry Spinach Salad

I’ve made countless variations of this salad over the years, and it never gets old. Here’s why I think you’ll love it too:

  • Fresh and Flavorful: The combination of sweet strawberries, creamy goat cheese, and crisp spinach is simply irresistible. The dressing ties it all together with a tangy sweetness that’s perfectly balanced.
  • Quick and Easy: This salad comes together in minutes, making it perfect for busy weeknights or a quick lunch.
  • Healthy and Nutritious: Packed with vitamins, minerals, and antioxidants, this salad is a nutritional powerhouse. Spinach is full of iron and vitamins, strawberries are loaded with vitamin C, and goat cheese provides calcium and protein.
  • Versatile: You can easily customize this salad to your liking. Add different nuts, seeds, or proteins to create a complete meal.
  • Beautiful Presentation: The vibrant colors of the strawberries and spinach make this salad a feast for the eyes as well as the palate. It’s perfect for serving guests or bringing to a potluck.

Because it’s so quick and easy to make, this salad is a go-to in my house. Because it’s packed with flavor and color, everyone enjoys eating it. If you are looking for a fresh salad recipes, look no further.

Ingredients for Strawberry Spinach Salad with Goat Cheese

Here’s what you’ll need to make this delightful salad:

  • 6 cups fresh baby spinach leaves, washed and dried
  • 1 pint fresh strawberries, hulled and sliced or halved
  • 1/2 cup goat cheese, crumbled
  • 1/4 cup thinly sliced red onion
  • 1/4 cup chopped pecans or walnuts (optional for crunch)
  • 3 tablespoons balsamic vinegar
  • 2 tablespoons extra virgin olive oil
  • 1 tablespoon honey or maple syrup
  • Salt and freshly ground black pepper, to taste

How to Make Strawberry Spinach Salad: Step-by-Step

Here’s a breakdown of how to assemble this salad:

  1. Prepare The Salad Ingredients:

    Place the fresh baby spinach leaves in a large salad bowl. Add the sliced or halved strawberries and thinly sliced red onion on top. This forms the colorful base of your salad.

  2. Make The Dressing:

    In a small bowl or jar, whisk together the balsamic vinegar, olive oil, honey, salt, and pepper. Mix until the dressing is smooth and well combined.

  3. Toss The Salad:

    Drizzle the dressing over the salad. Toss gently using salad tongs or large spoons to coat the spinach and strawberries evenly without damaging the leaves.

  4. Add The Finishing Touches:

    Sprinkle the crumbled goat cheese over the top. If you like, add the chopped pecans or walnuts for a nice crunch. Give it one last gentle toss if desired.

  5. Serve and Enjoy:

    Serve the salad immediately as a fresh starter or side dish. It pairs perfectly with grilled chicken or fish for a tasty and balanced meal.

Pro Tips for the Best Strawberry Spinach Salad

Here are a few tips to ensure your salad turns out perfectly:

  • Use Fresh, High-Quality Ingredients: This salad is all about the freshness of the ingredients, so choose the best quality spinach, strawberries, and goat cheese you can find.
  • Wash and Dry Spinach Thoroughly: Nobody likes gritty spinach! Make sure to wash and dry your spinach leaves thoroughly before adding them to the salad. A salad spinner works wonders for this.
  • Taste and Adjust the Dressing: The dressing is the key to this salad, so taste it before adding it to the salad and adjust the honey or balsamic vinegar to your liking.
  • Don’t Overdress the Salad: Too much dressing can make the salad soggy. Start with a little dressing and add more as needed.
  • Add the Goat Cheese Just Before Serving: This will prevent the cheese from melting or becoming too soft.

Common Mistakes to Avoid

Even though this recipe is simple, here are some common mistakes to avoid:

  • Using Overripe Strawberries: Overripe strawberries can be mushy and detract from the texture of the salad. Choose firm, ripe strawberries for the best results.
  • Using Pre-Crumbled Goat Cheese: Pre-crumbled goat cheese often contains cellulose, which can affect its texture and flavor. Opt for a log of goat cheese and crumble it yourself for the best taste and consistency.
  • Skipping the Red Onion: The red onion adds a nice bite to the salad that complements the sweetness of the strawberries and the creaminess of the goat cheese. Don’t skip it!
  • Not Toasting the Nuts: Toasting the nuts before adding them to the salad enhances their flavor and adds a nice crunch.

Variations to Try

This salad is incredibly versatile, so feel free to experiment with different ingredients and flavors. Here are a few ideas:

  • Add Protein: Grilled chicken, salmon, or shrimp would be delicious additions to this salad. You could also add chickpeas or white beans for a vegetarian option.
  • Swap the Cheese: If you’re not a fan of goat cheese, try feta, blue cheese, or mozzarella instead.
  • Add Different Fruits: Blueberries, raspberries, or blackberries would all be great additions to this salad.
  • Use a Different Dressing: If you’re not a fan of balsamic vinegar, try a lemon vinaigrette or a poppy seed dressing.
  • Add Avocado: Avocado adds a creamy texture and healthy fats to the salad.
  • Make it a Grain Bowl: Add cooked quinoa or farro to make it a heartier and more filling meal.

This salad with goat cheese is a perfect base to add and subtract ingredients as you wish. It’s easy to customize to your liking.

How to Store Leftovers

This salad is best served immediately, but if you have leftovers, here’s how to store them:

  • Store the Salad and Dressing Separately: This will prevent the salad from becoming soggy.
  • Store in an Airtight Container: Store the salad and dressing in separate airtight containers in the refrigerator.
  • Consume Within 24 Hours: The salad is best consumed within 24 hours, as the spinach and strawberries will start to wilt after that.

Frequently Asked Questions (FAQ)

  • Can I make this salad ahead of time?

    While it’s best served immediately, you can prepare the ingredients ahead of time. Wash and dry the spinach, slice the strawberries, and make the dressing. Store everything separately and assemble the salad just before serving.

  • Can I use frozen strawberries?

    I don’t recommend using frozen strawberries, as they can be mushy when thawed. Fresh strawberries are the best option for this salad. This strawberry is best fresh.

  • Can I substitute the honey with something else?

    Yes, you can substitute the honey with maple syrup, agave nectar, or even a pinch of sugar.

  • Is this salad gluten-free?

    Yes, this salad is naturally gluten-free, as it doesn’t contain any gluten-containing ingredients.

  • Is this salad vegetarian?

    Yes, this salad is vegetarian. To make it vegan, simply omit the goat cheese or use a vegan cheese alternative.

Serving Suggestions

This Strawberry Spinach Salad with Goat Cheese is a versatile dish that can be served in a variety of ways:

  • As a Starter: Serve it as a refreshing starter before a main course.
  • As a Side Dish: Pair it with grilled chicken, fish, or tofu for a complete meal.
  • As a Light Lunch: Enjoy it on its own for a light and healthy lunch.
  • At a Potluck: Bring it to a potluck or picnic for a crowd-pleasing dish.
  • As a Topping: Use it as a topping for grilled bread or crostini.

I hope you enjoy this Strawberry Spinach Salad with Goat Cheese as much as I do. It’s a simple, healthy, and delicious way to nourish your body and soul. Happy cooking, friends!

Hey there, friend! Avery Collins here, from my cozy Portland kitchen. Today, we’re diving into a dish that’s close to my heart: Lemon Garlic Pasta. It’s the kind of recipe I turn to when I need something quick, comforting, and bursting with flavor – a little sunshine on a plate, if you will. This dish is perfect for a busy weeknight, a light lunch, or even a simple but elegant dinner party. It’s more than just a recipe; it’s an experience.

My journey into cooking started out of necessity. After years of neglecting my well-being, I had to learn to nourish myself. And let me tell you, there were many kitchen mishaps along the way! But through it all, I discovered the simple joy of creating something delicious and wholesome. This Lemon Garlic Pasta embodies that journey – it’s uncomplicated, forgiving, and utterly satisfying. So grab your apron, and let’s get cooking!

Why You’ll Love This Lemon Garlic Pasta

This isn’t just another pasta recipe; it’s a love letter to simple, fresh ingredients. Here’s why I think you’ll adore it:

  • Quick & Easy: Seriously, this dish comes together in under 30 minutes. Perfect for those evenings when you’re short on time but still crave something delicious.
  • Flavor Explosion: The bright, zesty lemon, the pungent garlic, and the creamy Parmesan create a symphony of flavors that will tantalize your taste buds.
  • Versatile: This recipe is a blank canvas! Add grilled chicken, shrimp, or your favorite veggies to make it a complete meal.
  • Simple Ingredients: You probably already have most of these ingredients in your pantry. No fancy, hard-to-find items here!
  • Comfort Food with a Twist: It’s comforting like a warm hug, but the lemon keeps it light and refreshing.

Lemon Garlic Pasta Ingredients

  • 8 oz spaghetti or fettuccine
  • 4-6 cloves fresh garlic, minced
  • 1/4 cup freshly squeezed lemon juice
  • 1 tbsp lemon zest
  • 1/4 cup extra virgin olive oil
  • 1/2 cup grated Parmesan cheese
  • Salt and pepper to taste
  • 2 tbsp chopped fresh parsley (for garnish)

How to Make Lemon Garlic Pasta: Step-by-Step

Ready to transform simple ingredients into something magical? Follow these steps, and you’ll be enjoying a bowl of sunshine in no time.

  1. Cook the Pasta: Fill a large pot with salted water and bring to a boil. Add the spaghetti or fettuccine and cook until al dente, about 8-10 minutes. Remember to reserve about a cup of pasta water before draining! This pasta water is liquid gold and will help create a luscious sauce.
  2. Sauté the Garlic: While the pasta is cooking, heat the olive oil in a large skillet over medium heat. Add the minced garlic and sauté until golden and fragrant, about 2 minutes. Be careful not to burn the garlic, as it will become bitter. The aroma of garlic sizzling in olive oil is one of life’s simple pleasures.
  3. Make the Lemon Sauce: Reduce the heat to low and add the lemon juice and lemon zest to the skillet with the garlic. Stir well to combine. The lemon juice will deglaze the pan, lifting up any flavorful bits that have stuck to the bottom.
  4. Combine Pasta and Sauce: Add the drained pasta to the skillet with the lemon garlic sauce. Toss to coat, adding reserved pasta water as needed to achieve your desired consistency. The pasta water helps to emulsify the sauce and create a creamy texture.
  5. Add Parmesan Cheese: Stir in the grated Parmesan cheese until it’s melted and the sauce is creamy. Season with salt and pepper to your taste. Don’t be shy with the Parmesan! It adds a wonderful richness and depth of flavor.
  6. Garnish and Serve: Serve immediately, garnished with fresh parsley. A sprinkle of red pepper flakes adds a nice touch of heat, if you like.

Pro Tips for the Perfect Lemon Garlic Pasta

Here are a few tricks I’ve learned over the years to elevate your Lemon Garlic Pasta to the next level:

  • Use Fresh Ingredients: This recipe shines when made with fresh, high-quality ingredients. Use freshly squeezed lemon juice, freshly minced garlic, and freshly grated Parmesan cheese for the best flavor.
  • Don’t Overcook the Garlic: Burnt garlic is bitter and unpleasant. Keep a close eye on it while it’s sautéing, and remove it from the heat as soon as it turns golden.
  • Reserve Enough Pasta Water: The starchy pasta water is essential for creating a creamy, emulsified sauce. Don’t be afraid to add more than you think you need!
  • Taste and Adjust: Taste the sauce as you go and adjust the seasonings to your liking. Add more lemon juice for a brighter flavor, more garlic for a bolder taste, or more Parmesan for extra richness.
  • Warm Your Serving Bowls: Warming your serving bowls helps to keep the pasta warm while you eat it. Simply rinse the bowls with hot water before serving.

Common Mistakes to Avoid

Even with a simple recipe like this, it’s easy to make a few common mistakes. Here’s what to watch out for:

  • Overcooking the Pasta: Mushy pasta is a cardinal sin! Cook the pasta until it’s al dente, meaning it’s still firm to the bite.
  • Burning the Garlic: As mentioned earlier, burnt garlic is a no-no. Keep the heat at medium and watch it closely.
  • Using Bottled Lemon Juice: Bottled lemon juice simply doesn’t compare to the flavor of fresh lemon juice. Trust me on this one!
  • Not Salting the Pasta Water: Salting the pasta water seasons the pasta from the inside out. Don’t skip this step!
  • Forgetting to Reserve Pasta Water: This is a crucial ingredient for creating a creamy sauce. Don’t forget to save some before draining the pasta!

Lemon Garlic Pasta Variations

One of the things I love most about this recipe is how easily it can be customized. Here are a few variations to try:

  • Add Protein: Grilled chicken, shrimp, or salmon would be delicious additions to this pasta.
  • Add Veggies: Toss in some sautéed spinach, asparagus, or cherry tomatoes for extra nutrients and flavor.
  • Make it Spicy: Add a pinch of red pepper flakes to the sauce for a touch of heat.
  • Use Different Herbs: Substitute basil, oregano, or thyme for the parsley.
  • Add Pine Nuts: Toasted pine nuts add a lovely crunch and nutty flavor.

Storing and Reheating Leftovers

If you have any leftovers (which is unlikely!), store them in an airtight container in the refrigerator for up to 3 days. To reheat, simply microwave until warmed through, or sauté in a skillet with a little olive oil. You may need to add a splash of water to loosen the sauce.

Frequently Asked Questions (FAQ)

Here are some common questions I get asked about this recipe:

  • Can I use dried herbs instead of fresh? While fresh herbs are always best, you can use dried herbs in a pinch. Use about 1 teaspoon of dried herbs for every 1 tablespoon of fresh herbs.
  • Can I make this recipe gluten-free? Yes! Simply use your favorite gluten-free pasta.
  • Can I make this recipe vegan? Yes, you can make this vegan by substituting the Parmesan cheese with nutritional yeast or a vegan Parmesan alternative.
  • Can I add cream to the sauce? Absolutely! A splash of heavy cream or half-and-half will make the sauce even richer and creamier.
  • What kind of pasta is best for this recipe? Spaghetti and fettuccine are classic choices, but you can use any pasta you like. Penne, linguine, and angel hair would all work well.

Serving Suggestions

This Lemon Garlic Pasta is delicious on its own, but it also pairs well with a variety of side dishes. Here are a few of my favorites:

  • A Simple Salad: A green salad with a light vinaigrette is the perfect complement to this pasta.
  • Garlic Bread: Because who doesn’t love garlic bread with pasta?
  • Roasted Vegetables: Roasted broccoli, asparagus, or Brussels sprouts would be delicious additions.
  • Grilled Chicken or Fish: Add some protein to make it a complete meal.
  • A Glass of White Wine: A crisp Sauvignon Blanc or Pinot Grigio would pair perfectly with this pasta.

And there you have it! Easy & Flavorful Lemon Garlic Pasta. I hope you enjoy making and eating this dish as much as I do. Remember, cooking is about more than just following a recipe; it’s about connecting with your food and nourishing your body and soul. So get in the kitchen, experiment, and have fun! Until next time, happy cooking!

Remember that the key to amazing lemon garlic pasta is the balance of flavors. The pasta is the base, but it’s the lemon garlic sauce that brings it all together. The olive oil should be of good quality, as it contributes to the overall richness of the sauce. When you add a few simple ingredients, you can create something truly special. The lemon juice is the star of the show, providing that bright, zesty flavor. I’m always excited to share this quick and easy recipe with friends and family. Don’t be afraid to adjust the amount of garlic to your taste buds. Garlic pasta is a classic for a reason – it’s simple, satisfying, and always a crowd-pleaser. A splash of pasta water can make all the difference in the consistency of the sauce. This dish is a testament to how simple ingredients can create extraordinary flavor. The lemon is the perfect complement to the garlic and Parmesan. It’s perfect for a light lunch or a quick weeknight dinner. This lemon garlic pasta is one of my go-to recipes when I’m short on time. I’m sure you’ll love it as much as I do!

Why You’ll Love This Dish

When it comes to creating a meal that’s bursting with flavor, versatility, and a touch of heat, Sticky Sesame Cauliflower stands out as a true champion. This dish is not just a side; it’s a celebration of texture and taste that will have everyone at the table reaching for seconds. Whether you’re a seasoned cook or a kitchen novice, this recipe invites you to fuse simplicity with an explosion of flavors. Imagine crispy, golden cauliflower florets draped in a luscious, sticky sauce that balances sweet, savory, and spicy notes in every bite. It’s a vegan-friendly dish that makes plant-based eating feel indulgent and exciting, perfect for anyone looking to elevate their dinner game.

Overview of Sticky Sesame Cauliflower

Sticky Sesame Cauliflower is a gluten-free, plant-based dish that captures the essence of Asian cuisine while being easy to prepare at home. With every bite, you’ll experience the crunchiness of roasted cauliflower combined with a sweet and savory sauce that has just the right kick. This recipe is a fantastic way to turn humble ingredients into something extraordinary, proving that healthy eating doesn’t have to be boring.

Ingredients You’ll Need

Bite-sized fluffy cauliflower florets coated in a glossy sesame sauce, garnished with green onions.

To whip up this delightful dish, gather the following ingredients:

  • 1 medium head of cauliflower, cut into bite-sized florets
  • 1/4 cup cornstarch
  • 1/4 cup sesame oil
  • 1/4 cup soy sauce (gluten-free if needed)
  • 2 tablespoons maple syrup
  • 2 tablespoons rice vinegar
  • 1 tablespoon sesame seeds
  • 2 cloves garlic, minced
  • 1 teaspoon grated fresh ginger
  • Salt and pepper to taste
  • Chopped green onions for garnish

How to Make Sticky Sesame Cauliflower

Now, let’s dive into the cooking adventure! Here’s how to create this mouthwatering dish step-by-step:

Step 1: Preheat and Prepare

Start by preheating your oven to 425°F (220°C). This high temperature is crucial for achieving that perfect crispy texture. Line a baking sheet with parchment paper to prevent sticking and make cleanup a breeze.

Step 2: Coat the Cauliflower

In a large bowl, toss the cauliflower florets with cornstarch until they are evenly coated. This coating is what gives the cauliflower its delightful crunch. Make sure each floret is covered well, as this will enhance the texture when baked.

Step 3: Bake the Cauliflower

Spread the coated cauliflower on the prepared baking sheet in a single layer. Bake in the preheated oven for about 25-30 minutes, or until they are golden brown and crispy. Don’t forget to flip them halfway through to ensure even cooking.

Step 4: Create the Sticky Sauce

While your cauliflower is baking, it’s time to prepare the sticky sauce that will elevate this dish to the next level. In a small saucepan over medium heat, combine sesame oil, soy sauce, maple syrup, rice vinegar, minced garlic, grated ginger, salt, and pepper. Bring this mixture to a simmer and cook for about 5 minutes, stirring occasionally until the sauce thickens slightly.

Step 5: Combine and Serve

Once the cauliflower is beautifully baked, remove it from the oven and transfer it to a large bowl. Pour the sticky sauce over the hot cauliflower and toss gently to coat every piece evenly. Sprinkle with sesame seeds and garnish with chopped green onions for that extra pop of color and flavor.

Tips for Perfecting Your Cauliflower

Here are some tips to ensure your Sticky Sesame Cauliflower turns out perfectly:

  • Don’t Rush the Baking: Allow the cauliflower to bake until they are truly golden and crispy. This step is crucial for achieving the best texture.
  • Adjust the Heat: If you like it spicier, consider adding a bit of sriracha or chili flakes to the sauce.
  • Keep it Fresh: Serve the dish immediately after mixing the sauce with the cauliflower to maintain that crispy texture.

Variations to Explore

Feel free to get creative with this recipe! Here are some variations you can try:

  • Different Vegetables: Don’t limit yourself to just cauliflower! Try using broccoli, Brussels sprouts, or even mushrooms for a flavorful twist.
  • Protein Boost: Add some crispy tofu or tempeh for a heartier meal. Simply cube the tofu, coat it in cornstarch, and bake alongside the cauliflower.
  • Noodle Bowl: Serve the sticky cauliflower over a bed of noodles instead of rice for a delightful twist.

Substitutions for Dietary Needs

If you have specific dietary needs, here are some substitutions you can make:

  • Maple Syrup: For a vegan option, use maple syrup instead of honey.
  • Gluten-Free Options: Make sure to use gluten-free soy sauce or tamari to keep this dish gluten-free.
  • Low-Sodium Version: Opt for low-sodium soy sauce to reduce the salt content without sacrificing flavor.

Equipment You’ll Need

To make your cooking process smooth and enjoyable, here’s some equipment you might find helpful:

  • Baking sheet
  • Parchment paper
  • Large mixing bowl
  • Small saucepan
  • Whisk
  • Spatula or tongs for tossing

Storage and Freezing

Leftovers? No problem! Here’s how to store your Sticky Sesame Cauliflower:

  • Refrigeration: Store any leftovers in an airtight container in the refrigerator for up to 3 days.
  • Freezing: While fresh cauliflower is best, you can freeze the baked florets. Just ensure they are cooled completely before transferring to a freezer-safe bag. They can last up to 3 months. Reheat in the oven to regain some crispiness.

FAQs About Sticky Sesame Cauliflower

Here are some common questions and answers to help you with your cooking:

  • Can I use frozen cauliflower? Yes! Just make sure to thaw and drain excess moisture before coating and baking.
  • What can I serve with this dish? This flavorful cauliflower pairs beautifully with steamed rice, quinoa, or even a fresh salad.
  • Is this recipe kid-friendly? Absolutely! The sweet and savory flavors, combined with a fun texture, make it a hit with both kids and adults.

Troubleshooting Common Issues

If you face any hiccups in your cooking journey, here are some solutions:

  • Cauliflower Not Crispy: Ensure you coat the florets evenly with cornstarch and bake them long enough. Flip them halfway through for even cooking.
  • Sauce Too Thick: If your sauce becomes too thick, add a splash of water or vegetable broth to loosen it up.
  • Too Much Heat: If you accidentally made it too spicy, balance it out by adding a bit more maple syrup or a splash of vinegar.

Conclusion

Incorporating Sticky Sesame Cauliflower into your meal rotation not only brings joy to your palate but also offers a wonderful way to explore the vibrant world of plant-based cooking. With its perfect blend of sweetness, spice, and crunch, this dish invites you to savor every bite while feeling good about what you’re eating. So, gather your ingredients, unleash your inner chef, and embark on this flavorful journey that promises to delight your senses and those of your loved ones. Happy cooking!

Sticky Sesame Cauliflower - Easy Glutenfree Vegan Friendly Recipe

Prep Time 10 minutes
Cook Time 30 minutes
Total Time 40 minutes
Servings 4 servings
Calories 250
This flavorful vegan cauliflower dish features a sticky sesame sauce, perfect for a quick and healthy meal.

Ingredients

Cauliflower

  • 1 medium head of cauliflower (cut into bite-sized florets)
  • 1/4 cup cornstarch
  • 1/4 cup sesame oil
  • 1/4 cup soy sauce (gluten-free if needed)
  • 2 tablespoons maple syrup
  • 2 tablespoons rice vinegar
  • 1 tablespoon sesame seeds
  • 2 cloves garlic, minced
  • 1 teaspoon grated fresh ginger
  • to taste salt and pepper
  • for garnish chopped green onions

Instructions 

  • Preheat oven to 425°F (220°C) and line a baking sheet.
  • Toss cauliflower with cornstarch and spread on the baking sheet.
  • Bake for 25-30 minutes until golden, flipping halfway.
  • Simmer sesame oil, soy sauce, maple syrup, rice vinegar, garlic, ginger, salt, and pepper until slightly thickened.
  • Transfer baked cauliflower to a bowl, pour sauce over, and toss to coat. Garnish with sesame seeds and green onions.

Notes

For extra crunch, broil for an additional 2 minutes after baking.
Calories: 250kcal
Cost: $15
Course: Main Course
Cuisine: Fusion
Keyword: Cauliflower

Nutrition

Calories: 250kcal | Carbohydrates: 35g | Protein: 6g | Fat: 12g | Sodium: 900mg

Loved this recipe? Save it to your favorite Pinterest board so you can easily find it later! It’s the perfect way to keep all your sweet ideas in one place. ✨

Detailed view of savory sticky sesame cauliflower, highlighted by soft lighting and beautiful textures.

Why You’ll Adore These Guilt-Free Brownies

Let’s be honest: when it comes to satisfying that sweet tooth, nothing quite hits the spot like a rich, fudgy brownie. The dilemma, however, often lies in the sugar content, especially if you’re trying to maintain a healthier lifestyle or simply avoid that mid-afternoon sugar crash. Enter my Easy Zero Sugar Brownies with Greek Yogurt, a delectable treat that proves you can indulge without the guilt!

These brownies are not merely a healthier alternative; they’re a celebration of flavor and texture. With the magic of Greek yogurt and unsweetened applesauce, you’ll experience that dense, fudgy consistency we all crave, all while keeping the sugar at bay. Whether you’re prepping for a week of healthy meals or simply treating yourself, these brownies will keep you coming back for more.

Ingredients That Make a Difference

Before we dive into the recipe, let’s talk about the star ingredients that make these brownies a triumph:

  • 1 cup unsweetened cocoa powder: This is the foundation of our chocolaty goodness. Look for high-quality cocoa for the best flavor.
  • 1/2 cup Greek yogurt: Not just any yogurt! Use plain Greek yogurt for that creamy texture and protein boost.
  • 1/2 cup unsweetened applesauce: A natural sweetener and moisture enhancer, applesauce keeps the brownies from being dry.
  • 3 large eggs: These provide structure and richness.
  • 1 teaspoon vanilla extract: A dash of vanilla elevates the flavor profile, making each bite unforgettable.
  • 1/2 teaspoon baking powder: This is our rising agent, helping the brownies achieve that perfect lift.
  • 1/4 teaspoon salt: A pinch of salt enhances all the flavors in this sweet treat.
  • 1/2 cup sugar substitute: Feel free to choose your favorite, whether erythritol, stevia, or another option — just make sure it’s suitable for baking.
  • 1/2 cup chopped nuts (optional): Add a bit of crunch with walnuts, pecans, or your nut of choice!

Step-by-Step to Brownie Bliss

Soft, moist zero sugar brownies with a creamy Greek yogurt topping, captured in warm, natural light.

Step 1: Preheat and Prepare

First, preheat your oven to 350°F (175°C). Meanwhile, grease an 8×8 inch baking pan, or line it with parchment paper for easy removal later. This step is crucial; no one wants a brownie stuck to the pan!

Step 2: Mix the Wet Ingredients

In a large mixing bowl, combine the cocoa powder, Greek yogurt, unsweetened applesauce, eggs, and vanilla extract. Use a whisk to mix until the batter is smooth and free of lumps. This blend will create a rich base that’s not only tasty but also packed with nutrients.

Step 3: Add the Dry Ingredients

Next, sprinkle in the baking powder, salt, and sugar substitute. Stir until everything is well combined. If you’re feeling adventurous, this is the time to fold in those chopped nuts for added texture and flavor.

Step 4: Bake to Perfection

Pour the batter into your prepared baking pan and spread it evenly. Place it in the preheated oven and bake for 20-25 minutes. Keep an eye on the brownies — a toothpick inserted in the center should come out clean or with a few moist crumbs when they’re ready.

Step 5: Cool and Serve

Once baked, remove the brownies from the oven and let them cool in the pan for about 10 minutes. This cooling time is essential as it helps the brownies set properly. After cooling, carefully lift them out using the parchment paper and transfer to a wire rack to cool completely before cutting them into squares.

Tips for the Perfect Brownies

Here are some insider tips to ensure your brownies turn out just right:

  • Don’t Overmix: Once you add the dry ingredients, mix gently. Overmixing can lead to tough brownies.
  • Check for Doneness: Ovens can vary, so start checking your brownies a few minutes before the timer goes off.
  • Experiment with Flavors: Consider adding a touch of cinnamon or espresso powder for a flavor twist!

Variations to Try

Feel free to get creative! Here are some variations that can elevate your brownies:

  • Mint Chocolate: Add a few drops of mint extract for a refreshing twist.
  • Peanut Butter Swirl: Swirl in some natural peanut butter before baking for a rich, nutty flavor.
  • Chocolate Chip: Fold in a handful of sugar-free chocolate chips for extra chocolaty goodness!

Substitutions You Can Make

If you don’t have all the ingredients on hand, don’t fret! Here are some substitutions:

  • For Greek yogurt, you can use unsweetened regular yogurt or a non-dairy alternative like coconut yogurt.
  • Unsweetened applesauce can be swapped for mashed bananas or pumpkin puree.
  • If you’re out of eggs, you can use flax eggs (1 tablespoon ground flaxseed mixed with 2.5 tablespoons water = 1 egg).

Storing and Freezing Your Brownies

These brownies are perfect for meal prep! Here’s how to store them:

  • Room Temperature: Keep in an airtight container for up to 5 days.
  • Refrigerator: If it’s warm where you are, store them in the fridge for up to a week.
  • Freezing: Cut into squares, wrap individually in plastic wrap or parchment paper, and store in a freezer bag. They stay good for up to 3 months. When you’re ready to enjoy, let them thaw at room temperature for about an hour!

FAQs About Zero Sugar Brownies

Why is my brownie batter thicker than usual?

It’s perfectly normal for this batter to be thicker due to the Greek yogurt and applesauce, which provide moisture without excess sugar.

Do I need to let the brownies cool completely?

While it might be tempting to dig in right away, allowing them to cool fully will help them set and enhance their fudgy texture.

Why did my brownies sink in the middle?

A slight sinking can occur due to the lower sugar content and the density of the ingredients. It’s totally normal and often results in a gooey, delicious center!

Conclusion: Your Sweet Adventure Awaits

In a world full of sugary temptations, my Easy Zero Sugar Brownies with Greek Yogurt offer a delicious alternative that doesn’t skimp on flavor or satisfaction. With a few simple ingredients and steps, you can create a dessert that not only pleases your palate but also aligns with your health goals. So, gather your ingredients, invite a friend or two, and embark on this sweet adventure that proves indulgence can indeed be guilt-free. Happy baking!

Easy Zero Sugar Brownies with Greek Yogurt

Prep Time 10 minutes
Cook Time 25 minutes
Total Time 35 minutes
Servings 9 pieces
Calories 180
Delight in these moist, fudgy brownies that are sweetened naturally with a sugar substitute and enriched with Greek yogurt for added protein.

Ingredients

Dried ingredients

  • 1 cup unsweetened cocoa powder
  • 1/2 cup Greek yogurt
  • 1/2 cup unsweetened applesauce
  • 3 large eggs
  • 1 teaspoon vanilla extract
  • 1/2 teaspoon baking powder
  • 1/4 teaspoon salt
  • 1/2 cup sugar substitute (like erythritol or stevia)
  • 1/2 cup chopped nuts (optional) (optional)

Instructions 

  • Preheat oven to 350°F (175°C) and grease an 8x8 inch pan.
  • Mix cocoa, Greek yogurt, applesauce, eggs, and vanilla until smooth.
  • Add baking powder, salt, and sweetener; stir well.
  • Fold in nuts if using, then pour batter into pan.
  • Bake for 20-25 minutes; cool before cutting.

Notes

Using a sugar substitute keeps these brownies low in sugar while still satisfying your sweet tooth.
Calories: 180kcal
Cost: $10
Course: Dessert
Cuisine: American
Keyword: brownies

Nutrition

Calories: 180kcal | Carbohydrates: 20g | Protein: 6g | Fat: 10g | Sodium: 50mg

Loved this recipe? Save it to your favorite Pinterest board so you can easily find it later! It’s the perfect way to keep all your sweet ideas in one place. ✨

Delicious brownies made with cocoa powder and Greek yogurt, showcasing a textured surface and soft shadows.