Author

Avery Collins

Browsing

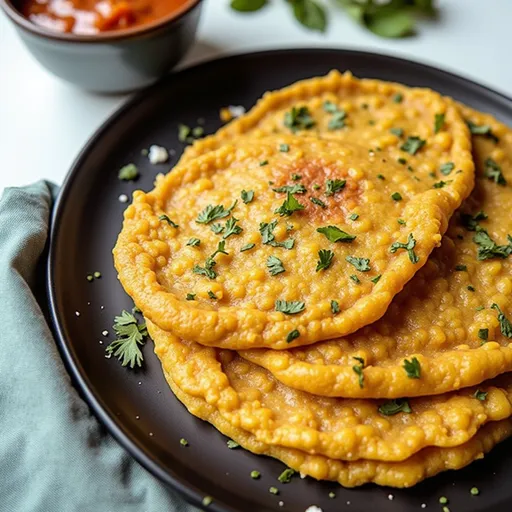
Why You’ll Love This Recipe

Are you ready to embark on a culinary adventure that will set your taste buds ablaze? Let me introduce you to the sensational Easy Buffalo Chicken Bowls! This dish is more than just food; it’s a celebration of bold flavors, vibrant colors, and satisfying textures. Imagine a harmonious blend of juicy, spicy shredded chicken, nutritious veggies, and creamy ranch dressing all piled high in a bowl. Whether you’re on the hunt for a quick weeknight dinner or a delicious meal prep option for your busy week, this recipe promises to deliver both flavor and convenience. Let’s dive into this explosive flavor experience together!

Ingredients You’ll Need

Gathering fresh, quality ingredients is key to making these Easy Buffalo Chicken Bowls shine. Here’s what you’ll need:

  • 2 cups cooked shredded chicken: This can be rotisserie chicken for a quick fix or homemade for that extra love.
  • 1/2 cup buffalo sauce: Choose your favorite brand or homemade if you’re feeling adventurous!
  • 1 cup cooked rice: White or brown works perfectly; feel free to experiment with quinoa for a protein-packed alternative.
  • 1 cup corn: Canned or frozen, this adds a delightful sweetness to balance the spice.
  • 1 cup black beans: Rinsed and drained, they provide a hearty texture and boost of protein.
  • 1/2 cup diced tomatoes: Fresh or canned, they bring a juicy burst to every bite.
  • 1/2 cup shredded cheese: Cheddar is a classic, but feel free to mix it up with pepper jack for an extra kick.
  • 1/4 cup sliced green onions: These will add a fresh crunch and a pop of color.
  • 1/4 cup ranch dressing: The ultimate cooling agent to balance the heat!
  • Salt and pepper to taste: Essential for seasoning your dish perfectly.

How to Create Your Flavorful Bowl

A beautifully arranged Buffalo Chicken Bowl with warm tones, showcasing chicken, corn, black beans, and ranch dressing.

Now that you have your ingredients lined up like eager dancers waiting for the music to begin, let’s get to the fun part — the cooking! Follow these simple steps to whip up your Easy Buffalo Chicken Bowls:

  1. Mix the Chicken: In a large bowl, combine the shredded chicken and buffalo sauce. Mix thoroughly until every piece of chicken is generously coated in that fiery sauce.
  2. Prepare the Base: Scoop the cooked rice into serving bowls. This will be the hearty foundation of your meal.
  3. Layer the Goodness: Top the rice with the buffalo chicken mixture. It’s okay to be generous here — let that chicken shine!
  4. Add Your Veggies: Sprinkle the corn, black beans, and diced tomatoes on top of the chicken. This not only adds flavor but also vibrant colors to your bowl.
  5. Cheese It Up: Scatter shredded cheese over the top, allowing it to melt slightly from the heat of the chicken.
  6. Drizzle and Garnish: Finish with a drizzle of ranch dressing and a sprinkle of sliced green onions. Don’t forget to season with salt and pepper to taste!
  7. Serve and Enjoy: Dig in while it’s warm or let it cool for a refreshing bowl later!

Tips for the Best Buffalo Chicken Bowls

  • Use Pre-Cooked Chicken: Rotisserie chicken is a fantastic shortcut that saves time without sacrificing flavor.
  • Adjust the Heat: If you like it spicier, don’t hesitate to add more buffalo sauce or a sprinkle of cayenne pepper.
  • Add Crunch: For an added texture contrast, consider topping with tortilla strips or croutons.
  • Pack for Lunch: These bowls make excellent meal-prep options! Just layer the ingredients in a jar, keeping the ranch dressing separate until you’re ready to eat.
  • Mix Up Your Base: Rice isn’t your only option; try quinoa, cauliflower rice, or even leafy greens for a lighter bowl.

Variations to Explore

Cooking is all about creativity and personal expression. Here are some variations to customize your Easy Buffalo Chicken Bowls:

  • Vegetarian Twist: Swap out the chicken for roasted cauliflower or chickpeas tossed in buffalo sauce.
  • Tex-Mex Fusion: Add avocado slices, jalapeños, or even a dollop of guacamole for a Southwestern flair.
  • Asian Influence: Try adding shredded carrots, sesame seeds, and a drizzle of sriracha for an Asian-inspired buffalo bowl.

Substitutions You Can Make

If you’re missing an ingredient or want to make adjustments based on dietary needs, here are some easy substitutions:

  • Chicken: Use turkey or tofu for a lighter option.
  • Buffalo Sauce: A homemade mixture of hot sauce and butter can work if you’re out of store-bought sauce.
  • Rice: Quinoa, couscous, or even a bed of leafy greens can be great alternatives.
  • Dressings: Swap ranch for blue cheese dressing or even a yogurt-based dressing for a healthier twist.

Essential Equipment

To make your cooking experience smoother, here’s what you’ll need:

  • A large mixing bowl for combining the chicken and buffalo sauce.
  • Serving bowls for plating your delicious meal.
  • A spoon or spatula to mix and serve.
  • Measuring cups for precise ingredient portions.

Storage and Freezing Tips

Leftovers are the best! Here’s how to store your buffalo chicken bowls for maximum freshness:

  • Refrigeration: Store individual components in airtight containers in the fridge for up to 4 days. Keep the ranch dressing separate until serving.
  • Freezing: You can freeze the buffalo chicken mixture for up to 2 months. Just thaw it in the refrigerator overnight before reheating.
  • Reheating: Microwave portions in 30-second intervals or heat on the stovetop until warmed through.

FAQs about Buffalo Chicken Bowls

Can I make this recipe ahead of time?
Absolutely! Prep the chicken and veggies ahead of time, and assemble your bowls when you’re ready to eat.

Can I use frozen chicken?
Yes, just make sure to cook it thoroughly before shredding.

What’s the best way to adjust the spice level?
Start with a milder buffalo sauce, and gradually add more until you reach your desired heat.

Is this recipe gluten-free?
Yes, as long as you use gluten-free buffalo sauce and check your other ingredients.

Troubleshooting Common Issues

If you find yourself stuck, here are some quick fixes:

  • Too Spicy: Add a dollop of sour cream or extra ranch to cool it down.
  • Dry Chicken: If the chicken feels dry, mix in a bit more buffalo sauce or add a splash of chicken broth to moisten.
  • Too Much Sauce: If you’ve overdone the sauce, balance it with additional rice or beans.

Final Thoughts

Easy Buffalo Chicken Bowls are not just a meal; they are a bold expression of flavor and creativity. Every bite is a delightful journey through spice and satisfaction, making them perfect for any occasion. Whether you’re whipping them up for a quick lunch, prepping for the week, or serving them at a casual gathering, these bowls will undoubtedly impress. So, grab your skillet, unleash your inner chef, and ignite your taste buds with this delicious dish. Bon appétit!

Craving bold, spicy flavor with minimal effort? These Easy Buffalo Chicken Bowls are a perfect mix of heat, c… in 2025

Prep Time 10 minutes
Cook Time 15 minutes
Total Time 25 minutes
Servings 4 servings
Calories 550
Enjoy a quick and flavorful meal with spicy buffalo chicken served over rice, topped with fresh veggies and cheese.

Ingredients

Protein

  • 2 cups cooked shredded chicken
  • 1/2 cup buffalo sauce

Base

  • 1 cup cooked rice (white or brown)

Vegetables & Beans

  • 1 cup corn (canned or frozen)
  • 1 cup black beans (canned, rinsed and drained)
  • 1/2 cup diced tomatoes

Cheese & Garnish

  • 1/2 cup shredded cheese (cheddar or your choice)
  • 1/4 cup sliced green onions
  • 1/4 cup ranch dressing

Seasoning

  • to taste salt and pepper

Instructions 

  • Mix shredded chicken with buffalo sauce until fully coated.
  • Place cooked rice in bowls as the base.
  • Top rice with buffalo chicken mixture.
  • Add corn, black beans, diced tomatoes, and cheese on top.
  • Drizzle ranch dressing and garnish with green onions. Season with salt and pepper.

Notes

Use your favorite cheese and adjust spice level to taste.
Calories: 550kcal
Cost: $15
Course: Main Course
Cuisine: American
Keyword: Buffalo Chicken

Nutrition

Calories: 550kcal | Carbohydrates: 65g | Protein: 45g | Fat: 20g | Sodium: 1500mg

Loved this recipe? Save it to your favorite Pinterest board so you can easily find it later! It’s the perfect way to keep all your sweet ideas in one place. ✨

An appetizing Buffalo Chicken Bowl captured in soft natural light, highlighting ingredients like shredded cheese and diced tomatoes.

Why You’ll Love This Dish

Let me tell you, friends, there’s something magical about cooking with spice. It’s not merely about the heat; it’s about creating a symphony of flavors that dance on your palate. My Spicy Skillet Delight is just that—an adventure that ignites your senses and transforms everyday ingredients into a culinary masterpiece. With simple, low-cost ingredients and a little bit of fire, you can whip up a dish that’s bursting with flavor and excitement. Perfect for cozy nights in or a lively gathering with friends, this recipe is designed to make you feel like a culinary rockstar.

Ingredients That Spark Joy

Let’s break down the ingredients you’ll need to create this delicious masterpiece. You don’t have to break the bank to bring bold flavors to your table—this recipe is all about using what you have and making it extraordinary.

  • Delicious Meals: Start with a protein of your choice—chicken, shrimp, or even tofu for a vegetarian option. Each brings its unique flavor to the table.
  • Simple Ingredients: Fresh vegetables like bell peppers, onions, and zucchini add color and crunch. Don’t forget your spices—cayenne, paprika, and cumin are your best friends here!
  • Low-Cost Ingredients: Use pantry staples like rice or quinoa to round out the dish. These not only add substance but also help absorb all that beautiful spice.

Steps to Culinary Bliss

Eye-level shot of a steaming skillet filled with a spicy dish, showcasing rich textures and ingredients.

Ready to embrace the heat? Here’s how to create your Spicy Skillet Delight:

  1. Gather your ingredients and feel the excitement build as you prepare to transform them into something special.
  2. Heat a skillet over medium-high heat. Add a splash of oil and let it shimmer.
  3. Start by adding your chosen protein to the skillet. Sear it until golden brown, letting those savory aromas fill your kitchen.
  4. Once the protein is cooked, toss in your chopped vegetables. Stir them around, allowing them to soften and mingle with the protein.
  5. Now it’s time to bring the spice! Sprinkle in your cayenne, paprika, and cumin. The heat will wake up the dish and get your taste buds dancing.
  6. Mix everything together and let it all cook for a few more minutes. The flavors will meld beautifully, creating a dish that’s vibrant and inviting.
  7. Finally, serve your Spicy Skillet Delight over a bed of rice or quinoa, and watch as your family or guests dive in with enthusiasm.

Tips for Success

Cooking is all about exploration, but here are a few tips to ensure your Spicy Skillet Delight turns out perfectly every time:

  • Don’t be afraid to adjust the spice levels to suit your taste. Want more heat? Add a pinch of crushed red pepper flakes or a dash of hot sauce.
  • Let your protein marinate in the spices for 30 minutes before cooking. This extra time allows the flavors to penetrate deeply.
  • Experiment with different vegetables based on what’s in season or what you have on hand. Zucchini, spinach, or even corn can add unique flavors and textures.

Variations to Explore

Your Spicy Skillet Delight can take on many forms! Here are a few delicious variations you might want to try:

  • Curry Twist: Add coconut milk and curry powder for a creamy, aromatic version that transports your taste buds to the tropics.
  • Mexican Fiesta: Incorporate black beans, corn, and a sprinkle of lime juice for a zesty, taco-inspired dish.
  • Italian Flair: Toss in some Italian herbs like oregano and basil, and finish with a handful of grated parmesan for a rich, comforting experience.

Substitutions That Work

Flexibility in the kitchen is key! Here are some substitutions to consider:

  • If you’re out of cayenne, try chili powder or paprika for a different flavor profile.
  • Use any protein you have on hand—ground turkey, beef, or even chickpeas can work just as well.
  • For a grain base, consider quinoa, couscous, or even cauliflower rice for a low-carb alternative.

Essential Equipment

To create your Spicy Skillet Delight, you’ll need:

  • A large skillet or frying pan
  • A sharp knife and cutting board for prepping your ingredients
  • A spatula or wooden spoon for stirring and mixing

Storage and Freezing Tips

Got leftovers? No problem! Here’s how to store and freeze your delicious creation:

  • Store any leftovers in an airtight container in the fridge for up to three days.
  • For longer storage, freeze individual portions in freezer-safe bags. Just remember to label them!
  • To reheat, simply thaw in the fridge overnight and warm in the skillet or microwave until heated through.

FAQs

Let’s tackle some common questions about this vibrant dish:

  • Can I make this dish vegetarian? Absolutely! Just substitute the protein with tofu or tempeh, and you’re good to go!
  • What if I can’t handle spicy food? You can definitely tone down the spice by reducing the amount of cayenne and swapping in milder spices like sweet paprika.
  • How can I make this dish gluten-free? Simply ensure the grains you use, like rice or quinoa, are certified gluten-free. This dish is naturally gluten-free!

Troubleshooting Common Issues

Even the best chefs have off days! Here are some troubleshooting tips:

  • If the dish is too spicy, add a dollop of sour cream or yogurt to balance the heat.
  • If your vegetables are too soft, try sautéing them separately and adding them at the end to maintain their crunch.
  • For a dry dish, add a splash of broth or water while cooking to keep it moist and flavorful.

Embrace the Adventure

Cooking is so much more than just preparing food; it’s about sharing experiences and creating lasting memories. My Spicy Skillet Delight is the perfect gateway to ignite your culinary journey. So, gather your ingredients, turn up the heat, and don’t shy away from the spice! This dish is a testament to the beauty of bold flavors and the joy of cooking.

Whether you’re cooking for yourself, a loved one, or a group of friends, this recipe is sure to impress. It’s about bringing people together, making them feel alive, and celebrating the art of cooking. So put on your apron, embrace the adventure, and get ready to savor every spicy, delicious bite. Cheers to delicious moments and unforgettable meals!

Free Cookbook

Prep Time 10 minutes
Cook Time 20 minutes
Total Time 30 minutes
Servings 4 people
Calories 250
Discover delicious meals with simple, low-cost ingredients using this free, budget-friendly family cookbook.

Ingredients

Main Ingredients

  • 2 cups delicious meals (Prepared meals or ingredients)
  • 1 cup simple ingredients (Basic pantry items)
  • 0.5 cup low-cost ingredients (Affordable staples)

Instructions 

  • Get your hands on my FREE budget-friendly cookbook!
  • I’ve created a free, budget-friendly family cookbook to help you get started!

Notes

Use affordable ingredients to keep costs low and flavor high.
Calories: 250kcal
Cost: $0
Course: Main
Cuisine: Various
Keyword: Budget

Nutrition

Calories: 250kcal | Carbohydrates: 45g | Protein: 10g | Fat: 5g | Sodium: 300mg

Loved this recipe? Save it to your favorite Pinterest board so you can easily find it later! It’s the perfect way to keep all your sweet ideas in one place. ✨

Detailed view of a deliciously plated Spicy Skillet Delight with a blurred cozy background.

Why You’ll Crave This Dish Weekly

There’s something intoxicating about the aroma of Peruvian Chicken sizzling on the grill that can awaken your senses and spark joy in your kitchen. This dish is not just a meal; it’s an experience that dances on your palate, blending vibrant flavors with the warmth of home cooking. With roots in traditional Peruvian cuisine, this chicken recipe embodies the spirit of adventure and boldness that every cook should embrace.

Growing up in San Antonio, Texas, I learned early on how the right combination of spices could transform a simple dish into a culinary masterpiece. Just like my grandmother’s legendary recipes, this Peruvian Chicken will have you gathering friends and family around the table, eager for seconds and thirds. So, let’s dive into this juicy, flavor-packed dish that’s bound to be your weekly craving!

Overview of Peruvian Flavors

Peruvian cuisine is a vibrant tapestry of indigenous ingredients and culinary influences from Spanish colonizers and immigrants. This recipe captures the essence of that fusion with a marinade that sings with zesty lime, aromatic garlic, and earthy spices. The result? Chicken that’s not only moist and tender but also bursting with flavor, making it an ideal choice for weeknight dinners or festive gatherings.

Ingredients You’ll Need

Succulent Peruvian chicken breasts glistening with olive oil and spices, set against a blurred cozy background.

To embark on this flavor journey, gather the following ingredients:

  • 4 boneless, skinless chicken breasts
  • 1/4 cup olive oil
  • Juice of 2 limes
  • 4 cloves garlic, minced
  • 1 tablespoon ground cumin
  • 1 tablespoon paprika
  • 1 teaspoon dried oregano
  • 1 teaspoon salt
  • 1/2 teaspoon black pepper
  • 1/4 teaspoon cayenne pepper (optional)
  • Fresh cilantro for garnish

These ingredients come together to create a marinade that will infuse your chicken with incredible flavor while keeping it juicy and tender. If you’re adventurous, feel free to adjust the spices to match your heat tolerance!

How to Make It: Step-by-Step Instructions

  1. In a large bowl, combine olive oil, lime juice, minced garlic, cumin, paprika, oregano, salt, black pepper, and cayenne pepper (if using).

  2. Add the chicken breasts to the marinade, ensuring they are well coated. Cover the bowl and refrigerate for at least 1 hour, or for the best flavor, overnight.

  3. Preheat your grill or stovetop grill pan over medium-high heat.

  4. Remove the chicken from the marinade and discard any leftover marinade.

  5. Grill the chicken for 6-7 minutes on each side, or until fully cooked, reaching an internal temperature of 165°F (75°C).

  6. Once cooked, remove the chicken from the grill and let it rest for a few minutes before slicing.

  7. Garnish with fresh cilantro and serve with your choice of sides, such as rice, roasted vegetables, or a crisp salad.

Helpful Tips for Perfectly Grilled Chicken

  • Marination Time: The longer you marinate the chicken, the more flavor it will absorb. If you can, let it sit overnight!
  • Grilling Temperature: Make sure your grill or grill pan is hot before adding the chicken. This helps create those delicious grill marks and locks in moisture.
  • Resting Time: Allow the chicken to rest after grilling. This step is crucial for juicy meat, as it lets the juices redistribute.

Variations and Substitutions

This recipe is incredibly versatile! Here are some ideas to mix things up:

  • Different Cuts: Feel free to use bone-in chicken thighs or drumsticks for richer flavor. Adjust cooking time accordingly.
  • Heat Levels: Add more cayenne pepper or even a splash of hot sauce to the marinade for an extra kick. If you prefer milder flavors, omit the cayenne altogether.
  • Herbs Galore: Try adding fresh herbs like parsley or even mint to the marinade for a unique twist.

Equipment You’ll Need

To make this dish, you’ll need the following kitchen tools:

  • Mixing bowl for marinating
  • Grill or stovetop grill pan
  • Meat thermometer to check doneness
  • Sharp knife for slicing
  • Cutting board

Storage and Freezing Instructions

If you find yourself with leftovers (which, let’s be honest, is rare), you can store them in an airtight container in the refrigerator for up to 3 days. The flavors will deepen, making for even tastier leftovers!

To freeze, wrap the grilled chicken tightly in plastic wrap and then in aluminum foil, or place it in a freezer-safe bag. It can be frozen for up to 3 months. When you’re ready to enjoy it again, simply thaw in the refrigerator overnight and reheat gently.

Frequently Asked Questions

Can I use boneless chicken thighs instead of breasts?
Absolutely! Boneless chicken thighs will add more richness and flavor to the dish. Just make sure to adjust your cooking time accordingly.

What sides pair well with Peruvian Chicken?
This chicken is fantastic with a variety of sides. Consider serving it with fluffy rice, roasted potatoes, or a zesty salad for a complete meal.

Can I make the marinade ahead of time?
Yes! Prepare the marinade the day before and store it in the fridge until you’re ready to use it. This will enhance the flavors even more!

Troubleshooting Common Issues

Chicken is Dry: Overcooking is the main culprit for dry chicken. Use a meat thermometer to ensure it reaches the perfect internal temperature without going over.

Flavor is Lacking: Always taste your marinade before adding the chicken. Adjust the seasoning to your preference; sometimes a touch more salt or lime juice can make all the difference.

Conclusion: Ignite Your Culinary Passion!

If you’re ready to elevate your weeknight dinners, this Peruvian Chicken recipe is the perfect starting point. It’s a celebration of flavors that invites everyone at your table to dig in and savor every bite. With its bold spices, juicy chicken, and the addition of fresh cilantro, this dish is a culinary adventure that you’ll want to embark on time and time again.

So, grab your ingredients, fire up that grill, and get ready to delight your taste buds. Remember, cooking is not just about following a recipe, but about sharing love and creating memories. Enjoy the process, and most importantly, enjoy the delicious results of your hard work. Happy cooking!

Peruvian Chicken You’ll Crave Weekly

Prep Time 10 minutes
Cook Time 15 minutes
Total Time 25 minutes
Servings 4 servings
Calories 250
This flavorful Peruvian-style chicken is marinated in a zesty blend of lime, garlic, and spices, then grilled to perfection. Perfect for a quick, delicious meal any day of the week.

Ingredients

Meat

  • 4 pieces boneless, skinless chicken breasts
  • 0.25 cup olive oil
  • 2 pieces limes (juice)
  • 4 cloves garlic, minced
  • 1 tablespoon ground cumin
  • 1 tablespoon paprika
  • 1 teaspoon dried oregano
  • 1 teaspoon salt
  • 0.5 teaspoon black pepper
  • 0.25 teaspoon cayenne pepper (optional)
  • to taste fresh cilantro for garnish

Instructions 

  • Mix olive oil, lime juice, garlic, cumin, paprika, oregano, salt, black pepper, and cayenne in a bowl.
  • Add chicken to marinade, cover, and refrigerate for at least 1 hour.
  • Preheat grill to medium-high heat.
  • Remove chicken from marinade and grill 6-7 minutes per side until cooked through.
  • Let rest, then garnish with cilantro and serve.

Notes

Marinate for longer for more flavor, and serve with sides of your choice.
Calories: 250kcal
Cost: $15
Course: Main Course
Cuisine: Peruvian
Keyword: chicken

Nutrition

Calories: 250kcal | Carbohydrates: 8g | Protein: 35g | Fat: 10g | Sodium: 400mg

Loved this recipe? Save it to your favorite Pinterest board so you can easily find it later! It’s the perfect way to keep all your sweet ideas in one place. ✨

A mouthwatering view of seasoned Peruvian chicken, showcasing its juicy texture and vibrant colors.

Why You’ll Love These Teriyaki Chicken Bowls

Let’s be real: meal prep can sometimes feel more like a chore than an adventure. But with these Meal Prep Teriyaki Chicken Bowls, you’re not just preparing meals; you’re embarking on a flavor journey that’ll have your taste buds doing the cha-cha all week long! These bowls are not only vibrant and satisfying but also incredibly easy to whip up, making them the ideal solution for busy weekdays. Picture this: tender, marinated chicken, crisp-tender veggies, and a luscious sweet-savory teriyaki sauce, all cradled over a hearty base of brown rice. It’s a fiesta of flavors that’ll make your lunch breaks something to look forward to!

A Flavorful Adventure Awaits

My love for teriyaki chicken didn’t happen overnight. It started during my culinary adventures in Japan, where I first tasted the magic of teriyaki in a cozy izakaya tucked away in Tokyo. The balance of sweet and savory, the caramelization of the sauce as it clung to the chicken, was nothing short of culinary poetry. I knew I had to recreate that experience back in my kitchen, and that’s when the idea for these meal prep bowls was born. Today, I’m excited to share this recipe with you, combining tradition with a bit of my Texan flair!

Gather Your Flavor Crew: What You’ll Need

Let’s gather the ingredients that will turn your ordinary week into a culinary carnival! Here’s what you’ll need:

For the Chicken Bowls:

  • 1 lb chicken breast, diced
  • 1 cup broccoli florets
  • 1 cup bell peppers, sliced
  • 1 cup carrots, sliced
  • 1 cup cooked brown rice

For the Homemade Teriyaki Sauce (makes 1 cup):

  • 1/2 cup teriyaki sauce (store-bought or homemade)
  • 2 tablespoons olive oil
  • 1 teaspoon garlic powder
  • 1 teaspoon ginger powder
  • Salt and pepper to taste
  • Sesame seeds (optional, for garnish)
  • Green onions (optional, for garnish)

Let’s Build Those Bowls: Step-by-Step

Ready to get cooking? Follow these simple steps to create your meal prep masterpiece:

  1. Marinate the Chicken: In a bowl, combine the diced chicken breast with olive oil, garlic powder, ginger powder, salt, and pepper. Let it marinate for about 15 minutes. This step infuses the chicken with flavor and ensures every bite is juicy and delicious.
  2. Cook the Chicken: Heat a large skillet over medium heat. Add the marinated chicken and cook until it’s beautifully browned and cooked through, about 6-8 minutes. The aroma will be heavenly!
  3. Add the Veggies: Toss in the broccoli, bell peppers, and carrots into the skillet with the chicken. Stir-fry for an additional 5-7 minutes until the vegetables are tender yet still vibrant. You want that crunch to shine through.
  4. Pour in the Teriyaki Sauce: Drizzle the teriyaki sauce over the chicken and vegetables, letting it cook for another 2-3 minutes until everything is heated through and the sauce thickens slightly. You’ll want to ensure every piece is coated!
  5. Assemble the Bowls: Divide the cooked brown rice evenly into your meal prep containers. Top each rice portion with the teriyaki chicken and vegetable mixture, making it a colorful and inviting dish. Don’t forget to garnish with sesame seeds and sliced green onions for that extra pop!
  6. Cool and Store: Allow the bowls to cool before sealing them up. These beauties can be stored in the refrigerator for up to 4 days, ready to brighten your lunch game.

Mix It Up: Your Bowl, Your Rules!

This recipe is a canvas for your creativity! Here are some tips and variations to make these teriyaki bowls truly yours:

Tips:

  • Spice It Up: If you like a bit of heat, consider adding a pinch of red pepper flakes to the chicken marinade or drizzling some sriracha over the finished bowls.
  • Change the Veggies: Feel free to swap out veggies based on what you love or have on hand. Snap peas, zucchini, or even asparagus can be fabulous additions!
  • Switch Up the Rice: For a low-carb option, try using cauliflower rice instead of brown rice. It’s a fantastic way to lighten things up without sacrificing flavor.

Variations:

  • Protein Alternatives: Not a fan of chicken? Substitute with tofu for a vegetarian option or even shrimp for a seafood twist!
  • DIY Teriyaki Sauce: Making your teriyaki sauce is simpler than you think. Just combine soy sauce, honey, and a splash of rice vinegar, and you’ll have a flavorful sauce that’s free of preservatives.

Storage and Freezing

One of the best parts about meal prep is the ability to store and freeze meals for later! Here’s how to keep your teriyaki bowls fresh:

Refrigeration:

Your assembled bowls can be stored in the refrigerator for up to 4 days. Just make sure they are sealed tightly to avoid any odors from other foods.

Freezing:

For longer storage, you can freeze the chicken and sauce separately from the rice and veggies. This way, you maintain the best texture and flavor. Simply thaw overnight in the fridge before reheating.

FAQs: Your Teriyaki Troubles, Solved!

Q: My sauce is too thin! Help?

A: No worries! Just simmer it for an additional 1-2 minutes. If it’s still thin, mix ½ teaspoon of cornstarch with 1 tablespoon of cold water, then whisk it into the simmering sauce to thicken it up quickly.

Q: Can I freeze these bowls?

A: Absolutely! Just remember to freeze the chicken and sauce separately from the rice to keep everything at its best.

Q: Why did my chicken turn rubbery?

A: Overcooking is often the culprit! Chicken cooks quickly, so be sure to take it off the heat once it reaches an internal temperature of 165°F (74°C).

Q: It’s too salty! What do I do?

A: If you used soy sauce, try reducing it to ¼ cup and adding a tablespoon of water. Balance it out with a little extra honey or a squeeze of lime!

Cooking Equipment

To make your cooking experience smooth and enjoyable, here’s what you’ll need:

  • Large skillet or sauté pan
  • Cutting board and sharp chef’s knife
  • Mixing bowls for marinating
  • Meal prep containers (preferably microwave-safe)
  • Measuring cups and spoons

Nutritional Info (Per Bowl)

Each bowl is packed with wholesome ingredients that not only satisfy your hunger but also nourish your body:

  • Approx. 430 calories
  • 36g protein
  • 14g fat
  • 32g carbs

Final Thoughts: A Meal Prep Delight

These Meal Prep Teriyaki Chicken Bowls are more than just a culinary creation; they are a celebration of flavors that remind us how exciting meal prep can be. With every bite, you’ll experience the juiciness of the chicken, the freshness of the veggies, and the tantalizing sweetness of the teriyaki sauce—all while knowing you’ve prepared something quick, healthy, and utterly delicious. So fire up that skillet, grab your favorite ingredients, and let’s make mealtime an adventure worth savoring! Remember, cooking is about joy, experimentation, and the love you put into every dish. Let’s keep that fire burning and keep exploring the wonderful world of flavors together!

Why You’ll Love This Dish

Welcome to the tantalizing world of Masoor Dal Chilla—where flavor meets nutrition in a beautiful dance! If you’ve ever craved a dish that not only satisfies your hunger but also excites your taste buds, this is it. Crispy on the outside and soft on the inside, these red lentil pancakes are the perfect blend of health and indulgence.

But wait, there’s more! Not only are these chillas gluten-free and vegan, but they are also high in protein, making them an excellent choice for breakfast, lunch, or even a light dinner. Imagine starting your day with a dish that fuels your body with plant-based goodness while also being an adventure for your palate. Yes, please!

Embrace the chance to elevate your culinary repertoire and impress your family and friends with this vibrant dish that’s as versatile as it is delicious. Let’s dive into this recipe and unleash the flavor!

Ingredients

For the Chilla Batter

A vibrant Indian pancake made from red lentils, garnished with chopped onions and spinach.
  • 1 cup masoor dal (red lentils)
  • 1/2 teaspoon cumin seeds
  • 1/2 teaspoon turmeric powder
  • 1-2 green chilies, finely chopped
  • 1/4 cup onion, finely chopped
  • 1/4 cup spinach, finely chopped
  • Salt to taste
  • Water as needed

For Cooking

  • Oil for cooking

How to Make Crispy Masoor Dal Chilla

Step 1: Prepare the Batter

The first step to creating these delightful pancakes is to prep your masoor dal. Rinse the lentils thoroughly under running water, removing any debris and excess starch. Once rinsed, soak the masoor dal in water for at least 2 hours—this soaking process is crucial as it softens the lentils and makes them easier to blend into a smooth batter. The more you soak them, the creamier your chilla will be!

Step 2: Blend the Mixture

After the lentils have soaked, drain the water and transfer them to a blender. Add just enough fresh water to blend the lentils into a smooth, thick batter. You want it to be pourable but not too runny—think pancake batter consistency. This is where you can let your creativity shine by adjusting the thickness to your liking!

Step 3: Mix in the Flavor

In a mixing bowl, combine your blended masoor dal batter with cumin seeds, turmeric powder, the finely chopped green chilies, onions, spinach, and a generous pinch of salt. Stir it all together until well mixed. This fusion of spices and veggies not only enhances the flavor but also injects a splash of color into your dish. Trust me, your taste buds will thank you!

Step 4: Cook the Chilla

Now it’s time to heat things up! Grab a non-stick pan or skillet and place it over medium heat. Add a drizzle of oil to lightly grease the surface. Once the oil shimmers, it’s showtime. Pour a ladleful of your chilla batter onto the pan, using the back of the ladle to spread it into a thin, round circle. Don’t worry about perfection—each pancake is an expression of your culinary artistry!

Cook for 2-3 minutes until the edges begin to lift and the bottom turns a beautiful golden brown. Flip the chilla with a spatula and cook the other side for another 2-3 minutes until crispy. Repeat this process with the remaining batter, adding more oil to the pan as needed.

Step 5: Serve & Enjoy!

Once your chillas are cooked to perfection, it’s time to serve! Stack them high on a plate and pair them with your favorite chutney, yogurt, or even a fresh salad. Each bite is a celebration of flavor that invites you to savor the moment.

Serving Ideas & Variations

The beauty of masoor dal chilla lies in its versatility. Here are some fun ideas to customize your pancakes:

  • Avocado Delight: Top your chilla with creamy mashed avocado and a squeeze of lemon juice for a refreshing twist.
  • Cheesy Indulgence: Sprinkle some shredded vegan cheese or regular cheese on top just before flipping to add a melt-in-your-mouth goodness.
  • Veggie Boost: Enhance the nutritional profile by adding grated carrots, diced bell peppers, or even some corn to the batter.
  • Sweet & Savory Combo: For a unique experience, serve your chilla with mango chutney or a sweet chili sauce. The contrast will blow your mind!

Make-Ahead & Storage Tips

Want to prepare in advance? You can soak the masoor dal the night before and keep it in the refrigerator. The batter can also be made ahead of time and stored in an airtight container in the fridge for up to 2 days. Just give it a good stir before using, as it may thicken up.

If you have leftovers, store them in an airtight container in the fridge. They will stay fresh for about 3-4 days. Reheat them in a skillet with a little oil until crispy again, or in the microwave if you’re in a hurry.

Nutrition (Per Chilla – Approximate)

Each chilla is not just a delightful culinary experience; it’s also packed with nutrients. Here’s a rough nutrition breakdown:

  • Calories: 120
  • Protein: 6g
  • Carbohydrates: 18g
  • Fiber: 4g
  • Fat: 3g

FAQs

Can I use other lentils instead of masoor dal?

While masoor dal gives these chillas their unique flavor and texture, you can experiment with other lentils like yellow moong dal or even chickpeas. Just adjust the soaking and blending time as needed.

Are masoor dal chillas spicy?

The heat level can easily be adjusted by modifying the quantity of green chilies you add. For a milder flavor, you can omit the chilies altogether or use just one.

Can I freeze the chillas?

Absolutely! Once cooled, stack the chillas with parchment paper between them and place them in a freezer-safe container. They can be frozen for up to a month. Reheat them on a skillet or in the microwave when you’re ready to enjoy!

Troubleshooting

If your chilla is turning out soggy, it could be due to excess water in your batter. Make sure to achieve the right consistency before cooking. Also, ensure your pan is hot enough when you pour in the batter; a sizzling sound should greet you!

On the other hand, if your chilla is too dry or burning, lower the heat and add a bit more oil to keep things moist.

Conclusion

Cooking is an adventure, and with Masoor Dal Chilla, you’re armed with a recipe that’s not just easy, but also opens the door to endless creativity. Whether you’re whipping these up for breakfast, lunch, or a quick snack, remember that every bite is a step into a world of flavor that celebrates spice, health, and joy. So gather your ingredients, fire up that pan, and let the journey begin! Your taste buds are in for a thrilling ride, and you’re right at the helm. Happy cooking!

🥞🌱 Masoor Dal Chilla – A High-Protein Indian Pancake! Crispy, gluten-free, and packed with flavor, th… in 2025

Prep Time 2 hours
Cook Time 15 minutes
Total Time 2 hours 15 minutes
Servings 4 pancakes
Calories 180
Enjoy these crispy, gluten-free Indian pancakes made from red lentils, packed with protein and flavor.

Ingredients

Main

  • 1 cup masoor dal (red lentils)
  • 0.5 teaspoon cumin seeds
  • 0.5 teaspoon turmeric powder
  • 1-2 green chilies green chilies, finely chopped
  • 0.25 cup onion, finely chopped
  • 0.25 cup spinach, finely chopped
  • to taste salt
  • as needed water
  • oil for cooking oil

Instructions 

  • Rinse and soak the lentils for 2 hours, then blend into a smooth batter with water.
  • Mix the batter with cumin, turmeric, chilies, onion, spinach, and salt.
  • Heat a greased pan and pour a ladleful of batter, spreading into a thin circle.
  • Cook for 2-3 minutes until golden, flip, and cook the other side until crispy.
  • Repeat with remaining batter and serve hot with chutney or yogurt.

Notes

Serve immediately for best crispiness and flavor.
Calories: 180kcal
Cost: $4
Course: Breakfast, Snack
Cuisine: Indian
Keyword: gluten-free, High Protein, lentils

Nutrition

Calories: 180kcal | Carbohydrates: 30g | Protein: 12g | Fat: 3g | Sodium: 200mg

Loved this recipe? Save it to your favorite Pinterest board so you can easily find it later! It’s the perfect way to keep all your sweet ideas in one place. ✨

A beautifully detailed shot of a golden Masoor Dal Chilla, highlighting its texture and crispy edges.

Why This Dish Is a Must-Try

When it comes to comfort food, few dishes can rival the warmth and heartiness of a well-prepared chicken and potatoes dish. My Cozy Garlic Parmesan Crockpot Chicken & Potatoes is not just a meal; it’s an experience that envelops you like a warm hug on a chilly evening. Imagine tender, juicy chicken breasts resting atop a bed of buttery baby potatoes, all infused with a rich garlic-Parmesan cream sauce. It’s a symphony of flavors that come together beautifully, creating a dish that’s perfect for weeknight dinners, family gatherings, or simply whenever you crave something soul-satisfying.

The Magic of Slow Cooking

Slow cooking is an art form that transforms simple ingredients into something extraordinary. The gentle heat of the crockpot allows the flavors to meld seamlessly, resulting in chicken that is incredibly moist and potatoes that are tender enough to melt in your mouth. This method not only saves you time but also allows you to set it and forget it. You can go about your day, and by the time you return, your kitchen will be filled with the inviting aroma of a hearty meal waiting for you.

Gather Your Ingredients

Deliciously prepared garlic parmesan chicken and halved baby potatoes served in a cozy setting.

Before diving into the culinary adventure, it’s vital to gather all your ingredients. Here’s what you’ll need to prepare this comforting dish:

  • 4 boneless, skinless chicken breasts
  • 4 cups baby potatoes, halved
  • 1 cup grated Parmesan cheese
  • 1/2 cup chicken broth
  • 1/4 cup unsalted butter, melted
  • 6 cloves garlic, minced
  • 1 teaspoon dried Italian seasoning
  • Salt and pepper to taste
  • Fresh parsley, chopped (for garnish)

Tools You’ll Need

Having the right tools can make all the difference when it comes to creating a delicious meal. For this recipe, you will need:

  • A reliable crockpot
  • A mixing bowl
  • A whisk or fork for mixing
  • A cutting board and knife for prepping your ingredients
  • A measuring cup for accurate measurements

Let’s Cook: Step-by-Step Instructions

Cooking should be a joyful experience, and this recipe is as simple as it is delicious. Let’s break it down step by step:

Step 1: Prepare Your Ingredients

Start by prepping your ingredients. Halve the baby potatoes and set them aside. Take the chicken breasts and trim any excess fat, ensuring they’re ready to soak up all the delicious flavors.

Step 2: Mix the Flavorful Sauce

In a mixing bowl, combine the melted butter, minced garlic, chicken broth, grated Parmesan cheese, Italian seasoning, salt, and pepper. Whisk until everything is well combined into a creamy mixture that promises to elevate the dish.

Step 3: Layer the Ingredients in the Crockpot

Begin by placing the halved baby potatoes at the bottom of the crockpot. This base not only serves as a perfect platform for the chicken but also allows those potatoes to soak up all the savory goodness as they cook.

Step 4: Add the Chicken

Lay the chicken breasts on top of the potatoes. Make sure they’re evenly spaced, allowing the sauce to coat each piece beautifully.

Step 5: Pour the Sauce

Now, pour the creamy garlic-Parmesan sauce over the chicken and potatoes. Ensure that everything is generously coated; this is where the magic happens!

Step 6: Slow Cook to Perfection

Cover the crockpot and set it to cook on low for 6-7 hours or on high for 3-4 hours. The longer cooking time on low will allow the flavors to deepen and the chicken to become incredibly tender. You’ll know it’s done when the chicken is fully cooked and the potatoes are fork-tender.

Step 7: Garnish and Serve

Once cooking is complete, give everything a gentle stir to combine the flavors. Garnish with freshly chopped parsley for a pop of color and freshness. Serve hot, and prepare for the compliments to roll in!

Variations to Consider

While this recipe is a winner as is, there’s always room for creativity in the kitchen. Here are a few variations you might consider:

  • Add Vegetables: Toss in some carrots, bell peppers, or green beans for added nutrition and color.
  • Spice It Up: If you’re feeling adventurous, add a pinch of red pepper flakes or diced jalapeños for a spicy kick.
  • Herb Infusion: Experiment with different herbs like thyme, rosemary, or oregano to customize the flavor profile.

Substitutions and Adjustments

Don’t have all the exact ingredients on hand? No problem! Here are some substitutions you can make without sacrificing flavor:

  • Chicken: You can use thighs instead of breasts for a richer flavor.
  • Cheese: If you’re out of Parmesan, try using Pecorino Romano or even a dairy-free cheese for a different twist.
  • Broth: Vegetable broth can be used instead of chicken broth for a vegetarian option.

Storage and Freezing Tips

This dish is perfect for meal prep! Here’s how to store leftovers:

  • Refrigeration: Store leftovers in an airtight container in the fridge for up to 3-4 days.
  • Freezing: You can freeze the cooked dish for up to 2 months. Thaw in the fridge before reheating.

FAQs About the Recipe

Can I use frozen chicken?

Yes, you can use frozen chicken. However, make sure to increase the cooking time by 1-2 hours to ensure it cooks thoroughly.

Can I make this dish dairy-free?

Absolutely! Substitute the unsalted butter with a dairy-free margarine and use a dairy-free cheese alternative for the Parmesan.

How can I make this dish spicier?

Incorporate red pepper flakes or jalapeños into the sauce for an extra layer of heat.

Can leftovers be reheated?

Yes, leftovers can be reheated in a microwave or on the stovetop. Add a splash of chicken broth or cream to maintain creaminess.

Final Thoughts

My Cozy Garlic Parmesan Crockpot Chicken & Potatoes is more than just a recipe; it’s a celebration of flavors, a reminder of home-cooked comfort, and an invitation to gather around the table with loved ones. Each bite tells a story of warmth, love, and rich culinary tradition. So go ahead, roll up your sleeves, and embrace the thrill of cooking this delightful dish. You’ll not only satisfy your palate but also create unforgettable moments that linger long after the meal is done. And remember, cooking is an adventure; don’t be afraid to add your own twist! Enjoy!

Cozy Garlic Parmesan Crockpot Chicken & Potatoes

Prep Time 15 minutes
Cook Time 4 hours
Total Time 4 hours 15 minutes
Servings 4 servings
Calories 550
A comforting and flavorful crockpot dish featuring tender chicken breasts, baby potatoes, and a savory garlic Parmesan sauce.

Ingredients

Protein

  • 4 pieces boneless, skinless chicken breasts

Vegetables

  • 4 cups baby potatoes, halved

Dairy & Cheese

  • 1 cup grated parmesan cheese

Broth & Sauces

  • 1/2 cup chicken broth

Fats & Oils

  • 1/4 cup unsalted butter, melted

Garlic & Herbs

  • 6 cloves garlic, minced
  • 1 teaspoon dried Italian seasoning

Seasonings

  • to taste salt and pepper

Garnish

  • for garnish fresh parsley, chopped

Instructions 

  • Mix melted butter, garlic, chicken broth, Parmesan, Italian seasoning, salt, and pepper.
  • Place potatoes in crockpot, then top with chicken breasts.
  • Pour garlic Parmesan mixture over everything, ensuring even coating.
  • Cover and cook on low for 6-7 hours or high for 3-4 hours until cooked through.
  • Garnish with chopped parsley before serving.

Notes

For extra flavor, sprinkle additional Parmesan or herbs before serving.
Calories: 550kcal
Cost: $15
Course: Main Course
Cuisine: American
Keyword: chicken, garlic, Parmesan, Potatoes

Nutrition

Calories: 550kcal | Carbohydrates: 45g | Protein: 50g | Fat: 20g | Sodium: 900mg

Loved this recipe? Save it to your favorite Pinterest board so you can easily find it later! It’s the perfect way to keep all your sweet ideas in one place. ✨

An appetizing display of chicken and potatoes, highlighting the parmesan garnish and warm lighting.

Why This Broccoli Cheese Pasta is a Game-Changer

Are you ready to embark on a flavor journey that will leave your taste buds dancing with joy? Let me take you through the delightful world of Broccoli Cheese Pasta, a dish that celebrates the marriage of creamy goodness and cheesy delight. This isn’t just a meal; it’s an experience! Whether you’re looking for a quick weeknight fix or a comforting family favorite, this dish has got you covered. With its tender broccoli florets, perfectly cooked pasta, and a rich cheese sauce that sings with flavor, you’ll find yourself reaching for seconds before you even finish your first bowl.

This recipe embraces the essence of comfort food while sneaking in some nutritious greens. If you’re like me, you believe that food should not only satisfy your hunger but also ignite your passion for cooking. Buckle up, because we’re about to turn a simple dish into something extraordinary!

Ingredients You’ll Need

Before we dive into the cooking process, let’s gather our ingredients. Here’s what you’ll need for this creamy masterpiece:

  • 12 oz pasta (penne, rotini, or fettuccine work well)
  • 4 cups water (for boiling)
  • 1 teaspoon salt
  • 2 cups broccoli florets (chopped into bite-sized pieces)
  • 1 teaspoon olive oil
  • 1 clove garlic (minced)
  • 1/4 teaspoon salt
  • 2 tablespoons butter
  • 2 tablespoons all-purpose flour
  • 2 cups milk (whole milk recommended for creaminess)
  • 1 cup shredded cheddar cheese (or a mix of mozzarella and parmesan)
  • 1/2 teaspoon mustard powder (optional, but trust me, it enhances flavor)
  • 1/2 teaspoon salt
  • 1/4 teaspoon black pepper
  • 1/4 teaspoon paprika (adds a slight smokiness)

Step-by-Step Instructions

Bowl of delicious broccoli cheese pasta, featuring vibrant green florets.

Step 1: Cook the Pasta

Start by filling a large pot with 4 cups of water and bringing it to a boil. Add 1 teaspoon of salt to enhance the flavor of the pasta. Toss in your choice of pasta—penne, rotini, or fettuccine—and cook according to the package instructions until al dente. Remember to stir occasionally to prevent sticking. Once the pasta is cooked to perfection, drain it and set it aside, but don’t forget to reserve about 1/2 cup of that starchy pasta water for later. Trust me, it’ll come in handy!

Step 2: Prepare the Broccoli

While your pasta is cooking, let’s give some love to our broccoli. Heat 1 teaspoon of olive oil in a pan over medium heat. Add 1 clove of minced garlic and sauté it until fragrant—this should take about 30 seconds. Then, toss in the chopped broccoli florets and sprinkle with 1/4 teaspoon of salt. Stir and cook for a few minutes until the broccoli is vibrant and slightly tender but still has that delightful crunch. Remove it from the heat and set aside.

Step 3: Make the Cheese Sauce

Now, onto the star of the show—the cheese sauce! In a medium saucepan, melt 2 tablespoons of butter over medium heat. Once melted, add 2 tablespoons of all-purpose flour to create a roux. Whisk continuously for about a minute to eliminate any raw flour taste. Gradually pour in 2 cups of milk while whisking to prevent lumps from forming. Allow the sauce to simmer for a few minutes until it thickens. At this point, stir in 1/2 teaspoon of mustard powder, 1/2 teaspoon of salt, 1/4 teaspoon of black pepper, and 1/4 teaspoon of paprika for that subtle smokiness. Reduce the heat to low and add 1 cup of shredded cheese. Stir until the cheese melts into a creamy, dreamy sauce.

Step 4: Combine Everything

With all components ready, it’s time for the grand unification! Add the cooked pasta to the cheese sauce, mixing well to ensure every noodle is coated in that rich, velvety goodness. Gently fold in the sautéed broccoli, making sure it’s evenly distributed throughout. If your sauce seems a bit too thick for your liking, add a splash of the reserved pasta water to achieve your desired consistency. Don’t forget to taste and adjust the seasoning if necessary; it’s all about finding that perfect balance!

Step 5: Serve and Enjoy

Now comes the moment we’ve all been waiting for! Serve your creamy broccoli cheese pasta warm, garnishing it with extra cheese, a sprinkle of red pepper flakes for some heat, or even toasted breadcrumbs for a delightful crunch. Each bite is a celebration of flavors that will spark joy in every single person at your table. You’ve created a dish that’s not just food; it’s comfort wrapped in a bowl!

Tips for Success

Before you dive in, let’s talk about a few tips to ensure your dish is nothing short of spectacular:

  • Fresh vs. Frozen: While fresh broccoli will give you the best texture, frozen broccoli can work in a pinch. Just be sure to thaw it and drain well before sautéing.
  • Cheese Choices: Experiment with different types of cheese! Cheddar is classic, but mixing in Gruyère or pepper jack can add a fun twist.
  • Don’t Overcook the Broccoli: You want your broccoli to have a slight crunch to it. Overcooked broccoli can turn mushy and lose its vibrant color.
  • Adjust Creaminess: If you want an extra creamy sauce, consider adding a splash of heavy cream or reducing the amount of milk slightly.
  • Boost the Flavor: A dash of hot sauce or a sprinkle of cayenne pepper can kick things up a notch if you’re feeling adventurous!

Variations to Try

This recipe is incredibly versatile, allowing you to customize it to your liking. Here are some fun variations to consider:

  • Protein Boost: Add grilled chicken, shrimp, or crispy bacon for a hearty twist.
  • Veggie Power: Incorporate other vegetables like spinach, peas, or even roasted bell peppers for an added nutritional punch.
  • Pasta Alternatives: For a low-carb option, try zucchini noodles or cauliflower pasta instead of traditional pasta.

Equipment You’ll Need

Having the right tools can make your cooking experience smoother and more enjoyable. Here’s what you’ll need:

  • Large Pot: A Dutch oven or large pot for boiling pasta.
  • Skillet: A medium skillet for sautéing the broccoli and garlic.
  • Medium Saucepan: For the cheese sauce.
  • Whisk: Essential for creamy sauces to avoid lumps.

Storage, Freezing & Reheating

If you find yourself with leftovers (though I doubt it!), here’s how to store and reheat them:

  • Storage: Keep leftovers in an airtight container in the refrigerator for up to 3 days.
  • Freezing: While possible, freezing may alter the texture of the cheese sauce. For best results, freeze only the pasta and prepare the cheese sauce fresh when ready to serve.
  • Reheating: Warm on the stovetop over low heat, adding a splash of milk to restore creaminess. You can also microwave in 30-second intervals, stirring in between.

Frequently Asked Questions

Can I use frozen broccoli?

Absolutely! Just be sure to thaw and drain it before sautéing to ensure the best texture.

What’s the best cheese for this recipe?

While cheddar is a classic choice, feel free to mix in mozzarella, Gruyère, or even a smoky Gouda for added depth of flavor!

How do I make this gluten-free?

Simply swap out the all-purpose flour for a gluten-free blend and use gluten-free pasta. It’s that easy!

Final Thoughts

In a world filled with complicated recipes and culinary tricks, this Broccoli Cheese Pasta stands out as a beacon of simplicity and joy. It reminds us that cooking doesn’t have to be intimidating; it can be an adventure filled with flavor and heart. Grab your apron, gather your ingredients, and prepare to create a dish that will resonate with everyone who takes a bite. Each forkful is a celebration of comfort food at its finest. So go ahead, unleash your inner chef, and let the creamy, cheesy goodness spark joy in your kitchen today!

Broccoli Cheese Pasta Recipe — A Creamy, Cheesy Delight

Prep Time 10 minutes
Cook Time 20 minutes
Total Time 30 minutes
Servings 4 servings
Calories 650
This creamy broccoli cheese pasta combines tender pasta, vibrant broccoli, and a rich cheese sauce for a comforting and flavorful meal.

Ingredients

Pasta

  • 12 oz pasta (penne, rotini, or fettuccine)
  • 4 cups water (for boiling)
  • 1 teaspoon salt
  • 2 cups broccoli florets (chopped into bite-sized pieces)
  • 1 teaspoon olive oil
  • 1 clove garlic (minced)
  • 1/4 teaspoon salt
  • 2 tablespoons butter
  • 2 tablespoons all-purpose flour
  • 2 cups milk (whole milk recommended for creaminess)
  • 1 cup shredded cheddar cheese (or a mix of mozzarella and parmesan)
  • 1/2 teaspoon mustard powder (optional, enhances flavor)
  • 1/2 teaspoon salt
  • 1/4 teaspoon black pepper
  • 1/4 teaspoon paprika (adds a slight smokiness)

Instructions 

  • Cook the pasta in boiling water until al dente, then drain and set aside, reserving 1/2 cup of pasta water.
  • Sauté garlic in olive oil, add broccoli and season with salt; cook until tender. Remove from heat.
  • Melt butter, whisk in flour to form a roux, then gradually add milk and cook until thickened. Stir in seasonings and cheese until smooth.
  • Mix cooked pasta and broccoli into the cheese sauce, adding reserved pasta water if needed to loosen. Adjust seasoning.
  • Serve warm, garnished with extra cheese or toppings as desired.

Notes

For extra flavor, sprinkle with red pepper flakes or toasted breadcrumbs before serving.
Calories: 650kcal
Cost: $15
Course: Main Course
Cuisine: American
Keyword: Broccoli, Cheese, pasta

Nutrition

Calories: 650kcal | Carbohydrates: 85g | Protein: 30g | Fat: 25g | Sodium: 900mg

Loved this recipe? Save it to your favorite Pinterest board so you can easily find it later! It’s the perfect way to keep all your sweet ideas in one place. ✨

Appetizing broccoli cheese pasta dish, highlighting its creamy texture.

Why You’ll Love This High-Protein Bake

Are you ready to elevate your dinner game with a dish that not only satisfies your hunger but also fuels your fire? This high-protein bake is a game-changer, seamlessly blending flavors and nutrition into one delicious experience. Imagine a dish that combines the wholesome goodness of oats, creamy cottage cheese, and the natural sweetness of honey, all while packing a protein punch. It’s not just a meal; it’s a celebration of what cooking can be—bold, adventurous, and utterly satisfying.

Whether you’re an experienced home cook or just starting your culinary journey, this recipe invites you to experiment and embrace the joy of cooking. It’s versatile enough to adapt to your taste while being simple enough to whip up on a busy weeknight. So let’s dive into the deliciousness that awaits!

Ingredients You’ll Need

Gather your ingredients before you begin, ensuring you have everything at your fingertips for a smooth cooking experience. Here’s what you’ll need:

  • 1 cup rolled oats – The base of our bake, providing fiber and heartiness.
  • 1 cup cottage cheese – Adds creaminess and a boost of protein.
  • 1/2 cup Greek yogurt – For tanginess and extra protein.
  • 1/2 cup almond milk – Keeps the mixture moist without overpowering flavors.
  • 1/2 cup protein powder (vanilla or chocolate) – A key player in our high-protein goal.
  • 2 eggs – Binds the ingredients together beautifully.
  • 1/4 cup honey or maple syrup – Natural sweetness to balance the savory elements.
  • 1 teaspoon vanilla extract – Enhances the overall flavor profile.
  • 1 teaspoon baking powder – Helps the bake rise to perfection.
  • 1/2 teaspoon cinnamon – Adds warmth and depth to the dish.
  • 1/4 teaspoon salt – Elevates all the flavors.
  • 1/2 cup mixed berries (fresh or frozen) – Bursting with flavor and nutrition.

How to Make This High-Protein Bake

A delicious slice of high protein bake with mixed berries, highlighted by soft, natural lighting.

Now that you have all your ingredients ready, let’s transform them into something magical. Follow these simple steps:

  1. Preheat your oven to 350°F (175°C) and grease a 9×9 inch baking dish. This will ensure your bake comes out easily.
  2. In a large mixing bowl, combine the rolled oats, protein powder, baking powder, cinnamon, and salt. Stir these dry ingredients together until well mixed.
  3. In another bowl, mix together the cottage cheese, Greek yogurt, almond milk, eggs, honey (or maple syrup), and vanilla extract until smooth and creamy.
  4. Pour the wet ingredients into the dry ingredients. Mix them together until fully combined, making sure no dry oats remain.
  5. Gently fold in the mixed berries, adding a splash of color and flavor to your bake.
  6. Transfer the mixture to your prepared baking dish and spread it evenly.
  7. Bake for 25-30 minutes, or until the top is golden and a toothpick inserted into the center comes out clean.
  8. Allow to cool for a few minutes before slicing into squares and serving.

Make Ahead Options

This high-protein bake is perfect for meal prep! You can assemble the mixture and store it in the refrigerator for up to 24 hours before baking. Just ensure you drain any excess moisture from the berries, especially if you’re using frozen ones. When ready to enjoy, simply pop it into the oven as instructed, and you’ll have a warm, comforting meal ready to fuel your day!

Expert Tips for Perfection

To ensure your high-protein bake turns out perfectly every time, consider these expert tips:

  • Choose quality ingredients: Whenever possible, opt for fresh, organic ingredients. They make a difference in flavor and nutrition.
  • Don’t skip the eggs: They help bind the mixture and create a fluffy texture. If you’re vegan, consider using flax eggs as a substitute.
  • Experiment with spices: Want to add a little heat? Consider incorporating a pinch of cayenne pepper or nutmeg.
  • Use seasonal fruits: Swap in your favorite fruits based on the season to keep things exciting.
  • Check for doneness: Ovens vary, so keep an eye on your bake. If the top is getting too dark, cover it loosely with foil.

What to Serve with This Bake?

This high-protein bake stands beautifully on its own, but it also plays well with others. Here are some ideas for what to serve alongside:

  • Fresh Fruit Salad: A light, refreshing side to balance the richness of the bake.
  • Yogurt Parfait: Layer some Greek yogurt and granola on the side for added texture and flavor.
  • Nut Butter: A drizzle of almond or peanut butter on top can elevate the dish to new heights.

How to Store and Freeze

Leftovers? No problem! Here’s how to store and freeze your high-protein bake:

  • Refrigerator: Store any leftovers in an airtight container in the fridge for up to 3-4 days. Reheat in the microwave or oven until warmed through.
  • Freezer: Allow the bake to cool completely before wrapping it tightly in plastic wrap or aluminum foil. It can be frozen for up to 2-3 months. When you’re ready to enjoy, simply reheat directly from frozen at 375°F (190°C) for about 40-45 minutes.

Variations to Try

One of the best parts of cooking is the ability to make a dish your own. Here are a few variations to consider:

  • Nutty Addition: Add a handful of chopped nuts like almonds or walnuts for extra crunch and healthy fats.
  • Chocolate Chip Delight: Swap some berries for chocolate chips for a dessert-like twist.
  • Veggie Boost: For a savory version, consider adding sautéed spinach or zucchini to the mix.

FAQs About This Recipe

Can I use a different type of milk?

Absolutely! Any milk alternative will work, such as soy milk, oat milk, or even dairy milk if you prefer.

Can I make this recipe dairy-free?

Yes, simply replace the cottage cheese and Greek yogurt with plant-based alternatives, and you’re good to go!

What if my bake is too dry?

If your bake turns out dry, it might be due to overbaking. Next time, check for doneness a few minutes earlier. Adding a touch more almond milk can also help retain moisture.

Can I double the recipe?

Definitely! Just make sure to adjust your baking time if you use a larger dish.

Conclusion

This high-protein bake is not just a recipe; it’s an invitation to explore your kitchen and ignite your culinary passion. With its rich flavors, versatile ingredients, and nourishing qualities, it’s bound to become a staple in your meal rotation. So gather your ingredients, embrace the thrill of cooking, and get ready to serve up a dish that’s sure to impress. Share your creations and remember: every bite is a chance to celebrate the adventure of cooking!

Want A High-Protein Bake?

Prep Time 10 minutes
Cook Time 30 minutes
Total Time 40 minutes
Servings 9 squares
Calories 250
A delicious high-protein baked treat perfect for a nutritious snack or breakfast.

Ingredients

Dry Ingredients

  • 1 cup rolled oats
  • 1 cup cottage cheese
  • 1/2 cup greek yogurt
  • 1/2 cup almond milk
  • 1/2 cup protein powder (vanilla or chocolate)
  • 2 eggs eggs
  • 1/4 cup honey or maple syrup
  • 1 teaspoon vanilla extract
  • 1 teaspoon baking powder
  • 1/2 teaspoon cinnamon
  • 1/4 teaspoon salt
  • 1/2 cup mixed berries (fresh or frozen)

Instructions 

  • Preheat oven to 350°F (175°C) and grease a 9x9 inch baking dish.
  • Mix dry ingredients in a bowl.
  • Combine wet ingredients until smooth.
  • Mix wet into dry, then fold in berries.
  • Pour into dish and bake 25-30 minutes until golden.
  • Cool slightly, then slice and serve.

Notes

This bake is packed with protein and fiber, making it a perfect healthy snack or breakfast.
Calories: 250kcal
Cost: $15
Course: Breakfast, Snack
Cuisine: American
Keyword: bake, High Protein

Nutrition

Calories: 250kcal | Carbohydrates: 30g | Protein: 20g | Fat: 5g | Sodium: 150mg

Loved this recipe? Save it to your favorite Pinterest board so you can easily find it later! It’s the perfect way to keep all your sweet ideas in one place. ✨

Eye-level shot of a golden-brown high protein bake with a cozy blurred background.

Why You’ll Love These Sticky Chicken Rice Bowls

Let’s be honest: we all crave meals that don’t just nourish us but also tantalize our taste buds. Enter my Delicious Sticky Chicken Rice Bowls—a dish that transforms ordinary ingredients into an extraordinary experience. Picture this: succulent chicken thighs marinated in a flavorful blend of soy sauce, honey, and garlic, then bathed in a tender embrace of stir-fried veggies. These bowls are not just about filling your belly; they’re about igniting your senses and making you feel alive.

These Sticky Chicken Rice Bowls are perfect for any occasion—from a quick weeknight dinner to meal prep for the week ahead. When you take that first bite, the sticky glaze coats your palate, and the vibrant colors of the broccoli and carrots dance on your plate. It’s a dish that invites you to slow down and savor each mouthful, transforming your dinner table into a stage for flavor.

What Makes This Dish So Irresistible?

There’s something magical about the combination of flavors and textures in this recipe. The chicken thighs, with their juiciness and rich flavor, absorb the marinade beautifully, creating a sticky, sweet, and savory experience. Add to that the crispness of freshly sautéed vegetables, and you’ve got a meal that keeps you coming back for more.

Here’s what makes these bowls stand out:

  • Flavor Explosion: The marinade brings together soy sauce, honey, garlic, and ginger, creating a symphony of taste that’s both comforting and exciting.
  • Colorful Presentation: With vibrant broccoli florets and julienned carrots, this dish is as much a feast for the eyes as it is for the stomach.
  • Easy to Customize: Want to spice things up? Add some red pepper flakes or a splash of sriracha to the marinade for an extra kick!
  • Healthy and Satisfying: Packed with protein, fiber, and nutrients, this recipe checks all the boxes for a clean dinner.

Delicious Sticky Chicken Rice Bowls Recipe

A delicious Sticky Chicken Rice Bowl featuring tender chicken, jasmine rice, and vibrant vegetables.

Ingredients

  • 2 cups jasmine rice
  • 4 cups water
  • 1 lb chicken thighs, boneless and skinless
  • 1/4 cup soy sauce
  • 1/4 cup honey
  • 2 tablespoons rice vinegar
  • 3 cloves garlic, minced
  • 1 tablespoon fresh ginger, grated
  • 2 tablespoons sesame oil
  • 1 cup broccoli florets
  • 1 carrot, julienned
  • 2 green onions, sliced
  • Sesame seeds for garnish

Instructions

  1. Rinse the jasmine rice under cold water until the water runs clear.
  2. In a pot, combine the rinsed rice and water. Bring to a boil, then reduce heat to low, cover, and simmer for 15-20 minutes until the rice is cooked and water is absorbed.
  3. In a bowl, mix together soy sauce, honey, rice vinegar, garlic, and ginger to create the marinade.
  4. Add the chicken thighs to the marinade and let sit for at least 30 minutes (or overnight in the fridge for more flavor).
  5. Heat sesame oil in a skillet over medium-high heat. Add the marinated chicken thighs and cook for 6-8 minutes on each side until fully cooked and caramelized.
  6. In the same skillet, add broccoli and carrots, stir-frying for about 3-4 minutes until tender.
  7. To assemble the bowls, place a scoop of rice at the bottom, top with sliced sticky chicken, and add the stir-fried vegetables.
  8. Garnish with sliced green onions and sesame seeds before serving.

Tips for Success

Cooking is an adventure, and a few tips can help you navigate this particular recipe:

  • Marinate Longer: For deeper flavor, marinate the chicken thighs overnight. The longer they sit in the marinade, the more flavorful they become.
  • Use Fresh Ingredients: Fresh garlic and ginger will elevate the taste profile significantly, so don’t skimp on quality.
  • Don’t Rush the Cooking: Give the chicken time to caramelize; this adds depth to the flavor. A well-cooked chicken thigh should have a nice golden-brown crust.

Variations to Explore

This recipe is incredibly versatile, allowing you to switch things up based on what you have on hand or what flavors you’re craving:

  • Protein Swaps: Swap out the chicken thighs for boneless chicken breasts, tofu, or even shrimp. Each protein brings its own unique flavor and texture.
  • Veggie Mix: Feel free to incorporate other vegetables such as bell peppers, snap peas, or bok choy. Just adjust the cooking time for different veggies!
  • Grain Alternatives: If you’re looking to change up the base, try using quinoa, brown rice, or cauliflower rice for a low-carb option.

Substitutions You Can Make

Don’t have everything on hand? No problem! Here are some substitutions that work well:

  • Soy Sauce: Use coconut aminos for a soy-free option or tamari for gluten-free cooking.
  • Honey: Maple syrup can be used as a vegan alternative, providing similar sweetness.
  • Rice Vinegar: Apple cider vinegar can substitute in a pinch, adding a nice tang.

Equipment You’ll Need

Before you get cooking, make sure you have the right tools:

  • A medium-sized pot for cooking the rice.
  • A mixing bowl for marinating the chicken.
  • A skillet or wok for stir-frying the chicken and vegetables.
  • A cutting board and knife for chopping ingredients.

Storage and Freezing Tips

If you have leftovers (which is rare because these bowls are so good!), here’s how to store them:

  • Refrigeration: Store the rice, chicken, and vegetables in separate airtight containers for up to 3 days. Reheat gently in the microwave or on the stovetop.
  • Freezing: You can freeze the cooked chicken and vegetables together in a freezer-safe container for up to 2 months. Just cook the rice fresh when you’re ready to enjoy!

FAQs

Got questions? Let’s tackle some of the most common ones:

  • Can I use chicken thighs instead of breasts? Absolutely! Thighs are juicier and provide a richer flavor.
  • Is this dish gluten-free? You can make it gluten-free by using tamari instead of soy sauce and ensuring all other ingredients are gluten-free.
  • Can I make this dish ahead of time? Yes! Prepare the chicken and vegetables ahead of time, and just cook the rice fresh for the best texture.

Troubleshooting Common Issues

Sometimes cooking can be unpredictable, but don’t worry! Here’s how to fix common problems:

  • Chicken Not Cooking Evenly: Ensure your skillet is hot enough before adding the chicken. If it’s too crowded, the chicken will steam instead of sear.
  • Rice Too Sticky: Rinse your rice thoroughly before cooking. This removes excess starch and helps achieve fluffy grains.

Conclusion

Cooking is an adventure worth savoring, and my Delicious Sticky Chicken Rice Bowls are the perfect way to embark on that journey. With each bite, you’ll discover a world of flavor and nourishment that’s both satisfying and invigorating. Whether you’re cooking for yourself or sharing with loved ones, this dish is sure to create lasting memories around the table. So grab your skillet and get ready to celebrate the art of the kick—because life is too short for bland meals! Embrace the heat, and let this recipe inspire your culinary creativity!

Delicious Sticky Chicken Rice Bowls Recipe

Prep Time 15 minutes
Cook Time 30 minutes
Total Time 45 minutes
Servings 4 servings
Calories 650
Enjoy a flavorful bowl of tender chicken, fragrant jasmine rice, and colorful stir-fried vegetables, all topped with sesame seeds and green onions.

Ingredients

Rice and Water

  • 2 cups jasmine rice
  • 4 cups water

Chicken and Marinade

  • 1 lb chicken thighs, boneless and skinless
  • 1/4 cup soy sauce
  • 1/4 cup honey
  • 2 tablespoons rice vinegar
  • 3 cloves garlic, minced
  • 1 tablespoon fresh ginger, grated
  • 2 tablespoons sesame oil

Vegetables

  • 1 cup broccoli florets
  • 1 carrot julienned carrot
  • 2 green onions sliced green onions
  • sesame seeds for garnish sesame seeds

Instructions 

  • Rinse rice and cook with water until tender, about 15-20 minutes.
  • Mix soy sauce, honey, rice vinegar, garlic, and ginger to make marinade. Marinate chicken for at least 30 minutes.
  • Cook marinated chicken in sesame oil until caramelized, about 6-8 minutes per side. Stir-fry vegetables in the same skillet for 3-4 minutes.
  • Assemble bowls with rice, sliced chicken, and vegetables. Garnish with green onions and sesame seeds.

Notes

For extra flavor, marinate the chicken overnight.
Calories: 650kcal
Cost: $15
Course: Main Course
Cuisine: Asian
Keyword: chicken, Rice, Stir Fry

Nutrition

Calories: 650kcal | Carbohydrates: 85g | Protein: 40g | Fat: 20g | Sodium: 1500mg

Loved this recipe? Save it to your favorite Pinterest board so you can easily find it later! It’s the perfect way to keep all your sweet ideas in one place. ✨

Eye-level shot of a Sticky Chicken Rice Bowl, showcasing chicken thighs, broccoli, and sesame seeds.

Why You’ll Adore This Chickpea Omelette

Welcome to the world of bold flavors and daring culinary adventures! If you’ve ever found yourself yearning for a hearty, satisfying breakfast that doesn’t revolve around eggs, then you’re in for a treat. The Tasty Vegan Chickpea Omelette is here to revolutionize your mornings, one spice-infused bite at a time. Imagine biting into a fluffy, savory omelette that’s not only delicious but also packed with protein and vibrant vegetables. This dish is not just a meal; it’s an experience that invites your taste buds to dance and your spirit to soar.

Chickpea flour, the star ingredient, is the magical elixir that transforms humble legumes into a culinary masterpiece. With its nutty flavor and incredible texture, it’s no wonder this flour is becoming a staple in kitchens around the globe. Whether you’re a vegan, vegetarian, or simply someone looking to spice up your breakfast routine, this omelette is your ticket to flavor town.

Getting to Know Chickpea Flour

Before diving into the recipe, let’s chat about chickpea flour. Also known as gram flour or besan, this finely ground flour is made from dried chickpeas. It’s a powerhouse of nutrition, boasting high protein content, essential vitamins, and minerals. The best part? It’s naturally gluten-free, making it a fantastic option for those with dietary restrictions.

When choosing chickpea flour, aim for a finely milled variety that boasts a pale yellow color. This ensures a smooth texture in your omelette. You can easily find it in most grocery stores, often located in the international aisle or specialty flour section. Stock up, because once you try this recipe, you’ll want to have chickpea flour on hand for all your future culinary creations!

Ingredient Breakdown

Delicious Vegan Chickpea Omelette, showcasing its fluffy texture and colorful filling.

Let’s take a closer look at the ingredients that will help you whip up this delicious omelette:

  • 1 cup chickpea flour: The base of our omelette, providing protein and a delightful nuttiness.
  • 1 cup water: To hydrate the flour and create the perfect batter.
  • 1/4 teaspoon turmeric powder: A pinch of sunshine that adds color and an earthy flavor.
  • 1/4 teaspoon baking powder: This helps the omelette rise and become fluffy.
  • 1/2 teaspoon salt: Essential for enhancing all the flavors.
  • 1/4 teaspoon black pepper: A touch of spice to wake up your palate.
  • 1/2 cup chopped vegetables: Choose your favorites, like bell peppers, onions, or spinach for a burst of freshness.
  • 1 tablespoon olive oil: For cooking and adding richness.
  • Fresh herbs (optional): Garnish your omelette with herbs like parsley or cilantro for a fresh finish.

Step-by-Step Guide to Your New Favorite Breakfast

Now that we’ve gathered our ingredients, it’s time to dive into the cooking process. Follow these steps to create a Tasty Vegan Chickpea Omelette that you’ll want to make again and again:

Step 1: Prepare the Omelette Mixture

In a mixing bowl, combine the chickpea flour, water, turmeric powder, baking powder, salt, and black pepper. Whisk everything together until the mixture is smooth and free of lumps. This batter should have a pancake-like consistency. Let it sit for a few minutes to allow the flour to fully hydrate, enhancing the texture of your omelette.

Step 2: Add Your Vegetables

Stir in your chopped vegetables until they’re evenly distributed throughout the batter. This is where you can get creative! Feel free to mix and match your favorite veggies or even toss in some spices to elevate the flavor further.

Step 3: Heat Your Skillet

Heat olive oil in a non-stick skillet over medium heat. Once the oil is shimmering, it’s time to pour in your chickpea mixture. Use half of the batter for the first omelette, spreading it evenly across the skillet.

Step 4: Watch for the Perfect Cook

Cook your omelette for about 5-7 minutes. You’ll know it’s ready when the edges begin to lift away from the pan and the bottom is a beautiful golden brown. It’s crucial to be patient here—rushing can lead to a soggy omelette.

Step 5: Flip and Finish

Carefully flip the omelette and cook for an additional 3-5 minutes until it’s fully cooked through. Repeat this process with the remaining batter to create a second omelette. Once both omelettes are cooked, serve them warm, garnished with fresh herbs if desired. Enjoy the explosion of flavors!

Tips for Success

As you embark on your omelette-making adventure, keep these tips in mind to ensure success:

  • Consistency is Key: Aim for a batter that’s not too thick or thin. The pancake-like consistency is your best bet.
  • Watch the Heat: Cooking on medium-low heat allows the omelette to cook evenly without burning.
  • Pre-Cook Vegetables: If using watery vegetables like spinach or mushrooms, consider pre-cooking them to avoid excess moisture that can make your omelette soggy.
  • Patience is a Virtue: Wait until the edges crisp up before attempting to flip; this will help maintain the omelette’s integrity.

Delicious Variations

Your Tasty Vegan Chickpea Omelette is a blank canvas ready for your personal touch! Here are some delicious variations to consider:

  • Spicy Southwest: Add diced jalapeños, cumin, and smoked paprika for a fiery kick.
  • Italian-Inspired: Incorporate sun-dried tomatoes, basil, and a sprinkle of nutritional yeast for a cheesy flavor.
  • Asian Flair: Mix in scallions, shredded carrots, and a dash of soy sauce or tamari for a savory twist.

What to Serve with Your Omelette

While this chickpea omelette is delightful on its own, pairing it with complementary sides can elevate your meal:

  • Crispy Hash Browns: The perfect crunchy counterpart to the soft texture of the omelette.
  • Fresh Fruit: A side of berries or citrus segments adds a refreshing touch.
  • Toasted Bread: A slice of sourdough or whole grain bread is ideal for mopping up any leftover bits on your plate.

Storage and Freezing Tips

If you find yourself with leftovers (which is rare because these are so good!), here’s how to store them:

  • Refrigeration: Place the omelettes in an airtight container and store them in the fridge for up to 2 days. The texture may change a bit, but they’ll still taste great.
  • Freezing: For longer storage, you can freeze the cooked omelettes. Just wrap them in plastic wrap and place them in a freezer-safe bag. Reheat in a skillet over low heat when you’re ready to enjoy.

FAQs About Chickpea Omelettes

Can I make this omelette gluten-free?
Absolutely! Chickpea flour is naturally gluten-free, making this recipe a fantastic option for those with gluten sensitivities.

Can I use other flours?
While chickpea flour is ideal for this recipe, you can experiment with other flours like oat or almond flour, but the texture and flavor will vary.

How do I know when the omelette is done?
Look for golden-brown edges and a firm center. If you’re unsure, you can gently lift the omelette to check the bottom for color.

Troubleshooting Common Issues

Even the best cooks encounter hiccups. Here are some common issues and how to resolve them:

  • Soggy Omelette: Ensure you’re not overcrowding the pan with vegetables and avoid using overly watery ingredients.
  • Omelette Sticking to the Pan: Use a well-seasoned non-stick skillet and ensure the oil is hot enough before adding the batter.
  • Uneven Cooking: Keep the heat at medium-low and allow enough time for the omelette to cook thoroughly before flipping.

Final Thoughts

Cooking should never feel like a chore; it should be a joyful exploration of flavors and creativity. The Tasty Vegan Chickpea Omelette embodies this philosophy, encouraging you to embrace the spice and adventure that cooking offers. With its vibrant flavors, nutritious ingredients, and endless customization options, this omelette is more than just breakfast—it’s a celebration of culinary joy. So grab your skillet, let your creativity flow, and turn up the heat in your kitchen. Your taste buds will thank you!

Tasty Vegan Chickpea Omelette

Prep Time 10 minutes
Cook Time 15 minutes
Total Time 25 minutes
Servings 2 servings
Calories 250
A delicious and healthy vegan chickpea omelette perfect for breakfast or brunch. Easy to make and packed with flavor.

Ingredients

Dried ingredients

  • 1 cup chickpea flour
  • 1 cup water
  • 1/4 teaspoon turmeric powder
  • 1/4 teaspoon baking powder
  • 1/2 teaspoon salt
  • 1/4 teaspoon black pepper
  • 1/2 cup chopped vegetables (e.g., bell peppers, onions, spinach)
  • 1 tablespoon olive oil
  • optional fresh herbs (for garnish)

Instructions 

  • Mix chickpea flour, water, turmeric, baking powder, salt, and black pepper until smooth.
  • Stir in chopped vegetables.
  • Heat olive oil in a skillet over medium heat.
  • Pour batter into skillet, cook 5-7 minutes, flip, then cook 3-5 minutes.
  • Repeat with remaining batter. Serve warm with herbs.

Notes

Use fresh vegetables for best flavor and texture.
Calories: 250kcal
Cost: $10
Course: Breakfast
Cuisine: Vegan
Keyword: Chickpeas

Nutrition

Calories: 250kcal | Carbohydrates: 40g | Protein: 10g | Fat: 5g | Sodium: 500mg

Loved this recipe? Save it to your favorite Pinterest board so you can easily find it later! It’s the perfect way to keep all your sweet ideas in one place. ✨

Close-up of a Vegan Chickpea Omelette, highlighting its soft surface and fresh herbs.