Author

Avery Collins

Browsing

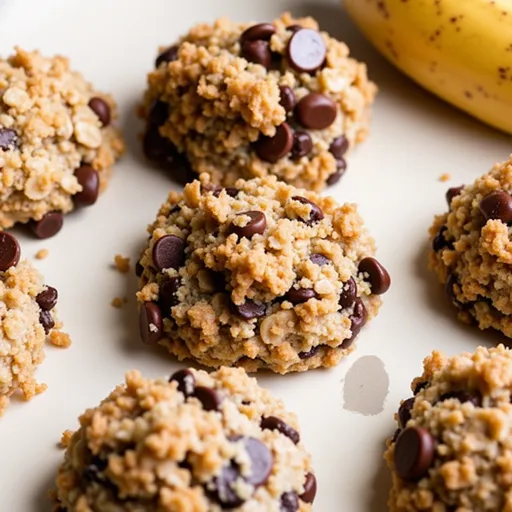
Why You’ll Fall in Love with These No Bake Peanut Butter Oat Cups

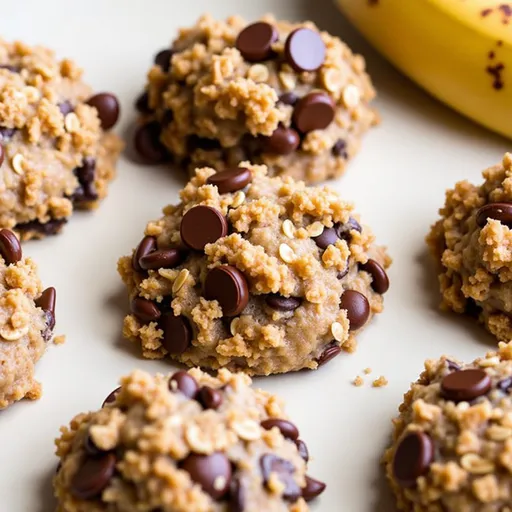
Ah, the sweet allure of peanut butter! For many of us, it’s more than just a spread; it’s a nostalgic journey back to simpler times. These Easy No Bake Peanut Butter Oat Cups are here to rekindle that love while taking your taste buds on an adventure. Imagine a treat that’s not only simple to whip up but also satisfies your sweet tooth without the guilt of excess sugar. With a delightful chewy texture and a hint of chocolate, these cups are the perfect snack for any occasion.

What Makes These Oat Cups Stand Out?

These little cups pack a punch with their combination of wholesome ingredients. Rolled oats provide a hearty base, while peanut butter adds creaminess and protein. Sweetened with honey or maple syrup, they strike the right balance between indulgence and health. Plus, they’re no-bake! That means you can have your treat ready in no time, without having to heat up your kitchen.

Ingredients You’ll Need

A hand-crafted no bake peanut butter oat cup displayed on a rustic surface, illuminated by warm light.

To embark on this sweet adventure, gather the following ingredients:

  • 1 cup rolled oats
  • 1/2 cup peanut butter
  • 1/4 cup honey or maple syrup
  • 1/2 teaspoon vanilla extract
  • 1/4 cup chocolate chips (optional)
  • A pinch of salt

These ingredients are simple, yet they come together to create something truly special. The rolled oats offer a satisfying bite, while the peanut butter and honey bring a rich sweetness that’s hard to resist. And let’s not forget that optional chocolate! It’s like the cherry on top of this delightful creation.

Step-by-Step Guide to Your New Favorite Treat

Ready to dive into the kitchen? Let’s get started on making these delicious oat cups, and I promise you, it’ll be worth every minute.

Step 1: Combine the Ingredients

In a mixing bowl, combine the rolled oats, peanut butter, honey (or maple syrup), vanilla extract, and a pinch of salt. Mix these together until everything is well combined. The mixture should be sticky and cohesive, making it easy to mold.

Step 2: Prepare the Muffin Tin

Line a muffin tin with paper liners or give it a good spray with non-stick cooking spray. This step is crucial to ensure that your oat cups come out easily once they’re set.

Step 3: Scoop and Pack the Mixture

Scoop the mixture into the muffin cups, pressing down firmly to pack it in. You want these cups to hold their shape, so don’t be shy about applying a little elbow grease here!

Step 4: Chill Until Set

Refrigerate the muffin tin for at least 30 minutes. This chilling time allows the oat cups to firm up so they can be easily removed without crumbling.

Step 5: Enjoy Your Creation

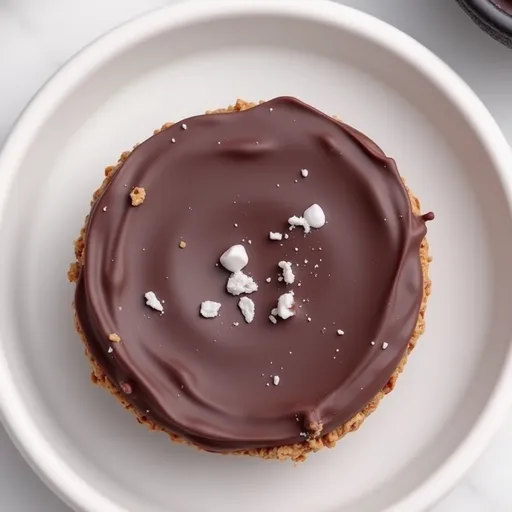
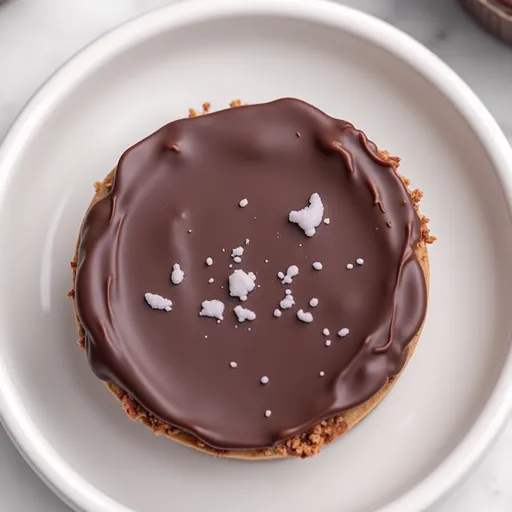
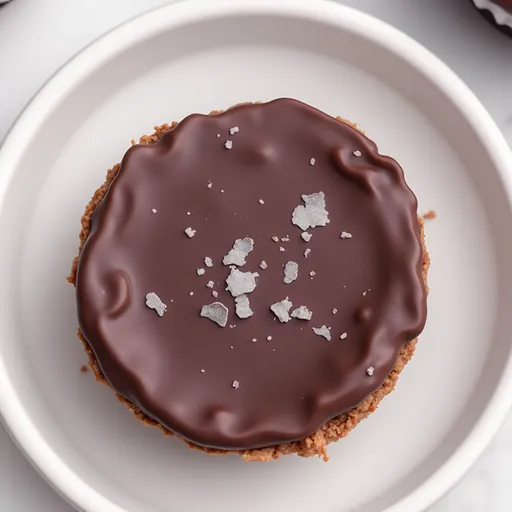
Once the oat cups are set, gently remove them from the muffin tin. Take a moment to admire your work before digging in. You can enjoy them as is or add a drizzle of melted chocolate on top for an extra touch of decadence.

Tips for Perfect Peanut Butter Oat Cups

While this recipe is straightforward, here are some tips to ensure your oat cups turn out perfectly:

  • Choose the Right Peanut Butter: Natural peanut butter works best, as it’s free from added sugars and oils. Make sure it’s well-stirred before measuring to avoid clumps.
  • Consistency is Key: If your mixture feels too dry, add a little more honey or peanut butter. Too wet? Consider adding a few more oats.
  • Chocolate Melting Tips: If you decide to add chocolate, melt it gently in the microwave in 20-second bursts, stirring in between to prevent burning.
  • Patience Pays Off: Allow the oat cups to chill completely before removing them to avoid any crumbling.

Flavor Variations to Try

One of the best things about these no bake peanut butter oat cups is their versatility. Here are a few variations to consider:

  • Nutty Add-Ins: Add chopped nuts like almonds or walnuts for an extra crunch.
  • Seeds Galore: Mix in chia seeds, flaxseeds, or pumpkin seeds for added nutrition.
  • Fruit Fusion: Toss in dried fruits like cranberries or apricots for a chewy, fruity twist.
  • Spice It Up: A dash of cinnamon or a pinch of sea salt on top can elevate the flavors tremendously.

Storage and Freezing Instructions

These oat cups are perfect for meal prep! Here’s how to store them:

In the Fridge:

Keep your oat cups fresh in an airtight container in the fridge for up to two weeks. If you want to prevent them from sticking together, place a piece of parchment paper between layers.

In the Freezer:

If you want to make a larger batch, these oat cups freeze beautifully. Store them in a freezer-safe container, separating layers with parchment paper, and they’ll stay fresh for up to three months.

Thawing:

When you’re ready to enjoy them, simply let them thaw in the fridge for about 30 minutes, or for the adventurous, enjoy them straight from the freezer!

FAQs About No Bake Peanut Butter Oat Cups

Can I use quick oats instead of rolled oats?

While quick oats can be used, they tend to create a mushier texture. Rolled oats provide a better chew.

What can I substitute for honey?

You can easily swap honey for maple syrup or agave nectar if you need a vegan option.

How can I make these cups more chocolatey?

Feel free to mix in cocoa powder into the oat mixture or top with a generous drizzle of melted chocolate.

Common Mistakes to Avoid

Even simple recipes can have their hiccups. Here are some common mistakes and how to avoid them:

  • Too Much Liquid: Adding too much honey or syrup can make the mixture too wet. Start with the recommended amount and only add more if necessary.
  • Rushing to Remove: Patience is key! Wait until the oat cups are fully set in the fridge before you try to remove them.
  • Not Packing Firmly: If you don’t pack the mixture down firmly, the cups may crumble when you take them out.

Final Thoughts

These Easy No Bake Peanut Butter Oat Cups are not just a treat; they’re an invitation to get creative in the kitchen. Whether you enjoy them as an afternoon snack, a post-workout boost, or a sweet treat after dinner, they’re sure to satisfy. So grab your ingredients, unleash your inner chef, and let each bite remind you of the joy that cooking can bring. Remember, food is not just about sustenance; it’s about creating connections and memories, and these oat cups are the perfect way to do just that. Happy cooking!

Easy No Bake Peanut Butter Oat Cups

Prep Time 10 minutes
Total Time 10 minutes
Servings 12 pieces
Calories 150
These delicious no-bake peanut butter oat cups are a quick and healthy treat perfect for any time of day.

Ingredients

Base

  • 1 cup rolled oats
  • 1/2 cup peanut butter
  • 1/4 cup honey or maple syrup
  • 1/2 teaspoon vanilla extract
  • 1/4 cup chocolate chips (optional)
  • pinch salt

Instructions 

  • Mix oats, peanut butter, honey, vanilla, and salt until well combined.
  • Fold in chocolate chips if using.
  • Press mixture into a lined muffin tin.
  • Refrigerate for 30 minutes until set.
  • Remove from tin and enjoy!

Notes

Store in an airtight container in the fridge for best freshness.
Calories: 150kcal
Cost: $10
Course: Snack
Cuisine: American
Keyword: peanut butter

Nutrition

Calories: 150kcal | Carbohydrates: 20g | Protein: 4g | Fat: 8g | Sodium: 50mg

Loved this recipe? Save it to your favorite Pinterest board so you can easily find it later! It’s the perfect way to keep all your sweet ideas in one place. ✨

A delicious assortment of peanut butter oat cups featuring a creamy texture and soft shadows.

Why You’ll Love This Dish

Let me take you on a culinary adventure that begins with a pot of boiling water and ends with a plate of pure joy. This Easy Garlic Parmesan Chicken Pasta is not just a meal; it’s an experience bursting with flavor, texture, and a healthy twist that will make your taste buds sing! This dish is perfect for those busy weeknights when you crave something hearty yet wholesome. Imagine twirling whole wheat pasta around your fork, coated in a creamy garlic sauce, with tender chicken and vibrant vegetables dancing in every bite. It’s comfort food that nourishes your body and soul — what’s not to love?

Cooking in my kitchen, I’ve learned that the right blend of ingredients can transform a simple dish into something spectacular. This pasta recipe combines the goodness of whole grains, lean protein, and fresh veggies, all while keeping it light and satisfying. It’s your ticket to a dinner that feels indulgent without the guilt. So, roll up your sleeves and get ready to dive into this delightful dish!

Ingredients You’ll Need

Here’s what you’ll need to bring this savory delight to life:

  • 8 oz whole wheat pasta
  • 2 boneless, skinless chicken breasts
  • 3 tablespoons olive oil
  • 4 cloves garlic, minced
  • 1 cup cherry tomatoes, halved
  • 1 cup fresh spinach
  • 1/2 cup grated Parmesan cheese
  • Salt and pepper to taste
  • Fresh basil for garnish (optional)

Step-by-Step Instructions

A bowl of Garlic Parmesan Chicken Pasta featuring chicken, spinach, and cherry tomatoes.

1. Cook the Pasta

Start by bringing a large pot of salted water to a rolling boil. Add the whole wheat pasta and cook according to the package instructions until it reaches al dente perfection. This usually takes about 8 to 10 minutes. Remember, you want that perfect bite, so don’t overcook it! Once done, drain the pasta and set it aside, but don’t forget to reserve a cup of that starchy pasta water — it’s liquid gold for our sauce later!

2. Season and Cook the Chicken

While the pasta is cooking, it’s time to give our chicken some love. Season the chicken breasts generously with salt and pepper. In a large skillet, heat 2 tablespoons of olive oil over medium heat. Once the oil is shimmering, add the chicken breasts and cook for about 6-7 minutes on each side until they are golden brown and cooked through. You want them to reach an internal temperature of 165°F (75°C). Once cooked, remove the chicken from the skillet and let it rest for a few minutes before slicing it into juicy, bite-sized pieces.

3. Build the Garlic Flavor

In the same skillet, add the remaining tablespoon of olive oil and toss in the minced garlic. Sauté it for 1-2 minutes until it becomes fragrant, but be careful not to let it brown — burnt garlic can ruin the flavor of our dish. It’s all about that balance, after all!

4. Add the Fresh Vegetables

Next, toss in the halved cherry tomatoes and fresh spinach. Stir them around in the skillet for about 3-4 minutes, just until the spinach wilts and the tomatoes start to soften. This is where the colors and aromas really start to come alive! You’ll want to inhale deeply at this stage — it’s pure magic.

5. Combine and Finish

Now, it’s time to reintroduce our sliced chicken back into the skillet. Add the drained pasta and give everything a good toss to combine. Stir in the grated Parmesan cheese, mixing it into the warm pasta and veggies until it melts into a creamy, dreamy sauce. If the mixture feels too thick, don’t hesitate to add a splash of that reserved pasta water until you reach your desired consistency. Season with additional salt and pepper to taste, adjusting to your preference.

6. Serve Hot

Plate up your masterpiece while it’s hot! Garnish with fresh basil for that aromatic finish, and watch as everyone gathers around, drawn in by the delightful aroma wafting through your home. This dish is best enjoyed fresh, but trust me — leftovers can be a joy to savor the next day!

Tips for the Best Outcome

To ensure your Garlic Parmesan Chicken Pasta is as delicious as possible, here are a few insider tips:

  • Don’t skip the salt: Salt the pasta water generously; it’s your chance to infuse flavor into the pasta itself.
  • Use freshly grated Parmesan: If you can, choose fresh Parmesan cheese instead of pre-packaged varieties. The flavor and texture will elevate your dish!
  • Season as you go: Taste and adjust the seasoning at each step to ensure a balanced flavor profile.
  • Add greens at the last minute: If you want to add more greens, such as kale or broccoli, toss them in during the last minutes of cooking to keep them vibrant.

Variations and Substitutions

This recipe is incredibly adaptable! Here are some variations you might enjoy:

  • Protein swaps: Feel free to use shrimp, turkey, or even tofu for a plant-based option.
  • Veggie overload: Add bell peppers, zucchini, or other seasonal vegetables for added nutrition.
  • Spice it up: For those who love heat, sprinkle in red pepper flakes when sautéing the garlic.

Equipment You’ll Need

To whip up this delicious meal, you’ll need:

  • A large pot for boiling pasta
  • A colander for draining
  • A large skillet for cooking
  • A sharp knife for slicing

Storage and Freezing

If you find yourself with leftovers (which is unlikely because it’s that good!), here’s how to store them:

  • Refrigerator: Store in an airtight container for up to 4 days. Reheat gently in the microwave or on the stovetop, adding a splash of broth or milk to keep it creamy.
  • Freezer: While fresh pasta dishes are best enjoyed immediately, you can freeze this for up to 2 months. Just remember to cool it completely before freezing. Thaw overnight in the fridge before reheating.

FAQs

Can I use regular pasta instead of whole wheat?
Absolutely! While I love the added fiber from whole wheat pasta, regular pasta will work just fine.

Can I make this dish vegetarian?
Yes! Substitute the chicken with chickpeas or a hearty vegetable like mushrooms for a satisfying vegetarian meal.

What can I serve this with?
This pasta pairs beautifully with a crisp green salad or some garlic bread on the side for a complete meal.

Troubleshooting Common Issues

If you run into any hiccups while cooking, don’t worry! Here are some quick solutions:

  • Too dry: If your dish turns out dry, simply add a bit more olive oil or reserved pasta water to loosen it up.
  • Too salty: If you accidentally over-seasoned, add a splash of cream or more veggies to balance the flavors.

In Conclusion

This Easy Garlic Parmesan Chicken Pasta recipe is more than just a meal; it’s a celebration of flavors and a reminder that healthy eating doesn’t have to be boring. It’s quick, flavorful, and perfect for meal prep! The journey from humble ingredients to a delicious dish is what cooking is all about. So, gather your family, set the table, and enjoy the fruits of your labor. Remember, every meal is an opportunity to create memories — let this pasta dish be one of them! Happy cooking, friends!

Easy Garlic Parmesan Chicken Pasta Recipe for a Healthy Dinner

Prep Time 10 minutes
Cook Time 20 minutes
Total Time 30 minutes
Servings 4 servings
Calories 550
A quick and healthy pasta dish featuring tender chicken, fresh vegetables, and a flavorful garlic Parmesan sauce.

Ingredients

Pasta

  • 8 oz whole wheat pasta

Chicken

  • 2 pieces boneless, skinless chicken breasts

Oil

  • 3 tablespoons olive oil

Garlic

  • 4 cloves garlic, minced

Vegetables

  • 1 cup cherry tomatoes, halved
  • 1 cup spinach, fresh

Cheese

  • 1/2 cup grated parmesan cheese

Seasonings

  • to taste salt and pepper

Garnish

  • optional fresh basil (for garnish)

Instructions 

  • Cook pasta according to package instructions. Drain and set aside.
  • Season chicken with salt and pepper. Cook in a skillet with 2 tbsp olive oil for 6-7 minutes per side. Rest and slice.
  • In the same skillet, sauté garlic in remaining olive oil for 1-2 minutes.
  • Add cherry tomatoes and spinach; cook until wilted, about 3-4 minutes. Return chicken, add pasta, and toss.
  • Stir in Parmesan cheese, season with salt and pepper, and serve garnished with basil if desired.

Notes

Use fresh basil for added flavor and aroma.
Calories: 550kcal
Cost: $15
Course: Main Course
Cuisine: American
Keyword: chicken, healthy, pasta

Nutrition

Calories: 550kcal | Carbohydrates: 70g | Protein: 40g | Fat: 15g | Sodium: 600mg

Loved this recipe? Save it to your favorite Pinterest board so you can easily find it later! It’s the perfect way to keep all your sweet ideas in one place. ✨

An appetizing plate of Garlic Parmesan Chicken Pasta showcasing fresh ingredients.

Why You’ll Love It

If you’re anything like me, the mere thought of a warm, gooey dessert can make your heart flutter and your taste buds tingle. Enter the 3 Ingredient Peanut Butter Mug Cake, a decadent treat that transforms your peanut butter dreams into reality in just a few minutes. This delightful mug cake is not only easy to make but also satisfies your sweet tooth without the fuss of elaborate baking. It’s perfect for those late-night cravings or an impromptu dessert that will impress anyone lucky enough to share it with you.

Overview

This mug cake is the epitome of simplicity. With only three ingredients—peanut butter, sugar, and an egg—you can whip up a rich and satisfying dessert that rivals any bakery’s offerings. The beauty of this recipe lies in its versatility and the comforting flavor of peanut butter. Whether you’re an experienced chef or a kitchen novice, this recipe is your golden ticket to dessert bliss.

What’s in This 3 Ingredient Mug Cake

A single serving of peanut butter mug cake in a white mug, with soft shadows and a blurred background.

Let’s break down the ingredients that make this mug cake a standout:

  • Peanut Butter: The star of the show! It adds a rich, nutty flavor and a creamy texture that’s simply irresistible. Whether you prefer creamy or crunchy, both types work beautifully in this recipe.
  • Sugar: Just a tablespoon of sugar is all you need to sweeten the deal. It balances the savory notes of the peanut butter and contributes to that delightful cake-like texture.
  • Egg: The magic ingredient that holds everything together and helps the cake rise. It adds moisture and richness, making every bite a little slice of heaven.

How To Make This 3 Ingredient Peanut Butter Mug Cake?

Ready to dive into the world of mug cakes? Let’s get cooking! Here’s how to turn those simple ingredients into a delightful dessert:

  1. In a microwave-safe mug, combine the peanut butter and sugar until well mixed.
  2. Add the egg and stir until the mixture is smooth and fully combined.
  3. Microwave on high for about 1 minute, or until the cake has risen and is set in the middle. Let cool slightly before enjoying.

Tips for the Perfect Mug Cake

To ensure your mug cake turns out perfectly every time, keep these tips in mind:

  • Choose the Right Mug: Use a large mug to give the cake room to rise without spilling over. A 12-ounce mug works well.
  • Microwave Variations: Microwave wattages can vary, so keep an eye on your cake as it cooks. Start with 45 seconds and add time as needed.
  • Let It Cool: Allow the cake to cool for a minute or two before digging in—it’s hot, and you don’t want to burn your tongue on that deliciousness!

Variations & Substitutions

Feeling adventurous? Here are some fun variations and substitutions to elevate your mug cake:

  • Chocolate Lovers: Add a tablespoon of cocoa powder or a handful of chocolate chips to the batter for a delightful chocolate-peanut butter fusion.
  • Nutty Twist: Try mixing in chopped nuts like almonds or walnuts for added crunch and flavor.
  • Sweeten It Up: If you’re in the mood for something sweeter, consider using brown sugar for a deeper, molasses-like flavor.

Serving Suggestions

This mug cake is delicious on its own, but if you want to take it to the next level, consider these serving suggestions:

  • Top It Off: A scoop of vanilla ice cream or a dollop of whipped cream can transform this simple dessert into a decadent treat.
  • Fresh Fruits: Slice some bananas or strawberries on top for a fresh and fruity contrast to the rich peanut butter flavor.
  • Drizzle It: A drizzle of honey or chocolate syrup can add an extra layer of sweetness and elegance.

Storage & Freezing

Since this recipe makes a single serving, it’s best enjoyed fresh. However, if you find yourself with leftovers (though I doubt it!), you can store any uneaten cake in the refrigerator for a day. Just reheat in the microwave for a few seconds before enjoying. Freezing is not recommended, as the texture may change once thawed.

Recipe FAQs

Got questions? I’ve got answers! Here are some frequently asked questions about this amazing mug cake:

  • Can I use natural peanut butter? Absolutely! Just ensure it’s well-stirred and not too runny. Natural peanut butter can give a deliciously rich flavor.
  • What if I don’t have sugar? You can substitute with honey or maple syrup, but you may need to adjust the quantity slightly since they are liquid sweeteners.
  • Can I make this mug cake without an egg? Yes! You can replace the egg with a tablespoon of yogurt or applesauce for a vegan version.

Troubleshooting

If your mug cake doesn’t turn out as expected, here are a few troubleshooting tips:

  • Not Rising: Ensure your microwave is set to high and that you’re using a fresh egg. Also, make sure to mix the ingredients thoroughly.
  • Too Dry: If the cake is dry, try microwaving for a shorter time next time. Every microwave is different, so adjust accordingly.
  • Too Gooey: If the center is too wet, give it an extra few seconds in the microwave, but be careful not to overcook it.

More Peanut Butter Recipes

If you can’t get enough of that peanut butter goodness, check out these other delightful recipes:

Conclusion

In just a few minutes, you can indulge in a warm slice of heaven with this 3 Ingredient Peanut Butter Mug Cake. It’s the perfect blend of simplicity and flavor, inviting you to experiment and customize it to your heart’s content. So next time you’re craving something sweet, grab your peanut butter, and embrace the adventure of mug cake magic! Remember, cooking should be fun and creative, so don’t be afraid to make it your own. Happy baking!

3 Ingredient Peanut Butter Mug Cake

Prep Time 2 minutes
Cook Time 1 minute
Total Time 3 minutes
Servings 1 serving
Calories 350
A quick and easy microwave mug cake made with just three simple ingredients. Perfect for a satisfying treat in minutes!

Ingredients

Main

  • 4 tablespoons peanut butter
  • 1 tablespoon sugar
  • 1 large egg egg

Instructions 

  • Combine peanut butter and sugar in a microwave-safe mug.
  • Add the egg and stir until smooth.
  • Microwave on high for about 1 minute until set.

Notes

Use natural peanut butter for a healthier option.
Calories: 350kcal
Cost: $3
Course: Dessert
Keyword: peanut butter

Nutrition

Calories: 350kcal | Carbohydrates: 20g | Protein: 14g | Fat: 28g | Sodium: 150mg

Loved this recipe? Save it to your favorite Pinterest board so you can easily find it later! It’s the perfect way to keep all your sweet ideas in one place. ✨

Delicious 3 ingredient peanut butter mug cake displayed beautifully with natural lighting highlighting its texture.

Why You’ll Fall in Love with These Muffins

As the crisp air of autumn settles in, there’s nothing quite like the aroma of freshly baked muffins wafting through your home. These BEST Healthy Pumpkin Muffins are not just any muffins; they are a celebration of the season, marrying rich pumpkin puree with the warm embrace of spices. Imagine biting into a soft, moist muffin, the flavors of cinnamon and nutmeg dancing on your palate, while pockets of dark chocolate melt in your mouth. They are perfect for breakfast, a snack, or even a delightful dessert! Plus, they’re packed with wholesome ingredients that make you feel good about indulging.

Essential Ingredients for Cozy Muffins

Creating these delightful treats requires simple yet powerful ingredients that not only contribute to the flavor but also pack in the nutrition. Here’s what you’ll need:

  • 1 cup canned pumpkin puree: The star of our show, bringing moisture and a hint of sweetness.
  • 1/3 cup honey or maple syrup: A natural sweetener that enhances the autumn flavors.
  • 1/4 cup coconut oil, melted: For that rich texture and a subtle tropical note.
  • 2 large eggs: Binding everything together and adding protein.
  • 1 teaspoon vanilla extract: A splash of warmth that elevates the flavor profile.
  • 1 1/2 cups whole wheat flour: A healthier alternative to all-purpose flour, adding fiber.
  • 1 teaspoon baking powder: For that perfect rise.
  • 1 teaspoon baking soda: Works with the acidity of the pumpkin for extra fluffiness.
  • 1 teaspoon cinnamon: The quintessential spice of fall.
  • 1/2 teaspoon nutmeg: A warm spice that complements the pumpkin beautifully.
  • 1/4 teaspoon salt: To balance the sweetness.
  • 1/2 cup chopped walnuts or pecans (optional): For a delightful crunch.
  • 1/2 cup dark chocolate chips (optional): The perfect indulgent touch!

Crafting Your Muffins: Step-by-Step

Beautifully arranged pumpkin muffins on a wooden table, showcasing a fluffy interior and warm lighting.

Now that you have your ingredients ready, let’s dive into the steps to create these mouthwatering muffins:

  1. Preheat Your Oven: Begin by preheating your oven to 350°F (175°C). Line a muffin tin with paper liners or lightly grease it to prevent sticking.
  2. Mix the Wet Ingredients: In a large mixing bowl, combine the pumpkin puree, honey or maple syrup, melted coconut oil, eggs, and vanilla extract. Whisk until the mixture is smooth and well combined.
  3. Combine the Dry Ingredients: In another bowl, whisk together the whole wheat flour, baking powder, baking soda, cinnamon, nutmeg, and salt. This ensures even distribution of the leavening agents and spices.
  4. Combine Wet and Dry: Gradually add the dry ingredients to the wet mixture, stirring gently until just combined. It’s crucial not to overmix; a few lumps are perfectly fine!
  5. Add Optional Ingredients: If you’re feeling adventurous, fold in the chopped nuts and dark chocolate chips for a delicious twist.
  6. Fill the Muffin Tin: Scoop the batter into the prepared muffin tin, filling each cup about 2/3 full to allow room for rising.
  7. Bake to Perfection: Bake for 18-20 minutes, or until a toothpick inserted into the center comes out clean. Your kitchen will smell heavenly, and you’ll be ready to dig in!
  8. Cool and Enjoy: Allow the muffins to cool in the tin for a few minutes before transferring them to a wire rack. This step is crucial to achieve the perfect texture.

Are These Muffins Healthy?

Absolutely! These muffins are a wholesome treat that balances flavor and nutrition. With the natural sweetness of pumpkin and honey, along with the fiber from whole wheat flour, they make for a satisfying snack that won’t weigh you down. The inclusion of nutrient-rich ingredients like coconut oil and eggs also contributes to a well-rounded treat. Whether you enjoy them for breakfast or as an afternoon snack, these muffins offer a guilt-free way to indulge in the flavors of fall.

Can I Make Substitutions?

Cooking is all about creativity! Here’s how you can customize these muffins:

  • Sweetener: If you prefer a different sweetener, you can try agave syrup or even coconut sugar. Just remember to adjust the quantity to taste!
  • Flour: Whole wheat flour adds nutrition, but if you need a gluten-free option, consider using a gluten-free flour blend. Just make sure it’s a 1:1 substitution.
  • Nut Options: If you have nut allergies, feel free to omit the nuts or substitute with seeds like sunflower or pumpkin seeds for added crunch.
  • Chocolate Chips: For a healthier twist, try using dark chocolate chips or even cacao nibs for a less sweet option.

Expert Tips & Tricks

To ensure your muffins turn out perfectly every time, consider these helpful tips:

  • Don’t Overmix: The key to fluffy muffins is to mix the batter just until combined. Overmixing can lead to dense muffins.
  • Let the Batter Rest: Allowing the batter to rest for about 10 minutes before baking can enhance the texture.
  • Check for Doneness: Ovens can vary, so keep an eye on your muffins. Insert a toothpick to check; it should come out clean when they’re done.
  • Cool Completely: Let your muffins cool completely to maintain their moisture and avoid sogginess.

Storage and Freezing: Keep Them Fresh!

These muffins are perfect for meal prep! Here’s how to store them:

  • Room Temperature: Store cooled muffins in an airtight container at room temperature for up to 4 days.
  • Refrigeration: If you want them to last longer, refrigerate them for up to a week.
  • Freezing: For longer storage, freeze the muffins! Just allow them to cool completely, then place them in a freezer bag or container. They can be frozen for up to 3 months. When you’re ready to enjoy, thaw them in the fridge overnight or pop them in the microwave for a quick warm-up.

FAQs: Everything You Need to Know

Can I use fresh pumpkin instead of canned? Absolutely! Just make sure to cook and puree the fresh pumpkin until it’s smooth before using it in the recipe.

What if I don’t have whole wheat flour? You can substitute with all-purpose flour or a gluten-free blend for a different texture.

How do I know if my muffins are baked through? The toothpick test is your best friend! Insert a toothpick into the center; if it comes out clean, they’re ready!

Conclusion: Embrace the Flavors of Fall

With every bite of these BEST Healthy Pumpkin Muffins, you’re not just tasting the delightful blend of spices and pumpkin; you’re also embracing the spirit of autumn. They are perfect for cozy mornings or as an afternoon treat. So grab your apron and whisk, and let the kitchen be your canvas! These muffins are more than just a recipe; they’re an experience, a moment to cherish with loved ones. Get ready to savor the season, one muffin at a time!

The BEST Healthy Pumpkin Muffins

Prep Time 10 minutes
Cook Time 20 minutes
Total Time 30 minutes
Servings 12 muffins
Calories 150
Enjoy these moist and flavorful healthy pumpkin muffins, perfect for a nutritious snack or breakfast.

Ingredients

Wet Ingredients

  • 1 cup canned pumpkin puree
  • 1/3 cup honey or maple syrup
  • 1/4 cup coconut oil, melted
  • 2 large eggs
  • 1 teaspoon vanilla extract

Dry Ingredients

  • 1.5 cups whole wheat flour
  • 1 teaspoon baking powder
  • 1 teaspoon baking soda
  • 1 teaspoon cinnamon
  • 1/2 teaspoon nutmeg
  • 1/4 teaspoon salt
  • 1/2 cup chopped walnuts or pecans (optional)
  • 1/2 cup dark chocolate chips (optional)

Instructions 

  • Preheat oven to 350°F (175°C) and prepare muffin tin.
  • Mix pumpkin, honey, coconut oil, eggs, and vanilla until smooth.
  • Combine dry ingredients in a separate bowl.
  • Gradually add dry to wet, mixing until just combined. Fold in nuts and chocolate chips if desired.
  • Scoop batter into muffin tin and bake for 18-20 minutes. Cool before serving.

Notes

For extra flavor, add a sprinkle of cinnamon on top before baking.
Calories: 150kcal
Cost: $10
Course: Breakfast, Snack
Cuisine: American
Keyword: healthy, Muffins, pumpkin

Nutrition

Calories: 150kcal | Carbohydrates: 22g | Protein: 4g | Fat: 6g | Sodium: 150mg

Loved this recipe? Save it to your favorite Pinterest board so you can easily find it later! It’s the perfect way to keep all your sweet ideas in one place. ✨

A delectable pumpkin muffin with dark chocolate chips, highlighted by natural light and soft shadows.

Why You’ll Love This Cold Chicken Sandwich

Let’s face it: the lunch hour can often feel like a culinary afterthought, a mere placeholder between breakfast and dinner. But what if I told you that your midday meal could be an adventure? Enter the Cold Chicken Sandwich! This isn’t just any sandwich; it’s a vibrant explosion of flavors, textures, and colors that dares you to delight your taste buds. It’s the perfect blend of juicy chicken, crunchy veggies, and a creamy kick, all snuggled between two slices of whole grain bread. Say goodbye to boring lunches and hello to a dish that not only fills your stomach but also fuels your spirit!

Inspired by the rich tapestry of flavors I’ve encountered throughout my culinary journey, this sandwich invites you to embrace the art of cooking boldly. With just a handful of ingredients, you can create a masterpiece that’s better than anything from the local bakery!

Ingredients that Make a Difference

Before we dive into the preparation of this delicious meal, let’s take a moment to appreciate the star players in this sandwich:

  • 2 slices of whole grain bread
  • 1 cup cooked chicken, shredded
  • 1/4 cup mayonnaise
  • 1 tablespoon Dijon mustard
  • 1/2 cup lettuce, shredded
  • 1/4 cup cucumber, thinly sliced
  • 1/4 cup bell pepper, thinly sliced
  • Salt and pepper to taste
  • Optional: slices of cheese

Each ingredient plays a crucial role in crafting a sandwich that’s not only delicious but also nourishing. The whole grain bread provides a hearty base, while the chicken offers protein to keep you energized. The creamy mayo and zesty Dijon mustard add depth, and the fresh veggies bring a crunch that elevates the entire experience.

Steps to Sandwich Perfection

A delicious cold chicken sandwich showcasing shredded chicken, lettuce, and sliced cucumber.

Alright, let’s get cooking! This Cold Chicken Sandwich is a breeze to prepare and can be whipped up in no time.

  1. In a bowl, mix the shredded chicken with mayonnaise, Dijon mustard, salt, and pepper until well combined.
  2. Lay one slice of bread on a clean surface.
  3. Spread the chicken mixture evenly over the bread slice.
  4. Layer the shredded lettuce, cucumber slices, and bell pepper slices on top of the chicken mixture.
  5. If desired, add slices of cheese on top of the veggies.
  6. Cover with the second slice of bread.
  7. Cut the sandwich in half or quarters, as preferred.
  8. Wrap in parchment paper or place in a lunch box for easy transport.

And just like that, you have a delicious Cold Chicken Sandwich ready to be devoured! It’s perfect for lunch at work, a picnic in the park, or a casual gathering with friends.

Tips for an Unforgettable Sandwich

To take your Cold Chicken Sandwich to the next level, here are a few tips that I swear by:

  • Let it Chill: Allow the sandwich to sit in the refrigerator for about 30 minutes before serving. This helps the flavors meld beautifully.
  • Experiment with Herbs: Fresh herbs like dill, basil, or cilantro can add a whole new dimension of flavor. Don’t hesitate to mix in your favorites!
  • Spice It Up: If you’re feeling adventurous, add a dash of hot sauce or some sliced jalapeños to bring the heat!
  • Crunch Factor: Consider adding sliced radishes or shredded carrots for an extra crunch and pop of color.

Variations to Explore

The beauty of this sandwich lies in its versatility. If you’re looking to shake things up, try out these variations:

  • Southwestern Twist: Add some diced avocado and a sprinkle of taco seasoning for a Tex-Mex flair.
  • Asian-Inspired: Swap out the mayo for a mix of soy sauce and sesame oil, and add some shredded cabbage and sliced green onions.
  • Classic Caesar: Use Caesar dressing instead of mayo, and add some romaine lettuce and parmesan cheese.

Substitutions That Work

Don’t have all the ingredients on hand? No problem! Here are some easy substitutions:

  • Chicken: Use shredded turkey or even canned tuna as a protein alternative.
  • Bread: Gluten-free or sourdough bread works wonderfully in place of whole grain.
  • Veggies: Feel free to get creative with your veggie choices! Spinach, arugula, or even roasted red peppers can all add a delightful twist.

Equipment You’ll Need

This recipe requires minimal equipment, making it accessible to any home cook:

  • A bowl for mixing
  • A knife for slicing
  • A cutting board
  • Optional: a sandwich press if you want to toast your sandwich!

Storage and Freezing Tips

This sandwich is best enjoyed fresh, but if you find yourself with leftovers, here’s how to store them:

  • Refrigeration: Store any leftover sandwich in an airtight container in the fridge for up to 2 days.
  • Freezing: If you want to prepare sandwiches in advance, consider freezing the chicken mixture separately. Assemble the sandwich fresh when you’re ready to eat.

FAQs About the Cold Chicken Sandwich

Let’s tackle some common questions about this recipe:

  • Can I make this sandwich ahead of time? Absolutely! Just keep the ingredients separate and assemble it when you’re ready to eat.
  • What can I serve with it? Pair it with a side salad, some crunchy chips, or fresh fruit for a well-rounded meal.
  • Can I use leftover chicken? Yes! This is a fantastic way to use up leftover rotisserie chicken or any cooked chicken you have on hand.

Troubleshooting Common Issues

If you run into any hiccups while making your sandwich, don’t worry! Here are some solutions:

  • Too Dry: If your chicken mixture feels dry, add a little more mayonnaise or a splash of chicken broth to moisten it up.
  • Flavor Lacking: Don’t hesitate to adjust the seasoning! A little more mustard, salt, or pepper can make a world of difference.
  • Vegetables Going Soggy: To prevent sogginess, layer the lettuce closest to the bread, acting as a barrier between the wet ingredients and the bread.

Conclusion: Embrace the Adventure

So there you have it! The Cold Chicken Sandwich is not just a meal; it’s a celebration of flavors and creativity. With just a few simple ingredients and a dash of imagination, you can transform your lunch from mundane to magnificent. Remember, cooking is all about experimenting and discovering what works for you. So, roll up your sleeves, embrace your adventurous spirit, and get ready to enjoy a sandwich that’s as exciting as it is delicious. Your taste buds will thank you, and your lunch hour will never be the same again! Happy cooking!

Cold Chicken Sandwich Recipe (Chicken & Veggies Sandwich)

Prep Time 10 minutes
Total Time 10 minutes
Servings 2 sandwiches
Calories 350
A delicious and easy cold chicken sandwich perfect for lunch boxes, packed with fresh veggies and flavorful chicken.

Ingredients

Bread

  • 2 slices whole grain bread

Chicken

  • 1 cup cooked chicken, shredded

Mayonnaise

  • 1/4 cup mayonnaise

Dijon Mustard

  • 1 tablespoon dijon mustard

Lettuce

  • 1/2 cup lettuce, shredded

Cucumber

  • 1/4 cup cucumber, thinly sliced

Bell Pepper

  • 1/4 cup bell pepper, thinly sliced

Salt and Pepper

  • to taste salt and pepper

Optional Cheese

  • slices slices of cheese (optional)

Instructions 

  • Mix shredded chicken with mayonnaise, Dijon mustard, salt, and pepper.
  • Spread the mixture on one bread slice.
  • Add lettuce, cucumber, and bell pepper on top.
  • If desired, add cheese slices.
  • Cover with the second bread slice, cut, and pack.

Notes

Use fresh ingredients for best flavor.
Calories: 350kcal
Cost: $10
Course: Lunch
Cuisine: American
Keyword: chicken

Nutrition

Calories: 350kcal | Carbohydrates: 40g | Protein: 30g | Fat: 10g | Sodium: 600mg

Loved this recipe? Save it to your favorite Pinterest board so you can easily find it later! It’s the perfect way to keep all your sweet ideas in one place. ✨

A vibrant cold chicken sandwich presented with fresh ingredients and soft lighting.

Why You’ll Love This Dish

Let me take you on a flavor-packed journey with my Crispy Oven Roasted Chicken Thighs with Potatoes Recipe. This dish isn’t just a meal; it’s an experience that embodies comfort and culinary adventure. Imagine biting into succulent chicken thighs, their skin beautifully crisped, paired with tender, flavorful potatoes that have soaked up all those delicious spices. It’s the kind of dish that makes your kitchen feel alive, and I promise, it’s as fun to make as it is to eat!

What makes this recipe truly special is its simplicity without sacrificing flavor. It’s perfect for any occasion, whether you’re cooking for a lively family dinner or an intimate gathering with friends. Embrace the art of roasting, where the oven does most of the work, allowing you to kick back and enjoy the delightful aromas wafting through your home.

Ingredients You’ll Need

Before we dive into the cooking, let’s gather our ingredients. You’ll need:

  • 4 bone-in, skin-on chicken thighs
  • 1 pound baby potatoes, halved
  • 3 tablespoons olive oil
  • 1 teaspoon garlic powder
  • 1 teaspoon onion powder
  • 1 teaspoon smoked paprika
  • Salt and pepper to taste
  • Fresh herbs (optional, for garnish)

These ingredients come together to create a dish that is rich in flavor and bursting with character. The chicken thighs are the stars of the show, while the potatoes serve as the perfect sidekick, soaking up all the delicious juices.

How to Make the Crispy Oven Roasted Chicken Thighs with Potatoes Recipe

Juicy chicken thighs and roasted baby potatoes arranged beautifully on a plate, illuminated by natural light.

Step 1: Prepping for Flavor

Let’s get that oven fired up! Preheat it to 425°F (220°C). This high temperature is key for achieving that golden, crispy skin we’re after.

In a large bowl, combine the olive oil, garlic powder, onion powder, smoked paprika, salt, and pepper. This isn’t just seasoning; it’s a flavor bomb waiting to explode! Stir it well until everything is nicely blended. Now, it’s time to coat our chicken. Add the chicken thighs to the bowl and make sure they’re well-coated with this aromatic mixture. Feel free to get your hands in there — it’s the best way to ensure every inch of the chicken is seasoned.

Step 2: Preparing the Potatoes

In another bowl, toss the halved baby potatoes with a drizzle of olive oil, salt, and pepper. Just like the chicken, we want to make sure these spuds are ready to soak up all that incredible flavor. Give them a good toss to coat evenly. Once they’re ready, it’s time to arrange everything on the baking sheet.

Step 3: Roasting to Perfection

Place the seasoned chicken thighs on a baking sheet, skin side up, and arrange the potatoes around them. The even distribution of chicken and potatoes ensures that every bite is bursting with flavor.

Now, slide the baking sheet into your preheated oven and roast for 35-40 minutes. Keep an eye on that chicken! We’re looking for crispy skin and an internal temperature of 165°F (75°C). If you want to take it a step further, broil for an additional 2-3 minutes at the end to achieve extra crispy skin. This is where the magic happens!

Once finished, remove the baking sheet from the oven and let the chicken rest for a few minutes. This crucial step allows the juices to redistribute, resulting in moist, tender chicken. Don’t skip it!

How to Serve This Flavorful Dish

Garnishes

Garnishing may seem like an afterthought, but it’s not! A sprinkle of fresh herbs like parsley can elevate your dish, adding a pop of color and a fresh burst of flavor. Plus, it looks fantastic on the plate!

Side Dishes

This meal stands beautifully on its own, but if you want to round it out, consider serving it with a crisp green salad or some steamed vegetables like green beans or asparagus. They provide a refreshing crunch that balances the richness of the chicken and potatoes.

Creative Ways to Present

Here’s a fun idea: serve the chicken and potatoes family-style right from the baking sheet. It invites everyone to dig in and share, creating a warm, communal dining experience. Alternatively, plate each chicken thigh atop a bed of the roasted potatoes, drizzled with a bit of pan sauce or extra virgin olive oil for that restaurant-quality finish.

Make Ahead and Storage

Storing Leftovers

If you find yourself with leftovers (which is unlikely, but let’s be realistic), store the chicken and potatoes in an airtight container in the fridge. They’ll stay delicious for up to 3 days, perfect for quick and easy meals that are anything but boring!

Freezing

You can also freeze cooked chicken thighs and potatoes! Just place them in a freezer-safe container or heavy-duty freezer bag. Make sure to separate portions for easy reheating later. Frozen leftovers maintain good quality for about 2 months.

Reheating

When it’s time to enjoy those leftovers, I recommend heating them in an oven at 350°F (175°C). This method keeps the skin crispy and the potatoes tender, unlike the microwave, which can make things soggy. Reheat for about 15-20 minutes or until everything is heated through.

FAQs

Can I use boneless chicken thighs in this recipe?

Absolutely! Boneless thighs can work, but keep an eye on the cooking time as they may cook faster. Just ensure the internal temperature still reaches 165°F (75°C).

What potatoes work best for this dish?

Medium-starch potatoes like Yukon Gold or red potatoes are ideal. They hold their shape well while roasting and absorb flavors beautifully.

Is it possible to make this recipe gluten-free?

Yes! Since this recipe uses naturally gluten-free ingredients, it’s perfect for gluten-free diets. Just be cautious with your seasonings.

Can I add vegetables to the roasting pan?

Definitely! Toss in carrots, Brussels sprouts, or bell peppers alongside the potatoes for a one-pan meal bursting with variety and nutrition.

How do I know when the chicken is fully cooked?

The safest way is to check with a meat thermometer. The internal temperature should reach 165°F (75°C), and the juices should run clear when pierced.

Tips for Success

To ensure your chicken comes out perfectly every time, here are a few tips:

  • Pat the chicken dry: Before seasoning, pat the chicken thighs dry with paper towels. This step is crucial for getting that skin super crispy.
  • Don’t overcrowd the pan: Make sure there’s enough space on the baking sheet for air to circulate. This will help the chicken and potatoes roast evenly.
  • Experiment with spices: Feel free to adjust the spices to your liking. Add a pinch of cayenne for heat or fresh herbs for a burst of freshness.

Final Thoughts

This Crispy Oven Roasted Chicken Thighs with Potatoes Recipe is a testament to the power of simple ingredients and bold flavors. It’s a dish that invites exploration and creativity, urging you to experiment and find your unique spin. The thrill of cooking is in the journey, and I hope this recipe inspires you to embrace the heat and excitement of your kitchen.

So, gather your ingredients, preheat that oven, and get ready to create a meal that’s not just food but a celebration of life, flavor, and the joy of cooking. After all, every great dish tells a story — let this one be yours! Happy cooking!

Crispy Oven Roasted Chicken Thighs with Potatoes Recipe

Prep Time 10 minutes
Cook Time 40 minutes
Total Time 50 minutes
Servings 4 servings
Calories 550
Enjoy perfectly crispy chicken thighs paired with tender roasted potatoes in this easy oven recipe.

Ingredients

Main Ingredients

  • 4 pieces bone-in, skin-on chicken thighs
  • 1 pound baby potatoes, halved
  • 3 tablespoons olive oil
  • 1 teaspoon garlic powder
  • 1 teaspoon onion powder
  • 1 teaspoon smoked paprika
  • to taste salt and pepper salt and pepper
  • optional for garnish fresh herbs

Instructions 

  • Preheat oven to 425°F (220°C). Mix olive oil, garlic powder, onion powder, paprika, salt, and pepper.
  • Coat chicken thighs with the seasoning mixture. Toss potatoes with olive oil, salt, and pepper.
  • Arrange chicken and potatoes on a baking sheet. Roast for 35-40 minutes until crispy and cooked through.
  • Optional: Broil for 2-3 minutes for extra crispiness. Rest before serving. Garnish with herbs if desired.

Notes

Ensure chicken reaches an internal temperature of 165°F (75°C) for safety.
Calories: 550kcal
Cost: $15
Course: Main Course
Cuisine: American
Keyword: chicken, Potatoes, Roast

Nutrition

Calories: 550kcal | Carbohydrates: 40g | Protein: 45g | Fat: 25g | Sodium: 800mg

Loved this recipe? Save it to your favorite Pinterest board so you can easily find it later! It’s the perfect way to keep all your sweet ideas in one place. ✨

A dish featuring crispy chicken thighs and tender potatoes, showcasing textures and colors in a cozy setting.

Why You’ll Love This Recipe

Welcome to a slice of heaven, folks! This Healthy Oatmeal Apple Cake is more than just a dessert; it’s a warm embrace on a chilly day, a sweet reminder of cozy family gatherings, and an invitation to indulge without the guilt. With every bite, you’ll experience the delightful crunch of oats, the natural sweetness of apples, and the aromatic warmth of cinnamon. It’s like wrapping yourself in a blanket of comfort food that nourishes both body and soul.

What sets this cake apart is its simplicity and health-conscious appeal. Made with wholesome ingredients like rolled oats, applesauce, and honey, it fits perfectly into a busy lifestyle without sacrificing flavor. Whether you’re looking for a guilt-free treat after dinner, a quick snack for the kids, or a dish to share at your next gathering, this cake has got you covered. So, roll up your sleeves, grab your apron, and let’s dive into the magic of baking this delightful creation!

Ingredients for Healthy Oatmeal Apple Cake

To get started on this culinary adventure, gather the following ingredients:

  • 2 cups rolled oats
  • 1 cup unsweetened applesauce
  • 1 cup grated apple (about 1 large apple)
  • 1/2 cup honey or maple syrup
  • 1/2 cup almond milk (or any milk of choice)
  • 1/4 cup coconut oil, melted
  • 1 teaspoon vanilla extract
  • 1 teaspoon baking powder
  • 1 teaspoon cinnamon
  • 1/2 teaspoon salt
  • 1/2 cup raisins or walnuts (optional)

How to Make Healthy Oatmeal Apple Cake

Eye-level shot of a slice of Healthy Oatmeal Apple Cake with rich oats and apple pieces, illuminated by natural light.

Preheat the Oven and Prepare Your Pan

Before anything else, let’s get that oven working for us! Preheat it to 350°F (175°C). While that warms up, take a 9-inch round cake pan and grease it lightly with coconut oil or butter. This step is crucial to ensure your cake slides out effortlessly after baking.

Mixing the Ingredients

In a large mixing bowl, combine the rolled oats, baking powder, cinnamon, and salt. These dry ingredients will form the base of our cake, providing texture and flavor. In another bowl, whisk together the applesauce, grated apple, honey or maple syrup, almond milk, melted coconut oil, and vanilla extract. This mixture is where the magic happens, blending together to create a moist and flavorful batter.

Now, pour the wet ingredients into the dry ingredients, stirring until everything is well combined. Make sure there are no clumps — we’re aiming for a smooth and cohesive batter. If you’re feeling adventurous, fold in some raisins or walnuts at this point for an extra flavor punch!

Baking the Cake

With your batter ready, pour it into the prepared cake pan, spreading it evenly across the surface. Pop it into your preheated oven and bake for 25-30 minutes, or until a toothpick inserted in the center comes out clean. This is the moment when your kitchen will start to smell like pure bliss — trust me, it’s worth the wait!

Cooling and Storing

Once baked to perfection, remove the cake from the oven and let it cool in the pan for about 10 minutes. This resting period helps maintain moisture and prevents it from falling apart. After that, gently transfer the cake to a wire rack to cool completely. Patience is key here — allow it to cool fully before slicing into it!

Store any leftovers in an airtight container in the refrigerator for up to four days. You can also freeze slices for up to three months — perfect for those days when you need a quick sweet fix!

Tips for Success

  • For a richer flavor, consider toasting the rolled oats lightly before mixing them in.
  • Experiment with different types of apples — sweeter varieties like Fuji or Gala will yield a sweeter cake, while tart ones like Granny Smith will add a nice balance.
  • Don’t skip the cooling step! Letting the cake settle helps enhance its flavor and texture.
  • For a fun twist, try adding a teaspoon of nutmeg or ginger to the batter for a spiced kick.

Equipment Needed

  • 9-inch round cake pan
  • Mixing bowls (large and medium)
  • Whisk
  • Spatula
  • Measuring cups and spoons
  • Wire rack for cooling

Variations of Healthy Oatmeal Apple Cake

This cake is incredibly versatile, and you can easily customize it to suit your taste preferences:

  • Add in some chopped nuts, like pecans or hazelnuts, for a delightful crunch.
  • Swap in different dried fruits like cranberries or apricots for a unique flavor profile.
  • Make it a chocolatey treat by folding in some cocoa powder or dark chocolate chips.
  • For a tropical twist, mix in some shredded coconut and pineapple chunks.

Serving Suggestions for Healthy Oatmeal Apple Cake

When it comes to serving, the sky’s the limit! Here are some delicious ways to enjoy your cake:

  • Top a slice with a dollop of Greek yogurt and a drizzle of honey for a creamy contrast.
  • Serve it warm with a scoop of vanilla ice cream for a comforting dessert.
  • Pair it with a cup of spiced chai or coffee for a delightful afternoon treat.
  • Slice it into bars for easy grab-and-go snacks — perfect for busy mornings or lunchboxes!

FAQs about Healthy Oatmeal Apple Cake

Got questions? I’ve got answers!

  • Can I use other types of oats? Absolutely! Quick oats work in a pinch, but rolled oats provide the best texture.
  • Is this cake suitable for vegans? Yes! Just swap the honey for maple syrup and you’re good to go!
  • How can I make this gluten-free? Simply ensure you use certified gluten-free oats, and you’re set!
  • What’s the best way to store leftovers? Keep it in an airtight container in the fridge for up to four days, or freeze slices for later enjoyment!

Troubleshooting Common Issues

If you find yourself facing any hiccups along the way, here are some solutions:

  • Dry cake: This can happen if you overbake it. Keep an eye on the timer and check for doneness early!
  • Too crumbly: Ensure you’ve measured your ingredients correctly, especially the applesauce, as it adds moisture.
  • Not sweet enough: Feel free to adjust the amount of honey or maple syrup to your liking!

Final Thoughts

This Healthy Oatmeal Apple Cake isn’t just a dessert; it’s a celebration of flavors, a testament to wholesome ingredients, and a reminder that indulgence can be guilt-free. Each slice brings warmth and joy, perfect for sharing with family and friends. So whether it’s a gathering or a quiet afternoon at home, let this cake be your go-to sweet treat that nourishes both the body and spirit. Embrace the adventure of baking, and remember — good food brings us together. Happy baking, my friends!

Healthy Oatmeal Apple Cake

Prep Time 10 minutes
Cook Time 30 minutes
Total Time 40 minutes
Servings 8 slices
Calories 250
A wholesome and delicious cake combining oats and apples for a nutritious treat.

Ingredients

Dry ingredients

  • 2 cups rolled oats
  • 1 teaspoon baking powder
  • 1 teaspoon cinnamon
  • 1/2 teaspoon salt

Wet ingredients

  • 1 cup unsweetened applesauce
  • 1 cup grated apple (about 1 large apple)
  • 1/2 cup honey or maple syrup
  • 1/2 cup almond milk (or any milk of choice)
  • 1/4 cup coconut oil (melted)
  • 1 teaspoon vanilla extract

Optional add-ins

  • 1/2 cup raisins or walnuts (optional)

Instructions 

  • Preheat oven to 350°F (175°C) and grease a 9-inch pan.
  • Mix dry ingredients in a bowl.
  • Combine wet ingredients in another bowl.
  • Mix wet into dry, fold in optional nuts or raisins.
  • Pour batter into pan and bake 25-30 minutes.

Notes

This cake is perfect for a healthy snack or breakfast option.
Calories: 250kcal
Cost: $12
Course: Dessert
Cuisine: Healthy
Keyword: apple, oats

Nutrition

Calories: 250kcal | Carbohydrates: 45g | Protein: 5g | Fat: 7g | Sodium: 150mg

Loved this recipe? Save it to your favorite Pinterest board so you can easily find it later! It’s the perfect way to keep all your sweet ideas in one place. ✨

Detailed image of a Healthy Oatmeal Apple Cake, highlighting the golden brown crust and soft interior with apple chunks.

Why You’ll Love These Cookies

Let me tell you why these banana oatmeal cookies are about to become your new favorite treat. In just 20 minutes, you can whip up a batch of cookies that are not only delicious but also packed with wholesome ingredients. Imagine the sweet aroma of ripe bananas mingling with the warm, comforting scent of cinnamon wafting through your kitchen. That’s the magic of this recipe!

These cookies are a delightful fusion of flavor and health. With their chewy texture and the natural sweetness of bananas, they’re perfect for breakfast, a midday snack, or a guilt-free dessert. Plus, they’re incredibly versatile, inviting you to experiment with various mix-ins and toppings that can elevate them to new heights. So grab your mixing bowl and let’s dive into the adventure of baking!

Banana Oatmeal Cookies: Ingredients & Substitutions

Before we get our hands dirty, let’s gather our ingredients. Here’s what you’ll need:

  • 2 ripe bananas
  • 1 cup rolled oats
  • 1/2 cup peanut butter or almond butter
  • 1/4 cup honey or maple syrup
  • 1/2 teaspoon vanilla extract
  • 1/2 teaspoon baking soda
  • 1/2 teaspoon cinnamon (optional)
  • 1/4 cup chocolate chips or nuts (optional)

Now, don’t worry if you find yourself missing an ingredient or two. Here are some handy substitutions:

  • Bananas: If you have applesauce on hand, it can work as a great replacement for moisture.
  • Nut Butters: Sunflower seed butter or tahini can step in for peanut or almond butter for nut-free options.
  • Sweeteners: Maple syrup or agave nectar can replace honey if you prefer a vegan option.
  • Oats: Quick oats can be substituted for rolled oats, but be mindful that the texture might change slightly.

How to Make Banana Oatmeal Cookies

Eye-level view of warm banana oatmeal cookies, showcasing their texture and ingredients.

Ready to create some cookie magic? Follow these simple steps to bring your banana oatmeal cookies to life:

1. Preheat the Oven

Start by preheating your oven to 350°F (175°C). While it warms up, line a baking sheet with parchment paper to prevent sticking and make cleanup a breeze.

2. Mash the Bananas

In a large mixing bowl, mash those ripe bananas until they’re smooth and creamy. The riper the bananas, the sweeter your cookies will be, so don’t shy away from those speckled beauties!

3. Mix the Ingredients

Now, add in the rolled oats, peanut butter, honey (or maple syrup), vanilla extract, baking soda, and cinnamon (if using). Stir everything together until well combined. You want a uniform mixture that’s thick and hearty.

4. Add Mix-ins

If you’re feeling adventurous, fold in your choice of chocolate chips or chopped nuts. This is where the fun begins! You could even throw in some dried fruits like cranberries or blueberries for a flavor explosion.

5. Scoop and Flatten

Using a spoon or a cookie scoop, drop spoonfuls of the cookie dough onto the prepared baking sheet, spacing them about 2 inches apart. Don’t forget to flatten each cookie slightly with the back of a spoon. This helps them bake evenly and gives them that classic cookie shape.

6. Bake & Cool

Slide the baking sheet into your preheated oven and bake for 10-12 minutes, or until the edges turn a delightful golden brown. Once they’re done, remove them from the oven and let them cool for a few minutes on the baking sheet. Then, transfer them to a wire rack to cool completely.

7. Serve & Enjoy

Once cooled, these cookies are ready to be devoured! Enjoy them warm, or let them cool to room temperature. They make a perfect snack for both kids and adults alike!

Storage & Freezing

These banana oatmeal cookies are great for meal prep! You can store them in an airtight container at room temperature for about two days. For longer storage, keep them in the refrigerator for up to a week. If you want to stock up for later, freeze the cookies in a single layer on a baking sheet, then transfer them to a freezer-safe bag or container. They can last up to two months this way. Just reheat them in the oven for a few minutes for that fresh-baked feel!

Tips for Perfect Cookies

Here are a few tips to ensure your banana oatmeal cookies come out perfectly every time:

  • Banana Ripeness: The riper the banana, the sweeter your cookies will be. Look for bananas with brown spots for the best flavor.
  • Texture Check: If the dough seems too dry, add a splash of milk or a little more nut butter. If it’s too wet, add a sprinkle of oats.
  • Even Baking: Make sure to space the cookies evenly on the baking sheet to allow for proper air circulation, ensuring they bake evenly.

FAQs About Banana Oatmeal Cookies

Can I make these cookies vegan?

Absolutely! Just substitute the honey with maple syrup, and you’re good to go. Use a flax or chia egg to replace the egg if you’re using one.

What if I don’t have baking soda?

You can omit it, but your cookies might turn out a bit denser. Alternatively, you can use baking powder, but remember to double the amount!

How do I know when the cookies are done?

Look for the edges to be golden brown. The centers will still be soft but will firm up as they cool.

Variations to Try

Don’t be afraid to get creative! Here are some variations to elevate your banana oatmeal cookies:

  • Nutty Delight: Add chopped walnuts or pecans for a crunchy texture.
  • Fruity Fun: Mix in dried fruits like raisins, cranberries, or chopped apricots.
  • Spiced Up: Experiment with spices like nutmeg or ginger for a different flavor profile.

Conclusion: Bake Your Way to Bliss

These banana oatmeal cookies are not just a recipe; they’re an invitation to explore the world of baking with joy and creativity. Each bite is a reminder that healthy treats can be both satisfying and delicious. So embrace your inner chef, gather your ingredients, and let the sweet, comforting aroma fill your kitchen. Don’t forget to share your cookie adventures — I can’t wait to hear about the mix-ins you chose and the smiles they brought to your loved ones. Happy baking!

Banana Oatmeal Cookies

Prep Time 10 minutes
Cook Time 12 minutes
Total Time 22 minutes
Servings 12 cookies
Calories 150
These easy-to-make banana oatmeal cookies require simple ingredients and are perfect for a healthy snack or dessert.

Ingredients

Bananas

  • 2 pieces ripe bananas

Oats

  • 1 cup rolled oats

Nut Butter

  • 1/2 cup peanut butter or almond butter

Sweetener

  • 1/4 cup honey or maple syrup

Flavorings

  • 1/2 teaspoon vanilla extract
  • 1/2 teaspoon baking soda
  • 1/2 teaspoon cinnamon (optional)

Add-ins (optional)

  • 1/4 cup chocolate chips or nuts

Instructions 

  • Preheat oven to 350°F (175°C) and line a baking sheet.
  • Mash bananas in a large bowl, then mix in oats, nut butter, honey, vanilla, baking soda, and cinnamon.
  • Fold in chocolate chips or nuts if desired.
  • Drop spoonfuls onto the baking sheet, flatten slightly, and bake for 10-12 minutes.
  • Cool briefly before transferring to a wire rack. Enjoy!

Notes

For softer cookies, slightly increase baking time.
Calories: 150kcal
Cost: $10
Course: Dessert
Cuisine: American
Keyword: Banana, Oatmeal

Nutrition

Calories: 150kcal | Carbohydrates: 22g | Protein: 3g | Fat: 6g | Sodium: 50mg

Loved this recipe? Save it to your favorite Pinterest board so you can easily find it later! It’s the perfect way to keep all your sweet ideas in one place. ✨

Detailed shot of golden-brown banana oatmeal cookies, highlighting their homely appearance.

Why You’ll Love Cooking with a Crockpot

When it comes to cooking, convenience and flavor can sometimes feel like they’re at odds. Enter the crockpot — a kitchen marvel that allows you to create delicious meals with minimal effort. Imagine coming home after a long day, greeted by the tantalizing aroma of a meal that has been simmering away all day. With a crockpot, that dream can be your reality!

Whether you’re a busy parent juggling schedules or a culinary enthusiast looking to experiment, crockpot cooking is the hero you didn’t know you needed. And what’s even better? You can whip up super healthy crockpot recipes that pack a flavor punch without breaking the bank. From tender chicken dishes to hearty stews filled with veggies, the possibilities are endless!

The Essence of a Flavorful Recipe

This brings us to my Free Cookbook, where I’ve poured my heart and soul into creating recipes that are not only easy to prepare but also bursting with flavor. Each recipe is crafted with simple, low-cost ingredients that allow you to enjoy cooking without the stress of complicated techniques or expensive grocery bills. The beauty of this cookbook lies in its promise: delicious meals that can be made with everyday staples you likely already have in your pantry!

Ingredients That Sing

Eye-level view of a delicious spicy recipe, showcasing rich colors and intricate details under warm light.

Let’s dive into the foundation of any great meal: the ingredients. In my free, budget-friendly family cookbook, you will find a variety of ingredients that are not only affordable but also versatile. Here’s a peek at what you can expect:

  • Chicken: The star of many crockpot recipes, chicken is lean, easy to cook, and absorbs flavors beautifully.
  • Vegetables: From carrots to bell peppers and sweet potatoes, veggies add color, nutrition, and a satisfying crunch to your meals.
  • Herbs and Spices: A dash of cayenne or a sprinkle of paprika can elevate your dish from ordinary to extraordinary.
  • Broths and Sauces: These are essential for adding depth and richness to your crockpot creations.

Steps to Flavor Explosion

Cooking with a crockpot is as easy as 1-2-3! Here’s how you can get started:

  1. Gather your ingredients.
  2. Add them to your crockpot, layering the chicken at the bottom for optimal flavor absorption.
  3. Set your crockpot on low and let it work its magic for several hours.

Tips for Perfect Crockpot Cooking

To get the most out of your crockpot meals, keep these tips in mind:

  • Layer Wisely: Place denser ingredients like carrots and potatoes at the bottom of the crockpot, and softer items like greens on top.
  • Don’t Overfill: Leave some room for steam; filling the crockpot too full can lead to uneven cooking.
  • Adjust for Time: If you’re short on time, increase the heat setting, but remember that low and slow typically yields the best flavors.

Variations to Spice Things Up

One of the best aspects of crockpot cooking is the ability to customize recipes to suit your taste. Here are a few variations you can try:

  • Add Heat: If you like it spicy, consider adding jalapeños or red pepper flakes for an extra kick.
  • Switch Up the Protein: While chicken is a classic, you can substitute with turkey, pork, or even a plant-based protein for a vegetarian option.
  • Experiment with Sauces: Different sauces can dramatically change the flavor profile of your meal. Try BBQ sauce, teriyaki sauce, or even a creamy Alfredo!

Substitutions for Dietary Needs

Dietary restrictions don’t have to limit your crockpot creativity. Here are some substitutions to consider:

  • Gluten-Free: Ensure your sauces and broths are gluten-free, or make your own!
  • Dairy-Free: Use coconut milk or dairy-free cream alternatives to keep your dish creamy without the dairy.
  • Low-Sodium: Opt for low-sodium broth and be mindful of additional salt in your seasoning.

Essential Equipment for Success

To create these flavorful dishes, you’ll need the right tools. Here’s what I recommend:

  • Crockpot: Invest in a good quality slow cooker. A programmable model can be a game-changer!
  • Measuring Cups and Spoons: Precision in your measurements will help ensure consistent results.
  • Wooden Spoon: A sturdy spoon for stirring is key, especially for thicker sauces.

Storage and Freezing Tips

Leftovers can be a lifesaver for busy weeknights. Here’s how to store your meals:

  • Refrigeration: Store leftovers in airtight containers in the fridge for up to four days.
  • Freezing: Most crockpot meals freeze well. Just make sure to cool them completely before transferring them to freezer-safe bags. They can last up to three months in the freezer.

FAQs About Crockpot Cooking

Here are some frequently asked questions that might help you on your crockpot journey:

  • Can I cook frozen chicken in the crockpot? It’s best to thaw the chicken before cooking to ensure even cooking.
  • How long can I leave food in the crockpot? While it’s safe to leave food for several hours, try not to exceed the recommended cooking time to avoid overcooked meals.
  • Can I use a metal insert in a ceramic crockpot? Always check your manufacturer’s guidelines, but typically it’s best to stick to ceramic to avoid damage.

Troubleshooting Common Issues

Sometimes things don’t go as planned. Here are a few troubleshooting tips:

  • Too Watery: If your dish turns out too watery, remove the lid and let it cook on high for the last half hour to reduce the liquid.
  • Not Enough Flavor: Taste your dish before serving. A pinch of salt or a squeeze of lemon can often bring the flavors to life.
  • Overcooked Chicken: If your chicken is dry, consider adjusting the cook time next time or adding a bit more liquid.

Conclusion: Ignite Your Cooking Passion

Cooking should never feel like a chore; instead, it should be an adventure that ignites your passion for flavor. With my Free Cookbook, you’ll find a treasure trove of good chicken crockpot recipes that are designed to inspire and delight. So why not grab your crockpot, gather some simple ingredients, and embark on a culinary journey that will transform your mealtime into a flavor explosion? Remember, every great dish starts with a little bit of heat — so turn up the flavor and let your cooking adventure begin!

Free Cookbook

Prep Time 10 minutes
Cook Time 20 minutes
Total Time 30 minutes
Servings 4 people
Calories 250
Discover delicious meals with simple, low-cost ingredients using this free, budget-friendly family cookbook.

Ingredients

Main Ingredients

  • 2 cups delicious meals
  • 1 cup simple ingredients
  • 0.5 cup low-cost ingredients

Instructions 

  • Get your hands on my FREE budget-friendly cookbook!
  • I’ve created a free, budget-friendly family cookbook to help you get started!

Notes

Enjoy affordable and nutritious meals with minimal effort!
Calories: 250kcal
Cost: $15
Course: Main Course
Cuisine: Various
Keyword: budget-friendly

Nutrition

Calories: 250kcal | Carbohydrates: 45g | Protein: 8g | Fat: 5g | Sodium: 300mg

Loved this recipe? Save it to your favorite Pinterest board so you can easily find it later! It’s the perfect way to keep all your sweet ideas in one place. ✨

Intimate close-up of a mouthwatering spicy meal, highlighting its texture and natural ingredients.

Why You’ll Want to Try This Recipe

Cooking isn’t just a necessity; it’s an adventure waiting to happen! If you’ve ever felt intimidated by the prospect of preparing low-carb meals that tantalize your taste buds, you’re not alone. But fear not, my culinary comrades! This spicy recipe invites you to unleash your inner chef and ignite your passion for cooking. With simple, low-cost ingredients, you can create an unforgettable dining experience that brings warmth, flavor, and a little fire to your table.

Imagine the aroma of spices wafting through your kitchen, the sizzle of ingredients melding together, and the rich flavors dancing on your palate. This is not just a recipe; it’s a journey into the world of bold cooking where every bite tells a story. Whether you’re a seasoned pro or just starting out, this dish will empower you to experiment with heat and flavor, transforming even the simplest ingredients into something extraordinary.

The Essentials: Ingredients You Need

To embark on this culinary adventure, you’ll require a few key ingredients. Don’t worry; these are not exotic treasures but rather delicious meals that can be found at your local grocery store. Let’s break it down:

  • Delicious Meals: Think about the flavors you love and how they can come together in harmony.
  • Simple Ingredients: Fresh vegetables, quality proteins, and aromatic spices will be your best friends.
  • Low-Cost Ingredients: You don’t have to break the bank to cook well! Look for sales on seasonal produce and bulk items.

Step into the Kitchen: How to Prepare

Appetizing spicy recipe showcased with detailed textures in warm natural lighting, set against a blurred background.

If you’re ready to take the plunge, here’s a step-by-step guide to help you create a dish that’s not only easy but also packed with flavor:

  1. Get your hands on my FREE budget-friendly cookbook! Yes, you heard it right! This invaluable resource is your ticket to a world of scrumptious recipes that won’t stretch your wallet.
  2. I’ve created a free, budget-friendly family cookbook to help you get started! Dive into the recipes that inspire you, and let your creativity flow. Cooking should be fun, not a chore!

Tips for Success

As you embark on this flavorful journey, keep these tips in mind to enhance your cooking experience:

  • Prep Ahead: Spend a little time prepping your ingredients in advance. Chop vegetables and marinate proteins the night before to save time on busy days.
  • Taste as You Go: Don’t be afraid to sample your dish during the cooking process. This allows you to adjust seasoning and ensure every bite is just right.
  • Experiment with Spices: Spice is where the magic happens! Feel free to add more heat or layer different spices to create a depth of flavor that excites your palate.

Variations to Consider

One of the best parts of cooking is experimenting with variations. Here are a few ideas to spark your creativity:

  • Protein Swap: Try using chicken, beef, or even plant-based proteins like tofu or tempeh. Each will impart a unique flavor profile.
  • Vegetable Medley: Don’t hesitate to mix and match your vegetables. Zucchini, bell peppers, and broccoli can all add texture and flavor.
  • Herbs and Citrus: Fresh herbs like cilantro or basil can bring a delightful freshness. A squeeze of lemon or lime can elevate your dish even further.

Substitutions for Dietary Needs

Cooking for a crowd with varying dietary restrictions? No problem! Here are some substitutions to consider:

  • Gluten-Free: Ensure that any sauces or pre-packaged ingredients are labeled gluten-free.
  • Dairy-Free: Substitute cream with coconut milk or almond milk for a creamy texture without the dairy.
  • Low-Carb Alternatives: Use cauliflower rice instead of traditional rice or zoodles (zucchini noodles) instead of pasta to keep things low-carb.

Essential Equipment

Having the right tools can make your cooking experience smoother and more enjoyable. Here’s what I recommend:

  • Crockpot: Perfect for low-carb meals, a crockpot allows you to set it and forget it while your flavors meld together beautifully.
  • Sharp Knives: Invest in a good set of knives for efficient chopping and slicing.
  • Measuring Cups and Spoons: Precision is key to ensure balanced flavors.

Storage and Freezing Tips

Leftovers are a cook’s best friend! Here’s how to store your delicious creations:

  • Refrigeration: Store any leftovers in airtight containers in the fridge for up to 3-4 days.
  • Freezing: Most low-carb meals freeze beautifully. Allow your dish to cool completely before transferring it to freezer-safe bags. It can last up to 3 months!

FAQs: Your Cooking Questions Answered

If you have questions about cooking or this specific recipe, you’re not alone! Here are some frequently asked questions:

  • Can I make this recipe ahead of time? Absolutely! Many low-carb dishes taste even better the next day after the flavors have had a chance to meld.
  • What if I don’t have a crockpot? You can use a stovetop pot or an oven-safe dish, just adjust the cooking time accordingly.
  • How can I add more spice? Don’t be shy! Add chopped fresh chilis, red pepper flakes, or a splash of hot sauce to kick it up a notch.

Troubleshooting Common Issues

Even the best cooks encounter hiccups now and then. Here’s how to overcome some common pitfalls:

  • Too Salty? Add a splash of vinegar or a bit of sugar to balance out the saltiness.
  • Not Enough Flavor? Consider adding more spices or a splash of broth to enhance the overall taste.
  • Overcooked Vegetables? If your veggies are mushy, try adding them later in the cooking process next time.

Final Thoughts: Embrace the Fire

Cooking is more than just a means to fill our bellies; it’s an expression of creativity and love. As you dive into this spicy recipe, I encourage you to embrace the fire, explore new flavors, and savor each moment in the kitchen. Remember, cooking should be an adventure, not a checklist. So grab your skillet, let your passion shine, and transform everyday ingredients into an extraordinary meal. With the right approach, every dish can tell a story worth sharing.

Free Cookbook

Prep Time 10 minutes
Cook Time 20 minutes
Total Time 30 minutes
Servings 4 people
Calories 250
Discover delicious meals with simple, low-cost ingredients using this free, budget-friendly family cookbook.

Ingredients

Main Ingredients

  • 2 cups delicious meals (Prepared meals or ingredients)
  • 1 cup simple ingredients (Basic pantry items)
  • 0.5 cup low-cost ingredients (Affordable staples)

Instructions 

  • Get your hands on my FREE budget-friendly cookbook!
  • I’ve created a free, budget-friendly family cookbook to help you get started!

Notes

Use seasonal ingredients for best results.
Calories: 250kcal
Cost: $0
Course: Main
Cuisine: Various
Keyword: Budget

Nutrition

Calories: 250kcal | Carbohydrates: 45g | Protein: 8g | Fat: 5g | Sodium: 300mg

Loved this recipe? Save it to your favorite Pinterest board so you can easily find it later! It’s the perfect way to keep all your sweet ideas in one place. ✨

Eye-level shot of a mouth-watering spicy meal, highlighting simple, low-cost ingredients under soft lighting.