Error generating article.


If you’re ready to turn your weeknight dinners into flavor-packed adventures, you’re in the right place! Welcome to the world of Air Fryer Honey Garlic Salmon, where sweet meets savory in a dance of deliciousness that will awaken your senses. This dish isn’t just a meal; it’s a story — a story of bold flavors and culinary courage. In less than 15 minutes, you can bring the warmth of a cozy kitchen and the thrill of adventure right to your dinner table.
This recipe is more than just quick cooking; it’s about embracing the art of flavor. Here are five reasons to dive into this culinary creation:
Let’s dive deeper into what makes this recipe tick. Here’s what you’ll need:

Ready to whip up this masterpiece? Follow these simple steps:
To elevate your air fryer salmon game, consider these expert insights:
Even the best chefs make mistakes! Here’s how to sidestep some common pitfalls:
Feeling adventurous? Here are some creative twists on the classic:
Want to prep ahead? Here’s how to store and reheat your delicious salmon:
Got questions? I’ve got answers! Here are some common queries about this dish:
This recipe is not only delicious but can also fit various dietary needs. Here are some tips:
To achieve the best results, here’s what you’ll need:
Now that you’ve crafted this incredible dish, let’s talk presentation:
With every bite of this Air Fryer Honey Garlic Salmon, you’ll experience a burst of flavors that tantalize your taste buds and warm your heart. So, grab your apron, heat up that air fryer, and let’s turn dinner into an adventure!


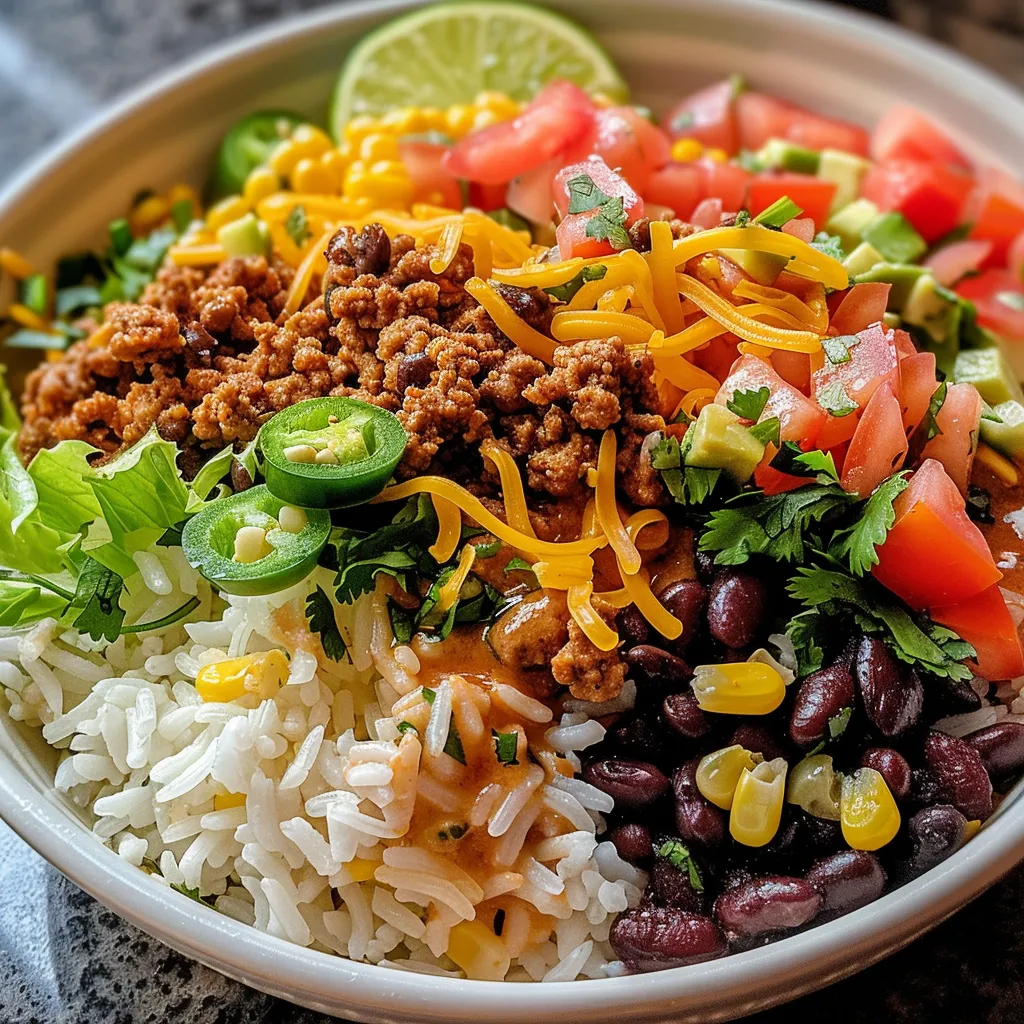
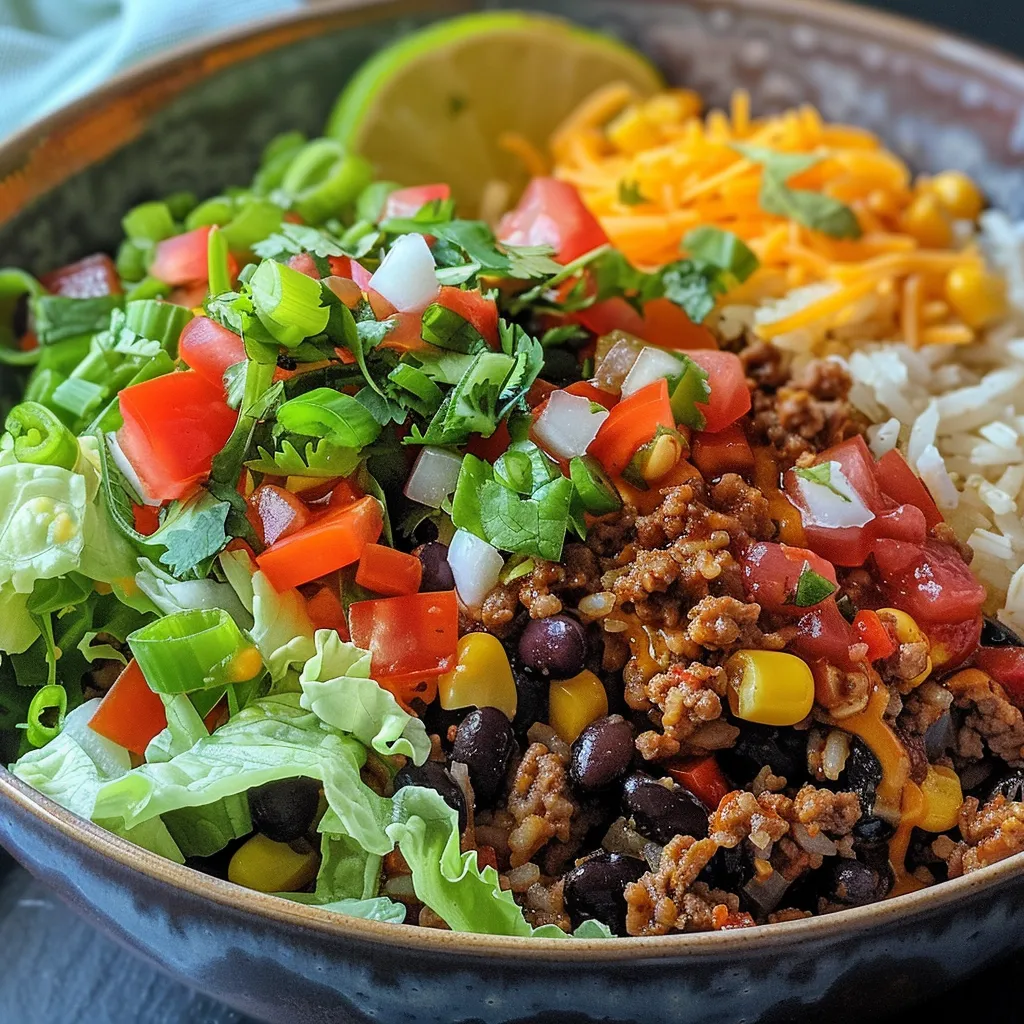
Are you ready to embark on a culinary journey that dances on your taste buds and ignites your passion for cooking? This Taco Rice Bowl recipe is not just a meal; it’s an adventure! Bursting with vibrant flavors and colorful ingredients, this dish is perfect for any night of the week. Whether you’re cooking for family, friends, or just treating yourself, let’s dive into the art of flavor!
Here’s why this Taco Rice Bowl will become your go-to recipe:
Before we jump into the cooking, let’s break down the ingredients. Here’s what you’ll need:
Before we get cooking, here are some expert tips to ensure your Taco Rice Bowl is a hit:
Even the best chefs can stumble. Here’s how to avoid common pitfalls:
Looking to shake things up? Here are some delicious variations:
Want to prep ahead? Here’s how to store and reheat:
Got questions? Let’s clear them up!
Let’s make this meal as nutritious as it is delicious!
Here’s what you’ll need in your kitchen:
Presentation matters! Here’s how to serve your Taco Rice Bowl:
There you have it! A Taco Rice Bowl that’s not just a meal but a celebration of flavor, creativity, and joy. So grab your skillet, embrace the heat, and let your culinary adventure begin. Remember, cooking is about experimenting, celebrating, and most importantly, having fun. Enjoy every bite of your delicious creation!

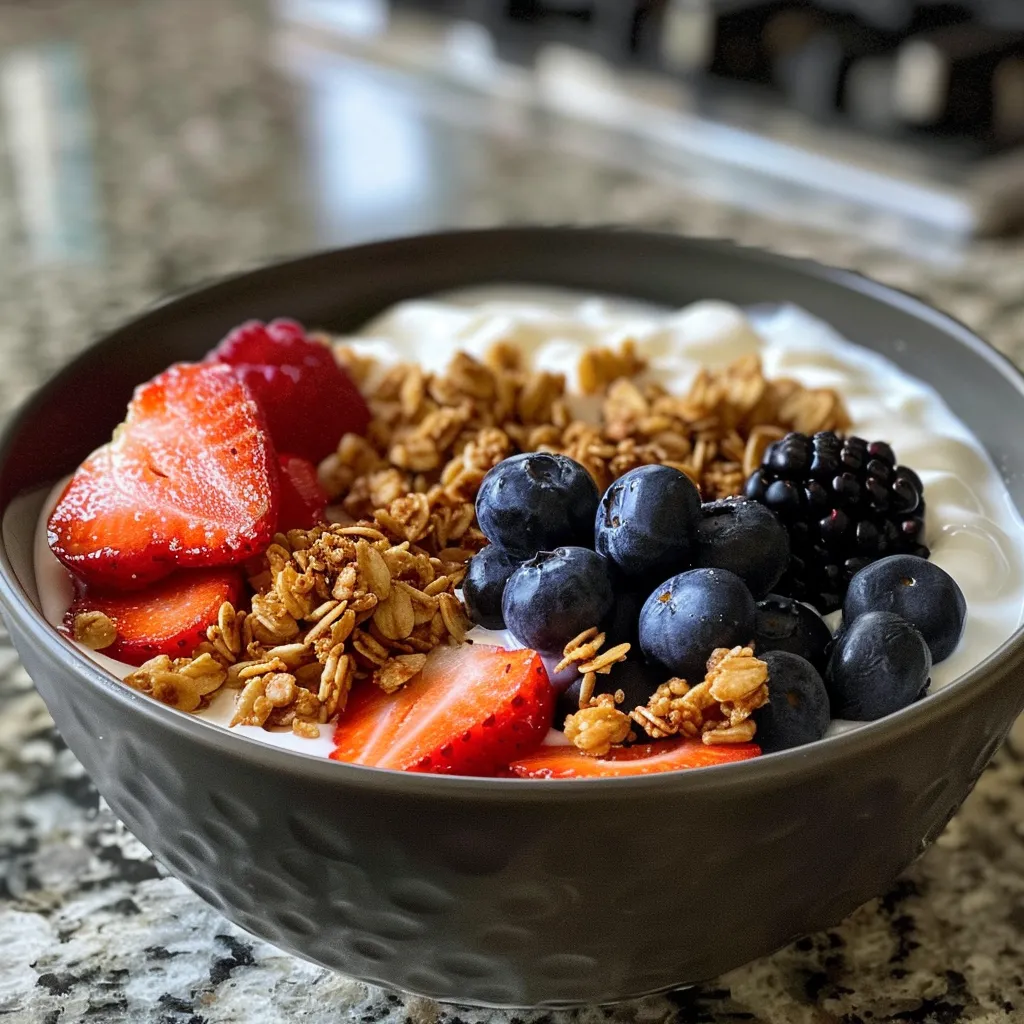
Hey there, flavor adventurers! Are you ready to transform your mornings into a vibrant tapestry of taste and energy? Let’s dive into the world of Greek yogurt breakfast bowls — a dish that’s not just about health, but about awakening your senses. This Healthy Greek Yogurt Breakfast Bowl is bursting with fresh berries, crunchy granola, and a drizzle of sweetness that’s sure to ignite your spirit and fuel your day. Plus, with its rich blend of textures and flavors, it’s an invitation to play in the kitchen every morning!
There’s something magical about starting your day with a bowl that not only satisfies your hunger but also dances on your palate. Here are five reasons why you’ll fall head over heels for this Greek yogurt breakfast bowl:
Let’s dissect the ingredients of our Greek yogurt breakfast bowl, ensuring you know exactly what’s going into your delicious morning creation.

Ready to elevate your breakfast game? Here are some expert tips to ensure your Greek yogurt breakfast bowl is nothing short of perfection:
Even the best cooks make mistakes sometimes. Here are some common pitfalls you might encounter while preparing your Greek yogurt breakfast bowl, along with easy fixes:
Ready to switch things up? Here are four delectable variations on the classic Greek yogurt breakfast bowl that will keep your mornings exciting:
Want to enjoy this Greek yogurt breakfast bowl throughout the week? Here’s how you can prep and store it:
Got questions? I’ve got answers! Here are some frequently asked questions about Greek yogurt breakfast bowls:
Tailor this Greek yogurt breakfast bowl to fit your dietary needs and preferences:
Here’s what you’ll need to create your Greek yogurt breakfast bowl:
Looking for ways to elevate your breakfast bowl experience? Here are some serving suggestions:
Now that you’ve got the scoop on creating, customizing, and enjoying your Greek yogurt breakfast bowl, it’s time to embrace the adventure of cooking with heat — or in this case, with fresh, vibrant flavors! Remember, every breakfast is an opportunity to create a story worth telling. So grab your skillet or mixing bowl, and let’s make mornings exciting again!

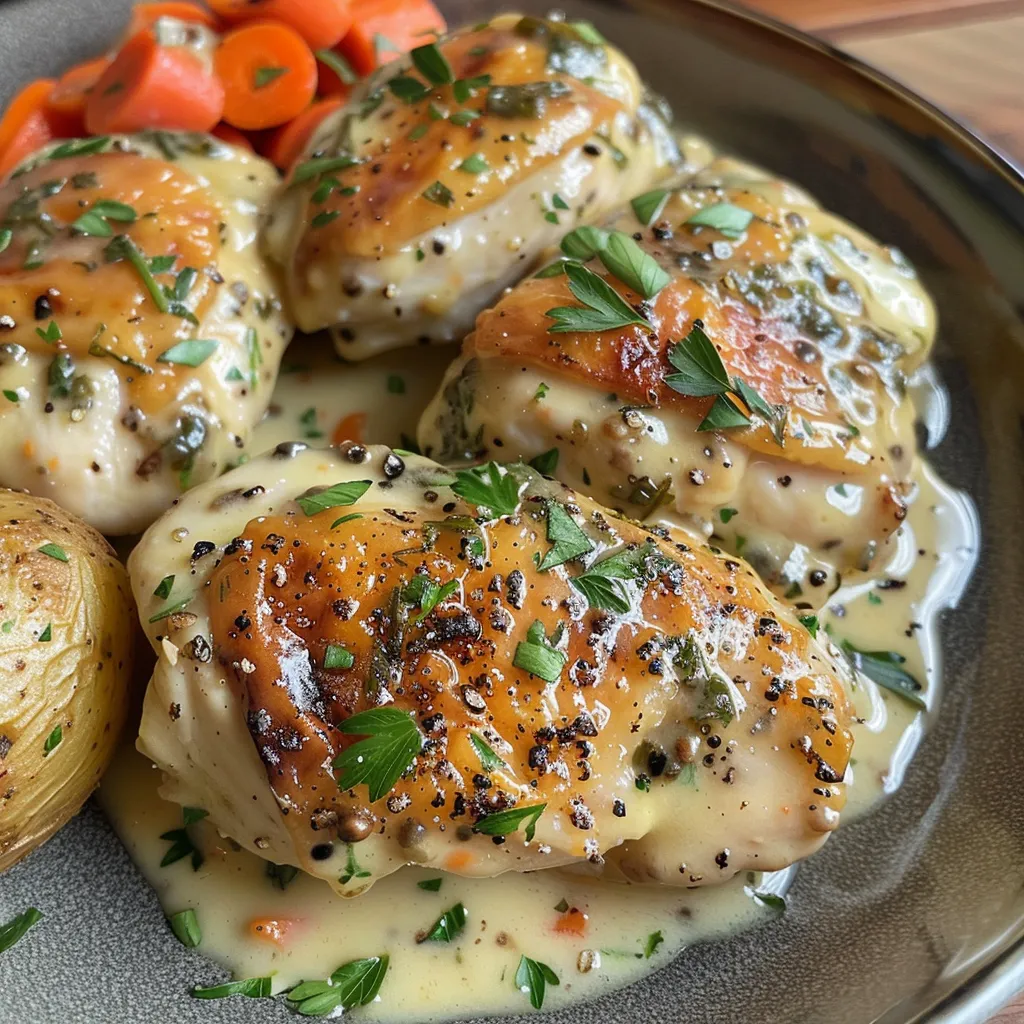
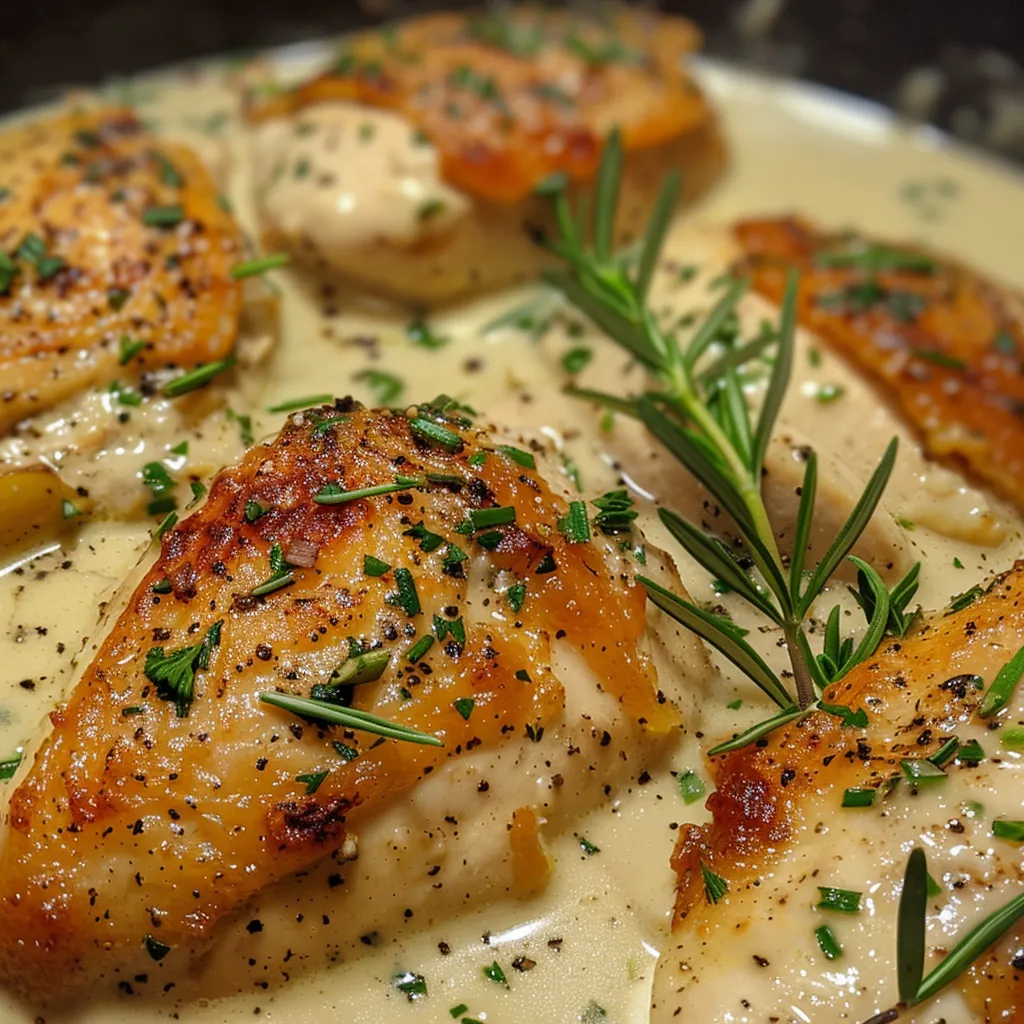
Welcome to a culinary adventure that will ignite your taste buds and elevate your comfort food game! This creamy herb chicken, paired with buttery mashed potatoes and sweet glazed carrots, is a dish that not only warms your heart but also invites you to explore the depths of flavor. As a chef born and raised in San Antonio, Texas, I’ve learned that food is more than just sustenance; it’s an experience, a story, and a fire that brings people together around the table. Let’s dive into this magical recipe that embraces the art of spice and comfort!
Cooking this creamy herb chicken is as delightful as the dish itself. Follow these steps to create a meal that will impress.
Start by boiling the peeled and cubed potatoes in salted water until fork-tender, about 15–20 minutes. Drain and mash them with butter, milk, and salt until smooth. Keep them warm while you prepare the rest.
In a saucepan over medium heat, add the carrots along with butter, brown sugar, salt, and a splash of water. Cover and simmer for 10–12 minutes until tender and glazed, stirring occasionally. Remove the lid for the last 2–3 minutes to thicken the glaze.
Pat the chicken dry and season both sides with salt, pepper, garlic powder, thyme, and rosemary. Heat olive oil and butter in a skillet over medium-high heat. Sear the chicken for 4–5 minutes per side until golden and cooked through. Remove and set aside.
In the same pan, add minced garlic and cook for 30 seconds. Deglaze with chicken broth, scraping up the browned bits. Stir in heavy cream, Parmesan, Dijon mustard (if using), and let it simmer until slightly thickened, about 3–5 minutes.
Return the chicken to the pan and spoon the sauce over it. Simmer for 2 more minutes to meld the flavors.
Plate the mashed potatoes and glazed carrots alongside the chicken, spooning extra sauce over everything. Finish with a sprinkle of parsley or chives for that fresh touch.
Even the best chefs can stumble. Here are some common pitfalls and how to avoid them:
Feeling adventurous? Here are some variations to keep things exciting:
This creamy herb chicken is perfect for meal prep! Here’s how to store and reheat:
Absolutely! Chicken thighs will provide even more flavor and tenderness.
You can substitute with coconut cream or a dairy-free heavy cream alternative.
Ensure the cream is at room temperature before adding it to the hot pan, and avoid boiling.
Yes, you can prepare the components ahead of time and assemble them before serving.
Consider serving with roasted asparagus or a fresh green salad for a balanced meal.
Yes, as long as you use gluten-free chicken broth and Dijon mustard.
Add red pepper flakes or a dash of hot sauce to the herb cream sauce for some heat.
A sturdy skillet or cast-iron pan is ideal for even cooking and browning.
This creamy herb chicken can be adapted for various dietary preferences:
To successfully whip up this dish, consider the following kitchen essentials:
Presentation is key! Here are some tips to make your dish visually appealing:
Cooking is an adventure, and this creamy herb chicken is your passport to a world of flavor! With its delightful combination of textures and tastes, not only will this dish satisfy your cravings, but it will also inspire you to experiment more in the kitchen. Remember, the journey of cooking is just as important as the destination, so embrace the spice, savor each bite, and share the joy of good food with those you love. Now grab your skillet, let the heat inspire you, and let’s make some unforgettable memories around the table!

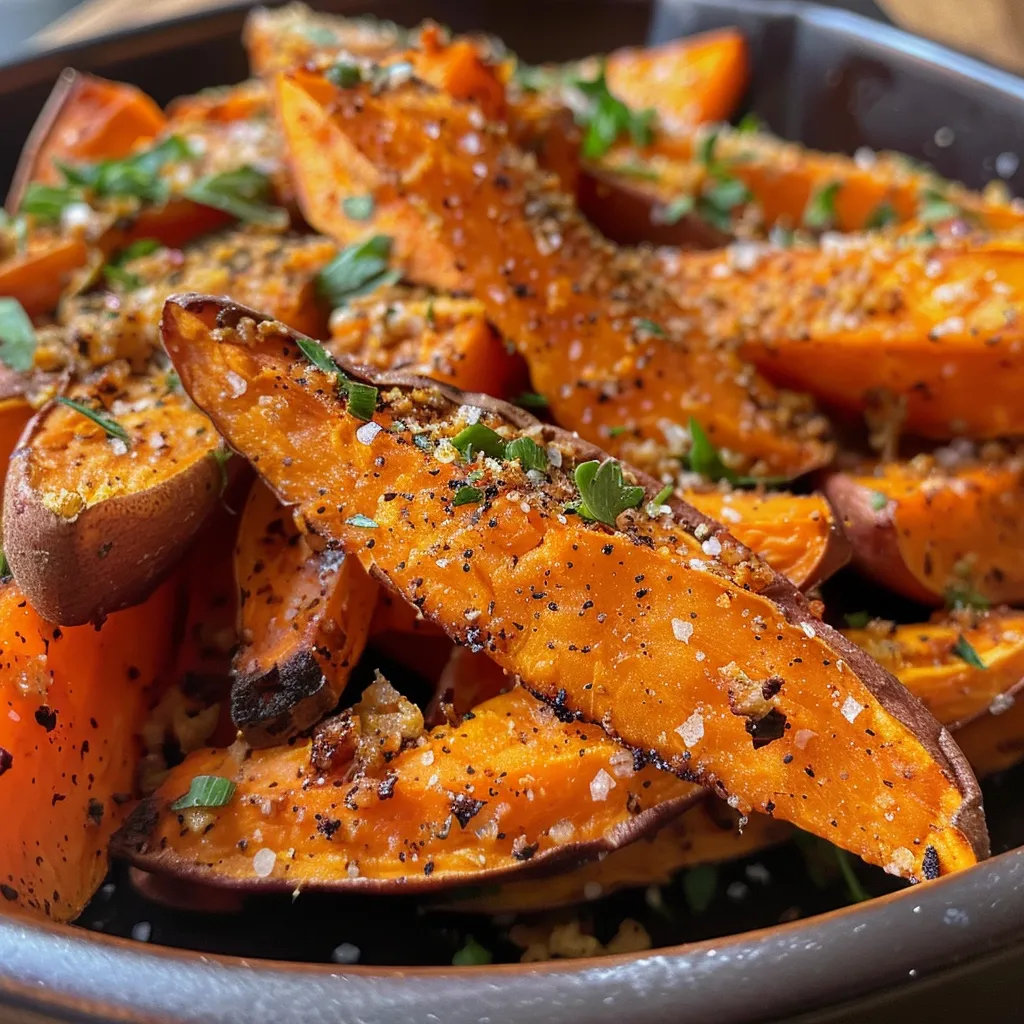
If you’re anything like me, you know that the right side dish can elevate any meal from ordinary to extraordinary. Enter the air fryer sweet potato fries—a dish that’s not just about satisfying your cravings but also about lighting up your taste buds with a symphony of flavors. Imagine biting into a crisp, golden fry that’s tender on the inside, seasoned just right, and bursting with the natural sweetness of the potato. In this comprehensive guide, I’m going to show you how to make the best air fryer sweet potato fries, why they’re a healthier alternative to traditional frying methods, and how to customize them to fit your palate. So roll up your sleeves, grab your air fryer, and let’s dive into this flavorful adventure!
There’s a reason why air fryer sweet potato fries have become a culinary favorite. Here are five compelling benefits that will have you reaching for your air fryer:
Let’s talk about the stars of our show: the ingredients. Here’s what you’ll need to create these irresistible air fryer sweet potato fries, along with some substitution options:

Now that we’ve got our ingredients ready, let’s get cooking! Follow these steps to achieve perfectly crispy fries:
To elevate your cooking game, here are some expert insights that will help you achieve the best results:
Even the best cooks can hit a snag now and then. Here’s how to troubleshoot common issues:
Want to shake things up? Here are some delicious variations to try:
These fries are best enjoyed fresh, but you can certainly make them ahead of time. Here’s how:
Let’s tackle some common questions about air fryer sweet potato fries:
Sweet potato fries can fit into various dietary needs. Here are some tips:
To achieve the best results, here’s what you’ll need:
Now that your sweet potato fries are ready, here are some ideas on how to serve them:
With this ultimate guide to air fryer sweet potato fries, I hope you feel empowered to embrace the art of cooking with heat. Remember, cooking isn’t just about following a recipe; it’s about experimentation and finding your unique flavor. So don’t shy away from bringing your spice cabinet to the forefront! Get out there, try new things, and let your culinary adventure begin. Because when it comes to food, a little fire can turn a simple dish into a story worth telling!

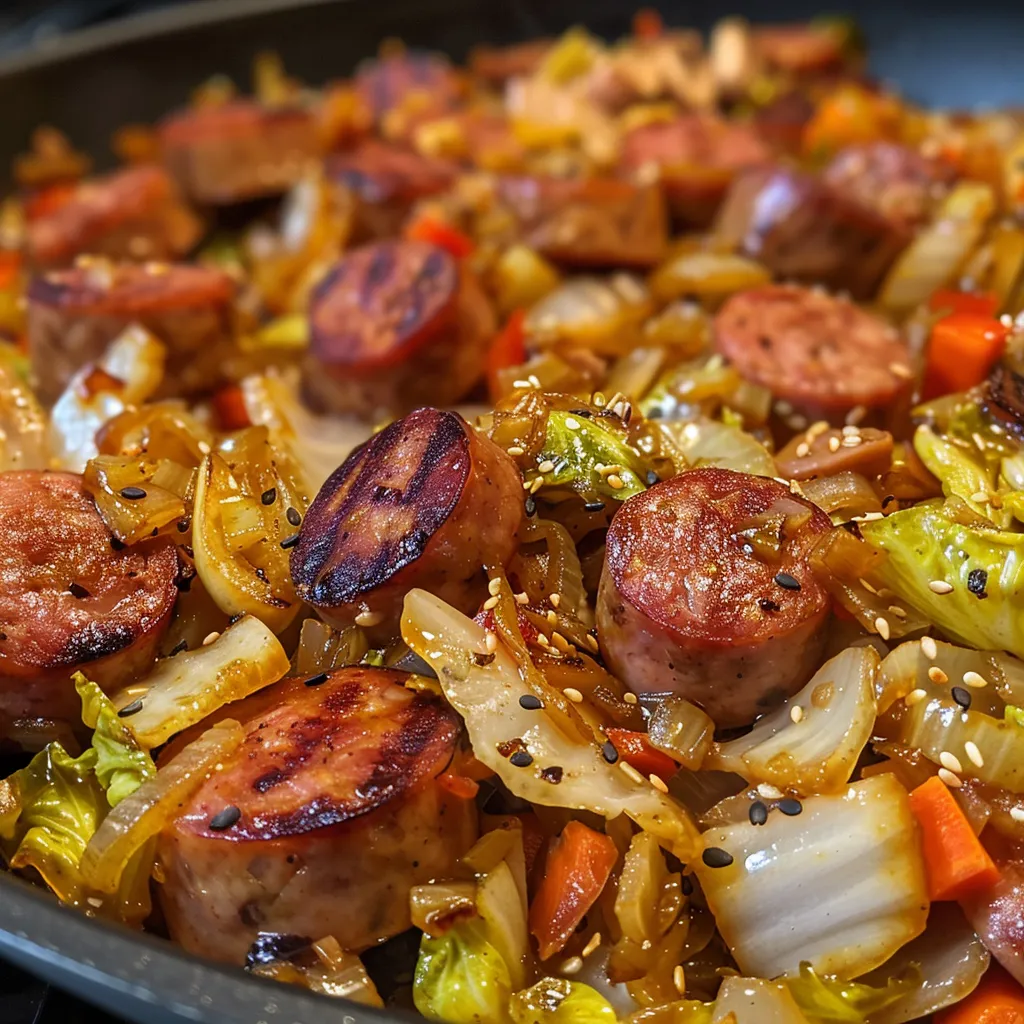
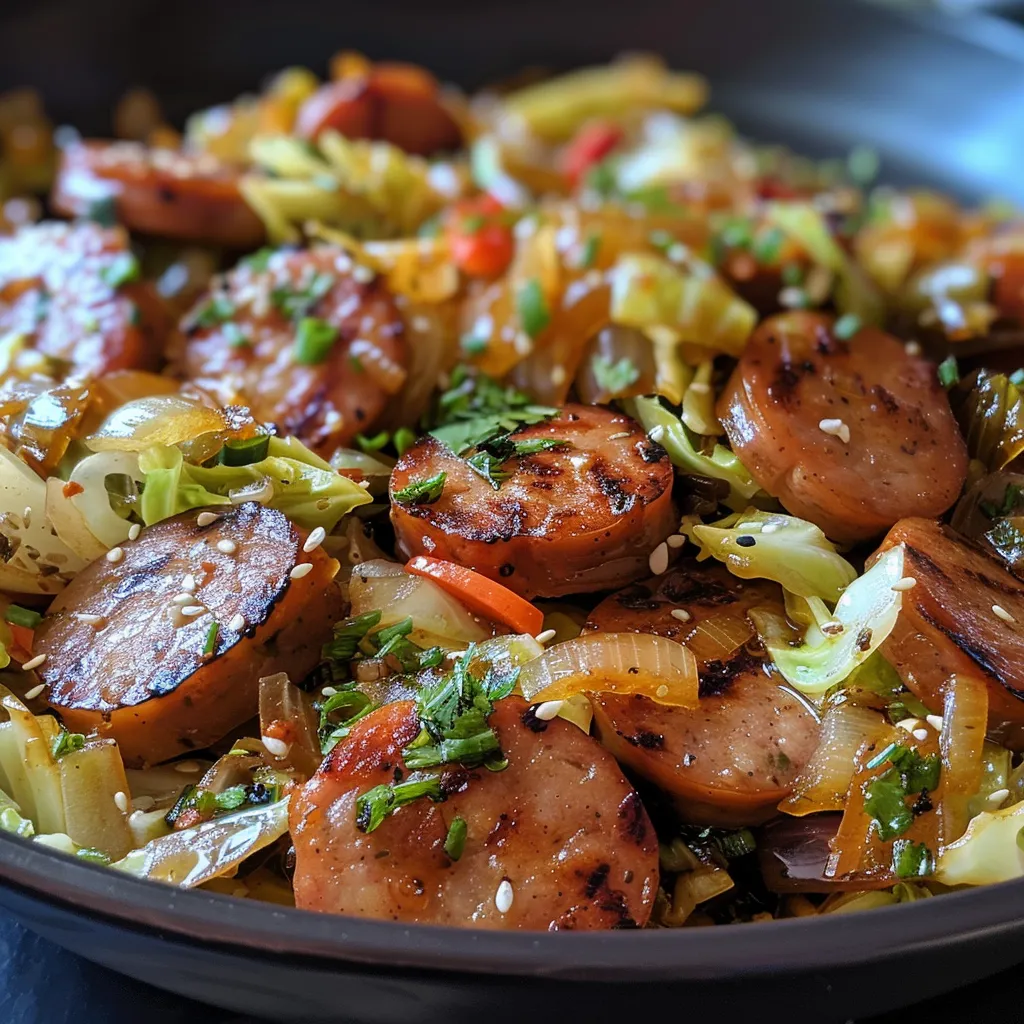
Are you ready to elevate your dinner game? Dive into my Easy Sausage and Cabbage Stir Fry, where smoky sausage meets the crispness of cabbage, all kissed with a hint of spice. In this guide, you’ll discover not just a recipe, but an adventure, a way to embrace the heat and transform a simple meal into a flavorful feast. Whether you’re a kitchen novice or a seasoned cook, this dish is your ticket to a quick, satisfying meal that packs a punch!
Here’s what you’ll need to create this culinary masterpiece:
Let’s get cooking! Follow these simple steps for an unforgettable stir fry:
Let’s make sure your stir fry is perfect every time. Here are some common pitfalls and how to avoid them:
This recipe is a blank canvas! Here are some exciting variations to try:
This stir fry is great for meal prep! Here’s how to store it:
Got questions? I’ve got answers! Here are some FAQs about this delicious stir fry:
This stir fry is not only delicious but can also be tailored to fit various dietary needs:
You don’t need fancy equipment to whip up this dish, but having the right tools can make a difference:
Serve this stir fry on its own or alongside:
There you have it! A comprehensive guide to the Easy Sausage and Cabbage Stir Fry that promises to ignite your passion for cooking. Remember, the kitchen is your playground, and with this recipe, you have the power to make every meal an adventure. So grab your skillet, unleash your creativity, and let the flavors set your taste buds ablaze. Happy cooking!
Welcome, fellow adventurers of flavor! If you’re ready to embrace a culinary journey that melds health with indulgence, you’ve landed in the right place. These Raw Chocolate Brownies are not just another dessert; they’re a testament to the power of wholesome ingredients that ignite your taste buds and set your soul on fire. Imagine sinking your teeth into a rich, fudgy brownie that’s not only delicious but also packed with nutrients. Let’s dive into this recipe and explore why these brownies will become your new favorite treat!
Let’s take a closer look at the key ingredients that make these brownies not just good, but phenomenal.
Even the most experienced cooks can run into pitfalls. Here’s how to troubleshoot:
Want to spice things up? Here are some delightful variations:
These brownies are perfect for meal prep. Here’s how to store them:
These brownies are not just a treat; they’re packed with nutritional benefits:
To make these brownies, you’ll need:
Elevate your brownie experience with these serving ideas:
There you have it! A recipe that celebrates both health and indulgence, inviting you to explore the bold, beautiful world of raw chocolate brownies. Remember, cooking is an adventure, and every bite tells a story. So gather your ingredients, roll up your sleeves, and let the magic of these brownies bring joy to your kitchen. Spice up your life, and enjoy the delicious rewards of your culinary courage!

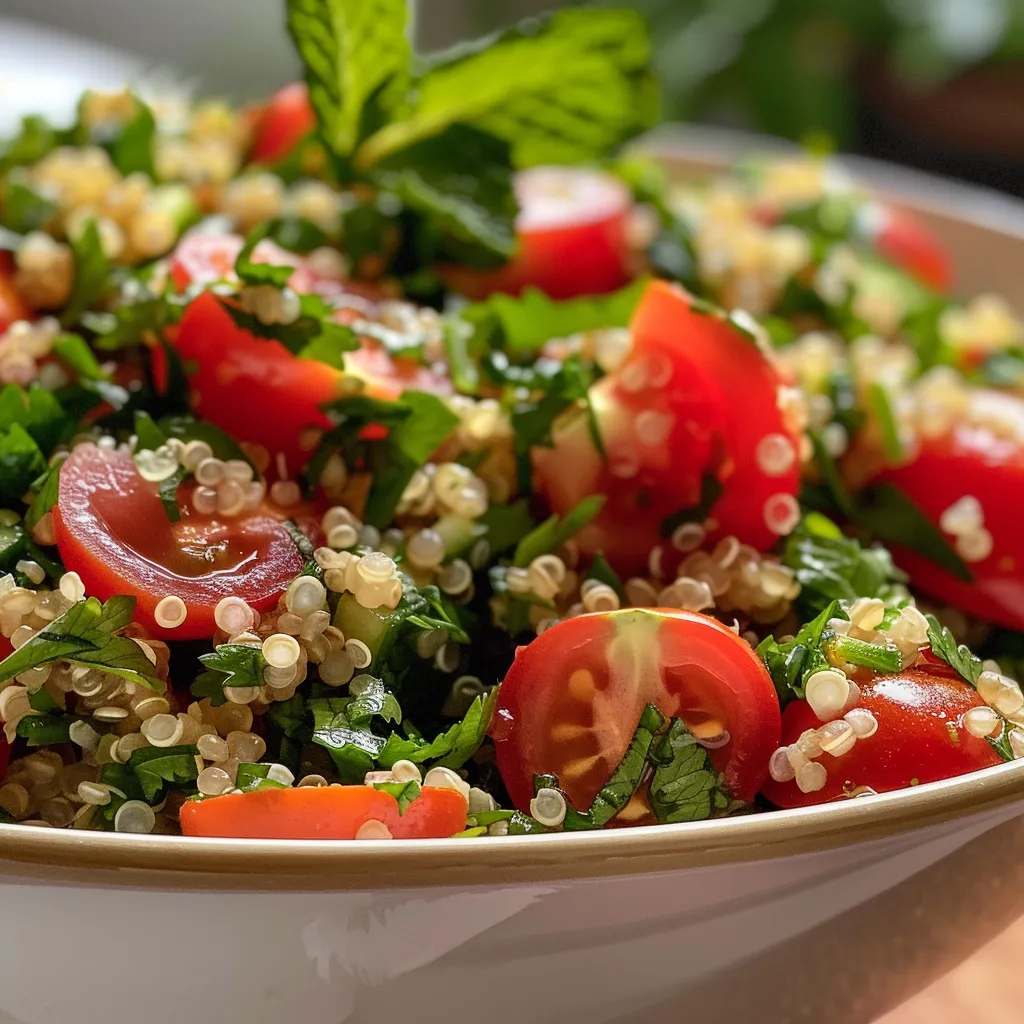
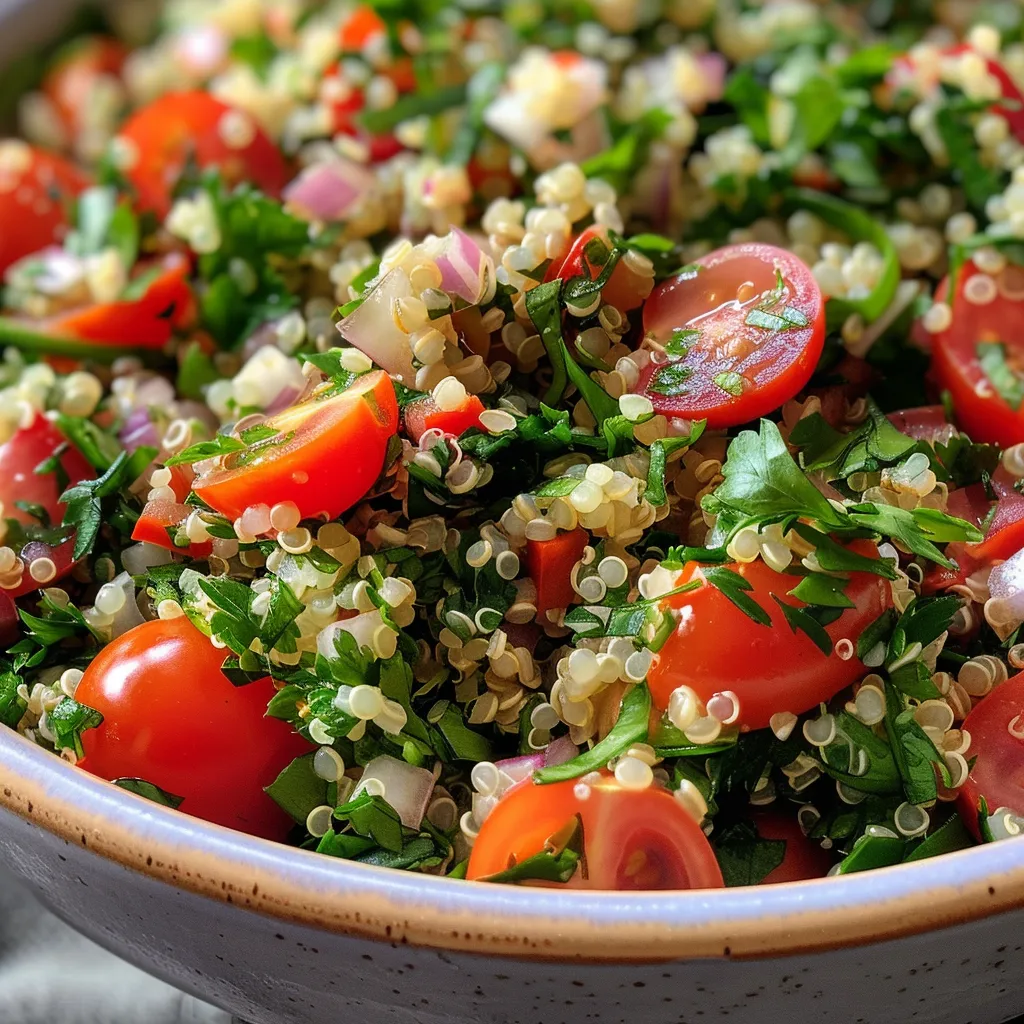
Welcome to a culinary adventure where vibrant flavors meet healthful ingredients! This Quinoa Tabouleh Salad is more than just a meal; it’s a celebration of fresh herbs, zesty lemon, and the nutty goodness of quinoa. Perfect for warm days or as a lively side dish, this salad will ignite your culinary passion. Let’s dive into the reasons you’ll love this recipe and how to make it shine on your kitchen table.
Here’s what you’ll need to create this delicious Quinoa Tabouleh Salad. Explore some great substitutions if you’re missing an ingredient!
Let’s get cooking! Follow these simple steps to create your Quinoa Tabouleh Salad.
Elevate your salad with these expert insights!
Even the best chefs make mistakes! Here are common pitfalls and how to avoid them:
Make this recipe your own with these creative twists!
This salad is perfect for meal prep! Here’s how to store it:
Got questions? Here are some common ones about Quinoa Tabouleh Salad:
This salad not only delights the palate but is also a healthy choice!
For the best results, here are some tools to consider:
How you serve this salad can elevate your meal! Consider these ideas:
Now that you’ve got the full scoop on creating the ultimate Quinoa Tabouleh Salad, it’s time to grab your ingredients and let your culinary creativity run wild! Remember, cooking is not just about following a recipe; it’s about embracing the flavors and letting them tell your story. Enjoy every bite and make it your own!

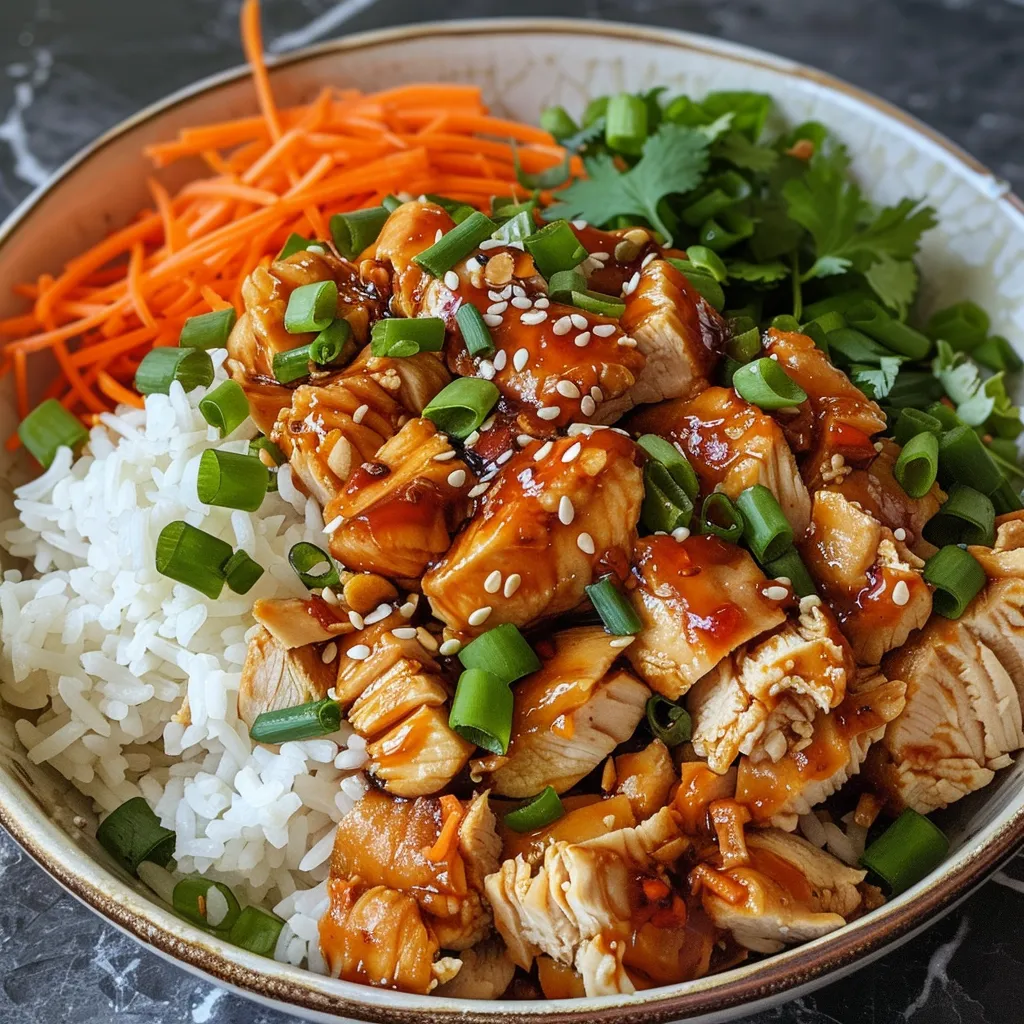
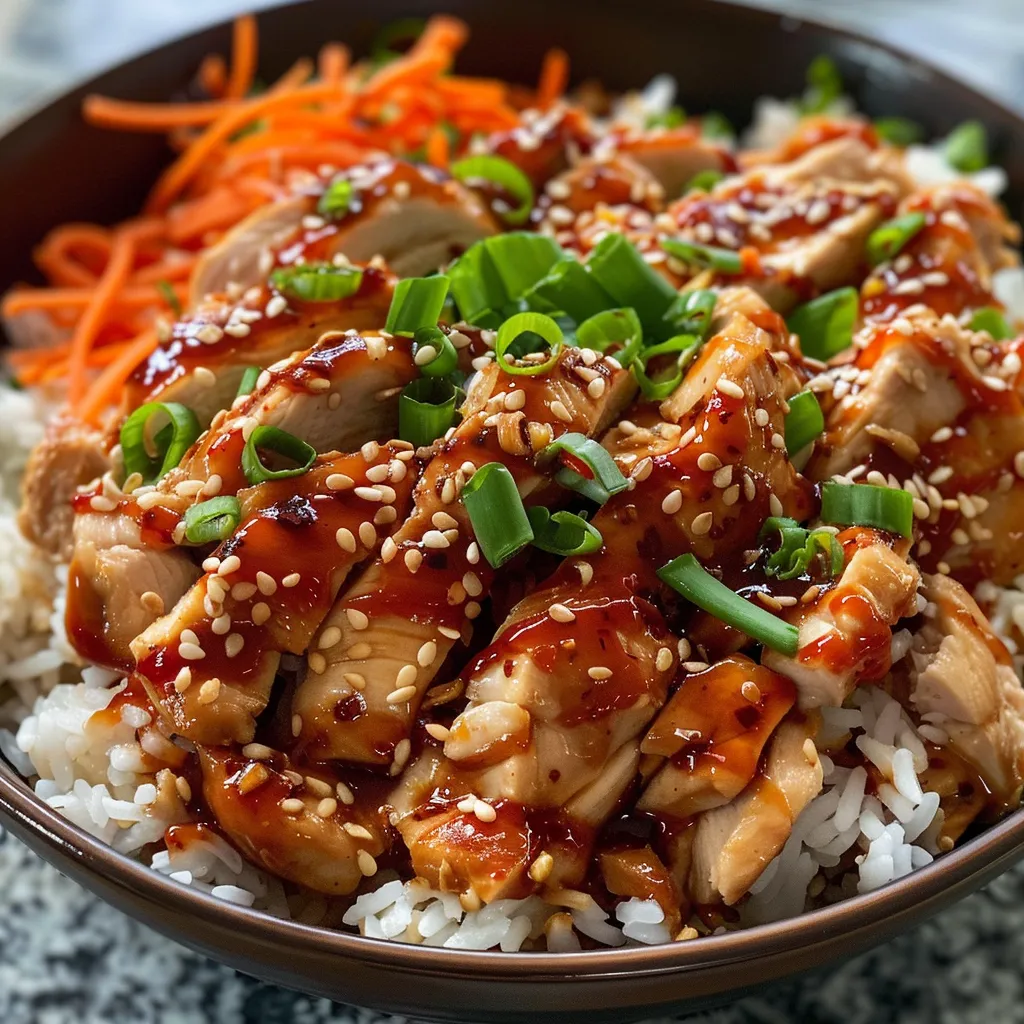
Welcome, my fellow culinary adventurer! Today, we’re diving headfirst into the world of bold flavors with a dish that not only satisfies your hunger but also ignites your passion for cooking: the Sweet Chili Chicken Rice Bowl. This dish combines tender chicken thighs, zesty pickled cucumbers, and a crisp sesame slaw, creating a vibrant explosion of flavors that will make your taste buds dance. Whether you’re a seasoned chef or a kitchen novice, this recipe is your ticket to culinary excitement that comes together in a flash!
Let’s break down the magic of this dish and explore why it’s a favorite in my kitchen. By the end of this article, you’ll be equipped with everything you need to not just make this dish, but to elevate your cooking game to new heights. Ready? Let’s get cooking!
Let’s take a closer look at the ingredients that create this unforgettable Sweet Chili Chicken Rice Bowl.
Now that we have our ingredients prepped and ready, it’s time to bring this Sweet Chili Chicken Rice Bowl to life!
Start by patting your diced chicken thighs dry with paper towels—this helps them get a better sear. In a bowl, toss the chicken with soy sauce to season. Then, sprinkle cornstarch over the pieces and mix until evenly coated. This creates a light, crisp crust once pan-fried.
Rinse the jasmine rice under cold water until it runs clear. In a pot, combine rice with 2¼ cups water and a pinch of salt. Bring to a boil, reduce to low, cover, and cook for 15–18 minutes. Remove from heat and keep covered.
Thinly slice your cucumber and place it in a bowl. Mix rice vinegar, sugar, and salt until dissolved, then pour over cucumbers with just enough water to cover. Let sit while you cook the rest—it gets more flavorful the longer it pickles.
In a mixing bowl, whisk together mayonnaise and ponzu. Add julienned pear, coleslaw mix, and a teaspoon of the pickling liquid. Stir until combined. Season with salt, pepper, and half the sesame seeds.
Heat oil in a large skillet over medium-high heat. Add the chicken in a single layer and let it cook undisturbed for 2–3 minutes until golden. Flip and cook the other side for another 2–3 minutes until crispy and cooked through.
Transfer the cooked chicken to a clean bowl and drizzle with sweet chili sauce. Toss until every piece is glossy and coated.
Fluff your rice and divide it into serving bowls. Top with the sweet chili chicken, a heap of sesame slaw, and drained pickled cucumbers. Finish with the rest of the sesame seeds for a final nutty crunch.
Even the best chefs can encounter bumps in the road. Here are some common pitfalls to avoid and how to troubleshoot them.
Don’t be afraid to switch things up! Here are some variations to make this dish uniquely yours:
This dish is perfect for meal prep! Here’s how to store and reheat your Sweet Chili Chicken Rice Bowls:
For those mindful of nutrition, here are some tips to keep your bowl healthy:
Having the right tools can make all the difference. Here’s what I recommend for this recipe:
Make your Sweet Chili Chicken Rice Bowls even more enticing with these serving suggestions:
Now, my adventurous cook, it’s your turn to take this recipe and make it your own! Embrace the flavors, experiment with variations, and most importantly, have fun in the kitchen. Remember, cooking is an adventure, and every bowl tells a delicious story. So grab your skillet, heat things up, and let’s create some culinary magic together!