Author

Avery Collins

Browsing

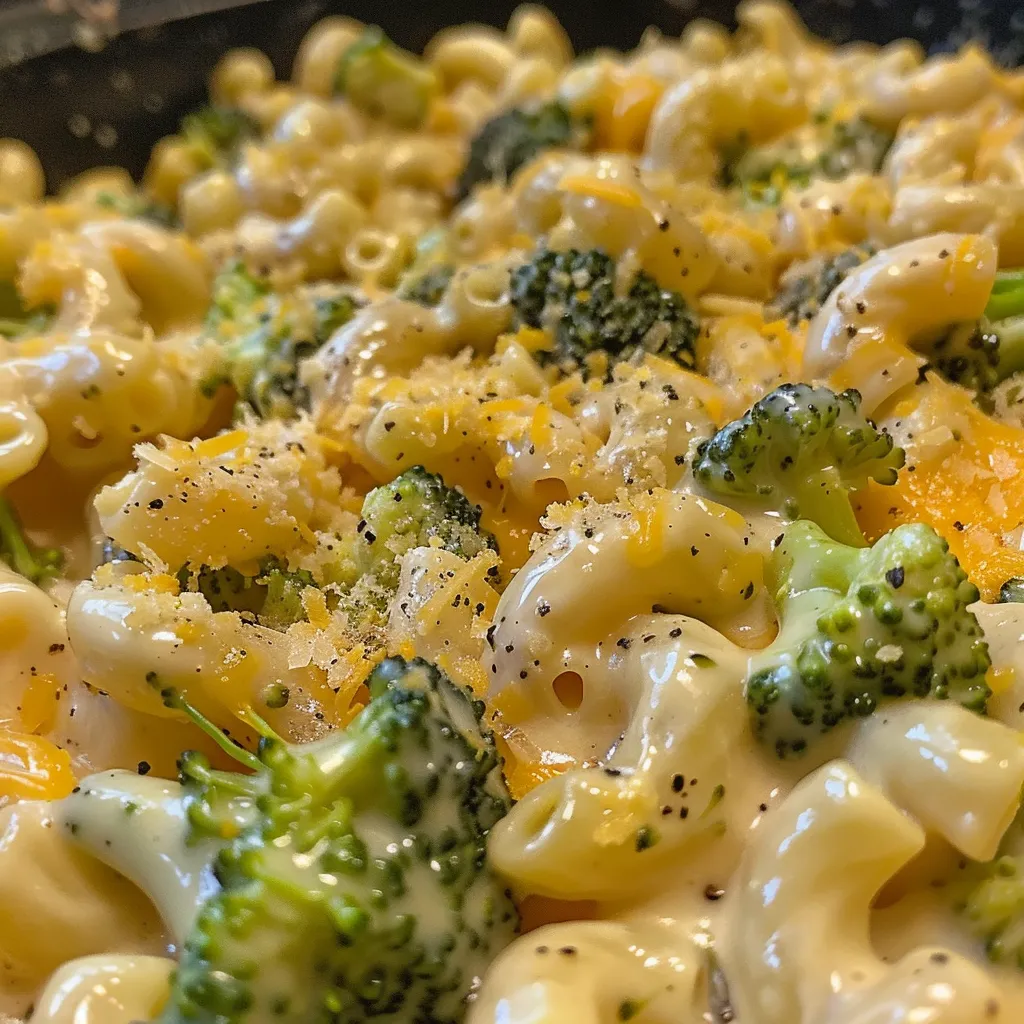
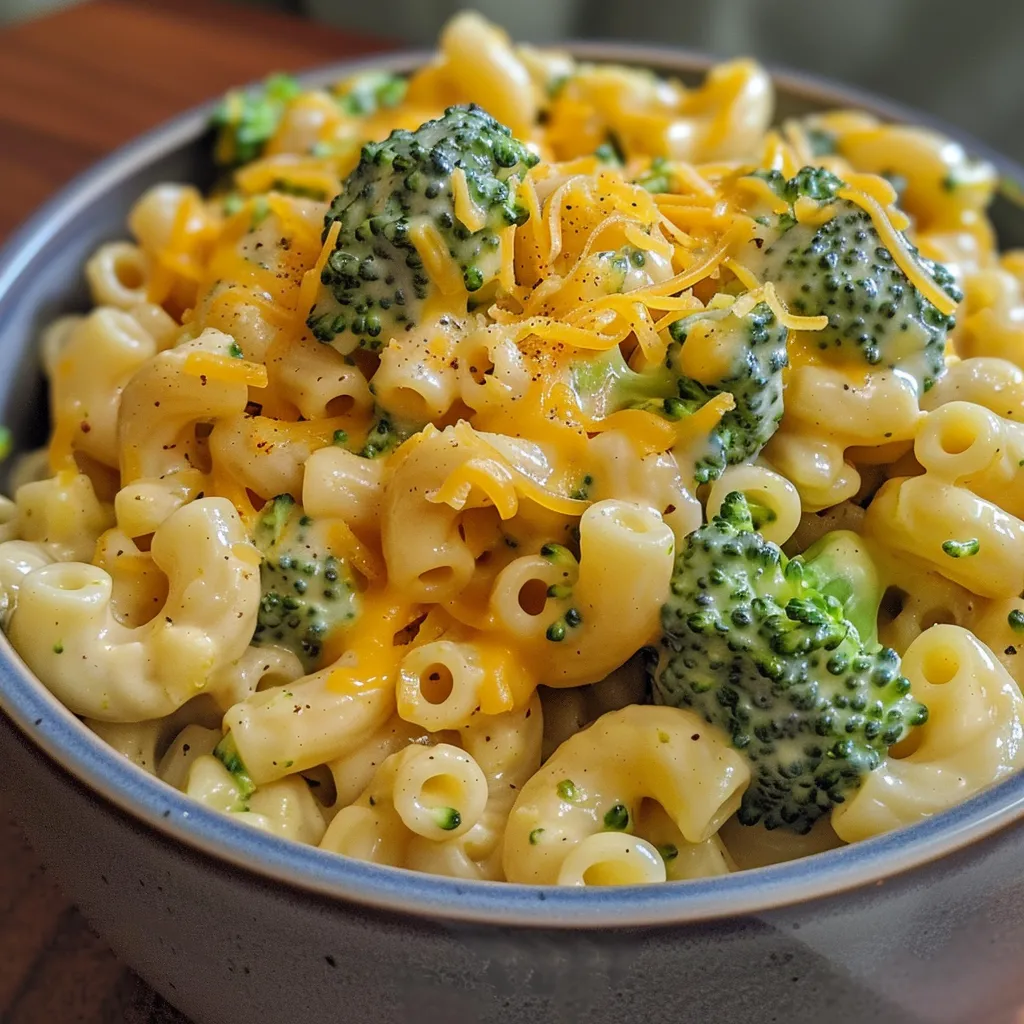
Unleashing Flavor: A Culinary Adventure with One Pot Healthy Broccoli Mac and Cheese

Welcome to the vibrant world of cooking where flavor reigns supreme! Today, we’re diving into a dish that’s not just a meal but an experience — One Pot Healthy Broccoli Mac and Cheese. This isn’t your typical mac and cheese; it’s a celebration of creamy cheddar, fresh broccoli, and the thrill of cooking with ease. As someone who grew up in a kitchen brimming with spices and textures, I can assure you: this recipe will awaken your taste buds and inspire your culinary adventures.

In just one pot, you can whip up a dish that’s comforting and nourishing, making it perfect for busy weeknights or cozy gatherings. So, grab your skillet and let’s turn up the heat!

Why You’ll Love This Recipe

  • One-Pot Wonder: Less cleanup means more time to savor your meal and enjoy with loved ones.
  • Quick and Easy: Ready in under 30 minutes, this recipe is perfect for busy schedules.
  • Nutritious and Delicious: Packed with protein from the cheese and nutrients from the broccoli, it’s a wholesome choice.
  • Comfort Food Reinvented: Indulge guilt-free in the creamy goodness without compromising on health.
  • Customizable: With easy variations, you can make it your own, adding different spices or proteins.

Ingredient Breakdown and Substitutions

Let’s take a closer look at what makes this dish shine:

  • Whole Milk: The creamy base. You can substitute with almond milk or oat milk for a dairy-free option.
  • Water or Broth: I prefer broth for its depth of flavor; however, water is a fine base if that’s all you have.
  • Pasta of Choice: Whether you go for traditional elbow macaroni or whole grain, the choice is yours — and gluten-free options work beautifully too!
  • Fresh Broccoli: Finely chopped for quick cooking, but frozen will do in a pinch.
  • Extra Sharp Cheddar Cheese: This gives the dish its irresistible creaminess. Feel free to experiment with different cheeses like gouda or pepper jack for a spicy kick!
  • Plain Greek Yogurt: Adds creaminess and a subtle tang. You could swap it for sour cream or a vegan yogurt for a plant-based version.
  • Butter or Ghee (optional): A tablespoon elevates the flavor, but you can skip it for a lighter option.

How to Make One Pot Healthy Broccoli Mac and Cheese

Side angle photo of healthy mac and cheese with broccoli, showcasing its rich texture and ingredients.

Ready to unleash the magic in your kitchen? Follow these simple steps:

  1. In a large pot, bring whole milk and water/broth to a boil. Once boiling, add in your pasta and reduce to a simmer for about 10 minutes.
  2. Next, stir in your broccoli and continue to cook for an additional 2-3 minutes until both the pasta and broccoli are cooked to your liking.
  3. Remove from heat and stir in cheese, yogurt, and butter/ghee (if using) until the cheese is melted and everything is well combined. Serve hot and enjoy!

Pro Tips for Success

  • Use Fresh Ingredients: Fresh broccoli provides better flavor and texture. If you’re using frozen, thaw it first for best results.
  • Don’t Overcook the Pasta: Aim for al dente, as the pasta will continue to cook slightly after you remove it from heat.
  • Experiment with Cheeses: Mix different cheeses for a layered flavor profile.
  • Spice It Up: A pinch of cayenne or smoked paprika can add a delightful heat and depth.
  • Stir Thoroughly: Make sure to mix the cheese and yogurt well to achieve that creamy consistency.
  • Garnish Wisely: Top with fresh herbs like parsley or chives for a pop of color and flavor.
  • Serve Immediately: This dish is best enjoyed fresh, while the cheese is gooey and the flavors are vibrant.
  • Pair with a Side: Serve with a simple green salad or crusty bread for a complete meal.

Common Mistakes and Troubleshooting

Even the best chefs can run into hiccups! Here are some common pitfalls and how to avoid them:

  • Too Thick? If the mixture is too thick, stir in a bit more milk or broth to reach your desired consistency.
  • Cheese Not Melting? Make sure to remove the pot from heat before adding cheese to prevent it from clumping.
  • Too Much Heat? If it gets too spicy, balancing with a little extra yogurt can help mellow the flavors.

Variations to Spice Things Up

Your culinary adventure doesn’t have to end here! Try these variations:

  • Protein Boost: Add cooked chicken, turkey, or tofu for a heartier dish.
  • Veggie Delight: Incorporate other vegetables like bell peppers, peas, or spinach for added nutrition.
  • Spicy Kick: Toss in jalapeños or a splash of hot sauce for an extra zing.
  • Herb Infusion: Mix in fresh herbs like basil or thyme for a fragrant twist.

Storage and Make-Ahead Instructions

This dish is perfect for meal prep! Here’s how to store it:

  • Refrigeration: Store leftovers in an airtight container for up to 3 days.
  • Freezing: Freeze in single portions for up to a month. Thaw overnight in the fridge before reheating.
  • Reheating: Gently reheat on the stove with a splash of milk to restore creaminess.

Frequently Asked Questions

  • Can I use different pasta shapes? Absolutely! Any shape will work, but make sure to adjust cooking time as needed.
  • Is this dish gluten-free? Use gluten-free pasta to make this recipe suitable for gluten-free diets.
  • Can I make this vegan? Yes! Substitute with plant-based cheese, yogurt, and milk for a vegan version.
  • What can I serve it with? This dish pairs wonderfully with a fresh salad, garlic bread, or roasted vegetables.
  • How can I make it creamier? Add more cheese or a splash of cream for a richer texture.
  • Can I add more vegetables? Definitely! Feel free to mix in any veggies you like.
  • How long does it take to make? This dish is ready in under 30 minutes!
  • Can I prepare it ahead of time? Yes, follow the storage instructions above for meal prep success.

Nutritional Tips and Dietary Adaptations

This recipe is not only delicious but also nutritious! Here are some tips:

  • Balance Your Plate: Pair with a side of greens for a well-rounded meal.
  • Watch Your Portions: Enjoy in moderation, especially if you’re watching your calorie intake.
  • Adapt for Dietary Needs: Easily modify for dairy-free, gluten-free, or vegetarian diets.

Essential Equipment

To make this dish, you’ll need:

  • Large Pot: For cooking the pasta and combining ingredients.
  • Wooden Spoon: Great for stirring and mixing.
  • Measuring Cups and Spoons: Ensure precise ingredient measurements.
  • Cutting Board and Knife: For chopping vegetables efficiently.

Serving Suggestions

Once your One Pot Healthy Broccoli Mac and Cheese is ready, consider these serving ideas:

  • Garnish with Fresh Herbs: A sprinkle of parsley or basil adds brightness and flavor.
  • Pair with a Side Salad: A simple arugula salad with lemon dressing complements the richness of the dish.
  • Include Crusty Bread: Serve with warm, crusty bread for a satisfying meal.

Conclusion

Cooking is all about exploration, and with this One Pot Healthy Broccoli Mac and Cheese, you’re equipped to create something truly special. Embrace the flavors, play with ingredients, and most importantly, enjoy the process. Remember, every dish you make is a story worth telling — and this one is sure to be a crowd-pleaser. So grab your ingredients, fire up that stove, and let’s cook boldly!

One Pot Healthy Broccoli Mac and Cheese

Prep Time 5 minutes
Cook Time 15 minutes
Total Time 20 minutes
Servings 4 servings
Calories 550
A quick and nutritious one-pot meal combining pasta, broccoli, and cheese for a comforting yet healthy dish.

Ingredients

Liquid

  • 2 cups whole milk
  • 1.5 cups water or broth (prefer broth for more flavor)

Pasta

  • 8 oz pasta of choice

Broccoli

  • 8-10 oz broccoli, finely chopped

Cheese

  • 2 cups shredded extra sharp cheddar cheese

Yogurt

  • 1/4 cup plain Greek-style yogurt

Butter or Ghee

  • 1 tbsp butter or ghee (optional)

Instructions 

  • Bring milk and water/broth to a boil, add pasta, and simmer for 10 minutes.
  • Add broccoli and cook for 2-3 minutes until tender.
  • Remove from heat and stir in cheese, yogurt, and butter/ghee until melted. Serve.

Notes

For extra flavor, use broth instead of water and add a pinch of pepper or paprika.
Calories: 550kcal
Cost: $10
Course: Main Course
Cuisine: American
Keyword: Broccoli, Cheese, One Pot

Nutrition

Calories: 550kcal | Carbohydrates: 70g | Protein: 25g | Fat: 20g | Sodium: 600mg

Ignite Your Taste Buds with a Flavor-Packed Dump-and-Bake Dumpling Red Curry

Welcome to a culinary adventure where bold flavors meet the comforting embrace of home cooking. Today, we’re diving into the vibrant world of Dump-and-Bake Dumpling Red Curry. This dish is not just a recipe; it’s an experience, a dance of spices and textures that will transport your taste buds straight to the heart of Southeast Asia. With a quick prep time and a delightful mix of ingredients, you’ll see why this meal is perfect for busy weeknights or a cozy gathering with friends. So grab your skillet, and let’s turn up the heat!

Why You’ll Love This Recipe

  • Quick & Easy: This recipe requires minimal prep and only one baking dish. Perfect for those nights when time is tight but flavor can’t be compromised.
  • Comforting & Hearty: The combination of creamy coconut milk and fluffy dumplings creates a comforting dish that warms the soul.
  • Customizable: Adjust the spice level and ingredients to suit your palate. Whether you love it spicy or mild, this recipe adapts to your taste.
  • Family-Friendly: A hit with kids and adults alike! The rich flavors and fun dumplings make dinner a delightful experience.
  • One-Pan Wonder: Easy cleanup is a bonus! With everything baked in one dish, you can spend more time enjoying your meal and less time washing up.

Ingredients Breakdown

Let’s get into the heart of this dish: the ingredients. Here’s what you’ll need, along with some tasty substitutions to keep things interesting!

  • 1 tbsp olive oil: For sautéing the aromatic base. Substitute with coconut oil for an extra tropical flavor.
  • 1 small onion, finely chopped: Adds sweetness and depth. Red onions are a great alternative if you prefer.
  • 2 cloves garlic, minced: Fresh garlic elevates the dish. Garlic powder can be used in a pinch.
  • 1 tbsp fresh ginger, grated: For a zesty kick. Ground ginger works too, but fresh is best.
  • 1–2 tbsp red curry paste: Adjust this based on your heat preference. Green curry paste can be a flavorful swap!
  • 1 can (14 oz) coconut milk: The creamy base of this curry. Use light coconut milk for a lower-fat option without sacrificing flavor.
  • 1 cup vegetable or chicken broth: For depth. Homemade broth is ideal, but store-bought works just fine.
  • 1 tbsp fish sauce (optional): Adds umami. For a vegetarian version, substitute with soy sauce or omit entirely.
  • 1 tsp sugar or honey: Balances the flavors. Maple syrup can be used for a vegan option.
  • 1 cup diced bell peppers: Color and sweetness. Any variety works; you can also use frozen veggies!
  • 1 cup diced carrots: Adds crunch and nutrition. Substitute with zucchini for a different texture.
  • 1 cup snap peas or green beans: Freshness in every bite! Frozen options are great too.
  • Salt & pepper to taste: Essential for seasoning. Don’t skimp on this!
  • 1 cup biscuit mix (like Bisquick): For the dumpling base. Homemade biscuit mix can be made easily if you’re feeling adventurous.
  • ½ cup milk: To bring the dumpling batter together. Any milk works — try almond or oat milk for a dairy-free version.
  • 1 tbsp melted butter: Adds richness. Use vegan butter for a plant-based alternative.
  • Optional: chopped cilantro or parsley: Fresh herbs to brighten the dish before serving!

Instructions: How to Create Your Dumpling Delight

Side view of a creamy red curry with dumplings, featuring vibrant bell peppers, carrots, and snap peas.

Ready to bring this dish to life? Follow these simple steps:

  1. Preheat the oven to 375°F (190°C) and lightly grease a 9×13-inch baking dish.
  2. In a bowl, mix together the coconut milk, broth, red curry paste, ginger, garlic, onion, fish sauce, and sugar. Stir in the chopped vegetables and season with salt and pepper.
  3. Prepare the dumpling batter by mixing the biscuit mix, milk, melted butter, and herbs (if using). Drop spoonfuls evenly over the curry mixture — rustic shapes are perfect.
  4. Bake uncovered for 35–40 minutes, or until dumplings are golden and cooked through, and the curry is bubbling.
  5. Let rest for 5 minutes. Serve hot with a sprinkle of fresh cilantro, lime wedges, or a side of jasmine rice if desired.

Pro Tips for Perfection

  • Don’t skimp on the spices: The red curry paste is the star. Adjust according to your heat preference and don’t be afraid to experiment!
  • Use fresh produce: The fresher your ingredients, the more vibrant the flavors. Shop local if you can!
  • Let it rest: Allowing the dish to sit for a few minutes before serving helps the flavors meld beautifully.
  • Experiment with toppings: A dollop of sour cream or a sprinkle of feta cheese can add an unexpected twist!
  • Store leftovers properly: Keep any leftovers in an airtight container in the fridge for up to 3 days.
  • Freeze for later: This dish freezes well! Portion it out in freezer-safe containers for easy meals later.
  • Test for doneness: Ensure the dumplings are cooked through and the curry is bubbling for the best texture.
  • Adjust the thickness: If the sauce seems too thick, add a splash of additional broth or coconut milk.

Common Mistakes and Troubleshooting

Even the best cooks encounter hiccups. Here are some common issues and how to fix them:

  • Too spicy: Balance the heat with a dollop of sour cream or yogurt on top.
  • Dry dumplings: Ensure you don’t overbake! Keep an eye on them after 30 minutes.
  • Too watery: If your curry is too thin, simmer it on the stovetop for a few minutes to reduce the liquid.
  • Flavorless dish: Always taste and adjust seasoning before baking. A pinch of salt or a squeeze of lime can make a world of difference.

Delicious Variations

Looking to mix things up? Try one of these exciting variations:

  • Spicy Shrimp Addition: Toss in some shrimp for a seafood twist. Just add them in the last 15 minutes of baking.
  • Vegan Delight: Use tofu instead of dumplings and sub all animal products with plant-based alternatives.
  • Grain-Free Option: Swap the dumpling mix for a cauliflower rice topping for a lower-carb meal.
  • Extra Veggies: Add more vegetables like broccoli or spinach for an extra dose of nutrition.

Storage and Make-Ahead Instructions

This dish is perfect for meal prep! Here’s how to store it:

  • Refrigerate: Store in an airtight container for up to 3 days.
  • Freeze: Portion into freezer-safe containers and freeze for up to 3 months. Thaw overnight in the fridge before reheating.
  • Reheat: Warm in the oven at 350°F (175°C) until heated through, or microwave in short bursts.

Frequently Asked Questions

Got questions? Here are some common ones answered:

  • Can I use frozen dumplings? Absolutely! Frozen dumplings work perfectly in this recipe.
  • Is this dish gluten-free? Yes, just ensure your biscuit mix is gluten-free.
  • What can I serve with this? Jasmine rice or naan bread are excellent companions!
  • Can I make this ahead of time? Yes! Prepare the curry mixture and store it separately from the dumplings. Assemble and bake when you’re ready.
  • What other proteins can I use? Chicken, beef, or tofu are all great options!
  • How spicy is this dish? The spice level can be adjusted based on the amount of red curry paste you use.
  • Can I add more vegetables? Definitely! Get creative with your favorite veggies.
  • What if I don’t have red curry paste? You can make a homemade version or use another type of curry paste you have on hand.

Nutritional Tips & Dietary Adaptations

For those looking to make this dish healthier:

  • Lower the fat: Use light coconut milk to reduce calories.
  • Increase fiber: Add more vegetables or swap in whole grain dumplings.
  • Protein boost: Incorporate chicken or chickpeas for added protein content.

Essential Equipment

Here’s what you’ll need to whip up this delicious dish:

  • Baking Dish: A 9×13-inch dish works best for even baking.
  • Mixing Bowls: For combining ingredients and prepping your dumplings.
  • Measuring Cups and Spoons: Essential for accuracy in your cooking.
  • Wooden Spoon: Ideal for mixing and serving.

Serving Suggestions

To elevate your dining experience, consider these serving ideas:

  • Garnish: Fresh cilantro, lime wedges, or a drizzle of sriracha can add layers of flavor.
  • Side Dishes: Pair with a light salad or crispy spring rolls for a complete meal.
  • Drink Pairings: A chilled coconut water or a light white wine complements the flavors beautifully.

In conclusion, this Dump-and-Bake Dumpling Red Curry is not just a meal; it’s a celebration of flavor, warmth, and the joy of cooking. With its simple ingredients, easy instructions, and endless variations, this dish is designed for everyone — from the culinary novice to the seasoned chef. So roll up your sleeves, embrace the spice, and let’s create a dish that’s sure to become a family favorite!

Dump-and-Bake Dumpling Red Curry

Prep Time 10 minutes
Cook Time 40 minutes
Total Time 50 minutes
Servings 4 servings
Calories 550
A cozy, flavorful red curry baked with fluffy dumplings, perfect for a comforting meal with minimal effort.

Ingredients

Main ingredients

  • 1 tbsp olive oil
  • 1 small onion, finely chopped
  • 2 cloves garlic, minced
  • 1 tbsp fresh ginger, grated
  • 1–2 tbsp red curry paste (adjust for spice)
  • 1 can (14 oz) coconut milk
  • 1 cup vegetable or chicken broth
  • 1 tbsp fish sauce (optional)
  • 1 tsp sugar or honey
  • 1 cup diced bell peppers
  • 1 cup diced carrots
  • 1 cup snap peas or green beans
  • Salt & pepper to taste Salt & pepper
  • 1 cup biscuit mix (like Bisquick)
  • ½ cup milk
  • 1 tbsp melted butter

Optional toppings

  • to taste chopped cilantro or parsley

Instructions 

  • Preheat oven to 375°F (190°C). Lightly grease a 9×13-inch baking dish.
  • Mix coconut milk, broth, curry paste, ginger, garlic, onion, fish sauce, and sugar. Stir in vegetables and season with salt and pepper.
  • Prepare dumpling batter with biscuit mix, milk, melted butter, and herbs. Drop spoonfuls over the curry mixture.
  • Bake uncovered for 35–40 minutes until dumplings are golden and curry bubbles.
  • Rest for 5 minutes. Serve hot with cilantro or side rice if desired.

Notes

You can adjust spice level with more or less curry paste. For a vegetarian version, omit fish sauce.
Calories: 550kcal
Cost: $15
Course: Main Course
Cuisine: Asian
Keyword: Red Curry

Nutrition

Calories: 550kcal | Carbohydrates: 70g | Protein: 15g | Fat: 25g | Sodium: 900mg

Welcome to a culinary adventure that promises to awaken your senses and challenge your taste buds! In this recipe for Dump-and-Bake Dumpling Red Curry, we’re combining the hearty comfort of dumplings with the vibrant, aromatic spices of red curry. This dish is not just a meal; it’s a celebration of flavor and a testament to the magic of cooking with spice. Whether you’re a busy parent looking for a quick family dinner or a culinary enthusiast eager to experiment, this recipe is your ticket to a delicious, satisfying, and unforgettable experience.

Why You’ll Love This Recipe

  • Effortless Preparation: With a simple dump-and-bake method, this recipe minimizes prep time without sacrificing flavor. Just toss your ingredients together and let the oven do the work!
  • Flavor Explosion: The combination of red curry paste, coconut milk, and fresh vegetables creates a symphony of flavors that will make every bite a delight.
  • Family-Friendly: This dish is perfect for kids and adults alike! The comforting dumplings and creamy curry are sure to please even the pickiest of eaters.
  • Customizable: You can easily adapt the recipe by switching up the vegetables or using different proteins. The possibilities are endless!
  • One-Pan Wonder: Less cleanup means more time to enjoy your meal! Everything cooks in one dish, making it ideal for busy weeknights.

Ingredients Breakdown

Here’s what you need to create this mouthwatering Dump-and-Bake Dumpling Red Curry:

  • 1 tbsp olive oil: For sautéing the aromatic base.
  • 1 small onion, finely chopped: Adds sweetness and depth.
  • 2 cloves garlic, minced: A must for flavor! Fresh garlic elevates the dish.
  • 1 tbsp fresh ginger, grated: Provides a zesty kick and complements the curry.
  • 1-2 tbsp red curry paste: Adjust according to your spice preference — this is where the magic happens!
  • 1 can (14 oz) coconut milk: Creamy goodness that makes the curry rich and luscious.
  • 1 cup vegetable or chicken broth: Enhances the curry’s flavor and provides liquid for the dumplings.
  • 1 tbsp fish sauce (optional): Adds umami; feel free to skip if you prefer a vegetarian version.
  • 1 tsp sugar or honey: Balances the heat and acidity in the dish.
  • 1 cup diced bell peppers: A colorful addition that brings sweetness and crunch.
  • 1 cup diced carrots: Adds texture and natural sweetness.
  • 1 cup snap peas or green beans: For that fresh, crisp bite.
  • Salt & pepper to taste: Essential for seasoning.
  • 1 cup biscuit mix (like Bisquick): The base for your dumplings.
  • ½ cup milk: Helps bind the dumpling mix.
  • 1 tbsp melted butter: For richness in the dumpling batter.
  • Optional: chopped cilantro or parsley: For garnish and a burst of freshness.

Step-by-Step Instructions

Let’s get cooking! Follow these easy steps to whip up your Dump-and-Bake Dumpling Red Curry:

  1. Preheat the Oven: Preheat your oven to 375°F (190°C) and lightly grease a 9×13-inch baking dish.
  2. Prepare the Curry Base: In a large mixing bowl, combine the coconut milk, broth, red curry paste, ginger, garlic, onion, fish sauce, and sugar. Stir in your chopped vegetables and season with salt and pepper.
  3. Make the Dumpling Batter: In a separate bowl, mix the biscuit mix, milk, melted butter, and herbs (if using) until just combined. The batter should be thick but spoonable.
  4. Assemble the Dish: Drop spoonfuls of the dumpling batter evenly over the curry mixture. Don’t worry about making them perfect; rustic shapes are just fine!
  5. Bake to Perfection: Bake uncovered for 35–40 minutes, or until the dumplings are golden brown and cooked through, and the curry is bubbling invitingly.
  6. Rest and Serve: Let the dish rest for about 5 minutes before serving. Garnish with fresh cilantro or parsley, and serve hot with lime wedges or jasmine rice if desired.

Pro Tips for the Best Dumpling Bake

  • Spice It Up: Adjust the amount of red curry paste based on your family’s heat tolerance. Start with less if you’re unsure!
  • Texture Matters: For fluffy dumplings, avoid overmixing the batter. Stir just until combined.
  • Vegetable Variations: Feel free to swap out veggies with what you have on hand. Zucchini or mushrooms can add a delightful twist!
  • Make It Ahead: Prepare the curry base a day in advance and store it in the fridge. Just add the dumpling batter before baking!
  • Frozen Dumplings: If you’re short on time, you can use store-bought frozen dumplings instead of making your own.
  • Perfect Pairing: Serve with a side of steamed jasmine rice to soak up all that delicious curry sauce.
  • Garnish Wisely: A sprinkle of lime juice and fresh herbs right before serving brightens up the dish beautifully!
  • Leftover Love: This dish holds up well in the fridge and tastes even better the next day — the flavors meld beautifully!

Common Mistakes and Troubleshooting

Even the best chefs have faced kitchen mishaps! Here are common pitfalls to avoid:

  • Overcooking the Dumplings: Keep an eye on your dumplings. If they’re in the oven too long, they may become dry.
  • Too Spicy?: If the curry is too spicy for your taste, balance it with a little more coconut milk or a dash of sugar.
  • Not Enough Liquid: If your curry appears too thick before baking, add a splash of broth or water to ensure a creamy consistency.
  • Skipping Seasoning: Don’t skip the salt and pepper — they enhance all the flavors in the dish!

Flavor Variations

Let your creativity run wild! Try these variations to mix things up:

  • Protein Power: Add shredded cooked chicken, shrimp, or tofu for a protein-packed meal.
  • Vegan Delight: Swap fish sauce with soy sauce or coconut aminos and use vegetable broth for a vegan version.
  • Herb Infusion: Experiment with different herbs like basil or mint for a fresh twist on the traditional flavor.
  • Cheesy Addition: Stir in some shredded cheese before baking for a creamy, cheesy dumpling experience!

Storage and Make-Ahead Instructions

This dish is perfect for meal prep! Here’s how to store and reheat:

  • Refrigeration: Store leftovers in an airtight container in the fridge for up to 3 days.
  • Freezing: You can freeze the assembled dish before baking. Just thaw in the fridge overnight before cooking.
  • Reheating: Reheat in the oven at 350°F (175°C) until warmed through, or in the microwave for a quick fix.

FAQs

Let’s tackle some common questions about this recipe:

  • Can I use homemade dumplings?: Absolutely! Feel free to use your favorite dumpling recipe or store-bought varieties.
  • What if I can’t find red curry paste?: You can substitute with green curry paste, although the flavor will differ slightly.
  • How do I adjust the spiciness?: Start with a smaller amount of curry paste and taste as you go. You can always add more!
  • Can I make this dish gluten-free?: Yes! Use a gluten-free biscuit mix and ensure your broth is gluten-free.
  • Is this recipe kid-friendly?: Definitely! The flavors are bold yet comforting, making it a hit with kids.
  • Can I use frozen vegetables?: Yes! Frozen veggies work well in this dish and can save you prep time.
  • How long does it take to make this dish?: Total time is around 50 minutes, including prep and baking!
  • What should I serve with this?: Jasmine rice or a fresh salad pairs perfectly with the dumpling curry!

Nutrition Tips and Dietary Adaptations

Looking to make this dish even healthier? Here are some tips:

  • Whole Ingredients: Opt for whole grain biscuit mix for added fiber.
  • Reduce Sodium: Use low-sodium broth and fish sauce to keep the sodium levels in check.
  • Load Up on Veggies: Feel free to add more vegetables to boost the nutritional value of the dish.
  • Balanced Meals: Pair with a side of greens to create a well-rounded meal.

Equipment Recommendations

Here’s a quick list of tools that will make your cooking experience smoother:

  • 9×13-inch baking dish: Ideal for assembling and baking the dish.
  • Mixing bowls: For combining ingredients easily.
  • Measuring cups and spoons: Essential for accurate ingredient measurements.
  • Wooden spoon: Perfect for mixing your curry base and dumpling batter.

Serving Suggestions

Ready to dig in? Here’s how to serve your Dump-and-Bake Dumpling Red Curry:

  • Fresh Herbs: Garnish with chopped cilantro or parsley for an added burst of flavor.
  • Lime Wedges: Serving lime wedges on the side gives a zesty kick to the dish.
  • Rice Heaven: Serve alongside fluffy jasmine rice to soak up the aromatic curry sauce.
  • Crunchy Side Salad: A refreshing salad can complement the rich curry beautifully.

So there you have it! Your definitive guide to the Dump-and-Bake Dumpling Red Curry that not only promises an explosion of flavor but also celebrates the joy of cooking boldly. Embrace the heat, mix up the ingredients, and make this dish your own. Ready to spice up your kitchen? Let’s get cooking!

Dump-and-Bake Dumpling Red Curry

Prep Time 10 minutes
Cook Time 40 minutes
Total Time 50 minutes
Servings 4 servings
Calories 550
A quick and cozy baked red curry with fluffy dumplings, perfect for a comforting meal.

Ingredients

Dumpling Batter

  • 1 tbsp olive oil
  • 1 small onion, finely chopped
  • 2 cloves garlic, minced
  • 1 tbsp fresh ginger, grated
  • 1–2 tbsp red curry paste (adjust for spice)
  • 1 can (14 oz) coconut milk
  • 1 cup vegetable or chicken broth
  • 1 tbsp fish sauce (optional)
  • 1 tsp sugar or honey
  • 1 cup diced bell peppers
  • 1 cup diced carrots
  • 1 cup snap peas or green beans
  • Salt & pepper to taste

Dumpling Batter

  • 1 cup biscuit mix (like Bisquick)
  • ½ cup milk
  • 1 tbsp melted butter

Optional toppings

  • to taste chopped cilantro or parsley

Instructions 

  • Preheat oven to 375°F (190°C) and grease a 9×13-inch dish.
  • Mix coconut milk, broth, curry paste, ginger, garlic, onion, fish sauce, and sugar. Add vegetables and season with salt and pepper.
  • Prepare dumpling batter by combining biscuit mix, milk, melted butter, and herbs. Drop spoonfuls over the curry mixture.
  • Bake uncovered for 35–40 minutes until dumplings are golden and curry bubbles.
  • Rest for 5 minutes, then serve hot with cilantro or sides.

Notes

You can customize the spice level with more or less curry paste.
Calories: 550kcal
Cost: $15
Course: Main Course
Cuisine: Thai
Keyword: Red Curry

Nutrition

Calories: 550kcal | Carbohydrates: 70g | Protein: 15g | Fat: 25g | Sodium: 900mg

Ignite Your Palate: The Ultimate Serbisches Reisfleisch Experience

Welcome to a culinary adventure that will set your taste buds ablaze! Today, we’re diving into the vibrant world of Serbisches Reisfleisch, a dish that marries aromatic spices with tender chicken and a colorful medley of vegetables. If you’re looking to elevate your cooking game, this recipe will not only awaken your culinary spirit but also bring warmth and excitement to your kitchen. Get ready to embrace the thrill of cooking with heat!

Why You’ll Love This Recipe

This is not just another rice dish; it’s a celebration of flavor and culture. Here’s why this Serbisches Reisfleisch will become a staple in your kitchen:

  • Incredible Flavor Profile: The combination of spices, herbs, and fresh ingredients creates a symphony of taste that dances on your palate.
  • Quick and Easy: With straightforward steps and minimal prep time, you can whip up this dish in under an hour.
  • Versatile Meal: Perfect for weeknight dinners or special gatherings, this dish is bound to impress.
  • Healthy Ingredients: Packed with vegetables and lean protein, it’s a nourishing option that doesn’t skimp on flavor.
  • Family-Friendly: Even the pickiest eaters will be drawn in by the enticing aromas and vibrant colors.

Ingredient Breakdown

Let’s gather what you need to create this mouthwatering dish. Each ingredient plays a vital role in crafting the perfect Serbisches Reisfleisch.

  • 160 g Basmati Reis: This long grain rice is known for its fluffy texture and nutty flavor, making it the ideal base.
  • 250 g passierte Tomaten: These crushed tomatoes add a rich, tangy depth to the dish.
  • 100 g Erbsen: Fresh or frozen, they add a pop of color and sweetness.
  • 2 Paprika: Use vibrant red bell peppers for sweetness and crunch.
  • 450 ml Gemüsebrühe: A flavorful vegetable broth enhances the rice and ties all the flavors together.
  • 350 g Hähnchenbrustfilet: Tender chicken breast adds protein and heartiness to the dish.
  • 2 TL Salz: Essential for bringing out the natural flavors of the ingredients.
  • 1 TL Paprika edelsüß: This sweet paprika adds color and a mild flavor.
  • 1/2 TL Cayenne Pfeffer oder Paprika rosenscharf: Adjust the heat to your liking — a dash of cayenne brings a delightful kick!
  • 2 Knoblauchzehen: Fresh garlic sends the flavor profile soaring.
  • 1 Zwiebel: A finely chopped onion adds sweetness and depth.

Step-by-Step Instructions

Delicious Serbisches Reisfleisch in a side view, featuring colorful ingredients like peas and diced tomatoes.

Now that you have your ingredients, let’s get cooking! Follow these simple steps to create a dish that even your grandmother would be proud of.

  1. Peel and finely dice the onion and garlic.
  2. Dice the red bell peppers into small cubes.
  3. Cut the chicken breast into approximately 1 cm cubes.
  4. Heat a splash of olive oil in a large skillet or pot.
  5. Add the diced onion and sauté until translucent.
  6. Stir in the bell peppers and chicken, cooking for an additional 2 minutes until the chicken is slightly browned.
  7. Add the spices and garlic, letting them bloom for a minute.
  8. Stir in the rice and peas before pouring in the passierte Tomaten and Gemüsebrühe.
  9. Cover and let simmer for about 14 minutes until the rice is tender.
  10. Adjust seasoning to taste and enjoy your culinary masterpiece!

Pro Tips for Perfecting Serbisches Reisfleisch

Want to take your dish from great to unforgettable? Here are some expert insights:

  • Use Fresh Ingredients: The fresher your produce, the more vibrant your dish will be.
  • Don’t Rush the Cooking: Allow the flavors to meld by letting it simmer undisturbed.
  • Adjust the Spice Level: Start small with cayenne pepper and adjust based on your heat tolerance.
  • Experiment with Proteins: Substitute chicken for beef or even tofu for a vegetarian version.
  • Add Fresh Herbs: A sprinkle of fresh parsley or cilantro at the end brightens the entire dish.
  • Leftovers are Gold: This dish gets even better as it sits; make ahead for meal prep.
  • Check for Doneness: Ensure the rice is fully cooked by tasting before serving.
  • Use a Lid: Keeps the moisture in while cooking, ensuring fluffy rice.

Common Mistakes and Troubleshooting

Even the best chefs face hiccups in the kitchen. Here’s how to tackle common issues:

  • Rice Too Sticky: This may mean too much water was used or the rice wasn’t rinsed beforehand. Rinse until water runs clear before cooking.
  • Too Much Heat: If it’s too spicy, balance with a touch of sugar or additional creaminess from sour cream.
  • Undercooked Rice: If your rice isn’t tender after 14 minutes, add a splash more liquid and continue cooking.
  • Flavor Lacking: Adjust seasoning; a bit more salt or a squeeze of lemon juice can elevate the dish.

Variations to Spice Things Up

Get creative! Here are four exciting variations of this classic dish:

  • Beef Variation: Substitute chicken with lean beef for a heartier version.
  • Vegetable Delight: Omit the meat and amp up the veggies with zucchini, carrots, or mushrooms.
  • Spicy Sausage Rice: Add sliced spicy sausage for a savory twist.
  • Vegan Option: Swap chicken for chickpeas and use vegetable broth for a plant-based meal.

Storage and Make-Ahead Instructions

Planning ahead? Here’s how to store and reheat your Serbisches Reisfleisch:

  • Refrigeration: Store leftovers in an airtight container for up to 4 days.
  • Freezing: This dish freezes well! Store in a freezer-safe container for up to 3 months.
  • Reheating: Reheat on the stovetop with a splash of broth or in the microwave until heated through.

Comprehensive FAQ

Got questions? We’ve got answers! Here are some common queries about Serbisches Reisfleisch:

  • Can I use brown rice? Yes, but increase the cooking time and liquid.
  • Is this dish gluten-free? Yes, as long as the broth is gluten-free!
  • What’s the best way to reheat leftovers? On the stovetop with a splash of broth for best results.
  • Can I make this dish vegetarian? Absolutely! Just skip the chicken and use beans for protein.
  • How do I ensure the rice doesn’t burn? Keep the heat low and add enough liquid.
  • What spices can I add for more flavor? Consider cumin or coriander for a unique twist.
  • Can I add more vegetables? Yes! Get creative with seasonal veggies.
  • How do I store leftovers safely? Cool completely before sealing in an airtight container.

Nutritional Tips and Dietary Adaptations

This dish can easily fit into various dietary preferences:

  • Low-Carb Option: Swap rice for cauliflower rice.
  • Paleo-Friendly: Use a mix of vegetables instead of rice.
  • Higher Protein: Add more chicken or beans for a protein punch.
  • Low-Sodium: Opt for low-sodium broth and reduce added salt.

Equipment Recommendations

Having the right tools makes cooking a breeze. Here’s what you’ll need:

  • Large Skillet or Pot: For even cooking and a nice sear on the chicken.
  • Sharp Knife: Makes prepping your ingredients quick and easy.
  • Cutting Board: Essential for safe chopping of veggies.
  • Measuring Cups and Spoons: For accurate ingredient measurements.

Serving Suggestions

Presentation matters! Here’s how to serve your Serbisches Reisfleisch:

  • Garnish: Top with fresh parsley for a pop of color and flavor.
  • Accompaniments: Serve with a side salad or crusty bread to soak up the delicious sauce.
  • Elevate the Experience: Pair with a chilled white wine or a refreshing beverage.

Conclusion

There you have it! A comprehensive guide to making Serbisches Reisfleisch that will not only satisfy your hunger but also ignite a fire in your culinary journey. Remember, cooking is about exploration and enjoyment, so don’t be afraid to add your personal touch. Grab your skillet, embrace the adventure, and let the flavors inspire you! Your kitchen is your canvas, and spice is your paint. Happy cooking!

Serbisches Reisfleisch

Prep Time 10 minutes
Cook Time 20 minutes
Total Time 30 minutes
Servings 4 servings
Calories 550
A flavorful Serbian-style rice dish with chicken, vegetables, and rich spices, perfect for a hearty meal.

Ingredients

Main ingredients

  • 160 g Basmati Reis
  • 250 g passierte Tomaten
  • 100 g Erbsen
  • 2 pieces Paprika
  • 450 ml Gemüsebrühe
  • 350 g Hähnchenbrustfilet
  • 2 TL Salz
  • 1 TL Paprika edelsüß
  • 0.5 TL Cayenne Pfeffer oder Paprika rosenscharf
  • 2 cloves Knoblauchzehen
  • 1 piece Zwiebel

Instructions 

  • Zwiebel und Knoblauch fein würfeln, Paprika in kleine Würfel schneiden, Hähnchen in 1cm Stücke.
  • Olivenöl erhitzen, Zwiebel anbraten, Paprika und Hähnchen hinzufügen und 2 Minuten braten.
  • Gewürze und Knoblauch dazugeben, kurz mitbraten, Reis und Erbsen hinzufügen, mit Tomaten und Brühe ablöschen.
  • Abgedeckt 14 Minuten köcheln lassen, bis der Reis gar ist, dann abschmecken und servieren.

Notes

Guten Appetit! Für mehr Geschmack, frische Kräuter hinzufügen.
Calories: 550kcal
Cost: $12
Course: Main Course
Cuisine: Serbian
Keyword: chicken, Rice

Nutrition

Calories: 550kcal | Carbohydrates: 85g | Protein: 35g | Fat: 10g | Sodium: 1500mg

Unleash the Flavor: The Comforting Cauliflower Chicken Casserole That Dares to Spice Things Up

Welcome to a culinary adventure that transforms humble ingredients into a dish that warms both the heart and the stomach! My Cauliflower Chicken Casserole is not just a meal; it’s a flavorful experience that invites you to embrace the boldness of spice while savoring creamy goodness. In this article, we’ll dive deep into the magic of this casserole, explore its many facets, and equip you with everything you need to make this dish a showstopper at your next gathering.

Whether you’re a seasoned home cook or just starting your culinary journey, this recipe is designed for everyone. With a blend of tender cauliflower and broccoli, creamy sauces, and shredded chicken, it’s a comforting dish that’s packed with flavor and perfect for a family meal or a cozy night in. So, let’s get cooking!

Why You’ll Love This Recipe

  • Comfort in a Dish: This casserole combines creamy and cheesy layers with the satisfying crunch of tender veggies, creating a dish that feels like a warm hug.
  • Perfect for Meal Prep: Make it ahead of time and reheat throughout the week. It holds its flavor beautifully, making it a go-to for busy nights.
  • Endless Customization: With variations and substitutions, you can make this casserole your own, whether you’re vegan, gluten-free, or just looking to switch things up.
  • Nutritious and Delicious: Packed with vitamins from cauliflower and broccoli, this dish gives you the comfort food experience without compromising your health.
  • Impress Your Guests: Serve it at gatherings, and watch as your friends and family rave about the explosion of flavors!

Ingredient Breakdown and Substitutions

Let’s get into the heart of this dish—the ingredients. Here’s what you need, along with some useful substitutions to make this casserole truly yours:

  • 2 cups cauliflower florets: Fresh or frozen works! Just ensure they’re well-drained if using frozen.
  • 2 cups broccoli florets: Broccoli adds a vibrant color and flavor. Substitute with green beans if you prefer.
  • ½ cup cream cheese (softened): The creamy base that ties everything together. Use Greek yogurt for a lighter version.
  • 2 tbsp mayonnaise: Adds richness. Swap with sour cream for a tangy twist.
  • ½ tsp garlic powder: Elevates flavor. Fresh minced garlic can be used for a stronger kick.
  • ¼ tsp sea salt: Adjust to taste!
  • ¼ tsp freshly ground pepper: Freshly ground is best for flavor.
  • ¾ cup grated cheese: A mix of cheddar and mozzarella creates the perfect cheesy topping. Experiment with pepper jack for some heat!
  • 2 cups cooked and shredded chicken: Use rotisserie chicken for convenience or any leftover cooked chicken.

Step-by-Step Instructions

Juicy, golden cauliflower chicken casserole displayed in a baking dish, featuring broccoli and cheese.

Ready to bring this casserole to life? Follow these simple steps:

  1. Preheat your oven to 375°F (190°C). Grease a 9 x 9 oven-safe dish with avocado oil spray and set it aside.
  2. Prepare your cauliflower and broccoli. In a large saucepan, bring about 2 inches of water to a rolling boil. Add the florets and cook for 2-3 minutes until fork-tender. Drain and return them to the saucepan.
  3. In a large mixing bowl, combine softened cream cheese with mayonnaise, then stir in garlic powder, sea salt, and pepper. Add ¼ cup of grated cheese and shredded chicken, mixing until well combined.
  4. Fold in the steamed cauliflower and broccoli, ensuring everything is coated in the creamy sauce.
  5. Transfer the mixture into the prepared baking dish and top with the remaining ½ cup of grated cheese.
  6. Bake in the oven for 20 minutes. Then, switch your oven to broil and broil for an additional 2-3 minutes or until the cheese is bubbly and golden brown.
  7. Serve warm and watch the smiles spread around the table!

Pro Tips for the Perfect Casserole

Elevate your cooking game with these expert insights:

  • Steam, Don’t Boil: Steaming your veggies retains more nutrients and flavor compared to boiling.
  • Let It Rest: Allow the casserole to sit for a few minutes before serving. This helps the flavors meld and makes serving easier.
  • Experiment with Spices: Don’t be afraid to add a pinch of cayenne or smoked paprika for an unexpected kick!
  • Use Quality Cheese: Opt for block cheese and grate it yourself for better melting and flavor.
  • Keep It Covered: If it’s browning too quickly in the oven, cover it with aluminum foil to prevent burning.
  • Make it Vegan: Substitute chicken with chickpeas or a plant-based protein and use vegan cream cheese.
  • Add Crunch: Top with crushed tortilla chips or breadcrumbs for added texture.
  • Use Fresh Herbs: A sprinkle of fresh parsley or chives before serving adds a pop of color and freshness.

Common Mistakes and Troubleshooting

Even the best of us make mistakes in the kitchen. Here are some common pitfalls and how to avoid them:

  • Overcooked Vegetables: Keep an eye on your cooking time; you want them tender but not mushy.
  • Too Much Liquid: If your casserole seems soupy, make sure to drain the veggies well before mixing.
  • Flavorless Cheese: Always season your cheese mixture well; it’s the heart of the dish!
  • Burnt Topping: If the top is browning too quickly, cover it with foil and continue baking.

Delicious Variations to Try

Add your own twist to this casserole with these tasty variations:

  • Mexican Twist: Add black beans, corn, and taco seasoning for a fiesta-inspired dish.
  • Buffalo Style: Mix in some buffalo sauce for a spicy kick; top with blue cheese crumbles.
  • Italian Flair: Incorporate Italian herbs and substitute chicken with Italian sausage.
  • Cheesy Broccoli and Cauliflower Bake: Omit chicken for a vegetarian spin, focusing on the cheesy goodness of the veggies.

Storage and Make-Ahead Instructions

Planning for the week? Here’s how to store and prepare ahead:

  • Refrigeration: Store leftovers in an airtight container in the fridge for up to 3-4 days.
  • Freezing: Freeze the casserole before baking for up to 2 months. Thaw overnight in the fridge before baking.
  • Reheating: Reheat in the oven at 350°F (175°C) until warmed through, about 15-20 minutes.

Frequently Asked Questions

Got questions? I’ve got answers!

  • Can I use frozen vegetables? Yes! Just make sure to thaw and drain them well.
  • What can I substitute for chicken? Try chickpeas, tofu, or any plant-based protein.
  • Is this casserole gluten-free? Yes, as long as you use gluten-free mayonnaise and check your cheese.
  • How can I make this dish spicier? Add diced jalapeños or a dash of hot sauce to the mixture.
  • Can I prepare this dish ahead of time? Absolutely! Assemble it the day before and bake it right before serving.
  • What’s the best way to reheat leftovers? The oven is best to maintain texture, but the microwave will work in a pinch!
  • How do I keep the cheese from burning? Cover with foil if it starts to brown too quickly.
  • Can I make it dairy-free? Yes, by using vegan cream cheese and cheese substitutes.

Nutritional Tips and Dietary Adaptations

Want to make this dish even healthier? Consider these adaptations:

  • Low-Carb Option: Swap the cream cheese with Greek yogurt and add more non-starchy vegetables.
  • Boost Fiber: Add lentils or chickpeas to increase the protein and fiber content.
  • Increase Veggies: Feel free to throw in any other vegetables you love, like spinach or bell peppers!

Equipment Recommendations

To make your cooking experience seamless, consider having these tools on hand:

  • 9 x 9 Baking Dish: Perfect for casseroles, ensuring even cooking.
  • Large Saucepan: For steaming veggies and mixing ingredients.
  • Mixing Bowl: A sturdy bowl for combining your creamy ingredients.
  • Spatula: Great for folding in ingredients and serving.

Serving Suggestions

Want to elevate your meal presentation? Here are some ideas:

  • Garnish: Top with freshly chopped herbs like parsley or basil for a pop of color.
  • Pair with a Salad: A fresh green salad with vinaigrette complements the richness of the casserole.
  • Serve with Bread: Crusty bread or garlic bread makes for a perfect side!

As we wrap up, remember that cooking is all about experimentation and joy. Embrace the flavors, let your creativity shine, and most importantly, enjoy every bite of this delicious Cauliflower Chicken Casserole. Now grab that skillet, add a little fire to your food, and let’s make magic happen in your kitchen!

Cauliflower Chicken Casserole

Prep Time 10 minutes
Cook Time 25 minutes
Total Time 35 minutes
Servings 4 servings
Calories 350
A creamy, cheesy casserole combining tender cauliflower, broccoli, and shredded chicken for a comforting meal.

Ingredients

Vegetables

  • 2 cups cauliflower florets
  • 2 cups broccoli florets
  • ½ cup cream cheese (softened)
  • 2 tbsp mayonnaise
  • ½ tsp garlic powder
  • ¼ tsp sea salt
  • ¼ tsp freshly ground pepper
  • ¾ cup grated cheese (¼ cup in the sauce and ½ cup for topping)
  • 2 cups cooked and shredded chicken

Instructions 

  • Preheat oven to 375°F (190°C). Grease a 9x9 dish and set aside.
  • Boil water, cook cauliflower and broccoli for 2-3 minutes until fork-tender, then drain.
  • Mix softened cream cheese, mayo, seasonings, ¼ cup cheese, and shredded chicken in a bowl. Add steamed vegetables and combine.
  • Transfer mixture to prepared dish, top with remaining cheese, and bake for 20 minutes. Broil for 2-3 minutes until bubbly and browned.
  • Serve warm.

Notes

For extra flavor, add herbs or spices as desired.
Calories: 350kcal
Cost: $15
Course: Main Course
Cuisine: American
Keyword: casserole, Cauliflower, chicken

Nutrition

Calories: 350kcal | Carbohydrates: 12g | Protein: 30g | Fat: 20g | Sodium: 600mg

Unleashing the Crunch: Your Ultimate Guide to Baked Banana Chips

Welcome to a culinary adventure that begins with the humble banana! These banana chips aren’t just a snack; they’re a delightful journey into the world of flavor and texture. Imagine biting into a crispy, sweet, and slightly tangy chip that dances on your taste buds, all while being a healthy alternative to store-bought snacks. In this comprehensive guide, we’ll explore everything you need to know about making the perfect baked banana chips in the oven, from the ingredients to pro tips that will elevate your snack game.

So grab your apron and prepare to transform those bananas into something extraordinary. Let’s dive into the world of banana chips and discover why this recipe is bound to become one of your favorites!

Why You’ll Love This Recipe

  • Simple & Accessible: With just two ingredients—bananas and lemon juice—you can create a delicious snack that’s both healthy and satisfying.
  • Healthier Alternative: Homemade banana chips are a great substitute for processed snacks, packed with natural sweetness and crunch without the additives.
  • Versatile Snack: Perfect for elevating your breakfast, enjoying as an afternoon snack, or even using as a topping for desserts, these chips can do it all!
  • Customizable Flavors: You can easily experiment with flavors by adding spices or sweeteners to the banana slices before baking.
  • Great for Meal Prep: Make a batch ahead of time and store them for a quick snack anytime you need a pick-me-up.

Ingredients Breakdown

Let’s talk about the stars of the show: the ingredients! Here’s what you’ll need to make your baked banana chips:

  • 3 ripe bananas: Choose bananas that are ripe but not overripe. They should be slightly yellow with a few brown spots, indicating sweetness without being mushy.
  • 1 ½ tbsp lemon juice: This adds a zesty flavor and helps prevent the bananas from browning too quickly.

If you’re looking to shake things up, consider these substitutions:

  • Other Citrus Juices: Try lime or orange juice if you want to experiment with different flavors.
  • Spices: A sprinkle of cinnamon or nutmeg can add a warm, comforting flavor profile to your chips.
  • Sweeteners: For an extra touch of sweetness, drizzle a little honey or maple syrup over the slices before baking.

How to Make Baked Banana Chips

Side view of several crispy baked banana chips on a plate, highlighting their thin slices.

Get ready to turn your kitchen into a mini snack factory! Follow these simple steps to create your own delicious baked banana chips:

  1. Preheat the oven to 200°F (95°C) and line a baking sheet with parchment paper to ensure easy cleanup and prevent sticking.
  2. Prepare the bananas: Peel and slice the bananas into ⅛-inch rounds, ensuring even thickness for uniform baking.
  3. Brush with lemon juice: Lightly brush each slice of banana with lemon juice on both sides. This step not only adds flavor but also helps keep the bananas from browning too quickly.
  4. Arrange slices: Line the banana slices over the prepared baking sheet, spacing them apart to allow for air circulation while baking.
  5. Bake to perfection: Place the baking sheet in the hot oven and bake for about 1 hour to 1 hour and 30 minutes, or until the bananas can be flipped. After flipping, bake for an additional 30 minutes. Remove from the oven and allow to cool completely until they reach that perfect crunchy texture.

Pro Tips for Perfectly Baked Banana Chips

Ready to take your baking game to the next level? Here are some expert insights to ensure your banana chips turn out amazing every time:

  • Slice thickness matters: Aim for consistent ⅛-inch rounds to ensure even baking and prevent some chips from burning while others remain chewy.
  • Keep an eye on them: Ovens can vary in temperature, so start checking your chips at the one-hour mark to prevent over-baking.
  • Experiment with flavors: Try adding a sprinkle of sea salt for a sweet-and-salty combo or toss in some cocoa powder for a chocolatey twist.
  • Store wisely: Keep your banana chips in an airtight container to maintain freshness. They can last up to two weeks if stored properly.
  • Make-ahead option: Bake a large batch and share with friends or store for quick snacks throughout the week!
  • Don’t overcrowd: Give each chip enough space on the baking sheet to bake evenly and achieve maximum crunch.
  • Cool completely: Let your chips cool on the baking sheet before transferring them to a container to ensure they get crunchy.
  • Layer with care: If you’re stacking your banana chips in a container, use parchment paper between layers to prevent sticking.

Common Mistakes and Troubleshooting

Even the best chefs make mistakes! Here are some common pitfalls to avoid while making your banana chips:

  • Under-baking: If your chips aren’t crisping up, give them more time in the oven. Remember, they’ll continue to crisp as they cool.
  • Over-baking: Keep a close watch to prevent burning. If they start to turn dark brown, it’s time to take them out!
  • Uneven slices: Use a mandoline slicer for consistent thickness if you struggle with knife skills.
  • Skipping lemon juice: Don’t skip the lemon juice! It’s crucial for flavor and helps preserve the color and texture of your chips.

Variations to Elevate Your Banana Chips

Why stop at plain when you can spice things up? Here are some fun variations to try:

  • Cinnamon Sugar Chips: Sprinkle a mixture of cinnamon and sugar over the banana slices before baking for a sweet treat.
  • Spicy Banana Chips: Add a dash of cayenne or chili powder to the lemon juice for a kick that contrasts beautifully with the sweetness.
  • Choco-Coconut Delight: Dip the chips in melted dark chocolate and sprinkle with shredded coconut after baking for a decadent snack.
  • Nutty Banana Chips: Toss the banana slices with crushed nuts (like almonds or pecans) before baking for added crunch and flavor.

How to Store and Make Ahead

Proper storage is key to enjoying your baked banana chips for as long as possible. Here’s how:

  • Airtight containers: Store your cooled chips in an airtight container to keep them fresh. Glass jars or resealable bags work well.
  • Room temperature: Keep them at room temperature for the best texture. Avoid refrigerating, as moisture can make them chewy.
  • Make-ahead tips: Feel free to double or triple the recipe; baked banana chips can be made ahead of time and stored for easy snacking!

FAQs about Baked Banana Chips

Got questions? I’ve got answers! Here are some frequently asked questions about baked banana chips:

  • 1. Can I use green bananas? Yes, but they’ll be less sweet and more starchy. Ripe bananas yield a sweeter flavor.
  • 2. Why do I need to use lemon juice? Lemon juice enhances flavor and prevents browning, keeping your chips looking appetizing.
  • 3. How do I know when my banana chips are done? They should be golden brown and crisp. Let them cool to check for crunchiness.
  • 4. Can I freeze banana chips? Yes, but they may lose some crispiness upon thawing. Store them in an airtight bag if freezing.
  • 5. What can I do with leftover chips? Use them as toppings for yogurt, oatmeal, or salads, or blend them into smoothies for added texture.
  • 6. Are baked banana chips healthy? Yes! They’re a nutritious snack packed with potassium and fiber, especially compared to fried alternatives.
  • 7. How long do banana chips last? Properly stored, they can last up to two weeks at room temperature.
  • 8. Can I bake other fruits like this? Absolutely! Apples, pears, and sweet potatoes can also be baked into crispy chips.

Nutritional Tips and Dietary Adaptations

Banana chips are not only delicious, but they can also be part of a balanced diet. Here are some nutritional insights:

  • Rich in potassium: Bananas are known for their high potassium content, which is essential for heart health and muscle function.
  • Fiber boost: These chips provide dietary fiber, aiding digestion and promoting a feeling of fullness.
  • Low in calories: Compared to many processed snacks, homemade banana chips are low in calories when prepared without added sugars or fats.

For those with dietary restrictions, these chips are naturally gluten-free and can easily be made vegan by using plant-based sweeteners. Always check the labels if you’re adding any additional ingredients!

Equipment Recommendations

To make your banana chip adventure even smoother, here’s a list of helpful kitchen tools:

  • Mandoline slicer: Ensures even and consistent slicing of bananas for uniform baking.
  • Baking sheets: Use heavy-duty, non-stick baking sheets for the best results.
  • Parchment paper: Essential for preventing sticking and making cleanup a breeze.
  • Air-tight containers: Perfect for storing your homemade banana chips and keeping them fresh.

Serving Suggestions

Now that your banana chips are ready, how can you enjoy them? Here are some creative serving ideas:

  • Snack platter: Serve them alongside nuts, dried fruits, and a selection of cheeses for an elevated snack board.
  • Breakfast boost: Sprinkle them over yogurt or oatmeal for added crunch and flavor.
  • Healthy dessert: Dip them in dark chocolate or serve with a side of nut butter for a delightful treat.
  • Salad topper: Use banana chips as a unique topping for salads, adding sweetness and crunch to greens.

Conclusion: Embrace the Crunch!

There you have it! A complete guide to making delicious baked banana chips that are sure to impress family and friends. This journey is not just about enjoying a crunchy snack; it’s about exploring flavors, experimenting with techniques, and celebrating the joy of cooking. So, whether you’re munching on them straight from the jar, adding them to your morning bowl, or sharing with loved ones, remember that each chip tells a story. Grab those bananas, ignite your creativity, and let your culinary adventure begin. Happy cooking!

Baked Banana Chips Recipe

Prep Time 10 minutes
Cook Time 1 hour 30 minutes
Total Time 1 hour 40 minutes
Servings 4 servings
Calories 150
Enjoy crispy, homemade banana chips with minimal effort. Perfect as a healthy snack or garnish.

Ingredients

Fruits

  • 3 bananas bananas (peeled and thinly sliced)
  • 1.5 tablespoons lemon juice

Instructions 

  • Preheat oven to 200°F (95°C) and line a baking sheet with parchment paper.
  • Peel and slice bananas into ⅛-inch rounds.
  • Brush slices with lemon juice and arrange on baking sheet, spacing apart.
  • Bake for 1 to 1.5 hours, flipping halfway, until crispy. Cool completely.

Notes

Keep an eye on the chips to prevent burning and ensure even crispiness.
Calories: 150kcal
Cost: $5
Course: Snack
Cuisine: American
Keyword: Banana

Nutrition

Calories: 150kcal | Carbohydrates: 40g | Protein: 2g | Sodium: 5mg

Dive Into Flavor with the Refreshing Ribbon Salad

Welcome to a fresh culinary adventure that promises to tantalize your taste buds! The Carrot and Cucumber Ribbon Salad is not just a salad; it’s a celebration of vibrant colors, crisp textures, and bold flavors. Inspired by my roots in San Antonio, where spices dance in the air, this dish combines the refreshing crunch of cucumbers and carrots with a zesty dressing that will awaken your senses. Perfect for summer gatherings or as a bright side dish for any meal, it’s time to discover why this salad is a must-try!

Why You’ll Love This Recipe

  • Easy and Quick: With just a handful of ingredients and minimal prep time, this salad is perfect for busy weeknights or last-minute gatherings.
  • Vegan and Dairy-Free: Made with dairy-free yogurt, it caters to various dietary needs without compromising on flavor.
  • Bright and Colorful: This salad is visually stunning, making it an eye-catching addition to any table.
  • Refreshing and Hydrating: Packed with cucumbers and carrots, this dish not only tastes great but also keeps you hydrated and energized.
  • Customizable: Easily adapt the recipe with your favorite herbs and spices to make it uniquely yours!

Ingredient Breakdown

To create the magic of the Carrot and Cucumber Ribbon Salad, you’ll need the following ingredients:

  • 1 large cucumber: Choose a firm cucumber for those beautiful ribbons.
  • 2 medium carrots: Opt for medium-sized carrots that offer a sweet crunch.
  • 2 tbsp chopped fresh dill: This herb adds a burst of flavor and freshness.
  • 1 clove garlic (minced): For that extra kick!
  • 1/2 tsp salt: Essential for enhancing all the flavors.
  • 2 tbsp extra-virgin olive oil: A rich, flavorful base for the dressing.
  • 1/4 cup dairy-free yogurt: This creamy element ties it all together.
  • 2 tbsp freshly squeezed lemon juice: Brightens the dish beautifully.

Possible Substitutions

A side view of a colorful salad featuring cucumber and carrot ribbons garnished with dill.
  • Yogurt: Swap with cashew cream for a nutty flavor or use tahini for a deeper, earthy taste.
  • Fresh Herbs: Basil or mint can replace dill for a different flavor profile.
  • Dressings: Try using a balsamic vinaigrette for an added sweetness.
  • Veggies: Add bell peppers or radishes for extra crunch and color.

How to Make Carrot and Cucumber Ribbon Salad

This salad is as simple as it is delicious! Follow these steps:

  1. Prepare the Dressing: In a bowl, mix the dairy-free yogurt, olive oil, lemon juice, minced garlic, and salt. Stir until well combined.
  2. Prepare the Vegetables: Using a vegetable peeler, shave the cucumber and carrots into ribbons and place them in a large bowl.
  3. Assemble the Salad: Add the chopped fresh dill to the vegetable ribbons. Pour the prepared dressing over the veggies and gently toss to combine.
  4. Chill: Cover the bowl with a lid or cling film and refrigerate for 20-30 minutes to allow the flavors to meld.
  5. Serve: Give the salad a final toss, adjust seasoning if needed, and garnish with extra dill before serving.

Pro Tips for the Perfect Salad

  • Use a sharp peeler: A good peeler will make your ribbons thin and elegant, ensuring they soak up the dressing beautifully.
  • Let it chill: Allowing the salad to chill melds the flavors and enhances the refreshing quality!
  • Experiment with textures: Try adding toasted nuts for crunch or seeds for an extra nutrient boost.
  • Serve immediately: While this salad can be made ahead, it’s best enjoyed fresh to maintain the crispness of the veggies.
  • Adjust the dressing: If you love a tangy flavor, add more lemon juice or a splash of vinegar.
  • Garnish creatively: Fresh herbs or edible flowers not only add flavor but also make the presentation pop!
  • Balance is key: Taste as you go to ensure the dressing complements the veggies without overpowering their natural flavors.
  • Pair wisely: This salad goes well with grilled meats, tacos, or even as a standalone lunch!

Common Mistakes & Troubleshooting

  • Over-dressing: Be careful not to drown the salad in dressing; start with less and add more if needed.
  • Using wilted veggies: Always choose fresh, firm vegetables for the best flavor and texture.
  • Skipping the chill: Don’t skip the chilling step; it makes a world of difference in flavor!
  • Not seasoning enough: A pinch here and there can elevate your dish immensely; don’t forget the salt!

Variations to Keep it Interesting

  • Asian Twist: Add sesame oil and a splash of soy sauce, garnished with sesame seeds.
  • Spicy Kick: Incorporate a dash of chili flakes or diced jalapeños for heat.
  • Creamy Avocado: Add diced avocado for a creamy texture and healthy fats.
  • Fruit Fusion: Include mango or pineapple for a sweet, tropical version.

Storage and Make-Ahead Instructions

This salad is best enjoyed fresh, but if you want to prepare it ahead of time:

  • Make Ahead: Prepare the dressing and veggies separately; combine them just before serving to maintain crispness.
  • Storage: Keep the salad in an airtight container in the fridge for up to 2 days. However, it’s best consumed within 24 hours for optimal freshness.

Nutrition Tips and Dietary Adaptations

This salad is not only delicious but also packed with nutrients:

  • Hydration: Cucumbers are over 90% water, making this salad an excellent choice for hydration.
  • Fiber Boost: Both carrots and cucumbers provide dietary fiber, aiding digestion.
  • Low-Calorie: This salad is low in calories, making it a great option for a light meal or side.

Equipment Recommendations

  • Vegetable Peeler: A high-quality peeler will create uniform ribbons.
  • Mixing Bowl: A large bowl allows for easy mixing without spills.
  • Measuring Spoons: Essential for accuracy in dressing preparation.

Serving Suggestions

Elevate your dining experience with these serving ideas:

  • As a Side Dish: Pair it with grilled chicken, fish, or your favorite plant-based protein.
  • On a Bed of Greens: Serve over a bed of mixed greens for added volume and texture.
  • With Grains: Enjoy it alongside quinoa or couscous for a filling meal.

Frequently Asked Questions

  • Can I make this salad ahead of time? Yes, but it’s best to keep the dressing and veggies separate until just before serving to maintain freshness.
  • What can I substitute for the dill? Fresh basil, mint, or parsley work beautifully.
  • Is this salad gluten-free? Absolutely! All ingredients are naturally gluten-free.
  • How long will leftovers last? Store in the fridge for up to 2 days, but it’s best enjoyed fresh.
  • Can I add protein to this salad? Yes! Grilled chicken, chickpeas, or tofu would be fantastic additions.
  • Can I use other vegetables? Definitely! Consider adding bell peppers, radishes, or even spiralized zucchini.
  • What’s the best way to serve this salad? It’s best served chilled as a refreshing side dish or light lunch.
  • Is this salad kid-friendly? Yes! The colors and flavors are appealing to kids, and it’s a great way to sneak in veggies.

With a story woven through every bite, the Carrot and Cucumber Ribbon Salad invites you to embrace the thrill of cooking with fire and flavor. So grab your knife, peel those veggies, and let this vibrant dish dance into your heart and onto your table!

Carrot and Cucumber Ribbon Salad

Prep Time 10 minutes
Total Time 10 minutes
Servings 4 servings
Calories 150
A fresh and vibrant salad combining shaved carrots and cucumbers with a tangy dairy-free dressing, perfect for a light meal or side dish.

Ingredients

Vegetables

  • 1 large cucumber (shaved into ribbons)
  • 2 medium carrots (shaved into ribbons)
  • 2 tbsp chopped fresh dill
  • 1 clove garlic (minced)
  • 0.5 tsp salt
  • 2 tbsp extra-virgin olive oil
  • 0.25 cup dairy-free yogurt
  • 2 tbsp freshly squeezed lemon juice

Instructions 

  • Mix yogurt, olive oil, lemon juice, garlic, and salt to make the dressing.
  • Shave cucumber and carrots into ribbons and place in a bowl.
  • Add dill to the vegetables and toss with the dressing.
  • Refrigerate for 20-30 minutes to let flavors meld.
  • Give the salad a final toss, garnish with dill, and serve.

Notes

Use fresh dill for the best flavor.
Calories: 150kcal
Cost: $10
Course: Salad
Cuisine: Fusion
Keyword: vegetables

Nutrition

Calories: 150kcal | Carbohydrates: 20g | Protein: 4g | Fat: 8g | Sodium: 250mg

Welcome to a Tropical Escape: The Magic of Mango Coconut Chia Seed Pudding

Are you ready to transform your breakfast game with a dish that feels like a tropical vacation in every spoonful? With our Easy Mango Coconut Chia Seed Pudding, you’re not just making a meal; you’re crafting an experience. Packed with nutrients and bursting with flavor, this creamy pudding is your perfect companion for busy mornings or a delightful evening treat. Let’s dive into the world of chia seeds and discover why this recipe deserves a spot in your kitchen!

Why You’ll Love This Recipe

This isn’t just another chia pudding recipe; this is a celebration of flavors, textures, and health! Here are five reasons to fall in love with this dish:

  • Nutritious Powerhouse: Rich in omega-3 fatty acids, fiber, and protein, chia seeds are a complete superfood that fuels your body and mind.
  • Quick & Easy: With just a handful of ingredients and minimal prep time, you can whip up this pudding in no time — perfect for busy lifestyles.
  • Versatile Base: This recipe serves as a fantastic canvas; customize it with various fruits, nuts, or spices to suit your taste preferences.
  • Make-Ahead Delight: Prepare it in advance and store it in the fridge for a convenient grab-and-go breakfast that stays fresh for days.
  • Deliciously Decadent: The combination of creamy coconut milk and sweet mango creates a luscious dessert that tastes as good as it looks.

Ingredient Breakdown: The Building Blocks of Flavor

Here’s what you’ll need to create your tropical masterpiece:

  • 1/4 cup chia seeds: These tiny seeds are packed with nutrients and form the pudding’s base.
  • 1 cup coconut milk (canned): This rich and creamy milk adds that tropical flavor and silky texture.
  • 1/2 cup milk of your choice: Use almond, oat, or regular milk for extra creaminess — adjust as needed.
  • 1 tablespoon maple syrup: A touch of natural sweetness to balance the flavors.
  • 1 teaspoon vanilla essence: For a hint of warmth and depth.
  • 1/2 cup mango, chopped: Fresh or frozen mango will bring vibrant color and sweetness.
  • 1 tablespoon unsweetened coconut flakes: These add a delightful texture and additional coconut flavor.
  • Greek yogurt (for topping): Plain or vanilla, this adds creaminess and a protein boost.

Pro Tips for Perfect Chia Seed Pudding

Side view of a vibrant chia seed pudding topped with mango and coconut flakes.

Mastering this chia pudding is all about technique. Here are some expert insights to elevate your creation:

  • Mix Well: Ensure chia seeds are thoroughly mixed with the liquids to avoid clumping. Stir vigorously to distribute evenly.
  • Refrigerate Overnight: For the best texture, let the chia pudding sit in the fridge overnight. This allows the seeds to fully absorb the liquid.
  • Adjust Consistency: If the pudding is too thick, simply stir in a little more milk to achieve your desired texture.
  • Experiment with Flavors: Don’t be afraid to add spices like cinnamon or nutmeg, or even a splash of citrus juice for an exciting twist.
  • Layering is Key: For a beautiful presentation, layer the pudding with mango puree and yogurt in jars or bowls.
  • Portion Control: Use small mason jars to create individual servings that are easy to store and transport.
  • Garnish Generously: Top with extra mango, coconut flakes, or nuts just before serving for texture and visual appeal.
  • Stay Creative: Use any fruit you love — berries, bananas, or even peaches make fantastic alternatives!

Avoiding Common Mistakes

Even the best chefs make mistakes. Here are some common pitfalls and how to avoid them:

  • Crunchy Pudding: If your pudding turns out gritty, you may not have mixed the chia seeds well enough with the liquid. Always stir thoroughly!
  • Too Thick or Too Watery: Adjust the milk quantity to suit your preference. Remember, chia seeds will swell as they absorb liquid.
  • Skipping the Chill: Don’t rush the refrigeration step. The pudding needs time to set and achieve the right consistency.
  • Flavorless Pudding: Don’t skimp on flavor enhancers like vanilla or maple syrup. They make a significant difference!

Delicious Variations to Try

Ready to mix things up? Here are some mouthwatering variations of this chia pudding:

  • Berry Bliss: Swap mango for a medley of your favorite berries for a tangy twist.
  • Chocolate Indulgence: Add cocoa powder to the mixture for a rich, chocolatey delight; top with fresh raspberries.
  • Pineapple Coconut Delight: Replace mango with pineapple for a piña colada-inspired treat.
  • Nutty Banana Crunch: Top with sliced bananas and a sprinkle of nuts for added crunch and flavor.

Storage and Make-Ahead Instructions

Want to make your life easier? Here’s how to store and prepare this dish in advance:

  • Refrigeration: Store your chia pudding in an airtight container in the fridge for up to 5 days.
  • Make Ahead: Prepare the pudding 2-3 days in advance for effortless breakfasts throughout the week.
  • Portioning: Use small jars to keep individual servings ready to grab and go!

Frequently Asked Questions

Have questions? We’ve got answers! Here are some common inquiries about chia seed pudding:

  • Can I eat chia pudding every day?: Absolutely! With its high fiber and nutrient content, it’s a healthy addition to your diet.
  • How long does chia pudding last in the fridge?: It will stay fresh for about 5 days when stored properly in an airtight container.
  • Can I use different types of milk?: Yes, feel free to experiment with almond, oat, or even soy milk as substitutes!
  • What if my pudding is too thick?: Simply stir in more milk until you reach your desired consistency.
  • Can I use frozen mango?: Absolutely! Just thaw it before adding to your pudding for the best texture.
  • Is chia pudding gluten-free?: Yes, chia seeds and the other ingredients are naturally gluten-free!
  • How do I make it vegan?: This recipe is already vegan-friendly with the use of maple syrup and plant-based milk!
  • Can I layer the pudding?: Definitely! Layer it with fruits or yogurt for a beautiful presentation and varied textures.

Nutritional Benefits and Dietary Adaptations

Chia seeds are a powerhouse of nutrients, making this pudding not just delicious but healthy too! Here’s what you gain:

  • High in Fiber: Supports digestive health and keeps you feeling full longer.
  • Rich in Omega-3s: Essential fatty acids that promote heart health and brain function.
  • Good Source of Protein: Helps in muscle repair and keeps your energy levels balanced.
  • Low in Calories: A guilt-free treat that satisfies your sweet tooth without the extra calories.

Essential Equipment for Success

To create your chia pudding with ease, make sure you have the following tools:

  • Mixing Bowl: For combining your ingredients seamlessly.
  • Whisk or Spoon: To mix thoroughly and avoid clumps.
  • Measuring Cups and Spoons: For accurate ingredient measurements.
  • Glass Jars or Containers: Perfect for storing and serving your pudding.

Serving Suggestions: Elevate Your Experience

Ready to serve? Here are some ideas to elevate your chia pudding experience:

  • Top with Fresh Fruits: Add slices of fresh mango, berries, or banana for a burst of flavor.
  • Drizzle with Honey or Maple Syrup: A little extra sweetness goes a long way!
  • Sprinkle with Nuts or Seeds: For added crunch and nutrition, toss on some chopped nuts or seeds.
  • Serve with a Side of Yogurt: Pair your pudding with a dollop of Greek yogurt for creaminess and protein.

Now, grab your ingredients and embark on this delicious journey! Embrace the flavors, embrace the process, and let every bite remind you that cooking is an adventure. Enjoy your mango coconut chia seed pudding, and may it inspire you to keep exploring the vibrant world of spice and flavor!

Easy Mango Coconut Chia Seed Pudding

Prep Time 10 minutes
Total Time 10 minutes
Servings 2 servings
Calories 250
A delicious and healthy no-bake dessert featuring creamy coconut milk, sweet mango, and crunchy chia seeds.

Ingredients

Chia Seeds

  • 1/4 cup chia seeds

Coconut Milk

  • 1 cup coconut milk from a can

Milk of Choice

  • 1/2 cup milk of your choice (add extra if necessary)

Maple Syrup

  • 1 tablespoon maple syrup

Vanilla Essence

  • 1 teaspoon vanilla essence

Mango

  • 1/2 cup mango, chopped

Coconut Flakes

  • 1 tablespoon coconut flakes, unsweetened

Greek Yogurt

  • for topping Plain or vanilla greek yogurt

Instructions 

  • Mix chia seeds, coconut milk, milk of choice, maple syrup, and vanilla essence in a bowl.
  • Stir well and let sit for 5-10 minutes until the chia seeds absorb the liquid and thicken.
  • Layer chopped mango and chia pudding in serving glasses.
  • Top with coconut flakes and a dollop of Greek yogurt.
  • Serve immediately or refrigerate for up to 2 hours before serving.

Notes

Adjust the sweetness by adding more or less maple syrup to taste.
Calories: 250kcal
Cost: $8
Course: Dessert
Cuisine: Fusion
Keyword: mango

Nutrition

Calories: 250kcal | Carbohydrates: 35g | Protein: 6g | Fat: 10g | Sodium: 50mg

Unleash the Flavor: Your Ultimate Guide to the Zesty Tuna Melt Wrap

Welcome, fellow culinary adventurers! If you’re ready to elevate your lunch game with a dish that’s not only simple but bursting with flavor, you’ve landed in the right spot. This tuna melt wrap is your ticket to a whirlwind of taste and texture that will set your taste buds ablaze. In just 10 minutes, you’ll whip up a delightful meal that harmonizes creamy Greek yogurt, savory tuna, and a vibrant mix of ingredients. So grab your skillet and let’s dive into the magic of this recipe!

Why You’ll Love This Recipe

This tuna melt wrap isn’t just quick and easy; it’s a flavor-packed experience that you’ll crave again and again. Here are some reasons to fall in love with this dish:

  • Quick and Convenient: Ready in just 10 minutes, this wrap is perfect for busy days or spontaneous lunch cravings.
  • Health-Packed Ingredients: Packed with protein from tuna and nutrients from vegetables, this recipe keeps you energized and satisfied.
  • Customizable: Whether you like it spicy, cheesy, or loaded with veggies, this wrap can adapt to your taste preferences.
  • Minimal Cleanup: With just one bowl and a skillet, you’ll spend less time cleaning and more time enjoying your meal.
  • Flavor Explosion: The combination of tangy Greek yogurt, zesty mustard, and sweet corn creates a symphony of flavors in every bite.

Ingredient Breakdown: What You’ll Need

Let’s talk about the key ingredients that make this tuna melt wrap sing. Here’s what you’ll need:

  • 1 can skipjack tuna (5 oz): This is your protein powerhouse. Feel free to substitute with yellowfin or even canned salmon for a twist.
  • 2 Tbsp Greek yogurt: This adds creaminess and tang. You can swap it with sour cream or avocado for different flavor profiles.
  • ½ Tbsp Dijon mustard: The mustard gives a delightful kick. Use regular mustard if that’s what you have.
  • ½ lemon (juice of, about 1 Tbsp): Fresh lemon juice brightens the flavors. If you don’t have fresh, bottled works in a pinch.
  • ¼ cup corn: Sweet corn adds texture and sweetness. Use canned, frozen, or fresh corn as per availability.
  • ¼ cup red onion, diced: For a crunch and slight bite; substitute with green onions or shallots if you prefer.
  • 1 Tbsp dill relish (or capers): This brings a tangy element. If you’re not a relish fan, omit it or use chopped pickles.
  • ½ tsp garlic powder: For that aromatic flavor; fresh minced garlic works too.
  • ¼ tsp black pepper: Freshly cracked pepper adds depth.
  • ¼ cup shredded mozzarella cheese: This creates that gooey, melty texture. Feel free to explore with cheddar, gouda, or even a vegan cheese.
  • 1 wrap (at least 10 inches in size): A large burrito-sized wrap is ideal; you can also use a gluten-free tortilla or lettuce wraps for a low-carb option.

Expert Tips for Tuna Melt Success

Side view of a healthy tuna melt wrap with visible layers and toppings.

Now that we’ve covered the ingredients, let’s get into some pro tips that will take your tuna melt wrap from good to legendary:

  • Mix it Right: Ensure your tuna is well-drained to avoid a soggy wrap. The right texture is key!
  • Heat Your Wrap: Warm your tortilla before filling it to make it pliable and easier to roll.
  • Layer for Success: Start with cheese at the base, then add the tuna mixture. This helps keep the wrap from getting soggy.
  • Press and Flip: When cooking, gently press down on the wrap to ensure even browning and melting. Flip carefully!
  • Experiment with Spices: Don’t hesitate to add spices like chili powder or cayenne for an extra kick!
  • Don’t Rush the Grill: Cooking on medium heat allows the cheese to melt without burning the wrap.
  • Make it a Meal: Pair your wrap with a side salad or some crispy sweet potato fries for a balanced meal.
  • Make-Ahead Magic: Prepare the tuna mixture a day ahead and store it in the fridge for an even quicker assembly!

Avoiding Common Mistakes

Even the best of us make slip-ups! Here are some common mistakes to watch out for:

  • Soggy Wrap: Don’t overload your wrap with filling. Less is more!
  • Underseasoning: Taste your mixture before wrapping; adjust seasoning as needed.
  • Not Preheating the Pan: Ensure your skillet is hot enough before adding the wrap to get that perfect golden crust.
  • Skipping the Cheese: Cheese is essential for that meltiness; don’t skip it!

Delicious Variations to Try

If you’re feeling adventurous, here are some fun variations to shake things up:

  • Spicy Tuna Melt: Add chopped jalapeños or a dash of hot sauce to the tuna mixture for an extra kick!
  • Veggie-Packed Wrap: Toss in diced bell peppers, spinach, or even shredded carrots for added crunch and nutrition.
  • Italian Twist: Incorporate pesto instead of mustard and add sun-dried tomatoes for a Mediterranean flavor.
  • Breakfast Wrap: Mix in scrambled eggs with the tuna for a hearty breakfast option!

Storage and Make-Ahead Instructions

Want to prep ahead? Here’s how to store your tuna melt wrap and keep it fresh:

  • Fridge Storage: Store the tuna mixture in an airtight container for up to 2 days. Assemble the wrap just before eating for the best texture.
  • Freezing: While the assembled wrap can be frozen, it’s best to freeze the filling only. Thaw in the fridge overnight before wrapping.
  • Meal Prep: Prepare multiple servings of the tuna mixture and portion it out for quick lunches throughout the week!

Frequently Asked Questions (FAQ)

Got questions? Let’s clear up some common queries about this tasty tuna melt wrap:

  • Can I use canned chicken instead of tuna? Absolutely, canned chicken works just as well!
  • What type of wrap is best? A burrito-sized tortilla is ideal, but you can use any type of wrap that suits your dietary needs.
  • How do I make it dairy-free? Substitute Greek yogurt with a dairy-free alternative and choose vegan cheese.
  • Can I add more vegetables? Yes! Feel free to include any of your favorites for added nutrition and flavor.
  • Is this recipe gluten-free? Use gluten-free wraps and ensure other ingredients are certified gluten-free.
  • How can I make it spicier? Incorporate crushed red pepper flakes or diced peppers into the filling for added heat!
  • What can I serve with the tuna melt wrap? Pair it with a side salad, fresh fruit, or even some crunchy chips!
  • How long does it take to prepare? This recipe takes about 10 minutes from start to finish!

Nutritional Tips and Dietary Adaptations

This tuna melt wrap can be tailored to fit various dietary preferences:

  • Low-Carb: Use lettuce wraps instead of tortillas for a fresh, low-carb option.
  • High-Protein: Add extra tuna or mix in some cooked chickpeas for an additional protein punch.
  • Vegan: Substitute tuna with mashed chickpeas and use vegan yogurt and cheese alternatives.

Essential Equipment Recommendations

To make your tuna melt wrap experience seamless, here are some kitchen tools I recommend:

  • Skillet or Grill Pan: A non-stick skillet or grill pan is perfect for achieving that crispy exterior.
  • Mixing Bowl: Use a medium-sized bowl for easy mixing of your tuna and ingredients.
  • Spatula: A sturdy spatula helps flip the wrap without falling apart!
  • Microwave (optional): For warming your wrap before assembly, a microwave makes it quick and easy.

Serving Suggestions

Now that you’ve mastered the tuna melt wrap, here are some serving ideas to elevate your meal:

  • With a Side Salad: A crisp green salad with a tangy vinaigrette complements the richness of the wrap.
  • Chips and Salsa: Crunchy tortilla chips with a zesty salsa make for a fun and flavorful combo.
  • Fresh Fruit: A side of seasonal fruit adds a refreshing touch to your plate.
  • Soup: Pair your wrap with a warm bowl of tomato or vegetable soup for a comforting meal.

So there you have it — your ultimate guide to creating a mouthwatering tuna melt wrap that’s sure to impress. Embrace the flavors, experiment with your ingredients, and remember: cooking is an adventure! Now, go forth and make this wrap your own. Happy cooking!

Healthy Tuna Melt Wrap Recipe, Easy 10 Minute Lunch

Prep Time 5 minutes
Cook Time 10 minutes
Total Time 15 minutes
Servings 1 serving
Calories 350
This quick and nutritious tuna wrap is perfect for a fast lunch, combining creamy tuna with melted cheese in a warm tortilla.

Ingredients

Canned Tuna

  • 1 can skipjack tuna, 5 oz (or yellowfin)
  • 2 Tbsp greek yogurt
  • 0.5 Tbsp dijon mustard
  • 0.5 lemon juice of lemon (about 1 Tbsp)
  • 0.25 cup corn
  • 0.25 cup red onion, diced (about 1/4 of a red onion)
  • 1 Tbsp dill relish (or capers)
  • 0.5 tsp garlic powder
  • 0.25 tsp black pepper
  • 0.25 cup shredded mozzarella cheese (or cheese of choice)
  • 1 wrap burrito-sized wrap (at least 10 inches)

Instructions 

  • Drain tuna and mix with Greek yogurt, mustard, lemon juice, corn, red onion, relish, garlic powder, and black pepper.
  • Warm the wrap in the microwave for 10-20 seconds. Place on a surface, add cheese, then top with tuna mixture.
  • Fold sides inward, then roll from bottom to top to enclose the filling.
  • Heat a skillet with a little olive oil over medium heat. Cook the wrap seam side down for 3-4 minutes, then flip and cook another 2-3 minutes until golden.
  • Slice and serve hot. For smaller wraps, divide the tuna mixture between two tortillas.

Notes

Use a burrito-sized wrap for best results. Feel free to customize with your favorite cheese or add extra veggies.
Calories: 350kcal
Cost: $10
Course: Lunch
Keyword: quick, Tuna, Wrap

Nutrition

Calories: 350kcal | Carbohydrates: 30g | Protein: 30g | Fat: 15g | Sodium: 600mg

Ignite Your Culinary Passion with Sticky Chicken Bowls

Welcome to a culinary adventure that promises to set your kitchen ablaze! If you’re ready to embrace the thrill of cooking with heat, these Sticky Chicken Bowls are your ticket to flavor town. Combining succulent chicken with a symphony of spices, honey, and sriracha, this dish will awaken your culinary spirit and bring joy to your table. It’s more than just a meal; it’s a celebration of bold flavors and an invitation to dance with your ingredients.

Why You’ll Love This Recipe

This isn’t just another chicken and rice dish. Here’s why these Sticky Chicken Bowls will steal your heart:

  • Flavor Explosion: The rich combination of soy sauce, honey, and spices creates a sticky sauce that is irresistible.
  • Quick and Easy: Perfect for busy weeknights, this recipe comes together in under 30 minutes!
  • Customizable: Adjust the heat level with varying amounts of sriracha and spice to match your palate.
  • Healthy Options: Incorporate veggies and whole grains for a nutritious twist on a classic.
  • Meal Prep Friendly: These bowls are great for batch cooking, making them ideal for meal prep enthusiasts.

Ingredients Breakdown

Let’s dive into the foundation of your Sticky Chicken Rice Bowls. Here’s what you’ll need:

  • 2 cups uncooked rice: The base of your dish. Feel free to use jasmine, brown, or cauliflower rice for a low-carb option.
  • 2 small heads broccoli (chopped): Fresh and vibrant, they add color and crunch.
  • 3 large chicken breasts: Opt for boneless, skinless for easy cooking.
  • 2 tbsp olive oil: For sautéing your chicken and veggies.
  • 1 tsp salt: Enhances all the flavors in the dish.
  • 1/2 tsp pepper: A subtle kick of heat.
  • 1 tsp chili powder: For depth and warmth.
  • 1 tsp smoked paprika: Adds a smoky dimension.
  • 1 tsp onion powder: For a touch of sweetness.
  • 1 tsp oregano: Brings an earthy flavor.
  • 1/2 cup soy sauce: The backbone of your sticky sauce.
  • 1/2 cup honey: Provides sweetness and helps the sauce stick.
  • 1/4 cup rice vinegar: For a tangy twist.
  • 3 cloves garlic (minced): Aromatic and flavorful.
  • 2 tbsp sriracha: Adjust for heat according to your taste.
  • 2 tsp sesame oil: Adds a nutty flavor.
  • 1 tsp ground ginger: For warmth and spice.
  • 2 tsp arrowroot powder mixed with 2 tbsp water: This will thicken your sauce (sub cornstarch if needed).
  • 1/2 cup mayo: Base for your spicy mayo.
  • 1 tbsp sriracha: Extra heat for the mayo.
  • 2–3 tbsp water: To adjust the mayo consistency.
  • Sesame seeds for topping: A finishing touch for crunch.

Step-by-Step Cooking Instructions

Side view of a succulent sticky chicken bowl garnished with sesame seeds.

Now that you have your ingredients ready, let’s put it all together:

  1. Cook the rice according to package instructions, then set aside.
  2. Chop the broccoli into small florets and set aside.
  3. Slice chicken breasts into strips and season with salt, pepper, paprika, chili powder, onion powder, and oregano.
  4. Heat olive oil in a skillet over medium heat. Add the chicken and cook until golden and fully cooked through, about 5-7 minutes.
  5. In the same pan, steam or sauté the broccoli until tender.
  6. In a bowl, whisk together the sticky sauce ingredients: soy sauce, honey, rice vinegar, garlic, sriracha, sesame oil, ground ginger, and arrowroot slurry. Pour this into the skillet with the chicken and simmer until thickened.
  7. For the spicy mayo, combine mayo, sriracha, and water in a bowl until desired consistency is reached.
  8. Assemble your bowls: start with a base of rice, add chicken and broccoli, drizzle with spicy mayo, and top with sesame seeds.

Pro Tips for the Perfect Sticky Chicken Bowls

Enhance your cooking experience with these expert tips:

  • Prep Ahead: Chop your veggies and marinate your chicken the night before to save time.
  • Adjust the Heat: If you prefer less spice, start with half the sriracha and adjust to taste.
  • Use Leftovers: These bowls are perfect for repurposing leftover chicken or veggies!
  • Cook in Batches: Make extra sauce to use on other stir-fries or grilled meats throughout the week.
  • Tweak the Sauce: Experiment with different sweeteners like maple syrup or agave for a unique flavor.
  • Fresh Herbs: Garnish with cilantro or green onions for an extra burst of flavor.
  • Cooking Technique: Use a high-heat method like stir-frying for that coveted caramelization.
  • Texture Play: Incorporate nuts like cashews or peanuts for added crunch.

Common Mistakes and Troubleshooting

Even the best cooks encounter hiccups. Here’s how to avoid common pitfalls:

  • Overcooking Chicken: Use a meat thermometer to ensure chicken reaches 165°F.
  • Too Much Sauce: If the sauce is too thick, add a splash of water to loosen it.
  • Undercooked Rice: Ensure you follow the rice cooking time as per the package instructions.
  • Too Salty: Balance with a little sugar if you accidentally overdo the soy sauce.
  • Bland Flavor: Always taste and adjust seasonings, especially salt and acid.

Variations to Spice Things Up

Ready to switch things up? Here are some creative variations for your Sticky Chicken Rice Bowls:

  • Buffalo Chicken Style: Swap the sticky sauce for buffalo sauce for a fiery twist.
  • Vegetarian Delight: Replace chicken with tofu or chickpeas for a plant-based option.
  • Teriyaki Chicken: Use teriyaki sauce instead of the sticky sauce for a sweet flavor profile.
  • Asian Fusion: Add pineapple for a tropical touch or swap rice for quinoa for a different texture.

Storage and Make-Ahead Instructions

Want to enjoy these bowls later? Here’s how to store them:

  • Refrigerate: Store in airtight containers for up to 4 days.
  • Freeze: These bowls can be frozen for up to 3 months. Assemble without the mayo and sauce.
  • Reheat: Gently reheat in the microwave or on the stove, adding a splash of water for moisture.

Frequently Asked Questions

Got questions? Let’s tackle some common queries:

  • Can I use chicken thighs instead of breasts? Yes, boneless skinless thighs are an excellent substitution.
  • How do I make this dish gluten-free? Substitute soy sauce with tamari or coconut aminos.
  • What can I use instead of honey? Maple syrup or agave syrup work well as alternatives.
  • Can I add other vegetables? Absolutely! Peppers, snap peas, or carrots would be delicious additions.
  • Is this recipe suitable for meal prep? Yes, these bowls are perfect for meal prepping and can be stored in the fridge for easy lunches.
  • How spicy is this dish? The spice level can be adjusted based on how much sriracha you use.
  • What rice works best? Jasmine rice is fragrant and fluffy, but brown rice adds more fiber.
  • Can I make this vegan? Yes, swap chicken for tofu and use vegan mayo for the spicy sauce.

Nutritional Insights and Dietary Adaptations

For those watching their dietary intake, consider the following:

  • Low-Calorie Option: Use cauliflower rice as a base for a low-calorie meal.
  • Dairy-Free: Ensure your mayo is dairy-free or replace it with a cashew-based sauce.
  • High-Protein: For a protein boost, add edamame or chickpeas.

Essential Equipment Recommendations

Before you start cooking, make sure you have the right tools:

  • Skillet: A non-stick skillet is ideal for cooking chicken and sautéing veggies.
  • Rice Cooker: For perfectly cooked rice every time.
  • Whisk: Essential for mixing sauces smoothly.
  • Airtight Containers: Perfect for storing leftovers and meal prep.

Serving Suggestions

When it comes to serving your Sticky Chicken Bowls, presentation is key:

  • Garnish: Finish with chopped green onions and a sprinkle of sesame seeds for an extra touch.
  • Side Dishes: Pair with a light salad or steamed dumplings for a complete meal.
  • Drink Pairing: A refreshing iced tea or a light beer complements the spice beautifully.

Conclusion: Your Culinary Adventure Awaits!

There you have it! A comprehensive guide to creating mouthwatering Sticky Chicken Bowls that will not only satisfy your taste buds but also ignite your passion for cooking. Remember, the kitchen is your playground; don’t be afraid to experiment and make this recipe your own. With a little fire and a lot of heart, you can transform every meal into a delightful story worth telling. So grab your skillet, unleash your creativity, and let’s get cooking!

Sticky Chicken Bowls Recipe

Prep Time 10 minutes
Cook Time 20 minutes
Total Time 30 minutes
Servings 4 servings
Calories 650
A flavorful and easy-to-make chicken bowl featuring tender chicken, broccoli, and a sticky sauce, topped with spicy mayo and sesame seeds.

Ingredients

Rice

  • 2 cups uncooked rice

Broccoli

  • 2 small heads broccoli (chopped)

Chicken

  • 3 large chicken breasts
  • 2 tbsp olive oil
  • 1 tsp salt
  • 1/2 tsp pepper
  • 1 tsp chili powder
  • 1 tsp smoked paprika
  • 1 tsp onion powder
  • 1 tsp oregano
  • 1/2 cup soy sauce
  • 1/2 cup honey
  • 1/4 cup rice vinegar
  • 3 cloves garlic (minced)
  • 2 tbsp sriracha
  • 2 tsp sesame oil
  • 1 tsp ground ginger
  • 2 tsp arrowroot powder (sub cornstarch) (mixed with 2 tbsp water to make slurry)
  • 1/2 cup mayo
  • 1 tbsp sriracha (for mayo)
  • 2-3 tbsp water (for mayo thinning)

Toppings

  • sesame seeds (for topping)

Instructions 

  • Cook rice according to package instructions.
  • Chop broccoli and season chicken with spices, then cook chicken in oil until golden.
  • Steam or sauté broccoli until tender, then add sticky sauce and simmer until thickened.
  • Mix mayo, sriracha, and water to make spicy mayo.
  • Assemble bowls with rice, chicken, broccoli, drizzle spicy mayo, and top with sesame seeds.

Notes

Adjust spice levels and toppings as desired for best flavor.
Calories: 650kcal
Cost: $15
Course: Main Course
Cuisine: Asian
Keyword: Broccoli, chicken, Rice

Nutrition

Calories: 650kcal | Carbohydrates: 85g | Protein: 45g | Fat: 20g | Sodium: 1500mg