Author

Avery Collins

Browsing

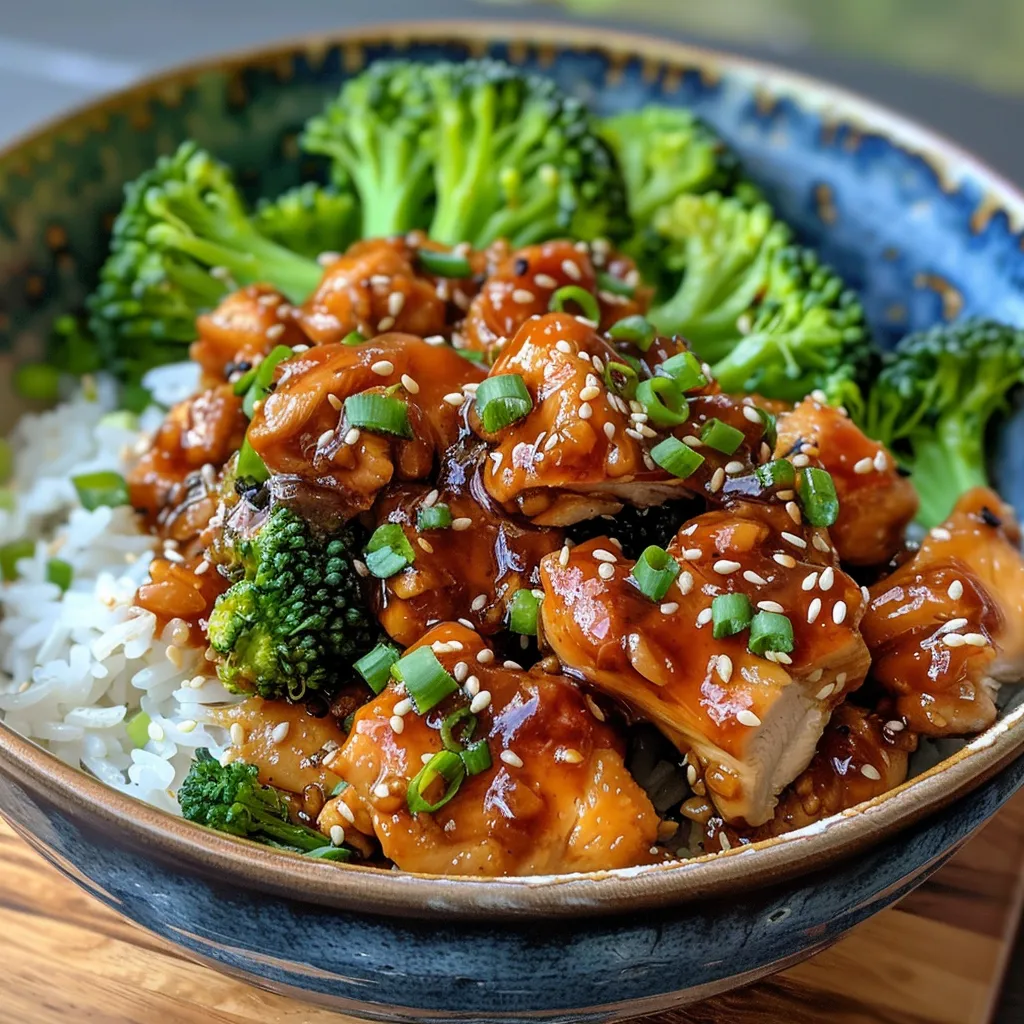
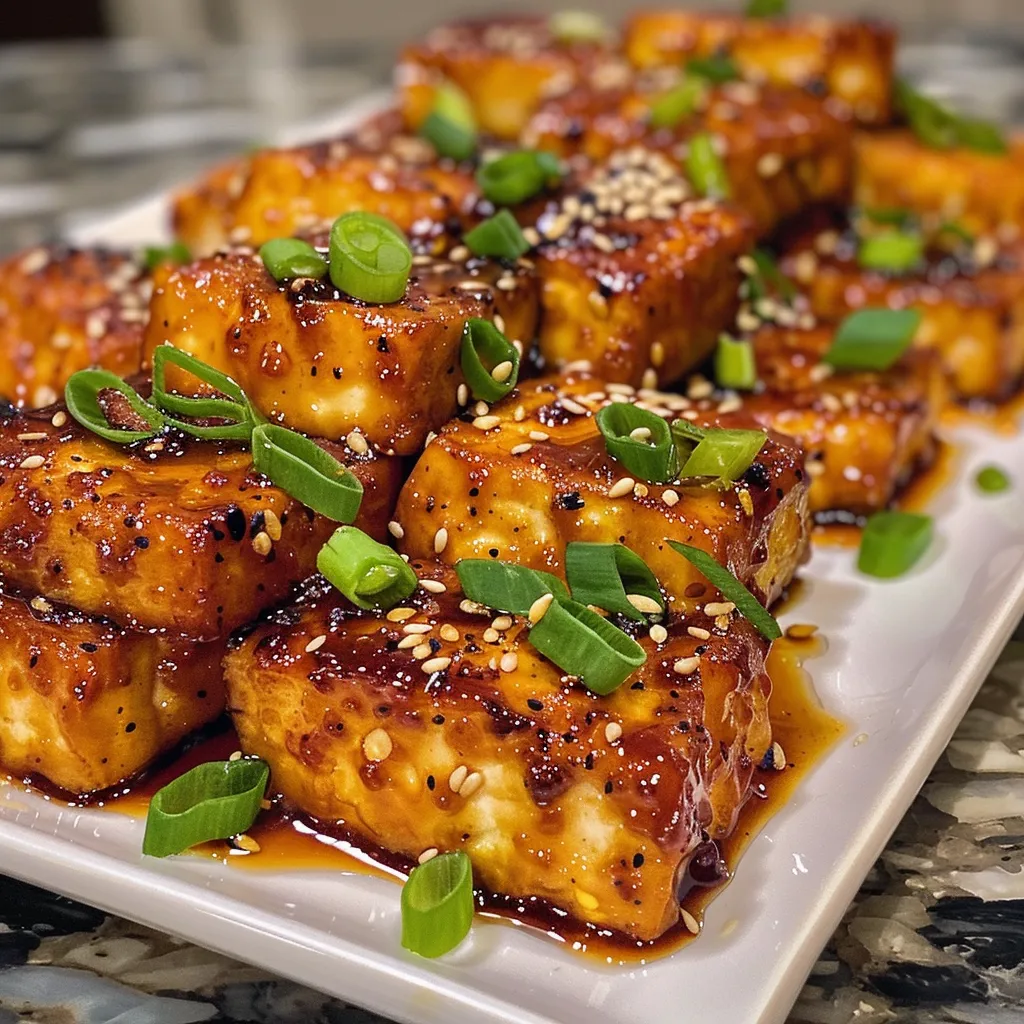
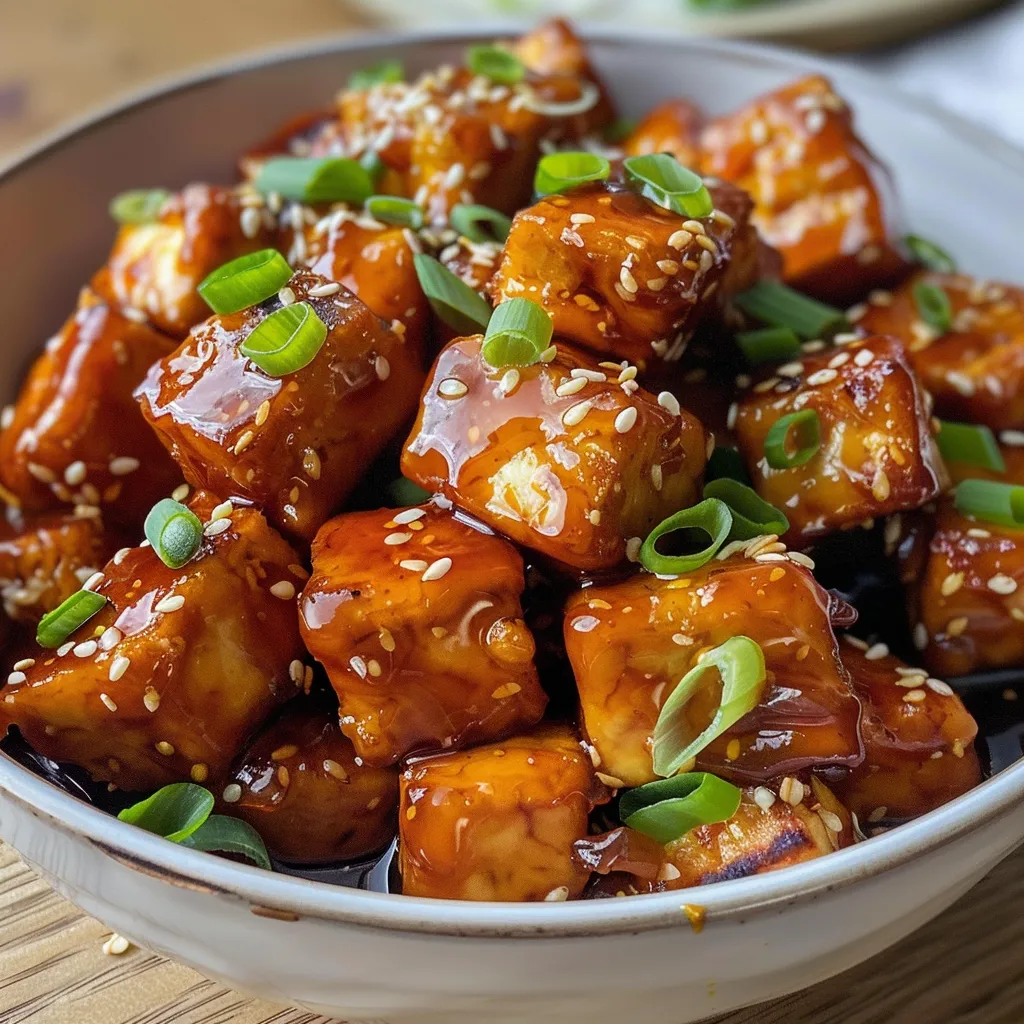
Unleash Your Culinary Adventure: The Crispy Honey Garlic Tofu That Will Make You Dance in the Kitchen

Welcome to a flavor-packed journey where crispy honey garlic tofu takes center stage! If you’re ready to elevate your home-cooking game, this dish is your ticket to a vibrant world of taste and texture. With its sweet and savory notes, this crispy honey garlic tofu recipe will not only tantalize your taste buds but also inspire you to embrace the joy of cooking with spice. Let’s dive in!

Why You’ll Love This Recipe

This recipe is more than just a meal; it’s an experience! Here are five reasons why this crispy honey garlic tofu will become a staple in your kitchen:

  • Quick and Easy: Perfect for busy weeknights or last-minute gatherings, this recipe comes together in under 30 minutes.
  • Flavor Explosion: The sweet and savory combination of honey and garlic creates a mouthwatering glaze that you won’t be able to resist.
  • Versatile Ingredients: Packed with plant-based protein, this tofu dish is suitable for vegetarians, vegans, and anyone looking to add more healthy options to their diet.
  • Customizable: Feel free to experiment with different spices or add vegetables to make this dish your own!
  • Make-Ahead Friendly: This recipe is perfect for meal prep, allowing you to whip up a batch in advance for easy, delicious meals throughout the week.

Ingredients for Crispy Honey Garlic Tofu Recipe

Gather your ingredients and get ready to create magic in your kitchen! Here’s what you’ll need:

  • Firm tofu: 400 grams (14 oz) – This is the star of the dish! Firm tofu holds its shape and crisps beautifully when cooked.
  • Honey: 4 tablespoons – Adds natural sweetness; for a vegan option, substitute with maple syrup or agave nectar.
  • Garlic: 4 cloves, minced – Fresh garlic delivers a robust flavor that enhances the dish.
  • Soy sauce: 3 tablespoons – Provides a savory depth to the honey garlic sauce.
  • Cornstarch: 1/2 cup – Coats the tofu for that delightful crispy texture.
  • Sesame oil: 2 tablespoons – Adds a nutty undertone to the sauce.
  • Green onions: 2, chopped – For garnish and a fresh pop of flavor.
  • Sesame seeds: 2 tablespoons – Toasted seeds add crunch and visual appeal.
  • Vegetable oil: For frying (about 1 cup) – Choose a high smoke point oil for frying.

How to Make Crispy Honey Garlic Tofu

Side angle shot of golden-brown tofu drizzled with honey garlic sauce and topped with sesame seeds.

Now that you have your ingredients, let’s get cooking! Follow these steps to create your crispy honey garlic tofu:

  1. Drain the firm tofu and press it to remove excess moisture for 15-20 minutes. This step is crucial for achieving a crispy texture.
  2. Cut the pressed tofu into uniform bite-sized cubes, ensuring they cook evenly.
  3. In a small bowl, mix the honey, minced garlic, soy sauce, and sesame oil to create the honey garlic sauce.
  4. Coat each tofu cube evenly in cornstarch, which will help create that irresistible crunch.
  5. Heat vegetable oil in a skillet over medium-high heat. Carefully fry the tofu cubes until they are golden brown and crispy, about 3-4 minutes per side.
  6. Remove the fried tofu and place it on a paper towel-lined plate to drain excess oil.
  7. Return the skillet to medium heat, pour in the honey garlic sauce, and let it simmer for about a minute, allowing the flavors to meld.
  8. Add the crispy tofu to the sauce and gently toss to coat each piece evenly.

Pro Tips for Perfecting Your Crispy Honey Garlic Tofu

Want to take your crispy honey garlic tofu to the next level? Here are some expert insights:

  • Pressing is key: The more moisture you remove from the tofu, the crispier it will get. Don’t skip this step!
  • Uniformity matters: Cut the tofu into uniform pieces for even cooking.
  • Oil temperature: Ensure your oil is hot enough before adding the tofu to avoid soggy results.
  • Don’t overcrowd the pan: Fry in batches if necessary to maintain the temperature of the oil.
  • Adjust the sweetness: Feel free to tweak the amount of honey based on your personal taste preferences.
  • Use fresh garlic: Freshly minced garlic brings a robust flavor that powdered garlic just can’t replicate.
  • Try different sauces: Experiment with different sauces and spices to create your own unique variations.
  • Serve immediately: For the best texture, serve the tofu right after tossing it in the sauce.

Common Mistakes and Troubleshooting

Every cooking adventure comes with its learning curves! Here are some common mistakes and how to avoid them:

  • Too much moisture: If your tofu isn’t crispy, it might not have been pressed enough. Make sure to drain and press properly.
  • Undercooking the tofu: Ensure that you allow enough time for the tofu to brown properly in the oil.
  • Burnt garlic: Watch the garlic closely while it cooks in the sauce, as it can burn quickly and turn bitter.
  • Too thick sauce: If your sauce is too thick, add a splash of water to achieve the desired consistency.

Variations to Try

Feel free to get creative with these variations to customize your crispy honey garlic tofu:

  • Spicy Honey Garlic Tofu: Add red pepper flakes or a splash of sriracha to the honey garlic sauce for a spicy kick.
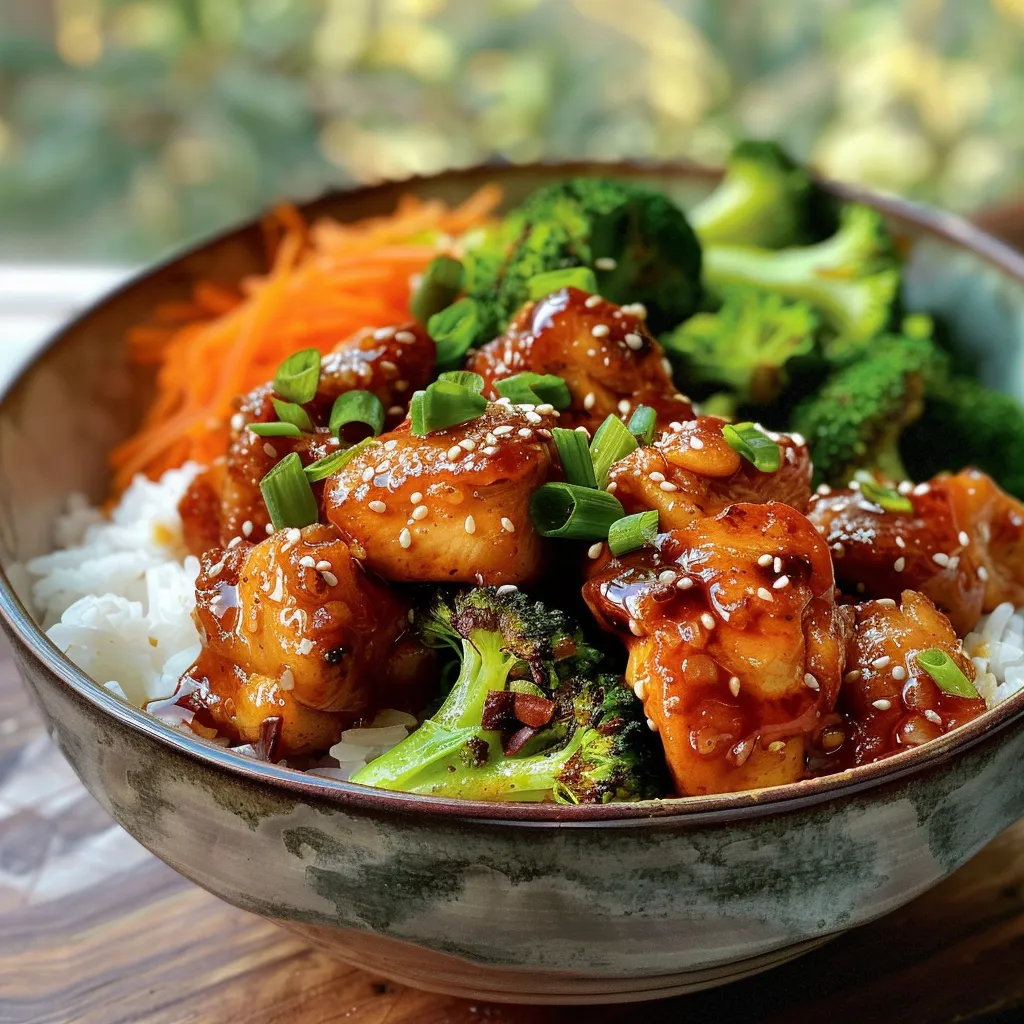
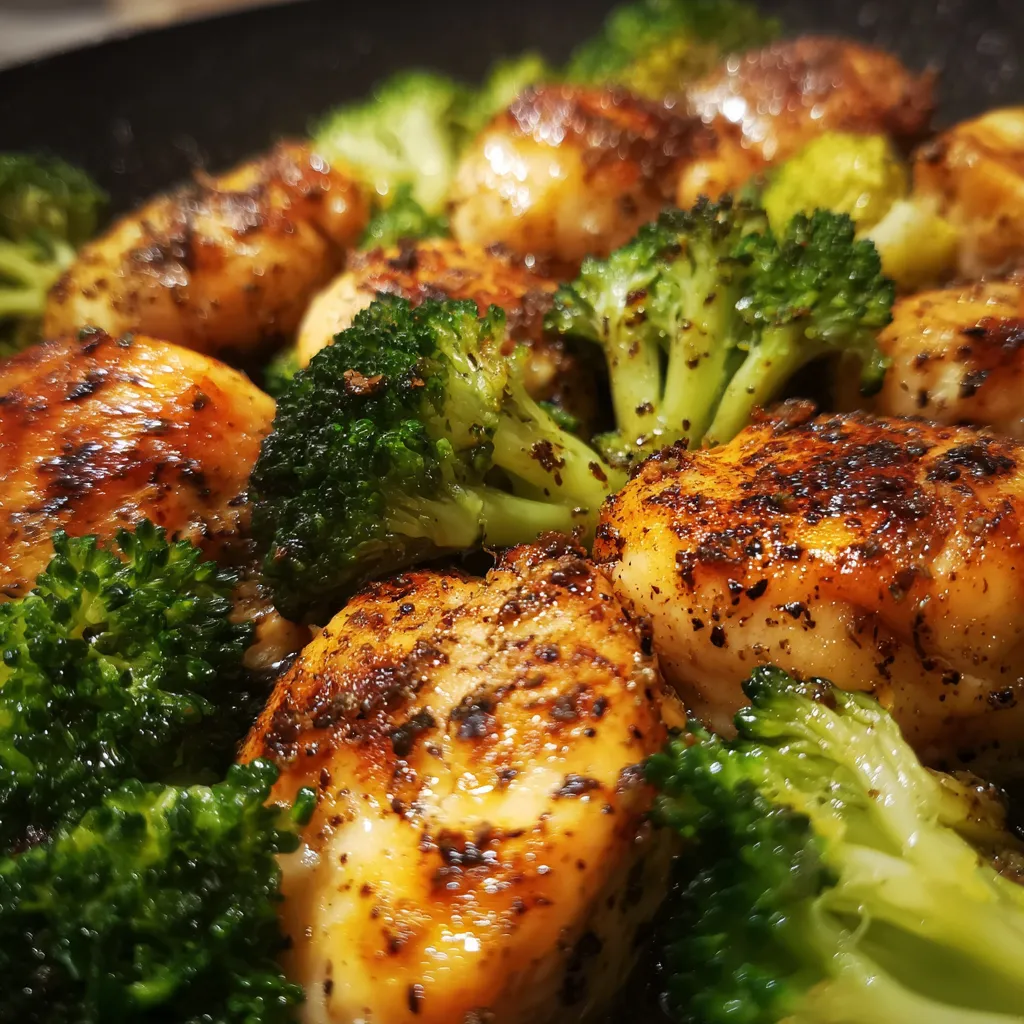
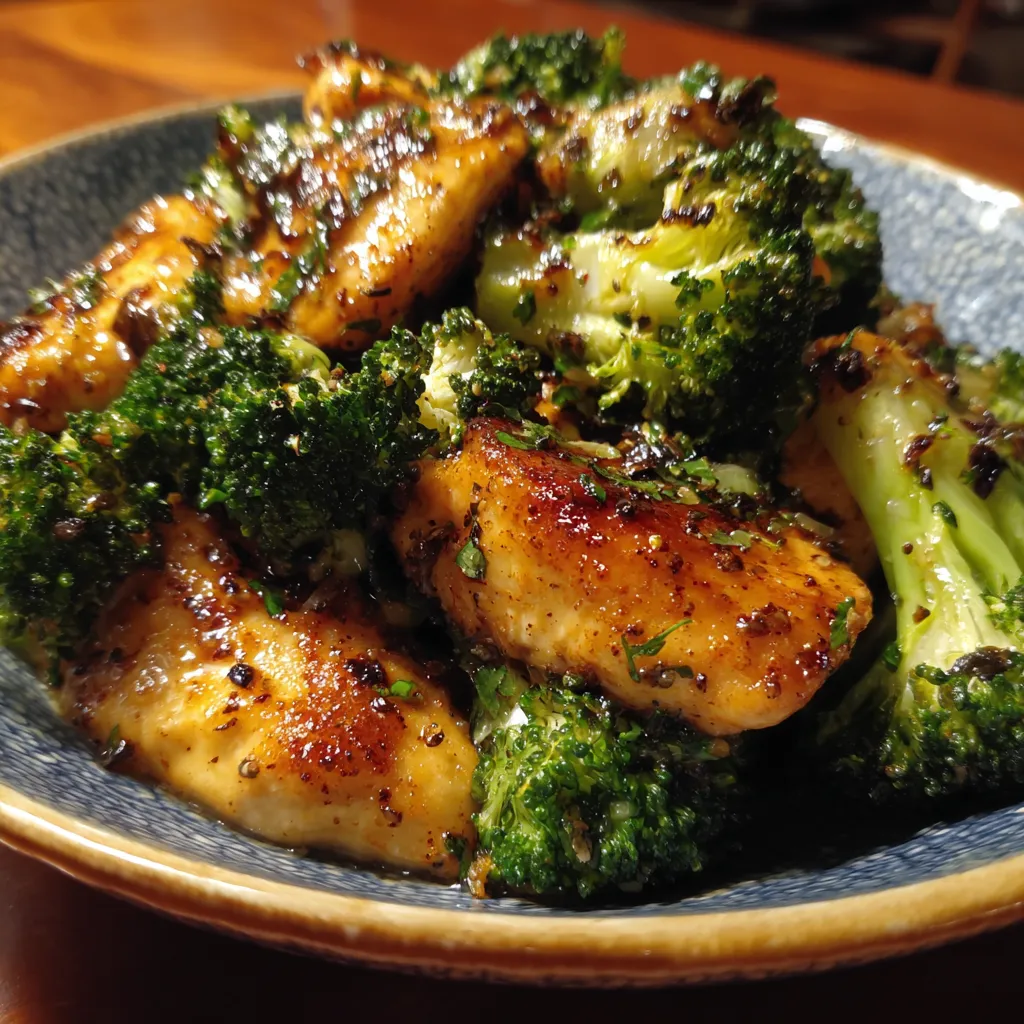
  • Vegetable Medley: Toss in some bell peppers, broccoli, or snap peas during the last minute of cooking for added nutrition and color.
  • Peanut Sauce Variation: Swap the honey garlic sauce for a creamy peanut sauce for a different flavor profile.
  • Sweet and Sour Version: Mix equal parts honey and rice vinegar for a tangy twist on the classic sauce.

Storage and Make-Ahead Instructions

Want to make this dish ahead of time? Here’s how to store and reheat your crispy honey garlic tofu:

  • Storage: Store leftover tofu in an airtight container in the refrigerator for up to 3 days.
  • Reheating: Reheat in a skillet over medium heat to regain that crispy texture, adding a splash of water to the pan to prevent burning.
  • Make-Ahead: You can prep the tofu and sauce separately a day in advance. Just fry and combine when you’re ready to serve!

Frequently Asked Questions

Still have questions? Here are some common FAQs about crispy honey garlic tofu:

  • Can I make this recipe vegan? Yes! Simply substitute honey with maple syrup or agave nectar.
  • Is this recipe gluten-free? To make it gluten-free, use tamari instead of soy sauce.
  • Can I use soft tofu? While firm tofu is recommended for crispiness, you can use soft tofu for a different texture, but it won’t be as crispy.
  • How can I make the sauce spicier? Add chili paste or fresh chopped chilies to the sauce for an extra kick.
  • What can I serve with crispy honey garlic tofu? This dish pairs well with steamed rice, quinoa, or a fresh salad.
  • Can I freeze crispy honey garlic tofu? Freezing is not recommended, as it can affect the texture. It’s best enjoyed fresh!
  • How do I store leftovers? Keep leftovers in an airtight container in the fridge for up to 3 days.
  • What’s the best way to reheat the tofu? Reheat in a skillet over medium heat to maintain crispiness.

Nutritional Tips and Dietary Adaptations

This crispy honey garlic tofu is not only delicious but can also be adapted to fit various dietary needs:

  • Low-Carb Option: Serve the tofu over zoodles (zucchini noodles) or cauliflower rice for a low-carb alternative.
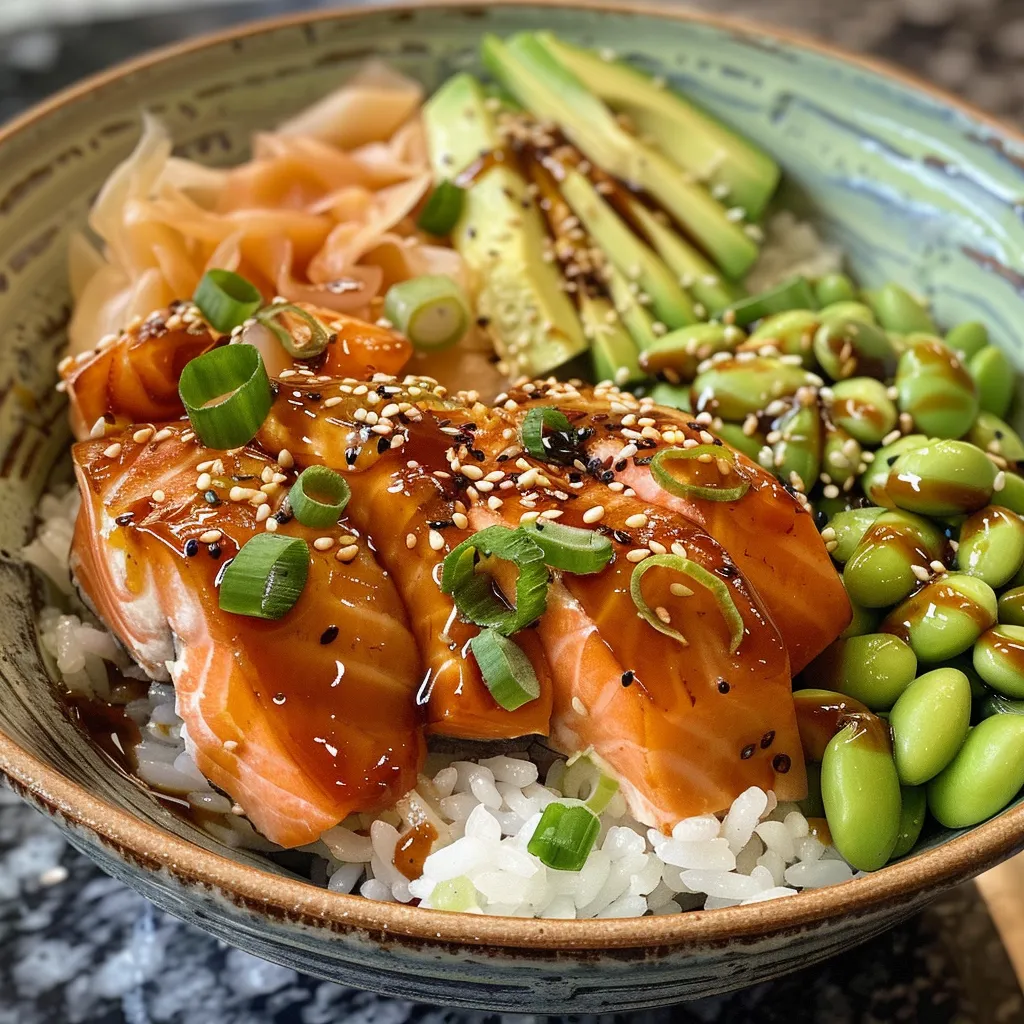
  • Protein Boost: Add chickpeas or edamame to the dish for an extra protein punch.
  • Low-Sugar Variation: Use a sugar-free sweetener in place of honey for a low-sugar option.

Essential Kitchen Equipment

To nail this recipe, here’s what you’ll need:

  • Non-stick skillet: Essential for achieving that perfect crisp without sticking.
  • Sharp knife: For cutting the tofu into even cubes.
  • Cutting board: A sturdy surface to prep your ingredients.
  • Measuring cups and spoons: Accurate measurements lead to the best results!
  • Paper towels: For draining excess oil after frying.

Serving Suggestions

Now that your crispy honey garlic tofu is ready, here are some serving ideas to enhance your meal:

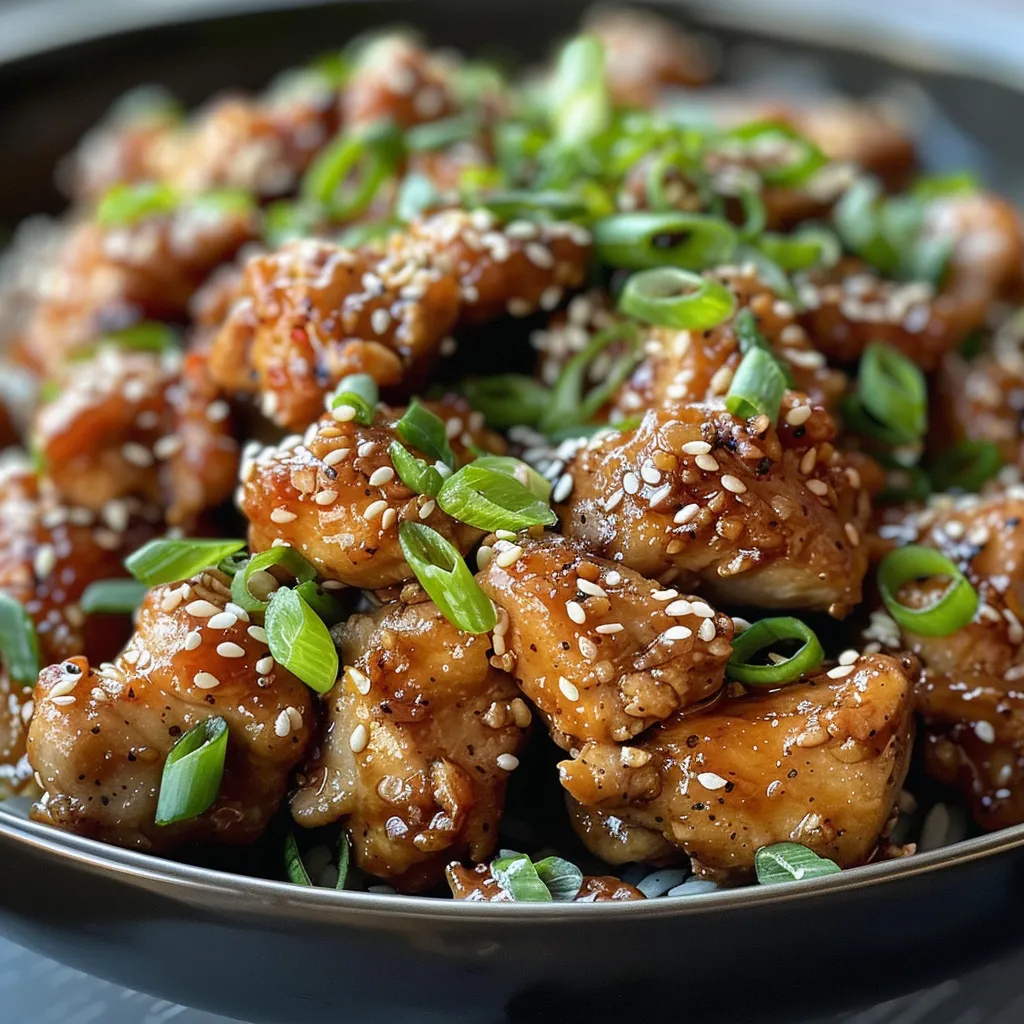
  • Garnish: Top with chopped green onions and sesame seeds for added flavor and texture.
  • Accompaniment: Serve alongside steamed jasmine rice or quinoa to soak up that delicious sauce.
  • Salad Pairing: A crisp cucumber or cabbage salad can provide a refreshing contrast to the rich flavors.

Final Thoughts

Crispy honey garlic tofu is a testament to the magic of cooking boldly with spice. With its perfect balance of sweet and savory, this dish invites you to dance in the kitchen and create memories around the table. So grab your skillet, unleash your creativity, and let the flavors of this recipe inspire your culinary adventures. Remember, every meal is a story waiting to be told!

Crispy honey garlic tofu recipe that will amaze you!

Prep Time 20 minutes
Cook Time 10 minutes
Total Time 30 minutes
Servings 4 servings
Calories 350
This crispy honey garlic tofu combines crunchy texture with a sweet and savory sauce, perfect for a quick and impressive vegan-friendly meal.

Ingredients

Protein

  • 400 grams Firm tofu (pressed and cubed)
  • 4 tablespoons Honey (or maple syrup for vegan)
  • 4 cloves Garlic (minced)
  • 3 tablespoons Soy sauce
  • 1/2 cup Cornstarch (for coating)
  • 2 tablespoons Sesame oil
  • 2 green onions Green onions (chopped)
  • 2 tablespoons Sesame seeds
  • 1 cup Vegetable oil (for frying)

Instructions 

  • Press and cube the tofu, then coat in cornstarch.
  • Fry tofu in hot vegetable oil until golden and crispy, about 3-4 minutes per side.
  • Mix honey, minced garlic, soy sauce, and sesame oil to make the sauce.
  • Drain fried tofu on paper towels, then toss in the sauce to coat.

Notes

Ensure tofu is pressed well to achieve maximum crispiness.
Calories: 350kcal
Cost: $15
Course: Main Course
Cuisine: Asian
Keyword: Tofu

Nutrition

Calories: 350kcal | Carbohydrates: 45g | Protein: 15g | Fat: 15g | Sodium: 900mg

Discover the Magic of Zucchini Rollatini

Welcome to a culinary adventure where vibrant flavors meet plant-powered goodness! Zucchini Rollatini is not just a dish; it’s an exploration of taste, texture, and the joy of cooking with fresh ingredients. With this recipe, you’ll learn how to transform simple zucchini into a show-stopping meal that will impress your family and friends. Whether you’re a seasoned chef or a kitchen novice, this delightful rollatini is designed to inspire creativity and bring the warmth of Italian cuisine to your table.

Why You’ll Love This Recipe

  • Healthier Option: This dish is packed with nutrients from zucchini and spinach, making it a light yet satisfying meal.
  • Vegan Delight: Featuring a creamy vegan ricotta, this rollatini caters to plant-based diets while still delivering on flavor.
  • Easy to Customize: You can easily swap out ingredients or add your favorite spices to make it your own.
  • Quick Preparation: With a prep time of just 20 minutes, you can have this dish ready in no time, perfect for busy weeknights.
  • Impressive Presentation: The rolled zucchini slices create an elegant dish that’s sure to impress any guest.

Ingredient Breakdown

Let’s dive into the key components of this delicious Vegan Zucchini Rollatini:

  • 4-5 zucchinis: Look for fresh, firm zucchinis to slice lengthwise into thin strips. If you don’t have zucchinis, eggplant works as a fantastic substitute!
  • Olive oil: A drizzle of high-quality olive oil adds a rich flavor. Consider infused oils for an extra kick.
  • 1 cup (240g) fresh vegan ricotta: This creamy base is essential for the filling. You can make your own or buy it at specialty stores. Cashew-based ricotta brings a wonderful texture!
  • 1 lb (500g) fresh spinach: Cooked and chopped spinach adds a nutritious punch. Feel free to substitute with kale or Swiss chard.
  • Basil leaves: Fresh basil, chopped to taste, enhances the dish with its aromatic qualities.
  • 1 tbsp Italian seasoning: This blend of herbs brings that classic Italian flavor. You can mix your own using oregano, thyme, and rosemary.
  • Pinch of salt: Essential for balancing flavors. Use sea salt for a touch of elegance.
  • 1 cup (240ml) marinara sauce: A high-quality store-bought sauce or homemade sauce can elevate the dish. Look for options without added sugars.
  • Vegan mozzarella cheese: This melty topping adds indulgence. Look for brands that melt well, or try nutritional yeast for a lighter option.

Pro Tips for Perfect Rollatini

Side view of Vegan Zucchini Rollatini on a plate garnished with basil.

Before you start crafting your zucchini rollatini, here are some expert insights that will take your dish to the next level:

  • Slice with Precision: Use a mandoline for even, thin zucchini slices. This ensures uniform cooking and easier rolling.
  • Pat Dry: After slicing, pat your zucchini slices dry with a paper towel to remove excess moisture. This prevents sogginess in the final dish.
  • Layer Flavors: Don’t hesitate to add spices to the ricotta mixture. A pinch of nutmeg can add depth.
  • Don’t Overstuff: Be generous but cautious when filling the zucchini. Overstuffing can lead to messy rolls that fall apart.
  • Perfect Bake: Bake until the cheese is bubbly and golden for that perfect finish.
  • Let it Rest: Allow your rollatini to rest for a few minutes before serving. This helps the flavors meld together beautifully.
  • Garnish Wisely: Fresh herbs or a sprinkle of red pepper flakes can elevate your presentation and flavor.
  • Experiment: Feel free to add roasted red peppers or olives for a Mediterranean twist!

Avoiding Common Mistakes

Even the best chefs can run into pitfalls when preparing this dish. Here’s how to sidestep common errors:

  • Too Thick Slices: If your zucchini slices are too thick, they won’t roll properly. Aim for 1/8 inch thick.
  • Soggy Filling: Make sure your spinach is well-drained. Excess moisture can lead to a watery filling.
  • Skipping the Sauce: Marinara sauce isn’t just for flavor; it also helps keep the rollatini moist during baking.
  • Underbaking: Ensure that the rollatini is fully cooked through. A golden top is your cue that it’s ready!

Delicious Variations

Ready to switch things up? Here are four delectable variations to try:

  • Mexican Flair: Swap the marinara for salsa and add black beans for a South-of-the-Border twist.
  • Herbed Cashew Cream: Replace the vegan ricotta with a herbed cashew cream for a rich, creamy filling.
  • Stuffed with Quinoa: Mix cooked quinoa with your spinach and ricotta for added texture and protein.
  • Italian Sausage: For a heartier dish, mix in some crumbled vegan Italian sausage with your filling.

Storage and Make-Ahead Tips

Want to prepare your rollatini in advance? Here’s how to store and reheat your dish:

  • Make-Ahead: Assemble the rollatini and cover them with marinara sauce. Refrigerate for up to 24 hours before baking.
  • Storing Leftovers: Store any leftovers in an airtight container in the refrigerator for up to 3 days.
  • Freezing: You can freeze uncooked rollatini for up to 2 months. Just ensure they’re well-wrapped to prevent freezer burn.
  • Reheating: To reheat, bake at 350°F (175°C) until heated through, about 20 minutes.

Comprehensive FAQ

Got questions? We’ve got answers! Here are some frequently asked questions about Zucchini Rollatini:

  • Can I use other vegetables?: Absolutely! Eggplant, bell peppers, or even mushrooms can be used in place of zucchini.
  • Is this recipe gluten-free?: Yes, just ensure your marinara sauce is gluten-free, and you’re good to go!
  • How do I make this oil-free?: Use vegetable broth for sautéing the spinach and omit the olive oil.
  • Can I make this dish in advance?: Yes, you can assemble and refrigerate the rollatini before baking.
  • What’s the best way to slice zucchini?: A mandoline slicer works best for achieving even, thin slices.
  • Will this dish hold up well for meal prep?: Yes, it’s great for meal prep! Just store in individual portions for easy access.
  • Can I add protein to this dish?: Yes! Consider adding lentils or chickpeas to the filling for extra protein.
  • What’s the ideal side dish?: A simple garden salad or garlic bread pairs beautifully with rollatini!

Nutritional Insights and Dietary Adaptations

Conscious of your dietary needs? Here’s how Zucchini Rollatini fits into various lifestyles:

  • Low Carb: With zucchini as the main ingredient, it’s a fantastic low-carb option.
  • High Fiber: Packed with vegetables, this dish offers a significant amount of dietary fiber.
  • Customizable for Allergies: Easily adapt the ingredients to cater to nut or soy allergies by choosing suitable substitutes.

Essential Equipment

To achieve the best results, here are a few kitchen tools you’ll need:

  • Mandoline slicer: For perfectly thin zucchini slices.
  • 9×13 inch baking dish: Ideal for baking your rollatini evenly.
  • Large skillet: For sautéing your spinach.
  • Mixing bowl: To combine your ricotta and other filling ingredients.

Serving Suggestions

Once your Zucchini Rollatini is ready, it’s time to serve! Here are a few ideas to elevate your dining experience:

  • Garnish with Fresh Herbs: A sprinkle of freshly chopped basil or parsley adds a pop of color and flavor.
  • Pair with a Side Salad: A light arugula salad drizzled with balsamic vinaigrette complements the rich flavors.
  • Serve with Crusty Bread: A slice of garlic bread or a warm baguette is perfect for sopping up extra sauce.
  • Offer a Variety of Sauces: Consider providing marinara, pesto, or a spicy arrabbiata on the side for dipping.

Conclusion

Your journey into the world of Zucchini Rollatini is just beginning! With its vibrant flavors and healthy ingredients, this dish is more than just a meal — it’s a celebration of cooking with passion and creativity. So gather your ingredients, invite your loved ones to the table, and unleash your inner chef. Remember, cooking should be an adventure, and with every rollatini you create, you’re telling your own delicious story. Now, roll up your sleeves and get ready to dive into a plate full of plant-powered joy!

Vegan Zucchini Rollatini

Prep Time 15 minutes
Cook Time 20 minutes
Total Time 35 minutes
Servings 4 servings
Calories 250
A delicious plant-based take on classic zucchini rollatini, packed with flavorful vegan cheese and spinach.

Ingredients

Vegetables

  • 4-5 pieces zucchinis (sliced)
  • 1 cup 240g fresh vegan ricotta
  • 1 lb 500g fresh spinach, chopped and cooked
  • 1 tbsp Italian seasoning
  • Pinch to taste salt
  • 1 cup 240ml marinara sauce
  • Vegan mozzarella cheese vegan mozzarella cheese

Instructions 

  • Preheat oven to 400°F (200°C).

Notes

Ensure zucchini slices are thin for easier rolling.
Calories: 250kcal
Cost: $15
Course: Main Course
Cuisine: Italian
Keyword: Spinach, Vegan, zucchini

Nutrition

Calories: 250kcal | Carbohydrates: 30g | Protein: 10g | Fat: 12g | Sodium: 600mg

Unleashing Flavor: The Adventure of Sticky Chicken Bowls

Welcome to a culinary experience that celebrates spice, sweetness, and the art of creating unforgettable meals! Today, we’re diving into the world of sticky chicken bowls, a dish that’s not only a feast for your taste buds but also a canvas for your culinary creativity. This recipe is your ticket to flavor fireworks, blending bold spices with a sticky sauce that will set your taste buds on fire. Whether you’re cooking for your family, hosting friends, or just treating yourself, these bowls are where comfort meets adventure.

In our journey today, we’ll explore every facet of this dish, from the ingredients that create magic to the techniques that elevate it from a simple meal to an unforgettable feast. Buckle up, because we’re about to embark on a flavorful adventure!

Why You’ll Love This Recipe

  • Quick and Easy: This dish comes together in under 30 minutes, making it perfect for busy weeknights. You can enjoy a delicious, home-cooked meal without the fuss!
  • Customizable: The beauty of sticky chicken rice bowls lies in their versatility. You can tailor the ingredients to suit your taste, whether you prefer a little more heat or a touch of sweetness.
  • Healthy and Nutritious: Packed with protein, vitamins, and minerals, these bowls offer a wholesome meal that nourishes your body while satisfying your cravings.
  • Flavor Explosion: The combination of savory chicken coated in a luscious, sticky sauce is simply addictive. Expect a perfect balance of sweet and spicy in every bite.
  • Social Meal: These bowls are great for sharing, encouraging lively conversation and connection around the table. Perfect for gatherings!

Ingredient Breakdown

To craft your sticky chicken bowls, let’s take a closer look at each ingredient and explore some substitutions that can elevate your dish even further.

  • Rice (2 cups uncooked): This forms the hearty base for your bowls. You can use jasmine rice for a fragrant touch, or brown rice for added fiber and nutrition.
  • Broccoli (2 small heads, chopped): Adds a vibrant crunch and nutritional boost. Feel free to swap it for any seasonal vegetable you have on hand—bell peppers or snap peas work beautifully!
  • Chicken (3 large breasts): The star of the show! Opt for thighs if you prefer a juicier cut. For a vegetarian option, consider tofu or tempeh instead.
  • Olive oil (2 tbsp): Essential for sautéing the chicken. You can also use avocado oil for a higher smoke point.
  • Salt & Pepper: Basic seasoning that enhances the chicken’s flavor. Adjust to your taste!
  • Chili Powder, Smoked Paprika, Onion Powder, Oregano: These spices create a depth of flavor that transforms the chicken into something extraordinary.
  • Soy Sauce (1/2 cup): Provides umami and saltiness. For a gluten-free option, use tamari.
  • Honey (1/2 cup): Adds sweetness and helps create that sticky texture. Maple syrup is a great vegan alternative.
  • Rice Vinegar (1/4 cup): Balances the flavors. Substitute with apple cider vinegar if needed.
  • Garlic (3 cloves, minced): Fresh garlic brings a pungent punch! Garlic powder can be used in a pinch, but fresh is always best.
  • Sriracha (2 tbsp): For those who crave heat! Adjust according to your spice tolerance.
  • Sesame Oil (2 tsp): This adds a nutty aroma and enhances the overall flavor profile.
  • Ground Ginger (1 tsp): A touch of warmth that complements the sweet and spicy elements.
  • Arrowroot Powder (2 tsp mixed with 2 tbsp water): This thickens the sauce beautifully. Cornstarch can serve as a substitute.
  • Mayo (1/2 cup): Base for the spicy mayo drizzle. Use vegan mayo for a plant-based option.
  • Sesame Seeds: For garnish—these little gems add texture and visual appeal!

Step-by-Step Cooking Instructions

Side view of a bowl filled with sticky chicken, rice, and garnished with sesame seeds.

Now that you have your ingredients ready, let’s get cooking! Follow these straightforward steps to create your sticky chicken bowls:

  1. Cook the rice: Begin by cooking the rice according to package instructions. Fluff it up and set it aside.
  2. Prep the broccoli: Chop the broccoli into small florets, then set aside. You can steam it for a few minutes until tender or sauté it in the same pan as the chicken later.
  3. Season the chicken: Slice chicken breasts into strips and season generously with salt, pepper, smoked paprika, chili powder, onion powder, and oregano.
  4. Cook the chicken: Heat olive oil in a large skillet over medium-high heat. Add the chicken and cook until golden brown and fully cooked through, about 6-8 minutes.
  5. Cook the broccoli: In the same pan, add the broccoli and sauté until tender or steam it separately. This step is all about maximizing flavor and efficiency!
  6. Make the sticky sauce: In a bowl, whisk together the soy sauce, honey, rice vinegar, minced garlic, sriracha, sesame oil, ground ginger, and arrowroot slurry. Pour this luscious sauce into the skillet with the chicken and simmer until it thickens, about 3-5 minutes.
  7. Prepare the spicy mayo: In a small bowl, mix the mayo, sriracha, and water until it reaches a pourable consistency.
  8. Assemble the bowls: In each bowl, layer rice, chicken, and broccoli. Drizzle with spicy mayo and top with sesame seeds for that extra flair!

Pro Tips for Perfection

  • Use a Meat Thermometer: To ensure your chicken is perfectly cooked, use a meat thermometer. The internal temperature should reach 165°F (75°C).
  • Prep Ahead: Make your sauce in advance and store it in the fridge. This can save you time on busy evenings.
  • Balance the Flavors: Taste as you go! Adjust the sweetness or spice level according to your preference.
  • Don’t Skip the Rest: Let the chicken rest for a few minutes after cooking. This helps keep it juicy and tender.
  • Experiment with Toppings: Try adding avocado, chopped green onions, or crushed peanuts for extra texture.
  • Perfect the Rice: Rinse your rice before cooking to remove excess starch. This results in fluffier grains.
  • Double the Recipe: Sticky chicken bowls are great for meal prep! Make a double batch for easy lunches throughout the week.
  • Mind Your Heat: Adjust the heat level by adding more or less sriracha or by using different types of chili powders.

Common Mistakes and Troubleshooting

Even the best chefs hit some bumps along the way. Here are common pitfalls to avoid and solutions to keep your sticky chicken bowls on track:

  • Overcooking the Chicken: This can result in dry meat. Keep an eye on the cooking time and use a thermometer for accuracy.
  • Too Thick Sauce: If your sauce thickens too much, whisk in a bit of water until you reach your desired consistency.
  • Bland Flavor: Always taste your sauce before mixing it with the chicken. Adjust seasoning as needed!
  • Sticking Rice: If your rice sticks together, ensure you’re rinsing it before cooking and using the right water-to-rice ratio.

Creative Variations

Let’s shake things up! Here are some variations to keep your sticky chicken bowls exciting:

  • Spicy Pineapple Chicken: Add chunks of pineapple to the sauce for a tropical twist!
  • Vegan Delight: Substitute chicken with marinated tofu and use maple syrup instead of honey.
  • Thai-Inspired: Incorporate coconut milk into the sauce for a creamy, rich flavor.
  • Asian Noodle Bowl: Replace rice with cooked noodles for a different texture and flavor profile.

Storage and Make-Ahead Instructions

Want to enjoy your sticky chicken bowls even later? Here’s how to store and reheat:

  • Refrigeration: Store leftovers in an airtight container in the fridge for up to 3 days.
  • Freezing: You can freeze the chicken and sauce separately for up to 2 months. Thaw in the fridge before reheating.
  • Reheating: Gently reheat in the microwave or on the stovetop until warm. If the sauce thickens too much, add a splash of water to loosen it up.

FAQ About Sticky Chicken Bowls

  • Can I use brown rice instead of white rice? Absolutely! Brown rice adds more fiber and nutrients.
  • What’s the best way to make this dish gluten-free? Use tamari instead of soy sauce and ensure all other ingredients are gluten-free.
  • How can I adjust the spice level? Modify the amount of sriracha or add different chili powders based on your heat preference.
  • Can I make this in advance? Yes! You can prepare the sauce and chicken ahead of time for quick assembly later.
  • What can I substitute for honey? Maple syrup is a great vegan alternative that works perfectly!
  • How do I make this dish vegetarian? Swap the chicken for tofu or tempeh, and adjust the cooking time accordingly.
  • Can I add more vegetables? For sure! Feel free to add bell peppers, snap peas, or any seasonal veggies you love.
  • What’s the best way to serve these bowls? Create a beautiful presentation with rice at the bottom, topped with chicken, veggies, and a drizzle of spicy mayo.

Nutrition Tips and Dietary Adaptations

This dish can easily fit into various dietary lifestyles:

  • Low-Carb: Substitute rice with cauliflower rice or zoodles (zucchini noodles) for a low-carb option.
  • Paleo: Use honey as your sweetener and omit soy sauce or replace it with coconut aminos.
  • Keto: Choose high-fiber veggies and use erythritol or stevia as a sweetener in the sauce.

Essential Equipment Recommendations

  • Skillet: A large non-stick or cast-iron skillet is essential for cooking the chicken and sautéing the veggies.
  • Rice Cooker: If you cook rice often, a rice cooker can simplify the process for perfectly cooked rice every time.
  • Meat Thermometer: An invaluable tool for ensuring your chicken is cooked to perfection without drying it out.

Serving Suggestions

To make your sticky chicken bowls even more delightful, consider these serving ideas:

  • Garnish: Fresh cilantro, chopped green onions, or lime wedges add brightness and freshness.
  • Sides: Pair with a light cucumber salad or steamed edamame for a complete meal.
  • Drinks: A refreshing iced tea or a light beer complements the flavors beautifully.

Wrapping Up Your Flavor Adventure

There you have it! Sticky chicken bowls that are not just a meal but an adventure waiting to happen. With each ingredient chosen and every step executed, you’re crafting a dish that tells a story of flavor, adventure, and warmth. So grab your skillet, embrace the heat, and let your culinary creativity shine. You’re not just cooking; you’re creating memories around the table!

Now it’s your turn to dive in and enjoy the thrill of cooking boldly. Happy cooking, and may your meals always be filled with fire and flavor!

Sticky Chicken Bowls Recipe

Prep Time 10 minutes
Cook Time 20 minutes
Total Time 30 minutes
Servings 4 servings
Calories 650
A flavorful and easy-to-make bowl featuring tender chicken, broccoli, and rice topped with spicy mayo and sesame seeds.

Ingredients

Rice

  • 2 cups uncooked rice

Vegetables

  • 2 small heads broccoli, chopped

Chicken

  • 3 large chicken breasts

Sauces & Oils

  • 2 tbsp olive oil
  • 1 tsp salt
  • 1/2 tsp pepper
  • 1 tsp chili powder
  • 1 tsp smoked paprika
  • 1 tsp onion powder
  • 1 tsp oregano

Sauce ingredients

  • 1/2 cup soy sauce
  • 1/2 cup honey
  • 1/4 cup rice vinegar
  • 3 cloves garlic, minced
  • 2 tbsp sriracha
  • 2 tsp sesame oil
  • 1 tsp ground ginger
  • 2 tsp arrowroot powder mixed with water (to make slurry)

Spicy Mayo

  • 1/2 cup mayo
  • 1 tbsp sriracha
  • 2-3 tbsp water (to thin mayo)

Toppings

  • sesame seeds for topping sesame seeds

Instructions 

  • Cook rice and set aside.
  • Chop broccoli and set aside.
  • Season chicken, cook in skillet until golden and cooked through.
  • Steam or sauté broccoli until tender. Make sauce, add to chicken and simmer until thickened.
  • Mix mayo, sriracha, and water for spicy mayo. Assemble bowls with rice, chicken, broccoli, drizzle spicy mayo, and top with sesame seeds.

Notes

Use fresh ingredients for best flavor. Adjust spice level to taste.
Calories: 650kcal
Cost: $15
Course: Main Course
Cuisine: Asian
Keyword: Broccoli, chicken, Rice

Nutrition

Calories: 650kcal | Carbohydrates: 85g | Protein: 45g | Fat: 20g | Sodium: 1500mg

Ignite Your Culinary Adventure with Healthy Sesame Chicken

Welcome to a vibrant world of flavors that will set your taste buds dancing! This Healthy Sesame Chicken Dinner is not just a meal; it’s an experience that brings the warmth of home cooking straight to your table. Bursting with fresh veggies, zesty ginger, and a hint of sweetness, it’s the perfect recipe to spice up any night of the week. In this guide, we’ll dive deep into every aspect of making this dish, ensuring you feel empowered to cook it boldly!

Why You’ll Love This Healthy Sesame Chicken Recipe

  • Quick and Easy: Ready in just 30 minutes, making it perfect for busy weeknights.
  • Healthy Ingredients: Packed with lean protein and colorful veggies, it’s a nourishing meal that doesn’t skimp on flavor.
  • Versatile: Customize with your favorite vegetables or proteins for a dish that’s truly your own.
  • Full of Flavor: The combination of sesame oil, ginger, and garlic creates a vibrant taste that’s hard to resist.
  • Great for Meal Prep: This recipe stores well, making it a fantastic option for meal planning.

Ingredients Breakdown

Let’s get into the heart of the dish! Here’s what you’ll need to create your Healthy Sesame Chicken:

  • Chicken: 1.5 lbs boneless, skinless chicken breasts or thighs, cut into 1-inch pieces. Substitutions: Tofu or tempeh for a vegetarian option.
  • Sauce Ingredients: 2 tbsp low-sodium soy sauce or tamari, 1 tbsp rice vinegar, 1 tbsp sesame oil, 1 tsp freshly grated ginger, 2 cloves garlic, minced, 1/2 tsp black pepper, 1 tbsp cornstarch.
  • Vegetables: 2 cups fresh broccoli florets, 1 red bell pepper, cored and sliced, 1 cup snap peas, 1 large carrot, peeled and thinly sliced or julienned.
  • Broth: 1/2 cup low-sodium chicken or vegetable broth.
  • Sweetener: 2 tbsp honey or maple syrup. Tip: Adjust sweetness to taste!
  • For Garnish: 2 tbsp toasted sesame seeds and 2 green onions, thinly sliced.
  • Serving Options: Cooked brown rice, quinoa, or cauliflower rice.

Pro Tips for Cooking Success

Juicy sesame chicken dish served with vegetables, showcasing vibrant colors and textures.

Here are some expert tips to ensure your sesame chicken dinner is nothing short of spectacular:

  • Marinate Properly: Allow the chicken to marinate for at least 30 minutes — the longer, the better! This enhances flavor.
  • High Heat Cooking: Use medium-high to high heat for stir-frying. This keeps the chicken juicy and vegetables crisp.
  • Don’t Overcrowd the Pan: Cook in batches if necessary. This ensures even cooking and browning.
  • Whisk the Sauce Well: Make sure to whisk your sauce thoroughly to prevent lumps from the cornstarch.
  • Adjust Spice Level: Add red pepper flakes to the sauce for a kick, but start small! You can always add more.
  • Fresh Ingredients Matter: Use fresh veggies for the best flavor and texture. Frozen can work, but they may not provide the same crunch.
  • Garnish Generously: Don’t skip the sesame seeds and green onions! They add a beautiful touch and extra flavor.
  • Experiment: Feel free to swap out vegetables based on what you have on hand — bell peppers, carrots, and snap peas are just the beginning!

Common Mistakes and Troubleshooting

Cooking can be a dance, and sometimes we trip! Here’s how to avoid common pitfalls:

  • Chicken Sticking: If your chicken sticks to the pan, make sure your oil is hot enough before adding the chicken.
  • Too Saucy: If your sauce is too runny, let it simmer a bit longer to thicken, or add a bit more cornstarch slurry.
  • Overcooked Veggies: Keep an eye on your cooking time — stir-fry veggies should be tender-crisp, not mushy!
  • Missing Flavor: If your dish tastes flat, adjust with a splash more soy sauce or vinegar to brighten it up.

Delicious Variations to Try

Make this recipe your own with these creative twists:

  • Spicy Sesame Chicken: Add extra red pepper flakes or a dash of sriracha to the sauce for a fiery version!
  • Sesame Ginger Tofu: Substitute chicken with firm tofu for a plant-based delight that absorbs the sauce beautifully.
  • Sweet and Sour Sesame Chicken: Incorporate pineapple chunks into the stir-fry for a sweet twist that complements the savory sauce.
  • Sesame Chicken Wraps: Serve the chicken and veggies in lettuce wraps for a fun, low-carb option.

Storage and Make-Ahead Instructions

This dish is perfect for meal prep! Here’s how to store it:

  • Refrigeration: Store leftovers in an airtight container for up to 3 days. Reheat on the stovetop for the best texture.
  • Freezing: To freeze, allow the dish to cool completely before transferring it to a freezer-safe container. It can last for up to 2 months.
  • Make-Ahead: You can marinate the chicken a day in advance. The longer it sits, the more flavorful it becomes!

Frequently Asked Questions

Got questions? We’ve got answers! Here are some common inquiries about this Healthy Sesame Chicken recipe:

  • Can I use frozen chicken? Yes, but make sure to thaw it completely before marinating.
  • What if I’m allergic to soy? Use coconut aminos or a soy-free tamari alternative.
  • Can I add nuts? Absolutely! Chopped cashews or peanuts make a delightful crunchy topping.
  • How can I make this dish gluten-free? Use tamari or coconut aminos instead of soy sauce.
  • Is this dish spicy? It’s mild, but you can add red pepper flakes to increase the heat.
  • What should I serve it with? It pairs beautifully with brown rice, quinoa, or a fresh green salad.
  • Can I make it vegetarian? Yes! Substitute chicken with firm tofu or chickpeas.
  • How do I reheat leftovers? Reheat on the stovetop over low heat to maintain texture and flavor.

Nutritional Tips and Dietary Adaptations

This Healthy Sesame Chicken recipe is not only delicious but packed with nutrients:

  • Protein-Packed: Each serving provides a good amount of protein from the chicken, supporting muscle health.
  • Fiber-Rich: The addition of colorful veggies increases fiber intake, aiding digestion and promoting satiety.
  • Low in Sugar: By using honey or maple syrup in moderation, you keep added sugars in check.
  • Low-Calorie Option: This recipe is lower in calories compared to traditional sesame chicken, making it a great choice for health-conscious eaters.

Recommended Equipment

To whip up this dish, here are some essential tools:

  • Wok or Large Skillet: For even cooking and stir-frying.
  • Cutting Board: A sturdy surface for chopping vegetables and chicken.
  • Sharp Knife: Essential for precise cutting and dicing.
  • Mixing Bowls: For marinating chicken and mixing sauces.
  • Measuring Cups and Spoons: To ensure accurate ingredient proportions.

Serving Suggestions

How you present your food can elevate the dining experience! Here are some ideas:

  • Garnish: Sprinkle with toasted sesame seeds and sliced green onions for a pop of color.
  • Plate Style: Serve over a bed of quinoa or brown rice for a satisfying meal.
  • Side Dishes: Pair with a light cucumber salad or steamed edamame for a refreshing contrast.
  • Presentation: Use colorful plates to make the vibrant colors of the veggies stand out!

Embrace the adventure of cooking this Healthy Sesame Chicken Dinner! Let every bite remind you that food is not just fuel but a journey filled with flavor, excitement, and the joy of creating something truly unforgettable. So grab your skillet, ignite that flame, and let’s make magic happen in your kitchen!

Delicious Healthy Sesame Chicken Dinner: Quick & Easy Recipe

Prep Time 15 minutes
Cook Time 15 minutes
Total Time 30 minutes
Servings 4 servings
Calories 420
A flavorful and nutritious sesame chicken stir-fry packed with vegetables and a savory sauce, perfect for a quick weeknight dinner.

Ingredients

Protein

  • 1.5 lbs boneless, skinless chicken breasts or thighs, cut into 1-inch pieces
  • 2 tbsp low-sodium soy sauce or tamari
  • 1 tbsp rice vinegar
  • 1 tbsp sesame oil
  • 1 tsp freshly grated ginger
  • 2 cloves garlic, minced
  • 1/2 tsp black pepper
  • 1 tbsp cornstarch
  • 1 tbsp neutral cooking oil (plus more for cooking)
  • 1/2 cup low-sodium chicken or vegetable broth
  • 1/4 cup low-sodium soy sauce or tamari
  • 2 tbsp rice vinegar
  • 2 tbsp honey or maple syrup
  • 1 tbsp sesame oil
  • 1 tbsp freshly grated ginger
  • 3 cloves garlic, minced
  • 1 tbsp cornstarch (for slurry)
  • 2 tbsp cold water (for slurry)
  • 1/2 tsp red pepper flakes (optional)

Vegetables

  • 2 cups fresh broccoli florets
  • 1 red bell pepper, cored and sliced
  • 1 cup snap peas, trimmed
  • 1 large carrot, peeled and sliced or julienned

Garnish & Serving

  • 2 tbsp toasted sesame seeds (optional)
  • 2 green onions thinly sliced (optional)

Cooked rice or grains

  • as desired brown rice, quinoa, or cauliflower rice (for serving, optional)

Instructions 

  • Pat chicken dry, cut into 1-inch pieces. Mix soy sauce, rice vinegar, sesame oil, ginger, garlic, black pepper, and cornstarch. Coat chicken and refrigerate 30 min.
  • Combine broth, soy sauce, rice vinegar, honey, sesame oil, ginger, garlic, and red pepper flakes. Whisk cornstarch with water for slurry, add to sauce, set aside.
  • Wash and prepare vegetables: broccoli, bell pepper, snap peas, carrot.
  • Cook chicken in oil until browned, remove. Stir-fry vegetables until tender-crisp.
  • Return chicken to pan, add sauce, cook 1-2 min until thickened. Serve over rice, garnish with sesame seeds and green onions.

Notes

Adjust seasonings to taste and serve immediately for best flavor.
Calories: 420kcal
Cost: $15
Course: Main Course
Cuisine: Asian
Keyword: Sesame Chicken

Nutrition

Calories: 420kcal | Carbohydrates: 45g | Protein: 35g | Fat: 12g | Sodium: 950mg

The Irresistible Crunch: Elevating Your Snack Game with Crispy Smashed Broccoli Chips

Welcome, fellow flavor adventurers! Today, we’re diving into the bold and tantalizing world of crispy smashed broccoli chips. If you’ve ever wondered how to transform humble broccoli into a crunchy delight that dances on your palate, you’re in for a treat. This recipe ignited my passion for spices and has become a staple in my kitchen, where I celebrate the art of cooking with fire and flavor. Let’s get started on this culinary adventure that will not only bring joy to your taste buds but also pack a punch of nutrition!

Why You’ll Love This Recipe

  • Transformative Crunch: These crispy smashed broccoli chips are a spectacular twist on traditional snacks, offering that satisfying crunch you’ve been craving.
  • Healthy Indulgence: Packed with vitamins, fiber, and antioxidants, these broccoli chips provide a guilt-free snacking option that’s as nutritious as it is delicious.
  • Flavor Explosion: With a blend of spices and vegan parmesan, each chip is bursting with flavor that makes broccoli anything but boring.
  • Easy to Make: With just a few simple steps, you’ll have a snack that’s ready to impress your family and friends in no time.
  • Customizable: This recipe is not only delicious but adaptable! You can tweak the spices and ingredients to suit your taste preferences.

Ingredient Breakdown: What You Need

Let’s gather our ingredients and get cooking. Here’s what you’ll need to make these crispy smashed broccoli chips:

  • 2 medium heads of broccoli: Cut into florets for easy smashing and baking.
  • 2 tbsp olive oil: Adds richness and helps the spices stick to the broccoli.
  • 1 tbsp cornstarch: This is the secret to achieving that crispy texture we all love.
  • 1 tsp garlic powder: For a robust, savory flavor that elevates the dish.
  • 1 tsp onion powder: Adds depth and enhances the overall taste.
  • 1 tsp smoked paprika: Infuses a smoky richness that pairs beautifully with broccoli.
  • 1/4 cup vegan parmesan cheese: A delicious dairy-free option that adds cheesy goodness.
  • Salt and pepper to taste: Essential for balancing flavors.
  • 1/2 cup dairy-free yogurt: Perfect for a dipping sauce that complements the chips.
  • 1 tbsp lemon juice: Freshens up the dip and adds a zesty kick.
  • 1 tsp dried dill: Enhances the flavor of the dipping sauce for a refreshing finish.

Pro Tips for Perfecting Your Crispy Smashed Broccoli Chips

A side view of crunchy broccoli chips, showcasing a vibrant green color and crispy edges.
  • Boil Wisely: Don’t overboil the broccoli! It should be tender but still vibrant and firm to hold its shape when smashed.
  • Pat It Dry: After boiling, be sure to thoroughly dry the broccoli. Excess moisture will prevent that coveted crunch.
  • Smash Gently: Use a flat-bottomed cup or glass to gently smash the florets. Aim for a thickness of about 1/2 inch for optimal crispiness.
  • Even Spacing: Arrange the smashed broccoli on the baking sheet with space between each piece to ensure even cooking and crisping.
  • Flip for Perfection: Don’t skip the flipping halfway through baking. It promotes even browning and crispiness on both sides.
  • Experiment with Spices: Feel free to swap or add spices! Try cayenne for heat or nutritional yeast for a cheesy flavor.
  • Monitor Baking Time: Ovens can vary, so keep an eye on your chips as they bake. You want them golden and crispy, not burnt!
  • Dip It Good: Don’t forget to mix the yogurt dip well! The tanginess balances the richness of the chips.

Common Mistakes and Troubleshooting

Even the best chefs face challenges, so here are some common pitfalls and how to avoid them:

  • Too Soft: If your chips aren’t crispy, it could be due to excess moisture. Always dry the broccoli thoroughly before baking.
  • Burnt Chips: If you find your chips are burning, reduce the oven temperature slightly and increase the baking time.
  • Flavorless Chips: Ensure you’re seasoning generously. Taste the oil mixture before brushing it on to adjust flavors as needed.
  • Uneven Cooking: Make sure your smashed broccoli is evenly spaced on the baking sheet for consistent cooking.
  • Greasy Texture: If your chips are oily, reduce the olive oil in the seasoning mix. A light coating is all you need.

Variations to Spice Things Up

The beauty of cooking lies in creativity! Here are some exciting variations to explore:

  • Cheesy Ranch: Mix in ranch seasoning and extra nutritional yeast for a zesty twist.
  • Sriracha Kick: Add a tablespoon of Sriracha to the oil mixture for a spicy kick that’ll leave your taste buds tingling.
  • Herb Infusion: Experiment with fresh herbs like rosemary or thyme in the seasoning for an aromatic flavor profile.
  • Sweet and Spicy: Combine a bit of brown sugar with chili powder for a sweet and savory version.

Storage and Make-Ahead Instructions

These chips are best enjoyed fresh, but if you have leftovers, here’s how to store and reheat them:

  • Storage: Keep leftover chips in an airtight container at room temperature for up to 2 days. They’ll lose some crispiness but will still be tasty!
  • Reheating: To revive the crunch, reheat in a 350°F (175°C) oven for about 5-10 minutes until crispy again.
  • Make-Ahead: You can prepare the broccoli ahead of time, smash, and season. Just bake them fresh when you’re ready to serve.

FAQs: Your Burning Questions Answered

  • Can I use frozen broccoli? Yes, just ensure to thaw and drain it well before smashing and baking.
  • Why isn’t my broccoli crispy? Ensure it’s dry and monitor your baking time closely.
  • Can I skip the boiling step? Yes, but boiling helps to soften the broccoli, ensuring it cooks evenly.
  • Is this recipe kid-friendly? Absolutely! The fun texture and flavors are sure to please kids and adults alike.
  • Can I make it gluten-free? Yes, this recipe is naturally gluten-free as long as you check your ingredients.
  • What can I serve with these chips? They make a fantastic snack on their own or served with dips like hummus or guacamole.
  • How do I customize the flavor? Feel free to play with spices, herbs, and even cheese alternatives to fit your taste.
  • What’s the best way to ensure even cooking? Space the smashed florets out on the baking sheet and flip halfway through baking.

Nutritional Insights and Dietary Adaptations

These crispy smashed broccoli chips are not just a treat for your taste buds; they’re also packed with nutrients!

  • Low Calorie: Each serving is low in calories, making them a fantastic guilt-free snack.
  • High Fiber: Broccoli is rich in fiber, supporting digestive health and keeping you feeling fuller longer.
  • Vegan-Friendly: This recipe is easily adapted to be vegan, making it suitable for various dietary preferences.

Equipment Recommendations

To make your cooking experience seamless, here’s what you’ll need:

  • Large Pot: For boiling the broccoli efficiently.
  • Baking Sheet: Ensure it’s rimmed to catch any drips.
  • Parchment Paper: Helps prevent sticking and makes for easy cleanup.
  • Pastry Brush: For evenly applying the seasoning mixture to the chips.
  • Flat-bottomed Cup or Glass: Essential for smashing the broccoli florets to the perfect thickness.

Serving Suggestions: How to Enjoy Your Chips

Serve these crispy smashed broccoli chips hot, with a side of your favorite dip for a delicious snack. They also make a fantastic side dish to complement your main courses. Pair them with grilled chicken, roasted meats, or even as a crunchy topping for salads!

Conclusion

There you have it, my fiery food lovers! The journey to creating crispy smashed broccoli chips is not just about snacking; it’s about embracing the adventure of cooking with spice and creativity. Don’t be afraid to experiment, make it your own, and most importantly, enjoy every crunchy bite! So, roll up your sleeves and set your kitchen ablaze with flavor — because cooking should always be an exhilarating experience. Happy snacking!

Crispy Smashed Broccoli Chips

Prep Time 10 minutes
Cook Time 25 minutes
Total Time 35 minutes
Servings 4 servings
Calories 180
Enjoy these crispy, flavorful broccoli chips with a tangy dairy-free yogurt dip, perfect as a healthy snack or appetizer.

Ingredients

Vegetables

  • 2 heads broccoli (cut into florets)
  • 2 tbsp olive oil
  • 1 tbsp cornstarch
  • 1 tsp garlic powder
  • 1 tsp onion powder
  • 1 tsp smoked paprika
  • 1/4 cup vegan parmesan cheese
  • to taste Salt and pepper
  • 1/2 cup dairy-free yogurt
  • 1 tbsp lemon juice
  • 1 tsp dried dill (for sauce)

Instructions 

  • Boil broccoli: Bring a large pot of salted water to a boil. Add broccoli florets and cook for 5-6 minutes. Drain and dry.
  • Smash broccoli: Place boiled broccoli on a parchment-lined baking sheet. Gently press each floret to flatten.
  • Prepare seasoning: Mix olive oil, cornstarch, garlic powder, onion powder, smoked paprika, vegan parmesan, salt, and pepper.
  • Brush and bake: Brush broccoli with seasoning, then bake at 425°F (220°C) for 20-25 minutes until crispy, flipping halfway.
  • Make sauce: Combine dairy-free yogurt, lemon juice, and dill. Serve with broccoli chips.

Notes

For extra crispiness, bake a few extra minutes and flip carefully.
Calories: 180kcal
Cost: $15
Course: Appetizer, Snack
Cuisine: American
Keyword: Broccoli, healthy, Vegan

Nutrition

Calories: 180kcal | Carbohydrates: 20g | Protein: 8g | Fat: 10g | Sodium: 250mg

Are you tired of the same old breakfast routine? Ready to inject a little excitement into your mornings? Let me introduce you to my Breakfast Veggie Wrap, a vibrant, flavor-packed dish that combines fresh veggies, creamy avocado, and fluffy scrambled eggs. This recipe is not just about filling your stomach; it’s an adventure that wakes up your senses and fuels your day with energy. Perfect for those who crave a kick to start their day, this wrap is as nutritious as it is delicious!

Why You’ll Love This Recipe

This breakfast veggie wrap isn’t just a meal; it’s a celebration of flavor and health. Here are five reasons why this recipe deserves a spot in your morning rotation:

  • Quick and Easy: In just 15 minutes, you can whip up a satisfying breakfast that’s ready to go, making it perfect for busy mornings.
  • Nutrient-Packed: Loaded with vitamins from fresh veggies and protein from eggs, this wrap is a great source of energy to kickstart your day.
  • Customizable: Whether you have picky eaters or dietary restrictions, this recipe can easily adapt to suit everyone’s tastes and needs.
  • Flavor Explosion: The combination of spices and fresh ingredients creates a deliciously balanced flavor profile that’s sure to excite your palate.
  • Meal Prep Friendly: Make a batch ahead of time, and you’ll have healthy breakfasts ready to grab on the go!

Ingredients Breakdown

Here’s what you’ll need to create my Breakfast Veggie Wrap. Each ingredient plays a vital role in creating the perfect breakfast experience:

  • 1 lavash wrap: A soft, pliable base that holds everything together. If you prefer gluten-free, a corn tortilla works just as well.
  • 3 eggs: The star of the show! These fluffy scrambled eggs bring protein and texture. You can substitute scrambled tofu for a vegan option.
  • 1/3 avocado, mashed: Adds a creamy, healthy fat component that ties all the flavors together.
  • 1/4 cup sweet onion, chopped: Provides a sweet crunch that complements the other ingredients.
  • 1/4 cup red bell pepper, chopped: Brightens the dish with color and flavor, plus it’s a rich source of Vitamin C.
  • 1/3 cup black beans: A fantastic source of plant-based protein that adds heartiness to the wrap.
  • 1 cup spinach: Adds a nutrient boost! You can also substitute kale or arugula for a different flavor profile.
  • 1/4 tsp sea salt: Enhances all the flavors without overpowering them.
  • Black pepper: A pinch of spice to bring everything to life!

Pro Tips for the Perfect Wrap

To ensure your breakfast veggie wrap is a hit, here are some expert insights to keep in mind:

  • Whisk eggs thoroughly: This ensures your scrambled eggs are fluffy and light.
  • Don’t overcrowd the pan: When sautéing vegetables, give them space to caramelize properly for maximum flavor.
  • Add heat: If you enjoy a little spice, consider adding jalapeños or a dash of hot sauce to your filling.
  • Layer wisely: Spread the avocado first, then add the eggs and veggies on top to prevent sogginess.
  • Use fresh ingredients: Fresh veggies not only taste better but also provide more nutrients.
  • Try different wraps: Experiment with whole wheat tortillas, spinach wraps, or even collard greens for a low-carb option.
  • Roll tightly: Make sure to roll your wrap tightly to keep all the fillings from spilling out.
  • Heat before serving: A quick toast in a skillet after assembling can give your wrap a delightful crispy texture.

Common Mistakes and Troubleshooting

Side view of a stuffed Breakfast Veggie Wrap showcasing vibrant ingredients.

Even the most experienced cooks can run into hiccups. Here’s how to avoid common mistakes:

  • Overcooking the eggs: Keep an eye on your scrambled eggs to avoid a dry, rubbery texture. Remove them from heat while they’re still slightly runny.
  • Using too much filling: Overstuffing your wrap can lead to a messy experience. Stick to a moderate amount of each ingredient.
  • Not seasoning adequately: A little salt and pepper go a long way. Don’t skip these essential seasonings!
  • Not letting the veggies cool: If the vegetables are too hot when assembling, they can turn the avocado into mush. Let them cool slightly first.

Delicious Variations

Feeling adventurous? Here are some fun variations to try:

  • Southwestern Wrap: Add corn, black olives, and a sprinkle of taco seasoning for a southwest kick.
  • Greek Wrap: Substitute feta cheese and add cucumber and olives for a Mediterranean twist.
  • Smoky BBQ Wrap: Add pulled pork or jackfruit with BBQ sauce for a smoky flavor explosion.
  • Breakfast Burrito: Wrap everything in a flour tortilla and serve with salsa for a classic breakfast burrito.

Storage and Make-Ahead Instructions

Need to prepare in advance? Here’s how to store and reheat your wraps:

  • Make ahead: Assemble the wraps, but do not cook them. Store in an airtight container in the fridge for up to 2 days.
  • Freezing: You can freeze the assembled wraps before cooking. Wrap them tightly in foil or plastic wrap and store in the freezer for up to a month.
  • Reheating: For best results, reheat wrapped in foil in a toaster oven at 350°F for about 15-20 minutes. Alternatively, use a microwave for 1-2 minutes, but the wrap may lose some crispness.

Frequently Asked Questions

Got questions? I’ve got answers! Here are some FAQs about this breakfast veggie wrap:

  • Can I make this wrap vegan? Yes! Just substitute the eggs with scrambled tofu or chickpeas.
  • What other veggies can I add? Feel free to add zucchini, mushrooms, or any other seasonal vegetables you enjoy.
  • Can this recipe be made gluten-free? Absolutely! Use a gluten-free wrap or lettuce leaves to make a low-carb version.
  • What’s the best way to serve these wraps? They’re delicious on their own or served with a side of salsa or guacamole.
  • How long does it take to prepare? The total time for this wrap is about 15 minutes — perfect for busy mornings!
  • Is this wrap suitable for meal prep? Yes! Make a batch over the weekend for quick breakfasts throughout the week.
  • What can I substitute for black beans? Any type of beans works here; kidney beans, chickpeas, or even lentils can be delicious!
  • Can I add cheese? Yes! A sprinkle of cheese can add extra creaminess and flavor if you like.

Nutrition Tips and Dietary Adaptations

This breakfast veggie wrap can be tailored to meet your dietary needs:

  • Low-carb: Use a lettuce wrap or a low-carb tortilla instead of lavash for fewer carbs.
  • Added fiber: Incorporate chia seeds or ground flaxseed into the filling for an extra fiber boost.
  • High-protein: Add extra eggs or substitute with egg whites for a leaner option.
  • Vegan-friendly: Replace eggs with tofu scramble and consider nutritional yeast for a cheesy flavor.

Equipment Recommendations

Here’s what you’ll need to make this zesty breakfast veggie wrap:

  • Non-stick skillet: Essential for cooking eggs and sautéing vegetables without sticking.
  • Spatula: A good spatula ensures easy flipping and mixing of your ingredients.
  • Whisk: For perfectly scrambled eggs, a whisk is a must.
  • Cutting board and knife: To chop your veggies in preparation.

Serving Suggestions

Want to elevate your breakfast experience? Here are some creative ways to serve your wraps:

  • Side of salsa: Fresh salsa adds a zesty kick that complements the wrap perfectly.
  • Fresh fruit: A side of seasonal fruit can balance the savory flavors of your wrap.
  • Yogurt dip: A dollop of Greek yogurt mixed with herbs can add a creamy element.
  • Herbal tea or coffee: Pair your wrap with your favorite morning beverage for a complete breakfast.

In closing, my Breakfast Veggie Wrap is not just a meal; it’s an invitation to kickstart your day with energy, flavor, and a sense of adventure. Embrace the spice of life and let every bite remind you that cooking is an art — one that you can master with a little creativity and passion. Grab your skillet, gather your ingredients, and let’s get cooking!

Breakfast Veggie Wrap

Prep Time 10 minutes
Cook Time 10 minutes
Total Time 20 minutes
Servings 1 serving
Calories 350
A quick and nutritious breakfast wrap filled with eggs, veggies, and creamy avocado for a satisfying start to your day.

Ingredients

Wraps

  • 1 piece lavash wrap
  • 3 eggs eggs
  • 0.33 avocado avocado, mashed
  • 0.25 cup sweet onion, chopped
  • 0.25 cup red bell pepper, chopped
  • 0.33 cup black beans
  • 1 cup spinach
  • 0.25 tsp sea salt
  • to taste black pepper

Instructions 

  • Whisk eggs and scramble in a pan over medium heat. Set aside.
  • Sauté onion, bell pepper, black beans, salt, and pepper until tender. Add spinach to wilt.
  • Spread mashed avocado on the lavash wrap. Top with sautéed veggies and scrambled eggs.
  • Roll up the wrap, cut in half, and serve.

Notes

Feel free to add hot sauce or cheese for extra flavor.
Calories: 350kcal
Cost: $8
Course: Breakfast
Cuisine: American
Keyword: Veggie, Wrap

Nutrition

Calories: 350kcal | Carbohydrates: 40g | Protein: 18g | Fat: 15g | Sodium: 500mg

The Art of Cooking: Welcome to My Poulet Sauté au Brocoli Adventure

Every culinary journey begins with a single step, and today, we’re diving into the vibrant world of Poulet Sauté au Brocoli. This dish is not just a recipe; it’s a celebration of flavor and a canvas for your culinary creativity. Join me as we explore how tender chicken meets crisp broccoli in a tantalizing sauce that’s sure to ignite your passion for cooking. Let’s embark on this adventure together!

Why You’ll Love This Recipe

Beyond its deliciousness, this recipe offers numerous benefits that make it a go-to meal for adventurous cooks:

  • Quick and Easy: With a total cooking time of about 30 minutes, it’s perfect for busy weeknights.
  • Healthy Ingredients: Packed with lean protein and nutrient-rich vegetables, this dish is a wholesome option for any meal.
  • Flavor Explosion: The combination of soy sauce, sesame oil, and fresh ginger creates a depth of flavor that will tantalize your taste buds.
  • Customizable: Feel free to swap out or add your favorite vegetables, making it a versatile dish for any palate.
  • Impress Your Guests: Serve this dish at your next gathering, and watch as your friends rave about your culinary skills.

Ingredient Breakdown: What You’ll Need

Gathering the right ingredients is crucial for a flavorful Poulet Sauté au Brocoli. Here’s what you’ll need:

  • 500 g blancs de poulet: Use boneless, skinless chicken breasts cut into strips or cubes for easy cooking.
  • 1 c.à.s. fécule de maïs: This will help create a crispy coating on the chicken, adding texture.
  • 300 g brocoli: Choose fresh broccoli florets for the best flavor and crunch.
  • 2 c.à.s. sauce soja: Opt for low-sodium soy sauce for a healthier option without sacrificing taste.
  • 1 c.à.s. huile de sésame: This ingredient brings a delightful nutty flavor to your dish.
  • 1 c.à.s. huile végétale: For cooking the chicken, choose a neutral oil like canola or sunflower.
  • 2 gousses ail: Minced garlic adds a wonderful aroma and flavor.
  • 1 c.à.c. gingembre frais: Grated ginger gives the dish a spicy kick.
  • 1 c.à.s. sucre brun ou miel: A touch of sweetness balances the savory flavors.
  • sel & poivre: Season to taste for the perfect finish.

Step-by-Step Instructions

Side view of a delicious Poulet sauté au brocoli.

Ready to get cooking? Follow these simple steps for a mouthwatering Poulet Sauté au Brocoli:

  1. Prepare the Chicken: Sprinkle the chicken pieces with corn starch and toss to coat evenly.
  2. Sear the Chicken: Heat the vegetable oil in a wok over medium-high heat. Add the chicken and sauté for 5–6 minutes until golden brown. Remove and set aside.
  3. Cook the Aromatics: In the same wok, add minced garlic and grated ginger; sauté for 1 minute until fragrant.
  4. Add the Broccoli: Toss in the broccoli florets along with 2 tablespoons of water. Cover and steam for 2–3 minutes until tender yet crisp.
  5. Combine: Return the chicken to the wok and pour in the soy sauce, sesame oil, and honey. Stir well to combine.
  6. Thicken the Sauce: Cook for another 1–2 minutes until the sauce thickens slightly.
  7. Season: Adjust salt and pepper to taste. Serve immediately over a bed of rice or noodles.

Expert Tips for the Perfect Poulet Sauté au Brocoli

Here are some expert insights to elevate your cooking:

  • Don’t Overcrowd the Pan: Cook in batches if necessary to ensure even cooking and browning.
  • Experiment with Heat: For an extra kick, add red pepper flakes or a splash of hot sauce.
  • Use Fresh Ingredients: Fresh vegetables and spices significantly enhance flavor.
  • Prep Ahead: Chop your ingredients beforehand for a seamless cooking experience.
  • Balance Flavors: Taste as you go; adjust seasoning to find your perfect balance.
  • Let It Rest: Allow the dish to rest for a minute off the heat before serving for richer flavors.
  • Try Different Proteins: Substitute chicken with shrimp, beef, or tofu for a new twist.
  • Garnish Creatively: Add sesame seeds or chopped green onions for visual appeal and added crunch.

Common Mistakes and Troubleshooting

If you run into issues while cooking, here’s how to troubleshoot:

  • Too Salty: If the dish is overly salty, add a splash of vinegar or a bit of sugar to balance it.
  • Soggy Broccoli: If your broccoli is overcooked, reduce steaming time next time.
  • Chicken Not Browning: Ensure your pan is hot enough before adding the chicken.
  • Too Thick Sauce: If your sauce is too thick, thin it out with a bit of water or broth.

Delicious Variations

Feel free to get creative! Here are some variations to consider:

  • Vegetable Medley: Add bell peppers, snap peas, or carrots for a colorful mix.
  • Spicy Kick: Incorporate sliced jalapeños or chili paste for heat.
  • Citrus Zing: A squeeze of lime or lemon juice brightens up the flavors.
  • Nutty Delight: Toss in some cashews or peanuts for added crunch and richness.

Storage and Make-Ahead Instructions

Want to enjoy this dish later? Here’s how to store and prep ahead:

  • Refrigeration: Store leftovers in an airtight container in the fridge for up to 3 days.
  • Freezing: Freeze portions in freezer-safe containers for up to 2 months.
  • Reheating: Reheat gently on the stovetop, adding a splash of water to maintain moisture.

Comprehensive FAQ

Got questions? Here are answers to common queries:

  • Can I use frozen broccoli? Yes, just reduce the steaming time to avoid mushiness.
  • What can I substitute for chicken? Tofu, shrimp, or beef are great alternatives.
  • Is this dish gluten-free? Use tamari instead of soy sauce for a gluten-free option.
  • Can I add more sauce? Absolutely! Just increase the proportions of soy sauce and sesame oil.
  • How can I make this dish vegan? Substitute chicken with tofu and use maple syrup instead of honey.
  • What’s the best way to serve this dish? Serve it over steamed rice, quinoa, or noodles for a complete meal.
  • How spicy is this dish? It’s mild, but you can adjust the heat to your liking.
  • Can I use other oils? Yes, avocado oil or peanut oil can also work well.

Nutritional Tips and Dietary Adaptations

Looking to tailor this dish to your dietary needs? Here are some tips:

  • Low-Carb Option: Serve it on a bed of cauliflower rice for a low-carb meal.
  • High-Protein Boost: Add edamame or chickpeas for an extra protein kick.
  • Low-Calorie Variation: Use less oil and sugar for a lighter version.

Essential Equipment for Success

Having the right tools makes all the difference. Here’s what you’ll need:

  • Wok or Large Skillet: Ideal for stir-frying and achieving that perfect sear.
  • Sharp Knife: For precise chopping of chicken and vegetables.
  • Cutting Board: A sturdy surface for safe and efficient prep.
  • Measuring Spoons: For accurate measurements of ingredients.
  • Spatula or Tongs: Essential for flipping and stirring ingredients seamlessly.

Serving Suggestions

Complete your meal with these ideas:

  • Rice: Serve over jasmine, basmati, or brown rice for a filling base.
  • Noodles: Pair with soba or rice noodles for a different texture.
  • Salad: A side salad with a tangy dressing complements the savory dish perfectly.

Conclusion: Your Culinary Adventure Awaits

Cooking Poulet Sauté au Brocoli is not just about following a recipe; it’s about embracing the flavors, experimenting with ingredients, and enjoying the journey. Whether you’re cooking for yourself or impressing guests, this dish is your ticket to an unforgettable meal. So, grab your skillet, unleash your inner chef, and let the flavors take you on a wild ride. Bon appétit!

Poulet sauté au brocoli

Prep Time 10 minutes
Cook Time 15 minutes
Total Time 25 minutes
Servings 4 servings
Calories 350
A quick and flavorful stir-fry combining tender chicken and crisp broccoli in a savory sauce.

Ingredients

Protein

  • 500 g blancs de poulet (en lamelles ou dés)
  • 1 c.à.s. fécule de maïs (pour enrober le poulet)

Vegetables

  • 300 g brocoli (en fleurettes)

Sauces & Oils

  • 2 c.à.s. sauce soja
  • 1 c.à.s. huile de sésame
  • 1 c.à.s. huile végétale (pour la cuisson)
  • 1 c.à.c. gingembre frais (râpé)
  • 1 c.à.s. sucre brun ou miel

Aromatics

  • 2 gousses ail (émincé)
  • sel & poivre sel & poivre (au goût)

Instructions 

  • Saupoudrer le poulet de fécule et bien enrober.
  • Chauffer l'huile végétale dans un wok, saisir le poulet 5–6 min jusqu’à coloration, puis réserver.
  • Dans le même wok, ajouter ail et gingembre, cuire 1 min jusqu’à parfum.
  • Ajouter brocoli et 2 cs d’eau, couvrir 2–3 min pour attendrir.
  • Remettre le poulet, ajouter sauce soja, sésame et miel, bien mélanger, puis cuire 1–2 min jusqu’à épaississement.

Notes

Servez avec du riz pour un repas complet.
Calories: 350kcal
Cost: $12
Course: Main Course
Cuisine: French
Keyword: Broccoli, chicken, Stir Fry

Nutrition

Calories: 350kcal | Carbohydrates: 40g | Protein: 40g | Fat: 10g | Sodium: 900mg

Ignite Your Taste Buds with Teriyaki Salmon Sushi Bowl

Welcome to a culinary adventure that will transform your kitchen into a lively Japanese izakaya! My Teriyaki Salmon Sushi Bowl is not just a meal; it’s an experience that melds vibrant flavors, textures, and colors into a deliciously balanced dish. In this guide, you’ll dive deep into the elements that make this sushi bowl a standout, ensuring you embrace every moment of cooking this gluten-free delight. Let’s get started!

Why You’ll Love This Recipe

  • Flavor Explosion: Combining the sweet and savory notes of teriyaki sauce with succulent salmon creates a flavor profile that’s nothing short of unforgettable.
  • Quick and Easy: With a total prep and cooking time of under 30 minutes, this dish is perfect for weeknight dinners or quick lunches.
  • Healthy and Nutritious: Packed with protein from salmon and fiber from edamame and avocado, this meal supports your health while tantalizing your taste buds.
  • Customizable: Whether you want to switch up the protein or add different toppings, this recipe invites creativity and personalization.
  • Gluten-Free Goodness: Using gluten-free tamari ensures that everyone at the table can enjoy this sushi bowl without worry!

Ingredient Breakdown

Here’s what you need to create this culinary masterpiece:

  • 180g (6.5oz) sushi rice: The heart of your bowl, providing a sticky base that’s perfect for holding the other ingredients together.
  • 3 tbsp rice vinegar: This adds a tangy flavor that balances the sweetness of teriyaki sauce.
  • 1 tsp caster sugar: Helps to round out the flavors and complements the rice vinegar.
  • 0.5 tsp fine salt: Essential for enhancing all the other flavors in the dish.
  • 30ml (1fl oz) maple syrup: A natural sweetener that gives the teriyaki sauce a rich depth.
  • 1 tsp sesame oil: Adds a nutty aroma and richness to the dish.
  • 2 tsp gluten-free tamari soy sauce: The key to achieving that authentic teriyaki flavor while keeping it gluten-free.
  • 0.5 tsp garlic granules: For a subtle hint of garlic that enhances the overall taste.
  • 1 tsp mirin: This sweet rice wine adds complexity to your teriyaki sauce.
  • 2 salmon fillets: Choose fresh, high-quality salmon for the best flavor and texture.
  • 2 tbsp sesame seeds: For a delightful crunch and a hint of nuttiness.
  • 4 spring onions: Adds freshness and a mild onion flavor.
  • 150g (5oz) edamame beans: These provide a protein-packed, colorful touch to your sushi bowl.
  • Half a ripe avocado: For creaminess that balances the other flavors beautifully.

Pro Tips for Perfecting Your Teriyaki Salmon Sushi Bowl

A vibrant Teriyaki Salmon Sushi Bowl showcasing tender salmon and fresh ingredients like edamame and spring onions.
  • Rice Cooking: Always rinse your sushi rice before cooking to remove excess starch, ensuring a fluffier texture.
  • Marinade Magic: Allow the salmon to marinate for at least 15 minutes for deeper flavor absorption.
  • Warm vs. Hot Rice: Dress the sushi rice while it’s warm, not hot, for optimal flavor infusion without cooking the dressing.
  • Avocado Selection: Choose a ripe avocado for the best creaminess; it should yield slightly to gentle pressure.
  • Garnishing: Experiment with toppings like pickled ginger or seaweed salad to elevate your presentation.
  • Healthier Options: Substitute maple syrup with honey or agave for a different sweetness profile.
  • Leftover Salmon: If you have leftover teriyaki salmon, use it in salads or wraps for an easy meal prep solution.
  • Serving Temperature: Serve the bowl warm for the best flavor experience, but it can also be enjoyed cold.

Common Mistakes and Troubleshooting

Don’t let small hiccups discourage you! Here are some common pitfalls and how to navigate them:

  • Overcooked Rice: If your sushi rice becomes mushy, try reducing the cooking time next time and keep an eye on it.
  • Too Much Sauce: If your bowl turns out too wet, reduce the marinade by simmering it longer to achieve a thicker glaze.
  • Salmon Texture: If your salmon is overcooked, ensure you check its doneness a minute or two earlier next time.
  • Flavor Balance: If the dish lacks flavor, consider adjusting the seasoning in the dressing or marinade to suit your palate.

Variations to Spice Up Your Bowl

Feel free to get creative! Here are some delicious variations:

  • Protein Swap: Try chicken, shrimp, or tofu instead of salmon for a different flavor and texture.
  • Vegetarian Delight: Add grilled vegetables like zucchini, bell peppers, or mushrooms for a hearty vegetarian option.
  • Spicy Kick: Incorporate sliced jalapeños or a drizzle of sriracha for a fiery twist.
  • Rice Alternatives: Use quinoa or cauliflower rice as a base for a unique, healthy alternative.

Storage and Make-Ahead Instructions

Want to meal prep? Here’s how to store your sushi bowl for later enjoyment:

  • Refrigeration: Store the components separately in airtight containers for up to 3 days. Keep the rice, salmon, and toppings chilled.
  • Reheating: For optimal taste, reheat the salmon gently in a pan over low heat to avoid drying it out.
  • Assembly: Assemble your sushi bowl just before serving to keep everything fresh and flavorful.

Comprehensive FAQ

Still have questions? Let’s clarify some common queries:

  • Can I use brown rice? Absolutely! Just adjust the cooking time according to package instructions.
  • Is this recipe gluten-free? Yes! Just use gluten-free tamari instead of regular soy sauce.
  • What if I can’t find sushi rice? Short-grain rice can be a good substitute, but sushi rice is preferred for its stickiness.
  • Can I make this ahead of time? Yes! Just store components separately and assemble when ready to eat.
  • What’s the best way to serve this dish? Serve it in wide bowls for a beautiful presentation and easy access to all the flavors.
  • Can I add other vegetables? Absolutely! Carrots, cucumbers, or radishes can add crunch and color.
  • How do I know when the salmon is done? It should be opaque and flake easily with a fork, typically around 2-3 minutes per side depending on thickness.
  • What can I use instead of maple syrup? Honey or agave nectar can be great alternatives for sweetness.

Nutrition Tips and Dietary Adaptations

This Teriyaki Salmon Sushi Bowl is not only delicious but also nutritious! Here are some tips to boost its health benefits:

  • Healthy Fats: The avocado adds heart-healthy fats; consider adding nuts or seeds for an extra crunch and nutrition boost.
  • Fiber Boost: Incorporate more vegetables like spinach or kale for added fiber and nutrients.
  • Low Sodium: Use low-sodium tamari to keep the salt content in check without sacrificing flavor.

Equipment Recommendations

To achieve the best results, here’s a list of essential tools:

  • Rice Cooker: A rice cooker can simplify the process, ensuring perfectly cooked sushi rice every time.
  • Non-stick Frying Pan: Ideal for making the teriyaki sauce and cooking the salmon without sticking.
  • Sharp Knife: For slicing the salmon and vegetables with ease.
  • Measuring Cups and Spoons: Precision in measuring ensures the right flavor balance.

Serving Suggestions

Make this dish even more delightful with these serving tips:

  • Garnish with Fresh Herbs: Chopped cilantro or parsley can elevate the aesthetic and flavor.
  • Offer Extra Sauces: Serve with additional tamari or a spicy mayo on the side for those who love a kick!
  • Pair with a Drink: A refreshing green tea or a light sake can complement the meal beautifully.

There you have it — a Teriyaki Salmon Sushi Bowl that’s not only a feast for the eyes but a delight for the palate! With this guide, you’re well-equipped to create your own masterpiece, inviting warmth and flavor into your kitchen. Remember, cooking is an adventure, so embrace each moment and savor the journey. Happy cooking!

Teriyaki Salmon Sushi Bowl (GF)

Prep Time 15 minutes
Cook Time 20 minutes
Total Time 35 minutes
Servings 2 servings
Calories 650
A delicious gluten-free sushi bowl featuring glazed salmon, fluffy rice, and fresh vegetables, perfect for a quick and healthy meal.

Ingredients

Rice

  • 180 g sushi rice
  • 3 tbsp rice vinegar
  • 1 tsp caster sugar
  • 0.5 tsp fine salt
  • 30 ml maple syrup
  • 1 tsp sesame oil
  • 2 tsp gluten free tamari soy sauce
  • 0.5 tsp garlic granules
  • 1 tsp mirin

Salmon

  • 2 fillets salmon fillets

Toppings & Vegetables

  • 2 tbsp sesame seeds
  • 4 spring onions spring onions
  • 150 g edamame beans
  • Half a ripe avocado avocado

Instructions 

  • Cook rice as per instructions; prepare dressing by mixing vinegar, sugar, and salt. Pour over hot rice and fluff.
  • Toast sesame seeds; stir into rice and set aside to cool slightly.
  • Prepare marinade with maple syrup, sesame oil, tamari, garlic, and mirin. Cook salmon chunks in glaze until coated and cooked through.
  • Divide rice into bowls, top two-thirds with rice, and add edamame and sliced avocado to remaining third.
  • Pour glaze over salmon, add to bowls, sprinkle spring onions, and serve.

Notes

Use fresh salmon for best flavor and ensure rice is cooked properly for perfect texture.
Calories: 650kcal
Cost: $15
Course: Main Course
Cuisine: Japanese
Keyword: gluten-free, Salmon, Sushi

Nutrition

Calories: 650kcal | Carbohydrates: 90g | Protein: 35g | Fat: 20g | Sodium: 900mg

Welcome to a culinary journey that ignites your taste buds and fuels your day! These Healthy Nut & Seed Energy Cookies are not just a snack; they’re a power-packed companion for your busy life. With a perfect blend of wholesome ingredients, these cookies will keep you energized through long workdays, workouts, or any adventure that comes your way. So grab your apron, and let’s turn your kitchen into a flavorful playground!

Why You’ll Love This Recipe

These cookies are more than just delicious; they come with a host of benefits that will make you want to whip up a batch every week!

  • Nutrient-Dense: Packed with nuts and seeds, these cookies provide essential vitamins, minerals, and antioxidants, making them a healthy choice for any time of day.
  • Natural Sweetness: Sweetened with honey or maple syrup, these cookies are sugar-free and refined sugar-free, catering to those who want to avoid processed sugars.
  • Customizable: Feel free to adjust the mix-ins to match your taste preferences or dietary needs. Want to go nut-free? No problem!
  • Perfect for Any Occasion: Whether you need a quick breakfast on the go, a post-workout snack, or a delightful treat for your afternoon slump, these cookies fit the bill.
  • Great for Meal Prep: Make a batch at the start of the week for grab-and-go snacks that are healthy and satisfying.

Ingredients Breakdown

Here’s what you’ll need to create these delightful cookies, along with some tips on substitutions to cater to your specific needs:

  • 1 cup rolled oats: The chewy base that provides fiber and structure. You can substitute with gluten-free oats for a gluten-free version.
  • ½ cup mixed nuts: Choose from cashews, almonds, or walnuts, roughly chopped to add varied texture and nutrients. For a nut-free option, use sunflower seeds instead.
  • ¼ cup pumpkin seeds: These little powerhouses add magnesium and a delightful nutty taste. Swap with chia seeds if you prefer.
  • 2 tbsp chia seeds: These help bind the cookies and offer omega-3 fatty acids. If you’re out, ground flaxseeds can work as a substitute.
  • 2 tbsp flaxseeds: Another binding agent, packed with fiber. Both chia and flaxseeds are fantastic for your digestive health.
  • ½ cup dried cranberries (or raisins): For a touch of natural sweetness and chewiness. Feel free to use any dried fruit you like!
  • ¼ cup natural peanut butter or almond butter: Adds creaminess and healthy fats. Opt for sunflower seed butter for a nut-free alternative.
  • ¼ cup honey or maple syrup: Your natural sweetener choice. For a vegan option, stick with maple syrup.
  • 1 tsp vanilla extract: Adds depth of flavor; always a worthy addition!
  • ½ tsp cinnamon: This spice elevates the flavor profile, bringing warmth and comfort to every bite.
  • Pinch of salt: A crucial ingredient that enhances all the flavors.

How to Make Healthy Nut & Seed Energy Cookies

Ready to bake? Let’s bring this recipe to life!

  1. Preheat: Set your oven to 325°F (160°C) and line a baking sheet with parchment paper.
  2. Mix Dry Ingredients: In a large mixing bowl, combine the oats, nuts, seeds, dried fruits, cinnamon, and salt.
  3. Prepare Wet Mixture: In a small saucepan over low heat, melt the peanut butter and honey together until smooth. Stir in vanilla extract.
  4. Combine: Pour the wet mixture over the dry ingredients and stir until everything is fully coated.
  5. Shape Cookies: Using a cookie scoop or spoon, form cookies on the baking sheet and gently press to flatten into rounds.
  6. Bake: Place in the oven and bake for 12–15 minutes or until golden and firm. Let them cool completely on a rack to set.

Pro Tips for Perfect Cookies

Side view of freshly baked energy cookies filled with nuts and seeds, highlighting their chewy appearance.

Want to elevate your cookie game? Check out these expert insights:

  • Don’t Overmix: Mix just until combined to keep your cookies chewy.
  • Experiment with Flavors: Try adding a dash of nutmeg or a scoop of protein powder for an extra kick.
  • Watch the Bake Time: Every oven is different! Keep an eye on them to avoid over-baking.
  • Use a Cookie Scoop: For uniform size and even baking, a cookie scoop is your best friend.
  • Chill the Dough: For thicker cookies, chill the dough for 30 minutes before baking.
  • Try Different Mix-ins: Get creative with add-ins like dark chocolate chips, coconut flakes, or sunflower seeds!
  • Store Properly: Keep them in an airtight container to maintain freshness.
  • Freeze for Later: These cookies freeze beautifully! Just thaw and enjoy whenever you need a boost.

Common Mistakes and Troubleshooting

Even seasoned bakers make mistakes! Here’s how to avoid pitfalls:

  • Too dry: If your dough looks crumbly, add a splash of nut milk or more nut butter to help bind it.
  • Overbaking: If cookies are too hard, reduce the bake time slightly next time.
  • Not sticking together: Ensure you’re using enough binding agents (like nut butter and sweeteners) for the right texture.
  • Lack of flavor: Adjust spices or add a pinch more salt to enhance the overall taste.

Recipe Variations

Feeling adventurous? Here are some creative variations to try:

  • Chocolate Chip Energy Cookies: Add ½ cup of dark chocolate chips for a sweet twist.
  • Fruit & Nut Medley: Swap cranberries for dried apricots or figs for a different flavor.
  • Spicy Kick: Add a dash of cayenne pepper for a surprising heat!
  • Protein-Packed: Incorporate your favorite protein powder into the dry ingredients for an extra energy boost.

Storage & Make-Ahead Instructions

Worried about freshness? Here’s how to keep your cookies in prime condition:

  • Room Temperature: Store in an airtight container at room temperature for up to one week.
  • Freezing: Freeze cookies in a single layer on a baking sheet, then transfer to a container. They can last up to three months!
  • Make-Ahead: Prepare the dough a day in advance and store it in the fridge until you’re ready to bake.

Comprehensive FAQ

Got questions? We’ve got answers!

  • Can I make these cookies vegan? Absolutely! Just use maple syrup instead of honey and stick with a plant-based nut butter.
  • How do I know when the cookies are done? They should be golden brown and firm to the touch but still slightly soft in the center.
  • Can I use different nuts? Yes! Feel free to mix and match your favorite nuts and seeds.
  • Are these cookies gluten-free? Yes, just ensure you’re using certified gluten-free oats.
  • What’s the best way to serve these cookies? They’re great on their own or paired with a glass of almond milk for a satisfying snack.
  • Can I add protein powder to the recipe? Absolutely! Just replace a small portion of the oats with your favorite protein powder.
  • How long do these cookies last? They can last for up to a week at room temperature or up to three months in the freezer.
  • What’s the nutritional information per cookie? Each cookie is packed with fiber, healthy fats, and protein; check the nutritional breakdown for details!

Nutritional Tips and Dietary Adaptations

These cookies are not just tasty; they can also fit into various dietary needs:

  • High-Protein: Incorporate protein-rich ingredients like protein powder or hemp seeds.
  • High-Fiber: Add more chia or flaxseeds to boost fiber content.
  • Low-Carb: Substitute oats with ground almonds or coconut flour for a lower-carb option.
  • Paleo-Friendly: Use almond butter and maple syrup, and skip the oats for a paleo twist.

Equipment Recommendations

To make your cooking experience smooth and enjoyable, here’s what you need:

  • Mixing Bowls: A set of various sizes for mixing ingredients.
  • Cookie Scoop: Perfect for evenly shaped cookies.
  • Baking Sheet: A sturdy baking sheet lined with parchment paper for easy cleanup.
  • Measuring Cups and Spoons: Essential for accuracy in your baking.
  • Oven Thermometer: Ensures your oven is at the right temperature for perfect baking.

Serving Suggestions

Want to elevate your cookie experience? Here are some serving ideas:

  • With Milk: Pair these cookies with a cold glass of almond or oat milk for a delightful snack.
  • As a Breakfast Treat: Crumble over yogurt with fresh fruits for a power-packed breakfast.
  • During Workouts: Enjoy these cookies as a quick energy boost before or after your workout.
  • At Gatherings: Serve alongside a fruit platter for a healthy dessert option at your next gathering.

Conclusion

There you have it! A comprehensive guide to creating the ultimate Healthy Nut & Seed Energy Cookies. With their mouthwatering flavor and impressive nutritional benefits, there’s no reason not to indulge. These cookies are not just food; they’re a celebration of life’s flavors and the perfect way to fuel your fire. So embrace the adventure, make these cookies, and remember: cooking is about fun, experimentation, and, most importantly, enjoying every delicious bite. Happy baking!

Healthy Nut & Seed Energy Cookies

Prep Time 10 minutes
Cook Time 15 minutes
Total Time 25 minutes
Servings 12 cookies
Calories 150
These wholesome energy cookies are packed with nuts, seeds, and dried fruits, perfect for a nutritious snack on the go.

Ingredients

Dry ingredients

  • 1 cup rolled oats
  • ½ cup mixed nuts (cashews, almonds, walnuts), roughly chopped
  • ¼ cup pumpkin seeds
  • 2 tbsp chia seeds
  • 2 tbsp flaxseeds
  • ½ cup dried cranberries (or raisins)
  • ¼ cup natural peanut butter or almond butter
  • ¼ cup honey or maple syrup
  • 1 tsp vanilla extract
  • ½ tsp cinnamon
  • Pinch salt

Instructions 

  • Preheat oven to 325°F (160°C) and line a baking sheet with parchment paper.
  • Mix oats, nuts, seeds, dried cranberries, cinnamon, and salt in a bowl.
  • Heat peanut butter and honey until smooth, then stir in vanilla.
  • Combine wet and dry ingredients, then form into cookies and flatten on the baking sheet.
  • Bake for 12–15 minutes until golden; cool completely before serving.

Notes

Store in an airtight container for up to a week.
Calories: 150kcal
Cost: $15
Course: Snack
Keyword: Cookies, energy, healthy

Nutrition

Calories: 150kcal | Carbohydrates: 20g | Protein: 4g | Fat: 8g | Sodium: 50mg

Unleashing Flavor with a Honey Garlic Sheet Pan Delight

Welcome to the world of culinary adventure, where the irresistible combination of savory and sweet dances on your palate. Today, we’re diving into the magic behind the Honey Garlic Sheet Pan Sausage. This dish isn’t just a meal; it’s an experience, perfect for busy weeknights and gatherings alike. With its vibrant colors and mouthwatering aromas, this dish will have you and your family coming back for seconds. So grab your skillet and let’s set the kitchen ablaze with flavors!

Why You’ll Love This Recipe

  • Quick and Easy: With a prep time of just 15 minutes and a cook time of 30 minutes, this recipe is perfect for the busy home cook.
  • One-Pan Wonder: Minimal cleanup is needed since everything cooks together on one sheet pan, making it a breeze to serve and clean up.
  • Flavor Explosion: The sweet and savory honey garlic glaze elevates the dish, bringing together the hearty sausage and tender vegetables.
  • Healthy and Wholesome: Packed with nutritious ingredients like sweet potatoes and broccoli, this meal keeps your energy levels high.
  • Versatile for Meal Prep: This dish works wonderfully as leftovers and can be easily adapted for meal prep, making your weeknight dinners a snap!

Ingredients You’ll Need

Gather these ingredients to create your own Honey Garlic Sheet Pan Sausage:

  • 14 ounces chicken or turkey sausage: Sliced into 1/2-inch rounds for a hearty, protein-packed base.
  • 2 medium sweet potatoes: Peeled and diced into 1/2-inch cubes, providing a naturally sweet contrast.
  • 2 cups broccoli florets: Cut into bite-sized pieces, adding a vibrant green crunch.
  • 1 tablespoon unsalted butter: For richness and flavor in the glaze.
  • 4 cloves garlic: Minced, the star of the show that brings depth to the dish.
  • 1/4 cup honey: The secret to that perfect sweetness.
  • 1/4 cup low-sodium soy sauce: To balance the sweetness and add umami.
  • 1 tablespoon apple cider vinegar: A splash of acidity to brighten the flavors.
  • Salt and black pepper: To taste, enhancing the overall flavor profile.
  • 2 tablespoons fresh parsley: Minced for garnishing and a fresh finish.

How to Make the Perfect Honey Garlic Sheet Pan Sausage

A side view of juicy sausage with honey glaze and roasted vegetables.

Here’s how to bring this delightful dish to life:

  1. Preheat your oven: Get that oven warmed up to 400°F. Line a sheet pan with parchment paper to prevent sticking.
  2. Arrange the ingredients: On the prepared sheet pan, lay out the sliced sausage, diced sweet potatoes, and broccoli florets in an even layer.
  3. Make the honey garlic glaze: In a small saucepan over medium heat, melt the butter. Add minced garlic and sauté for about a minute until fragrant. Stir in honey, soy sauce, apple cider vinegar, salt, and pepper. Let it simmer for 2-3 minutes, stirring occasionally.
  4. Coat and roast: Pour the honey garlic glaze evenly over the sausage, sweet potatoes, and broccoli. Toss everything until well coated, then pop it in the oven.
  5. Cooking time: Roast for 25–30 minutes, stirring halfway through, until the sweet potatoes are fork-tender and the sausage is beautifully browned.
  6. Finishing touches: Once done, remove from the oven and sprinkle with freshly minced parsley before serving.

Pro Tips for Perfecting Your Dish

  • Ingredient freshness: Use fresh vegetables for the best texture and flavor.
  • Customize your sausage: Feel free to use plant-based sausage for a vegetarian option, or experiment with different flavors like spicy Italian.
  • Cut uniform pieces: Keeping your sweet potatoes and broccoli cut to similar sizes ensures even cooking.
  • Glaze variations: Experiment with different sweeteners like maple syrup or agave for a twist on the glaze.
  • Marinate ahead: If you have time, marinating the sausage in the honey garlic glaze for an hour or overnight can intensify the flavors.
  • Don’t overcrowd: If your pan is too crowded, the ingredients will steam instead of roast. Use two pans if necessary.
  • Serve warm: This dish is best enjoyed fresh from the oven, so time your sides accordingly.
  • Save the leftovers: This dish makes for fantastic leftovers; just store them in an airtight container for up to 3 days.

Common Mistakes and Troubleshooting

Even the best of us can make a misstep in the kitchen. Here are some common pitfalls and how to avoid them:

  • Overcooking vegetables: Keep an eye on the broccoli and sweet potatoes to prevent them from becoming mushy. Aim for that perfect tender-crisp texture.
  • Too much sauce: If your glaze is too thick, add a splash of water to thin it out before coating the ingredients.
  • Skipping the parsley: Don’t underestimate the power of fresh herbs; they add a brightness that balances the dish beautifully.
  • Inconsistent seasoning: Always taste before serving! Adjust salt and pepper based on your personal preference.

Variations to Spice Things Up

This recipe is a canvas—feel free to add your unique flair! Here are some variations:

  • Spicy twist: Add red pepper flakes or use spicy sausage for a kick that’ll make your taste buds dance.
  • Veggie overload: Swap in other vegetables like bell peppers, zucchini, or carrots for a colorful medley.
  • Sweet potato alternatives: Try butternut squash or even regular potatoes for different textures and flavors.
  • Herb infusion: Incorporate fresh thyme or rosemary into the glaze for an herbaceous twist.

Storage and Make-Ahead Instructions

Want to prepare ahead of time? Here’s how:

  • Make ahead: You can chop veggies and prepare the glaze a day in advance. Store them separately in the fridge until you’re ready to cook.
  • Storing leftovers: Store any leftovers in an airtight container in the fridge for up to 3 days. Reheat in the oven to maintain texture.
  • Freezing: This dish can be frozen for up to 3 months. Just ensure it’s well-sealed to avoid freezer burn.

FAQs: Your Burning Questions Answered

  • Can I use different types of sausage? Absolutely! Feel free to use any sausage you love—Italian, chicken, or even a plant-based option.
  • Is this recipe gluten-free? Yes, as long as you use gluten-free soy sauce, this dish is gluten-free!
  • How do I know my sweet potatoes are done? They should be fork-tender and slightly caramelized when cooked perfectly.
  • Can I add more vegetables? Of course! Just be mindful of cooking times for each vegetable.
  • What can I serve with this dish? It pairs beautifully with a fresh salad or crusty bread to soak up the delicious glaze.
  • Can I double this recipe? Yes! Just make sure not to overcrowd the pan; use two pans if necessary for even roasting.
  • How do I reheat leftovers? Reheat in the oven for the best results; microwave is fine but may lead to sogginess.
  • What’s the best way to add more heat? You can add chili powder, cayenne, or even sliced jalapeños to the mix!

Nutritional Tips and Dietary Adaptations

This dish is not only delicious but can also be adapted for various dietary needs:

  • Low-carb option: Substitute sweet potatoes with cauliflower florets for a lower-carb version.
  • Vegan adaptation: Use vegan sausage and replace honey with maple syrup for a plant-based delight.
  • Higher protein: Add chickpeas or lentils to the pan for an extra protein boost.

Essential Equipment Recommendations

Here’s what you need to make this dish shine:

  • Sheet pan: A sturdy, rimmed sheet pan is essential for even roasting.
  • Parchment paper: This helps with easy cleanup and prevents sticking.
  • Sharp knife: For cutting your veggies and sausage with precision.
  • Mixing bowl: A medium bowl is handy for tossing ingredients in the glaze.

Serving Suggestions

Make your meal even more satisfying with these serving ideas:

  • Garnish with fresh herbs: A sprinkle of parsley or cilantro adds a fresh touch.
  • Pair with a salad: A crisp green salad with a tangy vinaigrette complements the richness of the dish.
  • Serve with crusty bread: Perfect for mopping up the delicious honey garlic glaze.

As we wrap up this culinary journey, remember that cooking is all about exploration and joy. The Honey Garlic Sheet Pan Sausage not only brings flavors together but also creates memories around the dinner table. So don’t hold back—embrace the heat, savor the sweetness, and let your culinary spirit shine! Happy cooking!

Honey Garlic Sheet Pan Sausage

Prep Time 10 minutes
Cook Time 30 minutes
Total Time 40 minutes
Servings 4 servings
Calories 450
A quick and flavorful sheet pan meal featuring sausage, sweet potatoes, and broccoli glazed with honey garlic sauce.

Ingredients

Meat

  • 14 ounces chicken or turkey sausage, sliced into 1/2-inch rounds

Vegetables

  • 2 medium sweet potatoes, peeled and diced into 1/2-inch cubes
  • 2 cups broccoli florets, cut into 1/2-inch pieces

Dairy

  • 1 tablespoon unsalted butter

Garlic & Condiments

  • 4 cloves garlic, minced
  • 1/4 cup honey
  • 1/4 cup low-sodium soy sauce
  • 1 tablespoon apple cider vinegar

Seasonings

  • to taste Salt
  • to taste Black pepper

Herbs

  • 2 tablespoons fresh parsley, finely minced

Instructions 

  • Preheat oven to 400°F (200°C). Line a sheet pan with parchment paper.
  • Arrange sausage, sweet potatoes, and broccoli on the pan. Melt butter and sauté garlic for 1 minute.
  • Stir in honey, soy sauce, vinegar, salt, and pepper; simmer 2-3 minutes.
  • Pour glaze over ingredients and toss to coat. Roast for 25-30 minutes, stirring halfway.
  • Sprinkle with parsley before serving.

Notes

Ensure sweet potatoes are fork-tender and sausage is browned before serving.
Calories: 450kcal
Cost: $15
Course: Main Course
Cuisine: American
Keyword: sausage

Nutrition

Calories: 450kcal | Carbohydrates: 50g | Protein: 25g | Fat: 20g | Sodium: 900mg