Author

Avery Collins

Browsing

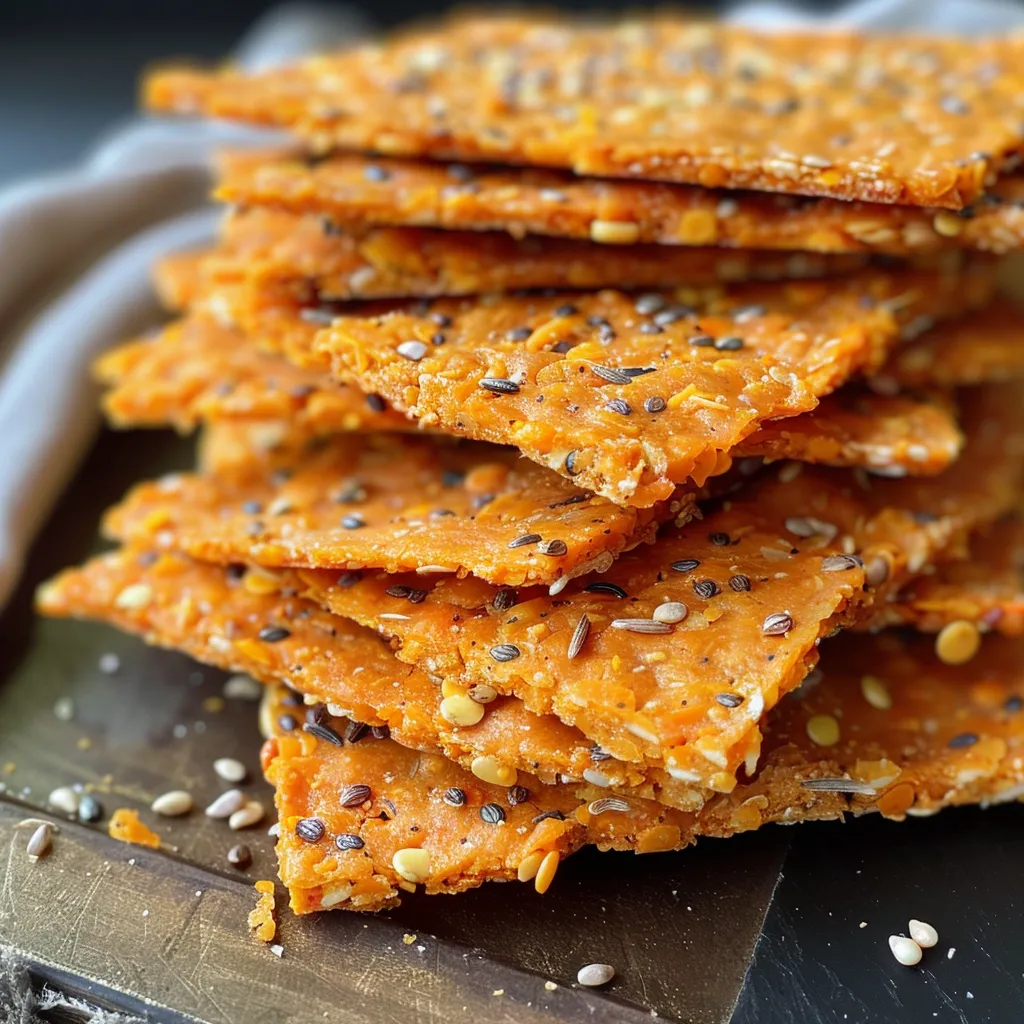
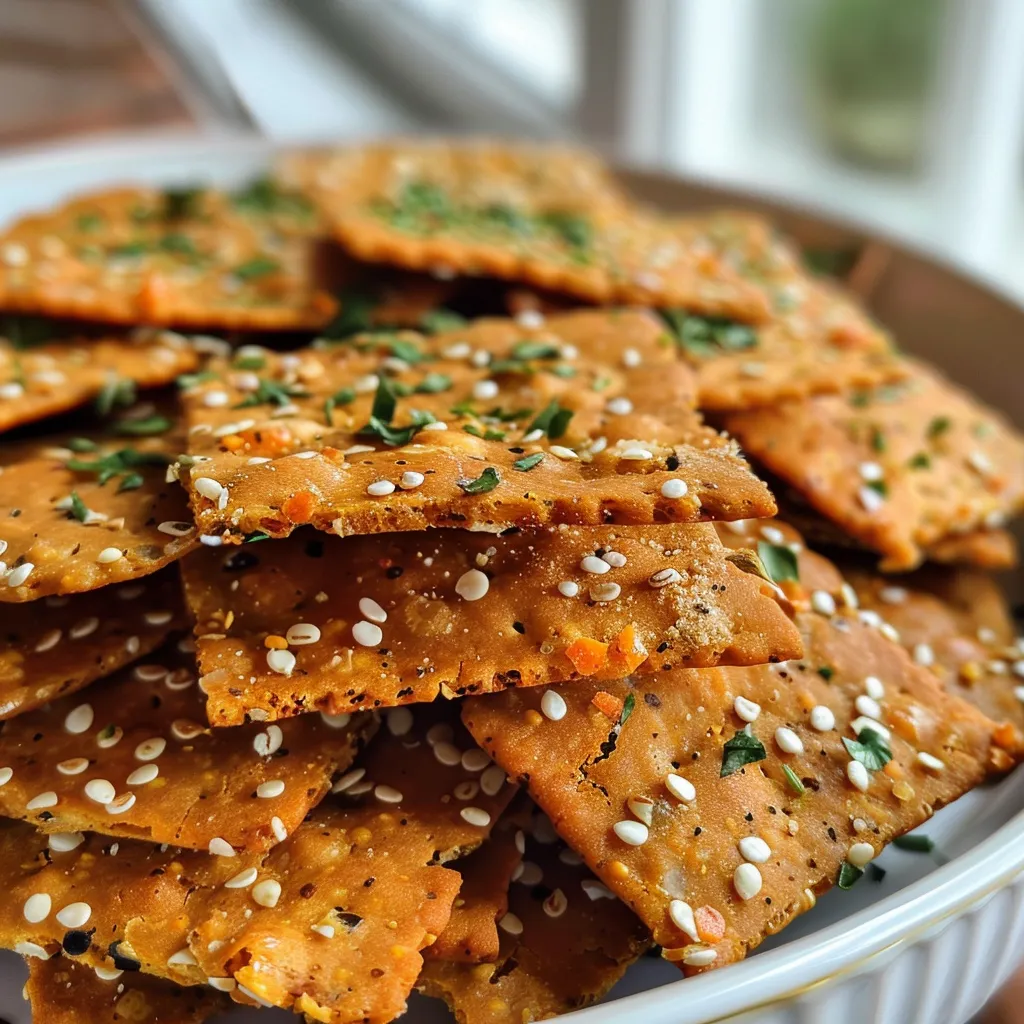
Unlock the Flavor: Why Red Lentil Crackers Are Your New Favorite Snack

Welcome to a culinary adventure that’s about to transform your snacking game! These red lentil crackers are not just a crunchy delight; they’re a powerhouse of flavor and nutrition. If you’re tired of the same old snacks and looking for something bold, protein-rich, and satisfying, you’ve landed in the right place. In just a few simple steps, you’ll create a snack that’s not only gluten-free but also bursting with the essence of spices that will ignite your taste buds. So, grab your apron and let’s dive into this recipe that’s as vibrant as a fiesta in my hometown of San Antonio!

Why You’ll Love This Recipe

  • Protein Powerhouse: These crackers are made from red lentils, which are naturally high in protein, making them a satisfying snack that keeps hunger at bay.
  • Easy to Make: With just a handful of ingredients, you’ll have homemade lentil crackers ready in no time. Perfect for busy schedules!
  • Gluten-Free Goodness: Ideal for those with gluten sensitivities. You can enjoy these crackers without worry!
  • Versatile Flavor Profiles: Customize your crackers with different herbs and spices, allowing you to create a flavor that resonates with your palate.
  • Healthy Snacking: These crackers are a healthy alternative to store-bought snacks, packed with nutrients and free from preservatives.

Gather Your Ingredients

Let’s break down what you’ll need to create these crunchy delights.

  • 200 g Rote Linsen: The star of the show, providing flavor and nutrition.
  • ¾ TL Backpulver: This will help your crackers rise slightly, giving them a delightful crunch.
  • 1 TL Knoblauchpulver: Adds a robust flavor that pairs perfectly with the lentils.
  • 1 TL Rosmarin: Fresh or dried, this herb elevates the flavor profile.
  • 1 TL Paprikapulver: For that smoky undertone that every cracker needs.
  • ½ TL Salz: Essential for enhancing all the flavors.
  • 3 EL Sonnenblumenkerne: These seeds add a nutty crunch.
  • 3 EL Sesam: Another layer of texture and taste.
  • 35 ml Olivenöl: Helps bind the ingredients and adds richness.

Step-by-Step Instructions

Side view of red lentil crackers with seeds and herbs displayed attractively.

Ready to get cooking? Here’s how to create your red lentil crackers:

  1. Preheat your oven to 180 °C (350 °F) with convection.
  2. Blend the red lentils in a mixer until they reach a fine flour consistency.
  3. In a bowl, combine the lentil flour, dry ingredients, then mix in the oil and 100 ml water to form a thick dough.
  4. Spread the dough onto a parchment-lined baking sheet, then cover it with another sheet of parchment. Roll it out evenly to your desired thickness.
  5. Remove the top parchment and cut the dough into your preferred shapes using a sharp knife or pizza cutter.
  6. Bake in the middle of the oven for 25-30 minutes until crispy, then let cool completely.

Pro Tips for Perfect Crackers

  • Don’t Skip the Preheat: Ensuring your oven is fully preheated guarantees even cooking.
  • Roll Evenly: Aim for uniform thickness to ensure all crackers bake at the same rate.
  • Experiment with Flavors: Try adding spices like cumin or chili powder for a kick!
  • Storage Matters: Keep your red lentil crackers in an airtight container to maintain freshness.
  • Freezing for Later: These crackers freeze well! Just place them in an airtight container and pull them out as needed.
  • Mind the Baking Time: Check them at the lower end of baking time to prevent burning.
  • Cut Before Baking: This helps them to crisp up nicely.
  • Flavor Infusion: Let the dough rest for 10 minutes after mixing to allow flavors to meld.

Common Mistakes and Troubleshooting

Even the best chefs have their off days! Here are some common pitfalls and how to avoid them:

  • Too Thick Dough: If your dough is too thick, add a little more water, one tablespoon at a time.
  • Crackers Not Crisping: Ensure your oven is at the right temperature and consider leaving them in a few extra minutes, checking frequently.
  • Sticking to the Parchment: If they stick, try lightly oiling the parchment before spreading the dough.

Creative Variations

Want to jazz things up? Here are four variations to try:

  • Herb-Infused: Add dried oregano and thyme for an Italian twist.
  • Spicy Kick: Incorporate cayenne pepper or crushed red pepper flakes for heat.
  • Cheesy Flavor: Mix in nutritional yeast for a cheesy flavor without dairy.
  • Nutty Delight: Add chopped walnuts or almonds for a hearty crunch.

Storage and Make-Ahead Instructions

These crackers store beautifully. Keep them in an airtight container at room temperature for up to a week. For longer storage, freeze them in an airtight container with parchment between layers to prevent sticking. Simply thaw at room temperature when you’re ready to enjoy.

Nutrition Tips and Dietary Adaptations

This recipe is naturally vegan and gluten-free, rich in protein, and can easily be adapted for various diets. Want to make them low-carb? Substitute some of the lentils for ground flaxseed or almond flour!

Equipment Recommendations

For the best results, you’ll need:

  • High-Speed Blender or Food Processor: Essential for making the lentil flour.
  • Baking Sheet: A good quality baking sheet will ensure even baking.
  • Parchment Paper: Keeps the crackers from sticking and makes cleanup a breeze.
  • Rolling Pin: For rolling out your dough evenly.

Serving Suggestions

Enjoy these red lentil crackers on their own or pair them with:

  • Hummus: A classic combo that’s protein-packed.
  • Guacamole: The creaminess of guacamole pairs perfectly with the crunch.
  • Cheese Spread: For those who enjoy a dairy option, a rich cheese spread is fantastic.
  • Fresh Salsa: Add a kick of flavor with a fresh, zesty salsa.

FAQs About Red Lentil Crackers

  • Can I use other types of lentils? Yes, but red lentils yield the best texture and flavor.
  • How can I make these crackers spicier? Add more cayenne or try spicy seasoning blends.
  • Are these crackers suitable for kids? Absolutely! They’re healthy, and you can adjust the spices to suit their tastes.
  • Can I bake these without a mixer? Yes, you can mash the lentils by hand, but a mixer saves time.
  • What’s the best way to eat these crackers? They’re perfect for dipping, snacking, or even as a crunchy topping for soups!
  • How long do these last? If stored properly, they can last up to a week at room temperature or longer in the freezer.
  • Can I make them ahead of time? Yes! They’re great for meal prep and make easy grab-and-go snacks.
  • Do I need to cook the lentils first? No, blending them dry into flour is all you need.

Wrap Up: Ignite Your Snacking Adventure!

With these red lentil crackers, you’ve not only learned a tasty recipe but also discovered the joy of cooking with spices and fresh ingredients. The next time you’re looking for a snack that’s healthy, delicious, and easy to make, remember this recipe. Embrace the art of the kick, and let your taste buds dance with every crunchy bite. So go ahead, make a batch, and let the snacking begin!

Rote Linsencracker – proteinreicher, gesunder Snack

Prep Time 10 minutes
Cook Time 25 minutes
Total Time 35 minutes
Servings 8 pieces
Calories 250
Enjoy a crunchy, protein-rich snack made from red lentils, perfect for a healthy treat anytime.

Ingredients

Main

  • 200 g Rote Linsen
  • 0.75 TL Backpulver
  • 1 TL Knoblauchpulver
  • 1 TL Rosmarin
  • 1 TL Paprikapulver
  • 0.5 TL Salz
  • 3 EL Sonnenblumenkerne
  • 3 EL Sesam
  • 35 ml Olivenöl

Instructions 

  • Backofen auf 180 °C Umluft vorheizen.
  • Rote Linsen im Mixer zu Mehl mahlen und mit trockenen Zutaten vermengen.
  • Mit Öl und Wasser zu einem Teig verrühren, dann ausrollen.
  • Teig in gewünschte Form schneiden und backen.
  • 25-30 Minuten knusprig backen, abkühlen lassen.

Notes

Für extra Crunch, nach dem Backen noch einmal kurz im Ofen aufbacken.
Calories: 250kcal
Cost: $12
Course: Snack
Cuisine: German
Keyword: lentils

Nutrition

Calories: 250kcal | Carbohydrates: 35g | Protein: 12g | Fat: 8g | Sodium: 300mg

Start Your Day Right with This Flavor-Packed Keto Breakfast Casserole

Are you ready to kickstart your mornings with a burst of flavor and energy? This Keto Breakfast Casserole is not just another meal; it’s a celebration of savory sausage, vibrant veggies, and creamy cheese, all wrapped up in a low-carb delight that will have you feeling satisfied and invigorated. Perfect for busy weekdays or leisurely weekends, this casserole is your ultimate go-to for a breakfast that’s as nourishing as it is delicious.

With everything you need in one dish, this recipe is a game changer for those committed to a keto lifestyle. So, grab your skillet, and let’s dive into the world of bold flavors and satisfying textures!

Why You’ll Love This Recipe

  • Flavor Explosion: A delightful medley of sausage, cheese, and veggies creates an unforgettable taste experience that will awaken your taste buds.
  • Effortless Meal Prep: Prepare this dish ahead of time, making your mornings less hectic and more enjoyable.
  • Flexible Ingredients: Customize with your favorite meats, vegetables, or cheeses for a breakfast that’s uniquely yours.
  • Low-Carb Goodness: Perfect for keto enthusiasts, this casserole keeps your carb count low while delivering high protein and healthy fats.
  • Family-Friendly: A dish that everyone will love, making it easy to gather around the table for a hearty breakfast.

Ingredients and Substitutions

Let’s break down the ingredients for this keto breakfast casserole:

  • 1 pound ground sausage: Use Italian or breakfast sausage — or try turkey sausage for a leaner option.
  • 1 medium onion, chopped: Sweet onions add a subtle sweetness; yellow or red onions work well too.
  • 1 green bell pepper, chopped: Feel free to substitute with red, yellow, or even jalapeño for a spicy kick.
  • 8 large eggs: Essential for binding all the ingredients together.
  • 1/2 cup heavy cream: For richness; can be replaced with coconut milk for a dairy-free version.
  • 1/4 cup unsweetened almond milk: Any keto-friendly milk will do, or use full-fat coconut milk for added creaminess.
  • Spices: 1 teaspoon garlic powder, 1/2 teaspoon onion powder, 1/4 teaspoon salt, and 1/4 teaspoon black pepper. Adjust to your taste preferences.
  • 2 cups shredded cheddar cheese: A cheese blend works great too. Try pepper jack for an extra kick!
  • Optional garnish: Fresh parsley adds a pop of color and fresh flavor.

How to Make This Keto Breakfast Casserole

Side view of a deliciously baked Keto Breakfast Casserole showcasing chopped vegetables and melted cheese.

Ready to whip up this mouthwatering casserole? Follow these simple steps:

  1. Brown the Sausage: In a large skillet over medium-high heat, crumble the ground sausage. Cook until no longer pink, stirring occasionally. Drain any excess grease.
  2. Sauté Vegetables: Add chopped onion and bell pepper to the skillet. Cook until softened, about 5-7 minutes.
  3. Season the Mixture: Stir in garlic powder, onion powder, salt, and pepper. Mix well and let it cool slightly.
  4. Whisk Eggs: In a large bowl, whisk eggs until light and frothy.
  5. Add Dairy and Seasonings: Pour in the heavy cream and almond milk, whisking until combined. Add a pinch of salt and pepper.
  6. Preheat Oven: Preheat your oven to 350°F (175°C) and grease a 9×13 inch baking dish.
  7. Combine Ingredients: Pour the cooled sausage and vegetable mixture into the prepared baking dish, spreading it evenly.
  8. Add Cheese Layer: Sprinkle half of the shredded cheddar cheese over the sausage and vegetable mixture.
  9. Pour Egg Mixture: Pour the egg mixture evenly over the layers in the baking dish.
  10. Top with Remaining Cheese: Sprinkle the remaining cheddar cheese on top.
  11. Optional Garnish: Sprinkle chopped parsley over the top for a fresh touch.
  12. Bake: Bake for 35-45 minutes, until the casserole is set and the top is golden brown. A knife inserted in the center should come out clean.
  13. Let it Rest: Allow the casserole to rest for 10-15 minutes before slicing and serving.

Pro Tips for the Perfect Casserole

  • Cool Your Mixture: Let the sausage and veggie mixture cool before adding it to the eggs to prevent curdling.
  • Experiment with Flavors: Don’t hesitate to add spices like smoked paprika or cayenne for an extra kick.
  • Make it Ahead: Prepare the dish the night before, cover, and refrigerate. Bake in the morning for a quick breakfast.
  • Check for Doneness: Keep an eye on the casserole as it bakes; ovens vary, so it might take longer for some.
  • Use Quality Cheese: Opt for freshly shredded cheese for better melting and flavor.
  • Cut Even Squares: For serving, let the casserole cool for a few minutes to make cutting easier and avoid crumbling.
  • Pair with Fresh Fruit: Serve with a side of berries for a refreshing contrast to the savory casserole.
  • Freeze Portions: Cut the casserole into squares and freeze for easy breakfasts on busy mornings.

Common Mistakes and Troubleshooting

Even the best chefs make mistakes! Here’s how to avoid common pitfalls:

  • Overcooking: Watch the baking time closely; overcooked eggs can lead to a rubbery texture.
  • Too Much Grease: Drain excess fat from the sausage to prevent a greasy casserole.
  • Skipping Seasoning: Don’t skimp on spices! They are crucial for a flavorful dish.
  • Skipping the Resting Time: Letting the casserole rest helps the flavors meld and makes slicing easier.

Delicious Variations to Try

Mix things up with these creative twists on the classic recipe:

  • Veggie Lover’s Casserole: Add in spinach, mushrooms, or zucchini for a nutrient boost.
  • Spicy Southwest Casserole: Incorporate diced jalapeños and pepper jack cheese for a kick.
  • Herbed Delight: Mix in fresh herbs like basil or cilantro for a fragrant touch.
  • Breakfast Burrito Casserole: Layer in some cooked tortilla strips for a Tex-Mex flair.

Storage and Make-Ahead Instructions

This dish is perfect for meal prep! Here’s how to store it:

  • Refrigerate: Store leftovers in an airtight container in the fridge for up to 4 days.
  • Freeze: To freeze, wrap individual portions tightly in plastic wrap and then in foil. They will keep for up to 3 months.
  • Reheat: For best results, reheat in the oven at 350°F (175°C) until warmed through, about 15-20 minutes.

Frequently Asked Questions (FAQs)

  • Can I use other types of meat? Absolutely! Ground turkey, chicken, or even cooked bacon work great.
  • Is this dish gluten-free? Yes, this recipe is naturally gluten-free, making it a safe choice for those with gluten sensitivities.
  • Can I make it dairy-free? Yes! Substitute the heavy cream and cheese with coconut milk and dairy-free cheese alternatives.
  • How do I know when it’s done? The casserole is done when it’s set in the center and lightly golden on top.
  • Can I add more vegetables? Definitely! Feel free to include any low-carb veggies you enjoy.
  • How long does it take to make? Including prep time, you’re looking at about an hour from start to finish.
  • Can leftovers be reheated? Yes, leftovers reheat beautifully in the oven or microwave.
  • Is this recipe suitable for meal prep? Absolutely! It’s perfect for make-ahead breakfasts.

Nutrition Tips and Dietary Adaptations

This keto breakfast casserole is not only delicious but also packed with nutrients:

  • Protein Power: Each serving contains a healthy dose of protein from the eggs and sausage, keeping you full longer.
  • Healthy Fats: The heavy cream and cheese offer beneficial fats that are essential for a ketogenic diet.
  • Fiber Boost: Incorporating vegetables increases fiber content, aiding digestion and promoting satiety.

Recommended Equipment

Here’s what you need to make this fantastic casserole:

  • Large Skillet: For sautéing the sausage and vegetables.
  • Mixing Bowl: To whisk the eggs and combine ingredients.
  • 9×13 Inch Baking Dish: Ideal size for this casserole.
  • Whisk: For mixing the egg mixture until frothy and combined.

Serving Suggestions

This casserole is delightful on its own, but here are some serving ideas:

  • Top with Avocado: Sliced avocado adds creaminess and healthy fats.
  • Pair with Salsa: A fresh salsa can enhance the flavor profile beautifully.
  • Serve with a Side Salad: A light side salad adds freshness and balances the richness of the casserole.

So there you have it, folks! This Keto Breakfast Casserole is more than just a meal; it’s a journey into the world of flavors that will leave you craving more. Embrace this recipe, make it your own, and let every bite remind you that cooking is an adventure meant to be explored. Get ready to spice up your mornings!

Keto Breakfast Casserole: The Ultimate Low-Carb Morning Meal

Prep Time 10 minutes
Cook Time 40 minutes
Total Time 50 minutes
Servings 6 servings
Calories 450
A delicious low-carb breakfast casserole combining sausage, vegetables, eggs, and cheese for a satisfying morning meal.

Ingredients

Meat

  • 1 pound ground sausage (Italian or breakfast sausage)
  • 1 medium onion, chopped
  • 1 green bell pepper, chopped green bell pepper, chopped

Eggs and Dairy

  • 8 large eggs
  • 0.5 cup heavy cream
  • 0.25 cup unsweetened almond milk
  • 1 teaspoon garlic powder
  • 0.5 teaspoon onion powder
  • 0.25 teaspoon salt (or to taste)
  • 0.25 teaspoon black pepper (or to taste)

Cheese

  • 2 cups shredded cheddar cheese (or your favorite cheese blend)

Optional Garnish

  • 0.25 cup chopped fresh parsley (for garnish)

Instructions 

  • Cook sausage until browned, then add onion and bell pepper; cook until softened.
  • Stir in garlic powder, onion powder, salt, and pepper; cool slightly.
  • Whisk eggs with heavy cream and almond milk; season with salt and pepper.
  • Layer sausage mixture and half of cheese in a greased 9x13 dish, pour egg mixture over, then top with remaining cheese.
  • Bake at 350°F (175°C) for 35-45 minutes until set and golden. Rest 10 minutes before serving.

Notes

This casserole is perfect for meal prep and easy to customize with your favorite keto-friendly ingredients.
Calories: 450kcal
Cost: $15
Course: Breakfast
Cuisine: American
Keyword: Keto

Nutrition

Calories: 450kcal | Carbohydrates: 6g | Protein: 30g | Fat: 35g | Sodium: 900mg

Igniting Flavor and Adventure with the Sweet Potato Taco Bowl

Welcome to the vibrant world of bold flavors and culinary adventures! If you’re searching for a meal that’s not just food but an experience, then you’ve arrived at the right place. The Sweet Potato Taco Bowl is a celebration of textures, tastes, and creativity, all wrapped up in a dish that speaks to the heart. With tender roasted sweet potatoes, zesty ground beef (or your choice of protein), and a fiesta of toppings, this bowl is not only a feast for the eyes but also a delight for the palate. Let’s dive into why this dish should become a staple in your kitchen!

Why You’ll Love This Recipe

Let me tell you, this Sweet Potato Taco Bowl is more than just a meal; it’s a culinary journey. Here are five reasons you’ll fall head over heels for this dish:

  • Flavor Explosion: The combination of smoky paprika, seasoned ground beef, and fresh toppings creates a symphony of flavors that will dance on your taste buds.
  • Nutrient-Rich: Sweet potatoes are packed with vitamins A and C, fiber, and antioxidants, making this bowl a powerhouse of nutrition.
  • Customizable: Whether you’re vegan, gluten-free, or just picky, this bowl adapts to your dietary needs effortlessly.
  • Meal Prepping Heaven: Make a big batch and enjoy it throughout the week without losing flavor or freshness.
  • Quick & Easy: With straightforward steps, this recipe can be on your table in less than 45 minutes!

Ingredients Breakdown

Here’s what you’ll need to create this dazzling dish, along with some substitution ideas:

  • 1 large sweet potato: Peeled and cubed, this sweet gem serves as the hearty base. Chef’s tip: Butternut squash works beautifully if you’re feeling adventurous.
  • 1 tbsp olive oil: This oil helps achieve crispy edges on your sweet potatoes. Alternative: Avocado oil is a fantastic choice for high-heat roasting.
  • 1 tsp smoked paprika: Adds a smoky depth that brings warmth to the bowl. Swap: Use regular paprika with a pinch of cumin for a different twist.
  • Salt & pepper to taste: Essential for enhancing the flavors of your ingredients.
  • ½ lb ground beef: A classic choice, but feel free to substitute with turkey or lentils for a vegetarian option.
  • 1 tbsp taco seasoning: For that quintessential taco flavor. Make your own: Combine cumin, chili powder, garlic powder, and a pinch of cayenne.
  • ½ cup pico de gallo: Freshness is key! You can also use store-bought if you’re short on time.
  • ¼ cup guacamole: Because what’s a taco bowl without guac? Alternative: Try a dollop of avocado puree for a lighter option.
  • 2 tbsp sour cream: Optional, but it adds a creamy finish. Substitution: Dairy-free alternatives work just as well!

Step-by-Step Cooking Instructions

Side view of a Sweet Potato Taco Bowl showcasing layers of sweet potato and toppings.

Ready to ignite your kitchen? Here’s how to whip up your Sweet Potato Taco Bowl:

  • Roast Sweet Potatoes: Preheat your oven to 425°F (220°C). Toss the sweet potato cubes with olive oil, smoked paprika, salt, and pepper. Spread them in a single layer on a baking sheet and roast for 15 minutes. Flip and roast for another 10–15 minutes until they’re golden and tender.
  • Cook the Beef: In a skillet, brown the ground beef over medium heat. Once cooked, add the taco seasoning and 2 tablespoons of water. Simmer for 2–3 minutes until the mixture thickens.
  • Assemble the Bowl: Divide the roasted sweet potatoes into bowls. Top with the seasoned beef, pico de gallo, guacamole, and a sprinkle of sour cream. Garnish with fresh cilantro, lime wedges, or crumbled cheese if you’re feeling fancy!

Pro Tips for Taco Bowl Mastery

To ensure your Sweet Potato Taco Bowl is flawless every time, consider these expert suggestions:

  • Perfect Texture: For crispy sweet potatoes, ensure they’re spread out on the baking sheet without crowding.
  • Season Generously: Don’t skimp on salt and pepper; they enhance all the flavors!
  • Flavor Layers: Consider adding layers of flavor with spices like cayenne or chili flakes for added heat.
  • Fresh Ingredients Matter: Use the freshest pico de gallo and guacamole you can find — it makes a world of difference!
  • Make-Ahead Magic: Roast your sweet potatoes in advance and reheat them to save time on busy nights.
  • Mix Proteins: Combine beef with black beans for a delightful texture contrast.
  • Garnish Wisely: A sprinkle of feta or cotija cheese adds a salty kick that elevates the dish.
  • Experiment with Sauces: Try adding a drizzle of chipotle sauce or a squeeze of lime for a zesty finish.

Common Mistakes & Troubleshooting

Here’s how to troubleshoot any issues that may arise while making your Sweet Potato Taco Bowl:

  • Sweet Potatoes Not Crispy: If they’re soggy, avoid overcrowding the baking sheet, and ensure they’re spread out in a single layer.
  • Too Much Heat: If your bowl ends up too spicy, balance it out with a dollop of sour cream or guacamole.
  • Dry Meat: Keep the beef moist by not overcooking it; add a splash of water if needed for moisture.
  • Flavor Lacking: Always taste and adjust seasoning as you go—don’t be afraid to add more spices!

Variations to Spice Up Your Bowl

Feeling adventurous? Here are some variations to keep things fresh:

  • Vegetarian Delight: Swap ground beef for lentils or black beans for a hearty vegetarian option.
  • Southwestern Twist: Add corn and black beans for a Tex-Mex flair.
  • Breakfast Bowl: Top with scrambled eggs and avocado for a delightful breakfast version.
  • Spicy Kick: Toss in jalapeños or a splash of hot sauce for those who crave extra heat.

Storage & Make-Ahead Instructions

Want to enjoy this dish throughout the week? Here’s how to store and prepare ahead of time:

  • Storage: Store leftovers in an airtight container in the refrigerator for up to 4 days.
  • Make-Ahead: Roast sweet potatoes and cook the beef in advance. Assemble the bowl just before serving for optimal freshness.

Comprehensive FAQ

Here are some common questions about the Sweet Potato Taco Bowl:

  • Can I make this Sweet Potato Taco Bowl vegetarian? Absolutely! Just replace the ground beef with lentils or black beans.
  • How do I store leftovers? Keep them in an airtight container in the fridge for up to 4 days.
  • Can I freeze this bowl? While individual components can be frozen, the assembled bowl is best enjoyed fresh.
  • What can I use instead of pico de gallo? You can substitute with fresh salsa or diced tomatoes.
  • Is this dish gluten-free? Yes! Just ensure your taco seasoning is gluten-free.
  • How can I add more protein? Try adding beans or increasing the quantity of meat!
  • Is it spicy? The heat level depends on the taco seasoning and other spices you add. Adjust to your preference!
  • Can I use sweet potatoes with the skin on? Yes, if you prefer, just wash them thoroughly before cubing.

Nutritional Tips & Dietary Adaptations

This Sweet Potato Taco Bowl is not only delicious but also nutritious. Here are some tips to make it fit various dietary needs:

  • Low-Carb Option: Replace sweet potatoes with cauliflower for a lower-carb alternative.
  • Dairy-Free: Use coconut yogurt or avocado in place of sour cream for a dairy-free twist.
  • High-Protein: Add extra beans or a scoop of Greek yogurt for an extra protein boost.

Essential Equipment

To whip up this fantastic bowl, here’s what you’ll need:

  • Baking Sheet: A sturdy baking sheet is essential for roasting your sweet potatoes.
  • Skillet: A non-stick skillet works best for browning the meat without sticking.
  • Mixing Bowls: Handy for tossing your sweet potatoes and mixing ingredients.

Serving Suggestions

Elevate your Sweet Potato Taco Bowl experience with these serving suggestions:

  • Fresh Herbs: Garnish with cilantro, parsley, or green onions for an aromatic touch.
  • Lime Wedges: A squeeze of lime juice adds brightness and zest.
  • Crunchy Toppings: Consider adding tortilla strips or crushed chips for extra texture.

Now that you know everything there is to know about crafting the perfect Sweet Potato Taco Bowl, it’s time to get cooking! Embrace the thrill of creating a dish that’s not just food but a story worth telling. Remember, cooking is about experimentation and celebration. So grab your ingredients, put on your favorite playlist, and let the flavors ignite your kitchen adventure!

Sweet Potato Taco Bowl

Prep Time 10 minutes
Cook Time 30 minutes
Total Time 40 minutes
Servings 4 servings
Calories 550
A flavorful and healthy bowl combining roasted sweet potatoes, seasoned beef, and fresh toppings for a satisfying meal.

Ingredients

Sweet Potatoes

  • 1 large sweet potato, peeled + cubed
  • 1 tbsp olive oil
  • 1 tsp smoked paprika
  • Salt & pepper to taste Salt & pepper
  • ½ lb ground beef (or turkey/lentils)
  • 1 tbsp taco seasoning (or homemade)
  • ½ cup pico de gallo
  • ¼ cup guacamole
  • 2 tbsp sour cream (or dairy-free alt.)

Instructions 

  • Preheat oven to 425°F (220°C). Toss sweet potatoes with oil, paprika, salt, and pepper. Roast for 15 mins, flip, then roast another 10–15 mins until golden.
  • Brown ground beef in a skillet over medium heat. Add taco seasoning and water; simmer 2–3 mins until thickened.
  • Divide roasted sweet potatoes into bowls. Top with beef, pico de gallo, guacamole, and sour cream. Garnish as desired.

Notes

Feel free to customize toppings or spice level to your preference.
Calories: 550kcal
Cost: $15
Course: Main Course
Cuisine: Mexican
Keyword: sweet potato

Nutrition

Calories: 550kcal | Carbohydrates: 65g | Protein: 35g | Fat: 20g | Sodium: 900mg

Welcome to the Ultimate Tater Tot Casserole Adventure

Welcome to the flavorful world of Tater Tot Casserole! This dish is a comforting blend of hearty ground beef, vibrant vegetables, and crispy tater tots, all enveloped in a rich, creamy sauce. If you’re ready to elevate your dinner game and awaken your taste buds, then buckle up, my friends! This recipe is your ticket to a culinary adventure that brings joy and satisfaction to every bite.

Why You’ll Love This Recipe

  • Comfort food at its best: Tater Tot Casserole is the ultimate comfort food that warms your soul and fills your belly.
  • Quick and easy preparation: With simple ingredients and straightforward steps, you can whip up this dish in no time.
  • Customizable to your taste: Whether you want to add extra veggies or switch proteins, this recipe is flexible to suit your cravings.
  • Perfect for feeding a crowd: This casserole is great for family gatherings or potlucks, making it easy to serve many.
  • Leftovers that taste even better: Trust me, the flavors deepen overnight, making the leftovers a delightful treat!

Ingredient Breakdown

Let’s dive into what makes this Tater Tot Casserole a showstopper. Here’s what you’ll need:

  • 1 pound ground beef: The heart of this dish, bringing a savory depth of flavor. You can also use ground turkey or chicken for a lighter option.
  • 1 cup diced onions: For that aromatic base, use yellow or sweet onions for subtle sweetness.
  • 2 cups mixed veggies: Feel free to use frozen peas, carrots, and corn – convenience at its finest!
  • 1 can condensed cream of mushroom soup: Adds creaminess and umami. If you’re feeling adventurous, try cream of chicken or a homemade version!
  • 2 tablespoons Worcestershire sauce: This secret ingredient enhances the meat’s flavor with a savory punch.
  • 1/2 cup milk: For a smoother consistency in the sauce.
  • 1/2 teaspoon salt and 1/4 teaspoon ground black pepper: Essential for seasoning, adjust to your taste.
  • 2 cups shredded cheddar cheese: Because cheese makes everything better! Feel free to experiment with other cheeses like Monterey Jack or pepper jack for extra kick.
  • 2-pound bag frozen tater tots: The crispy crown of this casserole; no need to thaw them, just layer them directly on top!

Step-by-Step: How to Make Tater Tot Casserole

Side view of a Tater Tot Casserole in a baking dish, showcasing layers of beef and vegetables.

Ready to get cooking? Follow these simple steps to create your masterpiece:

  1. In a large skillet, brown ground beef with onions over medium heat. Drain excess liquid.
  2. Mix in mixed veggies, cream of mushroom soup, Worcestershire sauce, milk, salt, and black pepper. Stir until well combined.
  3. Spread the beef mixture evenly into the bottom of a greased 9×13 casserole dish.
  4. Sprinkle shredded cheddar cheese evenly over the meat mixture.
  5. Top with a single layer of frozen tater tots, arranging them closely for maximum crispiness.
  6. Bake in a preheated 425°F oven for 25-30 minutes, or until the tater tots are golden brown and crispy.

Pro Tips for a Perfect Casserole

  • Brown the meat properly: For depth of flavor, let the meat get a nice brown crust before adding other ingredients.
  • Don’t skip the cheese: Use quality cheese for a gooey, melt-in-your-mouth experience.
  • Layer wisely: Ensure even coverage of the tater tots for consistent crispiness.
  • Customize your veggies: Feel free to throw in bell peppers, mushrooms, or any fresh veggies you have on hand.
  • Adjust the seasoning: Always taste your mixture before baking; you can add more salt or pepper according to your preference.
  • Let it rest: Allow the casserole to sit for a few minutes after baking. This helps it set and makes serving easier.
  • Mix up the meats: Try using a blend of ground beef and sausage for a bolder flavor.
  • Garnish for flair: Top with green onions or fresh herbs before serving for a pop of color and freshness!

Common Mistakes and Troubleshooting

Even the best chefs make mistakes. Here are some tips to avoid common pitfalls:

  • Not draining the beef: Excess grease can make your casserole soggy; always drain after browning.
  • Overbaking: Keep an eye on those tater tots! Overbaking can lead to a burnt topping.
  • Skipping the seasoning: Don’t forget to season your beef mixture; it makes all the difference in taste.
  • Using thawed tater tots: For the crispiest result, always use frozen tater tots without thawing!

Delicious Variations to Try

If you think Tater Tot Casserole is just one-note, think again! Here are some fun variations:

  • Cheeseburger Casserole: Add diced pickles and ketchup to the beef mixture for a classic burger flavor.
  • Taco Tater Tot Casserole: Swap the cream of mushroom soup for a can of salsa and add taco seasoning for a zesty twist.
  • Veggie-Loaded Casserole: Go meatless! Use lentils or black beans as a protein source and pack in more veggies.
  • BBQ Chicken Tater Tot Casserole: Replace beef with shredded BBQ chicken for a smoky, sweet flavor profile.

Storage and Make-Ahead Instructions

This casserole is great for meal prep! Here’s how to store it:

  • In the refrigerator: Store leftovers in an airtight container for up to 4 days.
  • Freezing: You can freeze the casserole before baking. Just wrap it tightly in foil and it will last for up to 3 months. Bake from frozen, adding extra time.
  • Reheating: Reheat leftovers in the oven at 350°F until heated through, about 20-25 minutes.

Frequently Asked Questions

Got questions? I’ve got answers! Here are some common queries about Tater Tot Casserole:

  • Can I make this casserole ahead of time? Absolutely! Prepare the casserole and store it in the fridge until you’re ready to bake.
  • What can I serve with Tater Tot Casserole? Pair it with a simple salad or some garlic bread for a complete meal.
  • Can I use fresh vegetables instead of frozen? Yes, just make sure to cook them first to soften them before adding to the casserole.
  • What cheese is best? Sharp cheddar works wonderfully, but feel free to mix in your favorite cheeses!
  • Is this dish kid-friendly? Totally! The crispy topping and cheesy filling are usually a hit with kids.
  • Can I make it spicy? Yes! Add jalapeños or a splash of hot sauce to the beef mixture for a kick.
  • How long does it take to bake? Bake for 25-30 minutes, but keep an eye on it to avoid over-browning the tots.
  • What if my casserole is too watery? If you find the casserole too watery, try using less milk or draining the beef more thoroughly next time.

Nutritional Tips and Dietary Adaptations

Want to make this recipe fit your dietary needs? Here are some tips:

  • Gluten-Free: Use gluten-free cream of mushroom soup or make your own at home.
  • Dairy-Free: Substitute cheese with a dairy-free alternative, and use coconut milk or almond milk instead.
  • Lower Calorie: Swap ground beef for lean ground turkey and use reduced-fat cheese.

Equipment Recommendations

Having the right tools can make a world of difference! Here’s what I recommend:

  • Large Skillet: For browning the meat and sautéing the onions.
  • 9×13 Casserole Dish: A must-have for layering your casserole.
  • Measuring Cups and Spoons: Precision is key when cooking!
  • Spatula: For mixing ingredients and serving your casserole.

Serving Suggestions

When it comes to serving your Tater Tot Casserole, consider these ideas:

  • Top with fresh herbs: A sprinkle of cilantro or parsley adds a burst of flavor and color.
  • Pair with a fresh salad: A light side salad balances the richness of the casserole.
  • Offer hot sauce: For those who like it spicy, a side of hot sauce can elevate the dish!

Conclusion: Your Next Culinary Adventure Awaits!

There you have it! A complete guide to making the ultimate Tater Tot Casserole that will not only satisfy your hunger but also ignite your passion for cooking. Remember, cooking is about experimenting and enjoying the process. So don’t be afraid to add your twist! Whether it’s a sprinkle of spice or a new ingredient, embrace the adventure and savor every bite. Until next time, happy cooking!

Tater Tot Casserole

Prep Time 15 minutes
Cook Time 30 minutes
Total Time 45 minutes
Servings 6 servings
Calories 850
A comforting and easy-to-make casserole combining ground beef, vegetables, cheese, and crispy tater tots.

Ingredients

Meat and Vegetables

  • 1 pound ground beef
  • 1 cup diced onions
  • 2 cup mixed veggies
  • 1 can condensed cream of mushroom soup (about 15 ounces)
  • 2 tablespoons Worcestershire sauce
  • 1/2 cup milk
  • 1/2 teaspoon salt
  • 1/4 teaspoon ground black pepper
  • 2 cups shredded cheddar
  • 2 pounds frozen tater tots

Instructions 

  • Brown ground beef with onions in a skillet, then drain.
  • Mix in veggies, mushroom soup, Worcestershire sauce, milk, salt, and pepper.
  • Spread mixture into a 9x13 dish and sprinkle cheese on top.
  • Layer frozen tater tots over the cheese.
  • Bake at 425°F for 25-30 minutes until bubbly and golden.

Notes

For a healthier option, use low-fat cheese and lean ground beef.
Calories: 850kcal
Cost: $15
Course: Main Course
Cuisine: American
Keyword: Tater Tots

Nutrition

Calories: 850kcal | Carbohydrates: 80g | Protein: 50g | Fat: 45g | Sodium: 1500mg

Welcome to the Flavor Frontier: A Low Carb Philly Cheesesteak Casserole Adventure

Are you ready to embark on a culinary journey that will ignite your taste buds and redefine your dinner table? My Low Carb Philly Cheesesteak Casserole is not just a dish; it’s a celebration of flavor, comfort, and the joy of cooking boldly. With juicy ground beef, vibrant bell peppers, and a melty cheese blend, this casserole is the perfect way to elevate your low-carb lifestyle without sacrificing taste. Let’s dive into the world of deliciousness that awaits!

Why You’ll Love This Recipe

This casserole is more than just a meal; it’s a delightful experience packed with benefits that will make you want to whip it up again and again. Here’s why:

  • Low Carb Goodness: Enjoy the rich flavors of a traditional cheesesteak while keeping your carb count low. This recipe fits perfectly into a keto or low-carb diet.
  • Flavor Explosion: The combination of seasoned ground beef, sautéed onions and peppers, and creamy cheeses creates a symphony of flavors that’ll have you coming back for seconds.
  • Easy Meal Prep: This casserole is perfect for meal prep! Make a big batch and enjoy it throughout the week or freeze it for later.
  • Quick Cooking Time: From prep to table in just about 30 minutes, this dish is ideal for busy weeknights.
  • Versatile and Customizable: Add your favorite veggies or spices to make this dish your own. The possibilities are endless!

Ingredient Breakdown and Substitutions

Let’s get into the nitty-gritty of what makes this Philly cheesesteak casserole a hit! Here’s what you’ll need:

  • 2 lbs ground beef (80/20 fat ratio preferred): This cut ensures you get a juicy, flavorful base. You can substitute with ground turkey or chicken for a leaner option.
  • 1 large onion (diced): Yellow onions provide sweetness, but feel free to use red for a bolder flavor.
  • 2 large bell peppers (green, red, or mixed, diced): The colors not only enhance the dish visually but also add different flavor profiles. Try adding jalapeños for a spicy kick!
  • 2 cloves garlic (minced): Fresh garlic elevates the flavor. If you’re short on time, garlic powder works too.
  • 8 oz cream cheese (softened): This creates a creamy texture that binds the flavors together. Neufchâtel cheese is a great low-fat alternative.
  • 2 tbsp Worcestershire sauce: Adds depth and umami. Soy sauce can be a substitute in a pinch.
  • Salt and pepper (to taste): Essential for enhancing all the flavors.
  • 8 oz provolone cheese (sliced): For that authentic cheesesteak taste. Mozzarella can be used if you prefer a milder flavor.
  • 1.5 cups mozzarella cheese (shredded): The star of the cheese pull! Feel free to mix and match with your favorite cheeses.
  • 1 tbsp olive oil: A healthy fat for sautéing. You can use avocado oil for a different flavor profile.

Step-by-Step Instructions

Side view of a cheesy casserole dish filled with ground beef, onions, and bell peppers.

Ready to create a masterpiece? Follow these simple steps to whip up your cheesesteak casserole:

  1. Preheat your oven to 350°F (175°C) and spray a 9×13 baking dish with non-stick spray.
  2. Heat olive oil in a large skillet over medium heat.
  3. Add diced onions and bell peppers to the hot oil, cooking for 5-6 minutes until they start to soften and become fragrant. Add minced garlic and cook for another 30 seconds, stirring constantly to prevent burning.
  4. Add ground beef to the skillet, breaking it up with your spatula as it cooks. Season generously with salt and pepper, cooking for 7-8 minutes until completely browned with no pink remaining. Drain excess fat if needed.
  5. Stir in Worcestershire sauce and let it coat the meat mixture for enhanced flavor. Reduce heat to low and add the softened cream cheese, stirring until completely melted and creamy.
  6. Transfer the mixture to your prepared baking dish and spread evenly. Layer torn provolone pieces over the beef, then top with shredded mozzarella for that perfect cheese pull.
  7. Bake for 22-25 minutes until cheese is melted, bubbly, and lightly golden on top. Let rest for 5 minutes before serving to allow flavors to meld together.

Pro Tips for Perfecting Your Casserole

To ensure your low carb Philly cheesesteak casserole turns out perfectly every time, keep these expert insights in mind:

  • Don’t rush the sautéing: Properly caramelizing the onions and peppers brings out their natural sweetness and adds complexity to the dish.
  • Drain excess fat: If your ground beef is particularly fatty, draining it will prevent a greasy texture in the final dish.
  • Experiment with cheeses: Mixing different types of cheese can add depth and enhance the flavor profile. Try adding some gouda or cheddar for a twist!
  • Use a baking dish with a light coating of oil: This will help prevent sticking and make clean-up easier.
  • Let it rest: Allowing the casserole to sit for a few minutes after baking helps the flavors meld and makes serving easier.
  • Add spice: If you like a kick, sprinkle in some red pepper flakes or diced jalapeños during the cooking process.
  • Try different meats: Ground turkey, chicken, or even sausage can be fantastic substitutes to switch things up.
  • Pair with a side salad: For a complete meal, consider serving this casserole alongside a fresh garden salad or steamed veggies.

Common Mistakes and Troubleshooting

Even the most seasoned cooks can make mistakes! Here’s how to avoid common pitfalls:

  • Overcooking the vegetables: Keep an eye on your onions and peppers; they should be tender but still have a bite. Overcooked veggies can turn mushy.
  • Not seasoning adequately: Be generous with salt and pepper! Taste as you go and adjust to your preference.
  • Skipping the rest period: Letting the casserole rest allows flavors to settle and makes it easier to slice and serve.
  • Using cold cream cheese: Ensure your cream cheese is at room temperature for smooth incorporation into the meat mixture.

Delicious Variations to Try

Want to mix things up? Here are some variations to customize your Philly cheesesteak casserole:

  • Veggie-Loaded Version: Add mushrooms, spinach, or zucchini for extra nutrients and flavor.
  • Spicy Southwest Twist: Incorporate diced tomatoes, black beans, and cumin for a Southwest flair.
  • Buffalo Chicken Casserole: Swap ground beef for shredded chicken and mix in buffalo sauce for a spicy kick.
  • Italian Style: Add Italian sausage instead of beef and mix in marinara sauce for a cheesy Italian delight.

Storage and Make-Ahead Instructions

This casserole is perfect for meal prep! Here’s how to store and reheat:

  • Refrigerator: Store leftovers in an airtight container for up to 3 days. Reheat in the microwave or oven until warmed through.
  • Freezing: Allow the casserole to cool completely, then cover tightly with plastic wrap and foil. It can be frozen for up to 2 months. Thaw overnight in the refrigerator before reheating.
  • Make-Ahead Option: Assemble the casserole up to a day in advance, cover, and refrigerate. Bake when ready to serve.

Frequently Asked Questions

Here are some common questions about the Low Carb Philly Cheesesteak Casserole:

  • Can I use another type of meat? Yes! Ground turkey, chicken, or even sausage can be used.
  • How do I make this dairy-free? Substitute cream cheese with a dairy-free version and use non-dairy cheese alternatives.
  • Can I add more vegetables? Absolutely! Feel free to load it up with your favorite veggies.
  • What can I serve with this casserole? A fresh salad or steamed vegetables make great side dishes.
  • How do I make it spicier? Add diced jalapeños or a sprinkle of red pepper flakes during cooking.
  • Can I make this ahead of time? Yes! Prepare ahead and refrigerate until ready to bake.
  • How long will leftovers last? Leftovers can be stored in the fridge for up to 3 days.
  • Is this casserole gluten-free? Yes, as long as you ensure your Worcestershire sauce is gluten-free!

Nutritional Tips and Dietary Adaptations

This cheesesteak casserole can fit into various dietary needs:

  • Keto-Friendly: With low carbs and high fat, it’s perfect for those on a keto diet.
  • Paleo Adaptation: Use ground meat, vegetables, and a dairy-free cheese alternative for a paleo-friendly meal.
  • High Protein: This dish is packed with protein from the beef and cheese—great for muscle-building diets.

Essential Equipment Recommendations

To make your cooking experience smooth, here are some essential tools:

  • Large Skillet: For sautéing vegetables and browning the beef.
  • 9×13 Baking Dish: Perfect for assembling and baking your casserole.
  • Spatula: For breaking up and mixing your ingredients.
  • Mixing Bowl: To combine your cheeses and seasonings easily.

Serving Suggestions for Maximum Enjoyment

To create a complete dining experience, consider serving your Low Carb Philly Cheesesteak Casserole with:

  • Fresh Garden Salad: A light salad with a vinaigrette pairs beautifully to balance the richness.
  • Cauliflower Rice: A low-carb alternative to traditional rice that complements the casserole.
  • Steamed Broccoli or Asparagus: These veggies add color and nutrition to your plate.

In conclusion, my Low Carb Philly Cheesesteak Casserole is more than a meal; it’s an invitation to explore, experiment, and enjoy the art of cooking. So grab your skillet, embrace the heat, and let’s make dinner an adventure!

Low Carb Philly Cheesesteak Casserole

Prep Time 10 minutes
Cook Time 25 minutes
Total Time 35 minutes
Servings 4 servings
Calories 850
A delicious low-carb twist on the classic Philly cheesesteak, baked to cheesy perfection.

Ingredients

Meat and Dairy

  • 2 lbs ground beef (80/20 fat ratio preferred)
  • 8 oz cream cheese (softened to room temperature)
  • 8 oz provolone cheese (sliced)
  • 1.5 cups mozzarella cheese (shredded)

Vegetables and Aromatics

  • 1 large onion (diced)
  • 2 large bell peppers (diced)
  • 2 cloves garlic (minced)
  • 1 tbsp olive oil

Condiments and Seasonings

  • 2 tbsp Worcestershire sauce
  • salt and pepper (to taste) salt and pepper (to taste)

Instructions 

  • Preheat oven to 350°F (175°C). Sauté onions and peppers in olive oil for 5-6 minutes, then add garlic and cook 30 seconds.
  • Add ground beef, season with salt and pepper, cook until browned, then drain excess fat.
  • Stir in Worcestershire sauce, then add cream cheese, stirring until melted and creamy.
  • Transfer mixture to a baking dish, layer torn provolone, then top with shredded mozzarella. Bake 22-25 minutes until bubbly and golden.
  • Let rest 5 minutes before serving.

Notes

For extra flavor, add sliced mushrooms or hot sauce.
Calories: 850kcal
Cost: $15
Course: Main Course
Cuisine: American
Keyword: beef, casserole, Cheesesteak

Nutrition

Calories: 850kcal | Carbohydrates: 20g | Protein: 70g | Fat: 55g | Sodium: 1500mg

Ignite Your Taste Buds: Discover the Magic of Spaghetti Squash Casserole

Welcome, fellow food adventurers! Today, we’re diving deep into a dish that’s not just a meal but a culinary experience — my Spaghetti Squash Casserole. This is where hearty ground beef and spicy Italian sausage unite with creamy ricotta and gooey mozzarella, creating a low-carb comfort food that’s bold and inviting. If you’ve ever found yourself craving something both delicious and satisfying, look no further! With our combination of spices and flavors, this casserole will ignite your passion for cooking and leave your taste buds dancing.

In this article, we’ll explore everything you need to know about making this scrumptious dish, including tips for success, variations, and essential ingredients. Buckle up, because we’re about to turn up the heat in the kitchen!

Why You’ll Love This Recipe

  • Low-Carb Delight: Perfect for those watching their carb intake, this casserole replaces traditional pasta with nutrient-rich spaghetti squash, giving you all the comfort without the guilt.
  • Hearty and Satisfying: With a generous amount of ground beef and sausage, this dish offers a protein-packed punch that will keep you full and satisfied.
  • Easy to Make: Layering ingredients and baking makes this casserole simple and straightforward, perfect for busy weeknights.
  • Flavor Explosion: The blend of Italian spices, garlic, and cheeses creates a dish that’s bursting with flavor, ensuring every bite is a delight.
  • Make-Ahead Friendly: This casserole can be prepared in advance and stored, making it a perfect option for meal prep or gatherings.

Ingredients Breakdown

Let’s get down to the essentials! Here’s what you’ll need to create your own Spaghetti Squash Casserole. I’ve also included some substitution suggestions to help you customize the dish to your liking.

  • 1 tablespoon Extra-Virgin Olive Oil: A splash enhances flavor and allows for beautiful sautéing.
  • 1 pound Ground Beef: Provides a hearty protein base. Feel free to use ground turkey or chicken for a leaner option.
  • 1 pound Italian Sausage: Adds a kick of flavor. You can substitute with turkey sausage for a lighter version.
  • 1 medium Onion (diced): Contributes sweetness and depth to the dish. Yellow or white onions work best.
  • 3 cloves Minced Garlic: Elevates the dish with aromatic warmth. Fresh garlic is always a winner!
  • 1 tablespoon Italian Seasoning: Brings a robust flavor profile. You can create your own blend with oregano, basil, and thyme.
  • 1 teaspoon Red Pepper Flakes (optional): For a touch of heat. Adjust according to your spice tolerance.
  • Salt and Pepper (to taste): Essential for enhancing flavors.
  • 2 cups Marinara Sauce: Use high-quality sauce for the best taste. Homemade is fantastic if you have the time!
  • 15 ounces Ricotta Cheese: Creamy and rich, this adds a beautiful texture.
  • 8 ounces Cream Cheese (softened): Ensures a smooth blend, making every bite luscious.
  • 1/4 cup Chopped Parsley: Brightens flavors and adds freshness.
  • 1/2 cup Grated Parmesan Cheese: Adds a savory dimension to the dish.
  • 1 medium Pre-cooked Spaghetti Squash: The star of the show. Make sure it’s roasted to perfection before adding!
  • 1 tablespoon Arrowroot Powder (optional): Acts as a thickener for extra creaminess.
  • 2 cups Grated Mozzarella Cheese: Creates a golden finish and melty goodness.
  • Parsley or Basil (for garnish): Adds color and freshness to your plated dish.

Step-by-Step Instructions

Side angle of a hearty spaghetti squash casserole showcasing ricotta and mozzarella layers.

Alright, let’s get cooking! Follow these simple steps to whip up your Spaghetti Squash Casserole.

  1. Prepare the Spaghetti Squash: Preheat your oven to 400°F (200°C). Slice the spaghetti squash in half lengthwise, scoop out the seeds, and brush the inside with olive oil. Season with salt and pepper. Place cut-side down on a baking sheet and roast for 40-45 minutes until tender.
  2. Cook the Meat: In a large skillet over medium heat, add olive oil and sauté diced onions until translucent. Add ground beef and Italian sausage, cooking until browned. Stir in minced garlic, Italian seasoning, and red pepper flakes, cooking for another minute.
  3. Add Marinara Sauce: Pour in the marinara sauce, mixing well to combine. Let the mixture simmer for about 5 minutes.
  4. Prepare the Cheese Mixture: In a separate bowl, combine ricotta, cream cheese, chopped parsley, and Parmesan cheese until smooth.
  5. Combine and Layer: Once the spaghetti squash is ready, scrape the flesh with a fork to create noodles. Mix the squash with the meat mixture and then layer half of it in your baking dish. Spread the cheese mixture on top, followed by the remaining meat and squash.
  6. Top with Mozzarella: Finish by sprinkling the grated mozzarella cheese over the top.
  7. Bake: Bake in the oven for 25-30 minutes, until the cheese is bubbly and golden brown.
  8. Garnish and Serve: Remove from the oven and let it cool for a few minutes. Garnish with parsley or basil before serving.

Pro Tips for Perfecting Your Casserole

  • Don’t Overcook the Squash: Make sure the spaghetti squash is al dente, as it will continue to cook in the oven.
  • Experiment with Meats: Try using a mix of meats or going vegetarian with beans or lentils for a different twist.
  • Layer Wisely: Ensure even distribution of ingredients for a balanced flavor in every bite.
  • Use Quality Marinara: A good sauce makes all the difference! Go for homemade or a high-quality store-bought brand.
  • Monitor Cheese Melting: Keep an eye on the cheese as it bakes to prevent burning; cover with foil if needed.
  • Let It Rest: Allow the casserole to cool slightly before cutting; this helps it hold its shape.
  • Spice Up Your Life: Adjust the amount of red pepper flakes based on your heat preference.
  • Make It Ahead: This casserole can be assembled a day in advance and baked when ready!

Common Mistakes and Troubleshooting

Even the best chefs have their off days. Here are some common pitfalls to avoid:

  • Watery Casserole: Make sure to drain excess liquid from the roasted spaghetti squash before mixing it in.
  • Overcooked Meat: Avoid cooking the meat too long in the skillet; it will cook further in the oven.
  • Too Dense: If your casserole feels too heavy, consider reducing the amount of cheese or adding more veggies.
  • Burnt Cheese: If your cheese is browning too quickly, cover the casserole with foil to protect it.

Delicious Variations to Try

Ready to shake things up? Here are some variations to customize your Spaghetti Squash Casserole experience:

  • Veggie Delight: Add sautéed spinach, mushrooms, or bell peppers for an extra veggie boost.
  • Mexican Twist: Incorporate taco seasoning, black beans, and corn for a Southwest spin.
  • Cheesy Alfredo: Swap marinara for Alfredo sauce and add broccoli for a creamy version.
  • Herb Infusion: Experiment with different herbs like thyme, rosemary, or fresh basil for varied flavor profiles.

Storage and Make-Ahead Instructions

Your Spaghetti Squash Casserole can be a meal prep superstar! Here’s how to store it:

  • Refrigerator: Store leftovers in an airtight container for up to 4 days.
  • Freezer: This casserole freezes well! Wrap it tightly in plastic wrap and foil, and it can last up to 3 months. Just thaw in the fridge before baking.
  • Reheating: Reheat individual portions in the microwave or warm the whole casserole in the oven at 350°F until heated through.

Comprehensive FAQs

Here are some frequently asked questions to help you along:

  • Can I use fresh spaghetti squash instead of pre-cooked? Yes, just roast it according to instructions before mixing it into the casserole.
  • How do I know when the spaghetti squash is done? It should be easily pierced with a fork, and the flesh should separate into strands.
  • Can I make this casserole vegetarian? Absolutely! Substitute the meats with beans, lentils, or extra vegetables.
  • What if I don’t have ricotta cheese? Cream cheese or cottage cheese can be used as substitutes.
  • Can I add more cheese? Yes! Feel free to up the cheese game for a gooier experience.
  • Is there a gluten-free option? This recipe is naturally gluten-free, making it a safe choice for those with gluten sensitivities.
  • How long can I store leftovers? Leftovers can be kept in the fridge for up to 4 days or frozen for up to 3 months.
  • What’s the best way to serve this casserole? Garnish with fresh herbs and enjoy it hot, paired with a side salad for a complete meal!

Nutritional Tips and Dietary Adaptations

If you’re looking to adapt this recipe for specific dietary needs, here are some tips:

  • Low-Carb Lovers: This casserole is already low in carbs, thanks to the spaghetti squash!
  • Gluten-Free: Ensure your marinara sauce and other ingredients are gluten-free.
  • High-Protein Option: Use lean ground turkey or chicken for an even higher protein content.

Must-Have Equipment

Before you start, make sure you have the following kitchen essentials:

  • Sharp Chef’s Knife: For slicing the spaghetti squash effortlessly.
  • Cutting Board: A sturdy surface for food prep.
  • Large Skillet: For browning meats and sautéing vegetables.
  • Oven-Safe Baking Dish: To hold your assembled casserole.
  • Mixing Bowls: For combining and prepping your ingredients.

Serving Suggestions

Now that your Spaghetti Squash Casserole is ready and smelling divine, it’s time to serve! Here are a few ideas:

  • With a Side Salad: A fresh green salad with a tangy vinaigrette complements the richness of the casserole.
  • Pair with Garlic Bread: For a comforting combo, serve with a slice of garlic bread.
  • Top with Fresh Herbs: A sprinkle of fresh basil or parsley right before serving adds a vibrant touch.

There you have it, folks! My Irresistible Spaghetti Squash Casserole is not just a recipe but a celebration of flavor, adventure, and the joy of cooking. So grab your skillet, embrace the spice, and let’s make some magic in the kitchen!

Delicious Spaghetti Squash Casserole Low Carb Comfort Food

Prep Time 15 minutes
Cook Time 30 minutes
Total Time 45 minutes
Servings 4 servings
Calories 650
A hearty and flavorful low-carb casserole featuring spaghetti squash, savory meats, and cheesy goodness, perfect for a comforting meal.

Ingredients

Protein

  • 1 tablespoon Extra-Virgin Olive Oil (a splash enhances flavor)
  • 1 pound Ground Beef (provides a hearty protein base)
  • 1 pound Italian Sausage (adds a kick of flavor)

Vegetables

  • 1 medium Onion (diced, contributes sweetness)
  • 3 cloves Minced Garlic (elevates the dish)

Seasonings

  • 1 tablespoon Italian Seasoning
  • 1 teaspoon Red Pepper Flakes (optional, for a touch of heat)
  • to taste Salt
  • to taste Pepper

Sauces & Cheeses

  • 2 cups Marinara Sauce (use high-quality sauce)
  • 15 ounces Ricotta Cheese (creamy and rich)
  • 8 ounces Cream Cheese (softened, ensures a smooth blend)
  • 1/4 cup Chopped Parsley (brightens flavors)
  • 1/2 cup Grated Parmesan Cheese (adds a savory dimension)
  • 1 medium Pre-cooked Spaghetti Squash (the star of the show)
  • 1 tablespoon Arrowroot Powder (optional, acts as a thickener)
  • 2 cups Grated Mozzarella Cheese (creates a golden finish)
  • to taste Parsley or Basil (for garnish, adds color and freshness)

Instructions 

  • Heat olive oil in a large skillet and cook ground beef, Italian sausage, diced onion, and minced garlic until browned.
  • Add marinara sauce, Italian seasoning, red pepper flakes, salt, and pepper. Simmer for 10 minutes.
  • In a bowl, mix ricotta, cream cheese, chopped parsley, Parmesan, and arrowroot powder. Combine with cooked meats and spaghetti squash.
  • Transfer mixture to a baking dish, top with grated mozzarella, and bake at 375°F (190°C) for 20 minutes until golden.
  • Garnish with parsley or basil before serving.

Notes

For a lower sodium version, use reduced-sodium marinara and cheese.
Calories: 650kcal
Cost: $15
Course: Main Course
Cuisine: American
Keyword: comfort food, Low Carb, Spaghetti Squash

Nutrition

Calories: 650kcal | Carbohydrates: 45g | Protein: 45g | Fat: 35g | Sodium: 1200mg

Dive into the World of Coconut Curry Salmon

Welcome to a culinary adventure where every bite tells a story! My One-Pan Coconut Curry Salmon with Garlic Butter is not just a recipe; it’s an experience that brings together the rich, creamy essence of coconut milk and the vibrant flavors of spices. This dish is your passport to a world of flavor, transforming an ordinary dinner into something extraordinary. Whether you’re a seasoned chef or just stepping into the kitchen, this recipe is designed to thrill your taste buds and ignite your passion for cooking.

In this article, I’ll guide you through the secrets of creating a mouth-watering coconut curry salmon dish that’s as easy to prepare as it is to savor. With bold ingredients and a punch of flavor, you’ll quickly understand why this dish is an absolute favorite in my kitchen.

Why You’ll Love This Recipe

This One-Pan Coconut Curry Salmon is a dish that’s bound to become a staple in your rotation. Here’s why:

  • Quick and Easy: Ready in under 30 minutes, this dish is perfect for busy weeknights.
  • One-Pan Wonder: Minimal cleanup required, just one pan to cook everything and serve!
  • Flavor Explosion: The combination of garlic, ginger, and spices creates a rich, aromatic sauce that elevates the salmon.
  • Healthy and Nutritious: Salmon is packed with omega-3 fatty acids, making this dish both delicious and good for you.
  • Versatile Pairings: Serve it with rice, quinoa, or a fresh salad for a well-rounded meal.

Ingredient Breakdown

Let’s dive into the ingredients that make this dish sing. Each component plays a crucial role in building flavor and texture.

Essential Ingredients

  • 4 salmon fillets: Skin-on or skinless, fresh is best for optimal flavor and texture.
  • 1 teaspoon salt: Enhances the flavors of the salmon and sauce.
  • ½ teaspoon black pepper: Adds subtle heat and depth.
  • ½ teaspoon paprika: For a hint of sweetness and vibrant color.
  • 1 tablespoon olive oil: Helps achieve that golden sear on the salmon.
  • 2 tablespoons butter: Adds richness to the sauce.
  • 4 cloves garlic, minced: The aromatic base that infuses the dish with flavor.
  • 1 teaspoon fresh ginger, grated: Brightens the sauce with a fresh kick.
  • 1 teaspoon curry powder: The star spice that defines the dish.
  • ½ teaspoon turmeric: Not only adds color but also health benefits.
  • ½ teaspoon red pepper flakes (optional): For those who love a little heat!
  • 1 can (13.5 oz) coconut milk: The creamy foundation of the sauce, balancing the spices.
  • 1 tablespoon tomato paste: Adds depth and umami flavor.
  • 1 teaspoon honey or maple syrup: A touch of sweetness to balance the spices.
  • 1 tablespoon soy sauce: Enhances the dish with its savory notes.
  • Juice of ½ a lime: Brightens the dish and adds a fresh zing.
  • ¼ cup fresh cilantro or basil, chopped: A fragrant garnish that ties everything together.

Substitutions

  • Salmon: Use any firm fish like trout or even chicken for a different twist.
  • Coconut milk: Substitute with almond milk or another non-dairy option if preferred.
  • Honey: Maple syrup or agave can be used for a vegan-friendly option.
  • Fresh herbs: If you don’t have cilantro or basil, parsley works too!

Pro Tips for the Perfect Dish

Side view of succulent salmon in a rich coconut curry sauce, showcasing garlic and spices.

Here are some expert insights to help you nail this recipe and wow your guests:

  • Fresh Ingredients Matter: Always use **fresh salmon** and **aromatics** for a vibrant flavor.
  • Don’t Overcook the Salmon: Aim for it to be just opaque in the center for the best texture.
  • Customize the Heat: Adjust the red pepper flakes to your spice tolerance level.
  • Let It Simmer: Allow the salmon to soak in the sauce for a few minutes to absorb all those flavors.
  • Balance the Sweetness: Adjust honey/maple syrup according to your preference for sweetness versus spice.
  • Garnish Generously: Fresh herbs brighten the dish, so don’t skimp on the garnish!
  • Use a Non-Stick Pan: This helps prevent sticking and ensures even cooking.
  • Make it Ahead: The sauce can be made ahead of time and refrigerated for convenience.

Common Mistakes and Troubleshooting

Even seasoned cooks can run into hiccups. Here are some common pitfalls and how to avoid them:

  • Overcooking the Salmon: Keep an eye on the cooking time. Salmon cooks quickly; it’s better to undercook slightly than overcook!
  • Too Much Spice: Start with less curry powder if you’re unsure about the heat level. You can always add more!
  • Thick Sauce: If your sauce is too thick, add a splash of water or broth to thin it out.
  • Burnt Garlic: Mince the garlic finely and add it at the right time to prevent burning.

Delicious Variations

Want to mix things up? Here are some fun variations of this dish:

  • Vegetable Additions: Toss in some spinach, bell peppers, or snap peas for extra nutrition and color.
  • Spicy Coconut Curry: Add more red pepper flakes or even a chopped jalapeño for a fiery kick.
  • Thai-Inspired: Incorporate lemongrass and Thai basil for a different flavor profile.
  • Creamy Coconut Curry Pasta: Serve over pasta instead of rice for a unique twist.

How to Store and Make Ahead

Planning to make this dish ahead of time? Here’s how to store it:

  • Refrigerate: Store any leftovers in an airtight container in the fridge for up to 3 days.
  • Reheat: Gently reheat in a pan over low heat, adding a splash of coconut milk to keep it creamy.
  • Make Ahead: Prepare the sauce and marinate the salmon a day in advance for the best flavor.

Frequently Asked Questions

Got questions? I’ve got answers! Here are some of the most common queries about this dish:

  • Can I use frozen salmon? Yes, just ensure it’s fully thawed before cooking for even results.
  • What can I serve with this dish? Pair with steamed rice, quinoa, or a fresh salad for a complete meal.
  • How do I know when the salmon is done? It should flake easily with a fork and look opaque in the center.
  • Can I make this dish vegetarian? Absolutely! Substitute salmon with tofu or chickpeas for a vegetarian version.
  • Is this recipe spicy? The level of spice can be adjusted based on your preference for red pepper flakes.
  • How do I store leftovers? Keep in an airtight container in the fridge for up to 3 days.
  • Can I freeze this dish? It’s best enjoyed fresh, but you can freeze the sauce separately for future use.
  • What’s the best type of coconut milk to use? Full-fat coconut milk yields the richest flavor and creaminess.

Nutritional Tips and Dietary Adaptations

This dish is not only delicious but also nutritious! Here are some tips:

  • Rich in Omega-3: Salmon is a great source of omega-3 fatty acids, which are essential for heart health.
  • Low Carb Option: Serve with cauliflower rice for a low-carb alternative.
  • Gluten-Free: Ensure the soy sauce is gluten-free if you have dietary restrictions.
  • Vegan Adaptation: Use tofu and coconut aminos instead of soy sauce for a vegan-friendly dish.

Recommended Equipment

To make this dish, you’ll need the following kitchen essentials:

  • Non-Stick Skillet: For easy cooking and cleanup.
  • Spatula: To flip the salmon without breaking it apart.
  • Measuring Cups and Spoons: Accuracy matters for the best flavor!
  • Knife and Cutting Board: For prepping your ingredients efficiently.

Serving Suggestions

When it comes to serving, the sky’s the limit! Here are some suggestions to elevate your meal:

  • Steamed Jasmine Rice: The perfect base to soak up the delicious sauce.
  • Quinoa Salad: A refreshing side that complements the richness of the curry.
  • Garlic Naan: Ideal for sopping up every drop of that creamy coconut sauce.
  • Fresh Vegetable Salad: A crisp salad with a tangy dressing balances the richness of the dish.

Conclusion

Now that you’ve discovered the magic behind my One-Pan Coconut Curry Salmon with Garlic Butter, it’s time to fire up your skillet and embark on this culinary journey! With its vibrant flavors, quick preparation, and healthy ingredients, this dish is bound to impress your family and friends. Remember, cooking is all about experimenting and having fun — so don’t hesitate to add your personal touch. Let the spices dance, and enjoy every bite of this unforgettable meal!

One-Pan Coconut Curry Salmon with Garlic Butter

Prep Time 10 minutes
Cook Time 15 minutes
Total Time 25 minutes
Servings 4 servings
Calories 450
A quick and flavorful one-pan dish featuring tender salmon in a rich coconut curry sauce, perfect for a satisfying meal.

Ingredients

Protein

  • 4 fillets salmon fillets (skin-on or skinless)

Seasonings

  • 1 teaspoon salt
  • ½ teaspoon black pepper
  • ½ teaspoon paprika

Cooking fats

  • 1 tablespoon olive oil
  • 2 tablespoons butter

Aromatics

  • 4 cloves garlic, minced
  • 1 teaspoon fresh ginger, grated

Spices & Sauces

  • 1 teaspoon curry powder
  • ½ teaspoon turmeric
  • ½ teaspoon red pepper flakes (optional, for heat)

Coconut & Tomato

  • 1 can (13.5 oz) coconut milk
  • 1 tablespoon tomato paste
  • 1 teaspoon honey or maple syrup
  • 1 tablespoon soy sauce
  • Juice of ½ a lime lime juice
  • ¼ cup fresh cilantro or basil, chopped (for garnish)

Instructions 

  • Season the salmon with salt, pepper, and paprika.
  • Heat olive oil and 1 tablespoon butter in a large pan over medium heat. Cook salmon until golden and cooked through, about 4-5 minutes per side. Remove and set aside.
  • Add garlic, ginger, curry powder, turmeric, and red pepper flakes to the pan. Sauté for 1 minute.
  • Pour in coconut milk, tomato paste, honey, soy sauce, and lime juice. Simmer for 5 minutes to thicken slightly.
  • Return salmon to the pan, spoon sauce over, and cook for another 2-3 minutes. Garnish with chopped cilantro or basil before serving.

Notes

For extra heat, add more red pepper flakes or serve with a side of rice.
Calories: 450kcal
Cost: $15
Course: Main Course
Cuisine: Fusion
Keyword: Salmon

Nutrition

Calories: 450kcal | Carbohydrates: 20g | Protein: 35g | Fat: 25g | Sodium: 900mg

Ignite Your Passion for Cooking with This Eggplant Casserole Recipe

Welcome to a culinary adventure that will awaken your taste buds and inspire your inner chef! This Eggplant Casserole is not just a dish; it’s a celebration of flavors, textures, and the bold spirit of cooking. Combining rich tomatoes, creamy ricotta, and a symphony of spices, this casserole is the perfect way to spice up your cooking game. Whether you’re a seasoned home cook or just starting out, this recipe invites you to embrace the thrill of crafting something extraordinary from simple ingredients. Let’s dive into the world of eggplant casserole and unleash the flavor!

Why You’ll Love This Recipe

  • Flavor Explosion: The combination of roasted eggplant, tangy tomatoes, and creamy cheeses creates a deliciously rich taste that will leave you craving more.
  • Comforting and Satisfying: This casserole is the epitome of comfort food, perfect for cozy dinners or gatherings with loved ones.
  • Healthy and Nutritious: Packed with vegetables and wholesome ingredients, this dish is vegetarian-friendly and loaded with nutrients.
  • Versatile Dish: Great as a main course or side dish, you can serve it with crusty bread or a fresh salad for a well-rounded meal.
  • Make-Ahead Friendly: Perfect for meal prep, this eggplant casserole can be assembled in advance and stored in the refrigerator for easy baking later.

Ingredient Breakdown

To create this mouthwatering Eggplant Casserole, gather the following ingredients:

  • Eggplant: 2 large eggplants are the star of the show. Look for firm, heavy eggplants with smooth, unblemished skin. Globe or Italian eggplants are ideal for this recipe due to their size and meaty texture. Smaller varieties like Japanese or Fairy Tale eggplants can also be used, but you may need to adjust the quantity accordingly.
  • Olive Oil: 1 tablespoon of extra virgin olive oil for sautéing the vegetables, enhancing flavor and browning.
  • Onion: 1 medium yellow onion, finely chopped, forms the aromatic base of the sauce.
  • Garlic: 2 cloves of minced garlic add depth and savoriness.
  • Red Bell Pepper: 1 medium, chopped, to contribute sweetness and vibrant color.
  • Crushed Tomatoes: 1 can (28 ounces) forms the flavorful sauce base.
  • Dried Oregano: 1 teaspoon for that classic Mediterranean flavor.
  • Dried Basil: ½ teaspoon enhances the aromatic profile.
  • Salt and Pepper: To taste for seasoning.
  • Ricotta Cheese: 1 cup, providing a creamy layer.
  • Grated Parmesan Cheese: ½ cup, adding umami and richness.
  • Fresh Parsley: ¼ cup, for brightness and freshness.
  • Shredded Mozzarella Cheese: ½ cup, for a gooey topping.

Preparation Steps

Side view of a juicy eggplant casserole, highlighting its golden brown top and bubbling texture.

Now, let’s get cooking! Follow these steps to create your eggplant casserole masterpiece:

  • Preheat Your Oven: Start by preheating your oven to 375°F (190°C) for optimal baking.
  • Prepare the Eggplant: Wash and slice the eggplants into ½-inch rounds. Sprinkle both sides with salt and let them sit for 20-30 minutes to draw out moisture.
  • Cook the Base: Heat olive oil in a large skillet, add chopped onions, and sauté until translucent. Then, add minced garlic and chopped red bell pepper, cooking until fragrant.
  • Add Tomatoes and Seasoning: Pour in the crushed tomatoes, add oregano and basil, and season with salt and pepper. Let the sauce simmer for 10 minutes.
  • Mix the Ricotta: In a bowl, combine ricotta, Parmesan, and parsley. Mix until well blended.
  • Layer the Casserole: In a greased baking dish, spread a layer of tomato sauce, then a layer of eggplant, followed by half the ricotta mixture and half the mozzarella. Repeat the layers, finishing with the remaining tomato sauce.
  • Bake to Perfection: Bake for 30-35 minutes until the eggplant is tender and the cheese is bubbly and golden.
  • Rest and Serve: Let the casserole cool for 10-15 minutes before serving to help it set.

Pro Tips for Perfect Eggplant Casserole

  • Salting the Eggplant: This technique helps reduce bitterness and prevent sogginess. Be patient and let them sweat!
  • Quality Tomatoes: Use good quality crushed tomatoes for the best flavor. Fire-roasted varieties can add a delightful smokiness.
  • Experiment with Cheeses: Feel free to mix different cheeses like gouda or provolone for a unique twist.
  • Herb Variations: Fresh herbs can enhance the flavor; consider adding thyme or rosemary for a fragrant touch.
  • Don’t Overcrowd the Layers: Keep your layers even to ensure each serving has a balanced flavor.
  • Check for Doneness: Bake until the eggplant is tender; if you pierce it with a fork, it should feel soft.
  • Rest Before Serving: Letting it sit allows flavors to meld and makes it easier to cut.
  • Garnish Creatively: Fresh basil or a drizzle of balsamic reduction can elevate your dish when served.

Common Mistakes and Troubleshooting

Even the best of us make mistakes in the kitchen. Here are some tips to help you troubleshoot:

  • Soggy Eggplant: Ensure you salt the eggplant slices adequately and let them sit to draw out moisture.
  • Too Salty: Start with less salt and adjust as needed during cooking.
  • Burnt Cheese: If your casserole is browning too quickly, cover it with foil midway through baking.
  • Undercooked Eggplant: If your eggplant isn’t tender, cover it and bake for an additional 5-10 minutes.

Delicious Variations

Want to mix things up? Here are some exciting variations to try:

  • Spicy Kick: Add crushed red pepper flakes or diced jalapeños for a spicy twist.
  • Mediterranean Style: Mix in olives and feta cheese for a tangy Mediterranean flair.
  • Meat Lovers: Incorporate cooked ground beef or sausage for added protein.
  • Vegan Option: Substitute ricotta and mozzarella with vegan cheese alternatives.

Storage and Make-Ahead Instructions

This eggplant casserole is perfect for meal prep. Here’s how to store it:

  • Make-Ahead: Assemble the casserole up to a day in advance and store it covered in the refrigerator until ready to bake.
  • Leftovers: Store any leftover casserole in an airtight container in the refrigerator for up to 4 days.
  • Freezing: You can freeze the casserole before baking for up to 3 months. Thaw overnight in the fridge before baking.

Frequently Asked Questions

  • Can I use different vegetables? Absolutely! Zucchini, mushrooms, or spinach can be great additions.
  • What can I serve with eggplant casserole? Pair it with a fresh salad or garlic bread for a complete meal.
  • How do I know when it’s done? The casserole should be bubbly and the eggplant tender when pierced with a fork.
  • Can I make it gluten-free? Yes, just ensure your breadcrumbs (if using) are gluten-free.
  • What if I don’t like ricotta? You can substitute it with cottage cheese or omit it entirely.
  • How long does it keep in the fridge? It will last for about 4 days, stored properly in an airtight container.
  • Is eggplant casserole healthy? Yes! It’s packed with vegetables and can be made lighter by adjusting cheese portions.
  • Can I reheat it? Yes, simply warm it in the oven or microwave until heated through.

Nutrition Tips and Dietary Adaptations

This casserole is not only delicious but also offers a range of nutritional benefits:

  • Rich in Fiber: Eggplant is a great source of dietary fiber, promoting digestion and gut health.
  • Low in Calories: This dish is relatively low in calories, making it a healthy option for any meal.
  • Customizable for Dietary Needs: Easily adapt this recipe for vegan, gluten-free, or low-carb diets with simple substitutions.

Recommended Equipment

Ensure you have the right tools for success:

  • Large Skillet: Ideal for sautéing vegetables and creating the sauce.
  • Baking Dish: A 9×13 inch baking dish works perfectly for this casserole.
  • Sharp Knife: For slicing the eggplant and chopping vegetables.
  • Measuring Cups and Spoons: Essential for precise ingredient measurements.

Serving Suggestions

When it comes to serving your Eggplant Casserole, the possibilities are endless:

  • Fresh Salad: A light arugula or mixed greens salad adds freshness and balances the richness of the casserole.
  • Crusty Bread: Serve with warm, crusty bread for soaking up the delicious sauce.
  • Herb Garnish: Top with extra parsley or basil for a vibrant finish.

As you embark on this culinary journey, remember that cooking is about exploration and adventure. This Eggplant Casserole is a canvas for your creativity—don’t hesitate to make it your own! Embrace the flavors, enjoy the process, and most importantly, share your delicious creation with loved ones. Happy cooking!

Eggplant Casserole Recipe

Prep Time 30 minutes
Cook Time 35 minutes
Total Time 1 hour 5 minutes
Servings 6 servings
Calories 350
A hearty and flavorful baked eggplant casserole layered with rich tomato sauce, cheesy ricotta, and melty mozzarella. Perfect for a comforting vegetarian meal.

Ingredients

Vegetables

  • 2 large eggplants (firm, heavy, ideal for baking)
  • 1 tablespoon olive oil (for sautéing)
  • 1 medium yellow onion (finely chopped)
  • 2 cloves garlic (minced)
  • 1 medium red bell pepper (chopped)
  • 1 can (28 ounces) crushed tomatoes (rich tomato base)
  • 1 teaspoon dried oregano (classic herb flavor)
  • ½ teaspoon dried basil (aromatic herb)
  • ½ teaspoon salt (to taste)
  • ¼ teaspoon black pepper (to taste)
  • 1 cup whole milk ricotta cheese (creamy layer)
  • ½ cup grated Parmesan cheese (nutty flavor)
  • ¼ cup chopped fresh parsley (brightens ricotta)
  • ½ cup shredded mozzarella cheese (melty topping)

Instructions 

  • Preheat oven to 375°F (190°C). Salt eggplant slices, rest 20-30 mins, then dry.
  • Sauté onion in olive oil until translucent, add garlic and bell pepper, cook 3 mins.
  • Add crushed tomatoes, oregano, basil, salt, and pepper; simmer 10 mins.
  • Mix ricotta, Parmesan, and parsley. Layer sauce, eggplant, ricotta, mozzarella in a baking dish. Repeat layers.
  • Bake 30-35 mins until bubbly and golden. Rest 10 mins before serving. Garnish with parsley.

Notes

Use firm eggplants and adjust salt to taste. Resting the casserole helps it set for easier serving.
Calories: 350kcal
Cost: $15
Course: Main Course
Cuisine: Mediterranean
Keyword: Eggplant

Nutrition

Calories: 350kcal | Carbohydrates: 40g | Protein: 15g | Fat: 15g | Sodium: 800mg

Welcome to a culinary adventure that will awaken your taste buds and inspire your inner chef! Today, we’re diving into the delightful world of Garlic Butter Shrimp Sausage and Broccoli. This dish is not just a meal; it’s a celebration of flavor, a dance of textures, and an invitation to embrace the art of cooking with passion. With its rich garlic butter sauce, succulent shrimp, and savory sausage, you’re in for a treat that’s perfect for busy weeknights or special gatherings. So grab your skillet, and let’s ignite some flavor!

Why You’ll Love This Recipe

This dish is a powerhouse of flavors and benefits, making it a must-try for any home cook. Here are just a few reasons why you’ll love making Garlic Butter Shrimp Sausage and Broccoli:

  • Quick and Easy: This dish comes together in under 30 minutes, making it perfect for those hectic evenings when you need a satisfying meal without the fuss.
  • One-Pan Wonder: All the magic happens in one skillet, simplifying cleanup while maximizing flavor. Less mess means more time to enjoy your meal!
  • Balanced Meal: Packed with protein from the shrimp and sausage, alongside nutrient-rich broccoli, this dish is a complete meal that’s both healthy and hearty.
  • Customizable: Feel free to switch up the ingredients based on what you have on hand or your dietary preferences. It’s versatile and forgiving!
  • Impressive Presentation: The vibrant colors and enticing aromas of this dish make it a showstopper at any dinner table, ready to impress family and friends.

Ingredients Breakdown

Let’s gather our ingredients for this flavor-packed dish. Here’s what you’ll need:

  • 1 lb shrimp: Peeled and deveined, these little gems add sweetness and protein to the dish.
  • 8 oz sausage: Sliced, any variety you love—smoked sausage, chicken sausage, or even a spicy chorizo for a kick.
  • 2 cups broccoli florets: Fresh or frozen, they bring color, crunch, and a host of nutrients.
  • 3 tbsp unsalted butter: The star of our garlic butter sauce, adding richness and flavor.
  • 4 cloves garlic: Minced, because garlic makes everything better!
  • 2 tbsp olive oil: For sautéing and enhancing the deliciousness.
  • Salt and pepper: To taste, ensuring everything is perfectly seasoned.
  • Optional garnish: Fresh parsley and lemon wedges for that final touch of brightness.

**Substitutions:** If you’re looking for alternatives, try using tofu instead of shrimp for a vegetarian option, or swap out broccoli for asparagus or green beans. The beauty of this recipe is its flexibility!

Step-by-Step Preparation

Now that we have everything ready, let’s dive into the cooking process. Follow these steps for a flawless dish:

  1. Prepare the Ingredients: Peel and devein the shrimp, leaving the tails on if desired for presentation. Slice the sausage into bite-sized pieces and chop the broccoli into small florets.
  2. Cook the Sausage: In a large skillet over medium heat, heat 1 tablespoon of olive oil. Add the sliced sausage and cook until browned and crispy, about 5-7 minutes. Remove the sausage from the skillet and set aside.
  3. Cook the Broccoli: In the same skillet, add another tablespoon of olive oil. Sauté the broccoli florets for 5-6 minutes until tender but still crisp. Season with salt and pepper, then remove and set aside.
  4. Cook the Shrimp: Add the shrimp to the skillet, seasoning with salt and pepper. Cook for 2-3 minutes on each side until pink and opaque. Remove the shrimp from the skillet.
  5. Make the Garlic Butter Sauce: In a small saucepan, melt the butter over medium heat. Add the minced garlic and sauté for 1-2 minutes until fragrant and golden.
  6. Combine Everything: Return the cooked sausage, broccoli, and shrimp to the skillet. Pour the garlic butter sauce over the mixture and toss to combine, ensuring everything is evenly coated.
  7. Serve: Serve immediately, garnished with fresh parsley and a squeeze of lemon if desired. Enjoy your culinary masterpiece!

Pro Tips for Perfection

To elevate your dish and ensure success, consider these expert insights:

  • Room Temperature Shrimp: Let your shrimp sit out for about 20 minutes before cooking. This helps them cook evenly.
  • Uniform Sizes: Cut the broccoli and sausage into similar sizes to ensure even cooking throughout.
  • Don’t Overcook: Keep an eye on the shrimp; they cook quickly. Overcooking can lead to rubbery texture.
  • Fresh Garlic: Use fresh garlic for the best flavor. Pre-minced garlic can’t compete with the vibrant punch of freshly chopped cloves.
  • Adjust the Heat: If you like it spicy, add a pinch of red pepper flakes to the garlic butter sauce for an extra kick.
  • Rest the Dish: Allow the dish to sit for a few minutes after cooking; this helps the flavors meld together.
  • Garnish Wisely: Fresh herbs like parsley or cilantro not only add color but also enhance the flavor profile.
  • Experiment: Feel free to add other vegetables like bell peppers or snap peas for added texture and flavor.

Common Mistakes & Troubleshooting

Even seasoned cooks can stumble! Here are some common pitfalls and how to avoid them:

  • Overcooked Broccoli: If your broccoli turns mushy, it’s a sign it’s been in the pan too long. Aim for a bright green color and crisp texture.
  • Rubbery Shrimp: Overcooked shrimp can become tough. Keep an eye on them, and remember they continue cooking after being removed from heat.
  • Too Much Garlic: While garlic is a star player, too much can overpower the dish. Stick to the recommended amount unless you’re a garlic aficionado!
  • Dry Sausage: If your sausage turns out dry, try using a fattier variety or reduce cooking time.

Variations to Spice Things Up

Ready to mix things up? Here are some delicious variations you can try:

  • Spicy Cajun Style: Add Cajun seasoning to the shrimp for a fiery twist.
  • Asian-Inspired: Replace the garlic butter sauce with a soy sauce and sesame oil blend, adding a sprinkle of sesame seeds.
  • Herbaceous Delight: Incorporate fresh herbs like basil or thyme for a garden-fresh flavor.
  • Cheesy Goodness: Sprinkle grated Parmesan or feta cheese over the top just before serving for a rich finish.

Storage and Make-Ahead Instructions

Want to prep ahead? Here’s how to store and make this dish in advance:

  • Refrigeration: Store leftovers in an airtight container for up to 3 days. Reheat gently in a skillet over low heat.
  • Freezing: This dish can be frozen for up to 2 months. Freeze before adding the garlic butter sauce for best results.
  • Make-Ahead: You can prepare the shrimp and sausage in advance. Just reheat and add to the broccoli and sauce when you’re ready to eat.

Frequently Asked Questions

Here’s a roundup of common queries about this recipe:

  • Can I use frozen shrimp? Yes, just make sure to thaw them completely beforehand for even cooking.
  • What type of sausage is best? Any type you prefer! Smoked or spicy sausage works wonderfully.
  • Can I add other vegetables? Absolutely! Feel free to include bell peppers, carrots, or snap peas.
  • What can I serve with this dish? Serve it over rice, quinoa, or simply enjoy it on its own for a low-carb meal.
  • How do I know when the shrimp are done? They should be pink and opaque. Avoid overcooking for the best texture.
  • Is this dish healthy? Yes! It’s packed with protein, fiber, and essential nutrients from the broccoli.
  • Can I make this dish vegetarian? Substitute shrimp and sausage with tofu and add more vegetables!
  • What’s the best way to reheat leftovers? Gently in a skillet over low heat to maintain texture.

Nutritional Tips and Dietary Adaptations

This dish is not only delicious but can also be tailored to fit various dietary needs:

  • Low-Carb Option: Serve without rice or pasta to keep it keto-friendly.
  • Dairy-Free: Use olive oil instead of butter and skip any cheese for a dairy-free dish.
  • Gluten-Free: Ensure your sausage is gluten-free and enjoy without worries!
  • High-Protein: Add more shrimp or use a higher-protein sausage to amp up the nutritional content.

Essential Kitchen Equipment

To create this flavor-packed dish, you’ll need the following kitchen essentials:

  • Large Skillet: A non-stick or cast-iron skillet works best for sautéing and combining flavors.
  • Cutting Board: For easy chopping and preparation of your ingredients.
  • Chef’s Knife: A sharp knife is crucial for efficient and safe chopping.
  • Measuring Spoons: For accurate measurement of your ingredients, especially spices.
  • Spatula: A sturdy spatula for tossing ingredients and ensuring everything is well-coated.

Serving Suggestions

To make your meal even more delightful, consider these serving ideas:

  • Garnish: Fresh parsley or cilantro adds a pop of color and fresh flavor.
  • Lemon Wedges: A squeeze of lemon brightens up the garlic butter sauce.
  • Pairing: Serve with a crisp green salad or garlic bread to complement the meal.

Conclusion

There you have it—an adventurous journey into the world of Garlic Butter Shrimp Sausage and Broccoli! This dish represents the perfect balance of heat, flavor, and nutrition, inviting you to explore and experiment in your kitchen. Remember, cooking is not just about following a recipe; it’s about bringing your personality and passion to the plate. So, roll up your sleeves, ignite that skillet, and let each bite remind you that food is an adventure worth taking. Happy cooking!

Garlic Butter Shrimp Sausage and Broccoli

Prep Time 10 minutes
Cook Time 15 minutes
Total Time 25 minutes
Servings 4 servings
Calories 450
A quick and flavorful dish combining shrimp, sausage, and broccoli in a garlic butter sauce, perfect for a satisfying meal.

Ingredients

Protein

  • 1 lb shrimp, peeled and deveined (leave tails on if desired)
  • 8 oz sausage, sliced

Vegetables

  • 2 cups broccoli florets

Dairy & Oils

  • 3 tbsp unsalted butter
  • 2 tbsp olive oil

Garlic & Seasonings

  • 4 cloves garlic, minced
  • Salt and pepper to taste Salt and pepper

Optional Garnish

  • as desired fresh parsley, lemon wedges (for garnish)

Instructions 

  • Sauté sausage in 1 tbsp olive oil until browned, then set aside.
  • Sauté broccoli in 1 tbsp olive oil until tender-crisp, then set aside.
  • Cook shrimp in the same skillet until pink, then set aside.
  • Melt butter, add garlic, and sauté until fragrant. Return sausage, broccoli, and shrimp to skillet, toss with garlic butter, and serve garnished with parsley and lemon if desired.

Notes

For extra flavor, add a squeeze of lemon before serving.
Calories: 450kcal
Cost: $15
Course: Main Course
Cuisine: American
Keyword: Seafood

Nutrition

Calories: 450kcal | Carbohydrates: 20g | Protein: 40g | Fat: 22g | Sodium: 900mg

Unleashing the Flavor: The Eggplant Ground Beef Casserole

Welcome to a culinary adventure that will ignite your kitchen! If you’re craving a dish that marries the rich, savory notes of ground beef with the earthy undertones of eggplant, then my Eggplant Ground Beef Casserole is your ticket to flavor town. This casserole not only satisfies hunger but also brings a symphony of textures and tastes to your table. With just a few humble ingredients, we’re about to create a masterpiece that’s perfect for weeknight dinners or special occasions.

Why You’ll Love This Recipe

There are countless reasons to fall head over heels for my Eggplant Ground Beef Casserole. Here are just a few:

  • Flavorful Layers: Each bite unveils a harmonious blend of roasted eggplant, hearty beef, and a touch of sweetness from the tomatoes.
  • Comfort Food Redefined: This dish wraps you in warmth and nostalgia, making it the perfect meal for family gatherings.
  • Make-Ahead Magic: Perfect for prepping in advance, you can assemble it the night before and bake it when you’re ready to feast.
  • Customizable Goodness: With simple substitutions, you can cater to different diets—gluten-free, vegetarian, or even vegan!
  • Easy to Scale: Whether you’re feeding a crowd or just a few, this casserole can be easily adjusted to meet your needs.

Ingredient Breakdown and Substitutions

Let’s dive into the heart of this recipe—its ingredients. The beauty lies in their simplicity and the robust flavors they create when combined.

  • Eggplant: You’ll need about 2 pounds of eggplant, sliced. You can leave the skin on for extra texture and fiber. If you prefer, zucchini or yellow squash can be used as alternatives.
  • Ground Beef: A pound of ground beef adds depth to the dish. If you’re looking for a lighter option, ground turkey or plant-based ground meat works beautifully too.
  • Onion: One large onion, finely chopped, creates a sweet and savory base. Feel free to swap in shallots for a milder flavor.
  • Tomatoes: A pound of chopped tomatoes (canned or fresh) brings acidity and moisture. You can also use tomato sauce or crushed tomatoes if that’s what you have on hand.
  • Almond Milk: This adds creaminess without dairy. If you prefer, substitute with regular milk, oat milk, or even coconut milk for a twist.

Step-By-Step Guide: How to Make Eggplant Ground Beef Casserole

Side angle of a juicy eggplant ground beef casserole, showing layers of ingredients.

Now, let’s roll up our sleeves and get to cooking! Follow these steps for a foolproof casserole that’s sure to impress.

  1. Prepare the Eggplant: Slice the eggplant into ½-inch thick rounds. Place them on a baking tray lined with parchment paper. Lightly sprinkle with salt and bake at 400°F for 15 minutes until softened.
  2. Cook the Meat Sauce: In a large skillet, heat 3 tablespoons of olive oil over medium heat. Add the chopped onion and sauté until translucent. Add the ground beef, cooking until browned and any liquid has evaporated (about 10 minutes). Stir in the chopped tomatoes, bring to a boil, then reduce heat and simmer for 20 minutes.
  3. Season the Sauce: Once the sauce has thickened, stir in fresh parsley, salt, and ground black pepper. Taste and adjust seasoning as needed. Simmer uncovered for another 10 minutes.
  4. Layering the Casserole: In an ovenproof dish, layer the casserole as follows: one third of the eggplant slices, half of the meat sauce, another third of eggplant slices, remaining meat sauce, and finish with the final third of eggplant slices.
  5. Add the Topping: In a separate bowl, whisk together 2 lightly beaten eggs and 1 tablespoon of almond milk. Pour this mixture evenly over the assembled casserole.
  6. Bake to Perfection: Return to the oven and bake at 375°F for 10-15 minutes, or until the top is golden and bubbly. Let it cool for a few minutes before serving.

Pro Tips for Casserole Success

Before you dive in, here are some expert insights to elevate your casserole game:

  • Salting Eggplant: While not always necessary, salting eggplant before roasting can help reduce bitterness and improve texture. Just sprinkle salt on the slices, let sit for 15 minutes, then rinse and pat dry.
  • Using Fresh Herbs: Fresh herbs like basil or oregano can elevate the flavor profile. Add them to the meat sauce for an aromatic touch.
  • Experiment with Cheese: If you’re a cheese lover, sprinkle some shredded mozzarella or parmesan on top during the last few minutes of baking for a melty finish.
  • Layering Variations: Feel free to add layers of spinach or other vegetables for added nutrition and flavor.
  • Resting Time: Let the casserole sit for at least 10 minutes before serving; this helps the layers set and makes for easier slicing.

Common Mistakes and Troubleshooting

Even the best chefs can stumble. Here’s how to avoid common pitfalls:

  • Overcooking the Eggplant: Keep an eye on the eggplant while baking; it should be tender but not mushy. Check for doneness after 15 minutes.
  • Dry Casserole: If your casserole turns out dry, it may be due to overcooking. Ensure you monitor the baking time and cover it with foil if the top browns too quickly.
  • Too Much Salt: If the dish is too salty, balance it out with a splash of vinegar or a sprinkle of sugar.
  • Inconsistent Layers: For even cooking, ensure that your eggplant and meat sauce layers are distributed evenly throughout the dish.

Variations to Spice Things Up

Here are some fun twists on the classic casserole:

  • Vegetarian Delight: Substitute ground beef with lentils or chickpeas for a hearty, plant-based option.
  • Spicy Kick: Add crushed red pepper flakes or diced jalapeños to the meat sauce for a heat infusion.
  • Cheesy Eggplant Heaven: Layer mozzarella cheese between the eggplant and meat sauce for a creamy, cheesy experience.
  • Herbaceous Twist: Incorporate fresh herbs like thyme, rosemary, or dill for a fragrant upgrade.

Storage and Make-Ahead Instructions

This casserole is a meal prep superstar! Here’s how to store it:

  • Refrigeration: Store leftovers in an airtight container in the fridge for up to 4 days.
  • Freezing: You can freeze the casserole before baking. Just cover it tightly with foil and freeze for up to 3 months. When ready to bake, simply thaw overnight in the fridge and bake as instructed.
  • Reheating: To reheat, place in the oven at 350°F until heated through (about 20-30 minutes) or microwave individual portions.

Frequently Asked Questions

Still have questions? Let’s tackle some common queries:

  • Can I make this casserole gluten-free? Yes! Just use gluten-free breadcrumbs and ensure your sauces and other ingredients are gluten-free.
  • How do I know when the casserole is done? The top should be golden brown, and the edges should be bubbling. A knife inserted should come out hot.
  • Can I use other meats? Absolutely! Ground turkey, chicken, or even sausage can work well in this recipe.
  • What should I serve with this casserole? A fresh green salad or crusty bread pairs perfectly with this hearty dish.
  • Can I add more vegetables? Yes! Feel free to add spinach, mushrooms, or bell peppers for extra nutrition.
  • How long can I store leftovers? In the fridge, leftovers can last for up to 4 days. For longer storage, freeze them.
  • Can I prepare this dish in advance? Yes! You can assemble the casserole the night before and bake it right before serving.
  • Is this dish suitable for meal prep? Absolutely! It freezes well and can be easily reheated, making it a perfect meal prep option.

Nutritional Tips and Dietary Adaptations

This casserole is not only delicious but can also be part of a balanced diet. Here are some tips:

  • Protein Boost: Add a scoop of protein powder to the meat mixture for an extra protein punch without altering the flavor.
  • Low-Carb Option: Substitute eggplant for pasta to create a low-carb version of traditional lasagna.
  • Increase Fiber: Add beans or lentils to the meat sauce to enhance fiber content and keep you feeling full longer.

Essential Equipment for Success

To make your cooking experience seamless, here’s a quick list of equipment to have on hand:

  • Sharp Knife: For slicing the eggplant and chopping vegetables.
  • Cutting Board: A sturdy board to prepare your ingredients.
  • Large Skillet: For cooking the meat sauce evenly.
  • Ovenproof Dish: Ensure it’s large enough to hold all the layers of deliciousness!
  • Baking Tray: For roasting the eggplant slices to perfection.

Serving Suggestions

Now that your casserole is baked to golden perfection, it’s time to dig in! Here are some serving ideas:

  • Fresh Green Salad: Pair it with a simple green salad tossed in balsamic vinaigrette for a refreshing contrast.
  • Crusty Bread: Serve with a side of crusty French bread to soak up all the delicious sauce.
  • Herb Garnish: A sprinkle of fresh parsley or basil on top adds a pop of color and flavor.

In conclusion, my Eggplant Ground Beef Casserole is more than just a meal; it’s a celebration of flavors and a testament to the beauty of cooking with love. So grab your skillet, embrace your adventurous spirit, and let’s create something unforgettable together. Bon appétit!

Eggplant Ground Beef Casserole

Prep Time 20 minutes
Cook Time 45 minutes
Total Time 1 hour 5 minutes
Servings 4 servings
Calories 550
A hearty and flavorful casserole combining roasted eggplant with savory ground beef and tomatoes, topped with a baked egg mixture for added richness.

Ingredients

Vegetables

  • 2 pounds eggplant, sliced
  • 3 tablespoons olive oil
  • 1 large onion, finely chopped
  • 1 pound ground beef
  • 1 pound chopped tomatoes
  • 1 tablespoon fresh parsley (or 1 tsp dried)
  • ¼ teaspoon ground black pepper
  • ½ teaspoon salt
  • 2 eggs lightly beaten eggs
  • 1 tablespoon almond milk

Instructions 

  • Cook chopped onion and ground beef until browned, about 10 minutes.
  • Add chopped tomatoes, simmer for 20 minutes, then stir in parsley, salt, and pepper. Simmer uncovered for 10 minutes.
  • Slice eggplants into ½-inch pieces and bake at 375°F (190°C) for 15 minutes until softened.
  • Layer eggplant slices and meat sauce in an ovenproof dish, ending with eggplant slices.
  • Mix eggs with almond milk and pour evenly over the casserole. Bake at 375°F (190°C) for 10–15 minutes until golden.

Notes

For a vegetarian version, substitute ground beef with lentils or mushrooms.
Calories: 550kcal
Cost: $15
Course: Main Course
Cuisine: Mediterranean
Keyword: Eggplant

Nutrition

Calories: 550kcal | Carbohydrates: 40g | Protein: 35g | Fat: 30g | Sodium: 800mg