Author

Avery Collins

Browsing

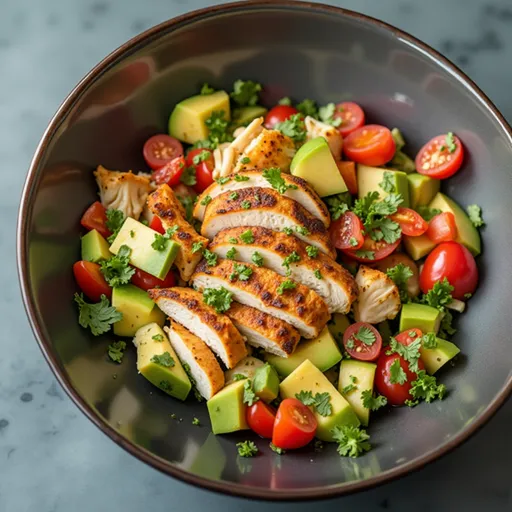
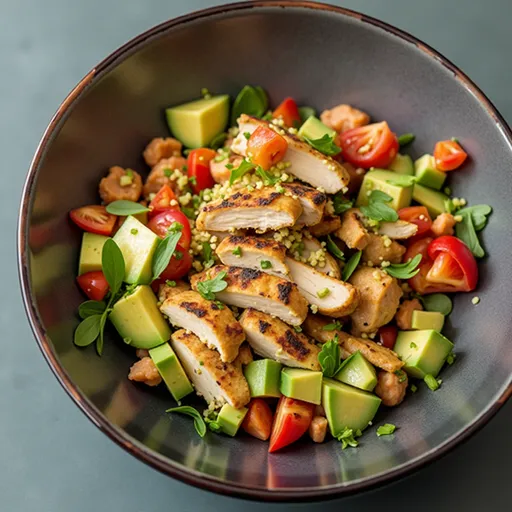
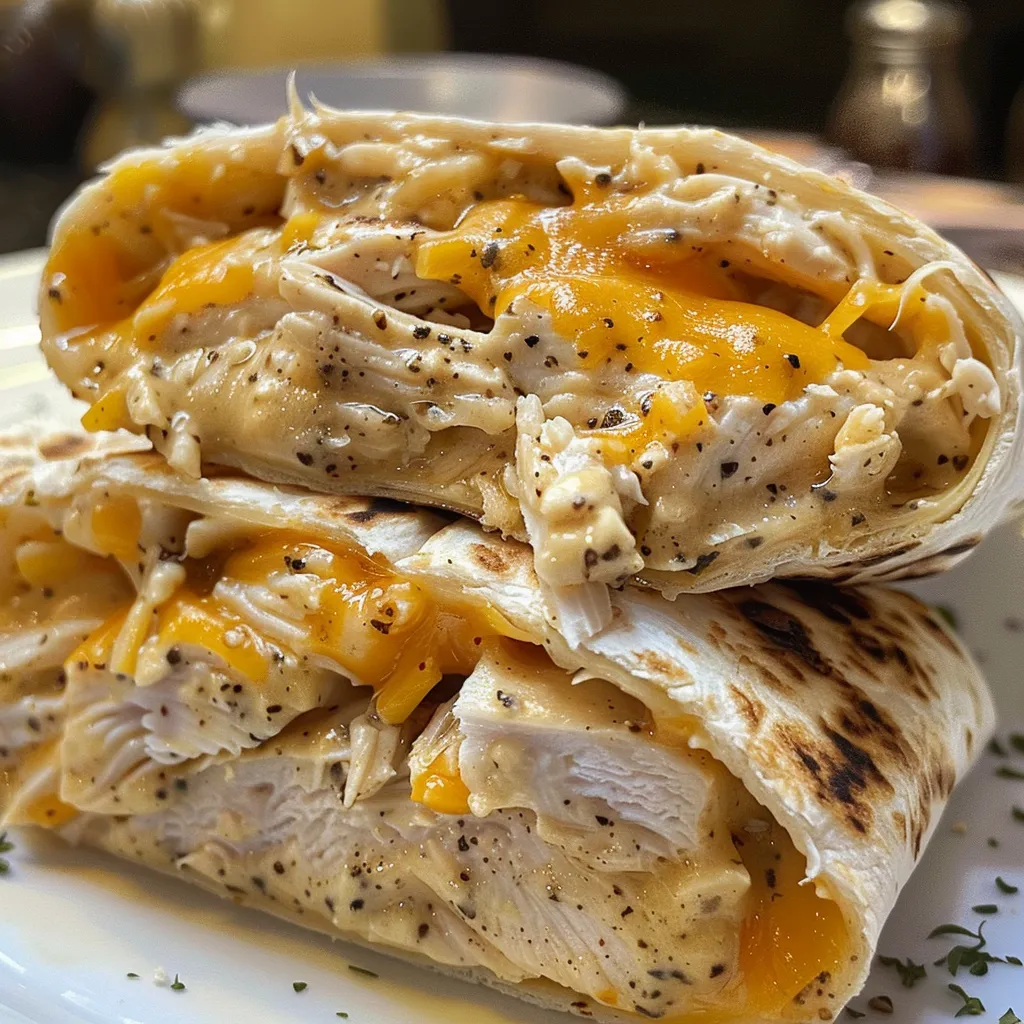
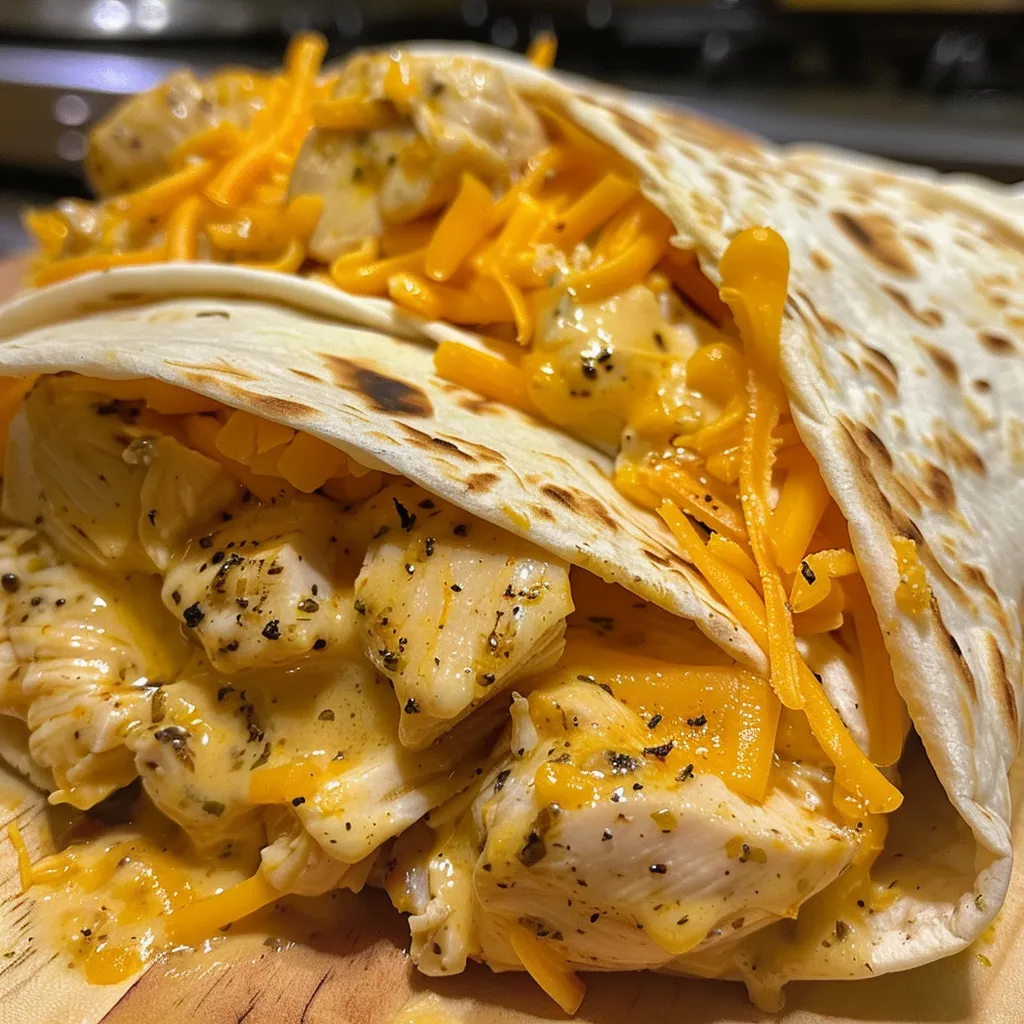
Your Ultimate Guide to Cheesy Garlic Chicken Wraps

Welcome to a culinary adventure that’s going to ignite your taste buds and transform your weeknight dinners! Today, we’re diving into the world of Cheesy Garlic Chicken Wraps, a dish that perfectly marries tender chicken with a creamy garlic aioli and gooey cheddar. If you’re ready to fire up your culinary creativity, let’s get cooking!

Why You’ll Love This Recipe

These wraps aren’t just a meal; they’re an experience. Here’s why you’ll want to make them tonight:

  • Flavor Explosion: The combination of garlic aioli and cheddar creates a rich, mouth-watering sensation that you’ll crave.
  • Quick and Easy: Perfect for busy weeknights, these wraps can be whipped up in under 30 minutes!
  • Customizable: Feel free to add your favorite veggies or switch up the cheese for endless variations.
  • Meal Prep Friendly: Make a batch ahead of time for lunches that keep you energized and satisfied.
  • Kid Approved: These wraps are not just for adults; they’re a hit with children too!

Ingredients for Cheesy Garlic Chicken Wraps

Gather these ingredients to create your masterpiece:

  • 2 cups cooked chicken (shredded) – Perfect for using leftovers or rotisserie chicken.
  • 1/2 cup garlic aioli – For that creamy, garlicky richness.
  • 1 cup cheddar cheese (shredded) – Go for sharp cheddar for a deeper flavor.
  • 4 large tortillas – Choose whole wheat or gluten-free options if preferred.
  • Salt and pepper to taste – Essential for bringing all the flavors together.

How to Prepare Your Cheesy Garlic Chicken Wraps

Side view of a chicken wrap filled with shredded chicken, garlic aioli, and cheddar cheese.

Ready to cook? Follow these simple steps for a delicious outcome:

  1. Prepare the Chicken: If you’re starting with raw chicken, season it with salt and pepper, then cook it in a skillet over medium heat until golden brown and cooked through. Shred it once it’s cool enough to handle.
  2. Mix the Filling: In a bowl, combine the shredded chicken, garlic aioli, and cheddar cheese. Mix well until everything is evenly coated.
  3. Assemble the Wraps: On each tortilla, add a generous amount of the chicken mixture. Roll them up tightly, tucking in the sides as you go.
  4. Toast the Wraps: Heat a skillet over medium heat and add the wraps seam-side down. Toast each wrap for about 2-3 minutes on both sides until golden and crispy.
  5. Serve and Enjoy: Slice the wraps in half, serve with your favorite sides, and dig in!

Pro Tips for Perfect Cheesy Garlic Chicken Wraps

  • Choose Quality Ingredients: Fresh, high-quality ingredients elevate your dish!
  • Don’t Overstuff: Keep a good balance; too much filling can make wrapping difficult.
  • Experiment with Spices: Add spices like paprika or chili flakes for an extra kick!
  • Let Rest: Allow the wraps to sit for a minute after cooking to help them hold together.
  • Use a Non-Stick Skillet: This helps to achieve that perfect crisp without sticking.
  • Make it Ahead: You can prepare the filling a day in advance and store it in the fridge.
  • Watch the Heat: Keep an eye on the heat to avoid burning the wraps while toasting.
  • Garnish Wisely: Fresh herbs or a squeeze of lemon can brighten up the flavors!

Common Mistakes and Troubleshooting

Even the best chefs make mistakes! Here are common pitfalls and how to avoid them:

  • Wraps Falling Apart: Ensure they’re tightly rolled, and consider using a toothpick to hold them together.
  • Dry Chicken: Avoid overcooking your chicken; it should be juicy and flavorful.
  • Uneven Cooking: Make sure your skillet is evenly heated before toasting the wraps.
  • Too Much Aioli: While it’s delicious, too much can make the wraps soggy. Balance is key!

Delicious Variations to Try

Feel like mixing things up? Here are some variations to excite your palate:

  • Buffalo Chicken Wraps: Substitute the garlic aioli with buffalo sauce for a spicy twist.
  • Veggie-Packed Wraps: Add sautéed peppers, onions, and spinach for extra nutrition.
  • Southwestern Style: Incorporate black beans, corn, and pepper jack cheese for a zesty option.
  • Breakfast Wraps: Fill with scrambled eggs, cheese, and chicken for a hearty breakfast.

Storage and Make-Ahead Instructions

Here’s how to keep your wraps fresh:

  • Refrigerate: Store leftovers in an airtight container in the fridge for up to 3 days.
  • Freeze: Wrap individually in plastic wrap and freeze for up to a month. Thaw in the fridge before toasting.
  • Make Ahead: Prepare the filling up to 24 hours in advance for quick assembly later.

FAQs About Cheesy Garlic Chicken Wraps

  • Can I use fresh chicken instead of cooked? Yes, just make sure to cook it thoroughly before mixing with other ingredients.
  • What can I substitute for garlic aioli? You can use plain mayonnaise mixed with minced garlic or Greek yogurt.
  • Are these wraps gluten-free? Use gluten-free tortillas to make them suitable for gluten-sensitive diets.
  • How long do these wraps take to make? They can be prepared in about 30 minutes from start to finish.
  • Can I use a different cheese? Absolutely! Feel free to experiment with mozzarella, pepper jack, or any cheese you love.
  • What should I serve with these wraps? They pair well with a fresh salad, fries, or a dipping sauce.
  • Can I add vegetables? Definitely! Bell peppers, spinach, or zucchini are great additions.
  • How do I get the wraps extra crispy? Make sure your skillet is hot before adding the wraps and avoid overcrowding.

Nutritional Information and Dietary Adaptations

Looking to make these wraps healthier? Consider the following:

  • Lower Calorie Version: Use grilled chicken breast and low-fat cheese.
  • Vegetarian Option: Substitute chicken with black beans or a plant-based protein.
  • Low-Carb Option: Use lettuce wraps instead of tortillas.

Essential Equipment for Your Cheesy Garlic Chicken Wraps

Here’s what you’ll need:

  • Large Skillet: For toasting the wraps to perfection.
  • Mixing Bowls: To combine your filling ingredients.
  • Sharp Knife: For slicing the wraps and prepping ingredients.
  • Spatula: To flip the wraps while toasting.

Serving Suggestions

Make your meal complete by pairing these wraps with:

  • Fresh Salad: A side of mixed greens with vinaigrette adds a refreshing crunch.
  • Sweet Potato Fries: These offer a comforting side that complements the wraps beautifully.
  • Homemade Dipping Sauce: A creamy ranch or zesty salsa can elevate the dish.

Conclusion

There you have it! Your guide to creating mouth-watering Cheesy Garlic Chicken Wraps that are not just a meal but a celebration of flavor. Whether you’re cooking for family, hosting friends, or just treating yourself, these wraps are sure to impress. Now, roll up your sleeves, grab those spices, and let’s get cooking — because the kitchen is where the real magic happens!

Cheesy Garlic Chicken Wraps

Prep Time 10 minutes
Cook Time 10 minutes
Total Time 20 minutes
Servings 4 servings
Calories 450
Delight in these flavorful wraps filled with shredded chicken, melted cheddar, and garlic aioli for a quick and satisfying meal.

Ingredients

Chicken

  • 2 cups cooked chicken (shredded)
  • 1/2 cup garlic aioli
  • 1 cup cheddar cheese (shredded)

Tortillas

  • 4 large large tortillas

Seasoning

  • to taste Salt and pepper

Instructions 

  • Spread garlic aioli on each tortilla.
  • Distribute shredded chicken evenly over the tortillas.
  • Sprinkle shredded cheddar cheese on top.
  • Season with salt and pepper to taste.
  • Roll up the tortillas to form wraps.
  • Serve immediately or warm briefly before serving.

Notes

You can add chopped vegetables like lettuce or tomatoes for extra freshness.
Calories: 450kcal
Cost: $12
Course: Main Course
Cuisine: American
Keyword: chicken

Nutrition

Calories: 450kcal | Carbohydrates: 40g | Protein: 35g | Fat: 20g | Sodium: 900mg

Why You’ll Love This Recipe

Are you ready to embark on a culinary adventure that transforms your breakfast routine into a colorful celebration? The Beetroot Dosa is not just a dish; it’s an experience that tantalizes the senses and invites creativity into your kitchen. This crispy, vibrant pink dosa is a fusion of traditional Indian flavors and modern health consciousness, making it the perfect addition to your morning menu. With its enticing hue and delightful crunch, this dosa will not only satisfy your taste buds but also nourish your body with vitamins and minerals.

Ingredients You’ll Need

Gathering the right ingredients is the first step towards crafting this beautiful dish. Here’s what you’ll need:

  • 1 cup rice flour
  • 1/2 cup grated beetroot
  • 1/4 cup urad dal flour
  • 1/4 teaspoon cumin seeds
  • 1/4 teaspoon salt (to taste)
  • 1/2 teaspoon turmeric powder
  • Water (as needed to make batter)
  • Oil (for cooking)

How to Make Beetroot Dosa

Eye-level shot of a beetroot dosa showcasing its texture and color, accompanied by side dishes.

This recipe is straightforward and perfect for those busy mornings when you want something nutritious yet quick. Here’s a step-by-step guide:

Step 1: Mix the Dry Ingredients

In a large mixing bowl, combine the rice flour, urad dal flour, grated beetroot, cumin seeds, salt, and turmeric powder. This blend not only brings flavor but also a beautiful pink hue to your dosa.

Step 2: Create the Batter

Gradually add water to the dry mixture while stirring continuously. Aim for a smooth, pourable consistency. You want it to be thin enough to spread easily on the skillet but thick enough to hold its shape.

Step 3: Heat the Skillet

Preheat a non-stick skillet or tawa over medium heat. Lightly grease it with oil to ensure your dosa doesn’t stick.

Step 4: Cook the Dosa

Pour a ladleful of the batter onto the skillet, spreading it into a thin circle. Drizzle a little oil around the edges to help it crisp up. Cook until the dosa turns golden brown and crispy, about 2-3 minutes.

Step 5: Flip and Finish

Carefully flip the dosa and cook for an additional minute on the other side. Once both sides are golden and crispy, remove it from the skillet. Repeat with the remaining batter.

Step 6: Serve and Enjoy

Serve your vibrant beetroot dosa hot with coconut chutney or any dip of your choice. Each bite is a burst of flavor and color that will brighten your day!

The Nutritional Value of Beetroot Dosa

Beetroot is a powerhouse of nutrients, packed with vitamins A, B, and C, as well as minerals like iron and potassium. Incorporating beetroot into your breakfast not only adds color but also boosts your overall health. This dosa is a fantastic way to start your day, providing you with energy and vitality.

Tips for Perfecting Your Dosa

Here are some pro tips to elevate your dosa-making game:

  • Consistency is Key: Make sure your batter is smooth and pourable. If it’s too thick, your dosa may not spread well.
  • Temperature Matters: Ensure your skillet is hot enough before pouring the batter; this helps achieve that coveted crispiness.
  • Experiment with Spices: Don’t hesitate to add spices like black pepper or chopped green chilies to the batter for an extra kick.

Variations to Try

Feeling adventurous? Here are some creative twists to the classic beetroot dosa:

  • Cheesy Delight: Add grated cheese to the batter for a cheesy version that will delight kids and adults alike.
  • Herbed Dosa: Mix in finely chopped herbs like cilantro or mint for a fresh flavor boost.
  • Vegetable Medley: Incorporate finely chopped spinach, carrots, or bell peppers for added nutrition and color.

Substitutions You Can Make

If you don’t have all the ingredients on hand, here are some easy substitutions:

  • Urad Dal Flour: You can substitute with chickpea flour for a different flavor profile.
  • Rice Flour: If you’re gluten-free, try using a gluten-free all-purpose flour blend.
  • Beetroot: While beetroot is the star here, you can use grated carrots or sweet potatoes for a different color and taste.

Essential Equipment

To make your cooking experience smooth and enjoyable, ensure you have the following:

  • A non-stick skillet or tawa
  • A mixing bowl
  • A ladle for pouring the batter
  • A spatula for flipping

Storage and Freezing

If you happen to have leftover dosa, you can store them in an airtight container in the refrigerator for up to 2 days. Reheat them on a skillet for a few minutes before serving. For longer storage, you can freeze the uncooked batter in freezer-safe containers. Just thaw it in the refrigerator overnight before cooking.

FAQs About Beetroot Dosa

Can I make this dosa without beetroot?
Yes! You can experiment with other vegetables or simply make a plain dosa using just the flours.

How do I make the dosa crispier?
Adding a bit of cornflour or increasing the amount of rice flour can enhance the crispiness of your dosa.

What can I serve with beetroot dosa?
This dosa pairs wonderfully with coconut chutney, mint chutney, or even a spicy pickle for those who like an extra kick.

Troubleshooting Common Issues

Not every cooking adventure goes as planned. Here are some common issues you may encounter and how to fix them:

  • Dosa Sticking to the Pan: Ensure your skillet is adequately greased and hot before pouring the batter.
  • Dosa Not Cooking Evenly: Check that your skillet is heated evenly. If it’s too hot, the dosa may burn, and if it’s too cool, it may not cook through.
  • Soggy Dosa: If your dosa becomes soggy, ensure your batter is not too watery. Adjust the water content for a better texture.

Conclusion

Embrace the vibrant world of flavors with this stunning beetroot dosa! With its beautiful color, delightful crunch, and a healthy punch, it’s a dish that not only nourishes but also excites. So gather your ingredients, unleash your creativity, and turn your kitchen into a canvas of culinary art. Remember, cooking is all about exploration and joy, so don’t hesitate to put your spin on this recipe. Whether you’re serving it for breakfast or a quick snack, your beetroot dosa is sure to become a beloved staple in your home. Happy cooking!

Beetroot Dosa Recipe | Instant Crispy Healthy Beetroot Pink Dosa

Prep Time 10 minutes
Cook Time 15 minutes
Total Time 25 minutes
Servings 4 pieces
Calories 150
A vibrant and healthy Indian-style pancake made with beetroot, perfect for a nutritious breakfast or snack.

Ingredients

Dry Ingredients

  • 1 cup rice flour
  • 1/2 cup grated beetroot
  • 1/4 cup urad dal flour
  • 1/4 teaspoon cumin seeds
  • 1/4 teaspoon salt (to taste)
  • 1/2 teaspoon turmeric powder
  • as needed water (to make batter)
  • as needed oil (for cooking)

Instructions 

  • Mix rice flour, urad dal flour, beetroot, cumin, salt, and turmeric.
  • Add water gradually to form a smooth, pourable batter.
  • Heat a skillet and lightly grease with oil.
  • Pour batter and spread into a thin circle, then cook until golden and crispy.
  • Flip and cook the other side briefly, then serve hot.

Notes

Use a non-stick pan for best results and serve with chutney.
Calories: 150kcal
Cost: $4
Course: Breakfast
Cuisine: Indian
Keyword: Beetroot

Nutrition

Calories: 150kcal | Carbohydrates: 30g | Protein: 4g | Fat: 2g | Sodium: 150mg

Loved this recipe? Save it to your favorite Pinterest board so you can easily find it later! It’s the perfect way to keep all your sweet ideas in one place. ✨

Detailed view of a beetroot dosa, highlighting its crispy edges and rich pink color, with a blurred background.

Why This Avocado Chicken Salad Will Ignite Your Lunch Routine

Let’s face it: lunch can often fall into a mundane routine. But what if I told you that just a handful of ingredients could transform your midday meal into a vibrant fiesta of flavors? This Healthy Avocado Chicken Salad is the answer to your lunchtime woes. Bursting with creamy avocado, tender chicken, and a zesty twist, this salad doesn’t just fill your belly—it awakens your taste buds and adds a spark to your day.

Growing up in San Antonio, I learned that food is more than just sustenance—it’s a celebration. Each meal tells a story, especially when it’s packed with flavor and personality. This salad is no exception. With its fresh ingredients and bold flavors, it’s perfect for meal prep or a quick lunch that feels anything but ordinary. So grab your apron, let’s dive into this culinary adventure!

Key Ingredients for the Perfect Avocado Chicken Salad

What makes this salad sing? Let’s break down the ingredients that come together to create this delicious dish:

  • 2 cups cooked, shredded chicken: The star of the show! Use leftover rotisserie chicken, grilled chicken, or poach your own. The choice is yours!
  • 1 ripe avocado, diced: Creamy and rich, avocados add a luscious texture and healthy fats to keep you satisfied.
  • 1/4 cup plain Greek yogurt: This ingredient gives the salad a creamy base without the extra calories, plus it’s packed with protein!
  • 1 tablespoon lemon juice: A splash of citrus to brighten the flavors and keep the avocado from browning.
  • 1/4 cup diced celery: For that satisfying crunch and a refreshing taste.
  • 1/4 cup diced red onion: Adds a bit of zing! The sweet and sharp flavor of red onion complements the creaminess of the avocado.
  • Salt and pepper to taste: Essential for enhancing all the flavors.
  • Fresh herbs (like cilantro or parsley) for garnish: Because a little greenery never hurt anyone! Plus, it adds a burst of freshness.

Step-by-Step Instructions to Make Your Salad

Delicious Healthy Avocado Chicken Salad featuring diced avocado, shredded chicken, and fresh herbs.

Ready to whip up this culinary masterpiece? Follow these simple steps to create a salad that’s not only healthy but also utterly delicious:

  1. In a large bowl, combine the shredded chicken and diced avocado. You want them to get cozy together!
  2. In a separate small bowl, mix the Greek yogurt and lemon juice until smooth. This is your creamy dressing that will tie everything together.
  3. Pour the yogurt mixture over the chicken and avocado, and gently fold to combine. Be careful not to mash the avocado too much; we want it to stay chunky and inviting!
  4. Add the diced celery and red onion, mixing until evenly distributed. Feel free to add even more veggies if you’re feeling adventurous!
  5. Season with salt and pepper to taste. Don’t be shy—this is your chance to personalize the flavor!
  6. Garnish with fresh herbs before serving. A sprinkle of cilantro or parsley adds a beautiful touch and enhances the overall flavor.

Nutritional Benefits of This Powerhouse Salad

Not only is this salad a feast for your taste buds, but it also packs a serious nutritional punch. Here’s why this dish deserves a spot in your lunch rotation:

  • Avocado: Loaded with healthy fats, fiber, and essential nutrients, avocados are great for heart health and keeping you full.
  • Chicken: A fantastic source of lean protein, chicken helps in muscle repair and boosts your metabolism.
  • Greek Yogurt: Rich in protein and probiotics, Greek yogurt supports digestion and keeps your gut happy.
  • Celery: Low in calories but high in vitamins and minerals, celery adds crunch and hydration.
  • Red Onion: Packed with antioxidants, red onions can help reduce inflammation and improve overall health.

Creative Variations to Keep Your Meals Exciting

While this avocado chicken salad is fantastic as is, there’s always room to get creative. Here are some fun variations to try:

  • Add some heat: Spice things up by throwing in diced jalapeños or a pinch of cayenne pepper for an extra kick.
  • Swap out the chicken: Feeling vegetarian? Substitute the chicken with chickpeas or white beans for a plant-based protein option.
  • Incorporate fruits: Diced apples or grapes can add a touch of sweetness that complements the savory ingredients beautifully.
  • Mix in nuts: Add some chopped walnuts or almonds for an extra crunch and a dose of healthy fats.
  • Change the herbs: Experiment with different herbs like dill or basil for a fresh twist on flavor.

Serving Suggestions and Meal Prep Tips

Now that you’ve created this amazing salad, let’s talk about how to serve and store it:

  • Serve it in lettuce wraps: For a low-carb option, use large lettuce leaves as wraps and fill them with your avocado chicken salad.
  • Pair with whole grain crackers: For a satisfying crunch, serve alongside your favorite whole-grain crackers or pita chips.
  • Meal Prep: This salad keeps well in the fridge for up to three days, making it perfect for meal prep. Store it in airtight containers for easy grab-and-go lunches.

Frequently Asked Questions

Got questions about this delicious dish? You’re not alone! Here are some FAQs:

  • Can I use canned chicken? Absolutely! Canned chicken is a great time-saver and still provides a tasty base for your salad.
  • Is this recipe gluten-free? Yes! All the ingredients are naturally gluten-free, making it a safe choice for those with gluten sensitivities.
  • How can I make it dairy-free? Substitute Greek yogurt with a dairy-free yogurt alternative, and you’re all set!
  • Can I freeze this salad? While the ingredients can be frozen, it’s best to enjoy this salad fresh to maintain its texture and flavor.

Troubleshooting Common Issues

If you encounter any hiccups while making your salad, here are some quick fixes:

  • Avocado browning: If you’re prepping ahead of time, add a little extra lemon juice to the avocado to slow down the browning process.
  • Too dry: If your salad feels dry, add a bit more Greek yogurt or a splash of olive oil to moisten it up.
  • Too salty: If you accidentally over-salt, add more diced veggies or a squeeze of lemon juice to balance the flavors.

Final Thoughts

This Healthy Avocado Chicken Salad is more than just a recipe—it’s an invitation to elevate your lunch experience. Bursting with flavor and nutrients, it encourages you to embrace your inner chef and celebrate the art of cooking. Whether you enjoy it as a quick lunch or a hearty snack, you’re not just feeding yourself; you’re indulging in a culinary adventure that brings joy to your day.

So, what are you waiting for? Gather your ingredients, unleash your creativity, and let this salad transform your lunchtime routine into a flavorful fiesta! Remember, cooking is not just about following recipes; it’s about exploring flavors, experimenting with ingredients, and most importantly, enjoying the process. Happy cooking!

Healthy Avocado Chicken Salad

Prep Time 10 minutes
Total Time 10 minutes
Servings 4 servings
Calories 350
A nutritious and delicious salad combining shredded chicken and creamy avocado, perfect for a quick lunch or light dinner.

Ingredients

Main

  • 2 cups cooked, shredded chicken
  • 1 ripe avocado avocado, diced
  • 0.25 cup plain greek yogurt
  • 1 tablespoon lemon juice
  • 0.25 cup diced celery
  • 0.25 cup diced red onion
  • to taste salt and pepper
  • for garnish fresh herbs (cilantro or parsley)

Instructions 

  • Combine shredded chicken and diced avocado in a large bowl.
  • Mix Greek yogurt and lemon juice until smooth, then add to the bowl.
  • Gently fold to combine, then add diced celery and red onion.
  • Season with salt and pepper to taste.
  • Garnish with fresh herbs before serving.

Notes

Use ripe avocados for best flavor and texture.
Calories: 350kcal
Cost: $12
Course: Salad
Cuisine: Healthy
Keyword: Avocado, chicken

Nutrition

Calories: 350kcal | Carbohydrates: 20g | Protein: 40g | Fat: 15g | Sodium: 400mg

Loved this recipe? Save it to your favorite Pinterest board so you can easily find it later! It’s the perfect way to keep all your sweet ideas in one place. ✨

Eye-level shot of a vibrant Healthy Avocado Chicken Salad in a bowl with a soft background.

Welcome to the World of Spaghetti Squash

Ah, the humble spaghetti squash. It’s not just a low-carb substitute for pasta; it’s a versatile ingredient that can transform your dishes into delightful culinary adventures. In this article, we’ll explore how to cook spaghetti squash in the oven, uncovering the secrets to achieving the perfect texture and flavor. Whether you’re a seasoned chef or just starting your cooking journey, this guide will empower you to embrace the magic of this vibrant squash.

Why You’ll Love This Recipe

Cooking with spaghetti squash is not only easy but also rewarding. Here are five reasons why you’ll love this recipe:

  • Versatility: Spaghetti squash can be used in a variety of dishes, from savory to sweet. You can pair it with marinara, pesto, or even a zesty lemon sauce.
  • Low-Calorie Option: If you’re looking to cut carbs, spaghetti squash is a fantastic alternative to traditional pasta, allowing you to enjoy your favorite dishes without the guilt.
  • Rich in Nutrients: This squash is packed with vitamins A and C, fiber, and antioxidants, making it a nutritious addition to your meals.
  • Easy to Prepare: With just a few simple steps, you can prepare spaghetti squash in the oven, freeing you up to focus on other elements of your meal.
  • Fun for Everyone: Cooking spaghetti squash is a great activity to get the whole family involved. Kids love helping to scrape out the strands and can even customize their own toppings!

Ingredients You’ll Need

To make your delicious spaghetti squash, gather the following ingredients:

  • 1 medium spaghetti squash (about 2 pounds)
  • 1 teaspoon extra virgin olive oil
  • 1/2 teaspoon kosher salt
  • 1/4 teaspoon ground black pepper

If you’re looking for substitutions, consider using avocado oil instead of olive oil for a different flavor profile. You can also experiment with different spices or add some garlic powder for an extra kick.

Pro Tips for Perfect Spaghetti Squash

Side view of a roasted spaghetti squash, showcasing its golden flesh.

To ensure your spaghetti squash turns out perfectly every time, keep these expert tips in mind:

  • Choose the right squash: Look for a squash that feels heavy for its size, has a hard rind, and is free from cracks. A deep yellow color usually indicates ripeness.
  • Cut safely: Use a very sharp, sturdy chef’s knife to cut the squash. If you find it difficult to cut, microwave it for a few minutes to soften the skin.
  • Don’t rush the cooking: Cooking times can vary based on the size of your squash. Always check for doneness by gently pressing the skin; it should give slightly when fully cooked.
  • Store properly: If you have leftover cooked squash, store it in an airtight container in the fridge for up to five days.
  • Experiment with flavors: Feel free to add different herbs and spices to the flesh before baking for a unique twist!
  • Fluff it up: After baking, be sure to fluff the strands with a fork gently; this will enhance the texture and make it more enjoyable.
  • Pair wisely: Think about what sauces or toppings will complement the squash best. Creamy sauces work well, but so do zesty, tomato-based options.
  • Try roasting the seeds: Don’t throw away the seeds! Rinse them, toss them in olive oil and salt, and roast them for a crunchy snack.

Common Mistakes and Troubleshooting

Even the best chefs can make mistakes! Here are some common pitfalls and how to avoid them:

  • Overcooking: If your squash ends up mushy, it’s likely been cooked too long. Watch the clock and check for fork-tenderness.
  • Undercooking: If the strands are still hard, it needs more time in the oven. Cover with foil if the top is browning too quickly.
  • Not seasoning enough: Don’t skimp on salt and pepper! The seasoning enhances the natural sweetness of the squash.
  • Cutting incorrectly: Make sure to cut the squash lengthwise for the best results. Cutting it crosswise will not yield the desired strands.

Variations to Try

Once you master the basic recipe, explore these variations to keep things exciting:

  • Spaghetti Squash Alfredo: Toss the cooked strands with a creamy Alfredo sauce and sautéed mushrooms for a decadent meal.
  • Spaghetti Squash Primavera: Mix in your favorite sautéed vegetables like bell peppers, zucchini, and carrots for a colorful dish.
  • Spaghetti Squash with Meatballs: Pair it with homemade or store-bought meatballs and marinara for a classic Italian feast.
  • Spaghetti Squash Breakfast Bowl: Top the strands with eggs, spinach, and feta cheese for a nutritious breakfast option.

Storage and Make-Ahead Instructions

If you love meal prepping, here’s how to store and reheat your spaghetti squash:

  • Refrigerate: Store cooked spaghetti squash in an airtight container in the fridge for up to five days.
  • Freeze: You can freeze cooked squash strands for up to three months. Just ensure they’re well-sealed to prevent freezer burn.
  • Reheat: To reheat, place the squash in the microwave for a few minutes or sauté in a pan with a bit of olive oil until warmed through.

Frequently Asked Questions

Here are some common queries you might have about cooking spaghetti squash:

  • How do I know when spaghetti squash is done? Check for fork-tenderness and a slight give when pressed. The skin should not be hard.
  • Can I cook spaghetti squash in the microwave? Yes! Pierce it with a fork, microwave for 10-12 minutes, flipping halfway through.
  • What can I serve with spaghetti squash? It pairs well with marinara, pesto, or a simple olive oil and garlic dressing. Try it as a base for your favorite protein!
  • Is spaghetti squash gluten-free? Absolutely! It’s a fantastic gluten-free alternative to traditional pasta.
  • How do I cut spaghetti squash safely? Always use a sharp knife and cut the squash lengthwise. If it’s hard to cut, microwave for a few minutes first.
  • Can I eat spaghetti squash seeds? Yes! They can be roasted for a crunchy snack. Just rinse and dry them before roasting.
  • How long can I store leftovers? Cooked spaghetti squash can be stored in the fridge for up to five days or frozen for three months.
  • Can I eat spaghetti squash raw? While it’s edible raw, cooking brings out its sweetness and improves the texture.

Nutrition Tips and Dietary Adaptations

Cooking spaghetti squash is not just about flavor; it’s also about nutrition:

  • Low-Calorie Meal: Spaghetti squash contains only about 42 calories per cup, making it a great choice for weight management.
  • High in Fiber: This squash is rich in fiber, which aids digestion and helps you feel full longer.
  • Vegan Friendly: It’s naturally vegan and can be paired with plant-based sauces for a delicious meal.
  • Low-Carb: Perfect for those following a keto or low-carb diet, offering a satisfying alternative to high-carb pasta.

Equipment Recommendations

To make your cooking experience smoother, here’s a list of essential tools:

  • Sharp Chef’s Knife: A must-have for cutting through the tough skin of the squash.
  • Cutting Board: Ensure your cutting board is sturdy and doesn’t slip for safe cutting.
  • Baking Sheet: Line it with parchment paper for easy cleanup and to prevent sticking.
  • Fork: A simple yet essential tool for fluffing the strands after cooking.

Serving Suggestions

Once your spaghetti squash is cooked, consider these delicious serving ideas:

  • Top with Parmesan: A sprinkle of freshly grated Parmesan cheese adds a savory touch.
  • Herbs Galore: Fresh herbs such as basil, parsley, or thyme can elevate the dish’s freshness.
  • Nuts and Seeds: Add toasted pine nuts or sunflower seeds for a delightful crunch.
  • Sweet Twist: Drizzle with honey or maple syrup and add cinnamon for a sweet dessert option!

In conclusion, cooking spaghetti squash in the oven opens up a world of culinary possibilities. With its unique texture and ability to absorb flavors, you can create dishes that surprise and delight your taste buds. So grab your knife and your squash, and let’s unleash the magic together!

How to Cook Spaghetti Squash in the Oven

Prep Time 10 minutes
Cook Time 40 minutes
Total Time 50 minutes
Servings 4 servings
Calories 150
This simple oven-baked spaghetti squash recipe yields tender, flavorful strands perfect for a healthy meal or side dish.

Ingredients

Main

  • 1 medium spaghetti squash (about 2 pounds)
  • 1 teaspoon extra virgin olive oil
  • 1/2 teaspoon kosher salt
  • 1/4 teaspoon ground black pepper

Instructions 

  • Preheat oven to 400°F (200°C). Line a baking sheet with parchment paper.
  • Cut the squash in half lengthwise, scoop out seeds, and brush cut sides with olive oil. Season with salt and pepper.
  • Place cut-side down on the baking sheet and bake for 35-40 minutes until fork-tender.
  • Flip the squash, then use a fork to fluff the strands. Serve as desired.

Notes

Be careful when handling the hot squash and ensure it is cooked just enough to avoid sogginess.
Calories: 150kcal
Cost: $15
Course: Side Dish
Keyword: Spaghetti Squash

Nutrition

Calories: 150kcal | Carbohydrates: 35g | Protein: 3g | Fat: 4g | Sodium: 150mg

Ignite Your Culinary Passion with Garlic Butter Beef Bites and Potatoes

Welcome to a flavor-packed journey that will tantalize your taste buds and awaken your inner chef! In this article, we will dive deep into the magic of Garlic Butter Beef Bites with Potatoes. This dish is not just a meal; it’s an experience that combines tender beef, creamy baby potatoes, and a mouthwatering garlic butter sauce that’s sure to set your taste buds ablaze. Whether you’re cooking for a family dinner or a cozy gathering with friends, this recipe is your ticket to culinary adventure!

Cooking is all about exploration, and with each ingredient, you can create a masterpiece that tells a story. Inspired by my childhood in San Antonio where spice is the soul of every dish, I invite you to embrace the warmth and excitement of cooking with heat. Let’s turn a simple recipe into a flavorful feast!

Why You’ll Love This Recipe

  • Comfort Food Classic: This dish brings the warmth of home cooking right to your table, making it perfect for family gatherings or cozy nights in.
  • Easy Preparation: With minimal prep and hands-on time, you can set it and forget it while the slow cooker does the work.
  • Bursting with Flavor: The garlic butter sauce infuses every bite with rich, savory goodness that elevates the humble beef and potatoes.
  • Versatile Ingredients: Use fresh, frozen, or even leftover ingredients to whip up this dish, making it perfect for any pantry.
  • Meal Prep Dream: Leftovers reheat beautifully, perfect for lunch the next day or quick dinners throughout the week.

Ingredients You’ll Need

Let’s break down the ingredients for this delicious Garlic Butter Beef Bites with Potatoes. Each component plays a crucial role in crafting a dish that’s not only flavorful but also comforting.

  • 1.5 pounds Beef stew meat: Cut into bite-sized pieces for easy cooking and eating. If you prefer, you can substitute with chuck roast or brisket.
  • 1 pound Baby potatoes: Halved for even cooking. You can also use Yukon Gold or red potatoes for a different texture.
  • 4 tablespoons Unsalted butter: Melted for the garlic butter sauce, providing richness. For a healthier option, consider using olive oil.
  • 3 cloves Garlic: Minced for flavor; garlic powder can be used as a substitute in a pinch.
  • 1 teaspoon Onion powder: Adds depth to the flavor; feel free to use fresh onion if you prefer.
  • 1 teaspoon Smoked paprika: For a smoky flavor that enhances the beef; regular paprika can be used if needed.
  • 0.5 teaspoon Dried thyme: Enhances the aroma; alternatively, fresh thyme can be used for a more vibrant flavor.
  • 0.5 teaspoon Dried rosemary: Adds a fragrant touch; fresh rosemary can also be a delightful substitute.
  • 0.5 teaspoon Salt: To taste; adjust according to your dietary preferences.
  • 0.25 teaspoon Black pepper: For seasoning; increase for a spicier kick.
  • 0.25 cup Beef broth: To keep the dish moist and flavorful; vegetable broth works well for a lighter option.
  • 1 tablespoon Olive oil: For searing the beef; can be replaced with any cooking oil you prefer.

Step-by-Step Preparation of Garlic Butter Beef Bites with Potatoes

Close-up image of tender beef stew meat in garlic butter sauce surrounded by golden baby potatoes.

Now, let’s get into the kitchen and prepare this delightful dish. Follow these steps to ensure your Garlic Butter Beef Bites with Potatoes come out perfectly!

  • Step 1: Gather Ingredients – Gather all your ingredients and cut the beef into bite-sized pieces, halving the baby potatoes for even cooking.
  • Step 2: Optional Parboiling – For a creamier texture, parboil the baby potatoes for a few minutes to soften them slightly. This step is optional but recommended for best results.
  • Step 3: Sear the Beef – Heat olive oil in a skillet over medium-high heat. Sear the beef bites until browned on all sides, about 3-4 minutes. This step adds a rich flavor through caramelization.
  • Step 4: Create the Garlic Butter Sauce – In a small bowl, combine melted butter, minced garlic, onion powder, smoked paprika, thyme, rosemary, salt, and black pepper to create a luscious garlic butter sauce.
  • Step 5: Assemble in Slow Cooker – In the slow cooker, place the halved baby potatoes and seared beef. Pour the garlic butter sauce over the top and add beef broth to keep everything juicy.
  • Step 6: Cook to Perfection – Cover the slow cooker and cook on low for 6-8 hours or on high for 3-4 hours until the beef is fork-tender. The slow cooking allows the flavors to meld beautifully.
  • Step 7: Rest and Serve – Let the dish rest for about 10 minutes before serving. This allows the juices to redistribute, making each bite flavorful.

Pro Tips for Making Perfect Garlic Butter Beef Bites with Potatoes

To ensure your meal is a standout success, here are some expert tips to elevate your dish:

  • Use Quality Ingredients: Fresh beef and quality spices will enhance the flavor of your dish significantly.
  • Don’t Skip Browning the Beef: This step locks in flavor and adds depth, making a noticeable difference in the final dish.
  • Experiment with Spices: Feel free to add your favorite spices—cumin or coriander can bring an exciting twist to the garlic butter sauce.
  • Adjust Cooking Time: Depending on your slow cooker, cooking times may vary; always check for fork-tender meat.
  • Garnish for Flavor: Fresh herbs like parsley or cilantro can brighten your dish and add a pop of color.
  • Consider Adding Veggies: Carrots, bell peppers, or green beans can add color and nutrition to the meal.
  • Make Ahead: This dish can be prepared ahead of time and stored in the refrigerator for up to 2 days before slow cooking.
  • Thicken the Sauce: If you prefer a thicker sauce, you can mix a cornstarch slurry (1 tablespoon cornstarch with 2 tablespoons water) and stir it in during the last 30 minutes of cooking.

Common Mistakes and Troubleshooting

Even the best chefs make mistakes! Here are some common pitfalls and solutions:

  • Beef Not Tender: If your beef isn’t tender after cooking, it likely needs more time. Slow cookers vary in temperature, so adjust accordingly.
  • Too Salty: If the dish turns out too salty, balance it with a splash of vinegar or add more potatoes to absorb the saltiness.
  • Flavor Lacking: Always taste and adjust seasoning as necessary; sometimes, a pinch of salt or a dash of garlic can make a world of difference.
  • Sauce Too Thin: If your sauce isn’t thickening, remember to add the cornstarch slurry 30 minutes before serving.

Variations on Garlic Butter Beef Bites with Potatoes

Want to shake things up? Here are some exciting variations you can try:

  • Spicy Kick: Add diced jalapeños or a teaspoon of red pepper flakes for an extra layer of heat.
  • Herbaceous Delight: Replace dried herbs with fresh ones for a vibrant flavor; consider basil or oregano.
  • Vegetarian Option: Substitute beef with hearty veggies like portobello mushrooms and chickpeas, and use vegetable broth for a delicious plant-based twist.
  • Global Flavors: Incorporate international spices like curry powder or harissa for a global flair.

Storage and Make-Ahead Instructions

This dish is perfect for meal prep! Here’s how to store and reheat:

  • Refrigerator: Store in an airtight container for up to 3 days. Reheat in the microwave or on the stovetop.
  • Freezer: Freeze for up to 3 months in an airtight container. Thaw overnight in the refrigerator before reheating.
  • Make-Ahead: Prepare the dish up to the slow cooking step, refrigerate overnight, and start cooking the next day.

Frequently Asked Questions

Here’s a collection of common questions people ask about Garlic Butter Beef Bites with Potatoes:

  • Can I use frozen beef? Yes, but make sure to thaw it completely before cooking for best results.
  • What can I serve with this dish? This dish pairs wonderfully with a fresh salad, crusty bread, or over rice.
  • How do I know when the beef is done? The beef should be fork-tender and easy to shred.
  • Can I make this in an Instant Pot? Absolutely! Use the sauté function to brown the beef, then cook on high pressure for 35 minutes.
  • What if I don’t have a slow cooker? You can also cook this in a Dutch oven in the oven at 300°F for 2-3 hours.
  • Is this dish gluten-free? Yes, as long as you use gluten-free broth and double-check your spices.
  • Can I add other vegetables? Definitely! Carrots, peas, or bell peppers can enhance the dish.
  • How do I enhance the flavor? Consider marinating the beef overnight or adding a splash of red wine to the sauce.

Nutrition Tips and Dietary Adaptations

For those watching their diet, here are some nutritional tips:

  • Low-Carb Option: Swap potatoes for cauliflower for a low-carb alternative.
  • Protein Boost: Add beans or lentils for extra protein and fiber.
  • Lower Fat: Use less butter or substitute with a light alternative to reduce fat content.

Equipment Recommendations

To create this delicious dish, you’ll need:

  • Slow Cooker: A reliable slow cooker is essential for even cooking and flavor development.
  • Skillet: For searing the beef, a heavy-bottomed skillet works best.
  • Measuring Cups and Spoons: To ensure accurate ingredient measurements.

Serving Suggestions

Serve your Garlic Butter Beef Bites with Potatoes with style:

  • Garnish: Top with fresh parsley or chives for a pop of color and freshness.
  • Side Dishes: Consider pairing with roasted vegetables or a crisp green salad for a balanced meal.
  • Presentation: Serve in a rustic bowl for a comforting, homey feel or on a platter for family-style dining.

Embrace the joy of cooking and the excitement of flavor with this Garlic Butter Beef Bites with Potatoes recipe. Each bite is a journey through taste, texture, and tradition, inviting you to savor every moment at the table. So grab your skillet, gather your ingredients, and let’s create a meal that’s not just food but a story worth telling!

Garlic Butter Beef Bites with Potatoes

Prep Time 15 minutes
Cook Time 4 hours
Total Time 4 hours 15 minutes
Servings 4 servings
Calories 650
Enjoy tender beef bites cooked in a flavorful garlic butter sauce with tender potatoes, perfect for a hearty and satisfying meal.

Ingredients

Meat

  • 1.5 pounds Beef stew meat (Cut into bite-sized pieces)

Vegetables

  • 1 pound Baby potatoes (Halved for even cooking)

Dairy & Oils

  • 4 tablespoons Unsalted butter (Melted for the garlic butter sauce)
  • 1 tablespoon Olive oil (For searing the beef)

Spices & Seasonings

  • 3 cloves Garlic (Minced for flavor)
  • 1 teaspoon Onion powder (Adds depth to the flavor)
  • 1 teaspoon Smoked paprika (For a smoky flavor)
  • 0.5 teaspoon Dried thyme (Enhances aroma)
  • 0.5 teaspoon Dried rosemary (Adds fragrant touch)
  • 0.5 teaspoon Salt (Or to taste)
  • 0.25 teaspoon Black pepper (For seasoning)

Liquids

  • 0.25 cup Beef broth (To keep the dish moist)

Instructions 

  • Cut beef into bite-sized pieces and halve the potatoes.
  • Sear beef in hot oil until browned.
  • Mix melted butter, garlic, spices, and seasonings to make the sauce.
  • Combine potatoes, beef, sauce, and broth in slow cooker; cook on low 6-8 hours.
  • Rest for 10 minutes before serving.

Notes

For extra flavor, garnish with fresh herbs before serving.
Calories: 650kcal
Cost: $15
Course: Main Course
Cuisine: American
Keyword: beef, garlic, Potatoes

Nutrition

Calories: 650kcal | Carbohydrates: 50g | Protein: 60g | Fat: 30g | Sodium: 900mg

Ignite Your Culinary Adventure with Ricotta Eggplant Casserole

Welcome to a culinary journey where the vibrant flavors of creamy ricotta and tender eggplant come together in perfect harmony. My Ricotta Eggplant Casserole isn’t just a recipe; it’s an experience that warms the soul and tantalizes the taste buds. This dish is perfect for any gathering, whether it’s a cozy family dinner or a lively gathering of friends. With layers of savory tomato sauce, rich ricotta, and beautifully roasted eggplant, every bite tells a story of flavor and warmth.

Let’s dive deep into the world of this eggplant casserole that melts hearts and encourages everyone to embrace their inner chef!

Why You’ll Love This Recipe

There are countless reasons to fall head over heels for this dish. Here are just a few:

  • Flavor Explosion: The combination of creamy ricotta, zesty tomato sauce, and the earthy flavor of roasted eggplant creates a rich flavor profile that’s simply irresistible.
  • Comfort Food: This casserole is the epitome of comfort food, bringing warmth and satisfaction with each serving. It’s like a hug in a dish!
  • Easy Preparation: With simple ingredients and straightforward steps, even novice cooks can whip this up effortlessly.
  • Versatile Dish: Whether you serve it as a main course or a side dish, it pairs beautifully with salads, crusty bread, or even grilled meats.
  • Make-Ahead Friendly: This casserole can be assembled ahead of time and stored in the fridge or freezer, making it a perfect option for busy days.

Ingredient Breakdown

Understanding your ingredients is key to culinary success. Here’s what you’ll need and some recommended substitutions:

  • Eggplants: 2 large eggplants (about 2 pounds total). Look for firm, shiny skin. If you prefer, you can substitute with zucchini for a lighter version.
  • Olive Oil: 1/4 cup plus more for drizzling. Extra virgin gives the best flavor, but you can use any cooking oil.
  • Onion: 1 large onion, chopped. Yellow onions work best, but red onions can add a sweeter touch.
  • Garlic: 4 cloves, minced. Fresh garlic is a must, but garlic powder can be used in a pinch.
  • Crushed Tomatoes: 1 (28 ounce) can. Opt for fire-roasted tomatoes for an added depth of flavor.
  • Tomato Sauce: 1 (15 ounce) can. You can also use marinara sauce if you want a more herby flavor.
  • Dried Herbs: 1 teaspoon oregano, 1/2 teaspoon basil. Fresh herbs can elevate the dish further.
  • Red Pepper Flakes: 1/4 teaspoon (optional). Adjust to your heat preference.
  • Ricotta Cheese: 15 ounces. For a lighter version, try cottage cheese blended until smooth.
  • Parmesan Cheese: 1/2 cup grated, plus more for topping. Pecorino Romano is a great alternative.
  • Egg: 1 large, lightly beaten. This helps bind the ricotta mixture.
  • Fresh Parsley: 1/4 cup, chopped. Basil or even cilantro can be refreshing substitutes.
  • Shredded Mozzarella: 8 ounces. A must for that melty, gooey topping.

Step-by-Step Instructions

Side view of a baked Ricotta Eggplant Casserole showcasing layers of eggplant and cheese.

Ready to bring this dish to life? Follow these easy steps for a delicious ricotta eggplant casserole:

  1. Prepare the Eggplant: Slice the eggplant into 1/4-inch thick rounds. Salt generously on both sides and let rest for 30 minutes to 1 hour. This draws out excess moisture and bitterness. Rinse thoroughly and pat dry.
  2. Make the Tomato Sauce: Heat 1/4 cup olive oil in a large skillet over medium heat. Add the chopped onion and cook until softened (5-7 minutes). Stir in the minced garlic and cook for 1 minute until fragrant. Add the crushed tomatoes, tomato sauce, oregano, basil, and red pepper flakes (if using). Season with salt and pepper to taste. Simmer covered for at least 30 minutes, stirring occasionally.
  3. Prepare the Ricotta Mixture: In a medium bowl, combine the ricotta cheese, 1/2 cup Parmesan cheese, beaten egg, and parsley. Season with salt and pepper, then mix well.
  4. Cook the Eggplant: Choose your preferred cooking method:
    • Baking: Preheat your oven to 400°F (200°C). Lightly grease baking sheets, arrange eggplant slices in a single layer, drizzle with olive oil, and bake for 15-20 minutes, flipping halfway through until tender and lightly browned.
    • Pan-Frying: Heat a thin layer of olive oil in a large skillet over medium heat. Working in batches, fry eggplant slices until golden brown on both sides (2-3 minutes per side). Drain on paper towels.
  5. Assemble the Casserole: Preheat your oven to 375°F (190°C). Spread a thin layer of tomato sauce on the bottom of a 9×13 inch baking dish. Layer eggplant slices over the sauce, overlapping slightly. Spread half of the ricotta mixture over the eggplant, then sprinkle half of the mozzarella cheese. Repeat layers: tomato sauce, eggplant, ricotta mixture, and mozzarella cheese. Finish with a final layer of tomato sauce and sprinkle with remaining grated Parmesan cheese.
  6. Bake the Casserole: Cover the baking dish with aluminum foil and bake for 30 minutes. Remove the foil and bake for another 15-20 minutes, or until the cheese is melted, bubbly, and lightly browned.
  7. Let it Rest: Allow the casserole to rest for at least 10-15 minutes before serving. This helps the layers set and makes serving easier.

Pro Tips for the Perfect Casserole

Want to elevate your casserole game? Here are some expert insights:

  • Salt the Eggplant: Don’t skip salting the eggplant! It removes bitterness and moisture, ensuring a tender texture.
  • Layer Wisely: Ensure even distribution of flavors by layering your ingredients thoughtfully; it’s all about balance.
  • Experiment with Heat: Adjust the red pepper flakes according to your heat tolerance. It’s all about finding your perfect spice level!
  • Make Ahead: Assemble the casserole a day in advance and store it in the fridge. Bake it fresh when you’re ready to serve.
  • Resting Time: Always let your casserole rest before slicing. This helps maintain its structure and makes for prettier servings.
  • Try Different Cheeses: For a fun twist, mix different cheeses like gouda or feta into the ricotta mixture.
  • Garnish Boldly: Don’t forget to finish with fresh herbs or a drizzle of olive oil for a burst of freshness!
  • Freeze for Later: This casserole freezes beautifully. Just cover tightly and store in the freezer for up to 3 months.

Common Mistakes and Troubleshooting

Even the best chefs make mistakes! Here are some common pitfalls to avoid:

  • Too Much Moisture: If your casserole is watery, ensure you’ve properly salted your eggplant and allowed it to dry before cooking.
  • Overcooked Eggplant: Keep an eye on your eggplant while cooking; it should be tender but not mushy.
  • Uneven Layers: For consistent flavor, layer your ingredients evenly and don’t skip the sauce between layers.
  • Skipped Resting Time: Cutting into the casserole too soon can lead to a messy serving. Patience is key!

Variations to Spice Things Up

Feel like experimenting? Here are some delicious variations to try:

  • Add Meat: Mix in cooked ground beef, turkey, or Italian sausage for a heartier casserole.
  • Vegetable Medley: Incorporate other vegetables such as bell peppers, spinach, or zucchini for added nutrition and flavor.
  • Cheesy Layers: Use different cheeses like gouda or feta for a unique flavor twist.
  • Herb Infusion: Swap out parsley for fresh basil or oregano for a burst of aromatic flavor.

Storage and Make-Ahead Instructions

This casserole is fantastic for meal prep!

  • Refrigeration: Store leftovers in an airtight container in the fridge for up to 4 days.
  • Freezing: Freeze the unbaked casserole for up to 3 months. Thaw in the fridge overnight before baking.
  • Reheating: Reheat leftovers in the oven at 350°F (175°C) until warmed through, about 20-25 minutes.

Comprehensive FAQ

Got questions? Here are answers to some common queries about this delicious dish:

  • Can I use frozen eggplant? Yes, but fresh eggplant has a better texture. If using frozen, thaw and drain excess moisture before use.
  • Is this casserole vegetarian? Absolutely! It’s packed with vegetables and cheese, making it a delightful vegetarian option.
  • Can I prepare this ahead of time? Yes! Assemble it the day before, cover tightly, and store in the fridge until ready to bake.
  • How can I make it gluten-free? This recipe is naturally gluten-free! Just ensure your sauces and cheeses are gluten-free.
  • Can I add spices? Yes! Feel free to add your favorite spices like cumin or smoked paprika for extra flavor.
  • What’s the best way to serve it? Serve it hot, garnished with fresh herbs, alongside a simple green salad or crusty bread.
  • Can I use low-fat cheese? Yes, low-fat ricotta and mozzarella can be used, but they may alter the texture slightly.
  • How long does it take to bake from frozen? Bake at 375°F (190°C) for about 1 hour or until heated through and bubbly.

Nutritional Tips and Dietary Adaptations

This casserole can be adapted to fit various dietary needs:

  • Low Carb: Substitute eggplant with cauliflower for a low-carb version.
  • High Protein: Incorporate cooked chicken or turkey into the layers for an added protein boost.
  • Dairy-Free: Use cashew ricotta or a non-dairy cheese alternative to make it dairy-free.
  • Low Sodium: Use low-sodium tomato products and limit added salt without sacrificing flavor.

Equipment Recommendations

Here’s what you’ll need to create this masterpiece:

  • 9×13 inch Baking Dish: Ideal for layering your casserole.
  • Large Skillet: Perfect for sautéing onions and garlic.
  • Sharp Knife: For slicing eggplants evenly.
  • Mixing Bowls: Essential for combining your ricotta mixture.
  • Aluminum Foil: To cover the casserole while baking.

Serving Suggestions

Pair your ricotta eggplant casserole with these delightful accompaniments:

  • Green Salad: A simple arugula or mixed greens salad with a light vinaigrette balances the richness of the casserole.
  • Garlic Bread: Crusty garlic bread is a classic side that complements every bite.
  • Red Wine: A glass of Chianti or a light-bodied red wine enhances the meal beautifully.
  • Fresh Herbs: Garnish with fresh basil or parsley for a pop of color and freshness.

Conclusion

In conclusion, my Ricotta Eggplant Casserole is more than just a dish — it’s a celebration of flavor, warmth, and the art of cooking boldly. With rich layers of creamy ricotta, tender eggplant, and zesty tomato sauce, this recipe invites you to embrace your culinary creativity. Now, grab your skillet, let the spices guide you, and prepare to make a casserole that will melt hearts and warm kitchens. Remember, cooking is an adventure — so let’s add a little fire to your food!

Ricotta Eggplant Casserole: A Delicious and Easy Recipe

Prep Time 45 minutes
Cook Time 50 minutes
Total Time 1 hour 35 minutes
Servings 6 servings
Calories 450
A flavorful baked casserole combining roasted eggplant, rich ricotta, and savory tomato sauce, perfect for a comforting meal.

Ingredients

Eggplant

  • 2 large eggplants (about 2 pounds total)
  • 0.25 cup olive oil (plus more for drizzling)
  • 1 large onion (chopped)
  • 4 cloves garlic (minced)
  • 28 ounce crushed tomatoes
  • 15 ounce tomato sauce
  • 1 teaspoon dried oregano
  • 0.5 teaspoon dried basil
  • 0.25 teaspoon red pepper flakes (optional)
  • to taste Salt and freshly ground black pepper
  • 15 ounces ricotta cheese
  • 0.5 cup grated Parmesan cheese (plus more for topping)
  • 1 large egg (lightly beaten)
  • 0.25 cup chopped fresh parsley
  • 8 ounces mozzarella cheese (shredded)

Instructions 

  • Slice eggplant, salt generously, rest 30-60 mins, rinse, and pat dry.
  • Make tomato sauce: cook onion and garlic in olive oil, add tomatoes, herbs, simmer 30 mins.
  • Mix ricotta, Parmesan, egg, parsley, season with salt and pepper.
  • Cook eggplant: bake at 400°F for 15-20 mins or pan-fry until golden.
  • Assemble: layer sauce, eggplant, ricotta, mozzarella in a baking dish, repeat, top with sauce and Parmesan.
  • Bake at 375°F covered 30 mins, uncover and bake 15-20 mins until bubbly and browned. Rest 10-15 mins before serving.

Notes

For best results, let the casserole rest before serving to allow flavors to meld.
Calories: 450kcal
Cost: $15
Course: Main Course
Cuisine: Italian
Keyword: Eggplant

Nutrition

Calories: 450kcal | Carbohydrates: 45g | Protein: 25g | Fat: 20g | Sodium: 900mg

Ignite Your Taste Buds with Hawaiian Chicken Sheet Pan

Welcome to the culinary adventure of your life! If you’re ready to dive into a dish that brings the spirit of the islands right to your kitchen, then this Hawaiian Chicken Sheet Pan recipe is your passport. Picture succulent chicken thighs marinated in a savory blend of soy sauce, honey, and spices, roasted to perfection alongside vibrant bell peppers and sweet pineapple chunks. This recipe isn’t just about feeding your hunger; it’s about awakening your taste buds and embracing the thrill of cooking with heat and flavor!

Why You’ll Love This Recipe

Let’s break down exactly why this Hawaiian Chicken Sheet Pan will become your go-to meal for any occasion:

  • One-Pan Wonder: With everything cooked on a single sheet pan, cleanup is a breeze, making it perfect for weeknight dinners!
  • Flavor Explosion: The combination of sweet pineapple, savory soy sauce, and tender chicken creates a balance of flavors that will keep your taste buds dancing.
  • Customizable Veggies: Feel free to toss in your favorite seasonal vegetables for a colorful twist and added nutrition.
  • Quick Prep Time: You can have this dish prepped and in the oven in under 30 minutes, making it ideal for busy schedules.
  • Perfect for Meal Prep: This dish stores well, giving you delicious leftovers that taste just as great the next day.

Ingredients Breakdown

Here’s what you’ll need to create this Hawaiian Chicken Sheet Pan, along with a few tips on substitutions:

  • 2 lbs boneless, skinless chicken thighs: Cut into 1 to 1.5 inch pieces for even cooking. Prefer chicken breasts? They work beautifully, too, but be mindful of cooking time.
  • 1 red bell pepper: Sliced into strips. You can experiment with yellow or orange bell peppers for added sweetness.
  • 1 green bell pepper: Adds a pop of color and crunch.
  • 1 cup pineapple chunks: Fresh is ideal, but canned works in a pinch—just be sure to drain them well.
  • 1 small red onion: Sliced into wedges for a hint of sweetness.
  • 3 tbsp soy sauce: Low-sodium is recommended, but feel free to explore tamari for a gluten-free option.
  • 2 tbsp honey: For a touch of natural sweetness; agave syrup can be a great substitute.
  • 1 tbsp olive oil: Helps with roasting and adds healthy fats.
  • 1 tsp garlic powder: Fresh minced garlic could also be used for a punchier flavor.
  • 1/2 tsp ground ginger: Gives warmth to the dish; fresh ginger is an excellent alternative.
  • 1/4 tsp black pepper: Adjust to taste for that perfect seasoning.

Step-by-Step Instructions

Juicy pieces of chicken thighs mixed with vibrant bell peppers and pineapple, presented on a sheet pan.

Ready to cook? Follow these simple steps to make your Hawaiian Chicken Sheet Pan:

  1. Preheat your oven to 400°F (200°C). Line a half sheet pan (about 13×18 inches) with parchment paper or aluminum foil for easy cleanup.
  2. In a medium bowl, whisk together soy sauce, honey, olive oil, garlic powder, ground ginger, and black pepper until smooth and well combined.
  3. Add the chicken pieces to the marinade, tossing until evenly coated. Let it marinate for about 10 minutes at room temperature while you prepare the vegetables.
  4. Spread the marinated chicken, bell peppers, pineapple chunks, and red onion in a single layer on the prepared sheet pan. Avoid overcrowding to ensure proper roasting; if necessary, use two pans.
  5. Place the sheet pan in the preheated oven and roast for 20 to 25 minutes, or until the chicken reaches an internal temperature of 165°F and the pineapple’s edges turn golden brown and caramelized.
  6. Remove from the oven and let rest for 3 to 5 minutes before serving. Serve warm over jasmine rice or with a refreshing side salad for a complete meal.

Pro Tips for Perfecting Your Hawaiian Chicken Sheet Pan

Now that you have the basics down, here are some expert insights to elevate your dish:

  • Marinate Longer: For even deeper flavor, consider marinating the chicken for 30 minutes to an hour.
  • Experiment with Spice: If you love heat, add a pinch of red pepper flakes to the marinade for a spicy kick.
  • Broil At The End: For extra caramelization, switch to broil for the last 2-3 minutes of cooking.
  • Layer Smart: Place denser vegetables like onions on the bottom and lighter ones like bell peppers on top for even cooking.
  • Fresh Herbs Finish: Garnish with chopped cilantro or green onions just before serving for a burst of freshness.

Common Mistakes and Troubleshooting

Even the best chefs can run into issues. Here’s how to avoid common pitfalls:

  • Overcrowding the Pan: This can lead to steaming instead of roasting. Ensure there’s space between pieces for even cooking.
  • Undercooked Chicken: Always use a meat thermometer to check for doneness. Chicken should reach an internal temperature of 165°F.
  • Dry Chicken: Avoid overcooking by closely monitoring the time and temperature. Chicken thighs are forgiving, but will dry out if left too long.

Variations to Try

Feeling adventurous? Here are some delicious variations to switch things up:

  • Tropical Twist: Add diced mango or papaya for an extra tropical flavor.
  • Veggie Delight: Substitute or add broccoli, snap peas, or zucchini for a colorful veggie medley.
  • Spicy Hawaiian: Incorporate jalapeños or sriracha in the marinade for a fiery version.
  • Teriyaki Style: Swap honey for teriyaki sauce and add sesame seeds for a nutty finish.

Storage and Make-Ahead Instructions

Want to prepare this dish in advance? Here’s how to store and reheat it:

  • Refrigeration: Store leftovers in an airtight container in the fridge for up to 3 days.
  • Freezing: You can freeze the marinated chicken for up to 3 months. Just thaw in the fridge overnight before cooking.
  • Reheating: To reheat, bake in a preheated oven at 350°F (175°C) until warmed through, about 10-15 minutes.

FAQs About Hawaiian Chicken Sheet Pan

Got questions? We’ve got answers!

  • Can I use chicken breast instead of thighs?: Yes, but be careful not to overcook them as they can dry out more quickly.
  • What vegetables can I add to this dish?: Feel free to add any of your favorites! Broccoli, snap peas, or even carrots work wonderfully.
  • Can I use canned pineapple?: Absolutely! Just ensure it’s drained well to avoid excess moisture.
  • How long do I bake Hawaiian chicken on a sheet pan?: The chicken typically takes about 20-25 minutes at 400°F.
  • Can I make this dish ahead of time?: Yes! You can marinate the chicken the night before and roast it when you’re ready.
  • What can I serve with Hawaiian chicken?: Jasmine rice, quinoa, or a fresh salad pairs beautifully with this dish.
  • How do I know when the chicken is done?: Use a meat thermometer; chicken should reach 165°F internally.
  • Can I adjust the sweetness of the dish?: Absolutely! You can add less honey or substitute with a different sweetener if preferred.

Nutritional Tips and Dietary Adaptations

This Hawaiian Chicken Sheet Pan is not only delicious but can also be tailored to fit various dietary needs:

  • Gluten-Free: Use gluten-free soy sauce or tamari to make this dish suitable for gluten-sensitive diets.
  • Low-Carb Option: Serve it with cauliflower rice instead of jasmine rice for a low-carb meal.
  • High-Protein: This dish is naturally high in protein thanks to the chicken thighs, making it a great option for fitness enthusiasts.

Essential Equipment Recommendations

To make your Hawaiian Chicken Sheet Pan experience even smoother, consider having the following tools on hand:

  • Half Sheet Pan: A sturdy, large pan is crucial for even cooking and easy cleanup.
  • Parchment Paper or Aluminum Foil: For lining the pan, it makes cleanup a breeze.
  • Meat Thermometer: Ensures your chicken is cooked to perfection every time.
  • Mixing Bowl: For marinating the chicken and mixing the ingredients.

Serving Suggestions

When it comes to serving, the Hawaiian Chicken Sheet Pan shines alongside:

  • Jasmine Rice: The fluffy rice absorbs the delicious sauce beautifully.
  • Fresh Salad: A crisp green salad adds a refreshing contrast to the warm, savory chicken.
  • Grilled Pineapple: For an extra touch of tropical flavor, serve with grilled pineapple slices.

In Conclusion

Cooking should be an adventure, and this Hawaiian Chicken Sheet Pan recipe is a gateway to bold flavors and vibrant colors. Whether you’re cooking for family, friends, or just treating yourself, this dish delivers satisfaction with every bite. So grab your skillet, embrace the heat, and let the flavors of the islands transport you to a tropical paradise. Remember, with every dish you create, you’re not just feeding your body—you’re telling a story. Now go forth and cook with passion!

Hawaiian Chicken Sheet Pan

Prep Time 10 minutes
Cook Time 25 minutes
Total Time 35 minutes
Servings 4 servings
Calories 450
A quick and flavorful sheet pan meal featuring tender chicken, sweet pineapple, and colorful peppers, perfect for a weeknight dinner.

Ingredients

Protein

  • 2 lbs boneless, skinless chicken thighs (cut into 1 to 1.5 inch pieces)

Vegetables

  • 1 red bell pepper red bell pepper (sliced into strips)
  • 1 green bell pepper green bell pepper (sliced into strips)
  • 1 cup pineapple chunks (fresh or canned, drained and patted dry)
  • 1 small red onion red onion (sliced into wedges)

Sauces & Seasonings

  • 3 tbsp soy sauce (low-sodium recommended)
  • 2 tbsp honey
  • 1 tbsp olive oil
  • 1 tsp garlic powder
  • 1/2 tsp ground ginger
  • 1/4 tsp black pepper (add more to taste if desired)

Instructions 

  • Preheat oven to 400°F (200°C). Line a sheet pan with parchment or foil.
  • Mix soy sauce, honey, olive oil, garlic powder, ginger, and pepper in a bowl. Toss chicken in marinade and let sit for 10 minutes.
  • Arrange chicken, peppers, pineapple, and onion on the prepared pan in a single layer.
  • Roast for 20-25 minutes until chicken is cooked through and pineapple edges are caramelized.
  • Rest for 3-5 minutes, then serve warm, optionally over rice or with a side salad.

Notes

For extra flavor, sprinkle with chopped green onions or sesame seeds before serving.
Calories: 450kcal
Cost: $15
Course: Main Course
Cuisine: Hawaiian
Keyword: chicken, pineapple, sheet pan

Nutrition

Calories: 450kcal | Carbohydrates: 50g | Protein: 35g | Fat: 10g | Sodium: 900mg

Welcome to Your New Favorite Comfort Dish

Imagine a dish that wraps you in warmth and flavor, where every bite feels like a hug from the inside out. That’s exactly what you get with this Creamy Chicken Noodle Skillet. This isn’t just a meal; it’s an experience that combines tender chicken, luscious noodles, and the right amount of spice to elevate your dinner game. If you’re ready to turn a simple weeknight dinner into a culinary adventure, let’s dive into this delightful recipe that’s perfect for any occasion!

Why You’ll Love This Recipe

Before we get into the nitty-gritty, let’s talk about why this Creamy Chicken Noodle Skillet deserves a spot in your regular rotation:

  • Quick and Easy: With just one skillet and under 30 minutes of prep time, you can have a delicious meal on the table in no time.
  • Comfort Food at Its Best: This dish is a cozy hug in a bowl, perfect for those chilly nights when you crave something warm and fulfilling.
  • Kid-Friendly: Even the pickiest eaters will happily devour this creamy delight, making it a family favorite.
  • Flexible and Adaptable: Whether you have leftover rotisserie chicken or want to throw in some veggies, this recipe can easily accommodate your pantry staples.
  • Health-Conscious Option: With options for low-calorie ingredients, this dish can fit into your Weight Watchers plan without sacrificing flavor.

Ingredient Breakdown

Let’s roll up our sleeves and get into the ingredients that make this dish shine:

  • Kluski Noodles: 8 oz. of these delightful noodles create a hearty base. If unavailable, you can swap them with egg noodles or any pasta of your choice.
  • Carrots: 1 cup of chopped carrots add a touch of sweetness and crunch. Feel free to use frozen or even zucchini for a twist!
  • Celery: 1/2 cup of chopped celery brings a fresh crunch and depth of flavor.
  • Yellow Onion: 1 small onion, diced, for that aromatic base that sets the stage for all those robust flavors.
  • Butter: 1 teaspoon for that rich flavor. You can use olive oil or a plant-based option if you prefer.
  • Garlic: 2 cloves, minced, to add that punch of flavor that everyone loves.
  • All-Purpose Flour: 1 tablespoon for thickening the creamy sauce. Gluten-free flour works just as well!
  • Chicken Broth: 1 1/2 cups to create a rich, savory base. Homemade broth? Even better!
  • Skim Milk: 1/2 cup makes this dish creamy without being too heavy. Substitute with almond milk or oat milk for a dairy-free version.
  • Cooked Chicken: 2 cups of shredded chicken—this could be leftover roasted chicken or a quick rotisserie chicken that you picked up.

Step-by-Step Cooking Instructions

Side view of a hearty creamy chicken noodle dish with noodles, chicken, and carrots.

Now that we have everything prepped, let’s get cooking! Follow these simple steps to create your masterpiece:

  1. Bring a large pot of water to a boil. Add the noodles and cook until al dente, about 5-7 minutes. Drain and set aside.
  2. Melt the butter in a large skillet over medium heat. Add the carrots, celery, and onion. Cook for about 4 minutes until they start to soften, then stir in the garlic and cook for another minute.
  3. Sprinkle in the flour and stir to combine, cooking for about 1 minute to remove the raw flavor.
  4. Gradually pour in the chicken broth and skimming milk, stirring constantly. Increase the heat to medium-high until it starts to simmer, then reduce to medium and allow it to thicken, about 5 minutes.
  5. Finally, fold in the cooked chicken and noodles, stirring until everything is well combined. Serve hot and enjoy!

Pro Tips for the Perfect Skillet

To take your Creamy Chicken Noodle Skillet to the next level, here are some expert insights:

  • Perfect Texture: Make sure not to overcook the noodles. They should be al dente since they will continue to cook in the skillet.
  • Flavor Boost: For an extra kick, toss in a pinch of cayenne pepper or red pepper flakes. Spice is your friend!
  • Make-Ahead Magic: Prepare the chicken and vegetables in advance to save time during the week.
  • Herb Infusion: Fresh herbs like thyme or parsley sprinkled on top enhance the flavor and presentation.
  • Thicker Sauce: If you prefer a thicker sauce, add a bit more flour and let it simmer longer.
  • Don’t Rush It: Allow the sauce to simmer gently; rushing the process could lead to a grainy texture.
  • Use Quality Broth: The better the broth, the tastier your sauce will be. Homemade is always best!
  • Watch the Salt: If using rotisserie chicken, taste before adding additional salt, as the chicken is often well-seasoned.

Common Mistakes and Troubleshooting

Here are some pitfalls to avoid while preparing your dish:

  • Overcooking the Noodles: They should be firm to the bite since they will soak up sauce as they cool.
  • Skipping the Garlic: Don’t skip the garlic; it adds layers of flavor that are essential to the dish.
  • Not Tasting: Always taste your sauce before serving. You can balance flavors with additional seasoning if needed.
  • Using Cold Chicken: If your chicken is cold from the fridge, warm it up slightly before adding it to the skillet.

Delicious Variations to Try

Feeling adventurous? Here are some variations to spice things up:

  • Vegetarian Delight: Swap the chicken for chickpeas and add a variety of vegetables like bell peppers and spinach.
  • Spicy Southwest: Add diced jalapeños or a splash of hot sauce for a fiery twist.
  • Cheesy Goodness: Stir in a cup of shredded cheddar or Parmesan cheese for an extra creamy, cheesy sauce.
  • Asian Fusion: Incorporate soy sauce and sesame oil, and add snow peas and bell peppers for an Asian-inspired skillet.

Storage and Make-Ahead Instructions

Want to keep leftovers? Here’s how:

  • Refrigerate: Store in an airtight container for up to 3 days. Reheat on the stovetop over low heat.
  • Freezing: This dish can be frozen for up to a month. Just make sure to let it cool completely before packing it up.
  • Make-Ahead: Prepare the chicken and veggies a day ahead, and simply combine and cook the next day.

Frequently Asked Questions

Let’s tackle some common questions to ensure your cooking adventure goes smoothly:

  • Can I use uncooked chicken? Yes, just brown it in the skillet before adding the vegetables.
  • Can I substitute the noodles? Absolutely! Feel free to use any pasta you have on hand.
  • What if I want a thicker sauce? Add more flour or let it simmer longer to achieve your desired consistency.
  • How do I store leftovers? Cool completely, then refrigerate in an airtight container for up to 3 days.
  • Can I add more vegetables? Definitely! Broccoli, peas, or bell peppers can be great additions.
  • I don’t have chicken broth, can I use water? While you can, using broth will add much more flavor to your dish.
  • How do I make this dairy-free? Substitute the milk with almond or soy milk and use a dairy-free butter alternative.
  • Is this recipe Weight Watchers friendly? Yes! You can easily adjust the ingredients to keep it low-calorie.

Nutritional Tips and Dietary Adaptations

This dish can easily be tailored to fit various dietary needs:

  • Low-Calorie Option: Use skim milk, and lean chicken for a lighter dish.
  • Gluten-Free: Opt for gluten-free pasta and flour to make this recipe suitable for gluten-sensitive eaters.
  • Vegetarian: Replace chicken with plant-based proteins and use vegetable broth.

Equipment Recommendations

Here’s what you’ll need to whip up this delicious dish:

  • Large Pot: For boiling the noodles.
  • Skillet: A large, non-stick skillet is ideal for sautéing.
  • Measuring Cups and Spoons: Accurate measurements make for the best results!
  • Wooden Spoon: For stirring all those lovely ingredients together.

Serving Suggestions

To elevate your meal, consider pairing this dish with:

  • Crusty Bread: A warm piece of bread is perfect for soaking up the creamy sauce.
  • Side Salad: A fresh salad can balance the richness of the skillet.
  • Wine Pairing: A crisp white wine like Sauvignon Blanc complements the flavors beautifully.

Conclusion: Cook with Passion!

In this Creamy Chicken Noodle Skillet, you’ve discovered a recipe that is not only comforting but also brimming with possibilities. From the vibrant flavors to the tantalizing textures, every bite invites you to savor the moment. So go ahead, grab your skillet, add a little fire, and create a dish that’s sure to spark joy at your table. Remember, cooking is about exploration — let your taste buds lead the way!

Creamy Chicken Noodle Skillet

Prep Time 10 minutes
Cook Time 20 minutes
Total Time 30 minutes
Servings 4 servings
Calories 450
A quick and comforting one-pan meal featuring tender chicken, vegetables, and creamy noodles.

Ingredients

Pasta

  • 8 oz Kluski noodles
  • 1 cup carrots, chopped
  • 1/2 cup celery, chopped
  • 1 small yellow onion, chopped
  • 1 teaspoon butter
  • 2 cloves garlic, minced
  • 1 tablespoon all purpose flour
  • 1.5 cups chicken broth
  • 1/2 cup skim milk
  • 2 cups cooked chicken breast, shredded

Instructions 

  • Cook noodles in boiling water until al dente, then drain.
  • Melt butter in a skillet, cook vegetables for 4 minutes, add garlic, then stir in flour.
  • Add broth and milk, simmer until thickened, about 5 minutes.
  • Stir in cooked chicken and noodles, then serve.

Notes

For extra flavor, add herbs like parsley or thyme.
Calories: 450kcal
Cost: $15
Course: Main Course
Cuisine: American
Keyword: chicken, creamy, noodles

Nutrition

Calories: 450kcal | Carbohydrates: 55g | Protein: 35g | Fat: 10g | Sodium: 600mg

Discover a Flavor Explosion with Lemon Butter Salmon

If you’re ready to elevate your dinner game, look no further than this vibrant lemon butter salmon recipe. Combining the rich, flaky texture of salmon with the zingy brightness of lemon and the savory depth of butter, this dish is a culinary adventure waiting to happen. Add in crispy potatoes and roasted broccoli, and you have a meal that not only satisfies your hunger but also excites your taste buds. Dive into this recipe that transforms your dinner table into a feast of flavors!

Why You’ll Love This Recipe

This lemon butter salmon dish is more than just a meal; it’s an experience. Here are five compelling reasons to make it tonight:

  • Quick and Easy: With a total prep and cooking time of under an hour, this meal is perfect for busy weeknights.
  • Flavor-Balancing Act: The combination of zesty lemon, rich butter, and aromatic garlic creates a flavor profile that dances on your palate.
  • Nutritious and Delicious: Salmon is packed with omega-3 fatty acids, making this a heart-healthy choice without compromising on taste.
  • Versatile Pairings: This recipe pairs beautifully with a variety of sides, making it easy to customize to your family’s preferences.
  • Impressive Presentation: The vibrant colors of the dish make it a showstopper on any dinner table!

Ingredients Breakdown

Here’s what you’ll need to create this delicious lemon butter salmon:

  • 4 fillets salmon (6 oz each): Wild-caught salmon is recommended for superior flavor and health benefits.
  • 4 medium potatoes (about 2 lbs): You can substitute russet, Yukon gold, or even sweet potatoes for a twist.
  • 1 lb broccoli florets: Fresh is best, but frozen broccoli can work in a pinch.
  • 1/2 cup unsalted butter (1 stick): For a richer flavor, you can use ghee or vegan butter.
  • 2 lemons: One for juice and the other for beautiful slices as a garnish.
  • 4 cloves garlic (minced): Fresh garlic elevates the dish, but garlic powder can be used in a hurry.
  • 1 teaspoon salt: Adjust according to taste.
  • 1/2 teaspoon black pepper: Freshly cracked pepper adds a delightful kick.
  • 1 teaspoon paprika: Use smoked paprika for added depth.
  • 2 tablespoons olive oil: Essential for roasting the potatoes and broccoli.
  • Fresh parsley for garnish (optional): This adds a vibrant touch to your presentation!

Pro Tips for Perfect Lemon Butter Salmon

Close-up view of Lemon Butter Salmon, golden potatoes, and bright green broccoli.

Mastering this recipe is simple with these expert insights:

  • Fresh Ingredients Matter: Always opt for fresh lemon juice and herbs for the best flavor.
  • Pat Your Salmon Dry: Drying the fillets before cooking ensures a crispy exterior.
  • Don’t Overcrowd the Baking Sheet: Give your potatoes and broccoli room to roast and crisp up beautifully.
  • Use a Meat Thermometer: Aim for an internal temperature of 145°F (63°C) for perfectly cooked salmon.
  • Rest Before Serving: Letting the salmon sit for a few minutes after cooking helps retain moisture.
  • Make It a One-Pan Meal: Roasting everything together saves time and cleanup!
  • Experiment with Herbs: Add dill or thyme to the lemon butter for an aromatic twist.
  • Switch Up the Veggies: Feel free to swap in asparagus, green beans, or any seasonal veggie you love!

Avoid Common Mistakes

Even the most seasoned cooks can run into hiccups. Here are some common mistakes to avoid:

  • Overcooking the Salmon: Salmon cooks quickly; keep an eye on it to prevent dryness.
  • Inadequate Seasoning: Don’t skimp! Proper seasoning enhances all the flavors.
  • Using Cold Butter: For the best sauce consistency, use softened butter when making lemon butter sauce.
  • Ignoring the Resting Time: Skipping this step can lead to a dry salmon; always rest before serving.

Variations to Spice Up Your Meal

Want to mix things up? Here are some delightful variations:

  • Spicy Lemon Butter: Add a pinch of red pepper flakes to the butter for a kick.
  • Herbed Lemon Butter: Mix in fresh dill, thyme, or rosemary for an aromatic twist.
  • Asian-Inspired: Use soy sauce and ginger in place of lemon for a different flavor profile.
  • Grill It: Cook the salmon on the grill for a smoky flavor and charred texture.

Storage and Make-Ahead Instructions

This dish can easily be made ahead of time or stored for later:

  • Make-Ahead: Prepare the lemon butter sauce in advance and store it in the refrigerator for up to a week.
  • Storage: Store leftover salmon, potatoes, and broccoli in an airtight container for up to 3 days in the fridge.
  • Reheating: Reheat in the oven at 350°F (175°C) until warmed through for the best texture.

Frequently Asked Questions

Got questions? We’ve got answers:

  • Can I use frozen salmon? Yes! Just ensure it’s fully thawed before cooking for best results.
  • What’s the best side dish for lemon butter salmon? Couscous or a fresh salad complements it beautifully.
  • Can I make this dish gluten-free? Absolutely! All ingredients listed are gluten-free as is.
  • What can I substitute for broccoli? Asparagus, Brussels sprouts, or green beans work great.
  • Is there a dairy-free option? Use vegan butter or olive oil instead of unsalted butter.
  • How do I know when the salmon is done? It should flake easily with a fork and be opaque in color.
  • Can I prepare this dish in advance? You can prep the ingredients and store them separately until cooking.
  • What’s the ideal cooking temperature for salmon? The USDA recommends 145°F (63°C) for safe consumption.

Nutrition Tips and Dietary Adaptations

This dish is not only delicious but also packed with nutrients:

  • Heart-Healthy Fats: Salmon is an excellent source of omega-3 fatty acids, which promote heart health.
  • Vitamins and Minerals: Broccoli adds vitamins K and C, while potatoes provide potassium and fiber.
  • Low-Carb Option: Swap out potatoes for cauliflower for a low-carb alternative.

Equipment Recommendations

Having the right tools makes all the difference in the kitchen:

  • Baking Sheet: A sturdy, rimmed baking sheet is essential for roasting.
  • Medium Saucepan: Perfect for melting butter and mixing your lemon sauce.
  • Meat Thermometer: Ensures your salmon is perfectly cooked every time.
  • Chef’s Knife: A sharp knife makes prep work a breeze.

Serving Suggestions

When it comes time to serve, consider these ideas to enhance your dinner:

  • Garnish with Fresh Herbs: A sprinkle of parsley or dill adds a pop of color and flavor.
  • Serve with Lemon Wedges: Let guests squeeze fresh lemon juice over their salmon to brighten the dish.
  • Pair with Wine: A chilled Sauvignon Blanc or a light Pinot Noir complements the flavors beautifully.
  • Accompany with a Salad: A crisp mixed greens salad balances the richness of the salmon.

In conclusion, lemon butter salmon with crispy potatoes and roasted broccoli is more than a meal; it’s an invitation to explore the world of flavors in your kitchen. Embrace the adventure, get your skillet ready, and let your culinary journey begin!

Lemon Butter Salmon with Crispy Potatoes and Roasted Broccoli

Prep Time 15 minutes
Cook Time 40 minutes
Total Time 55 minutes
Servings 4 servings
Calories 650
A flavorful and healthy dish featuring tender salmon topped with lemon butter, crispy roasted potatoes, and tender broccoli, perfect for a satisfying meal.

Ingredients

Protein

  • 4 fillets salmon (6 oz each)

Vegetables

  • 4 medium potatoes (about 2 lbs)
  • 1 lb broccoli florets

Dairy & Oils

  • 1/2 cup unsalted butter (1 stick)
  • 2 lemons lemons (1 for juice, 1 for slices)
  • 4 cloves garlic (minced)
  • 2 tablespoons olive oil

Spices & Seasonings

  • 1 teaspoon salt
  • 1/2 teaspoon black pepper
  • 1 teaspoon paprika

Instructions 

  • Preheat oven to 425°F (220°C). Toss potatoes with olive oil, salt, pepper, and paprika; spread on a baking sheet and roast for 25 minutes.
  • Melt butter, add minced garlic, lemon juice, salt, and pepper. Set aside.
  • Push potatoes to one side, place salmon fillets on the sheet, spoon lemon butter over, add lemon slices, and arrange broccoli. Roast for 15-20 minutes.
  • Remove from oven, garnish with parsley if desired, and serve with crispy potatoes and broccoli.

Notes

Ensure not to overcook the salmon for best results.
Calories: 650kcal
Cost: $15
Course: Main Course
Cuisine: American
Keyword: Salmon

Nutrition

Calories: 650kcal | Carbohydrates: 60g | Protein: 45g | Fat: 30g | Sodium: 900mg

Transform Your Dinner with This Keto Tuna Casserole

Welcome to the vibrant world of flavors where cooking becomes an adventure! If you’re looking for a dish that’s not just low-carb but also bursting with taste, then this Keto Tuna Casserole is your ticket to culinary delight. Packed with gooey cheese, tender tuna, and a medley of vegetables, it’s the kind of comfort food that warms your soul and satisfies your cravings. Get ready to embrace a dish that transforms your dinner game!

Why You’ll Love This Recipe

  • Rich in Flavor: This keto tuna casserole features a harmonious blend of spices, creamy cheeses, and nutritious veggies, delivering a taste explosion with each bite.
  • Quick and Easy: Perfect for busy nights, this recipe comes together in under an hour, making it a fantastic weeknight meal.
  • Low-Carb Goodness: With minimal carbs, this casserole is a perfect fit for your keto lifestyle, helping you stay on track without sacrificing flavor.
  • Versatile Ingredients: The ingredients can easily be tailored to your taste and dietary needs, allowing for endless customization.
  • Meal Prep Friendly: Make a big batch and enjoy leftovers throughout the week, saving you time and effort during your busy days.

Ingredients for Keto Tuna Casserole

Let’s dive into the heart of this dish—the ingredients! Each one plays a vital role in creating the perfect balance of flavor and texture. Here’s what you’ll need:

  • 2 tbsps (28g) butter: Adds richness and depth.
  • 1/2 onion (60g), chopped: For a sweet, aromatic base.
  • 2 cups (200g) sliced mushrooms: Adds earthiness and moisture.
  • 1 cup (30g) chopped spinach: A nutritious boost of color and flavor.
  • 2 five-ounce cans of tuna packed in water, drained: The star protein of this dish.
  • 1 cup (112g) grated mozzarella cheese: For that melty goodness.
  • 1 cup (113g) cream cheese, cubed: Creates a creamy texture.
  • 1 teaspoon Italian seasoning: Adds a burst of herbal flavors.
  • Salt and pepper to taste: Essential for seasoning.
  • 2 cups (224g) shredded Cheddar Cheese: The perfect topping for a golden finish.
  • 2 tbsp (28g) almond flour: Helps achieve a crispy topping.

Ingredient Substitutions

Close-up of a creamy Keto Tuna Casserole, featuring mushrooms and spinach.

If you’re missing an ingredient or want to make this your own, here are some easy substitutions:

  • Butter: Use olive oil or coconut oil for a dairy-free option.
  • Onion: Shallots or leeks can provide a milder flavor.
  • Mushrooms: Zucchini or bell peppers can add a different texture.
  • Spinach: Kale or Swiss chard are great alternatives.
  • Tuna: Canned chicken or salmon can work in a pinch.
  • Cheeses: Use any melty cheese like provolone or gouda.
  • Almond flour: Substitute with coconut flour or crushed pork rinds for a different crunch.

How to Make Keto Tuna Casserole

Now that we have our ingredients ready, let’s get cooking! Follow these simple steps to whip up your casserole.

  • Step 1: Preheat the Oven: Preheat your oven to 350°F (176°C) and coat a 9×9 inch baking dish with cooking spray.
  • Step 2: Prep Your Vegetables: Chop the spinach and onions, and slice the mushrooms.
  • Step 3: Sauté the Onions: In a large pan, melt the butter over high heat. Add the onions and sauté for about 3 minutes.
  • Step 4: Add Mushrooms: Once the onions soften, add the sliced mushrooms and cook for about 5 minutes, stirring often, until they reduce in size.
  • Step 5: Incorporate Spinach: Add in the chopped spinach and stir until it wilts. Then reduce the heat to low.
  • Step 6: Mix in the Cheeses: Add the cream cheese, mozzarella, Italian seasoning, salt, and pepper to the pan. Cook until the cheese begins to melt and blend with the veggies.
  • Step 7: Add Tuna: Incorporate the drained tuna and stir until everything is well combined.
  • Step 8: Assemble the Casserole: Spoon the mixture evenly into your prepared baking dish. Top with shredded cheddar and sprinkle almond flour over the top.
  • Step 9: Bake: Place in the oven and bake for 15-20 minutes or until the surface is crisped and golden brown.

Pro Tips for the Perfect Casserole

  • Use Fresh Ingredients: Fresh veggies and quality canned tuna will elevate the flavor of your casserole.
  • Don’t Overcook: Keep an eye on the baking process to ensure it doesn’t dry out; you want that creamy texture.
  • Experiment with Spices: Feel free to add your favorite spices or herbs to customize the taste.
  • Let It Rest: Allow the casserole to sit for a few minutes after baking for easier serving.
  • Double the Recipe: For family gatherings, consider doubling the ingredients and using a larger dish.
  • Freeze for Later: This casserole freezes well; just make sure to cool it completely before storing.
  • Pair with a Salad: Serve with a fresh green salad to balance the richness of the casserole.
  • Use Leftover Tuna: If you have leftover tuna from a previous meal, use it to save time!

Common Mistakes and Troubleshooting

Even the best chefs can run into hiccups while cooking. Here are some common mistakes and how to fix them:

  • Too Dry: If your casserole turns out dry, it might have baked too long. Next time, keep an eye on the timer.
  • Flavorless: If it lacks flavor, consider adding more seasoning or fresh herbs.
  • Too Watery: Ensure your vegetables are properly drained to avoid excess moisture.
  • Burnt Topping: If the top burns before the casserole is cooked through, cover it with foil until the last few minutes of baking.

Variations of Keto Tuna Casserole

Let’s embrace creativity! Here are some tasty variations to keep things exciting:

  • Spicy Tuna Casserole: Add diced jalapeños or a sprinkle of cayenne pepper for a kick.
  • Veggie-Packed Version: Incorporate additional vegetables like broccoli, cauliflower, or bell peppers.
  • Cheesy Broccoli Tuna Casserole: Mix in cooked broccoli florets for added nutrition and flavor.
  • Buffalo Tuna Casserole: Stir in buffalo sauce for a zesty twist that pairs perfectly with ranch dressing.

Storage and Make-Ahead Instructions

Planning ahead? Here’s how to store your casserole and make it in advance:

  • Refrigerate: Store leftovers in an airtight container in the fridge for up to 4 days.
  • Freeze: For longer storage, freeze the casserole before baking. Wrap it tightly in foil or plastic wrap.
  • Make Ahead: Prepare the casserole up to the baking step, cover, and refrigerate for up to 24 hours before baking.

Comprehensive FAQ

Got questions? I’ve got answers! Here are some common inquiries about this delicious keto tuna casserole:

  • Can I use fresh tuna? Absolutely! Just cook it first and flake it into the mixture.
  • Is this dish gluten-free? Yes, as long as you use gluten-free ingredients like almond flour.
  • What can I serve with this casserole? It pairs wonderfully with a side salad or steamed vegetables.
  • Can I make this dairy-free? Yes! Substitute cream cheese with a dairy-free alternative and use non-dairy cheese.
  • How do I reheat leftovers? Reheat in the microwave or oven until heated through.
  • How long does this casserole last? It lasts in the fridge for up to 4 days; in the freezer, up to 3 months.
  • Can I add pasta? For a non-keto version, you can mix in cooked low-carb pasta or zucchini noodles.
  • What’s the carb count per serving? This casserole is low-carb, typically around 4-6g net carbs per serving, depending on specific ingredients.

Nutrition Tips and Dietary Adaptations

For those watching their nutrition, here are some insights:

  • High in Protein: This casserole is a great source of protein from tuna and cheese, supporting muscle health.
  • Low in Carbs: Ideal for keto diets, keeping your carbohydrate intake low while enjoying a hearty meal.
  • Rich in Healthy Fats: Beneficial fats from cheese and butter help keep you satiated.
  • Fiber Boost: Add more vegetables to increase fiber content, promoting digestive health.

Equipment Recommendations

To make your cooking experience smoother, here are some essential tools:

  • 9×9 inch Baking Dish: Perfect size for this casserole.
  • Large Skillet: For sautéing your vegetables and combining ingredients.
  • Spatula: Useful for mixing and serving.
  • Measuring Cups and Spoons: Ensure accurate ingredient measurements for the best results.

Serving Suggestions

Make every meal a feast! Here are my favorite serving ideas:

  • With a Fresh Garden Salad: A crisp salad balances the richness of the casserole.
  • Top with Avocado: Sliced avocado adds creaminess and healthy fats.
  • Serve with Cauliflower Rice: A low-carb side that complements the flavors perfectly.
  • Pair with a Glass of Wine: Enjoy with a light white wine for a delightful dinner experience.

In conclusion, this Keto Tuna Casserole is not just a meal; it’s a celebration of flavors, creativity, and the joy of cooking. So grab your skillet, channel your inner chef, and dive into this mouth-watering dish that promises to elevate your dinner game! Remember, cooking is an adventure — let this casserole be your next exciting journey! Bon appétit!

Keto Tuna Casserole | One of The Best Keto Casserole Recipes

Prep Time 10 minutes
Cook Time 20 minutes
Total Time 30 minutes
Servings 4 servings
Calories 650
A delicious low-carb tuna casserole packed with cheesy goodness and vegetables, perfect for a quick keto-friendly meal.

Ingredients

Dairy and Vegetables

  • 28 g butter
  • 60 g onion, chopped
  • 200 g sliced mushrooms
  • 30 g chopped spinach
  • 2 cans (5 oz each) tuna packed in water, drained
  • 112 g grated mozzarella cheese
  • 113 g cream cheese, cubed
  • 1 tsp Italian seasoning
  • to taste Salt and pepper
  • 224 g shredded Cheddar Cheese
  • 28 g almond flour

Instructions 

  • Preheat oven to 350°F (176°C) and spray a 9x9 inch baking dish.
  • Sauté onions in butter for 3 minutes, then add mushrooms and cook for 5 minutes. Add spinach and cook until wilted.
  • Add cream cheese, mozzarella, Italian seasoning, salt, and pepper; cook until cheese melts.
  • Stir in drained tuna, then transfer mixture to the baking dish. Top with shredded cheddar and sprinkle almond flour.
  • Bake for 15-20 minutes until golden and crispy on top.

Notes

This casserole is perfect for a quick, satisfying keto dinner with plenty of cheesy flavor and healthy ingredients.
Calories: 650kcal
Cost: $15
Course: Main Course
Cuisine: American
Keyword: casserole, Keto, Tuna

Nutrition

Calories: 650kcal | Carbohydrates: 12g | Protein: 55g | Fat: 45g | Sodium: 950mg