Author

Avery Collins

Browsing

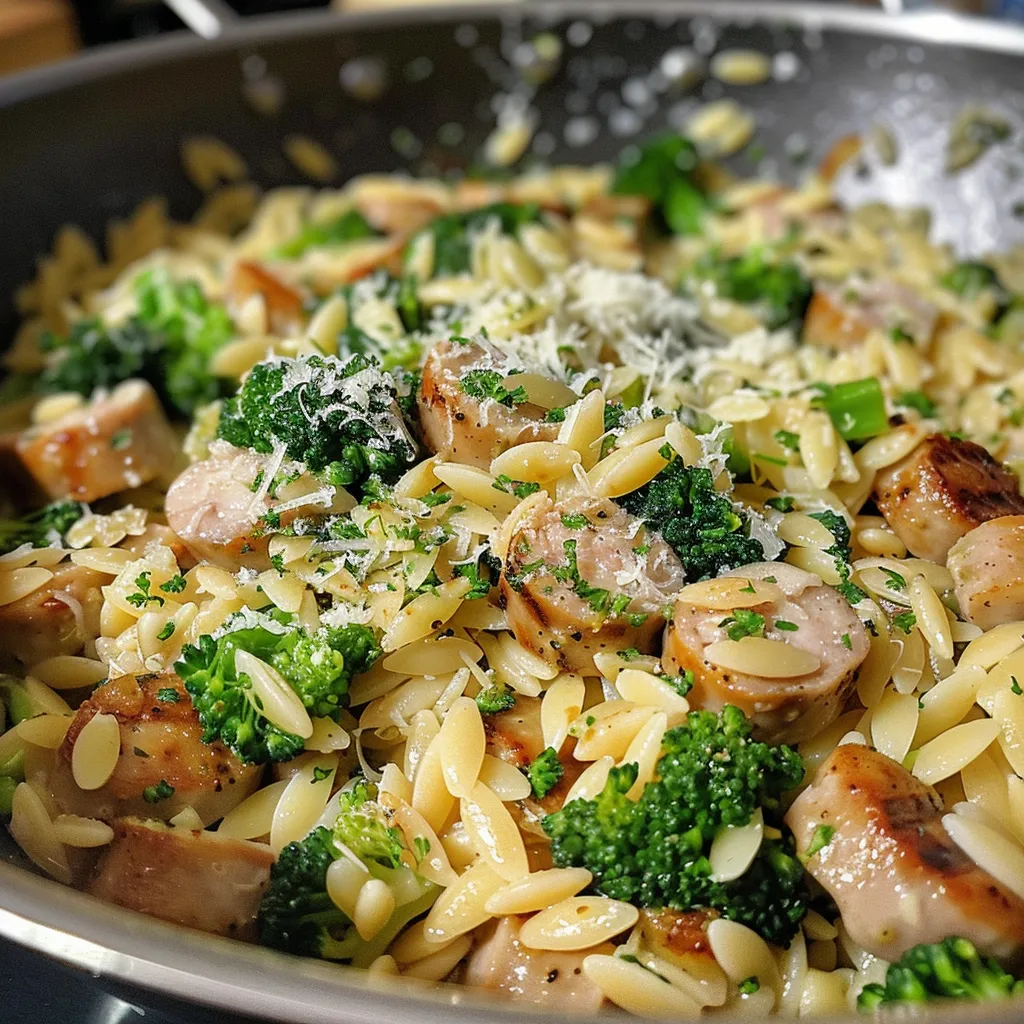
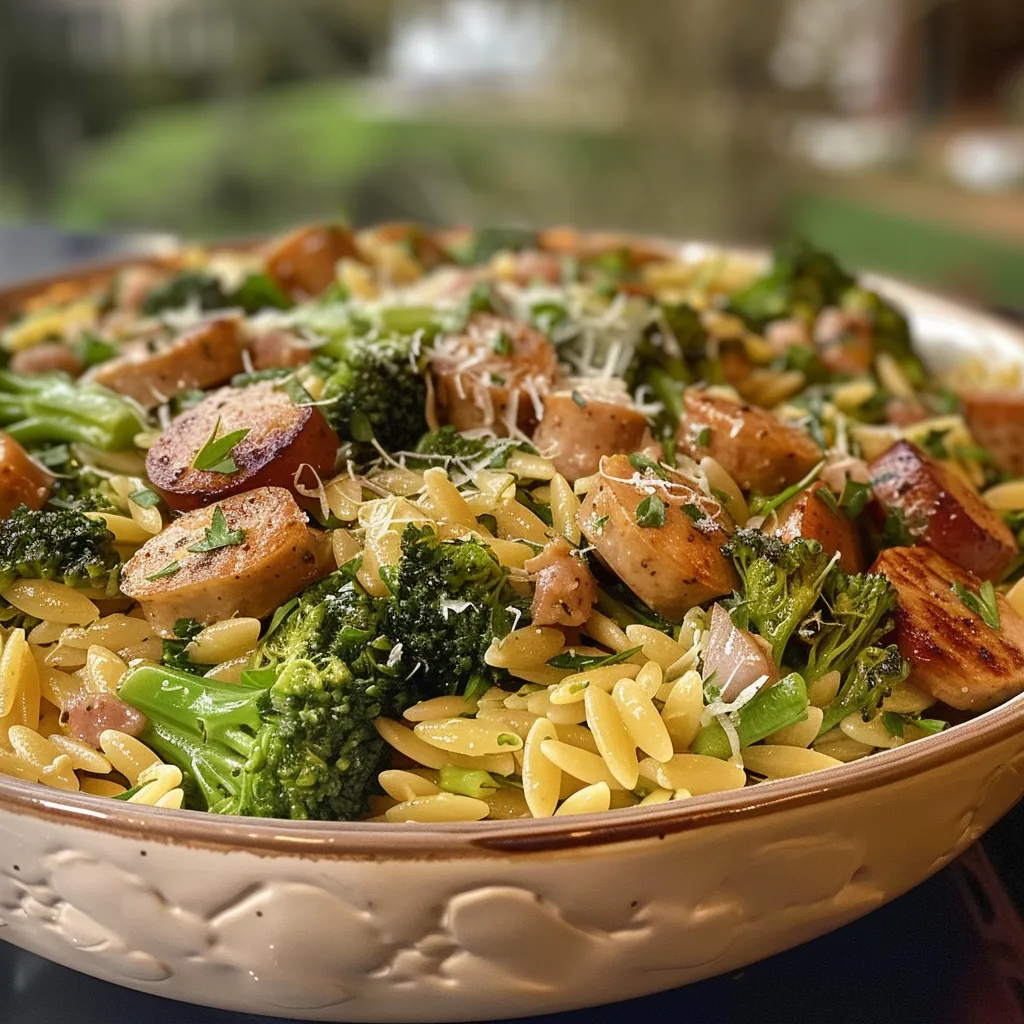
Ignite Your Culinary Adventure with Chicken Sausage and Broccoli Orzo

Welcome to the world of flavor and spice! This Chicken Sausage and Broccoli Orzo recipe is more than just a meal; it’s an experience, a journey that whisks you away to the heart of culinary creativity. If you’re craving a dish that’s not only satisfying but also bursting with a delightful medley of flavors, you’ve hit the jackpot! Packed with protein, vibrant vegetables, and the irresistible charm of orzo, this dish is a perfect canvas for your culinary artistry. Ready to cook? Let’s dive into the delicious details of this dish!

Why You’ll Love This Recipe

This isn’t just another recipe to add to your collection; it’s a culinary delight that promises to elevate your weeknight dinners. Here are just a few reasons why you’ll adore this Chicken Sausage and Broccoli Orzo:

  • One-Pan Wonder: Less clean-up means more time to savor the flavors and relax after a long day!
  • Quick & Easy: Ready in about 30 minutes, this dish is perfect for busy weeknights when you want a hearty meal without the hassle.
  • Flavor Explosion: The combination of chicken sausage, garlic, and fresh broccoli creates a savory profile that dances on your palate.
  • Nutritious Balance: With protein from the chicken sausage and fiber from the broccoli, this dish is as good for you as it is delicious.
  • Customizable: With simple substitutions and variations, you can make this dish your own every time you cook it!

Ingredients Breakdown

Before you start cooking, let’s break down what you’ll need to create this masterpiece. Here’s a list of ingredients along with potential substitutions to suit your taste:

  • 2 cups orzo pasta: A tiny pasta shape that cooks quickly and soaks up flavors. You can substitute it with quinoa or brown rice for a gluten-free option.
  • 1 tablespoon olive oil: Essential for sautéing, you can use avocado oil or butter for a different flavor.
  • 1 pound chicken sausage, sliced: Choose your favorite variety—spicy, sweet, or even herb-infused. Turkey sausage works too for a leaner option!
  • 2 cups broccoli florets: Fresh is best, but frozen broccoli will also work in a pinch.
  • 3 cloves garlic, minced: Fresh garlic is essential for aromatic richness. You can use garlic powder if you’re in a hurry.
  • 4 cups chicken broth: Homemade or store-bought, or use vegetable broth for a vegetarian version.
  • 1 teaspoon Italian seasoning: A blend of herbs that adds depth; feel free to use individual herbs like basil, oregano, and thyme.
  • Salt and pepper to taste: Don’t forget to season your dish to enhance its flavors!
  • 1/2 cup grated Parmesan cheese: This adds creaminess and richness. Nutritional yeast can be a great dairy-free substitute.
  • 2 tablespoons fresh parsley, chopped (for garnish): Fresh herbs brighten the dish; you can use basil or cilantro for a twist!

How to Make This Delicious Dish

Side angle photo showcasing Chicken Sausage mixed with broccoli and orzo pasta.

Let’s get cooking! Follow these steps to whip up a plate of Chicken Sausage and Broccoli Orzo that will make your taste buds dance:

  1. In a large pot, heat the olive oil over medium heat. Add the sliced chicken sausage and cook until browned, about 5-7 minutes.
  2. Add the minced garlic and cook for an additional 1 minute until fragrant.
  3. Stir in the broccoli florets and cook for 2-3 minutes until they start to soften.
  4. Add the orzo, chicken broth, Italian seasoning, salt, and pepper. Bring to a boil, then reduce heat to a simmer.
  5. Cover and cook for about 10-12 minutes, stirring occasionally, until the orzo is tender and has absorbed most of the liquid.
  6. Remove from heat and stir in the grated Parmesan cheese until melted and well combined.
  7. Serve hot, garnished with fresh parsley.

Pro Tips for Success

To ensure your Chicken Sausage and Broccoli Orzo turns out perfectly, keep these expert tips in mind:

  • Don’t Skimp on the Sauté: Browning the sausage adds depth of flavor, so give it enough time in the pan.
  • Mind the Broccoli: Add broccoli later in the cooking process to retain its vibrant color and nutrients.
  • Stir Often: Stirring the orzo prevents it from sticking and ensures even cooking.
  • Adjust the Liquid: If your orzo isn’t cooking as expected, add a splash more broth to keep it moist.
  • Cheese It Up: For an extra creamy finish, stir in more Parmesan or a splash of heavy cream.
  • Spinach Swap: Feel free to replace broccoli with spinach for a different texture and flavor, but add it last!
  • Batch Cooking: Make a double batch and freeze for quick meals later on!
  • Herb Variations: Experiment with different herbs to create unique flavor profiles!

Common Mistakes and Troubleshooting

Even seasoned chefs can run into a hiccup. Here’s how to troubleshoot and avoid common pitfalls:

  • Overcooking the Orzo: Keep an eye on the cooking time to avoid mushy pasta. Remember, it should be al dente!
  • Skipping Seasoning: Don’t forget to taste and adjust seasoning. A pinch of salt can make a world of difference!
  • Not Enough Liquid: Ensure you have enough broth to cook the orzo properly; it should absorb the liquid without drying out.
  • Choosing the Wrong Sausage: The type of sausage affects the flavor; be bold and choose one that sparks your interest!

Variations to Suit Your Taste

This recipe is incredibly versatile. Here are some fun variations you can try:

  • Spicy Kick: Add crushed red pepper flakes for a heat boost that’ll wake up your taste buds!
  • Mediterranean Twist: Toss in sun-dried tomatoes and olives to give the dish a zesty Mediterranean flair.
  • Vegetarian Version: Replace sausage with chickpeas for protein and add an array of colorful veggies.
  • Cheesy Delight: Mix in different cheeses like feta or gouda for varied flavor profiles.

Storage and Make-Ahead Instructions

If you want to meal prep or store leftovers, follow these guidelines:

  • Refrigeration: Store leftovers in an airtight container in the refrigerator for up to 3 days.
  • Freezing: Freeze portions in airtight containers for up to 2 months. Thaw in the fridge overnight before reheating.
  • Reheating: Reheat on the stovetop or microwave, adding a splash of broth to restore creaminess.

Frequently Asked Questions

Got questions? We’ve got answers! Here are some of the most common inquiries about this recipe:

  • Can I use different types of sausage? Absolutely! Feel free to explore turkey, pork, or even plant-based sausages.
  • What can I substitute for orzo? Quinoa, rice, or even couscous are great alternatives!
  • Can I add more vegetables? Yes! Carrots, peas, or bell peppers can boost nutrition and flavor.
  • Is this dish gluten-free? Use gluten-free orzo or a suitable substitute for a gluten-free version.
  • How can I make it creamier? Stir in cream cheese or extra cheese for a more indulgent texture.
  • Can I make this ahead of time? Yes! Prepare everything and store it separately until you’re ready to cook.
  • How do I store leftovers? Refrigerate in an airtight container for up to 3 days or freeze for longer storage.
  • What sides pair well with this dish? A light salad, garlic bread, or a refreshing cucumber salad complement this meal beautifully.

Nutrition Tips and Dietary Adaptations

This Chicken Sausage and Broccoli Orzo isn’t just delicious; it can be tailored to fit a variety of dietary needs:

  • Low-Carb Option: Swap out orzo for cauliflower rice for a low-carb alternative.
  • Dairy-Free: Use nutritional yeast instead of cheese and coconut milk for creaminess.
  • High-Protein: Add beans or lentils for an extra protein punch!
  • Vegan Option: Replace sausage with a plant-based alternative and omit cheese.

Equipment Recommendations

To make cooking easier and more efficient, here’s a list of kitchen tools that will help you whip up this recipe:

  • Large Pot: A heavy-bottomed pot is ideal for even cooking and preventing sticking.
  • Wooden Spoon: Great for stirring ingredients without scratching your cookware.
  • Measuring Cups & Spoons: For precise measurements that ensure perfect results.
  • Chef’s Knife: A sharp knife is essential for chopping veggies and sausage with ease.

Serving Suggestions

How you present your dish can elevate the dining experience. Here are some serving suggestions that will impress:

  • Garnish Generously: Top with fresh herbs and a sprinkle of cheese for an inviting look!
  • Pair with Wine: A crisp white wine like Sauvignon Blanc complements the flavors beautifully.
  • Accompany with Bread: Serve with crusty bread to soak up any leftover sauce.
  • Plate Creatively: Use colorful plates or bowls to make the dish pop visually!

Conclusion

Cooking is an adventure, and this Chicken Sausage and Broccoli Orzo is your passport to a world of flavors! With its rich tapestry of ingredients and textures, it’s a dish that brings warmth and satisfaction to your table. Whether you’re feeding a family or preparing a meal for one, this recipe is designed to make you feel like a culinary rockstar. So grab your skillet, embrace the fire, and embark on this delicious journey that will leave your taste buds singing. Happy cooking!

Chicken Sausage and Broccoli Orzo

Prep Time 10 minutes
Cook Time 15 minutes
Total Time 25 minutes
Servings 4 servings
Calories 550
A flavorful and hearty dish combining tender chicken sausage, fresh broccoli, and orzo pasta in a savory broth, topped with Parmesan and parsley.

Ingredients

pasta

  • 2 cups orzo pasta
  • 1 tablespoon olive oil

meat

  • 1 pound chicken sausage, sliced

vegetables

  • 2 cups broccoli florets
  • 3 cloves garlic, minced

liquid

  • 4 cups chicken broth
  • 1 teaspoon Italian seasoning
  • to taste Salt and pepper
  • 1/2 cup grated Parmesan cheese
  • 2 tablespoons fresh parsley, chopped (for garnish)

Instructions 

  • Heat olive oil in a large pot. Cook sausage until browned, then add garlic and cook 1 minute.
  • Add broccoli and cook 2-3 minutes. Stir in orzo, broth, Italian seasoning, salt, and pepper. Bring to boil.
  • Reduce heat, cover, and simmer 10-12 minutes until orzo is tender and liquid is absorbed.
  • Remove from heat, stir in Parmesan cheese, and garnish with parsley. Serve hot.

Notes

Feel free to add a squeeze of lemon for extra freshness.
Calories: 550kcal
Cost: $15
Course: Main Course
Cuisine: Italian-American
Keyword: chicken sausage

Nutrition

Calories: 550kcal | Carbohydrates: 70g | Protein: 30g | Fat: 20g | Sodium: 900mg

Why You’ll Love This Recipe

If you’re searching for a recipe that embodies the essence of comfort food, look no further than this Instant Pot Homestyle Chicken & Veggies. Picture this: succulent chicken breasts, tender vegetables, and a savory broth, all harmoniously blended together in a single pot. This dish is not only a delight to the senses but also a lifesaver for busy weeknights. With the magic of the Instant Pot, we can transform everyday ingredients into a meal that sings with flavor!

My journey with cooking has always been about celebrating flavors and embracing creativity. This recipe, in particular, draws on my passion for bold, vibrant tastes while still being simple enough for anyone to whip up. Whether you’re a seasoned chef or just starting out, you’ll find that this dish stands as a testament to how cooking can be both easy and exciting!

Ingredients: The Building Blocks of Flavor

To make this comforting dish, you will need the following ingredients:

  • 4 boneless, skinless chicken breasts
  • 2 cups mixed vegetables (carrots, peas, and corn)
  • 1 onion, diced
  • 3 cloves garlic, minced
  • 1 cup chicken broth
  • 1 teaspoon dried thyme
  • 1 teaspoon dried rosemary
  • Salt and pepper to taste
  • 2 tablespoons olive oil
  • 1 tablespoon cornstarch (optional, for thickening)

Each ingredient plays a vital role in crafting a dish that is not only healthy but also bursting with flavor. The chicken serves as the star, while the medley of vegetables brings a colorful, nutritious crunch. The aromatic herbs elevate the dish, creating layers of flavor that dance on your palate!

Instructions: Step-by-Step to Dinner Delight

Bowl of homestyle chicken and veggies with garlic and herbs, shot at eye level in soft, inviting lighting.

Let’s dive into the cooking process! Trust me, the aroma that fills your kitchen while this is cooking will have everyone eagerly awaiting dinner.

  1. Start by turning on your Instant Pot and selecting the ‘Sauté’ function. Add the olive oil and let it heat up.
  2. Once hot, toss in the diced onion and minced garlic. Sauté for about 2-3 minutes, or until they become soft and fragrant.
  3. Season the chicken breasts generously with salt, pepper, thyme, and rosemary. Add them to the pot and brown each side for about 3 minutes. This step is crucial for locking in those delicious flavors!
  4. Pour in the chicken broth and gently scrape up any browned bits from the bottom of the pot. This adds depth to your broth!
  5. Now, add the mixed vegetables on top of the chicken. Don’t worry about stirring; we want those veggies to steam beautifully.
  6. Close the lid of the Instant Pot and set the valve to ‘Sealing’. Select ‘Pressure Cook’ and set the timer for 10 minutes.
  7. Once the cooking time is complete, allow for a natural pressure release for 5 minutes. Then carefully switch the valve to ‘Venting’ to release any remaining pressure.
  8. Open the lid and, if you desire a thicker sauce, mix the cornstarch with a little water to create a slurry. Stir it into the pot, then turn on the ‘Sauté’ function again until the sauce thickens to your liking.
  9. Serve hot and enjoy the comforting warmth of this delightful dish!

Nutritional Benefits: Nourishing Your Body

This Instant Pot Homestyle Chicken & Veggies is not just a feast for the senses, but it’s also packed with nutrients. Each serving provides a healthy balance of protein, fiber, and essential vitamins that will nourish your body and keep you energized throughout the day.

Here’s a rough breakdown of the nutritional profile per serving:

  • Calories: Approximately 350
  • Protein: 30g
  • Carbohydrates: 25g
  • Fiber: 4g
  • Fat: 15g

These values can vary depending on the specific ingredients you use, but the overall health benefits remain substantial. Remember, healthy meals can be delicious too!

Preparation Time: Quick and Convenient

One of the biggest advantages of using the Instant Pot is the speed at which you can prepare a wholesome meal. The total preparation and cooking time for this recipe is around 30 minutes. This makes it an ideal choice for busy evenings when you need to get dinner on the table fast!

How to Serve: Delicious Serving Suggestions

This dish is perfect on its own, but if you want to elevate your dining experience, consider these serving suggestions:

  • Serve over a bed of fluffy rice or quinoa to soak up the flavorful broth.
  • Pair with a fresh green salad for a refreshing crunch.
  • Top with freshly chopped parsley or chives for a pop of color and freshness.
  • For an extra kick, drizzle some hot sauce over the top!

Additional Tips: Elevating Your Recipe

Want to make your Instant Pot Homestyle Chicken & Veggies even better? Here are some simple tips to elevate the dish:

  • Experiment with Spices: Add a pinch of cayenne pepper or smoked paprika for an extra layer of flavor.
  • Variety of Vegetables: Feel free to substitute or add vegetables based on what’s in season or what you have on hand. Broccoli, bell peppers, or even sweet potatoes can work wonderfully!
  • Quality Matters: Use high-quality chicken and fresh vegetables for the best taste.
  • Make It a Meal Prep Superstar: This dish stores well, making it perfect for meal prep. Just double the recipe to have ready-to-eat lunches throughout the week!

FAQ: Your Questions Answered

Here are some commonly asked questions about this recipe:

  • Can I use frozen chicken? Yes! You can use frozen chicken breasts, but you may need to increase the pressure cooking time to about 15-20 minutes. Ensure they are not stuck together for even cooking.
  • What if I don’t have an Instant Pot? You can adapt this recipe for stovetop or oven cooking, though it will take longer. Just ensure everything is cooked through and tender.
  • How do I store leftovers? Store any leftovers in an airtight container in the refrigerator for up to 3-4 days or freeze for up to 2-3 months.
  • Can I double the recipe? Absolutely! Just double all the ingredients and keep an eye on the pressure cooking time, which should remain the same.

Troubleshooting: Common Issues and Solutions

Even the best cooks encounter hiccups. Here are some troubleshooting tips:

  • Too Much Liquid: If you find the dish too soupy, you can use the ‘Sauté’ function to reduce the liquid to your desired consistency.
  • Chicken Not Cooked Through: If your chicken isn’t fully cooked, simply seal the pot and cook for an additional 2-3 minutes.
  • Burn Notice: If you experience a burn notice, ensure you’re scraping the bottom of the pot well after browning the chicken and before adding the broth.

No matter what, don’t be discouraged! Cooking is all about learning and adapting.

Conclusion: A Hug in a Bowl

There you have it, friends! This Instant Pot Homestyle Chicken & Veggies recipe is your ticket to a warm, comforting meal that the whole family will love. It’s a celebration of flavors, simplicity, and the joy of cooking. Remember, the kitchen is your playground — get creative, have fun, and don’t shy away from exploring new flavors.

As you gather around the table to enjoy this delicious dish, revel in the warmth that comes from sharing a meal made with love. So grab your Instant Pot, gather your ingredients, and let the adventure begin. Happy cooking!

Instant Pot Homestyle Chicken & Veggies – Comfort in a Pot!

Prep Time 10 minutes
Cook Time 15 minutes
Total Time 25 minutes
Servings 4 servings
Calories 350
A hearty and comforting chicken and vegetable dish cooked effortlessly in the Instant Pot, perfect for a quick wholesome meal.

Ingredients

Protein

  • 4 pieces boneless, skinless chicken breasts

Vegetables

  • 2 cups mixed vegetables (carrots, peas, and corn)

Aromatics

  • 1 piece onion, diced
  • 3 cloves garlic, minced

Liquids

  • 1 cup chicken broth

Spices & Oils

  • 1 teaspoon dried thyme
  • 1 teaspoon dried rosemary
  • to taste salt and pepper
  • 2 tablespoons olive oil
  • 1 tablespoon cornstarch (optional, for thickening)

Instructions 

  • Set Instant Pot to 'Sauté' and heat olive oil. Sauté onion and garlic for 2-3 minutes.
  • Season chicken with salt, pepper, thyme, and rosemary. Brown each side for 3 minutes.
  • Add chicken broth, scrape browned bits, then layer vegetables on top.
  • Close lid, set to 'Sealing', pressure cook for 10 minutes, then natural release for 5 minutes.
  • Optional: Mix cornstarch with water, stir into pot, and simmer until thickened.

Notes

For a thicker sauce, add cornstarch slurry at the end.
Calories: 350kcal
Cost: $15
Course: Main Course
Cuisine: American
Keyword: chicken, instant pot, vegetables

Nutrition

Calories: 350kcal | Carbohydrates: 30g | Protein: 40g | Fat: 10g | Sodium: 600mg

Loved this recipe? Save it to your favorite Pinterest board so you can easily find it later! It’s the perfect way to keep all your sweet ideas in one place. ✨

Delicious Instant Pot dish featuring juicy chicken, carrots, peas, and corn with a cozy background blur.

Why You’ll Love This Recipe

If you’re ready to embark on a culinary adventure that will ignite your senses and warm your heart, then you’ve landed in the right place! This Low-Carb Chicken Tikka Masala is not just a meal; it’s a celebration of flavor, a dash of tradition, and a sprinkle of innovation. With its rich spices and creamy texture, this dish captures the essence of Indian cuisine while keeping it light and healthy. Imagine tender pieces of chicken bathing in a luscious sauce that marries the tang of yogurt with the warmth of spices. Each bite is a journey that invites you to dive deeper into the world of cooking with fire and flavor.

Ingredients You’ll Need:

  • 1 lb chicken breast, cubed
  • 1 cup plain Greek yogurt
  • 2 tbsp tikka masala spice blend
  • 2 tbsp olive oil
  • 1 medium onion, chopped
  • 3 cloves garlic, minced
  • 1 inch ginger, grated
  • 1 can (14 oz) diced tomatoes
  • 1 cup coconut cream
  • Salt to taste
  • Fresh cilantro, for garnish

Crafting the Perfect Dish

Delicious Chicken Tikka Masala served in a bowl, showcasing tender chicken pieces and creamy sauce.

Cooking this Low-Carb Chicken Tikka Masala is as easy as it is rewarding. Follow along as we transform simple ingredients into a dish that dazzles. You don’t need to be a master chef to create something spectacular—just a little patience and a willingness to embrace the process. Here’s how to make it:

Step-by-Step Instructions

  1. In a bowl, combine the cubed chicken, Greek yogurt, and tikka masala spice blend. Marinate for at least 30 minutes, allowing those flavors to meld. Trust me, you’ll thank yourself later!
  2. Heat the olive oil in a large skillet over medium heat. Once hot, add the chopped onion and sauté until it becomes translucent, releasing its sweet aroma.
  3. Add the minced garlic and grated ginger to the skillet, cooking for another minute until fragrant. This combination is the backbone of authentic Indian cooking.
  4. Now, add the marinated chicken to the skillet, cooking until browned on all sides. The yogurt will help seal in moisture, keeping your chicken juicy and tender.
  5. Stir in the diced tomatoes and coconut cream, bringing the mixture to a simmer. This is where the magic happens—watch as the sauce transforms into a creamy delight.
  6. Reduce the heat and let it cook for about 15-20 minutes, until the chicken is cooked through and the sauce thickens to your desired consistency. Don’t rush this part; it’s all about building layers of flavor.
  7. Season with salt to taste and garnish with fresh cilantro before serving. This final touch adds a burst of freshness that perfectly complements the rich sauce.

Tips for Success

  • Marinate Longer: If you have time, marinating the chicken overnight will deepen the flavors even more.
  • Adjust Spice Levels: If you’re a spice lover, feel free to add a pinch of cayenne to the marinade for an extra kick!
  • Texture Control: For a smoother sauce, blend the diced tomatoes before adding them to the skillet.

Variations to Explore

This dish is incredibly versatile! Here are a few variations you can try:

  • Vegetarian Option: Substitute the chicken with paneer or chickpeas for a delicious plant-based version.
  • Different Proteins: Lamb or shrimp can also be used in place of chicken for a unique twist.
  • Low-Calorie Twist: Use light coconut cream or even Greek yogurt in place of the coconut cream for a lighter sauce.

Substitutions You Can Make

Cooking is all about creativity, and substitutions can often yield delightful results. Here are some suggestions:

  • Instead of Greek yogurt, you can use regular yogurt, but make sure to drain it for a thicker consistency.
  • If you don’t have tikka masala spice blend, you can create your own using cumin, coriander, turmeric, and garam masala.
  • For a dairy-free version, replace the coconut cream with almond or cashew cream.

Essential Equipment

Before you roll up your sleeves, make sure you have the right equipment handy:

  • A large skillet or sauté pan for cooking.
  • A mixing bowl for marinating the chicken.
  • A measuring cup and spoons for precise ingredient amounts.
  • A sharp knife and cutting board for easy prep.

Storage and Freezing Tips

Leftovers? Yes, please! Here’s how to store your Chicken Tikka Masala:

  • Refrigeration: Store in an airtight container in the fridge for up to 4 days.
  • Freezing: This dish freezes beautifully! Portion it out and keep it in freezer-safe containers for up to 3 months.
  • Reheating: To reheat, thaw in the fridge overnight and warm in a skillet or microwave, adding a splash of water if the sauce thickens too much.

FAQs

Can I make this recipe in advance?

Absolutely! This dish tastes even better the next day, as the flavors continue to develop. Just reheat before serving.

What can I serve with Chicken Tikka Masala?

Pair this dish with cauliflower rice for a low-carb option, or serve it with whole grain naan for a heartier meal.

Is it possible to make this dish spicier?

Troubleshooting Common Issues

Every cook faces challenges, but don’t let them deter you! Here are some common issues and how to tackle them:

  • Sauce Too Thin: If your sauce is too thin, let it simmer longer to reduce and thicken.
  • Chicken Overcooked: If your chicken ends up dry, try marinating it a little longer next time and cooking on lower heat.
  • Too Spicy: Balance out the heat by adding a dollop of yogurt or coconut cream when serving.

Conclusion

Cooking is a journey, and each dish tells a story. With this Low-Carb Chicken Tikka Masala, you’re not just preparing a meal; you’re bringing a world of flavor into your home. Embrace the spices, savor the textures, and share this dish with loved ones. Whether you’re hosting a dinner party or enjoying a quiet night in, this recipe is sure to impress. So grab your apron, fill your kitchen with the enticing aromas of spices, and let every bite remind you that cooking is an adventure meant to be savored. Happy cooking, amigos!

Low-Carb Chicken Tikka Masala Recipe

Prep Time 10 minutes
Cook Time 25 minutes
Total Time 35 minutes
Servings 4 servings
Calories 450
A flavorful low-carb twist on classic Chicken Tikka Masala, packed with spices and creamy coconut flavor.

Ingredients

Protein

  • 1 lb chicken breast, cubed

Dairy

  • 1 cup plain greek yogurt

Spices

  • 2 tbsp tikka masala spice blend

Oils

  • 2 tbsp olive oil

Vegetables

  • 1 medium onion, chopped
  • 3 cloves garlic, minced
  • 1 inch ginger, grated

Canned Goods

  • 1 can (14 oz) diced tomatoes
  • 1 cup coconut cream

Seasonings

  • to taste salt

Garnish

  • for garnish fresh cilantro

Instructions 

  • Marinate chicken with yogurt and spices for 30 minutes.
  • Sauté onion in oil until translucent, then add garlic and ginger.
  • Add marinated chicken and cook until browned.
  • Stir in diced tomatoes and coconut cream, simmer for 15 minutes.
  • Season with salt, garnish with cilantro, and serve.

Notes

For extra flavor, marinate the chicken longer or add a squeeze of lemon before serving.
Calories: 450kcal
Cost: $15
Course: Main Course
Cuisine: Indian
Keyword: chicken, Tikka Masala

Nutrition

Calories: 450kcal | Carbohydrates: 20g | Protein: 50g | Fat: 15g | Sodium: 600mg

Loved this recipe? Save it to your favorite Pinterest board so you can easily find it later! It’s the perfect way to keep all your sweet ideas in one place. ✨

Eye-level shot of a vibrant bowl of Chicken Tikka Masala topped with cilantro, surrounded by a cozy atmosphere.

Unleash the Flavor of Creamy Baked Feta Spaghetti Squash

Welcome, fellow flavor adventurers! If you’re ready to take your taste buds on a wild ride, let’s dive into the vibrant world of Creamy Baked Feta Spaghetti Squash. This dish is not just a meal; it’s an experience, blending the rich creaminess of feta cheese with the zesty brightness of roasted tomatoes and basil. Whether you’re a seasoned chef or a kitchen newbie, this recipe invites you to embrace the thrill of cooking with heat and flavor!

Imagine tender strands of spaghetti squash intertwined with luscious feta, all drizzled with olive oil and kissed by the oven’s warmth. It’s comfort food that doesn’t compromise on taste or health. Perfect for anyone craving a low-carb delight that satisfies the soul and the stomach!

Why You’ll Love This Recipe

  • Low-carb satisfaction: Indulge in a dish that feels rich and hearty without the guilt of high carbs. This baked feta spaghetti squash is perfect for keto enthusiasts or anyone wanting a healthier option.
  • One-pan wonder: Minimal cleanup is a dream come true! Everything bakes together in one dish, allowing you to enjoy maximum flavor with minimal effort.
  • Rich and creamy goodness: The feta melts into a creamy, tangy sauce that beautifully coats the squash, creating a comforting and flavorful experience with every bite.
  • Customizable delight: This recipe is a canvas for your creativity. Add your favorite veggies or spices to make it uniquely yours.
  • Impressive presentation: Serve this dish in the roasted squash halves for a stunning and rustic centerpiece at your table, sure to impress your guests!

Ingredient Breakdown

Let’s explore the essential ingredients that make this dish sing:

  • 1 medium spaghetti squash: The star of the show, providing a satisfying base that mimics pasta’s texture.
  • 3 tbsp extra-virgin olive oil: Enhances flavor and helps roast the ingredients to perfection.
  • 1/4 tsp kosher salt: Essential for flavor enhancement; adjust to your taste.
  • Pinch of ground black pepper: Adds a subtle kick to balance the richness of the feta.
  • 1 pint cherry tomatoes: Bursting with sweetness, they add freshness and color.
  • 1/2 cup chopped roasted red peppers: For depth and a hint of smokiness.
  • 4 garlic cloves, minced: Infuses the dish with aromatic flavor.
  • 4–8 oz feta cheese: The creamy hero of this recipe; use more for a richer sauce.
  • 1 tsp Italian seasoning: A blend of herbs that complements the other ingredients beautifully.
  • 1/4 cup chopped fresh basil (optional): Freshness that brightens up every bite.
  • Extra feta cheese to serve (optional): Because you can never have too much feta!

Pro Tips for Perfecting Your Dish

  • Microwave before cutting: To make slicing the spaghetti squash easier, microwave it for 5 minutes before cutting.
  • Experiment with spices: Don’t hesitate to add your favorite spices or herbs like chili flakes for a kick or oregano for a Mediterranean twist.
  • Roast until golden: Ensure the squash and feta are roasted until golden and bubbly for that irresistible texture and flavor.
  • Let it rest: Allow the dish to sit for a few minutes after baking to let the flavors meld beautifully.
  • Serve warm: This dish is best enjoyed warm, allowing the feta to retain its creamy texture.
  • Use a large baking dish: Ensure there’s enough space for the squash to roast evenly and the flavors to develop.
  • Save the seeds: Roast the spaghetti squash seeds for a crunchy snack!
  • Double the recipe: If hosting a gathering, doubling the recipe is a great way to ensure everyone gets their fill!
  • Pair with protein: Serve it alongside grilled chicken or shrimp for a complete meal.
  • Chill for later: This dish can be made ahead and reheated for quick meals throughout the week.

Common Mistakes and Troubleshooting

Even the best of us can run into hiccups. Here are some common mistakes to avoid:

  • Undercooking the squash: Ensure the squash is fork-tender before serving to get that perfect texture.
  • Overcooking the feta: Keep an eye on the feta to prevent it from becoming too dry. It should be creamy and slightly browned.
  • Not seasoning enough: Don’t skimp on the salt and pepper. They’re crucial for enhancing the flavors!
  • Ignoring personal tweaks: Feel free to adjust ingredients based on your palate. Cooking is about exploration!

Delicious Variations to Try

Ready to mix things up? Here’s how you can customize your baked feta spaghetti squash:

  • Mediterranean style: Add olives, artichokes, and sun-dried tomatoes for a Mediterranean flair.
  • Spicy kick: Incorporate diced jalapeños or a sprinkle of red pepper flakes for some heat.
  • Cheesy goodness: Mix in a blend of cheeses such as mozzarella or goat cheese for a richer flavor profile.
  • Herb-infused: Experiment with different herbs like thyme or rosemary for an aromatic twist.

Storage and Make-Ahead Instructions

This dish is perfect for meal prep! Here’s how to store and reheat:

  • Storage: Store leftovers in an airtight container in the refrigerator for up to 4 days.
  • Freezing: You can freeze the baked squash for up to a month. Just ensure it’s completely cooled before freezing.
  • Reheating: Reheat in the microwave or oven until warmed through. Add a splash of olive oil to revive the creaminess.

Frequently Asked Questions

  • Can I use other types of cheese? Absolutely! Goat cheese or ricotta can be delightful substitutes.
  • Is spaghetti squash gluten-free? Yes, this dish is naturally gluten-free, making it suitable for various diets.
  • How do I know when the squash is done? It’s done when it’s fork-tender and the strands separate easily.
  • Can I add meat to this recipe? Definitely! Grilled chicken or turkey would pair wonderfully.
  • What can I serve with this dish? It pairs beautifully with a fresh salad or roasted vegetables.
  • Can I make this vegan? Yes! Omit the feta and use a plant-based cheese alternative.
  • What’s the nutritional information? This dish is low in carbs and packed with nutrients. See the nutritional section for details.
  • Can I make this in advance? Yes, you can prepare it a day ahead and bake it just before serving.

Nutritional Tips and Dietary Adaptations

Not only is this dish delicious, but it’s also packed with nutrients!

  • Low-carb: It’s a fantastic option for those on a low-carb diet.
  • Rich in vitamins: Spaghetti squash is rich in vitamins A and C, promoting overall health.
  • Protein boost: Add protein-rich toppings like chicken or beans for a balanced meal.
  • Fiber-rich: This dish provides plenty of fiber, aiding in digestion.

Equipment Recommendations

To make your cooking experience seamless, here’s what you’ll need:

  • Sharp chef’s knife: For cutting the squash easily.
  • Large baking dish: To hold all the ingredients while they roast together.
  • Measuring spoons: For accurate ingredient measurements.
  • Heat-resistant spatula: For mixing and serving the dish.

Serving Suggestions

Ready to serve? Here are some ideas to elevate your meal:

  • Garnish with fresh herbs: A sprinkle of fresh basil or parsley adds a burst of color and flavor.
  • Pair with a crisp white wine: A chilled Sauvignon Blanc complements the dish beautifully.
  • Serve with crusty bread: A side of garlic bread or a fresh baguette is perfect for mopping up the creamy sauce.

In conclusion, Creamy Baked Feta Spaghetti Squash is more than just a meal; it’s a journey filled with flavors and possibilities. So grab your skillet, embrace the heat, and let your culinary adventure begin! Remember, cooking is about exploration and joy, so let this dish inspire you to create something extraordinary in your kitchen. Happy cooking!

Creamy Baked Feta Spaghetti Squash - homefoodkitchen

Prep Time 10 minutes
Cook Time 40 minutes
Total Time 50 minutes
Servings 4 servings
Calories 350
A delicious and creamy baked feta spaghetti squash recipe that's perfect for a quick, flavorful meal.

Ingredients

Main

  • 1 medium spaghetti squash
  • 3 tbsp extra-virgin olive oil (divided)
  • 1/4 tsp kosher salt (plus more as preferred)
  • Pinch ground black pepper
  • 1 pint cherry tomatoes (about 1 1/2 cups or 8 oz)
  • 1/2 cup chopped roasted red peppers
  • 4 cloves garlic, minced
  • 4–8 oz feta cheese (use less for a lighter sauce, more for a richer sauce)
  • 1 tsp italian seasoning
  • 1/4 cup chopped fresh basil (optional)

Extra feta cheese to serve

Instructions 

  • Preheat oven and prepare spaghetti squash by halving and roasting until tender.
  • Sauté garlic and cherry tomatoes in 1 tbsp olive oil until softened.
  • Mix roasted red peppers, feta, Italian seasoning, and basil into the tomato mixture.
  • Scrape spaghetti squash into strands and combine with feta sauce.
  • Drizzle with remaining olive oil, season to taste, and serve with extra feta if desired.

Notes

For a creamier texture, use more feta cheese.
Calories: 350kcal
Cost: $15
Course: Main Course
Cuisine: Mediterranean
Keyword: Feta, Spaghetti Squash

Nutrition

Calories: 350kcal | Carbohydrates: 45g | Protein: 15g | Fat: 18g | Sodium: 600mg

Kickstart your day with a bold and satisfying Keto Avocado and Smoked Salmon Breakfast Bowl! Packed with healthy fats, fresh greens, and vibrant flavors, this dish is the perfect way to embrace the morning with excitement. Dive into this breakfast adventure and savor every delicious bite!

Why You’ll Love This Recipe

This Keto Avocado and Smoked Salmon Breakfast Bowl is not just another breakfast option; it’s an experience. Here are compelling reasons why you will absolutely adore this recipe:

  • Quick and Easy: Perfect for busy mornings, this dish comes together in under 15 minutes.
  • Low Carb Delight: Ideal for those following a keto or low-carb diet, helping you maintain your dietary goals without sacrificing flavor.
  • Healthy Fats: Avocado and salmon provide a rich source of omega-3 fatty acids, promoting heart health and keeping you satisfied longer.
  • Versatile Ingredients: Customize the bowl with your favorite greens, toppings, or dressings, making it a canvas for your culinary creativity.
  • Nutritious and Filling: This breakfast bowl is not just about taste; it’s packed with proteins and healthy fats that ensure you start your day energized.

Ingredients Breakdown

Let’s dive into the vibrant components that make this breakfast bowl so special. Below is a detailed list of ingredients, along with some creative substitutions to inspire your culinary journey.

Main Ingredients:

  • 1 ripe avocado, diced: The creamy avocado adds a luscious texture and is rich in healthy fats.
  • 2 oz smoked salmon, torn into pieces: Smoky and savory, the salmon brings depth and protein to the dish.
  • 2 large eggs (poached or soft-boiled): These provide an additional protein boost and a velvety mouthfeel.
  • 1 cup fresh spinach, raw or wilted: A nutrient powerhouse, it adds color and a fresh crunch.
  • 1 tbsp olive oil (or avocado oil): A drizzle of oil enhances flavor and healthy fat content.
  • 1 tbsp cream cheese (optional): For an ultra-creamy texture, mix it in if you dare!
  • 1 tsp lemon juice: Brightens the dish and keeps the avocado fresh.
  • Pinch of salt and pepper: Essential seasonings to elevate the flavors.
  • Chopped fresh dill, for garnish: Adds a burst of herbal freshness.
  • Everything but the Bagel seasoning (optional): A fun twist that adds an extra layer of flavor.

Ingredient Substitutions:

  • Salmon Alternatives: If you’re not a fan of smoked salmon, try using grilled chicken or even tofu for a vegetarian twist!
  • Egg Variations: For a vegan option, swap eggs for silken tofu or chickpea scramble.
  • Greens Variability: Kale, arugula, or mixed salad greens can replace spinach for a different taste.
  • Oil Options: Coconut oil or sesame oil can be used for a unique flavor profile.

Step-by-Step Instructions

Ready to create your masterpiece? Follow these simple steps to assemble your Keto Avocado and Smoked Salmon Breakfast Bowl:

  • Step 1: Poach or soft-boil the eggs according to your preference. Set aside to cool slightly.
  • Step 2: Cut the avocado into cubes and drizzle with lemon juice to prevent browning.
  • Step 3: If you prefer warm spinach, lightly wilt it in a pan with a splash of olive oil; otherwise, keep it raw for a fresher taste.
  • Step 4: Start with a bed of spinach on your plate or bowl. Add the diced avocado and pieces of smoked salmon.
  • Step 5: Nestle the poached or soft-boiled eggs on top, allowing their runny yolk to mingle with the other ingredients.
  • Step 6: Drizzle with olive oil, sprinkle with salt and pepper, and garnish with fresh dill and Everything but the Bagel seasoning if desired.
  • Step 7: Enjoy your nutritious and flavorful keto breakfast!

Pro Tips for Perfecting Your Bowl

Side view of a bowl filled with diced avocado, smoked salmon, poached eggs, and fresh spinach.

To take your breakfast bowl from good to extraordinary, consider these pro tips:

  • Choose Ripe Avocados: Ensure your avocados are perfectly ripe for the best creamy texture.
  • Egg Cooking Techniques: Experiment with different egg cooking methods to find your favorite — soft-boiled, poached, or even scrambled!
  • Layering Flavors: Don’t shy away from adding spices or herbs to your greens for a flavor boost.
  • Make It Ahead: Prep ingredients the night before for a quick assembly in the morning.
  • Experiment with Dressings: Try different dressings like a tangy vinaigrette or a spicy mayo for a flavor twist.
  • Mind the Salt: Season each layer as you build the bowl for enhanced flavor.
  • Chill Your Ingredients: For a refreshing twist, chill the avocado and salmon before serving.
  • Presentation Matters: Take the time to arrange your ingredients artfully; it makes every bite more enjoyable!

Common Mistakes and Troubleshooting

Even the best chefs make mistakes! Here are some common pitfalls and how to troubleshoot them:

  • Overcooked Eggs: To avoid rubbery eggs, keep a close eye on cooking times, and remember that carryover cooking will continue to cook them after removing from heat.
  • Browning Avocado: If you don’t have lemon juice, use lime juice or even vinegar to keep your avocado vibrant.
  • Too Much Salt: If you’ve over-seasoned, balance the flavors with a squeeze of fresh lemon or a dollop of yogurt.
  • Unripe Avocado: If your avocado isn’t ripe enough, consider mashing it and mixing with a bit of olive oil to create a creamy spread.

Variations to Spice Up Your Bowl

Here are some creative variations to keep your breakfast exciting:

  • Tex-Mex Twist: Add diced tomatoes, jalapeños, and a sprinkle of cilantro for a zesty kick!
  • Asian Inspired: Incorporate sesame seeds, sliced cucumber, and a drizzle of soy sauce or ponzu.
  • Mediterranean Flair: Include olives, feta cheese, and a sprinkle of oregano for a fresh Mediterranean vibe.
  • Breakfast Burrito Bowl: Add sautéed bell peppers, onions, and a dollop of salsa for a breakfast burrito feel.

Storage and Make-Ahead Instructions

This breakfast bowl is best enjoyed fresh, but you can prep certain components ahead of time:

  • Make Ahead: Chop your ingredients the night before and store them separately in airtight containers.
  • Storage Tips: Store any leftovers in the fridge for up to 24 hours. The avocado may brown, so consider adding lemon juice to slow this process.
  • Reheating: If you stored cooked eggs, gently reheat them in the microwave or on the stovetop for a few seconds.

Frequently Asked Questions

Got questions? I’ve got answers! Check out these FAQs:

  • Can I use fresh salmon instead of smoked salmon? Absolutely! Fresh salmon can be grilled or cooked in a pan for a different flavor profile.
  • Is this recipe gluten-free? Yes! All ingredients are naturally gluten-free, making this bowl a great option.
  • How can I make this recipe vegetarian? Swap out the smoked salmon for roasted chickpeas or marinated tofu for a hearty alternative.
  • What can I add for extra crunch? Nuts, seeds, or crispy bacon bits can add delightful texture to your bowl.
  • Can I prepare this bowl in advance? You can prep ingredients ahead, but assemble just before eating for the best flavor and freshness.
  • How long does it take to prepare? The whole process takes about 15 minutes, making it a quick breakfast option!
  • Are there any dairy-free alternatives? Yes! Use a dairy-free cream cheese or skip it altogether for a lighter version.
  • What’s the nutritional value of this breakfast bowl? This bowl is high in healthy fats, protein, and low in carbs, making it a nutritious start to your day.

Nutrition Tips and Dietary Adaptations

Want to maximize the health benefits of your breakfast bowl? Consider these adaptations:

  • Add Fiber: Toss in some chia seeds or flaxseeds to boost the fiber content.
  • Go Dairy-Free: Opt for dairy-free yogurt instead of cream cheese for a lighter option.
  • Boost Antioxidants: Incorporate colorful vegetables like bell peppers or radishes for an antioxidant kick.

Equipment Recommendations

Here’s a quick list of kitchen essentials to help you create this breakfast bowl with ease:

  • Non-stick skillet: Ideal for cooking eggs without sticking.
  • Sharp knife: For precise cutting of avocados and other ingredients.
  • Cutting board: A sturdy surface is essential for preparation.
  • Bowl or plate: Make sure to have an appealing dish to showcase your culinary creation.

Serving Suggestions

To elevate your breakfast experience, consider serving your bowl with:

  • A side of fresh fruit: Sliced strawberries or a handful of blueberries adds a sweet contrast.
  • A warm cup of herbal tea: A calming beverage to complement the bold flavors of your breakfast.
  • Whole grain toast: If you’re not strictly keto, a slice of whole-grain bread can be a satisfying addition.

Final Thoughts

Cooking is an adventure, and this Keto Avocado and Smoked Salmon Breakfast Bowl is a perfect invitation to embrace the thrill. With its vibrant flavors and nutrient-packed ingredients, it’s a dish that will awaken your mornings and inspire your culinary creativity. Get ready to grab your skillet and add a little fire to your food — the table is waiting for your masterpiece!

Keto Avocado and Smoked Salmon Breakfast Bowl Recipe

Prep Time 10 minutes
Cook Time 5 minutes
Total Time 15 minutes
Servings 2 servings
Calories 450
A quick and nutritious keto breakfast featuring creamy avocado, smoked salmon, and perfectly cooked eggs, served over fresh spinach.

Ingredients

Main ingredients

  • 1 piece ripe avocado (diced)
  • 2 oz smoked salmon (torn into pieces)
  • 2 large eggs (poached or soft-boiled)
  • 1 cup fresh spinach (raw or wilted)
  • 1 tbsp olive oil (or avocado oil)
  • 1 tbsp cream cheese (optional)
  • 1 tsp lemon juice
  • Pinch salt and pepper
  • Chopped fresh dill (for garnish)

Instructions 

  • Poach or soft-boil the eggs. Set aside.
  • Dice the avocado and drizzle with lemon juice.
  • Wilt spinach in a pan with olive oil or leave raw.
  • Assemble by placing spinach, avocado, salmon, and eggs in a bowl. Drizzle with olive oil, season, and garnish.
  • Sprinkle with salt, pepper, dill, and optional seasoning. Serve and enjoy.

Notes

This breakfast is rich in healthy fats and protein, perfect for a keto diet.
Calories: 450kcal
Cost: $15
Course: Breakfast
Keyword: Avocado, Keto, Salmon

Nutrition

Calories: 450kcal | Carbohydrates: 10g | Protein: 30g | Fat: 35g | Sodium: 900mg

Why You’ll Fall in Love with This Recipe

There’s a reason why chicken thighs are the unsung heroes of the dinner table. They are juicy, flavorful, and oh-so-forgiving in the kitchen. Whether you’re a culinary novice or a seasoned chef, the Juicy Chicken Thigh Recipe is your ticket to a deliciously sticky, easy one-pan dinner that transforms your weeknight meals into something special. Imagine the aroma of tender chicken, infused with a sweet and savory honey-soy glaze, wafting through your kitchen. It’s a dish that beckons you to gather around the table, sharing stories and laughter, while also igniting your passion for cooking.

The Magic Behind This One-Pan Wonder

This recipe is not just about throwing ingredients together; it’s about creating a symphony of flavors that dance on your palate. Let’s break it down:

The Chicken Thighs

Tender, golden-brown chicken thighs on a textured plate, with a warm lighting effect and blurred background.

Why chicken thighs? They hold up beautifully under heat, remain juicy, and are less prone to drying out than their breast counterparts. For this recipe, we’re using bone-in, skin-on chicken thighs. The skin crisps up to a golden perfection, while the bone ensures the meat stays moist and flavorful.

The Sauce

The sauce is where the magic happens. A blend of honey, soy sauce, and a hint of apple cider vinegar creates a sticky glaze that clings to the chicken, making each bite a flavor explosion. The Dijon mustard adds a tangy twist, perfectly balancing the sweetness of the honey. It’s a combination that’s hard to resist!

One Pan, Minimal Fuss

Who doesn’t love a recipe that minimizes cleanup? This dish is cooked entirely in one pan, which means less time scrubbing pots and more time enjoying your culinary masterpiece. The oven does most of the work, allowing you to sit back, sip on a glass of wine, and relish the mouthwatering aroma filling your home.

Ingredient Breakdown & Simple Swaps

Let’s gather our ingredients and make some magic happen. Here’s what you’ll need:

  • 4 bone-in, skin-on chicken thighs – The star of the show!
  • 2 tablespoons olive oil – For that perfect sear.
  • 1 teaspoon salt – Essential for flavor.
  • 1/2 teaspoon black pepper – A little kick!
  • 1 teaspoon garlic powder – Adds depth.
  • 1 teaspoon onion powder – Sweetness and aroma.
  • 1/2 teaspoon smoked paprika – A touch of smokiness.
  • 1/4 cup honey – Sweet, sticky goodness.
  • 1/4 cup soy sauce – The umami factor.
  • 1 tablespoon apple cider vinegar – For that tangy zing.
  • 1 tablespoon Dijon mustard – A flavor enhancer.
  • Chopped green onions for garnish – Freshness and color.

Feel free to experiment with these ingredients! For instance, if you’re out of honey, you could swap in maple syrup for a different flavor profile. If you want a little heat, toss in some red pepper flakes or a splash of hot sauce. The beauty of this recipe lies in its versatility!

Let’s Talk Prep: Get Set Up for Success

Preparation is key to a successful cooking experience. Here’s how to set yourself up for culinary triumph:

  • Preheat your oven to 400°F (200°C) to ensure even cooking.
  • Gather all your ingredients and tools. You’ll need a large oven-safe skillet or baking dish and a whisk for mixing the sauce.
  • Pat the chicken thighs dry with paper towels. This helps the skin get crispy when cooking.

Now, let’s dive into the steps that will lead you to a delectable meal!

Step-By-Step: How To Make Juicy Chicken Thighs

This is where the magic happens! Follow these steps, and you’ll be rewarded with a glorious dinner:

1. Season & Brown the Chicken

In a large bowl, combine the olive oil, salt, pepper, garlic powder, onion powder, and smoked paprika. This spice blend is the foundation of flavor for your chicken. Add the chicken thighs to the bowl and toss to coat them evenly with the seasoning mixture.

2. Make the Sauce

In a small bowl, whisk together the honey, soy sauce, apple cider vinegar, and Dijon mustard. This is the sauce that will elevate your chicken to new heights! Pour this mixture over the seasoned chicken thighs, ensuring they are well coated.

3. Bake & Baste

Place the chicken thighs, skin side up, in your large oven-safe skillet or baking dish. Bake in the preheated oven for 35-40 minutes, or until the chicken is cooked through and the skin is crispy. Don’t forget to baste the chicken with the sauce halfway through cooking for that extra sticky goodness!

4. Rest & Garnish

Once done, remove the chicken from the oven and let it rest for a few minutes. This resting period allows the juices to redistribute, making every bite juicy and tender. Before serving, garnish with chopped green onions for a fresh touch.

Recipe Tips, Tricks, & Variations

To ensure your chicken turns out perfectly every time, here are some tips and tricks:

Can I Use Bone-In or Skin-On Thighs?

Absolutely! Bone-in, skin-on thighs are ideal for this recipe as they provide juicy meat and crispy skin. If you prefer boneless, skinless thighs, just reduce the cooking time slightly.

Sauce Too Sweet?

If you find the sauce too sweet for your liking, simply add a splash of rice vinegar or fresh lemon juice to balance the flavors.

Out of Fresh Garlic or Onion?

Don’t worry! You can use garlic powder and onion powder instead, or even a squeeze of garlic paste for a quick fix.

Want More Veggies?

Feel free to add in some sliced carrots, bell peppers, or snap peas when you cook the onions. They’ll soak up the sauce and add a nutritious boost!

Storing & Reheating

Store any leftovers in an airtight container in the fridge for up to 3 days. The sauce will thicken as it cools, so add a splash of water when reheating to loosen it up.

Freezer-Friendly?

Yes! Let everything cool, portion it into freezer-safe bags, and freeze for up to 2 months. Thaw overnight in the fridge and reheat as usual.

Serving Ideas: Make It a Meal

This dish shines as a standalone meal, but you can elevate it even further! Serve it with:

  • Steamed rice or quinoa to soak up that sticky sauce.
  • Roasted vegetables, like broccoli or zucchini, for a colorful plate.
  • A crisp green salad drizzled with a light vinaigrette for freshness.

Each of these sides complements the flavors of the chicken beautifully, creating a well-rounded meal.

The Kind of Recipe That Becomes a Family Classic

The Juicy Chicken Thigh Recipe isn’t just a meal; it’s an experience. The kind of dish that brings family and friends together around the table, sharing stories and savoring every bite. It’s packed with flavor, easy to make, and sure to become a beloved staple in your home. Once you serve this up, expect to hear the request, “Can we have this again?” more times than you can count!

FAQs

Here are some common questions that arise when preparing this dish:

Can I use skinless chicken thighs?

Yes, you can! Just reduce the cooking time, as skinless chicken tends to cook faster.

What if I don’t have an oven-safe skillet?

No problem! You can use a regular skillet for browning and then transfer the chicken to a baking dish before adding the sauce.

Can I add more spices?

Definitely! Feel free to experiment with your favorite spices. A touch of cayenne or chili powder can add a nice kick!

Conclusion

Cooking should be a joyful adventure, and this Juicy Chicken Thigh Recipe invites you to embrace that spirit! With its bold flavors and simple steps, it’s the perfect meal for any occasion, whether you’re cooking for family or hosting friends. So, roll up your sleeves, gather your ingredients, and get ready to create a dish that will leave everyone asking for seconds. Remember, the kitchen is your canvas; let your creativity shine and enjoy every moment of this culinary journey!

Juicy Chicken Thigh Recipe – Easy, Sticky, One-Pan Dinner

Prep Time 10 minutes
Cook Time 40 minutes
Total Time 50 minutes
Servings 4 servings
Calories 350
This flavorful chicken thigh recipe is quick to prepare and features a delicious sticky glaze, perfect for a satisfying one-pan dinner.

Ingredients

Main

  • 4 pieces bone-in, skin-on chicken thighs
  • 2 tablespoons olive oil
  • 1 teaspoon salt
  • 1/2 teaspoon black pepper
  • 1 teaspoon garlic powder
  • 1 teaspoon onion powder
  • 1/2 teaspoon smoked paprika
  • 1/4 cup honey
  • 1/4 cup soy sauce
  • 1 tablespoon apple cider vinegar
  • 1 tablespoon dijon mustard
  • chopped green onions for garnish

Instructions 

  • Preheat oven to 400°F (200°C).
  • Mix olive oil, salt, pepper, garlic powder, onion powder, and paprika. Coat chicken thighs.
  • Whisk honey, soy sauce, vinegar, and mustard. Pour over chicken in skillet.
  • Bake for 35-40 minutes, basting halfway. Rest briefly and garnish with green onions.

Notes

Ensure chicken skin is crispy by broiling for a few minutes if needed.
Calories: 350kcal
Cost: $15
Course: Main Course
Cuisine: American
Keyword: chicken, one-pan, sticky

Nutrition

Calories: 350kcal | Carbohydrates: 30g | Protein: 25g | Fat: 15g | Sodium: 900mg

Loved this recipe? Save it to your favorite Pinterest board so you can easily find it later! It’s the perfect way to keep all your sweet ideas in one place. ✨

Succulent chicken thighs with a shiny glaze, showcasing herbs and spices on a rustic surface.

Why You’ll Love This Fluffy Vegan Omelette

If you’ve ever craved a dish that not only satisfies your hunger but also ignites your culinary creativity, look no further than this Fluffy Vegan Omelette. It’s a celebration of vibrant vegetables, rich flavors, and the magic of plant-based cooking. This dish transforms the humble omelette into a canvas for your kitchen imagination — a dish that’s not just eaten, but experienced. Imagine waking up to the aroma of sautéed mushrooms and fresh spinach wafting through your kitchen; it’s the perfect way to start your day or to enjoy a quick, hearty dinner.

This recipe is not just for vegans; it’s for anyone who loves food that nourishes the body and the soul. With just a handful of ingredients, you’ll create a fluffy masterpiece that’s bursting with color and flavor. Let’s dive in!

What Makes This Omelette Special?

At the heart of this vegan omelette is the innovative JUST Egg, a plant-based egg substitute that’s made primarily from mung beans. This ingredient is a game-changer, mimicking the texture and flavor of traditional eggs while being completely free from animal products. Here’s what makes this dish a standout:

  • Quick and Easy: This omelette comes together in under 15 minutes, making it perfect for busy mornings or a simple dinner.
  • Customizable: The filling options are endless! You can add any veggies you have on hand.
  • Protein-Packed: Mung beans are high in protein, making this dish both filling and nutritious.
  • Flavorful: The combination of fresh vegetables, olive oil, and seasonings creates a savory, satisfying meal.

Ingredients You’ll Need

An appetizing vegan omelette with bell peppers, spinach, and mushrooms on a plate.

To create your Fluffy Vegan Omelette, gather the following ingredients:

  • 1 cup JUST Egg
  • 1/4 cup bell peppers, diced
  • 1/4 cup spinach, chopped
  • 1/4 cup onion, diced
  • 1/4 cup mushrooms, sliced
  • Salt and pepper to taste
  • 1 tablespoon olive oil
  • Fresh herbs (optional, for garnish)

Step-by-Step Instructions

Now, let’s get cooking! Follow these simple steps to whip up your Fluffy Vegan Omelette:

  1. In a bowl, pour 1 cup of JUST Egg and whisk it until slightly frothy.
  2. Add the diced bell peppers, chopped spinach, diced onion, and sliced mushrooms to the JUST Egg mixture. Season with salt and pepper to taste.
  3. Heat 1 tablespoon of olive oil in a non-stick skillet over medium heat.
  4. Pour the JUST Egg mixture into the skillet, spreading it evenly.
  5. Cook for 3-5 minutes until the edges start to set and the bottom is slightly golden.
  6. Carefully flip the omelette using a spatula and cook for an additional 2-3 minutes until fully cooked through.
  7. Slide the omelette onto a plate and garnish with fresh herbs if desired.
  8. Serve warm and enjoy your fluffy vegan omelette!

Success Tips for the Perfect Omelette

Creating a flawless omelette takes a little practice, but here are some tips to elevate your dish:

  • Don’t Rush the Cooking: Let the omelette cook slowly over medium heat; this ensures a fluffy texture.
  • Use Fresh Ingredients: Fresh vegetables will enhance the flavor and nutrition of your omelette.
  • Experiment with Seasonings: Add spices like paprika or nutritional yeast for an extra flavor kick.

Omelette Filling Ideas

The beauty of this Fluffy Vegan Omelette is how versatile it is. Here are some delicious filling ideas to spark your creativity:

  • Cheesy Veggie Delight: Add vegan cheese and sautéed zucchini.
  • Spicy Southwest: Incorporate diced jalapeños and corn for a kick.
  • Italian Inspiration: Use sun-dried tomatoes, basil, and olives for a Mediterranean twist.
  • Green Goodness: Mix in kale, avocado, and fresh herbs for a nutrient-packed option.

Topping Ideas to Elevate Your Dish

Top your omelette with these delightful additions for an extra layer of flavor:

  • Fresh Salsa: Adds a refreshing burst of flavor.
  • Avocado Slices: Creamy and satisfying, avocado pairs perfectly with the omelette.
  • Hot Sauce: For those who love a spicy kick!
  • Vegan Sour Cream: A dollop of this adds creaminess and tang.

Variations to Consider

Feeling adventurous? Try these variations to keep your omelette experience exciting:

  • Italian Omelette: Add Italian herbs and roasted red peppers.
  • Breakfast Burrito: Fold your omelette into a tortilla with some salsa and avocado.
  • Asian Fusion: Use mushrooms, green onions, and a splash of soy sauce.

Equipment You’ll Need

Here’s what you’ll need to make this Fluffy Vegan Omelette:

  • Mixing bowl
  • Whisk
  • Non-stick skillet
  • Spatula

Storage and Freezing Tips

This omelette is best enjoyed fresh, but if you have leftovers, here’s how to store them:

  • Refrigeration: Store any leftover omelette in an airtight container in the fridge for up to 2 days.
  • Freezing: You can freeze the cooked omelette! Wrap it tightly in plastic wrap and then place it in a freezer bag. It will keep for about a month. When ready to eat, thaw in the fridge and reheat in a skillet.

Frequently Asked Questions

Can I make this omelette without JUST Egg?
Yes! You can use tofu blended until smooth as a substitute, though the texture will be slightly different.

How do I make my omelette fluffier?
Whisking the JUST Egg until frothy and cooking it at the right temperature helps achieve that fluffy texture.

Can I add more vegetables?
Absolutely! Feel free to toss in any veggies you love or have on hand.

Troubleshooting Common Issues

If your omelette isn’t turning out as expected, here are some troubleshooting tips:

  • Omelette Sticking: Ensure your skillet is well-greased and use medium heat to prevent sticking.
  • Not Cooking Through: If the outside is golden but the inside is still wet, lower the heat and give it a bit more time to cook.
  • Flavorless Omelette: Don’t skip the seasoning! Salt and pepper are crucial for flavor.

Conclusion

Cooking is a journey, and with this Fluffy Vegan Omelette, you’re taking a delicious step forward. It’s more than just a meal; it’s a canvas for creativity and a doorway to exploring flavors that ignite your passion for cooking. So, gather your ingredients, embrace the joy of experimentation, and let each bite remind you that cooking is an adventure worth savoring. Bon appétit!

Fluffy Vegan JUST Egg Omelette with Veggies

Prep Time 5 minutes
Cook Time 8 minutes
Total Time 13 minutes
Servings 2 servings
Calories 150
A quick and delicious vegan omelette packed with colorful vegetables and fluffy texture, perfect for a nutritious breakfast or brunch.

Ingredients

Main

  • 1 cup just egg
  • 1/4 cup bell peppers, diced
  • 1/4 cup spinach, chopped
  • 1/4 cup onion, diced
  • 1/4 cup mushrooms, sliced
  • 1 tablespoon olive oil
  • to taste salt and pepper
  • 1 tablespoon fresh herbs (optional) (for garnish)

Instructions 

  • Whisk 1 cup of JUST Egg until frothy.
  • Add vegetables and season with salt and pepper.
  • Heat olive oil in a skillet over medium heat.
  • Pour mixture into skillet and cook 3-5 minutes until edges set.
  • Flip and cook 2-3 minutes until fully cooked. Garnish and serve.

Notes

Use fresh vegetables for best flavor and texture.
Calories: 150kcal
Cost: $10
Course: Breakfast
Cuisine: Vegan
Keyword: Vegan Omelette

Nutrition

Calories: 150kcal | Carbohydrates: 10g | Protein: 8g | Fat: 9g | Sodium: 300mg

Loved this recipe? Save it to your favorite Pinterest board so you can easily find it later! It’s the perfect way to keep all your sweet ideas in one place. ✨

A vibrant vegan omelette showcasing diced bell peppers and fresh herbs.

Ignite Your Passion for Cooking with the Carnivore Keto Chicken Casserole

Welcome to a culinary adventure that takes your taste buds on a journey through the vibrant world of flavors! The Carnivore Keto Chicken Casserole is not just a meal; it’s a celebration of bold ingredients and comforting textures. This dish is perfect for anyone looking to embrace the keto lifestyle or simply indulge in a hearty, satisfying dinner. With creamy cheeses, tender chicken, and a hint of spice, this casserole is destined to be your new go-to recipe. Let’s dive in!

Why You’ll Love This Recipe

Get ready to fall in love with the Carnivore Keto Chicken Casserole for these irresistible reasons:

  • Easy Preparation: This casserole comes together in under an hour, making it ideal for busy weeknights or spontaneous gatherings.
  • Rich Flavor Profile: The combination of cheeses and spices creates a creamy, cheesy delight that will awaken your taste buds.
  • Low-Carb Goodness: Perfectly suited for keto diets, this dish is packed with protein and healthy fats, keeping you satisfied without the carbs.
  • Versatile Ingredients: You can easily swap out chicken for other proteins or add in your favorite veggies to customize the dish.
  • Make-Ahead Marvel: Prepare it in advance and simply bake when you’re ready, saving you time without sacrificing flavor.

Ingredient Breakdown

To create the magic of the Carnivore Keto Chicken Casserole, gather the following ingredients:

  • 3 cups cooked chicken: Shredded or diced, this serves as the hearty base. You can use rotisserie chicken for convenience!
  • 8 ounces cream cheese: Softened for easy mixing and a creamy texture. If you’re dairy-free, try a plant-based cream cheese.
  • 1/2 cup heavy cream: This adds richness; for a lighter option, consider using coconut cream.
  • 1 1/2 cups cheddar cheese: Shredded and sprinkled on top for that cheesy crust. A blend of sharp and mild cheddar works wonders!
  • 2 tablespoons butter: Melted, for added flavor and richness.
  • 1/4 cup chicken broth (optional): This can enhance moisture and flavor; use low-sodium if desired.
  • Salt, pepper, garlic powder, and paprika: Essential for seasoning to elevate the dish’s flavor.

Pro Tips for Perfecting Your Casserole

Side view of a creamy chicken casserole dish with golden cheddar cheese.

Take your cooking to the next level with these expert insights:

  • Temperature Matters: Ensure your cream cheese is fully softened for a smooth mixture that integrates well with the chicken.
  • Layering Techniques: For extra flavor, consider layering the chicken and cheese for a gooey surprise in every bite.
  • Don’t Rush the Baking: Allow your casserole to bake until the cheese is bubbly and golden, as this creates that delicious crust.
  • Cooling Time: Let the casserole cool for 5-10 minutes after baking; this helps it set and makes serving easier.
  • Experiment with Spice: Feel free to add crushed red pepper flakes or jalapenos for an extra kick!
  • Use Fresh Ingredients: Freshly shredded cheese not only melts better but enhances the overall flavor.
  • Think Ahead: Prepare and assemble your casserole the night before, refrigerate, and simply bake it when you’re ready.
  • Serving Size Matters: Cut into portions before serving to allow for easier plating and less mess.

Avoid Common Mistakes

Even the most seasoned cooks can run into hiccups. Here’s how to avoid common pitfalls:

  • Overmixing: Stir the mixture until just combined; overmixing can make the casserole dense.
  • Too Much Liquid: If you find your casserole too soupy, reduce the amount of heavy cream or broth next time.
  • Skipping Seasoning: Don’t forget your spices! Seasoning is key to enhancing the casserole’s flavors.
  • Not Letting It Rest: Cutting too soon can lead to a messy serving; patience is a virtue here!

Variations on a Classic

Feel free to get creative! Here are some variations you can try:

  • Veggie-Loaded: Add sautéed spinach, mushrooms, or bell peppers for a nutritious twist.
  • Spicy Tex-Mex: Incorporate diced jalapenos and a sprinkle of taco seasoning for a southwestern flair.
  • Italian-Inspired: Mix in sun-dried tomatoes and Italian herbs for a Mediterranean touch.
  • Buffalo Chicken: Stir in buffalo sauce and top with blue cheese for a zesty kick.

Storage and Make-Ahead Instructions

Your Carnivore Keto Chicken Casserole can be enjoyed now and later! Here’s how:

  • Refrigeration: Store leftovers in an airtight container for up to 3 days. Reheat in the oven or microwave.
  • Freezing: Assemble the casserole, cover tightly, and freeze for up to 3 months. Thaw in the fridge overnight before baking.
  • Make-Ahead: Prepare the casserole up to a day in advance, keep it covered in the fridge, and bake when ready.

Frequently Asked Questions

Here are some common queries to guide you:

  • Can I use fresh chicken instead of cooked? Yes, but you will need to cook it first; shredded rotisserie chicken is a perfect shortcut.
  • What if I’m dairy-free? Substitute dairy ingredients with plant-based alternatives, and your casserole will still be delicious!
  • Can I make this recipe in advance? Absolutely! You can prepare it a day ahead and bake just before serving.
  • How long does it take to bake? Bake for 25-30 minutes or until the cheese is golden brown and bubbly.
  • What should I serve with this casserole? A fresh salad or steamed veggies pair wonderfully!
  • Can I use other cheeses? Feel free to experiment with different cheese blends like mozzarella or gouda.
  • Is this casserole suitable for meal prep? Yes! It’s a great option for meal prep and can be divided into portions for the week.
  • How do I reheat leftovers? Reheat in the oven at 350°F (175°C) until warmed through, about 15-20 minutes.

Nutritional Tips and Dietary Adaptations

This casserole is not just delicious but also dietary-friendly. Here’s how:

  • Keto-Friendly: High in protein and healthy fats, it fits perfectly into a low-carb lifestyle.
  • Gluten-Free: Naturally gluten-free, this dish is safe for those with gluten sensitivities.
  • Protein-Packed: With a solid protein content, it keeps you full and satisfied for longer.
  • Customizable: Adjust the spice levels and ingredients to cater to your dietary preferences.

Recommended Equipment

To make your cooking experience seamless, here’s what you’ll need:

  • Mixing Bowls: For easy combined ingredients, have a couple of sizes on hand.
  • Baking Dish: A 9×13 inch dish works perfectly for this casserole.
  • Measuring Cups and Spoons: Essential for accurate ingredient portions.
  • Sharp Knife: For shredding chicken and chopping veggies with ease.

Serving Suggestions

Complete your meal with these serving ideas:

  • Green Salad: A simple green salad with vinaigrette lightens the meal.
  • Cauliflower Rice: For a low-carb side, serve it with cauliflower rice or zoodles.
  • Pickled Veggies: Crunchy pickled veggies add a delightful contrast to the creamy casserole.
  • Herb Garnish: Fresh herbs like parsley or cilantro can brighten the dish right before serving.

So there you have it! The Carnivore Keto Chicken Casserole is not just a recipe; it’s an invitation to explore flavors, embrace creativity, and enjoy the art of cooking. Get ready to make this dish a staple in your kitchen and share it with family and friends. Happy cooking, and remember — every meal is a story waiting to be told!

Carnivore Keto Chicken Casserole

Prep Time 10 minutes
Cook Time 30 minutes
Total Time 40 minutes
Servings 4 servings
Calories 650
A delicious low-carb, high-fat casserole combining shredded chicken and cheesy goodness, perfect for a keto diet.

Ingredients

Protein

  • 3 cups cooked chicken, shredded or diced

Dairy

  • 8 ounces cream cheese, softened
  • 1/2 cup heavy cream
  • 1 1/2 cups cheddar cheese, shredded

Fats & Oils

  • 2 tablespoons butter, melted
  • 1/4 cup chicken broth (optional)

Seasonings

  • to taste Salt
  • to taste Pepper
  • to taste Garlic powder
  • to taste Paprika

Instructions 

  • Preheat oven to 375°F (190°C).
  • Mix cream cheese, heavy cream, melted butter, and chicken broth (if using).
  • Add salt, pepper, garlic powder, and paprika; stir in shredded chicken.
  • Transfer mixture to a baking dish, top with shredded cheddar cheese, and bake 25-30 minutes.
  • Let cool for 5-10 minutes before serving.

Notes

For extra flavor, sprinkle additional paprika or herbs before baking.
Calories: 650kcal
Cost: $15
Course: Main Course
Cuisine: Keto
Keyword: Cheese, chicken, Keto

Nutrition

Calories: 650kcal | Carbohydrates: 8g | Protein: 70g | Fat: 40g | Sodium: 900mg

Welcome to the Flavor Revolution: Creamy Tuscan Salmon

Are you ready to embark on a culinary journey that will ignite your passion for cooking? Let’s dive into the vibrant world of Creamy Tuscan Salmon, where every bite is a celebration of flavor and creativity. This dish transforms simple ingredients into a masterpiece that not only pleases the palate but also warms the soul. Perfect for a weeknight dinner or a romantic date night, you’ll find yourself coming back to this recipe time and again. With its rich cream sauce and bold spices, it’s no wonder this dish is a favorite among food lovers everywhere!

Why You’ll Love This Recipe

  • Quick and Easy: Ready in under 30 minutes, making it an ideal choice for busy weeknights or impromptu gatherings.
  • Flavor Explosion: The combination of sun-dried tomatoes, garlic, and fresh spinach creates a complex flavor profile that’s both comforting and exciting.
  • Versatile Dish: Perfect for serving with your favorite sides like mashed potatoes or a fresh salad, this dish adapts to your preferences.
  • Health-Conscious: Packed with omega-3 fatty acids from the salmon and antioxidants from the tomatoes, it’s a meal that nourishes as it delights.
  • Impressive Presentation: The vibrant colors of the dish make it as visually appealing as it is delicious, sure to impress your guests.

Ingredients Breakdown

Here’s what you’ll need to create this creamy delight:

  • 3 salmon filets (about 1 pound total): Fresh, wild-caught salmon is best for flavor and health benefits.
  • 1 teaspoon kosher salt: Enhances the natural flavor of the salmon.
  • ½ teaspoon freshly ground black pepper: Adds a subtle kick.
  • 1 tablespoon extra-virgin olive oil: For searing the salmon and imparting flavor.
  • ½ white onion (diced): Brings sweetness and depth to the sauce.
  • ½ cup sun-dried tomatoes in oil: Adds a rich, tangy flavor.
  • ½ cup cherry tomatoes: Freshness and juiciness to brighten the dish.
  • 1 tablespoon minced garlic: Essential for that aromatic base.
  • 1 cup heavy cream: The key to the creamy sauce that envelops the salmon.
  • ½ cup freshly shredded Parmesan cheese: For an extra layer of richness and flavor.
  • 1 teaspoon paprika: Adds warmth and color.
  • 1 teaspoon Italian seasoning: A blend of herbs that elevates the dish.
  • 1 cup fresh baby spinach: For a pop of color and nutrition.
  • Salt (to taste): Adjust to your preference.

Pro Tips for Perfect Salmon

Juicy salmon fillets topped with creamy sauce and fresh spinach, garnished with bright tomatoes.

Cooking is as much an art as it is a science. Here’s how to master this dish:

  • Pat it Dry: Always pat the salmon dry before seasoning to get a perfect sear.
  • Heat Matters: Ensure the oil is hot before adding the salmon to achieve a beautiful, crispy crust.
  • Don’t Overcook: The salmon doesn’t need to be fully cooked during the initial sear; it will finish cooking in the sauce.
  • Flavor Balance: Taste the sauce before adding salt; the Parmesan and sun-dried tomatoes can add saltiness.
  • Cook in Batches: If your skillet isn’t large enough, cook the salmon in batches to avoid steaming.
  • Fresh Ingredients: Use fresh spinach and quality tomatoes for the best flavor.
  • Let it Rest: Allow the salmon to rest briefly after cooking for juicier results.
  • Experiment: Feel free to add your favorite herbs or spices for a personalized twist.

Common Mistakes and Troubleshooting

Even seasoned cooks can run into hiccups. Here’s how to avoid common pitfalls:

  • Overcooked Salmon: Keep an eye on the time; salmon cooks quickly. It should flake easily but remain moist.
  • Too Thick Sauce: If the sauce is too thick, add a splash of chicken broth or pasta water to loosen it.
  • Burnt Garlic: Garlic can burn quickly; add it after the onions have softened to prevent bitterness.
  • Not Enough Flavor: Taste as you go; adjust seasonings based on your preference.

Flavor Variations

Feel like switching things up? Here are some delicious variations to try:

  • Spicy Kick: Add crushed red pepper flakes to the sauce for a fiery twist.
  • Lemon Zest: Incorporate lemon zest for a refreshing citrus note.
  • Herb-Infused: Swap Italian seasoning for fresh herbs like basil or dill to change the flavor profile.
  • Mushroom Medley: Add sautéed mushrooms for an earthy richness.

Storage and Make-Ahead Instructions

Want to prepare this dish in advance? Here’s how:

  • Make-Ahead: You can prepare the sauce a day in advance. Store it in the refrigerator and reheat gently before adding the salmon.
  • Storage: Leftovers can be stored in an airtight container in the fridge for up to 2 days.
  • Reheating: Reheat gently on the stovetop over low heat to prevent the salmon from drying out.

Frequently Asked Questions

  • Can I use frozen salmon? Yes, just ensure it’s fully thawed before cooking for even results.
  • What can I serve with creamy Tuscan salmon? This dish pairs beautifully with mashed potatoes, rice, or a fresh green salad.
  • Can I substitute the heavy cream? For a lighter version, use half-and-half or coconut cream.
  • Is this recipe gluten-free? Yes, all ingredients are gluten-free, but double-check your seasonings.
  • How do I know when the salmon is cooked? The salmon is done when it flakes easily with a fork and is opaque in the center.
  • Can I add more vegetables? Absolutely! Feel free to add bell peppers or zucchini for extra nutrition.
  • What type of salmon is best for this recipe? Wild-caught salmon is preferred for its flavor and sustainability.
  • Can I make this dish ahead of time? Yes! Prepare the sauce in advance and add the salmon right before serving.

Nutritional Benefits and Dietary Adaptations

This dish is not only delicious but offers numerous health benefits:

  • Rich in Omega-3s: Salmon is a powerhouse of omega-3 fatty acids, which support heart health.
  • Antioxidants: Tomatoes and spinach provide vital antioxidants that combat inflammation.
  • Protein-Packed: Each serving is loaded with high-quality protein, essential for muscle repair and growth.
  • Low-Carb Option: Omit the pasta or serve over zucchini noodles for a low-carb alternative.

Essential Equipment for Success

To create this dish, you’ll need:

  • Large Skillet: A non-stick or cast-iron skillet allows for even cooking and easy cleanup.
  • Spatula: A sturdy spatula is essential for flipping the salmon without breaking it apart.
  • Measuring Cups and Spoons: Accurate measurements ensure the perfect flavor balance.

Serving Suggestions

To make your meal complete, consider these serving ideas:

  • Pair with Sides: Serve alongside creamy mashed potatoes, garlic bread, or a crisp mixed greens salad.
  • Wine Pairing: A chilled glass of Chardonnay complements the creamy sauce beautifully.
  • Garnish: Finish with a sprinkle of fresh herbs or a drizzle of balsamic glaze for an extra touch of elegance.

Conclusion: Embrace the Adventure!

Cooking is an adventure, and with this Creamy Tuscan Salmon recipe, you’re not just making a meal; you’re creating a story filled with flavor and warmth. I encourage you to embrace the thrill of experimenting with spices, textures, and flavors. So grab your skillet, invite some friends, and let the magic unfold in your kitchen. Remember, every dish you create is a chance to celebrate the art of cooking — so let your creativity flow and enjoy the journey!

Creamy Tuscan Salmon

Prep Time 10 minutes
Cook Time 15 minutes
Total Time 25 minutes
Servings 4 servings
Calories 650
A rich and flavorful salmon dish with a creamy tomato and spinach sauce, perfect for a quick and elegant meal.

Ingredients

Protein

  • 3 filets salmon filets (about 1 pound total)
  • 1 teaspoon kosher salt
  • ½ teaspoon freshly ground black pepper
  • 1 tablespoon extra-virgin olive oil
  • ½ white onion white onion (diced)
  • ½ cup sun-dried tomatoes in oil
  • ½ cup cherry tomatoes
  • 1 tablespoon minced garlic
  • 1 cup heavy cream
  • ½ cup freshly shredded Parmesan cheese
  • 1 teaspoon paprika
  • 1 teaspoon Italian seasoning
  • 1 cup fresh baby spinach

Additional

  • to taste Salt

Instructions 

Notes

Ensure not to overcook the salmon for best texture.
Calories: 650kcal
Cost: $15
Course: Main Course
Cuisine: Italian
Keyword: Salmon

Nutrition

Calories: 650kcal | Carbohydrates: 20g | Protein: 45g | Fat: 45g | Sodium: 900mg

Why You’ll Love This Crockpot Crab Dip

When it comes to comfort food, few dishes can match the creamy indulgence of a well-made crab dip. This Crockpot Crab Dip elevates the classic appetizer into a slow-cooked masterpiece, perfect for gatherings or cozy nights in. With its rich blend of cream cheese, cheddar, and spices, this dip is a flavor explosion that brings warmth and joy to your table. Whether you’re hosting a party or simply craving something delicious to snack on while binge-watching your favorite show, this recipe will redefine your expectations for comfort food!

Ingredients That Shine

Creating this delightful dip is as simple as gathering a few key ingredients:

  • Cream Cheese: The rich, creamy base that forms the heart of this dip.
  • Cheddar Cheese: Adds a sharp, tangy flavor that pairs beautifully with crab.
  • Sour Cream: Contributes to the dip’s luscious texture and balances the flavors.
  • Spices: A blend of your favorite spices will elevate the taste, adding depth and character.
  • Lemon: A splash of fresh lemon juice brightens the dip and enhances the seafood flavor.

Simple Steps for Flavorful Results

Warm Crockpot Crab Dip displayed on a wooden surface, showcasing its rich texture.

The beauty of this recipe lies in its simplicity. Forget about complicated cooking techniques; this dip is designed for ease. Here’s how you can whip up this culinary delight:

  1. Prepare Your Ingredients: Start by softening the cream cheese. This will make it easier to blend with the other ingredients.
  2. Combine Everything: Toss the cream cheese, cheddar cheese, sour cream, spices, and lemon juice into the slow cooker. Mix them together until well combined.
  3. Slow Cook: Set your crockpot on low and let the mixture cook for about 2-3 hours, stirring occasionally to ensure even cooking.
  4. Serve and Enjoy: Once the dip is bubbly and creamy, it’s ready to serve! Pair it with tortilla chips, crackers, or fresh veggies for a truly irresistible snack.

Tips for the Perfect Dip

To take your Crockpot Crab Dip to the next level, consider these handy tips:

  • Use Fresh Crab: If possible, opt for fresh crab meat for an unbeatable flavor. Canned crab can work in a pinch, but nothing beats the freshness!
  • Mix Up the Cheeses: Experiment with different cheese blends. A hint of Monterey Jack or pepper jack can add an extra kick.
  • Don’t Skimp on Spices: Use a variety of spices to enhance the flavors. A dash of Old Bay seasoning or paprika can add a delightful twist.

Variations to Try

Why not get adventurous? Here are a few variations to consider:

  • Spicy Crab Dip: Add diced jalapeños or a splash of hot sauce for a spicy kick that’ll awaken your taste buds.
  • Garlic Lovers: Stir in minced garlic or garlic powder for a robust flavor. Roasted garlic can also add a sweet, caramelized note.
  • Herbed Delight: Incorporate fresh herbs like dill or parsley for a refreshing taste that complements the crab beautifully.

Substitutions You Can Make

If you’re missing an ingredient or want to make adjustments, here are some substitutions:

  • Greek Yogurt: Substitute sour cream with Greek yogurt for a tangy twist and a healthier option.
  • Vegan Cream Cheese: For a dairy-free version, use vegan cream cheese and nutritional yeast for that cheesy flavor.
  • Other Seafood: Try shrimp or lobster meat instead of crab for a different, yet equally delicious dip.

Essential Equipment

To create this dip, you’ll need:

  • Crockpot: A slow cooker is essential for this recipe. Make sure yours is big enough to hold the ingredients comfortably.
  • Mixing Bowl: For combining your ingredients before transferring them to the crockpot.
  • Spatula: To stir the dip during cooking and serve it afterward.

Storage and Freezing Tips

Got leftovers? No problem! Here’s how to store your Crockpot Crab Dip:

  • Refrigeration: Store any leftover dip in an airtight container in the fridge for up to 3-4 days.
  • Freezing: You can freeze the dip for up to 2 months. Just make sure to let it cool completely before transferring it to a freezer-safe container.
  • Reheating: To enjoy again, simply thaw in the refrigerator overnight and reheat in the crockpot or microwave until warmed through.

FAQs

Here are some common questions about making this dip:

  • Can I make this dip ahead of time? Absolutely! You can prepare it a day in advance, just refrigerate until ready to cook.
  • Can I use imitation crab in this recipe? Yes, imitation crab can be used, though purists may prefer real crab for flavor.
  • Is it spicy? The level of spice depends on the spices you choose. Feel free to adjust based on your taste preferences!

Troubleshooting Common Issues

Here are some potential issues you might encounter and how to fix them:

  • Dip is too thick: If your dip turns out thicker than expected, add a splash of milk or cream to achieve your desired consistency.
  • Not enough flavor: Taste your dip before serving. If it needs a boost, add more spices or a squeeze of lemon juice.
  • Uneven heating: Make sure to stir occasionally during cooking to ensure even heating and prevent hot spots.

Final Thoughts

This Crockpot Crab Dip is not just a recipe; it’s a celebration of flavors that brings people together. Whether you’re hosting a game night, throwing a casual get-together, or simply indulging in a night in, this dip adds warmth and richness to any occasion. So grab your ingredients, fire up that slow cooker, and prepare for a dip that’s bursting with flavor and comfort. Your taste buds will thank you! Enjoy this journey of culinary creativity and the joy of sharing good food with the people you love. Happy cooking!

Crockpot Crab Dip

Prep Time 10 minutes
Cook Time 2 hours
Total Time 2 hours 10 minutes
Servings 8 servings
Calories 250
A creamy and flavorful crab dip perfect for parties, easily made in a slow cooker.

Ingredients

Dairy

  • 8 oz cream cheese
  • 1.5 cups cheddar (shredded)
  • 0.5 cup sour cream

Spices & Seasonings

  • 1 tsp spices (to taste)
  • 1 tsp lemon (juice)

Instructions 

  • Toss all ingredients into the slow cooker and stir to combine.

Notes

Serve warm with crackers or bread.
Calories: 250kcal
Cost: $15
Course: Appetizer
Cuisine: American
Keyword: crab

Nutrition

Calories: 250kcal | Carbohydrates: 8g | Protein: 15g | Fat: 20g | Sodium: 400mg

Loved this recipe? Save it to your favorite Pinterest board so you can easily find it later! It’s the perfect way to keep all your sweet ideas in one place. ✨

Delicious crab dip in a slow cooker, featuring a golden top and inviting ingredients.