Author

Avery Collins

Browsing

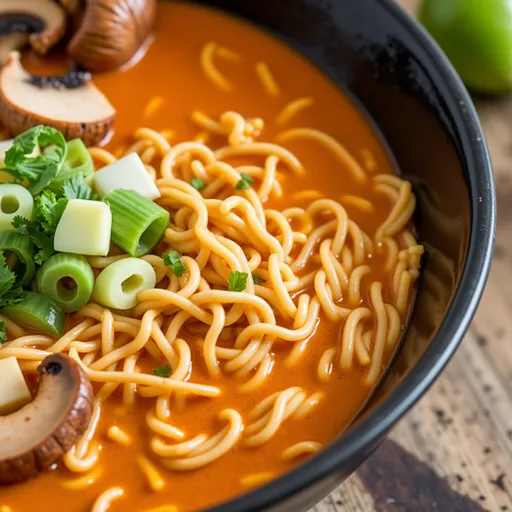
Why You’ll Love This Dish

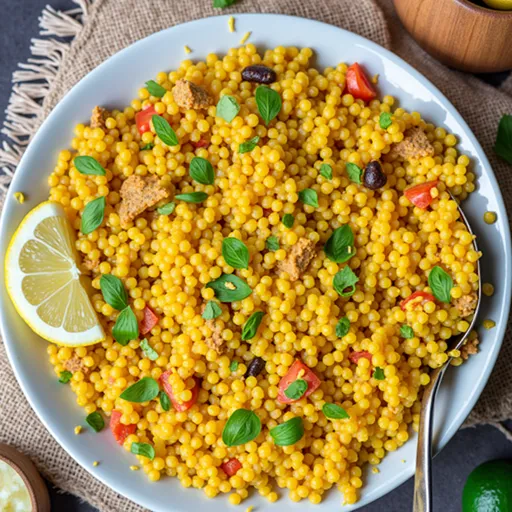
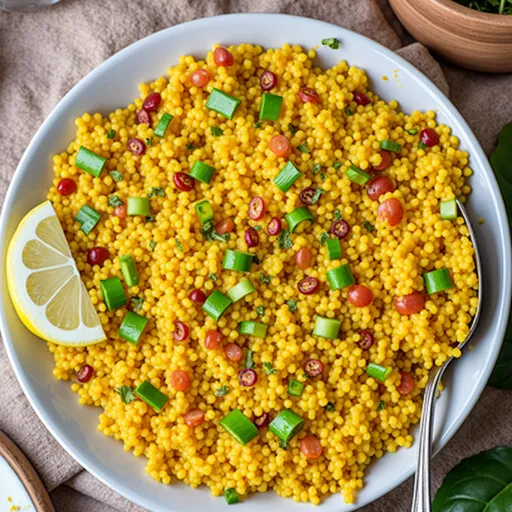
Have you ever had a dish that ignites your passion for cooking? Something so vibrant and flavorful that it makes you want to dive right into the kitchen and create? For me, that dish is Semiya Upma. It’s not just a meal; it’s a celebration of textures and flavors that can transform any breakfast into a culinary adventure. This South Indian delight is a perfect blend of roasted vermicelli, fresh vegetables, and tantalizing spices that dance on your palate and awaken your senses.

What I love most about Semiya Upma is its versatility. Whether you’re whipping up a quick breakfast, a light dinner, or a snack for the kids, this dish fits the bill perfectly. Plus, it’s easy to customize to suit your tastes or the ingredients you have on hand. The warm, comforting aroma that fills your kitchen while it cooks is just the cherry on top. Trust me, once you try it, you’ll want to add it to your regular rotation!

Ingredients You’ll Need

  • 1 cup semiya (vermicelli)
  • 2 tablespoons oil (canola or vegetable oil works well)
  • 1 teaspoon mustard seeds
  • 1 teaspoon urad dal (optional but adds great texture)
  • 1-2 green chilies, chopped (adjust based on your spice tolerance)
  • 1 onion, finely chopped
  • 1 carrot, grated
  • 1/2 cup peas (fresh or frozen)
  • 2 cups water
  • Salt to taste
  • Cilantro for garnishing

How to Make Semiya Upma

Delicious Semiya Upma served in a bowl, featuring a colorful mix of ingredients.

Step-by-Step Instructions

Let’s get cooking! Follow these simple steps to create a delicious plate of Semiya Upma:

  1. In a pan, dry roast the semiya over low heat. Stir frequently until it turns a beautiful golden brown. This step is crucial as it enhances the nutty flavor of the vermicelli. Once done, remove it from the pan and set it aside.

  2. In the same pan, heat the oil over medium heat. Add the mustard seeds and let them splutter. This is where the magic begins!

  3. Add urad dal to the pan and fry it until it turns golden. The result will be a delightful crunch that complements the softness of the semiya.

  4. Next, stir in the chopped green chilies and onions. Sauté until the onions become translucent, and you can smell their sweetness.

  5. Incorporate the grated carrot and peas into the mix. Cook for a few minutes until the veggies soften and become vibrant.

  6. Pour in 2 cups of water and season with salt to taste. Bring the mixture to a boil, allowing all those lovely flavors to meld together.

  7. Once boiling, add the roasted semiya. Stir well to combine, ensuring that every strand of vermicelli is coated with that flavorful broth.

  8. Reduce the heat to low, cover the pan, and let it cook for about 3-4 minutes until the semiya absorbs the water. This step is crucial for achieving that perfect fluffy texture.

  9. Finally, fluff the upma with a fork, garnish with fresh cilantro, and serve hot. Enjoy it on its own or pair it with some yogurt or a spicy chutney for a flavor explosion!

Serving Suggestions

Semiya Upma is incredibly versatile, making it suitable for various occasions. Here are some serving suggestions to elevate your dish:

  • Breakfast Delight: Serve it hot with a side of your favorite chutney and a steaming cup of chai to kickstart your day.
  • Lunchbox Favorite: Pack it into lunchboxes for a nutritious meal that will keep you energized throughout the day.
  • Snack Time: Enjoy it as a savory snack, topped with roasted peanuts or cashews for an extra crunch.
  • Brunch Option: Pair it with a refreshing salad or some sambar for a delightful brunch spread.

Tips for Perfecting Your Semiya Upma

Here are some tips to ensure that your Semiya Upma turns out perfect every time:

  • Roasting Vermicelli: Don’t skip the roasting step! It’s essential for flavor and prevents the semiya from becoming mushy.
  • Water Ratio: The water-to-vermicelli ratio is key. For every cup of semiya, use about 2 cups of water.
  • Customization: Feel free to add other vegetables like bell peppers, corn, or even some paneer for added protein.
  • Fluffing Technique: Use a fork to fluff the upma instead of a spoon, which helps keep it light and airy.

Variations You Can Try

Culinary creativity is the heart of cooking. Here are some variations to explore:

  • Spicy Upma: Add chopped ginger or even some red chili powder for a spicier kick.
  • Masala Upma: Incorporate a teaspoon of garam masala for a deeper flavor profile.
  • Herbed Upma: Mix in some fresh herbs like mint or parsley for a refreshing twist.

Equipment Needed

To make this delicious Semiya Upma, you’ll need:

  • A non-stick pan or skillet
  • A spatula for stirring
  • A fork for fluffing

Storage and Freezing Tips

If you have leftovers (which is rare!), here’s how to store them:

  • Refrigeration: Store in an airtight container in the refrigerator for up to 2-3 days. Reheat in the microwave or on the stovetop.
  • Freezing: You can freeze Semiya Upma for up to a month. Thaw in the refrigerator before reheating.

FAQs About Semiya Upma

Got questions about making Semiya Upma? Here are some common queries:

  • Can I use unroasted vermicelli? Yes, but make sure to roast it in a little oil before following the recipe.
  • Is this dish gluten-free? Unfortunately, traditional semiya is made from wheat. However, you can find gluten-free alternatives made from rice.
  • Can I make this in advance? Absolutely! Just prepare it ahead of time, let it cool, and store it in the fridge. It’s even delicious the next day!

Troubleshooting Common Issues

If your Semiya Upma doesn’t turn out as expected, here are some troubleshooting tips:

  • Too mushy: This often happens due to too much water. Ensure you’re following the water ratio closely.
  • Not flavorful enough: Adjust your spices and seasoning. Don’t be afraid to experiment with flavors!

Semiya Upma isn’t just a dish; it’s an experience. It invites you to explore the vibrant flavors of Indian cuisine while allowing you to express your creativity in the kitchen. So grab your ingredients, gather your spices, and let the adventure begin! Whether you’re enjoying it for breakfast, lunch, or dinner, each bite will transport you to a world of warmth and flavor. Happy cooking!

SEMIYA UPMA

Prep Time 5 minutes
Cook Time 10 minutes
Total Time 15 minutes
Servings 2 servings
Calories 250
A quick and flavorful South Indian breakfast made with vermicelli, vegetables, and spices.

Ingredients

Main

  • 1 cup semiya (vermicelli)
  • 2 tablespoons oil
  • 1 teaspoon mustard seeds
  • 1 teaspoon urad dal
  • 1-2 green chilies green chilies, chopped
  • 1 onion onion, finely chopped
  • 1 carrot carrot, grated
  • 1/2 cup peas (fresh or frozen)
  • 2 cups water
  • to taste salt
  • cilantro for garnishing

Instructions 

  • Dry roast semiya until golden; set aside.
  • Heat oil, add mustard seeds and urad dal; fry until golden.
  • Add green chilies and onion; sauté until translucent.
  • Add carrots and peas; cook briefly.
  • Pour water, add salt, bring to boil, then add roasted semiya. Cover and cook 3-4 minutes.
  • Fluff with fork, garnish with cilantro, serve hot.

Notes

You can add more vegetables or adjust spice levels as desired.
Calories: 250kcal
Cost: $4
Course: Breakfast
Cuisine: South Indian
Keyword: vegetables, Vermicelli

Nutrition

Calories: 250kcal | Carbohydrates: 45g | Protein: 6g | Fat: 8g | Sodium: 300mg

Loved this recipe? Save it to your favorite Pinterest board so you can easily find it later! It’s the perfect way to keep all your sweet ideas in one place. ✨

Bowl of Semiya Upma showcasing the texture and garnishes in warm lighting.

Unleashing the Comfort: The Cheesy Chicken Potato Bake

Welcome to a culinary adventure that will ignite your senses and fill your kitchen with the irresistible aroma of savory goodness. Today, we’re diving into a dish that is as comforting as a warm hug on a chilly evening: the Cheesy Chicken Potato Bake. Combining tender chicken, hearty potatoes, and a creamy cheese sauce, this recipe is not just a meal; it’s an experience. Whether you’re gathering loved ones around the dinner table or treating yourself to a cozy night in, this dish promises to deliver mouthwatering flavors with every bite.

As someone who grew up surrounded by the vibrant and diverse food culture of San Antonio, I can tell you that cooking is more than just following a recipe; it’s about embracing creativity and bold flavors. This Cheesy Chicken Potato Bake perfectly encapsulates that philosophy, transforming simple ingredients into a feast for the senses. So, roll up your sleeves, grab your skillet, and let’s make magic happen!

Why You’ll Love This Recipe

  • Quick to Prepare: Ready in about 1 hour, perfect for busy weeknights when you want something hearty without the hassle.
  • Comforting Flavors: A delightful combination of creamy cheese, juicy chicken, and tender potatoes, making it a family favorite.
  • Easy Cleanup: One-pan dish means less time washing up and more time enjoying your meal.
  • Versatile Ingredients: Utilizes common pantry staples, so you can whip it up without a special trip to the grocery store.
  • Delicious Leftovers: Tastes even better the next day, making it an ideal choice for meal prep or potlucks.

Ingredients Breakdown

Let’s gather our ingredients for this mouthwatering dish. Here’s what you’ll need:

  • 2 pounds boneless, skinless chicken breasts: Cut into 1-inch cubes for optimal cooking.
  • 2 pounds small red or Yukon gold potatoes: These varieties hold their shape well and offer a creamy texture.
  • 1 tablespoon olive oil: For that golden sear on the chicken.
  • Seasonings: 1 teaspoon salt (divided), 1/2 teaspoon black pepper (divided), 1 teaspoon garlic powder (divided), and 1/2 teaspoon onion powder (divided) for flavor enhancement.
  • 1/4 cup unsalted butter: This forms the base of our creamy cheese sauce.
  • 1/4 cup all-purpose flour: To thicken our sauce and create that luscious texture.
  • 2 cups whole or 2% milk: Add richness to the cheese sauce.
  • 1 cup shredded mozzarella cheese: For that gooey, melty goodness.
  • 1/2 cup grated Parmesan cheese: Adds a sharp, savory flavor that complements the mozzarella.
  • 2 tablespoons fresh parsley: Chopped for a pop of color and freshness.

Ingredient Substitutions

Side view of a baked casserole dish filled with chicken and potatoes, topped with cheese.

Don’t have everything on hand? No problem! Here are some substitutions you can make:

  • Chicken: Swap with turkey or firm tofu for a vegetarian option.
  • Cheese: Use cheddar or Monterey Jack for a different flavor profile.
  • Potatoes: Sweet potatoes can be a delightful alternative, adding a hint of sweetness.
  • Milk: Almond milk or oat milk works for a dairy-free version.
  • Butter: Coconut oil or margarine can be used for dairy-free cooking.

Pro Tips for a Perfect Bake

To ensure your Cheesy Chicken Potato Bake turns out flawlessly, keep these expert insights in mind:

  • Sear the Chicken: Don’t skip browning the chicken before baking; it locks in flavor and moisture.
  • Cook Potatoes Just Right: Par-cook the potatoes slightly before adding them to the baking dish for even tenderness.
  • Watch the Bake Time: Ovens vary, so check for doneness by ensuring the chicken is fully cooked and the potatoes are tender.
  • Let it Rest: Allow the dish to sit for 5 minutes post-baking, as it helps the flavors meld.
  • Garnish for Freshness: A sprinkle of fresh parsley right before serving adds a vibrant touch and enhances the dish visually.
  • Experiment with Spices: Add a pinch of cayenne or smoked paprika for an extra kick of flavor!
  • Use a Deep Dish: A 9×13 inch baking dish is perfect for layering flavors and ensuring even cooking.
  • Layer Wisely: Alternate layers of chicken and potatoes for a balanced bite every time.

Common Mistakes and Troubleshooting

Even the best cooks can have off days. Here are some common pitfalls and how to avoid them:

  • Undercooked Chicken: Always ensure chicken is cooked to an internal temperature of 165°F (74°C).
  • Runny Cheese Sauce: If your sauce is too thin, let it simmer a bit longer to thicken up.
  • Overcooked Potatoes: Keep an eye on them while baking to maintain their perfect texture.
  • Flavorless Dish: Taste your cheese sauce before pouring it over the chicken and potatoes; adjust seasoning as needed!

Variations to Spice It Up

This recipe is versatile, and here are some fun variations to keep things exciting:

  • Spicy Southwest Style: Add diced jalapeños and sprinkle with taco seasoning for a zesty twist.
  • Italian Flair: Mix in sun-dried tomatoes and Italian herbs for a Mediterranean vibe.
  • Vegetable Medley: Toss in your favorite veggies like broccoli or bell peppers for added nutrition and color.
  • Cheesy Spinach Addition: Stir in fresh spinach before baking for an extra layer of flavor and nutrients.

Storage and Make-Ahead Instructions

This dish not only shines on the dinner table but also makes for great leftovers. Here’s how to handle storage:

  • Refrigerator: Store leftovers in an airtight container for up to 3 days.
  • Freezer: For longer storage, freeze in a well-sealed container for up to 3 months.
  • Make-Ahead: Assemble the dish a day in advance, cover, and refrigerate. Bake when ready for a quick meal.

Comprehensive FAQ

1. Can I use frozen chicken?

Yes, just ensure it’s fully thawed before cooking for even results.

2. What can I serve with the Cheesy Chicken Potato Bake?

A simple green salad or roasted vegetables pair perfectly.

3. Can I make this dish gluten-free?

Absolutely! Use gluten-free flour for the cheese sauce.

4. How do I know when the potatoes are done?

They should be fork-tender and the chicken should reach 165°F (74°C).

5. Can I double the recipe?

Yes, just use a larger baking dish and ensure even cooking time.

6. Is there a vegetarian version?

Yes! Substitute chicken with tofu and use vegetable broth instead of chicken broth.

7. What cheese works best?

While mozzarella is traditional, feel free to mix in your favorite cheeses for a unique taste.

8. Can I add more spices?

Definitely! Experiment with your favorite seasonings to customize the flavor.

Nutritional Tips and Dietary Adaptations

This dish can be adapted to fit various dietary needs:

  • Low-Carb Option: Substitute potatoes with cauliflower for a keto-friendly version.
  • High-Protein Boost: Add chickpeas or black beans for extra protein and fiber.
  • Lightened-Up Version: Use low-fat cheese and skim milk to reduce calories without sacrificing flavor.

Equipment Recommendations

Here’s what you’ll need to bring this dish to life:

  • Large Skillet: For searing chicken and sautéing potatoes.
  • Medium Saucepan: To create the creamy cheese sauce.
  • 9×13 Inch Baking Dish: Essential for the perfect bake.
  • Whisk: For smooth sauce preparation.

Serving Suggestions

Once your Cheesy Chicken Potato Bake is bubbling and golden, it’s time to serve! Consider these ideas:

  • Garnish with Fresh Herbs: A sprinkle of fresh parsley brightens the dish.
  • Pair with Crusty Bread: Serve alongside a warm loaf to soak up that delicious cheese sauce.
  • Offer a Side Salad: A light salad balances the richness of the bake.

This Cheesy Chicken Potato Bake is more than just comfort food; it’s a celebration of flavors and a testament to the joy of cooking. So, whether you’re a seasoned chef or a kitchen novice, don’t shy away from adding a little fire to your food. Grab your ingredients, embrace your creativity, and let the kitchen become your stage. Happy cooking!

Cheesy Chicken Potato Bake

Prep Time 15 minutes
Cook Time 25 minutes
Total Time 40 minutes
Servings 6 servings
Calories 850
A hearty and cheesy baked dish combining tender chicken, potatoes, and melty cheese, perfect for a comforting family dinner.

Ingredients

Protein

  • 2 pounds boneless, skinless chicken breasts, cut into 1-inch cubes
  • 2 pounds small red potatoes or Yukon gold potatoes, scrubbed and cut into 1-inch chunks

Fats & Oils

  • 1 tablespoon olive oil

Seasonings

  • 1 teaspoon salt, divided
  • 1/2 teaspoon black pepper, divided
  • 1 teaspoon garlic powder, divided
  • 1/2 teaspoon onion powder, divided

Dairy & Cheese

  • 1/4 cup unsalted butter
  • 1/4 cup all-purpose flour
  • 2 cups whole milk or 2% milk
  • 1 cup shredded mozzarella cheese, divided
  • 1/2 cup grated Parmesan cheese

Herbs

  • 2 tablespoons fresh parsley, chopped

Instructions 

  • Preheat oven to 400°F (200°C). Grease a 9x13 inch dish.
  • Toss chicken with 1/2 tsp salt, 1/4 tsp pepper, 1/2 tsp garlic powder, 1/4 tsp onion powder. Sear in skillet 3-4 mins. Remove; potatoes cook 5-7 mins.
  • Make cheese sauce: melt butter, whisk in flour, cook 1 min. Gradually add milk, cook until thickened 5-7 mins. Stir in remaining seasonings, half mozzarella, Parmesan.
  • Combine potatoes and chicken in dish. Pour cheese sauce over, sprinkle remaining mozzarella. Bake 20-25 mins until golden. Rest 5 mins, garnish with parsley.

Notes

For extra flavor, add a pinch of red pepper flakes or herbs.
Calories: 850kcal
Cost: $15
Course: Main Course
Keyword: Cheese, chicken, potato

Nutrition

Calories: 850kcal | Carbohydrates: 70g | Protein: 65g | Fat: 45g | Sodium: 1500mg

Awaken Your Mornings with a Bold Start

Picture this: it’s the crack of dawn, the sun peeking through your kitchen window, and the aroma of something delicious is wafting through the air. You can almost taste the excitement of a new day ahead, and there’s no better way to kick it off than with a vibrant, nutritious bowl of peanut butter oatmeal. This isn’t just any breakfast; this is my Superfood Peanut Butter Oatmeal Bowl — a dish that promises to elevate your morning routine and ignite your passion for cooking.

This oatmeal bowl is not only packed with flavor but also loaded with health benefits, making it one of the most nutritious ways to start your day. Infused with hemp seeds, crunchy walnuts, and a hint of cinnamon, it’s a symphony of textures and tastes that will keep you energized and ready to conquer whatever the day throws at you.

Why You’ll Love This Recipe

  • Quick and Easy: Perfect for busy mornings, this oatmeal takes just 10 minutes to prepare, allowing you to enjoy a wholesome meal without the hassle.
  • Nutritious Powerhouse: Packed with protein, healthy fats, and fiber, this bowl will keep you full and satisfied, making it an ideal choice for breakfast.
  • Customizable: Whether you prefer it sweet or savory, this recipe is versatile — swap ingredients to suit your taste or dietary needs.
  • Energy Boost: With ingredients like peanut butter and hemp seeds, you’ll get a sustained energy release, perfect for tackling a busy day.
  • Delicious Flavor: The combination of peanut butter, cinnamon, and fresh fruit creates a mouthwatering flavor profile that you’ll crave every morning.

Ingredients You’ll Need

The beauty of this recipe lies in its simplicity. Here’s what you’ll need:

  • 1/3 cup quick oats
  • 1 cup water
  • 1/4 teaspoon cinnamon
  • 1/4 teaspoon vanilla extract
  • 1 teaspoon hemp seeds
  • 2 Tablespoons walnuts
  • 1/2 teaspoon flax meal
  • 1/2 banana, sliced
  • 2 Tablespoons blueberries
  • 1 teaspoon coconut sugar
  • 2 teaspoons peanut butter

Ingredient Substitutions

  • Oats: If quick oats aren’t available, you can use rolled oats; just remember to adjust the cooking time.
  • Nuts: Feel free to replace walnuts with your favorite nuts, like almonds or pecans, for a different crunch.
  • Fruits: Swap blueberries for strawberries, raspberries, or even dried fruits like raisins or apricots.
  • Sweetener: If coconut sugar isn’t your go-to, honey or maple syrup can be excellent alternatives.

How to Prepare Your Oatmeal Bowl

Delicious peanut butter oatmeal bowl featuring hemp seeds and a sprinkle of cinnamon.

Now that you have your ingredients ready, let’s dive into the preparation:

  1. In a small pot, bring the water to boil. Once boiling, add the quick oats, vanilla, and cinnamon. Lower the heat to a simmer and cook for about 3-5 minutes, stirring occasionally until the oats have absorbed most of the water.
  2. Transfer the cooked oatmeal into a bowl. Top it with hemp seeds, walnuts, sliced banana, blueberries, and a drizzle of peanut butter. Sprinkle with coconut sugar for an extra touch of sweetness.

Pro Tips for the Perfect Oatmeal

  • Texture Matters: For creamier oatmeal, use milk instead of water or add a splash of milk after cooking.
  • Don’t Rush: Letting your oats simmer properly will enhance their flavor and texture.
  • Mix It Up: Experiment with spices like nutmeg or cardamom for a unique twist.
  • Garnish Wisely: Adding fresh herbs like mint can elevate the flavor profile of your oatmeal.
  • Portion Control: Adjust the portion based on your hunger levels; this bowl can be a hearty meal or a light snack.
  • Make It Ahead: Prepare the oatmeal in advance and store it in the fridge; just reheat and add your toppings in the morning.
  • Storage: Keep leftovers in an airtight container in the fridge for up to 3 days; just reheat when ready to eat.

Common Mistakes and Troubleshooting

Even the best of us can run into hiccups when cooking. Here are a few common mistakes and how to avoid them:

  • Overcooking: Watch your oats! Overcooking can lead to a mushy texture. Aim for that creamy consistency.
  • Water Ratio: If your oats turn out too watery, reduce the amount of water next time. A good rule of thumb is 2:1 water to oats.
  • Not Enough Flavor: Don’t skimp on the spices! They can transform your oatmeal from bland to grand.

Variations to Spice Up Your Oatmeal

Feeling adventurous? Here are some unique variations to keep your breakfast exciting:

  • Chocolate Delight: Add unsweetened cocoa powder and top with sliced strawberries and a sprinkle of dark chocolate chips.
  • Savory Style: Incorporate sautéed spinach, a poached egg, and a dash of hot sauce for a savory twist.
  • Tropical Paradise: Mix in coconut milk, top with pineapple, and finish with shredded coconut.
  • Autumn Bliss: Add pumpkin puree and pumpkin spice for a seasonal flavor that warms you from the inside out.

Frequently Asked Questions

  • Can I use instant oats for this recipe? Yes, but adjust the cooking time according to package instructions — they cook faster!
  • How can I make this oatmeal gluten-free? Ensure you use certified gluten-free oats to avoid any cross-contamination.
  • Can I freeze peanut butter oatmeal? Absolutely! Freeze in individual servings and reheat when you’re ready to enjoy.
  • What if I don’t have hemp seeds? You can use chia seeds or sunflower seeds as a substitute.
  • How can I lower the sugar content? Reduce the amount of coconut sugar or omit it entirely if your toppings are sweet enough.
  • Can I add protein powder? Yes! Stir in a scoop of your favorite protein powder for an extra boost.
  • What are some good toppings? Consider nuts, seeds, fresh fruits, or even a dollop of yogurt for added creaminess.
  • Can I prepare this oatmeal overnight? Yes! Combine the ingredients and let them sit in the fridge overnight for a quick breakfast.

Nutritional Benefits and Dietary Adaptations

This Peanut Butter Oatmeal Bowl is not only delicious but also packed with health benefits:

  • High in Fiber: Oats are an excellent source of dietary fiber, which can aid digestion and promote heart health.
  • Rich in Healthy Fats: Peanut butter and walnuts provide essential fatty acids, keeping you satiated and energized.
  • Vitamins and Minerals: The addition of fruits and seeds adds vital vitamins and antioxidants, boosting your immune system.
  • Dietary Adaptations: Easily adaptable for vegan, gluten-free, or low-carb diets — just swap out ingredients as needed.

Equipment Recommendations

Here’s what you’ll need to whip up this delicious breakfast:

  • Small Pot: A good-quality pot for cooking your oatmeal evenly.
  • Measuring Cups and Spoons: Accurate measurements are key to achieving the perfect balance of flavors.
  • Spoon: For stirring and serving your oatmeal with flair.

Serving Suggestions

Serve your Superfood Peanut Butter Oatmeal Bowl warm, garnished with extra fruits and a drizzle of peanut butter for a delightful presentation. Pair it with a cup of herbal tea or coffee to enhance the experience. This bowl isn’t just breakfast; it’s a canvas for your culinary creativity.

Join My Email List for More Delicious Recipes!

If you enjoyed this recipe, be sure to join my email list for more culinary adventures and spicy inspirations that will keep your taste buds tingling. Remember, cooking should always be an adventure — let’s embrace the heat together!

You May Also Like

For more exciting recipes that celebrate the art of cooking with spice, check out these favorites:

  • Spicy Chorizo Breakfast Tacos – A kickstart to your morning with a Tex-Mex flair!
  • Fiery Chili Con Carne – A rich and hearty meal that warms your soul.
  • Sweet and Spicy Mango Salsa – A perfect accompaniment to grilled meats and seafood.

Embrace your kitchen adventures with this Superfood Peanut Butter Oatmeal Bowl. Remember, the right spice can transform the ordinary into the extraordinary. So grab your skillet, add a little fire, and let’s make every meal a story worth telling!

Superfood Peanut Butter Oatmeal Bowl

Prep Time 2 minutes
Cook Time 5 minutes
Total Time 7 minutes
Servings 1 bowl
Calories 350
A nutritious and delicious oatmeal bowl packed with superfoods, perfect for a healthy breakfast or snack.

Ingredients

Oats

  • 1/3 cup quick oats
  • water water (enough to cook oats)

Spices and Flavorings

  • 1/4 teaspoon cinnamon
  • 1/4 teaspoon vanilla extract

Seeds and Nuts

  • 1 teaspoon teaspoon hemp seeds
  • 2 Tablespoons tablespoons walnuts
  • 1/2 teaspoon flax meal

Fruits and Sweeteners

  • 1/2 banana banana sliced
  • 2 Tablespoons tablespoons blueberries
  • 1 teaspoon teaspoon coconut sugar
  • 2 teaspoons teaspoons peanut butter

Instructions 

  • Bring water to a boil, add oats, vanilla, and cinnamon. Simmer for 3-5 minutes, stirring occasionally.
  • Pour oatmeal into a bowl, top with seeds, nuts, fruit, and drizzle with peanut butter.

Notes

Feel free to customize with your favorite toppings or add a drizzle of honey for extra sweetness.
Calories: 350kcal
Cost: $4
Course: Breakfast
Cuisine: Healthy
Keyword: Breakfast, Oatmeal, Superfood

Nutrition

Calories: 350kcal | Carbohydrates: 55g | Protein: 10g | Fat: 12g | Sodium: 50mg

Why You’ll Love This Spicy Miso Ramen

Welcome to a culinary adventure that will ignite your taste buds and warm your heart! This Vegan Spicy Miso Ramen is not just another noodle dish; it’s a vibrant celebration of flavors that will take you on a journey through the umami-rich landscapes of Asian cuisine. Whether you’re a seasoned vegan or just dipping your toes into plant-based meals, this recipe is your passport to warmth, comfort, and a delightful kick of spice.

Ramen has a way of wrapping you in its comforting embrace, and when you add a spicy twist, it transforms into a thrilling experience. The earthy miso, combined with the fiery sriracha and aromatic sesame oil, creates a symphony of flavors that dance on your palate. Plus, with fresh vegetables and protein-packed tofu, this dish is a nutritional powerhouse that checks all the boxes for a healthy meal. Ready to dive in? Let’s make some magic in the kitchen!

Ingredients That Make a Difference

To achieve that perfect balance of spice and depth in your Vegan Spicy Miso Ramen, gathering the right ingredients is key. Here’s what you’ll need:

  • 1 tablespoon sesame oil – This oil adds a nutty flavor that enhances the overall taste.
  • 2 cloves garlic, minced – Fresh garlic brings robust flavor and aromatic essence.
  • 1 tablespoon fresh ginger, grated – Ginger adds warmth and a subtle zing.
  • 2 tablespoons white miso paste – This ingredient provides the umami foundation.
  • 1 tablespoon soy sauce or tamari – For that salty, savory depth.
  • 1 tablespoon sriracha – Adjust to taste for your desired heat level.
  • 4 cups vegetable broth – The base of your soup; the heart of the dish.
  • 1 cup unsweetened soy milk or other plant milk – Creamy texture without the dairy.
  • 200g ramen noodles – Make sure they’re vegan-friendly!
  • 1 block (about 200g) firm tofu, cubed – A great source of plant-based protein.
  • 1 cup sliced shiitake mushrooms – Earthy and rich, these mushrooms elevate the dish.
  • 1 cup chopped bok choy – Adds freshness and crunch.
  • 1 carrot, julienned – Sweetness and color to delight the eyes.
  • 2 green onions, sliced – For that finishing touch and a bit of bite.
  • Sesame seeds, for garnish – A nutty crunch on top.
  • Chili oil, for garnish (optional) – If you dare to turn up the heat!

Step-by-Step to Spicy Perfection

A mouth-watering Vegan Spicy Miso Ramen featuring colorful toppings and rich broth.

Now that you have your ingredients ready, let’s get cooking! Follow these simple steps to whip up a deliciously spicy bowl of ramen:

  1. In a sizable saucepan, warm the sesame oil over medium heat. This is where the magic begins! The oil should shimmer slightly but not smoke.
  2. Add the minced garlic and grated ginger to the pan. Sauté for about a minute, allowing the aromas to fill your kitchen. You want them to become fragrant but not browned!
  3. Next, combine the white miso paste, soy sauce, and sriracha into the pan. Stir this mixture for another minute, letting the ingredients meld together beautifully.
  4. Pour in the vegetable broth and bring the mixture to just below boiling. This is where the base of your soup starts to shine!
  5. Pour in the soy milk and let it simmer gently for about five minutes. Take a moment to taste the broth and adjust the seasoning if needed. Remember, this is your creation!
  6. While your broth is simmering, grab another pan and cook the cubed tofu. Heat it until golden on all sides, which should take about 8-10 minutes. Set it aside when done.
  7. According to the package directions, cook the ramen noodles in the broth. In the last couple of minutes, stir in the shiitake mushrooms and bok choy, allowing them to soften.
  8. Finally, serve the ramen in bowls, placing the golden tofu on top. Add the julienned carrot, green onions, and a sprinkle of sesame seeds. If you’re feeling adventurous, drizzle some chili oil on top for that extra kick!

Tips for the Perfect Bowl

To elevate your Vegan Spicy Miso Ramen even further, consider these expert tips:

  • Fresh Ingredients: Always use fresh vegetables for the best flavor and texture. Freshness is key in enhancing the overall dish.
  • Customize Your Heat: Don’t shy away from adjusting the amount of sriracha or chili oil to match your spice tolerance. Cooking should be a personal journey!
  • Make It Your Own: Feel free to add other vegetables like bell peppers, spinach, or even corn. The more colorful, the better!

Variations and Substitutions

Cooking is all about creativity, and this ramen recipe is no exception. Here are some variations to inspire your kitchen explorations:

  • Protein Swaps: If tofu isn’t your thing, try tempeh, edamame, or even chickpeas for a protein boost.
  • Different Noodles: Experiment with different types of noodles like udon or rice noodles for a unique twist.
  • Spice it Up: Consider adding a pinch of crushed red pepper or a dash of wasabi for an unexpected twist.

Equipment You’ll Need

Before you dive into this spicy adventure, ensure you have the right tools on hand:

  • A large saucepan for the broth.
  • A non-stick frying pan for cooking the tofu.
  • A stirring spoon for mixing.
  • Measuring cups and spoons for accuracy.
  • Bowls for serving your delicious creation.

Storage and Freezing

If you’re lucky enough to have leftovers (though I doubt it!), here’s how to store them:

  • Storage: Store any leftovers in an airtight container in the fridge for up to three days. Reheat gently on the stovetop.
  • Freezing: While the noodles may lose some texture, you can freeze the broth and veggies. Just make sure to store them separately from the noodles.

Frequently Asked Questions

Got questions? I’ve got answers! Here are some common queries about this delicious dish:

  • Can I make it gluten-free? Absolutely! Use gluten-free ramen noodles and tamari instead of soy sauce.
  • Is this recipe low in calories? Yes! It’s packed with nutritious ingredients and can be a wholesome meal option.
  • Can I add more spice? Of course! Feel free to boost the heat with more sriracha or by adding fresh chilies.

Troubleshooting Tips

If you encounter any hiccups while making your ramen, here are some quick fixes:

  • Bland Flavor: If the broth tastes dull, add a splash more soy sauce or a pinch of salt to enhance the flavor.
  • Too Spicy: If it’s too hot to handle, add a splash more soy milk to mellow out the heat.
  • Overcooked Noodles: Keep an eye on the cooking time to ensure your noodles have the perfect bite!

Conclusion: Your Culinary Adventure Awaits

Cooking is an adventure, and every recipe is a chance to explore new flavors and techniques. This Vegan Spicy Miso Ramen is more than just a meal; it’s a delicious experience that invites you to play with your food. The combination of spicy, savory, and umami flavors creates a dish that will leave you craving more. So gather your ingredients, unleash your inner chef, and let the aromas fill your kitchen. Enjoy each bite, and remember—cooking boldly is a journey worth taking. Happy cooking!

Vegan Spicy Miso Ramen

Prep Time 10 minutes
Cook Time 20 minutes
Total Time 30 minutes
Servings 4 servings
Calories 450
A flavorful and spicy vegan ramen packed with miso, tofu, and fresh vegetables, perfect for a comforting meal.

Ingredients

Broth and Seasonings

  • 1 tablespoon sesame oil
  • 2 cloves garlic, minced
  • 1 tablespoon fresh ginger, grated
  • 2 tablespoons white miso paste
  • 1 tablespoon soy sauce or tamari
  • 1 tablespoon sriracha or to taste

Main Ingredients

  • 4 cups vegetable broth
  • 1 cup unsweetened soy milk or other plant milk
  • 200 g ramen noodles (check for vegan)
  • 1 block firm tofu, cubed (about 200g)
  • 1 cup sliced shiitake mushrooms
  • 1 cup chopped bok choy
  • 1 carrot julienned
  • 2 green onions sliced

Garnishes

  • to taste sesame seeds, for garnish
  • to taste chili oil, for garnish (optional)

Instructions 

  • Heat sesame oil in a saucepan, cook garlic and ginger until aromatic.
  • Mix miso, soy sauce, and sriracha; add broth and heat below boiling.
  • Add soy milk and simmer for 5 minutes; season as needed.
  • Cook tofu until golden; set aside.
  • Cook noodles in broth; add mushrooms and bok choy in last minutes.
  • Assemble bowls, top with tofu, carrots, green onions, sesame seeds, and chili oil.

Notes

Feel free to adjust spice levels and garnishes to taste.
Calories: 450kcal
Cost: $15
Course: Main Course
Cuisine: Vegan
Keyword: Ramen

Nutrition

Calories: 450kcal | Carbohydrates: 70g | Protein: 20g | Fat: 12g | Sodium: 1500mg

Loved this recipe? Save it to your favorite Pinterest board so you can easily find it later! It’s the perfect way to keep all your sweet ideas in one place. ✨

A detailed view of Vegan Spicy Miso Ramen, showcasing noodles, mushrooms, and greens in a cozy setting.

Why You’ll Love This Recipe

In the whirlwind of life, finding time to whip up a delicious, nourishing meal can feel like a daunting task. Enter these 10-Minute Vegan Burrito Wraps. They are not just a recipe; they’re a celebration of flavors, colors, and textures that come together in a flash. Imagine vibrant black beans mingling with sweet corn, creamy avocado, and zesty salsa all nestled inside a warm tortilla. This dish not only satisfies your hunger but also invites you to embark on a culinary adventure right in your kitchen.

Perfect for busy weeknights or lazy weekends, these burritos are customizable, healthy, and oh-so-delicious. Plus, they offer a fantastic opportunity to engage the entire family in the cooking process. With just a handful of pantry staples, you can create something extraordinary that will impress even the pickiest eaters. So, let’s dive into this quick and easy recipe that’s sure to become a staple in your home.

Ingredients

Gathering the right ingredients is the first step to success. Here’s what you’ll need for these flavorful burritos:

  • 4 large whole grain tortillas
  • 1 can (15 oz) black beans, rinsed and drained
  • 1 cup cooked brown rice
  • 1 cup corn (fresh, frozen, or canned)
  • 1 avocado, sliced
  • 1 cup salsa
  • 1 cup fresh spinach or lettuce
  • 1 teaspoon cumin
  • 1 teaspoon chili powder
  • Salt and pepper to taste

Instructions

Delicious 10 Minute Vegan Burrito Wraps showcasing vibrant ingredients in a soft tortilla, shot in natural light.

Let’s get cooking! Follow these simple steps to create your 10-Minute Vegan Burrito Wraps:

  1. In a large bowl, combine the rinsed black beans, cooked brown rice, corn, cumin, chili powder, salt, and pepper. Stir until everything is well mixed.
  2. Lay out the tortillas on a clean surface, ready for assembly.
  3. Evenly distribute the bean and rice mixture onto each tortilla, ensuring you don’t overfill them.
  4. Add slices of avocado on top of the mixture, followed by a generous scoop of salsa and a handful of spinach or lettuce.
  5. Fold the sides of the tortilla over the filling, then roll it up tightly from the bottom to secure all the deliciousness inside.
  6. Serve immediately or wrap in foil for a quick meal on the go!

Nutrition Facts

These burritos are not only quick to make but also pack a powerful nutritional punch. Here’s a glance at what you’re getting in each serving:

  • Calories: Approximately 350
  • Protein: 12g
  • Fiber: 10g
  • Fat: 10g (mainly from the avocado)
  • Carbohydrates: 50g

Preparation Time

When it comes to quick meals, timing is everything! Here’s how the prep breaks down:

  • Gathering Ingredients: 3-4 minutes
  • Mixing the Filling: 3-4 minutes
  • Assembling the Burritos: 2-3 minutes

That totals to roughly 10 minutes from start to finish, making this dish not only a lifesaver but a game-changer in your kitchen!

How to Serve

These vegan burritos are incredibly versatile. Here are some creative ways to enjoy them:

  • On the Go: Wrap them tightly in foil for a portable meal that’s perfect for busy days.
  • Plated Delight: Serve them on a colorful platter with a side of extra salsa or guacamole for dipping.
  • With a Salad: Pair them with a fresh green salad topped with lime vinaigrette to balance the richness of the burrito.

Tips for Success

To ensure your burrito-making experience goes smoothly, consider these helpful tips:

  • Warm Your Tortillas: Always warm your tortillas before filling. This keeps them pliable and less likely to tear when rolling.
  • Don’t Overfill: Less is more! Avoid overstuffing to prevent messy spills and ensure easy rolling.
  • Customize It: Feel free to add other ingredients like diced bell peppers, shredded carrots, or jalapeños for added flavor and nutrition.

Variations

Want to change things up? Here are some variations to consider:

  • Protein Boost: Add cooked quinoa or tofu for extra protein, making your burritos even heartier.
  • Cheesy Touch: If you’re not strictly vegan, sprinkle some shredded cheese inside before rolling for a melty surprise.
  • Spicy Kick: Add diced jalapeños or a dash of hot sauce to the filling for those who enjoy a bit of heat.

Substitutions

Don’t have everything on hand? No problem! Here are some substitutions you can make:

  • Beans: Swap black beans for pinto beans or chickpeas for a different flavor profile.
  • Rice: Use leftover rice or even quinoa for a nutty twist.
  • Greens: If spinach isn’t available, feel free to use kale or arugula for a unique flavor.

Storage and Freezing

Leftover burritos? No problem! Here’s how to store them:

  • Refrigeration: Wrap any leftover burritos tightly in foil or plastic wrap and store in the refrigerator for up to 24 hours.
  • Freezing: These burritos freeze well! Wrap them tightly in foil and place in a freezer-safe bag. They can last for up to 3 months. To reheat, thaw them overnight in the fridge and bake at 350°F until warmed through.

FAQs

Here are some frequently asked questions that might help you in your burrito journey:

  • Can I make these ahead of time? Yes! You can prepare the filling in advance. Just assemble the burritos when you’re ready to eat to avoid soggy tortillas.
  • What if I don’t like cilantro? No worries! You can leave it out or substitute with fresh parsley or green onions for a different flavor.
  • Are these burritos spicy? As written, they are mild. Adjust the chili powder to your preference, or add fresh jalapeños for extra heat!

Troubleshooting

If you encounter issues while making your burritos, here are some tips:

  • Tortillas Breaking: This often happens with cold tortillas. Warm them in a pan or microwave before filling.
  • Too Soggy: Avoid adding too much salsa directly into the filling. Instead, serve extra salsa on the side.

Conclusion

These 10-Minute Vegan Burrito Wraps are more than just a meal; they’re a delicious reminder that cooking can be quick, easy, and incredibly satisfying. With their vibrant flavors and customizable nature, they invite you to express your culinary creativity and make mealtime a fun experience. Whether you’re cooking for yourself or entertaining friends and family, these burritos will undoubtedly impress and keep everyone coming back for more. So, grab your ingredients, roll up your sleeves, and let the adventure begin!

Happy cooking, and remember — every meal is an opportunity to spice up your life!

10-Minute Vegan Burrito Wraps

Prep Time 10 minutes
Total Time 10 minutes
Servings 4 servings
Calories 350
Quick and delicious vegan burrito wraps packed with beans, rice, and fresh veggies, perfect for a fast meal.

Ingredients

Tortillas

  • 4 pieces large whole grain tortillas
  • 1 can (15 oz) black beans (rinsed and drained)
  • 1 cup cooked brown rice
  • 1 cup corn (fresh, frozen, or canned)
  • 1 avocado avocado (sliced)
  • 1 cup salsa
  • 1 cup fresh spinach or lettuce
  • 1 teaspoon cumin
  • 1 teaspoon chili powder
  • to taste salt and pepper

Instructions 

  • Mix black beans, rice, corn, cumin, chili powder, salt, and pepper in a bowl.
  • Lay out tortillas and evenly distribute the mixture.
  • Add avocado slices, salsa, and greens on top.
  • Fold sides and roll up tightly.
  • Serve immediately or wrap for on-the-go.

Notes

Feel free to customize with your favorite veggies or add hot sauce for extra flavor.
Calories: 350kcal
Cost: $10
Course: Main Course
Cuisine: Vegan
Keyword: Burrito, quick, Vegan

Nutrition

Calories: 350kcal | Carbohydrates: 60g | Protein: 15g | Fat: 10g | Sodium: 600mg

Loved this recipe? Save it to your favorite Pinterest board so you can easily find it later! It’s the perfect way to keep all your sweet ideas in one place. ✨

An appetizing stack of vegan burrito wraps, highlighting fresh vegetables and beans, beautifully lit from the side.

Unlock the Flavor: Parmesan Zucchini Squares That Bring Joy to Any Table

Welcome, fellow flavor adventurers! Today, we’re diving into a dish that’s not just about zucchini, but a celebration of flavors that will make your taste buds dance. These Parmesan Zucchini Squares are the ultimate comfort food, perfect for any occasion — from cozy weeknight dinners to festive gatherings. Let’s kick things off with why you’ll absolutely love this recipe!

Why You’ll Love This Recipe

  • Flavor Explosion: With every bite, the zesty notes of Parmesan cheese blend beautifully with the fresh zucchini, creating a flavor profile that’s both comforting and sophisticated.
  • Easy to Make: Utilizing a simple Bisquick baking mix means you can whip these up without fuss, making it a perfect choice for busy weeknights.
  • Versatile Dish: These squares can be a side dish, appetizer, or even a main dish when paired with a salad or protein — making them a fantastic addition to any meal.
  • Healthy Options: Packed with nutrients from zucchini, these squares are a guilt-free way to indulge in comfort food.
  • Make Ahead: These squares store beautifully in the fridge or freezer, allowing you to prepare in advance and enjoy them whenever the craving hits!

Ingredient Breakdown

Let’s take a closer look at what goes into these delicious Parmesan Zucchini Squares and explore some possible substitutions.

  • Eggs: 4 large eggs are the binding force. If you’re looking for a vegan alternative, consider using flax eggs (1 tbsp flaxseed meal + 2.5 tbsp water per egg).
  • Bisquick Baking Mix: 1 cup gives these squares a nice texture. You can use gluten-free baking mixes if needed.
  • Onions: 1/2 cup chopped onions adds a sweet flavor. Red onions or scallions work wonderfully too.
  • Salt: 1/2 teaspoon enhances overall flavor. Adjust based on your taste or dietary requirements.
  • Parmesan Cheese: 1/2 cup, freshly grated is best for that rich, nutty flavor. Nutritional yeast is a great substitute for a dairy-free option.
  • Garlic Powder: 1/4 teaspoon adds depth. Fresh minced garlic can be used for a bolder taste.
  • Dried Oregano: 1/2 teaspoon brings an aromatic touch. Feel free to swap for Italian seasoning or fresh herbs.
  • Black Pepper: A dash to taste adds a gentle kick.
  • Minced Garlic: 1 teaspoon for that pungent punch.
  • Vegetable Oil: 1/2 cup keeps things moist. Olive oil or melted coconut oil are great alternatives.
  • Dried Parsley: 2 teaspoons for a hint of color and flavor. Fresh parsley can also work.
  • Zucchini: 3 cups thinly sliced. Any summer squash can be used if you want to mix things up!

Pro Tips for Perfect Parmesan Zucchini Squares

Side view of freshly baked Parmesan Zucchini Squares, highlighting the texture and color.

Ready to take your cooking to the next level? Here are some expert insights to ensure your dish turns out perfect every time:

  • Choose the Right Zucchini: Look for firm, shiny zucchini with no blemishes. Smaller ones are usually sweeter and more tender.
  • Dry Your Zucchini: After slicing, pat the zucchini dry with paper towels to avoid excess moisture that can lead to sogginess.
  • Fresh Grated Parmesan: Always opt for freshly grated cheese. Pre-packaged varieties can have anti-caking agents that affect the meltiness and flavor.
  • Don’t Overmix: When combining ingredients, mix just until combined to keep your squares light and fluffy.
  • Check for Doneness: Use a toothpick to check if the center is cooked through; it should come out clean.
  • Experiment with Spices: Feel free to add a pinch of red pepper flakes for heat or swap in your favorite herbs for a personal touch.
  • Adjust Cooking Time: Depending on your oven, you may need to tweak the cooking time slightly. Keep an eye on that golden color!
  • Cut Squares While Hot: For clean edges, cut the squares right after removing them from the oven.

Common Mistakes and Troubleshooting

Even the most seasoned chefs can run into hiccups. Here are common pitfalls and how to avoid them:

  • Too Soggy: Make sure to squeeze out excess moisture from your zucchini. This is key to achieving that perfect texture.
  • Overbaked: Watch your squares closely in the last few minutes; they can go from perfect to overdone quickly!
  • Flavors Too Mild: If you prefer a bolder flavor, don’t hesitate to double the garlic or add a splash of hot sauce to the mix.
  • Sticking to the Pan: Always grease your baking dish thoroughly to ensure easy removal of your delicious squares.

Variations to Elevate Your Zucchini Squares

Feeling adventurous? Here are some variations to switch things up:

  • Cheesy Spinach Zucchini Squares: Add 1 cup of fresh spinach for added nutrients and flavor.
  • Italian Herb Zucchini Squares: Mix in Italian seasoning and sun-dried tomatoes for a Mediterranean twist.
  • Mexican-Inspired: Add jalapeños and a sprinkle of cumin for a zesty kick!
  • Quinoa Zucchini Squares: Replace 1/2 cup of Bisquick with cooked quinoa for a heartier texture.

Storage and Make-Ahead Instructions

Want to prep your Parmesan Zucchini Squares ahead of time? Here’s how:

  • Refrigeration: Store in an airtight container in the fridge for up to 4 days. Reheat in the oven for best results.
  • Freezing: Allow squares to cool completely, then freeze in individual portions. They can be reheated directly from frozen in the oven.
  • Make-Ahead: Assemble the mixture and store it in the fridge overnight. Bake the next day for a fresh-out-of-the-oven experience.

Frequently Asked Questions

Here’s a roundup of common inquiries regarding these delightful squares:

  • Can I make these squares gluten-free? Absolutely! Just use a gluten-free baking mix instead of Bisquick.
  • What can I serve with Parmesan Zucchini Squares? These squares pair beautifully with a fresh salad, grilled chicken, or a hearty soup.
  • Can I use other cheeses? Yes! Cheddar, mozzarella, or feta can be substituted for Parmesan to create unique flavor profiles.
  • How do I know when they are done? They should be golden brown on top and a toothpick inserted in the center should come out clean.
  • Can I add meat to this recipe? Certainly! Cooked and crumbled sausage or bacon can be mixed in for added protein.
  • How do I make this dish vegan? Use flax eggs and nutritional yeast in place of cheese for a plant-based option.
  • What’s the best way to serve these squares? They can be served warm, at room temperature, or even cold as a refreshing snack!
  • Can I use frozen zucchini? It’s best to use fresh zucchini for the best texture, but if using frozen, make sure it’s fully thawed and drained.

Nutrition Tips and Dietary Adaptations

Looking to make your Parmesan Zucchini Squares even healthier? Here are some nutrition tips:

  • Reduce Sodium: Opt for low-sodium versions of ingredients to keep salt levels in check.
  • Increase Fiber: Incorporate whole-grain or alternative flour in place of Bisquick.
  • Boost Protein: Add a scoop of protein powder to the mix or serve alongside a protein-rich side.
  • Make it Dairy-Free: Swap cheese for nutritional yeast and use plant-based milk in the mixture.

Equipment Recommendations

For the best experience, here’s what you’ll need:

  • Mixing Bowls: A large mixing bowl for combining ingredients.
  • Whisk: To ensure eggs and ingredients are mixed thoroughly.
  • Baking Dish: A 13 x 9 inch greased baking dish is ideal for even baking.
  • Knife and Cutting Board: Essential for prepping your zucchini and onions.

Serving Suggestions

When it comes to serving, the possibilities are endless!

  • As an Appetizer: Serve warm with a side of marinara for dipping.
  • As a Side Dish: Pair with grilled meats or fish for a balanced meal.
  • For Breakfast: Enjoy with a dollop of Greek yogurt and fresh herbs.
  • As a Snack: Serve chilled or at room temperature for a nutritious bite.

Conclusion: Embrace the Adventure!

There you have it, my fellow culinary explorers! These Parmesan Zucchini Squares are not just a recipe; they’re an invitation to embrace the joy of cooking. With every bite, you’ll be reminded that food should awaken your senses and ignite your passion for flavor. So gather your ingredients, unleash your inner chef, and let’s create something truly unforgettable. Happy cooking!

Parmesan Zucchini Squares - Zucchini Casserole with Bisquick and Parmesan Cheese

Prep Time 10 minutes
Cook Time 40 minutes
Total Time 50 minutes
Servings 6 squares
Calories 250
A delicious baked zucchini casserole combining Parmesan cheese and herbs for a savory, easy-to-make dish.

Ingredients

Dried ingredients

  • 4 pieces eggs
  • 1 cup Bisquick baking mix
  • 0.5 cup chopped onions
  • 0.5 teaspoon salt
  • 0.5 cup Parmesan cheese (grated)
  • 0.25 teaspoon garlic powder
  • 0.5 teaspoon dried oregano
  • dash black pepper black pepper
  • 1 teaspoon minced garlic
  • 0.5 cup vegetable oil
  • 2 teaspoons dried parsley
  • 3 cups zucchini, thinly sliced

Instructions 

  • Preheat oven to 350°F (175°C).
  • Beat eggs in a bowl, then add Bisquick, onions, salt, Parmesan, garlic powder, oregano, black pepper, garlic, oil, and parsley; stir until combined.
  • Stir in sliced zucchini, then pour mixture into a greased 13x9 inch baking dish.
  • Bake for 35-40 minutes until golden brown, then cut into squares and serve.

Notes

For a crispier top, broil for an additional 2 minutes before serving.
Calories: 250kcal
Cost: $12
Course: Main Dish
Cuisine: American
Keyword: zucchini

Nutrition

Calories: 250kcal | Carbohydrates: 20g | Protein: 10g | Fat: 15g | Sodium: 400mg

Ignite Your Culinary Adventure with Steak and Shrimp Stir Fry

Are you ready to take your taste buds on a thrilling ride? This Steak and Shrimp Stir Fry is not just a meal; it’s a celebration of flavor, heat, and culinary creativity. With succulent steak and juicy shrimp mingling with vibrant vegetables, this dish is a feast for the senses. Let’s dive into the world of stir fry, where each bite is a welcome adventure!

Why You’ll Love This Recipe

  • Quick Cooking: Ready in under 30 minutes, this stir fry is perfect for busy weeknights, allowing you to whip up a delicious meal in no time.
  • Flavor Explosion: The combination of soy sauce, garlic, and ginger creates a mouthwatering sauce that enhances the natural flavors of the steak and shrimp.
  • Protein-Packed: Both steak and shrimp are lean sources of protein, making this dish not only delicious but also nutritious.
  • Customizable: This stir fry is versatile; you can swap out the vegetables or protein based on what you have in your kitchen.
  • Healthy and Satisfying: With its balance of protein, healthy fats, and fiber-rich vegetables, this meal is both filling and nourishing.

Ingredients Breakdown

Before jumping into the cooking process, let’s gather our ingredients. Each component plays a vital role in the final dish.

  • 1 pound flank steak: Thinly sliced against the grain for tenderness. You can substitute with ribeye or sirloin if preferred.
  • 1 pound shrimp: Peeled and deveined. Opt for large or jumbo shrimp for a more satisfying bite.
  • 2 tablespoons soy sauce: Adds umami and enhances the flavors. Low-sodium soy sauce can be used for a healthier option.
  • 1 tablespoon cornstarch: Helps to create a light coating on the steak, enhancing texture.
  • 2 tablespoons vegetable oil: Essential for stir frying; consider using sesame oil for an extra flavor boost.
  • 1 bell pepper: Sliced for crunch and color; red or yellow varieties add sweetness.
  • 1 cup broccoli florets: Adds a nutritious crunch; feel free to substitute with snap peas or green beans.
  • 1 carrot: Julienned for sweetness and color.
  • 3 garlic cloves: Minced for aromatic flavor.
  • 1 tablespoon ginger: Minced for a fresh, spicy kick.
  • 2 green onions: Chopped for garnish and a mild onion flavor.
  • Salt and pepper: To taste.
  • Sesame seeds: For garnish, adding a nutty flavor and visual appeal.

Pro Tips for a Perfect Stir Fry

Juicy steak and shrimp stir fry, showcasing bell peppers, broccoli, and carrots.

Ready to elevate your cooking game? Here are some expert insights to help you master the art of stir frying.

  • High Heat: Always cook on high heat to ensure that the steak sears properly and the shrimp cooks quickly without becoming rubbery.
  • Mise en Place: Prep all your ingredients before you start cooking. Stir frying goes fast, and you want everything at the ready!
  • Don’t Crowd the Pan: Avoid overcrowding the skillet, as this can lead to steaming instead of searing. Cook in batches if necessary.
  • Rest Your Meat: Allow the steak to rest after slicing to keep it juicy and tender.
  • Use Fresh Ingredients: Fresh vegetables and proteins will significantly impact the final flavor of your stir fry.
  • Experiment with Sauces: While soy sauce is a classic, try adding oyster sauce, teriyaki, or even a splash of lime juice for a twist!
  • Garnish Generously: Fresh herbs like cilantro or basil can elevate the dish even further.
  • Keep It Colorful: Aim for a variety of colors in your veggies to make your dish visually appealing and nutritious.

Avoiding Common Mistakes

Even seasoned cooks can make missteps. Here’s how to avoid the pitfalls of stir frying:

  • Overcooking the Shrimp: Shrimp cooks quickly; remove them from the heat as soon as they turn pink and opaque.
  • Too Much Sauce: Start with a small amount of sauce, as you can always add more, but you can’t take it away!
  • Not Prepping Ingredients: Failing to have everything ready can lead to overcooked proteins and undercooked veggies.
  • Using Cold Ingredients: Cold ingredients can drop the temperature of the pan, leading to steaming rather than frying. Use room temperature ingredients when possible.

Delicious Variations

This stir fry is endlessly adaptable. Here are some twists to keep the excitement alive:

  • Spicy Kick: Add sliced jalapeños or a dash of sriracha for a spicy version.
  • Asian-Inspired: Incorporate bok choy, snow peas, and a dash of sesame oil for an Asian flair.
  • Tex-Mex Fusion: Toss in black beans, corn, and a sprinkle of taco seasoning for a fun twist.
  • Coconut Curry: Add coconut milk and curry paste for a creamy, tropical variation.

Storage and Make-Ahead Tips

Want to prep ahead? Here’s how to store your stir fry:

  • Refrigeration: Store leftovers in an airtight container in the fridge for up to 3 days.
  • Freezing: Freeze in individual portions for up to 2 months. Thaw overnight in the fridge before reheating.
  • Reheating: Reheat on the stovetop over medium heat, adding a splash of water or broth to prevent drying out.

FAQs About Steak and Shrimp Stir Fry

Got questions? We’ve got answers!

  • What is the best cut of steak for stir fry? Flank steak is ideal for its tenderness and flavor, but ribeye or sirloin also work well.
  • Can I use frozen shrimp? Yes, just ensure they are fully thawed and patted dry before cooking.
  • How do I prevent my steak from being chewy? Slice against the grain and ensure not to overcook it.
  • What vegetables work well in a stir fry? Bell peppers, broccoli, carrots, snap peas, and bok choy are all fantastic options.
  • Can I make this dish ahead of time? Yes, you can prep the ingredients and store them separately until ready to cook.
  • What sauce variations can I use? Try teriyaki, hoisin, or a homemade garlic-ginger sauce for different flavor profiles.
  • How can I make this dish spicier? Add fresh chilies or a bit of chili paste to the sauce for a heat boost.
  • What can I serve with this stir fry? Serve over rice, quinoa, or even noodles for a complete meal.

Nutritional Tips and Dietary Adaptations

This Steak and Shrimp Stir Fry can easily fit various dietary needs:

  • Low-Carb: Serve it over cauliflower rice or enjoy it on its own for a satisfying low-carb meal.
  • Gluten-Free: Use tamari instead of soy sauce to make it gluten-free.
  • Paleo-Friendly: Skip the cornstarch and use coconut aminos in place of soy sauce for a paleo twist.

Essential Equipment

To ensure your stir fry turns out perfectly, here’s what you’ll need:

  • Wok or Large Skillet: A wok is ideal for high heat and quick cooking, but any large skillet will do.
  • Sharp Knife: A good knife is essential for easily slicing your steak and vegetables.
  • Spatula: A sturdy spatula helps in tossing the ingredients without losing them over the edge of the pan.

Serving Suggestions

Once your stir fry is ready, here’s how to serve it:

  • Garnish: Sprinkle with sesame seeds and chopped green onions for added flavor and aesthetics.
  • Side Dishes: Pair with steamed jasmine rice, fried rice, or a fresh salad to balance the meal.
  • Presentation: Serve family-style in a large dish or on individual plates for a restaurant-like experience at home.

Now that you’re armed with all this knowledge, it’s time to unleash your culinary creativity! Embrace the thrill of cooking and let this Steak and Shrimp Stir Fry be the canvas for your flavor masterpiece. Happy cooking!

STEAK AND SHRIMP STIR FRY

Prep Time 15 minutes
Cook Time 10 minutes
Total Time 25 minutes
Servings 4 servings
Calories 450
A quick and flavorful stir fry combining tender steak and succulent shrimp with colorful vegetables.

Ingredients

Protein

  • 1 pound flank steak (thinly sliced against the grain)
  • 1 pound shrimp (peeled and deveined)

Vegetables

  • 1 bell pepper bell pepper (sliced)
  • 1 cup broccoli florets
  • 1 carrot julienned carrot

Aromatics

  • 3 cloves garlic (minced)
  • 1 tablespoon ginger (minced)

Garnish & Seasoning

  • 2 green onions green onions (chopped)
  • to taste Salt and pepper Salt and pepper
  • for garnish Sesame seeds (for garnish)

Instructions 

  • Marinate the sliced steak with soy sauce and cornstarch for 10 minutes.
  • Heat vegetable oil in a wok or large skillet over medium-high heat. Cook steak until browned, then remove and set aside.
  • In the same pan, stir-fry garlic, ginger, bell pepper, broccoli, and carrot until vegetables are tender-crisp.
  • Add shrimp and cooked steak back to the pan, stir in soy sauce, and cook until shrimp are pink and cooked through.
  • Garnish with chopped green onions and sesame seeds before serving.

Notes

Use high heat for quick stir-frying to retain the vegetables' crunch and flavor.
Calories: 450kcal
Cost: $15
Course: Main Course
Cuisine: Asian
Keyword: shrimp, Steak

Nutrition

Calories: 450kcal | Carbohydrates: 40g | Protein: 45g | Fat: 15g | Sodium: 1200mg

Why You’ll Love These Roasted Veggie Chickpea Bowls

If you’re on a quest for a meal that’s both delicious and nourishing, look no further than these Roasted Veggie Chickpea Bowls with Maple Dijon Dressing. This isn’t just any bowl; it’s a vibrant celebration of flavors, textures, and colors that will awaken your palate and make your taste buds sing! These bowls are not only easy to prepare but also incredibly versatile, allowing you to customize them based on what’s in your fridge or what’s in season.

Imagine sinking your fork into a bed of fluffy quinoa or brown rice, topped with crispy roasted chickpeas and a rainbow of tender vegetables, all drizzled with a creamy, tangy dressing. It’s a dish that checks all the boxes: hearty, healthy, and utterly satisfying. Whether you need a quick lunch, a light dinner, or a meal prep option for the busy week ahead, these bowls have got your back. Plus, they’re 100% plant-based, making them a fantastic choice for anyone looking to incorporate more plant-based hearty meals into their diet.

Ingredients You’ll Need

Gathering the right ingredients is half the fun! Here’s what you’ll need to create your own Roasted Veggie Chickpea Bowls:

  • 1 can chickpeas, drained and rinsed
  • 2 cups mixed vegetables (bell peppers, zucchini, carrots, etc.)
  • 2 tablespoons olive oil
  • 1 teaspoon garlic powder
  • 1 teaspoon paprika
  • Salt and pepper to taste
  • 2 cups cooked quinoa or brown rice
  • 1/4 cup tahini
  • 2 tablespoons maple syrup
  • 1 tablespoon Dijon mustard
  • 2 tablespoons lemon juice
  • Water to thin (if needed)
  • Fresh parsley or cilantro for garnish

How to Make Your Roasted Veggie Chickpea Bowls

Top view of a colorful chickpea bowl featuring roasted bell peppers, zucchini, and carrots.

Step 1: Preheat the Oven

First things first, let’s get that oven preheated to 400°F (200°C). A hot oven is key to achieving perfectly roasted veggies that caramelize beautifully. Line a large baking sheet with parchment paper for easy cleanup later on.

Step 2: Roast the Vegetables and Chickpeas

In a large mixing bowl, toss together the drained chickpeas and your selection of mixed vegetables. I love using a medley of bell peppers, zucchini, and carrots, but feel free to get creative with whatever you have on hand! Add the olive oil, garlic powder, paprika, salt, and pepper. Toss everything together until well-coated, ensuring every piece is seasoned evenly.

Spread the mixture in a single layer on the baking sheet, which allows for even roasting. Pop it into the oven and roast for about 20-25 minutes, stirring halfway through. You want those veggies tender, slightly caramelized, and bursting with flavor!

Step 3: Prepare the Dressing

While your veggies are roasting, let’s whip up that luscious Maple Dijon Dressing. In a small bowl, combine the tahini, maple syrup, Dijon mustard, and lemon juice. Whisk them together until smooth. If it’s too thick for your liking, add a splash of water to reach your desired consistency. Season with a pinch of salt and pepper to enhance those flavors. You’ll want to taste it—feel free to adjust the sweetness or tanginess to your liking!

Step 4: Assemble the Bowls

Once the roasted veggies and chickpeas are ready, it’s time to assemble your masterpiece. In serving bowls, layer a generous portion of cooked quinoa or brown rice as your base. Top it off with a hearty helping of the roasted veggie and chickpea mixture. Don’t be shy—pile it high!

Step 5: Dress and Garnish

Drizzle each bowl with the Maple Dijon Dressing you prepared earlier. For a finishing touch, sprinkle some freshly chopped parsley or cilantro on top for a burst of color and freshness. These bowls can be served warm or at room temperature, making them incredibly versatile for any occasion.

Pro Tips for Making the Best Roasted Veggie Chickpea Bowls

  • Prep Ahead: To save time on busy days, chop your veggies and rinse your chickpeas in advance. Store them in the refrigerator until you’re ready to roast.
  • Use Seasonal Veggies: Feel free to swap in whatever vegetables are in season or what you have on hand. Seasonal veggies not only enhance flavor but also keep your meals exciting and varied. Think sweet potatoes in the fall or asparagus in the spring!
  • Adjust the Spice Level: If you like a bit of heat, add some red pepper flakes or cayenne pepper to the veggie mix before roasting. This adds a delightful kick that complements the sweetness of the maple syrup.
  • Experiment with Grains: While quinoa and brown rice are excellent choices, consider using farro, barley, or even cauliflower rice for a different texture and flavor profile.
  • Make Extra Dressing: The Maple Dijon Dressing is versatile; double the batch and use it as a dip for fresh veggies or as a salad dressing throughout the week.

How to Serve Your Roasted Veggie Chickpea Bowls

Serving these bowls can be as creative as you want! Here are some fun ideas to present this beautiful dish:

Garnishes

Add some crunch with toasted nuts or seeds, or sprinkle on some feta cheese for a creamy contrast! Sliced avocado also makes for a lovely addition.

Side Dishes

Pair these bowls with a light side salad or some crusty whole-grain bread to round out the meal. A refreshing cucumber salad or a tangy coleslaw would complement the flavors beautifully!

Make Ahead and Storage

Storing Leftovers

These bowls are perfect for meal prepping! If you have leftovers, store them in airtight containers in the refrigerator for up to 4 days. The flavors will continue to meld together, making for a delicious next-day meal.

Freezing

While I recommend enjoying them fresh, you can freeze the roasted veggies and chickpeas in a freezer-safe container for up to 3 months. Just make sure to store the dressing separately to keep it fresh!

Reheating

When you’re ready to enjoy your leftovers, simply reheat them in the microwave or in a hot skillet until warmed through. Drizzle with fresh dressing before serving for that kick of flavor!

FAQs

Can I use other vegetables in these bowls?

Absolutely! Feel free to swap out any of the vegetables for your favorites or whatever you have on hand. Bell peppers, sweet potatoes, or asparagus would all work wonderfully!

How long does it take to make these bowls?

You can whip up these delicious bowls in just about 40 minutes—perfect for a quick yet satisfying meal any day of the week!

Can I make this recipe gluten-free?

Yes! Just ensure that your tahini and mustard are gluten-free certified. Pairing these bowls with quinoa or brown rice will keep them gluten-free as well.

What is tahini made from?

Tahini is made from ground sesame seeds, giving it a rich and nutty flavor that complements many dishes beautifully. It’s also packed with healthy fats and nutrients!

Final Thoughts

I hope you find joy in making these Roasted Veggie Chickpea Bowls with Maple Dijon Dressing! They’re not only vibrant and delicious but also incredibly nourishing. Whether you’re prepping for a busy week or just looking for a delightful meal, this recipe has got you covered. With its bold flavors and wholesome ingredients, this dish is sure to become a staple in your kitchen. So grab your skillet, embrace the thrill of cooking, and enjoy every bite of this culinary adventure!

Irresistible Roasted Veggie Chickpea Bowls With Maple Dijon Dressing

Prep Time 10 minutes
Cook Time 25 minutes
Total Time 35 minutes
Servings 4 servings
Calories 450
A vibrant and healthy bowl combining roasted chickpeas and vegetables with a tangy maple Dijon dressing, perfect for a nutritious meal.

Ingredients

Canned Goods

  • 1 can chickpeas, drained and rinsed
  • 2 cups mixed vegetables (bell peppers, zucchini, carrots, etc.)

Dry Ingredients

  • 2 tablespoons olive oil
  • 1 teaspoon garlic powder
  • 1 teaspoon paprika

Base

  • 2 cups cooked quinoa or brown rice

Dressing

  • 1/4 cup tahini
  • 2 tablespoons maple syrup
  • 1 tablespoon dijon mustard
  • 2 tablespoons lemon juice
  • water as needed water to thin (Add gradually to reach desired consistency)

Garnish

  • as needed fresh parsley or cilantro (for garnish)

Instructions 

  • Preheat oven to 400°F (200°C).
  • Toss chickpeas and vegetables with olive oil, garlic powder, paprika, salt, and pepper. Roast for 20-25 minutes.
  • Whisk tahini, maple syrup, Dijon mustard, lemon juice, and water to make the dressing.
  • Layer cooked grains, roasted chickpeas, and vegetables in bowls. Drizzle with dressing and garnish with herbs.

Notes

Feel free to customize vegetables and adjust seasonings to taste.
Calories: 450kcal
Cost: $15
Course: Main Course
Cuisine: Healthy
Keyword: Vegetarian

Nutrition

Calories: 450kcal | Carbohydrates: 70g | Protein: 18g | Fat: 14g | Sodium: 600mg

Loved this recipe? Save it to your favorite Pinterest board so you can easily find it later! It’s the perfect way to keep all your sweet ideas in one place. ✨

A vibrant serving of roasted veggie chickpea bowl with quinoa and a drizzle of dressing.

Why You’ll Love These Spicy Chicken Tacos

Welcome to the vibrant world of spicy chicken tacos, where every bite tells a story of zest and adventure! These tacos are not just a meal; they are an experience bursting with flavor, inviting you to savor each moment. The combination of perfectly seasoned chicken, fresh toppings, and zesty sauces will ignite your passion for cooking and transform your dinner table into a fiesta. With a kick that dances on your palate, these tacos are perfect for family gatherings, casual dinners, or even a cozy night in. Get ready to unleash the flavors and spice up your life!

The Flavor Journey Begins

Growing up in a home steeped in the rich culinary traditions of San Antonio, Texas, I learned early on that cooking is about more than just following a recipe; it’s about embracing the heat and letting your ingredients sing! The smoky undertones of cumin, the warmth of paprika, and the fiery essence of cayenne pepper are my go-to allies in the kitchen. This spicy chicken taco recipe is a tribute to those flavors and memories, blending them into a meal that is both comforting and thrilling.

Ingredients You’ll Need

Delicious Spicy Chicken Tacos, presented with colorful ingredients on a wooden surface.

To embark on this flavorful journey, gather the following ingredients:

  • Chicken thighs: 1 pound, boneless and skinless
  • Olive oil: 2 tablespoons
  • Cayenne pepper: 1 teaspoon
  • Smoked paprika: 1 teaspoon
  • Ground cumin: 1 teaspoon
  • Garlic powder: 1 teaspoon
  • Salt: 1 teaspoon
  • Black pepper: 1/2 teaspoon
  • Lime juice: from 1 lime
  • Tortillas: 8 small corn or flour
  • Fresh cilantro: for garnish
  • Avocado: sliced, for topping
  • Red onion: thinly sliced, for topping
  • Radishes: thinly sliced, for topping
  • Sour cream: or yogurt, for serving (optional)

Steps to Flavorful Perfection

Let’s dive into the steps that will take your taco night to the next level:

  1. Prepare the Chicken: In a large bowl, combine the chicken thighs, olive oil, cayenne pepper, smoked paprika, ground cumin, garlic powder, salt, black pepper, and lime juice. Mix well, ensuring the chicken is evenly coated with the spicy marinade. Let it sit for at least 30 minutes, allowing those bold flavors to penetrate the meat.
  2. Cook the Chicken: In a skillet over medium-high heat, add a splash of olive oil. Once hot, add the marinated chicken thighs. Cook for about 6-7 minutes on each side, or until the chicken is cooked through and has a beautiful golden-brown crust. Remove from heat and let it rest for a few minutes before slicing.
  3. Warm the Tortillas: In the same skillet, lightly warm the tortillas until they are pliable. This adds a lovely texture and flavor to your tacos.
  4. Assemble Your Tacos: Start by placing a generous amount of the sliced chicken on each tortilla. Top with fresh cilantro, avocado slices, red onion, and radishes for a refreshing crunch.
  5. Serve with Flair: Drizzle with sour cream or yogurt if desired, and a squeeze of lime for that extra zing. Enjoy your spicy chicken tacos with your favorite side dishes!

Tips for the Perfect Taco Night

To ensure your taco experience is as delicious as possible, here are some pro tips:

  • Let the Chicken Marinate: The longer you let the chicken sit in the marinade, the more flavorful it will be. If time allows, marinate it for a few hours or even overnight!
  • Customize Your Heat: Feel free to adjust the amount of cayenne pepper based on your heat preference. You can even experiment with different spices like chipotle powder for a smoky flavor.
  • Fresh Ingredients Matter: Using fresh toppings elevates the dish. Don’t skimp on the cilantro or lime juice — they add brightness that balances the spices!

Variations to Explore

Cooking is all about creativity! Here are some variations you can try:

  • Vegan Option: Substitute chicken with firm tofu or jackfruit, marinated and cooked with the same spices for a plant-based delight.
  • Different Proteins: Try using shrimp or beef instead of chicken. Adjust the cooking time to ensure the protein is cooked through.
  • Add More Veggies: Incorporate grilled peppers, corn, or even sautéed mushrooms for added flavor and texture.

Substitutions You Can Make

Running low on ingredients? No worries! Here are some easy substitutions:

  • Chicken Thighs: Chicken breasts or even ground chicken work well.
  • Olive Oil: Canola oil, avocado oil, or any neutral oil can be used in place of olive oil.
  • Corn Tortillas: Flour tortillas or lettuce wraps are great alternatives for a gluten-free option.

Equipment You’ll Need

To whip up these delicious tacos, make sure you have the following kitchen essentials:

  • Large mixing bowl
  • Skillet or frying pan
  • Cutting board and knife
  • Spatula or tongs

Storage and Freezing Tips

Got leftovers? Here’s how to store them:

  • Refrigeration: Store the cooked chicken in an airtight container in the refrigerator for up to 3 days. Reheat in a skillet before serving.
  • Freezing: The cooked chicken can be frozen for up to 3 months. Thaw in the refrigerator overnight before reheating.

FAQs About Spicy Chicken Tacos

Can I make these tacos ahead of time?
Absolutely! You can prepare the chicken and toppings in advance. Just assemble them when you’re ready to serve for the freshest experience.

What can I serve with these tacos?
Pair these tacos with a refreshing side salad, Mexican rice, or some homemade guacamole for a complete meal.

How can I adjust the spice level?
If you prefer milder tacos, reduce the cayenne pepper and consider adding a dollop of sour cream to cool down the spice.

Troubleshooting Common Issues

If your chicken doesn’t turn out as expected, here’s how to fix it:

  • Chicken is Dry: Make sure to avoid overcooking. Use a meat thermometer to check for doneness (165°F is ideal).
  • Too Spicy: Balance out the heat with creamy toppings like sour cream, yogurt, or avocado.

Final Thoughts

These spicy chicken tacos are not just a meal; they are a celebration of flavor, culture, and the joy of cooking. Whether you’re hosting a taco night or simply craving something delicious, this recipe is sure to impress. So gather your ingredients, embrace the heat, and let the flavors take you on a culinary adventure. Remember, cooking is all about passion, creativity, and a pinch of fire! Enjoy every bite and share your taco creations with friends and family. Happy cooking!

Classic Spaghetti Carbonara

Prep Time 10 minutes
Cook Time 15 minutes
Total Time 25 minutes
Servings 4 servings
Calories 550
A quick and creamy Italian pasta dish made with eggs, cheese, pancetta, and pepper.

Ingredients

Pasta

  • 400 grams spaghetti
  • 150 grams pancetta (diced)
  • 3 large eggs (beaten)
  • 1 cup Parmesan cheese (grated)
  • 1 teaspoon black pepper (freshly ground)

Salt

  • to taste salt

Instructions 

  • Cook spaghetti in boiling salted water until al dente, then drain.
  • Cook pancetta in a skillet until crispy.
  • Mix eggs and Parmesan in a bowl.
  • Combine hot pasta with pancetta, then quickly mix in egg mixture to create a creamy sauce.
  • Season with black pepper and salt to taste, then serve immediately.

Notes

Use freshly grated Parmesan for best flavor.
Calories: 550kcal
Cost: $12
Course: Main Course
Cuisine: Italian
Keyword: pasta

Nutrition

Calories: 550kcal | Carbohydrates: 70g | Protein: 25g | Fat: 20g | Sodium: 800mg

Loved this recipe? Save it to your favorite Pinterest board so you can easily find it later! It’s the perfect way to keep all your sweet ideas in one place. ✨

A mouthwatering arrangement of Spicy Chicken Tacos showcasing fresh vegetables and herbs.

Ignite Your Taste Buds with BBQ Sheet-Pan Chicken

Picture this: the aroma of succulent chicken mingling with the sweet and smoky scent of barbecue sauce wafts through your kitchen. Welcome to the world of BBQ Sheet-Pan Chicken, a dish that not only tantalizes the senses but also elevates your weeknight dinners to a whole new level. This one-pan wonder is all about simplicity and flavor, merging tender chicken with vibrant veggies and a kick of zesty sauce. Get ready to embark on a culinary adventure that will have your family and friends asking for seconds!

Why You’ll Love This BBQ Sheet-Pan Chicken Recipe

  • Effortless Cleanup: Cooking everything on a single sheet pan means less time scrubbing dishes and more time savoring your meal.
  • Flavor Explosion: The combination of juicy chicken breasts with a rich barbecue sauce creates a mouthwatering experience that’s hard to resist.
  • Versatile Veggies: Customize the vegetable medley to your liking, ensuring each bite is filled with freshness and crunch.
  • Healthy & Wholesome: Packed with lean protein and colorful veggies, this dish is as nutritious as it is delicious.
  • Quick & Easy: With minimal prep and cooking time, this recipe is perfect for busy weeknights.

Ingredient Breakdown

Let’s dive into the magic of ingredients that make this BBQ Sheet-Pan Chicken shine. Here’s what you’ll need:

  • 4 pieces boneless, skinless chicken breasts: The star of the show, providing a juicy canvas for all those bold flavors.
  • 1 cup barbecue sauce: Choose your favorite brand or homemade version for a personal touch.
  • 1 piece bell pepper, sliced: Adds a sweet crunch; feel free to mix colors for a vibrant presentation.
  • 1 piece red onion, sliced: Offers a subtle sweetness that caramelizes beautifully in the oven.
  • 2 cups broccoli florets: These little green trees bring fiber and nutrients, not to mention a lovely pop of color.
  • 2 pieces zucchini, sliced: These tender veggies soak up flavor while adding a delightful texture.
  • 1 tablespoon olive oil: A splash of healthy fat to enhance the overall taste and help with browning.
  • Salt and pepper to taste: Essential for elevating all the flavors in this dish.

Pro Tips for BBQ Sheet-Pan Chicken Success

Close-up of BBQ Sheet-Pan Chicken with sliced bell peppers and broccoli.

Want to make this dish even better? Check out these expert insights:

  • Marinate for Maximum Flavor: For an extra kick, marinate the chicken in the barbecue sauce for at least 30 minutes (or up to overnight) before cooking.
  • Use a Meat Thermometer: Ensure your chicken reaches an internal temperature of 165°F for perfectly cooked, juicy meat.
  • Mix and Match Veggies: Don’t hesitate to throw in asparagus, carrots, or even sweet potatoes for variety.
  • Broil for Extra Crispiness: If you like a bit of char, broil the dish for the last 2-3 minutes of cooking.
  • Keep It Colorful: The more colorful your veggies, the more nutritious your dish! Aim for a rainbow on your plate.
  • Let It Rest: After cooking, allow the chicken to rest for 5 minutes before slicing to keep it juicy.
  • Don’t Overcrowd the Pan: Give your ingredients some breathing room to ensure they roast rather than steam.
  • Add a Pinch of Heat: If you’re feeling adventurous, sprinkle some red pepper flakes or cayenne for a spicy kick.

Common Mistakes and Troubleshooting

Even the best chefs can run into hiccups. Here’s how to avoid common mistakes:

  • Overcooking the Chicken: Keep a close eye on cooking time to prevent dry chicken. Use a thermometer to check doneness.
  • Underseasoning: Don’t be shy with salt and pepper! They’re essential in enhancing the flavors of your dish.
  • Choosing the Wrong BBQ Sauce: Opt for a sauce that balances sweetness, tang, and spice. Experiment to find your favorite!
  • Ignoring the Veggie Cut Sizes: Make sure your vegetables are cut similarly to ensure even cooking.

BBQ Sheet-Pan Chicken Variations

Let’s get creative! Here are some delicious variations to make this dish your own:

  • Tex-Mex Twist: Add black beans, corn, and taco seasoning for a southwestern flair.
  • Asian-Inspired: Swap out the BBQ sauce for teriyaki or hoisin sauce, and add snap peas and bell peppers.
  • Italian Style: Use Italian dressing and include cherry tomatoes, bell peppers, and zucchini for a Mediterranean vibe.
  • Smoky BBQ: Incorporate smoked paprika into your barbecue sauce for an extra depth of flavor.

Storage and Make-Ahead Instructions

Want to enjoy this dish later? Here’s how to store and reheat your BBQ Sheet-Pan Chicken:

  • Refrigerate: Store leftovers in an airtight container for up to 3 days.
  • Freeze: You can freeze cooked chicken and veggies for up to 3 months. Just make sure to label your containers!
  • Reheat: For best results, reheat in the oven at 350°F until warmed through. This will help retain the chicken’s juiciness.

Frequently Asked Questions

Got questions? I’ve got answers! Here are some FAQs about BBQ Sheet-Pan Chicken:

  • Can I use bone-in chicken? Absolutely! Just adjust the cooking time to ensure it’s cooked through.
  • What if I don’t have BBQ sauce? No problem! Use a homemade marinade or any sauce you love.
  • Can I add more veggies? Yes! Feel free to add any veggies you have on hand.
  • How do I make it spicier? Add jalapeños or sprinkle with cayenne before cooking.
  • Is this recipe gluten-free? Ensure your BBQ sauce is gluten-free, and you’re good to go!
  • Can I make this dish ahead of time? Yes! You can prep everything and store it in the fridge until you’re ready to cook.
  • What side dishes pair well with this? Try serving with rice, quinoa, or a fresh garden salad!
  • How can I make this dish vegetarian? Substitute the chicken with chickpeas or tofu and use a plant-based BBQ sauce.

Nutrition Tips and Dietary Adaptations

This BBQ Sheet-Pan Chicken is not only delicious but can also cater to various dietary needs:

  • Low-Carb Option: Skip starchy vegetables like potatoes and focus on non-starchy veggies like broccoli and zucchini.
  • High-Protein: Add a side of lentils or beans for an extra protein boost.
  • Dairy-Free: This recipe is naturally dairy-free, making it perfect for those with lactose intolerance.

Equipment Recommendations

To make your cooking experience seamless, here are some must-have tools:

  • Sheet Pan: A sturdy, large sheet pan is essential for even cooking.
  • Meat Thermometer: This tool is a game-changer for ensuring your chicken is perfectly cooked.
  • Sharp Knife: A good knife will help you slice veggies and chicken with ease.

Serving Suggestions

Ready to serve? Here are some delightful ideas:

  • With a Fresh Salad: Pair your dish with a crisp garden salad dressed in vinaigrette.
  • Over Rice or Quinoa: Serve the chicken and veggies over a bed of fluffy rice or quinoa for a hearty meal.
  • With Cornbread: A slice of warm cornbread on the side will complement the BBQ flavors beautifully.

Conclusion

There you have it! A BBQ Sheet-Pan Chicken recipe that’s not only easy to make but also bursting with flavor. Whether you’re looking for a quick weeknight meal or a dish to impress your guests, this recipe checks all the boxes. So, grab your ingredients, preheat that oven, and let’s get cooking! Remember, cooking is an adventure — don’t be afraid to spice things up! Happy cooking!

BBQ Sheet-Pan Chicken

Prep Time 10 minutes
Cook Time 25 minutes
Total Time 35 minutes
Servings 4 servings
Calories 450
Enjoy a flavorful and easy-to-make sheet-pan dinner featuring tender chicken and roasted vegetables coated in smoky barbecue sauce.

Ingredients

Protein

  • 4 pieces boneless, skinless chicken breasts
  • 1 cup barbecue sauce (your favorite brand)

Vegetables

  • 1 piece bell pepper, sliced (any color)
  • 1 piece red onion, sliced
  • 2 cups broccoli florets
  • 2 pieces zucchini, sliced
  • 1 tablespoon olive oil
  • to taste Salt and pepper

Instructions 

  • Preheat oven to 400°F (200°C). Line a sheet pan with parchment paper.
  • Place chicken breasts on the sheet pan and brush with barbecue sauce. Arrange sliced vegetables around the chicken.
  • Drizzle vegetables with olive oil and season with salt and pepper.
  • Bake for 25 minutes or until chicken is cooked through and vegetables are tender.

Notes

Use your favorite barbecue sauce for best flavor.
Calories: 450kcal
Cost: $15
Course: Main Course
Cuisine: American
Keyword: chicken

Nutrition

Calories: 450kcal | Carbohydrates: 40g | Protein: 50g | Fat: 10g | Sodium: 900mg