Author

Avery Collins

Browsing

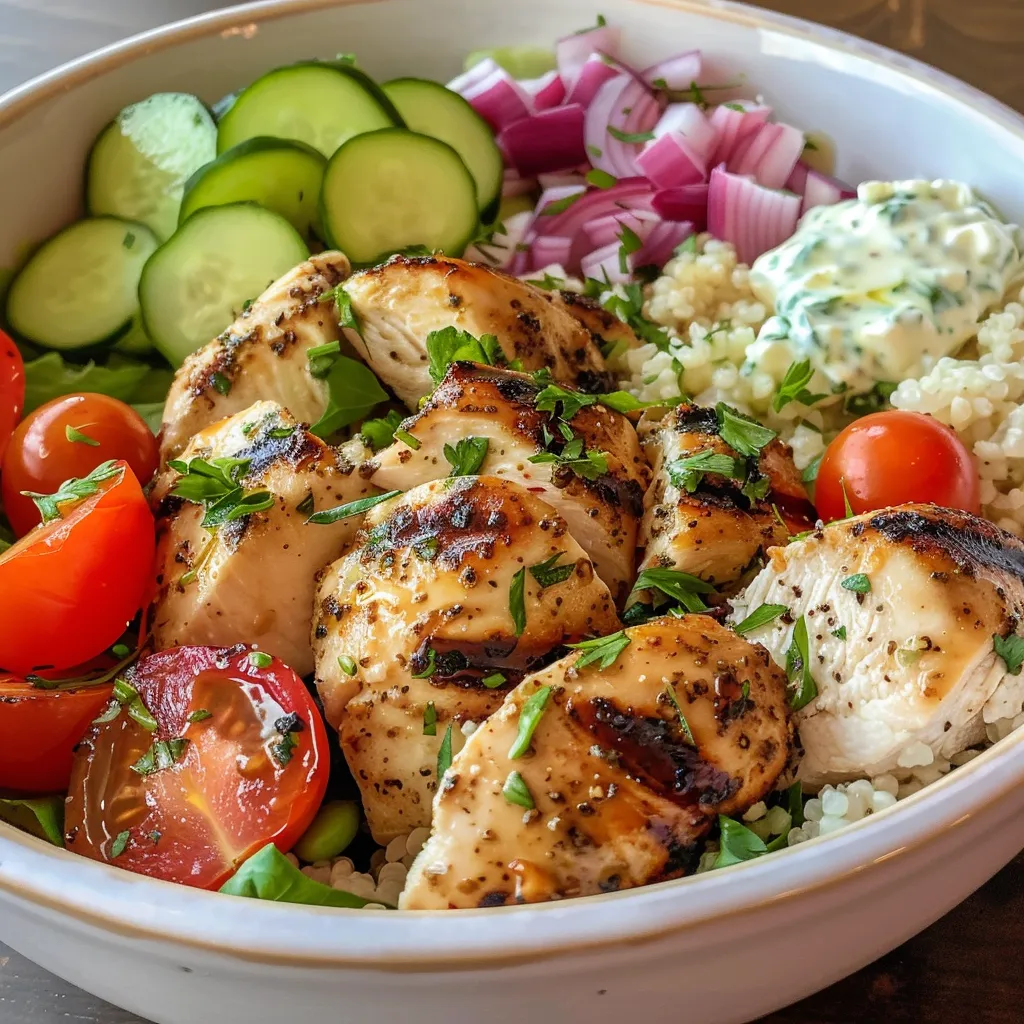
Ignite Your Culinary Passion with Greek Chicken Bowls

Welcome to a flavor-packed journey where juicy chicken, vibrant veggies, and creamy tzatziki come together in a bowl of pure bliss! If you’re looking for a meal that’s not just tasty but also invigorating, then you’ve found it. This Greek Chicken Bowl recipe is more than just a dinner; it’s a celebration of flavors that invites you to explore, experiment, and embrace the art of cooking boldly. Get ready to dive into a world where every bite sings with the essence of Greece!

As a chef who grew up in the spice-rich kitchens of San Antonio, I believe that food should evoke emotion and excitement. The Greek Chicken Bowl is a perfect example of how simple ingredients can transform into something extraordinary. In this guide, we’ll explore not only the recipe but also the techniques, tips, and variations that will help you create a meal that’s both comforting and adventurous. Let’s spice things up!

Why You’ll Love This Recipe

  • Flavor Explosion: Each bowl is a delightful mix of zesty lemon, fresh herbs, and savory chicken that tantalizes your taste buds.
  • Versatile Base: Whether you prefer rice or quinoa, this recipe allows you to customize your bowl according to your dietary preferences.
  • Perfect for Meal Prep: Prepare everything in advance for quick lunches or dinners throughout the week without sacrificing flavor.
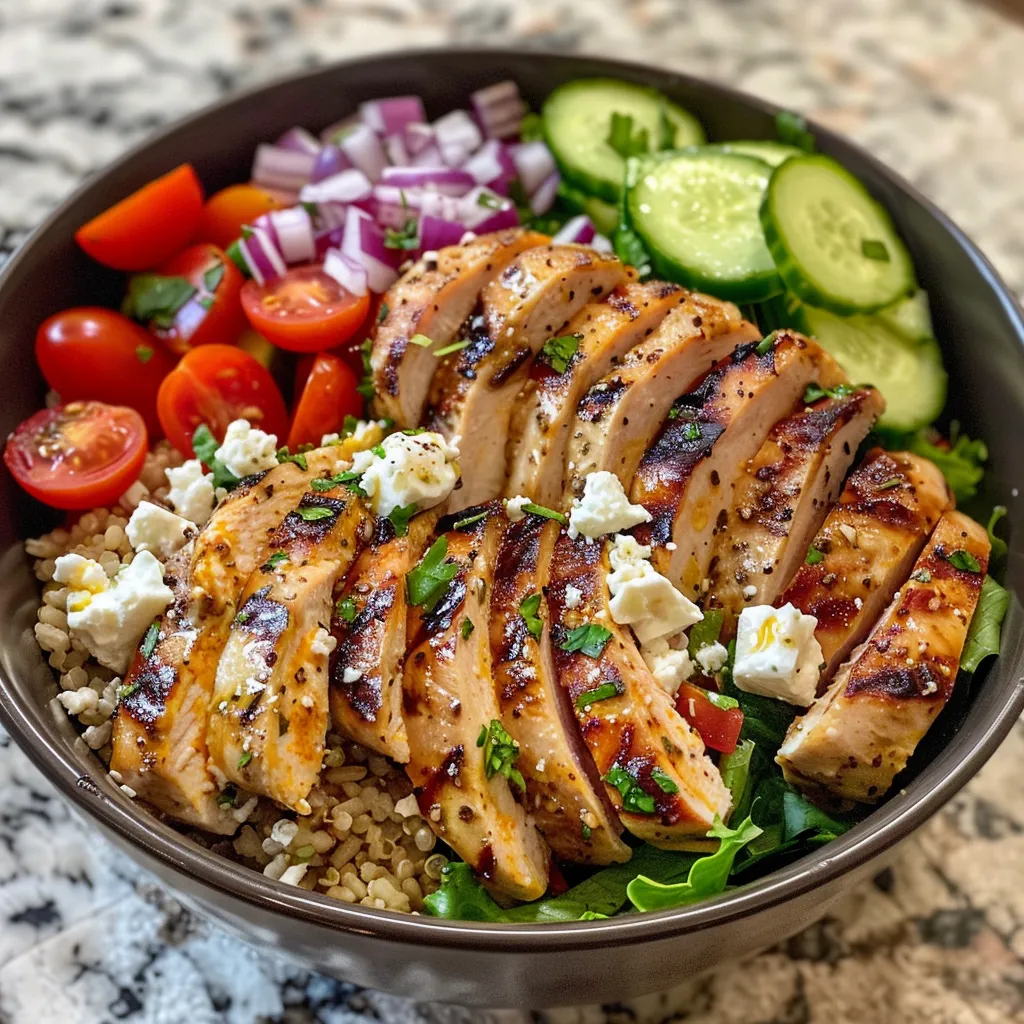
  • Fresh Ingredients: Packed with vibrant veggies like cucumber and tomatoes, these bowls are a feast for your eyes and your health.
  • Easy to Make: With straightforward steps and minimal prep time, you’ll feel like a culinary rockstar in no time!

Ingredient Breakdown

Before we dive into the cooking process, let’s take a closer look at the ingredients that make these Greek Chicken Bowls so special. Here’s what you’ll need:

  • 4 small chicken breasts: About 1 1/4 pounds; opt for boneless, skinless for easy cooking.
  • 1/4 cup olive oil: The rich heart of the marinade; choose high-quality extra-virgin for the best flavor.
  • 2 tablespoons lemon juice: Adds brightness and balances the flavors beautifully.
  • 2 cups cooked rice or quinoa: Your choice of base; both options are nutritious and filling.
  • 2 cups halved grape tomatoes: Burst with sweetness and add a pop of color.
  • 2 cups diced cucumber: Refreshing and hydrating, perfect for summer salads.
  • 4 cups shredded romaine lettuce: A crunchy base that adds texture to your bowl.
  • 1 cup sliced red onion: Provides a sharp bite that complements the other flavors.
  • 1/2 cup feta cheese: Creamy, salty goodness that ties everything together.
  • Tzatziki sauce: A dreamy mix of Greek yogurt, grated cucumber, garlic, and fresh dill, essential for that authentic taste.

If you’re looking for substitutions, feel free to use grilled tofu for a vegetarian option or swap out the feta for goat cheese if you prefer a different tang. Don’t hesitate to mix in your favorite veggies or even add a kick of spice with jalapeños or chili flakes!

How to Make Greek Chicken Bowls

A colorful Greek chicken bowl featuring diced cucumber, cherry tomatoes, and tzatziki sauce.

Now that we have our ingredients ready, let’s bring this recipe to life. Follow these steps to create your own Greek Chicken Bowls:

  1. Whisk the Marinade: In a large bowl, whisk together the olive oil, lemon juice, honey, garlic powder, oregano, basil, salt, pepper, and red pepper flakes until well combined.
  2. Marinate the Chicken: Pound the chicken to uniform thickness to ensure even cooking. Place the chicken in the marinade and let it soak for at least 30 minutes (or up to 4 hours for maximum flavor).
  3. Prepare the Tzatziki: While the chicken marinates, make your tzatziki sauce by mixing Greek yogurt, grated cucumber, lemon juice, olive oil, garlic, salt, and dill in a separate bowl. Set aside.
  4. Cook Your Base: Prepare the rice or quinoa according to package instructions. Chop your veggies while the grains are cooking.
  5. Cook the Chicken: Preheat your air fryer to 380°F (190°C). Place the marinated chicken in the fryer basket and cook for about 10 minutes, or until it reaches an internal temperature of 165°F (74°C).
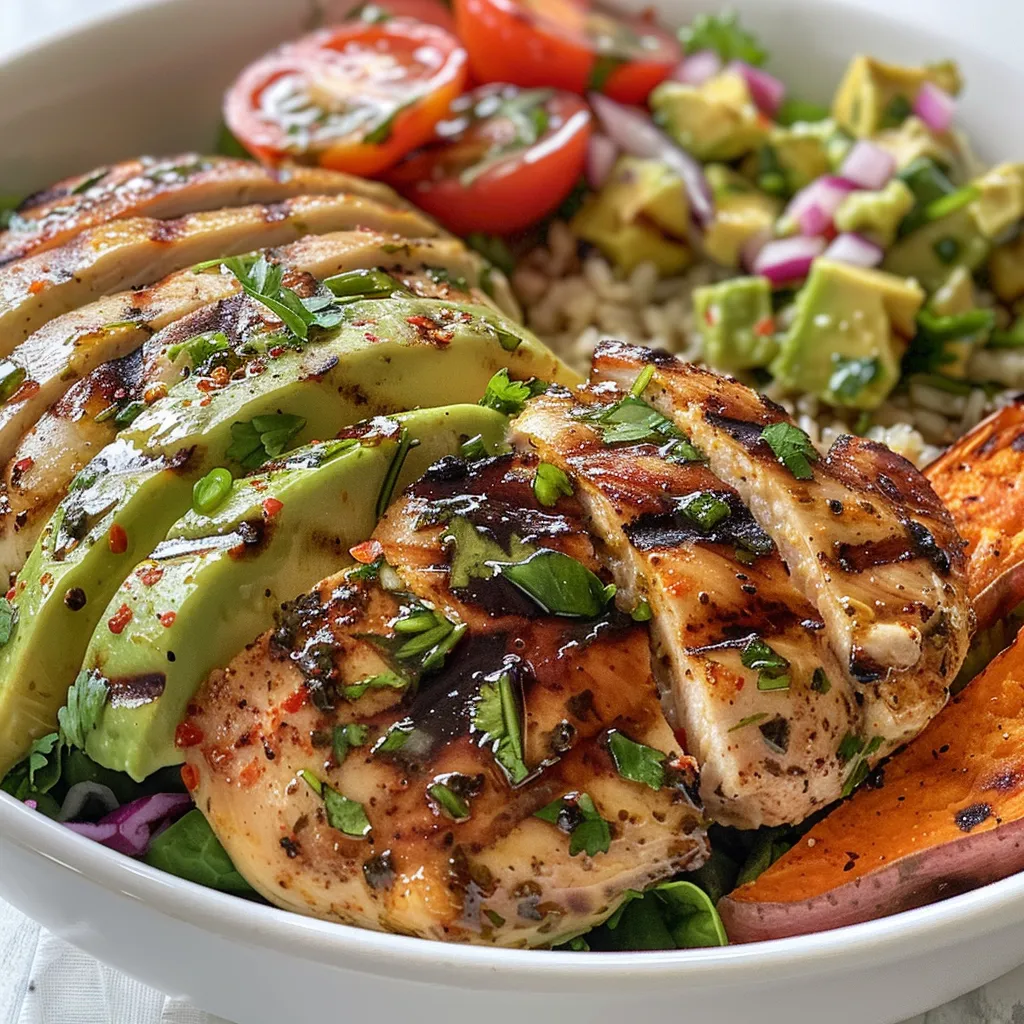
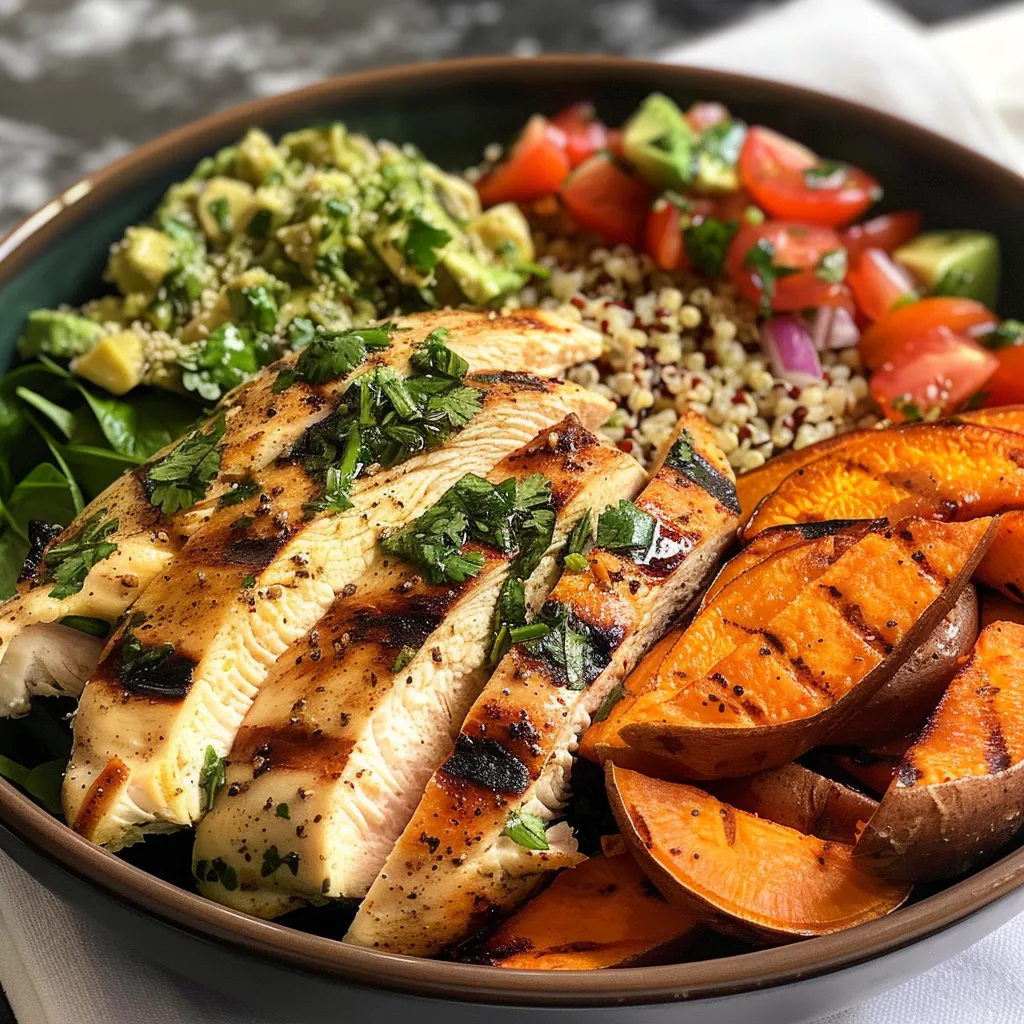
  6. Assemble the Bowls: Let the chicken rest for a few minutes before slicing. In a bowl, layer the cooked rice or quinoa, followed by the chopped vegetables, sliced chicken, and a generous dollop of tzatziki sauce. Top with feta cheese and enjoy!

Pro Tips for Perfect Greek Chicken Bowls

  • Use a Meat Thermometer: This ensures your chicken is perfectly cooked without being dry.
  • Let the Chicken Rest: Allowing the chicken to rest before slicing helps retain moisture.
  • Customize Your Toppings: Feel free to add olives, roasted red peppers, or even avocado for extra richness.
  • Make the Tzatziki Ahead: This sauce can be prepared a day in advance, allowing flavors to meld beautifully.
  • Experiment with Grains: Try farro or barley as a unique base instead of rice or quinoa.
  • Use Fresh Herbs: Fresh dill or parsley can elevate the flavor of your tzatziki and bowls.
  • Keep Veggies Crisp: Add cucumbers and lettuce just before serving for maximum freshness.
  • Balance the Heat: If you enjoy spice, consider adding a sprinkle of cayenne or crushed red pepper to the marinade.
  • Go Dairy-Free: Substitute the tzatziki with a cashew-based sauce for a vegan option.
  • Meal Prep Magic: Store each component separately to keep everything fresh throughout the week.

Common Mistakes and Troubleshooting

Even the best chefs make mistakes, so here are some common pitfalls and how to avoid them:

  • Overcooking the Chicken: Always use a meat thermometer to ensure the chicken is cooked just right.
  • Too Much Marinade: If the chicken sits too long, it can become overly salty. Stick to the recommended marinating time.
  • Inadequate Seasoning: Don’t skimp on salt and pepper; they are essential for enhancing flavors.
  • Limp Vegetables: Add veggies just before serving to maintain their crunch and freshness.

Delicious Variations

Let’s mix it up! Here are some creative variations of the Greek Chicken Bowl:

  • Spicy Chicken Bowl: Add diced jalapeños to the marinade for a kick that’ll wake up your taste buds.
  • Mediterranean Veggie Bowl: Substitute the chicken with roasted eggplant, zucchini, and bell peppers for a hearty vegetarian option.
  • Protein-Packed Bowl: Add chickpeas or lentils for extra protein, making it filling and nutritious.
  • Grilled Shrimp Bowl: Swap the chicken for marinated shrimp grilled to perfection, infused with the same flavors.

Storage and Make-Ahead Instructions

If you’re planning ahead, here’s how to store and enjoy your Greek Chicken Bowls later:

  • Refrigerate: Store each component separately in airtight containers. Grains, chicken, and tzatziki can last up to 4 days.
  • Freeze: You can freeze marinated chicken for up to 3 months. Thaw overnight in the refrigerator before cooking.
  • Make-Ahead Tzatziki: This sauce actually gets better with time! Make it a day in advance for enhanced flavor.

Frequently Asked Questions

Let’s address some common queries about Greek Chicken Bowls:

  • Can I use frozen chicken? Yes, just ensure it’s fully thawed before marinating and cooking.
  • What can I substitute for feta cheese? Goat cheese or nutritional yeast are excellent alternatives.
  • Can I make this recipe vegan? Absolutely! Use tofu or tempeh instead of chicken, and create a dairy-free tzatziki.
  • How do I make it gluten-free? Use quinoa as your base and ensure your tzatziki ingredients are gluten-free.
  • What’s the best way to serve leftovers? Reheat chicken and grains separately, then assemble again just before serving.
  • Can I add more veggies? Yes! Feel free to get creative with seasonal vegetables.
  • How do I keep the chicken tender? Marinating is key! Use a good marinade and don’t overcook.
  • What’s the best way to reheat the tzatziki? Tzatziki is best served cold, so it doesn’t need reheating—just give it a good stir!

Nutrition Tips and Dietary Adaptations

These Greek Chicken Bowls not only burst with flavor, but they also pack a nutritional punch. Here are some tips to further enhance their health benefits:

  • Increase Fiber: Add beans or lentils to your bowls for extra fiber and protein.
  • Choose Whole Grains: Opt for brown rice or quinoa for increased nutrients compared to white rice.
  • Load Up on Veggies: The more colorful your bowl, the more antioxidants you’ll receive—aim for a variety!
  • Mind the Portions: Be mindful of portion sizes, especially with rich ingredients like feta and tzatziki.

Essential Equipment Recommendations

The right tools can make your cooking experience smoother. Here’s what I recommend:

  • Air Fryer: Perfect for cooking chicken quickly and evenly while keeping it juicy.
  • Sharp Chef’s Knife: Essential for slicing chicken and chopping veggies with ease.
  • Mixing Bowls: A variety of sizes will help you with marinades, sauces, and grain prep.
  • Food Storage Containers: Airtight containers are crucial for meal prep and storing leftovers.

Serving Suggestions

When it comes to serving your Greek Chicken Bowls, presentation matters! Here are some ideas to elevate your dining experience:

  • Garnish with Fresh Herbs: A sprinkle of parsley or dill adds color and freshness.
  • Serve with Warm Pita: For a complete Mediterranean experience, offer warm pita bread on the side.
  • Pair with Wine: A chilled glass of Sauvignon Blanc or a light rosé complements the flavors beautifully.
  • Set Up a Bowl Bar: If hosting, let guests assemble their own bowls with various toppings and bases for a fun, interactive meal.

Now that you have all the tools and insights needed, it’s time to unleash your inner chef and create these spectacular Greek Chicken Bowls. Remember, cooking is about passion, creativity, and most importantly, enjoying the process. So grab your skillet, embrace the adventure, and let every bite be a story worth telling!

Happy cooking!

Greek Chicken Bowls

Prep Time 15 minutes
Cook Time 15 minutes
Total Time 30 minutes
Servings 4 servings
Calories 450
Enjoy a flavorful and healthy Greek-inspired meal with tender chicken, fresh vegetables, and creamy tzatziki sauce.

Ingredients

Protein

  • 4 small chicken breasts (about 1 1/4 pounds)
  • 1/4 cup olive oil
  • 2 tablespoons lemon juice

Carbohydrates

  • 2 cups cooked rice or quinoa
  • 2 cups halved grape tomatoes
  • 2 cups diced cucumber

Vegetables

  • 4 cups shredded romaine lettuce
  • 1 cup sliced red onion
  • 1/2 cup feta cheese

Sauces & Condiments

  • Tzatziki sauce (made with Greek yogurt, grated cucumber, garlic, and fresh dill) Tzatziki sauce

Instructions 

  • Whisk olive oil, lemon juice, and seasonings in a bowl. Marinate chicken for 30 minutes.
  • Make tzatziki by mixing yogurt, grated cucumber, lemon juice, olive oil, garlic, salt, and dill.
  • Cook rice or quinoa as per package instructions and prepare vegetables.
  • Preheat air fryer to 380°F and cook chicken for 10 minutes until internal temperature reaches 165°F. Rest and slice.
  • Assemble bowls with rice/quinoa, vegetables, sliced chicken, and tzatziki sauce.

Notes

For extra flavor, marinate chicken longer or add fresh herbs to the tzatziki.
Calories: 450kcal
Cost: $15
Course: Main Course
Cuisine: Greek
Keyword: chicken, healthy, Mediterranean

Nutrition

Calories: 450kcal | Carbohydrates: 50g | Protein: 40g | Fat: 15g | Sodium: 600mg

Ignite Your Kitchen: The Ultimate Cheesy Beef & Zucchini Casserole

Welcome to a culinary adventure that dances on your palate and warms your heart! Today, we’re diving into the exquisite world of the cheesy beef & zucchini casserole—a dish that’s not just food but an experience. This comforting meal combines the rich flavors of ground beef with the tender crunch of zucchini, all enveloped in a gooey, cheesy embrace. Whether you’re cooking for a family dinner or a cozy night in, this casserole is here to elevate your cooking game!

Why You’ll Love This Recipe

Here are just a few reasons why this casserole will become a staple in your kitchen:

  • Quick and Easy: With simple steps and minimal prep time, this dish is perfect for busy weeknights.
  • Customizable: You can easily adapt the recipe to suit your taste preferences or dietary needs.
  • Hearty and Filling: Packed with protein and veggies, this casserole will satisfy even the heartiest appetites.
  • Comfort Food at Its Best: The combination of melted cheese and tender zucchini creates a warm and inviting dish.
  • Leftover Friendly: This casserole tastes even better the next day, making it perfect for meal prep!

Ingredients You’ll Need

Gather these essential ingredients for a delicious cheesy beef & zucchini casserole:

  • 1 lb ground beef (or turkey for a lighter option): The protein powerhouse of this dish.
  • 2 medium zucchinis, sliced: Adds moisture and crunch, balancing the richness of the cheese.
  • 1 small onion, chopped: Provides aromatic sweetness that enhances the overall flavor.
  • 2 cloves garlic, minced: A must for that savory depth we all crave.
  • 1 cup shredded mozzarella cheese: For that melty, gooey goodness!
  • 1/2 cup shredded cheddar cheese: Adds a sharp tang that complements the mozzarella.
  • 1/2 cup heavy cream (or coconut milk for dairy-free): Helps create a creamy texture.
  • 1/2 cup tomato sauce (optional, for added flavor): A splash of acidity and sweetness.
  • 1/2 teaspoon dried oregano: For an herbal note that brightens the dish.
  • 1/2 teaspoon dried basil: Another layer of flavor that enhances the overall taste.
  • 1/4 teaspoon red pepper flakes (optional, for heat): Adds a kick if you dare!
  • Salt and pepper to taste: Essential for seasoning.
  • Olive oil (for sautéing): To keep things from sticking.

How to Make Cheesy Beef & Zucchini Casserole

Side view of a delicious Cheesy Beef & Zucchini Casserole, highlighting juicy beef and zucchini slices.

Now that you have all your ingredients ready, let’s embark on this cooking journey step by step:

  • Step 1: Preheat Your Oven: Set your oven to 375°F (190°C) so it’s hot and ready to bake the casserole.
  • Step 2: Brown the Ground Beef: In a large skillet, heat some olive oil over medium heat. Add the ground beef, breaking it apart with a spoon. Cook until fully browned. Drain any excess fat to keep the dish light.
  • Step 3: Sauté the Aromatics: Add the chopped onion and minced garlic to the skillet. Cook for 2-3 minutes until the onion softens and releases its aromatic essence.
  • Step 4: Add Zucchini and Seasonings: Stir in the sliced zucchini along with oregano, basil, red pepper flakes, salt, and pepper. Sauté for 5-7 minutes until the zucchini is tender but still has a bite.
  • Step 5: Mix in Cream and Tomato Sauce: Pour in the heavy cream and optional tomato sauce. Let the mixture simmer gently for about 2-3 minutes to meld the flavors. Adjust seasoning to taste.
  • Step 6: Assemble the Casserole: Transfer the beef and zucchini mixture evenly into a greased 9×13-inch baking dish. Sprinkle the mozzarella and cheddar cheeses evenly over the top.
  • Step 7: Bake to Perfection: Place the baking dish in the preheated oven and bake for 15-20 minutes, or until the cheese is melted, bubbly, and slightly golden.
  • Step 8: Let It Cool and Serve: Once baked, remove the casserole from the oven and let it cool for a few minutes. Serve warm and enjoy the explosion of flavors!

Tips for Success

Want to ensure your casserole turns out perfectly? Here are some expert insights:

  • Use Fresh Ingredients: Fresh zucchini and herbs will enhance the flavor significantly.
  • Don’t Overcook the Zucchini: Aim for tender yet firm zucchini to maintain texture.
  • Experiment with Cheese: Feel free to mix different cheeses like pepper jack for extra heat!
  • Make Ahead: Assemble the casserole a day in advance, cover, and refrigerate. Just bake when you’re ready!
  • Check for Doneness: Ensure the internal temperature reaches 165°F (74°C) for safe consumption.
  • Customize Seasonings: Adjust spices according to your taste preferences—feel free to get adventurous!
  • Incorporate More Veggies: Add bell peppers, mushrooms, or spinach for added nutrition and flavor.
  • Use a Meat Thermometer: This ensures your meat is cooked perfectly every time.

Common Mistakes and Troubleshooting

Every great cook makes mistakes. Here’s how to avoid them:

  • Greasy Casserole: Drain excess fat from the beef to prevent greasiness in the final dish.
  • Mushy Zucchini: Avoid overcooking—aim for a slight crunch to maintain texture.
  • Bland Flavor: Always season layers well; don’t forget the salt and pepper!
  • Cheese Not Melting: Increase oven temperature slightly if the cheese isn’t bubbling and golden.

Variations to Try

Feeling adventurous? Here are some fun variations to consider:

  • Spicy Southwestern Style: Add black beans, corn, and diced jalapeños for a spicy kick.
  • Italian Twist: Incorporate marinara sauce and Italian sausage for a hearty Italian version.
  • Vegetarian Delight: Replace beef with lentils or chickpeas for a filling vegetarian option.
  • Cheesy Broccoli Addition: Mix in steamed broccoli for a nutritious boost!

Make-Ahead and Storage Instructions

Planning for leftovers or want to prepare in advance? Here’s how to do it right:

  • Make Ahead: Assemble the casserole, cover it tightly with foil, and refrigerate for up to 24 hours. Bake when ready.
  • Storage: Store leftovers in an airtight container in the fridge for up to 3 days.
  • Freezing: Freeze an unbaked casserole for up to 3 months. Thaw overnight in the fridge before baking.
  • Reheating: Reheat in the oven at 350°F (175°C) until warmed through, about 20-25 minutes.

FAQs

Got questions? Here are some common queries about this cheesy beef & zucchini casserole:

  • Can I use a different type of meat? Absolutely! Ground turkey or chicken work great as alternatives.
  • Is there a dairy-free option? Yes! Use coconut milk and dairy-free cheese for a delicious dairy-free version.
  • What can I serve with this casserole? Pair it with a fresh salad or crusty bread for a complete meal.
  • How can I add more flavor? Consider adding spices like cumin or smoked paprika for a flavor boost.
  • Can I prepare this casserole in advance? Yes! It can be assembled ahead of time and baked later.
  • How do I know when it’s done? Look for bubbling cheese and a golden top; an internal temperature of 165°F (74°C) ensures it’s safe.
  • What if I don’t have tomato sauce? You can skip it or substitute with a bit of salsa for added flavor.
  • Can I use frozen zucchini? Fresh is best, but if you have frozen, just thaw and drain excess moisture before using.

Nutritional Tips and Dietary Adaptations

Your health matters! Here’s how to enjoy this casserole while being mindful of dietary needs:

  • Protein Boost: Add more beans or lentils to increase protein content.
  • Low-Carb Option: Replace zucchini with cauliflower for a low-carb version.
  • Gluten-Free: Ensure your cheeses and any added sauces are gluten-free.
  • Vegan Version: Use plant-based meat and dairy alternatives for a fully vegan dish.

Equipment Recommendations

For the best results, here’s what you’ll need:

  • Large Skillet: For browning the beef and sautéing vegetables.
  • Baking Dish: A 9×13-inch dish works perfectly for this casserole.
  • Measuring Cups and Spoons: Essential for accurate ingredient measurements.
  • Cutting Board and Knife: For chopping vegetables with ease.

Serving Suggestions

Make your meal complete with some delicious accompaniments:

  • Fresh Green Salad: A simple mixed greens salad with a light vinaigrette pairs beautifully.
  • Garlic Bread: Serve with warm, buttery garlic bread for a comforting touch.
  • Wine Pairing: A glass of red wine complements the savory flavors of the casserole well.
  • Pickled Vegetables: A side of pickled veggies adds a refreshing contrast to the rich casserole.

So there you have it, folks! The cheesy beef & zucchini casserole is not just a recipe; it’s a celebration of flavors, a canvas for your culinary creativity, and a dish that invites everyone to gather around the table. So grab your ingredients, ignite your passion for cooking, and let’s make magic happen in the kitchen!

Cheesy Beef & Zucchini Casserole Recipe

Prep Time 10 minutes
Cook Time 20 minutes
Total Time 30 minutes
Servings 4 servings
Calories 550
A hearty and cheesy casserole combining ground beef, zucchini, and flavorful cheeses, perfect for a comforting meal.

Ingredients

Meat

  • 1 lb ground beef (or turkey for a lighter option)

Vegetables

  • 2 medium zucchinis sliced zucchinis
  • 1 small onion, chopped
  • 2 cloves garlic, minced

Cheese

  • 1 cup shredded mozzarella cheese
  • 1/2 cup shredded cheddar cheese

Dairy & Sauces

  • 1/2 cup heavy cream (or coconut milk for dairy-free)
  • 1/2 cup tomato sauce (optional, for added flavor)

Spices & Seasonings

  • 1/2 teaspoon dried oregano
  • 1/2 teaspoon dried basil
  • 1/4 teaspoon red pepper flakes (optional, for heat)
  • to taste Salt and pepper
  • for sautéing Olive oil

Instructions 

  • Preheat oven to 375°F (190°C).
  • Cook ground beef in olive oil until browned; drain excess fat.
  • Add onion and garlic; cook 2-3 mins. Stir in zucchini, herbs, salt, and pepper; sauté 5-7 mins.
  • Mix in heavy cream and tomato sauce; simmer 2-3 mins. Transfer to greased dish.
  • Top with shredded cheeses. Bake 15-20 mins until bubbly and golden.
  • Let cool briefly before serving. Enjoy!

Notes

For a lighter version, use turkey and dairy-free cheese options.
Calories: 550kcal
Cost: $15
Course: Main Course
Cuisine: American
Keyword: beef, Cheese, zucchini

Nutrition

Calories: 550kcal | Carbohydrates: 20g | Protein: 40g | Fat: 35g | Sodium: 800mg

Ignite Your Culinary Passion with the Grilled Herb Chicken Bowl

If you’re ready to take your taste buds on an unforgettable journey, look no further than this vibrant Grilled Herb Chicken Bowl. This recipe is a celebration of flavors, featuring perfectly spiced chicken, crispy sweet potato fries, and a zesty avocado salsa that dances on your palate. Whether you’re aiming to impress guests or simply want to fuel your body with a meal that’s as nourishing as it is delicious, this dish has you covered. Let’s dive into the magic of cooking with heat and spice, where every bite tells a story!

Why You’ll Love This Recipe

  • Flavor Explosion: The marinade blends zesty lemon and aromatic herbs, ensuring every bite of chicken is bursting with flavor.
  • Perfect Textures: The contrast between the crispy sweet potato fries and creamy avocado salsa creates a delightful eating experience.
  • Quick & Easy: This dish comes together in under an hour, making it perfect for weeknight dinners or meal prep.
  • Healthful Ingredients: Packed with protein, healthy fats, and fresh vegetables, this bowl is as nutritious as it is delicious.
  • Customizable: With various toppings and sides, you can easily adapt this recipe to fit your dietary preferences.

Ingredients Breakdown

Before we get cooking, let’s gather our ingredients. Here’s what you’ll need:

  • For the Chicken
    2 large chicken breasts, butterflied or sliced into fillets
    2 tbsp olive oil
    1 tbsp lemon juice
    1 tsp garlic powder
    1 tsp dried oregano
    1 tsp paprika
    Salt & pepper to taste
  • For the Sweet Potato Fries
    2 large sweet potatoes, sliced into wedges
    1 tbsp olive oil
    1/2 tsp smoked paprika
    1/2 tsp garlic powder
    Salt & pepper to taste
  • For the Avocado Salsa
    2 ripe avocados, diced
    1 medium tomato, diced
    1/4 cup red onion, finely chopped
    1 tbsp fresh cilantro, chopped
    1 tbsp lime juice
    Salt & pepper to taste
  • For Assembly
    2 cups cooked quinoa or brown rice
    Mixed greens or spinach for serving

Feel free to make substitutions based on your preferences. For example, swap out quinoa for cauliflower rice for a low-carb option or use sweet potatoes for regular potatoes if you prefer.

Step-by-Step Instructions

Close-up of a grilled chicken dish served with colorful sweet potato fries and diced avocado.

Let’s get cooking! Follow these simple steps for a deliciously satisfying meal:

  1. Prepare the Sweet Potato Fries: Preheat the oven to 425°F (220°C). Toss the sweet potato wedges with olive oil, smoked paprika, garlic powder, salt, and pepper. Spread them on a parchment-lined baking sheet. Bake for 20-25 minutes, flipping halfway, until golden and crispy.
  2. Marinate the Chicken: In a mixing bowl, combine olive oil, lemon juice, garlic powder, oregano, paprika, salt, and pepper. Coat the chicken with the marinade and let it rest for 10-15 minutes.
  3. Cook the Chicken: Heat a grill or pan over medium heat and cook the chicken for about 4-5 minutes per side until the internal temperature reaches 165°F (74°C). Let the chicken rest for 5 minutes, then slice into strips.
  4. Make the Avocado Salsa: In a bowl, mix diced avocado, tomato, red onion, cilantro, lime juice, salt, and pepper to create the avocado salsa. Gently combine to keep the avocado intact.
  5. Assemble the Bowl: Start with a base of cooked quinoa or brown rice, add a handful of mixed greens or spinach, and layer on the sliced chicken, sweet potato fries, and avocado salsa. Optionally, drizzle with lime juice or a light yogurt dressing for extra flavor.

Pro Tips for Success

  • Marination Time: For deeper flavor, marinate the chicken for at least 30 minutes or overnight if time allows.
  • Baking Sweet Potatoes: Ensure your sweet potato wedges are evenly spaced on the baking sheet to achieve maximum crispiness.
  • Resting the Chicken: Always let grilled chicken rest before slicing. This ensures juicy, tender meat.
  • Fresh Ingredients: Use the freshest herbs and vegetables for the best flavor and texture.
  • Temperature Check: Invest in a meat thermometer to ensure your chicken is perfectly cooked without drying out.
  • Flavor Boost: Add a pinch of cayenne pepper to the marinade for an extra kick!
  • Meal Prep: Prepare extra sweet potato fries and avocado salsa for quick lunches throughout the week.
  • Storing Leftovers: Store leftover chicken and salsa separately to maintain freshness.

Common Mistakes & Troubleshooting

Cooking is a journey, and sometimes things don’t go as planned. Here are some common pitfalls and how to avoid them:

  • Dry Chicken: Avoid overcooking your chicken. Use a meat thermometer to check doneness.
  • Too Soggy Fries: Ensure your sweet potatoes are not overcrowded on the baking sheet, which can cause steaming instead of crisping.
  • Avocado Salsa Browning: To prevent browning, add lime juice immediately after cutting the avocados.
  • Uneven Seasoning: Always taste and adjust seasoning in your marinade before applying it to the chicken.

Recipe Variations

One of the best parts of cooking is the ability to adapt recipes to suit your taste. Here are some delicious variations to try:

  • Spicy Herb Chicken Bowl: Add diced jalapeños or chipotle powder to the marinade for a fiery kick.
  • Mediterranean Twist: Substitute the avocado salsa with a Greek salad featuring cucumbers, olives, and feta cheese.
  • Vegan Alternative: Replace chicken with marinated tofu or chickpeas and use a cashew cream instead of avocado.
  • Seasonal Veggie Bowl: Incorporate seasonal vegetables such as roasted zucchini or bell peppers into your bowl for added nutrition.

Storage and Make-Ahead Instructions

This dish is fantastic for meal prep! Here are some tips for storing and reheating:

  • Storage: Keep cooked chicken, sweet potato fries, and salsa in airtight containers in the refrigerator for up to 4 days.
  • Freezing: While sweet potatoes can be frozen, cooked chicken is best enjoyed fresh. If you must freeze it, use it within 2 months.
  • Reheating: To reheat, microwave the chicken and sweet potatoes until warmed through, then top with fresh avocado salsa before serving.

Frequently Asked Questions

Got questions? Here are some common queries about this dish:

  • Can I use chicken thighs instead of breasts?
    Absolutely! Chicken thighs will add more flavor and moisture.
  • What can I substitute for quinoa?
    You can use brown rice, cauliflower rice, or even couscous.
  • How do I make this dish gluten-free?
    Simply ensure your quinoa and any sauces used are certified gluten-free.
  • Can I grill the sweet potatoes?
    Yes! Grilling sweet potato wedges adds a smoky flavor; just ensure they are cut evenly.
  • How spicy is this dish?
    The heat level can be adjusted based on your preference. The base recipe is mild, but feel free to amp it up!
  • Is this dish suitable for meal prep?
    Yes! It’s perfect for meal prep and can be stored in the fridge for several days.
  • Can I use frozen chicken?
    Yes, but make sure to thaw it completely before marinating and cooking.
  • What’s the best way to serve this dish?
    Serve it warm, garnished with fresh herbs and a squeeze of lime juice for brightness.

Nutritional Tips and Dietary Adaptations

This dish is loaded with nutrients, making it a wholesome option for any meal. Here’s how to maximize its health benefits:

  • Protein Power: Chicken is a fantastic source of lean protein that supports muscle growth and repair.
  • Healthy Fats: Avocados provide heart-healthy monounsaturated fats and essential vitamins.
  • Fiber-Rich: Sweet potatoes and quinoa are excellent sources of dietary fiber, promoting healthy digestion.
  • Vitamins & Minerals: Fresh vegetables pack a punch of vitamins A and C, essential for overall health.

Equipment Recommendations

Here’s what you’ll need to whip up this delicious bowl:

  • Grill or Grill Pan: For that signature charred flavor on your chicken.
  • Baking Sheet: Essential for roasting your sweet potato fries to crispy perfection.
  • Mixing Bowls: For marinating chicken and mixing the avocado salsa.
  • Meat Thermometer: Ensures your chicken reaches the perfect internal temperature for juiciness.

Serving Suggestions

To elevate your Grilled Herb Chicken Bowl experience, consider these serving ideas:

  • Garnishing: Top with fresh herbs like cilantro or parsley to enhance flavor.
  • Drizzling: A light yogurt dressing or a tangy vinaigrette can add an extra layer of flavor.
  • Pairing: Serve with a side of roasted vegetables or a fresh garden salad for balance.
  • Adding Crunch: Toss in some nuts or seeds for added texture and nutrition.

This Grilled Herb Chicken Bowl is more than just a meal; it’s a culinary adventure that invites you to experiment and embrace the spice of life. With its vibrant flavors and nourishing ingredients, it’s sure to become a beloved staple in your kitchen. So grab your skillet, turn up the heat, and let’s create something extraordinary together!

Grilled Herb Chicken Bowl with Sweet Potato Fries & Avocado Salsa

Prep Time 15 minutes
Cook Time 25 minutes
Total Time 40 minutes
Servings 4 servings
Calories 650
A flavorful and healthy bowl combining grilled herb chicken, crispy sweet potato fries, and fresh avocado salsa for a satisfying meal.

Ingredients

For the Chicken

  • 2 large chicken breasts, butterflied or sliced into fillets
  • 2 tbsp olive oil
  • 1 tbsp lemon juice
  • 1 tsp garlic powder
  • 1 tsp dried oregano
  • 1 tsp paprika
  • Salt & pepper to taste Salt & pepper

For the Sweet Potato Fries

  • 2 large sweet potatoes, sliced into wedges
  • 1 tbsp olive oil
  • 1/2 tsp smoked paprika
  • 1/2 tsp garlic powder
  • Salt & pepper to taste Salt & pepper

For the Avocado Salsa

  • 2 ripe avocados, diced
  • 1 medium tomato, diced
  • 1/4 cup red onion, finely chopped
  • 1 tbsp fresh cilantro, chopped
  • 1 tbsp lime juice
  • Salt & pepper to taste Salt & pepper

For Assembly

  • 2 cups cooked quinoa or brown rice
  • Mixed greens or spinach for serving Mixed greens or spinach

Instructions 

  • Preheat oven to 425°F (220°C). Toss sweet potatoes with oil, paprika, garlic, salt, and pepper; bake 20-25 mins until crispy.
  • Mix marinade ingredients; coat chicken and rest 10-15 mins.
  • Grill chicken 4-5 mins per side until cooked; rest and slice.
  • Combine avocado, tomato, onion, cilantro, lime juice, salt, and pepper for salsa.
  • Assemble bowls with rice, greens, chicken, sweet potatoes, and salsa. Drizzle with lime or dressing if desired.

Notes

For extra flavor, add a squeeze of lime or a drizzle of yogurt dressing.
Calories: 650kcal
Cost: $15
Course: Main Course
Cuisine: American
Keyword: Bowl, chicken, healthy

Nutrition

Calories: 650kcal | Carbohydrates: 80g | Protein: 45g | Fat: 20g | Sodium: 500mg

Welcome to the Flavor Adventure: Baked Feta Spaghetti Squash

Are you ready to elevate your cooking game and dive into the delicious world of baked feta spaghetti squash? This dish is not just a meal; it’s a celebration of flavor, combining creamy feta, roasted tomatoes, and vibrant basil pesto to create a truly unforgettable experience. Whether you’re a seasoned chef or a kitchen novice, this recipe will ignite your passion for cooking and make your taste buds dance. Let’s embrace the thrill of flavor and get started!

Why You’ll Love This Recipe

  • Healthy & Low Carb: This dish offers a guilt-free indulgence with its low-carb spaghetti squash base, making it perfect for those seeking healthy dinner recipes.
  • Quick & Easy Preparation: With just a few simple steps, you can create a stunning meal in about an hour, leaving you plenty of time to kick back and enjoy.
  • Impressive Presentation: The vibrant colors of the roasted tomatoes and the creamy feta make for a visually stunning dish that’s sure to impress your guests!
  • Versatile & Customizable: Feel free to experiment with ingredients and create variations that suit your taste—this recipe is your canvas!
  • Perfect for Meal Prep: This dish stores beautifully, making it an excellent option for make-ahead meals. Just reheat and enjoy!

Ingredient Breakdown

Before we dive into the cooking, let’s take a closer look at the ingredients you’ll need for this mouthwatering feta spaghetti dish:

  • 1 medium spaghetti squash (about 2 pounds): The star of the show! This squash serves as a healthy, low-carb pasta alternative.
  • 3 teaspoons extra virgin olive oil (divided): This oil adds richness and depth to the dish.
  • ½ teaspoon kosher salt: Essential for enhancing the flavors of your ingredients.
  • ¼ teaspoon ground black pepper: Adds a touch of warmth and spice.
  • 1 8-ounce block feta cheese: The creamy goodness that melts beautifully and creates a decadent sauce.
  • 1 pint cherry tomatoes (about 2 cups): Sweet and juicy, these tomatoes burst with flavor.
  • 3 tablespoons basil pesto: This adds a fresh, herbaceous kick to the dish.
  • 1 clove garlic (minced): A classic flavor enhancer that brings everything together.
  • Chopped fresh basil (for serving): A final touch of freshness that elevates the entire dish.

Pro Tips for Perfect Baked Feta Spaghetti Squash

Side angle of a serving of baked feta spaghetti squash topped with pesto and chopped basil.

As you embark on your culinary adventure, consider these expert insights to make the most out of your baked feta dish:

  • Choose the Right Squash: Look for a firm, heavy spaghetti squash with a smooth, unblemished skin. This indicates freshness!
  • Prepping the Squash: Microwaving the spaghetti squash for 5 minutes before cutting it makes slicing a breeze and ensures even cooking.
  • Don’t Skip the Pesto: The basil pesto contributes a burst of flavor; feel free to use homemade or store-bought versions.
  • Watch the Bake Time: Keep an eye on your squash while it’s baking. Ovens can vary, so check for fork tenderness around the 55-minute mark.
  • Fluff & Mix Well: When the squash is done, fluff the strands thoroughly to incorporate the feta and tomatoes for a harmonious blend of flavors.
  • Experiment with Cheese: While feta is classic, you can try using goat cheese or ricotta for a different creamy texture.
  • Make It a Meal: Pair your baked feta spaghetti squash with grilled chicken or sautéed shrimp for a complete dinner.
  • Garnish Wisely: A sprinkle of chili flakes or a drizzle of balsamic glaze can take your dish to the next level!

Common Mistakes and Troubleshooting

Even the best chefs have their mishaps. Here are some common mistakes and how to avoid them:

  • Overcooking the Squash: If the squash becomes mushy, it can lose its texture. Keep an eye on it during baking!
  • Undercooking the Feta: Ensure the feta is nice and melty—if it’s not, give it a few extra minutes in the oven.
  • Skipping Seasoning: Don’t underestimate the power of salt and pepper. These basics create a foundational flavor that enhances the dish.
  • Not Fluffing the Squash: If you skip this step, you risk ending up with a clumpy dish rather than a well-integrated meal.

Delicious Variations

Once you’ve mastered the basic recipe, feel free to get creative! Here are some exciting variations to try:

  • Mediterranean Twist: Add olives and artichokes for a Mediterranean flair that complements the feta beautifully.
  • Spicy Kick: Toss in some red pepper flakes or diced jalapeños for an extra heat boost.
  • Veggie Delight: Incorporate zucchini, bell peppers, or spinach to amp up the nutrition and flavor.
  • Cheesy Goodness: Mix in a blend of mozzarella and parmesan for a melty, cheesy topping.

Storage and Make-Ahead Instructions

This dish is not only delicious, but it also stores well! Here’s how to keep it fresh:

  • Refrigerate: Store leftovers in an airtight container in the fridge for up to 4 days.
  • Freezing: While it’s best enjoyed fresh, you can freeze the dish for up to 3 months. Just remember to thaw before reheating!
  • Reheating: To reheat, place in the oven at 350°F until warmed through, or use the microwave for a quicker option.

Frequently Asked Questions

Got questions? Here are some common queries to help you out:

  • Can I use a different type of squash? Yes! Butternut or acorn squash can work as alternatives with varying flavors and textures.
  • Is this recipe gluten-free? Absolutely! This is a naturally gluten-free dish, perfect for those with dietary restrictions.
  • Can I make this vegan? Substitute the feta with a plant-based cheese and skip the pesto for a vegan-friendly version.
  • What should I serve with this dish? Grilled chicken, shrimp, or a side salad would complement the flavors beautifully.
  • How do I know when the squash is done? The skin should be tender to the touch, and the flesh should easily shred into strands with a fork.
  • Can I prepare this ahead of time? Yes! You can prep the squash and toppings in advance, then assemble and bake when ready to serve.
  • How do I store leftovers? Keep them in an airtight container in the fridge for up to 4 days for the best flavor and texture.
  • Can I use dried herbs instead of fresh? While fresh herbs are recommended for the best flavor, you can use dried herbs in a pinch—just adjust the quantity.

Nutritional Information & Dietary Adaptations

This dish is not just flavorful but also packed with nutrients. Here’s a brief overview:

  • Low Calorie: This recipe is low in calories, making it a great option for weight management.
  • High Fiber: The spaghetti squash is a great source of fiber, supporting digestion and keeping you full.
  • Rich in Antioxidants: Tomatoes and basil are rich in antioxidants, adding health benefits to your meal.
  • Protein Boost: Adding grilled chicken or chickpeas can enhance the protein content, making it a balanced meal.

Essential Equipment

To successfully create this dish, you’ll need a few essential tools:

  • Sharp Chef Knife: For cutting the spaghetti squash in half with ease.
  • Baking Sheet: A large, rimmed baking sheet lined with parchment paper to catch any drips.
  • Mixing Bowls: For combining the tomatoes, pesto, and garlic.
  • Fork: Essential for fluffing the squash strands once it’s done baking.

Serving Suggestions

Finally, let’s talk about how to serve this culinary masterpiece:

  • Plate it Pretty: Serve in the squash halves for an impressive presentation that’s sure to wow.
  • Garnish: Add a sprinkle of fresh basil or a drizzle of balsamic reduction for a gourmet touch.
  • Pair with Wine: A crisp white wine complements the flavors beautifully, enhancing the overall dining experience.

Are you ready to unleash the flavor in your kitchen? Grab your apron, turn up the heat, and let’s create something extraordinary with this baked feta spaghetti squash. Remember, cooking is an adventure, and every meal is a story waiting to be told. Enjoy every bite!

Baked Feta Spaghetti Squash

Prep Time 10 minutes
Cook Time 1 hour
Total Time 1 hour 10 minutes
Servings 4 servings
Calories 350
A delicious and healthy baked spaghetti squash topped with melty feta, cherry tomatoes, and basil pesto for a flavorful vegetarian meal.

Ingredients

Vegetables

  • 2 pounds spaghetti squash (about 2 pounds)
  • 3 teaspoons extra virgin olive oil (divided)
  • ½ teaspoon kosher salt
  • ¼ teaspoon ground black pepper
  • 1 8-ounce block feta cheese
  • 1 pint cherry tomatoes (about 2 cups)
  • 3 tablespoons Basil Pesto
  • 1 clove garlic (minced)

For serving

  • to taste Chopped fresh basil (for sprinkling)

Instructions 

  • Preheat oven to 400°F and line a baking sheet with parchment paper.
  • Cut the squash in half lengthwise, remove seeds, and place cut-side up. Drizzle with 1 teaspoon oil, season with salt and pepper.
  • Slice feta in half, place one half in each squash cavity. Mix tomatoes, pesto, garlic, and remaining oil; spoon over feta.
  • Bake until tender and tomatoes break down, about 55-65 minutes. Fluff flesh with a fork, stir in feta and tomatoes, then top with basil.

Notes

Be careful when handling the hot squash and check for doneness by pressing the skin.
Calories: 350kcal
Cost: $15
Course: Main Course
Cuisine: American
Keyword: healthy, pasta, Vegetarian

Nutrition

Calories: 350kcal | Carbohydrates: 40g | Protein: 12g | Fat: 20g | Sodium: 600mg

Unlock Flavor and Adventure with Vegan Sticky Sesame Chickpeas

Welcome to a culinary journey where every bite is a celebration of bold flavors! In this recipe for Vegan Sticky Sesame Chickpeas, we’ll dive into a dish that’s not just vegan, but also gluten-free and bursting with umami goodness. Perfect for a quick weeknight dinner or a show-stopping side dish, these chickpeas deliver a delightful balance of sweetness and spice. Get ready to embrace the art of cooking with fire and flavor!

Why You’ll Love This Recipe

There’s something truly magical about combining the humble chickpea with a sticky, sweet sauce. Here are five reasons why this recipe will become a favorite in your kitchen:

  • Quick and Easy: Ready in just 15 minutes! Perfect for busy weeknights or last-minute meals.
  • Flavor Explosion: The combination of garlic, sesame oil, and maple syrup creates a sauce that dances on your taste buds.
  • Versatile: Serve it over rice, quinoa, or paired with steamed vegetables for a complete meal.
  • Meal Prep Friendly: Great for batch cooking! Prepare a large batch and enjoy it throughout the week.
  • Nutritious Powerhouse: Packed with protein and fiber, these chickpeas are not only delicious but also incredibly healthy.

Ingredients Breakdown

Let’s gather our ingredients for this fantastic dish. Each component plays a vital role in building flavor.

  • 2 (15-ounce) cans chickpeas: These legumes are the star of the dish, providing a hearty texture and plant-based protein. You can also use dried chickpeas if soaked and cooked beforehand.
  • 3-4 large cloves garlic: Adds a fragrant and savory depth to the sauce. Fresh garlic is a must for that aromatic punch!
  • 1 tablespoon avocado oil or olive oil: Use avocado oil for a high smoke point and a neutral flavor that won’t overpower the dish.
  • 1.5 tablespoons toasted sesame oil: This ingredient brings a nutty flavor that gives the dish its distinct taste. Don’t skip this one!
  • 1/3 cup low sodium tamari or soy sauce: A key ingredient for that umami kick. Tamari is gluten-free, making it a perfect choice.
  • 3 tablespoons maple syrup: This natural sweetener balances the saltiness of the soy sauce and adds a delightful stickiness to the sauce.
  • 2 teaspoons rice vinegar: Provides acidity that brightens the flavors of the dish.
  • 1/2 teaspoon ground ginger: Adds warmth and complexity; fresh ginger can also be used for an extra kick.
  • 1 tablespoon tapioca starch: Helps thicken the sauce for that irresistible sticky texture.
  • 1/4 cup low sodium vegetable broth or water: Used to thin out the sauce as needed. Adjust based on your desired consistency.
  • 1/2 teaspoon red pepper flakes (optional): For those who enjoy a little heat, this is your chance to spice things up!

Step-by-Step Instructions

Now that we have our ingredients ready, let’s get cooking!

  1. Drain and rinse the chickpeas and set aside.
  2. Mince the garlic and add it to a sauté pan with the avocado or olive oil.
  3. Sauté over medium heat for a few minutes or until the garlic is very fragrant.
  4. In a small bowl, combine the tapioca starch and half of the vegetable broth. Whisk together until no clumps remain. Set aside.
  5. To the sauté pan with the garlic, add in the low sodium soy sauce, sesame oil, maple syrup, rice vinegar, ginger, and the additional 2 tablespoons of vegetable broth. Whisk together.
  6. Add in the tapioca mixture and stir until well combined.
  7. When bubbles start to form, add in the chickpeas and stir until they are well coated.
  8. Cook on low heat until the sauce becomes thick and sticky, about 5 minutes, stirring occasionally.
  9. Remove from the heat and let sit to allow the chickpeas to absorb all of the flavor.
  10. Serve with steamed broccoli, quinoa, or rice for a complete meal.

Pro Tips for Perfection

To ensure your Vegan Sticky Sesame Chickpeas turn out perfectly every time, keep these expert insights in mind:

  • Use Fresh Ingredients: Fresh garlic and ginger significantly enhance the flavor profile of the sauce.
  • Don’t Overcook: Keep an eye on the chickpeas as they cook in the sauce. You want them heated through but not mushy.
  • Adjust the Sweetness: Feel free to adjust the amount of maple syrup based on your sweetness preference.
  • Experiment with Spices: Add more red pepper flakes or even a dash of sriracha for a spicier kick!
  • Thickening Tip: If your sauce is too thin, mix in a bit more tapioca starch mixed with water to thicken it up.
  • Make it Creamy: Stir in a tablespoon of peanut or almond butter for a rich and creamy twist.
  • Serving Temperature: These chickpeas are delightful served warm, but they can also be enjoyed cold in salads.
  • Garnish: Top with sesame seeds or chopped green onions for added texture and flavor.

Common Mistakes and Troubleshooting

Even the best chefs make mistakes! Here are some common pitfalls and how to avoid them:

  • Too Salty: If your sauce ends up too salty, add a sprinkle of sugar or an additional splash of vinegar to balance it out.
  • Too Thick: If the sauce becomes too thick, add a little more vegetable broth or water to reach your desired consistency.
  • Bland Flavor: Always taste and adjust seasoning. A pinch of salt or a splash of soy sauce can elevate the dish.
  • Burnt Garlic: Keep the heat on medium; burnt garlic can ruin the sauce’s flavor.

Variations to Try

Ready to mix things up? Here are four delicious variations of this recipe:

  • Asian-Inspired Bowl: Serve over jasmine rice and top with shredded carrots and cucumber for a fresh crunch.
  • Spicy Chickpeas: Increase the red pepper flakes or add a diced jalapeño for a fiery twist.
  • Sweet and Savory: Add diced pineapple for a tropical twist that complements the flavor of the chickpeas.
  • Curry Flavor: Stir in a teaspoon of curry powder or garam masala for a warm, spicy twist.

Storage and Make-Ahead Instructions

This recipe is perfect for meal prep! Here’s how to store and reheat:

  • Refrigerator: Store in an airtight container for up to 5 days. Simply reheat on the stove or microwave.
  • Freezer: Freeze in a freezer-safe container for up to 3 months. Thaw overnight in the fridge before reheating.
  • Make-Ahead: Prepare the sauce and chickpeas separately and combine them just before serving to maintain the best texture.

Comprehensive FAQ

Let’s address some common questions about this recipe:

  • Can I use dried chickpeas instead of canned? Yes! Soak and cook them beforehand for the best results.
  • Is this recipe gluten-free? Yes, as long as you use gluten-free tamari or soy sauce.
  • Can I use fresh ginger instead of ground ginger? Absolutely! Use about 1 tablespoon of fresh ginger for a bolder flavor.
  • How can I make this recipe spicier? Add more red pepper flakes or some hot sauce to the mix.
  • What should I serve with these chickpeas? They pair wonderfully with rice, quinoa, or steamed vegetables.
  • Can I make this dish ahead of time? Yes! It stores well and can be reheated without losing its flavor.
  • What if my sauce is too thin? Mix in more tapioca starch combined with water to thicken it.
  • Are chickpeas healthy? Yes! They are high in protein, fiber, and various essential nutrients.

Nutritional Tips and Dietary Adaptations

For those watching their dietary intake, here are some helpful tips:

  • Low-Carb Option: Serve over cauliflower rice instead of traditional grains for a low-carb meal.
  • High-Protein Boost: Add a sprinkle of hemp seeds or chopped nuts for an extra protein punch.
  • Low-Calorie Adjustments: Reduce the amount of maple syrup or use a sugar substitute to cut down on calories.

Equipment Recommendations

To make this dish, you’ll need:

  • Sauté Pan: A non-stick pan works best for cooking the chickpeas and sauce.
  • Measuring Cups and Spoons: For accurate ingredient measurements.
  • Whisk: Essential for mixing the sauce ingredients together smoothly.

Serving Suggestions

These Vegan Sticky Sesame Chickpeas shine when paired with:

  • Steamed Broccoli: A classic side that complements the flavors beautifully.
  • Quinoa: A protein-packed grain that adds a nutty flavor to the dish.
  • Brown Rice: For a hearty and wholesome base that soaks up the sauce.

Conclusion

Embrace the adventure of cooking with these Vegan Sticky Sesame Chickpeas. With their perfect blend of flavors and textures, they are sure to become a star dish in your kitchen. So grab your skillet, light that fire, and let’s get cooking! Remember, the key to great food is in the fearless exploration of flavors. Enjoy every moment of this culinary journey!

Vegan Sticky Sesame Chickpeas

Prep Time 10 minutes
Cook Time 15 minutes
Total Time 25 minutes
Servings 4 servings
Calories 320
A flavorful vegan dish featuring crispy chickpeas coated in a sweet and savory sesame sauce, perfect for a quick and satisfying meal.

Ingredients

Canned Goods

  • 2 cans chickpeas (15 ounces each)
  • 3-4 cloves garlic (large cloves, minced)
  • 1 tablespoon avocado oil or olive oil
  • 1.5 tablespoons toasted sesame oil
  • 1/3 cup low sodium tamari or soy sauce
  • 3 tablespoons maple syrup
  • 2 teaspoons rice vinegar
  • 1/2 teaspoon ground ginger
  • 1 tablespoon tapioca starch
  • 1/4 cup low sodium vegetable broth or water (divided)
  • 1/2 teaspoon red pepper flakes (optional for spice)

Instructions 

  • Drain and rinse chickpeas; set aside.
  • Mince garlic and sauté in oil until fragrant.
  • Mix tapioca starch with half the broth until smooth.
  • Add soy sauce, sesame oil, maple syrup, vinegar, ginger, and broth to pan; whisk.
  • Add tapioca mixture, then chickpeas; cook until sauce thickens.
  • Serve with steamed broccoli, quinoa, or rice.

Notes

For extra spice, add red pepper flakes during cooking.
Calories: 320kcal
Cost: $12
Course: Main Course
Cuisine: Vegan
Keyword: Chickpeas

Nutrition

Calories: 320kcal | Carbohydrates: 55g | Protein: 12g | Fat: 8g | Sodium: 900mg

Unleashing Flavor: The Magic of Healthier Tater Tot Casserole

Welcome to a culinary adventure where comfort food meets health-conscious eating! This Healthier Tater Tot Casserole is not just a dish; it’s a celebration of flavors that evokes nostalgia while embracing nutrition. Packed with ground chicken, earthy mushrooms, and topped with crispy crowns, this casserole is sure to spark joy and flavor in every bite. Whether you’re feeding the family or hosting friends, this dish will awaken your taste buds and warm your heart!

Why You’ll Love This Recipe

Let’s dive into the reasons why this tater tot casserole is a must-try:

  • Guilt-Free Indulgence: With lean ground chicken and fat-free cream of mushroom soup, you can enjoy this comforting dish without the guilt.
  • Quick and Easy: Ready in just 30 minutes, this recipe is perfect for busy weeknights!
  • Customizable: Feel free to swap ingredients and make it your own—add veggies, change the protein, or spice it up!
  • Family-Friendly: Kids love tater tots! This dish is a guaranteed hit for even the pickiest eaters.
  • Meal Prep Hero: Make it ahead of time and simply pop it in the oven for a quick dinner solution.

Ingredients: Building Blocks of Deliciousness

Ready to gather your ingredients? Here’s what you’ll need to create this masterpiece:

  • 2 tbsp olive oil: For sautéing and adding richness.
  • 1 lb ground chicken: A lean protein that keeps the dish hearty.
  • 8 oz mushrooms (sliced): Adds umami and moisture.
  • 1 tbsp Taco John’s Potato Ole Seasoning: The secret ingredient that elevates the flavor.
  • 1 can fat-free cream of mushroom soup: A creamy base without the extra calories.
  • 1 cup crispy crowns: The crunchy topping that completes the dish.
  • 1/4 cup shredded cheddar cheese: For that melty, cheesy goodness.

How to Make Your Healthier Tater Tot Casserole

Side view of a juicy tater tot casserole, showcasing ground chicken and mushrooms.

Let’s get cooking! Follow these simple steps to create your flavorful casserole:

  1. Preheat: Preheat your oven to 350°F (175°C).
  2. Sauté: In a large skillet, heat the olive oil over medium-high heat. Add the ground chicken and sliced mushrooms, cooking until browned and cooked through.
  3. Season: Stir in the Taco John’s seasoning mix, ensuring the chicken and mushrooms are well-coated.
  4. Combine: Add the fat-free cream of mushroom soup and stir until everything is evenly mixed.
  5. Assemble: Pour the meat mixture into an 8×8 casserole dish that’s been sprayed with non-stick spray.
  6. Top: Layer the crispy crowns over the meat mixture. If you like it spicy, sprinkle additional Taco John’s seasoning on top!
  7. Bake: Place the baking dish in the preheated oven and bake for 30 minutes.
  8. Add Cheese: Remove the casserole from the oven, sprinkle the cheddar cheese on top (no need to put back in the oven as the cheese will melt quickly).
  9. Serve: Once the cheese is melted and bubbly, serve hot and enjoy!

Pro Tips for the Perfect Casserole

Want to elevate your casserole game? Here are some expert tips:

  • Don’t Skip Browning: Browning the chicken and mushrooms develops deep flavors that are key to a delicious casserole.
  • Layer Wisely: Ensure even distribution of crispy crowns for that perfect crunch in every bite.
  • Experiment with Spices: Don’t be afraid to mix in other spices or herbs to personalize the flavor profile.
  • Use Fresh Ingredients: Fresh mushrooms and quality chicken make a noticeable difference in taste.
  • Check for Doneness: Ensure the chicken is fully cooked before mixing with the soup for food safety.
  • Cover While Baking: If the tops start browning too quickly, cover with foil to prevent burning.
  • Let it Rest: Allow the casserole to sit for a few minutes after baking to set before serving.

Common Mistakes and Troubleshooting

Even the best chefs make mistakes! Here’s how to avoid common pitfalls:

  • Overcooking: Keep an eye on the casserole during baking to avoid drying it out.
  • Too Much Liquid: If the mixture is too watery, consider draining excess liquid before baking.
  • Texture Issues: If you want a crispier topping, broil for the last few minutes, watching closely to prevent burning.
  • Flavor Imbalance: Taste your mixture before baking and adjust seasonings to your preference.

Variations on the Classic Casserole

Feeling adventurous? Here are some fun variations to try:

  • Vegetarian Delight: Swap ground chicken for plant-based crumbles and add your favorite veggies.
  • Spicy Kick: Incorporate diced jalapeños or crushed red pepper for an extra heat boost.
  • Cheesy Broccoli: Mix in steamed broccoli florets before baking for added nutrition and flavor.
  • Buffalo Chicken: Use buffalo sauce in place of seasoning for a zesty twist!

Storage and Make-Ahead Instructions

This casserole is perfect for meal prep:

  • Refrigerate: Store leftovers in an airtight container for up to 3 days.
  • Freeze: Freeze before baking; cover tightly and store for up to 3 months.
  • Reheat: Bake from frozen at 350°F for approximately 45 minutes, or until heated through.

Frequently Asked Questions (FAQs)

Got questions? We’ve got answers!

  • Can I use beef instead of chicken? Yes! Ground beef or turkey would work well, though the casserole will be richer in flavor.
  • How can I make this dish gluten-free? Ensure the cream of mushroom soup and seasoning are gluten-free.
  • Can I add other vegetables? Absolutely! Bell peppers, zucchini, or corn would be excellent additions.
  • What can I use instead of cream of mushroom soup? A homemade white sauce or a different cream soup can be substituted.
  • Is this recipe suitable for meal prep? Yes! It keeps well and is easy to reheat.
  • How spicy is it? The spice level can be adjusted based on the Taco John’s seasoning and any added ingredients.
  • Can I use frozen tater tots? Yes! Frozen tater tots or crispy crowns work perfectly.
  • What sides pair well with this casserole? A fresh salad or steamed vegetables complement the dish nicely.

Nutritional Tips and Dietary Adaptations

Looking to make this dish even healthier? Consider these adaptations:

  • Increase Fiber: Add lentils or black beans to the meat mixture for extra fiber and nutrition.
  • Low-Calorie Options: Use low-fat cheese or omit cheese altogether for fewer calories.
  • Dairy-Free: Substitute with dairy-free cheese and a coconut-based cream soup.

Equipment Recommendations

Here’s what you’ll need to whip up this casserole:

  • Large Skillet: For browning the chicken and mushrooms.
  • Casserole Dish: An 8×8 dish is perfect for this recipe.
  • Non-stick Spray: To prevent sticking and make cleaning easier.
  • Mixing Spoon: A sturdy spoon for combining ingredients.

Serving Suggestions

Make your meal complete by pairing the casserole with:

  • Fresh Salad: A crisp garden salad with a tangy vinaigrette.
  • Garlic Bread: Perfect for scooping up all the deliciousness!
  • Steamed Veggies: Broccoli or green beans make a healthy side.

Now it’s time to grab your skillet and embark on this delicious journey! Embrace the thrill of cooking and let your taste buds dance with joy. Remember: every meal is an adventure waiting to happen. Enjoy your Healthier Tater Tot Casserole, and let it spark joy and flavor in every bite!

Healthier Tater Tot Casserole

Prep Time 10 minutes
Cook Time 30 minutes
Total Time 40 minutes
Servings 4 servings
Calories 450
A delicious and healthier twist on the classic tater tot casserole, packed with lean chicken and vegetables.

Ingredients

Main Ingredients

  • 2 tbsp olive oil
  • 1 lb ground chicken
  • 8 oz mushrooms (sliced)
  • 1 tbsp Taco John's Potato Ole Seasoning
  • 1 can fat free cream of mushroom soup
  • 1 cup crispy crowns
  • 1/4 cup shredded cheddar cheese

Instructions 

  • Preheat oven to 350°F (175°C).
  • Heat oil in a skillet, cook chicken and mushrooms until done. Stir in seasoning and soup.
  • Pour mixture into a sprayed 8×8 dish. Top with crispy crowns and optional seasoning.
  • Bake for 30 minutes. Add cheese, let melt, then serve.

Notes

For extra flavor, sprinkle additional seasoning before baking.
Calories: 450kcal
Cost: $15
Course: Main Course
Cuisine: American
Keyword: casserole, chicken, Tater Tot

Nutrition

Calories: 450kcal | Carbohydrates: 45g | Protein: 35g | Fat: 15g | Sodium: 900mg

A Zucchini Noodle Chicken Alfredo Adventure

Welcome to a creamy culinary delight that’s as bold as the Texas sun! This Zucchini Noodle Chicken Alfredo is not just another recipe; it’s a celebration of flavors and a daring twist on a classic comfort food. Whether you’re looking for low-carb alternatives or simply want to elevate your dinner game, this dish will make your taste buds dance with joy. So, grab your skillet and let’s ignite the heat in your kitchen!

Why You’ll Love This Recipe

Let’s dive into why this Zucchini Noodle Chicken Alfredo is a must-try:

  • Flavor Fusion: This dish brings together tender chicken and vibrant zucchini noodles, all enveloped in a rich, creamy alfredo sauce that tantalizes your palate.
  • Healthy Comfort Food: Enjoy all the comforting flavors of traditional Alfredo without the heavy carbs. Perfect for a guilt-free indulgence!
  • Simple Ingredients: With just a handful of fresh ingredients, you can whip up a delightful meal that feels gourmet.
  • Quick Preparation: Ready in under 30 minutes, this dish is perfect for busy weeknights or last-minute gatherings.
  • Customizable: Want to add more veggies or spice things up? This recipe is a canvas for your culinary creativity!

Ingredient Breakdown

Before we get cooking, let’s take a close look at what you’ll need for this dish:

  • 3 medium zucchinis: Spiralized into noodles, these beauties replace traditional pasta, adding freshness and crunch.
  • 2 tbsp butter: For sautéing and adding a rich flavor base.
  • 2 boneless, skinless chicken breasts: Thinly sliced, these will give the dish protein and heartiness.
  • 1 tsp kosher salt: To enhance all the flavors; adjust to taste.
  • 1 tsp freshly ground black pepper: A must for that perfect seasoning kick.
  • 3 cloves garlic, minced: Because garlic makes everything better! It adds depth and aroma.
  • ¾ cup heavy cream (180 mL): For that luxurious, creamy texture.
  • 1 cup shredded Parmesan cheese (110 g): The star of the alfredo sauce, adding richness and nuttiness.
  • 2 tbsp fresh parsley, chopped: For a pop of color and freshness to finish your dish.

Pro Tips for the Perfect Zucchini Noodle Chicken Alfredo

Side view of a plate of Zucchini Noodle Chicken Alfredo, highlighting juicy chicken and fresh parsley garnish.

Ready to take your dish to the next level? Here are some expert insights:

  • Spiralize with Care: Make sure to remove excess moisture from the zucchini noodles by salting them and letting them sit for a few minutes before cooking.
  • Cook Chicken Thoroughly: Ensure your chicken is cooked all the way through to avoid any food safety issues. It should reach an internal temperature of 165°F (75°C).
  • Adjust Creaminess: If you prefer a richer sauce, don’t hesitate to add more cream or cheese, but be cautious not to overpower the dish.
  • Fresh Herbs are Key: Always opt for fresh parsley over dried; the flavor is bright and vibrant.
  • Don’t Overcook the Noodles: Zucchini noodles cook quickly, so sauté them for just 3-4 minutes to maintain their crunch.
  • Reheat Gently: If you have leftovers, gently reheat them on low to avoid soggy noodles.
  • Experiment with Add-Ins: Try adding sautéed mushrooms, spinach, or even roasted cherry tomatoes for extra flavor.
  • Perfect Your Seasoning: Taste as you go! Adjust seasoning with salt, pepper, or even a pinch of red pepper flakes for heat.

Common Mistakes to Avoid

Even seasoned cooks can stumble, so keep these pitfalls in mind:

  • Ignoring Water Content: Zucchini has a high water content, which can make your dish watery. Always salt and drain your spiralized noodles.
  • Overcooking Chicken: Dry, overcooked chicken can ruin your dish. Cook just until done.
  • Skipping the Garlic: Garlic is the backbone of flavor in this recipe. Don’t leave it out!
  • Underestimating the Sauce: Make sure you have enough sauce to coat all the noodles evenly.

Variations to Explore

Feeling adventurous? Try these exciting variations:

  • Veggie-Loaded Alfredo: Add sautéed bell peppers, spinach, or mushrooms for a veggie-packed version.
  • Spicy Kick: Incorporate red pepper flakes or a dash of hot sauce into the alfredo sauce for a fiery twist.
  • Seafood Delight: Substitute chicken with shrimp or scallops for an ocean-inspired meal.
  • Vegan Alfredo: Swap heavy cream with coconut cream and cheese with nutritional yeast for a plant-based version.

Storage and Make-Ahead Instructions

This dish is perfect for meal prep! Here’s how to store it:

  • Refrigerate: Store leftovers in an airtight container in the fridge for up to 3 days. Reheat gently on the stovetop or microwave.
  • Freeze: Not recommended for freezing due to the texture of zucchini noodles, but you can freeze the sauce separately for future use.
  • Make Ahead: Prepare the alfredo sauce a day in advance and store it in the fridge. Just add freshly cooked zucchini noodles and chicken when ready to serve!

Frequently Asked Questions

Curious about more details? Here are some FAQs:

  • Can I use regular pasta instead of zucchini noodles? Absolutely! Just cook according to package instructions and combine with the sauce.
  • How do I make the sauce thicker? You can thicken the sauce by simmering it longer or adding a bit of cornstarch mixed with water.
  • What can I substitute for heavy cream? Full-fat coconut milk or unsweetened almond milk are great alternatives for a lighter sauce.
  • What is the best way to spiralize zucchini? Use a spiralizer, julienne peeler, or a box grater for thin, noodle-like shapes.
  • Can I add other proteins? Yes! Grilled salmon or shredded rotisserie chicken also work beautifully in this recipe.
  • How can I make this dish gluten-free? Ensure that all your ingredients, particularly the sauces, are gluten-free.
  • Is this recipe suitable for meal prep? Yes! It keeps well in the fridge, just keep the sauce separate until serving.
  • What should I serve with Zucchini Noodle Chicken Alfredo? A fresh salad or garlic bread pairs perfectly with this dish!

Nutritional Tips and Dietary Adaptations

Keep your meal balanced with these tips:

  • Low-Carb Friendly: This dish is naturally low in carbs, making it perfect for keto or low-carb diets.
  • Dairy-Free Option: Use coconut cream and nutritional yeast to create a dairy-free alfredo sauce.
  • High-Protein Meal: With chicken and cheese, you’re loading up on protein!

Equipment Recommendations

Make your cooking experience smoother with the right tools:

  • Spiralizer: This tool is essential for creating zucchini noodles effortlessly.
  • Non-Stick Skillet: Ensures easy cooking and cleanup while preventing the sauce from sticking.
  • Measuring Cups and Spoons: For accurate ingredient measurements, especially when making sauces.

Serving Suggestions

Make your meal even more delightful with these serving ideas:

  • Garnish with Extra Parsley: A sprinkle of fresh parsley adds color and brightness to your dish.
  • Serve with Crusty Bread: A slice of fresh bread complements the creamy sauce beautifully.
  • Pair with a Light Wine: A crisp white wine, like Sauvignon Blanc, pairs well with this dish.

Conclusion

Now that you’ve got all the tips, tricks, and variations, it’s time to experience the magic of Zucchini Noodle Chicken Alfredo. This dish is not just a meal; it’s an adventure waiting to unfold in your kitchen. With its creamy sauce and vibrant flavors, each bite will remind you that cooking can be a thrilling journey. So, embrace your inner chef, let loose, and add a little fire to your meals. Bon appétit!

Zucchini Noodle Chicken Alfredo

Prep Time 10 minutes
Cook Time 15 minutes
Total Time 25 minutes
Servings 4 servings
Calories 450
A light and creamy zucchini noodle dish with tender chicken and Parmesan cheese, perfect for a healthy yet satisfying meal.

Ingredients

Vegetables

  • 3 medium zucchinis, ends trimmed

Dairy

  • 2 tbsp butter
  • ¾ cup heavy cream
  • 1 cup shredded Parmesan cheese (plus extra for garnish)

Meat

  • 2 boneless, skinless chicken breasts chicken breasts, thinly sliced

Seasonings

  • 1 tsp kosher salt (plus more to taste)
  • 1 tsp freshly ground black pepper (plus more to taste)
  • 3 cloves garlic, minced

Herbs

  • 2 tbsp fresh parsley, chopped (plus extra for garnish)

Instructions 

  • Spiralize zucchinis into noodles and set aside.
  • In a large skillet, melt butter over medium heat and cook sliced chicken until browned and cooked through.
  • Add minced garlic, salt, and pepper; cook for 1 minute until fragrant.
  • Pour in heavy cream and bring to a simmer; stir in Parmesan cheese until melted and smooth.
  • Add zucchini noodles and chopped parsley; toss to coat and cook for 2-3 minutes until noodles are tender.

Notes

Use a spiralizer for best results and serve immediately for a fresh taste.
Calories: 450kcal
Cost: $15
Course: Main Course
Cuisine: American
Keyword: Alfredo, chicken, zucchini

Nutrition

Calories: 450kcal | Carbohydrates: 30g | Protein: 35g | Fat: 25g | Sodium: 900mg

A Culinary Adventure Awaits: Discover the Comforting Pasta Bake That Dares to Dance with Flavor

Welcome to a delicious journey that marries comfort with excitement! Today, we’re diving into the world of Healthy Chicken & Broccoli Pasta Bake. This dish isn’t just another casserole; it’s a vibrant celebration of flavors that will make your taste buds sing and your loved ones gather around the table with eager anticipation. Picture this: tender chunks of chicken, crisp broccoli, and whole wheat pasta, all harmoniously enveloped in a creamy sauce and baked to golden perfection. Let’s embark on this culinary adventure that’s both nourishing and thrilling!

Why You’ll Love This Healthy Chicken & Broccoli Pasta Bake

This dish is not only flavorful but also packed with nutritional goodness. Here are five reasons why it’ll become a staple in your kitchen:

  • Wholesome Ingredients: Made with whole wheat pasta, lean chicken, and fresh broccoli, this recipe is a powerhouse of nutrients.
  • Family-Friendly: Its creamy texture and comforting flavors make it a hit with both kids and adults, ensuring everyone cleans their plates.
  • Easy to Prepare: With a straightforward recipe and minimal prep time, you can whip this up on a busy weeknight without breaking a sweat.
  • Make-Ahead Wonder: Perfect for meal prep, this dish can be made ahead and stored for a quick, satisfying meal later.
  • Versatile and Adaptable: Customize the ingredients to your taste with various veggies or proteins, making it a dish that can evolve with your cravings!

Ingredient Breakdown and Substitutions

Let’s take a closer look at what makes this pasta bake shine. Here’s a detailed list of ingredients you’ll need, along with some handy substitutions:

  • 2 cups whole wheat pasta: For a gluten-free option, try brown rice or quinoa pasta.
  • 1 lb boneless, skinless chicken breast, diced: Chicken thighs can add more flavor and juiciness.
  • 2 cups fresh broccoli florets: Feel free to mix in other veggies like bell peppers or spinach for added color and nutrients.
  • 1 cup low-fat milk: Swap with almond milk or oat milk for a dairy-free version.
  • 1 cup shredded light mozzarella cheese: Go for cheddar or a dairy-free cheese alternative if you prefer.
  • 1 tablespoon olive oil: Avocado oil works well too, adding a light flavor.
  • 1 teaspoon garlic powder: Fresh minced garlic can enhance the flavor even further.
  • 1 teaspoon onion powder: Fresh onions sautéed until golden can give a more robust taste.
  • Salt and pepper to taste: Season generously to elevate all the flavors.
  • Optional: fresh parsley for garnish: Chopped basil or cilantro can also add a fresh touch!

Cooking Instructions: Step-by-Step Guide

Side view of a healthy chicken and broccoli pasta dish in a baking dish.

Now, let’s dive into the cooking process. Follow these simple steps to create your own masterpiece:

  1. Preheat your oven to 350°F (175°C).
  2. In a large pot, cook the whole wheat pasta according to package instructions until al dente. Drain and set aside.
  3. In a skillet, heat the olive oil over medium heat. Add the diced chicken and cook until browned and cooked through, about 5-7 minutes. Season with garlic powder, onion powder, salt, and pepper.
  4. In a large mixing bowl, combine the cooked pasta, chicken, broccoli, low-fat milk, and half of the mozzarella cheese. Stir until well combined.
  5. Transfer the mixture to a greased baking dish. Top with the remaining mozzarella cheese.
  6. Bake in the preheated oven for 25-30 minutes, or until the cheese is bubbly and golden brown.
  7. Once baked, let cool for a few minutes, then garnish with fresh parsley before serving.

Pro Tips for the Perfect Pasta Bake

Want to elevate your pasta bake experience? Check out these expert insights:

  • Don’t Overcook the Pasta: Aim for al dente, as the pasta will continue to cook in the oven.
  • Use Quality Ingredients: Fresh, high-quality ingredients will make a noticeable difference in flavor.
  • Experiment with Spices: Add a pinch of red pepper flakes for a subtle kick or Italian seasoning for an aromatic blend.
  • Layer Wisely: Ensure even distribution of ingredients in the baking dish for consistent cooking.
  • Try Different Cheeses: Mix mozzarella with parmesan or fontina for added depth of flavor.
  • Garnish Generously: Fresh herbs not only add flavor but also brighten up the dish visually.
  • Cool Before Storing: Allow the bake to cool completely before storing to avoid excess moisture.
  • Reheat Gently: When reheating, add a splash of milk to keep the dish creamy.

Common Mistakes and Troubleshooting

Even the best chefs make mistakes! Here’s how to avoid common pitfalls:

  • Overbaking: Keep an eye on your bake to prevent the cheese from burning. Cover with foil if necessary.
  • Dry Chicken: Ensure proper cooking time and check the internal temperature to avoid dryness.
  • Too Much Sauce: If your mixture seems too wet, add a bit more pasta or cheese to balance it out.
  • Undercooked Broccoli: Ensure the broccoli is tender but still vibrant; you can blanch it before adding to the mix.

Delicious Variations to Try

Why stick to just one version? Here are some exciting variations to keep things interesting:

  • Italian Chicken & Spinach Bake: Swap broccoli for fresh spinach and add Italian sausage for a hearty twist.
  • Cheesy Taco Pasta Bake: Incorporate taco seasoning, black beans, and corn for a Mexican-inspired version.
  • Veggie-Loaded Bake: Load up on your favorite vegetables like zucchini, bell peppers, and carrots for a nutrient-rich dish.
  • Buffalo Chicken Bake: Add buffalo sauce for a spicy kick and top with blue cheese crumbles before baking.

Storage and Make-Ahead Instructions

Planning ahead? Here’s how to store and reheat your pasta bake:

  • Storing: Allow the bake to cool completely, then store in an airtight container in the fridge for up to 3-4 days.
  • Freezing: This dish freezes well! Wrap tightly in plastic wrap and foil, then freeze for up to 3 months.
  • Reheating: For best results, reheat in the oven at 350°F (175°C) until warmed through, about 20-25 minutes.
  • Make-Ahead: Assemble the dish a day in advance, cover, and refrigerate until ready to bake. Just add a few extra minutes to the cooking time.

Frequently Asked Questions (FAQs)

Still have questions? Here are some common inquiries about this delightful dish:

  • Can I use frozen broccoli? Yes, frozen broccoli is a convenient option; just ensure it’s thawed and drained before adding.
  • Is this dish suitable for meal prep? Absolutely! It’s perfect for meal prep and can be portioned out for easy lunches or dinners.
  • How can I make it spicier? Add red pepper flakes or diced jalapeños to the chicken mixture for an extra kick.
  • What can I serve with this pasta bake? A side salad or garlic bread pairs beautifully with this dish.
  • Can I make it vegetarian? Yes! Substitute chicken with chickpeas or lentils and use vegetable broth instead of milk.
  • How do I ensure the chicken is cooked through? Use a meat thermometer; chicken should reach an internal temperature of 165°F (75°C).
  • Can I add more cheese? Absolutely! Feel free to layer in more cheese for an extra creamy texture.
  • What if I don’t have whole wheat pasta? Any pasta type you love will work, including gluten-free options!

Nutritional Tips and Dietary Adaptations

Looking to enhance the nutritional profile? Consider these tips:

  • Boost Fiber: Add legumes like lentils or chickpeas for an extra fiber kick.
  • Lower Calories: Opt for low-fat cheese and milk to reduce calories without sacrificing flavor.
  • Increase Veggies: Feel free to load up on vegetables; they add nutrients and bulk without many calories.
  • Protein Options: Swap chicken for turkey or plant-based protein for a different taste and texture.

Essential Equipment Recommendations

Here’s what you’ll need to create your pasta bake masterpiece:

  • Large Pot: For boiling the pasta and ensuring it’s perfectly cooked.
  • Skillet: A non-stick skillet is ideal for sautéing chicken and veggies.
  • Baking Dish: A 9×13 inch dish works best for even baking and easy serving.
  • Mixing Bowl: A large mixing bowl is essential for combining all your ingredients.

Serving Suggestions: Bringing It All Together

When it comes to serving, presentation is key! Here are some ideas:

  • Garnish with Fresh Herbs: Sprinkle fresh parsley or basil for a pop of color and flavor.
  • Pair with a Side Salad: A crisp green salad with a tangy vinaigrette complements the richness of the bake.
  • Serve with Garlic Bread: Warm, buttery garlic bread is the perfect accompaniment for scooping up that cheesy goodness.
  • Wine Pairing: A crisp white wine, like Sauvignon Blanc, pairs beautifully with this dish.

Conclusion: Embrace the Flavor Adventure

There you have it! A comprehensive guide to crafting the ultimate Healthy Chicken & Broccoli Pasta Bake. This dish is all about embracing flavors, experimenting with ingredients, and bringing joy to your table. So grab your skillet, turn up the heat, and let’s make cooking an adventure worth savoring. Remember, every dish tells a story, and this one is ready to be shared with family and friends. Happy cooking!

Healthy Chicken & Broccoli Pasta Bake

Prep Time 10 minutes
Cook Time 30 minutes
Total Time 40 minutes
Servings 4 servings
Calories 450
A nutritious and delicious baked pasta dish combining lean chicken, fresh broccoli, and melty light mozzarella for a wholesome meal.

Ingredients

Pasta

  • 2 cups whole wheat pasta

Chicken

  • 1 lb boneless, skinless chicken breast, diced

Vegetables

  • 2 cups fresh broccoli florets

Dairy & Oils

  • 1 cup low-fat milk
  • 1 cup shredded light mozzarella cheese
  • 1 tablespoon olive oil

Spices & Seasonings

  • 1 teaspoon garlic powder
  • 1 teaspoon onion powder
  • to taste Salt and pepper

Optional Garnish

  • as needed fresh parsley for garnish

Instructions 

  • Preheat oven to 375°F (190°C). Cook pasta until al dente, then drain.
  • In a skillet, heat olive oil and cook diced chicken until browned and cooked through.
  • Steam or blanch broccoli florets until tender.
  • In a large bowl, combine cooked pasta, chicken, broccoli, milk, cheese, garlic powder, onion powder, salt, and pepper.
  • Transfer mixture to a baking dish and bake for 20-25 minutes until bubbly and golden on top.

Notes

For extra flavor, sprinkle with fresh parsley before serving.
Calories: 450kcal
Cost: $15
Course: Main Course
Cuisine: Healthy
Keyword: Broccoli, chicken, pasta

Nutrition

Calories: 450kcal | Carbohydrates: 55g | Protein: 40g | Fat: 10g | Sodium: 600mg

Unlock the Magic of Dark Chocolate and Sea Salt Nut Bars

Welcome to a culinary journey that celebrates the perfect marriage of flavors: the irresistible Dark Chocolate and Sea Salt Nut Bars. In this comprehensive guide, we’ll explore how these bars can transform your snacking experience. Packed with a medley of nuts, a hint of sweetness, and a touch of salt, they’re not just a treat; they’re a testament to the joy of cooking boldly. Whether you’re looking for a post-workout snack or a sweet indulgence, these bars deliver on all fronts!

As a chef who has chased spice across continents, I can assure you that every ingredient plays a vital role in creating a snack that’s both satisfying and delicious. So, let’s dive into the world of these nut bars, where each bite is a mini adventure waiting to unfold!

Why You’ll Love This Recipe

Before we roll up our sleeves and get cooking, let’s talk about why these Dark Chocolate and Sea Salt Nut Bars will quickly become a staple in your kitchen:

  • Quick and Easy Preparation: With just a few simple steps, you can whip these bars up in no time, making them perfect for busy days.
  • Nutrient-Packed: Filled with protein-rich nuts and antioxidant-loaded dark chocolate, these bars are as healthy as they are delicious.
  • Customizable: Feel free to swap ingredients based on your preferences or dietary needs. This recipe is as flexible as it is tasty!
  • Perfect for Any Occasion: Whether you’re hosting a gathering, planning a road trip, or just need a sweet snack, these bars fit the bill.
  • Long-Lasting Energy: The combination of healthy fats and sugars provides sustained energy, making these bars a great pre-workout snack.

Essential Ingredients for Dark Chocolate and Sea Salt Nut Bars

Here’s what you’ll need to create your very own batch of these delectable nut bars:

  • 2 1/2 cups unsalted nuts of choice: I recommend a mix of cashews, peanuts, and almonds to bring a variety of flavors and textures.
  • 1/2 cup puffed rice: This adds a delightful crunch and lightness to the bars.
  • 1/4 cup brown rice syrup: A natural sweetener that binds the ingredients together while adding a hint of sweetness.
  • 1 1/2 teaspoons vanilla extract: For a warm, aromatic flavor that enhances the overall taste.
  • 1/2 teaspoon sea salt: Balances the sweetness and elevates the flavor profile.
  • 1 cup dark chocolate chips: Choose high-quality chocolate for the best flavor. Dark chocolate is rich in antioxidants and gives a deep, indulgent taste.
  • 2 teaspoons coconut oil: Helps melt the chocolate smoothly and adds a subtle coconut flavor.
  • Optional: flaky salt for topping: Adds a finishing touch and an extra burst of flavor.

How to Make Dark Chocolate and Sea Salt Nut Bars

Side view of a delicious dark chocolate sea salt nut bar, highlighting its rich texture and nutty ingredients.

Let’s get cooking! Follow these step-by-step instructions to create your delicious bars:

  1. Preheat your oven to 325˚F (160˚C).
  2. Spread the nuts in a single layer on a rimmed sheet pan and bake for 5-8 minutes, until fragrant and lightly browned. This step enhances the nutty flavor.
  3. Line an 8×8-inch pan with parchment paper and set it aside.
  4. In a large mixing bowl, combine the nuts and puffed rice and toss them together.
  5. In a microwave-safe bowl, combine the brown rice syrup and microwave it for 30 seconds. This makes it easier to mix. Whisk in the vanilla extract and sea salt until well combined, then pour over the nut mixture, stirring until everything is evenly coated.
  6. Transfer the mixture to the prepared pan, pressing it down into an even layer.
  7. Bake for 18-20 minutes. Once done, remove from the oven and let cool for about 30 minutes. Then, transfer to a cutting board and cut in half lengthwise, followed by cutting each half into 5-6 thin bars. Allow cooling completely.
  8. In a separate microwave-safe bowl, add the dark chocolate chips and coconut oil. Microwave in 30-second intervals, stirring well between each, until fully melted. Dip the bottom of each bar into the melted chocolate and transfer to a baking sheet lined with parchment paper.
  9. Drizzle the top of each bar with the remaining melted chocolate and sprinkle with flaky salt. Refrigerate until the chocolate is set, then enjoy!

Expert Tips for Perfecting Your Nut Bars

Here are some pro tips to ensure your Dark Chocolate and Sea Salt Nut Bars turn out perfectly:

  • Use Fresh Nuts: Freshly roasted nuts provide the best flavor. Check the expiration date on the package for freshness.
  • Evenly Coat the Mixture: Ensure that the nut mixture is evenly coated with the brown rice syrup for consistent flavor in every bite.
  • Don’t Skip the Cooling Time: Allowing the bars to cool completely ensures they hold their shape when cut.
  • Experiment with Nuts: Feel free to mix and match your favorite nuts, such as walnuts or pecans, for a unique flavor profile.
  • Use Quality Chocolate: The chocolate chips you choose can make or break the recipe. Opt for a high cocoa percentage for rich flavor.
  • Customize Your Sweetness: Adjust the amount of brown rice syrup to suit your taste preferences.
  • Store Properly: Keep the bars in an airtight container to maintain freshness and crunch.
  • Adjust Baking Time: If you prefer softer bars, reduce the baking time slightly; for firmer bars, increase it.

Common Mistakes and Troubleshooting

Here are some common pitfalls to avoid when making these nut bars:

  • Using Old Nuts: Old nuts can taste stale and affect the overall flavor of your bars. Always check for freshness!
  • Not Enough Binding: If your bars crumble, you may not have used enough brown rice syrup. Ensure it’s adequately mixed in.
  • Baking Too Long: Overbaking can lead to hard bars. Keep an eye on them during the last few minutes.
  • Cutting Too Soon: Cutting while warm can lead to crumbling. Wait until they cool completely for clean cuts.

Delicious Variations to Try

Looking to mix things up? Here are some tasty variations for your nut bars:

  • Chocolate-Coconut Delight: Add 1/2 cup of unsweetened shredded coconut for a tropical twist.
  • Nutty Fruit Fusion: Mix in 1/2 cup of dried fruits like cranberries or apricots for a burst of sweetness.
  • Spicy Heat: Incorporate a pinch of cayenne pepper for those who dare to add a little kick!
  • Vegan Version: Use maple syrup instead of brown rice syrup and dairy-free chocolate chips for an entirely vegan option.

Storage and Make-Ahead Instructions

These bars are not only easy to make but also easy to store:

  • Room Temperature: Keep them in an airtight container at room temperature for up to a week.
  • Refrigerator: For longer storage, keep them in the fridge where they can last for up to two weeks.
  • Freezing: You can freeze the bars in an airtight container for up to three months. Just thaw them in the refrigerator when you’re ready to enjoy!

Frequently Asked Questions (FAQs)

Here are some common questions about Dark Chocolate and Sea Salt Nut Bars:

  • Can I use milk chocolate instead of dark chocolate? Yes, but keep in mind that milk chocolate is sweeter and less rich than dark chocolate.
  • What nuts work best in this recipe? Any combination of your favorite nuts will work! Cashews, almonds, and peanuts are popular choices.
  • How do I make these bars gluten-free? All ingredients listed are naturally gluten-free, making these bars a safe choice for gluten-sensitive individuals.
  • What if I don’t have brown rice syrup? Honey or agave syrup can serve as substitutes, but they may alter the flavor slightly.
  • Can I add protein powder? Yes! Incorporate a scoop of your favorite protein powder into the nut mixture for an extra protein boost.
  • How do I know when the bars are done baking? They should be lightly browned and firm to the touch but not hard.
  • Is there a way to make these bars lower in sugar? Yes, you can reduce the amount of brown rice syrup or use a sugar substitute.
  • Can I make these nut bars without puffed rice? Absolutely! You can replace it with rolled oats or omit it altogether for a nut-only bar.

Nutritional Tips and Dietary Adaptations

If you’re looking to make these bars fit your dietary needs, consider the following:

  • Low-Carb Option: Substitute brown rice syrup with erythritol or monk fruit sweetener for a keto-friendly version.
  • Nut-Free Version: Use seeds like pumpkin or sunflower in place of nuts for a safe school snack.
  • High-Protein Addition: Incorporate seeds like chia or flaxseed for added nutrition.

Essential Equipment for Making Nut Bars

To create these delicious bars, you’ll need:

  • Mixing Bowls: Essential for combining your ingredients.
  • Measuring Cups and Spoons: Precision matters in baking!
  • Rimmed Baking Sheet: For toasting your nuts to perfection.
  • 8×8-inch Baking Pan: The perfect size for your bars!
  • Parchment Paper: Prevents sticking and makes cleanup a breeze.

Serving Suggestions

These bars can be enjoyed in a variety of ways:

  • As a Snack: Perfect for mid-afternoon cravings or post-workout fuel.
  • With Coffee or Tea: Pair with your favorite beverage for a delightful treat.
  • On-the-Go: They fit perfectly in lunchboxes or gym bags for a nutritious boost.

So there you have it! A complete guide to creating your very own Dark Chocolate and Sea Salt Nut Bars. With a little bit of effort, you can enjoy a snack that’s both delicious and nourishing. Happy cooking, and remember — embrace the thrill of flavor and heat in every dish!

Dark Chocolate and Sea Salt Nut Bars

Prep Time 10 minutes
Cook Time 20 minutes
Total Time 30 minutes
Servings 10 bars
Calories 250
These delicious homemade nut bars combine crunchy nuts, rich dark chocolate, and a touch of sea salt for a perfect snack or treat.

Ingredients

Nut mixture

  • 2 1/2 cups unsalted nuts of choice (3/4 cup cashews, 3/4 cup peanuts, 1 cup almonds)
  • 1/2 cup puffed rice
  • 1/4 cup brown rice syrup
  • 1 1/2 teaspoons vanilla extract
  • 1/2 teaspoon sea salt
  • 1 cup dark chocolate chips
  • 2 teaspoons coconut oil
  • Optional flaky salt for topping

Instructions 

  • Preheat oven to 160°C (325°F). Spread nuts on a sheet pan and bake 5-8 minutes.
  • Mix nuts and puffed rice. Microwave syrup, whisk in vanilla and salt, then combine with nut mixture.
  • Press mixture into an 8x8-inch pan lined with parchment. Bake for 18-20 minutes, cool, then cut into bars.
  • Melt chocolate and coconut oil in intervals. Dip bars in chocolate, drizzle tops, sprinkle flaky salt, then refrigerate until set.

Notes

Store in an airtight container for best freshness.
Calories: 250kcal
Cost: $15
Course: Snack
Keyword: nuts

Nutrition

Calories: 250kcal | Carbohydrates: 20g | Protein: 6g | Fat: 16g | Sodium: 50mg

Ignite Your Taste Buds with My Keto Mexican Casserole

Welcome to a culinary adventure that’s all about flavor and excitement! Today, we’re diving into my Keto Mexican Casserole, a dish that not only embraces the vibrant colors and bold tastes of Mexican cuisine but also fits seamlessly into your low-carb lifestyle. Packed with tender chicken, fresh veggies, and a spicy kick, this casserole is a feast for the senses. You’ll find yourself craving this dish again and again!

Why You’ll Love This Recipe

Let’s talk about what makes this keto Mexican casserole a true standout. Here are five compelling reasons to whip it up:

  • Low-Carb Delight: With a perfect balance of protein and veggies, this casserole keeps your carb count low without sacrificing flavor.
  • One-Pan Wonder: Save time on cleanup! Prepare and bake everything in a single skillet or casserole dish.
  • Versatile Ingredients: Customize the recipe with different proteins or veggies to suit your taste and dietary needs.
  • Quick to Assemble: With a prep time of just 15 minutes, dinner will be on the table in no time!
  • Family-Friendly: Even the pickiest eaters will love the cheesy, savory goodness of this dish.

Ingredient Breakdown and Substitutions

Let’s get into the nitty-gritty of what makes this casserole irresistible. Here’s a detailed look at the ingredients:

  • 1 Lb Chicken Breast: Cooked and shredded, this lean protein forms the hearty base of the casserole. Substitution: You can use cooked turkey or shredded rotisserie chicken.
  • 2 Tablespoons Olive Oil: For sautéing the veggies and adding richness. Substitution: Avocado oil works great too!
  • 1 Red Bell Pepper: Chopped for a sweet crunch. Substitution: Any bell pepper or even zucchini can be used.
  • 1 Red Onion: Adds depth and sweetness. Substitution: Yellow onion or shallots can also enhance the flavor.
  • Sour Cream: Contributes creaminess and tang. Substitution: Greek yogurt can be a lower-fat alternative.
  • Salsa: Choose spicy or mild based on your heat preference. Substitution: Diced tomatoes with green chilies for a fresh twist.
  • Cream Cheese: For an extra layer of creaminess. Substitution: Heavy cream for a richer texture.
  • Pepper Jack Cheese: Shredded for that melty goodness. Substitution: Cheddar or Monterey Jack cheese will work beautifully.
  • Spices: Chili powder, cumin, and oregano bring that Mexican flair. Substitution: Taco seasoning can be used for convenience.

How to Make My Keto Mexican Casserole

Side shot of a colorful Keto Mexican Casserole with layers of chicken, bell peppers, and cheese.

Ready to spice things up? Here’s how to create this delicious dish:

  1. Preheat your oven: Set it to 350°F (175°C).
  2. Heat the olive oil: In a large oven-safe skillet over medium heat, add the oil until it shimmers.
  3. Sauté the veggies: Add the chopped red bell pepper and onion, along with salt and pepper. Sauté until softened, about 5 minutes.
  4. Add the spices: Stir in the chili powder, cumin, and oregano, toasting them until fragrant (about 2 minutes).
  5. Mix in the creamy components: Remove from heat and stir in the sour cream, salsa, and shredded chicken until well combined.
  6. Prepare for baking: If not using an oven-safe skillet, transfer the mixture to an 8×8 casserole dish.
  7. Top it off: Pour the heavy cream over the top and sprinkle with shredded cheese.
  8. Bake: Place in the oven and bake for 30 minutes, or until heated through and the cheese is bubbling and golden brown.
  9. Garnish and serve: Top with fresh cilantro before serving. Enjoy your masterpiece!

Pro Tips for the Perfect Casserole

Elevate your cooking game with these expert tips:

  • Use fresh ingredients: Fresh vegetables and high-quality spices will enhance the flavors significantly.
  • Don’t rush the sauté: Taking time to properly sauté your veggies releases their natural sweetness and depth.
  • Experiment with spice levels: Adjust the amount of chili powder based on your heat tolerance.
  • Layer your flavors: Consider adding black olives or jalapeños for an extra kick.
  • Make it ahead: Prepare the casserole the night before and store it in the fridge before baking for an easy weeknight dinner.
  • Check for doneness: Ensure the casserole is heated through—use a thermometer to check that it reaches at least 165°F (74°C).
  • Let it rest: Allow the casserole to sit for a few minutes after baking for easier serving and enhanced flavors.
  • Pair it right: Serve with a fresh side salad or avocado for a balanced meal.

Common Mistakes and Troubleshooting

Even seasoned cooks can stumble in the kitchen. Here are some pitfalls to avoid:

  • Under-seasoning: Don’t be shy with the spices! Taste as you go to find the right balance.
  • Overcooking the chicken: If using leftover chicken, ensure it’s not overcooked to prevent dryness.
  • Skipping the resting time: Allowing the casserole to rest helps the flavors meld and makes for easier serving.
  • Not using enough cheese: Don’t skimp on cheese—it’s key for that melty, gooey texture!

Delicious Variations to Try

Get creative with your keto Mexican casserole! Here are four variations to keep things interesting:

  • Vegetarian Option: Swap chicken for black beans, lentils, or additional vegetables like zucchini and corn.
  • Seafood Twist: Use shrimp or crab meat for a coastal flair that’s both light and flavorful.
  • Buffalo Style: Incorporate buffalo sauce with the chicken for a spicy, tangy kick.
  • Tex-Mex Fusion: Add some taco seasoning and top with guacamole and pico de gallo for a fresh finish.

Storing and Make-Ahead Instructions

This casserole is super convenient for meal prep. Here’s how to store it:

  • Refrigeration: Store leftovers in an airtight container in the fridge for up to 4 days.
  • Freezing: Freeze portions in airtight containers for up to 3 months. Thaw overnight in the fridge before reheating.
  • Reheating: Warm in the microwave or oven until heated through. Add a splash of cream to restore moisture if needed.

Frequently Asked Questions

Got questions? I’ve got answers! Here are some of the most common queries about my keto Mexican casserole:

  • Can I use a different meat? Absolutely! Ground turkey, beef, or even pork would work well in this dish.
  • Is this suitable for meal prep? Yes! It stores and reheats beautifully, making it perfect for meal prep.
  • Can I make it dairy-free? Substitute dairy ingredients with non-dairy alternatives like coconut yogurt and vegan cheese.
  • What’s the best way to serve this casserole? Serve it hot, garnished with cilantro and a dollop of sour cream or avocado.
  • Can I add more vegetables? Definitely! Feel free to toss in any low-carb vegetables you love.
  • How spicy is this casserole? You control the heat! Adjust the salsa and chili powder to suit your taste.
  • Can I double the recipe? Sure! Just use a larger baking dish and adjust the cooking time accordingly.
  • What sides pair well? A fresh salad, cauliflower rice, or sautéed greens make excellent companions.

Nutritional Tips and Dietary Adaptations

Balancing your diet while enjoying this dish is easy! Here are a few tips:

  • Protein Boost: Add more chicken or even some beans for extra protein.
  • Fiber Power: Incorporate more veggies like spinach or broccoli to enhance the fiber content.
  • Low-Fat Option: Use leaner cuts of chicken or reduce the amount of cheese for a lighter dish.
  • Gluten-Free: This recipe is naturally gluten-free, making it a safe choice for those with gluten sensitivities.

Essential Equipment Recommendations

Before you start cooking, make sure you have the right tools:

  • Large Skillet: An oven-safe skillet makes cooking and transferring to the oven a breeze.
  • Cutting Board: A sturdy board for chopping veggies and prepping ingredients.
  • Sharp Knife: Essential for cutting chicken and vegetables efficiently.
  • Measuring Cups and Spoons: For accurate ingredient measurements and consistency.

Serving Suggestions

Don’t serve your casserole alone! Here are some ideas to round out your meal:

  • Fresh Salad: A crisp green salad with avocado and lime dressing complements the rich casserole.
  • Guacamole: Add a side of guacamole for a creamy, flavorful accompaniment.
  • Cauliflower Rice: Serve over cauliflower rice for a wholesome, low-carb base.
  • Pickled Jalapeños: For those who crave extra heat, these are a perfect topping!

So there you have it! My ultimate guide to creating a mouthwatering keto Mexican casserole that’s not just low-carb, but bursting with flavor and excitement. Cooking is an adventure, and I can’t wait for you to embark on this one. Grab your skillet, let your culinary creativity shine, and enjoy every delicious bite!

Keto Mexican Casserole

Prep Time 10 minutes
Cook Time 30 minutes
Total Time 40 minutes
Servings 4 servings
Calories 550
A flavorful low-carb casserole combining tender chicken, peppers, and cheese with Mexican spices, baked to perfection.

Ingredients

Protein

  • 1 Lb Chicken Breast (cooked + shredded into bite sized pieces)

Vegetables

  • 1 Red Bell Pepper Red Bell Pepper (chopped)
  • 1 Red Onion Red Onion (chopped)

Spices & Seasonings

  • 2 Teaspoons Kosher Salt
  • 1 Teaspoon Pepper
  • 1 Tablespoon Chili Powder
  • 1 Tablespoon Cumin
  • 2 Teaspoons Dried Oregano

Dairy & Cheese

  • 1/2 Cup Sour Cream
  • 1 Cup Salsa (spicy or mild depending on preference)
  • 1/4 Cup Heavy Cream
  • 1 Cup Pepper Jack Cheese (shredded)

Garnish

  • to taste Fresh Cilantro (to garnish)

Instructions 

  • Preheat oven to 350°F (175°C).
  • Saute peppers, onion, salt, and pepper until softened.
  • Add spices, toast until fragrant, then stir in sour cream, salsa, and chicken.
  • Transfer to oven-safe dish if needed, pour heavy cream, top with cheese, and bake 30 minutes until golden.
  • Garnish with cilantro and serve.

Notes

This casserole is perfect for a quick, low-carb dinner packed with flavor.
Calories: 550kcal
Cost: $15
Course: Main Course
Cuisine: Mexican
Keyword: Cheese, chicken, Keto

Nutrition

Calories: 550kcal | Carbohydrates: 20g | Protein: 50g | Fat: 30g | Sodium: 900mg