Author

Avery Collins

Browsing

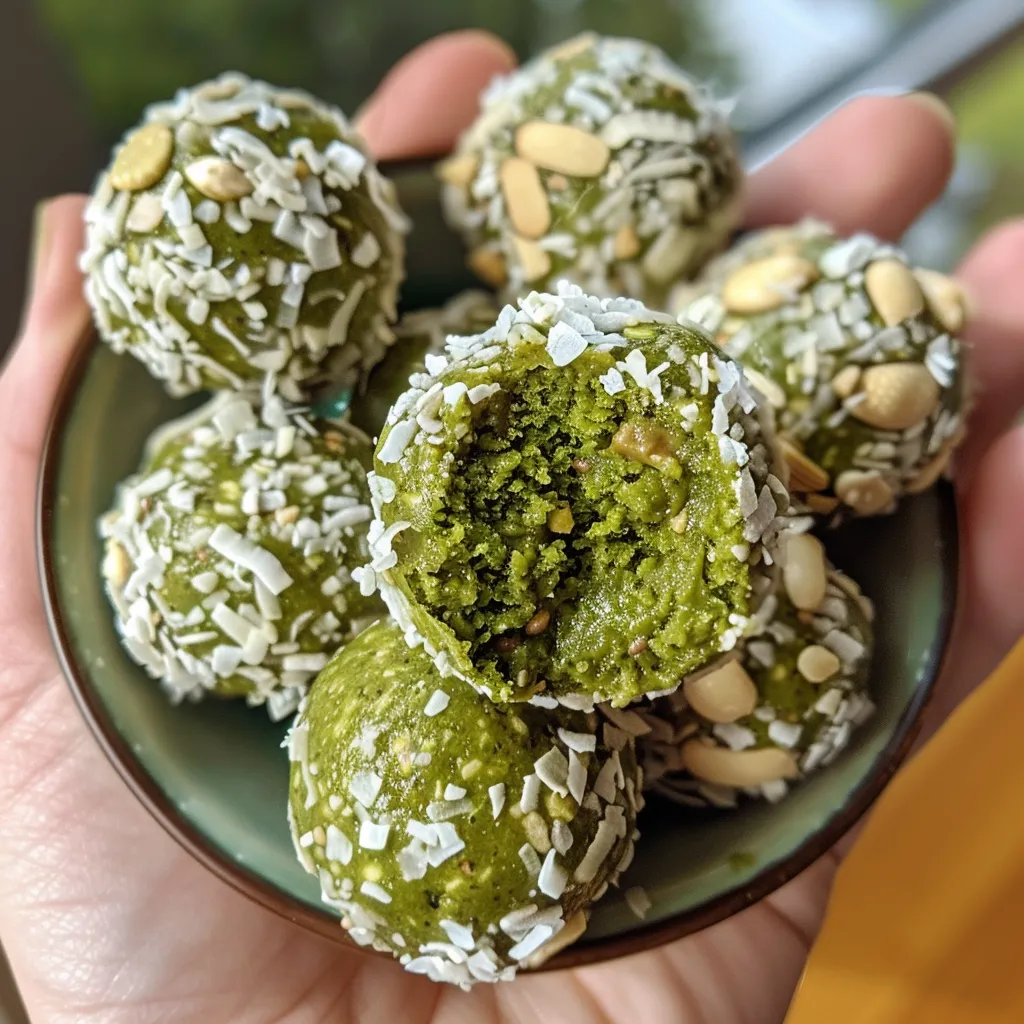
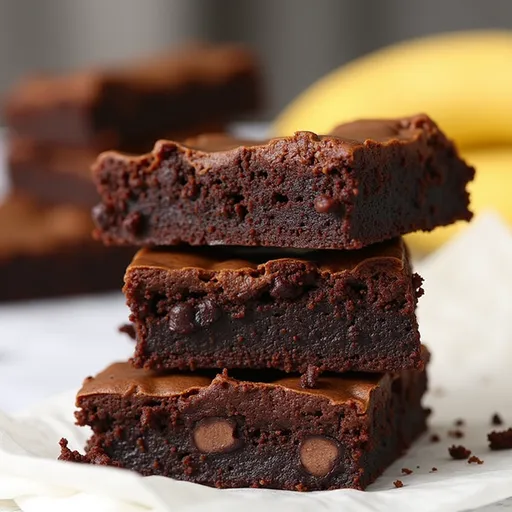
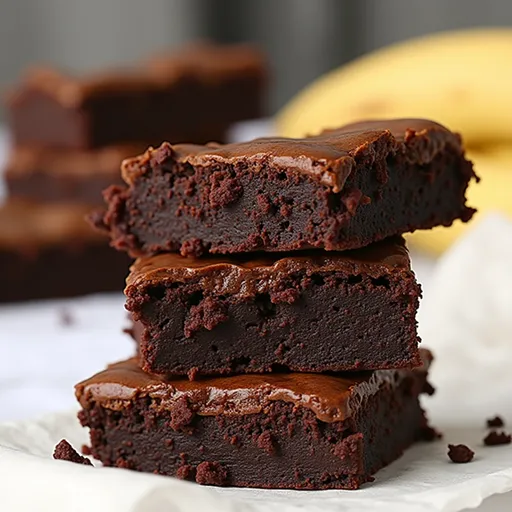
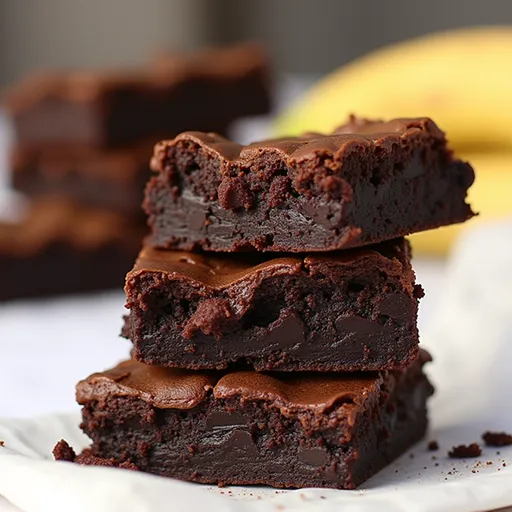
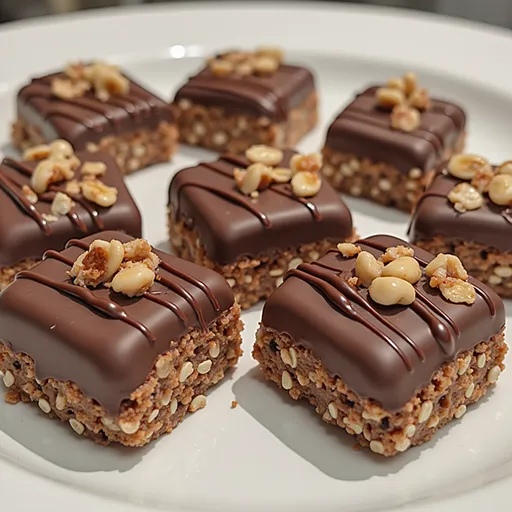
Why You’ll Love These Clusters

Are you ready to embark on a delicious journey that combines the natural sweetness of bananas with the rich, indulgent flavor of chocolate? Look no further than these Easy No-Bake Chocolate Banana Oat Clusters! Perfect for satisfying your sweet tooth without the guilt, this recipe is not only quick to prepare but also packed with wholesome ingredients. Whether you’re looking for a healthy snack, a dessert that won’t derail your diet, or a fun treat for kids, these clusters deliver on all fronts.

What Makes This Recipe Special?

Let’s talk about why this recipe has a special place in my heart (and my kitchen!). Here’s the thing: it’s all about balance. The creamy peanut butter adds a satisfying richness that harmonizes beautifully with the ripe bananas, while the dark chocolate chips bring a touch of decadence. Plus, the rolled oats not only provide texture but also keep you feeling full and energized. And did I mention it’s a no-bake recipe? You can whip these up in minutes and be on your way to enjoying a sweet escape!

Ingredients You’ll Need

Delicious no-bake chocolate banana oat clusters arranged on a plate, lit by soft natural light.

Gathering the right ingredients is half the fun! Here’s what you’ll need for these delightful no-bake clusters:

  • 2 ripe bananas: The riper, the better! Look for bananas with plenty of brown spots for maximum sweetness.
  • 1 cup rolled oats: This is the base of our clusters, providing fiber and heartiness.
  • 1/2 cup dark chocolate chips: Go for high-quality chocolate — it makes all the difference in flavor!
  • 1/4 cup peanut butter: Smooth or crunchy, this ingredient adds a creamy texture and a dose of protein.
  • 1/2 teaspoon vanilla extract: A splash of vanilla elevates the overall flavor profile.
  • A pinch of salt: Just a touch enhances all the sweet and nutty elements.

Step-by-Step Instructions

Ready to create your new favorite treat? Follow these simple steps:

  1. In a mixing bowl, mash the ripe bananas until smooth. Get those muscles working — a fork is all you need!
  2. Add the peanut butter, vanilla extract, and salt to the mashed bananas. Mix until everything is well combined. Feel free to use your hands for this — it’s a messy job, but someone’s got to do it!
  3. Stir in the rolled oats and dark chocolate chips until evenly distributed. This part is where the magic happens. You want every bite to be a delightful mix of flavors and textures!
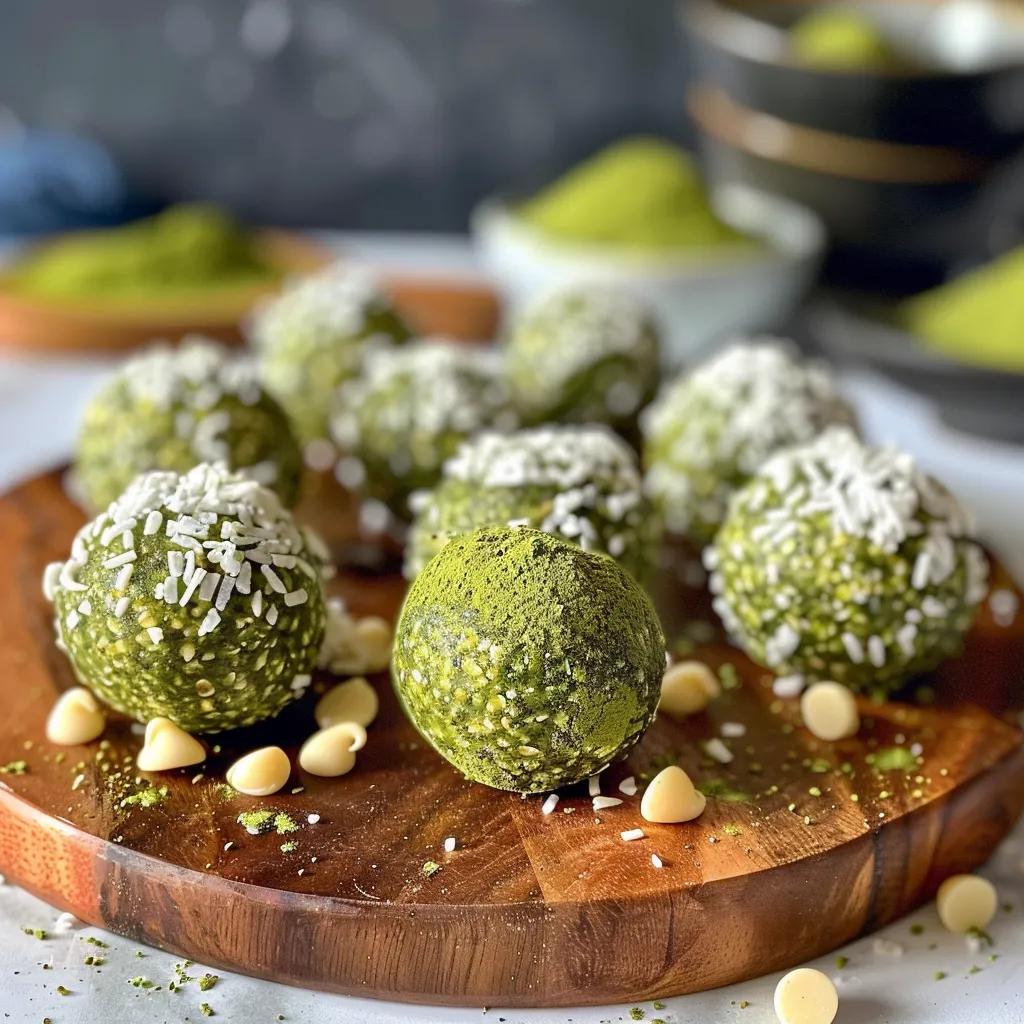
  4. Using a spoon, drop clusters of the mixture onto a parchment-lined baking sheet. Aim for golf ball-sized portions, but don’t stress about perfection — the charm is in their rustic look!
  5. Refrigerate the clusters for at least 30 minutes to firm up. This step is crucial for achieving that delightful bite. It’s the perfect time to clean up and daydream about how good these are going to taste!
  6. Once firm, enjoy your no-bake chocolate banana oat clusters! They’re ready to be devoured. You can eat them straight from the fridge, or pop them in a container to take on the go.

Serving Suggestions

These clusters are incredibly versatile and can be served in a variety of ways:

  • Enjoy them as an afternoon snack with a cup of tea or coffee.
  • Pair them with yogurt and fresh fruit for a wholesome breakfast.
  • Crush them over ice cream for a delightful dessert topping — talk about indulgence!
  • Wrap them as gifts for friends or family — who wouldn’t want a jar of these tasty bites?

Tips for Success

To ensure your No-Bake Chocolate Banana Oat Clusters turn out perfectly, keep these tips in mind:

  • Choose Ripe Bananas: The riper the bananas, the sweeter the clusters. Look for bananas that are mostly brown for the best results.
  • Don’t Skip the Refrigeration: Allowing the clusters to chill is essential. This step helps them hold their shape.
  • Customize Your Mix-Ins: Feel free to add nuts, seeds, or dried fruits. The beauty of this recipe is its adaptability!
  • Watch the Chocolate: If you’re not a fan of dark chocolate, you can swap it for milk chocolate or even white chocolate. Just be mindful of the sweetness!

Variations

If you’re feeling adventurous, why not experiment with these variations?

  • Coconut Delight: Add shredded coconut for a tropical twist!
  • Nutty Banana: Mix in your favorite nuts like walnuts or almonds for added crunch.
  • Spicy Kick: A pinch of cayenne pepper can elevate the flavor profile for those who dare!

Substitutions

Don’t have an ingredient on hand? Here are some easy substitutions:

  • Peanut Butter: Swap with almond butter, cashew butter, or sunflower seed butter for a nut-free option.
  • Rolled Oats: Quick oats can work in a pinch, but avoid instant oats as they may alter the texture.
  • Chocolate Chips: Use carob chips or omit chocolate entirely for a fruitier version!

Storage and Freezing

These clusters are perfect for meal prep! Store them in an airtight container in the refrigerator for up to one week. You can also freeze them for longer storage — just place them in a freezer-safe container with parchment paper between layers to prevent sticking. When you’re ready to enjoy, simply thaw in the fridge overnight.

FAQs

Got questions? I’ve got answers!

  • Can I use other fruits instead of bananas? Absolutely! Applesauce or pureed dates can work as a binder, but keep in mind that the flavor will change.
  • What if my mixture is too runny? If your mixture seems too wet, add more oats until you achieve the desired consistency.
  • How do I know when they’re ready to eat? Once they’ve firmed up in the fridge and hold their shape, they’re good to go!

Troubleshooting

If your clusters aren’t turning out as planned, here are a few common issues and solutions:

  • Clusters falling apart: This usually means they need more time in the fridge. If they’re still crumbly after chilling, consider adding a bit more peanut butter to help bind them.
  • Too sweet or not sweet enough: Adjust the sweetness by adding more or less chocolate. Remember, you can always sprinkle a little sea salt on top to enhance the flavors!

Final Thoughts

These Easy No-Bake Chocolate Banana Oat Clusters are more than just a treat; they’re an invitation to explore the joy of cooking with simplicity and creativity. Each bite is a celebration of flavor, a testament to the idea that healthy can be delicious and satisfying. So don’t hesitate — gather your ingredients and create this delightful recipe today. Whether you share them with loved ones or keep them all to yourself, these clusters are sure to become a beloved staple in your kitchen. Let the adventure begin!

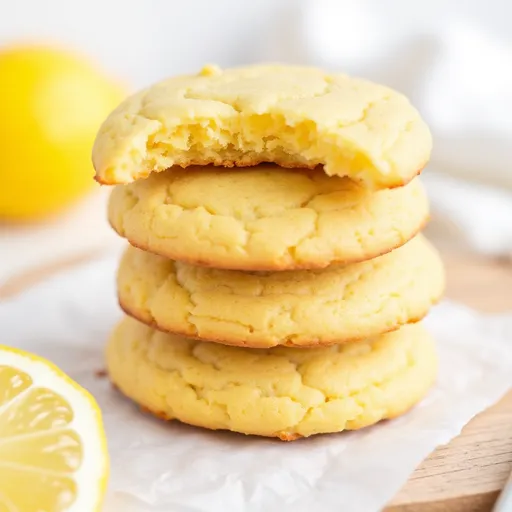
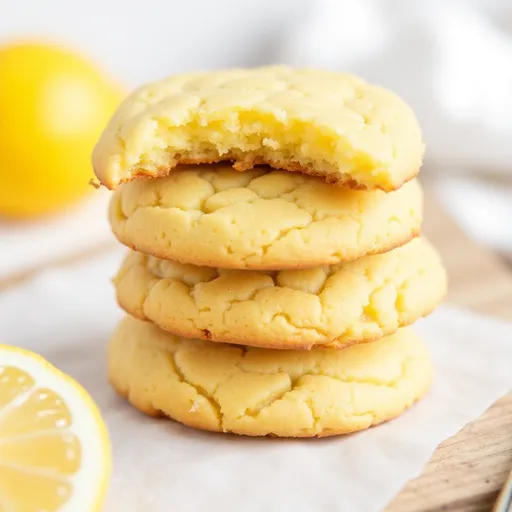
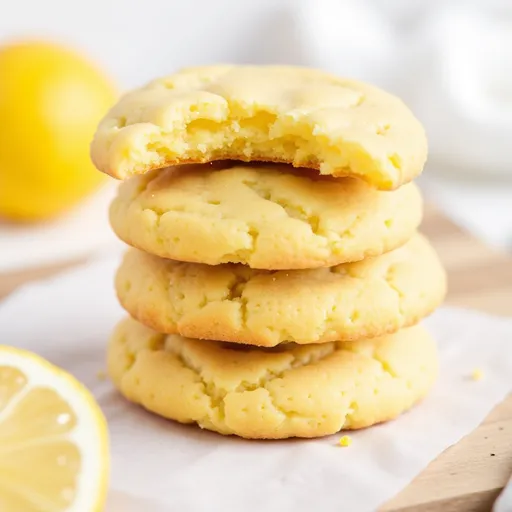
Easy No-Bake Chocolate Banana Oat Clusters: Healthy Treats Ready in Minutes!

Prep Time 10 minutes
Total Time 10 minutes
Servings 8 clusters
Calories 150
These quick and healthy no-bake chocolate banana oat clusters are perfect for a nutritious snack or dessert, ready in just minutes!

Ingredients

Fruits

  • 2 pieces ripe bananas
  • 1 cup rolled oats
  • 1/2 cup dark chocolate chips
  • 1/4 cup peanut butter
  • 1/2 teaspoon vanilla extract
  • a pinch salt

Instructions 

  • Mash bananas until smooth.
  • Mix in peanut butter, vanilla, and salt.
  • Stir in oats and chocolate chips.
  • Drop spoonfuls onto parchment-lined sheet.
  • Refrigerate for 30 minutes.
  • Enjoy your healthy clusters!

Notes

Store in an airtight container in the fridge for best freshness.
Calories: 150kcal
Cost: $8
Course: Snack
Cuisine: Healthy
Keyword: Banana

Nutrition

Calories: 150kcal | Carbohydrates: 22g | Protein: 3g | Fat: 7g | Sodium: 50mg

Loved this recipe? Save it to your favorite Pinterest board so you can easily find it later! It’s the perfect way to keep all your sweet ideas in one place. ✨

A detailed view of healthy chocolate banana oat clusters, highlighting their glossy chocolate coating.

Unleash the Flavor: The Spaghetti Squash Casserole Adventure

Welcome to a culinary journey that embraces the essence of comfort food with a fiery twist! Today, we’re diving into the world of spaghetti squash casserole, a dish that marries the nutty sweetness of spaghetti squash with rich cheeses and vibrant marinara sauce. If you’re looking for a meal that’s not just filling but also bursting with flavor, you’ve come to the right place. This recipe isn’t just another traditional casserole; it’s an explosion of taste that invites you to explore the art of cooking with passion and creativity.

So, why will you love this spaghetti squash casserole? Let’s break it down.

Why You’ll Love This Recipe

  • Healthy Comfort Food: This casserole is a guilt-free indulgence, packed with nutrients from the spaghetti squash and fresh ingredients. You can savor every bite without compromising your health goals.
  • Easy to Make: With simple steps and minimal prep time, this recipe is perfect for busy weeknights or when you want to impress guests without spending hours in the kitchen.
  • Gluten-Free Goodness: Whether you’re gluten intolerant or just looking for healthier options, this dish fits the bill. It’s naturally gluten-free and will satisfy even the most discerning palates.
  • Customizable: Love vegetables? Add your favorites! Prefer it spicier? Toss in some chili flakes! This casserole allows for endless variations, making it a versatile addition to your recipe repertoire.
  • Impressive Presentation: Serve it in the hollowed-out spaghetti squash shells for a stunning visual impact. Your guests will be in awe of both the look and the taste!

Ingredient Breakdown

Let’s take a closer look at what you’ll need to create this flavor-packed casserole:

  • 1 medium spaghetti squash (2 ½ to 3 pounds): This will be the star of the dish, offering a unique texture that resembles spaghetti when cooked.
  • 1 tablespoon olive oil: A must for roasting the squash and adding richness.
  • 1 ½ cups marinara sauce: Choose a high-quality sauce for the best flavor. I recommend a spicy marinara for those who dare to turn up the heat!
  • 1 cup grated provolone or mozzarella cheese: For that gooey, cheesy goodness that binds everything together.
  • 1 cup whole milk ricotta cheese: Adds creaminess and richness to the dish.
  • ½ cup grated parmesan cheese: A sprinkle of this sharp cheese on top will create an irresistible golden crust.
  • Black pepper: Don’t forget to season well! Freshly cracked black pepper enhances the flavors beautifully.
  • Fresh basil leaves: For garnishing, adding a burst of freshness and color.

Pro Tips for Perfecting Your Casserole

Side view of a baked spaghetti squash casserole with melted cheese and fresh basil on top.

Here’s how to ensure your spaghetti squash casserole turns out perfectly every time:

  • Choose the Right Squash: Look for a spaghetti squash that feels heavy for its size and has a smooth, firm skin with no blemishes.
  • Cook it Right: You can roast the squash in different ways. Either slice it in half and roast cut-side down or pierce it and roast whole. Both methods yield delicious results!
  • Don’t Rush the Cooling: Allow the squash to cool before handling it. This prevents burns and makes it easier to scrape out the strands.
  • Layer Your Flavors: Mix the marinara with the spaghetti strands before spreading them in the baking dish. This ensures even distribution of flavors throughout the casserole.
  • Keep an Eye on the Broiler: When broiling, stay close! Broilers can vary in intensity, so watch until the cheese is bubbly and golden brown.
  • Experiment with Cheeses: Feel free to mix and match different cheeses to find your perfect combination. A smoky cheese adds a unique depth of flavor.
  • Use Fresh Herbs: Always opt for fresh basil over dried. It elevates the dish and adds a vibrant aroma.
  • Make it Ahead: You can prepare the casserole a day in advance and refrigerate it. Just add a few extra minutes to the baking time when you’re ready to serve!

Avoid These Common Mistakes

To help you navigate the kitchen like a pro, here are some pitfalls to avoid:

  • Overcooking the Squash: Keep a close eye on cooking times. Overcooked squash can become mushy and lose its spaghetti-like texture.
  • Skipping the Seasoning: Don’t underestimate the importance of seasoning. A well-seasoned dish is always more flavorful, so don’t be shy with the salt and pepper!
  • Not Preheating the Oven: Always preheat your oven to ensure even cooking and a nice golden crust.
  • Not Letting it Rest: Allow the casserole to sit for a few minutes after baking. This helps it set and makes it easier to cut into squares.

Variations to Spice Things Up

Looking for new twists on this classic? Try these delicious variations:

  • Mexican-Inspired Casserole: Add black beans, corn, and taco seasoning to the marinara for a southwestern flair. Top with avocado and cilantro for serving.
  • Italian Sausage Casserole: Brown some Italian sausage with garlic and onions before mixing it with the squash and marinara. It adds a hearty touch!
  • Vegetable Medley: Incorporate sautéed zucchini, bell peppers, and spinach for an extra dose of veggies and color.
  • Spicy Arrabbiata Style: Use a spicy arrabbiata sauce instead of marinara for a kick that makes your taste buds dance!

Storage and Make-Ahead Instructions

Wondering how to store your leftovers? Here’s what you need to know:

  • Refrigerator: Store leftover spaghetti squash casserole in an airtight container for up to 4 days.
  • Freezing: This casserole freezes well! Just wrap it tightly in plastic wrap and then in aluminum foil for up to 3 months. Thaw in the fridge before reheating.
  • Reheating: To reheat, simply place it back in a preheated oven at 350°F until warmed through. You can also microwave individual portions if you’re in a hurry.

Frequently Asked Questions

Got questions? I’ve got answers! Here are some common inquiries about spaghetti squash casserole:

  • Can I use a different squash?: Absolutely! Butternut or acorn squash can work in a pinch, but the texture will vary.
  • Is this dish vegan-friendly?: To make it vegan, substitute the cheeses with plant-based alternatives and use a vegan marinara sauce.
  • Can I use store-bought marinara?: Yes! While homemade is fantastic, a good quality store-bought marinara can save time without sacrificing flavor.
  • How do I know when the squash is done?: The squash is done when you can easily pierce the skin with a fork and the flesh is tender.
  • What can I serve with this casserole?: Pair it with a fresh green salad, garlic bread, or roasted vegetables for a complete meal.
  • How can I make it spicier?: Add crushed red pepper flakes to the marinara or include jalapeños for an extra kick.
  • What if I don’t like ricotta?: You can substitute with cottage cheese or cream cheese for a different creamy texture.
  • Is this casserole kid-friendly?: Definitely! The cheesy goodness and familiar flavors make it a hit with kids.

Nutritional Tips and Dietary Adaptations

This spaghetti squash casserole is not just delicious but also nutritious! Here are a few tips:

  • Low-Carb Option: Spaghetti squash is a fantastic low-carb substitute for traditional pasta, making this dish suitable for keto diets.
  • Rich in Vitamins: Spaghetti squash is loaded with vitamins A and C, promoting eye health and boosting your immune system.
  • Protein Punch: With ricotta and the option of adding ground meat, this casserole is a great source of protein to keep you feeling full.
  • Vegan Adaptation: Use plant-based cheeses and marinara to adapt this recipe for a vegan diet without sacrificing taste.

Essential Equipment for Success

Here’s a quick list of tools that will make your cooking experience smooth and enjoyable:

  • Sharp Knife: Essential for cutting the spaghetti squash safely.
  • Rimmed Baking Sheet: A must for roasting the squash and ensuring even cooking.
  • Mixing Bowls: For combining ingredients effortlessly.
  • Fork: To scrape out those beautiful spaghetti strands.
  • Oven Mitts: Protect those hands when handling hot dishes!

Serving Suggestions

Now that your casserole is ready, how do you serve it? Here are some delightful ideas:

  • Garnish Generously: Top with fresh basil, a drizzle of olive oil, or a sprinkle of red pepper flakes for added flavor.
  • Pair with Fresh Bread: Crusty garlic bread or a warm baguette makes for the perfect companion to soak up any extra sauce.
  • Offer a Side Salad: A simple arugula salad with lemon vinaigrette complements the richness of the casserole beautifully.
  • Serve with Extra Marinara: Have some warm marinara on the side for those who want a little more sauciness!

In closing, this spaghetti squash casserole isn’t just a recipe; it’s an invitation to explore the world of flavors and comfort. Grab your ingredients, unleash your creativity, and remember, the kitchen is your playground. Embrace the thrill of cooking, and let every bite tell a story of warmth, spice, and adventure. Enjoy your culinary journey!

Spaghetti Squash Casserole

Prep Time 15 minutes
Cook Time 50 minutes
Total Time 1 hour 5 minutes
Servings 4 servings
Calories 350
A delicious low-carb casserole featuring roasted spaghetti squash topped with cheeses and fresh basil, perfect for a comforting yet healthy meal.

Ingredients

Vegetables

  • 1 medium spaghetti squash (2 ½ to 3 pounds)
  • 1 tablespoon olive oil
  • 1 1/2 cups marinara sauce (plus extra for serving)
  • 1 cup grated provolone or mozzarella cheese
  • 1 cup whole milk ricotta cheese
  • 1/2 cup grated parmesan cheese
  • to taste black pepper black pepper
  • for topping fresh basil leaves fresh basil leaves (for topping)

Instructions 

  • Preheat oven to 400°F (200°C). Roast the squash until tender, about 25-30 minutes sliced or 50-60 minutes whole.
  • Cool the squash, then scrape out the strands with a fork. Mix with marinara and cheese.
  • Spread the mixture on a baking sheet, top with ricotta and parmesan cheeses.
  • Broil until golden and crisp, about 6-8 minutes. Season with black pepper and garnish with basil.

Notes

Keep a close eye during broiling to prevent burning.
Calories: 350kcal
Cost: $15
Course: Main Course
Cuisine: American
Keyword: Spaghetti Squash

Nutrition

Calories: 350kcal | Carbohydrates: 45g | Protein: 20g | Fat: 15g | Sodium: 600mg

Discover the Magic of Matcha: A Journey into Flavor and Energy

Welcome to a world where flavor and energy collide! Today, we’re diving deep into the vibrant realm of matcha energy balls. These delightful bites aren’t just a treat for your taste buds; they’re an energizing snack that can elevate your day! This recipe will guide you through the creation of these green gems and empower you to embrace the art of cooking with heat, flavor, and a touch of adventure. So grab your apron, and let’s roll into this green wonderland!

Why You’ll Love This Recipe

Matcha energy balls are not just another snack; they’re the perfect fusion of taste, nutrition, and convenience. Here’s why they should be your go-to energizing snack:

  • Quick and Easy: These matcha energy balls come together in under 20 minutes. Perfect for those busy days when you need a healthy boost without a fuss!
  • Nutritious Powerhouse: Packed with almond flour, healthy fats, and antioxidants, these bites are as beneficial as they are delicious.
  • Gluten-Free Goodness: Made with gluten-free ingredients, these energy balls cater to various dietary needs without compromising on flavor.
  • Versatile and Customizable: Whether you prefer a hint of chocolate or a tropical twist, this recipe allows for endless variations to suit any palate.
  • Perfect Pre-Workout Snack: The combination of matcha and healthy fats provides sustained energy without the sugar crash, making it ideal for fueling your workouts!

Ingredient Breakdown: What You’ll Need

Let’s get down to the nitty-gritty! Here’s what you’ll need to craft these matcha energy balls:

  • 1 1/2 cups almond flour: A great source of protein and healthy fats, providing a nutty flavor and excellent texture.
  • 1/2 cup unsweetened shredded coconut: Adds a chewy texture and natural sweetness.
  • 1 tbsp matcha powder: The star ingredient! Matcha is rich in antioxidants and offers a gentle caffeine boost.
  • Pinch of salt: Enhances the overall flavor, balancing the sweetness.
  • 2/3 cup cashew butter: Creamy and rich, cashew butter adds healthy fats and a delightful flavor.
  • 1/3 cup honey: Natural sweetener that helps bind the ingredients together.
  • 1 tsp vanilla extract: Adds depth and a warm flavor note.
  • 1/3 cup white chocolate chips: For an indulgent touch, these chips provide a sweet contrast to the earthy matcha.

Pro Tips for Matcha Energy Ball Perfection

Side view of green Matcha Energy Balls arranged neatly, showcasing their round shape.

Before you dive into the making process, here are some tips to elevate your energy ball game:

  • Quality Matcha: Invest in high-quality matcha for a vibrant green color and rich flavor. This makes all the difference!
  • Chill for Better Texture: If the mixture feels too sticky, refrigerate it for 15 minutes before rolling into balls.
  • Experiment with Add-ins: Consider adding nuts, seeds, or dried fruit to create your unique flavor profile.
  • Storage Matters: Keep your energy balls in an airtight container to retain freshness and flavor.
  • Roll with the Punches: If you find the mixture too dry, add a splash of coconut milk or an extra spoonful of cashew butter to bring it together.
  • Serving Size: Aim for about one tablespoon of mixture per ball for consistent sizes and easy snacking.
  • Make Them Your Own: Use different nut butters, such as almond or peanut butter, for a unique twist!
  • Freshen Up: If you want an extra zing, add a teaspoon of citrus zest for a refreshing kick.

How to Make Matcha Energy Balls: Step-by-Step Instructions

Ready to unleash the green magic? Follow these simple steps to make your matcha energy balls:

  1. Add all the ingredients except for the chocolate chips to a food processor and pulse together until combined. Scrape down the sides as needed.
  2. Incorporate the chocolate chips by pulsing a few more times to mix.
  3. Roll the mixture into balls, using about one tablespoon per ball.
  4. Pour some shredded coconut onto a plate and roll each ball in the coconut for a delightful finish.
  5. Place the energy balls in the fridge to set for at least 2 hours.
  6. Store in the fridge. Enjoy your energizing snack!

Common Mistakes and Troubleshooting

Even the best cooks encounter hiccups! Here’s how to avoid common pitfalls:

  • Too Crumbly: If your mixture is dry, try adding more cashew butter or a touch of honey to bring it together.
  • Too Sticky: If the dough is too sticky, chill it for a few minutes or add more almond flour.
  • Flavor Too Mild: If the matcha flavor isn’t strong enough, add a little more matcha powder to enhance the taste.
  • Not Rolling Properly: If the mixture won’t hold together, make sure to pulse it well and check your ingredient ratios.

Variations to Spice Up Your Energy Balls

Why stop at just one flavor? Here are some delicious variations to try:

  • Chocolate Matcha Energy Balls: Add 2 tablespoons of cocoa powder for a rich chocolate flavor that complements the matcha.
  • Coconut Lime Matcha Balls: Incorporate zest from one lime and replace honey with agave for a tropical twist.
  • Protein-Packed Matcha Balls: Stir in protein powder for an added boost, perfect for post-workout recovery.
  • Nutty Matcha Delight: Include chopped nuts such as walnuts or pecans for an extra crunch!

Storage and Make-Ahead Instructions

These energy balls are perfect for meal prep! Here’s how to store them:

  • Fridge Storage: Keep your energy balls in an airtight container in the fridge for up to 2 weeks.
  • Freezer Storage: For longer preservation, store in the freezer for up to 3 months. Just thaw in the fridge when you’re ready to enjoy!

Comprehensive FAQ

Got questions? We’ve got answers! Here are some frequently asked questions:

  • How long do Matcha Energy Balls last? When stored properly in an airtight container, they last up to 2 weeks in the fridge or 3 months in the freezer.
  • Can I use other nut butters? Absolutely! Almond butter, peanut butter, or sunflower seed butter work great as substitutes.
  • Is matcha safe for kids? Yes, matcha is safe in moderation! It provides a gentle energy boost without the jitters.
  • What can I use instead of honey? Maple syrup or agave nectar are fantastic vegan alternatives to honey.
  • Can I make these energy balls nut-free? Yes! Use sunflower seed butter or tahini as nut-free alternatives.
  • What’s the best way to enjoy these? They make a perfect snack on their own or pair wonderfully with a cup of green tea!
  • Do I need to use a food processor? While a food processor makes it easier, you can mix by hand if you prefer.
  • Can I add superfoods? Definitely! Consider adding chia seeds, flaxseeds, or spirulina for an extra health kick.

Nutritional Tips and Dietary Adaptations

Looking to tweak the nutrition? Here are some tips:

  • For a Low-Carb Version: Substitute almond flour with coconut flour and use a sugar substitute instead of honey.
  • Boost Fiber: Add chia seeds or ground flaxseeds to the mixture for an extra fiber punch.
  • Vegan Option: Use maple syrup instead of honey and opt for a plant-based protein powder for a nutritious vegan treat.

Equipment Recommendations

Here’s what you’ll need to whip up these matcha energy balls:

  • Food Processor: Essential for quickly blending the ingredients.
  • Measuring Cups and Spoons: For precise ingredient measurements.
  • Baking Sheet: Use it to place your energy balls while they chill in the fridge.

Serving Suggestions

Now that you’ve crafted these little powerhouses, here’s how to serve them:

  • Snack Time: Enjoy them as an afternoon pick-me-up or a pre-workout fuel.
  • Tea Time: Pair with a warm cup of green tea for a delightful afternoon treat.
  • On-the-Go: Pack them in a small container for a quick snack while traveling or at work.

In conclusion, these matcha energy balls are more than just a recipe; they’re an invitation to explore the world of flavor and energy. So gather your ingredients, unleash your creativity, and let the magic of matcha inspire your culinary adventures. Here’s to bold cooking and delicious snacking! Enjoy every bite, and remember — a little fire in your food makes every meal an extraordinary story worth telling!

Matcha Energy Balls

Prep Time 15 minutes
Total Time 15 minutes
Servings 12 pieces
Calories 150
These delicious and energizing matcha energy balls are perfect for a quick snack or a healthy treat, combining the earthy flavor of matcha with the sweetness of honey and white chocolate chips.

Ingredients

Dry ingredients

  • 1 1/2 cups almond flour
  • 1/2 cup unsweetened shredded coconut (plus more for rolling)
  • 1 tbsp matcha powder
  • pinch salt
  • 2/3 cup cashew butter
  • 1/3 cup honey
  • 1 tsp vanilla extract
  • 1/3 cup white chocolate chips

Instructions 

  • Add all ingredients except chocolate chips to a food processor and pulse until combined. Scrape down sides as needed.
  • Add chocolate chips and pulse a few times to incorporate.
  • Roll mixture into about 12 balls, using one tablespoon each.
  • Roll each ball in shredded coconut to coat.
  • Place energy balls in the fridge to set for at least 2 hours.
  • Store in an airtight container in the fridge.

Notes

Keep the energy balls refrigerated for best freshness.
Calories: 150kcal
Cost: $10
Course: Snack
Cuisine: Fusion
Keyword: Matcha

Nutrition

Calories: 150kcal | Carbohydrates: 15g | Protein: 4g | Fat: 9g | Sodium: 50mg

Why You’ll Love These Brownies

Get ready to embark on a luscious journey that will redefine your idea of dessert! These 3-Ingredient Brownies with Banana are not just any brownies; they’re an experience waiting to happen. Imagine sinking your teeth into a fudgy, decadent treat that’s not only simple to make but also incredibly healthy. With just ripe bananas, cocoa powder, and almond butter, you’ll be amazed at how these three humble ingredients create a symphony of flavors that dance on your palate.

What sets these brownies apart? Their velvety texture and rich chocolate flavor come from the perfect ripeness of the bananas and the creamy almond butter, making them a delightful indulgence without the guilt. Whether you’re a baking novice or a seasoned pro, this recipe will empower you to whip up a dessert that feels luxurious but requires minimal effort. Plus, they’re vegan, gluten-free, and packed with nutrients, so you can savor every bite without hesitation.

Ingredients You’ll Need

Before you dive into the baking world, let’s gather our magic ingredients:

  • 2 ripe bananas – The riper, the better! Look for those with brown spots, as they will add natural sweetness.
  • 1/2 cup cocoa powder – Unsweetened cocoa powder will give your brownies that deep chocolate flavor.
  • 1/2 cup almond butter – This creamy nut butter not only binds the ingredients but also adds healthy fats and a nutty richness.

Step-by-Step Directions

A delicious slice of banana brownies on a wooden surface, highlighting the glossy cocoa topping and soft interior.

Now that you’ve got your ingredients ready, let’s get baking! Follow these simple steps to create your delicious brownies:

  1. Preheat your oven to 350°F (175°C) and grease an 8×8 inch baking dish. This ensures your brownies won’t stick and will come out beautifully.
  2. Mash the ripe bananas in a mixing bowl until smooth. Feel free to use a fork or a potato masher—just get them nice and creamy.
  3. Add the cocoa powder and almond butter to the mashed bananas. Mix until everything is well combined. You want a smooth batter without any lumps.
  4. Pour the batter into the prepared baking dish and spread it evenly. Make sure to reach all corners for a uniform bake.
  5. Bake in the preheated oven for 20-25 minutes, or until a toothpick inserted into the center comes out clean. Keep an eye on them to avoid overbaking.
  6. Allow to cool before cutting into squares and serving. This step is crucial as it helps the brownies set up nicely!

Servings and Timing

This recipe yields approximately 9 scrumptious brownies, depending on how large you cut them. They’re perfect for sharing—if you can resist keeping them all to yourself!

The total time from start to finish is around 35 minutes, making it a quick and easy dessert option for any occasion.

Variations to Try

One of the best parts of baking is experimenting with flavors! Here are some fun variations to elevate your brownies even further:

  • Nut-Free Version: Swap out almond butter for sunflower seed butter or tahini.
  • Add-Ins: Toss in some chocolate chips, chopped nuts, or dried fruit for added texture and flavor.
  • Protein Boost: Incorporate a scoop of your favorite protein powder into the batter and adjust the consistency with a splash of almond milk.
  • Spiced Up: Consider adding a dash of cinnamon or a pinch of cayenne for a surprising kick!

Storage and Freezing

Once you’ve made these delightful brownies, you might wonder how to store them:

  • Keep them in an airtight container at room temperature for up to 3 days.
  • If you want them to last longer, refrigerate for up to 5 days.
  • For extended storage, freeze them for up to 3 months. Just make sure to wrap them well to avoid freezer burn!

When you’re ready to enjoy a frozen brownie, simply let it thaw at room temperature for a bit or pop it in the microwave for a few seconds to warm it up.

FAQs

Can I replace almond butter with another nut butter?

Absolutely! Feel free to use peanut butter, cashew butter, or any nut butter you love. Just be mindful that this may slightly alter the flavor.

Are these brownies gluten-free?

Yes! Since this recipe contains no flour, these brownies are naturally gluten-free. Perfect for those with gluten sensitivities!

How can I know when the brownies are done baking?

Insert a toothpick into the center of the brownies. If it comes out clean or with a few moist crumbs, they’re ready. Just be careful not to overbake!

How ripe should the bananas be for this recipe?

Look for bananas that are very ripe, ideally with brown spots on the peel. This will ensure maximum sweetness and moisture in your brownies.

Can I add more ingredients to the batter?

Definitely! Feel free to experiment with flavors. Just remember that adding too many wet ingredients may affect the texture, so keep it balanced.

Troubleshooting Tips

If you run into any issues while making your brownies, here are some troubleshooting tips:

  • Brownies are too dry: This can happen if they are overbaked. Always check for doneness a few minutes before the recommended baking time.
  • Brownies are too mushy: If they’re underbaked, they will need more time in the oven. Remember, they will continue to firm up as they cool.
  • Flavor is lacking: If you find the brownies not as flavorful as you hoped, consider adding a pinch of salt or a splash of vanilla extract to enhance the taste.

Conclusion

There you have it! A simple yet indulgent recipe for 3-Ingredient Brownies with Banana that will have you dancing with joy after every bite. These brownies not only satisfy your chocolate cravings but also make you feel good about what you’re eating. So, gather your ingredients, channel your inner chef, and let the sweet aroma of baking fill your kitchen. Remember, cooking is an adventure, and every brownie you make tells a delicious story. Enjoy your journey into the world of sweetness, and don’t forget to share your creations with friends and family—if you can bear to part with them!

3-Ingredient Brownies with Banana - Recipes by Janet

Prep Time 10 minutes
Cook Time 20 minutes
Total Time 30 minutes
Servings 8 pieces
Calories 180
These simple, healthy brownies require just three ingredients and are perfect for a quick, delicious treat.

Ingredients

Main

  • 2 pieces ripe bananas
  • 0.5 cup cocoa powder
  • 0.5 cup almond butter

Instructions 

  • Preheat oven to 350°F (175°C) and grease an 8x8 inch baking dish.
  • Mash bananas until smooth in a bowl.
  • Mix in cocoa powder and almond butter until well combined.
  • Pour batter into dish and spread evenly.
  • Bake for 20-25 minutes, then cool before slicing.

Notes

Use ripe bananas for best flavor and sweetness.
Calories: 180kcal
Cost: $5
Course: Dessert
Cuisine: American
Keyword: brownies

Nutrition

Calories: 180kcal | Carbohydrates: 25g | Protein: 4g | Fat: 8g | Sodium: 10mg

Loved this recipe? Save it to your favorite Pinterest board so you can easily find it later! It’s the perfect way to keep all your sweet ideas in one place. ✨

An enticing brownie surrounded by ripe bananas, captured in warm, natural light to emphasize its moist texture.

Why You’ll Adore This Recipe

When it comes to satisfying cravings, few things can compete with the allure of a perfectly crafted nut bar. These Dark Chocolate Sea Salt Nut Bars are not only a feast for the senses, but they also strike that perfect balance between rich, indulgent chocolate and the satisfying crunch of mixed nuts. Picture this: a sweet, sticky base of dates and nuts, topped with a glossy layer of melted dark chocolate, all crowned with a sprinkle of sea salt. Each bite is a mini-adventure that invites you to savor the moment.

What’s more, these bars are incredibly versatile and packed with wholesome ingredients. They serve as a fantastic snack for busy days, a delightful addition to lunchboxes, or even a guilt-free dessert. With minimal effort, you can whip up these bars and indulge your sweet tooth while still feeling good about what you’re eating. So grab your apron; it’s time to dive into the delicious world of homemade nut bars!

Ingredients You’ll Need

Before we get started, let’s gather our ingredients. Here’s what you’ll need:

  • 1 cup mixed nuts (almonds, walnuts, pecans)
  • 1 cup pitted dates
  • 1/2 cup dark chocolate chips
  • 1/4 teaspoon sea salt
  • 1 tablespoon coconut oil
  • 1 teaspoon vanilla extract

These ingredients come together to create a treat that’s not only tasty but also packed with nutrients. Nuts offer healthy fats and protein, while dates provide natural sweetness and fiber. And let’s not forget about that luscious dark chocolate—rich in antioxidants and utterly divine!

Crafting Your Nut Bars: Step-by-Step Instructions

Delicious dark chocolate nut bars topped with sea salt, showcasing mixed nuts and chocolate.

Now that we’ve got our ingredients ready, let’s transform them into something extraordinary. Follow these simple steps to create your nut bars:

  1. Preheat the oven: Start by preheating your oven to 350°F (175°C). This is the perfect temperature for toasting our nuts, enhancing their flavor.
  2. Prepare your pan: Line an 8×8 inch baking dish with parchment paper. This will ensure that your bars come out easily once they’re set.
  3. Blend the nuts and dates: In a food processor, combine the mixed nuts and pitted dates. Blend until the mixture is well combined and sticky—this will form the base of your bars.
  4. Press into the dish: Transfer the nut and date mixture into the prepared baking dish. Use your hands or a spatula to press it evenly into the bottom.
  5. Melt the chocolate: In a small saucepan, melt the dark chocolate chips and coconut oil over low heat. Stir continuously until smooth and creamy.
  6. Add flavor: Remove the melted chocolate from heat and stir in the vanilla extract and sea salt. This step adds depth to the chocolate, making it even more irresistible.
  7. Pour and spread: Pour the melted chocolate over the nut base and spread it evenly using a spatula. Make sure every inch is covered in that luscious chocolate goodness.
  8. Final touches: If you’re feeling extra indulgent, sprinkle a little more sea salt on top for a delightful contrast to the sweetness.
  9. Chill to set: Refrigerate the bars for at least 2 hours, allowing the chocolate to set and firm up.
  10. Slice and serve: Once set, lift the bars out of the dish using the parchment paper. Cut into squares and enjoy!

Tips for Perfect Bars

To make sure your nut bars turn out perfectly every time, keep these tips in mind:

  • Choose the right nuts: Feel free to experiment with different nuts. Almonds, walnuts, and pecans are fantastic, but cashews or hazelnuts can also add a unique flavor.
  • Use fresh dates: Ensure your dates are fresh and soft. If they’re a bit dry, soak them in warm water for about 10 minutes to soften before blending.
  • Don’t rush the cooling: Allow the bars to chill for at least 2 hours. This will help the chocolate set properly, making slicing much easier.
  • Work with melted chocolate: If you find melting chocolate a bit tricky, try adding a touch of coconut oil to help it smooth out. This will also create a beautiful sheen on your bars.

Variations to Try

One of the best parts about making your own nut bars is the freedom to customize them. Here are some tasty variations to consider:

  • Flavor infusions: Add a dash of cinnamon or nutmeg for warmth and spice. A splash of almond or orange extract can also enhance the flavor profile.
  • Mix in some fruit: Dried cranberries, apricots, or even chocolate-covered raisins can bring a new dimension to your nut bars.
  • Nut butter twist: Swirl in a tablespoon of almond or peanut butter into the chocolate layer for added creaminess.

Substitutions You Can Make

If you find yourself missing an ingredient, don’t worry! Here are some substitutions you can use:

  • Nuts: If you’re allergic to nuts or want to mix it up, use seeds like pumpkin or sunflower seeds.
  • Sweeteners: While dates are a great natural sweetener, you can also use maple syrup or agave nectar to bind your bars together.
  • Chocolate: If dark chocolate isn’t your favorite, feel free to use milk chocolate or even white chocolate for a sweeter taste.

Essential Equipment

To create these delightful nut bars, you’ll need a few handy tools:

  • Food processor: A must-have for blending the nuts and dates into a sticky mixture.
  • Baking dish: An 8×8 inch dish works perfectly for these bars.
  • Parchment paper: Essential for easy removal and cleanup.
  • Small saucepan: For melting the chocolate and coconut oil.

Storage and Freezing Tips

To keep your nut bars fresh and delicious, follow these storage tips:

  • Airtight container: Store the bars in an airtight container at room temperature for up to a week.
  • Refrigeration: If you want them to last longer, keep them in the fridge, where they’ll stay fresh for about two weeks.
  • Freezing: For longer storage, you can freeze the bars. Just place them in an airtight container with parchment paper between layers to prevent sticking. They can last for several months in the freezer.

FAQs About Dark Chocolate Sea Salt Nut Bars

Got questions? Here are some common queries about this delightful recipe:

  • Can I use nuts that are not roasted? Absolutely! Raw nuts can be used, but roasting them enhances their flavor and crunch.
  • What if my bars are too crumbly? If your bars don’t hold together, try adding a little more melted chocolate or coconut oil to help bind them.
  • Can I make these vegan? Yes! This recipe is naturally vegan as long as you use dairy-free chocolate.

Troubleshooting Common Issues

Even the best chefs encounter issues sometimes! Here’s how to solve a few common problems:

  • Brittle bars: If your bars are too hard, it may be due to overbaking or not enough moisture from the dates. To remedy this, try adding a bit more sweetener next time.
  • Chocolate not setting: Ensure you refrigerate your bars long enough for the chocolate to firm up properly. If it’s still soft, it may need a bit more time in the fridge.

Conclusion: Your Adventure Awaits!

There you have it—a simple yet delectable recipe for Dark Chocolate Sea Salt Nut Bars that will tantalize your taste buds and spark your culinary creativity. The blend of rich chocolate and crunchy nuts creates an irresistible snack that’s both satisfying and nutritious. Whether you’re whipping these up for an afternoon treat, a hike, or just to indulge your sweet tooth, you’re in for a delightful experience.

So why wait? Grab those ingredients, fire up your food processor, and embark on a delicious adventure in your kitchen. Remember, cooking is all about exploration and having fun. So go ahead and add your spin to this recipe—experiment, taste, and enjoy every moment. Happy cooking!

Dark Chocolate Sea Salt Nut Bars

Prep Time 15 minutes
Cook Time 10 minutes
Total Time 25 minutes
Servings 8 bars
Calories 250
Delicious homemade nut bars with rich dark chocolate and a hint of sea salt, perfect for a healthy snack.

Ingredients

Mixed Nuts and Dates

  • 1 cup mixed nuts (almonds, walnuts, pecans)
  • 1 cup pitted dates

Chocolate and Flavoring

  • 1/2 cup dark chocolate chips
  • 1/4 teaspoon sea salt
  • 1 tablespoon coconut oil
  • 1 teaspoon vanilla extract

Instructions 

  • Preheat oven to 350°F (175°C) and line an 8x8 inch dish with parchment.
  • Blend nuts and dates until sticky, then press into dish.
  • Melt chocolate with coconut oil over low heat, then stir in vanilla and salt.
  • Pour chocolate over nut base and spread evenly, then refrigerate for 2 hours.
  • Lift out of dish, cut into squares, and enjoy.

Notes

Store in the refrigerator for best freshness.
Calories: 250kcal
Cost: $15
Course: Snack
Cuisine: American
Keyword: nuts

Nutrition

Calories: 250kcal | Carbohydrates: 20g | Protein: 5g | Fat: 15g | Sodium: 50mg

Loved this recipe? Save it to your favorite Pinterest board so you can easily find it later! It’s the perfect way to keep all your sweet ideas in one place. ✨

Eye-level shot of nut bars made with dark chocolate, dates, and sea salt against a blurred background.

Kickstart Your Day with a Flavor-Packed Low Fat Sausage Breakfast Casserole

Are you ready to fire up your mornings with a dish that’s as satisfying as it is healthy? The Low Fat Sausage Breakfast Casserole is your go-to solution for a hearty breakfast that fuels your day without weighing you down. This recipe combines the rich flavors of turkey sausage and creamy cheddar cheese, creating a delightful balance that will wake up your taste buds and keep you energized. Let’s dive into the mouthwatering details and discover why this casserole is destined for your breakfast table!

Why You’ll Love This Recipe

This isn’t just any breakfast; it’s a celebration of flavors, health, and convenience. Here’s why you’ll want to whip up this casserole:

  • Nutritious and Delicious: Packed with lean protein from turkey sausage and egg whites, this dish keeps you full without the guilt.
  • Quick and Easy: With minimal prep time and just a single baking dish, cleanup is a breeze — perfect for busy mornings.
  • Meal Prep Friendly: Make it ahead of time and enjoy it throughout the week, making breakfasts a no-brainer.
  • Customizable: Add your favorite vegetables or spices to personalize the flavor profile — the options are endless!
  • Family-Friendly: Even picky eaters will love this casserole, making it a hit at the breakfast table for everyone!

Ingredient Breakdown: What You Need

Let’s get into the heart of the matter — the ingredients! Here’s what you’ll need for this scrumptious casserole:

  • 1 pound turkey breakfast sausage: Choose a lean option for a healthy base.
  • 6 slices whole wheat bread: Use crusts removed for a soft texture; feel free to substitute with gluten-free bread if needed.
  • 1-1/2 cups reduced-fat shredded cheddar cheese: Adds creaminess and flavor without excess calories.
  • 1 cup egg beaters: For a low-fat, high-protein option; you can use 10 large egg whites as an alternative.
  • 1 whole egg: This helps bind the casserole together and adds richness.
  • 2 cups reduced-fat milk: It keeps the casserole moist; almond or oat milk can be great substitutes.
  • 1/2 tsp salt and 1/4 tsp pepper: For seasoning; adjust to taste.

Pro Tips for Perfecting Your Casserole

Side angle of a baked Low Fat Sausage Breakfast Casserole with melted cheese.

Ready to become a breakfast casserole connoisseur? Here are some expert tips to make your dish shine:

  • Fresh Herbs: Add chopped green onions or parsley for a fresh finish.
  • Layering: Layer ingredients thoughtfully to ensure even cooking and flavor distribution.
  • Bake Time: Keep an eye on the casserole; it’s ready when the egg is set and the top is golden brown.
  • Rest Before Serving: Let it cool for a few minutes after baking; this helps it set and makes serving easier.
  • Spice It Up: Don’t shy away from adding spices like cayenne or smoked paprika for an extra kick.
  • Store Leftovers: Keep any leftovers in the fridge for up to four days; reheat in the oven for the best texture.

Common Mistakes and Troubleshooting

Even the best chefs make mistakes! Here’s how to avoid common pitfalls:

  • Overcooking: Keep an eye on your casserole to avoid a dry texture; check for doneness at the 40-minute mark.
  • Dry Casserole: Ensure you have enough liquid; you can add more milk if it seems dry before baking.
  • Uneven Cooking: Stir the ingredients before pouring the egg mixture to ensure even distribution.

Variations to Spice Up Your Casserole

Want to mix things up? Here are some fun variations to try:

  • Veggie Lover’s Delight: Add sautéed bell peppers, spinach, or zucchini for a vibrant twist.
  • Southwestern Style: Incorporate black beans, corn, and diced jalapeños for a spicy kick.
  • Italian Flair: Use Italian sausage and add marinara sauce for a pasta-inspired breakfast.
  • Cheesy Broccoli: Toss in some steamed broccoli for a healthful crunch and extra nutrition.

Storage and Make-Ahead Instructions

This casserole is perfect for meal prep! Here’s how to store and prepare it:

  • Refrigerate: Store leftovers in an airtight container in the fridge for up to four days.
  • Freeze: For longer storage, freeze portions in individual containers for up to three months; just reheat in the oven or microwave.
  • Make-Ahead: Assemble the casserole the night before and refrigerate; bake in the morning for a quick breakfast.

Frequently Asked Questions

Got questions? We’ve got answers! Here’s the scoop on our casserole:

  • Can I use a different type of sausage?
    Absolutely! Feel free to experiment with chicken or pork sausage.
  • Is this casserole gluten-free?
    Yes, you can easily make it gluten-free by using gluten-free bread.
  • Can I add more cheese?
    Of course! Just remember that more cheese adds extra calories — try using a blend of cheeses for complexity.
  • What if I don’t have egg beaters?
    You can substitute with whole eggs; just use more eggs to match the volume.
  • How do I know when it’s done baking?
    The casserole is done when it’s puffed up and golden brown on top; a toothpick should come out clean.
  • Can I reheat this casserole?
    Yes! Reheat leftovers in the oven or microwave until warmed through.
  • What side dishes pair well with this casserole?
    Fresh fruit, yogurt, or a simple salad make great companions!
  • Can I make this casserole vegetarian?
    Absolutely! Swap the sausage for plant-based alternatives and load up on veggies.

Nutritional Insights and Dietary Adaptations

This casserole is a powerhouse of nutrition! Here’s a breakdown of its benefits:

  • High Protein: With turkey sausage and eggs, it’s a great way to start your day with energy.
  • Low Fat: Using lean meats and reduced-fat dairy keeps this dish light and enjoyable.
  • Versatile: Easily adaptable for various diets, including gluten-free and vegetarian options.

Essential Equipment for Your Casserole

To make this casserole, you’ll need:

  • 9×13-inch Baking Dish: A classic choice for casseroles, ensuring even cooking.
  • Skillet: For cooking the sausage and any veggies you choose to add.
  • Whisk: To mix your egg and milk mixture thoroughly.
  • Measuring Cups and Spoons: Accuracy is key for the best results!

Serving Suggestions to Elevate Your Breakfast

To bring your breakfast experience to the next level, consider these serving ideas:

  • Garnish: Top with chopped fresh herbs or a dollop of Greek yogurt for extra flavor.
  • Fruit Side: Serve alongside fresh berries or sliced melons for a refreshing contrast.
  • Hot Sauce: A few dashes of your favorite hot sauce can add a delightful kick!

With this Low Fat Sausage Breakfast Casserole, you’re not just preparing a meal; you’re igniting a flavor journey that brings joy and energy to your morning. So grab your ingredients, embrace the adventure of cooking, and let the magic of spice turn your breakfast into a celebration. Enjoy every bite and remember — cooking is all about experimenting and having fun!

Low Fat Sausage Breakfast Casserole

Prep Time 10 minutes
Cook Time 45 minutes
Total Time 55 minutes
Servings 6 servings
Calories 350
A healthy and delicious breakfast casserole featuring lean turkey sausage and reduced-fat cheese, perfect for a nutritious start to your day.

Ingredients

Meat

  • 1 pound turkey breakfast sausage

Bread

  • 6 slices wheat bread, crusts removed

Cheese

  • 1-1/2 cups reduced fat shredded cheddar cheese

Eggs and Milk

  • 1 cup egg beaters
  • 1 egg egg
  • 2 cups reduced fat milk

Seasonings

  • 1/2 tsp salt
  • 1/4 tsp pepper

Instructions 

  • Preheat oven to 350ºF (175ºC). Spray a 9×13-inch (23×33 cm) pan with cooking spray.
  • Cook sausage in a skillet until crumbled and no longer pink; drain excess fat.
  • Cube bread and layer in the prepared pan. Top with cooked sausage and shredded cheese.
  • Whisk together egg beaters, egg, milk, salt, and pepper; pour over layers.
  • Bake uncovered for 40-50 minutes until set and golden.

Notes

For a lower sodium option, reduce added salt or use low-sodium sausage.
Calories: 350kcal
Cost: $15
Course: Breakfast
Keyword: sausage

Nutrition

Calories: 350kcal | Carbohydrates: 20g | Protein: 30g | Fat: 15g | Sodium: 800mg

Unlocking the Flavor: Your Ultimate Guide to the JUST Egg Omelette

Welcome, culinary adventurers! If you’ve stumbled upon this guide, you’re probably ready to dive into the world of the JUST Egg omelette — a vibrant, plant-based delight that’s as satisfying as it is delicious. In this article, we’ll explore everything you need to know about crafting the perfect JUST Egg omelette, from ingredient selection to expert tips and creative variations. So grab your skillet, and let’s add some fire to your kitchen!

Why You’ll Love This Recipe

Here’s why the JUST Egg omelette is about to become your breakfast hero:

  • Plant-based goodness: Made from mung beans, JUST Egg offers a rich source of protein without the cholesterol found in traditional eggs.
  • Versatile flavor: You can customize your omelette with a range of fillings, from fresh herbs to spicy peppers, making each bite an adventure.
  • Quick and easy: This recipe is simple and quick, perfect for busy mornings when you want something hearty yet healthy.
  • Guilt-free indulgence: Enjoy the creamy, egg-like texture without any of the guilt — it’s low in calories and high in flavor.
  • Perfect for all diets: Whether you’re vegan, vegetarian, or just looking to reduce your egg consumption, this omelette fits seamlessly into any lifestyle.

Ingredient Breakdown

Let’s get down to the essentials! Here’s what you’ll need to create your JUST Egg omelette, along with some nifty substitutions to personalize your dish:

  • JUST Egg: This is your base! It mimics the taste and texture of eggs but is entirely plant-based. You can find it in most grocery stores or online.
  • Avocado oil: A healthy fat for cooking that adds a subtle flavor. Can be replaced with olive oil or coconut oil.
  • Shallots: These add a lovely sweetness. Substitute with onions if you prefer a stronger flavor.
  • Garlic: A must for depth! Fresh garlic is best, but garlic powder can work in a pinch.
  • Mushrooms: We recommend sliced button or cremini mushrooms for their earthy flavor. Feel free to use any kind you like!
  • Spinach: Fresh baby spinach is ideal, but kale or Swiss chard can also be great substitutes.
  • Vegan cheese: Adds creaminess. Use your favorite brand or omit for a lighter option.
  • All-purpose flour: This helps bind the omelette and gives it structure. Gluten-free flour works if you’re avoiding gluten.
  • Baking powder: A pinch of this helps fluff up your omelette. If you’re out, you can skip it, but the texture will be a tad denser.

How to Make Your JUST Egg Omelette

Side view of a vegan omelette showcasing mushrooms and spinach.

Ready to take the plunge? Let’s whip up a JUST Egg omelette that packs a punch!

Steps to Perfection

  1. Heat 1 tablespoon of avocado oil in a small non-stick pan over medium heat. Add the sliced shallots and minced garlic, sautéing for 30-60 seconds until fragrant.
  2. Add the sliced mushrooms and sauté until softened and golden, about 2-3 minutes.
  3. Now toss in the spinach and sauté until just wilted, about 1 minute. Lightly sprinkle with salt and pepper. Remove the mixture and set it aside on a plate.
  4. In a small bowl, whisk together the JUST Egg, flour, and baking powder until well combined. Set aside.
  5. Return the pan to the stove and heat the remaining 2 teaspoons of oil over medium-low heat. Swirl to coat the pan, then pour in the JUST Egg mixture. Tilt the pan to spread it evenly.
  6. Wait for the edges to solidify, gently running a spatula around the edges as it cooks. This should take about 2-3 minutes.
  7. Once the bottom is set but the top is still soft, carefully flip the omelette using your spatula. Add half of the vegan cheese, then the spinach and mushroom mixture, followed by the remaining cheese on one side.
  8. Gently fold the omelette over and remove it from heat. Serve hot and enjoy!

Pro Tips for the Perfect Omelette

Here’s where I share my secret weapons for omelette success:

  • Preheat your pan: A hot pan ensures a nice sear and prevents sticking.
  • Use a non-stick skillet: This makes flipping and sliding your omelette a breeze!
  • Don’t overcrowd: Less is more! Too many fillings can lead to a messy flip.
  • Keep it low and slow: Cooking on medium-low heat allows for even cooking without burning.
  • Experiment with herbs: Fresh herbs like cilantro or chives can elevate your omelette flavor.
  • Practice flipping: It takes some finesse; don’t be discouraged if it doesn’t go perfectly the first time!
  • Let it rest: Give the omelette a minute to settle after cooking for the best texture.

Troubleshooting Common JUST Egg Omelette Issues

Even the best chefs encounter issues! Here’s how to troubleshoot common problems:

  • Omelette is too watery: Ensure you’re not adding too many wet ingredients. Drain any excess moisture from fillings.
  • It’s falling apart: Make sure your pan is hot enough before adding the JUST Egg mixture, and don’t overload with fillings.
  • Too dense: If you skipped the baking powder, your omelette may be denser. Consider adding it next time!
  • Burnt bottoms: Adjust your heat! Medium-low is the sweet spot for cooking without burning.

Creative Variations to Try

Shake things up with these exciting variations:

  • Mediterranean Delight: Add sun-dried tomatoes, olives, and feta-style vegan cheese for a taste of the Mediterranean.
  • Southwest Style: Mix in black beans, corn, and diced jalapeños for a spicy kick.
  • Garden Harvest: Load up on seasonal veggies like zucchini, bell peppers, and fresh herbs for a garden-fresh flavor.
  • Mushroom Lover’s Dream: Enhance with various mushrooms and a splash of soy sauce or nutritional yeast for umami depth.

Storage and Make-Ahead Instructions

Want to meal prep? Here’s how to store your omelette:

  • Refrigeration: Store leftover omelette in an airtight container for up to 3 days.
  • Freezing: You can freeze cooked omelettes; wrap them tightly in plastic wrap and foil for up to 1 month.
  • Reheating: Gently reheat in the microwave or on the stove over low heat until warmed through.

FAQs About JUST Egg Omelettes

Got questions? I’ve got answers! Here are some common inquiries:

  • Can I use JUST Egg for baking? Yes, it can replace eggs in many baking recipes!
  • Is JUST Egg gluten-free? Yes, but check labels to ensure you choose gluten-free brands for other ingredients.
  • What can I use instead of vegan cheese? Nutritional yeast or avocado can provide creaminess without cheese.
  • How do I make it spicier? Add diced jalapeños or a pinch of cayenne pepper to the JUST Egg mixture.
  • Can I make this ahead of time? Yes! Prepare the filling and JUST Egg mixture ahead, and cook fresh when ready to serve.
  • What’s the best way to flip an omelette? Use a spatula to gently lift one side and quickly flip it over.
  • How can I add more protein? Include cooked chickpeas or lentils as a filling for extra protein.
  • Is it suitable for kids? Absolutely! It’s a fun, nutritious meal that kids can help prepare.

Nutritional Tips and Dietary Adaptations

As you embark on your omelette journey, consider these nutritional insights:

  • Boost fiber: Add beans or whole grains as a side to increase fiber intake.
  • Healthy fats: Avocado is a great addition to enhance omega-3s.
  • Watch sodium levels: Use low-sodium soy sauce or cheese alternatives to keep things healthy.

Equipment Recommendations

Here’s what you’ll need for success:

  • Non-stick skillet: Essential for effortless flipping and easy cleanup.
  • Spatula: A silicone or wooden spatula protects your non-stick surface.
  • Mixing bowl: For whisking together the JUST Egg and other ingredients.
  • Measuring cups and spoons: Precision is key in cooking!

Serving Suggestions

Elevate your omelette experience with these serving ideas:

  • Fresh salsa: Top with homemade salsa for a zesty kick.
  • Avocado slices: A creamy addition that complements the flavors beautifully.
  • Herb garnish: Fresh cilantro or parsley adds a burst of color and flavor.

So there you have it — everything you need to master the JUST Egg omelette! Remember, cooking is an adventure, so don’t be afraid to experiment and find your unique flavor combinations. I can’t wait for you to try this recipe and see how it transforms your breakfast game. Dive in, embrace the spice, and make every meal a story worth telling!

JUST Egg Omelette

Prep Time 5 minutes
Cook Time 5 minutes
Total Time 10 minutes
Servings 2 servings
Calories 250
A delicious vegan omelette packed with vegetables and vegan cheese, perfect for a quick and nutritious breakfast or meal.

Ingredients

oil

  • 1 tablespoon avocado oil (or preferred oil)
  • 1 small shallot (thinly sliced)
  • 1 clove garlic (minced)
  • 5 ounces mushrooms (sliced (about 5 medium))
  • 1 cup spinach (tight-packed)
  • 1/4 cup vegan cheese shreds
  • Salt & Pepper to taste Salt & Pepper
  • 2 teaspoons avocado oil (or preferred oil)
  • 1/2 cup JUST Egg
  • 1 tablespoon all-purpose flour
  • 1/8 teaspoon baking powder

Instructions 

  • Heat 1 tablespoon of oil in a pan. Sauté shallots and garlic for 30 seconds.
  • Add mushrooms and cook until golden, then add spinach and cook until wilted. Transfer to a plate.
  • Whisk together JUST Egg, flour, and baking powder. Wipe the pan and heat 2 teaspoons of oil.
  • Pour egg mixture into pan, cook until edges set, then flip and add cheese, spinach, and mushrooms. Fold and serve.

Notes

Use a non-stick pan for best results and customize with your favorite vegetables or vegan cheese.
Calories: 250kcal
Cost: $10
Course: Breakfast
Cuisine: Vegan
Keyword: Vegan Omelette

Nutrition

Calories: 250kcal | Carbohydrates: 20g | Protein: 12g | Fat: 15g | Sodium: 300mg

Why You’ll Adore These Moist Sugar Free Lemon Cookies

Imagine a world where cookies can be both delicious and guilt-free. Enter the realm of Moist Sugar Free Lemon Cookies—your new sweet escape that tantalizes your taste buds without the sugar crash. These zesty delights are not just any cookies; they’re a celebration of flavors, a splash of sunshine in your day, and a nod to healthier living. With each bite, you’ll experience the perfect balance of tangy lemon and the comforting texture of almond flour, making them the ultimate treat for any occasion.

The Magic of Lemon and Almond Flour

When it comes to creating cookies that are both flavorful and healthy, the combination of lemon and almond flour is a match made in culinary heaven. Lemon brings an invigorating brightness that dances on your palate, while almond flour adds a nutty richness that elevates the cookie to gourmet status.

These cookies are perfect for those who want to enjoy a sweet treat without the guilt that comes from traditional sugar-laden options. Plus, they’re incredibly easy to make, which means you’ll have more time to enjoy them with friends or family.

Ingredients You’ll Need

Eye-level shot of sugar-free lemon cookies with a soft, warm light highlighting their details.

To whip up these delightful cookies, gather the following ingredients:

  • 2 cups almond flour
  • 1/2 cup coconut oil, melted
  • 1/4 cup erythritol or other sugar substitute
  • 1 large egg
  • 1 tablespoon lemon zest
  • 2 tablespoons lemon juice
  • 1 teaspoon baking powder
  • 1/2 teaspoon salt
  • 1 teaspoon vanilla extract

Each ingredient plays a vital role in crafting the perfect cookie. The almond flour is the star, providing a base that’s not only gluten-free but also packed with nutrients. Coconut oil gives these cookies a rich moistness, while erythritol allows you to sweeten without spiking your blood sugar. And let’s not forget the lemon zest and juice, which infuse these treats with a refreshing citrusy punch!

Step-by-Step Guide to Baking

Now that we have our ingredients ready, let’s dive into the baking process. Follow these simple steps to create your own batch of Moist Sugar Free Lemon Cookies:

  1. Preheat the oven to 350°F (175°C) and line a baking sheet with parchment paper to ensure easy removal of the cookies.
  2. Mix the Wet Ingredients: In a large bowl, combine the melted coconut oil and erythritol. Stir until well blended.
  3. Add the Egg and Flavors: Crack in the egg, then add the lemon zest, lemon juice, and vanilla extract. Mix until the mixture is smooth and creamy.
  4. Combine the Dry Ingredients: In a separate bowl, whisk together the almond flour, baking powder, and salt. This ensures that the leavening agent is evenly distributed, giving your cookies the perfect rise.
  5. Form the Dough: Gradually add the dry mixture to the wet ingredients, stirring until a dough forms. It should be soft and slightly sticky.
  6. Scoop and Shape the Cookies: Use a tablespoon to scoop portions of dough and place them on the prepared baking sheet, leaving about 2 inches of space between each cookie. Flatten each cookie slightly with the back of a spoon.
  7. Bake to Perfection: Place the baking sheet in the preheated oven and bake for 12-15 minutes, or until the edges are lightly golden. Keep a close eye on them; you want that perfect balance between soft and slightly crisp!
  8. Cool and Enjoy: Once baked, let the cookies cool on the baking sheet for a few minutes before transferring them to a wire rack to cool completely. This step is crucial for achieving the right texture!

Tips for Success

To ensure your lemon cookies turn out perfectly every time, keep these tips in mind:

  • Measure Accurately: When using almond flour, avoid packing it into the measuring cup. Instead, spoon it in lightly and level it off for the best results.
  • Use Fresh Ingredients: For maximum flavor, opt for fresh lemons instead of bottled juice. The zest adds essential oils that enhance the cookie’s aroma and taste.
  • Don’t Overmix: When combining wet and dry ingredients, mix just until combined. Overmixing can lead to tough cookies.
  • Watch the Bake Time: Every oven is different, so start checking your cookies a minute or two before the minimum bake time to prevent overbaking.

Variations to Explore

Feeling adventurous? Here are some creative variations you can try with this basic recipe:

  • Chocolate Drizzle: Melt some sugar-free dark chocolate and drizzle it over the cooled cookies for a decadent twist.
  • Nutty Crunch: Add chopped walnuts or pecans to the dough for an added crunch and flavor.
  • Coconut Delight: Stir in some unsweetened shredded coconut for a tropical vibe.
  • Berry Bliss: Incorporate fresh blueberries or raspberries into the dough for a fruity burst.

Storage and Freezing Tips

Wondering how to keep your cookies fresh? Here’s how:

  • Room Temperature: Store the cookies in an airtight container at room temperature for up to 5 days. Place parchment paper between layers to prevent sticking.
  • Refrigeration: If you want them to last longer, pop them in the fridge. They’ll keep well for about a week.
  • Freezing: These cookies freeze exceptionally well! Once completely cooled, place them in a freezer-safe container, separating layers with parchment paper. They’ll stay fresh for up to 3 months.
  • Thawing: When you’re ready to enjoy your frozen cookies, simply remove them from the freezer and allow them to thaw at room temperature for about 30 minutes.

FAQs

Here are some common questions about baking these sugar-free cookies:

  • Can I use other types of flour? While almond flour is essential for the texture and flavor, you could experiment with coconut flour, but you’ll need to adjust the liquid content since it’s much more absorbent.
  • What if I don’t have erythritol? You can use other sugar substitutes like monk fruit sweetener or stevia, but be sure to check the conversion rates as they can vary.
  • How do I know when the cookies are done? The edges should be lightly golden, and the centers will still look soft. They will firm up as they cool.

Troubleshooting Common Issues

If your cookies don’t turn out as expected, don’t fret! Here are some troubleshooting tips:

  • Cookies are too crumbly: This could be due to too much almond flour or not enough moisture. Ensure precise measurements and consider adding a splash more coconut oil or a bit of water to the dough.
  • Cookies spread too much: If your cookies spread excessively, try chilling the dough for about 30 minutes before baking.
  • Flavor is lacking: Make sure you’re using fresh lemon zest and juice, as stale ingredients can dull the flavor.

Conclusion

These Moist Sugar Free Lemon Cookies are more than just a treat; they’re a testament to the joys of cooking with creativity and passion. With their vibrant flavors and healthy ingredients, they invite everyone to indulge without the guilt. Whether you’re enjoying them with a cup of tea, sharing them at a gathering, or savoring them all by yourself, these cookies are bound to become a staple in your kitchen. So grab your ingredients, preheat that oven, and let’s bake something beautiful together. Life is too short for bland cookies—let’s make every bite count!

Moist Sugar Free Lemon Cookies

Prep Time 10 minutes
Cook Time 15 minutes
Total Time 25 minutes
Servings 12 cookies
Calories 150
Delight in these moist, tangy lemon cookies that are completely sugar-free and perfect for a healthy treat.

Ingredients

dry ingredients

  • 2 cups almond flour
  • 1/2 cup coconut oil, melted
  • 1/4 cup erythritol or other sugar substitute
  • 1 large egg
  • 1 tablespoon lemon zest
  • 2 tablespoons lemon juice
  • 1 teaspoon baking powder
  • 1/2 teaspoon salt
  • 1 teaspoon vanilla extract

Instructions 

  • Preheat oven to 350°F (175°C) and line a baking sheet with parchment paper.
  • Mix melted coconut oil and erythritol until combined.
  • Add egg, lemon zest, lemon juice, and vanilla; mix until smooth.
  • Combine dry ingredients and gradually add to wet mixture, forming a dough.
  • Scoop dough onto baking sheet, flatten slightly, and bake for 12-15 minutes.

Notes

Store in an airtight container for best freshness.
Calories: 150kcal
Cost: $10
Course: Dessert
Keyword: Cookies, lemon, sugar free

Nutrition

Calories: 150kcal | Carbohydrates: 8g | Protein: 4g | Fat: 12g | Sodium: 50mg

Loved this recipe? Save it to your favorite Pinterest board so you can easily find it later! It’s the perfect way to keep all your sweet ideas in one place. ✨

Dessert scene featuring lemon cookies with a cozy, blurred background, emphasizing their freshness.

Why This Dish is a Game Changer

When it comes to healthy cooking, many people think they have to sacrifice flavor for nutrition. But let me tell you, that is absolutely not the case! My Healthy Low Calorie Creamy Chicken is a vibrant testament to how you can indulge in rich, creamy flavors without the guilt weighing you down. With its silky sauce and tender chicken, this dish is here to flip the script on your dinner table and reignite your love for cooking. Trust me, once you taste it, you’ll be asking for seconds!

Overview of Ingredients

Before we dive into the cooking process, let’s talk about the star players that make this recipe sing:

  • 2 boneless, skinless chicken breasts: Lean protein is the foundation of this dish, providing a high-protein base that supports your fitness goals.
  • 1 cup low-sodium chicken broth: This savory liquid brings moisture and depth of flavor without adding unnecessary salt.
  • 1/2 cup plain Greek yogurt: The secret weapon for that creamy texture, while keeping the calories in check. Plus, it’s packed with protein!
  • 1 tablespoon olive oil: This healthy fat not only enhances flavor but also helps in cooking the chicken to perfection.
  • 2 cloves garlic, minced: There’s nothing like the aroma of garlic sautéing in the pan to get your senses tingling!
  • 1 teaspoon onion powder: A quick way to add a layer of savory flavor without the fuss of chopping onions.
  • 1 teaspoon paprika: This spice brings warmth and a hint of smokiness to the dish.
  • Salt and pepper to taste: Essential for balancing flavors and enhancing the overall taste.
  • 1 cup spinach (fresh or frozen): A nutrient-dense addition that brightens the dish and adds a pop of color.
  • 1 tablespoon fresh parsley (optional, for garnish): A touch of freshness to finish off your masterpiece!

The Cooking Process

Appetizing low-calorie creamy chicken meal with herbs on top.

Now that we’ve gathered our ingredients, let’s get down to business! Cooking this dish is just as rewarding as eating it. Follow these steps for a creamy delight:

  1. In a large skillet, heat the olive oil over medium heat. This will create a perfect cooking surface for our chicken.
  2. While the oil heats, season the chicken breasts generously with salt, pepper, onion powder, and paprika. This step is crucial; it’s where the flavor begins to develop.
  3. Once the oil is shimmering, add the seasoned chicken to the skillet. Cook for about 6-7 minutes on each side, or until the chicken is no longer pink in the center. We want it golden and juicy!
  4. Remove the chicken from the skillet and set aside. This allows the juices to redistribute while we whip up the sauce.
  5. In the same skillet, add the minced garlic and sauté for about 1 minute, just until fragrant. Be careful not to burn it, as burnt garlic can turn bitter.
  6. Pour in the chicken broth, bringing it to a simmer. This will deglaze the pan, lifting all those delicious bits stuck to the bottom!
  7. Stir in the Greek yogurt until it’s well combined and creamy. You’ll see the sauce transform into a luscious coating.
  8. Add the spinach and cook until it’s wilted, which should only take a couple of minutes. This adds a beautiful color and health boost.
  9. Return the chicken to the skillet, coating it in that heavenly sauce. Let it simmer for a few minutes to meld the flavors together.
  10. For the grand finale, garnish with fresh parsley, if desired, and serve hot. You’ve just created a culinary masterpiece!

Tips for Success

To elevate your cooking game with this recipe, consider these handy tips:

  • Always taste as you go! Adjust salt and pepper according to your preference.
  • If you like a little kick, add some red pepper flakes to the sauce.
  • For a richer flavor, consider using homemade chicken broth if you have it on hand.
  • Let the chicken rest for a few minutes after cooking to maintain its juiciness.

Variations to Spice Things Up

What I love about this recipe is its versatility! Here are a few variations to keep it fresh:

  • Add a splash of lemon juice: Brightens up the flavors and adds a zing!
  • Incorporate other veggies: Bell peppers, mushrooms, or zucchini can be sautéed with the garlic for added nutrition.
  • Switch the protein: This recipe works beautifully with turkey or even plant-based chicken alternatives.

Substitutions for Every Pantry

Running low on an ingredient? No problem! Here are some substitutions:

  • Greek yogurt: You can use low-fat sour cream or even silken tofu for a dairy-free option.
  • Chicken broth: Vegetable broth works just as well if you’re looking for a lighter taste.
  • Fresh spinach: Kale or Swiss chard can be used in place of spinach for a heartier green.

Essential Equipment

Before you start cooking, make sure you have these essentials:

  • A large skillet or frying pan for sautéing and simmering.
  • A good quality knife for easy prep.
  • A cutting board for chopping ingredients.

Storage and Freezing

Got leftovers? Here’s how to store them:

  • Store in an airtight container in the fridge for up to 3 days.
  • For longer storage, freeze in a freezer-safe container for up to 2 months. Just make sure to thaw it overnight in the fridge before reheating!

FAQs

Let’s tackle some common questions you might have:

  • Can I make this dish dairy-free? Absolutely! Substitute Greek yogurt with coconut yogurt or silken tofu.
  • What can I serve with this chicken? It pairs perfectly with brown rice, quinoa, or a fresh green salad to balance the richness.
  • How do I know when the chicken is cooked through? Use a meat thermometer; the internal temperature should reach 165°F (75°C) to be safe.

Troubleshooting Tips

If you encounter any hiccups along the way, don’t fret! Here are some solutions:

  • Too thick sauce? Add a splash more chicken broth or water to thin it out.
  • Not enough flavor? A pinch of salt or a dash of your favorite hot sauce can elevate the taste.
  • Chicken is dry? Cook it on lower heat and ensure it’s not overcooked next time. You can also soak it in a brine before cooking.

Wrapping Up Your Culinary Adventure

There you have it! My Healthy Low Calorie Creamy Chicken recipe is not just a dish; it’s a celebration of flavors, health, and the joy of cooking. Whether you’re on a health kick or simply want to treat yourself to something delicious, this dish fits the bill. So grab your skillet, channel your inner chef, and let this creamy creation spark joy in your kitchen. Cooking is an adventure waiting to happen, and I’m thrilled to share this journey with you! Bon appétit!

Healthy Low Calorie Creamy Chicken

Prep Time 10 minutes
Cook Time 20 minutes
Total Time 30 minutes
Servings 4 servings
Calories 350
A delicious and healthy creamy chicken recipe that's quick to prepare and perfect for a nutritious meal.

Ingredients

Protein

  • 2 pieces boneless, skinless chicken breasts
  • 1 cup low-sodium chicken broth
  • 0.5 cup plain greek yogurt
  • 1 tablespoon olive oil
  • 2 cloves garlic, minced
  • 1 teaspoon onion powder
  • 1 teaspoon paprika
  • to taste salt and pepper
  • 1 cup spinach (fresh or frozen)
  • 1 tablespoon fresh parsley (optional, for garnish)

Instructions 

  • Cook chicken in olive oil until golden, then set aside.
  • Sauté garlic in the same skillet, add broth, and simmer.
  • Stir in Greek yogurt and add spinach; cook until wilted.
  • Return chicken to skillet, coat with sauce, garnish with parsley, and serve.

Notes

Use fresh spinach for best flavor and nutrition.
Calories: 350kcal
Cost: $15
Course: Main Course
Cuisine: Healthy
Keyword: chicken

Nutrition

Calories: 350kcal | Carbohydrates: 10g | Protein: 45g | Fat: 12g | Sodium: 600mg

Loved this recipe? Save it to your favorite Pinterest board so you can easily find it later! It’s the perfect way to keep all your sweet ideas in one place. ✨

Delicious chicken breast served in a creamy sauce, garnished with parsley.

Welcome to the Ultimate Comfort Food Experience

Ah, the magic of a warm, bubbling casserole, where every bite tells a story of comfort and flavor. If you’re seeking a dish that combines the heartiness of rotisserie chicken with the fresh crunch of zucchini, you’ve landed in the right place. This Rotisserie Chicken & Zucchini Casserole is not just a meal; it’s an adventure waiting to unfold in your kitchen. With just a handful of ingredients, you can create a masterpiece that’ll have your family asking for seconds. Let’s dive into the details and embrace the thrill of cooking!

Why You’ll Love This Recipe

  • Effortless Preparation: This casserole comes together quickly, making it perfect for busy weeknights. No need to spend hours in the kitchen; just grab your ingredients and go!
  • Flavor Explosion: The combination of tender chicken, fresh zucchini, and a creamy sauce creates a symphony of flavors that will ignite your taste buds.
  • Versatile Ingredients: With a base of rotisserie chicken, you can easily swap in seasonal vegetables or your favorite spices, making this recipe adaptable throughout the year.
  • Family-Friendly: Even the pickiest eaters will find it hard to resist this comforting dish. It’s a surefire hit for dinner!
  • Make-Ahead Potential: Prep this casserole in advance and simply pop it in the oven when you’re ready for a warm, delicious meal.

Ingredients Breakdown

Here’s what you’ll need for this delightful dish:

  • 1 small rotisserie chicken (pulled & shredded): The star of the show, this chicken adds rich flavor and saves you time.
  • 3 medium-sized zucchinis (diced): Fresh and tender, they bring a healthy crunch. Feel free to substitute with yellow squash!
  • 1 (6oz) box Stove Top chicken stuffing mix: This adds a delightful texture and savory depth to the casserole.
  • 1/2 cup butter (melted): A must-have for richness and flavor; it binds everything beautifully.
  • 1 (10oz) can cream of chicken soup: This creamy component is what makes the casserole feel indulgent.
  • 1/2 cup sour cream: It adds a tangy creaminess, enhancing the overall flavor profile.

Step-by-Step Instructions

Juicy rotisserie chicken and diced zucchini baked in a creamy casserole dish.

Ready to get cooking? Here’s how to assemble your casserole:

  • Step 1: Preheat your oven to 350° F and grease a 9×13 baking dish.
  • Step 2: In a large bowl, melt the butter and then mix it with the box of DRY stuffing mix; set aside HALF of the mixture for topping the casserole later.
  • Step 3: Add the pulled chicken, diced zucchini, cream of chicken soup, and sour cream to the stuffing and mix well.
  • Step 4: Spread the mixture into your baking dish and then evenly sprinkle the top with your reserved stuffing mixture.
  • Step 5: Bake, uncovered, in the middle rack for 35-45 minutes or until it’s warmed through and the top is golden brown.

Pro Tips for Success

  • Don’t rush the baking: Allowing enough time for the casserole to bake will ensure that all the flavors meld beautifully.
  • Customize your veggies: Feel free to add in bell peppers, carrots, or even spinach for extra nutrition and flavor.
  • Experiment with spices: A pinch of cayenne or smoked paprika can elevate the flavor, adding a delightful kick!
  • Make it cheesy: For a gooey touch, mix in some shredded cheese before baking.
  • Check for doneness: The casserole should be bubbly and golden brown on top — that’s how you know it’s ready!
  • Serve hot: Casseroles are best enjoyed right out of the oven while they’re still warm and inviting.
  • Leftovers? No problem!: This dish keeps well in the fridge, making lunch prep a breeze!
  • Garnish before serving: A sprinkle of fresh herbs like parsley or chives adds a burst of freshness and color.

Common Mistakes and Troubleshooting

Even the best cooks make mistakes! Here are some common pitfalls to avoid:

  • Overcooking the zucchini: They should be tender but not mushy. Add them later in the mixing process if you prefer a crunchier texture.
  • Substituting the soup: Ensure you use a creamy soup for the best flavor; a broth may not yield the same results.
  • Not enough seasoning: Taste the mixture before baking! Adjust the salt and pepper according to your preference.

Delicious Variations

Want to mix things up? Here are some tasty variations to try:

  • Mexican Twist: Add black beans, corn, and taco seasoning for a fiesta-inspired casserole.
  • Italian Flair: Incorporate marinara sauce, mozzarella, and Italian herbs for a comforting Italian-style dish.
  • Cheesy Broccoli: Swap some zucchini for steamed broccoli and stir in a cup of cheddar cheese.
  • Low-Carb Option: Use cauliflower rice instead of stuffing mix for a lighter, keto-friendly version.

Storage and Make-Ahead Instructions

This casserole is perfect for meal prep! Here’s how to make it ahead of time:

  • Make-Ahead: Assemble the casserole up to a day in advance, cover, and refrigerate. Just pop it in the oven when you’re ready to bake!
  • Freezing: You can freeze the unbaked casserole for up to 3 months. Thaw overnight in the fridge before baking.
  • Storing leftovers: Keep leftovers in an airtight container in the fridge for up to 4 days. Reheat in the oven for best results.

Frequently Asked Questions

  • Can I use fresh chicken instead of rotisserie? Absolutely! Just cook the chicken beforehand and shred it.
  • What can I substitute for the cream of chicken soup? Use cream of mushroom soup or a homemade white sauce for a different flavor.
  • How do I make this vegetarian? Substitute the chicken with chickpeas and use vegetable broth instead of soup.
  • Can I make this gluten-free? Use gluten-free stuffing mix and a gluten-free cream soup.
  • What other vegetables can I add? Carrots, spinach, or bell peppers work great for added nutrition.
  • Is this dish kid-friendly? Definitely! The flavors are mild and appealing to children.
  • How do I know when the casserole is done? It should be bubbly and the top should be golden brown.
  • Can I prepare this in a slow cooker? Yes! Layer the ingredients in your slow cooker and set it on low for 4-6 hours.

Nutritional Tips and Dietary Adaptations

While enjoying this comfort food, consider these tips:

  • Balance your plate: Serve with a side salad to add freshness and fiber.
  • Mindful servings: Keep portions moderate if you’re watching your calorie intake.
  • Boost the nutrients: Add more veggies or use whole-grain stuffing for extra fiber.

Equipment Recommendations

To ensure your cooking experience is seamless, here are some tools I recommend:

  • 9×13 Baking Dish: Perfect for casseroles and easy to clean!
  • Mixing Bowls: A set of various sizes will help for mixing ingredients efficiently.
  • Sharp Knife: Essential for dicing vegetables and shredding chicken.

Serving Suggestions

Make your meal complete with these side dishes:

  • Crusty Bread: A slice of warm, crusty bread pairs beautifully with the creamy casserole.
  • Simple Green Salad: A refreshing salad balances the richness of the casserole.
  • Steamed Vegetables: Lightly steamed broccoli or green beans add color and nutrients.

Conclusion

This Rotisserie Chicken & Zucchini Casserole is more than just a dish; it’s a celebration of flavors and comfort that’ll bring your family together. With its easy preparation, adaptability, and outright deliciousness, it’s sure to become a staple in your kitchen. So grab your ingredients and get ready to create a meal that warms hearts and fills bellies. Remember, cooking is about exploration, so don’t hesitate to make this recipe your own. Happy cooking!

Rotisserie Chicken & Zucchini Casserole

Prep Time 10 minutes
Cook Time 40 minutes
Total Time 50 minutes
Servings 6 servings
Calories 650
A delicious and easy casserole combining shredded chicken, zucchini, and savory stuffing for a comforting meal.

Ingredients

Protein

  • 1 small rotisserie chicken (pulled & shredded)

Vegetables

  • 3 medium zucchinis (diced)

Canned Goods

  • 1 6oz Stove Top chicken stuffing mix
  • 1/2 cup butter (melted)
  • 1 10oz can cream chicken soup
  • 1/2 cup sour cream

Instructions 

  • Preheat oven to 350°F (175°C) and grease a 9x13 dish.
  • Melt butter, mix with dry stuffing, and set aside half for topping.
  • Add chicken, zucchini, soup, and sour cream to stuffing; mix well.
  • Spread mixture in dish, sprinkle with reserved stuffing, and bake 35-45 mins.

Notes

For a crispier topping, broil for the last 2 minutes.
Calories: 650kcal
Cost: $15
Course: Main Course
Cuisine: American
Keyword: casserole, chicken, zucchini

Nutrition

Calories: 650kcal | Carbohydrates: 50g | Protein: 45g | Fat: 35g | Sodium: 900mg