Author

Avery Collins

Browsing

Why You’ll Love This Recipe

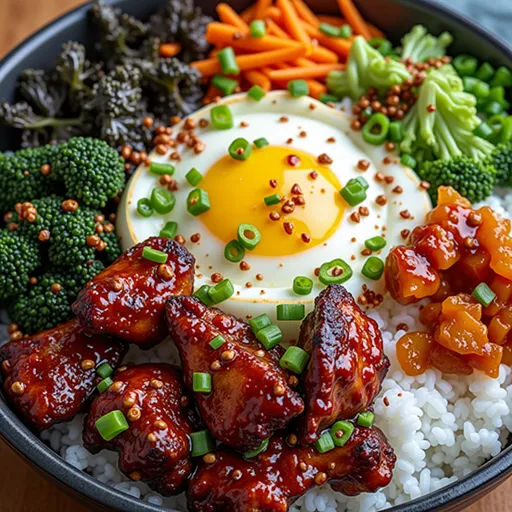
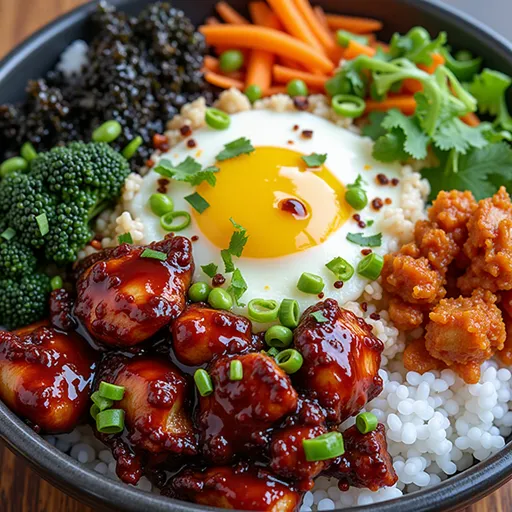
If there’s one dish that can transport you straight to the vibrant streets of Seoul, it’s Korean BBQ Chicken Rice Bowls. This dish is more than just a meal; it’s an experience, a fusion of flavors that brings together the sweet, savory, and a touch of spice, all wrapped up in a warm, comforting bowl. What’s not to love about tender chicken thighs marinated in a rich sauce, perfectly paired with fluffy rice and colorful vegetables? Whether you’re hosting a dinner party or simply need a quick and healthy meal for one, this recipe is sure to impress. Plus, it’s versatile enough to customize according to your taste. Let’s dive into the adventure of crafting these bowls that promise to awaken your taste buds and warm your heart.

The Flavor Explosion: Ingredients Breakdown

To create a dish that resonates with the soul and satisfies your cravings, the right ingredients are key. Here’s what you’ll need to craft your Korean BBQ Chicken Rice Bowls:

  • 1 pound chicken thighs (boneless and skinless): Tender and flavorful, chicken thighs are perfect for marinating and grilling.
  • 1/4 cup soy sauce: This salty umami powerhouse is the backbone of our marinade.
  • 2 tablespoons brown sugar: Adds a touch of sweetness to balance the saltiness of the soy sauce.
  • 2 tablespoons sesame oil: Infuses a nutty flavor that elevates the dish.
  • 2 cloves garlic, minced: Brings an aromatic kick that enhances the overall taste.
  • 1 teaspoon ginger, grated: Provides a warm, zesty note that complements the other flavors.
  • 1 tablespoon gochujang (Korean chili paste): This brings the heat and depth, making each bite a flavorful adventure.
  • 2 cups cooked rice: The perfect base to soak up all those delicious flavors.
  • 1 cup broccoli florets: Adds a vibrant color and crunch.
  • 1 carrot, julienned: For a touch of sweetness and texture.
  • 1 green onion, chopped: Freshness that brightens every bite.
  • Sesame seeds for garnish: A finishing touch that adds visual appeal and a delightful crunch.

One-Pot Flow: Cooking Steps

Bowl of Korean BBQ chicken rice with broccoli and sesame seeds, captured in warm natural light.

Let’s get cooking! Here’s a step-by-step guide to bring your Korean BBQ Chicken Rice Bowls to life:

  1. Prepare the Marinade: In a large bowl, combine the soy sauce, brown sugar, sesame oil, minced garlic, grated ginger, and gochujang. Whisk until the mixture is smooth and well blended.
  2. Marinate the Chicken: Add the chicken thighs to the marinade, ensuring they’re fully coated. Cover the bowl with plastic wrap and let it marinate in the fridge for at least 30 minutes. The longer, the better — overnight is even better, allowing maximum flavor penetration!
  3. Steam the Veggies: While your chicken is soaking up those delicious flavors, steam the broccoli and julienned carrots until they are tender yet still vibrant. This should take about 5-7 minutes.
  4. Cook the Chicken: Heat a grill pan or skillet over medium-high heat. Remove the chicken from the marinade (but don’t discard it — we’ll come back to that!). Cook the chicken for about 6-7 minutes on each side, or until fully cooked and browned. The marinade will create a lovely glaze that caramelizes on the chicken.
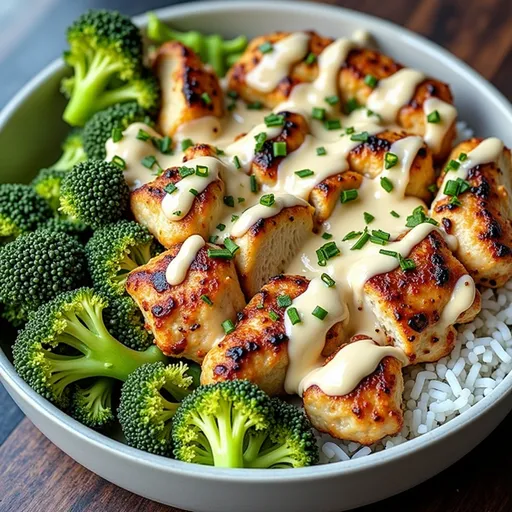
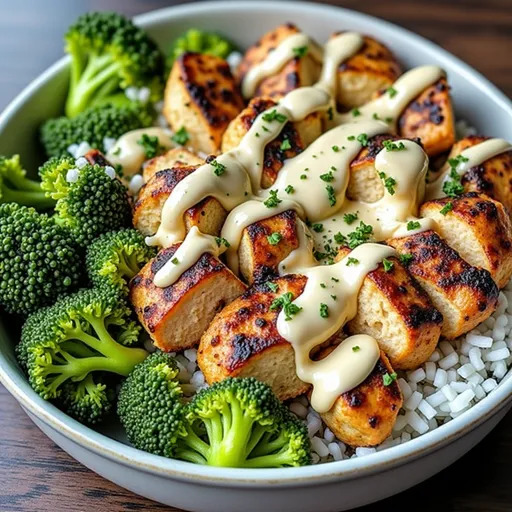
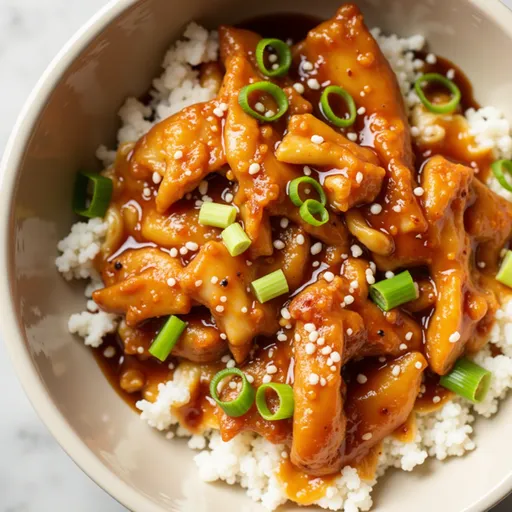
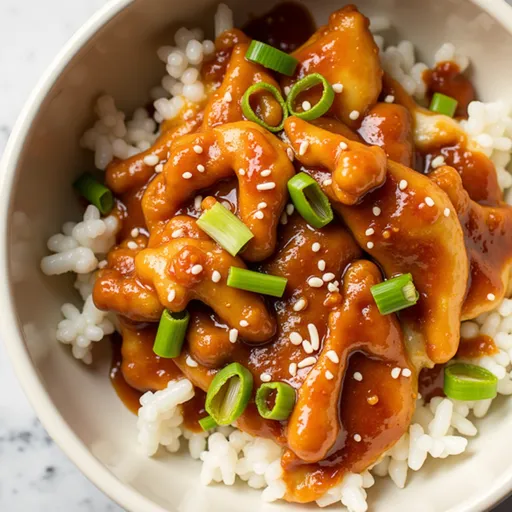
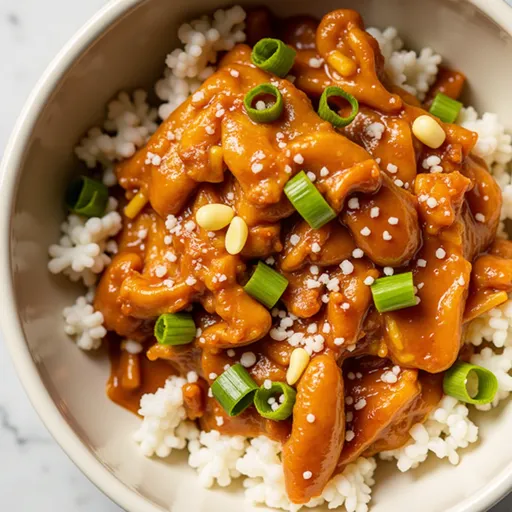
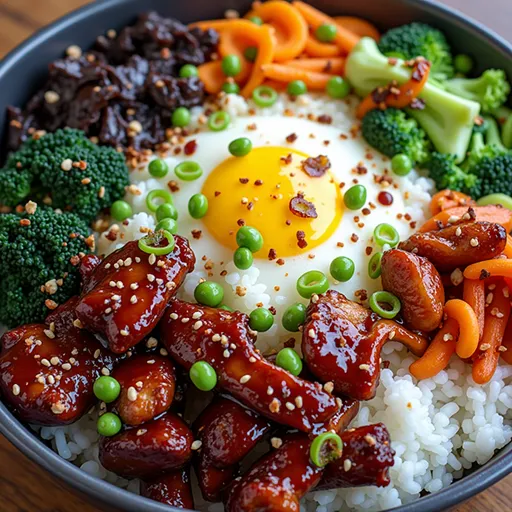
  5. Slice and Assemble: Once cooked, remove the chicken from the heat and allow it to rest for a few minutes before slicing it into strips. To assemble the bowls, place a scoop of cooked rice at the bottom of each bowl. Top with the sliced chicken, steamed broccoli, and carrots.
  6. Garnish and Serve: Finish with a sprinkle of chopped green onions and sesame seeds for that extra burst of flavor. Serve immediately and watch your friends and family dive into this colorful, delicious meal!

Sneak Ahead Prep Tips

Want to make your cooking process smooth and efficient? Here are some tips:

  • Prep your ingredients ahead of time. Chop your vegetables and marinate the chicken the night before to save time during the week.
  • If you have leftover rice, it’s a perfect opportunity to use it here. Cold rice works great for this dish!
  • Double the marinade and save half for a second batch of chicken later in the week. You’ll thank yourself for the quick meal prep!

First Ladle Moment: The Experience

Imagine the moment you scoop that first ladle of rice, topped with succulent chicken and vibrant veggies. It’s a sight to behold! The colors pop, and the aroma wafts through the kitchen, making your mouth water. The first bite is where the magic happens. You’ll experience the juicy chicken, the sweet and spicy sauce, and the crunch of fresh vegetables all in one go. It’s a flavor symphony that dances on your palate, and you’ll find yourself closing your eyes, savoring the moment. This is what cooking is all about: creating memories with every bite.

Table-Side Garnish Sparks

To elevate your Korean BBQ Chicken Rice Bowls even further, consider setting up a garnish bar at the table. Here are some fun ideas:

  • Sliced fresh chilies: For those who love a little extra heat, this is a must!
  • Gochujang: Let everyone add their own kick of spiciness.
  • Lime wedges: A squeeze of fresh lime juice brightens up the flavors.
  • Extra sesame seeds: A small dish of these adds a lovely crunch.
  • Quick pickles: A side of quick pickled cucumbers can add a delightful tartness that complements the dish beautifully.

Leftover Cuddle Plan

Leftovers? Yes, please! This dish is perfect for lunch the next day. Here’s how to enjoy it:

  • Reheat in a pan with a splash of water to loosen the sauce, then top with fresh green onions.
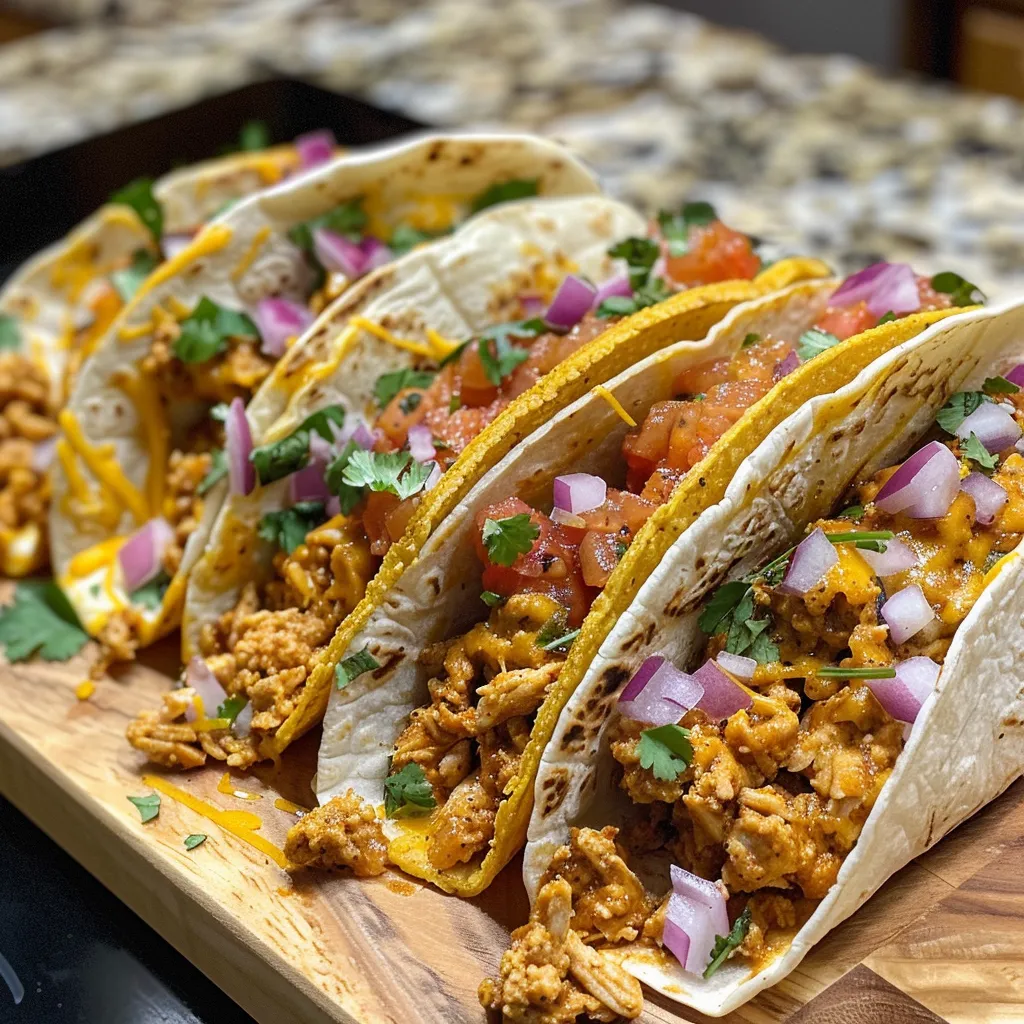
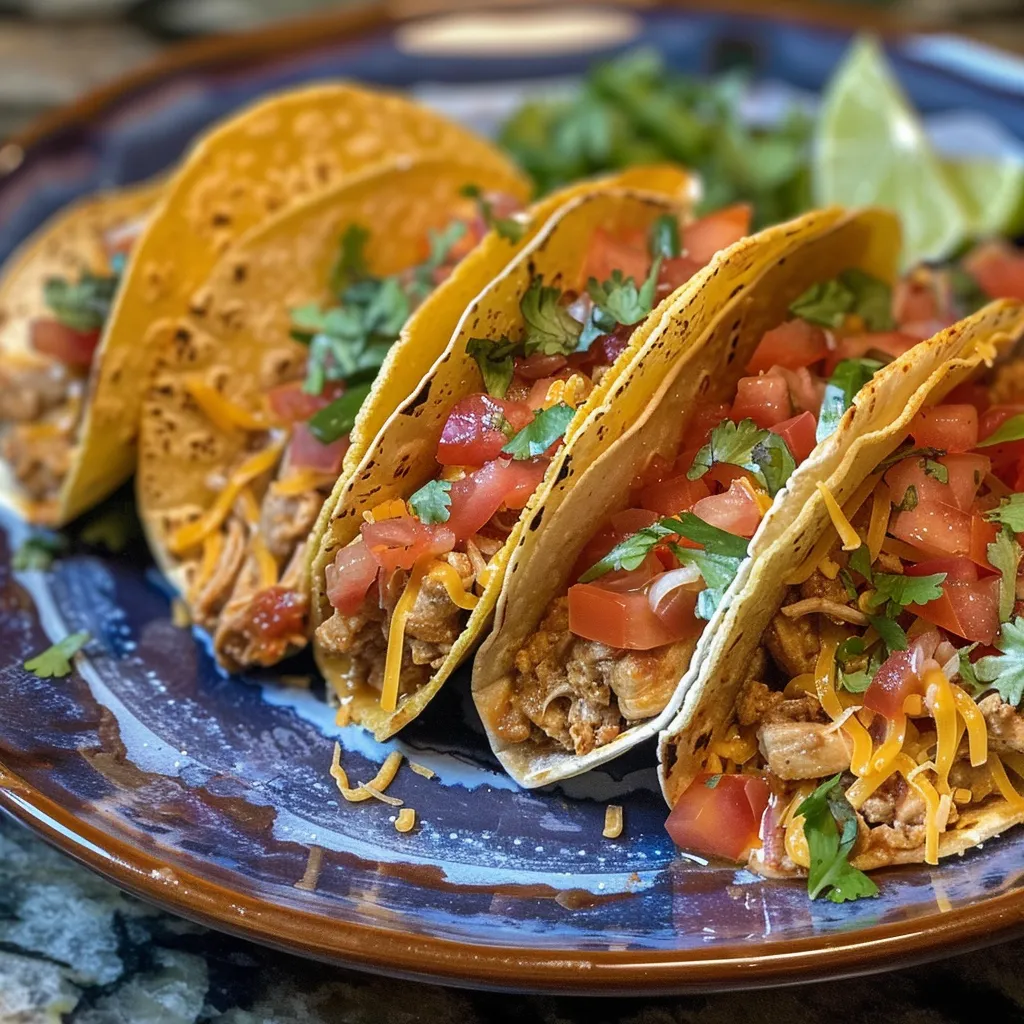
  • Wrap it up in a tortilla with some crisp lettuce for a quick grilled chicken wrap. It’s like a new meal in minutes!
  • Mix the chicken and rice cold with a squeeze of lime and a dash of sesame oil for a refreshing salad-style bowl.
  • These bowls freeze well too! Pack them in meal prep containers, and you’ll have a quick savory lunch ready to go. Just thaw overnight and reheat when needed.

Warm Wrap Plus Five FAQs

Let’s wrap this up with some frequently asked questions to ensure your cooking adventure is a success:

1. Can I use chicken breast instead of thighs?

Absolutely! Just be mindful that chicken breasts are leaner and can dry out more quickly. You might want to add a bit more marinade or cook them for a shorter time.

2. Can I use brown rice instead of white rice?

Yes! Brown rice adds a nutty flavor and extra fiber, though it takes longer to cook. So, plan ahead or use leftover brown rice for faster reheating.

3. Is this recipe gluten-free?

Yes, but ensure you use gluten-free soy sauce or tamari and check your sesame oil label.

4. Can I customize the veggies?

Definitely! Any fresh or roasted veggies work well here. Try bell peppers, snap peas, or even zucchini!

5. What if I want to reduce the spice level?

This recipe can be as spicy as you like. Feel free to adjust the gochujang or omit it altogether for a milder flavor.

Conclusion: Your Culinary Adventure Awaits

Korean BBQ Chicken Rice Bowls are not just a meal; they are an invitation to explore bold flavors and enjoy the art of cooking. With each ingredient thoughtfully chosen and each step carefully executed, you create something truly special. So, what are you waiting for? Grab your skillet, embrace the heat, and embark on this culinary adventure. Your taste buds will thank you, and the memories you create around the table will last a lifetime. Happy cooking!

Korean BBQ Chicken Rice Bowls

Prep Time 10 minutes
Cook Time 20 minutes
Total Time 30 minutes
Servings 4 servings
Calories 550
Enjoy a flavorful and easy-to-make Korean-inspired chicken rice bowl with tender marinated chicken and fresh vegetables.

Ingredients

Protein

  • 1 pound chicken thighs, boneless and skinless
  • 1/4 cup soy sauce
  • 2 tablespoons brown sugar
  • 2 tablespoons sesame oil
  • 2 cloves garlic, minced
  • 1 teaspoon ginger, grated
  • 1 tablespoon gochujang (Korean chili paste)

Carbohydrates

  • 2 cups cooked rice

Vegetables

  • 1 cup broccoli florets
  • 1 carrot julienned
  • 1 green onion chopped

Garnish

  • to taste sesame seeds (for garnish)

Instructions 

  • Mix soy sauce, brown sugar, sesame oil, garlic, ginger, and gochujang to make marinade.
  • Add chicken to marinade, refrigerate for 30 minutes.
  • Steam broccoli and carrots until tender.
  • Cook chicken on a hot skillet for 6-7 minutes per side, then slice.
  • Assemble bowls with rice, chicken, vegetables, green onions, and sesame seeds.

Notes

Marinate the chicken for better flavor and serve immediately.
Calories: 550kcal
Cost: $15
Course: Main Course
Cuisine: Korean
Keyword: chicken, Gochujang, Rice

Nutrition

Calories: 550kcal | Carbohydrates: 70g | Protein: 40g | Fat: 15g | Sodium: 1200mg

Loved this recipe? Save it to your favorite Pinterest board so you can easily find it later! It’s the perfect way to keep all your sweet ideas in one place. ✨

Delicious Korean BBQ chicken rice bowl featuring colorful vegetables and a side of soft shadows.

Unlocking Flavor: Your Guide to Healthy Oven Baked Chicken Tacos

Dive into the delicious adventure of making Healthy Oven Baked Chicken Tacos! This recipe is not just a meal; it’s a vibrant journey filled with spices, wholesome ingredients, and a touch of creativity. Join me as we explore how to craft these tacos that celebrate health without sacrificing flavor. In this guide, you’ll find everything you need to make these tacos irresistibly tasty and packed with nutrition.

Why You’ll Love This Recipe

  • Healthy Twist: These tacos are baked, not fried, making them a guilt-free option that doesn’t skimp on flavor.
  • Flavor Explosion: With vibrant spices like paprika and cumin, each bite delivers a punch of flavor that will leave you craving more.
  • Quick and Easy: This recipe is perfect for busy weeknights, allowing you to whip up a delicious meal in under 30 minutes.
  • Customizable: Use any protein or toppings you like, making it easy to adapt to your family’s preferences or dietary needs.
  • Meal Prep Friendly: Make a batch ahead of time and store them for a quick lunch or dinner option throughout the week.

Ingredient Breakdown

Let’s get into the nitty-gritty of what makes these tacos shine. Here’s what you’ll need:

  • 2 Tablespoons Avocado Oil: A great source of healthy fats; feel free to substitute with olive oil if you prefer.
  • 1 Onion (diced): Adds sweetness and depth; red or yellow onions work beautifully.
  • 3 Cloves Garlic (mashed): Fresh garlic enhances flavor; don’t skimp on this!
  • 1 Pound Ground Chicken: An excellent lean protein choice; you can also use turkey or beef.
  • 2 Teaspoons Paprika: For a subtle smokiness that elevates the dish.
  • 2 Teaspoons Cumin: Provides a warm, earthy flavor that’s essential in Mexican cuisine.
  • 1 Teaspoon Sea Salt: Enhances all flavors; adjust according to taste.
  • 1 Teaspoon Black Pepper: Adds a bit of heat; freshly ground is the best!
  • 1/2 Teaspoon Chipotle Pepper: For that smoky, spicy kick; adjust according to your heat tolerance.
  • 1/2 Cup Mild Red Enchilada Sauce: Ties all the flavors together and keeps the chicken moist.
  • 12 Thin Corn Tortillas: The perfect vessel for your filling; you can also use whole wheat or flour tortillas.
  • 1 1/2 Cups Mexican-Blend Shredded Cheese: A melty topping that pairs perfectly with the spices.

Pro Tips for Perfect Tacos

Side view of juicy chicken tacos in thin corn tortillas, garnished and ready to serve.
  • Don’t Overfill: Avoid tearing the tortillas by filling them just enough to hold the deliciousness without spilling.
  • Warm Your Tortillas: Warm tortillas before filling to enhance their flavor and flexibility.
  • Layer Your Ingredients: Start with the chicken, add cheese, then your favorite toppings for balanced flavor in every bite.
  • Experiment with Spices: Feel free to add cayenne, oregano, or even lime zest for a personal touch.
  • Use a Baking Sheet: Line it with parchment paper for easy cleanup and to prevent sticking.
  • Don’t Skip the Sauce: A good dipping sauce can elevate your tacos; consider a zesty lime crema or avocado salsa.
  • Cook Until Golden: Bake until the cheese is bubbly and the edges of the tortillas are golden for the best texture.
  • Let It Rest: Allow the tacos to sit for a couple of minutes before serving; this helps the flavors meld.
  • Keep it Fresh: Add fresh toppings like cilantro, avocado, or lime juice just before serving for added freshness.
  • Have Fun! Cooking is an adventure, so don’t be afraid to try new flavors and ingredients!

Common Mistakes and Troubleshooting

Even the best of us can run into hiccups in the kitchen. Here are a few common mistakes and how to fix them:

  • Too Dry Filling: If your chicken mixture turns out dry, add a splash more enchilada sauce or some chicken broth.
  • Burned Tortillas: Keep an eye on them in the oven; if they start to brown too quickly, cover with foil.
  • Flavorless Filling: Don’t forget to season your chicken well! Taste and adjust as necessary before filling the tortillas.
  • Cheese Not Melting: Ensure your oven is preheated; a hot oven is crucial for perfect melting.

Variations to Spice Things Up

Ready to shake things up? Here are some exciting variations to try:

  • Vegetarian Twist: Substitute ground chicken with black beans or lentils for a hearty vegetarian option.
  • Spicy Fiesta: Add diced jalapeños to the filling for an extra kick of heat.
  • Cheesy Delight: Mix in cream cheese with the shredded cheese for an ultra-creamy taco experience.
  • Sweet & Spicy: Add diced mango or pineapple to the filling for a sweet contrast to the savory spices.

Storage and Make-Ahead Instructions

Want to save some time? Here’s how to store and prepare these tacos ahead of time:

  • Make Ahead: Prepare the filling and store in an airtight container in the fridge for up to 3 days.
  • Freezing: Freeze the taco filling for up to 3 months. Thaw in the fridge before use.
  • Storing Leftovers: Keep any leftover tacos in an airtight container for up to 2 days; reheat in the oven to restore crispiness.

Frequently Asked Questions

  • Can I use a different protein? Absolutely! Ground turkey or beef can be substituted for the ground chicken.
  • How do I make these tacos gluten-free? Simply use gluten-free tortillas and ensure your toppings are also gluten-free.
  • Can I bake these tacos ahead of time? Yes! Bake them and keep them warm until serving, or reheat in the oven.
  • What toppings do you recommend? Fresh cilantro, diced avocado, or a drizzle of lime crema elevate these tacos beautifully.
  • What’s the best way to reheat leftover tacos? Reheat in the oven at 350°F for 10-15 minutes until heated through and crispy.
  • Can I use a slow cooker for the filling? Yes! Cook your chicken with spices and sauce in the slow cooker on low for 4 hours for maximum flavor.
  • Are these tacos kid-friendly? Definitely! They’re customizable, so let your kids choose their favorite toppings.
  • How spicy are these tacos? You control the spice! Adjust the chipotle pepper and toppings to your heat preference.

Nutrition Tips and Dietary Adaptations

Eating healthy doesn’t mean sacrificing taste. Here are some nutrition tips to make these tacos even better:

  • Opt for Whole Grains: Use whole wheat or corn tortillas for added fiber and nutrients.
  • Load Up on Veggies: Add diced bell peppers or spinach to the filling for extra vitamins.
  • Choose Low-Fat Cheese: Opt for reduced-fat cheese to cut back on calories without losing flavor.

Equipment Recommendations

Here’s what you’ll need to create these delicious tacos:

  • Baking Sheet: Essential for baking the tacos evenly and keeping cleanup easy.
  • Mixing Bowls: For mixing your filling and prepping your ingredients.
  • Sharp Knife: A good knife is key for chopping vegetables quickly and safely.
  • Measuring Cups and Spoons: Accurate measurements ensure your flavors are just right.

Serving Suggestions

Now, let’s talk about serving these beauties:

  • Pair with a Salad: A fresh avocado salad or a simple green salad complements the tacos perfectly.
  • Offer Dipping Sauces: Consider providing a zesty salsa, guacamole, or a creamy dressing on the side.
  • Drink Pairings: Serve with a refreshing limeade or a crisp beer to balance the flavors.

Conclusion

There you have it! A comprehensive guide to making Healthy Oven Baked Chicken Tacos that are not only delicious but also packed with flavor and nutrition. Remember, cooking is all about embracing the adventure — so get in the kitchen, experiment with these recipes, and make them your own. With every sprinkle of spice and dash of creativity, you’re not just cooking; you’re telling your story. So grab your skillet, fire up your oven, and let’s make some tacos that are sure to ignite your taste buds!

Healthy Oven Baked Chicken Tacos

Prep Time 10 minutes
Cook Time 20 minutes
Total Time 30 minutes
Servings 4 servings
Calories 450
Enjoy these flavorful and healthy oven-baked chicken tacos, perfect for a quick and satisfying meal.

Ingredients

Main Ingredients

  • 2 tablespoons Avocado Oil (or substitute oil of choice)
  • 1 piece Onion (diced)
  • 3 cloves Garlic (mashed)
  • 1 pound Ground Chicken
  • 2 teaspoons Paprika
  • 2 teaspoons Cumin
  • 1 teaspoon Sea Salt
  • 1 teaspoon Black Pepper
  • 0.5 teaspoon Chipotle Pepper
  • 0.5 cup Mild Red Enchilada Sauce
  • 12 pieces Thin Corn Tortillas (or tortillas of choice)
  • 1.5 cups Mexican-Blend Shredded Cheese

Instructions 

  • Preheat oven to 400°F (200°C).
  • Mix ground chicken with spices, garlic, and onion; cook until browned.
  • Spread enchilada sauce over cooked chicken mixture.
  • Fill tortillas with chicken mixture and cheese, then arrange on a baking sheet.
  • Bake for 15-20 minutes until cheese is melted and bubbly.

Notes

For a healthier option, use low-fat cheese and whole wheat tortillas.
Calories: 450kcal
Cost: $15
Course: Main Course
Cuisine: Mexican
Keyword: chicken

Nutrition

Calories: 450kcal | Carbohydrates: 40g | Protein: 35g | Fat: 20g | Sodium: 900mg

Dive into a world of flavor with my Brazilian Coconut Chicken recipe! This dish blends succulent chicken with creamy coconut milk and vibrant spices, creating a culinary adventure that will have your taste buds dancing. Perfect for a cozy dinner or impressing guests, this recipe is not just a meal; it’s an experience. Let’s turn up the heat and explore the layers of this delicious Brazilian comfort food!

Why You’ll Love This Recipe

This Brazilian Coconut Chicken is more than just another dinner option. Here are five irresistible reasons to embrace this dish:

  • Flavor Explosion: The combination of coconut milk, spices, and fresh herbs creates a creamy and tangy sauce that bursts with flavor.
  • One-Pan Wonder: Enjoy a hassle-free cooking experience with minimal cleanup. Everything comes together in one pan!
  • Customizable Heat: Adjust the level of spice to your taste. Add more cayenne pepper for a kick or skip it for a milder dish.
  • Quick and Easy: This recipe takes less than 30 minutes from start to finish, making it perfect for busy weeknights.
  • Impressive Presentation: Serve this dish with a sprinkle of fresh cilantro for a vibrant touch that will impress your guests.

Ingredient Breakdown

Let’s talk about the heart of this dish: the ingredients. Here’s what you’ll need:

  • 1.5 lbs (680 g) chicken breast: Cut into cubes. You can substitute with chicken thighs for a juicier flavor.
  • 2 tablespoons olive oil: Extra virgin olive oil is recommended for depth of flavor.
  • 1 medium onion, chopped: Yellow or white onions work beautifully in this recipe.
  • 3 cloves garlic, minced: Fresh garlic adds an aromatic kick.
  • 1 teaspoon ground cumin: This spice adds warmth and earthiness to the dish.
  • 1 teaspoon paprika: Choose smoked paprika for an additional layer of flavor.
  • 1/2 teaspoon cayenne pepper (optional): For a spicy kick; adjust according to your heat preference.
  • Salt and pepper, to taste: Essential for balancing flavors.
  • 1 can (14-ounce) coconut milk: The star of our creamy sauce.
  • 1 can (14-ounce) diced tomatoes, drained: Adds acidity and freshness.
  • 1 tablespoon lime juice: Brightens the flavors of the dish.
  • 1/4 cup fresh cilantro, chopped: For garnish and added freshness.
  • Steamed rice: For serving, soaking up all that delicious sauce.

How to Make Brazilian Coconut Chicken

Ready to cook? Follow these simple steps for a dish that’s sure to impress:

  1. In a large skillet, heat the olive oil over medium-high heat.
  2. Add the onion and sauté until translucent, about 3-4 minutes.
  3. Stir in the garlic, cumin, paprika, and cayenne pepper (if using), cooking for about 1 minute until fragrant.
  4. Add the chicken cubes and cook for 5-7 minutes, stirring occasionally, until browned on all sides.
  5. Season the chicken with salt and pepper to taste.
  6. Pour in the coconut milk and bring to a simmer.
  7. Stir in the drained diced tomatoes and lime juice.
  8. Reduce the heat to low and let it simmer gently for about 15-20 minutes, until the chicken is cooked through and the sauce has thickened.
  9. Stir in the chopped cilantro and adjust seasoning if necessary.
  10. Serve hot over steamed rice, garnished with extra cilantro.

Pro Tips for Perfecting Your Dish

Close-up view of coconut chicken with herbs and spices.

Elevate your cooking game with these expert insights:

  • Use Fresh Ingredients: Fresh herbs and spices can make a world of difference in flavor.
  • Don’t Rush the Cooking: Allow the chicken to brown properly for enhanced flavor.
  • Adjust the Consistency: If the sauce is too thick, add a splash of chicken broth or water.
  • Let It Rest: Allow the dish to sit for a few minutes before serving to let flavors meld.
  • Experiment with Spices: Try adding ginger or turmeric for a unique twist.
  • Balance the Acidity: Taste and adjust lime juice according to your preference for brightness.
  • Store in Airtight Containers: For leftovers, ensure you use airtight containers to keep the dish fresh.
  • Reheat Gently: Use low heat to reheat leftovers to prevent overcooking the chicken.

Common Mistakes and Troubleshooting

Even the best chefs make mistakes! Here’s how to avoid common pitfalls:

  • Overcooking the Chicken: Keep an eye on the cooking time; overcooked chicken can become dry.
  • Too Much Heat: If it’s too spicy, balance it out with a touch of sugar or more coconut milk.
  • Not Enough Sauce: If you find the sauce too sparse, consider adding more coconut milk or tomatoes.
  • Undercooked Chicken: Always check that the chicken is no longer pink inside and juices run clear.

Variations on Brazilian Coconut Chicken

Don’t be afraid to make this dish your own! Here are some variations to try:

  • Seafood Twist: Replace the chicken with shrimp or fish for a delicious seafood version.
  • Vegetarian Delight: Substitute chicken with chickpeas or tofu for a plant-based option.
  • Spicy Mango Coconut Chicken: Add diced mango for a sweet and spicy twist.
  • Curried Coconut Chicken: Mix in curry powder for an Indian-inspired flavor.

Storage and Make-Ahead Instructions

This dish is perfect for meal prep! Here’s how to store it:

  • Refrigerate: Store in an airtight container for up to 4 days.
  • Freeze: This dish freezes well for up to 3 months. Thaw in the refrigerator overnight before reheating.
  • Make-Ahead: You can cook the chicken in advance and add the coconut milk and other ingredients when ready to serve.

Comprehensive FAQ

Got questions? Let’s dive into some common inquiries:

  • Can I use frozen chicken? Yes, just ensure it’s fully thawed before cooking for even results.
  • What can I substitute for coconut milk? Almond milk or cashew cream can be used, but the flavor will differ.
  • How can I make this dish spicier? Increase the cayenne pepper or add fresh chopped chilies for extra heat.
  • Is this dish suitable for meal prep? Absolutely! It’s perfect for leftovers and reheats well.
  • Can I add vegetables? Yes! Bell peppers, spinach, or zucchini make excellent additions.
  • What should I serve with this dish? Serve over rice or with crusty bread to soak up the sauce.
  • How do I know when the chicken is cooked? Chicken is done when it reaches an internal temperature of 165°F (75°C).
  • Can I make this dish dairy-free? Yes, this recipe is already dairy-free since it uses coconut milk.

Nutrition Tips and Dietary Adaptations

Here are some tips for making this dish fit your dietary needs:

  • Low-Carb Option: Serve with cauliflower rice instead of regular rice for a low-carb alternative.
  • Gluten-Free: This recipe is naturally gluten-free, making it suitable for those with gluten sensitivities.
  • High-Protein: You can boost the protein content by adding more chicken or using beans for a vegetarian option.

Equipment Recommendations

Make sure you have the right tools for cooking:

  • Large Skillet: A sturdy skillet is essential for even cooking.
  • Wooden Spoon: Perfect for stirring and scraping up those delicious browned bits.
  • Measuring Cups and Spoons: Accurate measurements ensure perfect results.

Serving Suggestions

Here are some ideas to elevate your dining experience:

  • Garnish with Fresh Herbs: A sprinkle of cilantro and lime wedges add freshness.
  • Pair with a Side Salad: A light salad with a citrus vinaigrette complements the rich flavors.
  • Offer Crusty Bread: Serve with warm, crusty bread to soak up the sauce.

Conclusion

There you have it! My Brazilian Coconut Chicken is a feast for the senses, perfectly balancing heat, creaminess, and vibrant flavors. Whether you’re cooking for family or entertaining guests, this dish is sure to impress. So grab your skillet, embrace the adventure of cooking, and let your taste buds dance with this delightful recipe. Happy cooking!

Brazilian Coconut Chicken

Prep Time 10 minutes
Cook Time 25 minutes
Total Time 35 minutes
Servings 4 servings
Calories 450
A flavorful and creamy chicken dish inspired by Brazilian cuisine, perfect served over steamed rice.

Ingredients

Protein

  • 1.5 lbs chicken breast, cut into cubes
  • 2 tablespoons olive oil
  • 1 medium onion, chopped
  • 3 cloves garlic, minced
  • 1 teaspoon ground cumin
  • 1 teaspoon paprika
  • 0.5 teaspoon cayenne pepper (optional, for heat) (optional)
  • to taste Salt and pepper
  • 14 ounce coconut milk
  • 14 ounce diced tomatoes, drained
  • 1 tablespoon lime juice
  • 1/4 cup fresh cilantro, chopped (plus extra for garnish)

Serving

  • Steamed rice for serving

Instructions 

  • Heat olive oil in a skillet over medium-high heat.
  • Sauté onion until translucent, then add garlic, cumin, paprika, and cayenne; cook 1 minute.
  • Add chicken and cook until browned, then season with salt and pepper.
  • Pour in coconut milk, add tomatoes and lime juice, then simmer 15-20 minutes until cooked and thickened.
  • Stir in cilantro, serve over rice, garnished with extra cilantro.

Notes

Adjust seasoning to taste and serve hot over steamed rice.
Calories: 450kcal
Cost: $15
Course: Main Course
Cuisine: Brazilian
Keyword: chicken, coconut

Nutrition

Calories: 450kcal | Carbohydrates: 40g | Protein: 35g | Fat: 20g | Sodium: 600mg

Why You’ll Love This Creamy Garlic Chicken Bowl

Imagine the rich aroma of garlic wafting through your kitchen, mingling with the savory scent of tender chicken and the vibrant crunch of broccoli. This Creamy Garlic Chicken Bowl with Broccoli & Rice is not just a meal; it’s an experience that redefines comfort food. With every bite, you’ll savor the layers of flavor and texture that make this dish a household favorite.

What sets this dish apart is its simplicity and versatility. Whether you’re whipping it up for a weeknight dinner or prepping for a cozy gathering, this recipe is quick to prepare, making it ideal for any occasion. Plus, it’s packed with nutrients, so you can indulge without guilt. Let’s dive into the details of this deliciously easy dinner recipe!

Essential Tools and Preparation

Tools You’ll Need

A delicious bowl featuring diced chicken, broccoli, and rice in a creamy garlic sauce.
  • Large skillet
  • Cutting board
  • Sharp knife
  • Measuring cups and spoons
  • Wooden spoon or spatula
  • Pot for cooking rice

Importance of Each Tool

Having the right tools can make all the difference in your cooking experience. A good skillet is essential for achieving that perfect golden-brown chicken, while a sharp knife ensures your prep work is efficient and safe. A sturdy wooden spoon helps in stirring without scratching your skillet, allowing for a smooth cooking process. Don’t underestimate the importance of these tools; they can elevate a simple dish into an extraordinary one.

Ingredients: What You’ll Need

For the Chicken

1 lb chicken breast, diced

Veggies

2 cups broccoli florets

Base

1 cup rice (white or brown)

Creamy Sauce

3 cloves garlic, minced
1 cup heavy cream
1 cup chicken broth
2 tablespoons olive oil
salt and pepper to taste
1 teaspoon paprika (optional)
grated parmesan cheese (for serving, optional)

How to Make the Creamy Garlic Chicken Bowl

Step 1: Cook the Rice

Start by cooking the rice according to the package instructions. This will be the base of your bowl, soaking up all the delicious flavors from the creamy garlic sauce. Whether you opt for fluffy white rice or hearty brown rice, both will work beautifully in this dish.

Step 2: Sear the Chicken

In a large skillet, heat the olive oil over medium heat. Add the diced chicken, seasoning it generously with salt, pepper, and paprika if you’re feeling adventurous. Sear the chicken for about 5-7 minutes, or until it’s golden brown and cooked through. This step is crucial for developing flavor, so don’t rush it!

Step 3: Add the Garlic

Once the chicken is nicely browned, toss in the minced garlic. Sauté for about a minute until the garlic is fragrant, but be careful not to let it burn. Burnt garlic can turn bitter, and we want all the flavors to shine.

Step 4: Create the Creamy Sauce

Pour in the chicken broth and bring the mixture to a gentle simmer. Then stir in the heavy cream, allowing it to cook for another 3-5 minutes until the sauce thickens slightly. This creamy garlic sauce is the heart of your dish — rich, savory, and utterly irresistible.

Step 5: Cook the Broccoli

Finally, add the broccoli florets to the skillet. Cover the skillet and cook for about 4-5 minutes until the broccoli is bright green and tender but still has a bit of crunch. This adds not only flavor but also a beautiful pop of color to your bowl.

Step 6: Assemble Your Bowl

To serve, spoon the creamy garlic chicken and broccoli mixture over your cooked rice. If you’re feeling extra indulgent, sprinkle some grated Parmesan cheese on top for an added layer of flavor. Each scoop is a delightful blend of creamy, savory, and fresh — a true celebration of comfort food!

How to Serve Your Creamy Garlic Chicken Bowl

Add Extra Crunch

For those who love texture, consider adding a sprinkle of toasted nuts or seeds on top. Slivered almonds or sesame seeds can elevate the dish further and provide a satisfying crunch.

Fresh Herbs and Greens

Garnishing your bowl with fresh herbs, such as parsley or basil, can bring a burst of freshness that contrasts beautifully with the creamy sauce. A squeeze of lemon juice can also brighten the flavors, making each bite even more enjoyable.

Saucy Enhancements

If you like a bit of kick, drizzle some hot sauce over the top or add a dash of red pepper flakes to the sauce. Spice enthusiasts will appreciate this extra layer of flavor!

Tips for Perfecting Your Dish

  • Don’t overcook the chicken: Keep an eye on the chicken as it cooks to prevent it from drying out.
  • Adjust the garlic: If you’re not a huge fan of garlic, feel free to reduce the amount. On the other hand, if you love it, don’t hesitate to add more!
  • Experiment with spices: Don’t be afraid to add your favorite spices to the chicken. Cumin or chili powder can add an exciting twist.

Variations and Substitutions

This recipe is incredibly versatile! Here are some ideas to customize your creamy garlic chicken bowl:

  • Vegetable Swap: Replace broccoli with other vegetables like bell peppers, zucchini, or spinach for a colorful twist.
  • Dairy-Free Option: Substitute heavy cream with coconut cream or a dairy-free alternative for a lighter version.
  • Grain Alternatives: Instead of rice, try quinoa or cauliflower rice for a low-carb option.

Storage and Freezing

Refrigerator Storage

Leftovers can be stored in an airtight container in the fridge for up to 3 days. Reheat gently on the stove or in the microwave.

Freezing Creamy Garlic Chicken Bowl

If you want to prep for the week, this dish freezes well. Just make sure to store the rice separately to keep its texture intact. It can be frozen for up to 3 months.

Reheating Instructions

To reheat, simply thaw in the refrigerator overnight and warm on the stove over low heat, adding a splash of chicken broth if needed to loosen the sauce.

Frequently Asked Questions

Can I use other vegetables in my Creamy Garlic Chicken Bowl with Broccoli & Rice?

Absolutely! Feel free to mix and match your favorite vegetables based on what you have on hand.

How can I make my Creamy Garlic Chicken Bowl dairy-free?

To make it dairy-free, you can replace the heavy cream with coconut milk or a cashew-based cream for a similar texture.

What type of rice works best for this recipe?

Both white and brown rice work beautifully, but you can also experiment with jasmine or basmati rice for added fragrance and flavor.

Can I prep this dish ahead of time?

Yes! You can marinate the chicken and chop the veggies ahead of time, making dinner prep a breeze.

Final Thoughts

The Creamy Garlic Chicken Bowl with Broccoli & Rice is a dish that invites you to explore and enjoy cooking at home. With its delightful blend of flavors and textures, it’s a recipe that can easily become a staple in your kitchen. Whether you’re cooking for yourself or sharing with loved ones, this bowl is sure to bring smiles and satisfaction to the table. So grab your skillet, unleash your creativity, and savor every bite! Happy cooking!

Creamy Garlic Chicken Bowl with Broccoli & Rice: A Deliciously Easy Dinner Recipe

Prep Time 10 minutes
Cook Time 20 minutes
Total Time 30 minutes
Servings 4 servings
Calories 550
This creamy garlic chicken bowl with broccoli and rice is an easy, flavorful dinner perfect for busy weeknights.

Ingredients

Protein

  • 1 lb chicken breast, diced

Vegetables

  • 2 cups broccoli florets

Carbohydrate

  • 1 cup rice (white or brown)

Flavor & Seasoning

  • 3 cloves garlic, minced
  • 1 cup heavy cream
  • 1 cup chicken broth
  • 2 tablespoons olive oil
  • to taste salt and pepper
  • 1 teaspoon paprika (optional)

For serving

  • grated parmesan cheese (optional) grated parmesan cheese (for topping)

Instructions 

  • Cook rice according to package instructions.
  • Sauté diced chicken in olive oil until golden and cooked through, about 5-7 minutes.
  • Add garlic and cook for 1 minute, then pour in chicken broth and heavy cream. Simmer until sauce thickens, 3-5 minutes.
  • Add broccoli, cover, and cook for 4-5 minutes until tender. Serve over rice and top with Parmesan if desired.

Notes

Feel free to add more garlic or cheese for extra flavor.
Calories: 550kcal
Cost: $15
Course: Dinner
Cuisine: American
Keyword: Broccoli, chicken, creamy

Nutrition

Calories: 550kcal | Carbohydrates: 60g | Protein: 40g | Fat: 20g | Sodium: 600mg

Loved this recipe? Save it to your favorite Pinterest board so you can easily find it later! It’s the perfect way to keep all your sweet ideas in one place. ✨

An appetizing creamy garlic chicken bowl with vibrant broccoli and rice, beautifully presented.

Why You’ll Love This Recipe

When you think of comfort food, what comes to mind? For many, it’s a steaming bowl of pasta, a rich stew, or maybe even a hearty casserole. But let me introduce you to something that elevates comfort to an entirely new level: Slow Cooker Honey Garlic Chicken. This dish is where sweet and savory come to dance, creating a symphony of flavors that will leave your taste buds singing.

This recipe is perfect for busy weeknights or lazy weekends when you want something delicious with minimal effort. You simply toss the ingredients into the slow cooker and let it work its magic, transforming humble chicken thighs into succulent morsels that melt in your mouth. With its irresistible honey garlic sauce, this dish is so versatile it can be paired with rice, noodles, or even served in a sandwich.

What You’ll Need

Before we dive into cooking, let’s gather our ingredients to make the magic happen:

  • 2 pounds boneless, skinless chicken thighs
  • 1/2 cup honey
  • 1/4 cup soy sauce
  • 1/4 cup ketchup
  • 3 cloves garlic, minced
  • 1 tablespoon rice vinegar
  • 1 teaspoon ground ginger
  • Salt and pepper to taste
  • Chopped green onions for garnish

These simple ingredients come together to create a dish that’s not just easy to prepare but also packed with flavor. The combination of honey and soy sauce adds a beautiful glaze to the chicken, while the garlic and ginger give it that extra kick that keeps you coming back for more.

How to Make Slow Cooker Honey Garlic Chicken

Deliciously plated Slow Cooker Honey Garlic Chicken, showcasing a rich, honey glaze and tender chicken thighs.

Now that we have our ingredients, let’s get cooking! Follow these simple steps to create your own culinary masterpiece:

  1. Place the chicken thighs in the slow cooker, arranging them evenly.
  2. In a mixing bowl, combine the honey, soy sauce, ketchup, minced garlic, rice vinegar, ground ginger, salt, and pepper. Whisk until fully blended.
  3. Pour the sauce mixture over the chicken thighs in the slow cooker, ensuring they are well-coated.
  4. Cover and cook on low for 6-7 hours or on high for 3-4 hours, until the chicken is tender and fully cooked.
  5. Once cooked, use two forks to shred the chicken right in the slow cooker, stirring it into the sauce.
  6. Serve the chicken over rice or noodles, and garnish with chopped green onions for a fresh touch.

And just like that, you’ve created a meal that’s sure to impress anyone at your table!

Tools for This Recipe

Having the right tools can make a world of difference in your cooking experience. Here’s what I recommend for this recipe:

  • Slow Cooker: A good-quality slow cooker is essential for this dish. I recommend one with multiple settings for versatility.
  • Mixing Bowl: A medium-sized bowl for mixing the sauce will make things easier.
  • Measuring Cups and Spoons: Precision is key in cooking, so make sure you have these on hand.
  • Forks for Shredding: Two forks will do the trick when it comes to shredding your chicken.

Substitutions and Variations

Cooking is all about creativity and adapting to what you have on hand! Here are some substitutions and variations you can try:

  • Chicken Thighs: If you’re not a fan of thighs, boneless, skinless chicken breasts can work too. Just be cautious, as they tend to dry out faster.
  • Honey: For a less sweet version, you can use maple syrup or agave nectar.
  • Soy Sauce: For a gluten-free option, substitute with tamari or coconut aminos.
  • Garlic: Fresh garlic gives the best flavor, but you can also use garlic powder in a pinch.
  • Add Vegetables: Toss in some bell peppers, carrots, or broccoli into the slow cooker for added nutrition and color.

What to Serve with Honey Garlic Chicken

This dish is incredibly versatile and pairs well with a variety of sides. Here are a few ideas:

  • Rice: Whether you choose white, brown, or jasmine rice, it’s the perfect base to soak up that delicious sauce.
  • Noodles: Serve it over egg noodles or soba for a delightful twist.
  • Steamed Vegetables: Bright, colorful veggies not only add nutrition but also enhance the visual appeal of your meal.
  • Salad: A fresh green salad with a light vinaigrette can provide a refreshing contrast to the rich flavors of the chicken.

Leftovers and Storage

One of the best things about this recipe is that it makes fantastic leftovers! Here’s how to store and reheat:

  • Storage: Allow the chicken to cool completely before transferring it to an airtight container. It will keep in the refrigerator for up to 4 days.
  • Freezing: You can freeze the shredded chicken in a freezer-safe container for up to 3 months. When you’re ready to eat, thaw in the refrigerator overnight before reheating.
  • Reheating: To reheat, warm it on the stovetop or in the microwave until heated through. You might want to add a splash of water or chicken broth to keep it moist.

FAQs

Here are some common questions I get about this recipe:

  • Can I use frozen chicken thighs?
    Yes, you can use frozen chicken thighs. Just make sure to increase the cooking time by an hour or so if cooking on low.
  • Is this recipe spicy?
    Not at all! It’s quite mild, making it family-friendly. However, feel free to add some red pepper flakes if you want to bring the heat.
  • Can I make this in an Instant Pot?
    Absolutely! You can cook it in an Instant Pot on the high-pressure setting for about 10-12 minutes, followed by a quick release.

Troubleshooting

Even the best chefs face challenges in the kitchen. Here are some quick troubleshooting tips:

  • Chicken is dry: If you overcook the chicken, it can dry out. Make sure to monitor the cooking time closely.
  • Sauce is too thick: If your sauce turns out thicker than you’d like, simply add a little chicken broth or water to thin it out.
  • Not enough flavor: Always taste your sauce before pouring it over the chicken. Adjust with additional soy sauce or honey if needed.

Embrace the Adventure

Cooking should be an adventure, and with Slow Cooker Honey Garlic Chicken, you’re bound to have a delightful experience. This dish not only brings the warmth of home-cooked meals but also invites you to explore the exciting world of flavors. So grab your ingredients, fire up that slow cooker, and get ready to savor a dish that will have everyone at your table asking for seconds.

Remember, the kitchen is your playground. Don’t hesitate to experiment with this recipe, adding your unique twist or swapping in your favorite ingredients. Because at the end of the day, cooking is all about making memories and sharing love through food. Happy cooking, my friends!

Slow Cooker Honey Garlic Chicken

Prep Time 10 minutes
Cook Time 4 hours
Total Time 4 hours 10 minutes
Servings 4 servings
Calories 350
A flavorful and easy-to-make slow cooker dish featuring tender chicken thighs in a sweet and savory honey garlic sauce.

Ingredients

Protein

  • 2 pounds boneless, skinless chicken thighs

Sauces and Condiments

  • 1/2 cup honey
  • 1/4 cup soy sauce
  • 1/4 cup ketchup
  • 1 tablespoon rice vinegar
  • 3 cloves garlic, minced
  • 1 teaspoon ground ginger

Seasonings

  • to taste salt and pepper

Garnish

  • chopped green onions for garnish

Instructions 

  • Place chicken thighs in the slow cooker.
  • Mix honey, soy sauce, ketchup, garlic, rice vinegar, ginger, salt, and pepper in a bowl.
  • Pour sauce over chicken and cook on low for 6-7 hours.
  • Shred chicken and stir into the sauce before serving.
  • Serve over rice or noodles, garnished with green onions.

Notes

Adjust seasoning to taste and serve with your favorite sides.
Calories: 350kcal
Cost: $15
Course: Main Course
Cuisine: American
Keyword: chicken, garlic, honey

Nutrition

Calories: 350kcal | Carbohydrates: 45g | Protein: 30g | Fat: 8g | Sodium: 900mg

Loved this recipe? Save it to your favorite Pinterest board so you can easily find it later! It’s the perfect way to keep all your sweet ideas in one place. ✨

A tempting dish of Slow Cooker Honey Garlic Chicken, highlighting the texture and color of the honey sauce.

Ignite Your Kitchen Adventure with Keto Garlic Parmesan Chicken

Welcome to a culinary journey where flavor meets creativity! This Keto Garlic Parmesan Chicken recipe is more than just a meal—it’s an invitation to embrace the thrill of cooking with bold flavors and comforting textures. Imagine tender, juicy chicken breasts enveloped in a creamy garlic Parmesan sauce, baked to golden perfection. Whether you’re navigating a low-carb lifestyle or just craving something delicious, this dish promises to elevate your dinner game and ignite your taste buds. Ready to dive into this adventure? Let’s get cooking!

Why You’ll Love This Recipe

  • Quick and Easy: This recipe comes together in just 30 minutes, making it perfect for a busy weeknight dinner.
  • Flavor Explosion: The combination of garlic, Parmesan, and Italian herbs creates a rich, savory sauce that will have everyone asking for seconds.
  • Keto-Friendly: With minimal carbohydrates, this dish is ideal for those following a keto diet without sacrificing flavor.
  • Family Favorite: The creamy, cheesy sauce is sure to please both kids and adults, making it a go-to for family meals.
  • Versatile: This recipe works beautifully with various sides, from zoodles to cauliflower rice, allowing for endless meal options.

Ingredients Breakdown

Here’s what you’ll need to create the magic:

  • 4 boneless, skinless chicken breasts: The star of the show! Make sure they are fresh for the best flavor.
  • 1 teaspoon garlic powder: Adds a robust garlic flavor without the hassle of fresh garlic.
  • 1 teaspoon onion powder: Enhances the dish with a sweet onion flavor.
  • 1 teaspoon Italian seasoning: A blend of herbs that complements the chicken beautifully.
  • ½ teaspoon salt: Essential for bringing out all the flavors.
  • ½ teaspoon black pepper: Add a touch of heat and depth.
  • ¼ cup grated Parmesan cheese: For that creamy, cheesy goodness.
  • ¼ cup unsalted butter, melted: This is what makes the sauce rich and luscious.
  • 2 tablespoons fresh parsley, chopped: A colorful garnish that brightens the dish.

Feel free to experiment with ingredient substitutions. For instance, you can use chicken thighs for a juicier option, or swap the Parmesan with a dairy-free alternative to suit your dietary needs.

Step-by-Step Instructions

Close-up of tender chicken breasts coated in garlic and Parmesan.

Creating this flavorful dish is a breeze. Just follow these simple steps:

  1. Preheat the Oven: Set your oven to 375°F (190°C) to prepare for baking.
  2. Prepare the Chicken: Pat the chicken breasts dry with paper towels. This helps ensure they brown nicely.
  3. Mix Spices: In a small bowl, combine garlic powder, onion powder, Italian seasoning, salt, and black pepper.
  4. Season Chicken: Rub the spice mixture evenly over the chicken breasts to coat them thoroughly.
  5. Prepare the Baking Dish: In a large baking dish, pour the melted butter to coat the bottom.
  6. Arrange Chicken: Place the seasoned chicken breasts in the baking dish on top of the butter.
  7. Add Parmesan: Sprinkle the grated Parmesan cheese generously over each chicken breast.
  8. Bake the Chicken: Place the baking dish in the preheated oven and bake for 20-25 minutes or until the chicken is cooked through and the internal temperature reaches 165°F (75°C).
  9. Garnish: Once done, remove the dish from the oven and let it rest for a few minutes. Before serving, garnish with freshly chopped parsley.

Your Keto Garlic Parmesan Chicken is ready to be served immediately! Pair it with your favorite low-carb sides for a satisfying meal.

Pro Tips for Perfect Keto Garlic Parmesan Chicken

  • Don’t rush the resting: Letting the chicken rest after baking allows the juices to redistribute, keeping it moist.
  • Experiment with spices: Feel free to add a pinch of red pepper flakes for a kick or swap out the Italian seasoning for your favorite herb blend.
  • Use quality cheese: Freshly grated Parmesan will melt and incorporate better than pre-grated options.
  • Monitor cooking time: Oven temperatures can vary, so keep an eye on your chicken to avoid overcooking.
  • Consider marinating: For added flavor, marinate the chicken in the melted butter and spices for an hour before baking.
  • Use a meat thermometer: This ensures your chicken reaches the perfect doneness without any guesswork.
  • Make it a one-pan meal: Add vegetables like broccoli or asparagus to the baking dish for a complete meal in one pan.
  • Store leftovers properly: Keep any leftovers in an airtight container in the fridge for up to three days.

Common Mistakes and Troubleshooting

Every chef has faced challenges in the kitchen. Here are some common mistakes and how to avoid them:

  • Overcooking: Keep an eye on cooking time and use a meat thermometer to ensure the chicken is perfectly cooked.
  • Dry chicken: If your chicken turns out dry, it may have been overbaked. Always check the internal temperature.
  • Insufficient seasoning: Don’t skimp on seasoning! The spices are essential for flavor, so coat the chicken generously.
  • Skipping the rest period: Letting the chicken rest after baking is crucial for juiciness; don’t skip this step!

Variations to Spice Up Your Dish

Looking to switch things up? Here are some fun variations:

  • Spicy Kick: Add crushed red pepper flakes to the spice mix for a fiery twist.
  • Herb Infusion: Experiment with fresh herbs like thyme or rosemary for a unique flavor profile.
  • Cheesy Delight: Mix in some mozzarella cheese for an extra cheesy experience.
  • Vegetarian Version: Replace chicken with hearty vegetables like eggplant or portobello mushrooms for a vegetarian dish.

Storage and Make-Ahead Instructions

This recipe is perfect for meal prepping! Here’s how to store and reheat:

  • Storage: Store leftovers in an airtight container in the refrigerator for up to three days.
  • Freezing: You can freeze the chicken in an airtight container for up to three months. Thaw in the fridge overnight before reheating.
  • Reheating: For best results, reheat in the oven at 350°F (175°C) until warmed through, or use a microwave for a quick option.
  • Make-Ahead: You can prep the chicken and spices a day in advance. Store them separately in the fridge and bake when ready to serve.

Comprehensive FAQ

Got questions? We’ve got answers! Here are some frequently asked questions about this recipe:

  • Can I use chicken thighs instead of breasts? Absolutely! Thighs will add even more moisture to the dish.
  • What can I serve with this dish? It pairs well with low-carb sides like mashed cauliflower or zucchini noodles.
  • How can I make this dish dairy-free? Substitute the butter with olive oil and use a dairy-free cheese alternative.
  • Can I prepare this dish ahead of time? Yes! You can season the chicken and store it in the fridge until ready to bake.
  • What is the best way to tell if the chicken is cooked through? Use a meat thermometer to check for an internal temperature of 165°F (75°C).
  • How do I store leftovers? Store in an airtight container in the fridge for up to three days.
  • Can I use frozen chicken? Yes, but be sure to thaw it completely in the fridge before cooking.
  • What if I don’t have Italian seasoning? You can make your own blend using dried basil, oregano, and thyme.

Nutritional Insights and Dietary Adaptations

This Keto Garlic Parmesan Chicken is not only delicious but also fits various dietary needs. Here’s what you should know:

  • Low Carb: This dish is perfect for keto enthusiasts, keeping carbohydrates low while satisfying hunger.
  • Gluten-Free: All ingredients are gluten-free, making it suitable for those with gluten sensitivities.
  • High Protein: Each serving is packed with protein, making it an excellent option for muscle repair and growth.
  • Low Calorie: This dish is relatively low in calories, especially if served with low-carb sides.

Essential Equipment Recommendations

Here’s what you’ll need to whip up this delicious meal:

  • Baking Dish: A large baking dish is essential for accommodating the chicken and sauce.
  • Meat Thermometer: A must-have for ensuring perfectly cooked chicken every time.
  • Mixing Bowls: For combining your spices and preparing the chicken.
  • Measuring Cups and Spoons: Accurate measurements ensure consistent flavor in every batch.

Serving Suggestions

Your Keto Garlic Parmesan Chicken deserves a stellar sidekick! Here are some mouthwatering serving ideas:

  • Mashed Cauliflower: A creamy and satisfying low-carb alternative to traditional mashed potatoes.
  • Zoodles: Spiralized zucchini noodles provide a fresh, crunchy contrast to the rich chicken.
  • Cauliflower Rice: This fluffy, low-carb option makes a perfect base for soaking up the delicious sauce.
  • Steamed Broccoli: A simple, nutritious side that adds color and crunch to your plate.

Conclusion: Embrace the Flavor Adventure

Now that you’ve mastered Keto Garlic Parmesan Chicken, it’s time to embrace the adventure of cooking and flavor. This dish is a testament to the beauty of balancing spice and comfort, proving that a low-carb meal doesn’t have to be boring. So grab your skillet, dive into your spice cabinet, and let this dish inspire your next culinary creation. Remember, cooking is an adventure—make it delicious!

Keto Garlic Parmesan Chicken: An Incredible Ultimate Recipe

Prep Time 10 minutes
Cook Time 25 minutes
Total Time 35 minutes
Servings 4 servings
Calories 350
Enjoy tender, flavorful keto-friendly chicken infused with garlic and Parmesan, perfect for a quick and delicious meal.

Ingredients

Main Ingredients

  • 4 pieces boneless, skinless chicken breasts
  • 1 teaspoon garlic powder
  • 1 teaspoon onion powder
  • 1 teaspoon Italian seasoning
  • ½ teaspoon salt
  • ½ teaspoon black pepper
  • ¼ cup grated Parmesan cheese
  • ¼ cup unsalted butter, melted
  • 2 tablespoons fresh parsley, chopped (for garnish)

Instructions 

  • Preheat oven to 375°F (190°C).
  • Pat chicken dry, then rub with spice mixture.
  • Place chicken in baking dish with melted butter and sprinkle Parmesan on top.
  • Bake for 20-25 minutes until cooked through.
  • Rest briefly, garnish with parsley, and serve.

Notes

This dish pairs well with steamed vegetables or a fresh salad for a complete keto meal.
Calories: 350kcal
Cost: $15
Course: Main Course
Cuisine: American
Keyword: chicken, garlic, Keto, Parmesan

Nutrition

Calories: 350kcal | Carbohydrates: 4g | Protein: 45g | Fat: 18g | Sodium: 600mg

Unlock the Flavor Adventure with Sizzling Smashburger Quesadillas!

Welcome to a culinary journey where juicy, sizzling flavors collide! If you’re ready to turn your weeknight meals into a fiesta of taste, you’ve landed in the right place. These Smashburger Quesadillas are not just a meal; they are an explosion of flavors and textures that will leave your taste buds dancing. Whether you’re a busy parent, a culinary newbie, or a seasoned home cook, this recipe promises to elevate your cooking game. Let’s dive into how to make these delightful quesadillas that are as fun to prepare as they are to eat!

Why You’ll Love This Recipe

Here are just a few reasons why these Smashburger Quesadillas will become your new favorite:

  • Quick and Easy: Ready in under 30 minutes, perfect for busy weeknights!
  • Customizable: Add your favorite toppings or switch up the protein for a personalized touch.
  • Flavor Packed: Combining the best of burgers and quesadillas, each bite is a burst of savory goodness.
  • Fun to Make: Involve the family in the cooking process and let everyone create their own masterpiece.
  • Budget-Friendly: Using simple ingredients, this meal won’t break the bank.

Your Grocery Lineup: Ingredients Breakdown

Here’s what you’ll need to whip up these delicious quesadillas:

  • 1 lb ground beef: Look for an 80/20 fat ratio for the perfect balance of flavor and juiciness. If you’re going meatless, consider using Impossible Meat or seasoned black beans!
  • Salt, pepper, garlic powder: These are your essential seasonings. Feel free to add a pinch of cayenne for extra heat.
  • 4 large flour tortillas: Burrito-sized tortillas are ideal for wrapping up all that goodness. Gluten-free? Opt for almond flour tortillas for a delightful crunch!
  • 1 cup shredded cheese: A mix of sharp cheddar and American cheese provides the ultimate melty texture. Dairy-free? Try plant-based shreds!
  • Optional toppings: Pickles, diced onions, and burger sauce are perfect for serving and elevating your quesadilla experience.

Let’s Get Cooking: Your Step-by-Step Roadmap

Side profile of Smashburger Quesadillas showcasing golden-brown tortillas and savory filling.

Ready to bring the heat? Follow these foolproof steps to create your own Smashburger Quesadillas:

  • Step 1: Heat Things Up: Preheat a skillet or griddle over medium-high heat. This is where the magic happens!
  • Step 2: Build Your Burger Base: Press a small handful of ground beef onto one half of each tortilla. Don’t be shy with the seasoning!
  • Step 3: Sizzle & Flip: Cook the beef side down for about 2-3 minutes until it’s beautifully browned. Flip it to let the flavors mingle.
  • Step 4: Cheese It Up: Sprinkle cheese over the beef, fold the tortilla in half, and grill both sides until crispy and melty—about 3 minutes.
  • Step 5: Slice & Serve: Cut your quesadilla into wedges and serve with your favorite toppings or dipping sauce.

Pro Tips for a Perfect Smashburger Quesadilla

Mastering the art of quesadilla-making requires a few insider secrets. Here are my top pro tips:

  • Don’t Overcrowd: If your skillet is too crowded, you won’t achieve that perfect crispy texture. Cook in batches if needed.
  • Press Firmly: Press the beef firmly into the tortilla before cooking to ensure an even cook and great texture.
  • Experiment with Heat: If you like it hot, consider adding jalapeños or a drizzle of hot sauce before serving.
  • Use Fresh Ingredients: Fresh herbs and toppings can elevate the flavor profile. Try adding cilantro or green onions!
  • Keep It Warm: Place cooked quesadillas in a warm oven (around 200°F) while you finish cooking the rest.
  • Get Creative: Don’t hesitate to mix in other ingredients like sautéed mushrooms, bell peppers, or even BBQ sauce for a twist!

Common Mistakes and Troubleshooting

Even the most experienced cooks make mistakes. Here’s how to avoid common pitfalls:

  • Too Greasy: If your quesadillas are too greasy, ensure your ground beef isn’t overly fatty. Drain excess fat if necessary.
  • Cheese Not Melting: Make sure your skillet is hot enough! A non-stick skillet can help prevent sticking while evenly melting the cheese.
  • Tortillas Falling Apart: Use fresh tortillas and avoid overstuffing them. If they do tear, don’t panic—simply enjoy them as a deconstructed quesadilla!

Variations to Spice Up Your Quesadillas

Feeling adventurous? Here are four variations to keep things exciting:

  • Spicy Southwest: Add diced green chiles and pepper jack cheese for a kick of heat.
  • BBQ Chicken: Swap ground beef for shredded BBQ chicken and drizzle with ranch dressing.
  • Vegetarian Delight: Use a mix of black beans, corn, and diced bell peppers for a hearty, meatless option.
  • Breakfast Quesadilla: Mix in scrambled eggs and crumbled breakfast sausage for a fulfilling breakfast treat.

Storage and Make-Ahead Instructions

Want to prepare ahead of time? Here’s how to store and reheat your creations:

  • Make Ahead: Prepare the beef mixture up to a day in advance and store it in the fridge. Assemble and cook when ready to serve.
  • Storage: Leftover quesadillas can be stored in an airtight container in the refrigerator for up to 3 days.
  • Reheating: Reheat in a skillet over medium heat for best results, or pop them in the oven at 350°F until warmed through.

Nutrition Tips and Dietary Adaptations

Here are some tips to keep your Smashburger Quesadillas healthier:

  • Lean Protein: Choose lean ground beef or ground turkey to reduce fat content.
  • Whole Wheat Tortillas: For added fiber, use whole wheat tortillas instead of regular flour ones.
  • Load on Veggies: Add extra vegetables like spinach, mushrooms, or zucchini to bolster the nutritional value.

Equipment Recommendations

Here’s what you’ll need to make these quesadillas shine:

  • Cast Iron Skillet: Ideal for achieving that perfect crispy crust.
  • Spatula: A sturdy spatula will help you flip and serve without breaking your quesadilla.
  • Measuring Cups: For accurate ingredient portions, especially when seasoning.

Serving Suggestions for Ultimate Enjoyment

Pair your Smashburger Quesadillas with these delightful sides:

  • Fresh Salsa: Bright and zesty, salsa adds a refreshing contrast to the rich quesadillas.
  • Guacamole: Creamy guacamole balances the spice and adds a delicious layer of flavor.
  • Chips: Serve with tortilla chips for that extra crunch and joy!

Frequently Asked Questions

Got questions? Let’s clear them up:

  • Can I make this Smashburger Quesadilla ahead of time? Yes, you can prep the beef and store it in the fridge for a day before cooking.
  • What’s the best tortilla for a low-carb Smashburger Quesadilla? Look for low-carb tortillas available at most grocery stores.
  • How can I make this recipe spicier? Add jalapeños or use a spicy cheese blend to amp up the heat.
  • Can I use a different type of meat? Absolutely! Ground turkey, chicken, or even a plant-based option works great.
  • What if I don’t have cheese? Try cream cheese or skip it altogether; the beef flavor will still shine!
  • How do I keep my quesadillas from getting soggy? Ensure your skillet is hot enough before adding the quesadillas and don’t overfill them.
  • Can I freeze leftover quesadillas? Yes, wrap them tightly and freeze for up to 2 months. Reheat directly from frozen.
  • What’s a good dipping sauce for these quesadillas? A simple burger sauce or ranch dressing complements the flavors beautifully.

So there you have it! A comprehensive guide to making the best Smashburger Quesadillas that will ignite your taste buds and inspire your inner chef. Cooking is all about experimentation, so don’t hesitate to make this recipe your own. Remember, food is not just fuel; it’s a story waiting to be told. Now, grab your skillet, unleash your creativity, and let’s get cooking!

Smashburger Quesadillas

Prep Time 5 minutes
Cook Time 10 minutes
Total Time 15 minutes
Servings 4 pieces
Calories 650
Enjoy a delicious twist on quesadillas with seasoned ground beef and melted cheese, perfect for a quick and satisfying meal.

Ingredients

Meat and Seasonings

  • 1 lb ground beef (seasoned with salt, pepper, garlic powder)
  • 4 large flour tortillas
  • 1 cup shredded cheddar or American cheese
  • Optional pickles, diced onions, burger sauce (for serving)

Instructions 

  • Heat a skillet over medium-high heat.
  • Press ground beef onto half of each tortilla and season well.
  • Cook beef side down for 2–3 minutes until browned.
  • Flip, add cheese, fold, and grill until crispy and melty.
  • Slice and serve with toppings or dipping sauce.

Notes

For extra flavor, add diced onions or pickles inside the quesadilla before grilling.
Calories: 650kcal
Cost: $10
Course: Main Course
Cuisine: American
Keyword: beef, quesadilla

Nutrition

Calories: 650kcal | Carbohydrates: 50g | Protein: 40g | Fat: 35g | Sodium: 900mg

Why You’ll Love These Cookies

These Healthy Oat Banana Cookies are not just a delightful treat; they’re a revolution in your baking routine. Imagine biting into a cookie that’s sweetened naturally, bursting with flavor, and brimming with wholesome goodness. That’s the magic of ripe bananas and rolled oats coming together in this easy recipe. These cookies are perfect for satisfying your sweet tooth without the guilt of added sugars. They’re the ideal snack for kids and adults alike, making them a versatile choice that can be enjoyed at any time of the day.

With the warm aroma of cinnamon wafting through your kitchen as they bake, you’ll find it hard to resist sneaking a taste before they’re even cooled. And the best part? They come together in no time at all, making them a go-to option for quick snacks, breakfast treats, or even a healthy dessert. So grab those overripe bananas and let’s dive into this simple yet satisfying recipe!

Overview of Ingredients

Let’s break down the star players in our Healthy Oat Banana Cookies:

  • 2 ripe bananas: The foundation of our sweetness! As bananas ripen, their starches convert to sugars, making them the perfect natural sweetener.
  • 1 cup rolled oats: This whole grain powerhouse adds fiber and texture, turning our cookies into a wholesome snack.
  • 1/2 teaspoon cinnamon: A sprinkle of this spice adds warmth and depth, enhancing the flavor profile of our cookies.
  • 1/4 teaspoon salt: Just a pinch to balance the sweetness and bring out the flavors.
  • 1/4 cup dark chocolate chips or nuts (optional): For those who love a little extra indulgence, chocolate chips or a handful of nuts can elevate these cookies to a whole new level.

Step-by-Step Baking Instructions

Detailed shot of golden-brown oat and banana cookies with chocolate chips on a rustic background.

Ready to bake? Here’s how to whip up a batch of these delicious cookies:

  1. Preheat your oven: Start by preheating your oven to 350°F (175°C). This ensures that your cookies bake evenly and develop that perfect golden crust.
  2. Prepare your baking sheet: Line a baking sheet with parchment paper. This prevents the cookies from sticking and makes cleanup a breeze.
  3. Mash the bananas: In a mixing bowl, take your ripe bananas and mash them until smooth. The riper the bananas, the easier this will be!
  4. Combine the ingredients: Add the rolled oats, cinnamon, and salt to the mashed bananas. Mix until everything is thoroughly combined.
  5. Fold in extras: If you’re feeling adventurous, fold in the dark chocolate chips or nuts at this point. They add a delightful texture and flavor that pairs beautifully with the banana.
  6. Scoop the dough: Using a tablespoon, scoop out portions of the dough onto your prepared baking sheet, leaving some space between each cookie to allow for spreading.
  7. Flatten them out: Gently flatten the cookies slightly with the back of a spoon. This helps them bake evenly.
  8. Bake: Pop the baking sheet into the oven and bake for 10-12 minutes, or until the edges are golden brown. The smell in your kitchen will be absolutely irresistible!
  9. Cool down: Allow the cookies to cool on the baking sheet for a few minutes before transferring them to a wire rack to cool completely. This step is crucial — warm cookies are delicious, but cooled cookies have a better texture!

Tips for Perfect Cookies

Every baker knows that the secret to perfect cookies often lies in the details. Here are some tips to ensure your Healthy Oat Banana Cookies are top-notch:

  • Use overripe bananas: The sweeter the banana, the sweeter your cookies. Look for bananas with lots of brown spots for the best flavor.
  • Don’t skip the cinnamon: It’s not just for flavor; cinnamon also adds a hint of warmth that complements the bananas beautifully.
  • Watch the baking time: Ovens can vary, so keep an eye on the cookies. They’re done when the edges are golden and the tops look set.

Variations to Try

Once you’ve mastered the basic recipe, feel free to get creative! Here are some fun variations:

  • Nut butter cookies: Add a couple of tablespoons of your favorite nut butter (like almond or peanut) for a richer flavor and added protein.
  • Spiced banana cookies: Experiment with adding nutmeg or vanilla extract for a unique twist.
  • Dried fruits: Chopped dried fruits like cranberries or apricots can add a chewy texture and a burst of flavor.

Substitutions You Can Make

If you’re missing an ingredient or need to cater to dietary restrictions, here are some easy substitutions:

  • Oats: If you’re gluten-free, make sure to use certified gluten-free oats.
  • Dark chocolate chips: You can substitute with carob chips or leave them out entirely if you prefer a lighter cookie.
  • Bananas: If bananas aren’t your thing, try using unsweetened applesauce for a similar texture and sweetness.

Equipment You’ll Need

This recipe is straightforward and doesn’t require any fancy equipment. Here’s what you’ll need:

  • A mixing bowl
  • A fork for mashing bananas
  • A baking sheet
  • Parchment paper
  • A spoon for scooping and flattening the cookies
  • A wire rack for cooling

Storage and Freezing Tips

These cookies are great for meal prep! Here’s how to store them:

  • At room temperature: Store in an airtight container for up to 3 days.
  • In the fridge: They can last for about a week refrigerated.
  • For longer storage: Freeze the cookies in a single layer on a baking sheet until solid, then transfer them to a freezer bag. They can last up to 3 months in the freezer!

FAQs

Here are some common questions I get about these Healthy Oat Banana Cookies:

  • Can I use frozen bananas? Absolutely! Just make sure to thaw and drain any excess liquid before mashing.
  • Are these cookies vegan? Yes, this recipe is naturally vegan since it contains no eggs or dairy.
  • How can I make these cookies more filling? Consider adding some chopped nuts or seeds for an extra protein boost!

Troubleshooting Common Issues

If your cookies don’t turn out as expected, don’t fret. Here are some solutions:

  • Cookies spread too much: Make sure your bananas are not too watery. If they are, your dough might be too loose.
  • Cookies are too dry: This can happen if you overbake them. Keep an eye on the time and remove them as soon as the edges are golden.
  • Not sweet enough: If you prefer a sweeter cookie, feel free to add a little maple syrup or honey to the mash before mixing.

Conclusion: Embrace the Sweet Adventure

There you have it! Healthy Oat Banana Cookies that are not only easy to make but also bursting with flavor and nutrition. Whether you’re whipping these up for breakfast, a snack, or a sweet treat after dinner, they promise to be a hit. But more than just a recipe, they’re an invitation to explore the joy of cooking with simple, wholesome ingredients. So gather your loved ones, share this delightful treat, and let the warmth of home-baked cookies fill your heart and kitchen. Remember, the best recipes are the ones that bring us together and create lasting memories. Happy baking!

Healthy Oat Banana Cookies (No Sugar Needed!)

Prep Time 10 minutes
Cook Time 12 minutes
Total Time 22 minutes
Servings 12 cookies
Calories 150
Enjoy these healthy, naturally sweet cookies made with bananas and oats, perfect for a quick snack or breakfast.

Ingredients

Bananas

  • 2 pieces ripe bananas

Oats

  • 1 cup rolled oats

Spices

  • 1/2 teaspoon cinnamon
  • 1/4 teaspoon salt

Add-ins

  • 1/4 cup dark chocolate chips or nuts (optional)

Instructions 

  • Preheat oven to 350°F (175°C) and line a baking sheet.
  • Mash bananas until smooth in a bowl.
  • Mix in oats, cinnamon, and salt until combined. Fold in chocolate chips or nuts if using.
  • Scoop dough onto baking sheet and flatten slightly.
  • Bake for 10-12 minutes until edges are golden. Cool before serving.

Notes

For a sweeter taste, add a dash of vanilla extract or honey.
Calories: 150kcal
Cost: $5
Course: Dessert
Keyword: Banana, healthy, oats

Nutrition

Calories: 150kcal | Carbohydrates: 25g | Protein: 3g | Fat: 4g | Sodium: 150mg

Loved this recipe? Save it to your favorite Pinterest board so you can easily find it later! It’s the perfect way to keep all your sweet ideas in one place. ✨

A cozy arrangement of Healthy Oat Banana Cookies with gentle shadows and a blurred backdrop.

Why You’ll Love These Savory Muffins

When it comes to breakfast or a quick snack, these Vegan Savoury Muffins are a game-changer. Imagine biting into a warm muffin that’s not just fluffy but also packed with vibrant vegetables and spices that dance on your palate. These aren’t your typical muffins; they’re a celebration of flavor and nutrition that will elevate your mornings and keep you energized throughout the day. Whether you’re looking for a nutritious option for kids’ lunchboxes or something delightful to enjoy with your morning coffee, these muffins are your new go-to. They’re not just easy to make; they’re a canvas for your culinary creativity!

Ingredients You’ll Need

To whip up these irresistible muffins, gather the following ingredients:

  • 1 cup all-purpose flour
  • 1 cup whole wheat flour
  • 1 tablespoon baking powder
  • 1/2 teaspoon salt
  • 1/2 teaspoon black pepper
  • 1/2 cup almond milk (or any plant-based milk)
  • 1/4 cup olive oil
  • 1 tablespoon apple cider vinegar
  • 1/2 cup chopped spinach
  • 1/4 cup diced bell pepper
  • 1/4 cup chopped green onions
  • 1/4 cup nutritional yeast (optional)

Notes About the Ingredients

Vibrant Vegan Savoury Muffins featuring chopped spinach and bell pepper.

Before you dive into mixing, let’s talk about some of the ingredients that make these muffins shine:

  • Flours: The combination of all-purpose and whole wheat flour provides a delightful texture that balances fluffiness and heartiness. Feel free to experiment with gluten-free flour blends if you’re avoiding gluten!
  • Almond Milk: While almond milk is my go-to for its creamy consistency, you can substitute it with any plant-based milk you prefer, like oat or soy milk.
  • Nutritional Yeast: This ingredient adds a savory, cheesy flavor without any dairy. It’s rich in vitamins and adds a lovely umami punch!
  • Vegetables: Spinach, bell pepper, and green onions not only add flavor but also a plethora of nutrients. You can swap these out for other veggies like zucchini, shredded carrots, or even mushrooms to suit your taste!

Tips for Making the Muffin Batter

Creating the perfect muffin batter is an art, and I’m here to help you master it:

  • Mixing Technique: When combining the wet and dry ingredients, be gentle. Overmixing can lead to tough muffins. Stir until just combined and leave a few lumps — this is key to achieving that light and fluffy texture.
  • Don’t Drain the Veggies: There’s no need to strain your chopped spinach or bell peppers. The moisture they release while baking will keep your muffins deliciously moist.
  • Thick Batter: The batter will be quite thick, which is perfectly normal. Don’t worry — the veggies will provide moisture as they cook.

Tips for Baking the Muffins

Now that you’ve got the batter ready, let’s ensure your muffins bake to perfection:

  • Preheat Properly: Always preheat your oven to 375°F (190°C) before baking. This ensures a consistent bake and helps the muffins rise beautifully.
  • Fill the Muffin Tin: Fill each muffin cup about 3/4 full for the best rise. This way, your muffins won’t overflow but will still have plenty of room to puff up.
  • Check for Doneness: A toothpick inserted into the center of a muffin should come out clean when they’re done. If it has wet batter clinging to it, give them a few more minutes.

Customizing the Muffins

These muffins are incredibly versatile! Here are some ideas to customize them:

  • Spice it Up: Add a pinch of cayenne pepper or red pepper flakes if you like a little kick.
  • Cheesy Twist: Toss in some shredded vegan cheese for an extra layer of flavor. Just mix it in with the vegetables before pouring into the muffin tin.
  • Herbs and More: Fresh herbs like basil, parsley, or cilantro can brighten up the flavor profile. Experiment with different combinations to find your favorite!

More Vegan Muffins and Quick Breads with Vegetables

If you enjoy these savory muffins, why not explore more scrumptious vegan baking ideas? Here are a few recipes to try:

Instructions

Ready to bake? Here’s how to make your Vegan Savoury Muffins:

  1. Preheat the oven to 375°F (190°C) and line a muffin tin with paper liners or grease it.
  2. In a large bowl, mix together the all-purpose flour, whole wheat flour, baking powder, salt, and black pepper.
  3. In another bowl, whisk together the almond milk, olive oil, and apple cider vinegar.
  4. Pour the wet ingredients into the dry ingredients and mix until just combined.
  5. Fold in the chopped spinach, diced bell pepper, chopped green onions, and nutritional yeast (if using).
  6. Spoon the batter into the prepared muffin tin, filling each cup about 3/4 full.
  7. Bake for 20-25 minutes, or until a toothpick inserted into the center comes out clean.
  8. Allow to cool for a few minutes before transferring to a wire rack to cool completely.

Storage and Freezing

These savory muffins can be stored in an airtight container at room temperature for up to three days. If you want to keep them longer, freeze them in a freezer-safe bag for up to three months. Just pop them in the microwave or oven to reheat when you’re ready to enjoy!

FAQs

Here are some common questions about these muffins:

  • Can I make these muffins gluten-free? Yes! Use a 1:1 gluten-free flour blend and they should turn out just as delicious.
  • Can I add other vegetables? Absolutely! Feel free to swap in your favorite vegetables or what you have on hand.
  • What can I serve with these muffins? They pair beautifully with avocado, hummus, or a light soup for a satisfying meal.

Troubleshooting

If your muffins don’t turn out as expected, here are a few tips to troubleshoot:

  • If your muffins are too dense, try mixing the batter less next time and ensure you’re using the right amount of baking powder.
  • If they’re too dry, check your oven temperature. Ovens can vary, and yours may be running hotter than indicated.
  • If they stick to the muffin tin, make sure to use liners or grease the tin adequately before adding the batter.

Conclusion

Cooking should always be an adventure, and these Vegan Savoury Muffins are a perfect way to embark on a new one. With their bold flavors and wholesome ingredients, they’ll not only satisfy your taste buds but also inspire you to get creative in the kitchen. So grab your apron, preheat that oven, and let’s make breakfast exciting again! Your taste buds will thank you for every delicious bite!

Vegan Savoury Muffins

Prep Time 10 minutes
Cook Time 25 minutes
Total Time 35 minutes
Servings 12 muffins
Calories 150
Enjoy these delicious and healthy vegan savoury muffins, perfect for a quick snack or breakfast.

Ingredients

Dry ingredients

  • 1 cup all-purpose flour
  • 1 cup whole wheat flour
  • 1 tablespoon baking powder
  • 1/2 teaspoon salt
  • 1/2 teaspoon black pepper

Wet ingredients

  • 1 cup almond milk (or any plant-based milk)
  • 1/4 cup olive oil
  • 1 tablespoon apple cider vinegar

Add-ins

  • 1/2 cup chopped spinach
  • 1/4 cup diced bell pepper
  • 1/4 cup chopped green onions
  • 1 tablespoon nutritional yeast (optional)

Instructions 

  • Preheat oven to 375°F (190°C) and prepare muffin tin.
  • Mix dry ingredients in a bowl.
  • Whisk wet ingredients in another bowl.
  • Combine wet and dry, then fold in add-ins.
  • Spoon batter into muffin tin and bake for 20-25 minutes.
  • Cool before serving.

Notes

Use fresh spinach for best flavor.
Calories: 150kcal
Cost: $10
Course: Breakfast, Snack
Cuisine: Vegan
Keyword: healthy, Muffins, Vegetarian

Nutrition

Calories: 150kcal | Carbohydrates: 20g | Protein: 5g | Fat: 7g | Sodium: 200mg

Loved this recipe? Save it to your favorite Pinterest board so you can easily find it later! It’s the perfect way to keep all your sweet ideas in one place. ✨

Freshly baked Vegan Savoury Muffins displayed on a rustic wooden surface.

Discover the Joy of Zucchini Casserole: A Culinary Adventure

Welcome to a flavorful journey where the humble zucchini transforms into a star player in your kitchen! This zucchini casserole is not just a dish; it’s a celebration of summer’s bounty, rich cheeses, and aromatic herbs that dance in harmony. Whether you’re looking to impress guests or simply enjoy a cozy night in, this Savory Bisquick Zucchini Casserole is your ticket to gastronomic bliss. So roll up your sleeves and let’s dive deep into this delicious world!

Why You’ll Love This Zucchini Casserole

Here are just a few reasons why this dish deserves a spot on your dinner table:

  • Versatile Dish: Great as a main course or a side, this casserole is adaptable to any meal.
  • Easy Preparation: With simple steps and common ingredients, it’s perfect for both novice and seasoned cooks.
  • Flavor-Packed: The blend of cheeses and spices creates a depth of flavor that’s irresistible.
  • Healthy Choice: Packed with zucchini, it’s a nutritious option that doesn’t compromise on taste.
  • Make-Ahead Friendly: Prepare it in advance and bake when you’re ready, saving you time and effort!

Ingredient Breakdown: What You’ll Need

Let’s break down the hero ingredients of this dish and explore some delightful substitutions!

  • 4 cups grated zucchini: About 3 medium zucchinis. This vegetable is the star of the show, bringing moisture and texture.
  • 4 large eggs: They bind everything together and help the casserole set beautifully.
  • 1 cup baking mix: This can be Bisquick or any other similar product you have on hand.
  • 1/4 cup olive oil: Adds richness and helps the casserole to brown nicely.
  • 1 chopped onion: For a savory depth of flavor; you can substitute with shallots or leeks for a sweeter note.
  • 1 cup cheddar cheese: The classic choice, but feel free to mix it up with Monterey Jack or Gouda.
  • 1/2 cup parmesan cheese: Adds that extra umami kick; try Pecorino Romano for a sharper flavor.
  • 1 teaspoon Italian herbs: A blend of basil, oregano, and thyme works wonders!
  • Salt and pepper to taste: Essential for enhancing all the flavors.

Pro Tips for the Perfect Zucchini Casserole

Juicy Bisquick zucchini casserole displayed in a dish, showcasing layers of cheese and zucchini.

Ready to take your dish to the next level? Here are some expert insights:

  • Grate Your Zucchini: Squeeze out excess moisture after grating to prevent a soggy casserole.
  • Experiment with Cheeses: Mixing different cheeses can elevate the flavor profile significantly.
  • Season Generously: Don’t shy away from seasoning! It’s key to a delicious outcome.
  • Let It Rest: Allow the casserole to sit for a few minutes after baking; this helps it set and makes for easier slicing.
  • Use Fresh Herbs: If you have them, fresh herbs can add brightness to the dish.
  • Try Different Add-Ins: Consider adding cooked sausage, diced bell peppers, or spinach for an extra kick.
  • Cover While Baking: If the top is browning too quickly, cover with foil for part of the baking time.
  • Mind the Oven Temperature: Ensure your oven is preheated to get that perfect golden crust.

Avoiding Common Mistakes

Even the best chefs make mistakes! Here are some pitfalls to avoid:

  • Overcooking Zucchini: This can make your casserole watery. Remember, less is more when it comes to cooking time.
  • Skipping the Egg: Eggs are essential for binding; don’t skip them!
  • Not Tasting for Seasoning: Always taste your mixture before baking to adjust seasoning if needed.
  • Ignoring the Resting Time: Letting the casserole cool for a few minutes helps it hold its shape.

Delicious Variations to Try

This dish is a blank canvas—let your creativity shine! Here are some variations to consider:

  • Mexican Zucchini Casserole: Add black beans, corn, and a sprinkle of cumin for a southwest twist.
  • Cheesy Spinach Zucchini Bake: Incorporate fresh spinach and ricotta for a creamy texture.
  • Meat Lover’s Zucchini Casserole: Add cooked ground beef or turkey for a heartier dish.
  • Gluten-Free Option: Substitute the baking mix with a gluten-free blend to cater to dietary needs.

Storage and Make-Ahead Instructions

This casserole is perfect for meal prep! Here’s how to store it:

  • Refrigerate: Store leftovers in an airtight container for up to 3 days.
  • Freeze: You can freeze the unbaked casserole for up to 2 months. Just thaw overnight in the fridge before baking.
  • Reheat: Warm in the oven at 350°F for about 20 minutes, or until heated through.

Frequently Asked Questions

Here are some common questions about this recipe:

  • Can I use frozen zucchini? Yes, but make sure to drain it well to remove excess moisture.
  • What should I serve with zucchini casserole? It pairs beautifully with a fresh salad or grilled meats.
  • How can I make it spicier? Add diced jalapeños or a sprinkle of red pepper flakes to the mix!
  • Is it okay to add more cheese? Absolutely! Cheese lovers can never go wrong with extra cheese.
  • Can I make this vegetarian? Yes! Just skip the meat and load up on veggies.
  • What’s the best way to cut the casserole? Use a sharp knife and let it rest for a few minutes before cutting for clean slices.
  • Can I use other vegetables? Definitely! Bell peppers, mushrooms, or even sweet potatoes work great.
  • How long does it take to bake? Typically, it takes about 30-40 minutes in a preheated oven.

Nutritional Insights and Dietary Adaptations

This zucchini casserole is not only delicious but also a smart choice for your health!

  • Low-Carb Option: Replace the baking mix with almond flour for a low-carb version.
  • High-Protein Twist: Add cottage cheese for an extra protein punch.
  • Reduce Fat: Use low-fat cheese and omit the olive oil for a lighter casserole.

Essential Equipment for Success

To create this masterpiece, make sure you have:

  • Large Mixing Bowl: For combining all ingredients seamlessly.
  • Grater: Essential for shredding zucchini and cheese.
  • Baking Dish: A 9×13 inch dish works perfectly for this recipe.
  • Whisk: For mixing eggs and ensuring a smooth batter.

Serving Suggestions: Elevate Your Experience

Now that your casserole is baked to perfection, here’s how to serve it:

  • Garnish with Fresh Herbs: A sprinkle of parsley or basil adds a fresh touch.
  • Pair with a Salad: A light green salad balances the richness of the casserole.
  • Serve with a Side of Salsa: A zesty salsa can elevate the flavors even further.

In conclusion, this Savory Bisquick Zucchini Casserole is not just a recipe; it’s an experience that brings people together around the table. Embrace the flavors, share the love, and remember that every bite is a story waiting to be told. So grab your ingredients, unleash your creativity, and let’s make magic happen in the kitchen!

Savory Bisquick Zucchini Casserole

Prep Time 15 minutes
Cook Time 30 minutes
Total Time 45 minutes
Servings 6 servings
Calories 250
A delicious and easy zucchini casserole combining fresh vegetables, cheese, and Bisquick for a savory meal.

Ingredients

Vegetables

  • 4 cups grated zucchini (from about 3 medium zucchinis)
  • 4 large eggs
  • 1 cup baking mix
  • 1/4 cup olive oil
  • 1 chopped onion
  • 1 cup cheddar cheese
  • 1/2 cup parmesan cheese
  • 1 teaspoon italian herbs
  • to taste Salt and pepper Salt and pepper

Instructions 

  • Preheat oven to 375°F (190°C).
  • Mix grated zucchini, eggs, baking mix, olive oil, chopped onion, cheeses, herbs, salt, and pepper in a bowl.
  • Pour mixture into a greased baking dish and spread evenly.
  • Bake for 30 minutes until golden and set.
  • Let cool slightly before serving.

Notes

For a crisp top, broil for an additional 2 minutes at the end.
Calories: 250kcal
Cost: $12
Course: Main Course
Cuisine: American
Keyword: zucchini

Nutrition

Calories: 250kcal | Carbohydrates: 15g | Protein: 12g | Fat: 18g | Sodium: 300mg