Author

Avery Collins

Browsing

The Spicy Healthy Recipe That Turned My Kitchen Into a Flavor Fiesta

Welcome, fellow spice lovers! If you’re anything like me, your kitchen is your playground—a space where flavors collide, aromas mingle, and every meal is a new adventure. Today, I’m thrilled to share a vibrant, health-packed recipe that’s not only a feast for the senses but also a testament to the idea that eating healthy doesn’t have to be bland or boring. So grab your apron and prepare for a flavor fiesta with these delightful Pin by Raina Elkova on Здраве и фитнес!

Why This Recipe Is a Game-Changer

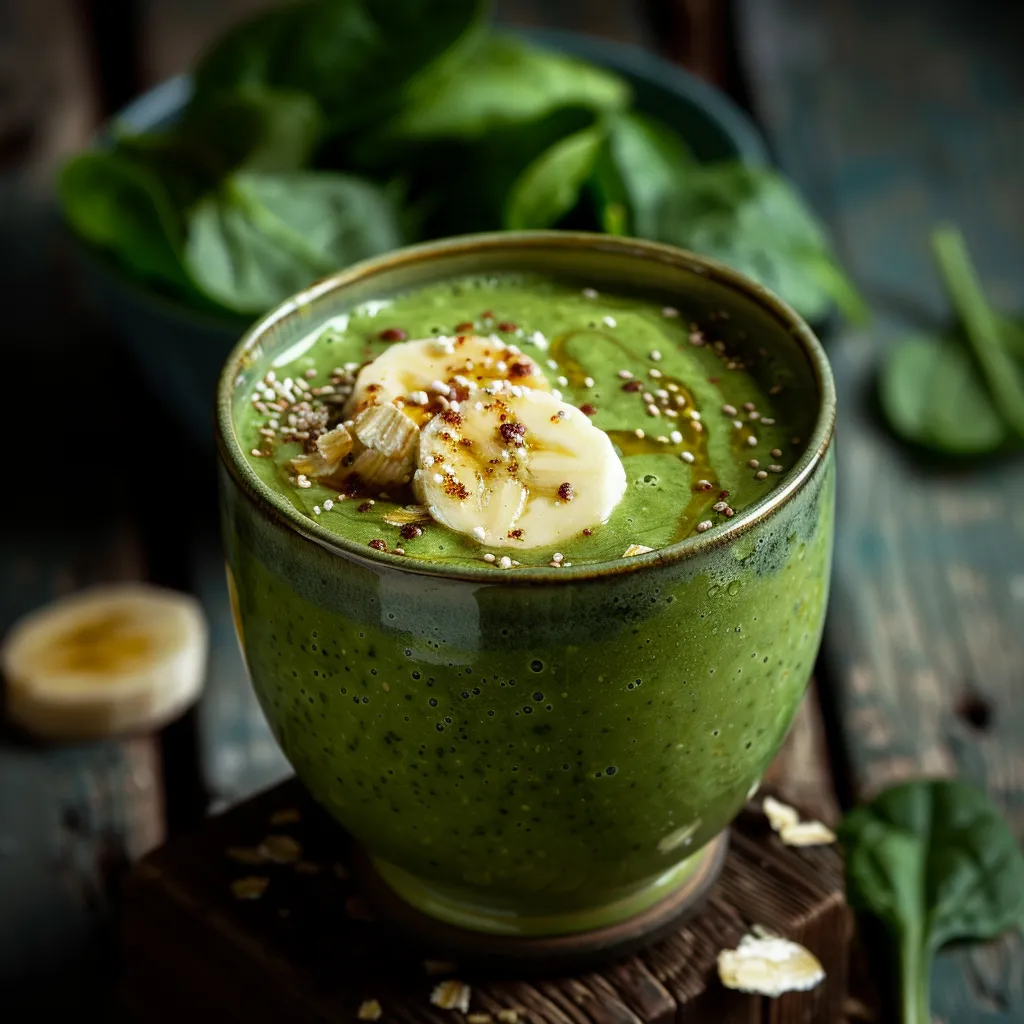
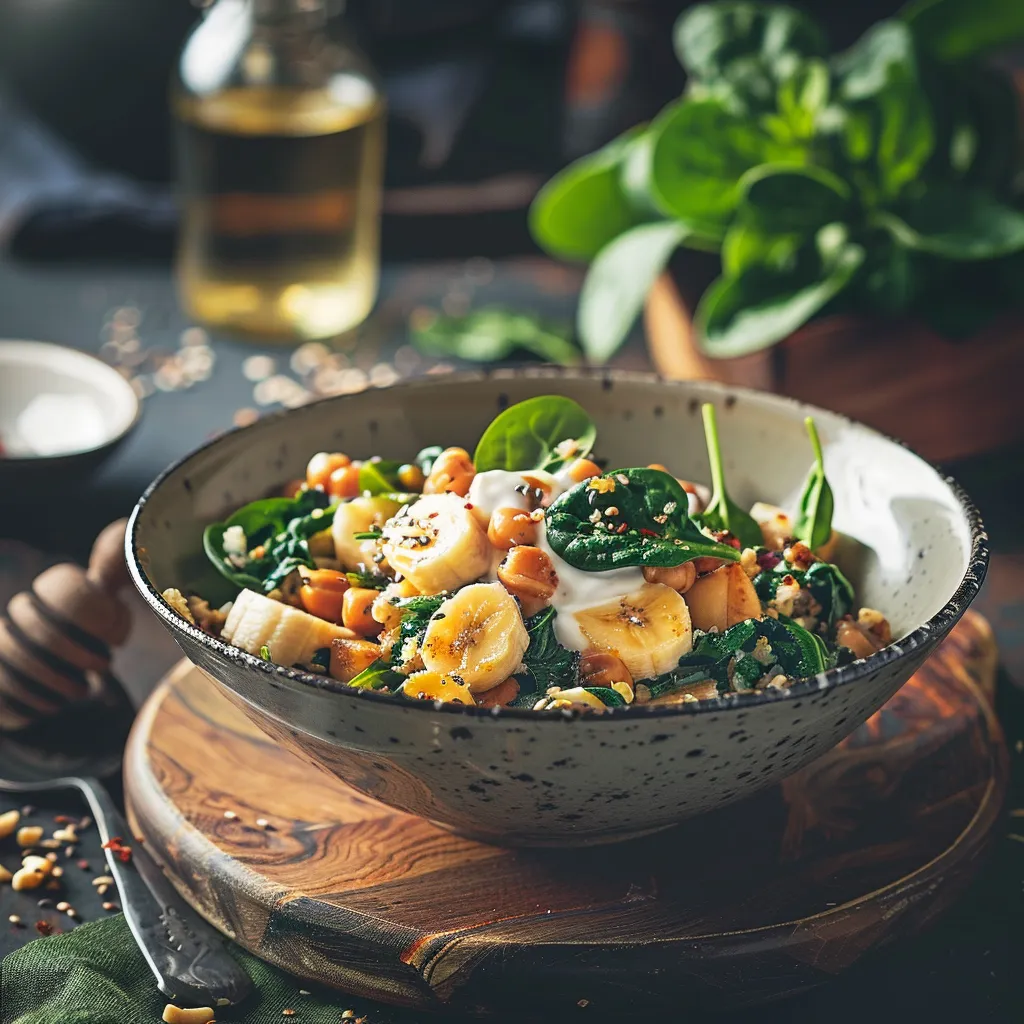
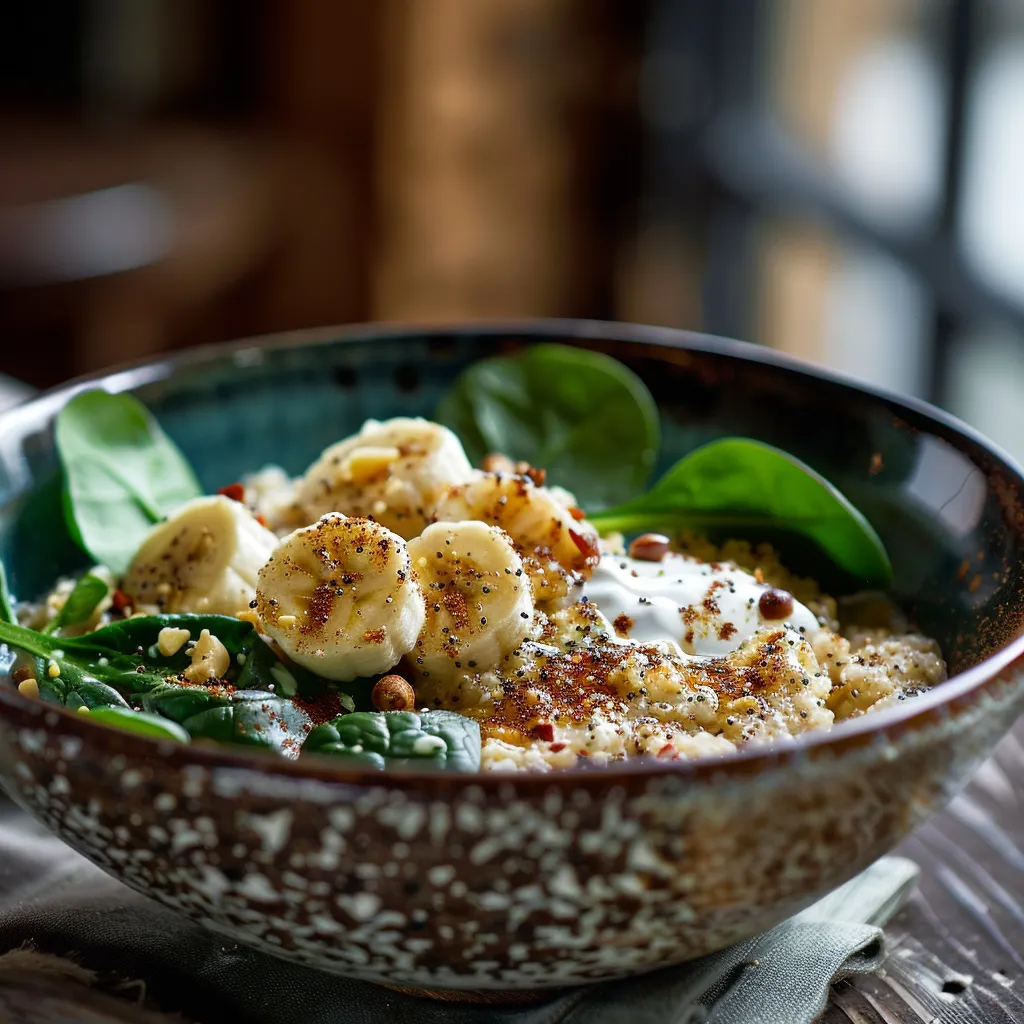
Let’s face it: in a world full of quick fixes and bland diets, finding a healthy recipe that actually excites your taste buds can feel like searching for a needle in a haystack. But fear not! This spicy, healthy concoction combines fresh spinach, the natural sweetness of a ripe banana, the creaminess of Greek yogurt, and just the right amount of liquid to create a concoction that dances on your palate.

This recipe is perfect for breakfast, a midday snack, or even a post-workout boost. It’s a celebration of health without sacrificing flavor, and I’m here to take you through every step of this culinary journey. Ready to dive in? Let’s go!

Ingredients: What You’ll Need

Eye-level shot of a delicious, healthy smoothie topped with fresh spinach and banana slices, softly lit from the side.

To whip up this delightful recipe, you’ll need just a handful of ingredients:

  • 1 cup fresh spinach
  • 1 ripe banana
  • 1/2 cup Greek yogurt
  • 1/2 cup water or almond milk
  • 1 tablespoon honey (optional)

Each ingredient plays a vital role in creating a symphony of flavors and textures. The spinach brings in a vibrant green hue and a wealth of nutrients, while the banana adds natural sweetness and creaminess. Greek yogurt? That’s my secret weapon for that luscious mouthfeel! And if you want a touch of extra sweetness, a drizzle of honey will do the trick.

How to Make Your Flavor Fiesta

Step-by-Step Instructions

Alright, let’s get down to business! Here’s how to create this deliciously spicy and healthy dish:

  1. Prepare Your Ingredients: Start by washing your fresh spinach thoroughly. You want to make sure there’s no grit or dirt left behind. Peel your ripe banana and gather your Greek yogurt and chosen liquid.
  2. Blend It Up: Place all your ingredients—the spinach, banana, Greek yogurt, water or almond milk, and honey (if using)—into a high-speed blender.
  3. Blend Until Smooth: Secure the lid on your blender and blend on high until the mixture is completely smooth and creamy. Depending on your blender, this might take about 30 seconds to a minute.
  4. Serve and Enjoy: Pour the vibrant green smoothie into a glass and serve immediately. You can garnish it with a sprinkle of chia seeds or a slice of banana for that extra touch!

Tips for Perfecting Your Fiesta

  • Balance Your Flavors: If you find the smoothie too sweet, add a squeeze of lemon juice to balance it out. If you prefer a creamier texture, feel free to add more Greek yogurt.
  • Experiment with Greens: Don’t limit yourself to spinach! Try kale, Swiss chard, or even arugula for a different flavor profile.
  • Chill Out: For an extra refreshing drink, freeze some spinach or banana beforehand. This will give your smoothie a frosty, slushy texture.

Variations and Substitutions

This recipe is incredibly versatile, and I encourage you to make it your own! Here are a few ideas:

  • Add Some Spice: For those who like a kick, consider adding a pinch of cayenne pepper or a dash of ginger for warmth.
  • Nut Butters: A tablespoon of almond or peanut butter can add healthy fats and an extra layer of flavor.
  • Non-Dairy Options: If you’re dairy-free, substitute Greek yogurt with a dairy-free yogurt alternative.

Storage & Freezing

This smoothie is best enjoyed fresh, but if you have leftovers, here’s how to store them:

  • Refrigeration: Store any leftover smoothie in an airtight container in the fridge for up to 24 hours. Give it a good shake or stir before enjoying.
  • Freezing: If you want to prep ahead, pour the smoothie into ice cube trays and freeze. You can blend a few cubes with your favorite liquid later for a quick smoothie!

FAQs: Your Questions Answered

Can I substitute the Greek yogurt?

Absolutely! You can use any yogurt of your choice—dairy-free options work great too. Just keep in mind that the flavor and texture may vary slightly.

What if I don’t have spinach?

No problem! Kale or even collard greens can be used as a substitute. Just make sure to wash them thoroughly!

How can I add more nutrients?

Consider adding a scoop of protein powder, a tablespoon of flaxseeds, or a handful of nuts to boost the nutritional value of your smoothie.

Is this suitable for meal prep?

Yes! As mentioned before, you can freeze the smoothie in ice cube trays and blend them later. It’s perfect for a busy morning!

Conclusion: Your Flavor Fiesta Awaits!

And there you have it, friends! A spicy healthy recipe that’s as exciting as it is nourishing. From the moment you blend those ingredients together to the last sip, you’ll be transported to a world of vibrant flavors and textures. I hope this recipe ignites your passion for cooking and inspires you to experiment in your kitchen.

Remember, cooking is all about joy, exploration, and a little dash of creativity. So make this Pin by Raina Elkova on Здраве и фитнес, share it with loved ones, and let the flavor fiesta begin! If you enjoyed this recipe, check out my other favorites like Nourish your soul: The clean eating recipe that transformed my health and Everyday delights: My simple dinners that make healthy living a joy. Bon appétit!

Pin by Raina Elkova on Здраве и фитнес

Prep Time 5 minutes
Total Time 5 minutes
Servings 1 serving
Calories 200
A quick and nutritious green smoothie perfect for a healthy start to your day.

Ingredients

Main ingredients

  • 1 cup fresh spinach
  • 1 ripe banana banana
  • 0.5 cup greek yogurt
  • 0.5 cup water or almond milk
  • 1 tablespoon honey (optional)

Instructions 

  • Place all ingredients into a blender.
  • Blend until smooth and creamy.
  • Pour into a glass and serve immediately.

Notes

Feel free to add more honey for sweetness or substitute almond milk for water.
Calories: 200kcal
Cost: $4
Course: Breakfast
Cuisine: Healthy
Keyword: Spinach

Nutrition

Calories: 200kcal | Carbohydrates: 40g | Protein: 8g | Fat: 2g | Sodium: 60mg

Loved this recipe? Save it to your favorite Pinterest board so you can easily find it later! It’s the perfect way to keep all your sweet ideas in one place. ✨

Hyper-detailed image of a nutritious smoothie with visible spinach leaves and banana chunks, in natural warm light.

The Gnocchi That Turns Up the Heat and Wins Hearts Every Time

There’s something undeniably magical about a bowl of gnocchi. Soft, pillowy morsels that dance on your tongue, they have this incredible ability to absorb flavors, making each bite a delightful explosion of taste. Today, I’m sharing my favorite recipe: Creamy Spinach and Mushroom Gnocchi with Garlic and Smoked Paprika Cream Sauce. This dish is a celebration of bold flavors and comforting textures, perfect for those who crave a little heat in their meals!

Why This Gnocchi Recipe Is a Must-Try

Why should you dive into this creamy concoction? Well, let me tell you, this isn’t just any gnocchi dish. It’s a celebration of freshness with sautéed mushrooms and vibrant spinach, all enveloped in a rich, smoky cream sauce that will make your taste buds sing. Plus, it comes together in just one pan and takes less than 30 minutes to whip up! Perfect for weeknights when you want something delicious without the fuss.

What Kind of Gnocchi to Use?

Eye-level shot of gnocchi with spinach, mushrooms, and a rich garlic smoked paprika cream.

When it comes to gnocchi, you have a couple of options. You can either go with store-bought potato gnocchi, which is convenient and delicious, or you can make your own from scratch if you’re feeling adventurous. If you choose the homemade route, I applaud you! But for those of us who want to dive right into the cooking, a good quality store-bought gnocchi will do the trick just fine. Look for gnocchi made with real potatoes for that authentic, fluffy texture.

Do You Have to Precook Gnocchi?

Nope! That’s the beauty of this recipe. You’ll cook the gnocchi right in the creamy sauce, allowing them to absorb all those flavors while they cook. The starch released by the gnocchi will also help thicken the sauce, creating a luscious coating that clings to every bite. No extra steps, no fuss — just pure, unadulterated bliss!

Ingredients

  • 1 package (16 oz) potato gnocchi
  • 2 cups fresh spinach, chopped
  • 8 oz mushrooms, sliced
  • 3 cloves garlic, minced
  • 1 cup heavy cream
  • 1 teaspoon smoked paprika
  • 2 tablespoons olive oil
  • Salt and pepper to taste
  • Parmesan cheese for garnish (optional)

How to Cook One-Pan Gnocchi

Ready to dive into this culinary adventure? Let’s get cooking!

Step 1: Cook the Gnocchi

Start by cooking the gnocchi according to the package instructions. Typically, this involves boiling them in salted water until they float to the surface, which usually takes just a few minutes. Once they’re done, drain them and set aside. This simple step is crucial, as it ensures your gnocchi will be perfectly tender and ready to absorb all that delicious sauce.

Step 2: Sauté the Mushrooms

In a large skillet, heat the olive oil over medium heat. The moment the oil glistens, add your sliced mushrooms. Sauté them until they become golden brown and caramelized, about 5 minutes. This browning process is where the magic happens — the mushrooms will develop a rich, savory flavor that forms the foundation of your dish. Season them with a pinch of salt and pepper to bring out their natural umami.

Step 3: Add Garlic and Spinach

Once the mushrooms are browned to perfection, it’s time to add the minced garlic. Cook it for about a minute, just until it becomes fragrant and starts to dance with the mushrooms. Next, toss in the chopped spinach, stirring it in until it wilts down — this should take about 2 minutes. The vibrant green of the spinach will not only add color but also a fresh burst of flavor that pairs beautifully with the earthiness of the mushrooms.

Step 4: Make the Creamy Sauce

Now for the pièce de résistance! Pour in the heavy cream and sprinkle in the smoked paprika, stirring everything together. As the sauce simmers for 3-4 minutes, it will thicken slightly and envelop the mushrooms and spinach in its creamy embrace. This is where the magic of flavor comes to life — the combination of the cream and smoked paprika creates a rich, smoky backdrop that enhances every ingredient.

Step 5: Combine with Gnocchi

Finally, add your cooked gnocchi to the skillet, tossing gently to coat them in the luxurious sauce. Let everything mingle for just a minute or two, allowing the gnocchi to soak up that creamy goodness. Taste and season with salt and pepper to your liking. If you’re feeling fancy, a sprinkle of red pepper flakes will add an extra kick!

Cooking Tips

  • Don’t overcook the gnocchi: Keep an eye on them while they’re cooking. They only need a few minutes in boiling water. If you let them sit too long, they can become mushy.
  • Experiment with spices: If smoked paprika isn’t your thing, feel free to swap it out for something else, like cayenne pepper or even Italian herbs.
  • Fresh vs. dried herbs: Fresh herbs can elevate this dish even further. Consider adding some fresh basil or parsley as a garnish for an aromatic finish.

Storage and Reheating Tips

If you have leftovers (which is highly unlikely because this dish is simply too good!), store them in an airtight container in the fridge for up to 3 days. When it’s time to reheat, do so gently on low heat in a skillet, adding a splash of milk or cream to keep the sauce from becoming too thick or separating. You want that creamy texture to stay intact, trust me!

What to Serve with This Gnocchi

This creamy spinach and mushroom gnocchi is a delightful dish on its own, but if you want to round out your meal, consider serving it with a fresh salad or some crusty garlic bread. A simple arugula salad tossed with lemon vinaigrette can cut through the richness, while garlic bread will soak up every last drop of the creamy sauce. The options are endless!

Variations to Try

Feel adventurous? Here are some fun variations to consider:

  • Add Protein: Toss in some grilled chicken, sautéed shrimp, or even crispy bacon for an extra layer of flavor and heartiness.
  • Mix Up the Veggies: Feel free to throw in other vegetables like bell peppers, zucchini, or cherry tomatoes for a pop of color and nutrition.
  • Cheese Lovers: If you adore cheese, add some cream cheese or goat cheese to the sauce for an even creamier texture and a tangy flavor kick.

Frequently Asked Questions

Can I substitute the heavy cream?

Absolutely! If you want to lighten it up, you can use half-and-half or even a plant-based cream for a dairy-free option. Just keep in mind that the sauce may not be as thick or rich.

What if I can’t find smoked paprika?

No problem! Regular paprika will work in a pinch, or you can use a dash of cayenne for a spicier kick. Just adjust the amount to your heat preference!

Can I freeze this dish?

While gnocchi can be frozen, I recommend freezing the cooked gnocchi separately from the sauce. Once the sauce is made, it may not reheat as well after freezing. You can freeze the sauce for up to a month, then cook fresh gnocchi when you’re ready to enjoy it again.

Conclusion

So there you have it! A bowl of Creamy Spinach and Mushroom Gnocchi with Garlic and Smoked Paprika Cream Sauce that’s not just a meal but an experience. It’s a dish that invites you to savor every bite, a celebration of flavors that will leave your heart and stomach satisfied. Whether you’re cooking for yourself, a partner, or a group of friends, this recipe is sure to impress and ignite the passion for cooking in your kitchen. So grab your skillet, turn up the heat, and let’s make some magic happen!

Creamy Spinach and Mushroom Gnocchi with Garlic and Smoked Paprika Cream Sauce

Prep Time 10 minutes
Cook Time 15 minutes
Total Time 25 minutes
Servings 4 servings
Calories 450
A delicious and comforting dish featuring tender gnocchi in a flavorful creamy sauce with spinach, mushrooms, garlic, and smoked paprika.

Ingredients

Gnocchi

  • 16 oz potato gnocchi
  • 2 cups fresh spinach, chopped
  • 8 oz mushrooms, sliced
  • 3 cloves garlic, minced
  • 1 cup heavy cream
  • 1 teaspoon smoked paprika
  • 2 tablespoons olive oil
  • to taste salt and pepper
  • for garnish parmesan cheese (optional)

Instructions 

  • Cook gnocchi according to package; drain and set aside.
  • Sauté mushrooms in olive oil until browned, about 5 minutes.
  • Add garlic; cook 1 minute until fragrant.
  • Stir in spinach; cook until wilted, about 2 minutes.
  • Pour in cream, add paprika; simmer 3-4 minutes until thickened. Season with salt and pepper.
  • Add gnocchi to sauce; toss and serve with Parmesan if desired.

Notes

For extra flavor, sprinkle with fresh herbs or additional Parmesan.
Calories: 450kcal
Cost: $15
Course: Main Course
Cuisine: Italian
Keyword: Gnocchi

Nutrition

Calories: 450kcal | Carbohydrates: 60g | Protein: 12g | Fat: 20g | Sodium: 400mg

Loved this recipe? Save it to your favorite Pinterest board so you can easily find it later! It’s the perfect way to keep all your sweet ideas in one place. ✨

Delicious gnocchi dish featuring spinach, mushrooms, and a flavorful garlic paprika sauce with garnish.

The Creamy, Citrusy Ricotta and Cream Cheese Tart That Sparks Pure Joy

Welcome, fellow food adventurers! Today, we’re diving into a luscious creation that’s bound to spark joy in your kitchen and on your table. Say hello to the Exquisite Ricotta and Cream Cheese Tart with a Delicate Lemon Touch. This tart is not just a dessert; it’s an experience, a canvas where creamy textures meet zesty brightness, turning every bite into a celebration of flavor.

Picture this: you’re hosting a dinner party, the table is set, the laughter is flowing, and in the center lies this stunning tart, glistening with a hint of lemon zest and crowned with fresh berries. Instantly, eyes light up, and the anticipation is palpable. So, are you ready to impress your guests and treat yourself to something truly special? Let’s roll up our sleeves and get baking!

Why This Tart Will Become Your New Favorite

There are a million reasons to love this tart, but let’s focus on the most compelling. First off, the textures are a delightful juxtaposition: the buttery, flaky crust cradles a creamy, velvety filling that practically melts in your mouth. And the flavor? Oh, it’s a harmonious dance of rich ricotta, smooth cream cheese, and a bright lemony zing that cuts through the richness — a perfect balance that will leave your taste buds singing.

This tart is not only a showstopper but also surprisingly easy to make. Whether you’re a seasoned baker or just starting, the steps are straightforward and rewarding. Plus, it’s incredibly versatile! You can serve it as a sophisticated dessert for a special occasion, a delightful addition to a brunch spread, or even as a sweet treat for a cozy weekend at home.

Ingredients: The Essentials You’ll Need

Eye-level shot of a creamy, golden tart topped with lemon zest, illuminated by natural light.
  • 1 1/2 cups all-purpose flour
  • 1/4 cup granulated sugar
  • 1/2 teaspoon salt
  • 1/2 cup unsalted butter, cold and cubed
  • 1 large egg yolk
  • 2 tablespoons ice water
  • 1 cup ricotta cheese
  • 1/2 cup cream cheese, softened
  • 1/2 cup powdered sugar
  • 1 teaspoon vanilla extract
  • Zest of 1 lemon
  • 2 tablespoons fresh lemon juice
  • Optional: fresh berries and mint for garnish

Step-by-Step: How to Make Your Tart

1. Prepare the Crust

Start with the crust, the foundation of our tart. In a mixing bowl, combine 1 1/2 cups of all-purpose flour, 1/4 cup of granulated sugar, and 1/2 teaspoon of salt. This mixture is the backbone of your tart, so make sure the flavors are well-balanced!

Next, add in 1/2 cup of cold, cubed unsalted butter. Using a pastry cutter or your fingers, cut in the butter until the mixture resembles coarse crumbs. It should look like a sandy beach — a bit clumpy but not too wet.

Then, add 1 large egg yolk and 2 tablespoons of ice water. Mix until the dough just comes together; you don’t want to overwork it. Form it into a disk, wrap it in plastic wrap, and pop it in the fridge for about 30 minutes to chill. This step is essential for achieving that flaky texture!

2. Bake the Crust

Preheat your oven to 350°F (175°C). Roll out the chilled dough on a lightly floured surface until it’s about 1/8-inch thick. Gently fit the dough into a tart pan, pressing it into the edges and trimming off any excess. Use a fork to prick the bottom of the crust — this helps prevent bubbling while baking.

Bake your crust for 15-20 minutes or until it’s golden brown. The aroma of baking butter and sugar will fill your kitchen, tempting you to sneak a taste! Once done, remove it from the oven and let it cool completely.

3. Create the Creamy Filling

While the crust cools, let’s whip up the filling that will bring this tart to life! In a mixing bowl, combine 1 cup of ricotta cheese, 1/2 cup of softened cream cheese, 1/2 cup of powdered sugar, 1 teaspoon of vanilla extract, the zest of 1 lemon, and 2 tablespoons of fresh lemon juice. Using an electric mixer or a whisk, beat until the mixture is smooth and creamy. You want it to be luscious and inviting, with that lemon zest adding a bright, fragrant note to the mix.

4. Assemble Your Tart

Once the crust is completely cooled, spread the creamy filling evenly into the tart shell. Smooth out the top with a spatula, making it as beautiful as it is delicious. If you’re feeling fancy, garnish with fresh berries and mint leaves for that extra pop of color and freshness.

5. Chill and Serve

Now, it’s time to chill out! Place your tart in the refrigerator for at least 1 hour before serving. This not only helps the flavors meld together but also gives the filling a perfect texture that’s firm yet creamy.

Tips for Success

  • Chill Your Ingredients: Cold butter is crucial for a flaky crust, so don’t skip this step!
  • Don’t Overmix: When making the filling, mix just until smooth. Overmixing can introduce excess air and change the texture.
  • Use Fresh Ingredients: Fresh lemons and quality cheeses will elevate your tart to new heights!

Variations to Try

If you want to switch things up, consider these delicious variations:

  • Berry Bliss: Swirl in some fresh pureed berries into the filling for a colorful twist.
  • Nutty Crunch: Add crushed nuts like pistachios or almonds to the crust for added texture.
  • Chocolate Drizzle: Once chilled, drizzle melted dark chocolate over the top for a decadent touch.

Substitutions You Can Make

  • If you don’t have ricotta cheese, you can use cottage cheese or mascarpone for a different flavor profile.
  • For a gluten-free option, substitute all-purpose flour with a gluten-free flour blend.
  • Maple syrup can be used in place of powdered sugar for a healthier sweetener.

Storage and Freezing Tips

This tart can be stored in the refrigerator for up to 3 days. Just cover it loosely with plastic wrap to keep it fresh. If you want to freeze it, I recommend freezing the baked crust separately from the filling. Wrap the crust tightly in plastic wrap and then in aluminum foil. You can freeze it for up to 2 months. When you’re ready to enjoy, thaw the crust, fill it, and chill as instructed!

FAQs About Your Ricotta and Cream Cheese Tart

Can I make this tart ahead of time?

Absolutely! You can prepare the crust and filling a day in advance. Just assemble and chill before serving.

What can I serve with this tart?

It’s delightful on its own, but you can serve it with whipped cream, a scoop of vanilla ice cream, or even a drizzle of lemon curd for an extra zesty kick.

Can I use different citrus fruits?

Definitely! Try orange or lime zest and juice for a fun twist on the classic flavor.

Final Thoughts

There you have it, my culinary comrades! The Exquisite Ricotta and Cream Cheese Tart with a Delicate Lemon Touch is not just a recipe but an invitation to create something beautiful and delicious. As you take that first bite, let the creamy, citrusy goodness transport you to a sunny day, where every slice is a moment of joy. So grab your ingredients, ignite that passion for cooking, and let’s make some magic happen in the kitchen! Happy baking!

For more delightful recipes, check out my simple dinners and baked treats. Let’s keep the cooking adventure alive!

Exquisite Ricotta and Cream Cheese Tart with a Delicate Lemon Touch

Prep Time 30 minutes
Cook Time 20 minutes
Total Time 50 minutes
Servings 8 pieces
Calories 350
A luscious tart combining creamy ricotta and cream cheese with a zesty lemon flavor, perfect for elegant occasions.

Ingredients

Dough

  • 1 1/2 cups all-purpose flour
  • 1/4 cup granulated sugar
  • 1/2 teaspoon salt
  • 1/2 cup unsalted butter, cold and cubed
  • 1 large egg yolk
  • 2 tablespoons ice water

Filling

  • 1 cup ricotta cheese
  • 1/2 cup cream cheese, softened
  • 1/2 cup powdered sugar
  • 1 teaspoon vanilla extract
  • zest of 1 lemon lemon zest
  • 2 tablespoons fresh lemon juice

Garnish (optional)

  • optional fresh berries and mint for garnish

Instructions 

  • Mix flour, sugar, and salt; cut in cold butter until coarse crumbs. Add egg yolk and ice water; form dough, chill 30 mins.
  • Preheat oven to 350°F (175°C). Roll out dough, fit into tart pan, prick bottom, and bake 15-20 mins until golden. Cool.
  • Beat ricotta, cream cheese, powdered sugar, vanilla, lemon zest, and lemon juice until smooth. Spread into cooled shell.
  • Optional: Garnish with berries and mint. Chill for at least 1 hour before serving.

Notes

Ensure the tart is well chilled before serving for best texture.
Calories: 350kcal
Cost: $15
Course: Dessert
Cuisine: European
Keyword: Cheese, lemon, tart

Nutrition

Calories: 350kcal | Carbohydrates: 40g | Protein: 8g | Fat: 20g | Sodium: 150mg

Loved this recipe? Save it to your favorite Pinterest board so you can easily find it later! It’s the perfect way to keep all your sweet ideas in one place. ✨

Detailed view of a freshly baked ricotta and cream cheese tart with lemon accents, softly lit from the side.

The Roast Turkey That Brings a Fireworks of Flavor to Every Bite

Ah, the roast turkey — a centerpiece that has graced our tables for generations, embodying warmth, family, and the spirit of togetherness. But today, I’m here to take that classic turkey breast and elevate it to a whole new level. Get ready to embark on a culinary journey that will ignite your taste buds and turn your holiday table into a vibrant feast!

As a proud Texan, born and raised in the smoky embrace of San Antonio, I know how to pack flavor into every dish. Growing up with spices that dance across the palate, I believe that cooking should be an adventure. Today, I’m sharing my recipe for Flavorful Roast Turkey Breast and Vegetables, a dish that combines the juiciness of turkey with the earthiness of roasted vegetables, all tied together with a symphony of spices. Trust me, this isn’t just a meal; it’s a celebration!

Ingredients: What You’ll Need

  • 1 (3-4 pound) turkey breast
  • 2 tablespoons olive oil
  • 1 teaspoon salt
  • 1/2 teaspoon black pepper
  • 1 teaspoon garlic powder
  • 1 teaspoon paprika
  • 1 teaspoon dried thyme
  • 2 carrots, sliced
  • 2 parsnips, sliced
  • 1 red onion, chopped
  • 1 cup baby potatoes, halved
  • Fresh herbs for garnish (optional)

Step 1: Prepping for Success

Close-up of flavorful turkey breast served with carrots, parsnips, and potatoes.

Before we dive into the oven, let’s set the stage for flavor. Preheat your oven to a warm and inviting 375°F (190°C). This is the perfect temperature to coax out the natural juices of the turkey while giving your vegetables that satisfying caramelization.

In a small bowl, mix together the salt, black pepper, garlic powder, paprika, and dried thyme. This spice blend is the magic dust that will transform your turkey into a flavor powerhouse. The garlic powder gives depth, the paprika adds a smoky warmth, and the thyme brings a hint of earthiness — all essential notes that harmonize beautifully.

Step 2: Seasoning the Star of the Show

Now, it’s time to pamper our turkey breast. Start by rubbing it generously with olive oil — this not only helps the spices adhere but also ensures a golden, crispy skin. Once the turkey is well-oiled, take your spice mixture and rub it all over the surface, making sure to get into all the nooks and crannies. This is where you can feel the love; let your fingers massage that turkey and infuse it with flavor!

Step 3: Arranging the Vegetable Medley

Next, let’s talk about those vibrant vegetables that will accompany our turkey. The beauty of this dish lies in its versatility — you can use whatever veggies you have on hand. Today, we’ll be using sliced carrots and parsnips, alongside chopped red onion and baby potatoes. They’ll soak up all the delicious juices from the turkey, creating a side dish that’s bursting with flavor.

Arrange the sliced veggies around the turkey in your roasting pan. This not only looks inviting but allows them to roast evenly. The colors of the carrots, parsnips, and onion create a stunning visual that will make your guests drool before they even take a bite!

Step 4: Roasting to Perfection

Now, it’s time for the magic to happen. Place the roasting pan in the preheated oven and let it do its thing. Roast the turkey and vegetables for about 1.5 to 2 hours, or until the internal temperature of the turkey reaches 165°F (74°C). This is the moment you’ve been waiting for: the turkey will be juicy, the skin crispy, and the aroma wafting through your home will have everyone gathering in the kitchen.

Don’t forget to baste the turkey occasionally with the pan juices. This is crucial for keeping it moist and enhancing the flavor. Grab a spoon or baster and give that turkey some love! The sound of sizzling juices and the sight of bubbling vegetables will make your heart sing.

Step 5: The Finishing Touches

Once your turkey is cooked to perfection, it’s time to let it rest. After pulling it from the oven, let the turkey sit for about 10 minutes. This resting period allows the juices to redistribute throughout the meat, ensuring every slice is succulent and full of flavor.

While the turkey is resting, take a moment to marvel at those roasted vegetables. They’ll be tender, caramelized, and ready to serve alongside your turkey. If you want to elevate the dish even further, consider garnishing with fresh herbs like rosemary or thyme. It adds a pop of color and a fresh aroma that ties everything together beautifully.

Tips for a Flawless Roast Turkey

  • Choosing the Right Turkey: Look for a fresh, organic turkey if possible. Frozen is fine, but be sure to give it enough time to thaw — at least 24 hours for every 4-5 pounds of turkey.
  • Season Generously: Don’t be shy with your spices. A well-seasoned turkey is the key to maximizing flavor.
  • Use a Meat Thermometer: This is your best friend in the kitchen. It ensures you cook the turkey to the perfect temperature without overcooking.
  • Resting Time Matters: Always allow your turkey to rest before slicing. This makes a world of difference in juiciness.

Variations and Substitutions

Feeling adventurous? Here are some fun variations and substitutions to consider:

  • Herbaceous Twist: Substitute the dried thyme with fresh herbs like rosemary or sage for an aromatic kick.
  • Vegetable Swap: Use seasonal vegetables like Brussels sprouts, squash, or sweet potatoes for a different flavor profile.
  • Spice it Up: Add a pinch of cayenne or chili powder to your spice mix for a little heat!

Storage and Freezing Tips

Got leftovers? Here’s how to store your delicious roast turkey:

  • Refrigerating: Store any leftover turkey in an airtight container for up to 3-4 days.
  • Freezing: You can also freeze your turkey! Wrap it tightly in plastic wrap and then aluminum foil, ensuring it’s airtight. It can last up to 4-6 months in the freezer.
  • Reheating: When reheating, add a splash of broth to keep it moist, and cover with foil to prevent drying out.

FAQs About Roast Turkey

How do I know when the turkey is done?
Use a meat thermometer! The internal temperature should reach 165°F (74°C) in the thickest part of the breast.

Can I use chicken instead of turkey?
Absolutely! Boneless chicken breasts can be used, but adjust the cooking time as chicken cooks faster than turkey.

What can I serve with roast turkey?
Classic sides include stuffing, cranberry sauce, and a fresh salad. Feel free to explore!

How do I achieve crispy skin?
Make sure to pat the turkey dry before seasoning, and don’t skip the olive oil — it’s key for crispiness!

Conclusion: A Flavorful Feast Awaits

There you have it, my friends — a roast turkey that’s not just a meal, but a memory in the making. With every bite of this Flavorful Roast Turkey Breast and Vegetables, you’ll experience a fireworks of flavor that will have your loved ones coming back for seconds (and thirds!). So, gather around the table, share stories, and let this beautiful dish be the backdrop to your cherished moments. Remember, cooking is not just about feeding the body; it’s about nourishing the soul. Now, let’s bring that fire to your food! Enjoy!

Flavorful Roast Turkey Breast and Vegetables

Prep Time 15 minutes
Cook Time 1 hour 45 minutes
Total Time 2 hours
Servings 4 servings
Calories 350
A delicious and hearty roast turkey breast served with flavorful roasted vegetables, perfect for a comforting meal.

Ingredients

Main

  • 3-4 pounds turkey breast
  • 2 tablespoons olive oil
  • 1 teaspoon salt
  • 1/2 teaspoon black pepper
  • 1 teaspoon garlic powder
  • 1 teaspoon paprika
  • 1 teaspoon dried thyme
  • 2 carrots sliced carrots
  • 2 parsnips sliced parsnips
  • 1 red onion chopped red onion
  • 1 cup baby potatoes, halved

Optional Garnish

  • fresh herbs (for garnish)

Instructions 

  • Preheat oven to 375°F (190°C).
  • Mix salt, pepper, garlic powder, paprika, and thyme; rub on turkey with olive oil.
  • Place turkey on a roasting pan; surround with vegetables.
  • Roast for 1.5-2 hours until internal temp reaches 165°F (74°C); baste occasionally.
  • Rest for 10 minutes, then slice and serve with vegetables, garnished with herbs.

Notes

Ensure the turkey reaches the proper internal temperature for safety and best flavor.
Calories: 350kcal
Cost: $15
Course: Main Course
Cuisine: American
Keyword: Turkey

Nutrition

Calories: 350kcal | Carbohydrates: 30g | Protein: 45g | Fat: 10g | Sodium: 800mg

Loved this recipe? Save it to your favorite Pinterest board so you can easily find it later! It’s the perfect way to keep all your sweet ideas in one place. ✨

Delicious roasted turkey with vibrant vegetables and fresh herbs.

The Juicy Baked Turkey Breast Recipe That Made My Thanksgiving Unforgettable

Thanksgiving is a time for family, friends, and feasting, and nothing brings people together quite like a beautifully baked turkey. This year, I’m excited to share with you my Juicy Baked Turkey Breast Recipe — a dish that not only elevates your holiday table but also ensures your gathering is filled with warmth and laughter. Whether you’re hosting a small, intimate gathering or a bustling family reunion, this turkey breast is sure to steal the spotlight.

Why You’ll Love This Juicy Baked Turkey Recipe

This turkey breast is not just any turkey breast; it’s a symphony of flavors, a dance of spices that will make your taste buds sing. The magic lies in the juicy, tender meat, infused with a medley of seasonings that create a savory crust. Imagine slicing into the golden-brown exterior to reveal the succulent, moist meat inside, each bite bursting with flavor. It’s the perfect centerpiece for your Thanksgiving feast, and trust me, your guests will be raving about it long after the last slice is served.

The Key for Juicy Turkey Breasts

The secret to achieving that coveted juiciness? It all starts with the brine. Allowing your turkey breast to soak in a flavorful brine overnight not only infuses it with moisture but also enhances its natural flavors. But don’t worry; if you’re short on time, this recipe still delivers a juicy turkey without the brining step. The combination of olive oil and broth ensures that the meat stays moist as it bakes, making it a foolproof option for any cook.

What’s the Best Temperature for Cooking Turkey Breasts?

The ideal cooking temperature for a juicy baked turkey breast is 375°F (190°C). This moderate heat allows the turkey to cook evenly without drying out the meat. Using an instant-read thermometer, you’ll know exactly when your turkey is done — look for an internal temperature of 165°F (74°C) at the thickest part of the breast. This ensures that your turkey is safe to eat while still being tender and juicy.

Ingredients for Baked Turkey Fillet

  • 1 whole turkey breast (about 3-4 pounds)
  • 2 tablespoons olive oil
  • 1 teaspoon salt
  • 1/2 teaspoon black pepper
  • 1 teaspoon garlic powder
  • 1 teaspoon onion powder
  • 1 teaspoon paprika
  • 1/2 teaspoon dried thyme
  • 1/2 teaspoon dried rosemary
  • 1/2 cup chicken broth

Helpful Tips

Before we dive into the steps, here are some tips to ensure your turkey breast turns out perfectly:

  • Let it come to room temperature: Before roasting, allow your turkey breast to sit at room temperature for about 30 minutes. This helps it cook evenly.
  • Use a roasting pan: A sturdy roasting pan not only supports the turkey but also allows for easy basting and collecting drippings for gravy.
  • Baste for flavor: Baste your turkey every 30 minutes with its own juices to lock in moisture and enhance flavor.
  • Rest before slicing: Always let your turkey breast rest for 10-15 minutes after baking. This allows the juices to redistribute, ensuring each slice is juicy.

What Can I Serve with Baked Turkey?

The beauty of this turkey breast is its versatility. Pair it with classic sides like mashed potatoes, green bean casserole, or cranberry sauce for a traditional Thanksgiving spread. For something a bit different, try serving it with a side of pumpkin soup or a refreshing salad. The options are endless!

Juicy Baked Turkey Breast Recipe – Thanksgiving’s Dinner

Ingredients

  • 1 whole turkey breast (about 3-4 pounds)
  • 2 tablespoons olive oil
  • 1 teaspoon salt
  • 1/2 teaspoon black pepper
  • 1 teaspoon garlic powder
  • 1 teaspoon onion powder
  • 1 teaspoon paprika
  • 1/2 teaspoon dried thyme
  • 1/2 teaspoon dried rosemary
  • 1/2 cup chicken broth

Instructions

  1. Preheat your oven to 375°F (190°C).
  2. Pat the turkey breast dry with paper towels, ensuring it’s free from excess moisture.
  3. In a small bowl, mix together the salt, black pepper, garlic powder, onion powder, paprika, thyme, and rosemary.
  4. Rub the olive oil all over the turkey breast, creating a beautiful sheen on the surface.
  5. Evenly coat the turkey breast with your spice mixture, making sure to cover all sides generously.
  6. Place the turkey breast on a roasting pan or baking dish, breast side up, allowing it to sit snugly in the pan.
  7. Pour chicken broth into the pan to keep the turkey moist during roasting.
  8. Bake in the preheated oven for about 1.5 to 2 hours, or until the internal temperature reaches 165°F (74°C).
  9. Baste the turkey with its juices every 30 minutes for added juiciness.
  10. Once cooked, remove the turkey from the oven and let it rest for 10-15 minutes before slicing.
  11. Slice and serve your juicy baked turkey breast for a delicious Thanksgiving dinner!

Storage & Freezing

If you find yourself with leftovers (which is a definite possibility because it’s so good!), store them in an airtight container in the refrigerator for up to 4 days. For longer storage, you can freeze the cooked turkey breast. Wrap it tightly in plastic wrap and then in aluminum foil to prevent freezer burn. It will keep well for up to 3 months. Just make sure to thaw it in the fridge overnight before reheating.

FAQ

Can I use bone-in turkey with this recipe?

Absolutely! You can use a bone-in turkey breast. Just remember that the cooking time may be a bit longer, so keep an eye on the internal temperature.

Can I substitute the chicken broth?

Yes, you can substitute the chicken broth with vegetable broth or even white wine for a different flavor profile.

What’s the best way to ensure my turkey breast is tender?

The key is to avoid overcooking it. Using a meat thermometer will help you achieve the perfect doneness without drying it out.

Variations and Substitutions

If you want to get creative with your turkey breast, consider these variations:

  • Herb Butter: Instead of olive oil, use a mixture of softened butter with fresh herbs like parsley and sage for a richer flavor.
  • Spicy Kick: Add a pinch of cayenne pepper or some chopped jalapeños to the spice mixture for an exciting heat.
  • Citrus Infusion: Squeeze fresh lemon or orange juice over the turkey before baking for a zesty twist.

Equipment

To make this recipe, you’ll need a few essential tools:

  • A roasting pan or baking dish
  • A sharp knife for slicing
  • An instant-read thermometer for checking doneness
  • Measuring spoons for accurate seasoning

Conclusion

There you have it, folks! My Juicy Baked Turkey Breast Recipe that is sure to make your Thanksgiving unforgettable. With its bold flavors, tender meat, and delightful aroma wafting through your kitchen, this dish embodies the spirit of the holiday season. So gather your loved ones, set the table, and enjoy the delicious moments that come from sharing a meal together. Remember, cooking is about joy, creativity, and a little bit of spice. Happy Thanksgiving, and may your turkey be as unforgettable as the memories you create around the table!

The Creamy Garlic Mushroom Pasta That Turned Up My Flavor Game to Eleven

Ah, pasta! The ultimate comfort food that can transport you straight to an Italian trattoria with just one forkful. But what if I told you that there’s a way to elevate this humble dish into something that ignites your taste buds and makes your heart sing? Welcome to my kitchen, where I’m about to introduce you to Creamy Garlic Mushroom Pasta—a dish that turned my flavor game to eleven!

This culinary masterpiece is a glorious combination of earthy mushrooms, aromatic garlic, and a luscious cream sauce that dances on your palate. It’s rich, velvety, and packed with umami, making it a delightful option for both weeknight dinners and special occasions. Ready to dive into a bowl of pure joy? Let’s get cookin’!

Why You’ll Love This Recipe: Creamy Garlic Mushroom Pasta

This isn’t just any pasta; this is a celebration of flavor, texture, and simplicity. From the moment you smell the garlic sizzling in olive oil, you’ll know you’re in for a treat. Imagine the aroma wafting through your kitchen, beckoning everyone to gather around the table. The creamy sauce envelops the pasta like a warm hug, while the mushrooms add a satisfying earthiness that complements the dish perfectly.

Whether you’re impressing guests or treating yourself to a cozy night in, this dish is guaranteed to leave a lasting impression. Plus, with just a handful of ingredients, it’s a breeze to whip up. Let’s not just make dinner—let’s create a culinary experience!

Deep Dive into Ingredients:

Eye-level shot of rich mushroom pasta in a bowl.

Before we roll up our sleeves, let’s take a closer look at the ingredients that will transform your kitchen into a flavor factory:

  • 8 oz pasta: Choose your favorite type! I recommend spaghetti or fettuccine for that perfect sauce adherence.
  • 2 tablespoons olive oil: A high-quality olive oil adds depth and richness. Trust me; it makes a difference.
  • 4 cloves garlic: Minced to perfection—garlic is the backbone of this dish, bringing warmth and fragrance.
  • 8 oz mushrooms: Sliced and ready to go! I love using cremini or button mushrooms for their robust flavor.
  • 1 cup heavy cream: The star of the show! This is what makes the sauce creamy and dreamy.
  • 1/2 cup grated parmesan cheese: For a sharp, salty kick that harmonizes beautifully with the cream.
  • Salt and pepper: Essential for seasoning and enhancing all the flavors.
  • Fresh parsley (optional): A sprinkle of chopped parsley adds a pop of color and freshness to the dish.

Cooking Tips for Perfection:

Cooking is an art, and like any artist, you need the right tools and techniques. Here are some tips to ensure your Creamy Garlic Mushroom Pasta turns out perfectly every time:

  • Don’t rush the garlic: Sauté it just until fragrant. Burned garlic can turn bitter and ruin your dish.
  • Brown the mushrooms: Give them time to develop a golden crust. This enhances their flavor and adds a nice texture.
  • Use fresh ingredients: Fresh garlic and high-quality parmesan will make a world of difference in taste.
  • Taste as you go: Adjust the seasoning and creaminess to your liking. Cooking is all about finding that perfect balance.

Step-by-Step Guide in Making Creamy Garlic Mushroom Pasta

Let’s roll up our sleeves and get cooking! Follow these simple steps to create your own bowl of Creamy Garlic Mushroom Pasta:

Instructions

  1. Cook the pasta: Bring a large pot of salted water to a boil. Add the pasta and cook according to package instructions until al dente. Drain and set aside.
  2. Sauté the garlic: In a large skillet over medium heat, add the olive oil. Once hot, add the minced garlic and sauté for about 1 minute until fragrant—don’t let it brown!
  3. Add the mushrooms: Toss in the sliced mushrooms and cook for about 5-7 minutes, until they are golden brown and tender.
  4. Make the creamy sauce: Pour in the heavy cream and bring it to a gentle simmer. Stir in the grated parmesan cheese until it melts and the sauce thickens slightly.
  5. Season: Taste your sauce and season with salt and pepper to your liking.
  6. Combine: Add the cooked pasta to the skillet and toss it to coat evenly with the sauce.
  7. Garnish: If desired, sprinkle with chopped parsley for a touch of color. Serve immediately and enjoy!

Additional Tips:

Want to take your Creamy Garlic Mushroom Pasta to the next level? Here are some ideas:

  • For a bit of heat, add a pinch of red pepper flakes while cooking the garlic.
  • Mix in some baby spinach or kale for added nutrition and a pop of color.
  • Love protein? Consider adding grilled chicken or shrimp to make it a heartier meal.

Variations and Substitutions:

The beauty of this recipe lies in its versatility. Here are some variations and substitutions you can try:

  • Mushrooms: Feel free to experiment with different types of mushrooms, such as shiitake or portobello, for unique flavors.
  • Pasta alternatives: If you’re looking for a gluten-free option, try using gluten-free pasta or zoodles (zucchini noodles).
  • Dairy-free option: Substitute heavy cream with coconut cream and use nutritional yeast instead of parmesan for a vegan version.

Storage & Freezing:

If you find yourself with leftovers (which is rare, trust me!), here’s how to store them:

  • Refrigerator: Store in an airtight container in the fridge for up to 3 days. Reheat gently on the stovetop or microwave, adding a splash of cream or water to loosen the sauce.
  • Freezing: I recommend freezing the sauce separately from the pasta. The sauce can be frozen for up to 3 months. Thaw and reheat before combining with freshly cooked pasta.

FAQs:

Can I substitute heavy cream?

Yes! You can use half-and-half for a lighter version, or even cashew cream for a dairy-free alternative.

How to make pasta less sticky?

Make sure to stir the pasta occasionally while it cooks and rinse it under cold water after draining to remove excess starch.

What to eat with mushrooms?

Mushrooms pair beautifully with garlic, herbs, and cheeses. Consider serving this pasta alongside a fresh salad or garlic bread.

Conclusion

Cooking is a journey, and each dish tells a story. My Creamy Garlic Mushroom Pasta is not just a meal; it’s a celebration of flavors, texture, and the joy of cooking. So grab your skillet, embrace the heat, and let the aromas fill your kitchen. It’s time to create something magical! Whether you’re sharing it with loved ones or savoring it solo, this dish will remind you why you fell in love with cooking in the first place. Here’s to many more culinary adventures—bon appétit!

And if you’re looking for more delicious recipes, check out my simple dinners or indulge in baked cranberry brie treats for a delightful appetizer!

Creamy Garlic Mushroom Pasta

Prep Time 10 minutes
Cook Time 15 minutes
Total Time 25 minutes
Servings 4 servings
Calories 550
A rich and creamy pasta dish packed with savory garlic and mushrooms, perfect for a quick and satisfying meal.

Ingredients

Pasta

  • 8 oz pasta (spaghetti or fettuccine)
  • 2 tablespoons olive oil
  • 4 cloves garlic, minced
  • 8 oz mushrooms, sliced
  • 1 cup heavy cream
  • 1/2 cup grated parmesan cheese
  • to taste salt and pepper
  • optional fresh parsley, chopped

Instructions 

  • Cook pasta until al dente, then drain.
  • Heat olive oil in a skillet, sauté garlic for 1 minute.
  • Add mushrooms and cook until golden, about 5-7 minutes.
  • Pour in heavy cream, simmer, then stir in Parmesan until thickened.
  • Season with salt and pepper, add pasta, toss to coat.
  • Garnish with parsley if desired, serve immediately.

Notes

For a lighter version, use half-and-half instead of heavy cream.
Calories: 550kcal
Cost: $15
Course: Main Course
Cuisine: Italian
Keyword: creamy, Mushrooms, pasta

Nutrition

Calories: 550kcal | Carbohydrates: 70g | Protein: 20g | Fat: 25g | Sodium: 400mg

Loved this recipe? Save it to your favorite Pinterest board so you can easily find it later! It’s the perfect way to keep all your sweet ideas in one place. ✨

Detailed view of smooth, creamy mushroom pasta dish.

The Spicy Secret That Made Me Love Weight Watchin’ in 2025

Welcome to a culinary adventure that’s not just about counting points but about igniting a passion for flavor and health! In 2025, I discovered the transformative power of spice and bold ingredients that made my journey through weight watching an exhilarating ride. Forget bland salads and boring meals; it’s time to embrace the heat, the crunch, and the vibrant colors of fresh vegetables wrapped in a wholesome embrace. Today, I’m excited to share with you a recipe that embodies this vibrant philosophy: a spicy wrap that’s not only satisfying but also guilt-free!

What You’ll Love About This Spicy Wrap Recipe

  • Flavor Explosion: Each bite is a dance of fresh vegetables and savory lean protein, creating a delightful combination that keeps your taste buds guessing.
  • Health-Conscious: With whole grains and fresh ingredients, this wrap aligns perfectly with your weight-watching goals while satisfying your cravings.
  • Customizable: Whether you’re in the mood for turkey, chicken, or tofu, this recipe allows you to experiment and make it your own.
  • Quick and Easy: Perfect for lunch on the go or a quick dinner, this recipe comes together in no time, making healthy eating a breeze!

Gather Your Ingredients

Gourmet food shot featuring a colorful, nutritious wrap with vibrant ingredients.

Before we dive into the cooking, let’s take a moment to appreciate the ingredients that will elevate this wrap from ordinary to extraordinary:

  • Fresh Vegetables: Carrots, cucumbers, and bell peppers. These crunchy delights add color, texture, and a nutrient boost!
  • Whole Grain Wrap or Lettuce Leaves: Choose your base! Whole grain wraps provide fiber, while lettuce leaves offer a refreshing crunch.
  • Lean Protein: Turkey slices, grilled chicken, or tofu. Each option brings its unique flavor and texture to the table.
  • Healthy Spread: Hummus, mustard, or Greek yogurt. These spreads add creaminess and flavor without the guilt.
  • Optional Add-ons: Avocado slices and sprouts for an extra layer of richness and nutrition.

How to Make Your Flavorful Spicy Wrap

Ready to fire up your kitchen? Let’s get down to the nitty-gritty of creating this delicious wrap that’ll make you forget you’re weight-watching!

Step-by-Step Instructions

  1. Prepare Your Vegetables: Start by washing your fresh vegetables thoroughly. Slice them into thin strips—think julienne style. This not only enhances the presentation but also makes them easier to roll into your wrap.
  2. Lay Out Your Base: On a clean surface, lay out your whole grain wrap or your crisp lettuce leaves. Let them spread out like a canvas waiting for a masterpiece!
  3. Add the Spread: Spread a thin layer of your chosen healthy spread over the wrap. This will serve as a flavorful adhesive for all your delicious fillings!
  4. Layer the Protein: Evenly distribute your lean protein (turkey, chicken, or tofu) over the spread. Ensure each bite is packed with protein goodness.
  5. Top with Vegetables: Pile on your sliced vegetables, and if you’re feeling indulgent, add some avocado slices or sprouts on top for that extra kick.
  6. Roll It Up: Here comes the fun part! Roll the wrap tightly, folding in the sides as you go. Channel your inner burrito-wrapping skills!
  7. Slice and Serve: If desired, slice the wrap in half for easy eating. Serve immediately or pack it up for a delicious meal later on.

Tips for the Perfect Wrap

  • Experiment with Flavors: Don’t be afraid to mix and match your vegetables and proteins. Each combination can lead to a new taste sensation!
  • Use Fresh Ingredients: Fresh vegetables not only taste better but also provide more nutrients. Visit your local farmer’s market for the freshest finds.
  • Make It Ahead: Prep your vegetables and proteins ahead of time so you can whip these wraps up in minutes during busy days.

Variations to Spice Things Up

Here’s where the real fun begins! Customize your wrap to suit your taste preferences:

  • Asian-Inspired: Use sesame oil in your spread, and add shredded cabbage and sliced green onions. Maybe a splash of soy sauce for that umami kick!
  • Mexican Flair: Swap out the spread for a zesty avocado dip, and include black beans and corn. A sprinkle of cilantro would be heavenly!
  • Mediterranean Twist: Use tzatziki sauce as your spread and add olives and feta cheese for a refreshing taste of the Mediterranean.

Can I Substitute Ingredients?

Absolutely! This spicy wrap is incredibly versatile. If you’re out of turkey, try ham, or go vegan with chickpeas instead of chicken. If you don’t have whole grain wraps, lettuce leaves are a fantastic low-carb alternative. The key is to keep the balance of flavors and textures in mind.

Storage & Freezing Tips

These wraps are best enjoyed fresh, but you can store them in the fridge for up to 2 days. Just make sure to wrap them tightly in plastic wrap or store them in an airtight container to prevent them from getting soggy. If you want to prep for the week ahead, you can store the filling ingredients separately and assemble them just before eating.

FAQs

  • Can I make these wraps gluten-free? Yes! Simply use gluten-free wraps or lettuce leaves as your base.
  • What can I add for extra crunch? Consider adding nuts, seeds, or crunchy vegetables like radishes or jicama for that satisfying crunch!
  • Are these wraps suitable for meal prep? Definitely! Prepare the fillings in advance and assemble them when ready to eat for a quick and healthy meal.

Final Thoughts

As you embark on your weight-watching journey, remember that healthy eating doesn’t have to be dull. This spicy wrap is proof that vibrant flavors and nutritious ingredients can coexist beautifully on your plate. So grab those fresh vegetables, roll up your sleeves, and let your kitchen become a haven for experimentation and joy.

Now, who’s ready to spice things up? With each bite, you’ll not only feel satisfied but also empowered to embrace your culinary creativity. For more delicious explorations, check out my joyful bites of bliss or explore simple dinners that will make healthy living a joy.

Here’s to flavorful adventures in your kitchen—let’s make weight watching a delicious affair!

Pin by California Clippin on Weight Watchin' in 2025

Prep Time 10 minutes
Total Time 10 minutes
Servings 2 servings
Calories 350
A healthy and delicious veggie wrap perfect for a quick lunch or snack, packed with fresh vegetables and lean protein.

Ingredients

Vegetables

  • 2 cups fresh vegetables (carrots, cucumbers, bell peppers) (washed and sliced into thin strips)
  • 2 pieces whole grain wrap or lettuce leaves
  • 4 oz lean protein (turkey slices, grilled chicken, or tofu) (cooked and sliced)
  • 2 tbsp healthy spread (hummus, mustard, or greek yogurt)
  • 1 avocado optional: avocado slices (for extra flavor)
  • a handful sprouts (optional)

Instructions 

  • Wash and slice vegetables into thin strips.
  • Lay out the wrap or lettuce leaves on a surface.
  • Spread hummus over the wrap.
  • Add lean protein evenly over the spread.
  • Top with vegetables and optional avocado or sprouts.
  • Roll tightly, fold sides, and slice if desired.

Notes

Use fresh ingredients for best flavor and nutrition.
Calories: 350kcal
Cost: $15
Course: Lunch
Cuisine: American
Keyword: vegetables

Nutrition

Calories: 350kcal | Carbohydrates: 45g | Protein: 25g | Fat: 10g | Sodium: 600mg

Loved this recipe? Save it to your favorite Pinterest board so you can easily find it later! It’s the perfect way to keep all your sweet ideas in one place. ✨

Eye-level view of a balanced meal wrap filled with vegetables and protein.

The Warm Embrace of Heat: My Cozy Shepherd’s Pie Christmas Dinner That Sparks Joy

When the chill of winter sets in and the holiday lights begin to twinkle, there’s nothing quite like the comforting embrace of a warm meal to chase the cold away. As a chef who grew up in the vibrant culinary heart of San Antonio, I’ve always believed that food has the power to tell a story. This Christmas, I want to share with you my take on a classic dish that’s as cozy as a crackling fire – a Shepherd’s Pie that doesn’t just fill the belly but ignites the soul with bold, spicy flavors. Are you ready to turn your holiday gathering into an unforgettable celebration? Let’s dive into this cozy Shepherd’s Pie Christmas dinner that sparks joy!

Why Shepherd’s Pie?

Shepherd’s Pie has long been a beloved comfort food, traditionally made with ground lamb and topped with creamy mashed potatoes. But here in Austin, where culinary boundaries are meant to be pushed, I’ve added my twist to this classic that makes it the star of the Christmas table. The rich flavors of the meat meld with a hint of spice, and that golden, crispy potato topping? Pure bliss. Let’s not forget the warmth of family and friends gathered around the table, sharing laughter and stories as they indulge in this savory masterpiece.

Ingredients That Pack a Punch

Eye-level shot of a hearty shepherd's pie with a golden crust, surrounded by festive holiday decor.

To make this Shepherd’s Pie, you’ll need the following ingredients:

  • 1 lb ground beef or lamb
  • 1 onion, chopped
  • 2 carrots, diced
  • 2 celery stalks, diced
  • 2 cloves garlic, minced
  • 1 cup frozen peas
  • 2 tablespoons tomato paste
  • 1 cup beef or vegetable broth
  • 2 tablespoons Worcestershire sauce
  • Salt and pepper to taste
  • 4 large potatoes, peeled and chopped
  • 4 tablespoons butter
  • 1/4 cup milk
  • Grated cheese (optional, for topping)

Steps to Shepherd’s Pie Perfection

Now that we have our ingredients ready, let’s get to cooking! Here’s how to make this delicious Shepherd’s Pie:

  1. Preheat your oven to 400°F (200°C). The anticipation of that warm, bubbling pie is already in the air!
  2. Boil the potatoes. Place your chopped potatoes in a pot of salted water and bring to a boil. Cook until tender, about 15 minutes. You want them soft enough to mash into creamy perfection.
  3. Make the mashed potatoes. Drain the potatoes and mash them with butter and milk until smooth. Set aside and let the aroma of butter fill your kitchen.
  4. Cook the meat. In a large skillet, cook the ground beef or lamb over medium heat until browned. Drain any excess fat to keep everything light and delicious.
  5. Add the veggies. Toss in the chopped onion, carrots, celery, and minced garlic. Cook until the vegetables are softened, about 5 minutes. This is where the magic happens—your kitchen will start smelling divine!
  6. Stir in the flavorings. Add the tomato paste, Worcestershire sauce, salt, and pepper to the meat mixture. Cook for another 2 minutes, allowing the flavors to meld.
  7. Add the broth and peas. Pour in the beef or vegetable broth and add the frozen peas. Let it simmer until the mixture thickens slightly, about 5 minutes. This is your hearty filling, and it’s about to elevate your dish!
  8. Assemble the pie. Transfer the meat mixture to a baking dish and spread the mashed potatoes evenly over the top. If you’re feeling indulgent, sprinkle some grated cheese over the mashed potatoes for that extra layer of comfort.
  9. Bake to perfection. Place your pie in the preheated oven and bake for 20-25 minutes until the top is golden brown and inviting.
  10. Let it cool. Remove from the oven and let it cool slightly before serving. This allows the flavors to settle and makes for easier serving.

Serving Suggestions

Once you’ve pulled that golden Shepherd’s Pie from the oven, it’s time to serve! Pair it with some roasted vegetables or a vibrant salad to balance the richness of the pie. My personal favorite is Roasted Brussels Sprouts with Bacon and Cranberries, which add a delightful crunch and sweetness that complements the savory pie beautifully.

Tips for the Perfect Shepherd’s Pie

  • Use quality meat: Whether you choose beef or lamb, go for the best quality you can find. Grass-fed options often have richer flavor profiles.
  • Experiment with spices: Don’t be afraid to add your own kick! A dash of cayenne or smoked paprika can elevate the flavor dramatically.
  • Make it in advance: Shepherd’s Pie can be prepared a day ahead. Simply assemble it and store it in the fridge. Pop it in the oven when your guests arrive!
  • Leftovers: This dish reheats beautifully, making it a fantastic option for meal prep. Simply cover it tightly and store in the fridge for up to three days.

Variations and Substitutions

Get creative! Here are a few ideas for variations and substitutions:

  • Vegetarian version: Substitute ground beef or lamb with lentils or mushrooms for a hearty vegetarian option.
  • Different veggies: Feel free to add other vegetables like corn, bell peppers, or mushrooms to the filling.
  • Herb it up: Fresh herbs like thyme or rosemary can add a lovely aromatic touch to your Shepherd’s Pie.

Storage & Freezing

To store your Shepherd’s Pie, let it cool completely, then cover it tightly with plastic wrap or aluminum foil and place it in the fridge. It will keep for 3-4 days. For longer storage, freeze the assembled pie before baking. Wrap it well and store it in the freezer for up to 3 months. When you’re ready to enjoy it, simply bake from frozen, allowing extra time for cooking.

FAQs

Can I substitute ground beef with something else?

Absolutely! Ground lamb is traditional, but you can use turkey, chicken, or even a plant-based meat substitute for a healthier or vegetarian option.

How do I make my mashed potatoes creamier?

For creamier mashed potatoes, make sure to use warmed milk and room temperature butter. You can also add sour cream or cream cheese for an extra velvety texture.

Can I add more vegetables?

Yes! Feel free to toss in any vegetables you like. Just be mindful of the moisture they might add—drain excess liquid if necessary.

Final Thoughts

There you have it—a cozy Shepherd’s Pie Christmas dinner that not only warms the body but also fills the heart with joy. This dish is more than just a recipe; it’s a celebration of flavors, memories, and the spirit of togetherness that makes the holidays so special. So gather your loved ones, set the table, and let the laughter and flavors mingle in the air. And remember, cooking is all about experimenting and having fun—so grab your skillet and unleash your inner chef!

Let me know how your Shepherd’s Pie turns out, and don’t forget to tag me in your photos! I can’t wait to see your delicious creations. Happy cooking, and may your holidays be filled with warmth, spice, and everything nice!

A Cozy Shepherd's Pie Christmas Dinner

Prep Time 20 minutes
Cook Time 30 minutes
Total Time 50 minutes
Servings 4 servings
Calories 650
A comforting and hearty shepherd's pie perfect for a festive Christmas dinner, combining savory meat and creamy mashed potatoes.

Ingredients

Meat and Vegetables

  • 1 lb ground beef or lamb
  • 1 unit onion, chopped
  • 2 carrots diced carrots
  • 2 stalks celery, diced
  • 2 cloves garlic, minced
  • 1 cup frozen peas
  • 2 tablespoons tomato paste
  • 1 cup beef or vegetable broth
  • 2 tablespoons worcestershire sauce
  • to taste salt and pepper

Mashed Potatoes

  • 4 large potatoes, peeled and chopped
  • 4 tablespoons butter
  • 1/4 cup milk
  • optional grated cheese (for topping)

Instructions 

  • Preheat oven to 400°F (200°C).
  • Boil potatoes until tender, then mash with butter and milk.
  • Cook meat with vegetables and seasonings until browned and softened.
  • Add broth and peas; simmer until thickened.
  • Spread meat mixture in a dish, top with mashed potatoes, optional cheese, and bake for 20-25 minutes.

Notes

For a richer flavor, add a splash of Worcestershire sauce to the meat mixture.
Calories: 650kcal
Cost: $15
Course: Main Course
Cuisine: British
Keyword: Shepherd's Pie

Nutrition

Calories: 650kcal | Carbohydrates: 80g | Protein: 40g | Fat: 25g | Sodium: 800mg

Loved this recipe? Save it to your favorite Pinterest board so you can easily find it later! It’s the perfect way to keep all your sweet ideas in one place. ✨

Detailed view of a shepherd's pie with mashed potato topping, featuring visible vegetables and meat filling.

The Festive Firecracker: My Ultimate Christmas Stuffed Turkey Breast Experience

Ah, the holiday season! A time for family gatherings, laughter, and, of course, the centerpiece of every festive table: the turkey. But let’s be honest, we’ve all been to that dinner where the turkey was a bit too dry or lacked that spark of flavor. This year, let’s set the bar high with a dish that will have your loved ones talking for years to come. Enter my Best Christmas Stuffed Turkey Breast — a bold and flavorful creation that transforms holiday cooking into a fiery celebration.

From the moment you step into the kitchen, the aroma of herbs and spices will beckon everyone close, inviting them to experience a dish that’s as much about warmth as it is about flavor. This stuffed turkey breast is not just food; it’s a story waiting to be shared — a blend of tradition and adventure, perfect for those who crave spice and comfort on their plate.

Why You’ll Love This Stuffed Turkey Breast

This isn’t your ordinary turkey recipe. Oh no! This turkey breast is stuffed with a delightful mixture of savory stuffing, perfectly seasoned to give you that warm, homey feeling, while also packing a punch of flavor that will wake up your taste buds. Imagine slicing into a tender turkey breast, the steam rising to greet you with hints of garlic and freshly chopped herbs. Each bite is not just a taste; it’s a symphony of textures and flavors that will make your Christmas dinner an unforgettable experience.

What Type of Turkey Breast Works Best?

When it comes to selecting the perfect turkey breast for stuffing, I recommend going for boneless turkey breasts. They’re easier to handle and allow for a more uniform cooking experience. If you’re feeling adventurous, you can even ask your butcher to butterfly the turkey breast for you, creating an ideal pocket for stuffing. Trust me, the ease of stuffing and rolling makes all the difference!

Options for Substitutions

Let’s face it: not everyone has the same taste preferences, and that’s okay! You can customize this recipe to your heart’s content. Here are some ideas:

  • Stuffing Variations: Swap out traditional stuffing for cornbread stuffing, wild rice, or even a quinoa mix for a healthier twist.
  • Herbs: If you don’t have fresh herbs on hand, dried herbs can work wonders too! Just remember to adjust the quantity since dried herbs are more concentrated.
  • Olive Oil: For a richer flavor, use melted butter instead of olive oil when searing your turkey.

Watch Out for These Mistakes While Cooking

Cooking is an art, and like any masterpiece, it requires attention to detail. Here are some common pitfalls to avoid:

  • Overstuffing: While it might be tempting to pack in as much stuffing as possible, overstuffing can lead to spills and uneven cooking.
  • Not Securing the Roll: Make sure to secure the turkey roll well with toothpicks or kitchen twine to keep the stuffing intact.
  • Skipping Temperature Checks: Always use a meat thermometer to ensure your turkey reaches an internal temperature of 165°F (74°C) for safe and delicious eating.

What to Serve With Stuffed Turkey Breast?

No turkey dinner is complete without a spread of delicious sides! I recommend serving this stuffed turkey breast with:

  • Creamy Mashed Potatoes: Perfect for soaking up those delicious drippings.
  • Roasted Vegetables: Brussels sprouts, carrots, or green beans roasted to perfection add a colorful touch to your plate.
  • Homemade Gravy: A rich gravy will tie all the flavors together beautifully.
  • Cranberry Sauce: A touch of sweetness cuts through the savory flavors.

Storage Instructions

Let’s talk leftovers! Your stuffed turkey breast is a treasure that can keep giving long after the holiday feast is over. Here’s how to store it:

  • Refrigeration: Store any leftover turkey in an airtight container in the fridge for up to 4 days.
  • Freezing: Wrap the cooled turkey tightly in plastic wrap and aluminum foil, then place it in a freezer bag. It will keep well for up to 3 months.

How to Know When the Stuffed Turkey Breast is Done

Perfectly cooked turkey is the key to a successful feast! Here’s how to check:

  • Use a Meat Thermometer: Insert it into the thickest part of the turkey, away from the stuffing. Look for a reading of 165°F (74°C).
  • Visual Cues: The juices should run clear, and the meat should be white throughout with no pink areas.

Stuffed Turkey Breast FAQ

How do I prevent the filling from leaking out while cooking?

To prevent leaks, be careful not to overstuff the turkey breast and secure it tightly with twine or toothpicks.

Why do we need both fresh and dried herbs in this recipe?

Fresh herbs add a bright flavor to the filling, while dried herbs provide a seasoned crust that holds up well during cooking.

Do I need to pound the turkey breast before stuffing?

Pounding the turkey to an even thickness helps it cook uniformly and makes rolling much easier. Aim for about 1/2 inch thickness.

Ingredients

  • 4 boneless turkey breasts
  • 1 cup cooked stuffing (your choice)
  • 2 tablespoons olive oil
  • 1 teaspoon salt
  • 1/2 teaspoon black pepper
  • 1 teaspoon garlic powder
  • 1 teaspoon onion powder
  • Fresh herbs for garnish (optional)

Step-by-Step Instructions

Step 1: Preheat Oven and Prepare Turkey

Preheat your oven to 375°F (190°C) and prepare your workspace. It’s time to make some magic happen!

Step 2: Butterfly the Turkey Breasts

Carefully butterfly each turkey breast to create a pocket, being cautious not to cut all the way through. This will hold all that delicious stuffing!

Step 3: Season the Turkey

Season the inside and outside of the turkey breasts generously with salt, pepper, garlic powder, and onion powder. Don’t skip this step; it’s where the flavor begins!

Step 4: Stuff the Turkey

Divide the cooked stuffing evenly among the turkey breasts, ensuring each pocket is fully stuffed.

Step 5: Secure the Opening

Secure the opening of each turkey breast with toothpicks or kitchen twine to keep the stuffing inside while cooking.

Step 6: Sear the Turkey Breasts

Heat olive oil in a skillet over medium-high heat. Sear the stuffed turkey breasts for 2-3 minutes on each side until browned. This step adds a beautiful crust and locks in flavor.

Step 7: Bake the Turkey

Transfer the seared turkey breasts to a baking dish and place them in the preheated oven. Bake for 25-30 minutes, or until the internal temperature reaches 165°F (74°C).

Step 8: Rest and Serve

Once out of the oven, let the turkey rest for about 5 minutes before slicing. This ensures the juices redistribute, keeping every bite moist and flavorful. Garnish with fresh herbs if desired and serve hot!

Conclusion

As you gather around the table this holiday season, let my Best Christmas Stuffed Turkey Breast be the star of your feast. With its juicy, herb-stuffed goodness, it’s bound to become a cherished tradition in your home. So grab your skillet, embrace the heat, and make this Christmas one for the books. Happy cooking!

The Christmas Stuffed Turkey Breast That Turns Up the Festive Heat

Ah, the holiday season! A time when the air is filled with the scent of fresh pine, the twinkling of lights dances in our eyes, and the clatter of family gathering around the table brings warmth to our hearts. And what better way to celebrate than with a Christmas Stuffed Turkey Breast that not only brings flavor but also a little fire to the festive feast? That’s right! This turkey breast is not just any main dish; it’s a culinary adventure that will impress your guests and transform your holiday dinner into a memorable celebration.

Why You’ll Love This Christmas Stuffed Turkey Breast

This dish is the ultimate showstopper. Imagine a juicy, tender turkey breast filled with a delightful stuffing that balances savory and sweet. The crunch of pecans, the tartness of cranberries, and the aromatic herbs come together in a symphony of flavors that elevate your holiday meal. Plus, it’s much easier to prepare than a whole turkey, making it a fantastic option for both small gatherings and larger celebrations. When you slice into this beauty, your guests won’t just see a dish; they’ll experience a story, a tradition, and a celebration all in one bite.

What Kind of Turkey Breast Should I Use?

For this recipe, a boneless turkey breast weighing about 2-3 pounds is ideal. It’s easier to stuff and roll while still delivering that juicy texture we all crave. If you prefer, you can also opt for skin-on turkey breast to add a bit of richness. Just remember, if you can’t find a skin-on version, a boneless skinless turkey breast will work too—just keep an eye on it to prevent drying out during cooking.

Ingredients for the Christmas Stuffed Turkey Breast

  • 1 boneless turkey breast (about 2-3 pounds)
  • 1 cup stuffing mix (prepared or homemade)
  • 1/4 cup dried cranberries
  • 1/4 cup chopped pecans or walnuts
  • 2 tablespoons olive oil
  • Salt and pepper to taste
  • Fresh herbs (rosemary, thyme) for garnish

How To Make the Christmas Stuffed Turkey Breast

Alright, let’s roll up our sleeves and dive into this delicious adventure!

Step 1: Preheat and Prepare

First things first, preheat your oven to 375°F (190°C). This will ensure your turkey breast roasts evenly and gets that beautiful golden color.

Step 2: Create the Pocket

Using a sharp knife, carefully slice a pocket into the thick side of the turkey breast. You want to create a cavity for the stuffing, so take your time and make sure not to cut all the way through. Think of it as opening a book that’s about to tell a delicious story.

Step 3: Prepare the Stuffing

Whether you’re using a store-bought stuffing mix or whipping up your own homemade version, now’s the time to prepare it according to package instructions. If you’re feeling adventurous, try adding some sautéed onions or celery for extra depth. Once it’s ready, mix in the dried cranberries and the chopped nuts. This stuffing is where the magic happens, bringing together flavors that will complement the turkey beautifully.

Step 4: Stuff and Secure

Now, stuff that turkey breast with the prepared mixture. Don’t be shy! Fill it up generously, but remember to leave a little space at the opening. If needed, secure the pocket with toothpicks to keep all that goodness inside while it roasts.

Step 5: Season and Roast

Rub the outside of the turkey breast with olive oil, then season generously with salt and pepper. This is where the skin (if using) gets that delightful crispy texture, and the flavor seeps into the meat. Place the stuffed turkey breast seam-side down on a baking sheet or in a roasting pan, and let the oven do its magic!

Step 6: Bake to Perfection

Bake in the preheated oven for about 45-60 minutes, or until the internal temperature reaches 165°F (74°C). The smell wafting through your kitchen will make it hard to resist sneaking a taste! Once it’s done, let it rest for about 10 minutes before slicing. This resting period allows the juices to redistribute, ensuring each bite is as juicy as the last.

How to Serve and Store Christmas Stuffed Turkey Breast

When it comes to serving, garnishing with fresh herbs like rosemary or thyme adds a festive touch. Pair this stunning dish with classic sides that complement its flavors. Think roasted vegetables, creamy mashed potatoes, or a vibrant cranberry sauce to balance the savory richness of the turkey.

As for leftovers (if there are any!), wrap them tightly in foil or store in airtight containers. They’ll keep in the refrigerator for up to 4 days. For longer storage, slice the turkey and freeze for up to 2 months. Just remember to reheat gently in the oven to keep that moisture intact.

What to Serve With Christmas Stuffed Turkey Breast?

The beauty of this dish is its versatility in pairing with sides. Here are some delightful options to consider:

  • Roasted Garlic Mashed Potatoes: Creamy and buttery, they make a perfect bed for those juicy slices of turkey.
  • Honey Glazed Carrots: Their sweetness beautifully contrasts the savory turkey and adds a pop of color to your plate.
  • Cranberry Sauce: A must-have that adds a tangy, fruity contrast to the rich flavors of the dish.
  • Green Bean Almondine: Light and crunchy, they offer a fresh contrast to the heavier components on your plate.
  • Stuffing Muffins: Miniature portions baked to crispy perfection, they’re a fun twist on traditional stuffing.
  • Gravy: A rich turkey gravy poured over each slice elevates the experience to another level.
  • Dinner Rolls: Soft rolls perfect for soaking up those delicious juices.
  • Roasted Brussels Sprouts: Earthy, crisp, and a touch bitter, they round out the plate beautifully.

Tips for Making the Best Stuffed Turkey Breast

  • Don’t rush the stuffing: Make sure the stuffing is cooled before filling the turkey. This helps prevent the turkey from cooking too quickly and drying out.
  • Use a meat thermometer: This is your best friend to ensure your turkey is cooked perfectly without overcooking.
  • Let it rest: Always let the turkey rest before slicing. This simple step makes a world of difference in juiciness.

Substitutions and Variations

If you’re looking to switch things up, here are some fun variations:

  • Stuffing Alternatives: Use a vegetarian stuffing mix or make your own with quinoa or rice for a twist.
  • Add fruits: Consider mixing in apples or pears with your stuffing for a sweet contrast.
  • Nut-free: If you have nut allergies, omit the nuts and add some breadcrumbs for texture instead.

Frequently Asked Questions

Can I make this recipe ahead of time?

Absolutely! You can prepare and stuff the turkey the day before, wrap it tightly, and refrigerate. Just roast it on the day of serving for the best results.

What can I use instead of stuffing mix?

If you prefer homemade stuffing, there are plenty of delicious recipes out there! Just ensure it’s moist and flavorful to complement the turkey.

How do I prevent the turkey from drying out?

Using a meat thermometer is key. Also, basting the turkey during roasting can help keep it moist.

Can I use chicken breast instead?

Yes! If you want a smaller version, chicken breast works just fine. Just be sure to adjust the cooking time accordingly.

Do I need to brine the turkey breast?

Brining is not necessary, but a dry brine with salt and herbs overnight can boost moisture and flavor.

Conclusion

This Christmas Stuffed Turkey Breast is more than just a holiday dish; it’s an invitation to create memories, to gather with loved ones, and to experience the joy of cooking with passion and spice. The balance of flavors, the tender meat, and the festive presentation make this dish a must-try for your holiday table. So, grab your apron, channel your inner chef, and get ready to impress everyone at your gathering. After all, food is not just about nourishment; it’s about bringing people together and sharing unforgettable moments. Happy cooking and happy holidays!