Author

Avery Collins

Browsing

Embrace the Comfort of Homemade Goodness: Crockpot Mac and Cheese

If you ever craved a dish that wraps you in a warm, cheesy embrace, then you’ve hit the jackpot with this Crockpot Mac and Cheese. Imagine coming home after a long day to the rich aroma of melted cheese, perfectly cooked pasta, and a hint of savory spices wafting through your kitchen. This recipe is not just about cooking; it’s about crafting a culinary experience that transforms ordinary ingredients into a dish that feels like a hug from the inside out. Let’s embark on this cheesy adventure that promises to bring joy to your table and ignite your passion for cooking!

Why You’ll Love This Recipe

Before we dive into the nitty-gritty, let’s talk about why this Crockpot Mac and Cheese is a must-try:

  • Effortless Preparation: Simply toss the ingredients into your crockpot and let it do the magic while you kick back and relax.
  • Ultimate Comfort Food: This dish is a creamy, cheesy delight that warms your soul and satisfies your cravings.
  • Customizable Flavors: Feel free to experiment with different cheeses, spices, and add-ins to make it uniquely yours.
  • Perfect for Any Occasion: Whether it’s a cozy family dinner or a lively gathering, this mac and cheese is sure to steal the show.
  • Leftover Love: Great for meal prep, it keeps well and tastes even better the next day!

Ingredient Breakdown

Velvety macaroni and cheese in a crockpot, showcasing rich textures and bubbling cheese.

Let’s gear up for this culinary adventure! Here’s what you’ll need to create the perfect Crockpot Mac and Cheese:

  • 8 ounces elbow macaroni: The classic choice for mac and cheese, these noodles soak up all the cheesy goodness.
  • 4 cups shredded sharp cheddar cheese: For that bold flavor that makes your taste buds dance.
  • 1 cup shredded mozzarella cheese: Adds a lovely stretchiness to each bite.
  • 2 cups milk: Creamy base that brings everything together.
  • 1 cup heavy cream: For a luxurious texture that feels indulgent.
  • 1/2 cup butter, melted: Adds richness and depth to the flavor.
  • 1/2 teaspoon salt: Enhances the flavors of the dish.
  • 1/4 teaspoon black pepper: A touch of warmth to balance the richness.
  • 1/4 teaspoon garlic powder: For that extra kick of flavor.
  • 1/4 teaspoon onion powder: Complements the garlic and elevates the overall taste.

Pro Tips for the Perfect Mac and Cheese

Here are some expert insights to elevate your Crockpot Mac and Cheese:

  • Choose Quality Cheese: Use freshly shredded cheese instead of pre-packaged to avoid a grainy texture.
  • Don’t Overcook the Pasta: The macaroni will continue cooking in the crockpot, so cook it al dente for the best texture.
  • Stir Occasionally: Give it a gentle stir every now and then to ensure even melting and prevent sticking.
  • Experiment with Cheeses: Mix different types of cheese, like gouda or pepper jack, for unique flavor profiles.
  • Add Spice: Experiment with cayenne pepper or smoked paprika for an added kick!
  • Top with Extras: Consider adding crispy bacon, breadcrumbs, or even jalapeños on top for texture and flavor.
  • Cook Low and Slow: Resist the urge to crank up the heat; slow cooking allows flavors to meld beautifully.
  • Use Whole Milk: For a creamier result, whole milk is your best friend.

Avoid Common Mistakes

Even the most seasoned cooks can run into hiccups. Here’s how to avoid them:

  • Overcooking the dish: Keep an eye on the time; aim for 2-3 hours on low for perfectly tender macaroni.
  • Using low-quality cheese: It may not melt well, leading to a clumpy texture.
  • Neglecting to stir: Stirring helps distribute heat and ingredients evenly.
  • Skipping the butter: This adds richness and flavor; don’t skip it!

Variations to Spice It Up

Ready to put your spin on this classic? Here are some delicious variations:

  • Buffalo Chicken Mac and Cheese: Add shredded rotisserie chicken and buffalo sauce for a spicy twist.
  • Veggie Delight: Toss in steamed broccoli, peas, or bell peppers for a colorful, nutritious boost.
  • Truffle Mac and Cheese: Drizzle with truffle oil before serving for an upscale flavor.
  • BBQ Pulled Pork Mac: Stir in shredded BBQ pork for an indulgent, smoky flavor combination.

Storage and Make-Ahead Instructions

This dish is a lifesaver for meal prep! Here’s how to store and reheat:

  • Refrigerate: Store leftovers in an airtight container for up to 4 days.
  • Freeze: For longer storage, freeze in portions for up to 3 months.
  • Reheat in the Oven: Warm in a 350°F oven, covered, for about 20 minutes, adding a splash of milk if it’s too thick.
  • Reheat in the Microwave: Heat in short bursts, stirring in between to ensure even warming.

Frequently Asked Questions

Got questions? Let’s clear them up:

  • Can I use gluten-free pasta? Yes! Just make sure to adjust cooking time as needed.
  • Can I make this ahead of time? Absolutely! Prep the ingredients and store them in the fridge until you’re ready to cook.
  • What’s the best way to reheat? The oven is best to maintain texture, but the microwave works in a pinch!
  • Can I add meat? Yes! Cooked bacon, sausage, or chicken are all great additions.
  • How do I prevent it from getting dry? Stir in a bit of milk when reheating to add moisture.
  • How spicy is this recipe? It’s mild, but you can adjust the spices to your preference.
  • What can I serve with mac and cheese? Pair it with a fresh salad, garlic bread, or grilled vegetables for a complete meal.
  • Can I use a different type of cheese? Yes! Feel free to experiment with your favorites.

Nourishing Your Body with Flavor

This Crockpot Mac and Cheese isn’t just a delicious meal; it can be tailored to meet various dietary needs:

  • For a lighter version: Use lower-fat cheese and milk, or replace heavy cream with unsweetened almond milk.
  • Looking for plant-based?: Substitute with vegan cheese and plant-based milk for a dairy-free option.
  • Protein boost: Add cooked lentils or chickpeas for a fiber-rich alternative.

Essential Equipment for Success

To create this cheesy masterpiece, gather the following:

  • Crockpot: A reliable slow cooker is essential for this recipe.
  • Mixing bowls: For combining your creamy ingredients before adding them to the pot.
  • Measuring cups and spoons: Accurate measurement ensures the right balance of flavors.
  • Spatula: For stirring and serving your mac and cheese.

Serving Suggestions

Now that you’ve created this delicious dish, let’s talk about how to serve it:

  • Garnish with Fresh Herbs: Sprinkle chopped parsley or chives for a pop of color and freshness.
  • Pair with Proteins: Serve alongside grilled chicken or a succulent steak for a hearty meal.
  • Serve with a Side Salad: A crisp green salad balances the richness of the mac and cheese.
  • Make it a Feast: Include crusty bread or garlic knots to soak up every cheesy bite!

With its creamy texture and rich flavors, this Crockpot Mac and Cheese is bound to become a staple in your home. So grab your skillet, embrace the thrill of cooking, and let this dish be a testament to the beauty of bold flavors and comforting meals. After all, cooking is an adventure — let’s make it one to remember!

Crockpot Mac and Cheese

Prep Time 10 minutes
Cook Time 2 hours 30 minutes
Total Time 2 hours 40 minutes
Servings 6 servings
Calories 650
A creamy, cheesy comfort food perfect for easy weeknight dinners made effortlessly in the crockpot.

Ingredients

Pasta

  • 8 ounces elbow macaroni

Cheese

  • 4 cups shredded sharp cheddar cheese
  • 1 cup shredded mozzarella cheese

Liquids

  • 2 cups milk
  • 1 cup heavy cream

Dairy & Fats

  • 1/2 cup melted butter

Seasonings

  • 1/2 teaspoon salt
  • 1/4 teaspoon black pepper
  • 1/4 teaspoon garlic powder
  • 1/4 teaspoon onion powder

Instructions 

  • Add the macaroni to the crockpot.
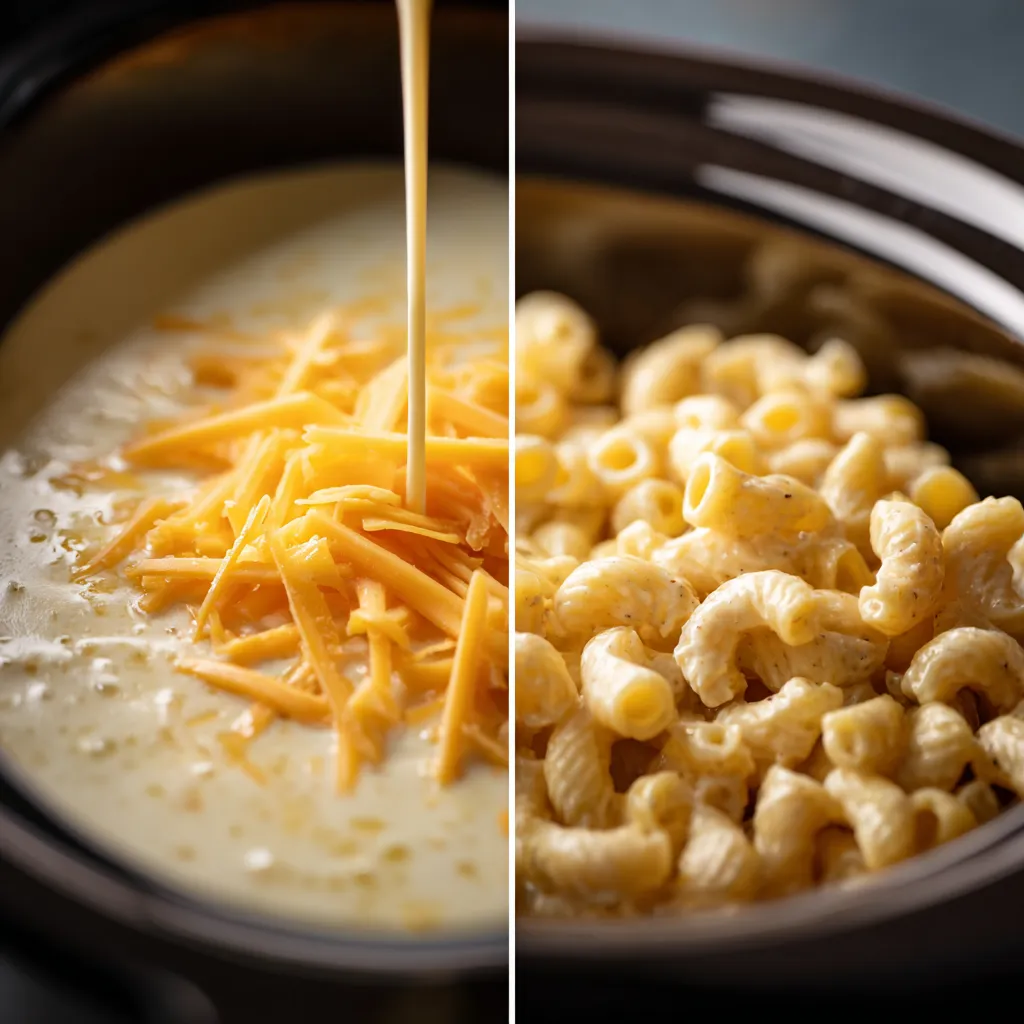
  • Mix milk, cream, melted butter, salt, pepper, garlic, and onion powders.
  • Pour mixture over macaroni and stir in cheeses.
  • Cook on low for 2-3 hours, stirring occasionally.
  • Optional: top with reserved cheese and let melt for 10-15 minutes before serving.

Notes

Use sharp cheddar for best flavor and stir occasionally during cooking.
Calories: 650kcal
Cost: $15
Course: Main Course
Cuisine: American
Keyword: Mac and Cheese

Nutrition

Calories: 650kcal | Carbohydrates: 70g | Protein: 30g | Fat: 35g | Sodium: 900mg

Loved this recipe? Save it to your favorite Pinterest board so you can easily find it later! It’s the perfect way to keep all your sweet ideas in one place. ✨

A steaming bowl of homemade Crockpot Mac and Cheese with a rich, cheesy appearance.

Ignite Your Culinary Adventure with Keto Philly Cheesesteak Rolls

Welcome, fellow flavor enthusiasts! Today, we’re diving into the mouthwatering world of Keto Philly Cheesesteak Rolls. This recipe is not just a mere meal; it’s an invitation to explore bold flavors and rich textures that will set your palate ablaze. Whether you’re a seasoned chef or a cooking newbie, these low-carb delights are designed to be both simple and sensational. So, grab your skillet, and let’s embark on this delicious journey!

Why You’ll Love This Recipe

Here’s the deal: this recipe isn’t just a twist on the classic Philly cheesesteak; it’s a culinary revolution that brings together the best of both worlds—flavor and health. Here are five reasons why you’ll absolutely love these Keto Philly Cheesesteak Rolls:

  • Flavor Explosion: The combination of ribeye steak, cream cheese, and provolone creates a savory symphony that’s hard to resist.
  • Low-Carb Marvel: Perfect for those on a keto diet, these rolls keep your carb count low while satisfying your cravings.
  • Quick and Easy: With minimal prep and cook time, these rolls can go from kitchen to table in under 30 minutes!
  • Meal Prep Friendly: Make a batch ahead of time for lunches or quick dinners. Just reheat and enjoy!
  • Customizable to Your Taste: Feel free to swap ingredients to match your flavor preferences or dietary needs.

Ingredient Breakdown

Delicious Keto Philly Cheesesteak Rolls on a wooden surface, showcasing filling and texture.

Let’s take a closer look at the ingredients that make this dish sing:

  • 1 lb thinly sliced ribeye steak: The star of our rolls! This cut adds rich flavor and tenderness.
  • 1 medium onion, sliced: Adds sweetness and depth when sautéed.
  • 1 medium green bell pepper, sliced: For that classic cheesesteak flavor, plus a pop of color.
  • 4 oz cream cheese, softened: This creamy addition binds everything together and adds richness.
  • 1 cup shredded provolone cheese: The gooey, melty topping that brings everything together.
  • 2 tbsp olive oil: For sautéing and adding healthy fats.
  • 1 tsp garlic powder: A dash of flavor to elevate the dish.
  • Salt and pepper to taste: Essential for seasoning.
  • 1 package low-carb tortillas or almond flour wraps: The vehicle for our flavorful filling—perfect for a keto diet.

Step-by-Step Instructions

Ready to roll? Here’s how to make these Keto Philly Cheesesteak Rolls:

  • Step 1: Heat olive oil in a skillet over medium heat.
  • Step 2: Add sliced onions and bell peppers to the skillet and sauté until softened.
  • Step 3: Add the thinly sliced ribeye steak to the skillet, cooking until browned.
  • Step 4: Stir in garlic powder, salt, and pepper to taste.
  • Step 5: Remove skillet from heat and mix in softened cream cheese until well combined.
  • Step 6: Lay out low-carb tortillas and spoon the steak mixture onto each one.
  • Step 7: Top with shredded provolone cheese.
  • Step 8: Roll up each tortilla tightly and place seam side down on a baking sheet.
  • Step 9: Bake in a preheated oven at 350°F (175°C) for 10-15 minutes or until golden brown.
  • Step 10: Let cool slightly before slicing and serving.

Pro Tips for Perfect Rolls

Want to take your rolls to the next level? Check out these expert insights:

  • Use Quality Meat: Always opt for fresh, high-quality ribeye for the best flavor.
  • Don’t Overcook: Keep the steak tender by cooking just until browned. It’ll continue to cook in the oven.
  • Experiment with Cheeses: Try using different cheeses like Monterey Jack or Cheddar for a unique twist.
  • Add Heat: For those who love spice, toss in some jalapeños or hot sauce to the filling.
  • Make Ahead: Prepare the filling a day in advance and assemble when ready to bake.
  • Garnish Well: Serve with fresh parsley or a sprinkle of red pepper flakes for added flavor.
  • Use Parchment Paper: Line your baking sheet to prevent sticking and make cleanup easier.
  • Keep an Eye on the Oven: Every oven is different, so check your rolls periodically to avoid burning.

Common Mistakes and Troubleshooting

Even the best chefs make mistakes! Here are some common pitfalls and how to avoid them:

  • Too Much Filling: Avoid overstuffing the tortillas, which can lead to messy rolls and difficulty in baking.
  • Using Cold Cream Cheese: Make sure your cream cheese is at room temperature for easy mixing.
  • Underseasoning: Don’t skip the salt and pepper; they’re crucial for enhancing flavors.
  • Burnt Edges: If the edges of your rolls brown too quickly, cover them with foil to prevent burning.

Variations to Try

Feel like getting creative? Here are some variations of this recipe:

  • Mushroom Lovers: Add sautéed mushrooms for an earthier flavor.
  • Spicy Southwest: Incorporate chipotle peppers in adobo for a smoky kick.
  • Italian Twist: Swap out the provolone for mozzarella and add marinara sauce for a cheesy dip.
  • Vegetarian Option: Replace the ribeye with sautéed zucchini and eggplant for a delicious veggie roll.

Storage and Make-Ahead Instructions

Want to keep the flavor going? Here’s how to store your rolls:

  • Refrigerate: Store any leftover rolls in an airtight container in the fridge for up to 3 days.
  • Freeze: Unbaked rolls can be frozen for up to 2 months. Just thaw in the fridge before baking.
  • Reheat: To reheat, place in a preheated oven at 350°F (175°C) for about 10 minutes.

Frequently Asked Questions

Got questions? We’ve got answers! Here are some FAQs about our Keto Philly Cheesesteak Rolls:

  • Can I use a different type of meat? Yes! Chicken or turkey would work well too.
  • What if I can’t find low-carb tortillas? Almond flour wraps or lettuce wraps are great alternatives.
  • How can I make these dairy-free? Substitute cream cheese with a dairy-free alternative and use a plant-based cheese.
  • How spicy are these rolls? They are not spicy unless you add spicy ingredients. Feel free to customize the heat level!
  • Can I add other vegetables? Absolutely! Bell peppers and mushrooms are great additions.
  • How do I know when they are done baking? They should be golden brown and crispy on the outside.
  • Do I need to pre-cook the tortillas? No, they will cook perfectly while baking with the filling inside.
  • How can I serve these rolls? Try serving with a side salad or dipping sauce for extra flavor.

Nutrition Tips and Dietary Adaptations

Staying healthy while enjoying delicious food is possible! Here are some nutritional insights:

  • Low-Carb Goodness: These rolls are perfect for keto enthusiasts, allowing you to enjoy without the carbs.
  • Protein-Packed: The ribeye and cheese provide ample protein, keeping you full longer.
  • Healthy Fats: Olive oil adds heart-healthy fats that are beneficial for overall health.
  • Vegetable Boost: Feel free to add more vegetables to increase fiber and nutrients.

Equipment Recommendations

To create these delightful rolls, you’ll need the following equipment:

  • Skillet: A good non-stick skillet is essential for sautéing your vegetables and meat.
  • Baking Sheet: For baking the rolls to golden perfection.
  • Spatula: To mix and serve your filling with ease.
  • Measuring Cups and Spoons: For precise ingredient measurements.

Serving Suggestions

How to elevate your meal? Here are some serving ideas:

  • Pair with a Salad: A fresh green salad drizzled with vinaigrette complements these rolls perfectly.
  • Serve with Dipping Sauce: Try a creamy ranch or spicy aioli for extra flavor.
  • Garnish with Fresh Herbs: A sprinkle of chopped parsley or cilantro adds freshness and color.
  • Enjoy with a Side of Veggies: Roasted or steamed vegetables make a great side dish.

In conclusion, these Keto Philly Cheesesteak Rolls are more than just a dish; they’re a celebration of flavor, health, and culinary adventure. So, gather your ingredients, roll up your sleeves, and let the cooking begin! Remember, the kitchen is your playground, and the only rule is to have fun while igniting those taste buds. Happy cooking!

Keto Philly Cheesesteak Rolls - So Tasty & Easy To Make

Prep Time 10 minutes
Cook Time 15 minutes
Total Time 25 minutes
Servings 4 rolls
Calories 550
Enjoy these delicious keto-friendly Philly cheesesteak rolls, packed with savory steak and melted cheese, perfect for a quick and satisfying meal.

Ingredients

Meat and Vegetables

  • 1 lb thinly sliced ribeye steak
  • 1 medium onion, sliced
  • 1 medium green bell pepper, sliced

Dairy

  • 4 oz cream cheese, softened
  • 1 cup shredded provolone cheese

Other ingredients

  • 2 tbsp olive oil
  • 1 tsp garlic powder
  • to taste salt and pepper
  • 1 package low-carb tortillas or almond flour wraps

Instructions 

  • Cook onions and peppers in olive oil until softened.
  • Add steak and cook until browned, then season with garlic, salt, and pepper.
  • Remove from heat and stir in cream cheese until combined.
  • Spoon mixture onto tortillas, top with provolone, roll up, and place on a baking sheet.
  • Bake at 350°F (175°C) for 10-15 minutes, then cool slightly before serving.

Notes

For extra flavor, add a dash of hot sauce or your favorite herbs.
Calories: 550kcal
Cost: $15
Course: Main Course
Cuisine: American
Keyword: Cheesesteak, Keto, Steak

Nutrition

Calories: 550kcal | Carbohydrates: 8g | Protein: 45g | Fat: 35g | Sodium: 900mg

Loved this recipe? Save it to your favorite Pinterest board so you can easily find it later! It’s the perfect way to keep all your sweet ideas in one place. ✨

Warm Keto Philly Cheesesteak Rolls with melted cheese and colorful vegetables.

The Ultimate Green Bean Casserole: A Flavorful Twist on a Classic

Gather ’round, food adventurers! Today, we’re diving into the heart of comfort food with a dish that not only warms the soul but also tantalizes the taste buds: the green bean casserole. This isn’t just any casserole; it’s an irresistible blend of fresh green beans, creamy sauce, and a crunchy topping that dances with flavor. As we embark on this culinary journey, prepare to discover the magic behind every layer of this iconic dish that has graced tables for generations.

Before we get our hands dirty, let’s talk about why this dish deserves a special place on your table — and trust me, it’s not just for Thanksgiving or holiday feasts. The green bean casserole is a versatile side dish that can elevate any meal, infusing your dinner with warmth, comfort, and that touch of spice that makes every bite unforgettable.

Why You’ll Love This Recipe

  • Quick and Easy Preparation: In just under an hour, you can whip up this delicious casserole, making it perfect for busy weeknights or last-minute gatherings.
  • Versatile Dish: Pair it with roasted meats, or serve it as a hearty vegetarian option — this casserole adapts beautifully to any menu!
  • Rich, Creamy Flavor: The combination of cream of mushroom soup and fresh ingredients creates a rich, comforting flavor profile that everyone will love.
  • Crunchy Topping: The crispy fried onions add that perfect crunch to contrast the creamy base, ensuring every bite is a delightful experience.
  • Perfect for Leftovers: This casserole heats up beautifully, making it a fantastic option for meal prep or enjoying the next day!

Ingredients Breakdown

Eye-level shot of a green bean casserole with a golden crunchy topping.

Let’s get into the nitty-gritty of what makes this casserole shine. Here’s what you’ll need:

  • 1 lb fresh green beans: Trimmed and ready to shine. Fresh is best, but you can use frozen if you’re in a pinch.
  • 1 can (10.5 oz) cream of mushroom soup: This is the star of our creamy sauce. You can also substitute with homemade mushroom sauce for a gourmet twist.
  • 1/2 cup milk: Whole or 2% milk works great. For a dairy-free option, use unsweetened almond milk.
  • 1 cup shredded cheddar cheese: You can’t go wrong with cheddar! Feel free to mix it up with mozzarella or a spicy pepper jack for a kick.
  • 1/2 cup crispy fried onions: The classic crunchy topping. Look for French fried onions in your grocery aisle.
  • 1/4 tsp garlic powder: A little hint of garlic elevates the flavor. Fresh minced garlic can also be used for a bolder presence.
  • Salt and pepper to taste: Don’t forget to season! A pinch of salt goes a long way.
  • 1 cup additional crispy fried onions for topping: Because who doesn’t love more crunch?

Cooking Instructions

Now that we have our ingredients lined up, it’s time to bring this casserole to life! Follow these simple steps:

  1. Preheat your oven to 350°F (175°C).
  2. Blanch the green beans: Bring a pot of water to a boil and blanch the green beans for 5 minutes. Drain and rinse under cold water to stop the cooking process.
  3. Mix the sauce: In a large mixing bowl, combine the cream of mushroom soup, milk, garlic powder, salt, and pepper. Stir until well mixed.
  4. Add the beans and cheese: Toss in the blanched green beans and the shredded cheddar cheese, ensuring everything is evenly coated.
  5. Prepare for baking: Transfer the mixture to a greased 9×13 inch baking dish.
  6. Top it off: Spread 1/2 cup of crispy fried onions over the top of the casserole.
  7. Bake: Place in the preheated oven and bake for 25 minutes.
  8. Final touch: Remove from the oven and sprinkle the remaining crispy fried onions on top. Return to the oven and bake for an additional 10 minutes, or until the topping is golden brown.
  9. Cool and serve: Let it cool for a few minutes before serving. Enjoy the oohs and aahs as everyone digs in!

Pro Tips for the Perfect Casserole

  • Don’t Overcook the Beans: Blanching should be just enough to soften them slightly. They’ll cook more in the oven, so keep that crunch!
  • Homemade Sauce Option: For a fresher taste, make your own mushroom sauce using sautéed mushrooms, garlic, and a bit of flour and broth.
  • Experiment with Cheese: Add a mix of cheeses like Gruyère or Parmesan for a flavor twist!
  • Make it Ahead: Assemble the casserole a day in advance. Just cover it tightly and refrigerate. Bake it straight from the fridge, adding a few extra minutes to the bake time.
  • Use Fresh Herbs: A sprinkle of thyme or rosemary can elevate the flavor profile and add aromatic depth.
  • Customization is Key: Add cooked bacon bits or sautéed mushrooms for an extra layer of flavor.
  • Mind the Salt: If using canned soup, be mindful of the salt content. Taste as you go!
  • Cover to Cook: If you notice the topping browning too quickly, cover with foil and continue baking.

Common Mistakes and Troubleshooting

  • Overcooked Beans: If your green beans turn mushy, reduce the blanching time next time.
  • Runny Casserole: Ensure your sauce is thick enough before mixing. If it’s too runny, add more cheese or let it bake longer.
  • Burnt Topping: Keep an eye on your casserole during the last few minutes to avoid burning the crispy fried onions.
  • Too Salty: If it tastes too salty, balance it with a splash of lemon juice or a pinch of sugar.

Delicious Variations to Try

Feeling adventurous? Here are some variations to give your green bean casserole a new twist:

  • Spicy Jalapeño Casserole: Add sliced jalapeños to the mix for a spicy kick.
  • Italian Herb Twist: Incorporate Italian seasonings and top with mozzarella cheese instead of cheddar.
  • Asian-Inspired Casserole: Replace the cream of mushroom soup with a coconut milk base and add soy sauce and sesame oil.
  • Loaded Casserole: Mix in some cooked and crumbled sausage for a hearty version that will satisfy any meat lover.

Storage and Make-Ahead Instructions

This casserole can be prepared ahead of time and stored in the refrigerator for up to 24 hours before baking. Here’s how to store:

  • Refrigerate: Cover the assembled casserole tightly with plastic wrap or aluminum foil.
  • Freeze for Later: You can freeze the unbaked casserole for up to 2 months. Thaw in the refrigerator overnight before baking.
  • Leftovers: Store any leftover casserole in an airtight container in the fridge for up to 4 days. Reheat in the oven at 350°F until warmed through.

Comprehensive FAQ

Got questions? I’ve got answers! Here are some common queries about the green bean casserole:

  • Can I use frozen green beans? Yes, frozen green beans work well. Just thaw and drain them before use.
  • Is there a gluten-free version? Absolutely! Use gluten-free cream of mushroom soup and check your fried onions for gluten content.
  • Can I make this dish vegan? Yes! Substitute the cream of mushroom soup with a vegan alternative and use plant-based milk.
  • How long do leftovers last? Leftovers can be stored in the fridge for 3-4 days, or frozen for up to 2 months.
  • Can I prepare this dish ahead of time? Yes, you can assemble it a day in advance and bake it when you’re ready to serve.
  • What should I serve with this casserole? It pairs wonderfully with roast chicken, turkey, or as part of a holiday feast.
  • Can I add meat to the casserole? Yes, cooked bacon or sausage can be mixed in for added flavor.
  • How can I make the topping crunchier? Consider adding panko breadcrumbs mixed with the fried onions for an extra crispy layer.

Nutritional Tips and Dietary Adaptations

This green bean casserole can be tailored to fit various dietary needs:

  • Lower Fat Option: Use reduced-fat soup and cheese. You can also substitute half the milk with low-fat yogurt for creaminess.
  • High Protein Variation: Add cooked chicken or turkey for a protein boost.
  • Vegetarian Delight: Stick to the original recipe for a hearty vegetarian dish; add more vegetables for variety.

Equipment Recommendations

To make this casserole, you’ll need:

  • Large Pot: For blanching the green beans.
  • Mixing Bowl: A large bowl to combine all the ingredients.
  • Baking Dish: A 9×13 inch dish is perfect for this recipe.
  • Oven: Preheat it right to get that perfect bake!

Serving Suggestions

Serve your green bean casserole as a side dish to:

  • Roasted Turkey: A classic pairing for holiday meals.
  • Grilled Meats: Chicken, pork, or beef — it complements them all!
  • Vegetarian Main Dishes: It works beautifully alongside a veggie pot pie or stuffed peppers.

So there you have it — the ultimate green bean casserole recipe that’s sure to become a family favorite. With its creamy texture, crunchy topping, and layers of flavor, this dish tells a story of comfort and joy. Remember, cooking is an adventure — so grab your skillet, get creative, and let every bite be a celebration of flavor!

Creamy Green Bean Casserole with Crunchy Topping

Prep Time 10 minutes
Cook Time 35 minutes
Total Time 45 minutes
Servings 6 servings
Calories 250
A delicious holiday side dish combining tender green beans in a creamy sauce topped with crispy fried onions for added crunch.

Ingredients

Green Beans

  • 1 lb fresh green beans, trimmed
  • 1 can cream of mushroom soup (10.5 oz can)
  • 0.5 cup milk
  • 1 cup shredded cheddar cheese
  • 0.5 cup crispy fried onions (for topping)
  • 0.25 tsp garlic powder
  • to taste salt and pepper
  • 1 cup additional crispy fried onions for topping

Instructions 

  • Preheat oven to 350°F (175°C). Blanch green beans for 5 minutes, then drain and rinse.
  • Mix cream of mushroom soup, milk, garlic powder, salt, and pepper in a bowl. Add green beans and cheese, stir well.
  • Transfer to a greased 9x13 inch dish. Top with 1/2 cup fried onions.
  • Bake for 25 minutes, then add remaining fried onions on top and bake for 10 more minutes until golden.
  • Let cool briefly before serving.

Notes

For extra flavor, consider adding a dash of soy sauce or hot sauce to the mixture.
Calories: 250kcal
Cost: $15
Course: Side Dish
Cuisine: American
Keyword: Green Beans

Nutrition

Calories: 250kcal | Carbohydrates: 20g | Protein: 10g | Fat: 15g | Sodium: 600mg

Loved this recipe? Save it to your favorite Pinterest board so you can easily find it later! It’s the perfect way to keep all your sweet ideas in one place. ✨

Delicious green bean casserole with a smooth texture and fried onion garnish.

Welcome to the World of Cottage Pie!

Cottage pie is a dish that warms not just the belly but the heart. A comforting blend of savory ground beef, aromatic vegetables, and a creamy mashed potato topping, this classic recipe is a canvas for culinary creativity. Whether you’re looking to feed a crowd or simply treat yourself after a long day, this best homemade cottage pie is your ticket to a flavorful adventure. In this article, we will explore everything you need to know to create the ultimate cottage pie that sets your kitchen ablaze with enticing aromas and bold flavors.

Why You’ll Love This Recipe

  • Comfort in Every Bite: Perfect for chilly nights, this hearty dish offers warmth and satisfaction that feels like a hug on a plate.
  • Endless Customization: From spicy to savory, you can adjust the flavors to make it your own — add herbs, spices, or even a dash of heat!
  • Meal Prep Friendly: Make-ahead options allow you to whip up a batch over the weekend and enjoy it throughout the week.
  • Family Favorite: With its delicious layers, it’s a dish that appeals to kids and adults alike, making it perfect for family dinners.
  • Budget-Friendly: Made primarily with ground beef and basic vegetables, it’s an economical choice that doesn’t skimp on flavor.

Ingredient Breakdown

Let’s dive into the essentials of making this scrumptious cottage pie. Each ingredient plays a vital role in delivering depth and flavor to this dish.

  • Ground Beef or Lamb: Traditionally, cottage pie is made with ground beef, but you can use lamb for a twist. Choose a blend with 15-20% fat for the juiciest results.
  • Onion: Chopped onion provides a sweet base flavor. You can substitute with shallots for a milder taste.
  • Carrots: Diced carrots add a hint of sweetness and vibrant color. Consider using parsnips for a different flavor profile.
  • Garlic: Minced garlic elevates the dish with its aromatic essence. Fresh is best, but pre-minced can save time.
  • Frozen Peas: These offer a pop of color and sweetness. You can replace them with corn or green beans if desired.
  • Tomato Paste: This thickens the filling and adds rich umami flavor. Try using sun-dried tomatoes for a unique twist.
  • Worcestershire Sauce: A splash of this sauce enhances the depth of the meat filling. Soy sauce can be a good alternative if you’re out.
  • Beef Broth: Provides moisture and flavor. Homemade is ideal, but store-bought works just fine.
  • Mashed Potatoes: The crowning glory! Use creamy mashed potatoes made with butter and cream for the best results. Sweet potatoes can be a delightful alternative.
  • Cheese (optional): A sprinkle of shredded cheese on top creates a beautiful crust. Go for cheddar or a mix for extra flavor.

Pro Tips for the Best Cottage Pie

  • Brown the Meat Well: Ensure the ground beef or lamb is well-browned to develop rich flavors that deepen the dish.
  • Layering is Key: Spread the meat filling evenly in your baking dish before topping with mashed potatoes for balanced bites.
  • Texture Matters: For a creamy topping, make sure your mashed potatoes are smooth without lumps. Add an extra splash of cream if needed.
  • Don’t Skip the Cheese: A cheesy topping adds a delightful crunch and flavor contrast — trust me, it’s worth it!
  • Let it Rest: Allow the cottage pie to cool for a few minutes after baking. This helps the filling set, making serving easier.
  • Experiment with Spices: Add a pinch of cayenne, thyme, or rosemary to the meat mixture for an exciting flavor boost.
  • Use a Baking Sheet: Place the baking dish on a sheet pan while baking to catch any drips and make clean-up a breeze.
  • Freezing for Later: This dish freezes beautifully. Just make sure to wrap it tightly to avoid freezer burn.
  • Portion Control: For easier servings, consider making individual cottage pies in ramekins — perfect for dinner parties!

Avoiding Common Mistakes

Even the best of us can make a few missteps in the kitchen. Here are some common pitfalls to watch out for:

  • Overcooking the Meat: This can lead to a dry filling. Cook just until browned and drain excess fat.
  • Underseasoning: Don’t be shy with your salt and pepper! Taste as you go to ensure the flavors are balanced.
  • Too Thin of a Filling: If your meat mixture is too runny, it won’t hold up under the mashed potatoes. Allow it to simmer longer to thicken.
  • Cold Mashed Potatoes: Cold potatoes can lead to a lumpy topping. Make sure they are warm when spreading over the filling.
  • Baking Time: Watch closely for a golden top. If it’s browning too quickly, cover with foil to prevent burning.

Delicious Variations to Try

Feeling adventurous? Here are some variations to spice up your cottage pie:

  • Vegetarian Cottage Pie: Substitute ground beef with lentils or mushrooms for a hearty, plant-based option.
  • Spicy Cottage Pie: Add jalapeños or chipotle peppers to the meat mixture for a kick that will wake up your taste buds.
  • Curried Cottage Pie: Incorporate curry powder into the filling for an exotic twist that combines comfort with bold flavors.
  • Mexican-Inspired Cottage Pie: Layer in black beans, corn, and top with mashed sweet potatoes for a vibrant, fiesta-ready dish!

Storage and Make-Ahead Instructions

This dish is perfect for meal prep! Here’s how to store your cottage pie:

  • Refrigerating: Leftover cottage pie can be stored in the refrigerator for up to 3-4 days. Just cover it with foil or plastic wrap.
  • Freezing: Freeze it for up to 3 months! Ensure it’s in an airtight container or wrapped well to prevent freezer burn.
  • Reheating: For best results, reheat in the oven until heated through, about 20-25 minutes at 350°F (175°C).

Frequently Asked Questions

Curious minds want to know! Here are answers to some common questions about cottage pie:

  • What’s the difference between cottage pie and shepherd’s pie? Cottage pie is made with ground beef, while shepherd’s pie uses ground lamb.
  • Can I make this recipe vegetarian? Absolutely! Substitute meat with lentils, mushrooms, or a mix of vegetables.
  • Can I prepare cottage pie in advance? Yes, you can make it a day ahead and store it in the fridge before baking.
  • How do I prevent my mashed potatoes from being lumpy? Mash them while warm and add cream or butter for a smoother texture.
  • Can I freeze cottage pie? Yes! It freezes well. Just make sure to cool it completely before wrapping.
  • What can I serve with cottage pie? Green salads or steamed veggies pair perfectly with this hearty dish.
  • How do I know when my cottage pie is done? Look for a golden top and bubbling filling; it should be hot throughout.
  • Can I add cheese to my mashed potatoes? Absolutely! Mixing in cheese adds flavor and makes for a creamier topping.

Nutritional Insights and Dietary Adaptations

Cottage pie can be tailored to fit various dietary needs:

  • Low-carb version: Swap out potatoes for cauliflower mash for a lighter option.
  • Gluten-free: Ensure your Worcestershire sauce and broth are gluten-free.
  • High-protein: Add beans or legumes to the meat mixture for an extra protein boost.

Essential Kitchen Equipment

To create this culinary masterpiece, you’ll need:

  • Large Skillet: For browning the meat and sautéing vegetables.
  • Baking Dish: A deep dish will work best for layering your ingredients.
  • Potato Masher: To achieve the perfect creamy mashed potatoes.
  • Oven Mitts: Safety first! Protect those hands when pulling your hot pie from the oven.

Serving Suggestions

Now that your cottage pie is ready, here are some ideas for serving:

  • Fresh Herbs: Garnish with fresh parsley or thyme for a burst of color and flavor.
  • Side Salads: A crisp green salad with vinaigrette cuts through the richness of the pie.
  • Crusty Bread: Serve with a slice of warm, crusty bread to soak up any delicious juices.

In conclusion, cottage pie is more than just a dish; it’s a celebration of flavors, a canvas for creativity, and a reminder that cooking is an adventure. With this comprehensive guide, you’re equipped to whip up a cottage pie that’s not only satisfying but also a reflection of your culinary spirit. So, grab your skillet, embrace the heat, and let’s make some magic in the kitchen!

Ignite Your Thanksgiving with This Southern Green Bean Casserole

Welcome to the culinary adventure of a lifetime! This isn’t just any green bean casserole; it’s a bold, savory masterpiece that promises to elevate your Thanksgiving table. With its rich flavors and a delightful kick, this Southern Green Bean Casserole will not only warm your heart but also ignite your taste buds. Let’s dive right in and discover why this recipe is the *ultimate* holiday side dish!

Why You’ll Love This Recipe

  • Flavor Explosion: Each bite combines creamy goodness with a hint of spice, balancing the savory green beans and crunchy fried onions.
  • Quick and Easy: With just a few simple steps, you can whip this dish together in under an hour, giving you more time to enjoy with family.
  • Versatile Dish: Perfect as a side or a potluck contribution, this casserole adapts to any gathering with flair!
  • Make Ahead Friendly: Prepare your casserole a day in advance and pop it in the oven when you’re ready to serve.
  • Dietary Flexibility: This recipe can easily be modified to cater to various dietary needs, ensuring everyone can enjoy it.

Ingredient Breakdown

An appetizing Southern Green Bean Casserole in a dish, featuring layers of green beans, cheese, and a crunchy topping, illuminated by natural light.

Let’s take a look at the star players in this dish!

  • Green Beans: 2 cans (14.5 oz each) of drained green beans are the base of this casserole. You can also use fresh or frozen if you prefer a *homemade* touch!
  • Cream of Mushroom Soup: This adds a rich, creamy texture. For a healthier alternative, opt for a low-fat version or a homemade equivalent.
  • Sour Cream: Adds a tangy flavor and creaminess; plain Greek yogurt can substitute for a lighter option.
  • Shredded Cheddar Cheese: This gives the casserole a cheesy goodness. Feel free to experiment with different cheese blends!
  • Milk: Just a splash to help mix everything together. You can use almond milk or oat milk for a dairy-free version.
  • French Fried Onions: These give the casserole its signature crunch. If you’re feeling adventurous, try homemade crispy onions!
  • Spices: Garlic powder, black pepper, salt, onion powder, and a dash of cayenne pepper (for that kick!) are essential. Adjust the spices to your heat preference!

Step-by-Step Instructions

Ready to get cooking? Here’s how to make your Southern Green Bean Casserole:

  1. Preheat Your Oven: Set your oven to 350°F (175°C) to prepare for baking.
  2. Mix the Base: In a large mixing bowl, combine the cream of mushroom soup, sour cream, milk, garlic powder, onion powder, salt, black pepper, and optional cayenne pepper. Mix until smooth.
  3. Add the Green Beans: Fold in the drained green beans and half of the French fried onions, stirring gently to combine.
  4. Transfer to Baking Dish: Pour the mixture into a greased 9×13 inch baking dish and spread it evenly.
  5. Sprinkle Cheese: Top the casserole with shredded cheddar cheese, ensuring it covers the mixture evenly.
  6. First Bake: Bake in the preheated oven for about 25 minutes, allowing the flavors to meld and the cheese to melt.
  7. Add Crunch: Remove from the oven and sprinkle the remaining French fried onions on top for that irresistible crunch.
  8. Final Bake: Return to the oven for an additional 10-15 minutes, or until the onions are golden brown and the casserole is bubbly.
  9. Cool and Serve: Let the casserole cool slightly before serving. Enjoy the smoky, rich flavors!

Pro Tips for Perfection

  • Don’t Overcook the Beans: If you’re using fresh green beans, blanch them for just a few minutes before adding them to maintain crispness.
  • Layer Flavors: Consider adding sautéed mushrooms or cooked bacon for an extra depth of flavor.
  • Adjust Spice Levels: If you’re unsure about spice, start with a pinch of cayenne and work your way up.
  • Cheese Choices: Experiment with different cheeses like Gruyère or Monterey Jack for a unique twist.
  • Serve Hot: This casserole is best enjoyed hot out of the oven, so time your serving accordingly!
  • Garnish: A sprinkle of fresh parsley can add a pop of color and freshness to your dish.
  • Use a Baking Dish: A glass or ceramic dish works best for even cooking and browning.
  • Watch the Time: Ovens vary; keep an eye on your casserole to avoid burning the onions!

Common Mistakes and Troubleshooting

Even the best of us can make a mistake in the kitchen. Here are some common pitfalls and how to avoid them:

  • Watery Casserole: Ensure your green beans are well-drained. Excess moisture can lead to a soggy dish.
  • Overcooked Onions: If the onions are getting too dark, you can cover the dish loosely with foil in the final baking stage.
  • Lack of Flavor: Taste and adjust seasoning before baking. Everyone’s palate is different, so don’t be afraid to add a pinch more salt or pepper!

Variations to Spice It Up

Want to switch things up? Here are some delicious variations on the classic casserole:

  • Spicy Southwest Casserole: Add diced jalapeños and swap cheddar for pepper jack cheese for a fiery kick.
  • Mushroom Medley: Mix in sautéed wild mushrooms for an earthy flavor boost.
  • Vegan Delight: Use plant-based cream of mushroom soup and vegan cheese for a cruelty-free option.
  • Loaded Green Beans: Add crispy bacon bits and a drizzle of balsamic reduction for an upscale twist.

Storage and Make-Ahead Instructions

This casserole is perfect for making ahead. Here’s how to store and reheat:

  • Make-Ahead: Assemble the casserole a day before and cover it tightly with foil. Store in the fridge, then bake when you’re ready.
  • Freezing: You can freeze the unbaked casserole for up to 2 months. Just be sure to wrap it well to avoid freezer burn.
  • Reheating: Bake covered at 350°F for about 30-40 minutes, or until heated through. Add a few additional French fried onions for crunch!

FAQs About Southern Green Bean Casserole

  • Can I use fresh green beans? Absolutely! Just blanch them for a few minutes before mixing them in.
  • What can I substitute for cream of mushroom soup? You can use a homemade version or a different cream soup like cream of celery.
  • How long can leftovers last? Store leftovers in the refrigerator for up to 3-4 days.
  • Can I make this dish gluten-free? Yes, use gluten-free cream of mushroom soup and ensure your fried onions are gluten-free!
  • What cheese works best? While cheddar is classic, feel free to experiment with different cheese varieties for unique flavors.
  • Can I add protein to this dish? Yes! Cooked chicken or turkey can make this casserole a heartier meal.
  • Is it OK to make this casserole in advance? Yes, you can prepare it the day before and bake it when you’re ready.
  • How do I make it spicier? Consider adding more cayenne pepper or even some hot sauce for an extra kick.

Nutrition Tips and Dietary Adaptations

This recipe is rich in nutrients, especially if you use fresh green beans! Here are some tips to keep it healthy:

  • Add More Vegetables: Consider mixing in other veggies like carrots or bell peppers for additional nutrients.
  • Lower the Fat: Use low-fat sour cream and cheese to reduce the overall calories.
  • Protein Boost: Add chickpeas or shredded chicken for added protein to make this a complete meal.

Equipment Recommendations

Having the right tools can make all the difference in your cooking experience. Here’s what I recommend:

  • 9×13 Inch Baking Dish: Perfect for layering and baking your casserole.
  • Mixing Bowls: A set of various sizes will help you mix your ingredients smoothly.
  • Measuring Cups and Spoons: Precision in your measurements leads to perfection in taste.
  • Spatula: A good spatula helps in folding ingredients without breaking them apart.

Serving Suggestions

This casserole is bursting with flavor and pairs beautifully with a variety of main dishes. Here are some serving suggestions:

  • Roasted Turkey: The classic Thanksgiving main course complements the casserole perfectly.
  • Honey Glazed Ham: The sweetness of ham contrasts nicely with the savory casserole.
  • Grilled Chicken: For a lighter option, grilled chicken with herbs is a fantastic pairing.

Conclusion

Now that you have all the secrets to crafting the perfect Southern Green Bean Casserole, it’s time to get cooking! This recipe isn’t just a dish; it’s a celebration of flavors and textures that will have your friends and family clamoring for seconds. So grab your apron, embrace the heat, and let’s make this Thanksgiving unforgettable!

Best Southern Green Bean Casserole Recipe for Thanksgiving Dinner

Prep Time 10 minutes
Cook Time 35 minutes
Total Time 45 minutes
Servings 8 servings
Calories 350
A classic and delicious green bean casserole perfect for Thanksgiving, combining creamy, cheesy, and crispy flavors.

Ingredients

Green Beans

  • 2 cans green beans, drained
  • 1 can cream of mushroom soup
  • 1 cup sour cream
  • 1 cup shredded cheddar cheese
  • 1/2 cup milk
  • 1 cup french fried onions
  • 1/2 teaspoon garlic powder
  • 1/2 teaspoon black pepper
  • 1/2 teaspoon salt
  • 1/4 teaspoon cayenne pepper (optional)
  • 1/2 teaspoon onion powder

Instructions 

  • Preheat oven to 350°F (175°C).
  • Mix soup, sour cream, milk, garlic, onion, salt, pepper, and cayenne (if using).
  • Add green beans and half of fried onions; stir gently.
  • Pour into a greased 9x13 inch dish and top with cheese.
  • Bake for 25 minutes, then add remaining onions and bake 10-15 more minutes.
  • Let cool slightly before serving. Enjoy!

Notes

For extra flavor, add a dash of hot sauce or paprika.
Calories: 350kcal
Cost: $15
Course: Side Dish
Cuisine: Southern
Keyword: Green Beans

Nutrition

Calories: 350kcal | Carbohydrates: 30g | Protein: 15g | Fat: 20g | Sodium: 900mg

Loved this recipe? Save it to your favorite Pinterest board so you can easily find it later! It’s the perfect way to keep all your sweet ideas in one place. ✨

A beautifully presented Southern Green Bean Casserole with a golden, crispy topping, surrounded by a blurred background for focus.

Ignite Your Taste Buds with High-Protein Honey Garlic Shrimp

Are you ready to elevate your dinner game? Welcome to a culinary adventure that combines the sweetness of honey, the zest of garlic, and the satisfying crunch of perfectly cooked shrimp. In this guide, we’ll not only delve into the high-protein honey garlic shrimp recipe that lights up my kitchen but also explore why this dish is a must-try for anyone looking to spice up their meals. Get set to unleash your inner chef and make a dish that will leave your taste buds dancing!

Why You’ll Love This Recipe

  • Quick and Easy: Ready in just 20 minutes, this dish is perfect for busy weeknights or last-minute guests.
  • High Protein Delight: With shrimp as the star, you’ll pack in protein without the heaviness.
  • Flavor Explosion: The balance of sweet honey and savory garlic creates an unforgettable sauce that coats the shrimp beautifully.
  • Versatile Serving Options: Serve it over rice, quinoa, or a bed of fresh greens for a complete meal.
  • Health Benefits: Shrimp are low in calories and rich in nutrients, making this a guilt-free indulgence.

Ingredient Breakdown

High-protein honey garlic shrimp displayed in a warm, inviting setting.

Let’s dive into the essential ingredients for this honey garlic shrimp recipe and explore some tasty substitutions you can make if needed.

  • Large Shrimp: 1 pound, peeled and deveined. Opt for fresh or frozen (just ensure it’s thawed). Shrimp are low in calories and high in protein, making them a fantastic choice.
  • Honey: 3 tablespoons. This natural sweetener caramelizes beautifully and balances the savory soy sauce. For a twist, you can substitute with maple syrup.
  • Soy Sauce: 3 tablespoons. Use low-sodium soy sauce to keep the dish lighter. Alternatively, tamari or coconut aminos work for a gluten-free option.
  • Garlic: 2 cloves, minced. Fresh garlic is non-negotiable for that aromatic depth; powdered garlic just won’t cut it.
  • Olive Oil: 1 tablespoon. For sautéing the shrimp. Feel free to swap it with sesame oil for an Asian flavor boost.
  • Ginger: 1 teaspoon, grated. This adds a subtle warmth that complements the honey and garlic perfectly. Fresh ginger is always best.
  • Salt and Pepper: To taste. These essentials enhance the flavors of the dish — don’t skip them!
  • Green Onions: Chopped, for garnish. They add a fresh crunch and a pop of color.
  • Cooked Rice or Quinoa: For serving. You can also try cauliflower rice for a low-carb alternative.

Step-by-Step Cooking Instructions

Follow these simple steps to whip up your high-protein honey garlic shrimp in no time:

  1. In a bowl, whisk together the honey, soy sauce, minced garlic, grated ginger, salt, and pepper.
  2. Add the shrimp to the marinade and let it sit for 15-20 minutes to soak in all that flavor.
  3. Heat olive oil in a large skillet over medium-high heat.
  4. Add the marinated shrimp to the skillet and cook for 2-3 minutes on each side, or until the shrimp are pink and cooked through.
  5. Remove from heat and garnish with chopped green onions.
  6. Serve over cooked rice or quinoa and enjoy!

Pro Tips for Perfect Honey Garlic Shrimp

  • Marinate Wisely: Letting the shrimp soak in the marinade longer (up to an hour) can deepen the flavors.
  • High Heat: Cooking on medium-high heat ensures the shrimp sear beautifully, locking in juices and flavor.
  • Don’t Overcook: Shrimp cook quickly. Once they turn pink and opaque, they’re done!
  • Use Fresh Ingredients: Fresh garlic and ginger will elevate the flavors to another level.
  • Garnish Generously: Don’t skimp on the green onions; they add brightness and a fresh crunch.
  • Experiment with Heat: If you like a kick, add a pinch of red pepper flakes to the marinade.
  • Batch Cooking: Make a double batch and enjoy leftovers for lunch the next day!
  • Serve Immediately: This dish is best enjoyed fresh, as the shrimp can lose their texture if left sitting.

Common Mistakes and Troubleshooting

  • Overcooking Shrimp: Keep a close eye when cooking; shrimp can turn rubbery if overcooked.
  • Too Salty: If your dish ends up too salty, add a sprinkle of sugar to balance it out.
  • Marinade Too Thin: If your sauce isn’t thickening, let it cook down a little longer in the pan before adding shrimp.
  • Using Old Garlic: Ensure your garlic is fresh; it should be firm and not sprouted for the best flavor.

Variations to Spice Up Your Dish

Feeling adventurous? Here are some variations to try with your honey garlic shrimp:

  • Spicy Honey Garlic Shrimp: Add sriracha or chili paste to the marinade for a fiery kick.
  • Honey Garlic Shrimp Tacos: Serve the shrimp in corn tortillas topped with avocado and cabbage slaw.
  • Honey Garlic Shrimp Stir-Fry: Toss in your favorite vegetables like bell peppers and broccoli for a complete meal.
  • Garlic Butter Shrimp: Swap the olive oil for butter for a rich, decadent flavor.

Storage and Make-Ahead Instructions

If you want to prep this dish ahead of time, here’s how to store it:

  • Refrigerator: Store leftovers in an airtight container for up to 3 days. Reheat gently in a skillet with a splash of water to restore moisture.
  • Freezer: You can freeze the shrimp before cooking. Just marinate and place in a freezer bag for up to 3 months. Thaw in the fridge overnight before cooking.
  • Make-Ahead Option: Marinate the shrimp the night before and cook them fresh when you’re ready to eat.

Frequently Asked Questions

  • Can I use frozen shrimp? Yes, just ensure they are thawed before marinating.
  • How do I make this dish gluten-free? Use tamari or coconut aminos instead of soy sauce.
  • Can I substitute the shrimp? Absolutely! Try chicken or tofu for a different protein option.
  • What’s the best way to serve this? This dish pairs wonderfully with rice, quinoa, or even a fresh salad.
  • How can I add more veggies? Incorporate bell peppers, snap peas, or broccoli during cooking for added nutrition.
  • Can I make this dish in advance? It’s best enjoyed fresh, but you can prep components ahead of time.
  • Is this dish suitable for meal prep? Yes! Pack it in containers for a delicious, healthy lunch option.
  • Can I adjust the sweetness? Feel free to add more or less honey depending on your taste preference.

Nutritional Tips and Dietary Adaptations

This honey garlic shrimp dish not only bursts with flavor but also offers numerous health benefits:

  • Protein Power: High in protein, shrimp are excellent for muscle repair and overall health.
  • Low Calorie: This dish is low in calories, making it suitable for weight management.
  • Heart-Healthy: Olive oil provides healthy fats, supporting heart health when enjoyed in moderation.
  • Gluten-Free Adaptations: Simply use gluten-free soy sauce alternatives to accommodate dietary needs.

Essential Equipment

To whip up your high-protein honey garlic shrimp, you’ll need:

  • Skillet: A non-stick skillet works wonders for easy cooking and cleanup.
  • Mixing Bowl: For marinating your shrimp and mixing the sauce.
  • Whisk: To combine the marinade ingredients seamlessly.
  • Spatula or Tongs: For flipping the shrimp in the skillet without damage.

Serving Suggestions

Now that you’ve created your masterpiece, here are some delicious ways to serve your honey garlic shrimp:

  • Over Rice or Quinoa: A simple, filling base that soaks up the sweet and savory sauce.
  • On a Bed of Greens: For a lighter option, serve it over a mix of fresh spinach and arugula.
  • In Tacos: Fill corn tortillas with shrimp, add avocado and salsa for a fun twist.
  • With a Side of Veggies: Pair it with steamed broccoli or sautéed asparagus for a colorful plate.

Conclusion: Your Culinary Adventure Awaits!

There you have it—a comprehensive guide to creating the best high-protein honey garlic shrimp that not only delights your palate but also nourishes your body. Embrace the bold flavors, enjoy the cooking process, and don’t be afraid to experiment with this recipe. Remember, cooking is an adventure, and with every bite, you’re telling a story. So grab your skillet, gather your ingredients, and let’s fire up that kitchen!

High-Protein Honey Garlic Shrimp

Prep Time 10 minutes
Cook Time 10 minutes
Total Time 20 minutes
Servings 4 servings
Calories 250
A quick and delicious high-protein dish featuring succulent shrimp coated in a sweet and savory honey garlic sauce, perfect for a nutritious meal.

Ingredients

Main

  • 1 pound large shrimp, peeled and deveined
  • 3 tablespoons honey
  • 3 tablespoons soy sauce
  • 2 cloves garlic, minced
  • 1 tablespoon olive oil
  • 1 teaspoon ginger, grated
  • to taste salt and pepper
  • chopped green onions for garnish green onions
  • cooked rice or quinoa for serving rice or quinoa

Instructions 

  • Whisk honey, soy sauce, garlic, ginger, salt, and pepper in a bowl.
  • Marinate shrimp in the mixture for 15-20 minutes.
  • Heat olive oil in a skillet over medium-high heat.
  • Cook shrimp 2-3 minutes per side until pink and cooked through.
  • Garnish with chopped green onions and serve over rice or quinoa.

Notes

For extra flavor, add a squeeze of lime before serving.
Calories: 250kcal
Cost: $15
Course: Main Course
Cuisine: Asian
Keyword: shrimp

Nutrition

Calories: 250kcal | Carbohydrates: 30g | Protein: 25g | Fat: 5g | Sodium: 900mg

Loved this recipe? Save it to your favorite Pinterest board so you can easily find it later! It’s the perfect way to keep all your sweet ideas in one place. ✨

Appetizing shrimp cooked in honey garlic sauce with soft shadows and blurred background.

Welcome to the Ultimate Comfort Food Experience

When it comes to comfort food, few dishes can compete with the rich, creamy allure of mac and cheese. This Easy Crock Pot Mac and Cheese recipe takes the classic dish to new heights, blending the velvety textures of cheese with the warm embrace of spices. As you dive into this guide, you’ll discover not just how to make the perfect crock pot version, but why it’s the ultimate choice for family gatherings, cozy nights in, or any occasion that calls for a little indulgence.

Why You’ll Love This Recipe

This recipe is more than just a meal; it’s a warm hug on a plate. Here are several reasons why you’ll fall head over heels for this comforting dish:

  • Effortless Preparation: Just toss everything into the crock pot and let it do its magic while you kick back and relax.
  • Rich Flavor Profile: The combination of cheddar and mozzarella creates a creamy texture with a depth of flavor that’s hard to resist.
  • Perfect for Meal Prep: This recipe yields a hearty amount, making it ideal for leftovers or meal prep for busy weeks ahead.
  • Customizable: Feel free to experiment with different cheeses or spices to make it your own — the possibilities are endless!
  • Kid-Friendly: This dish is a surefire hit with kids of all ages, serving up smiles with every cheesy bite.

Ingredient Breakdown: What You’ll Need

Eye-level perspective of hearty crock pot mac and cheese, highlighting rich textures and warm colors.

The beauty of this crock pot mac and cheese lies in its simplicity. Here’s what you’ll need and some handy substitutions:

  • Elbow Macaroni: 2 cups. You can substitute with any small pasta like shells or cavatappi.
  • Water: 4 cups. This helps cook the pasta to perfection.
  • Shredded Cheddar Cheese: 2 cups. For a sharper flavor, use aged cheddar.
  • Shredded Mozzarella Cheese: 1 cup. For a creamier texture, consider using fontina or provolone.
  • Milk: 1 cup. Whole milk gives the best flavor, but you can use almond or oat milk for a dairy-free option.
  • Butter: 1/2 cup, cubed. Substitute with margarine or a vegan butter spread if needed.
  • Garlic Powder: 1 teaspoon. Fresh minced garlic can also add a nice punch.
  • Onion Powder: 1 teaspoon. You can replace this with finely chopped onions if you prefer.
  • Salt and Pepper: To taste. Don’t be shy — seasoning is key!

How to Make This Creamy Delight

Get ready to embark on a culinary adventure with this easy-to-follow recipe:

  1. In your crock pot, combine the elbow macaroni and water.
  2. Add the cubed butter, garlic powder, onion powder, salt, and pepper. Stir well to combine.
  3. Cover and cook on high for 2 hours, stirring occasionally to prevent sticking.
  4. After 2 hours, add the milk and both cheeses, stirring until melted and creamy.
  5. Cook for an additional 30 minutes on low until everything is perfectly blended.
  6. Serve warm and enjoy the cheesy goodness!

Pro Tips for the Best Mac and Cheese

Let’s ensure your mac and cheese is nothing short of spectacular. Here are some expert insights:

  • Use Freshly Shredded Cheese: Pre-shredded cheese often contains anti-caking agents that can affect melting. Go for blocks of cheese and shred them yourself!
  • Don’t Overcook the Pasta: Since the pasta will continue to cook in the crock pot, aim for al dente during the initial cooking phase.
  • Add a Kick: Experiment with spices like cayenne or smoked paprika to elevate the flavor profile.
  • Stir Occasionally: Stirring helps ensure even cooking and prevents the pasta from clumping together.
  • Let it Rest: Allow the dish to sit for a few minutes after cooking for the flavors to meld perfectly.
  • Use a Liner: Consider using a crock pot liner for easy cleanup — less scrubbing, more enjoying!
  • Sauce it Up: If you prefer a saucier mac and cheese, add more milk or cheese to your desired consistency.
  • Garnish Generously: Top with chopped parsley, bacon bits, or breadcrumbs for added texture and flavor.

Common Mistakes and How to Avoid Them

Even the best chefs have their off days, so here’s how to troubleshoot common errors:

  • Dry Mac and Cheese: If your dish comes out too dry, it’s likely due to cooking too long or not enough liquid. Always ensure your pasta is well-coated in sauce.
  • Unmelted Cheese: If the cheese isn’t melting properly, it may be due to the type of cheese used. Stick to cheeses that melt well, like cheddar or mozzarella.
  • Clumpy Pasta: This can happen if the pasta isn’t stirred enough during cooking. Make it a habit to check and stir occasionally.

Delicious Variations to Try

Feeling adventurous? Here are some fun twists on the classic recipe:

  • Buffalo Chicken Mac: Stir in shredded rotisserie chicken and buffalo sauce for a spicy kick.
  • Loaded Baked Potato Mac: Add diced cooked potatoes, bacon bits, and chives for a hearty twist.
  • Veggie Delight: Toss in steamed broccoli, peas, or roasted red peppers for a pop of color and nutrition.
  • Truffle Mac and Cheese: Drizzle truffle oil on top before serving for an indulgent flavor boost.

Storage and Make-Ahead Instructions

This crock pot mac and cheese is perfect for leftovers! Here’s how to store and reheat:

  • Refrigeration: Store in an airtight container in the fridge for up to 4 days.
  • Freezing: You can freeze this dish for up to 3 months. Just make sure to cool completely before transferring to a freezer-safe container.
  • Reheating: Thaw overnight in the fridge, then reheat in the microwave or on the stove, adding a splash of milk if it seems dry.

Frequently Asked Questions

Here are some common questions that may arise:

  • Can I use whole wheat pasta? Absolutely! Whole wheat pasta adds a nutty flavor and extra nutrition.
  • How do I make it gluten-free? Use gluten-free pasta and ensure that all other ingredients are gluten-free.
  • Can I use other types of cheese? Yes! Feel free to mix and match your favorite cheeses; just make sure they melt well.
  • What if I don’t have a crock pot? You can make this on the stove by boiling the pasta and then combining all ingredients in a pot over low heat.
  • How do I make it spicy? Add jalapeños, crushed red pepper, or your favorite hot sauce to kick it up a notch.
  • Can I prepare this ahead of time? Yes, you can prep the ingredients the night before and refrigerate them until you’re ready to cook.
  • What sides pair well with mac and cheese? Serve with a crisp salad, roasted veggies, or garlic bread to balance out the meal.
  • Is this dish suitable for vegetarians? Yes! It’s a vegetarian-friendly dish that’s rich and satisfying.

Nutritional Insights and Dietary Adaptations

Making healthy choices doesn’t mean sacrificing flavor. Here are some tips:

  • Reduce Fat: Use low-fat cheese and milk to cut down on calories without losing creaminess.
  • Increase Protein: Add cooked chicken or beans for a protein-packed meal.
  • Add Fiber: Incorporate vegetables like spinach or kale for added nutrition and fiber.

Essential Equipment for Success

To make the cooking process smoother, here’s what you’ll need:

  • Crock Pot: A reliable slow cooker is key to achieving creamy perfection.
  • Measuring Cups and Spoons: For accurate ingredient measurements.
  • Wooden Spoon: Perfect for stirring and serving.
  • Airtight Containers: For storing leftovers and make-ahead meals.

Serving Suggestions: Make it a Meal

Now that you have your delicious mac and cheese ready, think about how to round out your meal:

  • Pair with a fresh garden salad drizzled with vinaigrette.
  • Serve alongside grilled chicken or BBQ ribs for a hearty feast.
  • Top with crispy breadcrumbs or fried onions for added crunch and flavor.

As you dive into this Easy Crock Pot Mac and Cheese, remember that cooking is all about joy and creativity. Embrace the process, experiment with flavors, and don’t be afraid to find your unique spin on this classic. Every time you savor that cheesy goodness, you’re not just enjoying a meal; you’re telling a story. So grab your ingredients, fire up that crock pot, and let the adventure begin!

Easy Crock Pot Mac and Cheese Recipe

Prep Time 10 minutes
Cook Time 2 hours 30 minutes
Total Time 2 hours 40 minutes
Servings 6 servings
Calories 650
A creamy and cheesy comfort food made effortlessly in the crock pot, perfect for a quick family dinner.

Ingredients

Main

  • 2 cups elbow macaroni
  • 4 cups water
  • 2 cups shredded cheddar cheese
  • 1 cup shredded mozzarella cheese
  • 1 cup milk
  • 1/2 cup butter, cubed
  • 1 teaspoon garlic powder
  • 1 teaspoon onion powder
  • to taste salt and pepper

Instructions 

  • Combine macaroni and water in the crock pot.
  • Add butter, garlic powder, onion powder, salt, and pepper. Cover and cook on high for 2 hours, stirring occasionally.
  • Stir in milk and cheeses, then cook on low for 30 minutes until creamy.
  • Serve warm and enjoy!

Notes

Stir occasionally during cooking for best results.
Calories: 650kcal
Cost: $15
Course: Main Course
Cuisine: American
Keyword: Mac and Cheese

Nutrition

Calories: 650kcal | Carbohydrates: 80g | Protein: 30g | Fat: 25g | Sodium: 900mg

Loved this recipe? Save it to your favorite Pinterest board so you can easily find it later! It’s the perfect way to keep all your sweet ideas in one place. ✨

Delicious mac and cheese served in a bowl, featuring gooey cheese and perfectly cooked pasta.

Unleashing the Flavor: Why This Avocado Chicken Salad is Your New Go-To

Welcome to the vibrant world of flavor, where every bite of my Healthy Avocado Chicken Salad sparks joy and excitement! Imagine creamy avocados marrying tender, succulent chicken, all mingling in a colorful medley that’s as nutritious as it is delicious. This isn’t just a salad—it’s a celebration of taste and health! In this comprehensive guide, we’ll explore the depth of flavors in this dish, along with tips, variations, and everything you need to ensure that every serving is a masterpiece.

Why You’ll Love This Recipe

Here’s why this salad is destined to become a staple in your kitchen:

  • Versatile Meal Option: Perfect for lunch, dinner, or even a snack, this dish adapts beautifully to any occasion.
  • Nutrient-Packed: Loaded with protein, healthy fats, and fiber, it keeps you energized and satisfied.
  • Quick and Easy: With minimal prep time, you can whip up this salad in less than 30 minutes!
  • Flavor Explosion: The combination of creamy, tangy, and crunchy elements creates a symphony of tastes that will delight your palate.
  • Meal Prep Friendly: Make a big batch for the week and enjoy it in various ways—on lettuce wraps, in sandwiches, or as a dip!

Ingredient Breakdown: What You’ll Need

Let’s dive into the ingredients that make this salad sing. Each element is carefully chosen to enhance flavor and nutrition. Here’s what you’ll need:

  • 2 cups cooked chicken breast, shredded: You can use rotisserie chicken for convenience or cook your own. Either way, this protein source is key.
  • 1 ripe avocado, mashed: The star of the show! Choose one that yields slightly to pressure for the perfect creamy texture.
  • 1/4 cup Greek yogurt: This adds creaminess and a tangy flavor. You can substitute with mayo for a richer taste.
  • 1 tablespoon lemon juice: Brightens the salad and helps prevent the avocado from browning.
  • 1/4 cup diced celery: Adds crunch and a refreshing bite.
  • 1/4 cup diced red onion: For a mild, sweet crunch—soak it in water for a few minutes to mellow the flavor if desired.
  • 1/4 cup chopped fresh cilantro: This herb brings a burst of freshness. If you’re not a fan, try parsley instead.
  • Salt and pepper to taste: Essential for enhancing all the flavors!
  • Lettuce leaves for serving: These create a crisp bed for your salad, perfect for wrapping!

Pro Tips for Perfection

Ready to take your salad to the next level? Here are some expert insights:

  • Choose the Right Avocado: Look for avocados that are dark green and slightly soft to touch. A firm avocado will take longer to mash and won’t blend as smoothly.
  • Shred the Chicken: Shredded chicken mixes better with the dressing and ensures every bite is packed with flavor.
  • Experiment with Add-Ins: Try adding diced bell peppers or even fruits like diced apples or grapes for a sweet contrast.
  • Make it Spicy: Add a dash of hot sauce or chopped jalapeños for an extra kick!
  • Chill Before Serving: Let the salad sit in the fridge for at least 30 minutes before serving. This allows the flavors to meld beautifully.
  • Use Fresh Ingredients: Fresh herbs and vegetables make a significant difference in taste and nutrition.
  • Adjust to Your Taste: Feel free to modify seasoning and ingredients based on what you love.
  • Batch Cooking: Prepare larger quantities and store them in portioned containers for grab-and-go meals!

Common Mistakes and Troubleshooting

Even the best chefs encounter hiccups! Here’s how to avoid common pitfalls:

  • Too Much Liquid: If your salad is too runny, add more avocado or Greek yogurt to thicken it up.
  • Avocado Browning: Squeeze more lemon juice over the salad to slow down oxidation.
  • Overseasoning: Start with a little salt and pepper, taste, and adjust as needed.
  • Chicken Too Dry: If your chicken is leftover from a previous meal, ensure it’s moist by adding a little more yogurt or avocado.

Creative Variations to Keep Things Exciting

Don’t be afraid to shake things up! Here are four fantastic variations to try:

  • Mexican Avocado Chicken Salad: Add black beans, corn, and a pinch of cumin. Top with a dollop of salsa!
  • Asian-Inspired Salad: Mix in sliced almonds, shredded carrots, and a drizzle of sesame oil.
  • Fruit-Infused Salad: Include diced apples or mango for a refreshing twist.
  • Curried Chicken Salad: Add curry powder and raisins for an exotic flavor profile.

Storage and Make-Ahead Instructions

Want to prepare ahead of time? Here’s how:

  • Refrigeration: Store in an airtight container in the fridge for up to 3 days.
  • Freezing: Not recommended, as the texture of the avocado will change once frozen.
  • Make-Ahead Tips: Prepare the chicken and chop veggies in advance, but mix the salad right before serving to maintain freshness.

Frequently Asked Questions

Got questions? I’ve got answers! Here are some of the most common inquiries:

  • Can I use canned chicken? Absolutely! Just drain and shred it to incorporate into your salad.
  • How can I make this salad lower in calories? Swap Greek yogurt for a low-fat version or reduce the quantity of avocado.
  • Can I double the recipe? Yes! Just ensure you have a large enough bowl to combine everything.
  • What’s the best way to serve this salad? Serve it on lettuce leaves, in a sandwich, or with whole-grain crackers for a delightful crunch!
  • How long does it last in the fridge? The salad is best consumed within 3 days, but it can last up to 5 days if stored properly.
  • Can I add nuts? Definitely! Chopped walnuts or pecans add a delightful crunch.
  • Is this recipe gluten-free? Yes, all ingredients are gluten-free. Just ensure any additional ingredients are certified gluten-free.
  • What can I substitute for Greek yogurt? Use sour cream or a dairy-free yogurt alternative for a similar texture.

Nutritional Tips and Dietary Adaptations

This Avocado Chicken Salad is not just a feast for your taste buds but also a nutritional powerhouse. Here’s how you can adapt it:

  • Paleo-Friendly: Use olive oil instead of Greek yogurt and skip the celery for a more primal dish.
  • Vegetarian Option: Replace chicken with chickpeas for a hearty, protein-rich alternative.
  • Keto-Friendly: Keep the ingredients as is, but ensure you monitor portion sizes to maintain low carb intake.

Essential Equipment Recommendations

To create your masterpiece, you’ll need:

  • Mixing Bowl: A large bowl to mix all ingredients thoroughly.
  • Sharp Knife: Essential for chopping veggies and shredding chicken.
  • Measuring Cups and Spoons: For accuracy in your ingredient ratios.
  • Spatula or Mixing Spoon: To combine the ingredients gently.

Serving Suggestions

Ready to serve up this vibrant dish? Here’s how to make it shine:

  • On Lettuce Wraps: Create a refreshing wrap using crisp lettuce leaves.
  • In a Sandwich: Spread onto whole-grain bread for a filling lunch.
  • As a Dip: Serve with whole-grain crackers or veggies for a healthy snack.
  • Garnished with Extra Herbs: Top with additional cilantro or parsley for an eye-catching finish.

So there you have it! Your roadmap to crafting a Healthy Avocado Chicken Salad that’s not only packed with flavor but also bursting with nutritional benefits. Dive in, and let the adventure of cooking ignite your passion for food. Remember, this isn’t just a recipe; it’s an invitation to savor life, one delicious bite at a time. Enjoy!

Welcome to the culinary adventure of a lifetime! In this vibrant world of Sweet Potato Taco Bowls, you’re not just throwing ingredients together; you’re crafting a meal that sings with flavor, color, and excitement. Whether you’re a seasoned chef or a kitchen novice, this recipe is your passport to a world where wholesome ingredients meet bold spices in a dance of deliciousness. Let’s dive into the art of creating a dish that’s as satisfying as it is healthy!

Why You’ll Love This Recipe

This isn’t just another meal; it’s a celebration of flavors and textures that will leave you craving more. Here are five reasons why this Sweet Potato Taco Bowl is a must-try:

  • Wholesome Goodness: Packed with nutrients from sweet potatoes, black beans, and colorful veggies, this bowl is a powerhouse of health.
  • Flavor Explosion: With bold spices like chili powder and cumin, each bite is a fiesta for your taste buds.
  • Quick and Easy: In just 30 minutes, you can whip up a meal that’s perfect for busy weeknights.
  • Customizable: Whether you want to add guacamole, sour cream, or extra veggies, the options are endless!
  • Meal Prep Friendly: Perfect for prepping in advance, making it an ideal choice for busy lifestyles.

Ingredient Breakdown: What You Need

Let’s gather our ingredients to build this flavorful masterpiece. Here’s what you’ll need for your Sweet Potato Taco Bowl:

  • 2 medium sweet potatoes: Peeled and diced. These are the star of the show! If you want a twist, try butternut squash instead.
  • 1 can black beans: Rinsed and drained. A great source of protein and fiber!
  • 1 cup corn: Fresh, frozen, or canned works perfectly.
  • 1 red bell pepper: Diced for a pop of color and crunch.
  • 1 avocado: Diced. Creamy and delicious, it balances the spices perfectly.
  • 1 teaspoon olive oil: For roasting the sweet potatoes.
  • 1 teaspoon chili powder: Adds that necessary kick!
  • 1 teaspoon cumin: Earthy and aromatic, it enhances the depth of flavor.
  • Salt and pepper to taste: Essential for seasoning.
  • 4 cups cooked brown rice or quinoa: Your hearty base.
  • Fresh cilantro: For garnish, bringing freshness and color.
  • Lime wedges: To squeeze over your bowl for that zesty finish.

Pro Tips for the Perfect Taco Bowl

An appetizing Sweet Potato Taco Bowl on a rustic surface, showcasing vibrant layers of fresh vegetables and grains.

Before we get cooking, let’s share some expert insights to elevate your Sweet Potato Taco Bowl:

  • Perfect Roasting: Ensure your sweet potatoes are cut evenly. This guarantees they cook uniformly and get that beautiful crispiness.
  • Don’t Rush the Roast: Allow those sweet potatoes to roast for the full 25-30 minutes. This develops their natural sugars, enhancing sweetness.
  • Layer Flavors: Season each component separately for a richer taste profile.
  • Creative Toppings: Think outside the box! Add crushed tortilla chips for crunch, or diced jalapeños for extra heat.
  • Meal Prep Magic: Make a double batch of sweet potatoes and beans to have on hand for quick lunches throughout the week.
  • Stuffed Variations: Use this recipe as a filling for tacos or burritos for a fun twist.
  • Fresh Herbs: Experiment with different herbs like parsley or green onions for varied flavor.
  • Control the Spice: Adjust the chili powder and cumin to your taste; spice is about balance!

Common Mistakes and Troubleshooting

Even the best can make mistakes! Here are some common pitfalls and how to avoid them:

  • Overcrowding the Baking Sheet: Give your sweet potatoes space to breathe. Overcrowding leads to steaming instead of roasting.
  • Skipping the Seasoning: Don’t skimp on salt and spices! They are essential for bringing out the flavors in your dish.
  • Not Prepping Ingredients Ahead: Take a few minutes to prep all ingredients before cooking. This keeps your cooking process smooth and enjoyable.
  • Ignoring Texture: Make sure to roast sweet potatoes until they’re tender but crispy. This contrast is key!

Variations: Make It Your Own!

Get adventurous and try these variations on your Sweet Potato Taco Bowl:

  • Vegan Delight: Swap black beans with lentils or chickpeas for a plant-based protein punch.
  • Fiesta Bowl: Add pico de gallo, guacamole, and sour cream for a fiesta in every bite.
  • Spicy Kick: Incorporate diced jalapeños or a drizzle of hot sauce for those who crave heat.
  • Grain Switch-Up: Use farro or quinoa in place of brown rice for different textures and flavors.

Storage and Make-Ahead Instructions

Want to make your cooking even more efficient? Here’s how to store and reheat:

  • Make-Ahead: Prep your sweet potatoes and beans a day in advance; simply store in airtight containers in the fridge.
  • Storage: Keep leftovers in an airtight container for up to 4 days. Reheat in the oven or microwave until warm.
  • Freezing: Sweet potatoes can be frozen! Simply roast them, let them cool, and freeze in a single layer before transferring to a freezer bag.

Comprehensive FAQ

Got questions? Here are some common queries about the Sweet Potato Taco Bowl answered:

  • Can I use other types of potatoes? Absolutely! Yukon gold or red potatoes also work beautifully.
  • Is this recipe gluten-free? Yes, it’s naturally gluten-free! Just ensure your toppings are also gluten-free.
  • How can I make it spicier? Add extra chili powder, jalapeños, or even a spicy salsa for a kick!
  • What can I use instead of beans? Try grilled chicken, tofu, or any other protein you prefer.
  • Can I make this in advance? Yes! The components can be prepared ahead of time and assembled when ready to eat.
  • How do I store leftovers? Store in an airtight container in the fridge for up to 4 days.
  • What’s a good side dish? A crisp green salad or tortilla chips pair wonderfully with this bowl.
  • Can I make it vegan? Absolutely! Just ensure to use vegan toppings and proteins.

Nutritional Tips and Dietary Adaptations

This bowl is not only delicious but can be tailored to fit various dietary needs:

  • Low-Carb: Skip the rice and load up on more veggies like spinach or kale.
  • High-Protein: Add grilled chicken, shredded beef, or tofu to amp up the protein content.
  • Diabetic-Friendly: Opt for quinoa instead of rice and watch portion sizes to manage carb intake.

Equipment Recommendations

To achieve taco bowl perfection, here’s what you’ll need:

  • Baking Sheet: For roasting those sweet potatoes to golden perfection.
  • Mixing Bowls: To mix and season your ingredients before cooking.
  • Sharp Knife: For easy chopping and dicing of your veggies.
  • Measuring Spoons: Essential for accuracy in seasoning.

Serving Suggestions

Make your Sweet Potato Taco Bowl shine with these serving suggestions:

  • Garnish with Fresh Herbs: A sprinkle of chopped cilantro or parsley elevates the dish.
  • Offer Lime Wedges: A squeeze of lime adds a refreshing zing.
  • Provide Toppings: Set out a toppings bar with guacamole, salsa, and sour cream for customization.

Now that you’re equipped with everything you need, it’s time to embrace your inner chef and create a Sweet Potato Taco Bowl that’s bursting with flavor and fun! Remember, cooking is an adventure — so let your creativity run wild, and enjoy every bite!

Sweet Potato Taco Bowls | Easy, Healthy Weeknight Dinner!

Prep Time 10 minutes
Cook Time 30 minutes
Total Time 40 minutes
Servings 4 servings
Calories 450
Enjoy a flavorful and nutritious dinner with these easy-to-make sweet potato taco bowls, perfect for a quick weeknight meal.

Ingredients

Vegetables and grains

  • 2 medium sweet potatoes, peeled and diced
  • 1 can black beans, rinsed and drained
  • 1 cup corn (fresh, frozen, or canned)
  • 1 red bell pepper diced red bell pepper
  • 1 avocado diced avocado
  • 4 cups cooked brown rice or quinoa
  • 1 teaspoon olive oil
  • 1 teaspoon chili powder
  • 1 teaspoon cumin
  • to taste salt and pepper salt and pepper

Garnishes and sides

  • to taste fresh cilantro fresh cilantro for garnish
  • to taste lime wedges lime wedges for serving

Instructions 

  • Preheat oven to 425°F (220°C). Toss sweet potatoes with olive oil, chili powder, cumin, salt, and pepper. Roast for 25-30 minutes, stirring halfway.
  • Prepare black beans, dice red bell pepper, and slice avocado.
  • Divide cooked rice or quinoa into bowls. Top with roasted sweet potatoes, black beans, corn, bell pepper, and avocado. Garnish with cilantro and serve with lime wedges.

Notes

Feel free to customize with your favorite toppings or add hot sauce for extra flavor.
Calories: 450kcal
Cost: $15
Course: Main Course
Cuisine: Mexican
Keyword: sweet potato

Nutrition

Calories: 450kcal | Carbohydrates: 80g | Protein: 12g | Fat: 10g | Sodium: 400mg

Loved this recipe? Save it to your favorite Pinterest board so you can easily find it later! It’s the perfect way to keep all your sweet ideas in one place. ✨

A beautifully arranged Sweet Potato Taco Bowl, featuring sweet potatoes, beans, and avocado under warm natural light.

Ignite Your Taste Buds: Experience the Art of Stuffed Bell Peppers

Welcome to a culinary adventure that will set your kitchen ablaze with flavor! Stuffed bell peppers are a vibrant celebration of freshness, creativity, and spice that will elevate your dining experience. With every bite, you’ll discover the delightful combination of textures and tastes that make this dish a go-to for any occasion. Let’s delve into the world of stuffed bell peppers and unlock the secrets to creating a dish that’s not just a meal, but a vibrant story on your plate.

Why You’ll Love This Recipe

This isn’t just any stuffed pepper recipe; it’s a passport to flavors! Here’s why you’ll be rushing to your kitchen:

  • Versatile Ingredients: Customize with any combination of grains, beans, and spices to make it your own.
  • Health Benefits: Packed with vitamins, fiber, and antioxidants, they’re a nutritious choice for any meal.
  • Easy to Prepare: With simple steps, you can have this dish ready in no time, perfect for busy weeknights.
  • Meal Prep Friendly: Make-ahead options and freezer-friendly tips ensure you’re ready for any craving.
  • Impressive Presentation: The colorful peppers make for an eye-catching dish that’s sure to impress your guests!

Ingredients Breakdown

Here’s what you’ll need to create your stuffed bell pepper masterpiece, along with some substitutions to keep things exciting:

  • Bell Peppers: Choose from red, green, yellow, or orange. Each brings a unique sweetness and color to your dish.
  • Cooked Rice: Use white, brown, or even quinoa for a nutty flavor. Cauliflower rice works for a low-carb option.
  • Diced Tomatoes: Fresh or canned, tomatoes add juiciness and acidity. Try swapping for diced green chilies for an extra kick!
  • Black Beans: These add protein and fiber. You can substitute with kidney beans or chickpeas for a different texture.
  • Corn: Fresh, frozen, or canned! Sweet corn balances the flavors beautifully.
  • Onion and Garlic: Essential aromatics that layer in depth. Shallots or leeks can be used in their place.
  • Spices: Cumin and chili powder are your best friends here. Experiment with smoked paprika for a richer flavor.
  • Cheese: Top with shredded cheese for a melty finish. Vegan cheese or nutritional yeast can substitute for a dairy-free option.

How to Prepare Bell Peppers

Let’s break it down step by step to ensure your stuffed peppers turn out perfect every time:

  • Preheat the Oven: Set it to 375°F (190°C) to get things heating up.
  • Prep the Peppers: Cut the tops off the bell peppers and remove the seeds and membranes to create a vessel for your filling.
  • Sauté Aromatics: In a skillet, heat olive oil over medium heat and sauté the onion and garlic until softened, about 3-5 minutes.
  • Mix the Filling: In a large bowl, combine rice, tomatoes, black beans, corn, and your sautéed mixture. Season with cumin, chili powder, salt, and pepper.
  • Stuff the Peppers: Fill each bell pepper with the mixture, pressing down gently to pack it tightly.
  • Arrange and Bake: Place the peppers upright in a baking dish, sprinkle cheese if desired, cover with foil, and bake for 25-30 minutes. Remove the foil and bake for an additional 10-15 minutes until tender.
  • Cool and Serve: Let cool for a few minutes before serving. Enjoy the symphony of flavors!

Pro Tips for Perfect Stuffed Bell Peppers

Get ready to elevate your stuffed bell pepper game with these expert insights:

  • Don’t Skip the Seasoning: Season each layer of your filling; it’s the key to depth and flavor.
  • Choose the Right Rice: For optimal texture, use rice that’s been cooked and cooled — it holds its shape better.
  • Experiment with Proteins: Add ground turkey, beef, or plant-based crumbles for a heartier meal.
  • Make it Saucy: Add a splash of vegetable broth or tomato sauce to the baking dish for extra moisture.
  • Garnish with Fresh Herbs: Top with fresh cilantro or parsley for a burst of freshness.
  • Adjust Cooking Time: If using larger or firmer peppers, you may need to increase baking time to ensure they’re tender.
  • Use a Meat Thermometer: Ensure the internal filling reaches 165°F (74°C) for safe consumption.
  • Rest Before Serving: Let them sit for 5-10 minutes after baking to allow flavors to meld.

Common Mistakes and Troubleshooting

Even seasoned chefs can run into hiccups. Here’s how to avoid common mistakes:

  • Overstuffing: While it’s tempting, overstuffing can lead to messy spills. Keep it packed but not bursting!
  • Underseasoning: A pinch of salt can make a world of difference; taste as you go!
  • Neglecting to Pre-cook Rice: Always use fully cooked rice; raw rice will absorb moisture and remain hard.
  • Overbaking: Keep an eye on your peppers; overbaking can lead to mushy results.

Variations to Spice Up Your Stuffed Peppers

Feeling adventurous? Here are some exciting variations to try:

  • Mexican Fiesta: Swap in taco seasoning, corn, black olives, and top with avocado for a fiesta in every bite.
  • Italian Delight: Use Italian sausage, marinara sauce, and mozzarella cheese for an Italian twist.
  • Mediterranean Medley: Incorporate feta cheese, olives, and quinoa for a Mediterranean-inspired dish.
  • Breakfast Stuffed Peppers: Fill with scrambled eggs, spinach, and cheese for a hearty breakfast option.

Storage and Make-Ahead Instructions

Want to make these ahead of time? Here’s how:

  • Refrigerate: Stuffed peppers can be stored in the fridge for up to 3 days before baking.
  • Freezer Friendly: Freeze uncooked stuffed peppers in an airtight container for up to 3 months. Bake from frozen, adding extra baking time.
  • Reheat: Microwave individual servings or bake at 350°F (175°C) until heated through.

Frequently Asked Questions

Got questions? We’ve got answers! Here are some common inquiries about stuffed bell peppers:

  • Can I make these ahead of time? Yes, you can prepare the filling and stuff the peppers a day in advance.
  • Can I freeze stuffed bell peppers? Absolutely! Just make sure they’re in an airtight container.
  • Can I use different vegetables? Yes! Zucchini, eggplant, or even mushrooms can be delicious alternatives.
  • What can I substitute for rice? Quinoa, couscous, or even lentils work great as substitutes!
  • How long do they last in the fridge? Cooked stuffed peppers can last up to 3 days in the fridge.
  • What’s the best way to reheat them? Bake in the oven or microwave until warmed through.
  • Can I make them vegan? Definitely! Just skip the cheese and use plant-based proteins.
  • What’s the best way to serve them? Garnish with fresh herbs and a drizzle of olive oil for an extra touch!

Nutrition Tips and Dietary Adaptations

Stuffed bell peppers can be tailored to fit various dietary preferences:

  • Low-Carb: Substitute rice with cauliflower rice or omit grains altogether.
  • Gluten-Free: All ingredients can be naturally gluten-free; just check labels for processed items.
  • High-Protein: Add beans, lentils, or lean meats to pump up the protein content even more.

Equipment Recommendations

Here’s what you’ll need to whip up these delicious peppers:

  • Chef’s Knife: For easy and precise cutting of the peppers.
  • Cutting Board: A sturdy surface for all your chopping needs.
  • Skillet: For sautéing your aromatics and mixing the filling.
  • Baking Dish: A 9×13 inch dish works perfectly for holding the peppers upright.

Serving Suggestions

Pair your stuffed bell peppers with delightful sides to complete your meal:

  • Fresh Salad: A crisp green salad with a zesty vinaigrette complements the peppers beautifully.
  • Garlic Bread: Serve with crusty garlic bread for a comforting touch.
  • Sour Cream or Yogurt: A dollop on top adds creaminess and balances the spice.
  • Grilled Veggies: Serve alongside a medley of grilled vegetables for added flavor and nutrition.

In conclusion, stuffed bell peppers are more than just a meal; they’re an invitation to explore, create, and share. With this comprehensive guide, you’re now equipped to make stunning, flavorful stuffed peppers that will awaken your culinary spirit. Whether you’re a novice or a seasoned chef, embrace the thrill of cooking with heat and make this dish your own. So grab your skillet, throw on an apron, and let’s get cooking! Remember, cooking is an adventure, and every dish tells a story—make this one unforgettable!