Author

Avery Collins

Browsing

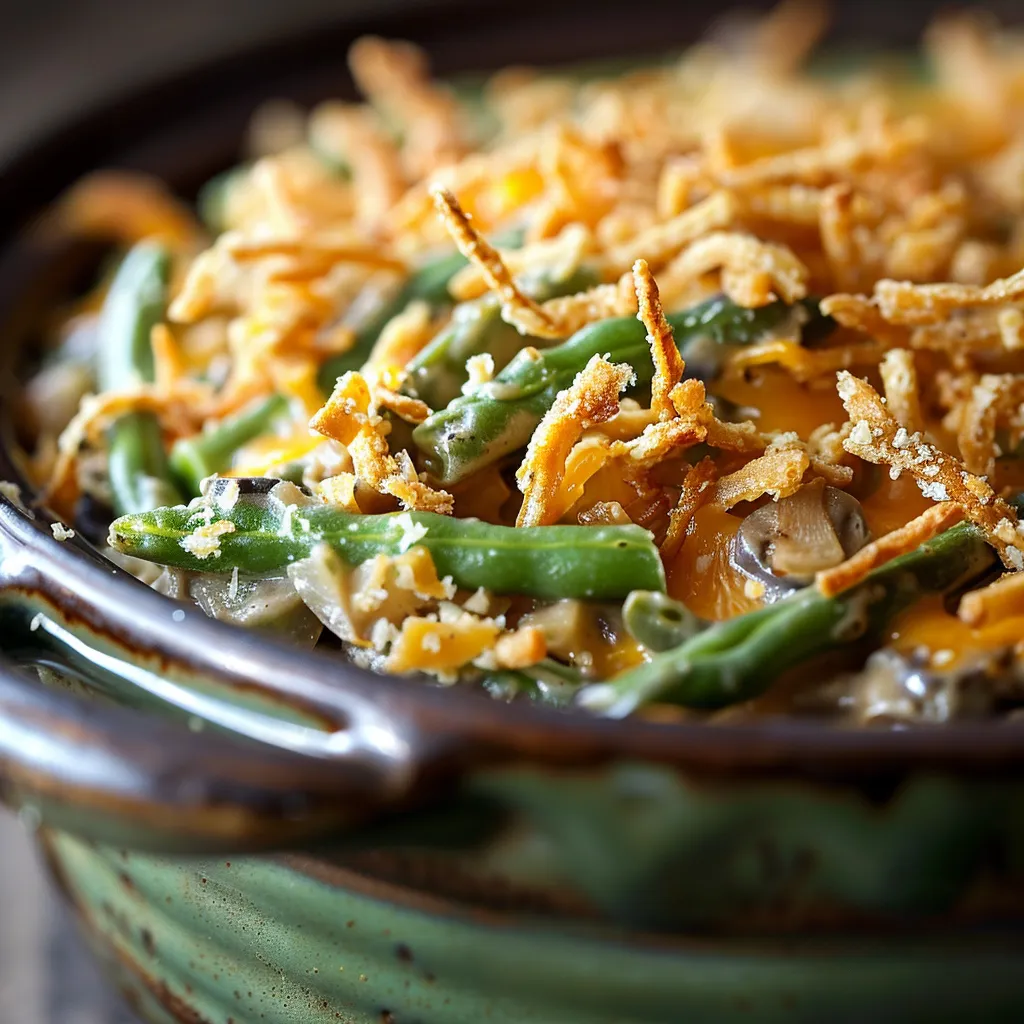
Embrace the Comfort: Your Guide to the Ultimate Crockpot Green Bean Casserole

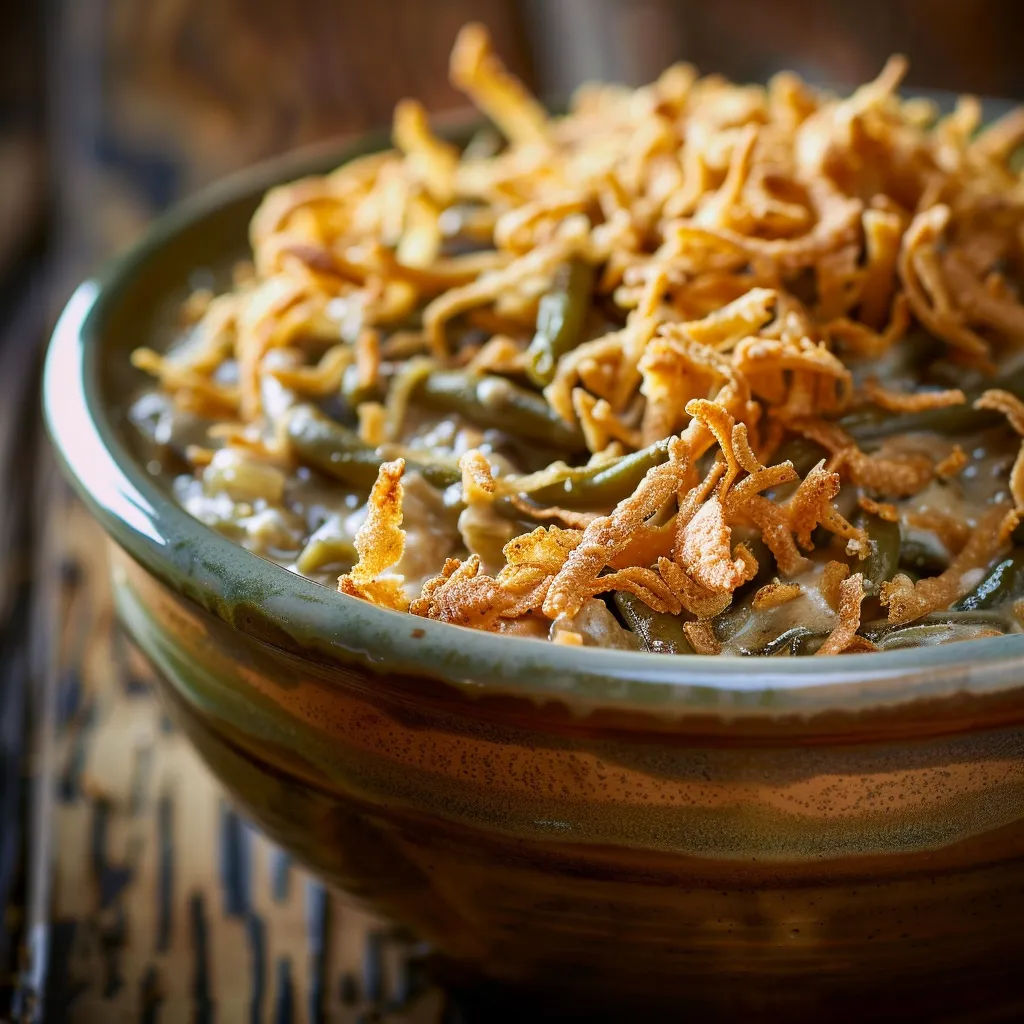
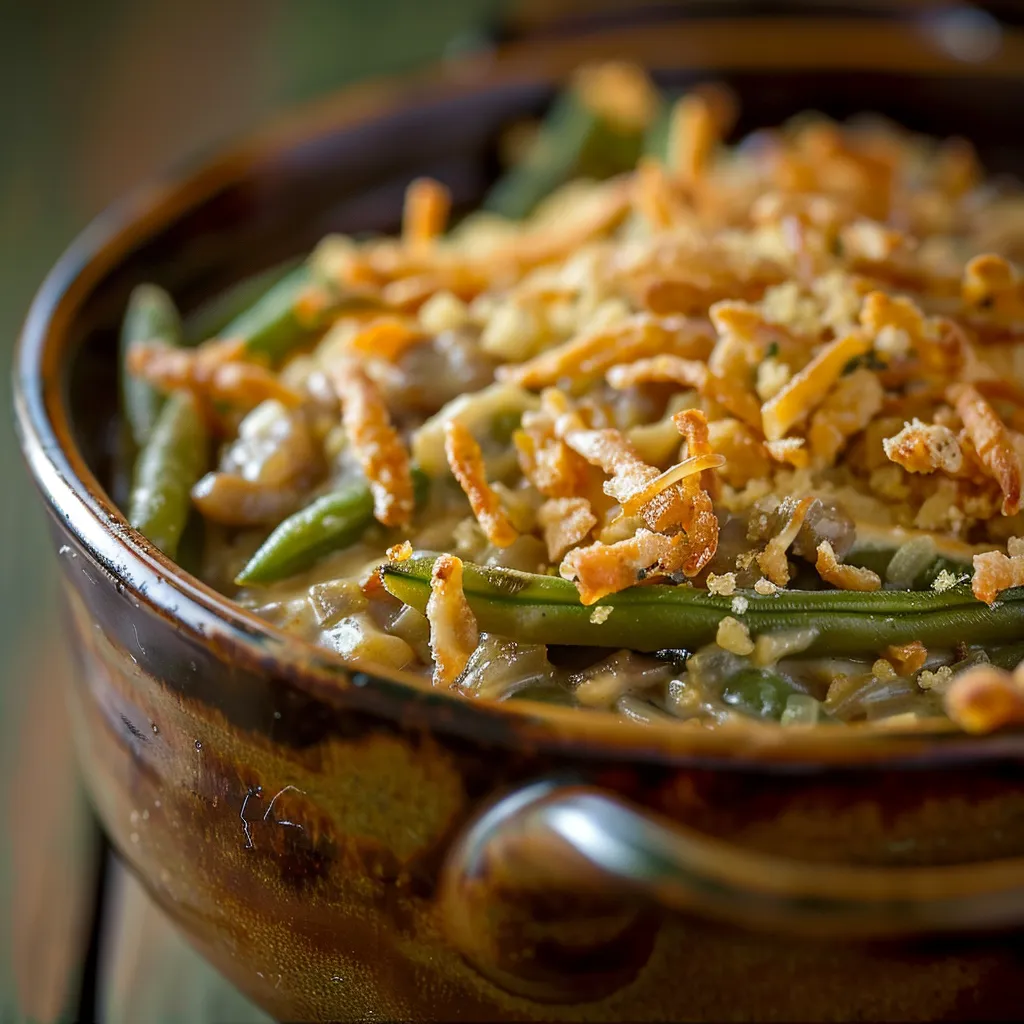
Welcome to the heart of comfort food! In this article, we’re diving deep into the rich and glorious world of green bean casserole. This dish is more than just a side; it’s a celebration of flavors, textures, and the joy of cooking with ease. Picture this: tender green beans enveloped in a creamy mushroom sauce, topped with a crispy layer of fried onions. It’s the kind of dish that makes you want to gather around the table and share stories with loved ones. Plus, using a slow cooker means you can set it and forget it, making it an ideal choice for busy days or festive gatherings.

Why You’ll Love This Recipe

This crockpot green bean casserole is a must-make for several reasons. Here’s why you’ll want to whip it up:

  • Effortless Cooking: Just throw everything into the slow cooker and let it do the work while you enjoy your day.
  • Rich Flavor: The creamy mushroom sauce combined with crunchy fried onions creates an irresistible flavor explosion.
  • Perfect for Any Occasion: Whether it’s Thanksgiving, a family gathering, or a cozy dinner, this dish fits right in.
  • Customizable: This recipe offers various substitutions and variations to suit your taste and dietary needs.
  • Make-Ahead Friendly: Prepare it in advance and store it in the fridge until you’re ready to cook.

Ingredient Breakdown

A beautifully presented dish of green bean casserole with a golden crispy topping.

Let’s get down to the nitty-gritty and explore the ingredients that make this casserole a hit:

  • Green Beans: You can use fresh, frozen, or canned green beans. For a crunchier texture, opt for fresh or frozen.
  • Cream of Mushroom Soup: The base of the sauce. You can substitute with cream of chicken or even a homemade mushroom sauce for a fresher flavor.
  • Milk: This adds creaminess. Feel free to use dairy-free milk for a vegan version.
  • French Fried Onions: These are essential for that crispy topping. If you prefer homemade, try baking thinly sliced onions until crispy.
  • Garlic Powder: Adds depth to the flavor. Fresh minced garlic can also be used for a bolder taste.
  • Cheddar Cheese: A classic addition that melts beautifully. Swap it for a dairy-free alternative or leave it out for a lighter dish.
  • Seasonings: Salt and black pepper enhance the overall taste.

Now that you have a clear understanding of the ingredients, let’s talk about how to combine them into a masterpiece.

Step-by-Step Instructions

Follow these simple steps to create your crockpot green bean casserole:

  1. In a large bowl, combine the drained green beans, cream of mushroom soup, milk, garlic powder, salt, and pepper.
  2. Stir in half of the French fried onions and half of the shredded cheddar cheese.
  3. Pour the mixture into the crockpot and spread it evenly.
  4. Cover and cook on low for 4-5 hours or on high for 2-3 hours until heated through.
  5. About 30 minutes before serving, sprinkle the remaining French fried onions and shredded cheddar cheese on top.
  6. Cover and continue to cook until the topping is crispy and the cheese is melted.

Expert Pro Tips

Want to elevate your casserole to the next level? Here are some pro tips to keep in mind:

  • Don’t Overcrowd: Ensure you’re not overstuffing the crockpot; this helps with even cooking.
  • Layer Wisely: For a better texture, layer your ingredients rather than mixing them all together.
  • Experiment with Cheese: Try different cheese types like Gruyere or Monterey Jack for unique flavor profiles.
  • Add Protein: Consider adding cooked chicken or bacon for a heartier dish.
  • Fresh Herbs: Sprinkle fresh thyme or parsley before serving for a burst of freshness.
  • Adjust Consistency: If the casserole seems too thick, add a splash more milk.
  • Timing Matters: If using fresh green beans, they may require a shorter cooking time compared to canned or frozen.
  • Make it Vegan: Substitute the cream of mushroom soup with a plant-based version and leave out the cheese.

Common Mistakes and Troubleshooting

Even the best cooks make mistakes! Here are some common pitfalls and how to avoid them:

  • Burnt Toppings: If the topping is browning too quickly, cover the crockpot with a paper towel before placing the lid back on to absorb excess moisture.
  • Too Runny or Thick: Adjusting the amount of soup or milk can help achieve your desired consistency.
  • Flavorless Dish: Don’t skimp on seasoning! Taste and adjust as necessary during cooking.
  • Overcooked Beans: Keep an eye on cooking times, especially with fresh green beans, to avoid mushiness.

Delicious Variations

Looking to mix things up? Here are some variations to try:

  • Loaded Green Bean Casserole: Add crispy bacon bits and extra cheese for a decadent twist.
  • Southwestern Style: Incorporate diced jalapeños and swap the cream of mushroom for a spicy cheese sauce.
  • Vegan Delight: Use tofu or tempeh instead of cheese and a plant-based cream of mushroom soup.
  • Asian-Inspired: Add sesame oil and top with crispy shallots for an Asian flair.

Storage and Make-Ahead Instructions

This casserole can easily be made ahead of time:

  • Refrigeration: Store leftovers in an airtight container in the fridge for up to 4 days.
  • Freezing: You can freeze the casserole before or after cooking. Just be sure to let it cool completely before freezing.
  • Reheating: For best results, reheat in the oven or microwave until heated through.

Frequently Asked Questions (FAQs)

Here are some common questions about this recipe:

  • Can I use fresh or frozen green beans?: Yes, both work well! Fresh beans will yield a crisper texture, while frozen will be softer.
  • How can I make this recipe gluten-free?: Opt for gluten-free cream of mushroom soup and ensure your fried onions are gluten-free as well.
  • Can I double this recipe?: Absolutely! Just ensure your crockpot is large enough to accommodate the increased volume.
  • What can I serve with this casserole?: Pair it with roasted meats, salads, or even on its own as a hearty vegetarian dish.
  • Is this recipe kid-friendly?: Definitely! The creamy texture and crunchy topping are usually a hit with kids.
  • How do I make it spicier?: Add red pepper flakes or diced jalapeños for a kick!
  • Can I make this in advance?: Yes! Prepare it the night before, refrigerate, and then cook it the next day.
  • What’s the best way to store leftovers?: Store in an airtight container in the fridge for up to 4 days.

Nutritional Tips and Dietary Adaptations

Here are some tips to adjust the recipe based on dietary needs:

  • Low-Calorie Version: Use low-fat cream of mushroom soup and reduce the cheese.
  • Vegan Version: Substitute with plant-based ingredients as mentioned earlier.
  • Higher Protein: Add cooked quinoa or lentils to the mix.
  • Low-Carb Option: Replace green beans with spiralized zucchini for a lighter dish.

Equipment Recommendations

Here’s what you’ll need:

  • Crockpot: A reliable slow cooker is essential for this recipe.
  • Mixing Bowl: For combining ingredients.
  • Measuring Cups and Spoons: Accurate measurements ensure best results.
  • Spatula: For mixing and serving your casserole.

Serving Suggestions

Serve this delicious green bean casserole with:

  • Roast Chicken: The flavors complement each other beautifully.
  • Beef Tenderloin: A rich, savory pairing that will impress your guests.
  • Vegetarian Meatloaf: A hearty option for a filling meal.
  • Cranberry Sauce: The tartness balances the creaminess of the casserole.

So there you have it! A comprehensive guide to making a crockpot green bean casserole that not only tantalizes the taste buds but also fills the heart with warmth and joy. Cooking is an adventure, and with this recipe, you’re all set to take your culinary journey to new heights. So grab your apron, gather your ingredients, and let the deliciousness begin!

Crockpot Green Bean Casserole With Crispy Topping

Prep Time 10 minutes
Cook Time 4 hours
Total Time 4 hours 10 minutes
Servings 8 servings
Calories 350
A creamy and crunchy green bean casserole cooked effortlessly in the crockpot, perfect for holiday gatherings or family dinners.

Ingredients

Canned Goods

  • 2 can green beans, drained
  • 1 can cream of mushroom soup
  • 1/2 cup milk
  • 1 cup french fried onions
  • 1/2 teaspoon garlic powder
  • 1/2 teaspoon black pepper
  • 1/2 teaspoon salt
  • 1 cup shredded cheddar cheese

Instructions 

  • Combine green beans, mushroom soup, milk, garlic powder, salt, and pepper in a large bowl.
  • Stir in half of the fried onions and cheese.
  • Pour mixture into crockpot and cook on low for 4-5 hours.
  • Before serving, top with remaining onions and cheese, then cook until crispy and melted.

Notes

For extra crunch, bake the topping separately in the oven for a few minutes before adding.
Calories: 350kcal
Cost: $15
Course: Side Dish
Cuisine: American
Keyword: Green Beans

Nutrition

Calories: 350kcal | Carbohydrates: 30g | Protein: 15g | Fat: 20g | Sodium: 900mg

Loved this recipe? Save it to your favorite Pinterest board so you can easily find it later! It’s the perfect way to keep all your sweet ideas in one place. ✨

Rich, creamy green bean casserole in a crockpot, showcasing its crispy onion topping.

Discover the Magic of Dark Chocolate Sea Salt Nut Bars

Welcome to a culinary adventure where rich, dark chocolate meets the crunch of mixed nuts, all crowned with a sprinkle of sea salt. This recipe for Dark Chocolate Sea Salt Nut Bars isn’t just a treat; it’s an experience that transforms your snack time into something extraordinary. You’re about to dive into the delicious world of nut bars, perfect for satisfying your cravings while keeping your energy levels high. Get ready to awaken your taste buds and add a sweet surprise to your snack repertoire!

Why You’ll Love This Recipe

Let’s talk about why these bars should be your next kitchen masterpiece. Here are five irresistible reasons to whip up a batch:

  • Quick to Make: In just 30 minutes, you’ll have a batch of homemade nut bars that can fuel your day.
  • Nutritious Ingredients: Packed with healthy fats from nuts and natural sweetness from dates, these bars are a guilt-free indulgence.
  • Customizable: Feel free to mix and match your favorite nuts or add in superfoods like chia seeds or dried fruits for an extra boost.
  • Perfect for Meal Prep: Make a batch on Sunday, and you’ll have grab-and-go snacks ready for the whole week!
  • Deliciously Satisfying: The combination of creamy dark chocolate and crunchy nuts provides a delightful texture that is hard to resist.

Ingredients You’ll Need

A delicious Dark Chocolate Sea Salt Nut Bar with visible nuts and chocolate, illuminated by soft natural light.

Here’s what you’ll need to create your own batch of these delectable Dark Chocolate Sea Salt Nut Bars:

  • 1 cup mixed nuts: Choose your favorites like almonds, walnuts, or pecans for a rich crunch.
  • 1 cup dates, pitted: These provide natural sweetness and binding for the bars.
  • 1/2 cup dark chocolate chips: Opt for high-quality dark chocolate for a deep, rich flavor.
  • 1/4 teaspoon sea salt: Enhances flavor and balances the sweetness.
  • 1 tablespoon coconut oil: Helps to melt the chocolate smoothly and adds a subtle coconut flavor.
  • 1 teaspoon vanilla extract: Adds depth and warmth to the overall flavor.

How to Make Dark Chocolate Sea Salt Nut Bars

Creating your own Dark Chocolate Sea Salt Nut Bars is easier than you might think! Follow these simple steps:

  1. Preheat your oven to 350°F (175°C) and line an 8×8 inch baking dish with parchment paper.
  2. In a food processor, combine the mixed nuts and dates. Process until a sticky mixture forms.
  3. Press the nut and date mixture evenly into the bottom of the prepared baking dish.
  4. In a small saucepan, melt the dark chocolate chips and coconut oil over low heat, stirring until smooth.
  5. Remove from heat and stir in the vanilla extract and sea salt.
  6. Pour the melted chocolate mixture over the nut layer, spreading it evenly.
  7. Sprinkle a little extra sea salt on top if desired.
  8. Refrigerate for at least 2 hours or until set.
  9. Once set, lift the bars out of the baking dish using the parchment paper and cut into squares.

Pro Tips for Perfecting Your Bars

Here are some expert insights to ensure your Dark Chocolate Sea Salt Nut Bars turn out perfectly every time:

  • Toast Your Nuts: For maximum flavor, toast your nuts in the oven at 350°F for about 10 minutes before processing.
  • Use Quality Chocolate: The better the chocolate, the better the flavor. Look for chocolate that is at least 70% cocoa.
  • Adjust Sweetness: If you prefer sweeter bars, add extra dates or a drizzle of honey to the nut mixture.
  • Experiment with Add-ins: Feel free to add ingredients like dried cranberries, coconut flakes, or chia seeds for added flavor and nutrition.
  • Temperature Matters: Make sure the chocolate isn’t too hot when mixing it with nuts to avoid melting the nut layer.
  • Cut with a Warm Knife: To achieve clean cuts, dip your knife in warm water before slicing the bars.
  • Don’t Rush the Cooling: Allow the bars to cool completely before cutting to achieve the right texture.
  • Wrap Well: Store each bar wrapped in parchment paper to maintain freshness.

Common Mistakes and Troubleshooting

Even the best cooks encounter hiccups. Here are some issues you might face and how to overcome them:

  • Bars are too crumbly: If your bars crumble, consider adding a splash of water or more melted chocolate to help bind the mixture.
  • Chocolate is too thick: If your melted chocolate thickens too much, return it to low heat, adding a bit more coconut oil.
  • Too sweet: Balance the sweetness by adding a pinch more salt or incorporating unsweetened cocoa powder into the mixture.
  • Not setting properly: Ensure your bars are refrigerated for a sufficient time; if they’re still soft, give them more chilling time.

Variations to Explore

Why stop at just one version? Here are some delicious variations you can try:

  • Peanut Butter Bliss: Add 1/4 cup of natural peanut butter to the chocolate mixture for a creamy twist.
  • Spicy Kick: Sprinkle in a pinch of cayenne pepper or chili flakes to add a surprising heat to your bars.
  • Fruit Fusion: Mix in 1/2 cup of dried fruits like apricots or cherries for an extra burst of flavor.
  • Nut-Free Delight: Swap out nuts for seeds, like sunflower or pumpkin seeds, for a nut-free version that’s just as satisfying.

Storage and Make-Ahead Instructions

These bars are perfect for meal prep or snack storage. Here’s how to keep them fresh:

  • Refrigeration: Store in an airtight container in the fridge for up to 2 weeks.
  • Freezing: For longer storage, freeze individual bars wrapped in plastic wrap for up to 3 months.
  • Thawing: Simply let frozen bars sit at room temperature for about 30 minutes before enjoying.

Frequently Asked Questions

Got questions? I’ve got answers! Here’s what you need to know:

  • Can I use other types of chocolate?: Absolutely! You can substitute dark chocolate with milk or white chocolate, but adjust sweetness accordingly.
  • Are these bars gluten-free?: Yes, as long as you use gluten-free certified ingredients, these nut bars are a delicious gluten-free option.
  • What can I use instead of dates?: Medjool dates are recommended for their stickiness, but you can use dried figs or raisins as alternatives.
  • Can I make these vegan?: Yes, this recipe is naturally vegan as long as you use dairy-free chocolate.
  • How do I know when the bars are set?: The bars should be firm to the touch and hold their shape when removed from the pan.
  • Can I add protein powder?: Yes! You can incorporate your favorite protein powder into the nut mixture for an extra protein boost.
  • What’s the best way to cut the bars?: Use a sharp, warm knife to slice through the bars for clean edges.
  • How can I make these bars lower in sugar?: Reduce the number of dates and replace them with mashed bananas for natural sweetness without as much sugar.

Nutrition Tips and Dietary Adaptations

These bars not only tantalize your taste buds but can also fit into various dietary needs:

  • Low Carb: Substitute dates with unsweetened applesauce and use fewer chocolate chips.
  • Keto-Friendly: Use a sugar-free chocolate and additional nuts or seeds to keep carbs low.
  • High Protein: Add protein powder or more nuts to meet your protein goals.

Essential Equipment

Here’s a quick rundown of what you’ll need to craft your nut bars:

  • Food Processor: Essential for blending the nuts and dates into a sticky mixture.
  • Baking Dish: An 8×8 inch square pan works perfectly for these bars.
  • Parchment Paper: A must for easy removal and cleanup.
  • Small Saucepan: Ideal for melting chocolate and coconut oil.

Serving Suggestions

Once your bars are ready, how do you enjoy them? Here are some tasty serving suggestions:

  • On-the-Go Snack: Perfect for a quick energy boost during busy days.
  • Breakfast Treat: Pair with a banana or yogurt for a filling breakfast.
  • Post-Workout Fuel: These bars are a great way to recover after a workout.

Conclusion

With their perfect combination of sweet, salty, and crunchy, these Dark Chocolate Sea Salt Nut Bars are not just snacks; they’re a celebration of flavor and creativity. So grab your apron, ignite your adventurous spirit, and let the kitchen be your playground. Every bite tells a story, and yours is just waiting to be written. Now, go grab your skillet and get cooking!

Dark Chocolate Sea Salt Nut Bars

Prep Time 15 minutes
Cook Time 10 minutes
Total Time 25 minutes
Servings 8 bars
Calories 350
Delight in these rich, chewy nut bars topped with smooth dark chocolate and a hint of sea salt, perfect for a quick snack or dessert.

Ingredients

Mixed Nuts and Dates

  • 1 cup mixed nuts (almonds, walnuts, pecans)
  • 1 cup pitted dates

Chocolate and Topping

  • 1/2 cup dark chocolate chips
  • 1/4 teaspoon sea salt
  • 1 tablespoon coconut oil
  • 1 teaspoon vanilla extract

Instructions 

  • Preheat oven to 350°F (175°C) and line an 8x8 inch dish with parchment.
  • Process nuts and dates until sticky mixture forms, then press into dish.
  • Melt chocolate chips and coconut oil over low heat, then stir in vanilla and sea salt.
  • Pour chocolate over nut layer and spread evenly, then sprinkle extra sea salt if desired.
  • Refrigerate for 2 hours until set, then lift out and cut into bars.

Notes

Store in the refrigerator for best freshness.
Calories: 350kcal
Cost: $15
Course: Dessert
Keyword: nuts

Nutrition

Calories: 350kcal | Carbohydrates: 40g | Protein: 8g | Fat: 20g | Sodium: 150mg

Loved this recipe? Save it to your favorite Pinterest board so you can easily find it later! It’s the perfect way to keep all your sweet ideas in one place. ✨

A beautifully presented Dark Chocolate Sea Salt Nut Bar, emphasizing its rich chocolate coating and nutty interior.

Discover the Magic of Slow Cooker Macaroni and Cheese

Welcome to the heart of comfort food! If you’ve ever craved a dish that wraps you in warmth and nostalgia, look no further than Trisha Yearwood’s Slow Cooker Macaroni and Cheese. This recipe is a culinary embrace, blending creamy textures and rich flavors that ignite your passion for cooking. Not only is it easy to prepare, but it also invites creativity and experimentation, transforming the simplest ingredients into a spectacular dish that’s perfect for any occasion.

In this comprehensive guide, we’ll explore everything you need to know about creating the ultimate slow cooker macaroni and cheese. From ingredient breakdowns and expert tips to delicious variations, you’ll be ready to elevate your kitchen game. So grab your skillet, and let’s dive into a world where cheese reigns supreme!

Why You’ll Love This Recipe

There’s something undeniably satisfying about a bowl of macaroni and cheese. Here are five compelling reasons why this slow cooker version will become a staple in your home:

  • Effortless Preparation: Simply combine ingredients in your slow cooker and let it work its magic while you relax or tackle other tasks.
  • Rich and Creamy Texture: The combination of sharp cheddar, mozzarella, and parmesan creates a luscious, gooey delight that’s hard to resist.
  • Customizable Flavor: This recipe serves as a blank canvas, allowing you to add your favorite spices, herbs, or even proteins for a unique twist.
  • Perfect for Gatherings: Whether it’s a family dinner or a potluck, this dish is sure to impress and satisfy a crowd.
  • Leftovers to Love: Whip up a big batch, and you’ll have creamy goodness to enjoy throughout the week!

Ingredients You’ll Need

Delicious slow cooker macaroni and cheese with a golden, cheesy crust.

Before we dive into the cooking process, let’s gather our ingredients. Here’s what you’ll need to create this creamy masterpiece:

  • 2 cups elbow macaroni: A classic choice that holds the cheese sauce beautifully.
  • 4 cups shredded sharp cheddar cheese: Provides a bold flavor that’s essential for a rich mac and cheese.
  • 1 cup shredded mozzarella cheese: Adds a gooey texture that stretches perfectly with each bite.
  • 1 cup grated parmesan cheese: Offers a nutty flavor that enhances the overall taste.
  • 3 cups whole milk: Ensures a creamy consistency without being too heavy.
  • 1 cup sour cream: Adds a tangy kick and extra creaminess.
  • 1/2 cup melted butter: Infuses richness throughout the dish.
  • 1 teaspoon salt: Essential for flavor enhancement.
  • 1/2 teaspoon black pepper: Provides a subtle warmth.
  • 1/2 teaspoon garlic powder: Adds depth to the flavor profile.
  • 1/2 teaspoon onion powder: Complements the garlic and rounds out the seasoning.

As you gather these ingredients, consider the following substitutions if you’re looking to mix things up:

  • Gluten-free option: Swap elbow macaroni for gluten-free pasta.
  • Cheese alternatives: Experiment with different cheese combinations such as gouda or pepper jack for a kick.
  • Dairy-free version: Use plant-based milk and vegan cheese to cater to dietary preferences.
  • Extra protein: Toss in cooked bacon, chicken, or veggies for added substance.

How to Make Trisha Yearwood’s Slow Cooker Macaroni and Cheese

Now that we have our ingredients ready, it’s time to get cooking! Follow these simple steps to achieve mac and cheese perfection:

  • Step 1: In your slow cooker, combine the elbow macaroni, sharp cheddar cheese, mozzarella cheese, and parmesan cheese. Stir gently to ensure even distribution.
  • Step 2: In a separate bowl, whisk together the whole milk, sour cream, melted butter, salt, black pepper, garlic powder, and onion powder until smooth.
  • Step 3: Pour the milk mixture over the macaroni and cheese in the slow cooker, stirring to combine all ingredients.
  • Step 4: Cover the slow cooker and cook on low for 2 to 3 hours, or until the macaroni is tender, and the cheese is melted and bubbly.
  • Step 5: Stir well before serving, and enjoy your creamy, delicious macaroni and cheese!

Pro Tips for Perfect Slow Cooker Mac and Cheese

To elevate your slow cooker macaroni and cheese to the next level, consider these expert insights:

  • Use freshly shredded cheese: Pre-shredded cheese often contains anti-caking agents that can affect the creamy texture.
  • Don’t skip the sour cream: It adds a tanginess and creaminess that enhances the overall flavor.
  • Stir halfway through cooking: This ensures that the cheese melts evenly and prevents sticking.
  • Experiment with spices: Consider adding paprika, cayenne, or even a dash of mustard powder for extra flavor depth.
  • Make it a meal: Incorporate cooked proteins or roasted vegetables to turn this dish into a complete meal.
  • Adjust for your slow cooker: Cooking times may vary, so keep an eye on it during the last hour to avoid overcooking.
  • Let it rest: Allowing the dish to sit for a few minutes after cooking helps the sauce thicken up.
  • Presentation matters: Serve in a beautiful dish and garnish with fresh herbs or crispy toppings for visual appeal.

Common Mistakes and Troubleshooting

Even the best chefs can run into hiccups in the kitchen. Here are some common mistakes and how to troubleshoot:

  • Too watery: If the dish turns out too watery, try adding a bit more cheese or let it cook longer to thicken up.
  • Overcooked pasta: If the pasta is mushy, reduce the cooking time next time. It should be al dente before serving.
  • Cheese clumping: Ensure your cheese is freshly shredded to prevent clumping during cooking.

Delicious Variations to Try

Feeling adventurous? Here are some variations to consider that will elevate your mac and cheese game:

  • Buffalo Chicken Mac and Cheese: Add shredded buffalo chicken and a drizzle of hot sauce for a spicy kick.
  • Truffle Mac and Cheese: Incorporate truffle oil for an upscale twist on the classic.
  • Vegetable Medley Mac and Cheese: Add steamed broccoli, spinach, or roasted peppers for a healthy boost.
  • BBQ Pulled Pork Mac and Cheese: Mix in tender pulled pork with your cheese for a smoky, hearty option.

Storage and Make-Ahead Instructions

Want to prepare your mac and cheese ahead of time? Here’s how:

  • Make Ahead: Prepare the dish in the slow cooker and refrigerate before cooking. When ready, cook on low for 2-3 hours.
  • Leftover Storage: Store leftovers in an airtight container in the refrigerator for up to 3-4 days.
  • Reheating: Reheat in the microwave or on the stovetop with a splash of milk to restore creaminess.

Comprehensive FAQ

Let’s tackle some frequently asked questions about slow cooker macaroni and cheese:

  • Can I use different types of cheese? Yes! Feel free to mix and match your favorite cheeses for unique flavors.
  • Is it necessary to pre-cook the pasta? No, the pasta cooks perfectly in the slow cooker with the other ingredients.
  • Can I freeze this dish? Yes, you can freeze it, but it’s best to avoid freezing the macaroni and cheese if you plan to include dairy products like sour cream.
  • How do I make it spicier? Add diced jalapeños or a sprinkle of cayenne pepper to kick up the heat.
  • Is this recipe suitable for kids? Absolutely! The creamy texture and mild flavors are usually a hit with kids.
  • What can I serve with macaroni and cheese? Pair it with a simple green salad or roasted vegetables to balance the richness.
  • How do I know when it’s done? The macaroni should be tender, and the cheese should be melted and bubbly.
  • Can I use a different type of pasta? Yes, you can use any pasta shape you prefer, but cooking times may vary.

Nutritional Tips and Dietary Adaptations

For those mindful of nutrition, here are some tips to adapt this dish:

  • Add veggies: Incorporating vegetables can increase fiber and nutrients.
  • Use low-fat dairy: Opt for low-fat cheese and milk to reduce calories.
  • Watch portion sizes: Enjoy in moderation along with a healthy side for a balanced meal.

Equipment Recommendations

To make your cooking experience smooth and enjoyable, here are a few recommended tools:

  • Slow Cooker: A reliable slow cooker is crucial for achieving the perfect texture and flavor.
  • Mixing Bowls: Having a few sizes on hand will make mixing ingredients easier.
  • Measuring Cups and Spoons: Precision is key to a successful recipe.

Serving Suggestions

When it’s time to serve, consider these ideas to elevate your dish:

  • Garnish: Top with chopped parsley or chives for a fresh finish.
  • Crunchy Toppings: Add panko breadcrumbs or crushed crackers for a delightful crunch.
  • Pair with Proteins: Serve alongside grilled chicken or smoky sausage for a hearty meal.

As you savor each bite of this creamy comfort food, remember that cooking is about exploration and joy. Trisha Yearwood’s Slow Cooker Macaroni and Cheese is more than just a dish; it’s an invitation to embrace bold flavors and create unforgettable moments at the table. So gather your loved ones, share stories, and let the magic of food bring you closer together. Happy cooking!

Trisha Yearwood’s Slow Cooker Macaroni and Cheese Recipe

Prep Time 10 minutes
Cook Time 2 hours 30 minutes
Total Time 2 hours 40 minutes
Servings 8 servings
Calories 650
A creamy, cheesy comfort food perfect for a cozy family dinner, made effortlessly in a slow cooker.

Ingredients

Pasta

  • 2 cups elbow macaroni
  • 4 cups shredded sharp cheddar cheese
  • 1 cup shredded mozzarella cheese
  • 1 cup grated parmesan cheese
  • 3 cups milk
  • 1 cup sour cream
  • 1/2 cup butter, melted
  • 1 teaspoon salt
  • 1/2 teaspoon black pepper
  • 1/2 teaspoon garlic powder
  • 1/2 teaspoon onion powder

Instructions 

  • Combine macaroni, cheddar, mozzarella, and Parmesan in the slow cooker.
  • Whisk together milk, sour cream, melted butter, salt, pepper, garlic powder, and onion powder.
  • Pour the milk mixture over the pasta and cheese, stirring to combine.
  • Cover and cook on low for 2-3 hours until tender and bubbly.
  • Stir well before serving and enjoy!

Notes

For extra flavor, add a pinch of paprika or a dash of hot sauce.
Calories: 650kcal
Cost: $15
Course: Main Course
Cuisine: American
Keyword: Macaroni and Cheese

Nutrition

Calories: 650kcal | Carbohydrates: 70g | Protein: 30g | Fat: 35g | Sodium: 900mg

Loved this recipe? Save it to your favorite Pinterest board so you can easily find it later! It’s the perfect way to keep all your sweet ideas in one place. ✨

Eye-level shot of macaroni and cheese, showcasing creamy texture and rich color.

Transform Your Meals with Korean Beef: The Ultimate Guide

Welcome to a culinary adventure that will ignite your taste buds and elevate your cooking game! This slow cooker Korean beef recipe is not just about food; it’s about creating an experience that’s rich in flavor, spice, and depth. Prepare to dive into a world where tender beef meets a sweet and savory sauce, all while using minimal effort in the kitchen. Let’s take this journey together!

Why You’ll Love This Recipe

This isn’t just any slow cooker recipe; it’s a delightful fusion of Korean flavors that brings warmth and excitement to your table. Here are five reasons to get excited about making this dish:

  • Effortless Cooking: With a slow cooker, you can set it and forget it! Just prep your ingredients, toss them in, and let the magic happen.
  • Flavor Explosion: The combination of soy sauce, brown sugar, and spices creates a sweet and savory sauce that will have everyone coming back for seconds.
  • Versatile Serving Options: Serve it over rice, noodles, or alongside steamed vegetables for a balanced meal that fits any occasion.
  • Meal Prep Friendly: This dish stores beautifully, making it perfect for meal prep or leftovers. Enjoy it throughout the week!
  • Customizable Heat Level: Adjust the spice by adding or omitting red pepper flakes to suit your taste buds. Perfect for both spice lovers and those who prefer milder flavors.

Ingredients Breakdown

Delicious Korean beef in a crock pot, showcasing rich textures and garnishes, illuminated by warm natural light.

Let’s get down to the essentials of this slow cooker Korean beef recipe. Here’s what you’ll need:

  • 1.5 pounds beef chuck roast: Cut into chunks for even cooking. This cut is ideal for slow cooking as it becomes tender and flavorful.
  • 1 cup low-sodium soy sauce: Provides the salty umami base for the sauce. Opting for low-sodium helps control the saltiness of the dish.
  • 1/2 cup brown sugar: Adds sweetness and balances the soy sauce. You can substitute with honey or a sugar alternative.
  • 1/4 cup rice vinegar: For tanginess and depth. Apple cider vinegar is a good substitute if you’re out of rice vinegar.
  • 1 tablespoon sesame oil: Infuses a nutty flavor that complements the beef beautifully.
  • 4 cloves garlic, minced: A must for any robust dish, adding depth and an aromatic punch.
  • 1 tablespoon fresh ginger, minced: Brightens the dish and enhances the overall flavor profile.
  • 1 teaspoon red pepper flakes (optional): Adjust according to your heat preference.
  • 1 cup beef broth: Keeps the beef moist and enhances the flavor of the sauce.
  • Garnishes: Chopped green onions and sesame seeds for finishing touches.
  • Steamed vegetables: For serving alongside the beef.

Pro Tips for Perfect Korean Beef

Want to take your slow cooker Korean beef to the next level? Here are some expert insights:

  • Brown the Beef First: For an extra layer of flavor, sear the beef chunks in a skillet before adding them to the slow cooker. This caramelization enhances the taste.
  • Don’t Skip the Marinade: Allow the beef to marinate in the sauce for at least 30 minutes before cooking. It enhances the flavor and tenderness.
  • Use a Meat Thermometer: Ensure your beef is cooked to the right temperature (145°F for medium) for perfect doneness.
  • Adjust Consistency: If the sauce is too thin after cooking, remove the beef and simmer the sauce on the stovetop until it thickens.
  • Fresh Herbs for Garnish: Consider adding fresh cilantro or parsley for a pop of color and freshness.
  • Pair with Kimchi: Serve with kimchi on the side for a traditional Korean touch and an extra kick of flavor.
  • Think Ahead: Prepare the sauce the night before and store it in the refrigerator for quicker assembly in the morning.
  • Experiment with Vegetables: Add bell peppers, carrots, or snap peas to the slow cooker for a complete meal.

Avoid These Common Mistakes

Even seasoned cooks can make a few missteps. Here’s what to watch out for:

  • Overcrowding the Slow Cooker: Too much beef can lead to uneven cooking. Stick to the recommended amount for best results.
  • Ignoring the Cooking Time: Cooking the beef for too long can make it dry. Follow the recommended cooking times closely.
  • Forgetting to Shred the Beef: Shredding the beef after cooking allows it to soak up more sauce, enhancing flavor.
  • Not Tasting Before Serving: Always taste and adjust seasoning before serving. You may want to add more soy sauce or sugar based on your preference.

Variations on Korean Beef

Feeling adventurous? Here are some variations to try:

  • Korean BBQ Style: Add a tablespoon of gochujang (Korean chili paste) for a deeper, spicier flavor.
  • Vegetarian Option: Substitute beef with tofu or tempeh for a plant-based version that’s just as satisfying.
  • Sweet and Spicy: Add sliced jalapeños or sriracha to the sauce for a kick.
  • Asian Fusion: Incorporate sweet potatoes or serve over quinoa for a twist on traditional serving methods.

Storage and Make-Ahead Instructions

Planning ahead can make meal times easier. Here’s how to store and reheat your Korean beef:

  • Refrigeration: Store leftovers in an airtight container in the fridge for up to 4 days.
  • Freezing: This dish freezes well. Store in freezer-safe bags for up to 3 months. Thaw overnight in the refrigerator before reheating.
  • Reheating: Reheat in a skillet over medium heat or in the microwave until heated through. Add a splash of beef broth to loosen the sauce if needed.

Frequently Asked Questions

Got questions? We’ve got answers! Here are some common inquiries about this delicious recipe:

  • Can I use a different cut of beef? Yes, you can use brisket or flank steak if you prefer.
  • Is this recipe gluten-free? Use tamari instead of soy sauce for a gluten-free option.
  • How can I make it spicier? Add more red pepper flakes or include fresh chili peppers in the sauce.
  • Can I cook it on high instead of low? Yes, cooking on high will take about 3-4 hours.
  • What should I serve with Korean beef? Serve with rice, noodles, or steamed veggies for a balanced meal.
  • Can I add vegetables to the slow cooker? Absolutely! Add veggies like carrots or bell peppers for added nutrition.
  • How do I know when the beef is done? The beef should shred easily with a fork when fully cooked.
  • Can I double the recipe? Yes, just ensure your slow cooker can accommodate the additional ingredients.

Nutritional Information and Dietary Adaptations

This Korean beef is not only delicious but can also fit into various dietary needs. Here’s a quick breakdown:

  • Calories: Approximately 350 per serving.
  • Protein: High in protein thanks to the beef.
  • Low-Carb Option: Serve over cauliflower rice to keep carbs low.
  • Low-Fat Version: Use lean cuts of beef or turkey for a lighter option.

Essential Equipment Recommendations

To make this recipe a breeze, here’s what you’ll need:

  • Slow Cooker: A reliable slow cooker is essential. Consider models with a timer for added convenience.
  • Cutting Board and Sharp Knife: For easy preparation of your ingredients.
  • Measuring Cups and Spoons: Accurate measurements make all the difference in flavor.
  • Mixing Bowl: For combining your sauce ingredients before cooking.

Serving Suggestions

Ready to serve your Korean beef? Here are some ideas to make it even more special:

  • Garnish: Top with fresh chopped green onions and sesame seeds for a beautiful presentation.
  • Accompaniments: Serve with a side of kimchi or pickled vegetables for a traditional Korean touch.
  • Rice or Noodles: Pair with jasmine rice, sticky rice, or noodles to soak up that delicious sauce.

So there you have it, folks! A comprehensive guide to making the most mouthwatering slow cooker Korean beef that will not only satisfy your hunger but also spark joy at your dinner table. Embrace the heat, savor the flavors, and let the cooking adventure begin! Remember, spice is not just an ingredient; it’s an invitation to explore the world on your plate. Happy cooking!

Healthy Crock Pot Side Dishes: Korean Beef

Prep Time 10 minutes
Cook Time 4 hours
Total Time 4 hours 10 minutes
Servings 4 servings
Calories 350
A flavorful and tender Korean beef dish cooked effortlessly in the crock pot, perfect for a healthy meal.

Ingredients

Main

  • 1.5 pounds beef chuck roast, cut into chunks
  • 1 cup low-sodium soy sauce
  • 0.5 cup brown sugar or a sugar substitute
  • 0.25 cup rice vinegar
  • 1 tablespoon sesame oil
  • 4 cloves garlic, minced
  • 1 tablespoon fresh ginger, minced
  • 1 teaspoon red pepper flakes (optional)
  • 1 cup beef broth
  • 2 green onions chopped (for garnish)
  • sesame seeds (for garnish)
  • steamed vegetables (for serving)

Instructions 

  • Combine soy sauce, brown sugar, rice vinegar, sesame oil, garlic, ginger, red pepper flakes, and beef broth in a bowl.
  • Place beef chunks in the crock pot and pour sauce over them.
  • Cover and cook on low for 6-8 hours until tender, then shred the beef and mix back into the sauce.
  • Serve over steamed vegetables, garnished with green onions and sesame seeds.

Notes

Adjust red pepper flakes to taste for spice level.
Calories: 350kcal
Cost: $15
Course: Side Dish
Cuisine: Korean
Keyword: beef

Nutrition

Calories: 350kcal | Carbohydrates: 40g | Protein: 30g | Fat: 10g | Sodium: 1500mg

Loved this recipe? Save it to your favorite Pinterest board so you can easily find it later! It’s the perfect way to keep all your sweet ideas in one place. ✨

Savory healthy Korean beef dish in a crock pot, highlighted with green onion and sesame seeds, with a blurred cozy background.

Unlock the Secrets of Southern Comfort: A Cornbread Stuffing Recipe That Will Ignite Your Passion for Home Cooking

Welcome to the heart of Southern cuisine! Today, we’re diving into a dish that captures the essence of comfort food: Paula Deen’s Cornbread Stuffing. This recipe is more than just a side; it’s a celebration of flavors that warms the soul and invites everyone to gather around the table. Whether you’re preparing for the holidays or simply craving a taste of home, this cornbread stuffing is a must-try. Let’s spice things up and transform your holidays into a feast of exciting flavors!

Why You’ll Love This Recipe

Here’s why this cornbread stuffing will become a staple in your kitchen:

  • Flavorful Base: The combination of cornbread, sautéed vegetables, and aromatic herbs creates a rich and savory flavor profile that will leave your taste buds dancing.
  • Endlessly Adaptable: Whether you prefer a classic stuffing or want to put your spin on it, this recipe allows for endless variations. Don’t hesitate to mix it up!
  • Perfect for Any Occasion: While it shines at Thanksgiving, this dish is a perfect side for any meal, adding warmth and satisfaction to weeknight dinners.
  • Easy to Prepare: With simple ingredients and clear instructions, even novice cooks can master this recipe with confidence.
  • Make-Ahead Friendly: Prepare it in advance and pop it in the oven just before serving, making your meal planning a breeze!

Essential Ingredients Breakdown

Warm cornbread stuffing with a golden hue, garnished with herbs.

Let’s talk about the essential ingredients you’ll need for this mouthwatering cornbread stuffing:

  • Cornbread Mix: Use a 10 oz package of dry cornbread mix for a quick and flavorful base. Alternatively, feel free to use homemade cornbread for a more rustic touch.
  • Unsalted Butter: ¼ cup of unsalted butter adds richness and depth. If you’re looking for a healthier option, feel free to substitute with olive oil.
  • Fresh Vegetables: Incorporate ½ cup each of chopped celery and onion for that savory crunch. These can be sautéed for extra sweetness and flavor.
  • Eggs: Two large eggs, lightly beaten, help bind your stuffing together, creating a perfect texture.
  • Chicken Broth: Use ¾ to 1 cup of chicken broth to moisten the stuffing. For a vegetarian version, vegetable broth works just as well.
  • Herbs and Spices: A mix of dried parsley, rubbed sage, thyme, and rosemary infuses your stuffing with aromatic flavors. Adjust these based on your taste preferences!
  • Seasoning: Don’t forget the salt and pepper! Adjust these to taste for a balanced seasoning.

Cooking Instructions

Get your apron on! Here’s how to make this delightful cornbread stuffing:

  1. Prepare the cornbread mix according to the package directions. Let it cool completely, then crumble it into a large bowl.
  2. Preheat your oven to 350°F (175°C).
  3. In a skillet, melt the butter over medium heat and sauté the chopped celery and onion for about 4-5 minutes until they soften and become fragrant.
  4. Add the cooked vegetables and all the dried seasonings to the crumbled cornbread and mix well.
  5. Whisk the eggs into the chicken broth, then pour over the cornbread mixture and mix gently until everything is well combined.
  6. Transfer the mixture to a greased baking dish, spreading it evenly.
  7. Bake for 25-30 minutes until the top is golden and crispy.

Pro Tips for Perfect Stuffing

Elevate your cornbread stuffing game with these expert insights:

  • Use Day-Old Cornbread: For an even better texture, use day-old homemade cornbread. It absorbs moisture better and enhances the flavor.
  • Experiment with Add-Ins: Feel free to add cooked sausage, dried cranberries, or nuts for a delightful twist.
  • Don’t Rush the Cooling: Allowing the cornbread to cool completely before crumbling ensures the best texture and prevents mushiness.
  • Adjust the Broth: Start with ¾ cup of broth and add more if needed. You want the mixture moist but not soggy!
  • Check for Seasoning: Always taste and adjust the seasoning before baking. A pinch more salt or herbs can elevate the dish significantly.
  • Cover with Foil: If you prefer a softer stuffing, cover the dish with foil for the first 20 minutes of baking.
  • Refrigerate Overnight: If making ahead, let the stuffing sit overnight for flavors to meld beautifully.
  • Let Cool Before Serving: Give it a few minutes to settle after baking; it will slice better and the flavors will deepen.

Avoiding Common Mistakes

Even the best can stumble! Here are some common pitfalls and how to avoid them:

  • Overmixing: Be gentle when combining the ingredients. Overmixing can lead to a dense stuffing.
  • Too Much Moisture: Avoid adding too much broth; the stuffing should be moist but not swimming in liquid.
  • Skipping the Herbs: Don’t skimp on the herbs and spices; they’re what make your stuffing sing!
  • Not Letting it Cool: Don’t rush the cooling of the cornbread; it helps achieve the right texture.
  • Ignoring Baking Time: Keep an eye on your stuffing during the last few minutes of baking to avoid over-browning.

Delicious Variations to Try

Want to spice things up? Here are some exciting variations to consider:

  • Savory Sausage Stuffing: Add cooked breakfast sausage for a heartier, meatier version.
  • Vegetarian Delights: Swap chicken broth for vegetable broth and toss in some sautéed mushrooms for umami flavor.
  • Spicy Jalapeño Cornbread Stuffing: Mix in diced jalapeños for a kick that will wake up your taste buds!
  • Herb-Infused Stuffing: Experiment with fresh herbs like thyme, rosemary, or sage for a more aromatic experience.

Storage and Make-Ahead Instructions

Your cornbread stuffing can be a make-ahead superstar:

  • Refrigeration: Store any leftovers in an airtight container in the refrigerator for up to 3-4 days.
  • Freezing: You can freeze stuffed portions for up to 2 months. Just thaw in the fridge before reheating.
  • Make-Ahead: Assemble the stuffing a day in advance, cover it, and refrigerate. Bake it just before serving for the freshest taste!

FAQs About Cornbread Stuffing

Got questions? We’ve got answers! Here are some common inquiries:

  • Can I use gluten-free cornbread mix? Absolutely! Just ensure that all other ingredients are also gluten-free.
  • How do I make this dairy-free? Substitute the butter with coconut oil or a dairy-free alternative, and use plant-based milk in the cornbread mix.
  • What can I serve with cornbread stuffing? It pairs brilliantly with roasted turkey, chicken, or a side of green beans for a complete meal.
  • How do I keep stuffing from drying out? Ensure you have enough broth and cover the dish for part of the baking time to retain moisture.
  • Can I add fruits? Yes! Diced apples or cranberries can add a delightful sweetness that balances the savory elements.
  • What if I don’t have cornbread mix? You can make cornbread from scratch using cornmeal, flour, milk, and eggs as a substitute.
  • What is the difference between stuffing and dressing? Stuffing is cooked inside the turkey, while dressing is baked separately. Both can be delicious!
  • Can I use store-bought cornbread? Absolutely! Just ensure it’s not overly sweet to maintain balance in your stuffing.

Nutritional Tips and Dietary Adaptations

Here’s how to make your stuffing a little lighter:

  • Reduce the Butter: Cut the butter in half or substitute with olive oil to lower saturated fat.
  • Swap Broth: Opt for low-sodium chicken or vegetable broth to control salt intake.
  • Add More Veggies: Increase the amount of celery, onion, or even carrots for added nutrients and fiber.
  • Whole Grain Cornbread: Use whole grain cornbread mix for more fiber and nutrients.

Must-Have Equipment

Before you start cooking, make sure you have the right tools:

  • Large Mixing Bowl: Perfect for combining all your ingredients.
  • Skillet: Essential for sautéing your vegetables to bring out their best flavors.
  • Baking Dish: A greased 9×13 inch baking dish works best for even cooking.
  • Whisk: For mixing the eggs and broth effortlessly.

Serving Suggestions

Your cornbread stuffing deserves some delicious companions:

  • Roast Turkey: The classic pairing for a reason! The savory stuffing complements the juicy turkey beautifully.
  • Cranberry Sauce: A tangy cranberry sauce adds a refreshing contrast to the rich stuffing.
  • Green Bean Casserole: This traditional side dish balances the flavors with its creamy texture.
  • Mashed Potatoes: Fluffy mashed potatoes with gravy provide a comforting trio with the stuffing.

In conclusion, indulge in the rich traditions of Southern cooking with this unforgettable cornbread stuffing recipe. Embrace the art of the kick, and remember that every meal is an adventure waiting to unfold. Let your kitchen be the canvas where you create mouthwatering masterpieces that bring friends and family together. Now get out there, grab your skillet, and let the flavors ignite your passion for cooking!

Paula Deen Cornbread Stuffing Recipe

Prep Time 15 minutes
Cook Time 30 minutes
Total Time 45 minutes
Servings 8 servings
Calories 250
A flavorful and comforting cornbread stuffing perfect for holiday dinners or family gatherings.

Ingredients

Dry Cornbread Mix

  • 0.25 cup unsalted butter
  • 0.5 cup chopped celery
  • 0.5 cup chopped onion
  • 2 large eggs (lightly beaten)
  • 0.75 cup chicken broth
  • 0.5 tbsp dried parsley
  • 2 tsp rubbed sage
  • 1 tsp dried thyme
  • 1 tsp dried rosemary
  • 0.5 tsp kosher salt (to taste)
  • 0.5 tsp black pepper (to taste)

Instructions 

  • Prepare and cool the cornbread, then crumble into a bowl.
  • Preheat oven to 350°F (175°C).
  • Melt butter and sauté celery and onion until soft.
  • Mix vegetables and seasonings with crumbled cornbread, then add eggs and broth, mixing gently.
  • Transfer to a greased dish and bake for 25-30 minutes until golden.

Notes

For extra flavor, add chopped herbs or a splash of hot sauce before baking.
Calories: 250kcal
Cost: $15
Course: Side Dish
Cuisine: American
Keyword: Cornbread

Nutrition

Calories: 250kcal | Carbohydrates: 35g | Protein: 6g | Fat: 10g | Sodium: 600mg

Loved this recipe? Save it to your favorite Pinterest board so you can easily find it later! It’s the perfect way to keep all your sweet ideas in one place. ✨

Deliciously textured cornbread stuffing in a rustic setting.

Unleash the Flavor: The Greek Yogurt Cookie Revolution

Welcome to the culinary adventure of a lifetime! If you’ve ever thought about indulging in a cookie that’s not just tasty but also packs a nutritional punch, you’re in the right place. These Protein Greek Yogurt Cookies are not just treats; they are a celebration of flavor, health, and the joy of cooking. Trust me, these cookies redefine what it means to balance health and indulgence — perfect for anyone from fitness enthusiasts to casual snackers. With a delightful chewiness and a rich taste, they invite you into the world of cooking with fire and flair. So grab your aprons, and let’s dive into this delicious journey together!

Why You’ll Love This Recipe

  • Healthy Indulgence: These cookies are loaded with protein from Greek yogurt and almond butter, making them a guilt-free treat.
  • Versatile Ingredients: With simple pantry staples, you can customize these cookies to fit your dietary preferences or cravings.
  • Quick and Easy: Ready in under 30 minutes, these cookies are perfect for when you need a sweet fix without the fuss.
  • Kid-Friendly: Get the little ones involved! They’ll love helping mix and scoop out the cookie dough.
  • Perfect for Meal Prep: Make a batch ahead of time for healthy snacks throughout the week — they store beautifully!

Ingredients You’ll Need

Delicious protein-packed Greek yogurt cookie featuring a golden-brown texture, highlighted by natural light.

Before we dive into the recipe, let’s break down the ingredients. Each component is thoughtfully chosen to not only enhance flavor but also add nutritional benefits. Here’s what you’ll need:

  • 1 cup Greek yogurt: This creamy base is packed with protein and healthy probiotics.
  • 1/2 cup almond butter: A plant-based powerhouse that adds richness and healthy fats.
  • 1/4 cup honey or maple syrup: Nature’s sweetener that balances the tang of yogurt without being overpowering.
  • 1 teaspoon vanilla extract: A dash of vanilla brings warmth and depth to the flavor profile.
  • 1 cup rolled oats: These provide a hearty texture and keep you feeling full longer.
  • 1/2 cup protein powder: Choose vanilla or chocolate to enhance the cookie flavor and boost protein content.
  • 1/2 teaspoon baking soda: This is your leavening agent that helps the cookies rise.
  • 1/4 teaspoon salt: A little salt goes a long way in enhancing the overall taste.
  • 1/2 cup dark chocolate chips or nuts (optional): For that extra indulgent touch — feel free to get creative!

Step-by-Step Recipe

Now that we’ve gathered our ingredients, it’s time to unleash the magic of cookie-making! Follow these simple steps to create your deliciously chewy Greek yogurt cookies:

  1. Preheat your oven to 350°F (175°C) and line a baking sheet with parchment paper.
  2. Mix the wet ingredients: In a large mixing bowl, combine Greek yogurt, almond butter, honey (or maple syrup), and vanilla extract. Mix until smooth and creamy.
  3. Combine the dry ingredients: In another bowl, whisk together the rolled oats, protein powder, baking soda, and salt.
  4. Combine wet and dry: Gradually add the dry ingredients to the wet mixture, stirring until just combined. If desired, fold in dark chocolate chips or nuts for that extra kick.
  5. Scoop the dough: Using a tablespoon, scoop out the dough onto the prepared baking sheet, spacing them about 2 inches apart.
  6. Flatten slightly: Gently flatten each cookie with the back of a spoon or your fingers to achieve that perfect shape.
  7. Bake: Place in the preheated oven and bake for 12-15 minutes, or until the edges are lightly golden.
  8. Cool and Enjoy: Once baked, let the cookies cool on the baking sheet for 5 minutes before transferring them to a wire rack to cool completely. Then dig in!

Pro Tips for Best Results

  • Don’t overmix: Mix just until combined to ensure your cookies remain soft and chewy.
  • Experiment with flavors: Try swapping almond butter with peanut butter or adding spices like cinnamon or nutmeg for a twist.
  • Adjust sweetness: If you prefer a sweeter cookie, feel free to add more honey or maple syrup to taste.
  • Chill the dough: For an even chewier texture, chill the cookie dough for 30 minutes before baking.
  • Use fresh ingredients: Ensure your baking powder and protein powder are fresh for the best rise and flavor.
  • Store wisely: Keep your cookies in an airtight container to maintain freshness and chewiness.
  • Know your oven: Every oven is different, so keep an eye on your cookies as they bake to avoid overcooking.
  • Incorporate mix-ins: Add dried fruits or seeds to boost the nutritional profile and add texture.
  • Customize your protein: Use plant-based protein powder if you’re looking for a vegan option.
  • Pair with a drink: Enjoy these cookies with a glass of milk or a scoop of yogurt for a satisfying snack!

Common Mistakes and Troubleshooting

Even the best chefs make mistakes, and troubleshooting is part of the cooking journey. Here are some common pitfalls and how to avoid them:

  • Cookies spreading too much: Ensure you’re using enough protein powder and chilling the dough before baking.
  • Too dry or crumbly: If your dough feels dry, add a splash more Greek yogurt or honey to balance it out.
  • Not enough sweetness: Taste your dough before baking and adjust the sweeteners as needed.
  • Overbaking: Remember, cookies continue to cook while cooling, so take them out when they’re slightly underdone.

Variations to Try

Let’s spice things up! Here are some creative variations to elevate your Greek yogurt cookies:

  • Chocolate Chip Delight: Fold in 1/2 cup of dark chocolate chips for a classic treat.
  • Nutty Oatmeal: Add 1/2 cup of chopped nuts such as walnuts or pecans for extra crunch and a healthy boost.
  • Berry Bliss: Mix in 1/2 cup of dried cranberries or blueberries for a sweet and tangy twist.
  • Spiced Pumpkin: Incorporate 1/2 cup of pumpkin puree and 1 teaspoon of pumpkin spice for a seasonal favorite.

Storage and Make-Ahead Instructions

Want to enjoy these cookies throughout the week? Here’s how to store and prepare them ahead of time:

  • Room Temperature: Store cookies in an airtight container at room temperature for up to 3 days.
  • Refrigeration: For longer freshness, keep them in the fridge for up to a week.
  • Freezing: Freeze the cookie dough in individual scoops. When you’re ready to bake, simply thaw and bake as directed!

Comprehensive FAQ

Here are some frequently asked questions about these delightful cookies:

  • Can I use Greek yogurt substitutes? Yes! You can use regular yogurt or even a dairy-free option like coconut yogurt.
  • How do I make these cookies vegan? Substitute almond butter with a plant-based alternative, and use flax eggs instead of regular eggs.
  • Can I use different protein powders? Absolutely! Choose your favorite flavor, but be mindful that it may alter the cookie taste.
  • What if I don’t have rolled oats? You can use quick oats, but the texture may differ slightly.
  • Are these cookies gluten-free? Yes, if you use certified gluten-free oats and ensure your protein powder is gluten-free.
  • How can I make these cookies lower in sugar? Substitute with a sugar-free sweetener or reduce the amount of honey or syrup.
  • What’s the best way to serve these cookies? Enjoy them fresh out of the oven, or pair with yogurt and fruit for a healthy snack!
  • How long do these cookies last? They stay fresh for up to a week in the fridge and can be frozen for up to 3 months!

Nutritional Tips and Dietary Adaptations

Let’s talk about how to adapt these cookies to your nutritional needs:

  • For higher protein: Add an extra scoop of protein powder or use Greek yogurt with higher protein content.
  • For lower calories: Reduce the amount of almond butter and substitute with applesauce.
  • For more fiber: Incorporate chia seeds or ground flaxseed into the dough.
  • For a keto option: Use almond flour instead of rolled oats and a keto-friendly sweetener.

Equipment Recommendations

To make this recipe a breeze, here are some kitchen essentials you’ll need:

  • Mixing bowls: Having a set of different sizes will help you organize your ingredients easily.
  • Baking sheet: A sturdy baking sheet ensures even cooking.
  • Parchment paper: This keeps your cookies from sticking and makes cleanup easy.
  • Measuring cups and spoons: Accurate measurements are key to cookie success!
  • Cookie scoop: For perfect cookie sizes, a scoop makes portioning a breeze.

Serving Suggestions

Now that you’ve baked your delicious cookies, how should you serve them? Here are some delightful ideas:

  • With a glass of milk: The classic pairing complements the chewy texture and rich flavor.
  • As a topping: Crumble them over yogurt or smoothie bowls for added crunch and flavor.
  • In a dessert sandwich: Use two cookies to sandwich a scoop of ice cream or Greek yogurt for a decadent treat.
  • On a dessert platter: Serve alongside fresh fruit and nuts for a balanced snack board.

Conclusion: Your New Favorite Cookie Awaits!

There you have it! Your guide to making the most scrumptious Protein Greek Yogurt Cookies that will not only satisfy your sweet tooth but also fuel your body with goodness. Embrace the art of cooking with spice, creativity, and joy. Each bite is a reminder that cooking is not just about feeding the body, but about igniting the spirit of adventure in all of us. So go ahead, bake a batch today, and let the flavors take you on a thrilling culinary journey!

Protein Greek Yogurt Cookie Recipe: Soft, Chewy, and Packed with Gains!

Prep Time 10 minutes
Cook Time 15 minutes
Total Time 25 minutes
Servings 12 cookies
Calories 150
Enjoy these soft, chewy, protein-packed cookies made with Greek yogurt and wholesome ingredients, perfect for a quick snack or post-workout treat.

Ingredients

wet ingredients

  • 1 cup greek yogurt
  • 1/2 cup almond butter
  • 1/4 cup honey or maple syrup
  • 1 teaspoon vanilla extract

dry ingredients

  • 1 cup rolled oats
  • 1/2 cup protein powder (vanilla or chocolate)
  • 1/2 teaspoon baking soda
  • 1/4 teaspoon salt
  • 1/2 cup dark chocolate chips or nuts (optional)

Instructions 

  • Preheat oven to 350°F (175°C) and line a baking sheet.
  • Mix Greek yogurt, almond butter, honey, and vanilla until smooth.
  • Combine oats, protein powder, baking soda, and salt in a separate bowl.
  • Mix dry ingredients into wet, fold in chocolate chips or nuts if desired.
  • Scoop dough onto baking sheet, flatten slightly, and bake for 12-15 minutes.
  • Cool cookies on a wire rack before serving.

Notes

For extra flavor, add a pinch of cinnamon or vanilla.
Calories: 150kcal
Cost: $15
Course: Dessert
Cuisine: American
Keyword: Cookies, protein

Nutrition

Calories: 150kcal | Carbohydrates: 18g | Protein: 8g | Fat: 6g | Sodium: 80mg

Loved this recipe? Save it to your favorite Pinterest board so you can easily find it later! It’s the perfect way to keep all your sweet ideas in one place. ✨

A warm, inviting Greek yogurt cookie with melty chocolate chips, showcasing its softness and chewiness.

Welcome to a culinary adventure that promises to elevate your holiday gatherings and family meals with an unforgettable twist on a classic: Corbread Stuffing. This recipe marries the heartiness of cornbread with a medley of savory ingredients, delivering a depth of flavor that dances on your palate. With its roots steeped in tradition, this stuffing is anything but ordinary. Prepare to ignite your taste buds and embrace the thrill of cooking boldly!

Why You’ll Love This Recipe

This isn’t just another stuffing recipe; it’s a celebration of flavor and texture that will have your guests raving. Here are five reasons why this cornbread stuffing will steal the show:

  • Unbelievable Flavor: The combination of fresh herbs and savory sausage creates a symphony of taste that’s both comforting and exciting.
  • Perfect Texture: With crispy edges and a soft, moist center, each bite offers a delightful contrast that keeps you coming back for more.
  • Customizable: Whether you prefer a vegetarian version or want to add your favorite ingredients, this recipe is a canvas for your creativity.
  • Make Ahead: Prepare this dish ahead of time, making your holiday cooking stress-free and enjoyable.
  • Versatile Side Dish: While perfect for Thanksgiving, this stuffing complements various main dishes throughout the year!

Ingredient Breakdown

Let’s dive into what makes this cornbread stuffing so special. Here’s what you’ll need:

  • Cornbread: A large batch of homemade cornbread serves as the base. Feel free to use store-bought if you’re short on time.
  • Butter: Unsalted butter adds richness. You can substitute with olive oil for a dairy-free option.
  • Onion and Celery: These aromatic vegetables provide a flavorful foundation. Consider adding leeks for a unique twist.
  • Garlic: Fresh minced garlic infuses the stuffing with a punch of flavor.
  • Fresh Herbs: Sage and thyme are traditional. Try adding rosemary or parsley for an extra layer of taste!
  • Sausage: Savory sausage enhances the stuffing. For a vegetarian option, substitute with mushrooms or lentils.
  • Broth: Chicken or vegetable broth keeps the stuffing moist and flavorful.
  • Eggs: Two large beaten eggs act as a binder, helping to hold the stuffing together.

Feel free to customize these ingredients to suit your taste and dietary preferences!

Pro Tips for the Perfect Cornbread Stuffing

Delicious cornbread stuffing featuring golden cubes, herbs, and warm lighting.

Let’s ensure your cornbread stuffing turns out perfectly every time. Here are some expert insights:

  • Use Day-Old Cornbread: If possible, use cornbread that’s a day old. It absorbs the broth better, preventing a soggy stuffing.
  • Sauté Vegetables: Sautéing the onion, celery, and garlic enhances their flavors and adds depth to the stuffing.
  • Season Generously: Don’t shy away from seasoning! Taste as you go, adjusting salt and pepper to your preference.
  • Let It Rest: After baking, let the stuffing sit for a few minutes before serving. This allows the flavors to meld beautifully.
  • Experiment with Nuts: Add chopped pecans or walnuts for a crunchy texture that complements the softness of the cornbread.
  • Check for Moisture: If the stuffing seems dry, add a splash of broth before serving to revive its moisture.
  • Make It Ahead of Time: Assemble the stuffing a day ahead and refrigerate it. Just pop it in the oven when you’re ready to serve!
  • Use a Baking Dish: For even cooking and a crispy top, spread the stuffing evenly in a greased baking dish.

Common Mistakes and Troubleshooting

Even the best chefs can stumble! Here’s how to navigate some common issues:

  • Too Dry: If your stuffing comes out dry, next time add more broth or cover it with foil while baking.
  • Soggy Stuffing: Avoid adding too much broth. Start with less and gradually mix in more until desired consistency is achieved.
  • Flavorless Stuffing: If your stuffing tastes bland, boost the seasoning with additional herbs and spices.
  • Overcooked: Keep an eye on the oven! Start checking for doneness 5-10 minutes before the recommended time.

Variations to Elevate Your Cornbread Stuffing

Feeling adventurous? Here are some variations to try:

  • Spicy Sausage Stuffing: Incorporate spicy sausage and jalapeños for a kick that’ll ignite your taste buds.
  • Mushroom and Spinach Stuffing: Replace sausage with sautéed mushrooms and spinach for a vegetarian delight.
  • Apple and Sage Stuffing: Add diced apples for a sweet contrast to the savory flavors.
  • Cheesy Cornbread Stuffing: Mix in shredded cheddar or feta cheese for a creamy, rich texture.

Storage and Make-Ahead Instructions

Want to enjoy this delicious stuffing without the last-minute rush? Here’s how to store and prepare it ahead of time:

  • Refrigeration: Store any leftovers in an airtight container in the fridge for up to 3 days.
  • Freezing: This stuffing freezes well! Place it in a freezer-safe container and enjoy it within 2 months.
  • Make Ahead: Prepare the stuffing a day in advance, cover it tightly, and refrigerate. Bake it just before serving.

FAQ: Your Questions Answered

Here are some common questions about cornbread stuffing:

  • Can I use store-bought cornbread? Absolutely! Store-bought cornbread saves time and works well in this recipe.
  • Is this stuffing gluten-free? If you use gluten-free cornbread and broth, this stuffing can be gluten-free!
  • Can I make this stuffing in the slow cooker? Yes! Transfer it to a greased slow cooker and cook on low for 4-6 hours.
  • How do I reheat leftovers? Reheat in the oven covered with foil to prevent drying out, or microwave in individual portions.
  • What main dishes pair well with cornbread stuffing? It pairs fabulously with roasted turkey, chicken, or even a hearty vegetarian main dish.
  • Can I add dried fruits? Yes! Dried cranberries or raisins can add a sweet touch to the stuffing.
  • How can I make it dairy-free? Substitute butter with olive oil and use dairy-free broth and eggs.
  • What’s the best way to serve cornbread stuffing? Serve it warm in a beautiful bowl, garnished with fresh herbs for an inviting presentation!

Nutritional Tips and Dietary Adaptations

This cornbread stuffing can easily accommodate various dietary needs:

  • Low-Calorie Option: Use less butter and substitute the sausage with veggies or legumes.
  • High-Protein Version: Add cooked quinoa or lentils for an extra protein boost.
  • Low-Carb Adaptation: Replace cornbread with a cauliflower mix for a low-carb stuffing.

Equipment Recommendations

To make your cooking experience seamless, here’s a list of essential tools:

  • Large Skillet: For sautéing your vegetables and sausage.
  • Mixing Bowls: You’ll need a few for combining ingredients and whipping eggs.
  • Baking Dish: A 9×13 inch dish is ideal for baking your stuffing evenly.

Serving Suggestions

Serve this cornbread stuffing as a side dish to your favorite holiday meals or any comforting dinner! Pair it with:

  • Roast Turkey: The classic pairing for Thanksgiving festivities.
  • Herb-Crusted Chicken: A simple yet flavorful main course.
  • Vegetable Gravy: Drizzle over servings for added moisture and flavor.

With this comprehensive guide, you’re now armed to create the ultimate cornbread stuffing that not only pays homage to tradition but also ignites your culinary creativity. So, gather your ingredients, unleash your passion, and let the cooking begin!

Join me in celebrating the art of cooking boldly, where every dish tells a story and every flavor is an adventure waiting to unfold. Happy cooking!

Cornbread Stuffing | The Modern Proper

Prep Time 15 minutes
Cook Time 35 minutes
Total Time 50 minutes
Servings 8 servings
Calories 250
A flavorful and comforting cornbread stuffing perfect for holiday dinners or family gatherings.

Ingredients

Main

  • 1 batch cornbread, cubed
  • 0.5 cup unsalted butter
  • 1 diced onion
  • 2 stalks celery
  • 2 cloves garlic, minced
  • 1 teaspoon dried sage
  • 1 teaspoon dried thyme
  • 1 teaspoon salt
  • 0.5 teaspoon black pepper
  • 2 cups chicken or vegetable broth
  • 2 large eggs, beaten
  • 0.5 cup fresh parsley, chopped

Instructions 

  • Preheat oven to 350°F (175°C).
  • Melt butter in a skillet; sauté onion and celery until soft.
  • Add garlic, sage, thyme, salt, and pepper; cook 1 minute.
  • Mix cornbread, sautéed vegetables, and parsley; whisk broth and eggs, then combine.
  • Transfer to a greased dish and bake 30-35 minutes until golden.

Notes

For extra flavor, add a pinch of smoked paprika or chopped cooked sausage.
Calories: 250kcal
Cost: $15
Course: Side Dish
Cuisine: American
Keyword: Cornbread

Nutrition

Calories: 250kcal | Carbohydrates: 35g | Protein: 8g | Fat: 10g | Sodium: 600mg

Loved this recipe? Save it to your favorite Pinterest board so you can easily find it later! It’s the perfect way to keep all your sweet ideas in one place. ✨

A rich, textured bowl of cornbread stuffing surrounded by a cozy blur.

Welcome to a culinary adventure that’s as quick as it is delicious! These 10-Minute Vegan Burrito Wraps are designed for those who crave vibrant flavors and a dash of spice without the fuss. Whether you’re a seasoned chef or just starting your kitchen journey, this recipe is your ticket to a mouthwatering meal that invites creativity and zest. Ready to wrap your taste buds around something extraordinary? Let’s dive in!

Why You’ll Love This Recipe

  • Quick and Easy: Perfect for busy weeknights, this recipe can be whipped up in just 10 minutes!
  • Plant-Based Goodness: Packed with protein from black beans and quinoa, these burritos are not just filling but also nutritious.
  • Customizable: Tailor the filling to your taste — whether you like it mild or spicy, the choice is yours!
  • Great for Meal Prep: Make a batch ahead of time for grab-and-go lunches or quick dinners throughout the week.
  • Kid-Friendly: Even picky eaters will love these burritos! Let them help assemble their own for extra fun.

Ingredient Breakdown

Let’s talk about the star players in our burrito game:

  • Whole Wheat Tortillas: These provide a sturdy and nutritious wrap. Substitute with gluten-free tortillas if desired.
  • Black Beans: Rinsed and drained for a hearty protein boost. You can swap them for pinto beans or chickpeas if you prefer.
  • Cooked Quinoa: This grain adds texture and nutty flavor. You can use rice or even lentils as a substitute.
  • Corn: Whether canned or frozen, corn adds a sweet crunch. If you’re looking for a twist, try using roasted corn!
  • Diced Tomatoes: Fresh tomatoes bring juiciness and flavor; canned tomatoes work just fine too.
  • Avocado: This creamy goodness is essential. If you’re in a pinch, you can use guacamole instead.
  • Shredded Lettuce: For that fresh crunch. Spinach or arugula are great alternatives!
  • Cumin & Chili Powder: These spices elevate the flavor profile. Adjust the amounts based on your heat preference!
  • Salt and Pepper: Essential for seasoning; don’t skimp on this step!
  • Lime Wedges: A squeeze of lime at the end brightens everything up.

Instructions for Assembly

A deliciously styled vegan burrito showing colorful layers of ingredients with warm lighting.

Alright, it’s time to bring this burrito to life! Follow these simple steps to assemble your vegan burrito wraps:

  1. In a mixing bowl, combine the black beans, cooked quinoa, corn, diced tomatoes, cumin, chili powder, salt, and pepper. Mix well to create the filling.
  2. Lay out the whole wheat tortillas on a clean surface.
  3. Evenly distribute the filling mixture onto the center of each tortilla.
  4. Top the filling with sliced avocado and shredded lettuce.
  5. Fold in the sides of the tortilla and then roll it up tightly from the bottom to form a wrap.
  6. Repeat for all tortillas until the filling is used up.
  7. Serve immediately, garnished with fresh cilantro and lime wedges.

Expert Tips for Perfection

  • Warming Tortillas: Heat your tortillas in a skillet for a few seconds on each side. This prevents tearing and enhances flavor.
  • Make it Spicy: If you like heat, add diced jalapeños or a splash of hot sauce to the filling.
  • Don’t Overfill: Keep the filling moderate to ensure easy rolling and handling.
  • Balance the Flavors: Taste your filling and adjust seasoning. A pinch of salt can elevate the entire dish.
  • Fresh Ingredients: Use ripe avocados and fresh veggies for the best flavor and texture.
  • Storage: Wrap burritos tightly in foil or plastic wrap to keep them fresh.
  • Freezing: These burritos freeze well! Wrap them individually and store in a freezer bag for up to 3 months.
  • Garnish: Fresh cilantro and lime juice take these wraps to the next level — don’t skip it!

Common Mistakes and Troubleshooting

Even the best chefs make mistakes! Here’s how to avoid common pitfalls:

  • Too Much Filling: If your burrito bursts, try reducing the amount of filling to make rolling easier.
  • Dry Filling: If your mixture feels dry, add a splash of lime juice or a drizzle of olive oil for moisture.
  • Overcooked Quinoa: Ensure your quinoa is fluffy, not mushy. Rinse beforehand and follow package instructions for cooking.

Variations to Spice Things Up

Feeling adventurous? Here are some variations to try:

  • Fiesta Burrito: Add black olives and diced bell peppers for extra crunch and flavor.
  • Southwestern Twist: Incorporate roasted sweet potatoes and smoked paprika into the filling.
  • Greek Style: Swap black beans for chickpeas and add feta cheese along with olives and cucumbers.
  • Breakfast Burrito: Fill with scrambled tofu, spinach, and diced tomatoes for a breakfast version.

Storage and Make-Ahead Instructions

Planning ahead? Here’s how to store and prepare these burritos:

  • Refrigeration: Keep the burritos in an airtight container in the fridge for up to 3 days.
  • Freezing Tips: Wrap burritos in foil and place them in a freezer-safe bag. Reheat in the oven or microwave when ready to eat.
  • Make Ahead: Prepare the filling in advance and store it separately. Assemble the burritos when you’re ready to eat!

Comprehensive FAQ

  • Can I make these burritos ahead of time? Absolutely! They store well in the fridge or freezer.
  • What if I don’t have lime juice? You can substitute with lemon juice or even vinegar for a tangy kick!
  • Can I add meat? Sure! Grilled chicken or beef can be great additions for non-vegan options.
  • How do I make these gluten-free? Use gluten-free tortillas and ensure all ingredients are certified gluten-free.
  • Are these burritos spicy? The spice level can be adjusted based on your preference. Omit chili powder for a milder version!
  • What can I serve with these burritos? Pair with salsa, guacamole, or a fresh salad for a complete meal.
  • How do I reheat frozen burritos? Thaw overnight in the fridge and reheat in the oven or microwave until heated through.
  • Can I customize the fillings? Absolutely! Feel free to experiment with your favorite veggies and proteins.

Nutritional Tips and Dietary Adaptations

This recipe is not only delicious but also packed with nutrition:

  • High Fiber: Black beans and quinoa are excellent sources of fiber, promoting digestive health.
  • Vegan-Friendly: Naturally plant-based, these burritos are suitable for vegan diets.
  • Protein-Packed: With both beans and quinoa, you’ll get a hefty dose of plant protein in each bite!

Equipment Recommendations

Before you get cooking, make sure you have these essential tools:

  • Mixing Bowl: For combining ingredients easily.
  • Skillet: Ideal for warming tortillas and toasting your burritos if desired.
  • Knife and Cutting Board: To chop up your veggies and slice the avocado beautifully.

Serving Suggestions

Now that your burritos are ready, here’s how to serve them:

  • Plate Them Up: Arrange on a platter and garnish with fresh cilantro and lime wedges for a pop of color.
  • Dip It: Serve with your favorite salsa or a side of creamy guacamole for an extra kick.
  • Pair with a Salad: A fresh green salad with a tangy vinaigrette complements the burritos wonderfully.

Conclusion

There you have it! A delicious, quick, and versatile recipe for 10-Minute Vegan Burrito Wraps that’s sure to become a favorite in your home. Not only are they packed with flavor and nutrition, but they also invite you to explore your own culinary creativity. So grab that skillet, ignite your spirit of adventure, and wrap up a meal that’s bursting with life today!

10-Minute Vegan Burrito Wraps

Prep Time 5 minutes
Cook Time 5 minutes
Total Time 10 minutes
Servings 4 servings
Calories 350
Quick and delicious vegan burrito wraps packed with flavorful beans, quinoa, and fresh veggies, ready in just 10 minutes.

Ingredients

Tortillas

  • 4 pieces whole wheat tortillas
  • 1 can black beans, rinsed and drained
  • 1 cup cooked quinoa
  • 1 cup corn (canned or frozen)
  • 1 cup diced tomatoes
  • 1 piece avocado, sliced
  • 1 cup shredded lettuce
  • 1 teaspoon cumin
  • 1 teaspoon chili powder
  • to taste salt and pepper
  • optional fresh cilantro for garnish
  • optional lime wedges for serving

Instructions 

  • Mix black beans, quinoa, corn, tomatoes, cumin, chili powder, salt, and pepper.
  • Place tortillas on a surface and distribute filling evenly.
  • Add sliced avocado and lettuce, then roll up tightly.
  • Repeat with remaining tortillas and filling.
  • Serve immediately with cilantro and lime wedges if desired.

Notes

Feel free to customize with your favorite veggies or add hot sauce for extra flavor.
Calories: 350kcal
Cost: $12
Course: Main Course
Cuisine: Vegan
Keyword: Burrito, quick, Vegan

Nutrition

Calories: 350kcal | Carbohydrates: 60g | Protein: 15g | Fat: 8g | Sodium: 600mg

Loved this recipe? Save it to your favorite Pinterest board so you can easily find it later! It’s the perfect way to keep all your sweet ideas in one place. ✨

Eye-level shot of a whole wheat tortilla wrap with fresh veggies and beans, set against a soft background.

The Sweet Heat: Roasted Sweet Potatoes That Ignite Your Taste Buds

Welcome to a culinary adventure that celebrates the natural sweetness and warmth of roasted sweet potatoes! This recipe is not just about cooking; it’s about creating a dish that tantalizes your taste buds and elevates your dining experience. In just 30 minutes, you’ll transform humble sweet potatoes into a vibrant side dish that brings joy to your table. Are you ready to embrace the thrill of cooking with a hint of spice and sweetness? Let’s dive in!

Why You’ll Love This Recipe

There are countless reasons to fall in love with roasted sweet potatoes, but here are five that stand out:

  • Quick and Easy: With just 30 minutes from prep to plate, this dish is perfect for busy weeknights or last-minute gatherings.
  • Health Benefits: Sweet potatoes are rich in vitamins A and C, fiber, and antioxidants, making them a nutritious addition to any meal.
  • Versatile Flavor: The combination of honey and cinnamon creates a sweet and spicy flavor profile that perfectly complements a variety of main dishes.
  • Beautiful Presentation: The caramelized edges and warm, golden color of these roasted sweet potatoes make for an eye-catching side dish that impresses.
  • Customizable: You can easily adapt this recipe with various spices, sweeteners, or additional ingredients to suit your palate.

Ingredients Breakdown

Eye-level shot of golden-brown roasted sweet potatoes with a soft, blurred background.

Before we get cooking, let’s take a closer look at the ingredients that make this dish sing:

  • Sweet Potatoes: You’ll need 2 large sweet potatoes. Look for firm, smooth-skinned potatoes with vibrant color. If sweet potatoes are not your thing, you can use butternut squash or regular potatoes as alternatives.
  • Olive Oil: 2 tablespoons of olive oil will help achieve that crispy exterior. Feel free to swap it with avocado oil for a more pronounced flavor.
  • Honey: Use 2 tablespoons of honey for sweetness. If you’re vegan, maple syrup is an excellent substitute that will still deliver that caramelized goodness.
  • Ground Cinnamon: A teaspoon of ground cinnamon adds warmth and depth. For a spicier kick, add a pinch of cayenne or chili powder.
  • Salt and Pepper: Season to taste; these simple ingredients enhance the natural flavors of the sweet potatoes.

Step-by-Step Instructions

Let’s get roasting! Follow these simple steps to create your sweet, spicy masterpiece:

  1. Preheat your oven to 400°F (200°C).
  2. Peel and cube the sweet potatoes into bite-sized pieces, aiming for uniformity for even cooking.
  3. In a large bowl, combine the sweet potatoes, olive oil, honey, cinnamon, salt, and pepper. Toss until each piece is well coated.
  4. Spread the sweet potatoes in a single layer on a baking sheet, ensuring they aren’t overcrowded to promote even roasting.
  5. Roast in the preheated oven for 25-30 minutes, or until tender and slightly caramelized, stirring halfway through for even browning.
  6. Remove from the oven and let cool for a few minutes before serving to enhance the flavor.

Pro Tips for Perfect Roasted Sweet Potatoes

Want to take your roasted sweet potatoes to the next level? Check out these expert insights:

  • Uniform Cutting: Cut your sweet potatoes into similar sizes for consistent cooking. Aim for 1-inch cubes.
  • Preheat the Baking Sheet: For extra crispiness, preheat the baking sheet in the oven before adding the sweet potatoes.
  • Don’t Skip the Stir: Stir halfway through the roasting time to promote even caramelization on all sides.
  • Taste as You Go: Adjust the seasoning before roasting. A little extra salt or honey can elevate the flavor dramatically.
  • Experiment with Spices: Try adding spices like cumin, paprika, or even a touch of nutmeg for a unique twist.
  • Use Fresh Ingredients: Fresh spices and quality honey can significantly impact the dish’s final taste.
  • Garnish Wisely: Consider garnishing with fresh herbs like parsley or cilantro for a pop of color and freshness.
  • Pair Perfectly: These sweet potatoes pair wonderfully with roast chicken or grilled fish, creating a beautiful balance on your plate.

Common Mistakes and Troubleshooting

Even the best cooks can run into hiccups. Here’s how to avoid common pitfalls:

  • Overcrowding the Pan: This can lead to steaming instead of roasting. Ensure there’s enough space for air to circulate.
  • Not Enough Oil: If your sweet potatoes aren’t browning, they might need a touch more oil to promote caramelization.
  • Underseasoning: Don’t be shy with your salt and spices — these are crucial for flavor enhancement!
  • Cutting Sizes: Inconsistent sizes can result in uneven cooking. Stick to similar dimensions for the best results.
  • Checking Doneness: Use a fork to check tenderness; they should be soft but not mushy!

Variations to Try

Feeling adventurous? Here are a few variations to spice up your roasted sweet potatoes:

  • Spicy Chipotle: Add minced chipotle peppers in adobo sauce to the oil mixture for a smoky kick.
  • Curry Flavor: Substitute cinnamon with curry powder for an exotic twist that pairs beautifully with coconut rice.
  • Maple Pecan: Replace honey with maple syrup and toss with chopped pecans for added crunch and sweetness.
  • Herb Infusion: Mix in fresh herbs like rosemary or thyme before roasting for a fragrant herbal note.

Storage and Make-Ahead Instructions

Planning ahead? Here’s how to store your roasted sweet potatoes:

  • Make Ahead: You can prep the sweet potatoes and toss them in oil and seasonings a few hours before roasting. Just keep them covered in the fridge.
  • Storage: Store leftover roasted sweet potatoes in an airtight container in the refrigerator for up to 4 days.
  • Reheating: Reheat in the oven at 350°F (175°C) for about 10-15 minutes to retain crispness.

Comprehensive FAQ

Got questions? We’ve got answers! Here are some frequently asked questions about roasted sweet potatoes:

  • Can I use other types of potatoes? Yes, while sweet potatoes are ideal, you can substitute with regular potatoes or even squash.
  • How do I know when they’re done? They should be tender when pierced with a fork and have a golden-brown exterior.
  • What’s the best way to serve them? They’re delicious on their own or served alongside proteins like chicken or fish.
  • Can I freeze roasted sweet potatoes? It’s best to freeze them before roasting. Cooked sweet potatoes can become mushy upon thawing.
  • How can I add more heat? Incorporate diced jalapeños or sprinkle chili flakes before roasting.
  • Are they good reheated? Yes, reheated roasted sweet potatoes stay flavorful and can regain their crispiness in the oven.
  • What if I don’t have honey? Maple syrup or agave syrup makes a fantastic substitute for sweetness.
  • Can I air-fry them? Absolutely! Toss with oil and seasonings and air-fry at 400°F for about 15-20 minutes.

Nutritional Tips and Dietary Adaptations

Here’s how to make this dish work for your dietary needs:

  • Gluten-Free: This recipe is naturally gluten-free. Enjoy it without worry!
  • Vegan: Substitute honey with maple syrup to keep this dish plant-based.
  • Low-Carb: If you’re watching carbs, swap sweet potatoes with cauliflower chunks for a lower-carb alternative.
  • Whole30 Approved: Use compliant oils and sweeteners to align with Whole30 guidelines.

Essential Equipment Recommendations

To achieve the best results, here’s what you’ll need:

  • Baking Sheet: A sturdy, rimmed baking sheet is essential for even roasting.
  • Mixing Bowl: A large bowl for tossing the sweet potatoes with oil and seasonings.
  • Sharp Knife: A good knife for peeling and cutting the sweet potatoes with ease.
  • Spatula: A spatula helps flip the sweet potatoes for uniform browning.

Serving Suggestions

Now that your roasted sweet potatoes are ready, here’s how to serve them:

  • On a Bed of Greens: Serve them over a bed of arugula or spinach for a refreshing contrast.
  • As a Side Dish: Pair them with grilled chicken, fish, or roasted meats for a balanced meal.
  • Add to Bowls: Toss them into grain bowls with quinoa, black beans, and avocado for a hearty lunch.
  • Top with Feta: Crumbled feta or goat cheese adds a creamy element that complements the sweetness.

In conclusion, roasted sweet potatoes are not just a side dish; they’re an experience — a delightful dance of sweet and spicy flavors that will leave you craving more. So grab your skillet, ignite your passion for cooking, and let every bite tell a story of warmth, love, and adventure. Thank you for joining me on this culinary journey; I can’t wait to hear how your sweet potatoes turn out!

Roasted Sweet Potatoes (Cinnamon & Honey • 30-Min)

Prep Time 10 minutes
Cook Time 25 minutes
Total Time 35 minutes
Servings 4 servings
Calories 180
Enjoy these sweet, caramelized roasted sweet potatoes infused with cinnamon and honey, perfect for a quick and healthy side dish.

Ingredients

Sweet Potatoes

  • 2 large sweet potatoes
  • 2 tablespoons olive oil
  • 2 tablespoons honey
  • 1 teaspoon ground cinnamon
  • to taste salt
  • to taste pepper

Instructions 

  • Preheat oven to 400°F (200°C).
  • Peel and cube sweet potatoes.
  • Toss sweet potatoes with olive oil, honey, cinnamon, salt, and pepper.
  • Spread on a baking sheet and roast for 25-30 minutes.
  • Let cool briefly before serving.

Notes

For extra flavor, sprinkle with a little more cinnamon before serving.
Calories: 180kcal
Cost: $10
Course: Side Dish
Cuisine: American
Keyword: Sweet Potatoes

Nutrition

Calories: 180kcal | Carbohydrates: 40g | Protein: 2g | Fat: 4g | Sodium: 50mg

Loved this recipe? Save it to your favorite Pinterest board so you can easily find it later! It’s the perfect way to keep all your sweet ideas in one place. ✨

Delicious roasted sweet potatoes highlighted by warm natural light, showcasing their texture.

Ignite Your Culinary Adventure with Greek Green Peas Stew

Welcome to a vibrant culinary journey where every bite tells a story! Today, we’re diving into a dish that embodies the rich flavors of the Mediterranean: Greek Green Peas Stew. This quick and easy recipe combines the earthy sweetness of green peas with the zesty freshness of Mediterranean ingredients, creating a gluten-free delight that’s perfect for any adventurous cook. Get ready to spice up your kitchen and transform humble ingredients into a dish that will awaken your senses!

Why You’ll Love This Recipe

  • Quick and Easy: This stew can be prepared in just 30 minutes, making it a perfect weeknight dinner option.
  • Vibrant Flavors: The combination of olive oil, fresh veggies, and herbs creates a dish that’s bursting with flavor.
  • Healthy and Nutritious: Packed with green peas and other wholesome ingredients, this stew is rich in vitamins and minerals.
  • Versatile Dish: Serve it as a main course or a side dish, and easily adapt it to suit your dietary preferences.
  • Great for Meal Prep: This stew tastes even better the next day, making it an excellent option for leftovers.

Ingredients You’ll Need

Delicious bowl of Greek Green Peas Stew featuring fresh herbs and vegetables.

To create this delightful Greek Green Peas Stew, gather the following ingredients:

  • 2 cups green peas (fresh or frozen)
  • 1 medium onion, chopped
  • 2 cloves garlic, minced
  • 2 medium tomatoes, diced
  • 1/4 cup olive oil
  • 1 teaspoon dried oregano
  • Salt and pepper to taste
  • 2 cups vegetable broth
  • 1 tablespoon fresh lemon juice
  • Chopped fresh parsley for garnish

Feel free to make substitutions based on your pantry! For instance, you can swap out the tomatoes for a can of diced tomatoes or use onions and carrots for added sweetness.

How to Make Greek Green Peas Stew

Follow these steps for a stew that’s as simple to make as it is delicious:

  • Step 1: In a large pot, heat the olive oil over medium heat.
  • Step 2: Add the chopped onion and sauté until translucent, about 5 minutes.
  • Step 3: Stir in the minced garlic and cook for an additional minute until fragrant.
  • Step 4: Add the diced tomatoes, green peas, oregano, salt, and pepper. Stir well to combine.
  • Step 5: Pour in the vegetable broth and bring to a boil.
  • Step 6: Reduce heat and let simmer for about 15-20 minutes, until the peas are tender.
  • Step 7: Stir in the fresh lemon juice before serving.
  • Step 8: Garnish with chopped parsley and serve warm.

Pro Tips for Making Greek Peas Stew

  • Balancing Flavors: The right seasoning is key! Taste and adjust the salt and pepper as needed for your palate.
  • Fresh vs. Frozen: Fresh green peas offer a sweeter flavor, but frozen peas work perfectly and are convenient.
  • Herb Variations: Experiment with fresh herbs like basil or dill for added depth.
  • Adding Protein: Throw in some cooked chickpeas or shredded chicken for a heartier meal.
  • Spice It Up: For a kick, add red pepper flakes or a dash of cayenne pepper while sautéing.
  • Make It Creamy: A splash of coconut milk or heavy cream can turn this stew into a luscious dish.
  • Storage: This stew keeps well in the fridge for up to 4 days, making it perfect for meal prep.
  • Freezing: Freeze leftovers in an airtight container for up to 3 months.

Common Mistakes and Troubleshooting

  • Overcooking the Peas: Keep an eye on the peas to avoid mushiness. They should remain vibrant and tender.
  • Not Seasoning Enough: Don’t skimp on salt and pepper! These essentials elevate the stew’s flavors.
  • Skipping the Lemon Juice: The acidity from the lemon juice brightens the dish, so don’t skip it!

Variations of Greek Green Peas Stew

Here are some fun twists you can try to make this stew your own:

  • Pasta Addition: Stir in cooked orzo for a heartier texture.
  • Spicy Version: Add diced jalapeños or a splash of hot sauce for heat.
  • Vegetable Medley: Incorporate other veggies like carrots, zucchini, or bell peppers to enhance nutrition.
  • Herbed Quinoa: Serve over a bed of herbed quinoa for a protein boost.

Storage and Make-Ahead Instructions

To make your cooking experience even smoother, consider these tips:

  • Make Ahead: Prepare the stew a day in advance and let the flavors meld overnight.
  • Refrigerate: Store in an airtight container for up to 4 days.
  • Freeze: Cool completely, then freeze in individual portions for a quick meal later.

Comprehensive FAQ

  • Can I use frozen peas? Absolutely! Frozen peas are a convenient option and work just as well.
  • What can I substitute for vegetable broth? Water can be used, but for more flavor, consider using chicken broth.
  • How do I make this dish vegan? It’s already vegan! Just ensure your vegetable broth is plant-based.
  • Can I use other vegetables? Yes! Feel free to add any veggies you enjoy, such as spinach or kale.
  • Is this stew gluten-free? Yes, this recipe is naturally gluten-free.
  • How can I thicken the stew? For a thicker consistency, mash some peas against the side of the pot.
  • What’s the best way to serve this stew? Serve warm, garnished with fresh parsley, and alongside crusty bread.
  • Can I add meat to this recipe? Yes, cooked chicken or turkey can add more protein to the stew.

Nutrition Tips and Dietary Adaptations

This Greek Green Peas Stew is not only delicious but also packed with nutrients. Here are some tips for making it even healthier:

  • Fiber Boost: Adding lentils or beans increases fiber content, making it more filling.
  • Lower Fat Option: Reduce the amount of olive oil for a lighter version.
  • Fresh Ingredients: Use fresh, organic vegetables whenever possible for the best flavor and nutritional value.

Equipment Recommendations

To ensure your cooking experience is seamless, here’s what you’ll need:

  • Large Pot: A sturdy pot is essential for even cooking.
  • Wooden Spoon: Perfect for stirring and scraping the bottom of the pot.
  • Measuring Cups and Spoons: Accurate measurements help achieve the best flavor.

Serving Suggestions

To enhance your meal, consider pairing this stew with:

  • Crusty Bread: A loaf of crusty bread is perfect for soaking up the delicious broth.
  • Rice or Quinoa: Serve over a bed of rice or quinoa for added texture.
  • Feta Cheese: Crumbled feta adds a creamy, tangy element that complements the stew beautifully.

In conclusion, this Greek Green Peas Stew is not just a meal; it’s a celebration of flavors and a reminder that cooking can be a delightful adventure. Embrace the spice, let your creativity flow, and don’t forget to share your culinary creations with friends and family. Happy cooking!

Quick & Easy Greek Green Peas Stew Recipe (Gluten-Free)

Prep Time 10 minutes
Cook Time 20 minutes
Total Time 30 minutes
Servings 4 servings
Calories 150
A flavorful and healthy Greek-inspired green peas stew that's quick to prepare and perfect for a wholesome meal.

Ingredients

Vegetables

  • 2 cups green peas (fresh or frozen)
  • 1 medium onion, chopped
  • 2 cloves garlic, minced
  • 2 medium tomatoes, diced
  • 1/4 cup olive oil
  • 1 teaspoon dried oregano
  • to taste salt
  • to taste pepper
  • 2 cups vegetable broth
  • 1 tablespoon fresh lemon juice

Garnish

  • chopped fresh parsley (for garnish)

Instructions 

  • Heat olive oil in a large pot over medium heat.
  • Sauté chopped onion until translucent, then add minced garlic and cook for 1 minute.
  • Add diced tomatoes, green peas, oregano, salt, and pepper; stir well.
  • Pour in vegetable broth and bring to a boil, then reduce heat and simmer for 15-20 minutes.
  • Stir in lemon juice, garnish with parsley, and serve warm.

Notes

This stew is naturally gluten-free and packed with plant-based protein and fiber.
Calories: 150kcal
Cost: $12
Course: Main Course
Cuisine: Greek
Keyword: Green Peas

Nutrition

Calories: 150kcal | Carbohydrates: 25g | Protein: 7g | Fat: 7g | Sodium: 400mg

Loved this recipe? Save it to your favorite Pinterest board so you can easily find it later! It’s the perfect way to keep all your sweet ideas in one place. ✨

Eye-level shot of a hearty Greek Green Peas Stew with olive oil glistening on top.