Author

Avery Collins

Browsing

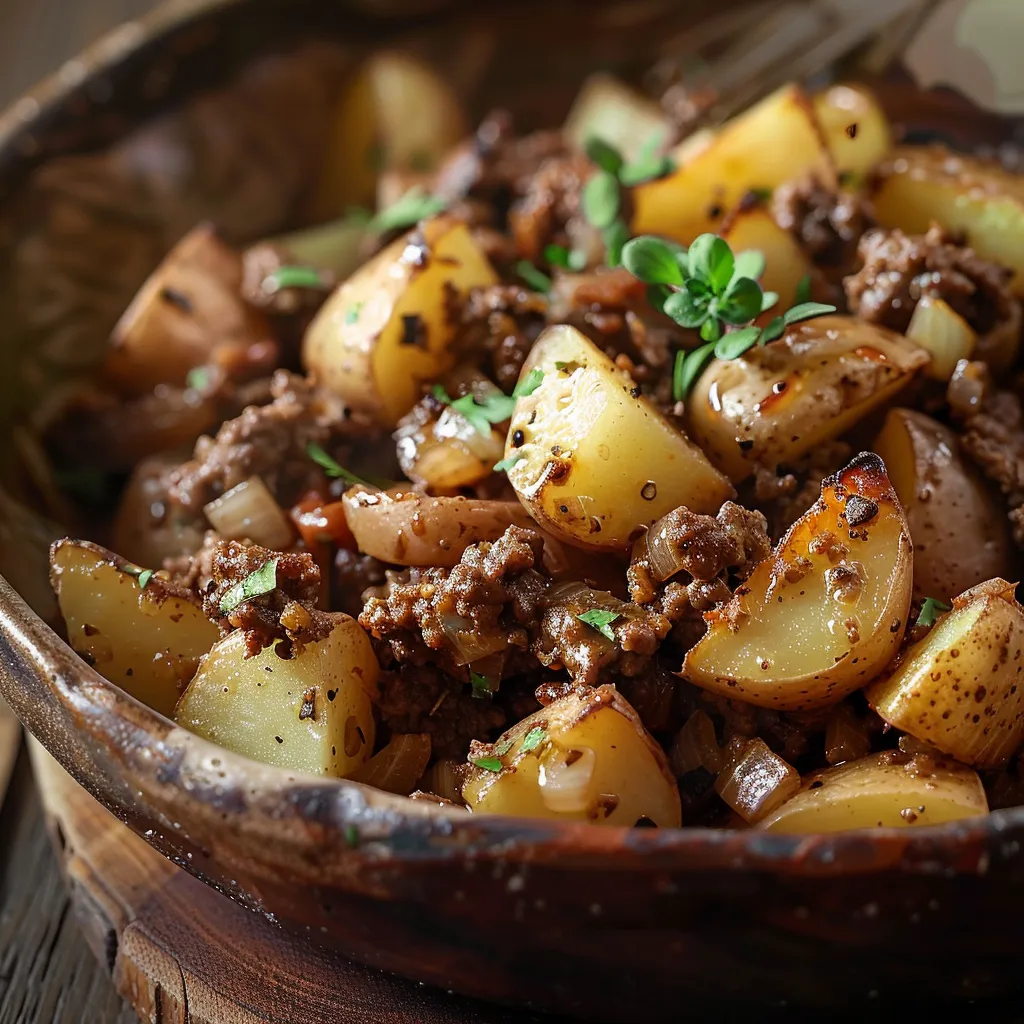
Unlock the Flavorful Depth of Southern Green Bean Casserole

Welcome to the world of Southern Green Bean Casserole, a dish that marries creamy comfort with a delightful kick of spice! This family favorite isn’t just a side; it’s a culinary adventure waiting to be explored. Whether you’re preparing for a festive gathering or a cozy dinner, this casserole is designed to bring warmth and joy to your table. So, grab your skillet, and let’s dive into the flavors that make this dish unforgettable!

Why You’ll Love This Recipe

  • Comforting Flavors: The creamy mushroom soup melds beautifully with tender green beans, creating a nostalgic taste that warms the heart.
  • Textural Harmony: With layers of crispy fried onions, this casserole offers a satisfying crunch that contrasts perfectly with its creamy base.
  • Flexibility: This recipe can easily accommodate dietary preferences, allowing for various ingredient swaps and additions.
  • Make-Ahead Friendly: Assemble it in advance, refrigerate, and simply bake before serving to save time on busy days.
  • Quick and Easy: With minimal prep and cook time, this dish is perfect for novice cooks and experienced chefs alike.

Ingredient Breakdown

Appetizing Southern Green Bean Casserole with golden fried onions, captured in warm natural light.

This Southern Green Bean Casserole is all about using quality ingredients to create a dish bursting with flavor. Below is a detailed look at each ingredient, along with some delicious substitutions!

  • Green Beans: Use either fresh or canned, but if you go fresh, blanch them for 3-4 minutes for the best texture.
  • Cream of Mushroom Soup: For a twist, try cream of celery or make your own from scratch for a richer flavor.
  • Milk: Whole milk adds richness, but you can substitute with almond or oat milk for a dairy-free version.
  • Shredded Cheddar Cheese: Feel free to mix in pepper jack for a spicy kick or use a dairy-free cheese alternative.
  • Fried Onions: If you’re feeling adventurous, homemade crispy onions can elevate the dish with fresh ingredients.
  • Spices: Garlic powder, black pepper, and salt are essential; don’t hesitate to add a pinch of cayenne for heat!

Step-by-Step Instructions

Ready to make your Southern Green Bean Casserole? Follow these simple steps for a guaranteed crowd-pleaser!

  1. Preheat the oven: Set it to 350°F (175°C) to prepare for baking.
  2. Combine ingredients: In a large bowl, mix the drained green beans, cream of mushroom soup, milk, garlic powder, black pepper, and salt until well blended.
  3. Add some goodness: Stir in 1/2 cup of shredded cheddar cheese and 1/2 cup of fried onions.
  4. Prepare the baking dish: Grease a 9×13 inch casserole dish and pour in the mixture evenly.
  5. First bake: Bake in the preheated oven for 25 minutes to let those flavors meld.
  6. Top it off: Remove from the oven and sprinkle with the remaining cheddar cheese and fried onions.
  7. Final bake: Return to the oven and bake for another 10-15 minutes until the cheese is melted and bubbly.
  8. Cool and serve: Let the casserole cool for a few minutes before diving in!

Pro Tips for the Perfect Casserole

  • Check for doneness: Ensure the casserole is heated through by inserting a knife in the center; it should come out hot.
  • Experiment with spices: A dash of soy sauce can enhance the umami flavor while a sprinkle of smoked paprika adds depth.
  • Don’t skip the cooling: Allowing the dish to cool slightly helps it set up, making it easier to serve.
  • Layer it up: For added texture, consider layering the green beans, cheese, and onion mixture for more distinct flavors.
  • Go fresh: Fresh green beans provide a vibrant crunch compared to canned, enhancing the overall experience.
  • Dip and taste: Taste your mixture before baking; adjust seasoning as necessary to create a balanced flavor profile.
  • Use a timer: Set a timer for each baking stage to avoid overcooking, ensuring your casserole is perfectly baked.
  • Serve at the right temperature: This casserole tastes best warm, so serve it fresh out of the oven!

Common Mistakes and Troubleshooting

Even the best chefs can face challenges, so here are some common pitfalls and solutions!

  • Too soggy: If your casserole turns out watery, drain the beans thoroughly and consider reducing the milk.
  • Burnt edges: Use aluminum foil to cover the edges if they begin to brown too quickly, ensuring even cooking.
  • Uneven baking: Ensure your oven is properly calibrated for even heat distribution. Rotate the casserole halfway through baking.
  • Not cheesy enough: Add more cheese directly on top before the final bake for a gooey, cheesy result.
  • Overcooked beans: If using fresh beans, blanch them just until tender before mixing to prevent mushiness.

Delicious Variations

Want to switch things up? Here are four exciting variations to try!

  • Spicy Cheesy Casserole: Add 1-2 diced jalapeños for a kick that will spice things up!
  • Vegan Delight: Substitute all dairy with plant-based alternatives and use vegan fried onions for a cruelty-free dish.
  • Loaded Casserole: Mix in cooked bacon bits or sausage for a meaty twist that meat lovers will adore.
  • Herb Infusion: Add fresh thyme or rosemary for an aromatic touch that elevates the flavors beautifully.

Storage and Make-Ahead Instructions

This casserole is perfect for meal prep! Here’s how to store and reheat it:

  • Refrigerate: Cover the casserole with plastic wrap or aluminum foil and store in the fridge for up to 3 days.
  • Freeze: For longer storage, freeze before baking. Just thaw overnight in the fridge before baking as directed.
  • Reheating: Reheat in the oven at 350°F (175°C) until heated through, usually 20-30 minutes.

Frequently Asked Questions

Got questions? I’ve got answers! Here are some common queries about the Southern Green Bean Casserole:

  • Can I use fresh green beans? Absolutely! Just blanch them first for the best texture.
  • How can I make it gluten-free? Use gluten-free cream of mushroom soup and ensure your fried onions are also gluten-free.
  • What can I substitute for cream of mushroom soup? You can use homemade mushroom cream sauce or any creamy soup base you prefer.
  • Is it possible to make this dairy-free? Yes! Swap the milk and cheese for dairy-free alternatives.
  • How long can I keep leftovers? Leftovers can be stored in the refrigerator for up to 3 days or frozen for up to a month.
  • Can I prepare this in advance? Absolutely! Assemble it a day before and bake it right before serving.
  • What can I serve with this casserole? It pairs beautifully with roasted meats, salads, or even a hearty bread.
  • Can I add other vegetables? Yes! Feel free to toss in some carrots, corn, or even diced bell peppers for added color and nutrition.

Nutritional Tips and Dietary Adaptations

While this casserole is undeniably delicious, here are some tips to make it healthier:

  • Lower Calories: Use low-fat cream of mushroom soup and reduce the amount of cheese for a lighter version.
  • Add Fiber: Toss in some cooked lentils or chickpeas to boost fiber content and make it heartier.
  • Balanced Flavor: Incorporate more herbs and spices to enhance flavor without extra calories, like thyme or Italian seasoning.

Equipment Recommendations

For the best results, here’s what you’ll need:

  • Large Mixing Bowl: Essential for combining all your ingredients without spills.
  • 9×13 Inch Baking Dish: Perfect size for this casserole, ensuring even baking.
  • Measuring Cups and Spoons: Accurate measurements are crucial for the best flavor.
  • Spatula: A good spatula helps ensure everything is well mixed and evenly spread in the baking dish.
  • Aluminum Foil: Handy for covering the casserole to prevent over-browning during baking.

Serving Suggestions

Now that your Southern Green Bean Casserole is perfectly baked and ready to shine, here are some serving suggestions:

  • Garnish: Top with fresh parsley or chives for a pop of color and freshness.
  • Pair with Protein: Serve alongside roasted chicken or beef for a complete meal.
  • Offer Bread: A warm, crusty loaf of bread or fluffy biscuits makes for a perfect sidekick.

So, there you have it! Your ultimate guide to crafting the best Southern Green Bean Casserole, full of flavors and flair. This dish is not just a recipe; it’s an experience, a celebration of spice and comfort that invites everyone to gather around the table. Now, go forth and make your kitchen a little spicier — because cooking should be an adventure!

Southern Green Bean Casserole Recipe

Prep Time 10 minutes
Cook Time 35 minutes
Total Time 45 minutes
Servings 6 servings
Calories 250
A classic Southern side dish combining tender green beans with creamy mushroom soup, cheddar cheese, and crispy fried onions for a flavorful casserole.

Ingredients

Green Beans

  • 2 cans green beans, drained
  • 1 can cream of mushroom soup
  • 0.5 cup milk
  • 1 cup shredded cheddar cheese
  • 1 cup fried onions
  • 0.5 teaspoon garlic powder
  • 0.5 teaspoon black pepper
  • 0.5 teaspoon salt

Instructions 

  • Preheat oven to 350°F (175°C).
  • Mix green beans, mushroom soup, milk, garlic powder, black pepper, and salt.
  • Stir in 1/2 cup cheddar and 1/2 cup fried onions.
  • Pour into a greased 9x13 inch dish and bake 25 minutes.
  • Top with remaining cheddar and fried onions, bake 10-15 minutes.
  • Let cool briefly before serving.

Notes

For extra flavor, add a dash of hot sauce or paprika.
Calories: 250kcal
Cost: $12
Course: Side Dish
Cuisine: Southern
Keyword: Green Beans

Nutrition

Calories: 250kcal | Carbohydrates: 20g | Protein: 10g | Fat: 15g | Sodium: 600mg

Loved this recipe? Save it to your favorite Pinterest board so you can easily find it later! It’s the perfect way to keep all your sweet ideas in one place. ✨

Delicious Southern Green Bean Casserole, highlighting layers of green beans, cheddar cheese, and sauce.

Ignite Your Culinary Passion with Ground Beef and Potatoes

Welcome, fellow food adventurers! If you’re looking for a dish that’s packed with flavor and heartiness, then you’ve come to the right place. This Ground Beef and Potatoes recipe is not just a meal; it’s an experience that embodies the warmth of family gatherings and the thrill of cooking with bold spices. In less than an hour, you can whip up a dish that will awaken your senses and leave your loved ones craving more. Let’s dive into this culinary adventure!

Why You’ll Love This Recipe

  • Quick & Easy: Perfect for busy weeknights, this recipe comes together in under 30 minutes, allowing you to enjoy quality time with your family.
  • Budget-Friendly: Made with simple, affordable ingredients, it’s a great way to feed a crowd without breaking the bank.
  • One-Pan Meal: Fewer dishes mean less cleanup and more time to savor your culinary masterpiece.
  • Flavor Explosion: The combination of spices and hearty ingredients creates a symphony of flavor that’s sure to please even the pickiest eaters.
  • Customizable: Whether you want to add more veggies or spice it up with some heat, this dish allows for endless variations!

Ingredient Breakdown

Plate of cooked ground beef and potatoes, highlighted by soft, natural light.

Before cooking, let’s gather our ingredients. This dish features a handful of simple yet essential components that create its rich flavor. Here’s what you’ll need:

  • 1 pound ground beef: The star of the show! Feel free to substitute with ground turkey or chicken for a lighter option.
  • 4 medium potatoes, diced: Yukon gold or red potatoes work best, but you can also use sweet potatoes for a twist.
  • 1 onion, chopped: Adds depth of flavor; consider using shallots for a sweeter taste.
  • 2 cloves garlic, minced: Garlic is a must in my kitchen; it elevates any dish!
  • 1 cup beef broth: This adds moisture and richness; vegetable broth can be used for a vegetarian-friendly option.
  • 1 teaspoon paprika: This spice gives a smoky undertone; feel free to use smoked paprika for extra depth.
  • 1 teaspoon salt: Essential for enhancing the flavors.
  • 1/2 teaspoon black pepper: A touch of heat to balance the dish.
  • 1 tablespoon olive oil: For sautéing; can substitute with avocado oil.
  • 1 cup mixed vegetables (optional): Frozen peas, carrots, or corn can easily be stirred in for added nutrition.

Pro Tips for Perfecting Your Dish

To truly master this Ground Beef and Potatoes dish, consider these expert insights:

  • Use a large skillet: A 12-inch or larger skillet will give you ample space to brown the meat and cook the potatoes evenly.
  • Mind the heat: Start on medium heat to avoid burning the garlic and onions; you want them to soften and caramelize beautifully.
  • Don’t overcrowd the pan: If your skillet is too full, the beef will steam instead of brown. Cook in batches if necessary.
  • Let it simmer: Allow the mixture to simmer covered; this helps the flavors meld together and the potatoes to become tender.
  • Season as you go: Taste and adjust the seasoning throughout the cooking process for the best results.
  • Variations are key: Experiment with adding different spices like cumin, chili powder, or even a splash of hot sauce for a kick!
  • Use leftovers creatively: This dish reheats well and can be repurposed into tacos or stuffed peppers the next day.
  • Top it off: For an extra layer of flavor, sprinkle some shredded cheese or fresh herbs before serving.

Common Mistakes and Troubleshooting

Even the best chefs make mistakes! Here are common pitfalls and how to avoid them:

  • Too watery: If your dish is too soupy, remove the lid and let it cook uncovered for a few minutes to thicken.
  • Undercooked potatoes: Make sure to dice your potatoes uniformly; smaller pieces cook more evenly. Check for doneness by piercing with a fork.
  • Bland flavor: If the dish lacks flavor, don’t hesitate to add more spices or herbs towards the end of cooking.
  • Burnt garlic: If you notice the garlic is turning brown too quickly, reduce the heat immediately to avoid bitterness.

Variations to Spice It Up

This recipe is a blank canvas waiting for your creative touch. Here are some variations to consider:

  • Spicy Southwest: Add diced jalapeños and a sprinkle of cayenne pepper for a fiery twist.
  • Italian Flair: Mix in Italian seasoning and top with Parmesan cheese for a Mediterranean vibe.
  • Cheesy Delight: Stir in shredded cheese during the last few minutes of cooking for a gooey finish.
  • Vegetarian Option: Swap out ground beef for lentils or quinoa for a hearty, meatless meal.

Storage and Make-Ahead Instructions

This dish is perfect for meal prep! Here’s how to store it:

  • Refrigerate: Store in an airtight container for up to 4 days. Reheat in the microwave or on the stovetop.
  • Freeze: This dish freezes well for up to 3 months. Thaw overnight in the fridge before reheating.
  • Make-ahead: Prepare the ground beef and potato mixture ahead of time, then reheat when ready to serve.

Frequently Asked Questions

Got questions? I’ve got answers! Here are some FAQs about the recipe:

  • Can I use frozen vegetables? Absolutely! Just stir them in towards the end of cooking to ensure they’re heated through.
  • What can I serve with this dish? It pairs beautifully with a fresh salad or crusty bread to soak up the flavorful juices.
  • How do I make it spicier? Add chopped fresh chilies or a dash of hot sauce to kick up the heat!
  • Is it gluten-free? Yes, this recipe is naturally gluten-free. Just ensure your broth is gluten-free.
  • Can I double the recipe? Definitely! Just use a larger pan and be mindful to cook it in batches if necessary.
  • What’s the best way to reheat it? The stovetop is preferred to maintain the texture, but the microwave works in a pinch.
  • How can I make this dish healthier? Consider using lean ground beef, adding more vegetables, or reducing the amount of oil used.
  • Can I use other meats? Sure! Ground turkey, chicken, or even sausage can be great substitutes.

Nutritional Tips and Dietary Adaptations

This dish can be adjusted to fit various dietary needs:

  • Low-carb: Substitute potatoes with cauliflower for a low-carb version of this hearty meal.
  • Whole30-friendly: Use compliant beef broth and skip any dairy for a Whole30-approved dish.
  • High-protein: Add beans or legumes to increase protein content while keeping it filling.

Equipment Recommendations

Here’s what you’ll need for success:

  • Large Skillet: A heavy-bottomed skillet is essential for even cooking.
  • Sharp Knife: A good chef’s knife will make chopping ingredients quick and easy.
  • Wooden Spoon: Perfect for stirring and scraping up those delicious bits stuck to the pan.
  • Measuring Cups and Spoons: Accurate measurements ensure your flavors are spot on.

Serving Suggestions

Now that your dish is ready, let’s talk presentation:

  • Garnish: A sprinkle of fresh parsley or green onions adds a pop of color and freshness.
  • Pair with: Serve alongside a crisp salad or some roasted vegetables for a balanced meal.
  • Accompaniments: Consider a dollop of sour cream or a drizzle of hot sauce for an extra layer of flavor.

In conclusion, the Ground Beef and Potatoes recipe is more than just a meal; it’s a canvas for your culinary creativity. So grab your skillet, embrace the thrill of cooking, and let this dish inspire your next kitchen adventure. Remember, spice should always invite you closer to the table. Happy cooking!

Ground Beef and Potatoes - An Organized Chaos

Prep Time 10 minutes
Cook Time 25 minutes
Total Time 35 minutes
Servings 4 servings
Calories 650
A hearty and flavorful dish combining ground beef, potatoes, and vegetables for a satisfying meal.

Ingredients

Meat

  • 1 pound ground beef

Vegetables

  • 4 medium potatoes, diced
  • 1 onion onion, chopped
  • 2 cloves garlic, minced
  • 1 cup beef broth
  • 1 teaspoon paprika
  • 1 teaspoon salt
  • 1/2 teaspoon black pepper
  • 1 tablespoon olive oil
  • 1 cup mixed vegetables (optional)

Instructions 

  • Heat olive oil in a skillet over medium heat.
  • Sauté onion and garlic until translucent.
  • Add ground beef; cook until browned.
  • Stir in potatoes, broth, paprika, salt, and pepper; simmer for 15-20 minutes.
  • Add vegetables if using; cook for 5 minutes, then serve hot.

Notes

For extra flavor, add herbs like thyme or parsley.
Calories: 650kcal
Cost: $15
Course: Main Course
Cuisine: American
Keyword: ground beef

Nutrition

Calories: 650kcal | Carbohydrates: 70g | Protein: 45g | Fat: 25g | Sodium: 900mg

Loved this recipe? Save it to your favorite Pinterest board so you can easily find it later! It’s the perfect way to keep all your sweet ideas in one place. ✨

Delicious ground beef and potato dish, showcasing rich textures and colors.

Unlocking the Secrets of Sweet Potatoes: A Flavorful Journey

Welcome, culinary adventurers! If you’re ready to dive into the rich, sweet, and earthy world of sweet potatoes, you’ve come to the right place. Whether you’re a seasoned gardener or a curious beginner, this guide will arm you with everything you need to grow these vibrant tubers right in your own backyard. Sweet potatoes are not just a delicious addition to your meals; they’re a testament to the beauty of cultivating your own food. In this comprehensive guide, we’ll explore how to grow sweet potatoes, from selecting the right slips to harvesting and enjoying the fruits of your labor.

Why You’ll Love Growing Sweet Potatoes

  • Versatile Ingredient: Sweet potatoes can be used in a myriad of dishes, from savory casseroles to sweet pies, making them a staple in any kitchen.
  • Health Benefits: Packed with vitamins A and C, fiber, and antioxidants, these tubers not only taste great but are also a nutritional powerhouse.
  • Easy to Grow: With the right conditions, sweet potatoes are forgiving and thrive even in less-than-perfect soil.
  • Culinary Adventure: Growing your own allows you to explore different varieties, including Japanese, purple, and white sweet potatoes.
  • Harvesting Joy: There’s nothing quite like digging up your own sweet potatoes, a true farm-to-table experience that brings satisfaction and pride.

Getting Started: Sweet Potato Slips and Soil Preparation

Vibrant sweet potato plants with green leaves in a well-drained garden bed, illuminated by soft sunlight.

Before you can indulge in the sweet rewards of your gardening efforts, you need to prepare your space and materials. Let’s break down the essentials.

Ingredients and Materials

  • Sweet Potato Slips: These are young shoots grown from a mature sweet potato. You can buy them or start your own from a sweet potato.
  • Well-Drained Soil: Sweet potatoes thrive in loose, well-aerated soil. Sandy loam is ideal.
  • Compost or Organic Fertilizer: Enrich your soil with organic matter to provide essential nutrients.
  • Water: Consistent moisture is crucial, but avoid soggy conditions.
  • Mulch: Use straw or grass clippings to retain moisture and suppress weeds.

How to Grow Sweet Potatoes

Now that you’re equipped with your materials, let’s delve into the step-by-step process of planting and growing your sweet potatoes.

1. Choosing a Sunny Location

Sweet potatoes love the sun! Select a spot in your garden that receives at least 6 to 8 hours of sunlight each day.

2. Preparing the Soil

Begin by testing your soil to ensure it’s well-drained. If it’s too compacted, mix in sand and compost to improve its texture and nutrient content.

3. Planting Your Sweet Potato Slips

  • Spacing: Plant slips about 12 inches apart to give them ample room to grow.
  • Depth: Bury the slips up to their leaves, ensuring they have a strong foundation.

4. Watering and Mulching

After planting, water the slips thoroughly. Keep the soil consistently moist, but be cautious to not overwater. Apply a layer of mulch to help retain moisture and suppress weeds.

5. Monitoring Growth

Check your plants regularly for pests and diseases. Early detection is key to maintaining healthy growth.

Harvesting Sweet Potatoes

The anticipation is real! Sweet potatoes are typically ready to harvest between 90 to 120 days after planting, particularly when the leaves start to yellow.

Steps to Harvest

  • Gently Dig Up: Use a garden fork to carefully loosen the soil around the base of the plant.
  • Lift with Care: Pull the tubers from the soil gently to avoid bruising.
  • Store Properly: Keep the harvested sweet potatoes in a cool, dark place to cure for a couple of weeks, enhancing their sweetness.

Common Mistakes and Troubleshooting

Even the most seasoned gardeners can face challenges. Here are some common pitfalls to avoid:

  • Overwatering: Sweet potatoes dislike soggy soil. Ensure adequate drainage.
  • Pest Problems: Keep an eye out for sweet potato weevils and aphids. Organic insecticides can help.
  • Timing Issues: Plant your slips after the last frost and ensure they have enough warm weather to grow.

Variations: Exploring Different Types of Sweet Potatoes

Why stick to just one type? Here are some variations you might want to try:

  • Japanese Sweet Potatoes: Known for their creamy texture and nutty flavor, they’re perfect for roasting.
  • Purple Sweet Potatoes: With their striking color, they’re not only beautiful but also packed with antioxidants.
  • White Sweet Potatoes: Milder in flavor, they’re fantastic for savory dishes and casseroles.
  • Sweet Potato Vines: Don’t forget about the greens! The leaves are edible and can be used in salads or stir-fries.

Storage and Make-Ahead Instructions

Once harvested, storing your sweet potatoes correctly is crucial for maximizing their flavor:

  • Cool, Dark Environment: Store them in a location between 55-60°F to maintain quality.
  • Avoid Refrigeration: Cold temperatures can alter their taste and texture.
  • Make Ahead: Cooked sweet potatoes can be refrigerated for up to a week or frozen for longer storage.

Frequently Asked Questions

  • What are sweet potato slips? Sweet potato slips are young shoots that can be planted to grow new sweet potatoes.
  • How do I know when to harvest sweet potatoes? Look for yellowing leaves; this typically indicates they are ready to be harvested.
  • Can I grow sweet potatoes in containers? Yes! Ensure your container is deep enough to accommodate their growth.
  • What pests to look out for? Sweet potato weevils and aphids are common pests to monitor.
  • Can sweet potatoes be grown in any climate? They thrive in warm climates but can be grown in cooler areas by starting slips indoors.
  • How often should I water sweet potatoes? Water consistently, keeping the soil moist but not soggy.
  • Are sweet potatoes healthy? Absolutely! They are rich in vitamins, fiber, and antioxidants.
  • Can I eat sweet potato leaves? Yes! They are nutritious and can be prepared similarly to spinach.

Nutrition Tips and Dietary Adaptations

Sweet potatoes are not just tasty; they’re also incredibly nutritious. Here’s how to make the most of them:

  • Pair with Healthy Fats: Serve with olive oil or avocado to enhance nutrient absorption.
  • Balance Your Plate: Combine sweet potatoes with lean proteins and greens for a well-rounded meal.
  • Explore Flavors: Spice them up with cumin, chili powder, or rosemary for an exciting flavor profile.

Equipment Recommendations

Having the right tools can make your gardening experience smoother:

  • Garden Fork: Essential for digging up sweet potatoes without damaging them.
  • Soil Testing Kit: Helps you understand your soil’s pH and nutrient levels for optimal growth.
  • Watering Can or Hose: Ensure you have a reliable way to keep your soil consistently moist.

Serving Suggestions

Once you’ve harvested and prepared your sweet potatoes, how can you enjoy them? Here are some delicious serving ideas:

  • Mashed Sweet Potatoes: Creamy and comforting, perfect with a sprinkle of cinnamon.
  • Roasted Sweet Potato Wedges: Toss with olive oil and spices for a crispy side dish.
  • Sweet Potato Pie: A classic dessert that highlights their natural sweetness.
  • Sweet Potato Hash: Sauté with onions and bell peppers for a hearty breakfast.

In conclusion, growing sweet potatoes is not just a gardening project; it’s an adventure that connects you to your food and enhances your culinary repertoire. Embrace the journey from planting your slips to savoring your delicious homegrown harvest. Remember, cooking with sweet potatoes is about creativity and exploration — so don’t be afraid to experiment! Happy gardening, and may your sweet potatoes thrive!

How to Grow Sweet Potatoes

Prep Time 30 minutes
Total Time 30 minutes
Servings 4 plants
Calories 150
Learn how to cultivate sweet potatoes successfully in your garden with these simple steps.

Ingredients

Planting Materials

  • 4 slips sweet potato slips (young shoots)
  • 1 cubic meter well-drained soil
  • 2 kg compost or organic fertilizer
  • 10 liters water
  • 1 bag mulch

Instructions 

  • Choose a sunny spot with well-drained soil.
  • Enrich soil with compost or organic fertilizer.
  • Plant slips 12 inches apart, burying up to the leaves.
  • Water thoroughly and keep soil moist.
  • Apply mulch to retain moisture and prevent weeds.
  • Harvest when leaves yellow, 90-120 days after planting.

Notes

Ensure consistent watering for best growth.
Calories: 150kcal
Cost: $15
Course: Gardening
Cuisine: Home Gardening
Keyword: Sweet Potatoes

Nutrition

Calories: 150kcal | Carbohydrates: 35g | Protein: 2g | Sodium: 10mg

Loved this recipe? Save it to your favorite Pinterest board so you can easily find it later! It’s the perfect way to keep all your sweet ideas in one place. ✨

Detailed view of young sweet potato shoots surrounded by organic mulch and soil texture.

Welcome to the spicy world of One Pot Chicken Spaghetti, a dish that marries simplicity with bold flavors, igniting passion in every bite! This easy chicken spaghetti recipe is not just a meal; it’s an experience, a chance to dive into the culinary adventure that will have your family begging for seconds. Whether you’re looking for a dinner on the table in under 30 minutes or a dish that warms the soul, this recipe is your ticket to culinary bliss.

Why You’ll Love This Recipe

  • One-Pot Wonder: Minimal cleanup means more time enjoying your meal and less time scrubbing pots!
  • Quick and Easy: Perfect for busy weeknights, this dish can be whipped up in just 30 minutes.
  • Customizable: Add your favorite vegetables or proteins to suit your family’s tastes.
  • Budget-Friendly: Simple ingredients make this a wallet-friendly option for family dinners.
  • Comfort Food: Rich flavors and creamy texture create a warm, comforting dish that everyone loves.

Ingredients Breakdown

Here’s what you’ll need to create this culinary masterpiece:

  • 1 pound boneless, skinless chicken breasts: Cut into bite-sized pieces. You can substitute with thighs for extra richness.
  • 2 tablespoons olive oil: For sautéing. Feel free to use any cooking oil you prefer.
  • 1 small onion, diced: The base for flavor. Shallots can be used for a milder taste.
  • 3 cloves garlic, minced: Fresh garlic adds depth. Garlic powder can be used in a pinch.
  • 1 red bell pepper, diced: Sweet and vibrant, but any color bell pepper works!
  • 1 teaspoon Italian seasoning: A blend of herbs that brings warmth. Use fresh herbs for an even bolder flavor.
  • 1/2 teaspoon salt: Adjust according to taste.
  • 1/4 teaspoon black pepper: Freshly ground for the best flavor.
  • 4 cups chicken broth: Low-sodium is a great option to control salt levels.
  • 12 ounces spaghetti: Traditional spaghetti works, but feel free to experiment with your favorite pasta.
  • 1 can (14.5 ounces) diced tomatoes: Adds moisture and flavor. You can use fresh tomatoes if you prefer.
  • 1 cup grated Parmesan cheese: For creaminess. Nutritional yeast can be used for a dairy-free option.
  • Fresh basil for garnish: Adds a burst of freshness; dried basil can substitute in a pinch.

Pro Tips for Perfect One Pot Chicken Spaghetti

  • Perfect Cooking Time: Keep an eye on the spaghetti; it should be al dente to avoid overcooking.
  • Flavor Balance: Adjust the spices to your taste. If you love heat, consider adding red pepper flakes!
  • Layering Flavors: Sauté the vegetables until golden to enhance flavor before adding the chicken.
  • Broth Matters: Use high-quality chicken broth for the best depth of flavor.
  • Stir Occasionally: This prevents sticking and ensures even cooking throughout.
  • Let It Rest: Allow the dish to sit for a few minutes after cooking for the flavors to meld.
  • Garnish Generously: Fresh basil not only adds flavor but elevates the presentation.
  • Save Some Cheese: Reserve a bit of cheese for topping when serving to impress your guests!

Common Mistakes and Troubleshooting

Even the best chefs make mistakes! Here are some common pitfalls and how to avoid them:

  • Too Sticky Spaghetti: Ensure there’s enough liquid and stir often while cooking.
  • Overcooked Chicken: Avoid cooking on too high heat to keep the chicken tender.
  • Flavorless Dish: Always taste and adjust seasoning as you cook. Don’t be afraid to add more spices!
  • Spaghetti Not Cooking Properly: Make sure it’s fully submerged in the broth when added.

Variations on One Pot Chicken Spaghetti

Don’t be afraid to get creative! Here are some variations to try:

  • Vegetable Medley: Add zucchini, spinach, or mushrooms for a veggie-packed dish.
  • Spicy Kick: Toss in jalapeños or a dash of hot sauce for some heat.
  • Cheesy Delight: Mix in different cheeses like mozzarella or cheddar for a cheesy twist.
  • Herbed Chicken: Use fresh herbs like thyme or rosemary for a fragrant touch.

Storage and Make-Ahead Instructions

This dish is perfect for meal prep! Here’s how to store and reheat:

  • Refrigeration: Store leftovers in an airtight container for up to 4 days.
  • Freezing: You can freeze portions for up to 3 months. Just thaw in the fridge overnight before reheating.
  • Reheating: Heat on the stove with a splash of broth for moisture, or in the microwave until warmed through.

Frequently Asked Questions

  • Can I use whole wheat spaghetti? Absolutely! Whole wheat spaghetti adds fiber and a nutty flavor.
  • Is this recipe gluten-free? Use gluten-free pasta and ensure your broth is gluten-free.
  • How can I make it creamier? Add more cheese or a splash of cream at the end for an ultra-creamy texture.
  • What can I substitute for chicken? Try shrimp, sausage, or even chickpeas for a vegetarian option.
  • Can I make this dish ahead of time? Yes! It can be made ahead and stored in the fridge or freezer.
  • What vegetables can I add? Anything goes! Peas, carrots, or broccoli are great options.
  • How spicy is this dish? The spice level is adjustable! Feel free to dial it up or down.
  • Can I add more broth? Yes, more broth can be added to make a soupy version.

Nutritional Tips and Dietary Adaptations

This easy chicken spaghetti recipe is not only delicious but can be adapted for various dietary needs:

  • Low-Carb: Substitute spaghetti with zucchini noodles or spaghetti squash.
  • Dairy-Free: Use a dairy-free cheese alternative and omit the Parmesan.
  • High-Protein: Add more chicken or legumes to increase protein content.

Equipment Recommendations

To make your cooking experience even better, here’s a list of essential tools you’ll need:

  • Large Pot: A sturdy pot allows for even cooking and easy stirring.
  • Wooden Spoon: Perfect for stirring without scratching your pot.
  • Measuring Cups and Spoons: Accurate measurements make for the best results!
  • Cutting Board and Knife: Essential for prepping your ingredients.

Serving Suggestions

Serve this dish with a side salad, garlic bread, or a glass of your favorite wine to elevate your meal. It’s not just food; it’s a vibrant experience that brings everyone to the table!

So what are you waiting for? Grab your skillet, embrace the heat, and let’s get cooking! With this One Pot Chicken Spaghetti, you’re not just making dinner—you’re creating memorable moments around your table. Happy cooking!

Welcome to the World of Slow-Cooked Comfort: Your Ultimate Guide to Crockpot Mac & Cheese

Ah, mac and cheese! A dish that dances on your taste buds, bringing warmth and nostalgia with every creamy, cheesy bite. But let’s take it a step further. Imagine indulging in a crockpot mac and cheese that transforms your busy days into delicious culinary adventures. With just a handful of ingredients and a dash of love, you can create a comforting masterpiece that’s both effortless and satisfying. Let’s dive into the magic of slow cooking and discover how to make the ultimate mac and cheese that melts into your heart!

Why You’ll Love This Recipe

  • Effortless Preparation: Toss everything into your crockpot, set it, and forget it. You’ll have a delicious meal without the fuss.
  • Rich, Creamy Texture: The slow cooking process melds flavors together, creating a velvety sauce that clings to every elbow macaroni.
  • Customizable Flavors: Use your favorite cheeses and add-ins to make this dish truly yours. Experimentation is encouraged!
  • Family-Friendly: This is a crowd-pleaser! Kids and adults alike can’t resist the creamy goodness of mac and cheese.
  • Perfect for Meal Prep: Make a big batch to enjoy throughout the week, or freeze portions for quick meals later on.

Ingredients Breakdown: What You’ll Need

An eye-level shot of delicious Mac & Cheese served from a Crockpot, with golden cheese and pasta visible.

Here’s what goes into our crockpot magic:

  • 2 cups elbow macaroni: The classic choice that holds onto the sauce beautifully.
  • 4 cups water: Essential for cooking the pasta in the crockpot.
  • 2 cups shredded cheddar cheese: The star of the show, bringing that cheesy richness.
  • 1 cup shredded mozzarella cheese: Adds a delightful stretch and creaminess.
  • 1 cup milk: For a creamy base that enhances flavor.
  • 1/2 cup cream cheese: Ensures the ultimate creaminess and depth.
  • 1 teaspoon garlic powder: Infuses aromatic flavor into the dish.
  • 1 teaspoon onion powder: Adds sweetness and complexity.
  • Salt and pepper to taste: Essential for balancing flavors.

Substitutions and Variations

Want to switch things up? Here are some delightful alternatives:

  • Different Pasta Shapes: Try penne, fusilli, or even gluten-free pasta for a unique twist.
  • Cheese Variations: Use gouda, pepper jack, or a sharp white cheddar for a flavor profile that sings.
  • Veggie Add-Ins: Toss in some steamed broccoli or sautéed mushrooms for a nutritious boost.
  • Protein Boost: Add cooked bacon, shredded chicken, or even crumbled sausage to elevate the dish.

Simple Method for Crockpot Mac & Cheese

Ready to get cooking? Here’s how to create this creamy delight:

  1. In your crockpot, combine the elbow macaroni and water.
  2. Add the garlic powder, onion powder, salt, and pepper. Stir until well mixed.
  3. Pour in the milk and cream cheese, stirring to blend.
  4. Cover and cook on high for 2 hours or low for 4 hours, stirring occasionally.
  5. Once the pasta is tender, add the cheddar and mozzarella cheese. Stir until melted and creamy.
  6. Serve warm and enjoy your simple mac & cheese!

Pro Tips for the Perfect Crockpot Mac & Cheese

  • Stir Frequently: Stirring every 30 minutes helps ensure even cooking and prevents sticking.
  • Use Freshly Shredded Cheese: Pre-shredded cheese contains anti-caking agents that can affect the creaminess. Buy blocks and shred your own!
  • Don’t Overcook: Keep an eye on the pasta; overcooked noodles can become mushy.
  • Adjust Consistency: If your mac and cheese is too thick, stir in a splash more milk or water to reach desired creaminess.
  • Make Ahead: Prepare your ingredients the night before and store them in the fridge for a quick dinner solution.

Avoiding Common Mistakes

Even the best chefs have their off days! Here are some tips to avoid common missteps:

  • Too Watery: Ensure you’re measuring your water accurately. If you’ve added too much, cook with the lid off for the last 30 minutes.
  • Burnt Edges: Make sure to stir frequently and check your crockpot settings; each one can vary.
  • Cheese Clumping: Always add cheese at the end of cooking when pasta is tender to ensure it melts evenly.

Storage and Make-Ahead Instructions

This dish is perfect for meal prep! Here’s how to store and reheat:

  • Refrigeration: Store any leftovers in an airtight container for up to 4 days.
  • Freezing: Freeze in portion-sized containers for up to 3 months. Thaw overnight in the fridge before reheating.
  • Reheating: Warm in the microwave or on the stovetop, adding a splash of milk for creaminess.

Frequently Asked Questions

Got questions? Here’s what others are asking about crockpot mac and cheese:

  • Can I use regular milk instead of evaporated milk? Yes, but evaporated milk gives a richer flavor and creamier texture.
  • Can I make this recipe ahead of time? Absolutely! Prepare the ingredients and store them in the fridge for a quick meal.
  • Can I use gluten-free pasta? Yes, gluten-free pasta works well! Just keep an eye on cooking times.
  • What’s the best cheese for mac and cheese? A combination of sharp cheddar and mozzarella is a classic choice, but feel free to mix it up!
  • How can I make it spicy? Add crushed red pepper flakes or diced jalapeños for an exciting kick!
  • Can I add vegetables? Yes! Broccoli, spinach, or peas can be great additions for extra nutrition.
  • What if my mac and cheese is too thick? Stir in a bit of milk or water until you reach your desired consistency.
  • How long does it take to cook? Cook on high for 2 hours or low for 4 hours, stirring occasionally.

Nutrition Tips and Dietary Adaptations

Want to make your mac and cheese even more nutritious? Here are some ideas:

  • Whole Wheat Pasta: Use whole wheat elbow macaroni for added fiber and nutrients.
  • Low-Fat Dairy: Choose low-fat milk and cheese for a lighter version.
  • Plant-Based Alternatives: Substitute dairy with almond milk and cashew cheese for a vegan option.

Equipment Recommendations

Here’s what you’ll need to create this crockpot magic:

  • Crockpot: A 6-quart capacity is ideal for this recipe.
  • Measuring Cups and Spoons: For precise ingredient measurements.
  • Wooden Spoon: Perfect for stirring without scratching your crockpot.
  • Airtight Containers: For storing leftovers and keeping them fresh.

Serving Suggestions

Pair your creamy mac and cheese with delicious sides:

  • Garlic Bread: A crunchy, buttery side that complements the creaminess.
  • Fresh Salad: A crisp green salad balances the richness of the dish.
  • Grilled Chicken: Add some protein for a complete meal experience.

Conclusion: Embrace the Comfort of Home Cooking

Cooking is more than just following a recipe; it’s an adventure. With this crockpot mac and cheese, you’re not just creating a meal; you’re crafting a story of comfort, warmth, and flavor that invites everyone to the table. So grab your ingredients, fire up your crockpot, and let the magic happen. Remember, in the world of cooking, spice brings life, and every bite should tell a story. Happy cooking, amigos!

Simple Mac & Cheese Crockpot Magic Recipe for Busy Days

Prep Time 10 minutes
Cook Time 2 hours
Total Time 2 hours 10 minutes
Servings 4 servings
Calories 650
A quick and easy crockpot mac & cheese perfect for busy days. Creamy, cheesy, and hassle-free!

Ingredients

Pasta

  • 2 cups elbow macaroni
  • 4 cups water

Cheese

  • 2 cups shredded cheddar cheese
  • 1 cup shredded mozzarella cheese
  • 1 cup milk
  • 1/2 cup cream cheese
  • 1 teaspoon garlic powder
  • 1 teaspoon onion powder
  • to taste salt and pepper

Instructions 

  • Combine macaroni and water in the crockpot.
  • Add garlic powder, onion powder, salt, and pepper. Stir in milk and cream cheese.
  • Cover and cook on high for 2 hours, stirring occasionally.
  • Once cooked, add cheddar and mozzarella cheese. Stir until melted and creamy.
  • Serve warm and enjoy!

Notes

For extra flavor, add a pinch of paprika or hot sauce.
Calories: 650kcal
Cost: $10
Course: Main Course
Cuisine: American
Keyword: Mac and Cheese

Nutrition

Calories: 650kcal | Carbohydrates: 80g | Protein: 30g | Fat: 25g | Sodium: 900mg

Loved this recipe? Save it to your favorite Pinterest board so you can easily find it later! It’s the perfect way to keep all your sweet ideas in one place. ✨

A detailed view of a bowl of Crockpot Mac & Cheese, emphasizing the gooey cheese and macaroni.

Unleashing the Magic of Vanilla & Speculoos Crêpe Cake

Welcome to a culinary adventure that will awaken your senses and ignite your creativity! This Vanilla & Speculoos Crêpe Cake is not just a dessert; it’s a celebration of flavors that dance together harmoniously. With each layer whispering sweet secrets of vanilla and the warm, spicy embrace of speculoos, this cake is destined to become your new favorite indulgence. Whether you’re hosting a gathering or simply treating yourself, this cake will transform any moment into a memorable occasion. Let’s dive into the delightful world of crêpes and cookie butter!

Why You’ll Love This Recipe

  • Layered Delight: This cake boasts an impressive stack of delicate crêpes, making it a stunning centerpiece for any table.
  • Flavor Explosion: The combination of creamy speculoos spread and light vanilla whipped cream creates a flavor sensation that is both comforting and exciting.
  • No Baking Required: Forget the oven! This recipe is all about cooking crêpes on the stovetop, making it accessible and fun for cooks of all levels.
  • Customizable Indulgence: You can easily adapt this recipe to include your favorite flavors or toppings, making it versatile for any taste preference.
  • Make-Ahead Magic: Prepare it in advance and let it chill in the fridge, allowing the flavors to meld beautifully. This cake is perfect for busy schedules!

Ingredient Breakdown

Eye-level view of a crêpe cake showcasing vanilla cream and speculoos layers.

Let’s talk about the star players in this recipe. Each ingredient plays a crucial role in building the flavors and textures that make this cake unforgettable.

  • All-purpose flour (1 cup): The foundation of our crêpes, providing structure without weighing them down. You can substitute with gluten-free flour if needed!
  • Large eggs (2): These bind the batter together while adding richness. For a vegan option, use flax eggs (2 tablespoons ground flaxseed mixed with 6 tablespoons water).
  • Milk (2 cups): This keeps the batter light and ensures the crêpes are tender. Any type of milk will work, including almond or oat milk for dairy-free.
  • Melted butter (2 tablespoons): Adds flavor and richness; coconut oil can be a great substitute for a dairy-free version.
  • Vanilla extract (1 teaspoon): Essential for that warm, aromatic flavor. Use pure vanilla extract for the best results.
  • Salt (1/4 teaspoon): Just a pinch enhances the overall flavor of the cake.
  • Whipped cream (1 cup): Light and fluffy, it balances the richness of the speculoos. You can use coconut whipped cream for a dairy-free alternative.
  • Speculoos cookie spread (1/2 cup): The star of the show! This creamy, spiced cookie butter adds depth and sweetness.
  • Crushed speculoos cookies (for garnish): These add a crunchy texture that elevates the presentation.

How to Make Vanilla & Speculoos Crêpe Cake

Ready to create your masterpiece? Follow these simple steps to craft your own Vanilla & Speculoos Crêpe Cake.

Step 1: Prepare the Crêpe Batter

In a mixing bowl, whisk together the flour, eggs, milk, melted butter, vanilla extract, and salt until smooth. Ensure there are no lumps for the best texture.

Step 2: Cook the Crêpes

Heat a non-stick skillet over medium heat and lightly grease it. Pour a small amount of batter into the skillet. Tilt the skillet to spread the batter evenly. Cook for about 1-2 minutes until the edges begin to lift, then flip and cook for another minute. Repeat until all batter is used, stacking the crêpes on a plate.

Step 3: Make the Speculoos Cream Filling

In a separate bowl, mix the whipped cream and speculoos cookie spread until well combined. This will be your luscious filling!

Step 4: Assemble the Cake

Place one crêpe on a serving platter, spread a layer of the speculoos cream on top, and add another crêpe. Repeat the process until all crêpes are stacked. Top with additional whipped cream and crushed speculoos cookies for garnish.

Step 5: Chill Before Serving

Refrigerate for at least 1 hour before serving to allow the cake to set. This step is crucial as it helps the flavors meld together beautifully.

Pro Tips for Success

  • Thin Layers: For best results, make your crêpes as thin as possible to achieve that delicate texture.
  • Chill the Batter: Letting the batter chill for about 30 minutes improves the texture of the crêpes.
  • Keep the Heat Moderate: Cooking at too high a temperature can burn the crêpes. Maintain a steady medium heat for even cooking.
  • Use a Non-stick Skillet: This prevents sticking and helps you achieve those perfect, golden-brown crêpes.
  • Experiment with Flavors: Feel free to add different spices to the batter, such as cinnamon or nutmeg, for an extra flavor kick.
  • Presentation Matters: Take your time to stack and garnish thoughtfully; presentation makes a big difference!
  • Make it Your Own: Add fresh fruit, chocolate drizzle, or a sprinkle of sea salt to elevate the flavor even more.
  • Use Quality Ingredients: The better the ingredients, the better the outcome. Opt for high-quality vanilla and fresh eggs whenever possible.

Common Mistakes and Troubleshooting

Even the best chefs make mistakes! Here are some common pitfalls and how to avoid them:

  • Crêpes Sticking to the Pan: Ensure your skillet is well-greased and heated properly before adding the batter.
  • Lumpy Batter: Whisk thoroughly to avoid lumps. If needed, use a blender to ensure a smooth consistency.
  • Crêpes Too Thick: Use a ladle to pour batter, and tilt the skillet to spread it evenly. Aim for a thin layer.
  • Filling Too Sweet or Too Rich: Balance is key! Taste as you go and adjust the speculoos and whipped cream to your liking.

Delicious Variations

Don’t hesitate to switch things up! Here are some fun variations to try:

  • Chocolate Delight: Add cocoa powder to your crêpe batter for a chocolatey twist.
  • Fruity Layer: Incorporate a layer of fresh berries or caramelized bananas between the crêpes for an extra fruity flavor.
  • Nutty Goodness: Mix in some chopped nuts or a drizzle of nut butter for added texture and flavor.
  • Spiced Up: Add a touch of chai spice or pumpkin spice to your whipped cream for an autumn-inspired cake.

Storage and Make-Ahead Instructions

Your Vanilla & Speculoos Crêpe Cake can be made ahead of time. Here’s how to store it:

  • Refrigeration: Keep the cake in the fridge for up to 3 days. Cover it with plastic wrap to preserve freshness.
  • Freezing: If you want to make it further in advance, you can freeze the assembled cake for up to 2 months. Just ensure it’s well wrapped to prevent freezer burn. Thaw in the fridge before serving.

Frequently Asked Questions

  • Can I make this cake gluten-free? Yes, simply swap all-purpose flour for a gluten-free alternative!
  • How do I prevent my crêpes from being rubbery? Make sure not to overmix the batter and avoid cooking them too long.
  • Can I use other flavors of cookie butter? Absolutely! Feel free to experiment with different flavors like gingerbread or chocolate.
  • What if I don’t have speculoos spread? You can substitute with any creamy nut butter or chocolate spread.
  • Can I add fruit to the filling? Yes! Fresh fruits like strawberries or bananas can be delicious additions.
  • Is this cake suitable for a birthday party? Definitely! Its stunning layers and flavors make it perfect for celebrations.
  • How do I garnish the cake? Top with whipped cream and crushed cookies, or even fresh berries for a pop of color!
  • Can I make this cake vegan? Yes, by using plant-based milk, flax eggs, and coconut whipped cream.

Nutrition Tips and Dietary Adaptations

Being mindful of nutrition doesn’t mean sacrificing flavor. Here are some tips:

  • Reduce Sugar: You can cut back on the sugar in the whipped cream or speculoos spread to make it a bit healthier.
  • Use Low-Fat Alternatives: Opt for low-fat milk and reduced-fat whipped cream if you’re watching your fat intake.
  • Add Fiber: Consider adding ground flaxseed or chia seeds to the crêpe batter for an additional health boost.

Equipment Recommendations

To make this recipe a success, consider these kitchen tools:

  • Non-stick skillet: Essential for cooking crêpes without sticking.
  • Whisk: A good whisk helps achieve a smooth batter.
  • Spatula: A flexible spatula is great for flipping crêpes.
  • Mixing bowls: Use separate bowls for the batter and filling to keep things organized.

Serving Suggestions

Now that your Vanilla & Speculoos Crêpe Cake is ready, here are some delightful ways to serve it:

  • With a Drizzle: A warm chocolate or caramel sauce drizzled over the top adds elegance.
  • Fresh Fruits: Serve with seasonal fruits like berries or citrus for a refreshing contrast.
  • Coffee Pairing: A cup of freshly brewed coffee or espresso complements the flavors beautifully.
  • Ice Cream Side: A scoop of vanilla or cinnamon ice cream takes this dessert to the next level.

Embrace the adventure of cooking with this Vanilla & Speculoos Crêpe Cake, and let its layers of flavor transport you to a world of indulgence. Your kitchen is a canvas, and this cake is a masterpiece just waiting to be created. Enjoy every bite and remember: the thrill of cooking is in the journey, so keep experimenting and adding your own flair. Happy cooking!

Vanilla & Speculoos Crêpe Cake

Prep Time 20 minutes
Cook Time 20 minutes
Total Time 40 minutes
Servings 8 slices
Calories 350
A delicious layered dessert combining delicate crêpes with vanilla and speculoos flavors, topped with whipped cream and crushed cookies.

Ingredients

Batter

  • 1 cup all-purpose flour
  • 2 large eggs
  • 2 cups milk
  • 2 tablespoons melted butter
  • 1 teaspoon vanilla extract
  • 1/4 teaspoon salt

Cream Layer

  • 1 cup whipped cream
  • 1/2 cup speculoos cookie spread

Garnish

  • crushed for garnish speculoos cookies

Instructions 

  • Whisk flour, eggs, milk, melted butter, vanilla, and salt until smooth.
  • Cook thin crêpes in a greased skillet, stacking as they cook.
  • Mix whipped cream and speculoos spread until combined.
  • Layer crêpes with spread, then chill for 1 hour before serving.
  • Top with whipped cream and crushed cookies, then serve.

Notes

Chilling the cake helps it set for cleaner slices.
Calories: 350kcal
Cost: $15
Course: Dessert
Cuisine: European
Keyword: crêpe, speculoos, vanilla

Nutrition

Calories: 350kcal | Carbohydrates: 45g | Protein: 7g | Fat: 18g | Sodium: 150mg

Loved this recipe? Save it to your favorite Pinterest board so you can easily find it later! It’s the perfect way to keep all your sweet ideas in one place. ✨

Decadent Vanilla & Speculoos Crêpe Cake with crushed cookie garnish.

Unlock Your Culinary Adventure with Bold Hosting Services

Welcome to a culinary journey where we blend the art of cooking with the science of digital hosting. Just like a master chef carefully selects spices to create a symphony of flavors, choosing the right hosting plan can elevate your online presence to new heights. In this comprehensive guide, we’ll explore the ins and outs of managed hosting services, specifically tailored to meet the unique needs of your website. Prepare to discover how to unleash your hosting potential and transform your website with bold performance and fiery support!

Why You’ll Love This Hosting Recipe

This is not just any hosting guide; it’s your roadmap to a seamless, high-performing website. Here’s why you’ll love diving into this recipe:

  • Robust Performance: Experience lightning-fast load times that keep your visitors engaged and coming back for more.
  • 24/7 Expert Support: Get assistance from our passionate team of hosting aficionados anytime you need it.
  • Scalable Solutions: Whether you’re running a personal blog or a booming e-commerce site, our plans grow with you.
  • Enhanced Security Measures: Feel confident with top-tier security protocols that keep your data safe from prying eyes.
  • User-Friendly Management Tools: Manage your hosting account effortlessly with intuitive dashboards designed for all skill levels.

Breaking Down the Ingredients: Hosting Essentials

Delicious food composition highlighting textures and colors, softly lit from the side.

Like any great dish, the ingredients matter. Here’s what you need to know about the components of our hosting services:

  • Managed Hosting: Enjoy a hassle-free experience with automatic updates, backups, and maintenance handled by experts.
  • Enterprise Hosting for WordPress: Perfect for high-traffic sites looking for dedicated resources and unparalleled performance.
  • Cloud VPS and Dedicated Servers: Ideal for those who need flexible resources tailored to specific tasks.
  • Shared Hosting: A cost-effective solution for beginners or smaller websites just getting started.
  • Performance Services: Enhance speed and reliability with CDN integration and caching solutions.

Pro Tips for Choosing Your Hosting Plan

Choosing a hosting plan can feel overwhelming, but with the right tips, you can make an informed decision:

  • Understand Your Needs: Assess the type of website you’re running to select a plan that matches your goals.
  • Read Reviews: Check customer testimonials to gauge the reliability and performance of different hosting services.
  • Inquire About Support: Ensure that the hosting provider offers 24/7 customer support for any issues that may arise.
  • Evaluate Scalability: Choose a plan that can grow with your website to avoid future headaches.
  • Look for Money-Back Guarantees: This gives you peace of mind and the freedom to switch if the service doesn’t meet your expectations.

Avoiding Common Mistakes in Web Hosting

Even seasoned chefs can make mistakes in the kitchen; here are some common missteps to avoid when selecting your hosting:

  • Overlooking Hidden Fees: Always read the fine print to understand any additional costs associated with your plan.
  • Ignoring Uptime Stats: Choose a provider that guarantees high uptime to keep your site accessible.
  • Neglecting Security Features: Don’t compromise on security; ensure your hosting plan includes SSL certificates and firewalls.
  • Choosing Based Solely on Price: The cheapest option may not provide the best value or service.
  • Failing to Plan for Growth: Consider how your website may evolve over time to select a plan that will accommodate future needs.

Delicious Variations: Customizing Your Hosting Experience

Your hosting plan doesn’t have to be one-size-fits-all. Here are some tasty variations you can explore:

  • Managed Hosting for E-commerce: Tailored for online stores, this plan focuses on speed and security.
  • WordPress Hosting with Built-in SEO Tools: Ideal for bloggers looking to enhance visibility and attract more readers.
  • Cloud Solutions for Developers: Provides flexibility and control for those building and testing applications.
  • Performance Packages for High-Traffic Sites: Boosts speed and reliability during peak times.

Storage and Make-Ahead Instructions

Just as a great dish can be prepped ahead of time, you can also prepare your hosting strategy:

  • Backup Regularly: Schedule automatic backups to avoid losing your precious data.
  • Utilize Cloud Storage: This allows you to expand your resources effortlessly as your site grows.
  • Optimize for Speed: Clean up unnecessary files and optimize images to improve performance.
  • Monitor Analytics: Regularly check your site’s performance metrics to ensure it’s running smoothly.

Frequently Asked Questions About Hosting Services

Got questions? We’ve got answers! Here are some frequently asked questions that can guide your hosting journey:

  • What is managed hosting? Managed hosting is a service where the hosting provider takes care of server management, including updates and security.
  • How does cloud hosting work? Cloud hosting utilizes a network of servers to balance loads and provide resources dynamically.
  • Can I upgrade my hosting plan later? Yes, most hosting providers offer scalable plans that allow you to upgrade as needed.
  • What is the importance of uptime? Uptime refers to the percentage of time your site is accessible; higher uptime means better reliability.
  • What security measures should I expect? Look for SSL certificates, DDoS protection, and regular backups as essential security features.
  • Is there a trial period for hosting? Many providers offer a money-back guarantee or trial period to test their services.
  • Can I host multiple websites on one plan? Some plans allow hosting multiple sites; check with your provider for specifics.
  • How can I optimize my website for speed? Use caching, optimize images, and choose a hosting provider with fast servers.

Recommended Equipment for Your Hosting Setup

To ensure your hosting experience is as smooth as a perfectly blended sauce, consider the following:

  • High-Speed Internet Connection: Essential for fast upload speeds and managing your website efficiently.
  • Reliable Computer: A sturdy and updated computer will help you manage your site without hiccups.
  • Quality Hosting Control Panel: Look for user-friendly control panels that streamline management tasks.
  • Backup Solutions: Invest in external hard drives or cloud storage for additional security of your data.

Serving Suggestions: Making the Most of Your Hosting

Once you have your hosting plan set up, it’s time to serve your website to the world:

  • Engage with Your Audience: Use social media, newsletters, and blog comments to connect with visitors.
  • Regularly Update Your Content: Fresh, engaging content keeps your audience coming back for more.
  • Utilize SEO Strategies: Optimize your site for search engines to increase visibility and attract new visitors.
  • Monitor Performance: Keep an eye on your site’s analytics to ensure everything is running smoothly.

Conclusion: Your Hosting Adventure Awaits!

Just like the thrill of experimenting with spices in the kitchen, selecting the right hosting service can be a delicious adventure. By understanding your unique needs, avoiding common pitfalls, and embracing the variety of options available, you can find a hosting plan that empowers your online presence. So, grab your skillet—or in this case, your computer—and let’s turn up the heat on your digital journey with a hosting plan that truly sets your website ablaze!

BigScoots Hosting Services

Prep Time 10 minutes
Total Time 10 minutes
Servings 1 service
Experience reliable and scalable hosting solutions tailored for your business needs, including managed WordPress hosting and enterprise options.

Ingredients

Hosting Services

  • 1 service managed hosting
  • 1 service managed hosting for wordpress
  • 1 service enterprise hosting for wordpress
  • 1 service managed hosting for mediavine
  • 1 unit managed servers
  • 1 unit cloud vps
  • 1 unit dedicated servers
  • 1 unit web hosting
  • 1 unit shared hosting
  • 1 service performance services

Instructions 

  • Contact us via live chat, phone, or support portal to get started.
  • Choose the hosting plan that fits your needs.
  • Set up your account and configure your services.
  • Access support anytime through login or billing portal.
  • Enjoy reliable hosting with 24/7 support.

Notes

For best results, consult with our support team to customize your hosting package.
Cost: $15
Course: Hosting
Cuisine: Business
Keyword: Managed Hosting

Loved this recipe? Save it to your favorite Pinterest board so you can easily find it later! It’s the perfect way to keep all your sweet ideas in one place. ✨

Eye-level shot of an appetizing meal, showcasing intricate details and cozy ambiance.

Transform Your Dinner Routine with This Flavor-Packed Chicken Zucchini Bake

Welcome to a culinary adventure that will elevate your dinner game! This High Protein Chicken Zucchini Bake is not just a meal; it’s a celebration of flavors and textures that brings together the best of both worlds — wholesome nutrition and mouthwatering taste. Bursting with the rich flavors of tender chicken, fresh zucchini, and a medley of spices, this dish is sure to ignite your taste buds. Whether you’re cooking for a busy weeknight or prepping for a cozy gathering, this recipe is your ticket to success in the kitchen!

Let’s dive into the details of this easy chicken zucchini bake that’s bound to become a staple in your home. With its vibrant colors and delightful crunch, your family won’t just eat this dish; they’ll savor every bite.

Why You’ll Love This Recipe

  • High in Protein: Packed with 2 cups of shredded chicken, this bake is a fantastic source of lean protein, perfect for keeping you full and satisfied.
  • Quick and Easy: With just 30 minutes in the oven, this recipe is a breeze, making it ideal for those hectic weeknights when time is of the essence.
  • Flavor Explosion: The combination of Italian seasoning, garlic, and cheese creates a savory flavor profile that dances on your palate.
  • Versatile Ingredients: This recipe allows for substitutions and variations, making it easy to cater to your personal taste or dietary needs.
  • One-Dish Wonder: Say goodbye to messy kitchens! Everything cooks together in one baking dish, minimizing cleanup time.

Ingredients for Easy Chicken Zucchini Bake

An appetizing High Protein Chicken Zucchini Bake, highlighting the layers of chicken, zucchini, and tomatoes against a softly blurred background.

Gather these ingredients for a deliciously satisfying meal that won’t break the bank:

  • 2 cups cooked, shredded chicken: Use rotisserie chicken for convenience or cook your own to control flavor.
  • 2 medium zucchinis, sliced: Look for firm zucchinis with glossy skin for the best texture.
  • 1 cup cherry tomatoes, halved: These sweet bursts of flavor add freshness and color.
  • 1 cup shredded mozzarella cheese: Provides that gooey, melty goodness that binds everything together.
  • 1/2 cup Greek yogurt: Adds creaminess while boosting protein content; feel free to substitute with sour cream if needed.
  • 1/4 cup grated parmesan cheese: A sprinkle of this brings a nutty flavor to the dish.
  • 2 cloves garlic, minced: The aromatic base that complements the chicken and veggies.
  • 1 tablespoon olive oil: A drizzle to enhance flavor and promote browning.
  • 1 teaspoon Italian seasoning: A blend of herbs that elevates the overall taste.
  • Salt and pepper to taste: Essential for bringing all the flavors together.
  • Fresh basil for garnish (optional): Adds a pop of color and freshness when serving.

Feel free to mix and match with your favorite veggies or spices to make this dish truly your own!

Step-by-Step Instructions

Let’s get cooking! Follow these simple steps to whip up this delightful chicken zucchini bake:

  1. Preheat your oven to 375°F (190°C).
  2. In a large mixing bowl, combine the shredded chicken, sliced zucchinis, cherry tomatoes, mozzarella cheese, Greek yogurt, Parmesan cheese, minced garlic, olive oil, Italian seasoning, salt, and pepper. Mix well until everything is evenly coated.
  3. Transfer the mixture into a greased baking dish and spread it out evenly.
  4. Bake in the preheated oven for 25-30 minutes, or until the zucchini is tender and the cheese is bubbly and golden.
  5. Remove from the oven and let it cool for a few minutes before serving.
  6. Garnish with fresh basil if desired, and serve warm for a comforting meal.

Pro Tips for the Perfect Chicken Zucchini Bake

  • Prep Ahead: Chop your veggies and shred the chicken the night before to save time.
  • Cheese Choices: Experiment with different cheeses such as feta or cheddar for unique flavors.
  • Don’t Overcook: To prevent soggy zucchini, keep an eye on your bake; it should be tender but not mushy.
  • Spice It Up: Add a dash of red pepper flakes or smoked paprika for an extra kick!
  • Use a Large Baking Dish: This ensures even cooking and prevents overflow.
  • Mix and Match Veggies: Try adding bell peppers, spinach, or even mushrooms for a different twist.
  • Tidy Up: Use parchment paper in your baking dish for easy cleanup.
  • Check for Doneness: The cheese should be melted and golden brown, and the zucchini should be tender.
  • Let It Rest: Allow the dish to cool for a few minutes before serving to enhance flavors.
  • Serve with Love: Emphasize presentation by adding a sprinkle of fresh herbs on top for an inviting look.

Common Mistakes and Troubleshooting

Even the best chefs make mistakes! Here are some common pitfalls and how to avoid them:

  • Soggy Zucchini: Make sure to slice the zucchini evenly and don’t overcrowd the dish.
  • Dry Chicken: Use shredded rotisserie chicken for moisture and flavor.
  • Cheese Not Melting: Ensure your oven is fully preheated before baking to achieve that gooey texture.
  • Flavorless Dish: Don’t skimp on seasoning! Taste and adjust as necessary.

Variations to Try

Get creative! Here are some delicious variations to make this recipe your own:

  • Spicy Chicken Zucchini Bake: Add jalapeños or a sprinkle of cayenne pepper for a fiery twist.
  • Southwestern Style: Toss in black beans, corn, and taco seasoning for a Tex-Mex flair.
  • Vegan Version: Substitute chicken with chickpeas and use vegan cheese alternatives.
  • Italian Herb Bake: Incorporate sun-dried tomatoes and fresh basil for a fresh Italian vibe.

Storage and Make-Ahead Instructions

This chicken zucchini bake is perfect for meal prep! Here’s how to store it:

  • Refrigerate: Store leftovers in an airtight container for up to 3 days.
  • Freeze: For longer storage, freeze portions in freezer-safe containers for up to 2 months.
  • Reheat: Warm it up in the oven at 350°F (175°C) until heated through or in the microwave on medium power.

Frequently Asked Questions (FAQs)

  • Can I use frozen zucchini? Yes, but fresh zucchini will yield a better texture.
  • How can I make this dish gluten-free? Ensure that your seasonings and cheese are gluten-free, and you’re good to go!
  • Can I add more veggies? Absolutely! Feel free to include any seasonal vegetables you love.
  • Is this dish kid-friendly? Yes! The cheesy goodness is sure to please even picky eaters.
  • What sides go well with this bake? A fresh garden salad or crusty bread pairs beautifully!
  • Can I use other proteins? Yes, shredded turkey or even tofu works great!
  • How do I know when it’s done? Look for bubbly cheese and tender zucchini; it should be a bit golden on top.
  • Can I prepare this in advance? Definitely! Assemble the dish ahead of time and bake when ready.

Nutritional Tips and Dietary Adaptations

This recipe is not only delicious but can also be tailored to fit various dietary needs:

  • Low-Carb Option: Reduce the number of zucchinis and add more protein.
  • Dairy-Free: Use dairy-free cheese and yogurt for a creamy texture.
  • Low-Fat: Opt for low-fat cheese and Greek yogurt to cut calories.
  • High Fiber: Serve with a side of quinoa or brown rice for added fiber.

Equipment Recommendations

To whip up this chicken zucchini bake, you’ll need:

  • Large Mixing Bowl: For combining all your ingredients easily.
  • Baking Dish: A 9×13 inch dish works best for even cooking.
  • Cutting Board and Knife: Essential for prepping your veggies and chicken.
  • Spoon or Spatula: For mixing and spreading the ingredients evenly.

Serving Suggestions

When it comes to serving your chicken zucchini bake, consider these delightful options:

  • Fresh Garden Salad: A crisp salad with vinaigrette complements the rich flavors of the bake.
  • Garlic Bread: Enjoy a slice of warm, buttery garlic bread to soak up the delicious cheesy goodness.
  • Steamed Veggies: Pair with a medley of steamed veggies for a burst of color and nutrition.
  • Rice or Quinoa: Serve over a bed of fluffy rice or quinoa for a heartier meal.

Embrace the flavors, ignite your creativity, and transform your dinner routine with this High Protein Chicken Zucchini Bake. Cooking should be an adventure, and this dish is your passport to culinary exploration. Now, grab your apron, preheat that oven, and let’s make some magic happen in your kitchen!

High Protein Chicken Zucchini Bake Recipe for Easy Dinners

Prep Time 10 minutes
Cook Time 30 minutes
Total Time 40 minutes
Servings 4 servings
Calories 350
A quick and nutritious baked dish combining shredded chicken, zucchini, and cheese for a satisfying dinner.

Ingredients

Protein

  • 2 cups cooked, shredded chicken
  • 2 medium zucchinis, sliced
  • 1 cup cherry tomatoes, halved
  • 1 cup shredded mozzarella cheese
  • 0.5 cup greek yogurt
  • 0.25 cup grated parmesan cheese
  • 2 cloves garlic, minced
  • 1 tablespoon olive oil
  • 1 teaspoon italian seasoning
  • to taste salt and pepper

Garnish

  • optional fresh basil for garnish (optional)

Instructions 

  • Preheat oven to 375°F (190°C).
  • Mix chicken, zucchini, tomatoes, cheeses, yogurt, garlic, oil, seasoning, salt, and pepper in a bowl.
  • Transfer mixture to a greased baking dish and spread evenly.
  • Bake for 25-30 minutes until zucchini is tender and cheese is bubbly.
  • Let cool slightly, garnish with basil if desired, and serve warm.

Notes

This dish is high in protein and easy to prepare for a quick dinner.
Calories: 350kcal
Cost: $15
Course: Dinner
Cuisine: American
Keyword: chicken, High Protein, zucchini

Nutrition

Calories: 350kcal | Carbohydrates: 20g | Protein: 45g | Fat: 12g | Sodium: 600mg

Loved this recipe? Save it to your favorite Pinterest board so you can easily find it later! It’s the perfect way to keep all your sweet ideas in one place. ✨

Eye-level shot of a baked dish with shredded chicken, zucchini slices, and cheese, illuminated by warm natural light.

Unlocking the Magic of Roasted Sweet Potatoes

Welcome to a culinary adventure where the humble sweet potato transforms into a dish bursting with flavor and warmth! In this article, we’re diving deep into the art of roasting sweet potatoes, exploring how this simple ingredient can elevate your meals. Whether you’re a seasoned cook or just starting your kitchen journey, this guide will arm you with everything you need to know about crafting the perfect roasted sweet potatoes.

Why You’ll Love This Recipe

This isn’t just any roasted sweet potato recipe; it’s a celebration of flavor! Here are five reasons why you’ll adore these roasted sweet potatoes:

  • Versatile Side Dish: These roasted sweet potatoes complement a variety of main courses, from grilled meats to hearty stews, making them a perfect addition to any meal.
  • Easy Meal Prep: Roasting a batch of sweet potatoes ahead of time allows for quick and nutritious meals throughout the week, making dinner a breeze.
  • Rich in Nutrients: Packed with vitamins A and C, fiber, and antioxidants, sweet potatoes are a health-conscious choice that doesn’t compromise on flavor.
  • Customizable Flavors: With just a few spices and herbs, you can tailor the flavor profile to suit your taste. Sweet, savory, or a bit spicy, the choice is yours!
  • Simple and Quick: This recipe requires minimal ingredients and effort, allowing you to enjoy delicious roasted sweet potatoes with just 30 minutes of prep and cooking time.

Ingredients Breakdown

Savory roasted sweet potatoes garnished with herbs, presented on a rustic surface.

Let’s talk about what you’ll need to create these irresistible roasted sweet potatoes:

  • Sweet Potatoes: 2 large sweet potatoes, peeled and cubed. You can substitute with yams or even butternut squash for a different flavor and texture.
  • Olive Oil: 2 tablespoons of olive oil. Feel free to experiment with avocado oil or coconut oil for a unique twist.
  • Salt: 1 teaspoon of salt enhances the natural sweetness of the potatoes.
  • Black Pepper: 1/2 teaspoon adds a hint of spice; adjust to your preference.
  • Garlic Powder: 1 teaspoon for a savory depth.
  • Paprika: 1 teaspoon adds a smoky flavor; try smoked paprika for an extra kick.
  • Dried Thyme: 1/2 teaspoon brings an aromatic touch.
  • Cumin: 1/2 teaspoon to add warmth and earthiness.

Pro Tips for Perfect Roasted Sweet Potatoes

Ready to roast? Here are some expert insights to ensure your sweet potatoes turn out perfectly every time:

  • Uniform Sizing: Cut sweet potatoes into uniform pieces (about 1-inch cubes) for even cooking.
  • Don’t Overcrowd: Spread the sweet potatoes in a single layer on your baking sheet. Overcrowding will cause steaming instead of roasting!
  • Flipping is Key: Flip the sweet potatoes halfway through roasting to achieve a golden-brown exterior on all sides.
  • Let Them Rest: Allow the sweet potatoes to cool slightly before serving; this enhances their flavor and texture.
  • Experiment with Seasonings: Don’t hesitate to mix up the spices! Try adding cinnamon for a sweet twist or chili powder for heat.
  • Use Parchment Paper: Lining your baking sheet with parchment paper makes for easy cleanup and prevents sticking.
  • Storage Options: Store leftover roasted sweet potatoes in an airtight container in the fridge for up to five days.
  • Reheat for Best Results: Reheat in the oven or air fryer to retain their crispy texture.

Avoiding Common Mistakes

Even the best can stumble in the kitchen! Here are some common pitfalls to avoid when roasting sweet potatoes:

  • Skipping the Oil: Oil is essential for achieving crispy, golden edges. Don’t skimp on it!
  • Ignoring the Oven Temperature: An oven that’s too cool will lead to soggy sweet potatoes. Preheat to 425°F (220°C) for optimal roasting.
  • Not Seasoning Enough: Sweet potatoes can handle bold flavors. Don’t be afraid to season generously!
  • Cooking Time: Keep an eye on your sweet potatoes in the oven. Cooking time can vary based on size and your oven’s calibration.

Delicious Variations to Try

Mix things up with these tasty variations on the classic roasted sweet potato:

  • Spicy Maple Glaze: Drizzle with maple syrup and sprinkle cayenne pepper before roasting for a sweet and spicy treat.
  • Herb-Infused Roasted Sweet Potatoes: Toss with fresh herbs like rosemary or sage for a fragrant and flavorful dish.
  • Sweet Potato Wedges: Cut sweet potatoes into wedges instead of cubes for a crispy, fry-like experience.
  • Sweet Potato Mash: Roast until tender, then mash with butter and a splash of cream for a delicious twist!

Storage and Make-Ahead Instructions

Planning ahead? Here’s how to store and prepare your roasted sweet potatoes:

  • Make-Ahead: You can prep sweet potatoes by peeling and cubing them a day in advance. Store in water in the fridge to prevent browning.
  • Storing Leftovers: Place cooled sweet potatoes in a sealed container in the fridge for up to five days.
  • Freezing: For longer storage, freeze roasted sweet potatoes in an airtight container for up to three months. Reheat directly from frozen in the oven.

Frequently Asked Questions

Got questions? Here are some common queries about roasting sweet potatoes:

  • Can I roast sweet potatoes with skin on? Yes, the skin is edible and nutritious! Just wash them thoroughly before roasting.
  • What’s the best way to cut sweet potatoes? Cut them into uniform cubes for even cooking. Aim for about 1-inch pieces.
  • Can I use other oils besides olive oil? Absolutely! Avocado oil and coconut oil are great alternatives.
  • How do I know when sweet potatoes are done? They should be fork-tender and have a golden-brown exterior.
  • What can I serve with roasted sweet potatoes? They pair well with grilled chicken, fish, or even as a base for a hearty salad.
  • Can I add cheese to roasted sweet potatoes? Yes! Sprinkle with feta or goat cheese for a creamy finish after roasting.
  • How do I spice up leftovers? Use them in salads, soups, or even breakfast hash for a tasty twist.
  • Are roasted sweet potatoes gluten-free? Yes, they are naturally gluten-free and perfect for gluten-sensitive diets.

Nutritional Insights and Dietary Adaptations

Sweet potatoes are not only flavorful but also packed with nutrients. They contain:

  • High Fiber Content: Aids in digestion and helps maintain a healthy gut.
  • Rich in Vitamins: Especially vitamin A, which is crucial for eye health and immune function.
  • Antioxidants: Help fight free radicals in the body, promoting overall health.

For those following specific diets, sweet potatoes can fit into various eating plans:

  • Paleo: Naturally compliant, just avoid added sugars.
  • Vegan: Ideal for a plant-based diet, loaded with nutrients.
  • Low-Carb: Use in moderation for a balanced approach.

Equipment Recommendations

For the best roasting experience, consider using:

  • Heavy-Duty Baking Sheet: Ensures even cooking and browning.
  • Parchment Paper: For easy cleanup and to prevent sticking.
  • Sharp Knife and Cutting Board: Essential for prepping your sweet potatoes efficiently.

Serving Suggestions

Ready to enjoy your roasted sweet potatoes? Here are some serving ideas:

  • As a Side Dish: Serve alongside grilled meats or roasted chicken.
  • In a Salad: Toss with greens, nuts, and goat cheese for a delicious salad.
  • With Dips: Pair with yogurt or hummus for a tasty appetizer.
  • As a Breakfast Option: Add to scrambled eggs or breakfast burritos for a nutritious start to your day.

Conclusion

There you have it! With this comprehensive guide to roasting sweet potatoes, you’re equipped to create a dish that’s not just tasty but also a canvas for your culinary creativity. Embrace the adventure in cooking and let each bite of your roasted sweet potatoes remind you that food is more than just fuel; it’s a celebration of flavor and warmth. So grab your skillet, ignite your passion, and let’s make some kitchen magic happen!

Savory Roasted Sweet Potatoes

Prep Time 10 minutes
Cook Time 30 minutes
Total Time 40 minutes
Servings 4 servings
Calories 150
Enjoy these flavorful roasted sweet potatoes, perfectly seasoned and crispy on the outside, tender inside.

Ingredients

Sweet Potatoes

  • 2 large sweet potatoes
  • 2 tablespoons olive oil
  • 1 teaspoon salt
  • 1/2 teaspoon black pepper
  • 1 teaspoon garlic powder
  • 1 teaspoon paprika
  • 1/2 teaspoon dried thyme
  • 1/2 teaspoon cumin

Instructions 

  • Preheat oven to 425°F (220°C). Peel and cube sweet potatoes.
  • Mix sweet potatoes with olive oil and seasonings.
  • Spread on a baking sheet and roast for 25-30 minutes.
  • Flip halfway through for even browning.
  • Remove from oven and serve warm.

Notes

Cut sweet potatoes into uniform pieces for even cooking.
Calories: 150kcal
Cost: $10
Course: Side Dish
Cuisine: American
Keyword: Sweet Potatoes

Nutrition

Calories: 150kcal | Carbohydrates: 35g | Protein: 2g | Fat: 4g | Sodium: 300mg

Loved this recipe? Save it to your favorite Pinterest board so you can easily find it later! It’s the perfect way to keep all your sweet ideas in one place. ✨

Deliciously caramelized sweet potato pieces, highlighting their rich texture.

Welcome to a flavor-packed journey where heat meets harmony in the kitchen! If you’re looking to spice up your weeknight meals without the carbs, you’ve landed in the right place. This keto stir fry is more than just a dish; it’s a vibrant celebration of colors, textures, and—most importantly—flavors. With just a handful of ingredients, you’ll create a dish that’s not only low-carb, but also bursting with life and boldness. So grab your skillet and let’s dive into a culinary adventure that promises to wake up your taste buds and make dinner something to look forward to!

Why You’ll Love This Recipe

  • Quick and Easy: In under 30 minutes, you can whip up a delicious, satisfying meal that’s perfect for busy weeknights.
  • Low-Carb Delight: Perfect for those on a keto journey, this chicken stir fry keeps your carb count low while still delivering on flavor.
  • Versatile Ingredients: Feel free to mix and match your favorite vegetables or proteins, making this dish your own each time.
  • Health Benefits: Packed with nutrients, this stir fry includes veggies rich in vitamins, minerals, and fiber, promoting a balanced diet.
  • Meal Prep Friendly: Make a big batch and store leftovers for a quick lunch or dinner throughout the week.

Ingredients for Your Keto Stir Fry

Let’s gather our ingredients! Here’s what you’ll need:

  • 1 lb chicken breast: Sliced thin for quick cooking.
  • 2 cups broccoli florets: Rich in fiber, they add crunch and color.
  • 1 cup bell peppers: Use a mix of red, yellow, and green for a colorful presentation.
  • 1 cup zucchini: Adds moisture and absorbs flavor beautifully.
  • 3 tablespoons soy sauce: Or coconut aminos for a soy-free option.
  • 2 tablespoons olive oil: For sautéing and adding healthy fats.
  • 2 cloves garlic: Minced, for that aromatic kick.
  • 1 teaspoon ginger: Minced, to elevate the flavor profile.
  • Salt and pepper: To taste.
  • Sesame seeds: Optional, for garnish and a nutty finish.

How to Make Your Keto Stir Fry

A vibrant and appetizing keto stir fry with chicken and assorted vegetables, highlighted by warm lighting and enticing textures.

Ready to cook? Let’s get sizzling!

  1. Heat the Oil: In a large skillet over medium-high heat, warm the olive oil until it shimmers.
  2. Sauté Aromatics: Add the minced garlic and ginger, stirring for about a minute until fragrant.
  3. Add Chicken: Toss in the sliced chicken breast. Cook until browned and no longer pink, about 5-7 minutes.
  4. Incorporate the Veggies: Stir in the broccoli, bell peppers, and zucchini. Cook for an additional 5 minutes until they’re tender-crisp.
  5. Mix in the Sauce: Pour the soy sauce over the stir fry, mixing well to ensure everything is coated. Cook for another 2 minutes.
  6. Season It Up: Add salt and pepper to taste.
  7. Serve Hot: Garnish with sesame seeds if desired, and enjoy!

Pro Tips for the Best Stir Fry

  • High Heat: Stir frying works best at high temperatures to achieve that perfect char and tenderness.
  • Prep Ahead: Chop veggies and slice meat beforehand to streamline cooking time.
  • Don’t Overcrowd: Cook in batches if necessary to avoid steaming your ingredients.
  • Fresh Ingredients: Use fresh veggies for the best flavor and texture.
  • Experiment: Feel free to add your favorite spices or sauces for an extra kick!
  • Protein Options: Swap chicken for beef, shrimp, or tofu based on your preference.
  • Garnish Wisely: Fresh herbs like cilantro or green onions can add a burst of freshness.
  • Adjust the Sauce: Use low-sodium soy sauce or tamari for a healthier option.

Common Mistakes and Troubleshooting

Even the best chefs have their off days. Here’s how to avoid common stir fry pitfalls:

  • Too Watery: If your stir fry is watery, it may be due to overcrowding the pan. Cook in smaller batches to keep that stir fry nice and crispy.
  • Overcooked Veggies: Keep an eye on your vegetables. They should be tender but still have a bit of crunch.
  • Bland Flavor: If your stir fry lacks flavor, consider adding more soy sauce or a splash of rice vinegar for brightness.
  • Burnt Garlic: Keep an eye on the garlic; it can turn bitter if overcooked. Add it later in the cooking process if needed.

Variations to Spice Things Up

This recipe is a canvas for creativity! Here are four fun variations:

  • Spicy Kick: Add red pepper flakes or a dash of sriracha for some heat.
  • Nutty Delight: Toss in some peanuts or cashews for added crunch and flavor.
  • Asian Fusion: Incorporate bok choy or snap peas for a different texture and taste.
  • Curry Twist: Add a tablespoon of curry paste for a unique flavor profile.

Storage and Make-Ahead Instructions

Want to make this recipe ahead of time? Here’s how to store it:

  • Refrigeration: Store leftovers in an airtight container in the fridge for up to 4 days.
  • Freezing: This stir fry can be frozen for up to 3 months. Just make sure to cool it completely before freezing.
  • Reheating: Reheat in a skillet over medium heat for best results, adding a splash of water or broth to loosen it up.

Frequently Asked Questions

Got questions? I’ve got answers! Here’s the lowdown on your keto stir fry:

  • Can I use frozen vegetables? Yes, but fresh is best for texture and flavor.
  • Is this dish gluten-free? Use coconut aminos or gluten-free soy sauce to keep it gluten-free.
  • Can I add more protein? Absolutely! Tofu, shrimp, or beef would work wonderfully.
  • How do I make it vegan? Swap chicken for tofu and use vegan stir fry sauce.
  • What other sauces can I use? Teriyaki, hoisin, or oyster sauce can add a unique twist.
  • Can I serve this with rice? Yes! Serve over cauliflower rice for a complete meal.
  • How spicy is it? Adjust the spice level by adding or omitting the ginger and garlic.
  • Can I meal prep this? Yes! It’s perfect for meal prep; just store in individual containers.

Nutritional Tips and Dietary Adaptations

This dish is not only low-carb but can also be tailored to fit various dietary needs:

  • Low Sodium: Use low-sodium soy sauce to reduce salt intake.
  • Paleo-Friendly: Substitute soy sauce with coconut aminos and add more veggies.
  • Ketogenic Adaptation: Maintain the low-carb ingredients and add healthy fats like avocado.

Equipment Recommendations

To get the best out of your stir fry, consider having these tools handy:

  • Wok or Large Skillet: Essential for high-heat cooking and even distribution.
  • Sharp Knife: For effortless slicing of your chicken and vegetables.
  • Cutting Board: A sturdy board to protect your countertops and keep you safe.
  • Spatula: A wide spatula for easy stirring and flipping.

Serving Suggestions

Make your keto stir fry shine with these serving ideas:

  • Over Cauliflower Rice: A great low-carb alternative to traditional rice.
  • With a Fresh Salad: A crisp side salad adds freshness and balances the meal.
  • As a Wrap: Serve in lettuce wraps for a fun, hands-on dining experience.
  • With a Side of Dipping Sauce: Pair it with a sweet chili sauce for an extra burst of flavor.

With all this knowledge, you’re now equipped to create a keto stir fry masterpiece that’s bold, flavorful, and utterly satisfying. Remember, cooking is an adventure! Embrace the heat, explore new flavors, and transform even the simplest ingredients into a dish that tells a story. So fire up that skillet, and let’s get cooking!

Keto Stir Fry

Prep Time 10 minutes
Cook Time 15 minutes
Total Time 25 minutes
Servings 4 servings
Calories 350
A quick and flavorful keto-friendly stir fry packed with vegetables and tender chicken, perfect for a low-carb meal.

Ingredients

Protein

  • 1 lb chicken breast, sliced

Vegetables

  • 2 cups broccoli florets
  • 1 cup bell peppers, sliced
  • 1 cup zucchini, sliced

Sauces & Oils

  • 3 tablespoons soy sauce (or coconut aminos)
  • 2 tablespoons olive oil
  • 2 cloves garlic, minced
  • 1 teaspoon ginger, minced
  • to taste salt and pepper
  • optional sesame seeds for garnish

Instructions 

  • Heat olive oil in a skillet over medium-high heat.
  • Sauté garlic and ginger for 1 minute.
  • Add chicken and cook until browned, 5-7 minutes.
  • Stir in vegetables and cook for 5 minutes until tender-crisp.
  • Pour soy sauce, cook 2 more minutes, season with salt and pepper, then serve garnished with sesame seeds.

Notes

Use coconut aminos for a soy-free option.
Calories: 350kcal
Cost: $12
Course: Main Course
Cuisine: Asian
Keyword: chicken, Keto, Stir Fry

Nutrition

Calories: 350kcal | Carbohydrates: 15g | Protein: 40g | Fat: 15g | Sodium: 900mg

Loved this recipe? Save it to your favorite Pinterest board so you can easily find it later! It’s the perfect way to keep all your sweet ideas in one place. ✨

A detailed view of a succulent Keto Stir Fry with bright vegetables and chicken, set against a blurred background.