Author

Avery Collins

Browsing

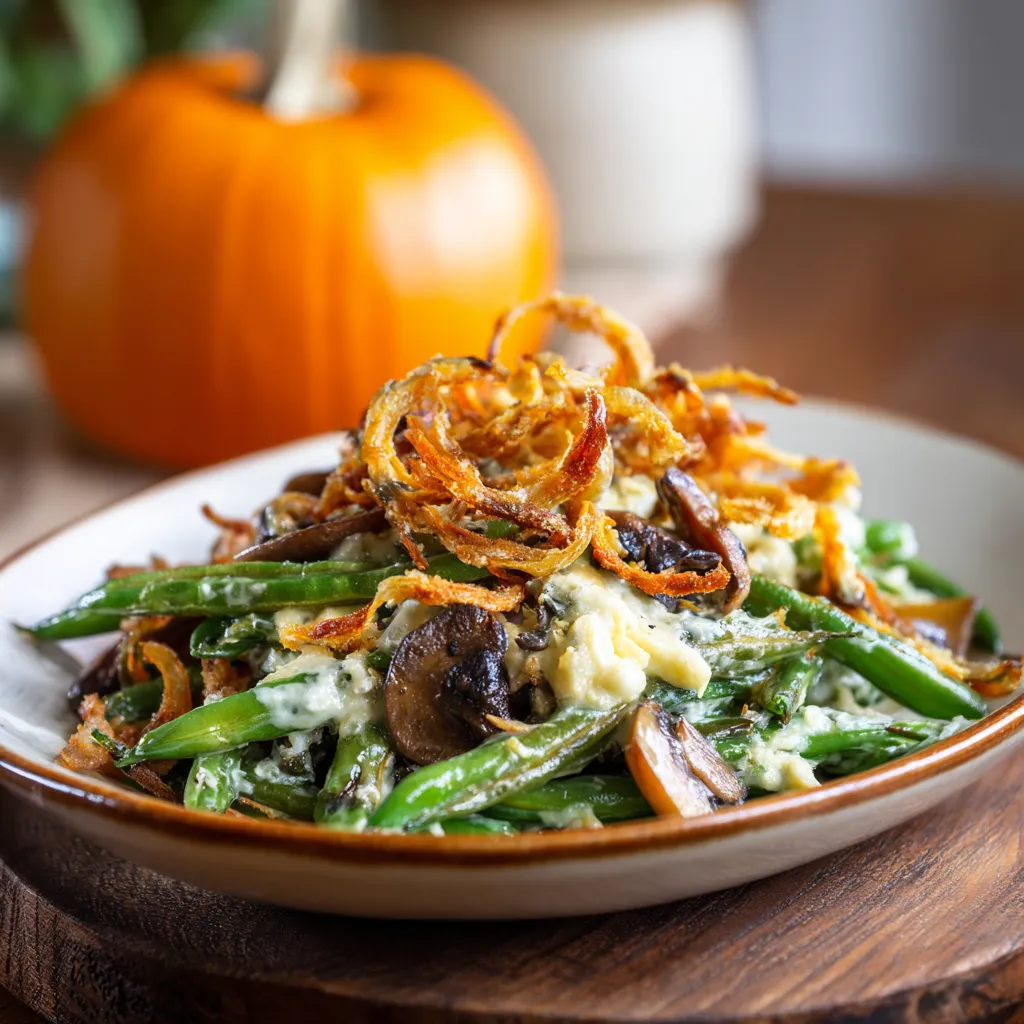
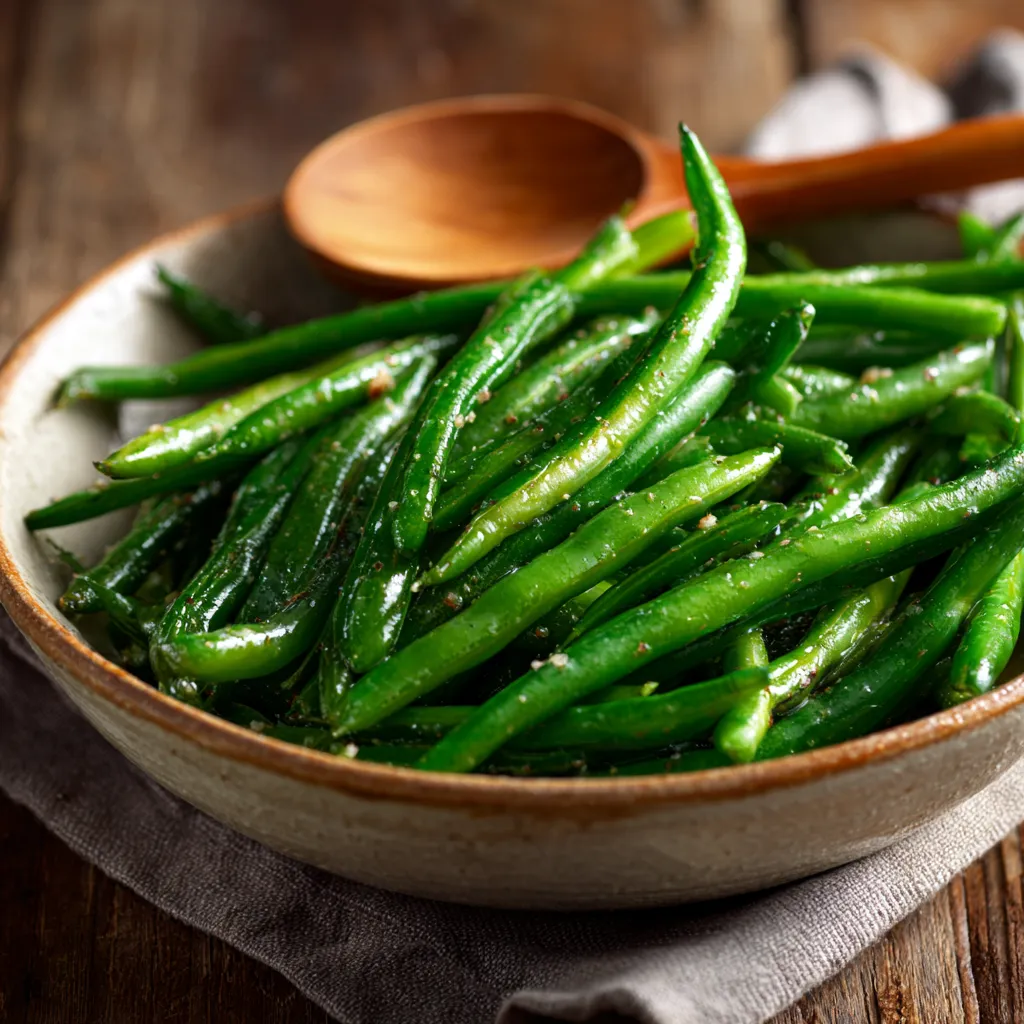
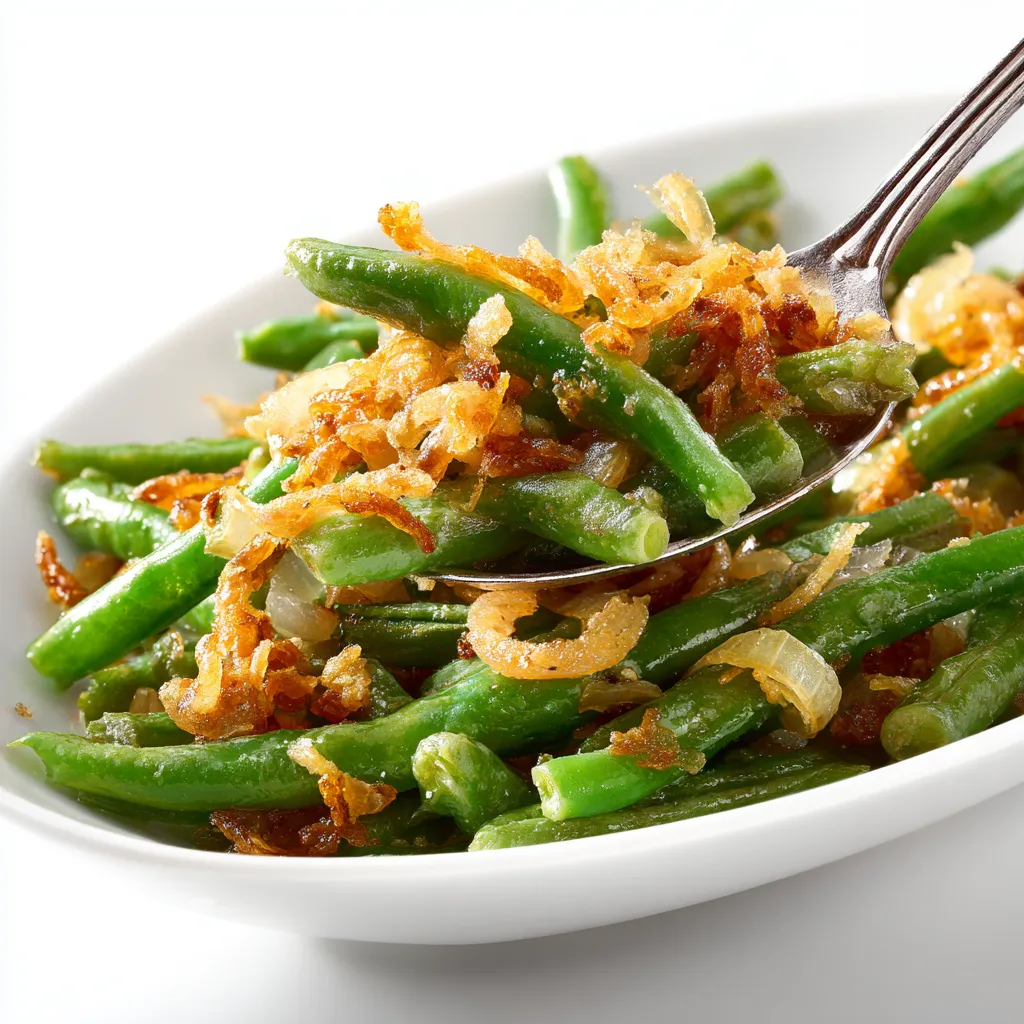
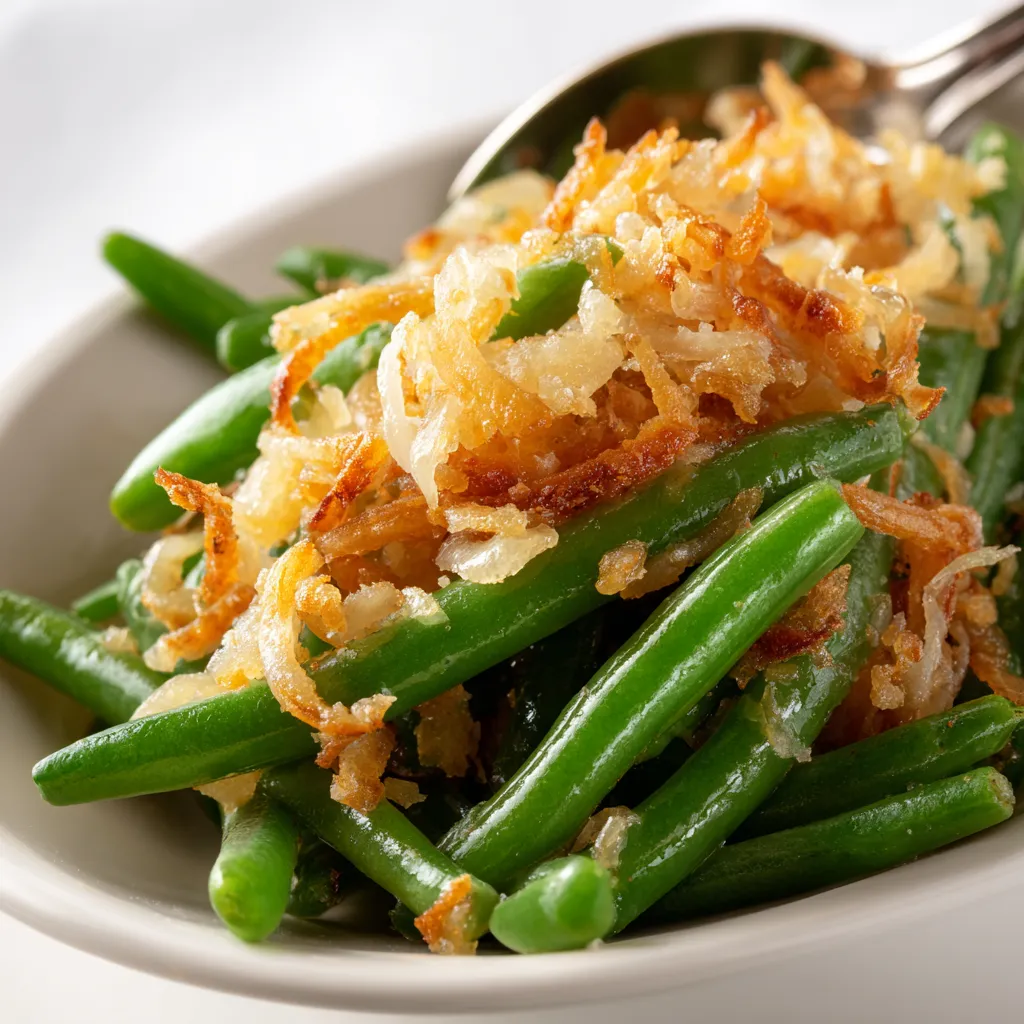
The Ultimate Green Bean Casserole: A Side Dish to Remember

Thanksgiving is more than just a meal; it’s a celebration of flavors, family, and tradition. And what better way to elevate your feast than with a timeless classic: the Green Bean Casserole? This dish isn’t just about mixing ingredients; it’s about creating a symphony of tastes that sparks joy and flavor in every bite. Whether you’re a seasoned chef or a kitchen newbie, this recipe will guide you through every step, ensuring your Green Bean Casserole is the star of the table.

Let’s dive into the delightful world of green beans and explore why this dish is a must-have for your Thanksgiving spread.

Why You’ll Love This Recipe

There’s something magical about a well-prepared Green Bean Casserole. Here’s why this recipe is a keeper:

  • Family-Friendly: It’s approachable for cooks of any skill level, making it perfect for gathering everyone around the kitchen.
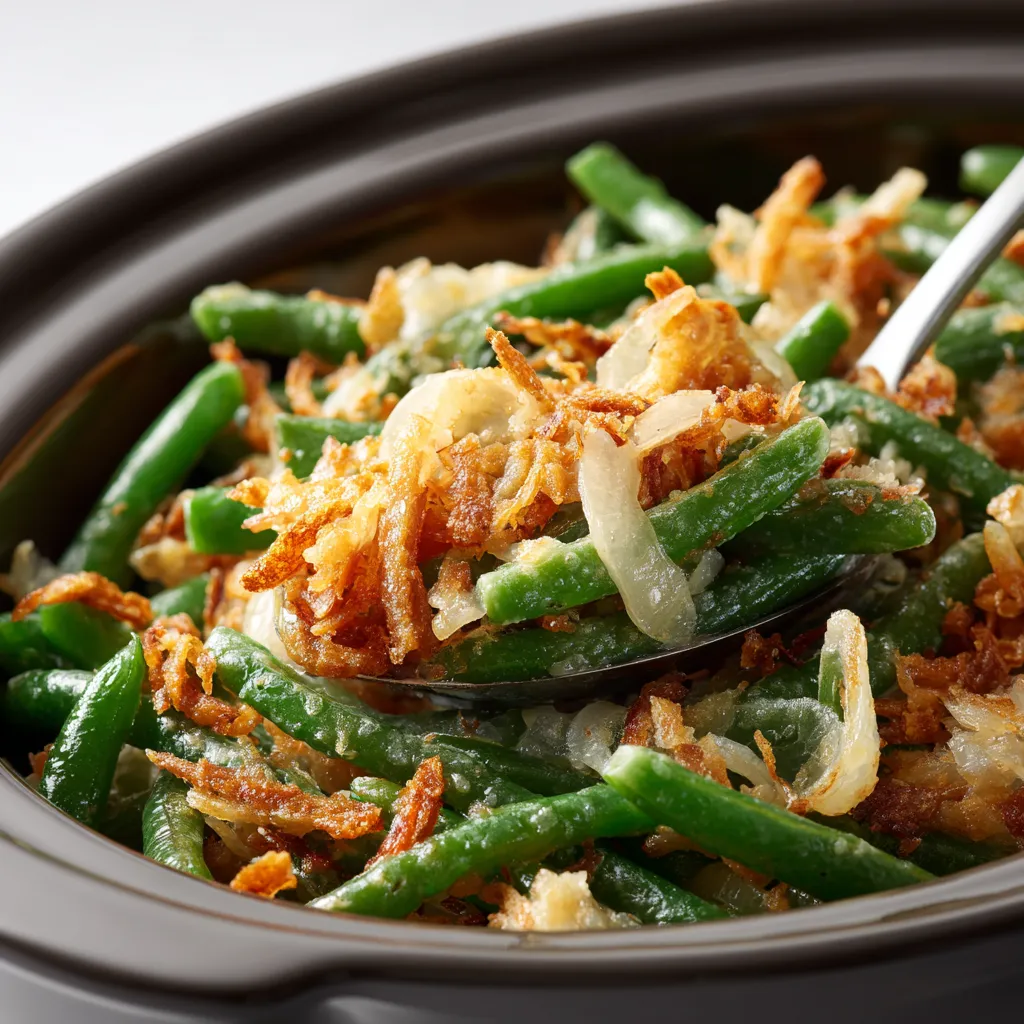
  • Comforting and Delicious: The combination of creamy mushroom soup, tender green beans, and crispy fried onions creates a cozy flavor profile that warms the heart.
  • Quick to Prepare: With just 15 minutes of prep time and about 35 minutes in the oven, you can have this dish ready in no time, allowing you to focus on other Thanksgiving essentials.
  • Customizable: From adding bacon for a smoky twist to swapping out green beans for other veggies, the variations are endless!
  • Tradition Meets Adventure: This recipe pays homage to the classic while inviting you to experiment with flavors, ensuring it’s never just another side dish.

Ingredients You’ll Need

A beautifully plated Green Bean Casserole with creamy sauce and golden fried onions.

Let’s gather our ingredients and get ready to create something unforgettable! Here’s what you’ll need:

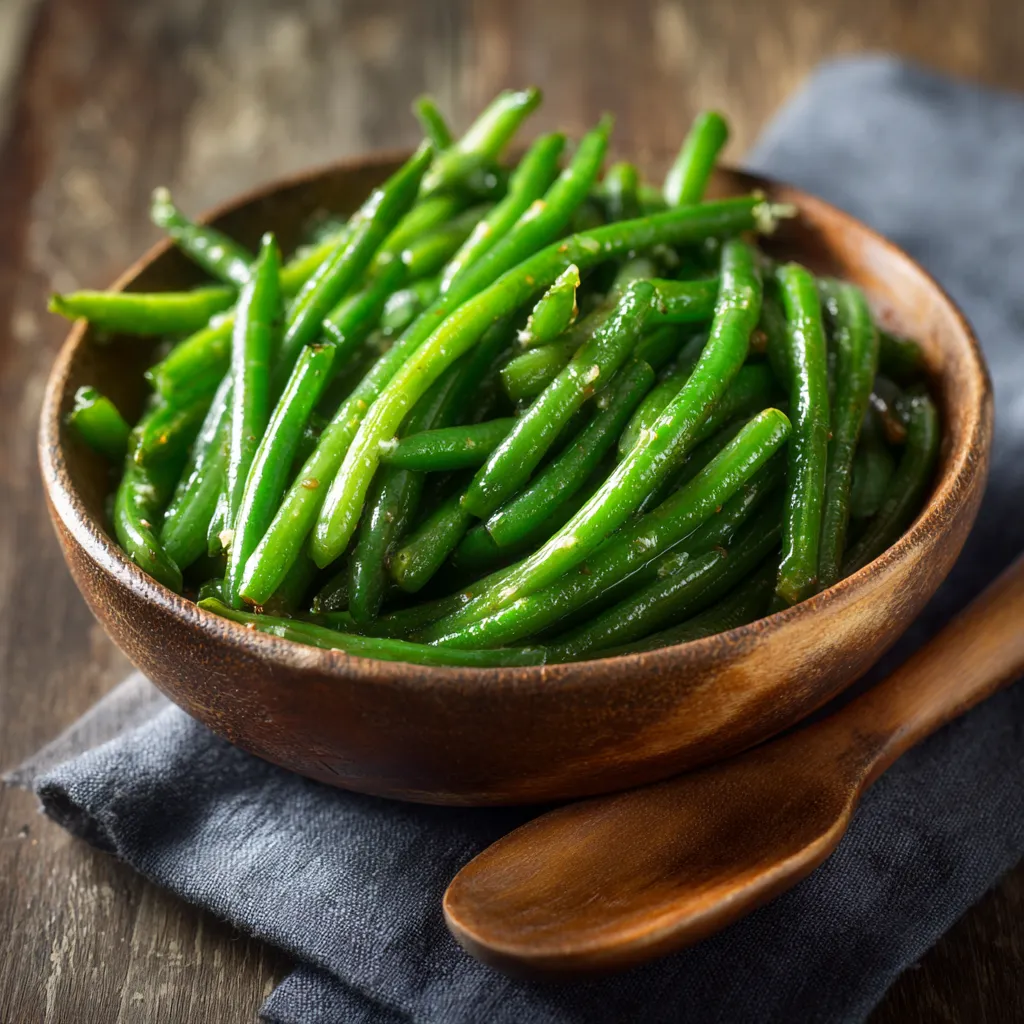
  • 2 cans (14.5 oz each) green beans: Drain them well for the best texture.
  • 1 can (10.5 oz) condensed cream of mushroom soup: This creamy base is essential for that rich flavor.
  • 3/4 cup milk: Use whole or 2% milk for a luscious consistency.
  • 1 tsp soy sauce: Adds a savory depth that balances the dish beautifully.
  • 1/4 tsp black pepper: A touch of spice to enhance the flavor.
  • 1 1/3 cups French fried onions: These add the signature crunch that everyone loves!

Feel free to substitute ingredients based on your dietary needs. For example, replace the cream of mushroom soup with a homemade version or a gluten-free alternative, or opt for almond milk instead of cow’s milk.

Step-by-Step Instructions

Now, let’s get our hands dirty! Follow these simple steps to create your masterpiece:

  1. Preheat the oven to 350°F (175°C).
  2. Combine ingredients: In a large mixing bowl, blend the drained green beans, cream of mushroom soup, milk, soy sauce, and black pepper until smooth.
  3. Transfer to casserole dish: Pour the mixture into a 1.5-quart casserole dish, spreading it evenly.
  4. Bake: Place in the preheated oven and let it bake for 25 minutes.
  5. Add the crunch: Remove from the oven and stir in 2/3 cup of French fried onions. Top with the remaining onions for that crispy finish.
  6. Final bake: Return to the oven and bake for an additional 10 minutes or until the onions are golden brown and delicious.
  7. Serve warm: Once out of the oven, let it sit for a few minutes before serving. Enjoy!

Pro Tips for the Perfect Green Bean Casserole

Want to elevate your Green Bean Casserole to new heights? Here are some expert insights:

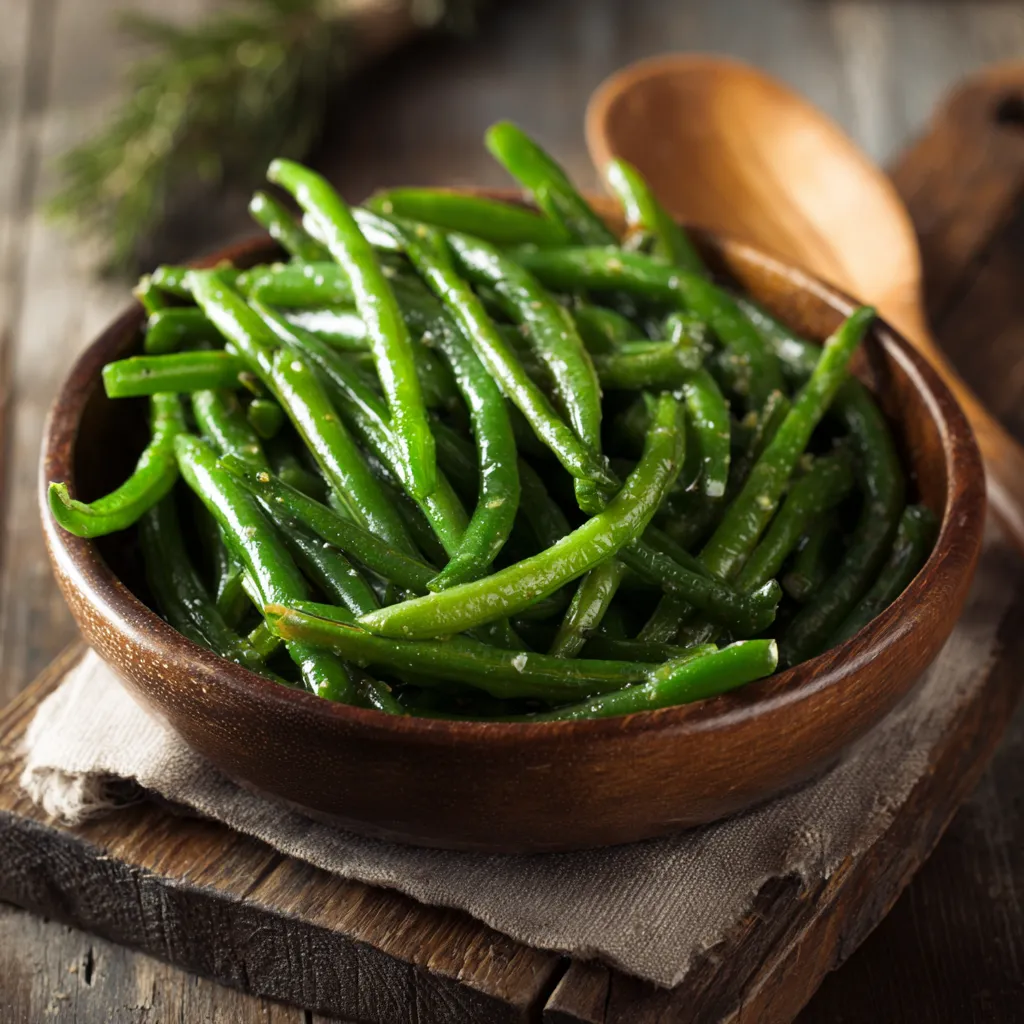
  • Fresh is Best: Whenever possible, use fresh green beans instead of canned for a vibrant texture and flavor.
  • Layered Flavors: Consider sautéing some garlic and onions before adding them to the mix for an extra layer of flavor.
  • Experiment with Cheeses: A sprinkle of shredded cheddar or parmesan can add a delightful twist to the traditional recipe.
  • Make it Ahead: You can prepare the casserole a day in advance. Just keep it covered in the fridge and bake it right before serving.
  • Consider Add-ins: Try adding cooked bacon, sautéed mushrooms, or even a sprinkle of crushed red pepper for a kick!
  • Check for Doneness: Make sure the green beans are tender but still have a bit of crunch to them. Nobody wants mushy beans!
  • Perfectly Golden Onions: To achieve that coveted golden topping, keep an eye on the oven during the last minutes of baking.
  • Serving Temperature: This casserole is best served warm, so time your bake to coincide with your meal!

Common Mistakes and Troubleshooting

Even the best chefs can run into hiccups. Here are some common pitfalls and how to avoid them:

  • Too Watery: If your casserole is too watery, ensure you drain the green beans thoroughly and use less milk.
  • Mushy Beans: Avoid overcooking the green beans in the oven; pre-cook them just enough to maintain their crunch.
  • Burnt Onions: If the onions start to burn, cover the dish loosely with foil to prevent them from getting too dark.
  • Flavor Lacking: If your casserole tastes bland, adjust with more soy sauce or seasonings.

Delicious Variations to Try

This recipe is versatile, so feel free to switch things up! Here are some variations to consider:

  • Green Bean Casserole with Bacon: Add crispy bacon bits for a smoky flavor.
  • Vegan Green Bean Casserole: Substitute the cream of mushroom soup with a homemade cashew cream and use plant-based milk.
  • Cheesy Green Bean Casserole: Mix in your favorite cheese or top with a cheese blend for a gooey finish.
  • Mushroom-Free Version: Swap the cream of mushroom soup with a white cheese sauce or a creamy Alfredo sauce.

Storage and Make-Ahead Instructions

If you’re planning ahead, here’s how to store and prepare your casserole:

  • Make-Ahead: Assemble the casserole and refrigerate it (unbaked) for up to 24 hours. Bake right before serving.
  • Leftovers: Store leftover casserole in an airtight container in the fridge for up to 3 days. Reheat in the oven for best results.
  • Freezing: You can freeze an unbaked casserole for up to 2 months. Thaw in the fridge overnight before baking.

Frequently Asked Questions

Have questions? Let’s answer some common ones about Green Bean Casserole:

  • Can I use frozen green beans? Yes, but make sure they’re thawed and drained before mixing.
  • How can I make this dish gluten-free? Use gluten-free cream of mushroom soup and check the fried onions for gluten content.
  • Can I add other vegetables? Absolutely! Consider adding corn, bell peppers, or even diced carrots for a colorful twist.
  • What if I don’t have cream of mushroom soup? You can make a simple white sauce as a substitute or use cream of celery soup.
  • How do I know when it’s done? The casserole should be bubbly and the onions golden brown.
  • Can I make it dairy-free? Yes! Substitute the cream of mushroom soup and milk with dairy-free alternatives.
  • What’s the best way to reheat leftovers? Reheat in the oven at 350°F until warmed through for the best texture.
  • What can I serve with Green Bean Casserole? This dish pairs wonderfully with roast turkey, ham, or any holiday main dish.

Nutritional Tips and Dietary Adaptations

For those mindful of their health, here are some tips to adapt this recipe:

  • Low-Fat Option: Use low-fat cream of mushroom soup and skim milk to cut calories.
  • High-Protein Version: Add cooked chicken or turkey for an extra protein boost.
  • Vegan-Friendly: As mentioned, opt for a plant-based cream and milk to keep it vegan.

Essential Equipment

Make sure you have these tools on hand for a smooth cooking experience:

  • Mixing Bowl: A large bowl for combining all your ingredients.
  • Casserole Dish: A 1.5-quart dish is ideal for this recipe.
  • Measuring Cups and Spoons: For accurate ingredient measurements.
  • Oven Mitts: Safety first! Protect your hands when handling hot dishes.

Serving Suggestions

When it comes to serving, presentation matters! Here are some tips:

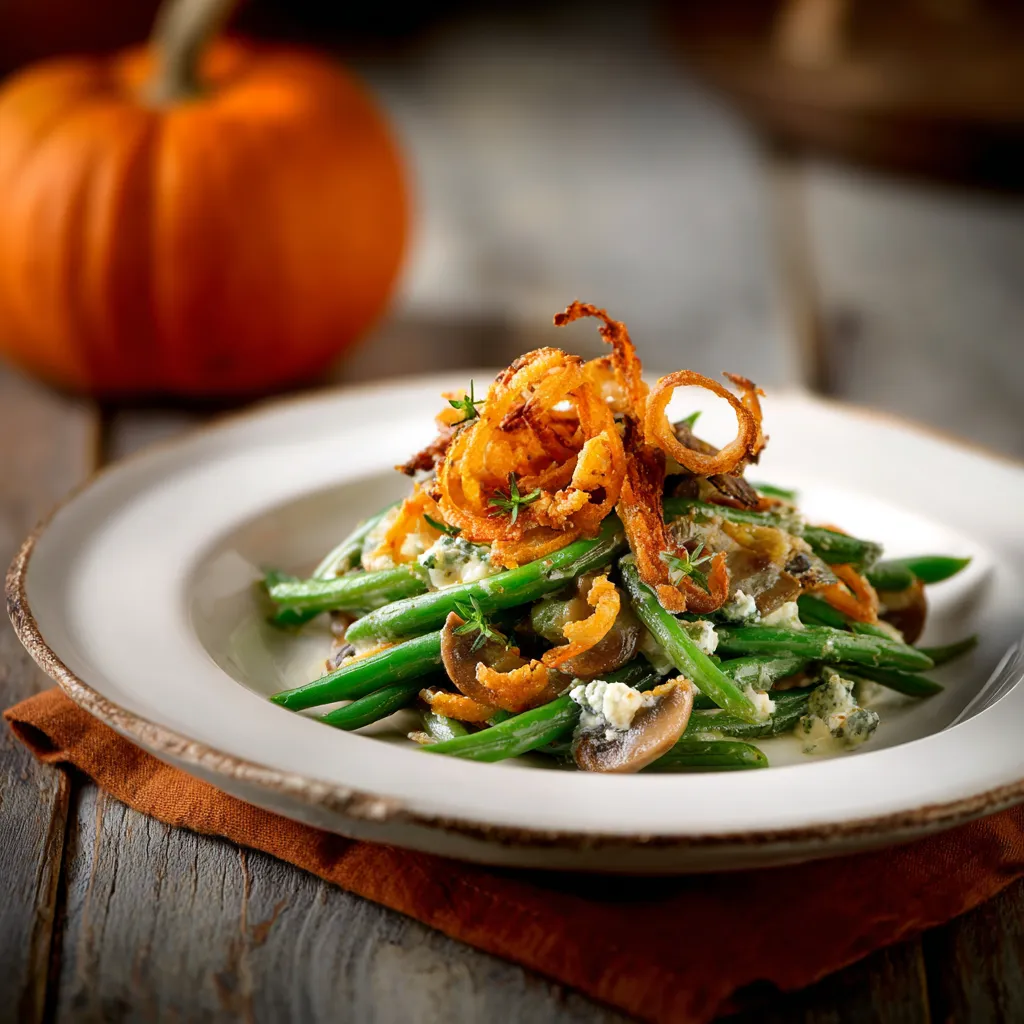
  • Garnish with Fresh Herbs: A sprinkle of fresh parsley or chives adds a pop of color and freshness.
  • Serve Family-Style: Place the casserole on the table in its dish for a communal feel.
  • Pair with Other Sides: Serve alongside classic mashed potatoes, cranberry sauce, and stuffing for a complete meal.

Conclusion

There you have it — the ultimate Green Bean Casserole that combines tradition with bold flavors, ensuring your Thanksgiving table is as vibrant as your family gatherings. This dish is more than just a side; it’s a celebration of cooking, a testament to the power of spice and comfort food. So grab your skillet, let your culinary creativity flow, and watch as your loved ones gather around for a taste of something truly special. Remember, cooking is an adventure, and every dish tells a story. Let this Green Bean Casserole be a part of yours!

Green Bean Casserole Campbells | Traditional Thanksgiving Green Beans Recipe

Prep Time 10 minutes
Cook Time 35 minutes
Total Time 45 minutes
Servings 6 servings
Calories 250
A classic holiday side dish featuring tender green beans in a creamy mushroom sauce topped with crispy fried onions.

Ingredients

Green Beans

  • 2 cans green beans, drained
  • 1 can condensed cream of mushroom soup
  • 3/4 cup milk
  • 1 tsp soy sauce
  • 1/4 tsp black pepper
  • 1 1/3 cups french fried onions

Instructions 

  • Preheat oven to 350°F (175°C).
  • Mix green beans, mushroom soup, milk, soy sauce, and black pepper in a bowl.
  • Pour into a 1.5-quart casserole dish and bake for 25 minutes.
  • Stir in 2/3 cup of fried onions, top with remaining onions, and bake for 10 more minutes.
  • Serve warm as a festive side dish.

Notes

For extra crunch, add more fried onions on top before the final bake.
Calories: 250kcal
Cost: $15
Course: Side Dish
Cuisine: American
Keyword: Green Beans

Nutrition

Calories: 250kcal | Carbohydrates: 35g | Protein: 6g | Fat: 10g | Sodium: 600mg

Loved this recipe? Save it to your favorite Pinterest board so you can easily find it later! It’s the perfect way to keep all your sweet ideas in one place. ✨

Delicious Green Bean Casserole served in a rustic dish, showcasing its creamy texture and crispy topping.

Welcome to a Flavor Adventure with Garlic & Rosemary Beef Tips!

Are you ready to embark on a culinary journey that celebrates the boldness of flavor and the thrill of cooking? My recipe for Garlic & Rosemary Beef Tips is not just a dish; it’s a story waiting to be told, a sensory experience that promises to awaken your taste buds and ignite your passion for cooking. In just under 30 minutes, you can transform humble beef tips into a mouthwatering masterpiece that’s perfect for any weeknight meal or special occasion.

Growing up in the spice-rich landscape of San Antonio, I learned early on that cooking is about more than just following a recipe—it’s about embracing the adventure of flavor. With this dish, you’ll learn how to balance the heat and warmth of garlic and rosemary, creating a meal that’s both savory and satisfying. Let’s dive into the world of spice and flavor together!

Why You’ll Love This Recipe

This dish is packed with robust flavors and offers numerous benefits:

  • Quick and Easy: Ready in just 20-30 minutes, perfect for busy weeknights.
  • Flavor Explosion: The bold combination of garlic and rosemary elevates the beef tips, creating a dish that’s anything but ordinary.
  • Versatile: Serve it over rice, with pasta, or alongside roasted vegetables for a complete meal.
  • Health-Conscious: Lean beef tips provide protein without excess fat, making it a healthy dinner option.
  • Customizable: Easily adapt this recipe with your favorite herbs or add heat with chili flakes.

Ingredient Breakdown

Before we get cooking, let’s gather our ingredients. Here’s what you’ll need:

  • 1 pound beef tips: Tender cuts like sirloin or tenderloin work best.
  • 3 tablespoons olive oil: Extra virgin olive oil adds richness and flavor.
  • 4 cloves garlic, minced: Fresh garlic provides that aromatic kick.
  • 2 teaspoons fresh rosemary, chopped: Fresh herbs make a world of difference, but you can use dried if needed.
  • Salt and pepper to taste: Essential for enhancing the dish’s flavors.
  • 1 tablespoon soy sauce: Adds umami and depth.
  • 1 tablespoon balsamic vinegar: A splash of acidity brightens the flavors.

For substitutions, if you’re out of rosemary, thyme or oregano can provide a lovely alternative. If you prefer a different protein, chicken or pork can also work beautifully!

Step-by-Step Instructions

Ready to get cooking? Let’s bring these flavors to life!

  1. In a large skillet, heat the olive oil over medium-high heat.
  2. Season the beef tips generously with salt and pepper.
  3. Add the beef tips to the skillet and sear on all sides until browned, about 5-7 minutes.
  4. Add the minced garlic and chopped rosemary to the skillet, stirring to combine.
  5. Pour in the soy sauce and balsamic vinegar, stirring to coat the beef tips evenly.
  6. Reduce heat to medium-low and cook for an additional 5-10 minutes until the beef is cooked to your desired doneness.
  7. Remove from heat and let rest for a few minutes before serving.

Pro Tips for Perfect Beef Tips

To take your Garlic & Rosemary Beef Tips to the next level, consider these expert insights:

  • Choose Quality Meat: Opt for high-quality, grass-fed beef for a richer flavor.
  • Don’t Overcrowd the Pan: Searing in batches ensures even cooking and a nice crust.
  • Let It Rest: Allowing the beef to rest after cooking keeps it juicy and tender.
  • Adjust Seasoning: Taste your dish before serving; feel free to add more salt or pepper if needed.
  • Experiment with Herbs: Feel free to mix in other herbs like thyme or parsley for added depth.
  • Make It Spicy: Add red pepper flakes for a kick if you love heat!
  • Pair with a Sauce: Consider serving with a creamy mushroom sauce for an extravagant touch.
  • Fresh Ingredients Matter: Always use fresh garlic and herbs for the best flavor.

Common Mistakes and Troubleshooting

Here are some common pitfalls and how to avoid them:

  • Overcooking the Beef: Use a meat thermometer to check for doneness—medium-rare is about 135°F.
  • Burnt Garlic: Add garlic later in the cooking process to prevent it from burning and becoming bitter.
  • Too Much Sauce: Keep it balanced; too much liquid can overpower the dish.
  • Skipping Resting Time: Letting the meat rest ensures juices redistribute for a juicier bite.

Variations to Try

Here are some creative twists to keep things fresh:

  • Asian-Inspired: Add ginger and serve with jasmine rice for a flavorful twist.
  • Mediterranean: Incorporate olives and feta cheese for a tangy flavor explosion.
  • Spicy Kick: Mix in a bit of sriracha or chili oil for a fiery variation.
  • Slow Cooker Version: Combine all ingredients in a slow cooker and let it tenderize over 6-8 hours.

Storage and Make-Ahead Instructions

Planning ahead? Here’s how to store and prepare for later:

  • Refrigeration: Store leftovers in an airtight container in the fridge for up to 3 days.
  • Freezing: Freeze in portions for up to 2 months. Thaw overnight in the refrigerator before reheating.
  • Make-Ahead: You can marinate the beef tips a day in advance for deeper flavor.

Comprehensive FAQ

Here are some common questions about Garlic & Rosemary Beef Tips:

  • Can I use chicken instead of beef? Yes! This recipe works beautifully with chicken breasts or thighs.
  • What can I serve with this dish? It’s fantastic over rice, pasta, or alongside a fresh salad.
  • Can I make this dish vegetarian? Absolutely! Substitute beef with hearty vegetables like mushrooms or eggplant.
  • How do I know when the beef is done? Use a meat thermometer for accuracy. Aim for 135°F for medium-rare.
  • Is this recipe gluten-free? Use tamari instead of soy sauce to make it gluten-free.
  • What can I substitute for balsamic vinegar? Red wine vinegar or apple cider vinegar can be used as alternatives.
  • How spicy is this dish? It’s not inherently spicy, but you can add red pepper flakes for heat!
  • Can I double the recipe? Yes! Just ensure your skillet can accommodate the larger quantity without overcrowding.

Nutrition Tips and Dietary Adaptations

This dish not only satisfies the palate but also supports a balanced diet:

  • Protein-Packed: Beef tips are a great source of protein, essential for muscle repair and growth.
  • Low Carb: Perfect for keto or low-carb diets when served with non-starchy vegetables.
  • Heart-Healthy Fats: Olive oil provides healthy fats that support cardiovascular health.

Essential Equipment Recommendations

Here’s what you’ll need:

  • Large Skillet: A heavy-bottomed skillet is ideal for achieving a good sear.
  • Wooden Spoon: Perfect for stirring and preventing scratches on your skillet.
  • Meat Thermometer: Ensures perfectly cooked beef every time.

Serving Suggestions

Make your presentation as exciting as your flavors! Consider:

  • Garnishing: Fresh rosemary sprigs or parsley add a pop of color.
  • Pairing: A glass of red wine complements the flavors beautifully.
  • Accompaniments: Serve with a side of roasted vegetables or a crisp salad for a balanced meal.

Final Thoughts

Cooking is an adventure filled with discovery, and my Garlic & Rosemary Beef Tips is a recipe that invites you to embrace that journey. With the right balance of flavors, you can create a dish that not only nourishes the body but also delights the senses. So grab your skillet, unleash your inner chef, and let the thrill of cooking with spice take center stage. Remember, with every dish you create, you’re not just feeding yourself—you’re telling a story. Happy cooking!

Welcome to a culinary adventure where sweet meets savory in the most delicious way! If you’re looking to elevate your meals, you’re in for a treat with these taco stuffed sweet potatoes. This recipe marries the natural sweetness of roasted sweet potatoes with the bold, zesty flavors of taco filling. Get ready to take your taste buds on a rollercoaster ride that’s as colorful as a fiesta!

Cooking is not just a task; it’s a journey of exploration and creativity. Growing up in the heart of San Antonio, I learned early on that the right spices and ingredients can turn a simple meal into a story worth telling. As you dive into this recipe, remember that cooking is about experimenting and finding your own balance between flavors. So grab your skillet, and let’s make some magic happen!

Why You’ll Love This Recipe

  • Quick and Easy: Ready in just 60 minutes, this dish is perfect for busy weeknights.
  • Nutritious and Delicious: Packed with vitamins A and C from the sweet potatoes, plus protein from the taco filling.
  • Customizable: Use ground beef, turkey, or even a plant-based alternative to suit your dietary needs.
  • Family-Friendly: A fun and interactive meal that encourages everyone to dive in and customize their own sweet potato.
  • Make-Ahead Friendly: Prep the filling in advance and assemble when ready to eat!

Ingredients

Let’s gather what we need for this flavor explosion! Here’s your shopping list:

  • 4 medium sweet potatoes: The star of the dish, bringing sweetness and nutrients.
  • 1 pound ground beef or turkey: Your choice of protein for a hearty filling.
  • 1 packet taco seasoning: For that authentic taco flavor.
  • 1 cup black beans: Rinsed and drained, adding fiber and protein.
  • 1 cup corn: Fresh or frozen, bringing a pop of sweetness.
  • 1 cup diced tomatoes: Adds moisture and acidity.
  • 1 cup shredded cheese: Cheddar or Mexican blend for melty goodness.
  • 1 avocado: Diced, for that creamy finish.
  • Sour cream or Greek yogurt: A dollop for tanginess.
  • Chopped cilantro: For garnish and freshness.
  • Salt and pepper: To taste.

Feel free to switch up ingredients based on your preferences:

  • Protein Swap: Try ground chicken, shrimp, or a plant-based option like lentils or mushrooms.
  • Beans Options: Swap black beans for pinto, kidney, or even chickpeas for a twist.
  • Cheese Variations: Go for pepper jack if you want to add a little kick!
  • Top It Off: Experiment with toppings like jalapeños, salsa, or fresh lime juice to enhance the flavors.

Step-by-Step Instructions

A vibrant stuffed sweet potato filled with ground meat, black beans, and corn, garnished with diced tomatoes and sour cream.

Ready to cook? Here’s how to whip up these delicious taco stuffed sweet potatoes:

  1. Preheat the oven: Set it to 400°F (200°C).
  2. Prep the sweet potatoes: Wash and pierce each potato with a fork. Place them on a baking sheet and bake for 45-60 minutes, until tender.
  3. Cook the meat: In a skillet over medium heat, cook the ground beef or turkey until browned. Drain any excess fat.
  4. Add seasoning: Stir in taco seasoning, black beans, corn, and diced tomatoes. Cook for an additional 5-7 minutes until everything is heated through. Season with salt and pepper to taste.
  5. Prepare the sweet potatoes: Once they’re done, let them cool slightly. Cut each potato in half lengthwise and fluff the insides with a fork.
  6. Stuff them: Fill each half with the savory taco filling.
  7. Top it off: Add shredded cheese, diced avocado, and a dollop of sour cream or Greek yogurt.
  8. Garnish: Sprinkle with chopped cilantro and serve warm.

Pro Tips

  • Perfect Texture: Bake sweet potatoes until they are very tender for the best texture when you fluff them.
  • Flavor Boost: Consider adding a splash of lime juice to the filling for a brightness that pairs perfectly with the sweet potatoes.
  • Microwave Shortcut: If you’re in a hurry, you can cook the sweet potatoes in the microwave on high for 5-8 minutes, depending on their size.
  • Make it Spicy: Add crushed red pepper flakes or diced jalapeños to the meat for a spicy kick.
  • Keep it Fresh: Use fresh herbs like cilantro or parsley to brighten up the dish just before serving.
  • Meal Prep: Prepare the taco filling a day in advance and store it in the fridge. Just reheat before serving!
  • Check for Doneness: Use a fork to check if the sweet potatoes are tender; they should easily pierce through.
  • Layer Flavors: For an extra depth of flavor, sauté onions and garlic before adding the meat to the skillet.

Common Mistakes and Troubleshooting

Even the best chefs have off days! Here are some common pitfalls and how to avoid them:

  • Overcooked Sweet Potatoes: If they’re too mushy, keep an eye on them while baking. Every oven is different!
  • Dry Filling: If your taco filling seems dry, consider adding a splash of broth or some extra diced tomatoes.
  • Uneven Cooking: Rotate the sweet potatoes halfway through baking for even cooking.
  • Too Much Spice: If it gets too spicy, balance it out with a little more sour cream or Greek yogurt on top.

Variations

Here are some fun twists to keep your meals exciting:

  • Bbq Chicken Sweet Potatoes: Substitute taco seasoning with BBQ sauce and shredded chicken.
  • Breakfast Version: Fill with scrambled eggs, black beans, and top with avocado and salsa for a hearty breakfast.
  • Vegetarian Delight: Use lentils or quinoa in place of meat, seasoned with taco spices.
  • Cheesy Spinach Stuffed: Mix spinach and cream cheese into the filling for a creamy, cheesy flavor.

Storage and Make-Ahead Instructions

This recipe is great for meal prep! Here’s how to store it:

  • Refrigeration: Store leftovers in an airtight container in the fridge for up to 5 days.
  • Freezing: You can freeze the taco filling for up to 3 months. Just thaw and reheat when ready to use.
  • Reheating: Reheat stuffed sweet potatoes in the oven at 350°F (175°C) for about 15-20 minutes or in the microwave for 2-3 minutes.

Comprehensive FAQ

Got questions? I’ve got answers! Here are some frequently asked questions:

  • Can I use other types of potatoes? Yes! While sweet potatoes are recommended for their flavor and nutrients, you can use regular potatoes if preferred.
  • Is this recipe gluten-free? Yes, this recipe is naturally gluten-free, but always check your taco seasoning for hidden gluten.
  • How do I make this dairy-free? Omit the cheese and use avocado or a dairy-free sour cream substitute.
  • What can I serve with this dish? A simple green salad or some spicy salsa pairs beautifully!
  • Can I add more vegetables? Absolutely! Bell peppers, zucchini, or corn can all be added to the filling.
  • How spicy is this recipe? It depends on your taco seasoning and any additional spices you add. Feel free to adjust to your heat preference!
  • How do I know when sweet potatoes are done? They should be fork-tender, which means you can easily pierce them with a fork.
  • Can I prepare these in advance? Yes! You can prepare the filling ahead of time and assemble the sweet potatoes when you’re ready to eat.

Nutritional Tips and Dietary Adaptations

Health is wealth! Here are some tips for keeping this dish nutritious:

  • Boost Fiber: Add more beans or even some chopped kale to increase fiber content.
  • Lean Proteins: Choose lean ground turkey or chicken to reduce saturated fat.
  • Cheese Alternatives: Opt for low-fat cheese or skip it altogether for a lighter version.
  • Vegan Twist: Use lentils, quinoa, or tempeh instead of meat for a delicious vegan option.

Equipment Recommendations

Before you dive in, make sure you have these kitchen essentials:

  • Quality Knife: For chopping and dicing your ingredients with ease.
  • Cutting Board: A sturdy surface is key for food prep.
  • Baking Sheet: To roast your sweet potatoes evenly.
  • Skillet: A non-stick skillet makes cooking the filling a breeze.
  • Measuring Cups and Spoons: Precision is vital for great flavor!

Serving Suggestions

Time to plate your masterpiece! Here are some fun serving ideas:

  • Plate it Up: Serve each stuffed sweet potato on a colorful plate for a vibrant presentation.
  • Garnish Galore: Elevate with sliced radishes, shredded lettuce, or diced jalapeños for added crunch.
  • Side Dishes: Pair with a refreshing corn salad or a zesty lime vinaigrette to complement the flavors.
  • Interactive Meal: Set up a taco bar with extra toppings and let everyone customize their sweet potato!

Conclusion

And there you have it! A deliciously bold dish that combines the sweetness of sweet potatoes with the savory zest of taco filling. These taco stuffed sweet potatoes are not just a meal; they’re an experience. Whether you’re cooking for family or friends, this recipe will ignite your kitchen and inspire your culinary adventures. So embrace the heat, celebrate the flavors, and remember: cooking is all about exploration. Get in there and have fun!

Easy Taco Stuffed Sweet Potatoes

Prep Time 10 minutes
Cook Time 50 minutes
Total Time 1 hour
Servings 4 servings
Calories 550
A delicious and healthy meal featuring baked sweet potatoes filled with flavorful taco ingredients, topped with cheese and fresh toppings.

Ingredients

Sweet Potatoes

  • 4 medium sweet potatoes
  • 1 pound ground beef or turkey
  • 1 packet taco seasoning
  • 1 cup black beans, drained and rinsed
  • 1 cup corn, frozen or canned
  • 1 cup diced tomatoes
  • 1 cup shredded cheese (cheddar or mexican blend)
  • 1 avocado diced avocado
  • sour cream or greek yogurt for serving sour cream or greek yogurt
  • chopped cilantro for garnish chopped cilantro
  • to taste salt and pepper

Instructions 

  • Preheat oven to 400°F (200°C). Pierce sweet potatoes and bake for 45-60 minutes.
  • Cook ground beef or turkey until browned; drain excess fat.
  • Add taco seasoning, black beans, corn, and tomatoes; cook 5-7 minutes. Season with salt and pepper.
  • Let sweet potatoes cool slightly, then cut in half lengthwise. Fluff insides and fill with meat mixture.
  • Top with cheese, avocado, sour cream, and cilantro. Serve warm.

Notes

For extra flavor, add a squeeze of lime or hot sauce.
Calories: 550kcal
Cost: $15
Course: Main Course
Cuisine: Mexican
Keyword: Sweet Potatoes

Nutrition

Calories: 550kcal | Carbohydrates: 70g | Protein: 35g | Fat: 20g | Sodium: 900mg

Loved this recipe? Save it to your favorite Pinterest board so you can easily find it later! It’s the perfect way to keep all your sweet ideas in one place. ✨

A delicious taco stuffed sweet potato on a rustic plate, showcasing melting cheese and fresh toppings in soft lighting.

Unleashing the Flavor: The Ultimate Ground Beef Philly Cheesesteak

Welcome to a culinary journey where the classic Philly cheesesteak meets bold flavors that ignite the senses! This recipe for Ground Beef Philly Cheesesteaks is not just a meal; it’s an experience that promises to transform your cooking and unleash your inner chef. Get ready to dive into a dish that’s as rich in history as it is in taste, and let’s make some magic in the kitchen!

Why You’ll Love This Recipe

  • Quick and Easy: Ready in just 30 minutes, this recipe is perfect for busy weeknights when you crave comfort food without the fuss.
  • Budget-Friendly: Using ground beef instead of pricier cuts makes this dish accessible without sacrificing flavor.
  • Flavor Explosion: The combination of sautéed onions, bell peppers, and melted provolone cheese creates an irresistible flavor profile that will have your taste buds dancing.
  • Customizable: This recipe serves as a fantastic base, allowing you to add your favorite spices or toppings to make it your own.
  • Family-Friendly: With its delicious, familiar flavors, this cheesesteak is sure to please even the pickiest of eaters!

Ingredient Breakdown

A delicious Ground Beef Philly Cheesesteak featuring sliced onions and green peppers on a hoagie roll.

Every great dish starts with quality ingredients. Here’s what you’ll need for your Ground Beef Philly Cheesesteaks:

  • 1 lb ground beef: Choose lean ground beef (85/15 or 90/10) to keep it flavorful without too much grease.
  • 1 medium onion: Thinly sliced for a sweet, caramelized addition.
  • 1 medium green bell pepper: Adds color and crunch; feel free to mix colors for visual appeal!
  • 2 cloves garlic: Minced to elevate the dish with aromatic goodness.
  • Salt and pepper to taste: Essential for enhancing all the flavors.
  • 4 hoagie rolls: The perfect vessel for your beef mixture; consider toasting them for added texture.
  • 8 slices provolone cheese: Melts beautifully and adds that classic cheesesteak richness.
  • 2 tablespoons olive oil: For sautéing and adding depth to the dish.

Pro Tips for the Perfect Philly Cheesesteak

  • Use a Hot Skillet: Make sure your skillet is hot enough to brown the beef without steaming it, ensuring maximum flavor.
  • Don’t Overcrowd the Pan: If making a larger batch, cook in batches to maintain that beautiful sear.
  • Add Worcestershire Sauce: A splash of this sauce during cooking can add a savory depth that takes your cheesesteak up a notch.
  • Experiment with Cheeses: While provolone is traditional, try mozzarella or cheddar for a twist on the classic!
  • Toast Your Rolls: A quick toast under the broiler adds a delightful crunch that holds up against the filling.
  • Layer Wisely: Divide the beef mixture into portions before adding cheese to ensure even melting.
  • Resting Time: Letting the assembled cheesesteak sit for a minute before serving allows the flavors to meld beautifully.
  • Garnish with Fresh Herbs: A sprinkle of fresh parsley or basil right before serving can elevate the dish visually and flavor-wise!

Common Mistakes and Troubleshooting

Even the best chefs make mistakes! Here are some common pitfalls and how to avoid them:

  • Dry Beef: Overcooking the beef can lead to dryness. Cook just until browned and no longer pink.
  • Soggy Rolls: If your rolls are soggy, it means there was too much moisture in the filling. Aim for a balance between juicy and dry!
  • Too Much Cheese: While cheese is delicious, too much can overwhelm the dish. Stick to the recommended amount for a balanced flavor.
  • Under-seasoning: Always taste as you go! Adjust salt and pepper to your preference for the best results.

Recipe Variations

Feel free to switch it up! Here are some delicious variations on the classic Philly cheesesteak:

  • Spicy Kick: Add sliced jalapeños or a sprinkle of red pepper flakes for a fiery version.
  • Vegetarian Option: Substitute ground beef with sautéed mushrooms or lentils for a hearty, meat-free alternative.
  • BBQ Twist: Mix BBQ sauce into the beef mixture for a smoky flavor that’s perfect for summer.
  • Cheesy Mushroom: Add sautéed mushrooms along with the beef for extra umami and depth.

Storage and Make-Ahead Instructions

Want to enjoy your cheesesteaks later? Here’s how to store and prepare them in advance:

  • Refrigeration: Store leftovers in an airtight container in the fridge for up to 3 days.
  • Freezing: You can freeze the cooked beef mixture for up to 2 months. Just reheat and serve when ready!
  • Make-Ahead: Prepare the beef and veggie mixture a day in advance and simply heat and assemble when ready to serve.

Frequently Asked Questions

Got questions? Let’s tackle some common queries about making the perfect Philly cheesesteak!

  • Can I use other types of meat? Absolutely! Chicken or pork can be delicious alternatives.
  • What’s the best cheese for cheesesteaks? Provolone is classic, but mozzarella and even Cheez Whiz can work wonders!
  • How can I make this dish healthier? Use leaner cuts of meat or swap in grilled veggies for a lighter option.
  • Can I make this dish gluten-free? Yes! Use gluten-free hoagie rolls or serve the filling over a salad.
  • What should I serve with cheesesteaks? Classic sides include fries, chips, or a fresh salad for a balanced meal.
  • How do I know when the beef is done? It should be browned and no longer pink; a quick temperature check should read 160°F (71°C).
  • Can I reheat the leftovers? Yes! Just use the stove or microwave to heat it gently—avoid overcooking!
  • How do I customize my cheesesteak? Get creative with toppings like pickles, hot sauce, or sautéed veggies!

Nutritional Insights and Dietary Adaptations

Eating well doesn’t mean sacrificing flavor! Here’s how to make this dish fit your dietary needs:

  • Low-Carb Option: Serve the beef mixture in lettuce wraps for a low-carb alternative.
  • Keto-Friendly: Use cheese as a base and skip the bread altogether.
  • Heart-Healthy: Opt for lean ground turkey or chicken and load up on veggies to reduce fat.
  • Vegan Variation: Substitute ground beef with lentils and vegan cheese for a plant-based delight.

Essential Equipment Recommendations

To make your cooking experience smoother, here’s what you’ll need:

  • Large Skillet: A non-stick or cast-iron skillet works best for even cooking.
  • Spatula: For breaking apart the ground beef and stirring the mixture.
  • Measuring Cups and Spoons: Ensure accurate ingredient measurements for the best results.
  • Knife and Cutting Board: Essential for slicing your veggies and rolls.

Serving Suggestions

Now that your cheesesteaks are ready, let’s talk presentation! Here are some serving suggestions:

  • Garnish: Top with fresh parsley or basil for a pop of color and flavor.
  • Pair with Sides: Serve alongside crispy fries, coleslaw, or a fresh garden salad.
  • Condiments: Offer hot sauce, ketchup, or mustard on the side for added flavor options.

There you have it! A bold and flavorful recipe for Ground Beef Philly Cheesesteaks that is sure to become a beloved staple in your home. Remember, cooking is an adventure, so don’t be afraid to experiment with flavors and make this dish your own. Now, grab your skillet and let the sizzle begin!

Ground Beef Philly Cheesesteaks

Prep Time 10 minutes
Cook Time 15 minutes
Total Time 25 minutes
Servings 4 servings
Calories 650
Enjoy a quick and hearty twist on the classic Philly cheesesteak with ground beef and melted provolone cheese in a soft hoagie roll.

Ingredients

Meat and Vegetables

  • 1 lb ground beef
  • 1 medium onion, thinly sliced
  • 1 medium green bell pepper, thinly sliced
  • 2 cloves garlic, minced
  • to taste salt and pepper

Bread and Cheese

  • 4 hoagie rolls hoagie rolls
  • 8 slices provolone cheese
  • 2 tablespoons olive oil

Instructions 

  • Heat olive oil in a skillet, sauté vegetables until softened.
  • Add ground beef, cook until browned, then stir in garlic, salt, and pepper.
  • Divide beef mixture into four portions, top each with cheese, and cover until melted.
  • Toast rolls if desired, then fill with beef and cheese mixture. Serve immediately.

Notes

For extra flavor, add a splash of Worcestershire sauce to the beef mixture.
Calories: 650kcal
Cost: $15
Course: Main Course
Cuisine: American
Keyword: beef

Nutrition

Calories: 650kcal | Carbohydrates: 60g | Protein: 40g | Fat: 30g | Sodium: 900mg

Loved this recipe? Save it to your favorite Pinterest board so you can easily find it later! It’s the perfect way to keep all your sweet ideas in one place. ✨

Warm, appetizing Ground Beef Philly Cheesesteak topped with provolone cheese and fresh ingredients.

Unleashing Flavor: The Ultimate Guide to Soulful Slow-Cooked Green Beans

Welcome to a culinary adventure where we transform humble fresh green beans into a show-stopping side dish that can steal the spotlight at any gathering. This recipe for Crockpot Green Beans is not just about cooking; it’s about embracing the warmth and depth that spices can bring to your table. In this guide, we’ll dive deep into the world of green beans, why you’ll love this recipe, and how to make it perfectly every time.

Why You’ll Love This Recipe

Get ready to fall in love with these crockpot green beans! Here are five compelling reasons to embrace this dish:

  • Effortless Preparation: Just toss everything into the crockpot, set it, and forget it! With minimal hands-on time, you can focus on other dishes or simply enjoy your day.
  • Flavor Explosion: This recipe balances savory garlic, sweet onions, and a hint of spice, making every bite a delightful experience that elevates the humble bean.
  • Nutritious Side Dish: Green beans are packed with vitamins A, C, and K, making this dish a healthy addition to any meal.
  • Perfect for Any Occasion: Whether it’s a holiday feast or a casual dinner, these green beans fit right in, complementing a variety of main courses.
  • Customizable to Your Taste: With various variations and substitutions, you can easily adapt this recipe to fit your preferences or dietary restrictions.

Ingredient Breakdown

Deliciously cooked green beans with onions and garlic displayed in a cozy kitchen setting.

Let’s explore the star players in this dish and some potential substitutions for each.

  • Fresh Green Beans: 2 pounds, trimmed. Fresh green beans are the foundation of this recipe, but you can also use frozen green beans for convenience.
  • Onion: 1 medium, chopped. Yellow or white onions work well, but feel free to use shallots for a milder flavor.
  • Garlic: 4 cloves, minced. Garlic powder can be used in a pinch, but fresh garlic adds a depth of flavor that you won’t want to miss.
  • Vegetable Broth: 1 cup. For a richer flavor, use low-sodium chicken broth or homemade broth if available.
  • Olive Oil: 1 tablespoon. This helps to sauté the onions and garlic for a more robust taste, but you can substitute with any cooking oil you prefer.
  • Seasonings: Include 1 teaspoon salt, 1/2 teaspoon black pepper, 1 teaspoon garlic powder, 1 teaspoon onion powder, and 1/2 teaspoon red pepper flakes (optional for heat).
  • Fresh Parsley: 1/4 cup, chopped for garnish. You can use other fresh herbs like thyme or basil to switch up the flavors.

Cooking Instructions

Now, let’s get cooking! Here’s how to make these delectable crockpot green beans.

  • **Prepare the Green Beans**: Place the trimmed green beans in the crockpot.
  • **Add Aromatics**: Sprinkle the chopped onion and minced garlic on top of the green beans.
  • **Mix the Broth**: In a separate bowl, combine the vegetable broth, olive oil, salt, black pepper, garlic powder, onion powder, and red pepper flakes. Stir well.
  • **Combine Ingredients**: Pour the broth mixture over the green beans and onions in the crockpot. Give it a gentle stir to ensure everything is mixed.
  • **Cook Low and Slow**: Cover and cook on low for 6-8 hours or on high for 3-4 hours until the beans are tender.
  • **Garnish and Serve**: Once cooked, stir gently and adjust seasoning if necessary. Garnish with chopped fresh parsley before serving.

Pro Tips for Perfect Crockpot Green Beans

Follow these expert insights to ensure your green beans turn out perfectly every time:

  • Don’t Overcrowd: Ensure there’s enough space in your crockpot for heat to circulate. If you’re making a larger batch, consider using a bigger pot.
  • Fresh is Best: Using fresh green beans ensures maximum flavor and texture. If you must use frozen, thaw them before adding to the crockpot.
  • Season to Taste: Always taste before serving. You can adjust salt and pepper to your liking, adding more spice if desired.
  • Layer Flavors: For an extra kick, consider adding a splash of soy sauce or balsamic vinegar to the broth mixture.
  • Check for Doneness: Cooking times may vary based on your crockpot model. Start checking for tenderness at the 3-hour mark if cooking on high.
  • Cool Before Storing: Allow the green beans to cool completely before transferring them to an airtight container for storage.
  • Make It Ahead: These beans can be made a day in advance. Just reheat gently on the stovetop or in the microwave.
  • Experiment with Spices: Feel free to add your favorite herbs or spices to customize the flavor profile. Thyme, rosemary, or even a dash of lemon zest can brighten the dish!
  • Keep It Simple: Sometimes, less is more. Don’t be afraid to let the natural flavor of the green beans shine through.
  • Garnish Creatively: Try topping with toasted nuts or crumbled feta cheese for an added layer of texture and flavor.

Common Mistakes and Troubleshooting

Even the best cooks can run into problems. Here are some common mistakes and how to troubleshoot them:

  • Beans Too Soft: If your beans are mushy, it may be due to overcooking. Next time, reduce the cooking time or check them earlier.
  • Flavor Lacking: If the dish tastes bland, consider adding more salt, spices, or a splash of vinegar to brighten the flavors.
  • Burnt Bottom: If you notice burning at the bottom, ensure there’s enough liquid in the pot. Stir occasionally if possible to prevent sticking.
  • Too Spicy: If you accidentally added too many red pepper flakes, balance the heat with a dollop of sour cream or yogurt when serving.

Delicious Variations

Want to switch things up? Here are four variations to try:

  • Italian Style: Add diced tomatoes, Italian seasoning, and a splash of balsamic vinegar for a zesty twist.
  • Southern Comfort: Incorporate diced ham or bacon for a smoky flavor that complements the beans beautifully.
  • Asian Fusion: Use soy sauce, sesame oil, and ginger for an Asian-inspired version. Top with sesame seeds before serving.
  • Herb Garden: Mix in fresh herbs like dill or chives instead of parsley for a different aromatic experience.

Storage and Make-Ahead Instructions

These crockpot green beans make for excellent leftovers! Here’s how to store and reheat them:

  • Refrigerate: Store in an airtight container in the fridge for up to 4 days.
  • Freeze: For longer storage, freeze in portions for up to 3 months. Thaw in the refrigerator before reheating.
  • Reheat: Gently reheat on the stovetop or in the microwave until warmed through. Add a splash of broth if the beans seem dry.

Comprehensive FAQ

Here are some frequently asked questions to help you make the most of this recipe:

  • Can I use canned green beans? While you can, fresh or frozen green beans yield better texture and flavor.
  • How do I know when the green beans are done? They should be tender, but still vibrant green. Taste a bean to check if they are to your liking.
  • Can I add other vegetables? Absolutely! Carrots, bell peppers, or potatoes can add variety and nutrition.
  • What’s the best way to serve these beans? They pair well with roasted meats, grilled fish, or even as a part of a vegetarian spread.
  • Are these beans gluten-free? Yes, this recipe is naturally gluten-free. Just ensure that any broth used is also gluten-free.
  • Can I make this recipe vegan? Yes, use vegetable broth and skip any meat additions for a delicious vegan option.
  • How do I adjust the spice level? Simply reduce or omit the red pepper flakes for a milder flavor.
  • What equipment do I need? A standard slow cooker is all you need to make this easy dish!

Nutritional Tips and Dietary Adaptations

With a few simple adjustments, you can tailor this recipe to meet specific dietary needs:

  • Low Sodium: Use low-sodium broth and limit added salt for a heart-healthy option.
  • Vegan-Friendly: Stick with vegetable broth and omit any animal products.
  • High Fiber: Green beans are naturally high in fiber, but you can incorporate other beans, such as chickpeas, for an extra boost.
  • Keto Adaptation: This recipe is low in carbs and fits well within a keto diet. Just keep an eye on portion sizes!

Equipment Recommendations

To make the most of this recipe, consider investing in the following equipment:

  • Slow Cooker: A reliable slow cooker ensures even cooking and allows you to prepare meals ahead of time.
  • Chopping Board: A sturdy board will make prepping your vegetables quick and easy.
  • Sharp Knife: A good knife is essential for efficiently chopping and preparing your ingredients.
  • Measuring Cups and Spoons: Accurate measurements ensure consistent flavor in your dishes.

Serving Suggestions

These crockpot green beans are versatile and can complement a wide range of dishes:

  • Grilled Chicken: The savory beans pair beautifully with the char of grilled chicken.
  • Roast Beef: A classic pairing that adds color and nutrition to your plate.
  • Vegetarian Stir-Fry: Incorporate these beans into a stir-fry for added crunch and flavor.
  • Holiday Meals: These beans make an excellent side for Thanksgiving or Christmas feasts.

Now that you have the ultimate guide to making the perfect crockpot green beans, it’s time to roll up your sleeves and dive into this adventure. Remember, cooking is about experimenting and embracing flavors that excite you. So grab that skillet or slow cooker, and let’s get cooking!

Exquisite Crockpot Green Beans: Always Turns Out Grat

Prep Time 10 minutes
Cook Time 4 hours
Total Time 4 hours 10 minutes
Servings 4 servings
Calories 150
A flavorful and easy-to-make crockpot green beans recipe that turns out perfectly every time, ideal for a delicious side dish.

Ingredients

Green Beans

  • 2 pounds fresh green beans, trimmed
  • 1 medium onion, chopped
  • 4 cloves garlic, minced
  • 1 cup vegetable broth
  • 1 tablespoon olive oil
  • 1 teaspoon salt
  • 0.5 teaspoon black pepper
  • 1 teaspoon garlic powder
  • 1 teaspoon onion powder
  • 0.5 teaspoon red pepper flakes (optional)
  • 0.25 cup chopped fresh parsley (for garnish)

Instructions 

  • Place green beans in crockpot and top with onion and garlic.
  • Mix broth, olive oil, salt, pepper, garlic powder, onion powder, and red pepper flakes; pour over ingredients.
  • Stir to combine, cover, and cook on low for 6-8 hours or high for 3-4 hours until tender.
  • Stir gently, adjust seasoning if needed, and garnish with parsley before serving.

Notes

For extra flavor, add a squeeze of lemon before serving.
Calories: 150kcal
Cost: $15
Course: Side Dish
Cuisine: American
Keyword: Green Beans

Nutrition

Calories: 150kcal | Carbohydrates: 20g | Protein: 5g | Fat: 7g | Sodium: 400mg

Loved this recipe? Save it to your favorite Pinterest board so you can easily find it later! It’s the perfect way to keep all your sweet ideas in one place. ✨

Fresh green beans in a slow cooker, illuminated by warm, natural light.

Introducing Your New Favorite Snack: Garlic Parmesan Cheeseburger Bombs

Are you ready to elevate your snack game with a dish that brings together the juicy goodness of cheeseburgers and the irresistible flavors of garlic and parmesan? Meet the Garlic Parmesan Cheeseburger Bombs, the bite-sized morsels that are perfect for any occasion—from game day gatherings to cozy family dinners. These little bundles of joy are stuffed with a savory beef mixture, encased in flaky biscuit dough, and topped with a buttery garlic sprinkle that will make your taste buds sing.

This recipe is not just about flavor; it’s an adventure in cooking that encourages you to embrace your inner chef. With simple ingredients and straightforward steps, you can whip up these cheeseburger bombs in no time. So roll up your sleeves, and let’s get cooking!

Why You’ll Love This Recipe

Here are just a few reasons why these Garlic Parmesan Cheeseburger Bombs will become your new go-to recipe:

  • Quick and Easy: With preparation and baking time totaling under 30 minutes, these bombs fit perfectly into your busy lifestyle.
  • Deliciously Customizable: Feel free to experiment with different cheeses or spices to make this recipe your own!
  • Perfect for Any Occasion: Whether it’s a party, a family movie night, or game day, these bombs are sure to impress.
  • Kid-Friendly: A fun finger food that kids will love, making it easier to get them involved in the kitchen.
  • Make Ahead: Prepare them in advance and freeze for a quick snack or meal anytime!

Ingredient Breakdown

A delicious Garlic Parmesan Cheeseburger Bomb presented on a rustic surface, showcasing a gooey cheese filling.

Here’s what you’ll need to create these flavorful bites:

  • 1 lb ground beef: Choose good quality beef for a juicy filling that’s packed with flavor.
  • 1 cup shredded cheddar cheese: For that melty, gooey goodness.
  • 1/2 cup grated parmesan cheese: Adds a nutty flavor that complements the garlic perfectly.
  • 1 tsp garlic powder: For an extra kick of garlic flavor.
  • 1 tsp onion powder: Enhances the overall taste of the beef mixture.
  • Salt and pepper to taste: Essential for seasoning your filling right.
  • 1 can refrigerated biscuit dough: The perfect outer layer that bakes up flaky and golden.
  • 1/4 cup melted butter: For brushing on top and adding richness.
  • 1 tbsp chopped fresh parsley: A fresh garnish that adds a pop of color and flavor.
  • 1/2 tsp garlic salt: For that extra garlic flavor on the outside.

Ingredient Substitutions

If you don’t have all the ingredients on hand, here are some easy substitutions:

  • Ground Turkey or Chicken: Use instead of beef for a lighter option.
  • Vegan Cheese: Substitute with a plant-based cheese for a dairy-free version.
  • Homemade Biscuit Dough: Feel free to make your own dough if you want to go from scratch.
  • Fresh Garlic: Use 2-3 cloves of minced garlic instead of garlic powder for a stronger flavor.

Instructions to Make Garlic Parmesan Cheeseburger Bombs

Follow these simple steps to create your delicious Garlic Parmesan Cheeseburger Bombs:

  1. Preheat the oven to 375°F (190°C).
  2. In a large bowl, combine the ground beef, cheddar cheese, parmesan cheese, garlic powder, onion powder, salt, and pepper. Mix well until everything is evenly incorporated.
  3. Open the can of refrigerated biscuit dough and separate the biscuits.
  4. Flatten each biscuit into a circle (about 4 inches in diameter) and place a spoonful of the beef mixture in the center.
  5. Fold the edges of the biscuit over the filling and pinch to seal, forming a ball.
  6. Place the filled biscuit balls on a greased baking sheet.
  7. Brush the tops with melted butter and sprinkle with garlic salt and fresh parsley.
  8. Bake for 15-20 minutes or until golden brown.
  9. Allow to cool slightly before serving to avoid burns.

Expert Pro Tips

To ensure your Garlic Parmesan Cheeseburger Bombs come out perfectly every time, keep these tips in mind:

  • Don’t Overfill: Be cautious not to overstuff the biscuit dough, as this can lead to leaks and messy baking.
  • Seal Properly: Make sure to pinch the edges tightly to avoid any filling escaping during baking.
  • Experiment with Spices: Add a dash of cayenne pepper or hot sauce to the beef mixture for a spicy kick!
  • Use Fresh Ingredients: Fresh herbs and good-quality cheese can elevate the flavors significantly.
  • Check for Doneness: Ensure the internal temperature of the beef mixture reaches 160°F (71°C) for safety.
  • Let Them Rest: Allow the bombs to cool for a few minutes after baking to help them firm up.
  • Pair with Dipping Sauce: Serve them with marinara or ranch dressing for an exciting flavor twist.
  • Store Leftovers Properly: Keep any leftover bombs in an airtight container in the fridge for up to 3 days.

Common Mistakes and Troubleshooting

Even the best cooks can make mistakes! Here are some common issues you might encounter and how to avoid or fix them:

  • Leaking Filling: This usually happens if the dough isn’t sealed well. Make sure to pinch securely.
  • Underbaked Dough: If the bombs are golden on the outside but doughy inside, you may need to increase the baking time by a few minutes.
  • Too Dry Filling: Ensure your beef mixture is well-seasoned and moist; adding a bit of Worcestershire sauce can help.

Flavor Variations

Feel free to mix things up with these delicious variations:

  • Buffalo Chicken Bombs: Substitute ground beef with shredded cooked chicken and add buffalo sauce for a spicy twist.
  • Mediterranean Bombs: Use ground lamb, feta cheese, and add herbs like oregano and mint for a fresh flavor.
  • Veggie Bombs: Replace the beef with a mixture of sautéed bell peppers, mushrooms, and zucchini for a vegetarian option.
  • BBQ Cheeseburger Bombs: Mix in your favorite BBQ sauce with the beef for a tangy flavor profile.

Storage and Make-Ahead Instructions

Want to prep these bombs ahead of time? Here’s how!

  • Make-Ahead: Assemble the bombs and place them on a baking sheet. Cover and refrigerate for up to 24 hours before baking.
  • Freezing: You can freeze unbaked bombs! Place them on a baking sheet, freeze until solid, then transfer to a freezer bag for up to 3 months. Bake from frozen, adding a few extra minutes to the baking time.
  • Leftover Storage: Store any leftover bombs in an airtight container in the fridge for up to 3 days. Reheat in the oven for best results.

Frequently Asked Questions

Here are some common questions and answers about making Garlic Parmesan Cheeseburger Bombs:

  • Can I use other types of meat? Absolutely! Ground turkey, chicken, or even plant-based meat alternatives work well.
  • How can I make these gluten-free? Use gluten-free biscuit dough and ensure all other ingredients are gluten-free.
  • What dipping sauces go well with these bombs? Marinara, ranch dressing, or even a spicy aioli pair perfectly!
  • Can I bake them in an air fryer? Yes, you can! Air fry at 320°F (160°C) for about 10-12 minutes or until golden.
  • How do I know when they’re done? Look for a golden-brown color on the outside and check that the beef filling is cooked through.
  • Can I make them mini-sized? Absolutely! Just use smaller pieces of biscuit dough and adjust the cooking time as necessary.
  • Can I add vegetables to the filling? Yes! Chopped onions, peppers, or even spinach can be a great addition to the beef mixture.
  • How long do these keep in the fridge? Store in an airtight container for up to 3 days, and reheat as needed.

Nutrition Tips and Dietary Adaptations

These Garlic Parmesan Cheeseburger Bombs can be adapted to fit various dietary preferences:

  • Low-Carb Option: Use a cauliflower or keto-friendly biscuit dough.
  • Dairy-Free: Use dairy-free cheese and butter for a completely dairy-free version.
  • High-Protein: Add extra cheese or substitute with a protein-rich ground meat alternative.

Essential Equipment

To make your cooking experience smoother, here’s a list of must-have equipment:

  • Baking Sheet: A sturdy, non-stick baking sheet is essential for even cooking.
  • Mixing Bowl: For combining your filling ingredients.
  • Measuring Cups and Spoons: Accurate measurements ensure perfect results.
  • Pastry Brush: Ideal for applying melted butter on top of the bombs.

Delicious Serving Suggestions

Serve your Garlic Parmesan Cheeseburger Bombs with these delicious sides:

  • Fresh Salad: A crisp green salad balances out the richness of the bombs.
  • Chips: Tortilla or potato chips add a crunchy element to your meal.
  • Fruit Platter: A refreshing fruit platter complements the savory flavors beautifully.

Now that you have the ultimate guide to making Garlic Parmesan Cheeseburger Bombs, it’s time to get in the kitchen and start cooking! Remember, cooking is all about exploration and fun, so don’t be afraid to try new things and make this recipe your own. Enjoy your culinary adventure!

Garlic Parmesan Cheeseburger Bombs

Prep Time 15 minutes
Cook Time 20 minutes
Total Time 35 minutes
Servings 8 pieces
Calories 350
These savory cheeseburger bombs wrapped in biscuit dough are perfect for a quick, crowd-pleasing appetizer or main dish.

Ingredients

Meat and Cheese

  • 1 lb ground beef
  • 1 cup shredded cheddar cheese
  • 1/2 cup grated parmesan cheese
  • 1 tsp garlic powder
  • 1 tsp onion powder
  • to taste salt and pepper
  • 1 can refrigerated biscuit dough
  • 1/4 cup melted butter
  • 1 tbsp chopped fresh parsley
  • 1/2 tsp garlic salt

Instructions 

  • Preheat oven to 375°F (190°C).
  • Mix beef, cheeses, garlic powder, onion powder, salt, and pepper.
  • Flatten biscuits, add filling, seal into balls, and place on baking sheet.
  • Brush with melted butter, sprinkle with garlic salt and parsley.
  • Bake 15-20 minutes until golden brown. Cool slightly before serving.

Notes

For extra flavor, add a dash of hot sauce or your favorite seasoning.
Calories: 350kcal
Cost: $15
Course: Appetizer
Cuisine: American
Keyword: Cheeseburger

Nutrition

Calories: 350kcal | Carbohydrates: 25g | Protein: 20g | Fat: 22g | Sodium: 600mg

Loved this recipe? Save it to your favorite Pinterest board so you can easily find it later! It’s the perfect way to keep all your sweet ideas in one place. ✨

Eye-level shot of a freshly baked Garlic Parmesan Cheeseburger Bomb with a crispy exterior and savory toppings.

Thanksgiving is a time for family, friends, and food that brings people together. This year, let’s make your table shine with a green bean casserole that not only honors tradition but also elevates it to new heights. This easy recipe is a flavor explosion that will have everyone coming back for seconds and asking for the secret to your success. With just a handful of ingredients and a few simple steps, you can create a dish that is as visually appealing as it is delicious. Buckle up, because we’re diving into the art of the perfect green bean casserole.

Why You’ll Love This Recipe

Here’s why this easy green bean casserole should be your go-to dish this Thanksgiving:

  • Flavorful depth: The combination of creamy mushroom soup and sharp cheddar cheese creates a rich base that complements the tender green beans perfectly.
  • Crunchy texture: Topping it with crispy fried onions adds a satisfying crunch that contrasts beautifully with the creaminess of the casserole.
  • Quick to prepare: With a prep time of just 15 minutes and a bake time of 35 minutes, you can focus on other dishes without sacrificing flavor.
  • Flexible recipe: Easy substitutions allow you to cater to various dietary needs without compromising on taste.
  • Family favorite: This classic green bean casserole has been a hit at every gathering, making it a beloved staple on the Thanksgiving table.

Ingredients Needed for Your Green Bean Casserole

Here’s what you’ll need to create this delicious masterpiece:

  • Green beans: 2 cans (14.5 oz each), drained. You can also use fresh or frozen green beans for a fresher taste.
  • Cream of mushroom soup: 1 can (10.5 oz). This is the heart of the casserole, giving it a creamy texture and umami flavor.
  • Milk: 1/2 cup. Adds creaminess; you can substitute with plant-based milk for a vegan option.
  • Shredded cheddar cheese: 1 cup. For that rich, cheesy goodness. Feel free to experiment with different cheese varieties!
  • Crispy fried onions: 1 1/2 cups. The perfect topping for added crunch and flavor.
  • Salt and pepper: To taste. Essential for enhancing the flavors.

How to Make Your Green Bean Casserole

Delicious green bean casserole with melted cheddar and golden toppings on a rustic table.

Ready to get cooking? Follow these simple steps:

  1. Preheat the oven: Set it to 350°F (175°C).
  2. Mix ingredients: In a large mixing bowl, combine the drained green beans, cream of mushroom soup, milk, and half of the crispy fried onions.
  3. Add cheese: Stir in half of the shredded cheddar cheese and season with salt and pepper to taste.
  4. Transfer to casserole dish: Pour the mixture into a 1.5-quart casserole dish and spread evenly.
  5. Bake: Place in the preheated oven and bake for 25 minutes.
  6. Add toppings: Remove from the oven and sprinkle the remaining cheese and crispy fried onions on top.
  7. Final bake: Return to the oven and bake for an additional 10-15 minutes, until the cheese is melted and bubbly.
  8. Cool and serve: Let it cool slightly before serving to allow the flavors to meld.

Pro Tips for the Perfect Casserole

Want to take your green bean casserole to the next level? Check out these expert tips:

  • Use fresh ingredients: If possible, opt for fresh green beans for a vibrant flavor and texture.
  • Don’t overcook the beans: If using fresh beans, blanch them briefly to keep their crispness.
  • Experiment with spices: Add a pinch of nutmeg or garlic powder for an extra flavor kick.
  • Layer flavors: Consider sautéing mushrooms with onions before adding to the mix for deeper flavor.
  • Make it ahead: Prepare the casserole a day in advance and store it in the fridge, then bake it just before serving.
  • Leftovers are king: This casserole tastes even better the next day, so don’t be afraid to make extra!
  • Keep it gluten-free: Use gluten-free fried onions and cream of mushroom soup for a gluten-free version.
  • Tweak the cheese: Try mixing in some pepper jack for a spicy twist!

Common Mistakes and Troubleshooting

Even the best chefs make mistakes! Here’s how to avoid common pitfalls:

  • Watery casserole: Make sure to drain the green beans well. Excess moisture can lead to a soupy dish.
  • Burnt topping: Keep an eye on the casserole during the last bake to ensure the onions don’t burn.
  • Too salty: Taste as you go, especially with the cream of mushroom soup, which can be salty on its own.
  • Overmixing: Stir gently to keep the green beans intact; you want texture, not mush!

Delicious Variations

Want to switch things up? Here are some fun variations to try:

  • Cheesy bacon: Add crumbled cooked bacon for a smoky, savory twist.
  • Mushroom medley: Mix in different types of mushrooms for a more complex flavor profile.
  • Vegan delight: Replace cream of mushroom soup with a homemade cashew cream and use vegan cheese.
  • Asian flair: Add soy sauce and sesame oil for an Asian-inspired bean casserole.

Storage and Make-Ahead Instructions

Planning ahead? Here’s how to store your casserole:

  • Refrigerate: Store leftovers in an airtight container for up to 3 days.
  • Freeze: You can freeze the casserole for up to 2 months. Just remember to leave off the fried onions until you bake it.
  • Reheat: To reheat, cover with foil and bake at 350°F (175°C) until heated through.

Frequently Asked Questions

Here are some common questions about green bean casserole:

  • Can I use fresh green beans? Yes, just blanch them before mixing for the best texture.
  • What can I substitute for cream of mushroom soup? You can use homemade cream sauces or other cream soups.
  • Is it possible to make this casserole ahead of time? Absolutely! Prepare it a day in advance and bake it fresh before serving.
  • How do I make it gluten-free? Use gluten-free cream of mushroom soup and fried onions.
  • Can I use frozen green beans? Yes, just thaw and drain them before use.
  • What’s the best way to reheat leftovers? Cover with foil and bake at 350°F until hot.
  • Can I add meat to the casserole? Yes, crumbled sausage or bacon can add great flavor.
  • What are some good side dishes to serve with it? Pair it with turkey, stuffing, or mashed potatoes for a complete meal.

Nutrition Tips and Dietary Adaptations

Looking to make your casserole a bit healthier? Here are some tips:

  • Low-fat options: Use low-fat cream of mushroom soup and reduced-fat cheese to cut calories.
  • Add veggies: Mix in chopped carrots or bell peppers for added nutrients.
  • Portion control: Serve smaller portions to keep your meal balanced.

Equipment Recommendations

Make sure you have the right tools for the job:

  • Casserole dish: A 1.5-quart dish is ideal for this recipe.
  • Mixing bowls: Use a large bowl for easy mixing.
  • Measuring cups: Precision matters, especially with liquids!

Serving Suggestions

Make your Thanksgiving feast unforgettable with these serving ideas:

  • Garnish: Top with fresh parsley or chives for a pop of color.
  • Pair with cranberry sauce: The tartness of cranberry complements the richness of the casserole.
  • Offer a variety: Serve alongside other sides like stuffing, mashed potatoes, and turkey for a full spread.

Now that you have the ultimate guide to making a show-stopping green bean casserole, it’s time to get cooking! Remember, cooking is about adventure and creativity. Don’t be afraid to experiment with flavors and make this dish your own. Gather your loved ones, set the table, and let the feasting begin. Happy Thanksgiving!

Easy Green Bean Casserole Recipe | A Classic Thanksgiving Side Dish Recipe!

Prep Time 10 minutes
Cook Time 35 minutes
Total Time 45 minutes
Servings 6 servings
Calories 250
This classic green bean casserole is a perfect side dish for Thanksgiving, combining creamy mushroom soup, crispy onions, and melted cheddar cheese for a flavorful and easy-to-make dish.

Ingredients

Green Beans

  • 2 cans green beans, drained
  • 1 can cream of mushroom soup
  • 0.5 cup milk
  • 1 cup shredded cheddar cheese
  • 1.5 cups crispy fried onions
  • to taste salt and pepper

Instructions 

  • Preheat oven to 350°F (175°C).
  • Mix green beans, mushroom soup, milk, half of onions, and half of cheese.
  • Transfer to casserole dish, season with salt and pepper.
  • Bake for 25 minutes, then top with remaining cheese and onions.
  • Bake for another 10-15 minutes until bubbly, then serve.

Notes

For extra flavor, add a dash of garlic powder or paprika.
Calories: 250kcal
Cost: $15
Course: Side Dish
Cuisine: American
Keyword: Green Beans

Nutrition

Calories: 250kcal | Carbohydrates: 20g | Protein: 10g | Fat: 15g | Sodium: 600mg

Loved this recipe? Save it to your favorite Pinterest board so you can easily find it later! It’s the perfect way to keep all your sweet ideas in one place. ✨

Eye-level shot of a bubbling green bean casserole garnished with fried onions and cheese.

Unlock the Secrets of Comfort Cooking with Garlic Parmesan Chicken and Potatoes

Welcome to a culinary journey where the simple becomes spectacular! Today, we dive into the art of crafting the perfect Garlic Parmesan Crockpot Chicken and Potatoes. This dish transforms humble ingredients into a heartwarming feast that will have your taste buds dancing with joy. The crockpot does the heavy lifting, allowing you to enjoy the warm embrace of garlic and parmesan flavors without spending hours in the kitchen. Ready to set your taste buds ablaze? Let’s get cooking!

Why You’ll Love This Recipe

Here’s why this recipe is a must-try:

  • Effortless Preparation: With minimal prep time, this dish is perfect for busy weeknights or lazy weekends. Simply dump and go!
  • Flavor Explosion: The combination of garlic, parmesan cheese, and Italian seasoning creates a rich, savory sauce that infuses every bite with warmth.
  • Family-Friendly: A crowd-pleaser, this dish is sure to satisfy even the pickiest eaters. Everyone will be asking for seconds!
  • Versatile Ingredients: This recipe allows for substitutions based on what you have on hand, making it adaptable to your pantry.
  • Comforting Meal: Perfect for chilly evenings, this dish evokes feelings of home and warmth, making it a go-to comfort food.

Ingredient Breakdown and Substitutions

Delicious garlic parmesan chicken with halved baby potatoes, garnished with parsley.

Let’s gather our ingredients for this delightful dish:

  • 4 boneless, skinless chicken breasts: You can substitute with chicken thighs for a juicier bite.
  • 4 cups baby potatoes, halved: Feel free to use regular potatoes cut into chunks or even sweet potatoes for a twist.
  • 1/2 cup grated parmesan cheese: For a dairy-free version, use nutritional yeast or a dairy-free cheese substitute.
  • 1/4 cup olive oil: You can swap with avocado oil or melted butter for a different flavor profile.
  • 5 cloves garlic, minced: If you love garlic, don’t hesitate to add more! Roasted garlic can also add a sweet depth.
  • 1 teaspoon Italian seasoning: A homemade mix of oregano, basil, and thyme can be used for a fresh touch.
  • Salt and pepper to taste: Adjust according to your personal preference.
  • Fresh parsley for garnish: Optional, but it adds a beautiful color contrast and fresh flavor.

Step-by-Step Cooking Instructions

Now, let’s get our hands dirty and create this flavorful masterpiece:

  1. Mix the Marinade: In a bowl, combine the olive oil, minced garlic, Italian seasoning, salt, and pepper.
  2. Prepare the Crockpot: Place the halved baby potatoes at the bottom of the crockpot.
  3. Season the Chicken: Sprinkle the chicken breasts with salt and pepper before placing them on top of the potatoes.
  4. Coat with Flavor: Pour the garlic olive oil mixture over the chicken and potatoes, ensuring everything is well coated.
  5. Cheesy Goodness: Sprinkle the grated parmesan cheese generously on top.
  6. Set and Forget: Cover and cook on low for 6-7 hours or high for 3-4 hours, until the chicken is cooked through and the potatoes are tender.
  7. Garnish and Serve: If desired, garnish with fresh parsley before serving to add a pop of color and flavor.

Pro Tips for Cooking Success

Want to elevate your dish even further? Check out these expert insights:

  • Perfect Timing: For the best texture, avoid overcooking the chicken. It should be juicy and tender, not dry.
  • Layering Flavors: Consider adding other vegetables like carrots or bell peppers for added nutrition and flavor depth.
  • Thickening the Sauce: If you prefer a thicker sauce, remove the lid for the last hour of cooking to allow excess liquid to evaporate.
  • Add a Kick: For those who love heat, sprinkle some red pepper flakes over the chicken before cooking.
  • Fresh Herbs: Experiment with fresh herbs like thyme or rosemary for a fragrant finish.
  • Chicken Broth Swap: For extra flavor, use chicken broth instead of water or just olive oil as the base.
  • Make it Ahead: This dish is perfect for meal prep! Cook it in advance and store it in the refrigerator for up to 3 days.
  • Freezing Tips: You can freeze leftovers in an airtight container for up to 3 months. Just reheat gently to maintain texture.

Common Mistakes and Troubleshooting

Even the best chefs make mistakes! Here’s how to avoid common pitfalls:

  • Overcrowding the Crockpot: Ensure there’s enough space for steam to circulate for even cooking.
  • Not Seasoning Enough: Don’t be afraid to taste and adjust seasoning throughout the cooking process.
  • Skipping the Cheese: Parmesan is key for that creamy finish; don’t skip it or substitute with a low-quality cheese.
  • Ignoring the Garnish: A sprinkle of fresh parsley or basil can elevate the presentation and flavor.

Flavor Variations and Customizations

Want to mix things up? Here are some tasty variations to try:

  • BBQ Twist: Add your favorite BBQ sauce to the garlic mixture for a smoky kick.
  • Lemon Herb Delight: Incorporate lemon zest and juice for a bright, zesty flavor profile.
  • Creamy Mushroom & Spinach: Stir in sautéed mushrooms and spinach for a hearty, earthy addition.
  • Spicy Kick: Add diced jalapeños or your favorite hot sauce for a fiery version of this dish.

Storage and Make-Ahead Instructions

This dish is perfect for prep-ahead meals:

  • Refrigeration: Store leftovers in an airtight container for up to 3 days. Reheat in the microwave or on the stovetop.
  • Freezing: Cool completely before transferring to a freezer-safe container. Label with the date for easy tracking.
  • Reheating: When ready to eat, thaw overnight in the fridge and reheat gently until warmed through.

Comprehensive FAQ

Got questions? We’ve got answers!

  • Can I add other vegetables to the Garlic Parmesan Chicken and Potatoes? Absolutely! Carrots, green beans, or bell peppers work beautifully.
  • What should I do if I want a thicker sauce for the dish? Remove the lid during the last hour of cooking to allow the sauce to thicken.
  • How can I adjust the recipe for a smaller or larger serving size? Simply scale the ingredients up or down, keeping the cooking time the same.
  • Can I use frozen chicken? Yes, you can use frozen chicken, but it may require additional cooking time.
  • What can I serve with this dish? Pair it with a fresh salad, crusty bread, or steamed vegetables.
  • Is this recipe gluten-free? Yes, all ingredients are gluten-free, making it suitable for gluten-sensitive diets.
  • How do I store leftovers? Store them in an airtight container in the fridge for up to 3 days.
  • Can I use a different cheese? Yes, feel free to experiment with cheddar or mozzarella for a different flavor.

Nutrition Tips and Dietary Adaptations

This dish can easily be adapted to fit various dietary needs:

  • Low-Carb Option: Substitute potatoes with cauliflower for a low-carb twist.
  • Heart-Healthy: Use skinless chicken thighs and reduce the amount of cheese for a lighter version.
  • Dairy-Free: Replace parmesan with nutritional yeast and use coconut milk for creaminess.

Equipment Recommendations

To make this recipe a breeze, here’s what you’ll need:

  • Crockpot: A reliable slow cooker is essential for evenly cooking the chicken and potatoes.
  • Mixing Bowl: For combining the marinade ingredients smoothly.
  • Measuring Cups and Spoons: Accurate measurements ensure balanced flavors.
  • Chef’s Knife: For easy chopping and preparation of ingredients.

Serving Suggestions

Ready to serve? Here are some ideas:

  • Garnish: A sprinkle of fresh parsley or basil adds a pop of color and freshness.
  • Side Dishes: Serve with a side salad, garlic bread, or roasted veggies.
  • Pairing Drinks: A crisp white wine or sparkling water complements the dish perfectly.

Conclusion

There you have it! A comforting and delicious Garlic Parmesan Crockpot Chicken and Potatoes recipe that’s sure to become a staple in your culinary repertoire. Embrace the flavors, experiment with variations, and invite your loved ones to share in the experience. Cooking is not just about the food; it’s about the connections we forge over meals. So grab that skillet, add a little fire, and let’s make magic happen in the kitchen!

Garlic Parmesan Crockpot Chicken and Potatoes

Prep Time 10 minutes
Cook Time 4 hours
Total Time 4 hours 10 minutes
Servings 4 servings
Calories 550
A flavorful and easy crockpot dish featuring tender chicken breasts, baby potatoes, and a savory garlic Parmesan sauce.

Ingredients

Protein

  • 4 pieces boneless, skinless chicken breasts

Vegetables

  • 4 cups baby potatoes, halved

Dairy & Oils

  • 1/2 cup grated parmesan cheese
  • 1/4 cup olive oil

Seasonings

  • 5 cloves garlic, minced
  • 1 teaspoon italian seasoning
  • to taste salt and pepper

Garnish

  • optional fresh parsley for garnish

Instructions 

  • Mix olive oil, garlic, Italian seasoning, salt, and pepper.
  • Place halved potatoes in crockpot, then add seasoned chicken on top.
  • Pour garlic olive oil mixture over everything, then sprinkle Parmesan cheese.
  • Cover and cook on low for 6-7 hours or high for 3-4 hours.
  • Garnish with parsley before serving if desired.

Notes

Ensure chicken is cooked through before serving.
Calories: 550kcal
Cost: $15
Course: Main Course
Cuisine: American
Keyword: chicken, garlic, Potatoes

Nutrition

Calories: 550kcal | Carbohydrates: 45g | Protein: 50g | Fat: 20g | Sodium: 600mg

Loved this recipe? Save it to your favorite Pinterest board so you can easily find it later! It’s the perfect way to keep all your sweet ideas in one place. ✨

Gourmet presentation of chicken breasts and baby potatoes drenched in garlic parmesan sauce.

Gather around, friends! Today, I’m excited to share a recipe that has been a staple in my kitchen for years — my beloved Slow Cooker Green Bean Casserole. This dish is more than just a side; it’s a celebration of flavors, a warm embrace on a chilly evening, and an invitation to enjoy the simple pleasures of life. With the ease of a slow cooker, this dish allows you to focus on what truly matters — the company you keep. So grab your apron, and let’s dive into the magic of this cozy casserole!

Why You’ll Love This Recipe

  • Hands-off cooking: Let your slow cooker do the work while you enjoy the company of your guests or tackle other preparations.
  • Layered flavors: The combination of cream of mushroom soup, cheddar cheese, and French fried onions creates an irresistible taste sensation.
  • Perfect for gatherings: This casserole is a crowd-pleaser that pairs beautifully with various main courses, making it ideal for potlucks and family dinners.
  • Customizable: With easy substitutions and variations, you can make this dish your own while still keeping its heartwarming essence.
  • Easy clean-up: With just one pot to wash, you can relax and enjoy your meal without the hassle of a mountain of dishes.

Ingredient Breakdown

Let’s break down the ingredients that make this casserole a true delight:

  • Green Beans: You’ll need 2 cans (14.5 oz each) of drained green beans. Fresh or frozen beans can also work—just make sure they’re cooked until tender.
  • Cream of Mushroom Soup: This is the backbone of our casserole. If you’re feeling adventurous, try substituting it with cream of celery soup for a different flavor profile.
  • Milk: 1/2 cup of milk helps to create a creamy texture. You can use any milk you prefer, including dairy-free alternatives such as almond or oat milk.
  • Cheddar Cheese: A whole cup of shredded cheddar cheese adds richness. Feel free to mix it up with Monterey Jack or a spicy pepper jack for a kick.
  • French Fried Onions: These crispy toppings add crunch and flavor. If you want a healthier option, try crushed nuts or homemade crispy onions.
  • Garlic Powder: A dash of garlic powder (1/2 teaspoon) enhances the flavor. Fresh minced garlic is a great substitute if you prefer a bolder taste.
  • Black Pepper and Salt: Season to taste to elevate the dish. Freshly cracked black pepper is always a nice touch.

Pro Tips for Success

A delicious slow cooker green bean casserole featuring green beans, cheddar cheese, and fried onions in a warm setting.
  • Prep ahead: You can combine all ingredients the night before and store them in the fridge. Simply transfer to the slow cooker in the morning and set it to cook.
  • Don’t skip the cheese topping: Adding the remaining cheese and French fried onions in the last 30 minutes of cooking creates a melty, crispy topping that everyone will rave about.
  • Experiment with spices: Feel free to add a pinch of cayenne pepper or paprika for an unexpected kick.
  • Check for doneness: Cooking times can vary based on the slow cooker, so check for doneness around the 3-hour mark.
  • Use quality ingredients: The better the ingredients, the better the flavor. Go for high-quality cheese and fresh beans if possible.
  • Adjust for dietary needs: This recipe can be made gluten-free by using gluten-free cream of mushroom soup and checking the fried onion brand.
  • Make it vegan: Swap the milk for a plant-based alternative and use vegan cheese.
  • Serve warm: This casserole is best enjoyed warm, right out of the slow cooker, so plan your timing accordingly.

Common Mistakes and Troubleshooting

Even the most seasoned cooks can face hiccups, so here are some common pitfalls and how to avoid them:

  • Too watery: If the casserole seems too runny, you can remove the lid for the last hour of cooking to allow some moisture to evaporate.
  • Burnt edges: If you notice the edges are browning too quickly, stir the casserole and reduce the heat if possible.
  • Overcooked beans: If using fresh beans, make sure to cook them until tender before adding them to the slow cooker to prevent mushiness.
  • Lack of flavor: Taste and adjust seasoning throughout the cooking process. Don’t be afraid to add more salt or spices as needed!

Variations to Try

Want to mix things up? Here are some delicious variations to consider:

  • Cheesy Bacon Green Bean Casserole: Add crumbled cooked bacon for a smoky flavor that pairs perfectly with the cheese.
  • Spicy Mexican Green Bean Casserole: Incorporate diced jalapeños and swap cheddar cheese for pepper jack for a spicy twist.
  • Italian Green Bean Casserole: Use Italian seasoning and add sun-dried tomatoes for a Mediterranean flair.
  • Herbed Green Bean Casserole: Replace the garlic powder with fresh herbs like thyme or rosemary for a fragrant option.

Storage and Make-Ahead Instructions

Got leftovers? Here’s how to store and reheat your casserole:

  • Refrigerate: Store leftover casserole in an airtight container in the fridge for up to 3 days.
  • Freeze: You can freeze the casserole before cooking. Just assemble the ingredients in a freezer-safe dish and thaw in the fridge before cooking.
  • Reheat: To reheat, place in the slow cooker on low until warmed through, or microwave in single servings until hot.

Frequently Asked Questions

Here are some common questions about this recipe:

  • Can I use fresh green beans? Yes! Just make sure to cook them until tender before adding them to the slow cooker.
  • Is this dish gluten-free? You can make it gluten-free by using gluten-free cream of mushroom soup and checking the brand of fried onions.
  • How can I make this dish vegan? Substitute the milk with a plant-based milk and use vegan cheese and soup.
  • Can I double this recipe? Absolutely! Just ensure your slow cooker is large enough to accommodate the extra ingredients.
  • How long does it take to cook? Cooking on low takes about 4 hours, but always check for doneness.
  • What should I serve it with? This casserole pairs well with roasted meats, grilled chicken, or even as a hearty vegetarian dish.
  • Can I make it ahead of time? Yes! You can prep the ingredients the night before and cook it the next day.
  • What if I don’t have cream of mushroom soup? You can substitute with cream of celery soup or make your own creamy sauce.

Nutrition Tips and Dietary Adaptations

This dish can be adapted to fit various dietary preferences:

  • Low-calorie option: Use reduced-fat cheese and low-fat soup to cut down on calories.
  • Vegetarian-friendly: This recipe is inherently vegetarian if you use vegetarian soup options.
  • High-protein twist: Add cooked chicken or turkey to boost protein content.

Equipment Recommendations

To make this dish, you’ll need:

  • Slow Cooker: A 4-quart slow cooker is perfect for this recipe.
  • Measuring Cups and Spoons: Essential for precise ingredient measurements.
  • Mixing Spoon: For combining all the ingredients effortlessly.

Serving Suggestions

Serve your Slow Cooker Green Bean Casserole hot and fresh. It pairs wonderfully with:

  • Roasted Chicken: The savory flavors complement each other beautifully.
  • Grilled Steaks: A hearty option for meat lovers.
  • Vegetarian Dishes: It stands out alongside veggie-based meals, enhancing their richness.
  • Family Gatherings: Perfect for holidays, potlucks, or any cozy gathering!

So there you have it — the ultimate guide to my Slow Cooker Green Bean Casserole. With its rich flavors and the ease of slow cooking, this dish is sure to become a staple in your home just like it is in mine. Embrace the adventure of cooking, and remember: every pinch of spice and layer of flavor tells a story worth sharing. Happy cooking!

Slow Cooker Green Bean Casserole

Prep Time 10 minutes
Cook Time 4 minutes
Total Time 4 hours
Servings 6 servings
Calories 250
A classic holiday side dish, this creamy green bean casserole is easy to prepare in a slow cooker and topped with crispy fried onions.

Ingredients

Green Beans

  • 2 cans green beans, drained

Cream of Mushroom Soup

  • 1 can cream of mushroom soup

Milk

  • 0.5 cup milk

Cheddar Cheese

  • 1 cup shredded cheddar cheese

French Fried Onions

  • 1 cup french fried onions

Garlic Powder

  • 0.5 teaspoon garlic powder

Black Pepper

  • 0.5 teaspoon black pepper

Salt

  • to taste salt

Instructions 

  • Combine green beans, mushroom soup, milk, garlic powder, black pepper, and salt in a slow cooker. Mix well.
  • Stir in 3/4 cup of shredded cheddar cheese.
  • Cover and cook on low for 4 hours.
  • Top with remaining cheddar cheese and fried onions. Cover and cook for 30 minutes.

Notes

For extra crunch, add more fried onions just before serving.
Calories: 250kcal
Cost: $15
Course: Side Dish
Cuisine: American
Keyword: Green Beans

Nutrition

Calories: 250kcal | Carbohydrates: 20g | Protein: 10g | Fat: 15g | Sodium: 600mg

Loved this recipe? Save it to your favorite Pinterest board so you can easily find it later! It’s the perfect way to keep all your sweet ideas in one place. ✨

An appetizing green bean casserole presented in a rustic dish, showcasing layers of creamy texture and golden toppings.

Ignite Your Culinary Spirit with These Vegetarian Black Bean Enchiladas

Welcome to a vibrant journey through flavor, where we explore the sensational world of Vegetarian Black Bean Enchiladas. These enchiladas are not just a meal; they are an experience—an explosion of spices and textures that will leave your taste buds dancing. Rooted in my Texan upbringing, where spice is king, this recipe is a celebration of bold flavors, creativity, and the joy of cooking. Get ready to embrace the thrill of crafting a dish that’s as nourishing as it is satisfying, all while awakening your culinary spirit.

Whether you’re looking for a quick weeknight dinner or a showstopper for your next gathering, these enchiladas will fit the bill. With their rich filling, zesty sauce, and gooey cheese, they’re sure to be a hit at the table. Let me guide you through this culinary adventure!

Why You’ll Love This Recipe

There are countless reasons to fall in love with these Vegetarian Black Bean Enchiladas, but here are just a few:

  • Healthful and hearty: Packed with protein-rich black beans and fresh veggies, these enchiladas are satisfying without being heavy.
  • Quick and easy: With minimal prep and cook time, you can whip up these enchiladas in under an hour!
  • Customizable: Feel free to mix and match the ingredients based on your preferences or what you have on hand.
  • Freezable: Make a double batch and freeze half for a quick meal later—just pop them in the oven when you’re ready to eat.
  • Deliciously comforting: The combination of melty cheese, flavorful enchilada sauce, and spiced filling will warm your soul.

Gathering Your Ingredients for Vegetarian Black Bean Enchiladas

Eye-level view of black bean enchiladas served in a dish, showcasing vibrant ingredients and cheese.

Let’s get started with the essentials. Here’s what you’ll need:

  • 1 can (15 oz) black beans, rinsed and drained
  • 1 cup corn kernels (fresh, frozen, or canned)
  • 1 cup diced bell peppers (any color for a pop of color)
  • 1 cup diced onions
  • 2 cloves garlic, minced
  • 1 teaspoon cumin
  • 1 teaspoon chili powder
  • 8 small corn or flour tortillas
  • 2 cups enchilada sauce (store-bought or homemade)
  • 1 cup shredded cheese (cheddar or Monterey Jack)
  • Fresh cilantro for garnish (optional)
  • Salt and pepper to taste

Step-by-Step Guide to Making Vegetarian Black Bean Enchiladas

Now that you have your ingredients, let’s dive into the cooking process!

Prepare the Flavorful Black Bean Filling

1. Preheat your oven to 375°F (190°C).

2. In a large skillet, heat a tablespoon of oil over medium heat.

3. Add the diced onions and bell peppers, sautéing until softened, about 5 minutes.

4. Stir in the minced garlic, cumin, chili powder, salt, and pepper, cooking for another minute until fragrant.

5. Fold in the black beans and corn, cooking until heated through. Remove from heat and set aside.

Warm and Fill the Tortillas

6. Spread a small amount of enchilada sauce at the bottom of your baking dish to prevent sticking.

7. Warm the tortillas, either in a skillet or microwave, so they’re pliable.

8. Place a few spoonfuls of the black bean mixture into each tortilla, roll them up, and place them seam-side down in the baking dish.

Assemble and Bake Your Vegetarian Black Bean Enchiladas

9. Pour the remaining enchilada sauce over the rolled tortillas and sprinkle with shredded cheese.

10. Cover with foil and bake for 20 minutes, then remove the foil and bake for an additional 10 minutes, or until the cheese is bubbly and golden.

11. Remove from the oven, garnish with fresh cilantro if desired, and serve hot.

Pro Tips for Perfect Vegetarian Black Bean Enchiladas

Ready to take your enchiladas to the next level? Here are some expert insights:

  • Use homemade enchilada sauce: If you have the time, homemade sauce can elevate the flavor. Try blending canned tomatoes with chili powder, garlic powder, and a splash of vinegar for a quick version.
  • Experiment with spices: Don’t shy away from adding a pinch of smoked paprika or cayenne pepper for an extra kick!
  • Make them gluten-free: Use corn tortillas to ensure your dish is gluten-free.
  • Cheese alternatives: For a vegan version, substitute cheese with a mixture of nutritional yeast and cashew cream.
  • Pre-cook the tortillas: Lightly frying the tortillas in a bit of oil before filling them can prevent them from getting soggy.
  • Layer flavors: Add a layer of sautéed mushrooms or spinach to enhance the filling.
  • Garnish generously: Fresh toppings like avocado, diced tomatoes, or a drizzle of lime crema can brighten up each bite.
  • Let them rest: Allow the enchiladas to sit for a few minutes after baking; this will help them hold their shape when serving.

Common Mistakes and Troubleshooting

Even the best of us make mistakes in the kitchen. Here’s how to avoid them:

  • Overfilling the tortillas: Be cautious not to overstuff; otherwise, they may burst while baking. Start with a few spoonfuls and add more if needed.
  • Using cold tortillas: Cold tortillas can crack when rolled. Make sure they’re warm and flexible.
  • Skipping the sauce: Always add sauce to the bottom of the baking dish to prevent sticking and enhance flavor.
  • Not covering with foil: Covering the dish with foil while baking helps to retain moisture, resulting in a better texture.

Creative Variations of Vegetarian Black Bean Enchiladas

If you’re feeling adventurous, here are some creative takes on this classic dish:

  • Sweet Potato Enchiladas: Swap black beans for roasted sweet potatoes for a sweet twist.
  • Mexican Street Corn Enchiladas: Add fresh corn, cotija cheese, and a squeeze of lime for a fresh take.
  • Spicy Chipotle Enchiladas: Incorporate chipotle peppers in adobo sauce into the filling for a smoky flavor.
  • Quinoa and Black Bean Enchiladas: Boost the protein content by adding cooked quinoa to the bean mixture.

Storage and Make-Ahead Instructions

Want to prepare your enchiladas in advance? Here’s how:

  • Refrigerating: Assemble the enchiladas, cover tightly with foil, and refrigerate for up to 2 days before baking.
  • Freezing: After assembling, wrap each enchilada individually in plastic wrap and store in a freezer-safe container. They can be frozen for up to 3 months. When ready to bake, thaw overnight in the refrigerator and bake as directed.

Frequently Asked Questions About Vegetarian Black Bean Enchiladas

Here are some FAQs to help you on your culinary journey:

  • Can I use other beans?: Absolutely! Pinto beans or kidney beans work well in this recipe.
  • How can I make this dish spicier?: Add diced jalapeños to the filling or use a spicier enchilada sauce.
  • Can I make this ahead of time?: Yes! You can prepare the filling and assemble the enchiladas in advance.
  • What if I can’t find corn tortillas?: Flour tortillas are a great alternative, though they may alter the flavor slightly.
  • How long do leftovers last?: Store leftovers in an airtight container in the fridge for up to 4 days.
  • Can I use a different type of cheese?: Sure! Feel free to substitute with your favorite cheese or a dairy-free option.
  • What’s the best way to reheat them?: Reheat enchiladas in the oven at 350°F (175°C) until heated through, about 15 minutes.
  • Can I skip the cheese?: Absolutely! The enchiladas will still be delicious without it.

Nutritional Tips and Dietary Adaptations

To ensure your meal is as nourishing as it is delicious, consider these tips:

  • Load up on veggies: Add more vegetables like zucchini, spinach, or mushrooms to the filling for added nutrients.
  • Watch your portions: Serve with a side of fresh salad to balance the meal.
  • Healthy fats: Top with sliced avocado or a dollop of Greek yogurt for healthy fats and creaminess.

Equipment Recommendations

Here are some kitchen essentials that will make your enchilada-making experience smoother:

  • Non-stick skillet: For easy cooking of the filling without sticking.
  • 9×13-inch baking dish: Perfect size for baking and serving.
  • Sharp knife: A good knife will make chopping veggies a breeze.
  • Wooden spoon: Ideal for mixing and sautéing without scratching your cookware.

Serving Suggestions

To elevate your dining experience, pair your enchiladas with:

  • Mexican Rice: Fluffy rice seasoned with lime and cilantro makes a great side.
  • Guacamole: Creamy avocado dip adds richness and flavor.
  • Southwestern Black Bean Salad: A vibrant salad with a kick that complements the enchiladas.
  • Fresh Pico de Gallo: Brighten up your plate with a zesty tomato salsa for freshness.

Now that you have all the tools and knowledge you need, it’s time to get cooking! Remember, cooking is about embracing adventure and taking risks. Enjoy the process, savor the flavors, and don’t hold back on the spice! With these Vegetarian Black Bean Enchiladas, you’ll create a dish that not only fills the belly but also warms the heart. Happy cooking!

Delicious & Easy Vegetarian Black Bean Enchiladas

Prep Time 15 minutes
Cook Time 30 minutes
Total Time 45 minutes
Servings 4 servings
Calories 350
These flavorful vegetarian enchiladas are quick to prepare and perfect for a satisfying meal. Loaded with black beans, corn, and cheese, they make a delicious and wholesome dinner.

Ingredients

Canned Goods

  • 1 can black beans, rinsed and drained
  • 1 cup corn kernels (fresh, frozen, or canned)
  • 1 cup diced bell peppers (any color)
  • 1 cup diced onions
  • 2 cloves garlic, minced
  • 1 teaspoon cumin
  • 1 teaspoon chili powder
  • 8 small corn or flour tortillas
  • 2 cups enchilada sauce (store-bought or homemade)
  • 1 cup shredded cheese (cheddar or monterey jack)

Garnish

  • fresh cilantro for garnish (optional)
  • salt and pepper to taste

Instructions 

  • Preheat oven to 375°F (190°C).
  • Sauté onions and bell peppers in oil until softened, about 5 minutes.
  • Add garlic, cumin, chili powder, salt, and pepper; cook for 1 minute.
  • Mix in black beans and corn; heat through. Spread a little enchilada sauce in a baking dish.
  • Fill tortillas with bean mixture, roll up, place seam-side down, cover with remaining sauce and cheese. Bake for 20-30 minutes.

Notes

For extra flavor, add a dash of hot sauce or serve with sour cream.
Calories: 350kcal
Cost: $15
Course: Main Course
Cuisine: Mexican
Keyword: Black Beans, Vegetarian

Nutrition

Calories: 350kcal | Carbohydrates: 50g | Protein: 15g | Fat: 12g | Sodium: 800mg

Loved this recipe? Save it to your favorite Pinterest board so you can easily find it later! It’s the perfect way to keep all your sweet ideas in one place. ✨

Warm, inviting image of vegetarian black bean enchiladas with a side of enchilada sauce and garnished cilantro.