Author

Avery Collins

Browsing

Welcome to the Comfort Food Revolution!

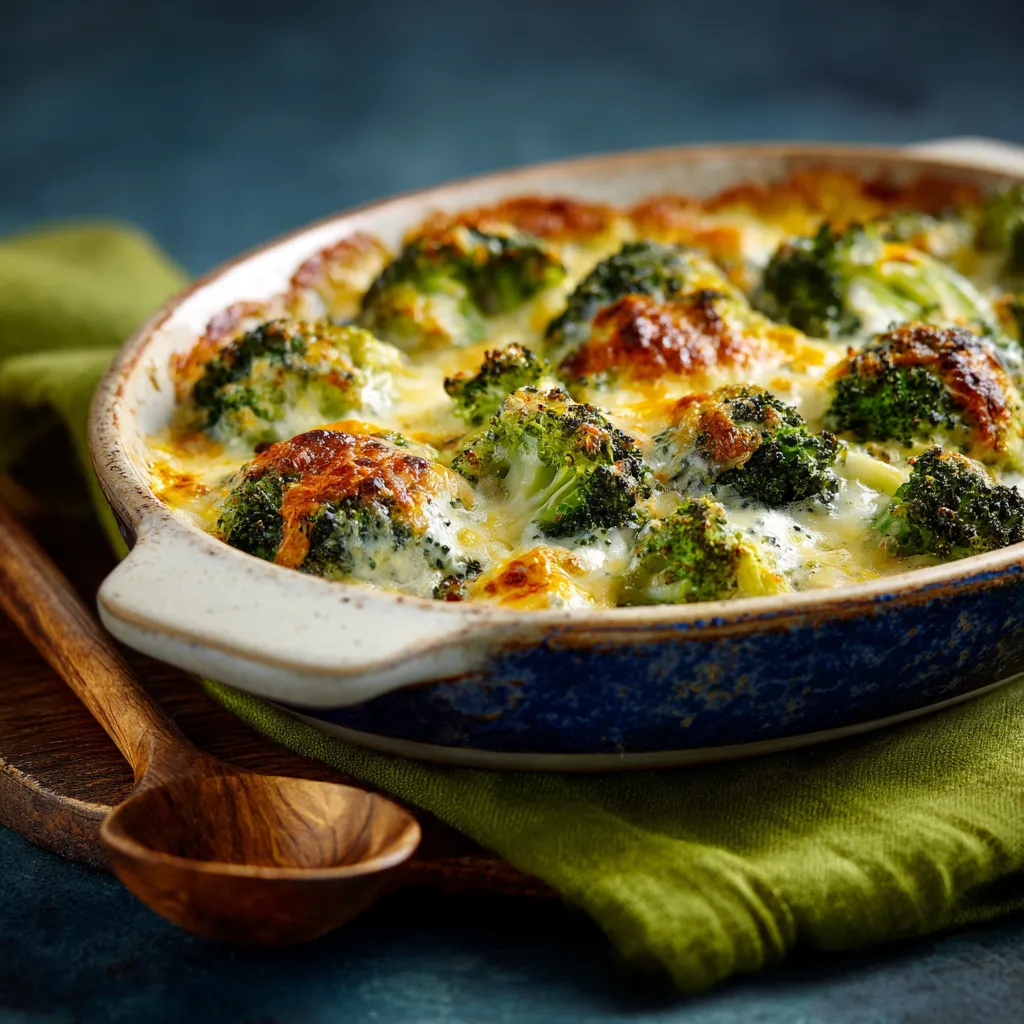
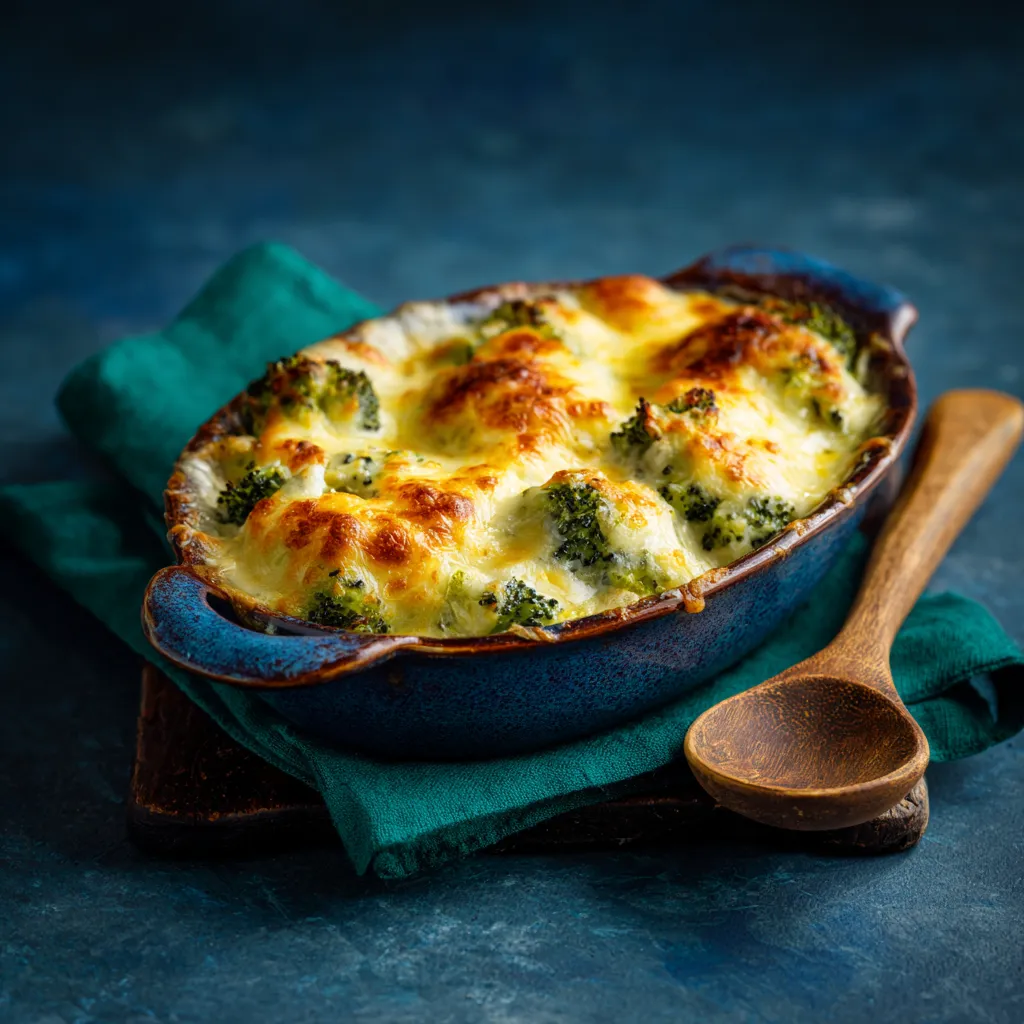
Let’s talk about a dish that’s as comforting as a warm hug on a chilly evening: Broccoli Cheese Rice Casserole. This creamy, cheesy delight has the power to turn a simple weeknight dinner into an unforgettable experience. Packed with tender broccoli, fluffy rice, and a cheese sauce that’s downright addictive, it’s no wonder this dish has captured hearts (and stomachs) everywhere. Are you ready to embark on this culinary adventure? Let’s dive in!

Why You’ll Love This Recipe

This isn’t just another casserole; it’s a celebration of flavor and comfort. Here are five reasons why this Broccoli Cheese Rice Casserole will become your new go-to dish:

  • Comfort in Every Bite: The creamy texture and cheesy goodness provide an embrace for your taste buds, making it perfect for family gatherings or cozy nights in.
  • Nutritious and Delicious: Broccoli is a powerhouse of vitamins and minerals, providing a healthy dose of nutrients while still being a crowd-pleaser.
  • Versatile as a Side or Main: Whether you serve it as a side dish with grilled chicken or as a main course loaded with additional proteins, this casserole shines in every role.
  • Make Ahead Magic: Perfect for meal prep, this casserole can be assembled in advance and baked just before serving, saving you time on busy nights.
  • Customizable to Your Liking: With a few simple tweaks, you can transform this recipe to suit your dietary needs or flavor preferences.

Ingredient Breakdown: What You’ll Need

Eye-level view of a creamy Broccoli Cheese Rice Casserole in a dish, highlighting the melted cheese and tender broccoli.

Let’s gather our ingredients for this culinary masterpiece. Here’s what you’ll need:

  • 6 cups fresh broccoli florets: Tender, vibrant, and full of flavor. You can also use frozen broccoli if that’s what you have on hand—it works just as well!
  • 2 cups cooked white rice: Fluffy rice provides the perfect base for this casserole. Brown rice or quinoa can also be used for a whole grain twist.
  • 3 tbsp butter: Adds richness and flavor to your sauce.
  • ¾ cup diced onion: For that aromatic base, adding depth to your cheese sauce.
  • 3 tbsp flour: This will help thicken your cheese sauce to that perfect creamy consistency.
  • 2 cups milk: Use whole milk for a creamier sauce or a non-dairy alternative for a lighter version.
  • Seasonings: Garlic powder, pepper, dry mustard, paprika, and salt—these are your flavor enhancers!
  • 3 tbsp cream cheese: For an extra layer of creaminess that takes the cheese sauce to the next level.
  • 2 cups shredded sharp cheddar cheese (divided): Because who can resist that melty, gooey goodness?

Let’s Get Cooking: Step-by-Step Instructions

Ready to whip up this delicious casserole? Follow these steps for a flawless dish:

  1. Preheat your oven to 350°F (175°C) so it’s hot and ready for your masterpiece.
  2. Blanch the broccoli: In a pot of boiling water, blanch the fresh broccoli florets for 2 minutes, then drain. This step keeps them tender yet crisp!
  3. Sauté the onion: In a saucepan, melt the butter over medium heat and cook the diced onion until softened, about 3-5 minutes.
  4. Make the cheese sauce: Stir in the flour and seasonings, then gradually whisk in the milk. Keep stirring until the mixture thickens, about 5 minutes.
  5. Add creaminess: Remove the saucepan from heat and stir in the cream cheese and 1 ½ cups of cheddar cheese until smooth and creamy.
  6. Combine ingredients: In a large bowl, mix the cheese sauce, blanched broccoli, and cooked rice together until everything is evenly coated.
  7. Transfer to casserole dish: Pour the mixture into a greased 2-quart casserole dish and sprinkle the remaining ½ cup of cheddar cheese on top.
  8. Bake: Place in the oven and bake for 35 minutes or until bubbly and golden on top. Let it cool slightly before serving.

Pro Tips for Perfection

Want to elevate your casserole game? Here are some expert insights to keep in mind:

  • Don’t overcook the broccoli: Blanching is key! Ensure those florets stay bright and vibrant without losing their crunch.
  • Cheese choices matter: Experiment with different types of cheese like Gruyère or Monterey Jack for a unique twist.
  • For a spicy kick: Add a pinch of cayenne or your favorite hot sauce to the cheese sauce for an unexpected flavor explosion.
  • Make it a meal: Toss in cooked chicken, turkey, or beans to turn this casserole into a hearty main dish.
  • Let it rest: Allow the casserole to sit for about 5-10 minutes after baking. This will help it set and make serving easier.
  • Save some for later: This casserole can be frozen before baking for up to 3 months—just thaw and bake when you’re ready!
  • Experiment with toppings: Try adding breadcrumbs or crushed crackers on top for added crunch.
  • Check for doneness: Ensure it’s heated through by inserting a knife into the center; it should come out hot.
  • Pair with sides: Serve this casserole alongside a fresh salad or crusty bread for a complete meal.

Common Mistakes and Troubleshooting

Even the best cooks run into hiccups! Here are some common issues and how to avoid them:

  • Grainy cheese sauce: This can happen if the cheese is overheated. Stir in cheese off the heat to maintain creaminess.
  • Too dry: If your casserole comes out dry, ensure the cheese sauce is adequately creamy before mixing in the broccoli and rice.
  • Overcooked broccoli: Remember, we want tender broccoli, not mush! Follow the blanching time closely.
  • Not enough flavor: Taste your cheese sauce before combining. Adjust seasoning as needed for a flavorful punch.

Variations: Make It Your Own!

This casserole is a blank canvas, ready for your creative touches. Here are four variations to try:

  • Italian Style: Add Italian seasoning and swap cheddar for mozzarella. Top with marinara sauce before baking for a pasta twist.
  • Southwestern Flair: Incorporate black beans, corn, and diced jalapeños, using pepper jack cheese for a spicy kick.
  • Vegetarian Delight: Load it up with extra vegetables like bell peppers, carrots, or spinach for a nutrient boost.
  • Breakfast Casserole: Mix in scrambled eggs and breakfast sausage for a hearty brunch option.

Storage and Make-Ahead Instructions

Want to prepare this dish in advance? Here’s how:

  • Make ahead: Assemble the casserole but don’t bake it. Cover and refrigerate for up to 24 hours. When ready, bake as directed.
  • Freezing: Freeze unbaked casserole in an airtight container for up to 3 months. Thaw overnight in the fridge before baking.
  • Leftovers: Store any leftovers in an airtight container in the fridge for up to 4 days. Reheat in the microwave or oven until warmed through.

Comprehensive FAQ

Got questions? I’ve got answers! Here are some frequently asked questions:

  • Can I use frozen broccoli? Absolutely! Just make sure to thaw and drain excess moisture before adding it to the casserole.
  • Can I add a protein to make it a main dish? Yes, cooked chicken, turkey, or even quinoa are great additions!
  • Why is my cheese sauce grainy? This can happen if the cheese is added too quickly or heated too high. Stir in cheese off the heat for a smooth consistency.
  • Can I make this dairy-free? Yes! Use plant-based milk and cheese alternatives for a dairy-free version.
  • How do I know when it’s done baking? Look for bubbly edges and a golden top. A knife inserted in the center should come out hot.
  • What should I serve with this casserole? Pair with a fresh salad, roasted vegetables, or crusty bread for a complete meal.
  • Can you make this gluten-free? Yes, substitute all-purpose flour with a gluten-free flour blend or cornstarch.
  • How can I spice it up? Add cayenne pepper, crushed red pepper flakes, or jalapeños for a spicy twist!

Nutrition Tips and Dietary Adaptations

Want to make this casserole fit your dietary needs? Here are some tips:

  • Lower calorie options: Use low-fat cheese and milk, and reduce the amount of butter.
  • Boosting fiber: Substitute brown rice or quinoa for white rice to increase fiber content.
  • Protein Power: Add beans or tofu for a plant-based protein boost.

Essential Equipment Recommendations

Before you start cooking, make sure you have the right tools!

  • Large pot: For blanching the broccoli.
  • Medium saucepan: To prepare the cheese sauce.
  • Mixing bowl: For combining all ingredients.
  • Casserole dish: A 2-quart dish works best for this recipe.
  • Whisk and spatula: Essential for mixing and ensuring a smooth cheese sauce.

Serving Suggestions

Ready to serve? Here’s how to present your casserole:

  • Garnish: Sprinkle with fresh herbs like parsley or chives before serving for a pop of color.
  • Pair with drinks: A crisp white wine or refreshing iced tea complements the flavors perfectly.
  • Serve warm: Enjoy your casserole straight from the oven while it’s still hot and bubbly!

Conclusion: Embrace the Adventure!

Cooking is not just about following a recipe; it’s about embracing the adventure and making it your own. This Broccoli Cheese Rice Casserole invites you to explore flavors, textures, and your own creativity. So gather your ingredients, unleash your inner chef, and create a dish that will not only fill bellies but also warm hearts. Here’s to cooking boldly—let’s add a little fire to our food!

Pioneer Woman Broccoli Cheese Rice Casserole Recipe

Prep Time 10 minutes
Cook Time 35 minutes
Total Time 45 minutes
Servings 6 servings
Calories 450
A comforting casserole combining fresh broccoli, cheesy sauce, and rice, baked to perfection.

Ingredients

Vegetables

  • 6 cups fresh broccoli florets
  • 2 cups cooked white rice

Sauce

  • 3 tbsp butter
  • ¾ cup diced onion
  • 3 tbsp flour
  • 2 cups milk

Seasonings

  • garlic powder, pepper, dry mustard, paprika, salt
  • 3 tbsp cream cheese
  • 2 cups shredded cheddar (divided)

Instructions 

  • Preheat oven to 350°F (175°C). Blanch broccoli for 2 minutes and drain.
  • Cook onion in butter, stir in flour and seasonings, then whisk in milk until thickened.
  • Remove from heat, stir in cream cheese and 1 ½ cups of cheddar until smooth.
  • Combine cheese sauce, broccoli, and rice; pour into a greased casserole dish.
  • Top with remaining cheddar and bake for 35 minutes until bubbly.

Notes

For extra flavor, add a pinch of paprika on top before baking.
Calories: 450kcal
Cost: $15
Course: Main Course
Cuisine: American
Keyword: Broccoli, Cheese, Rice

Nutrition

Calories: 450kcal | Carbohydrates: 50g | Protein: 20g | Fat: 20g | Sodium: 800mg

Loved this recipe? Save it to your favorite Pinterest board so you can easily find it later! It’s the perfect way to keep all your sweet ideas in one place. ✨

Delicious Broccoli Cheese Rice Casserole served in a cozy setting, showcasing the rice and broccoli with a creamy sauce.

Welcome to the World of Cottage Cheese Flatbreads

Ah, the humble cottage cheese flatbread! Imagine biting into a warm, golden piece of flatbread that’s not only rich in flavor but also packed with nutritional goodness. These delightful creations are not just a treat for your taste buds; they can be a versatile canvas for your culinary adventures. Whether you’re looking to whip up a quick meal or impress guests at your next gathering, this creamy flatbread recipe is your ticket to success. Let’s dive into the thrilling world of cottage cheese flatbreads and discover why they can ignite your culinary spirit!

Why You’ll Love This Recipe

Here are some irresistible reasons to make these cottage cheese flatbreads:

  • Quick and Simple: With just a handful of ingredients, you can whip up these flatbreads in under 30 minutes!
  • Nutritious and Filling: They’re packed with protein and healthy fats, making them a satisfying option for any meal.
  • Versatile Base: Use them as wraps, pizzas, or serve them alongside soups and salads.
  • Gluten-Free Option: Perfect for those avoiding gluten, you can easily adapt this recipe to meet your dietary needs.
  • Customizable Toppings: Load them up with your favorite veggies, spreads, or proteins for a complete meal.

Ingredient Breakdown

Delicious cottage cheese flatbreads with a soft, textured appearance, garnished with herbs.

Before you start cooking, let’s explore what goes into these delicious flatbreads:

  • 2 Eggs: The binding agent that provides structure and richness.
  • 1 Cup Cottage Cheese: Adds moisture and a creamy texture. You can substitute with ricotta if desired.
  • Pinch of Salt: Enhances flavor; feel free to experiment with flavored salts for a twist.
  • Pepper (to taste): Adds a subtle kick; try using freshly cracked black pepper for added depth.
  • Garlic Powder (to taste): Infuses the flatbread with a savory aroma; fresh minced garlic is a great alternative.

Pro Tips for Perfect Flatbreads

Ready to master the art of making cottage cheese flatbreads? Here are some expert tips:

  • Preheat Properly: Make sure your oven is fully preheated to ensure even baking.
  • Blend Thoroughly: Ensure a smooth mixture for a uniform texture — no lumps allowed!
  • Thin Layer: Spread the mixture thinly on the baking sheet for crispy edges and an even bake.
  • Watch the Time: Keep an eye on your flatbreads; overbaking can lead to dryness.
  • Let Cool: Allow the flatbreads to cool slightly before filling to avoid sogginess.
  • Experiment with Spices: Adjust the seasoning to match your mood — think smoked paprika or Italian herbs!
  • Storage Tips: Store leftovers in an airtight container in the fridge for up to 3 days.
  • Make-Ahead Option: Prepare the batter and refrigerate it for up to 24 hours before baking.

Common Mistakes and Troubleshooting

Even the best chefs make mistakes! Here’s how to avoid common pitfalls:

  • Too Thick: If your flatbreads are too thick, they may not cook evenly. Aim for a thin layer on the baking sheet.
  • Dry Texture: Overbaking can lead to dryness. Keep an eye on them and remove when lightly golden.
  • Sticking to the Pan: Always use parchment paper to prevent sticking and make cleanup a breeze.
  • Bland Flavor: Don’t be shy with your seasonings! Add herbs or spices to elevate the taste.

Variations to Spice Things Up

Feeling adventurous? Here are some exciting variations to try:

  • Herbed Flatbreads: Add fresh chopped herbs like basil or cilantro for a fragrant twist.
  • Spicy Flatbreads: Incorporate a pinch of cayenne or chili powder for an extra kick!
  • Cheesy Flatbreads: Mix in shredded cheese like mozzarella or cheddar for a gooey texture.
  • Veggie-Loaded Flatbreads: Fold in finely chopped spinach, bell peppers, or zucchini into the batter.

Storage & Make-Ahead Instructions

Want to enjoy your flatbreads later? Here’s how to store and prepare them in advance:

  • Refrigerate: Store cooled flatbreads in an airtight container for up to 3 days.
  • Freeze: For longer storage, wrap them tightly in plastic wrap and freeze for up to 2 months. Reheat in the oven when ready to enjoy.
  • Make Ahead: Prepare the batter in advance and store it in the fridge for up to 24 hours before baking.

Frequently Asked Questions

Got questions? I’ve got answers! Here are some FAQs about cottage cheese flatbreads:

  • Can I use low-fat cottage cheese?: Yes, but it may affect the texture slightly; full-fat is recommended for creaminess.
  • What can I use as a topping?: The options are endless! Try avocado, hummus, or your favorite deli meats.
  • Are these flatbreads gluten-free?: Yes! This recipe is inherently gluten-free as it doesn’t use flour.
  • Can I make them vegan?: Substitute eggs with flax eggs (1 tbsp flaxseed meal + 2.5 tbsp water) for a vegan option.
  • What’s the best way to reheat them?: Reheat in a preheated oven at 350°F (175°C) for 5-10 minutes for best results.
  • How do I know when they’re done?: Look for a lightly golden color and set texture; they should not be jiggly.
  • Can I use other cheeses?: Absolutely! Ricotta or cream cheese can be great alternatives.
  • What dishes pair well with these flatbreads?: They’re fantastic with soups, salads, or as a base for wraps and pizzas.

Nutritional Benefits & Dietary Adaptations

These flatbreads are a nutritional powerhouse:

  • High Protein: Cottage cheese is rich in protein, making these flatbreads a perfect choice for muscle recovery and growth.
  • Low Carb: A great option for those on a low-carb diet, especially when enjoyed with fresh veggies.
  • Rich in Calcium: Cottage cheese provides essential calcium, promoting bone health.

Essential Equipment

Before you get started, make sure you have these kitchen essentials:

  • Food Processor: For blending the batter into a smooth consistency.
  • Baking Sheet: A sturdy sheet lined with parchment paper ensures easy baking and cleanup.
  • Measuring Cups and Spoons: Accurate measurements are key to achieving great results.

Serving Suggestions

Now that your cottage cheese flatbreads are ready, here are some delicious serving ideas:

  • Wrap it Up: Fill with arugula, sliced tomatoes, and avocado for a fresh, satisfying meal.
  • Pizza Style: Top with marinara, mozzarella, and your favorite toppings for a quick flatbread pizza.
  • Pair with Soup: Serve alongside a hearty vegetable or lentil soup for a comforting meal.

So, what are you waiting for? Grab those ingredients and start your culinary adventure with these cottage cheese flatbreads. Remember, cooking isn’t just about following a recipe; it’s about experimenting, tasting, and having fun! Let your creativity flow and enjoy every bite of this flavorful journey!

Cottage Cheese Flatbreads

Prep Time 5 minutes
Cook Time 15 minutes
Total Time 20 minutes
Servings 4 pieces
Calories 180
Delicious and easy-to-make flatbreads using cottage cheese and eggs, perfect for a quick snack or meal.

Ingredients

Dairy

  • 2 pieces eggs
  • 1 cup cottage cheese
  • a pinch salt (to taste)
  • pepper to taste pepper
  • garlic powder to taste garlic powder

Instructions 

  • Preheat oven to 350°F (175°C) and line a baking sheet.
  • Blend eggs, cottage cheese, salt, pepper, and garlic powder until smooth.
  • Spread mixture evenly on the baking sheet as a thin layer.
  • Bake for 10-15 minutes until set and lightly golden.
  • Let cool, then fill with toppings and roll up to serve.

Notes

Use fresh cottage cheese for best flavor.
Calories: 180kcal
Cost: $8
Course: Breakfast, Snack
Cuisine: American
Keyword: cottage cheese

Nutrition

Calories: 180kcal | Carbohydrates: 8g | Protein: 14g | Fat: 10g | Sodium: 400mg

Loved this recipe? Save it to your favorite Pinterest board so you can easily find it later! It’s the perfect way to keep all your sweet ideas in one place. ✨

Appetizing cottage cheese flatbreads displayed on a plate, highlighted by warm natural light.

Discover the Ultimate Comfort: Your Go-To Crock Pot Mac and Cheese Recipe

Welcome to a journey of creamy goodness that’s destined to become your favorite comfort food — the ultimate crock pot mac and cheese. This dish is not just about ease; it’s a celebration of flavors that brings warmth and joy to your table. Picture this: a melting pot of cheese enveloping perfectly tender pasta, all cooked effortlessly in your trusty slow cooker. With my rich culinary background and passion for bold flavors, I’m here to guide you through crafting a mac and cheese that’s not just a meal, but a memorable experience. So grab your crock pot and let’s dive into the world of mac and cheese that’s perfect for busy days or cozy gatherings.

Why You’ll Love This Recipe

  • Effortless Cooking: Simply throw all the ingredients into your crock pot and let it work its magic while you enjoy your day.
  • Rich and Creamy Texture: The combination of sharp cheddar, mozzarella, and Parmesan creates a luscious, gooey consistency that clings to every bite.
  • Customizable Flavors: This recipe is a blank canvas — experiment with your favorite cheeses or spices to make it uniquely yours.
  • Perfect for Gatherings: Whether it’s a family dinner or a potluck, this dish is guaranteed to be a crowd-pleaser that’s easy to transport.
  • Make-Ahead Convenience: Prepare it in advance, store it in the fridge, and let your crock pot do the work at mealtime.

Ingredient Breakdown: What You’ll Need

Delicious bowl of Crock Pot Mac and Cheese with gooey cheese and pasta.

Let’s talk about the star players of this creamy comfort dish. Here’s what you’ll need, along with some fantastic substitutions to customize your creation:

  • 16 oz elbow macaroni: The classic choice for mac and cheese, but feel free to try cavatappi or fusilli for a fun twist.
  • 4 cups sharp cheddar cheese, shredded: This cheese gives that quintessential flavor. You can substitute with medium cheddar or a blend of your favorites.
  • 1 cup mozzarella cheese, shredded: Adds stretchiness! Swap it out for fontina or provolone for a different melt.
  • 1/2 cup grated Parmesan cheese: For that salty punch. Pecorino Romano works well too.
  • 4 cups milk: Whole milk is ideal, but you can mix in some evaporated milk for a creamier texture.
  • 1/2 cup unsalted butter, melted: Butter enhances flavor and creaminess. You can use olive oil, but it will change the flavor profile.
  • 1 teaspoon garlic powder: For depth. Fresh minced garlic can be used instead, just adjust to taste.
  • 1 teaspoon onion powder: Adds a hint of sweetness. Consider using finely chopped onions for a fresher flavor.
  • Salt and pepper to taste: Essential for balancing the flavors. Don’t skip!

Step-by-Step: How to Make Your Crock Pot Mac and Cheese

Ready to create a cheesy masterpiece? Follow these simple steps:

  1. Prepare the Crock Pot: Spray the inside of the crock pot with cooking spray or grease it with butter to prevent sticking.
  2. Mix the Base: In a large bowl, combine the uncooked elbow macaroni, melted butter, milk, garlic powder, onion powder, salt, and pepper. Stir well until everything is evenly mixed.
  3. Add the Cheeses: Fold in the shredded cheddar, mozzarella, and Parmesan cheese until the pasta is well coated.
  4. Transfer to the Crock Pot: Pour the mixture into the prepared crock pot and spread it out evenly.
  5. Cook to Perfection: Cover and cook on low for 2 to 3 hours, stirring occasionally, until the pasta is tender and the cheese is melted.
  6. Final Touch: Once done, give it one last stir and let it sit for a few minutes before serving to achieve optimal creaminess.

Pro Tips for Perfecting Your Mac and Cheese

  • Stir Occasionally: Give it a gentle stir once or twice during cooking to ensure even distribution of heat and cheese.
  • Boost the Flavor: A splash of hot sauce or a sprinkle of smoked paprika can elevate the flavor profile — experiment to find your perfect balance.
  • Use Freshly Shredded Cheese: Pre-shredded cheese often contains anti-caking agents that can affect melting. Freshly shredded cheese guarantees a smooth consistency.
  • Don’t Overcook: Keep an eye on the cooking time; overcooking can lead to mushy pasta. Check for tenderness around the 2-hour mark.
  • Garnish Wisely: Top with fresh herbs like parsley or chives for a pop of color and freshness before serving.
  • Consider Your Add-ins: Mix in cooked bacon, sautéed mushrooms, or steamed broccoli for added flavor and nutrition.
  • Save the Leftovers: Store any leftovers in an airtight container in the refrigerator for up to 4 days.
  • Reheat Gently: When reheating, add a splash of milk to restore creaminess and prevent drying out.

Common Mistakes and Troubleshooting

Even the best chefs make mistakes! Here are some common pitfalls and how to avoid them:

  • Too Dry? If your mac and cheese turns out dry, it may be due to overcooking or too little liquid. Next time, add a splash more milk during cooking.
  • Too Cheesy? While cheese is the star, if it’s overwhelming, try reducing the cheese quantity or adding more pasta to balance it out.
  • Clumpy Cheese? This can happen if you use pre-shredded cheese. Always opt for fresh cheese for the best melt.
  • Undercooked Pasta? Make sure you’re cooking on low and give the dish enough time to reach that creamy, luscious consistency.

Creative Variations to Try

Feel like experimenting? Here are some delicious variations to keep things exciting:

  • Spicy Jalapeño Mac: Add diced jalapeños or a spoonful of chipotle in adobo for a smoky, spicy kick.
  • Buffalo Chicken Mac: Mix in shredded cooked chicken and buffalo sauce for a delightful twist on classic flavors.
  • Vegetarian Delight: Toss in your favorite veggies like spinach, bell peppers, or zucchini for a nutritious boost.
  • Truffle Mac: Drizzle with truffle oil before serving for an upscale touch that’s sure to impress.

Storage and Make-Ahead Instructions

Planning ahead? Here’s how to store and prepare your mac and cheese for later:

  • Refrigeration: Store any leftovers in an airtight container for up to 4 days. Reheat gently on the stove or in a microwave, adding a splash of milk to restore creaminess.
  • Freezing: You can freeze mac and cheese for up to 3 months. Just thaw in the fridge overnight before reheating.
  • Make-Ahead Option: Prepare the dish a day in advance, store it in the refrigerator, and cook it in the crock pot on the day of serving. Just remember to adjust cooking time as needed.

Comprehensive FAQ

Got questions? Let’s answer some of the most common queries about crock pot mac and cheese:

  • Can I use gluten-free pasta? Absolutely! Just ensure your gluten-free pasta is cooked according to package instructions before adding it to the crock pot.
  • Can I substitute the milk? Yes! Use almond milk, oat milk, or any non-dairy milk of your choice, but keep in mind it may change the flavor slightly.
  • How can I make this dish healthier? You can reduce the cheese, use whole wheat pasta, or add more vegetables to boost nutrition.
  • Is it okay to double the recipe? Yes! Just ensure your crock pot is large enough to accommodate the increased volume.
  • Can I cook this on high instead of low? Yes, you can cook it on high for about 1 hour, but watch closely to prevent overcooking.
  • What’s the best way to reheat leftovers? Reheat in the microwave or on the stove, adding a splash of milk to keep it creamy.
  • Can I add protein to this recipe? Definitely! Chopped ham, cooked chicken, or even crumbled sausage can enhance the dish.
  • What if my mac and cheese is too thick? Simply stir in a bit more milk until you reach your desired consistency.

Nutritional Tips and Dietary Adaptations

Looking for healthier options? Here are some tips to consider:

  • Low-Calorie Option: Switch to low-fat cheese and milk to cut down on calories without sacrificing flavor.
  • Dairy-Free Adaptation: Use dairy-free cheese and milk alternatives for a delicious vegan version.
  • High-Protein Boost: Incorporate cooked lentils or beans for added protein without compromising taste.

Equipment Recommendations

To make your cooking experience seamless, here are some essential tools you’ll need:

  • Crock Pot: A reliable slow cooker is key to achieving that creamy, dreamy mac and cheese.
  • Mixing Bowls: A set of mixing bowls for combining ingredients before they go into the crock pot.
  • Spoon or Spatula: For stirring and mixing to ensure everything is well incorporated.
  • Measuring Cups and Spoons: Accuracy is essential for the perfect dish.

Serving Suggestions

Now that your mac and cheese is ready, here are some ideas to elevate your presentation:

  • Garnish: Top with fresh herbs like parsley or chives to add a splash of color.
  • Side Dishes: Pair with a simple green salad or roasted vegetables for a balanced meal.
  • Creative Serving: Serve in individual ramekins for a stylish touch at gatherings.

The Final Bite: Your Adventure Awaits

There you have it! A crock pot mac and cheese recipe that’s not just a meal but an adventure in flavors and textures. Embrace the joy of cooking and the magic of cheese as you create this comforting dish that will surely become a family favorite. Remember, cooking is about experimenting, so don’t hesitate to add your personal touch. Now, gather around the table, share stories, and indulge in the creamy comfort that is your homemade mac and cheese. Happy cooking!

Easy Crock Pot Mac and Cheese Recipe for Dinner

Prep Time 10 minutes
Cook Time 2 hours 30 minutes
Total Time 2 hours 40 minutes
Servings 6 servings
Calories 650
A creamy and cheesy crock pot mac and cheese perfect for a quick dinner. Simple to prepare and full of flavor.

Ingredients

Main Ingredients

  • 16 oz elbow macaroni
  • 4 cups sharp cheddar cheese, shredded
  • 1 cup mozzarella cheese, shredded
  • 1/2 cup grated parmesan cheese
  • 4 cups milk
  • 1/2 cup unsalted butter, melted
  • 1 teaspoon garlic powder
  • 1 teaspoon onion powder
  • to taste salt and pepper

Instructions 

  • Grease the crock pot and combine all ingredients except cheese.
  • Stir until well mixed, then add shredded cheeses and stir again.
  • Pour into crock pot, cover, and cook on low for 2-3 hours, stirring occasionally.
  • Stir well, let sit for a few minutes, then serve.

Notes

Use freshly shredded cheese for the best melt and flavor.
Calories: 650kcal
Cost: $15
Course: Main Course
Cuisine: American
Keyword: Mac and Cheese

Nutrition

Calories: 650kcal | Carbohydrates: 80g | Protein: 30g | Fat: 25g | Sodium: 900mg

Loved this recipe? Save it to your favorite Pinterest board so you can easily find it later! It’s the perfect way to keep all your sweet ideas in one place. ✨

Eye-level shot of a comforting dish of Mac and Cheese in a cozy setting.

Unleashing the Zest: A Journey into Lemon Cake Bliss

Welcome to a culinary adventure that will ignite your passion for baking! Today, we’re diving into the world of lemon cakes, specifically a **234 Calorie Lemon Cake** that bursts with sunshine and flavor. It’s not just a dessert; it’s a celebration of everything bright and zesty that will awaken your taste buds. So, if you’re ready to embrace the tangy thrill of lemon juice and zest, let’s get started!

Why You’ll Love This Recipe

  • Low Calorie Delight: At just 234 calories per slice, this cake allows you to indulge without guilt.
  • Simple Ingredients: Made with easily accessible components like almond flour and honey, this recipe simplifies your baking experience.
  • Versatile Options: You can customize this cake with various toppings, from fresh berries to a light drizzle of yogurt.
  • Quick Preparation: With an approximate prep and bake time of just 40 minutes, you’ll be savoring this cake in no time.
  • Perfect for Any Occasion: Whether it’s a family gathering or a cozy night in, this lemon cake fits right into any event.

Ingredients Breakdown

Delicious slice of lemon cake, showcasing moist texture and vibrant lemon color against a blurred background.

Let’s take a closer look at the key ingredients that make this cake a standout:

  • 1 cup almond flour: A gluten-free alternative that adds a nutty flavor and moist texture.
  • 1/4 cup honey or maple syrup: Natural sweeteners that complement the tartness of the lemon.
  • 1/4 cup unsweetened applesauce: Keeps the cake moist while reducing added fats.
  • 2 large eggs: Provides structure and helps bind the ingredients together.
  • 1/4 cup lemon juice: The star of the show, offering that signature citrus zing.
  • 1 teaspoon baking powder: Essential for leavening the cake, ensuring it rises beautifully.
  • 1/2 teaspoon vanilla extract: Adds a hint of sweetness that balances the tartness.
  • 1/4 teaspoon salt: Enhances flavors and brings out the best in the cake.
  • Zest of 1 lemon: Elevates the lemon flavor profile, making each bite a burst of freshness.

Pro Tips for Baking Success

  • Measure Accurately: Ensure your almond flour is leveled off for the right texture. Too much can lead to a dense cake.
  • Fresh Ingredients Matter: Use fresh lemon juice and zest for maximum flavor impact.
  • Room Temperature Eggs: Using eggs at room temperature helps them incorporate better into the batter.
  • Don’t Overmix: Gently fold the wet and dry ingredients to avoid a tough cake.
  • Check for Doneness: Insert a toothpick into the center; it should come out clean when the cake is ready.
  • Cool Properly: Allow the cake to cool in the pan for 10 minutes before transferring to a wire rack to prevent sogginess.
  • Experiment with Flavors: Add spices like cinnamon or nutmeg for an unexpected twist!
  • Storage Tips: Wrap the cake tightly to keep it moist; it can last up to 3 days at room temperature or a week in the fridge.

Common Mistakes and Troubleshooting

Even the most experienced bakers can run into issues. Here are some common mistakes and how to fix them:

  • Dense Texture: This can happen if the almond flour is packed too tightly. Always spoon it into the measuring cup and level it off.
  • Overbaking: Keep an eye on the cake during the last few minutes of baking. Start checking for doneness 5 minutes before the time is up.
  • Flavorless Cake: If the cake lacks flavor, check your lemon juice and zest. Fresh is always best!
  • Too Sweet or Tart: Adjust the honey or maple syrup based on your preference for sweetness. You can also balance tartness by adding a pinch of salt.

Variations to Elevate Your Lemon Cake

Why stick to one version when you can explore? Here are some delightful variations:

  • Lemon Blueberry Cake: Fold in fresh blueberries for a fruity twist.
  • Vegan Lemon Cake: Substitute eggs with flax eggs and use maple syrup for sweetness.
  • Coconut Lemon Cake: Add shredded coconut to the batter for a tropical flair.
  • Glazed Lemon Cake: Drizzle a simple glaze made from powdered sugar and lemon juice over the cooled cake for a sweet finish.

Storage and Make-Ahead Instructions

This cake stores beautifully, making it a great make-ahead option:

  • Room Temperature: Keep the cake wrapped in plastic wrap or in an airtight container for up to 3 days.
  • Refrigeration: If you want to extend its life, refrigerate for up to 1 week. Just make sure it’s wrapped well.
  • Freezing: Freeze slices individually wrapped in plastic wrap and then in foil for up to 3 months. Thaw overnight in the fridge before serving.

Frequently Asked Questions (FAQs)

  • Can I use regular all-purpose flour? Absolutely, but this will change the calorie count and texture. Almond flour keeps it moist and gives a unique flavor.
  • How can I make this cake gluten-free? This recipe is already gluten-free as it uses almond flour. Just ensure your other ingredients are gluten-free as well.
  • Can I substitute honey with sugar? Yes, but you may need to adjust the liquid ingredients slightly since sugar doesn’t add moisture like honey or syrup.
  • What can I serve with this cake? It pairs beautifully with fresh berries, yogurt, or a scoop of vanilla ice cream!
  • Is it possible to make this cake in a bundt pan? Yes! Just adjust the baking time, as bundt cakes often take longer to cook through.
  • Can I add poppy seeds? Definitely! Adding poppy seeds will give the cake a delightful crunch.
  • How do I make it more tangy? Increase the amount of lemon juice or add some lemon extract for a stronger flavor.
  • What’s the best way to serve leftovers? Serve chilled with a dollop of Greek yogurt for a refreshing treat!

Nutritional Tips and Dietary Adaptations

This recipe is not just delicious; it’s also nutritious! Here are some tips to enhance its health benefits:

  • Protein Boost: Add a scoop of protein powder to the batter for a post-workout snack.
  • Fiber-Filled: Incorporate ground flaxseeds or chia seeds for added fiber and nutrients.
  • Lower Sugar Options: Use stevia or monk fruit sweetener as a sugar substitute for a low-calorie option.

Equipment Recommendations

To make your baking process smooth, here are some essential tools:

  • Mixing Bowls: A set of nesting bowls helps with efficient mixing and measuring.
  • Measuring Cups and Spoons: Precision is key in baking, so invest in a good set.
  • Whisk: For mixing wet ingredients thoroughly, a balloon whisk works wonders.
  • Rubber Spatula: Perfect for folding ingredients gently without overmixing.
  • Oven Thermometer: Ensures your oven is at the right temperature for perfect baking.

Serving Suggestions to Impress

Now that your cake is baked and cooled, how do you present it? Here are some ideas:

  • Plating: Serve slices on a colorful plate with a sprinkle of powdered sugar for an elegant touch.
  • Toppings: Add fresh whipped cream, a dollop of Greek yogurt, or a fruit compote for added flavor and texture.
  • Pair with Beverages: Complement with a chilled glass of lemonade or a cup of herbal tea for a refreshing afternoon treat.

Conclusion: Embrace the Adventure of Flavor

There you have it! A **234 Calorie Lemon Cake** that not only tantalizes your taste buds but also invites you to embrace the thrill of cooking with zest and fire. As you embark on your baking journey, remember that the best recipes come from a place of passion and experimentation. So grab your ingredients, gather your loved ones, and let every slice tell a story of flavor, warmth, and joy. Happy baking, and may your kitchen always be filled with the delightful aroma of zest!

234 CALORIE LEMON CAKE

Prep Time 10 minutes
Cook Time 25 minutes
Total Time 35 minutes
Servings 4 pieces
Calories 234
A light and zesty lemon cake perfect for a healthy treat with only 234 calories per serving.

Ingredients

dry ingredients

  • 1 cup almond flour
  • 1/4 cup baking powder
  • 1/4 teaspoon salt

wet ingredients

  • 1/4 cup honey or maple syrup
  • 1/4 cup unsweetened applesauce
  • 2 large eggs
  • 1/4 cup lemon juice
  • 1 teaspoon vanilla extract
  • zest of 1 lemon lemon zest

Instructions 

  • Preheat oven to 350°F (175°C) and grease a small cake pan.
  • Mix dry ingredients in a bowl. Whisk wet ingredients in another bowl.
  • Combine wet and dry mixtures until smooth.
  • Pour batter into pan and bake for 25 minutes.
  • Cool, slice, and enjoy your lemon cake!

Notes

This cake is perfect for a light, citrusy dessert with minimal ingredients.
Calories: 234kcal
Cost: $10
Course: Dessert
Cuisine: American
Keyword: lemon

Nutrition

Calories: 234kcal | Carbohydrates: 20g | Protein: 6g | Fat: 14g | Sodium: 80mg

Loved this recipe? Save it to your favorite Pinterest board so you can easily find it later! It’s the perfect way to keep all your sweet ideas in one place. ✨

Detailed view of a lemon cake, highlighting its soft layers and fresh lemon garnish.

Unleashing the Flavor: The Ultimate Guide to Crispy Oven Baked Sweet Potato Fries

Are you ready to embark on a culinary adventure that will transform your kitchen into a flavor-packed haven? Let’s dive into the irresistible world of crispy oven baked sweet potato fries! These golden delights are not just a side dish; they’re a celebration of bold flavors, crispy textures, and the joy of cooking. In this comprehensive guide, we’ll explore everything you need to know to make the perfect batch of sweet potato fries that will have your taste buds dancing and your guests begging for more.

With the right techniques, tips, and a pinch of creativity, you’ll discover how to elevate your cooking game and turn humble sweet potatoes into a mouthwatering dish. Whether you’re serving them as a snack, an appetizer, or a side to your main course, these fries will ignite your passion for adventurous cooking. So grab your knife, preheat that oven, and let’s make some magic happen!

Why You’ll Love This Recipe

Before we get into the nitty-gritty, let me share why these oven baked sweet potato fries will become a staple in your kitchen:

  • Healthier alternative: Baked instead of fried, these fries pack all the flavor without the guilt.
  • Easy to make: With just a handful of ingredients and simple steps, anyone can master this recipe.
  • Customizable flavors: Experiment with spices and seasonings to create your signature fry style.
  • Perfect for any occasion: Whether it’s a casual family dinner or a festive gathering, these fries fit right in.
  • Kid-approved: Even the little ones will love these tasty bites, making them a hit for family meals.

Ingredient Breakdown

Oven-baked sweet potato fries arranged artfully, showcasing their golden-brown texture and crispy edges.

Let’s gather our ingredients and get ready to fry up some magic! Here’s what you’ll need:

  • Sweet Potatoes: 2 large sweet potatoes, peeled and cut into thin fries (1/4 inch thick). For a twist, try purple sweet potatoes for extra color and flavor!
  • Olive Oil: 2 tablespoons for that crispy texture. You can substitute with avocado oil or coconut oil for different flavor profiles.
  • Cornstarch: 1 teaspoon to help achieve a crunchier exterior. If you’re avoiding cornstarch, arrowroot powder works well too.
  • Spices: 1 teaspoon paprika and 1/2 teaspoon garlic powder will infuse your fries with delicious flavor. Feel free to add cayenne for heat or smoked paprika for a smoky twist!
  • Salt and Pepper: 1/2 teaspoon salt and 1/4 teaspoon black pepper to enhance all those delicious flavors.

Step-by-Step Instructions

Time to roll up those sleeves and get cooking! Follow these steps for the ultimate crispy sweet potato fries:

  1. Preheat the Oven: Set your oven to 425°F (220°C). This ensures that your fries start cooking immediately, locking in that crispiness.
  2. Prepare the Sweet Potatoes: Peel and cut the sweet potatoes into even fries, about 1/4 inch thick. Consistency is key for even cooking!
  3. Toss with Oil and Seasonings: In a large bowl, combine the sweet potato fries, olive oil, cornstarch, paprika, garlic powder, salt, and pepper. Toss until every fry is evenly coated.
  4. Arrange on a Baking Sheet: Spread the fries out in a single layer on a baking sheet lined with parchment paper. Ensure they aren’t overcrowded for optimal crispiness.
  5. Bake to Perfection: Bake for 25-30 minutes, flipping halfway through until they’re golden brown and crispy. Keep an eye on them to avoid burning!
  6. Let Cool and Serve: Once done, remove from the oven and let them cool for a few minutes. This step allows them to crisp up even more!

Pro Tips for Perfect Results

Ready to take your fries to the next level? Here are some expert insights to ensure you achieve the perfect batch every time:

  • Cut Evenly: Ensure your fries are cut to the same size for uniform cooking. Uneven pieces will lead to some being overcooked while others remain soft.
  • Soak Before Cooking: Soak the cut fries in cold water for about 30 minutes to remove excess starch. This helps to achieve that coveted crispiness!
  • Hot Baking Sheet: Preheat your baking sheet while the oven heats up. This helps the fries sizzle when they hit the pan, enhancing their crispiness.
  • Use Parchment Paper: This prevents sticking and makes for an easier clean-up. No one likes scrubbing a baking sheet after a delicious meal!
  • Experiment with Spices: Don’t be afraid to mix it up! Try adding cumin, chili powder, or even cinnamon for a sweet twist.
  • Don’t Overcrowd: Give those fries room to breathe. Overcrowding the baking sheet can lead to steaming instead of crisping.
  • Flipping Technique: Use a spatula to carefully flip the fries halfway through baking. This ensures even cooking and crispiness on both sides.
  • Cool Before Serving: Let them cool for a couple of minutes after baking. This helps maintain their crunchiness!

Common Mistakes and Troubleshooting

Even the best of us can run into hiccups while baking. Here are some common mistakes and how to avoid them:

  • Fries Are Soggy: This usually happens if the fries are overcrowded or not soaked long enough. Ensure they have space on the baking sheet!
  • Burnt Ends: If your fries are burning, try lowering the oven temperature slightly. Every oven is different, and some may run hotter than others.
  • Uneven Cooking: This can occur if the fries are cut unevenly. Take your time while cutting to ensure uniformity.
  • Too Soft: If your fries aren’t crispy, they may need more time in the oven. Just keep an eye on them to prevent burning!

Delicious Variations

Why stick to one flavor when you can explore a world of taste? Here are some fun variations to keep things exciting:

  • Spicy Sweet Potato Fries: Add a sprinkle of cayenne pepper or chili powder for a fiery kick.
  • Garlic Parmesan Fries: After baking, toss with freshly grated Parmesan cheese and minced garlic.
  • Herb-Infused Fries: Mix in dried herbs like thyme or rosemary for a fragrant twist.
  • Sweet and Savory: Drizzle with maple syrup and a pinch of sea salt for a delightful sweet and salty combo.

Storage and Make-Ahead Instructions

Want to enjoy these fries later? Here’s how to store and reheat them:

  • Storing Leftovers: Keep any leftover fries in an airtight container in the refrigerator for up to 3 days.
  • Reheating: For the best texture, reheat in the oven at 400°F (200°C) for about 10 minutes until crispy.
  • Make-Ahead Option: You can prepare the fries ahead of time, cut and seasoned, and store them in the fridge for up to 24 hours before baking.

Comprehensive FAQ

Got questions? Let’s clear up some common queries about sweet potato fries:

  • Can I use regular potatoes instead of sweet potatoes? Absolutely! Regular potatoes will work, but keep in mind they may require slightly different cooking times.
  • Should I peel the sweet potatoes? It’s up to you! Leaving the skins on adds extra texture and nutrients.
  • Can I freeze sweet potato fries? Yes! Freeze them before baking. When ready to cook, bake directly from frozen, adding a few extra minutes to the cooking time.
  • What dipping sauces pair well? Try ranch, spicy mayo, or a homemade garlic aioli for dipping.
  • How can I make these fries lower in carbs? Consider using zucchini or eggplant for a low-carb alternative.
  • Can I air fry these sweet potato fries? Yes! Air frying is a fantastic option to achieve crispiness with less oil.
  • What’s the best way to season sweet potato fries? Think outside the box! Try everything from curry powder to cinnamon for unique flavors.
  • Why are my fries not crisping up? Ensure they’re not overcrowded on the baking sheet and that you’ve soaked them beforehand.

Nutritional Tips and Dietary Adaptations

Sweet potatoes are not just delicious; they’re also packed with nutrients! Here’s why you’ll love them:

  • Rich in Vitamins: Sweet potatoes are an excellent source of vitamins A and C, which support your immune system and skin health.
  • High in Fiber: This helps with digestion and keeps you feeling full longer, making these fries a satisfying option.
  • Low Glycemic Index: They’re a great choice for maintaining stable blood sugar levels.
  • Gluten-Free: Naturally gluten-free, making them suitable for those with gluten sensitivities.

Essential Equipment for Success

To make the most of your sweet potato fry adventure, here are some tools that can help:

  • Sharp Knife: A good-quality knife is essential for cutting the sweet potatoes evenly.
  • Cutting Board: Use a sturdy cutting board to ensure safety while chopping.
  • Baking Sheet: A large, rimmed baking sheet is ideal for spreading out the fries.
  • Parchment Paper: This will help prevent sticking and make for easy clean-up.

Serving Suggestions

Now that you’ve crafted the perfect batch of sweet potato fries, it’s time to serve them up right! Here are some delicious ideas:

  • As a Side Dish: Pair them with grilled chicken, fish tacos, or a hearty burger for a complete meal.
  • Snack Time: Enjoy them on their own with a variety of dips for a satisfying snack.
  • In a Bowl: Create a sweet potato fry bowl with toppings like avocado, black beans, and a drizzle of lime dressing.
  • For Game Day: Serve them at your next gathering with an array of dipping sauces for a crowd-pleasing appetizer.

So there you have it! A definitive guide to making crispy oven baked sweet potato fries that will have your friends and family raving. Remember, cooking is an adventure, so don’t be afraid to experiment with flavors and techniques. Now, get out there and let your kitchen ignite with the boldness of these delicious fries. Happy cooking!

Crispy Oven Baked Sweet Potato Fries

Prep Time 10 minutes
Cook Time 25 minutes
Total Time 35 minutes
Servings 4 servings
Calories 150
Enjoy crispy, flavorful sweet potato fries baked to perfection in the oven for a healthier snack or side dish.

Ingredients

Sweet Potatoes

  • 2 large sweet potatoes
  • 2 tablespoons olive oil
  • 1 teaspoon cornstarch
  • 1 teaspoon paprika
  • 1/2 teaspoon garlic powder
  • 1/2 teaspoon salt
  • 1/4 teaspoon black pepper

Instructions 

  • Preheat oven to 425°F (220°C). Peel and cut sweet potatoes into 1/4 inch fries.
  • Toss fries with olive oil, cornstarch, paprika, garlic powder, salt, and pepper.
  • Spread fries on a parchment-lined baking sheet in a single layer.
  • Bake for 25-30 minutes, flipping halfway, until crispy and golden.
  • Let cool briefly before serving.

Notes

For extra crispiness, flip the fries halfway through baking.
Calories: 150kcal
Cost: $10
Course: Side Dish
Cuisine: American
Keyword: sweet potato

Nutrition

Calories: 150kcal | Carbohydrates: 30g | Protein: 2g | Fat: 4g | Sodium: 150mg

Loved this recipe? Save it to your favorite Pinterest board so you can easily find it later! It’s the perfect way to keep all your sweet ideas in one place. ✨

Delicious sweet potato fries on a rustic table, with warm lighting creating a cozy atmosphere.

Welcome to a world where creamy decadence meets health-conscious delight! If you’re ready to embark on an adventure that tantalizes your taste buds while keeping your waistline in check, then get ready for these Healthy Raspberry Cheesecake Bars. With their luscious texture and just the right amount of sweetness, they’re not just a dessert; they’re a celebration of flavor and joy. Let’s dive into this recipe that has all the flavor without the guilt!

Why You’ll Love This Recipe

These raspberry cheesecake bars bring together the best of both worlds: indulgent flavor and health-conscious ingredients. Here are five compelling reasons to make these bars your new go-to dessert:

  • Healthier Alternative: Made with Greek yogurt and almond flour, these bars provide a protein-packed punch without sacrificing taste.
  • Quick Prep Time: With a simple prep and bake process, you’ll have these heavenly bars ready in no time.
  • Versatile Ingredients: Easily substitute ingredients to suit your dietary needs or preferences.
  • Delightfully Tangy: The fresh raspberries add a vibrant burst of flavor, making each bite a refreshing experience.
  • Perfect for Meal Prep: These bars store well, making them an ideal choice for snacks throughout the week.

Ingredients Breakdown and Substitutions

Here’s what you’ll need to create these delightful bars:

  • 1 cup almond flour: A gluten-free option that gives a nutty flavor. You can also use oat flour or whole wheat flour if you prefer.
  • 2 tablespoons coconut oil: Melted for richness; can substitute with unsalted butter or avocado oil.
  • 2 tablespoons honey or maple syrup: This adds natural sweetness; feel free to adjust based on your taste.
  • 1/4 teaspoon salt: Enhances the flavors of the other ingredients.
  • 1 cup Greek yogurt: Provides creaminess and protein; you can also use low-fat cream cheese for a richer texture.
  • 1/4 cup cream cheese, softened: For that classic cheesecake taste; swap with light cream cheese for fewer calories.
  • 1/4 cup honey or maple syrup: For sweetness in the filling; adjust according to your preference.
  • 1 teaspoon vanilla extract: This rounds out the flavors beautifully.
  • 1 cup fresh or frozen raspberries: The star of this recipe, adding a lovely tartness; blueberries or strawberries can be substituted.
  • 1 tablespoon cornstarch: This helps to thicken the filling; arrowroot powder is a great alternative.

How to Make Healthy Raspberry Cheesecake Bars

Delicious Healthy Raspberry Cheesecake Bars displayed on a rustic wooden surface, showcasing their vibrant color.

Let’s get cooking! Follow these simple steps to create your delicious bars:

  • Preheat the oven: Set it to 350°F (175°C) and line an 8×8 inch baking dish with parchment paper.
  • Make the crust: In a bowl, mix almond flour, melted coconut oil, honey (or maple syrup), and salt until combined. Press the mixture firmly into the bottom of the prepared dish.
  • Prepare the filling: In another bowl, combine Greek yogurt, softened cream cheese, honey (or maple syrup), and vanilla. Mix until smooth and creamy.
  • Fold in raspberries: Gently add the raspberries and cornstarch into the filling mixture, being careful not to break them apart too much.
  • Assemble: Pour the cheesecake mixture over the crust, spreading it evenly.
  • Bake to perfection: Bake for 25-30 minutes until the edges are set and the center is slightly jiggly.
  • Cool and chill: Allow to cool to room temperature, then refrigerate for at least 2 hours before slicing into bars.
  • Serve chilled: Enjoy your healthy raspberry cheesecake bars with a dollop of yogurt or a sprinkle of nuts on top!

Pro Tips for Perfect Raspberry Cheesecake Bars

Here are some expert insights to elevate your cheesecake game:

  • Room Temperature Ingredients: Ensure your cream cheese and yogurt are at room temperature for a smoother batter.
  • Don’t Overmix: When folding in the raspberries, mix just enough to incorporate without breaking them apart.
  • Chill Time: Patience is key! Letting the cheesecake bars chill well helps achieve the perfect texture.
  • Use a Sharp Knife: For clean cuts, use a hot knife to slice the bars after chilling.
  • Flavor Boost: Experiment with citrus zest (like lemon or lime) in the filling for an extra zing.
  • Garnish Wisely: Top with fresh mint or a dusting of powdered sugar for an elegant finish.
  • Batch Cooking: Double the recipe and freeze half for a quick dessert option later!
  • Check Doneness: The bars should be set but slightly jiggly in the center when you take them out of the oven.

Common Mistakes and Troubleshooting

Even the best of us can make mistakes in the kitchen. Here’s how to troubleshoot:

  • Bars Not Setting: If they’re too jiggly, they may need more time in the oven. Keep an eye on them as oven temperatures can vary.
  • Crust Falling Apart: Make sure to press the crust mixture firmly into the pan; a compact crust holds together better.
  • Too Sweet: If you find the filling overly sweet, balance it with a little lemon juice or zest.
  • Raspberry Juice Bleeding: If your raspberries are very ripe, they might bleed into the batter. Use firmer berries for cleaner slices.

Variations to Try

Feeling adventurous? Here are some creative twists on the classic recipe:

  • Chocolate Raspberry Cheesecake: Add cocoa powder to the filling for a chocolatey delight.
  • Berry Swirl: Create a berry swirl by blending a portion of the raspberries into a puree and swirling it into the filling before baking.
  • Nutty Crust: Mix in crushed nuts like pecans or walnuts into the crust for added flavor and texture.
  • Vegan Option: Substitute Greek yogurt with a plant-based yogurt and use a flaxseed egg to bind the ingredients.

Storage and Make-Ahead Instructions

These cheesecake bars are perfect for meal prep!

  • Refrigeration: Store the bars in an airtight container in the fridge for up to a week.
  • Freezing: Wrap individual bars in plastic wrap and freeze for up to 3 months. Thaw overnight in the fridge before serving.

Comprehensive FAQ

Got questions? We’ve got answers!

  • Can I use different fruits? Absolutely! Strawberries and blueberries work beautifully in this recipe.
  • Is this recipe gluten-free? Yes, using almond flour ensures that these bars are gluten-free.
  • Can I make this vegan? Yes, with the right substitutions, you can easily make a vegan version.
  • How do I know when the bars are done? The edges should be set, and the center should have a slight jiggle.
  • What can I serve these bars with? They pair wonderfully with whipped cream, yogurt, or a berry compote.
  • Can I double the recipe? Absolutely! Just use a larger baking dish and adjust the baking time accordingly.
  • Are these bars suitable for kids? Yes! They’re a delicious and healthier dessert option for kids.
  • How long do they last in the fridge? They can last up to a week when stored properly in the fridge.

Nutrition Tips and Dietary Adaptations

Let’s talk nutrition! Here are some tips to keep these bars healthy:

  • Protein Boost: Add a scoop of protein powder to the filling for an extra protein kick.
  • Lower Sugar: Use stevia or monk fruit sweetener to reduce sugar without losing flavor.
  • Healthy Fats: Coconut oil not only enhances flavor but also provides healthy fats.
  • Fiber-Rich: Almond flour is high in fiber, which is great for digestion.

Equipment Recommendations

Here’s what you’ll need:

  • Mixing Bowls: A set of mixing bowls will help you keep things organized.
  • Measuring Cups and Spoons: Precision is key in baking!
  • 8×8 Inch Baking Dish: Perfect for baking these bars to golden perfection.
  • Whisk: For achieving a smooth filling without lumps.
  • Spatula: Ideal for folding in ingredients and spreading the filling evenly.

Serving Suggestions

When it comes to serving, the sky’s the limit. Here are some ideas:

  • Top with Fresh Raspberries: A burst of color and flavor on every plate.
  • Drizzle with Honey: A little extra sweetness never hurt anybody!
  • Pair with Ice Cream: Serve warm with a scoop of vanilla bean ice cream for an indulgent treat.
  • Garnish with Mint: A sprig of mint adds a fresh touch to the presentation.

In Conclusion

These Healthy Raspberry Cheesecake Bars are more than just a dessert; they’re an invitation to indulge without the guilt. With their delightful balance of tangy raspberries and creamy cheesecake, they embody everything that makes cooking an adventure. So grab your apron, embrace your inner chef, and let the flavors ignite your passion for cooking. These bars are a story worth telling, and I can’t wait for you to share it around your table!

Healthy Raspberry Cheesecake Bars

Prep Time 15 minutes
Cook Time 30 minutes
Total Time 45 minutes
Servings 9 bars
Calories 250
Enjoy these delicious and healthy raspberry cheesecake bars, perfect for a nutritious treat or dessert.

Ingredients

Crust

  • 1 cup almond flour
  • 2 tablespoons coconut oil, melted
  • 2 tablespoons honey or maple syrup
  • 1/4 teaspoon salt

Cheesecake filling

  • 1 cup greek yogurt
  • 1/4 cup cream cheese, softened
  • 1/4 cup honey or maple syrup
  • 1 teaspoon vanilla extract
  • 1 cup fresh or frozen raspberries
  • 1 tablespoon cornstarch

Instructions 

  • Preheat oven to 350°F (175°C) and line an 8x8 inch dish with parchment.
  • Mix almond flour, melted coconut oil, honey, and salt; press into dish for crust.
  • Combine Greek yogurt, cream cheese, honey, and vanilla until smooth.
  • Fold in raspberries and cornstarch into the filling.
  • Pour over crust, bake 25-30 mins, cool, then refrigerate 2 hours before slicing.

Notes

Chill the bars thoroughly for best texture.
Calories: 250kcal
Cost: $12
Course: Dessert
Cuisine: American
Keyword: raspberries

Nutrition

Calories: 250kcal | Carbohydrates: 30g | Protein: 6g | Fat: 12g | Sodium: 150mg

Loved this recipe? Save it to your favorite Pinterest board so you can easily find it later! It’s the perfect way to keep all your sweet ideas in one place. ✨

Eye-level shot of Healthy Raspberry Cheesecake Bars with a soft, blurred background highlighting their rich texture.

Welcome to a culinary adventure that will transform your holiday table! This Crock Pot Green Bean Casserole isn’t just another side dish; it’s a warm embrace of creamy goodness that beckons everyone closer. Perfect for those bustling family gatherings, this recipe allows you to save precious oven space while delighting your guests with flavors that sing nostalgia. Get ready to dive into the art of layering flavors, where every bite tells a story and every ingredient plays a vital role.

Why You’ll Love This Recipe

  • Time-Saving Convenience: The Crock Pot allows you to prepare your casserole well in advance, making your day less stressful.
  • Creamy and Comforting: With a luscious blend of sour cream and cream of mushroom soup, this dish delivers that rich, comforting flavor we all crave.
  • Versatile Ingredient Options: Customize your casserole with various bean types or cheese to suit your taste preferences.
  • Perfect for Gatherings: This recipe serves a crowd effortlessly, making it ideal for potlucks, holidays, or family reunions.
  • Easy Cleanup: Cooking in a Crock Pot means fewer dishes to wash, letting you spend more time enjoying your meal.

What You’ll Need

Gather your ingredients for this creamy delight. Here’s what you’ll need:

  • 2 cans of green beans (drained): Fresh or frozen can be substituted for a vibrant, crunchy texture.
  • 1 can of cream of mushroom soup: This creates the creamy base that ties everything together.
  • 1 cup of sour cream: Adds richness and tang to the dish.
  • 1 cup of shredded cheddar cheese: For that gooey, melty top.
  • 1 cup of French fried onions: These give a delightful crunch and flavor contrast.
  • 1 teaspoon of garlic powder: A must-have for that aromatic depth.
  • 1 teaspoon of onion powder: Enhances the savory notes.
  • Salt and pepper to taste: Essential for bringing all the flavors to life.

How to Make Green Bean Casserole in the Crock Pot

A delicious serving of green bean casserole, featuring gooey cheese and crispy fried onions in a warm setting.

Ready to bring this dish to life? Follow these simple steps:

  1. In a large mixing bowl, combine the cream of mushroom soup, sour cream, garlic powder, onion powder, salt, and pepper.
  2. Add the drained green beans and stir until well combined.
  3. Fold in half of the shredded cheddar cheese.
  4. Pour the mixture into the Crock Pot and spread it evenly.
  5. Top with the remaining cheddar cheese and French fried onions.
  6. Cover and cook on low for 3-4 hours or on high for 1.5-2 hours, until the casserole is hot and bubbly.
  7. Serve warm and enjoy your creamy green bean casserole!

Expert Tips for Success

  • Use Fresh Ingredients: Whenever possible, opt for fresh green beans to elevate the dish’s flavor and texture.
  • Adjust the Cheese: Mix cheddar with mozzarella or pepper jack for a unique twist that adds complexity.
  • Don’t Skip the Crunch: Ensure to add the French fried onions towards the end of cooking to keep them crispy.
  • Layer Flavors: Consider adding sautéed mushrooms or bell peppers for extra depth.
  • Experiment with Spices: A dash of cayenne or smoked paprika can add a delightful kick!
  • Make it Ahead: Prepare the mixture the night before and refrigerate. Just pop it in the Crock Pot when you’re ready!
  • Check for Doneness: Ensure the casserole is bubbling hot before serving, especially if you cooked on high.
  • Garnish Wisely: For a fresh touch, top with chopped parsley or chives just before serving.

Common Mistakes and Troubleshooting

  • Too Thick?: If the casserole is too thick, add a splash of chicken broth or milk before serving.
  • Not Enough Flavor?: Taste before serving; you can always adjust the salt and pepper to enhance flavors.
  • Overcooked Beans?: If using fresh beans, cook them separately first to ensure they maintain their crunch.

Variations to Spice Up Your Casserole

  • Meat Lover’s Delight: Add cooked bacon or chopped ham for a heartier dish.
  • Vegan Twist: Replace cream of mushroom soup with a plant-based alternative and use vegan cheese.
  • Southwestern Style: Incorporate diced green chiles and corn for a spicy, Southwest flair.
  • Mushroom Medley: Use a variety of mushrooms for a rustic, earthy taste.

Storing and Reheating Instructions

Got leftovers? Here’s how to keep your casserole fresh:

  • Refrigerate: Store leftovers in an airtight container and consume within 3-4 days.
  • Freezing: Freeze in a suitable container for up to 3 months. Thaw in the fridge before reheating.
  • Reheat: Warm in the microwave or transfer to an oven-safe dish and reheat at 350°F until heated through.

Frequently Asked Questions

  • Can I use fresh green beans?: Absolutely! Fresh green beans will add a vibrant crunch.
  • How can I make this dish gluten-free?: Use gluten-free cream of mushroom soup and verify all other ingredients.
  • Can I add more vegetables?: Yes, feel free to add peas or carrots for extra color and nutrition.
  • What can I serve with this casserole?: Pair with roasted chicken, turkey, or any hearty main dish.
  • How do I prevent the edges from burning?: Ensure the Crock Pot is not overfilled and check for doneness regularly.
  • Can I make this in the oven?: Yes! Bake at 350°F in a greased dish for 30-40 minutes.
  • Is this dish spicy?: No, but you can add heat with spices or hot sauce to suit your taste!
  • What’s the best way to serve this dish?: Serve warm, garnished with extra French fried onions for that irresistible crunch.

Nutritional Tips and Dietary Adaptations

For those watching their diet, here are some tips:

  • Lower Calorie Option: Use low-fat sour cream and reduced-fat cheese.
  • Increase Fiber: Add in black beans or chickpeas for extra fiber and protein.
  • Portion Control: Serve in smaller bowls to manage servings.

Equipment Recommendations

To make this recipe a breeze, consider these tools:

  • Crock Pot: A reliable slow cooker is essential for even cooking.
  • Mixing Bowl: A large bowl for mixing is a must.
  • Measuring Cups and Spoons: Accurate measurements ensure perfect results.

Serving Suggestions

Pair this delightful casserole with:

  • Roasted Meats: Perfect alongside turkey, ham, or a succulent roast.
  • Salads: A fresh green salad balances the richness of the casserole.
  • Crusty Bread: Serve with warm, crusty bread to soak up every last drop of creamy goodness.

This Crock Pot Green Bean Casserole is not just a dish; it’s an experience that brings people together. So grab your ingredients, embrace the joy of cooking, and let the flavors dance on your palate! Remember, cooking is an adventure, and every meal is a story waiting to be told. Happy cooking!

Save room in the oven this year, and make this creamy, easy Crock Pot Green Bean Casserole

Prep Time 10 minutes
Cook Time 3 hours
Total Time 3 hours 10 minutes
Servings 8 servings
Calories 250
This creamy Crock Pot Green Bean Casserole is a perfect make-ahead side dish that’s easy to prepare and full of flavor.

Ingredients

Green Beans

  • 2 cans green beans (drained)
  • 1 can cream of mushroom soup
  • 1 cup sour cream
  • 1 cup shredded cheddar cheese
  • 1 cup french fried onions
  • 1 teaspoon garlic powder
  • 1 teaspoon onion powder
  • to taste salt and pepper

Instructions 

  • Mix cream of mushroom, sour cream, garlic powder, onion powder, salt, and pepper.
  • Add green beans and half of the cheese; stir well.
  • Transfer to Crock Pot, top with remaining cheese and fried onions.
  • Cook on low for 3-4 hours or high for 1.5-2 hours until bubbly.
  • Serve warm and enjoy!

Notes

For extra flavor, add a dash of soy sauce or hot sauce.
Calories: 250kcal
Cost: $15
Course: Side Dish
Cuisine: American
Keyword: Green Beans

Nutrition

Calories: 250kcal | Carbohydrates: 20g | Protein: 10g | Fat: 15g | Sodium: 600mg

Loved this recipe? Save it to your favorite Pinterest board so you can easily find it later! It’s the perfect way to keep all your sweet ideas in one place. ✨

Appetizing Crock Pot green bean casserole garnished with crunchy onion rings, showcased in warm natural light.

Ignite Your Culinary Adventure with Vegan Spicy Miso Ramen

Welcome to a flavorful journey that will awaken your taste buds and inspire your kitchen adventures! This Vegan Spicy Miso Ramen is not just a meal; it’s an experience that melds heat and umami into a delightful fusion. As you dive into this recipe, you’ll discover how easy it is to transform simple ingredients into an unforgettable bowl of comfort. Embrace the thrill of cooking with spice as we explore the depths of flavor that this ramen promises!

Why You’ll Love This Recipe

This recipe isn’t just about slurping noodles; it’s about creating a bowl of happiness that brings warmth and joy. Here are five reasons why you’ll adore this Vegan Spicy Miso Ramen:

  • Bold Flavors: The combination of miso, ginger, and chili oil creates a vibrant symphony of tastes that tantalize your palate.
  • Quick and Easy: With just one pot and minimal prep time, this ramen is perfect for busy weeknights when you crave something hearty yet hassle-free.
  • Customizable: Feel free to experiment! Add your favorite vegetables or proteins to make it uniquely yours.
  • Nutritious: Packed with veggies and plant-based ingredients, this ramen is a wholesome meal that nourishes your body and soul.
  • Vegan Delight: This recipe caters to everyone, ensuring that those who enjoy a plant-based lifestyle can indulge without compromise.

Ingredients Breakdown

A detailed shot of Vegan Spicy Miso Ramen featuring ramen noodles, mushrooms, and green onions.

Before we get cooking, let’s explore the key ingredients that make this ramen stand out. Here’s what you’ll need, along with some fantastic substitutions:

  • 1 tablespoon sesame oil: For a nutty aroma and flavor. If you don’t have sesame oil, olive oil or coconut oil works in a pinch.
  • 2 cloves garlic, minced: Essential for depth. Feel free to substitute with shallots or garlic powder if you’re in a hurry.
  • 1 tablespoon fresh ginger, grated: Adds warmth and zing. Dried ginger can be used, but adjust the quantity to avoid overpowering the dish.
  • 2 tablespoons white miso paste: The heart of the broth. Can be replaced with red miso for a deeper flavor, but be aware it will change the color of your broth.
  • 1 tablespoon soy sauce or tamari: For umami depth. Use coconut aminos for a gluten-free option.
  • 1 tablespoon sriracha or to taste: For heat! Adjust based on your spice tolerance.
  • 4 cups vegetable broth: The base of your soup. If you want to make it richer, use homemade broth or add a vegetable bouillon cube.
  • 1 cup unsweetened soy milk or other plant milk: For creaminess. Almond milk or oat milk can be swapped in, but avoid sweetened varieties.
  • 200g ramen noodles: Check for vegan options. You can substitute with rice noodles or even zoodles for a low-carb option.
  • 1 block (about 200g) firm tofu, cubed: For protein. If you prefer, you can use chickpeas or seitan.
  • 1 cup sliced shiitake mushrooms: For texture and flavor. Any mushrooms will do, but portobello or button mushrooms are great alternatives.
  • 1 cup chopped bok choy: Adds freshness. You can swap it with spinach or kale if you like.
  • 1 carrot, julienned: For crunch and sweetness. Feel free to use other veggies like bell peppers or zucchini.
  • 2 green onions, sliced: A lovely garnish. You can substitute with chives or leeks.
  • Sesame seeds, for garnish: Optional, but they add a nice crunch and nutty flavor.
  • Chili oil, for garnish (optional): For those who want to crank up the heat!

Step-by-Step Instructions

Let’s dive into the cooking process! Follow these steps to create your Vegan Spicy Miso Ramen:

  1. In a sizable saucepan, warm sesame oil over medium heat. Stir in the garlic and ginger, allowing them to cook for about a minute until they become aromatic.
  2. Combine the miso paste, soy sauce, and sriracha in the pan, cooking for an additional minute to meld the flavors.
  3. Introduce the vegetable broth and heat it just below boiling. You want the broth hot, but not boiling.
  4. Pour in the soy milk and allow it to simmer gently for roughly five minutes. Sample the concoction and adjust the seasoning if necessary.
  5. Meanwhile, in another pan, cook the cubed tofu until golden on all sides, then set aside.
  6. According to the package directions, cook the ramen noodles in the broth. In the last couple of minutes of cooking, stir in the shiitake mushrooms and bok choy.
  7. Serve the ramen in bowls. On top of each bowl, place the seared tofu, chiffonaded carrot, green onions, and sprinkle with sesame seeds. Drizzle with chili oil, if desired. Enjoy responsibly!

Pro Tips for Perfect Ramen

Elevate your ramen game with these expert insights:

  • Ingredient quality matters: Use the freshest ingredients you can find for the best flavor.
  • Don’t rush the simmer: Allow the broth to develop its flavors by simmering gently.
  • Adjust the spice: If you want it hotter, add more sriracha or chili paste incrementally.
  • Mind the noodles: Cook them separately if you prefer them firm; add them just before serving.
  • Garnish generously: Don’t skimp on toppings; they add not just flavor but also visual appeal!
  • Make it creamy: For an even richer broth, add a splash of coconut milk.
  • Experiment with broths: Try different vegetable broths or homemade stock for unique flavors.
  • Use leftovers: This recipe is perfect for using up leftover vegetables and proteins.

Common Mistakes and Troubleshooting

Here are a few common pitfalls to avoid when making your Vegan Spicy Miso Ramen:

  • Overcooking the noodles: This can lead to mushy ramen. Cook them according to the package instructions and add them last.
  • Not tasting the broth: Always taste and adjust seasonings as you go to ensure the best flavor.
  • Using too much miso: Miso is potent! Start with less and add more to taste.
  • Skipping the aromatics: Garlic and ginger are crucial for flavor; don’t overlook them!
  • Not garnishing: Toppings make the dish visually appealing and add layers of flavor.

Variations to Try

Feel free to get creative! Here are some variations to inspire you:

  • Spicy Coconut Ramen: Add coconut milk for a creamy, tropical twist.
  • Mushroom Medley: Use a variety of mushrooms for different textures and flavors.
  • Green Veggie Boost: Toss in spinach, kale, or asparagus for added nutrition.
  • Protein-Packed: Swap tofu for tempeh or add edamame for extra protein.

Storage and Make-Ahead Instructions

This ramen is best enjoyed fresh, but you can make components ahead of time:

  • Broth storage: Store the broth in an airtight container in the fridge for up to 3 days, or freeze for up to 2 months.
  • Noodles: Cook noodles separately and store in a sealed container. They can be reheated in the broth.
  • Vegetable prep: Chop your veggies ahead of time and store them in the fridge for quick assembly.

Frequently Asked Questions

Here are some common questions about this recipe:

  • Can I make this ramen gluten-free? Yes, just use gluten-free ramen noodles and tamari instead of soy sauce.
  • What can I substitute for miso paste? You can use tahini or a combination of soy sauce and nut butter for a different flavor.
  • How spicy is this ramen? The spice level can be adjusted by modifying the amount of sriracha or chili oil used.
  • Can I use fresh noodles instead of dried? Absolutely! Fresh noodles may require less cooking time.
  • Is this recipe kid-friendly? It can be, just reduce the spice and customize toppings to suit their tastes.
  • How do I make it richer? Add a splash of coconut milk or increase the amount of miso paste.
  • Can I add more protein? Yes! Try adding chickpeas, lentils, or a soft-boiled egg.
  • What’s the best way to serve it? Serve hot with a variety of toppings for a beautiful presentation!

Nutritional Tips and Dietary Adaptations

This Vegan Spicy Miso Ramen is not only comforting but also packed with nutritious ingredients. Here are some tips and adaptations:

  • Protein Sources: Include tofu, tempeh, or legumes to boost protein content.
  • Fiber-Rich: Load up on vegetables to increase fiber, aiding digestion and overall health.
  • Low Carb Option: Substitute ramen noodles with zucchini noodles or shirataki noodles for a lower carb meal.
  • Nutrient Density: Use a variety of colorful veggies to maximize nutrients and antioxidants in your dish.

Essential Equipment Recommendations

To make this ramen, you don’t need fancy gadgets, but having the right tools can help:

  • Large saucepan: Ideal for preparing your broth and cooking noodles simultaneously.
  • Cutting board and knives: To chop your veggies and tofu efficiently.
  • Measuring spoons: Ensure accuracy in your ingredient quantities for the best results.
  • Wooden spoon: Perfect for stirring and mixing your ingredients without damaging your cookware.

Serving Suggestions

When it comes to serving your Vegan Spicy Miso Ramen, presentation is key! Here are some ideas to elevate your dish:

  • Colorful Bowls: Use vibrant bowls to make your ramen visually appealing.
  • Garnish Extravaganza: Top with sesame seeds, sliced jalapeños, or crispy garlic for extra flair.
  • Side Dishes: Serve with a side of Colorful Stuffed Peppers or Everyday Delights for a complete meal.

As you savor each bite of this Vegan Spicy Miso Ramen, remember that cooking is about exploration and adventure. Let this recipe inspire you to create, experiment, and embrace the fire in your kitchen. Enjoy this delightful dish, and don’t forget to share your culinary creations with family and friends. Happy cooking!

Vegan Spicy Miso Ramen

Prep Time 10 minutes
Cook Time 20 minutes
Total Time 30 minutes
Servings 4 servings
Calories 450
A flavorful and spicy vegan ramen packed with miso, tofu, and fresh vegetables, perfect for a comforting meal.

Ingredients

Broth and Flavorings

  • 1 tablespoon sesame oil
  • 2 cloves garlic, minced
  • 1 tablespoon fresh ginger, grated
  • 2 tablespoons white miso paste
  • 1 tablespoon soy sauce or tamari
  • 1 tablespoon sriracha or to taste

Main ingredients

  • 4 cups vegetable broth
  • 1 cup unsweetened soy milk or other plant milk
  • 200 g ramen noodles (check for vegan)
  • 1 block firm tofu, cubed (about 200g)
  • 1 cup sliced shiitake mushrooms
  • 1 cup chopped bok choy
  • 1 carrot julienned
  • 2 green onions sliced
  • to taste sesame seeds, for garnish
  • to taste chili oil, for garnish (optional)

Instructions 

  • Warm sesame oil in a saucepan, cook garlic and ginger until aromatic.
  • Mix miso, soy sauce, and sriracha; add broth and heat below boiling.
  • Add soy milk and simmer for 5 minutes; cook tofu until golden, then set aside.
  • Cook ramen in broth; stir in mushrooms and bok choy in last minutes.
  • Assemble bowls with tofu, carrots, green onions, sesame seeds, and chili oil.

Notes

Adjust spice levels with sriracha and chili oil to taste.
Calories: 450kcal
Cost: $15
Course: Main Course
Cuisine: Vegan
Keyword: Ramen

Nutrition

Calories: 450kcal | Carbohydrates: 70g | Protein: 20g | Fat: 12g | Sodium: 1500mg

Loved this recipe? Save it to your favorite Pinterest board so you can easily find it later! It’s the perfect way to keep all your sweet ideas in one place. ✨

Eye-level view of a steaming bowl of Vegan Spicy Miso Ramen, garnished with sesame seeds.

Indulge in the Creamy Comfort of Crockpot Mac and Cheese

Welcome to the ultimate comfort food experience! This Luxuriously Creamy Crockpot Mac and Cheese is not just a recipe; it’s a culinary adventure that invites you to explore the rich, creamy textures and flavors that only a slow cooker can deliver. If you think mac and cheese is just for kids, think again! This dish is perfect for gatherings, cozy nights in, or whenever you crave that warm, cheesy hug. Ready to dive in? Let’s get started!

Why You’ll Love This Recipe

What makes this crockpot mac and cheese stand out from the rest? Here are five compelling reasons:

  • Unmatched Creaminess: With a blend of sharp cheddar, mozzarella, and cream cheese, each bite is a velvety delight that melts in your mouth.
  • Effortless Cooking: Simply throw the ingredients into your slow cooker, set it, and forget it! This recipe is perfect for busy days.
  • Customizable Flavors: Feel free to experiment with different cheeses or add-ins to make it your own.
  • Perfect for Meal Prep: Make a big batch and enjoy it throughout the week. It’s just as delicious reheated!
  • Kid-Approved: This dish is a surefire hit with the little ones, making family meals easy and enjoyable.

Ingredient Breakdown

Delicious bowl of Mac and Cheese with a rich, creamy texture and soft shadows.

Gather your ingredients, and let’s break down what you’ll need to create this dreamy dish:

  • 8 ounces elbow macaroni: The classic choice for mac and cheese; you can substitute with any pasta shape you prefer.
  • 4 cups shredded sharp cheddar cheese: For that iconic flavor. Feel free to mix in other types like gouda or pepper jack for a kick!
  • 1 cup shredded mozzarella cheese: Adds a stretchy, gooey texture that elevates the dish.
  • 1 cup cream cheese, cubed: This is the secret to achieving that luxurious creaminess.
  • 3 cups milk: Use whole milk for richness, or low-fat milk if you prefer a lighter version.
  • 1/2 cup sour cream: It adds a tangy depth that perfectly complements the cheeses.
  • 1/4 cup unsalted butter, melted: For richness and flavor; opt for a non-dairy butter if you want a vegan option.
  • 1 teaspoon garlic powder: A subtle hint of garlic enhances the flavor profile.
  • 1 teaspoon onion powder: Another layer of flavor that rounds out the dish.
  • 1/2 teaspoon salt: Adjust to taste, especially if you’re using salted butter.
  • 1/4 teaspoon black pepper: For a bit of warmth; you can add more for a spicier kick.

Pro Tips for the Best Results

Want to ensure your crockpot mac and cheese is a hit? Check out these expert insights:

  • Don’t Overcook the Pasta: Cook the macaroni until just al dente before adding it to the slow cooker. This prevents mushiness later.
  • Shred Your Cheese: Pre-shredded cheese often contains anti-caking agents, which can affect the meltability. Shred your cheese fresh for the best results!
  • Stir Occasionally: Stir the mixture every 30-45 minutes to ensure even melting and prevent sticking.
  • Check Consistency: If the mac and cheese is too thick after cooking, add a splash of milk to loosen it up.
  • Let It Rest: Allow the dish to sit for 10-15 minutes after cooking; this helps the flavors meld together.
  • Experiment with Cheeses: Try blending different cheeses like Monterey Jack, Colby, or even a spicy pepper jack for a twist.
  • Add Fresh Herbs: Stir in chopped parsley or chives just before serving for a burst of freshness.
  • Include Protein: Add cooked chicken, bacon, or sausage for a hearty meal.

Common Mistakes and Troubleshooting

Even the best cooks can run into hiccups. Here’s how to avoid common mistakes:

  • Dry Mac and Cheese: If your dish turns out dry, it’s likely due to overcooking or not enough liquid. Ensure you stir in enough milk or cream to achieve the desired consistency.
  • Cheese Clumping: If the cheese clumps together, this could be from using pre-shredded cheese. Always shred your cheese fresh for a smooth melt.
  • Flavorless Dish: Don’t skip the seasonings! A pinch of salt and spices can elevate your mac and cheese.
  • Too Spicy: If you accidentally added too much heat, balance it with a bit more cream cheese or sour cream.

Delicious Variations to Try

Feeling adventurous? Here are some mouthwatering variations of this classic dish:

  • Buffalo Chicken Mac and Cheese: Stir in shredded cooked chicken and buffalo sauce for a spicy twist.
  • Vegetable Lovers Mac: Add steamed broccoli, peas, or spinach for a nutrient boost.
  • Truffle Mac and Cheese: Drizzle with truffle oil before serving for a luxurious touch.
  • BBQ Pulled Pork Mac: Top with pulled pork and drizzle with BBQ sauce for a hearty meal.

Storage and Make-Ahead Instructions

Planning to make this dish ahead of time? Here’s how to store and reheat it:

  • Refrigeration: Store leftovers in an airtight container in the fridge for up to 5 days.
  • Freezing: You can freeze mac and cheese for up to 3 months. Thaw in the fridge overnight before reheating.
  • Reheating: Warm in the microwave or on the stovetop. Add a splash of milk to revive the creaminess.

Frequently Asked Questions

Got questions? We’ve got answers! Here’s a rundown of common inquiries:

  • Can I use gluten-free pasta? Yes! Substitute with any gluten-free pasta of your choice.
  • What’s the best cheese for mac and cheese? A combination of sharp cheddar and mozzarella works wonders, but feel free to experiment!
  • Can I make this recipe vegetarian? Absolutely! Just omit any meat and use vegetable broth instead of chicken broth if desired.
  • How long can I keep leftovers? Store leftovers in the fridge for up to 5 days or freeze for 3 months.
  • Can I double the recipe? Yes! Just make sure your slow cooker can accommodate the larger volume.
  • Can I use a different type of milk? Yes! Almond milk or oat milk can be substituted, but it may alter the taste slightly.
  • What if my mac and cheese is too thick? Add a little milk to loosen it up while reheating.
  • How can I make it spicier? Add diced jalapeños or a dash of hot sauce for an extra kick!

Nutritional Tips and Dietary Adaptations

Want to enjoy this dish while keeping an eye on your nutrition? Try these adaptations:

  • Low-Fat Option: Use low-fat cheese and milk to reduce calories while keeping flavor.
  • Dairy-Free Version: Substitute with vegan cheese and almond milk.
  • Whole Grain Pasta: Opt for whole grain or legume-based pasta for added fiber and protein.

Essential Equipment for Perfect Mac and Cheese

To whip up this delicious dish, you’ll need:

  • Crockpot: A reliable slow cooker is essential for even cooking.
  • Large Pot: For boiling the macaroni before adding it to the crockpot.
  • Cheese Grater: Freshly grated cheese melts better than pre-shredded.

Serving Suggestions

Want to elevate your mac and cheese game? Try these fun serving ideas:

  • Garnish with Fresh Herbs: Sprinkle chopped parsley or chives on top for a vibrant finish.
  • Serve with Crusty Bread: Pair with a loaf of fresh bread to soak up all that cheesy goodness.
  • Offer Toppings: Set up a toppings bar with bacon bits, diced jalapeños, or crushed chips for added texture.

With this luxuriously creamy crockpot mac and cheese recipe, you’re not just making a meal; you’re creating memories. So grab your ingredients, unleash your inner chef, and let the slow cooker work its magic. Remember, cooking is an adventure—embrace it with every delicious bite! Enjoy!

The Secret to the Creamiest Crockpot Mac and Cheese Recipe Is Finally Out

Prep Time 10 minutes
Cook Time 3 hours
Total Time 3 hours 10 minutes
Servings 6 servings
Calories 650
This creamy crockpot mac and cheese is easy to make and irresistibly cheesy. Perfect for a comforting meal with minimal effort.

Ingredients

Pasta

  • 8 ounces elbow macaroni

Cheese

  • 4 cups shredded sharp cheddar cheese
  • 1 cup shredded mozzarella cheese
  • 1 cup cream cheese, cubed

Liquids

  • 3 cups milk
  • 1/2 cup sour cream
  • 1/4 cup unsalted butter, melted

Spices & Seasonings

  • 1 teaspoon garlic powder
  • 1 teaspoon onion powder
  • 1/2 teaspoon salt
  • 1/4 teaspoon black pepper

Instructions 

  • Cook the macaroni until al dente, then drain.
  • Combine all ingredients in the crockpot and stir well.
  • Cook on low for 2-3 hours, stirring occasionally until creamy.
  • Stir well and serve hot.

Notes

For extra flavor, add a pinch of paprika or a dash of hot sauce.
Calories: 650kcal
Cost: $15
Course: Main Course
Cuisine: American
Keyword: Mac and Cheese

Nutrition

Calories: 650kcal | Carbohydrates: 70g | Protein: 30g | Fat: 35g | Sodium: 900mg

Loved this recipe? Save it to your favorite Pinterest board so you can easily find it later! It’s the perfect way to keep all your sweet ideas in one place. ✨

Appetizing Crockpot Mac and Cheese in a cozy setting, showcasing golden cheese.

Ignite Your Culinary Passion with Sticky Chicken Rice Bowls

Welcome to a world where flavor meets excitement! Join me, Marcus Rivera, as we dive into the vibrant world of Sticky Chicken Rice Bowls. This dish isn’t just a meal; it’s an explosion of taste that invites you to embrace the thrill of cooking with heat. Picture this: tender chicken bathed in a rich, sticky glaze, paired with fluffy jasmine rice and a medley of fresh vegetables. Ready to transform your dinner routine and ignite your taste buds? Let’s get cooking!

Why You’ll Love This Recipe

Here’s why this Sticky Chicken Rice Bowl will become your go-to dish:

  • Quick and Easy: In just 30 minutes, you can whip up a satisfying meal that’s perfect for busy weeknights.
  • Flavor-Packed: The combination of soy sauce, honey, garlic, and ginger creates a sticky sauce that clings to every bite.
  • Customizable: Add your favorite veggies or swap proteins to make it your own!
  • Meal Prep Friendly: Make a big batch for easy lunches or dinners throughout the week.
  • Health Benefits: Packed with lean protein and fresh vegetables, this dish supports your healthy lifestyle.

Ingredients Breakdown

Delicious sticky chicken thighs served over jasmine rice with fresh vegetables.

Let’s get into the nitty-gritty of what you’ll need to create this culinary masterpiece. Here’s your shopping list:

  • 1 pound chicken thighs: Boneless and skinless for tender, juicy bites.
  • 1 cup jasmine rice: Fluffy and aromatic, it’s the perfect base for this dish.
  • 2 cups water: Essential for cooking the rice to perfection.
  • 1/4 cup soy sauce: Adds depth and umami flavor.
  • 1/4 cup honey: Sweetens the sticky sauce beautifully.
  • 2 tablespoons rice vinegar: Balances the flavors with a touch of acidity.
  • 2 cloves garlic, minced: Infuses the dish with aromatic goodness.
  • 1 tablespoon ginger, grated: Adds a warm, zesty kick.
  • 1 tablespoon sesame oil: Rich and nutty, it enhances the overall flavor.
  • 1 carrot, julienned: For crunch and color.
  • 1 cucumber, sliced: Refreshing and crisp, it balances the dish.
  • 2 green onions, chopped: Adds a fresh, mild onion flavor.
  • Sesame seeds for garnish: A finishing touch that adds texture.

**Substitutions**: You can easily swap chicken thighs for chicken breasts or even tofu for a vegetarian twist. For a gluten-free option, use tamari instead of soy sauce.

Pro Tips for Cooking Success

Let’s take your cooking game to the next level with these expert insights:

  • Marinate Wisely: Allow the chicken to marinate for at least 30 minutes for maximum flavor absorption.
  • Perfect Rice: Rinse the jasmine rice before cooking to remove excess starch and achieve fluffy grains.
  • Watch the Heat: Cook the chicken on medium heat to ensure it cooks through without burning the sauce.
  • Thickening the Sauce: If the sticky sauce isn’t thick enough, simmer it longer to achieve the desired consistency.
  • Texture Matters: Add a mix of crunchy and soft toppings for a delightful mouthfeel.
  • Use Fresh Ingredients: Always opt for fresh vegetables to enhance the overall flavor and nutrition of the dish.
  • Batch Cooking: Make extra chicken and sauce for easy meals throughout the week.
  • Garnish Generously: Don’t skip the sesame seeds; they add a delightful crunch and visual appeal.

Avoid These Common Mistakes

To ensure your Sticky Chicken Rice Bowls are a hit, steer clear of these pitfalls:

  • Skipping the Marinade: Don’t rush this step! Marinating is crucial for infusing flavor.
  • Overcooking the Chicken: Keep an eye on your chicken to prevent it from drying out.
  • Neglecting the Sauce: The sauce is the star! Make sure it’s seasoned well and thickened to your liking.
  • Ignoring Cooking Times: Follow cooking times for rice and chicken to ensure they’re cooked perfectly.

Delicious Variations to Try

Spice up your Sticky Chicken Rice Bowls with these exciting variations:

  • Spicy Twist: Add a teaspoon of chili paste or fresh chopped chilies to the marinade for some heat.
  • Veggie-Loaded: Incorporate bell peppers, snap peas, or bok choy for a colorful and nutrient-rich dish.
  • Asian-Inspired: Top with pickled vegetables and drizzle with sriracha for a zesty kick.
  • Southwestern Flair: Swap the soy sauce for BBQ sauce and add corn and black beans for a Tex-Mex vibe.

Storage and Make-Ahead Instructions

Planning ahead? Here’s how to store your Sticky Chicken Rice Bowls:

  • Refrigerate: Store any leftovers in an airtight container in the fridge for up to 4 days.
  • Freeze: For longer storage, freeze in portions for up to 3 months. Thaw overnight in the fridge before reheating.
  • Reheat: Warm in the microwave or on the stovetop over low heat, adding a splash of water if needed to prevent drying out.

Frequently Asked Questions

Got questions? I’ve got answers! Here are some FAQs about this recipe:

  • Q: Can I use chicken breasts instead of thighs?
    A: Absolutely! Boneless, skinless chicken breasts will work just fine.
  • Q: How can I make this dish gluten-free?
    A: Substitute soy sauce with tamari, and ensure all other ingredients are gluten-free.
  • Q: Can I prepare this dish in advance?
    A: Yes! You can marinate the chicken and pre-cook the rice for easy assembly later.
  • Q: What can I use instead of jasmine rice?
    A: Basmati or brown rice are excellent alternatives, though cooking times may vary.
  • Q: Is this recipe suitable for meal prep?
    A: Definitely! It stores well and can be reheated for delicious meals throughout the week.
  • Q: How spicy is the sauce?
    A: The sauce is mildly sweet and savory, but you can adjust the heat level by adding chili paste.
  • Q: Can I add other vegetables?
    A: Yes! Feel free to mix in your favorite veggies for added nutrition and flavor.
  • Q: How long does it take to cook?
    A: The entire dish takes about 30 minutes from start to finish!

Nutritional Tips and Dietary Adaptations

This dish not only tantalizes the taste buds but can also be tailored to fit various dietary needs:

  • Low-Carb Option: Replace rice with cauliflower rice for a lower-carb alternative.
  • Vegan Version: Substitute chicken with tofu or tempeh and use maple syrup instead of honey.
  • Low-Sodium Option: Use low-sodium soy sauce to reduce the sodium content.
  • Healthy Fats: Add avocado slices for a creamy texture and healthy fats.

Essential Equipment for Success

Here’s a quick list of equipment that will make your cooking experience smoother:

  • Non-stick skillet: Ideal for cooking chicken without sticking.
  • Rice cooker: Perfect for achieving perfectly cooked rice with minimal effort.
  • Measuring cups and spoons: For accurate ingredient measurements.
  • Sharp knife and cutting board: Essential for prepping your vegetables and chicken.

Serving Suggestions

Let’s make your presentation as delicious as the dish itself! Here are some serving ideas:

  • Layered Bowls: Create a visually appealing layered bowl with rice, chicken, and colorful veggies on top.
  • Garnish Generously: Finish with chopped green onions, sesame seeds, and a drizzle of spicy mayo for added flavor.
  • Side Dishes: Pair with a light salad or spring rolls to complement the meal.

Embark on your culinary journey with this Sticky Chicken Rice Bowl recipe, and let the adventure begin! With the right balance of flavors and a spirit of experimentation, you’ll create a dish that’s not just food but a story worth telling. So grab your skillet, embrace the fire, and let’s make mealtime an exhilarating experience!

Delicious Sticky Chicken Rice Bowls Recipe

Prep Time 10 minutes
Cook Time 20 minutes
Total Time 30 minutes
Servings 4 servings
Calories 650
A flavorful and easy-to-make dish featuring tender chicken served over jasmine rice with fresh vegetables and a savory sauce.

Ingredients

Protein

  • 1 pound chicken thighs, boneless and skinless

Grains

  • 1 cup jasmine rice

Liquids

  • 2 cups water
  • 1/4 cup soy sauce
  • 1/4 cup honey
  • 2 tablespoons rice vinegar
  • 2 cloves garlic, minced
  • 1 tablespoon ginger, grated
  • 1 tablespoon sesame oil

Vegetables

  • 1 carrot carrot, julienned
  • 1 cucumber cucumber, sliced
  • 2 green onions green onions, chopped

Garnish

  • sesame seeds sesame seeds for garnish

Instructions 

  • Mix soy sauce, honey, rice vinegar, garlic, ginger, and sesame oil to make the marinade.
  • Add chicken to marinade and let sit for 30 minutes.
  • Cook rice according to package instructions.
  • Cook chicken in a skillet until fully cooked, then rest and slice.
  • Simmer remaining marinade to thicken.
  • Assemble bowls with rice, chicken, vegetables, and sauce. Garnish with green onions and sesame seeds.

Notes

For extra flavor, marinate chicken longer or add a dash of chili flakes for heat.
Calories: 650kcal
Cost: $15
Course: Main Course
Cuisine: Asian
Keyword: chicken, easy, Rice

Nutrition

Calories: 650kcal | Carbohydrates: 85g | Protein: 45g | Fat: 20g | Sodium: 1500mg

Loved this recipe? Save it to your favorite Pinterest board so you can easily find it later! It’s the perfect way to keep all your sweet ideas in one place. ✨

Eye-level view of a vibrant sticky chicken rice bowl, featuring soft textures and colorful ingredients.