Author

Avery Collins

Browsing

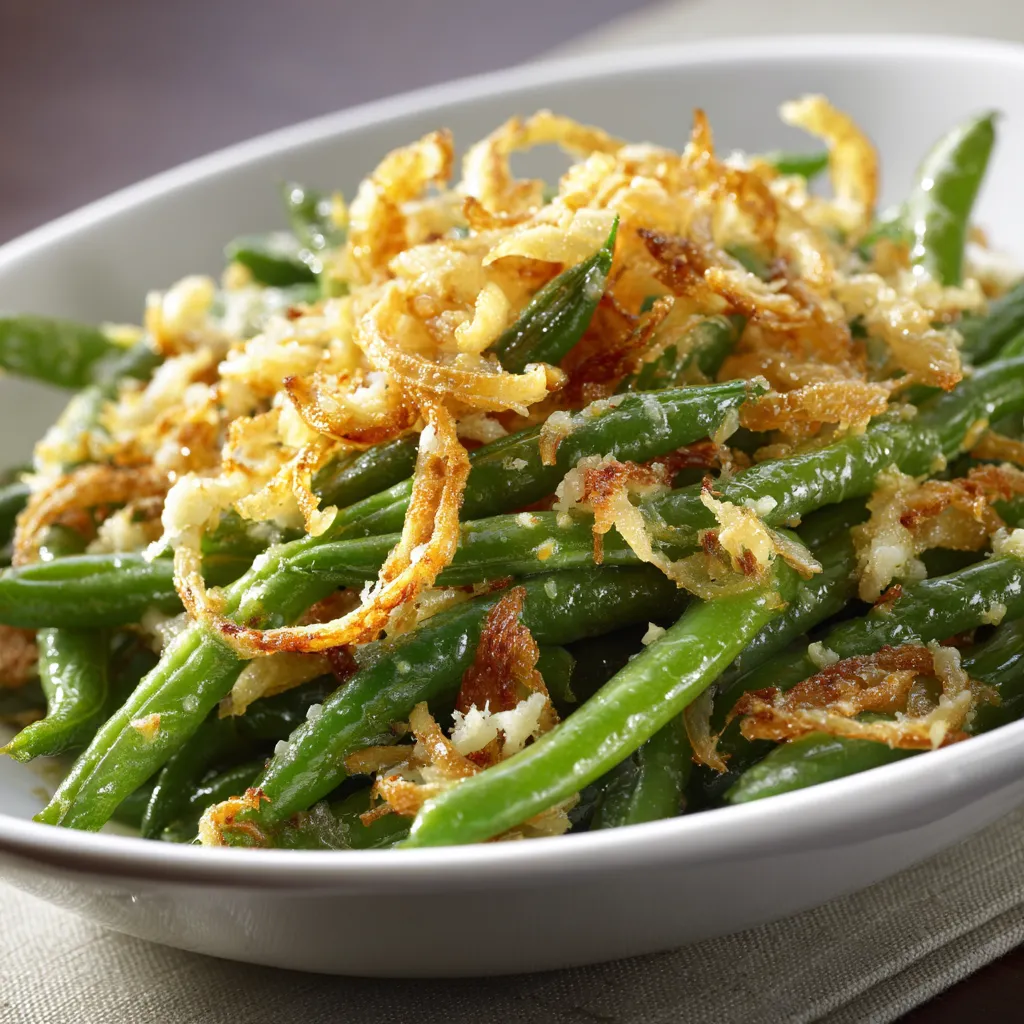
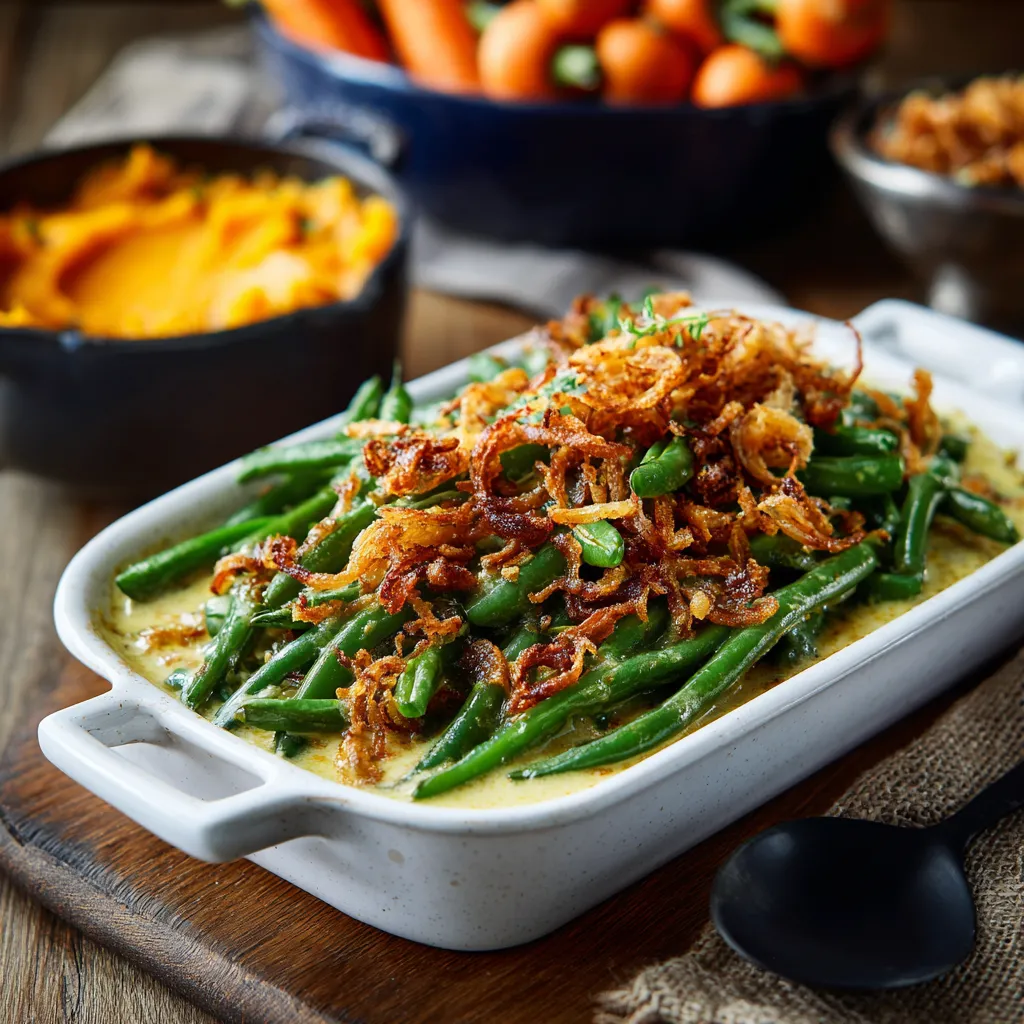
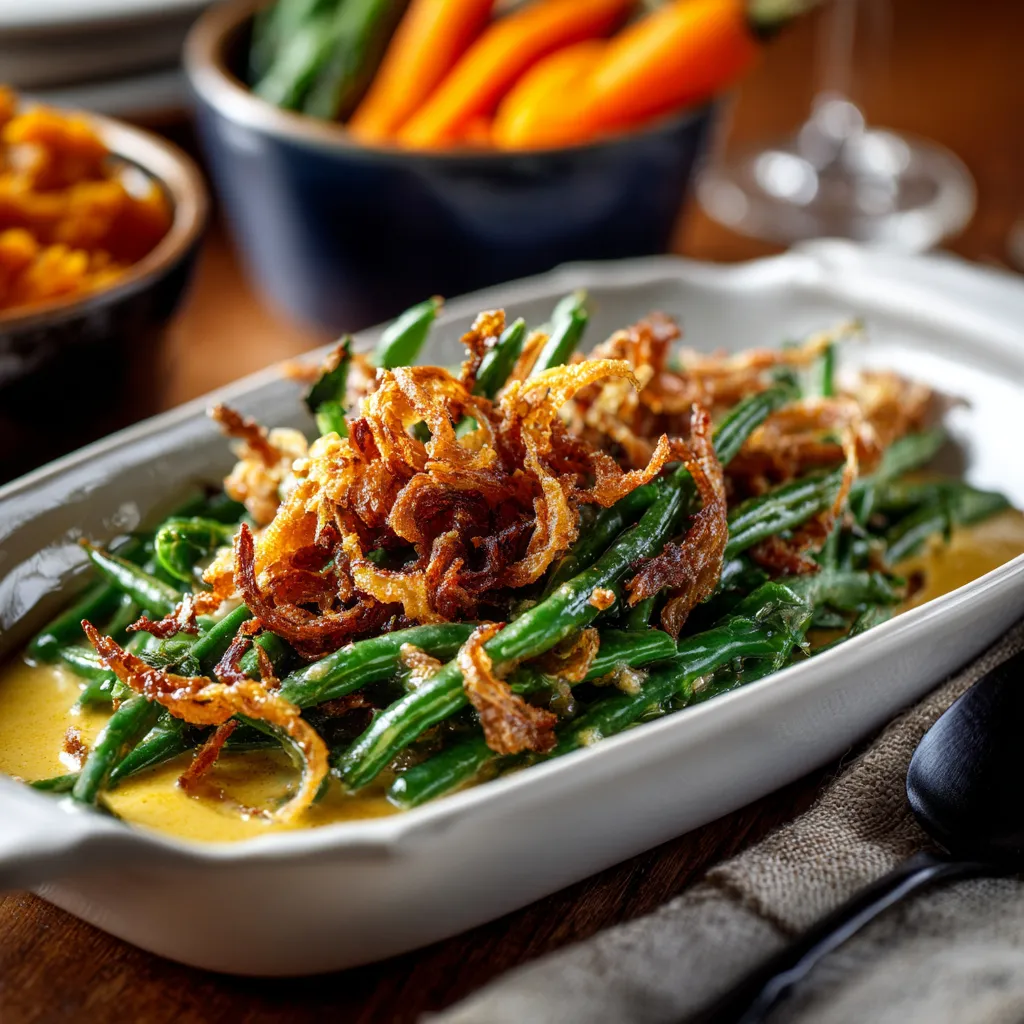
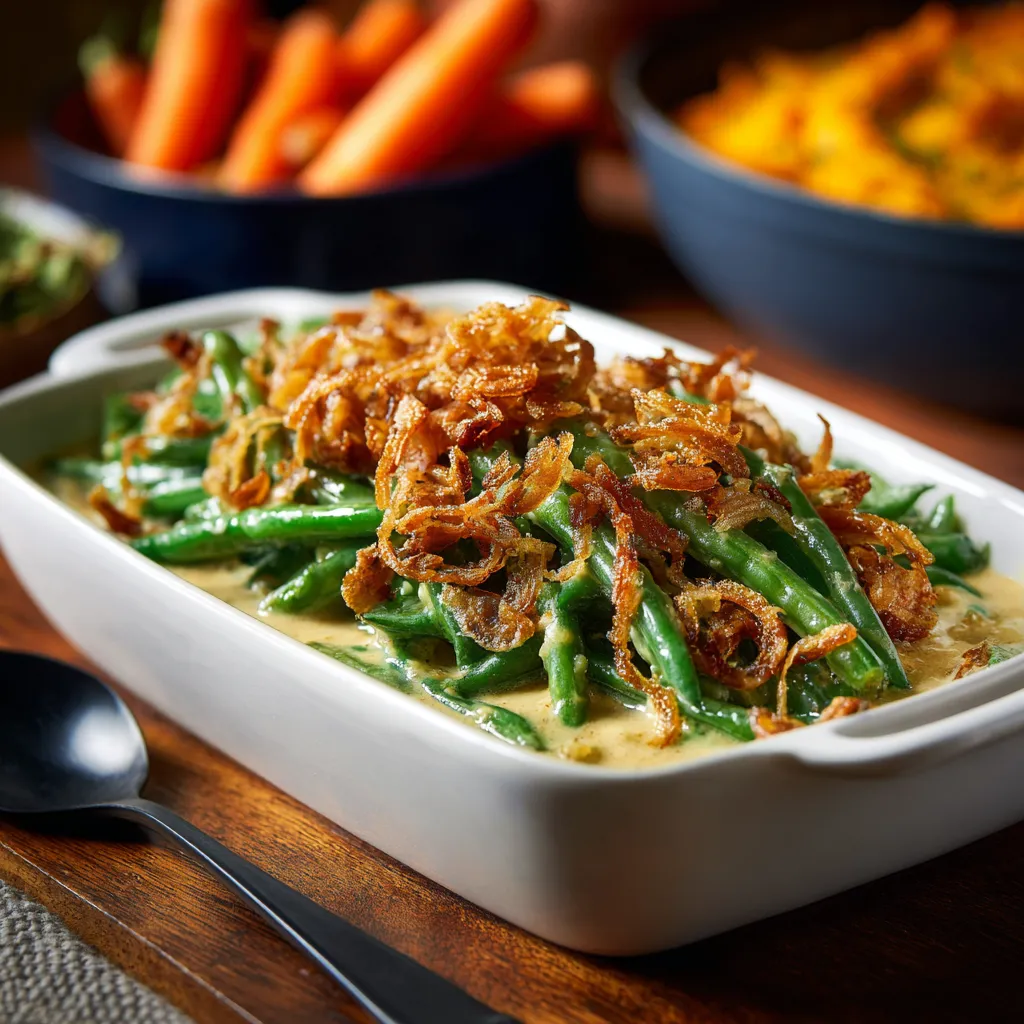
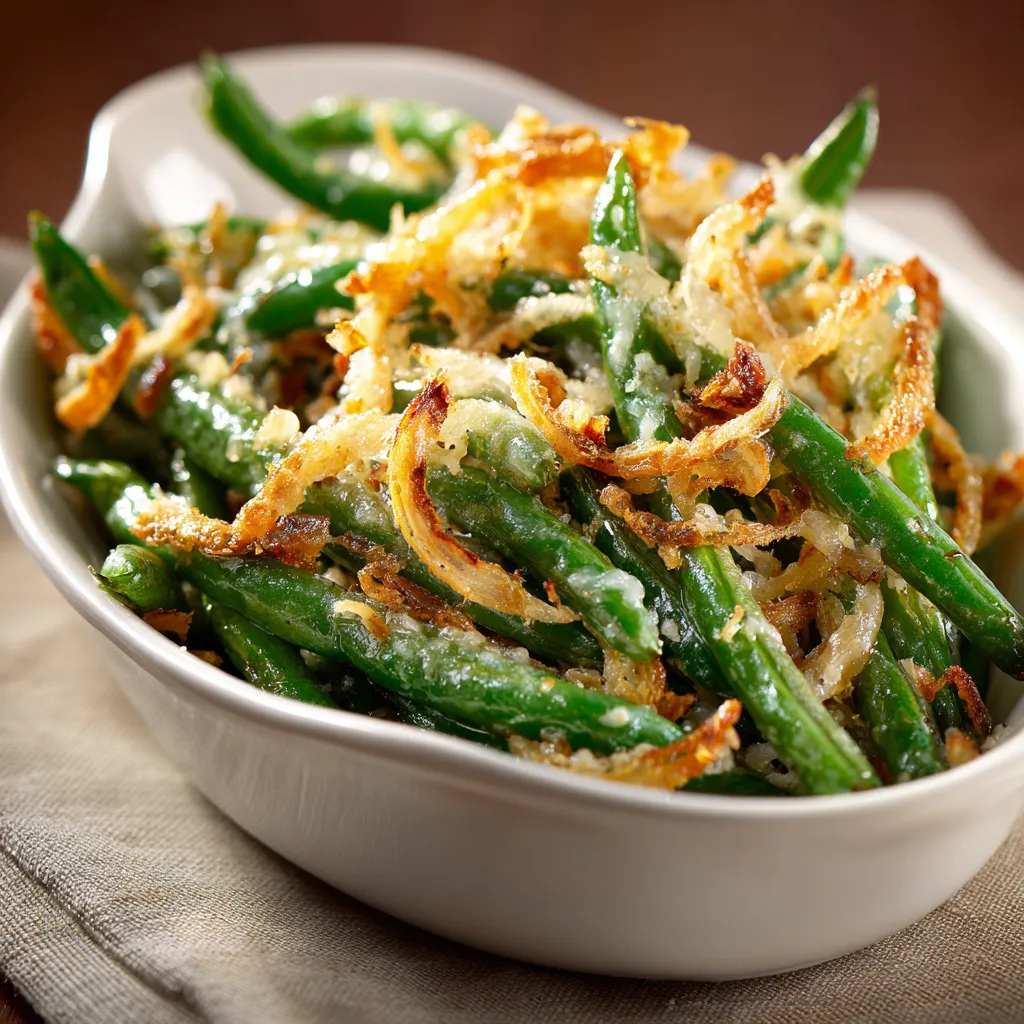
Welcome to the Flavor Adventure of My Campbells Green Bean Casserole

Join me, Marcus Rivera, as we embark on a culinary journey that transforms a classic comfort food into a bold statement of flavor! My Campbells Green Bean Casserole is more than just a dish; it’s a celebration of texture, richness, and nostalgia that beckons you closer to the table. With just a few simple ingredients, you’ll create a casserole that’s not only delicious but also brimming with warmth and heart. Let’s dive into the world of green beans and create something extraordinary together!

Why You’ll Love This Recipe

This isn’t just any green bean casserole; it’s a dish that will ignite your taste buds and elevate your holiday table. Here’s why:

  • Crowd-Pleasing Comfort: This classic dish is a staple at every holiday gathering, bringing joy to both young and old with its creamy texture and crispy topping.
  • Quick & Easy Preparation: With only a handful of ingredients, you can whip up this casserole in under an hour, leaving you more time to enjoy with family and friends.
  • Versatile Ingredients: You can easily adapt the recipe to fit dietary needs, from gluten-free to vegan options, ensuring everyone can dig in!
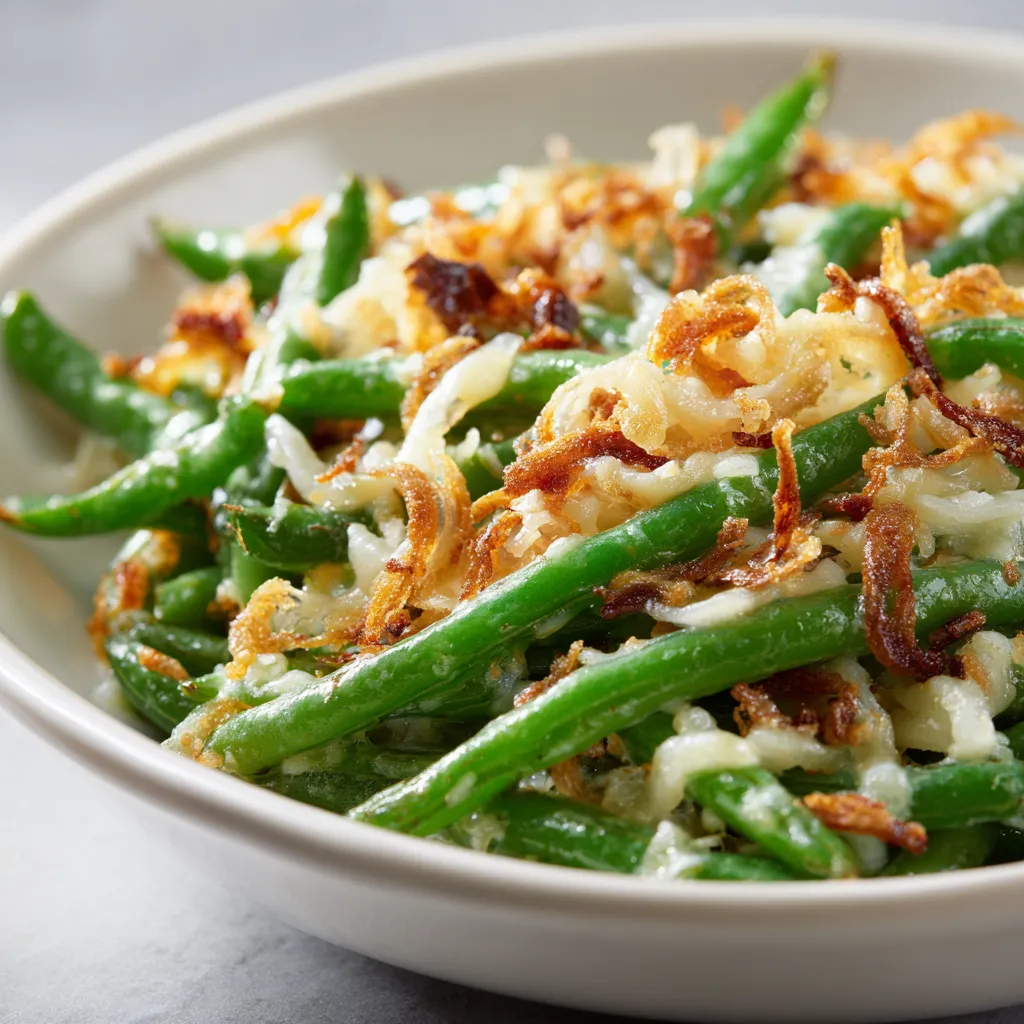
  • Rich Flavor Profile: The combination of creamy mushroom soup and crispy fried onions creates a delicious contrast that keeps you coming back for more.
  • Make-Ahead Convenience: Perfect for busy holidays, you can prepare this dish in advance and simply pop it in the oven when it’s time to eat!

Let’s Break Down the Ingredients

Detailed shot of a green bean casserole with golden onion topping, showcasing its texture.

To create this mouthwatering Campbells Green Bean Casserole, you’ll need the following ingredients, along with some handy substitutions:

  • Green Beans: 2 cans (14.5 oz each) of green beans, drained. You can substitute with fresh or frozen green beans (just blanch them first).
  • Cream of Mushroom Soup: 1 can (10.5 oz) of Campbell’s cream of mushroom soup. For a vegan option, use a plant-based cream soup or homemade cream sauce.
  • Milk: 3/4 cup of milk. Substitute with almond milk or oat milk for a dairy-free version.
  • French’s Crispy Fried Onions: 1 cup adds the crunch! You can make your own crispy onions or use gluten-free fried onions if needed.
  • Seasoning: 1/2 teaspoon each of black pepper and garlic powder for added flavor.

Step-by-Step Instructions for the Perfect Casserole

Now that you have your ingredients ready, let’s get cooking! Follow these simple steps:

  1. Preheat the Oven: Preheat your oven to 350°F (175°C).
  2. Mix the Ingredients: In a large mixing bowl, combine the drained green beans, cream of mushroom soup, milk, black pepper, and garlic powder. Stir until well mixed.
  3. Assemble the Casserole: Pour the mixture into a 1.5-quart casserole dish, spreading it evenly.
  4. Bake: Place in the preheated oven and bake for 25 minutes.
  5. Add the Topping: Remove from the oven, stir the casserole, and top with 1/2 cup of crispy fried onions.
  6. Final Bake: Return to the oven and bake for an additional 5-10 minutes, or until the onions are golden brown.
  7. Serve Warm: Take it out of the oven, let it cool slightly, and serve warm. Enjoy your creamy, crunchy masterpiece!

Pro Tips for the Ultimate Green Bean Casserole

To ensure your casserole turns out perfect every time, keep these expert tips in mind:

  • Use Fresh Ingredients: If you’re using fresh green beans, blanch them briefly in boiling water before mixing to ensure they cook evenly.
  • Don’t Overcook: Keep an eye on the baking time to avoid mushy green beans; they should be tender but still have a bite.
  • Experiment with Flavors: Add a pinch of cayenne pepper or smoked paprika for an extra kick! Spice isn’t just for heat; it adds depth.
  • Make Ahead: Prepare the casserole a day in advance and store it covered in the fridge. Just bake it right before serving!
  • Check for Allergens: Always read labels for store-bought ingredients to ensure they meet dietary restrictions.
  • Golden Topping: For an extra crunch, consider mixing some breadcrumbs with the fried onions before topping the casserole.
  • Adjust Consistency: If you prefer a creamier texture, add more soup or a splash of cream to the mixture before baking.
  • Pair with Proteins: This casserole pairs beautifully with roasted chicken or turkey for a complete meal!

Common Mistakes and Troubleshooting

Every great chef has made mistakes in the kitchen. Here’s how to avoid the most common pitfalls:

  • Watery Casserole: If you notice excess liquid in your casserole, ensure your green beans are fully drained, and avoid over-mixing the ingredients.
  • Burnt Topping: If your fried onions are browning too quickly, cover the casserole with foil during the last few minutes of baking.
  • Flavor Lacking: If it tastes bland, feel free to adjust the seasoning or add a splash of soy sauce for umami richness.
  • Texture Issues: If your casserole isn’t creamy enough, try adding a little more milk or soup to balance it out.

Delicious Variations to Try

Want to shake things up? Here are some exciting variations to explore:

  • Cheesy Twist: Add 1 cup of shredded cheese (like cheddar or mozzarella) to the mixture before baking for a gooey, cheesy casserole.
  • Mushroom Lovers: Toss in sautéed mushrooms for added flavor and texture.
  • Asian-Inspired: Use soy sauce and top with crispy shallots for a delightful twist on the classic.
  • Herb Infusion: Add fresh herbs like thyme or rosemary for a fragrant touch that brightens up the dish.

Storage and Make-Ahead Instructions

Planning ahead? Here’s how to store and reheat your casserole:

  • Refrigeration: The casserole can be covered and stored in the fridge for up to 3 days. Just reheat in the oven at 350°F until warmed through.
  • Freezing: You can freeze the unbaked casserole for up to 2 months. Thaw overnight in the fridge before baking.
  • Reheating: Cover with foil while reheating to maintain moisture and prevent burning.

Frequently Asked Questions

Got questions? I’ve got answers! Here are some common queries about this green bean casserole:

  • Can I use fresh green beans instead of canned? Absolutely! Just blanch them first to ensure they cook evenly.
  • How can I make this casserole gluten-free? Use gluten-free cream of mushroom soup and fried onions.
  • Can I prepare this dish in advance? Yes! You can assemble it ahead of time and bake just before serving.
  • What can I serve with green bean casserole? It pairs wonderfully with roasted meats, mashed potatoes, and cranberry sauce.
  • How do I make it creamier? Add more cream of mushroom soup or a splash of heavy cream to the mixture.
  • Can I use different types of onions? Yes! Try caramelized onions for a sweet flavor or shallots for a milder taste.
  • Is it possible to add protein? You can mix in cooked chicken or turkey for a heartier dish.
  • What’s the best way to reheat leftovers? Reheat in the oven covered with foil to keep it moist.

Nutritional Information & Dietary Adaptations

This casserole is not only delicious but can be adapted to fit various dietary needs:

  • Low-Calorie Option: Use low-fat cream of mushroom soup and skim milk.
  • Vegan Adaptation: Substitute with plant-based cream soup and dairy-free milk.
  • Protein Boost: Add cooked turkey or chicken for extra protein.

Essential Equipment Recommendations

Here’s what you’ll need to tackle this recipe:

  • Casserole Dish: A 1.5-quart dish works best for even baking.
  • Mixing Bowls: Use large mixing bowls for easy stirring and combining of ingredients.
  • Measuring Cups and Spoons: Accurate measurements are key to ensuring the perfect balance of flavors.

Serving Suggestions for the Perfect Meal

Now that you’ve made this mouthwatering casserole, here are some ideas for serving:

  • Pair with Roasted Turkey: The rich flavors complement the savory notes of turkey beautifully.
  • Serve with Cranberry Sauce: The tartness of cranberry sauce balances the creaminess of the casserole perfectly.
  • Enjoy with Mashed Potatoes: A classic combo that never disappoints!

And there you have it, folks! My Campbells Green Bean Casserole is not just a dish; it’s a flavorful adventure that will have your guests singing your praises. Remember, cooking is all about exploring and enjoying the process. So grab your skillet, embrace the spice, and let’s make unforgettable meals together!

Mouthwatering Campbells Green Bean Casserole

Prep Time 10 minutes
Cook Time 30 minutes
Total Time 40 minutes
Servings 6 servings
Calories 180
A classic holiday side dish that's easy to prepare and full of flavor. Perfect for family gatherings and festive occasions.

Ingredients

Green Beans

  • 2 cans green beans, drained
  • 1 can campbell's cream of mushroom soup
  • 3/4 cup milk
  • 1 cup french's crispy fried onions
  • 1/2 teaspoon black pepper
  • 1/2 teaspoon garlic powder

Instructions 

  • Preheat oven to 350°F (175°C).
  • Mix green beans, mushroom soup, milk, pepper, and garlic powder in a bowl.
  • Pour into a 1.5-quart casserole dish and bake for 25 minutes.
  • Top with 1/2 cup fried onions and bake for another 5-10 minutes until golden.
  • Serve warm and enjoy!

Notes

For a crunchier topping, add extra fried onions just before serving.
Calories: 180kcal
Cost: $15
Course: Side Dish
Cuisine: American
Keyword: Green Beans

Nutrition

Calories: 180kcal | Carbohydrates: 20g | Protein: 5g | Fat: 8g | Sodium: 600mg

Loved this recipe? Save it to your favorite Pinterest board so you can easily find it later! It’s the perfect way to keep all your sweet ideas in one place. ✨

Eye-level perspective of a mouthwatering green bean casserole, highlighting the creamy sauce and crispy layer.

Discover the Vibrant World of Cucumber Carrot Salad

Welcome to a culinary adventure that begins with the crisp crunch of a cucumber and the sweet earthiness of a carrot! This cucumber carrot salad is not just a simple side dish; it’s a celebration of freshness and zest that can elevate any meal. Bursting with flavor and packed with nutrients, this salad is the perfect accompaniment to your summer barbecues or a light lunch. Let’s dive into the details of how to make this delightful dish!

Why You’ll Love This Recipe

This cucumber carrot salad is a culinary masterpiece that brings together tastes and textures in a way that will leave your taste buds dancing. Here are just a few reasons why you’ll fall head over heels for this recipe:

  • Quick and Easy: This salad can be whipped up in just 15 minutes, making it perfect for busy weeknights or last-minute gatherings.
  • Nutritious Goodness: Packed with vitamins A, K, and C, this salad not only tastes great but also nourishes your body.
  • Versatile Flavor: With its zesty dressing, this cucumber carrot salad complements a variety of dishes, from grilled meats to Asian-inspired entrees.
  • Refreshing Crunch: The combination of crunchy cucumbers and crisp carrots creates a delightful contrast that brightens up your plate.
  • Customizable: Feel free to experiment with different ingredients and dressings to suit your taste preferences!

Ingredients Breakdown

Eye-level shot of a salad featuring sliced cucumbers and carrots, garnished with parsley.

To create this vibrant salad, you’ll need the following ingredients. Let’s talk about each one and some possible substitutions:

  • 2 Medium Cucumbers: Thinly sliced, these add a refreshing crunch. You can use Persian cucumbers for a sweeter taste or English cucumbers for a milder flavor.
  • 2 Medium Carrots: Julienne or slice them into matchsticks. If you’re in a rush, pre-cut carrots are a handy alternative.
  • 1 Tablespoon Olive Oil: This adds richness and depth to the dressing, but avocado oil works great too!
  • 1 Tablespoon Lemon Juice: Freshly squeezed lemon juice brightens the flavors. Alternatively, rice vinegar can add an Asian twist.
  • Salt and Pepper: Essential for enhancing the flavors; feel free to adjust according to your taste.
  • Fresh Parsley: This is for garnish, but you can substitute with cilantro for a different flavor profile.

How to Make Cucumber Carrot Salad

Ready to bring this salad to life? Follow these simple steps to create a dish that’s as beautiful as it is delicious:

  1. Wash the cucumbers and carrots thoroughly.
  2. Peel the carrots and slice them into thin matchsticks.
  3. Slice the cucumbers in half lengthwise and then into thin half-moons.
  4. In a large bowl, combine the sliced cucumbers and carrots.
  5. In a small bowl, whisk together the olive oil, lemon juice, salt, and pepper until well combined.
  6. Pour the dressing over the cucumber and carrot mixture, and toss to combine.
  7. Garnish with fresh parsley before serving. Enjoy your refreshing salad!

Pro Tips for Perfecting Your Salad

To ensure your cucumber carrot salad is always a hit, consider these expert insights:

  • Choose Fresh Produce: Always opt for the freshest cucumbers and carrots for the best flavor and crunch.
  • Chill Before Serving: Allow your salad to chill in the refrigerator for about 30 minutes before serving to let the flavors meld beautifully.
  • Adjust the Dressing: Feel free to add a splash of soy sauce or sesame oil for an Asian-inspired twist.
  • Experiment with Herbs: Don’t hesitate to try different herbs like mint or basil for a unique flavor boost.
  • Make it Colorful: Add bell peppers or radishes for extra color and crunch.
  • Batch it Up: Prepare a large batch for meal prep; it keeps well in the fridge for a few days.
  • Season to Taste: Always taste and adjust the seasoning to your preference before serving.
  • Mind the Thickness: Slice your vegetables thinly for the best texture and flavor absorption.

Common Mistakes and Troubleshooting

Even the best chefs can make mistakes! Here are some common pitfalls and how to avoid them:

  • Over-Dressing: Too much dressing can make the salad soggy. Start with a small amount, and add more if needed.
  • Cutting Too Thick: Thick slices can result in a less enjoyable texture. Aim for thin, bite-sized pieces.
  • Using Old Ingredients: Ensure your vegetables are fresh; wilted or old produce can ruin the dish.
  • Neglecting Seasoning: Don’t skip the salt and pepper; they are crucial for elevating the flavors!

Delicious Variations to Try

Looking to shake things up? Here are some exciting variations of the cucumber carrot salad to inspire your culinary creativity:

  • Asian Cucumber Salad: Add sliced scallions, sesame seeds, and a splash of soy sauce to create a zesty Asian-inspired version.
  • Spicy Kick: Toss in some sliced jalapeños or a pinch of red pepper flakes for a delightful heat.
  • Fruit Fusion: Incorporate diced mango or pineapple for a sweet and tropical twist.
  • Nutty Crunch: Sprinkle with chopped nuts like almonds or cashews to add a satisfying crunch.

Storage and Make-Ahead Instructions

This salad is perfect for meal prep, and here’s how to store it:

  • Make Ahead: You can prepare the salad a day in advance. Just leave out the dressing until you’re ready to serve to keep it fresh.
  • Storage: Store leftovers in an airtight container in the fridge for up to 3 days.
  • Freezing: It’s not recommended to freeze this salad, as the vegetables may become mushy upon thawing.

Frequently Asked Questions

If you have questions about making this cucumber carrot salad, you’re not alone! Here are some common inquiries:

  • Can I use other vegetables? Absolutely! Feel free to add bell peppers, radishes, or even zucchini for variation.
  • Is this salad vegan? Yes! All the ingredients are plant-based, making it a great choice for vegans.
  • Can I make it spicy? Yes! Adding spicy elements like chili flakes or fresh jalapeños can give it a kick.
  • How do I make it gluten-free? Ensure that any sauces or dressings used are gluten-free. Most ingredients are naturally gluten-free!
  • What’s the best way to serve it? This salad is best served chilled as a side dish or on its own for a light meal.
  • Can I use bottled dressing? While homemade dressing is recommended, a store-bought Asian sesame dressing can work in a pinch.
  • How can I enhance the flavor? Marinating the salad for a bit before serving can enhance the flavor even more.
  • What’s the nutritional value? This salad is low in calories, high in vitamins, and full of fiber, making it a healthy choice!

Nutritional Tips and Dietary Adaptations

This cucumber carrot salad is not only refreshing but also a powerhouse of nutrition. Here are some tips for maximizing its health benefits:

  • Vitamin Boost: Carrots are rich in beta-carotene, which is great for eye health.
  • Fiber-Rich: This salad is packed with fiber, aiding digestion and keeping you full.
  • Low-Calorie: It’s a low-calorie option, perfect for those watching their intake.
  • Detox-Friendly: The fresh ingredients support detoxification and hydration.

Essential Equipment

To whip up this delicious salad, you don’t need much! Here’s a quick list of equipment you’ll need:

  • Sharp Knife: For slicing your vegetables to the perfect size.
  • Cutting Board: To provide a stable surface for chopping.
  • Mixing Bowls: One large for the salad and one small for the dressing.
  • Whisk: To effortlessly combine your dressing ingredients.

Serving Suggestions

This cucumber carrot salad makes a versatile side dish that pairs beautifully with a variety of meals:

  • Grilled Meats: Serve alongside grilled chicken or fish for a refreshing contrast.
  • Asian Dishes: It complements stir-fries or noodle dishes perfectly.
  • Sandwiches and Wraps: Use it as a crunchy filling for wraps or as a side to your favorite sandwich.

In conclusion, this cucumber carrot salad is more than just a recipe; it’s an invitation to explore flavors and embrace the joy of cooking. Whether you’re a novice or a seasoned chef, this dish will inspire you to experiment with fresh ingredients and create something truly spectacular. So grab your knife, channel your inner chef, and let’s make some magic happen in the kitchen!

Cucumber Carrot Salad

Prep Time 10 minutes
Total Time 10 minutes
Servings 4 servings
Calories 80
A fresh and crunchy salad combining crisp cucumbers and sweet carrots, dressed with lemon and olive oil.

Ingredients

Vegetables

  • 2 medium cucumbers (sliced into half-moons)
  • 2 medium carrots (peeled and sliced into matchsticks)
  • 1 tablespoon olive oil
  • 1 tablespoon lemon juice
  • to taste salt
  • to taste pepper
  • fresh parsley for garnish

Instructions 

  • Wash and slice cucumbers and carrots.
  • Combine vegetables in a bowl.
  • Whisk olive oil, lemon juice, salt, and pepper.
  • Pour dressing over vegetables and toss.
  • Garnish with parsley and serve.

Notes

This salad is quick to prepare and perfect for a light, refreshing snack or side dish.
Calories: 80kcal
Cost: $8
Course: Salad
Keyword: Carrot, Cucumber

Nutrition

Calories: 80kcal | Carbohydrates: 15g | Protein: 2g | Fat: 4g | Sodium: 50mg

Loved this recipe? Save it to your favorite Pinterest board so you can easily find it later! It’s the perfect way to keep all your sweet ideas in one place. ✨

Detailed view of a Cucumber Carrot Salad, showcasing bright vegetables in natural lighting.

Unleashing Flavor: The Allure of Creamy Mushroom and Spinach Stuffed Sweet Potatoes

Welcome to a culinary adventure that’s about to set your kitchen ablaze with flavor! If you’ve ever savored the sweetness of roasted sweet potatoes combined with the rich, creamy texture of mushroom and spinach, you know that this dish isn’t just food — it’s an experience. In this guide, we’ll explore the depths of flavor that this recipe offers, ensuring you get every bit of joy from cooking. Get ready to dive into a world where comfort food meets gourmet excitement!

Why You’ll Love This Recipe

Let’s break down why these Creamy Mushroom and Spinach Stuffed Sweet Potatoes deserve a prime spot on your dinner table:

  • Hearty & Satisfying: The natural sweetness of the sweet potatoes paired with the savory mushroom filling creates a satisfying balance that leaves you feeling full without the heaviness.
  • Nutrient-Packed: Sweet potatoes are a fantastic source of vitamins A and C, while spinach adds iron and fiber, making this dish as nutritious as it is delicious.
  • Customizable: This recipe is a canvas! Feel free to play with different spices, herbs, or proteins to make it your own.
  • Vegan-Friendly: With simple substitutions, this dish can easily be made vegan, allowing everyone to enjoy it!
  • Make-Ahead Marvel: Perfect for meal prep, you can prepare these stuffed sweet potatoes ahead of time and simply bake them when you’re ready to eat.

Ingredients Breakdown

A deliciously plated sweet potato, overflowing with a creamy mushroom and spinach mixture, in warm lighting.

Here’s what you’ll need to create these culinary delights, along with some handy substitutions:

  • 4 medium sweet potatoes: Look for firm potatoes with vibrant orange flesh; they should be free of blemishes.
  • 2 cups fresh spinach, chopped: You can use frozen spinach, but make sure to thaw and drain it thoroughly.
  • 1 cup mushrooms, sliced: Cremini or shiitake mushrooms are fantastic for their robust flavor. If you’re feeling adventurous, try oyster mushrooms!
  • 1/2 cup cream cheese, softened: For a vegan version, use cashew cream or vegan cream cheese.
  • 1/4 cup grated parmesan cheese: Nutritional yeast makes a great vegan substitute here.
  • 2 tablespoons olive oil: Avocado oil works beautifully too, and adds a nice depth of flavor.
  • 2 cloves garlic, minced: Fresh garlic is key, but you can use garlic powder in a pinch (1/4 teaspoon per clove).
  • Salt and pepper to taste: Use freshly cracked black pepper for the best flavor.
  • Optional: Chopped fresh parsley for garnish: This adds a pop of color and freshness!

Step-by-Step Instructions

Ready to embark on this cooking journey? Follow these steps for a flawless dish:

  1. Preheat your oven to 400°F (200°C).
  2. Prepare the sweet potatoes: Wash them well and pierce with a fork to allow steam to escape. Place them on a baking sheet and bake for 45-60 minutes, until tender.
  3. Cook the filling: In a large skillet, heat olive oil over medium heat. Add minced garlic and sliced mushrooms, cooking until the mushrooms are soft, about 5-7 minutes.
  4. Add spinach: Toss in the chopped spinach and sauté until wilted, about 2-3 minutes.
  5. Mix in creamy goodness: Remove from heat and stir in the cream cheese and Parmesan until the mixture is creamy. Season with salt and pepper to your liking.
  6. Stuff the sweet potatoes: Once the sweet potatoes are done, cool slightly, cut in half lengthwise, and scoop out some flesh to create a pocket for the filling. Combine the scooped flesh with the mushroom and spinach mix.
  7. Return to the oven: Spoon the filling back into the potato halves. Bake for an additional 10-15 minutes to let the flavors meld.
  8. Garnish and serve: Top with chopped parsley if desired, and serve warm!

Pro Tips for Perfection

Want to elevate your dish even further? Here are some expert insights:

  • Roasting sweet potatoes: For a deeper flavor, try roasting your sweet potatoes at a higher temperature (450°F) for a shorter time.
  • Umami boost: Add a splash of soy sauce or tamari to the filling for an extra umami kick.
  • Textural contrast: Consider topping with crispy fried onions or panko breadcrumbs for a delightful crunch.
  • Herb infusion: Fresh herbs like thyme or rosemary can be added to the filling to enhance the flavor profile.
  • Cheese varieties: Experiment with different cheeses like feta or goat cheese for a tangy flavor.
  • Protein-packed: Mix in shredded chicken, cooked lentils, or black beans for added protein and heartiness.
  • Spice it up: If you enjoy heat, add a pinch of red pepper flakes to the filling.
  • Chill time: Allow your stuffed sweet potatoes to cool for a few minutes before serving; it allows the flavors to settle.

Common Mistakes and Troubleshooting

Even the best chefs make mistakes! Here are some common pitfalls and how to avoid them:

  • Overcooked potatoes: Keep an eye on your sweet potatoes to avoid them becoming mushy. Test for doneness with a fork.
  • Filling too thick: If your filling seems too thick, add a splash of vegetable broth or milk to loosen it up.
  • Inadequate seasoning: Make sure to taste as you go; underseasoned food can dull the flavor.
  • Prepping ahead: If preparing in advance, store the filling separately from the potatoes to maintain texture.

Variations to Explore

Your culinary canvas is limitless! Here are some variations to try:

  • Spicy Southwest Style: Add diced jalapeños and a sprinkle of cumin for a kick.
  • Italian Flair: Incorporate sun-dried tomatoes and basil for a Mediterranean twist.
  • Asian-Inspired: Use shiitake mushrooms, add sesame oil, and top with green onions and sesame seeds.
  • Breakfast Delight: Mix in scrambled eggs for a satisfying breakfast option!

Storage and Make-Ahead Instructions

Want to save some for later? Here’s how:

  • Refrigerate: Store leftovers in an airtight container in the refrigerator for up to 3-4 days.
  • Freeze: You can freeze the stuffed sweet potatoes before baking for up to 3 months. Just thaw in the refrigerator overnight before baking.
  • Reheat: Warm up your stuffed potatoes in the oven at 350°F for 20-25 minutes, or microwave for a quick fix.

Frequently Asked Questions

Let’s tackle some common questions about this recipe:

  • Can I use other vegetables in the filling? Absolutely! Feel free to add bell peppers, zucchini, or even kale for added nutrition.
  • How can I make this recipe spicier? Add crushed red pepper flakes or hot sauce to the filling for a fiery bite.
  • What’s the best way to know when my sweet potatoes are done? Insert a fork or knife into the flesh; it should slide in easily when fully cooked.
  • Can I prepare this dish ahead of time? Yes! You can make the filling and stuff the potatoes a day in advance; just bake them when you’re ready.
  • How do I know if my filling is too thick? If it’s difficult to spoon into the sweet potatoes, add a splash of liquid to loosen it up.
  • Are these stuffed sweet potatoes gluten-free? Yes, this dish is naturally gluten-free!
  • What can I serve with stuffed sweet potatoes? A refreshing green salad or a side of quinoa pairs beautifully.
  • Can I make these vegan? Yes, simply substitute dairy ingredients with vegan alternatives, and you’re set!

Nutritional Insights and Dietary Adaptations

This dish not only pleases the palate but also supports your dietary needs:

  • High in Fiber: Sweet potatoes and spinach provide a hearty dose of dietary fiber, promoting digestive health.
  • Rich in Antioxidants: The vibrant colors of the sweet potatoes and spinach are a sign of their antioxidant properties.
  • Low in Calories: This recipe is naturally lower in calories compared to traditional stuffed potato dishes, giving you a guilt-free indulgence.
  • Adaptable for Diets: Easily modify for vegan, gluten-free, or low-carb diets.

Essential Equipment for Success

To make your cooking process smooth and easy, here are some tools you might need:

  • Sharp Knife: For cutting and preparing your vegetables with ease.
  • Large Skillet: A sturdy skillet is key for sautéing your filling ingredients.
  • Baking Sheet: A good-quality baking sheet ensures even cooking of your sweet potatoes.
  • Measuring Cups and Spoons: Precision is key in cooking, so have these handy!

Serving Suggestions

Ready to serve? Here are some delightful ideas:

  • Top with Fresh Herbs: Chopped parsley, cilantro, or chives add a refreshing touch.
  • Pair with a Salad: A zesty arugula salad complements the dish beautifully.
  • Drizzle with Balsamic Glaze: A sweet and tangy balsamic reduction enhances the flavor profile.
  • Add a Protein: Serve with grilled chicken or chickpeas for a complete meal.

Conclusion

There you have it, my fearless food adventurers! These Creamy Mushroom and Spinach Stuffed Sweet Potatoes are not just a recipe; they’re a passport to flavor town. With every bite, you’re not just tasting a dish; you’re partaking in a story of warmth, creativity, and boldness. So grab your skillet, gather your ingredients, and let’s embark on this culinary adventure together. Remember, the kitchen is your playground, and every meal is a chance to experiment and ignite your passion for cooking. Until next time, keep the fire alive!

Creamy Mushroom and Spinach Stuffed Sweet Potatoes - recipestasteful

Prep Time 15 minutes
Cook Time 1 hour
Total Time 1 hour 15 minutes
Servings 4 servings
Calories 350
A delicious and nutritious dish featuring baked sweet potatoes filled with a creamy mushroom and spinach mixture, perfect for a wholesome meal.

Ingredients

Sweet Potatoes

  • 4 medium sweet potatoes

Vegetables

  • 2 cups fresh spinach, chopped
  • 1 cup mushrooms, sliced

Dairy

  • 1/2 cup cream cheese, softened
  • 1/4 cup grated parmesan cheese

Other

  • 2 tablespoons olive oil
  • 2 cloves garlic, minced
  • to taste salt and pepper
  • optional chopped fresh parsley for garnish

Instructions 

  • Preheat oven to 400°F (200°C). Bake sweet potatoes for 45-60 minutes until tender.
  • Cook garlic and mushrooms in olive oil until soft, then add spinach and cook until wilted.
  • Mix in cream cheese and Parmesan, season with salt and pepper.
  • Cut sweet potatoes in half, scoop out flesh, and combine with mushroom-spinach mixture.
  • Stuff the mixture into sweet potato halves, bake for 10-15 minutes, then garnish with parsley.

Notes

For extra flavor, sprinkle with additional parsley before serving.
Calories: 350kcal
Cost: $15
Course: Main Course
Cuisine: American
Keyword: Mushrooms, Spinach, Sweet Potatoes

Nutrition

Calories: 350kcal | Carbohydrates: 65g | Protein: 8g | Fat: 12g | Sodium: 300mg

Loved this recipe? Save it to your favorite Pinterest board so you can easily find it later! It’s the perfect way to keep all your sweet ideas in one place. ✨

Eye-level view of half a sweet potato filled with savory mushroom and spinach filling, set against a blurred background.

Welcome to Your Next Baking Adventure!

Ready to redefine your cookie game? Dive into the delicious world of Healthy Apple Pie Oatmeal Cookies with me, Marcus Rivera. These cookies are not just a treat; they’re a celebration of flavor, health, and the joy of cooking. Imagine biting into a cookie that captures the essence of fall, with warm spices and sweet apples dancing together in perfect harmony. What if I told you that you can enjoy this delightful experience without the guilt of traditional desserts? Let’s whip up a batch that’s not just tasty but nutritious!

Why You’ll Love This Recipe

This isn’t just any cookie recipe; it’s a blend of wholesome ingredients that will satisfy your sweet tooth while keeping your health in check. Here are five reasons to fall in love with these cookies:

  • Guilt-free indulgence: Made with gluten-free oats and whole wheat flour, these cookies are a nourishing treat that won’t weigh you down.
  • Natural sweetness: Sweetened with maple syrup or honey, you’ll enjoy the rich flavors without the refined sugars.
  • Fiber-rich: Packed with oats and apples, these cookies provide a hearty dose of fiber, promoting digestive health.
  • Customizable: Whether you prefer raisins, nuts, or a sprinkle of chocolate chips, this recipe allows you to tailor each batch to your taste.
  • Easy to make: With simple ingredients and straightforward steps, you’ll have delicious cookies ready in no time!

Ingredient Breakdown

Deliciously baked oatmeal cookies with diced apples and a sprinkle of cinnamon on a wooden surface.

Let’s dive into the heart of our cookie creation. Here’s what you’ll need and some smart substitutions for the ingredients:

  • 1 cup rolled oats: Use certified gluten-free oats if needed for a gluten-free version.
  • 1/2 cup whole wheat flour: Can be substituted with almond flour for a gluten-free option.
  • 1 teaspoon baking powder: This helps your cookies rise; don’t skip it!
  • 1 teaspoon cinnamon: Adds warmth and depth. Feel free to add more if you love that spice kick.
  • 1/4 teaspoon nutmeg: A little goes a long way for a cozy flavor.
  • 1/4 teaspoon salt: Balances the sweetness.
  • 1/2 cup unsweetened applesauce: Keeps the cookies moist; you can swap it with mashed bananas if you’re feeling adventurous.
  • 1/4 cup honey or maple syrup: Choose your favorite sweetener; both work beautifully.
  • 1/4 cup melted coconut oil: For a subtle tropical flavor and healthy fats. You can use unsalted butter as an alternative.
  • 1 teaspoon vanilla extract: Enhances the cookie’s overall flavor.
  • 1 cup diced apples: Fresh, peeled, and cored apples are essential for that apple pie flavor.
  • 1/4 cup raisins or chopped nuts (optional): Personalize your cookies with these add-ins!

Step-by-Step Instructions

Now that we’ve gathered our ingredients, let’s get baking! Follow these simple steps for cookie success:

  1. Preheat your oven to 350°F (175°C) and line a baking sheet with parchment paper.
  2. In a large bowl, mix together the rolled oats, whole wheat flour, baking powder, cinnamon, nutmeg, and salt.
  3. In another bowl, combine the applesauce, honey (or maple syrup), melted coconut oil, and vanilla extract.
  4. Pour the wet ingredients into the dry ingredients and stir until just combined.
  5. Gently fold in the diced apples and any optional raisins or nuts.
  6. Drop spoonfuls of the cookie dough onto the prepared baking sheet, spacing them about 2 inches apart.
  7. Bake for 12-15 minutes, or until the edges are lightly golden.
  8. Allow the cookies to cool on the baking sheet for a few minutes before transferring them to a wire rack to cool completely.

Pro Tips for Perfect Cookies

Want to elevate your baking game? Check out these expert insights:

  • Chill the dough: If you have time, chilling the dough for 30 minutes helps the flavors meld and can prevent spreading.
  • Use fresh spices: Old spices lose potency; make sure your cinnamon and nutmeg are fresh for the best flavor.
  • Don’t overmix: Stir until just combined to keep the cookies soft and chewy.
  • Experiment with textures: Try adding oats or seeds for an extra crunch.
  • Monitor baking time: Ovens vary, so keep an eye on your cookies to avoid overbaking.
  • Store properly: Keep cookies in an airtight container to maintain freshness.
  • Mix flavors: Consider adding a splash of almond extract for a unique twist.
  • Play with toppings: Drizzle with dark chocolate or sprinkle with sea salt for a gourmet touch.

Common Mistakes and Troubleshooting

No one likes a baking flop! Here are some frequent pitfalls and how to avoid them:

  • Dry cookies: Check your measurements! Too much flour can lead to dryness; use a kitchen scale for accuracy.
  • Too crumbly: If the dough is too dry, add a splash of milk or extra applesauce.
  • Cookies spreading too much: Chill the dough before baking to help maintain their shape.
  • Flavorless cookies: Don’t skimp on the spices; they make all the difference!

Delicious Variations

Want to mix things up? Here are four tasty variations to try:

  • Chocolate Chip Apple Cookies: Add 1/2 cup of dark chocolate chips for a sweet twist.
  • Nutty Apple Cookies: Stir in 1/4 cup of chopped walnuts or pecans for added crunch.
  • Spiced Apple Cookies: Incorporate 1/2 teaspoon of ginger or allspice for an extra depth of flavor.
  • Banana Apple Cookies: Substitute mashed bananas for applesauce for a unique taste.

Storage and Make-Ahead Instructions

Want to enjoy these cookies for longer? Here’s how to store and prepare ahead:

  • Room temperature: Store in an airtight container for up to 5 days.
  • Refrigerate: Keep for up to 2 weeks in the fridge. Just warm them up before serving!
  • Freezing: Freeze unbaked dough in spoonfuls, then bake straight from the freezer, adding a couple of extra minutes to the baking time.
  • Make-ahead: Prepare the dough ahead of time and bake fresh cookies whenever the craving hits!

Comprehensive FAQ

Got questions? I’ve got answers! Here are some common inquiries about our Healthy Apple Pie Oatmeal Cookies:

  • Can I use quick oats instead of rolled oats? Yes, but the texture will differ slightly; rolled oats provide a chewier bite.
  • Are these cookies gluten-free? Yes, simply use gluten-free oats and a suitable flour substitute.
  • How do I know when they’re done baking? The edges should be golden brown, and the centers will look soft but set.
  • Can I substitute applesauce? Absolutely! Mashed bananas or yogurt can work well as alternatives.
  • What if I don’t have maple syrup? Honey or agave syrup are great substitutes.
  • Can I make these cookies vegan? Yes, use a plant-based sweetener and replace the coconut oil with vegan butter.
  • What’s the best way to serve these cookies? Enjoy them warm, perhaps with a cup of tea or coffee for a delightful experience.
  • Can I add protein powder? Yes, just adjust the flour amount to maintain the right consistency.

Nutritional Tips and Dietary Adaptations

These cookies not only taste amazing but can also be adjusted for various dietary needs:

  • Low-carb option: Substitute almond flour for whole wheat flour and use erythritol as a sweetener.
  • High-protein option: Add protein powder to the dry ingredients for a nutritional boost.
  • Nut-free option: Omit nuts and replace with seeds like sunflower or pumpkin.
  • Low-sugar option: Reduce the sweetener further or use a sugar-free syrup.

Equipment Recommendations

Let’s make sure you have everything you need for a smooth baking experience:

  • Baking sheets: Good quality, non-stick sheets work best for even baking.
  • Mixing bowls: Use a large bowl for dry ingredients and a medium bowl for wet ingredients.
  • Measuring cups and spoons: Accurate measurements are key to success in baking.
  • Silicone spatula: Ideal for folding in ingredients without damaging the dough.
  • Wire rack: Essential for cooling cookies evenly and preventing sogginess.

Serving Suggestions

Ready to serve? Here are some creative ideas to enhance your cookie experience:

  • With a scoop of ice cream: Serve warm cookies with a scoop of vanilla or caramel ice cream for a decadent treat.
  • With a drizzle of yogurt: Top with Greek yogurt and a sprinkle of cinnamon for a healthy breakfast option.
  • As a snack platter: Pair these cookies with fresh fruit and nuts for a delightful afternoon snack.
  • Gift them: Package these cookies in a jar with a ribbon for a thoughtful homemade gift.

There you have it! A comprehensive guide to crafting your own Healthy Apple Pie Oatmeal Cookies. Embrace the joy of baking and the thrill of flavor! So, preheat that oven, gather your ingredients, and let’s make some cookies that are not just good for you but also a joy to eat. Remember, every cookie tells a story, and it’s time to share yours!

Healthy Apple Pie Oatmeal Cookies

Prep Time 10 minutes
Cook Time 15 minutes
Total Time 25 minutes
Servings 12 cookies
Calories 120
Enjoy these wholesome cookies packed with oats, apples, and warm spices for a healthy treat.

Ingredients

Dry ingredients

  • 1 cup rolled oats
  • 1/2 cup whole wheat flour
  • 1 teaspoon baking powder
  • 1 teaspoon cinnamon
  • 1/4 teaspoon nutmeg
  • 1/4 teaspoon salt

Wet ingredients

  • 1/2 cup unsweetened applesauce
  • 1/4 cup honey or maple syrup
  • 1/4 cup coconut oil, melted
  • 1 teaspoon vanilla extract
  • 1 cup diced apples (peeled and cored)
  • 1/4 cup raisins or chopped nuts (optional)

Instructions 

  • Preheat oven to 350°F (175°C) and line a baking sheet.
  • Mix dry ingredients in a bowl.
  • Combine wet ingredients in another bowl.
  • Mix wet into dry, then fold in apples and optional nuts.
  • Drop spoonfuls onto baking sheet and bake 12-15 minutes.
  • Cool cookies before serving.

Notes

For softer cookies, slightly underbake and let cool.
Calories: 120kcal
Cost: $10
Course: Dessert
Cuisine: Healthy
Keyword: apple, Cookies, Oatmeal

Nutrition

Calories: 120kcal | Carbohydrates: 20g | Protein: 2g | Fat: 5g | Sodium: 50mg

Loved this recipe? Save it to your favorite Pinterest board so you can easily find it later! It’s the perfect way to keep all your sweet ideas in one place. ✨

A mouthwatering stack of Healthy Apple Pie Oatmeal Cookies with soft shadows and natural light.

Rediscover the Comfort of Classic Green Bean Casserole

As the holiday season approaches, there’s one dish that never fails to ignite nostalgia and warmth—Campbell’s Green Bean Casserole. This timeless recipe is a staple at Thanksgiving dinner tables across America, bringing families together with its creamy goodness and crispy onion topping. But beyond its classic reputation, this dish embodies the spirit of experimentation and flavor layering that I hold dear. Join me, Marcus Rivera, as we dive into the heart of this beloved casserole, exploring why it continues to be a cherished tradition, and how you can make it your own!

Why You’ll Love This Recipe

This isn’t just any green bean casserole; it’s a celebration of flavors and memories. Here’s why you’ll adore this dish:

  • Simple Ingredients: With just a handful of pantry staples, you can whip up a dish that feels gourmet without breaking the bank.
  • Rich and Creamy Texture: The combination of Campbell’s cream of mushroom soup and milk creates a luscious base that envelops the green beans.
  • Crispy Onion Topping: The French Fried Onions add a delightful crunch that contrasts beautifully with the creamy filling.
  • Versatile for Any Occasion: While it shines at Thanksgiving, this casserole is perfect for potlucks, family dinners, or even a cozy night in.
  • Easy to Make Ahead: This dish can be prepared in advance, making your holiday cooking stress-free and enjoyable.

Ingredients Breakdown

Warm, inviting green bean casserole in a baking dish, showcasing its rich texture.

Let’s talk about the key ingredients that make this casserole a crowd-pleaser, along with some tasty substitutions:

  • Green Beans: Use 2 cans (14.5 oz each) of drained green beans for convenience, or opt for fresh green beans for a vibrant crunch.
  • Cream of Mushroom Soup: The star of the show! If you’re feeling adventurous, try making your own from scratch for a fresher taste.
  • Milk: 3/4 cup of milk keeps the mixture creamy; feel free to use almond or soy milk for a dairy-free version.
  • French Fried Onions: 1 1/3 cups provides the perfect topping. For a homemade twist, you can fry your own onions!
  • Black Pepper: Just 1/2 teaspoon enhances the flavors; adjust to your taste.
  • Soy Sauce: This optional ingredient adds a depth of flavor, but feel free to skip it if you prefer.

Step-by-Step Instructions

Ready to create this comforting casserole? Follow these simple steps:

  1. Preheat your oven to 350°F (175°C).
  2. Combine Ingredients: In a large mixing bowl, blend the drained green beans, cream of mushroom soup, milk, black pepper, and soy sauce if using.
  3. Add Crunch: Stir in 2/3 cup of the French Fried Onions, reserving the rest for topping.
  4. Pour into Casserole Dish: Transfer the mixture into a 1.5-quart casserole dish.
  5. Bake: Place in the preheated oven and bake for 25 minutes.
  6. Top & Finish: Remove from the oven, stir the casserole, and top with the remaining French Fried Onions. Return to the oven and bake for another 5-10 minutes until golden brown.
  7. Serve Warm: Enjoy your delicious green bean casserole with family and friends!

Pro Tips for Perfection

Want to elevate your casserole game? Here are some expert insights:

  • Fresh vs. Canned: If you opt for fresh green beans, blanch them before mixing to maintain their bright color and crispness.
  • Layering Flavors: Consider adding sautéed garlic or shallots for an aromatic twist.
  • Texture Matters: For extra crunch, bake the casserole uncovered for the last 10 minutes.
  • Make it Cheesy: Stir in some grated cheddar cheese for a cheesy variation that will delight cheese lovers.
  • Spice it Up: Add a pinch of cayenne or red pepper flakes if you like a little heat!
  • Alternative Toppings: Experiment with crispy bacon bits or panko breadcrumbs for a different texture.
  • Slow Cooker Option: For a make-ahead option, prepare the casserole in a slow cooker for 3-4 hours on low.
  • Garnish Wisely: Fresh herbs like parsley or thyme can add a beautiful finish and a burst of flavor.

Avoiding Common Mistakes

Even a classic recipe can go wrong. Here’s how to ensure your casserole turns out perfectly:

  • Overcooking Green Beans: If you’re using fresh beans, be careful not to overcook them before mixing.
  • Too Much Liquid: Stick to the recipe’s milk measurements to avoid a soupy casserole.
  • Skipping the Stir: Make sure to stir the casserole midway for even cooking and crispy topping.
  • Not Topping at the Right Time: Add the French Fried Onions only during the last minutes of baking to keep them crispy.

Creative Variations

Don’t hesitate to mix things up! Here are some fun twists on the classic recipe:

  • Cheesy Green Bean Casserole: Mix in shredded cheddar or mozzarella for an ooey-gooey delight.
  • Mushroom Medley: Add sautéed mushrooms for an earthy flavor boost.
  • Asian-Inspired Version: Replace soy sauce with teriyaki sauce and top with sesame seeds for a unique flair.
  • Spicy Southwest Casserole: Incorporate diced jalapeños and a sprinkle of cumin for a fiery twist.

Storage and Make-Ahead Instructions

If you’re planning ahead, here’s how to store and reheat your casserole:

  • Make-Ahead: Prepare the casserole up to the baking step. Store it in the fridge for up to 24 hours before baking.
  • Storing Leftovers: Keep any leftovers in an airtight container in the refrigerator for up to 3 days.
  • Reheating: Reheat in the oven at 350°F (175°C) until warmed through, about 15-20 minutes.

FAQs About Green Bean Casserole

Curious about this dish? Here are some common questions answered:

  • Can I use fresh green beans instead of canned? Absolutely! Just blanch them first.
  • What can I substitute for cream of mushroom soup? Try a homemade version or substitute with cream of chicken soup.
  • How do I make the casserole gluten-free? Use gluten-free fried onions and ensure your soup is gluten-free.
  • Can I freeze green bean casserole? Yes, but it’s best to freeze it before adding the crispy topping.
  • How long does it take to bake? Bake it for a total of 30-35 minutes, depending on your oven.
  • Can I make it vegan? Use vegan cream of mushroom soup and skip the fried onions or use a vegan alternative.
  • What should I serve with green bean casserole? Pair it with roasted turkey, mashed potatoes, or cranberry sauce for a complete Thanksgiving meal.
  • Is it necessary to stir during baking? Stirring midway helps ensure even cooking and prevents burning.

Nutritional Tips and Dietary Adaptations

Cooking with health in mind? Here’s how to adapt this recipe:

  • Lower in Calories: Use low-fat milk and reduced-fat cream of mushroom soup.
  • Increase Fiber: Add lentils or quinoa to the casserole for a hearty touch.
  • Nut-Free Option: Ensure all ingredients are free from nuts, especially if you’re serving guests with allergies.

Recommended Equipment

Here’s what you’ll need to create this dish:

  • Casserole Dish: A 1.5-quart dish is perfect for this recipe.
  • Mixing Bowl: A large bowl for combining your ingredients.
  • Oven Mitts: Safety first! Keep those hands protected during baking.

Serving Suggestions

Once your casserole is baked to perfection, here are some serving ideas:

  • Garnish: Sprinkle fresh herbs like parsley or chives on top for a pop of color.
  • Accompany with Sides: Serve alongside mashed potatoes, turkey, and cranberry sauce for a festive meal.
  • Pair with Drinks: A crisp white wine or spiced apple cider complements the flavors beautifully.

Conclusion: A Timeless Tradition Awaits

As you gather around the table this holiday season, remember that the heart of every meal is the love and warmth we share. This classic green bean casserole is more than just a dish; it’s a reminder of family traditions and a celebration of flavors. So grab your ingredients, embrace the adventure of cooking, and let’s create memories together. Here’s to a holiday filled with joy, laughter, and a perfectly spiced green bean casserole! Enjoy!

Make classic Campbells Green Bean Casserole for Thanksgiving dinner! This simple recipe is a holiday treat in 2025

Prep Time 10 minutes
Cook Time 30 minutes
Total Time 40 minutes
Servings 6 servings
Calories 180
This classic green bean casserole is a perfect holiday side dish, combining creamy mushroom soup with crispy fried onions for a delicious Thanksgiving treat.

Ingredients

Green Beans

  • 2 cans green beans, drained
  • 1 can campbell's cream of mushroom soup
  • 3/4 cup milk
  • 1 1/3 cups french's french fried onions
  • 1/2 teaspoon black pepper
  • 1 teaspoon soy sauce (optional)

Instructions 

  • Preheat oven to 350°F (175°C).
  • Mix green beans, mushroom soup, milk, black pepper, and soy sauce.
  • Stir in 2/3 cup of fried onions, save the rest for topping.
  • Pour into a casserole dish and bake for 25 minutes.
  • Top with remaining onions and bake 5-10 minutes until golden.

Notes

For extra flavor, add a dash of garlic powder or a splash of soy sauce.
Calories: 180kcal
Cost: $15
Course: Side Dish
Cuisine: American
Keyword: Green Beans

Nutrition

Calories: 180kcal | Carbohydrates: 20g | Protein: 4g | Fat: 8g | Sodium: 600mg

Loved this recipe? Save it to your favorite Pinterest board so you can easily find it later! It’s the perfect way to keep all your sweet ideas in one place. ✨

Delicious Campbell’s green bean casserole with a golden crust and soft green beans.

Unlock the Magic of Pizza Eggs: A Flavor-Packed Breakfast Adventure

Are you ready to transform your mornings from mundane to magnificent? Welcome to the world of Pizza Eggs—the dish that merges the comfort of pizza with the heartiness of eggs, creating a delightful culinary experience that will have your taste buds dancing. This recipe is not just a meal; it’s a vibrant adventure that will awaken your senses and turn breakfast into a feast. Let’s dive deep into the art of making Pizza Eggs and discover why you’ll fall in love with this recipe.

Why You’ll Love This Recipe

Pizza Eggs aren’t just delicious; they come with a host of benefits that make them a must-try:

  • Quick Preparation: You can whip up this dish in under 15 minutes, making it perfect for busy mornings without sacrificing flavor.
  • Low Carb Delight: Packed with protein and low in carbs, this dish is ideal for those looking to maintain a healthy lifestyle.
  • Endless Customization: Get creative! Add your favorite toppings, swap out ingredients, or adjust the spice levels to suit your palate.
  • Kid-Friendly Fun: Kids will love the interactive nature of this dish—let them choose their toppings for a breakfast they can help create!
  • Flavor Explosion: The combination of savory ingredients creates a mouth-watering experience that elevates your breakfast game.

Ingredients for Pizza Eggs

Delicious Pizza Eggs featuring a golden crust, melted mozzarella, and vibrant diced bell peppers.

To kickstart your culinary quest, gather the following:

  • 2 large eggs: The star of the show, providing protein and richness.
  • 1/4 cup pizza sauce: A flavor-packed base that brings the essence of pizza right to your breakfast.
  • 1/4 cup shredded mozzarella cheese: Melting beautifully to add that gooey goodness.
  • 1/4 cup diced bell peppers: For a pop of color and crunch.
  • 1/4 cup sliced mushrooms: Earthy flavors that pair nicely with the other ingredients.
  • 1/4 cup sliced pepperoni: For that classic pizza taste, or substitute with turkey or veggie options for a twist.
  • Salt and pepper to taste: Essential for seasoning.
  • Olive oil or cooking spray: To prevent sticking on the non-stick pan.

How to Make Pizza Eggs – Step-by-Step Directions

Ready to dive in? Follow these simple steps to create your Pizza Eggs:

  1. Heat a non-stick skillet over medium heat and add a little olive oil or cooking spray.
  2. In a bowl, whisk the eggs with salt and pepper until well combined.
  3. Pour the eggs into the skillet and let them cook for about a minute until they start to set.
  4. Add the pizza sauce evenly over the eggs.
  5. Sprinkle the shredded mozzarella cheese, diced bell peppers, mushrooms, and pepperoni on top.
  6. Cover the skillet with a lid and cook for another 2-3 minutes, or until the cheese is melted and the eggs are fully cooked.
  7. Gently slide the pizza eggs onto a plate and serve warm.

Pro Tips for Perfect Pizza Eggs

To elevate your Pizza Eggs to the next level, keep these expert tips in mind:

  • Use Fresh Ingredients: Fresh veggies and quality cheese make a noticeable difference in flavor.
  • Experiment with Spices: Add red pepper flakes or Italian seasoning for an extra kick.
  • Don’t Overcook the Eggs: Keep them soft and creamy by removing them from the heat just as they set.
  • Cover the Pan: This helps melt the cheese quickly and evenly while ensuring the eggs cook through.
  • Try Different Cheeses: Swap mozzarella for provolone, gouda, or even feta for unique flavor profiles.
  • Make It a Meal: Pair your Pizza Eggs with a side of fresh fruit or a light salad for a balanced breakfast.
  • Double the Recipe: Cooking for a crowd? Simply double the ingredients and use a larger pan!
  • Use a Cast Iron Skillet: For an even heat distribution and a beautiful presentation right from the stove to the table.

Common Mistakes and Troubleshooting

Even the best chefs make mistakes. Here are some common pitfalls and how to avoid them:

  • Overcooking the Eggs: This can lead to rubbery texture—aim for soft, fluffy eggs instead.
  • Skipping the Lid: Covering the pan is key to melting the cheese and cooking the eggs evenly.
  • Too Much Sauce: Use just enough pizza sauce to flavor without making the eggs soggy.
  • Ignoring Seasoning: Salt and pepper are essential to enhance the dish’s flavors—don’t skip them!

Variations to Try

Now that you’ve mastered the basic recipe, here are some fun variations:

  • Veggie Lovers: Substitute pepperoni with zucchini, spinach, and artichokes for a fresh twist.
  • Spicy Mexican Style: Add jalapeños, black beans, and a sprinkle of taco seasoning for a zesty change.
  • Breakfast Burrito: Wrap the cooked Pizza Eggs in a tortilla with avocado and salsa for a portable option.
  • Cheesy Herb Delight: Layer in fresh herbs like basil or oregano and use a mix of cheeses for complex flavors.

Storage and Make-Ahead Instructions

If you want to prep ahead, here’s how to store your Pizza Eggs:

  • Refrigerate: Store any leftovers in an airtight container in the refrigerator for up to 2 days.
  • Freeze: For longer storage, freeze the cooked Pizza Eggs for up to 1 month. Just remember to wrap them tightly to prevent freezer burn.
  • Reheat: When ready to eat, reheat in the microwave or on a skillet over low heat, adding a splash of water to keep them moist.

Frequently Asked Questions

Here are some common questions about Pizza Eggs:

  • Can I use egg whites instead of whole eggs? Yes, but the texture will be different—egg whites will yield a lighter dish.
  • What toppings can I use? Get creative! Use any pizza toppings you love like olives, onions, or even blue cheese.
  • How do I make this dish vegetarian? Simply omit the pepperoni and load up on vegetables.
  • Can I make Pizza Eggs in the oven? Yes! Pour the mixture into an oven-safe skillet and bake at 350°F until set.
  • What’s the best way to serve Pizza Eggs? Serve them hot, right from the skillet, with crusty bread or a simple salad.
  • Can I double the recipe? Absolutely! Just use a larger skillet to accommodate more eggs.
  • Are Pizza Eggs gluten-free? Yes, as long as your pizza sauce is gluten-free.
  • Can I use dairy-free cheese? Yes! There are many great dairy-free cheeses available that melt well.

Nutrition Tips and Dietary Adaptations

For those mindful of their diet, here are some tips to adapt Pizza Eggs:

  • Low-Calorie Option: Use egg whites and reduce the amount of cheese for a lighter dish.
  • High-Protein Boost: Add cottage cheese or Greek yogurt for extra protein without the extra calories.
  • Vegan Version: Substitute eggs with a chickpea flour mixture or tofu scramble for a plant-based alternative.

Essential Equipment for Making Pizza Eggs

While making Pizza Eggs is simple, having the right tools can enhance your cooking experience:

  • Non-Stick Skillet: Essential for easy cooking and cleanup.
  • Whisk: For perfectly blended eggs.
  • Airtight Containers: For storing leftovers or meal prep.

Serving Suggestions

To round out your breakfast, consider these serving suggestions:

  • Fresh Fruit: A side of berries or sliced oranges adds a refreshing contrast.
  • Avocado Toast: The creaminess of avocado pairs beautifully with the savory Pizza Eggs.
  • Herb Salad: A light salad with fresh herbs and a squeeze of lemon brightens the plate.

So there you have it! Your guide to creating the ultimate Pizza Eggs—a dish that will not only satisfy your hunger but also awaken your love for cooking. Embrace the adventure, experiment with flavors, and remember: the kitchen is your playground. Now grab your skillet, get cooking, and let every bite tell your story!

Pizza Eggs

Prep Time 5 minutes
Cook Time 7 minutes
Total Time 12 minutes
Servings 2 servings
Calories 250
A quick and delicious breakfast combining eggs with pizza flavors for a satisfying start to your day.

Ingredients

Eggs

  • 2 large eggs
  • 0.25 cup pizza sauce
  • 0.25 cup shredded mozzarella cheese
  • 0.25 cup diced bell peppers
  • 0.25 cup sliced mushrooms
  • 0.25 cup sliced pepperoni
  • to taste salt and pepper
  • as needed olive oil or cooking spray

Instructions 

  • Heat a skillet with olive oil or spray over medium heat.
  • Whisk eggs with salt and pepper, then pour into skillet and cook until set.
  • Add pizza sauce over eggs, then sprinkle cheese, peppers, mushrooms, and pepperoni.
  • Cover and cook until cheese melts and eggs are cooked through.
  • Slide onto a plate and serve warm.

Notes

You can customize toppings to your preference for more flavor.
Calories: 250kcal
Cost: $8
Course: Breakfast
Cuisine: American
Keyword: Eggs, Pizza

Nutrition

Calories: 250kcal | Carbohydrates: 8g | Protein: 14g | Fat: 18g | Sodium: 520mg

Loved this recipe? Save it to your favorite Pinterest board so you can easily find it later! It’s the perfect way to keep all your sweet ideas in one place. ✨

A mouthwatering serving of Pizza Eggs with layers of pepperoni, mushrooms, and a rich tomato sauce.

Unlocking the Healing Power of Food: Food as Medicine

Welcome to a culinary journey where every ingredient holds the potential to heal, nourish, and invigorate your body and spirit. Today, we’re diving deep into the transformative concept of food as medicine, a philosophy that has been gaining traction in the world of wellness. This approach not only emphasizes the nutritional value of what we eat but also the profound impact it can have on our overall health. By understanding how to harness the healing properties of food, we can create meals that are not just delicious but also restorative.

In this definitive guide, we’ll explore the essence of food as medicine, its vast benefits, and how you can seamlessly incorporate this philosophy into your kitchen. Get ready to embrace flavorful, health-boosting meals that make you feel alive and empowered!

Why You’ll Love This Recipe

  • Holistic healing: Harness the natural healing properties of ingredients that nourish both body and soul.
  • Flavor explosion: Experience vibrant, bold flavors that awaken your palate and keep your taste buds dancing.
  • Easy integration: Learn how to incorporate these principles into your daily cooking without overwhelming your routine.
  • Versatile options: Discover how to adapt recipes to fit various dietary needs while keeping them delicious.
  • Empowerment: Gain the confidence to experiment and create your own unique dishes that are both healthy and satisfying.

Ingredient Breakdown: The Essentials

A beautifully arranged salad with leafy greens, tomatoes, cucumbers, and walnuts, set against a softly blurred background.

Creating your food as medicine masterpiece starts with choosing the right ingredients. Here’s a breakdown of what you’ll need, along with some smart substitutions to enhance your dishes:

  • Leafy greens: Spinach, kale, or arugula are nutrient-dense options. Substitution: Swiss chard or collard greens can also work well.
  • Tomato: Rich in antioxidants, fresh tomatoes add flavor and color. Substitution: Use roasted red peppers for a smoky twist.
  • Cucumber: Adds crunch and hydration. Substitution: Zucchini offers a similar texture.
  • Nuts: Walnuts or almonds provide healthy fats and protein. Substitution: Try sunflower seeds for a nut-free option.
  • Olive oil: A heart-healthy fat that enhances flavor. Substitution: Avocado oil can be used for a different flavor profile.
  • Apple cider vinegar: A tangy addition that aids digestion. Substitution: Lemon juice can provide a fresh acidity.
  • Herbs: Fresh basil or parsley adds an aromatic touch. Substitution: Try cilantro or dill for a different flavor experience.

Pro Tips for Mastering Food as Medicine

Expert Insights

  • Start small: Don’t feel pressured to overhaul your entire diet overnight. Gradually introduce one or two healing foods each week.
  • Listen to your body: Pay attention to how different foods affect your mood and energy levels. Use this knowledge to guide your cooking choices.
  • Color is key: Aim to fill your plate with a rainbow of fruits and vegetables to maximize nutrient intake.
  • Batch cooking: Prepare meals ahead of time, allowing you to easily access nourishing options during busy weeks.
  • Season with purpose: Use spices like turmeric and ginger that not only flavor your food but also provide anti-inflammatory benefits.
  • Stay hydrated: Pair your meals with infused water or herbal teas to enhance digestion and detoxification.
  • Mindful eating: Take your time to savor each bite, promoting better digestion and a more satisfying eating experience.
  • Experiment: Don’t be afraid to try new combinations and techniques. Cooking should be fun and an adventure!

Avoiding Common Mistakes

As you embark on this culinary adventure, here are some common pitfalls to watch out for:

  • Over-complicating recipes: Keep it simple! Focus on a few key ingredients that shine instead of overwhelming flavors.
  • Ignoring seasonal produce: Seasonal fruits and vegetables are often more flavorful and nutrient-rich. Make them the star of your meals.
  • Neglecting balance: Ensure your meals include a mix of macronutrients – proteins, fats, and carbohydrates – for sustained energy.
  • Skipping herbs and spices: These are not just flavor enhancers; they are packed with health benefits that can elevate your dishes.

Delicious Variations to Explore

Once you’ve mastered the basics, consider these fun variations to keep your meals fresh and exciting:

  • Protein-packed salad: Add grilled chicken or chickpeas for a heartier dish.
  • Spicy kick: Incorporate jalapeños or a drizzle of sriracha for added heat.
  • Warm bowl: Serve the ingredients over quinoa or brown rice for a comforting, warm meal.
  • Soup it up: Blend the ingredients with vegetable broth for a nourishing soup that warms the soul.

Storage and Make-Ahead Instructions

To keep your meals as fresh as possible, follow these guidelines:

  • Refrigerate: Store prepared salads in airtight containers for up to 3 days. Keep dressings separate until ready to serve.
  • Freeze: Soups can be frozen for up to 3 months. Just reheat and enjoy when you need a quick meal.
  • Make-ahead dressing: Whisk up a batch of your favorite vinaigrette and store it in the fridge for easy access.

FAQ: Your Questions Answered

1. What is the food as medicine philosophy?

This approach emphasizes the healing properties of foods, advocating for a diet rich in whole, nutrient-dense ingredients to promote health and prevent disease.

2. Can I still enjoy my favorite comfort foods?

Absolutely! You can adapt comfort foods by incorporating healthier ingredients or using cooking methods that enhance their nutritional value.

3. How do I know which foods are best for me?

Listen to your body and consider consulting a nutritionist to tailor your diet to your individual health needs and preferences.

4. Are there specific foods I should avoid?

While it’s essential to enjoy everything in moderation, highly processed foods, excessive sugar, and refined grains can detract from your health.

5. How can I incorporate more spices into my cooking?

Start by adding a pinch of your favorite spices to everyday dishes and experiment with new combinations to discover what you love.

6. Is meal prepping necessary?

It’s not necessary, but meal prepping can save time and help ensure you have healthy options readily available.

7. What if I have dietary restrictions?

Focus on whole foods that fit your dietary needs and get creative with substitutions to ensure your meals are still flavorful and nutritious.

8. How do I stay motivated to eat healthily?

Find joy in cooking, experiment with new recipes, and remember that every meal is an opportunity to nourish your body.

Nutrition Tips and Dietary Adaptations

Whether you’re vegetarian, vegan, or following a gluten-free diet, food can be medicine for everyone! Here are some tips to adapt:

  • Vegans: Replace animal proteins with legumes, nuts, and whole grains for complete nutrition.
  • Vegetarians: Incorporate eggs and dairy for added protein and nutrients.
  • Gluten-free: Use alternative grains like quinoa, rice, or buckwheat to keep meals satisfying.

Essential Equipment for Your Kitchen

Equipping your kitchen with the right tools can make the cooking process smoother and more enjoyable:

  • High-quality knives: Essential for preparing fresh ingredients with precision.
  • Cutting boards: Invest in multiple boards to avoid cross-contamination.
  • Blender or food processor: Perfect for creating sauces, dressings, and soups.
  • Storage containers: Keep your prepped ingredients fresh and organized.

Serving Suggestions: Bringing It All Together

Presentation matters! Serve your dishes in colorful bowls, garnish with fresh herbs, and pair with complementary sides to elevate your meals. Remember, food is not just sustenance; it’s an experience, a celebration, and a way to connect with others.

Conclusion: The Adventure Awaits!

As you embark on your journey of cooking with the philosophy of food as medicine, remember that every meal is an opportunity to enhance your health and well-being. Embrace the vibrant flavors, the excitement of experimentation, and the joy of nourishing your body. So grab your skillet, unleash your inner chef, and let the adventure begin! Because in the world of food, spice is not just a flavor; it’s a story waiting to be told.

Food as Medicine: What It Means and How to Reap the Benefits

Prep Time 10 minutes
Total Time 10 minutes
Servings 2 servings
Calories 250
This vibrant salad combines nutrient-rich greens and toppings to boost your health and flavor your day.

Ingredients

Main ingredients

  • 1 cup leafy greens (spinach, kale, or arugula)
  • 1 medium tomato, chopped
  • 1/2 cucumber sliced cucumber
  • 1/4 cup walnuts or almonds
  • 1 tablespoon olive oil
  • 1 tablespoon apple cider vinegar
  • to taste salt and pepper (for seasoning)
  • optional herbs like basil or parsley (for garnish)

Instructions 

  • Wash greens and combine with tomato and cucumber in a bowl.
  • Add nuts and prepare dressing by whisking olive oil, vinegar, salt, and pepper.
  • Drizzle dressing over salad and toss gently.
  • Garnish with herbs if desired and serve immediately.

Notes

This simple salad is packed with nutrients and easy to customize with your favorite herbs.
Calories: 250kcal
Cost: $10
Course: Salad
Keyword: leafy greens

Nutrition

Calories: 250kcal | Carbohydrates: 15g | Protein: 6g | Fat: 20g | Sodium: 150mg

Loved this recipe? Save it to your favorite Pinterest board so you can easily find it later! It’s the perfect way to keep all your sweet ideas in one place. ✨

An appetizing food shot of a salad containing greens, tomatoes, cucumbers, and almonds, illuminated by warm natural light.

Wake Up Your Mornings with Flavor: The Ultimate Yogurt Granola Bowl Experience

Are you tired of the same old breakfast routine? Want to transform your mornings into a delightful journey of flavors? Welcome to the world of yogurt bowls! In this article, we’ll dive deep into the magic of Easy Yogurt Granola Bowls that blend creamy yogurt, crunchy granola, and vibrant fruits, ensuring every bite is a celebration of taste. Whether you’re a busy professional or a home chef looking to spice things up, this is the recipe that will reawaken your love for flavorful mornings!

Why You’ll Love This Recipe

This isn’t just any yogurt bowl; it’s a canvas for your culinary creativity. Here are five compelling reasons to whip up this dish:

  • Customizable Delight: You can tailor every aspect of the yogurt bowl to your preferences. Choose your favorite yogurt, fruits, and toppings to create a unique breakfast masterpiece.
  • Quick and Easy: With minimal prep and no cooking required, this recipe is perfect for those rushed mornings or leisurely weekends alike.
  • Nutritious Fuel: Packed with protein from yogurt and fiber from granola and fruits, this bowl jumpstarts your day with energy that lasts.
  • Beautiful Presentation: The vibrant colors of fruits and the layered textures make this dish not just delicious, but a feast for the eyes too!
  • Versatile for Any Diet: Whether you’re vegan, gluten-free, or following a specific diet, you can easily adapt this recipe to meet your needs.

Ingredient Breakdown

An attractive bowl of yogurt granola with mixed berries, banana slices, and nuts, illuminated by natural light.

Let’s breakdown the essential ingredients you’ll need for your yogurt granola bowl:

  • Yogurt: 1 cup of plain or flavored yogurt. Tip: Greek yogurt offers a thicker texture and more protein, while plant-based yogurts are perfect for dairy-free options.
  • Granola: 1/2 cup. Tip: Select a granola with wholesome ingredients. Try making your own for added flavor and crunch.
  • Fresh Fruits: 1/2 cup mixed fresh fruits (e.g., berries, banana, kiwi). Tip: Seasonal fruits can elevate the flavor and freshness of your bowl.
  • Sweetener: 1 tablespoon honey or maple syrup (optional). Tip: Use local honey for an extra touch and health benefits.
  • Nuts or Seeds: 1 tablespoon (optional). Tip: Almonds, walnuts, or chia seeds add a delightful crunch and healthy fats.

Pro Tips for the Perfect Yogurt Bowl

Here are some expert insights to elevate your yogurt bowl game:

  • Layering Technique: Start with yogurt as the base, followed by granola, and then fruits. This keeps the granola crunchy and the fruits fresh.
  • Mix It Up: Don’t hesitate to combine different yogurt flavors. Strawberry-banana or vanilla with mixed berries can create a delightful fusion.
  • Texture Matters: For contrast, consider using both crunchy granola and creamy yogurt, along with soft fruits.
  • Don’t Overdo the Sweetness: Add sweeteners carefully. You can always drizzle more on top if needed!
  • Experiment with Spices: A sprinkle of cinnamon or a dash of nutmeg can add a surprising twist.
  • Chill Your Bowl: For extra delight, chill your bowl in the fridge before serving. It keeps the yogurt cool and refreshing.
  • Freshness is Key: Use the freshest ingredients possible for the best flavor and texture.
  • Make It a Meal: Add protein powder or nut butter for a more filling breakfast.

Avoiding Common Mistakes

Even the best recipes can falter if you don’t watch out for these pitfalls:

  • Too Much Sweetness: Balance is key; avoid overwhelming the bowl with sweeteners.
  • Stale Granola: Ensure your granola is fresh to provide that satisfying crunch.
  • Neglecting Texture: Don’t skip on the nuts or seeds; they add essential texture that complements the yogurt and fruits.
  • Using Overripe Fruits: Choose fruits that are ripe but firm to maintain their integrity in the bowl.

Delicious Variations to Try

Mix and match to find your perfect yogurt bowl! Here are some mouthwatering variations:

  • Berry Blast Bowl: Use a mix of strawberries, raspberries, and blueberries. Top with a drizzle of honey and a sprinkle of chia seeds.
  • Banana Nut Bowl: Layer sliced bananas with almond butter and chopped walnuts for a hearty treat.
  • Tropical Paradise Bowl: Add mango, pineapple, and coconut flakes for a taste of the tropics.
  • Chocolate Delight Bowl: Incorporate cocoa powder into your yogurt and top with dark chocolate chips and strawberries.

Storage and Make-Ahead Instructions

If you want to prepare your yogurt bowls in advance, here’s how to do it right:

  • Make-Ahead: You can pre-portion yogurt and granola in containers, but keep them separate until you’re ready to eat to maintain texture.
  • Storage: Store any leftover yogurt bowls in an airtight container in the fridge for up to 2 days. Add fresh fruits and nuts just before serving.

Frequently Asked Questions

Here are some common queries that might pop up:

  • Can I use any kind of yogurt for this recipe? Absolutely! You can use regular, Greek, or plant-based yogurt based on your dietary preferences.
  • Is this recipe suitable for people with dairy intolerance? Yes, opt for dairy-free yogurt options like almond or coconut yogurt.
  • Can I make this recipe ahead of time? Yes, but keep the granola separate until just before eating to maintain its crunch.
  • How do I make a peanut butter drizzle? Simply mix equal parts peanut butter and a sweetener like honey, then warm it slightly for a pourable consistency.
  • Can I use frozen berries? Yes! Just thaw them before adding to your bowl for the best flavor.
  • What’s the best way to sweeten my yogurt bowl? A drizzle of honey or maple syrup works wonders, but you can also use agave syrup or stevia.
  • How can I add more protein to my yogurt bowl? Consider adding protein powder to your yogurt or topping with nuts and seeds.
  • Is it possible to make this a vegan dish? Absolutely! Use plant-based yogurt and skip any animal-derived toppings.

Nutrition Tips and Dietary Adaptations

Consider these tips to make your yogurt bowl even healthier:

  • Watch Portions: While nutritious, granola can be calorie-dense. Keep portions in check.
  • Incorporate Superfoods: Add ingredients like flax seeds or hemp hearts for an extra nutrient boost.
  • Balance Your Macros: Ensure a good mix of protein, fats, and carbs for sustained energy.
  • Stay Hydrated: Pair your yogurt bowl with a glass of water or herbal tea for a refreshing start to your day.

Essential Equipment Recommendations

To make your yogurt bowl preparation a breeze, consider these tools:

  • Mixing Bowls: Invest in a set of mixing bowls for easy preparation.
  • Measuring Cups and Spoons: Precision is key for balanced flavors and nutritional content.
  • Spatula: A silicone spatula can help you scoop every last bit of yogurt from the bowl.
  • Storage Containers: Use airtight containers for any leftovers to keep them fresh.

Serving Suggestions

Here are a few fun ways to enjoy your yogurt bowl:

  • Family Style: Serve a big bowl of yogurt and toppings on the table, letting everyone create their own masterpiece.
  • Breakfast Bar: Set up a yogurt bar with various yogurts, fruits, and toppings for a fun brunch gathering.
  • On-the-Go: Pack your ingredients separately for a delicious breakfast you can enjoy anywhere.
  • Post-Workout Fuel: Enjoy a protein-packed yogurt bowl after your workout for recovery and nourishment.

So there you have it! A complete guide to making the ultimate yogurt granola bowl that’s rich in flavor, texture, and nutrition. Embrace the art of cooking boldly and remember: every meal is an adventure waiting to be explored. Grab your skillet, or in this case, your bowl, and let’s get cooking!

Easy Yogurt Granola Bowls

Prep Time 5 minutes
Total Time 5 minutes
Servings 2 servings
Calories 250
A quick and nutritious breakfast option featuring creamy yogurt topped with crunchy granola and fresh fruits.

Ingredients

Dairy

  • 1 cup plain or flavored yogurt

Toppings

  • 1/2 cup granola
  • 1/2 cup mixed fresh fruits (e.g., berries, banana, kiwi)
  • 1 tablespoon honey or maple syrup (optional)
  • 1 tablespoon nuts or seeds (optional)

Instructions 

  • Add yogurt to a bowl as the base.
  • Layer granola on top of the yogurt.
  • Add fresh fruits over the granola.
  • Drizzle honey or syrup if desired.
  • Sprinkle nuts or seeds for crunch, if using.
  • Serve immediately and enjoy!

Notes

Use your favorite fruits and granola for variety.
Calories: 250kcal
Cost: $10
Course: Breakfast
Keyword: Fruits, Granola, yogurt

Nutrition

Calories: 250kcal | Carbohydrates: 40g | Protein: 8g | Fat: 5g | Sodium: 50mg

Loved this recipe? Save it to your favorite Pinterest board so you can easily find it later! It’s the perfect way to keep all your sweet ideas in one place. ✨

A vibrant yogurt and granola bowl featuring colorful fruits, displayed in a cozy setting with soft shadows.

Unlocking the Secrets of Perfect Sweet Potato Fries

Are you ready to embark on a delicious culinary adventure? Dive into the world of sweet potato fries that not only tantalize your taste buds but also elevate your snack game! These crispy, golden delights are not just any ordinary fries; they are a celebration of flavor and health. In this guide, I’ll equip you with everything you need to know about making the best sweet potato fries right in your kitchen, so let’s fire up that oven and get cooking!

Why You’ll Love This Recipe

  • Healthy indulgence: Sweet potatoes are packed with vitamins, minerals, and antioxidants, making these fries a nutritious option for any snacking occasion.
  • Quick and easy: With just a few simple ingredients and steps, you can whip up a batch of fries in no time!
  • Versatile flavors: Customize your fries with a variety of seasonings to suit your palate — sweet, savory, or spicy, the choice is yours.
  • Perfectly crispy: Achieve that ideal crunch with my foolproof baking method that ensures your fries are crispy on the outside and tender on the inside.
  • Great for sharing: Whether it’s a party snack or a cozy night in, these sweet potato fries are sure to impress and satisfy a crowd.

Understanding the Ingredients

A serving of crispy sweet potato fries with a warm, inviting background and soft shadows.

Let’s dive into the components that make our sweet potato fries irresistible. Here’s what you’ll need:

  • Sweet Potatoes: 2 large, peeled and cut into thin strips. These are the stars of the show! Choose firm, unblemished sweet potatoes for the best results.
  • Olive Oil: 2 tablespoons. This helps to achieve that golden, crispy exterior while adding a hint of flavor.
  • Paprika: 1 teaspoon. Adds a subtle smokiness that complements the sweetness of the potatoes beautifully.
  • Garlic Powder: 1/2 teaspoon. A must for that savory punch!
  • Salt: 1/2 teaspoon. Essential for enhancing all the flavors.
  • Black Pepper: 1/4 teaspoon. Adds a gentle kick to balance the sweetness.

How to Make Sweet Potato Fries

  1. Preheat your oven: Set it to 425°F (220°C). A hot oven is crucial for crispy fries!
  2. Prepare the sweet potatoes: Peel and cut the sweet potatoes into thin, even strips. Aim for uniformity to ensure even cooking.
  3. Toss and coat: In a large bowl, combine the sweet potato strips with olive oil, paprika, garlic powder, salt, and black pepper. Toss until every fry is evenly coated.
  4. Spread on a baking sheet: Line a baking sheet with parchment paper and spread the fries in a single layer, ensuring they are not touching.
  5. Bake to perfection: Place the baking sheet in the preheated oven and bake for 20-25 minutes, flipping halfway through. You want them crispy and golden brown!
  6. Cool and serve: Once baked, remove from the oven and let them cool slightly before serving. Enjoy your crispy fries!

Expert Tips for the Best Fries

  • Cut evenly: For consistent cooking, cut your sweet potatoes into similar-sized strips.
  • Don’t overcrowd: Give your fries space on the baking sheet to ensure they crisp up nicely. If needed, bake in batches.
  • Experiment with spices: Try adding cayenne pepper for heat, or cinnamon for a sweet twist — the options are endless!
  • Check for doneness: Look for a crispy texture and a golden-brown color; if they aren’t crispy enough, bake for a few more minutes.
  • Use a convection setting: If your oven has one, use it for even better crisping!
  • Let them breathe: If storing leftovers, place them in a single layer on a cooling rack to prevent sogginess.
  • Pair with dips: Serve with your favorite dipping sauces like spicy aioli, ranch, or even a zesty salsa!

Common Mistakes and Troubleshooting

Even the best chefs face challenges! Here are some common pitfalls and how to avoid them:

  • Fries are soggy: This often happens due to overcrowding on the baking sheet or insufficient oil. Ensure good spacing and proper coating to achieve that crispy texture.
  • Uneven cooking: If some fries are burnt while others are undercooked, check your oven calibration or consider rotating the baking sheet halfway through cooking.
  • Too salty or bland: Adjust your seasoning according to taste. Start with less and add more if needed.

Delicious Variations to Try

Why stop at the classic recipe? Here are some exciting variations to take your sweet potato fries to the next level:

  • Sweet and Spicy: Combine brown sugar with cayenne pepper for a sweet heat.
  • Herb-Infused: Toss the fries with fresh rosemary or thyme before baking for a fragrant touch.
  • Cheesy Delight: Sprinkle grated Parmesan cheese over the fries during the last 5 minutes of baking.
  • Asian-Inspired: Use sesame oil and toss with a sprinkle of sesame seeds and a drizzle of soy sauce.

Storage and Make-Ahead Instructions

Want to prepare your sweet potato fries in advance? Here’s how:

  • Make Ahead: You can cut the sweet potatoes and toss them with oil and spices, then store them in the refrigerator for up to 24 hours.
  • Storage: Store leftover fries in an airtight container in the fridge for up to 3 days. Reheat in the oven to regain crispiness.
  • Freezing: Freeze uncooked fries on a baking sheet until solid, then transfer them to a freezer bag. Bake directly from frozen, adding a few extra minutes to the cooking time.

Nutritional Insights

Sweet potatoes are a powerhouse of nutrition! Here’s a breakdown of why they’re a fantastic choice:

  • Rich in Vitamins: They are loaded with vitamin A, which is essential for eye health and immune function.
  • High in Fiber: Great for digestion and keeping you full longer, making them a perfect snack option.
  • Low Glycemic Index: Sweet potatoes have a lower glycemic index compared to white potatoes, helping to stabilize blood sugar levels.

Frequently Asked Questions

  • Can I leave the skins on? Yes! Leaving the skins on adds extra fiber and nutrients.
  • Do I need to soak sweet potatoes before baking? Soaking can help remove excess starch, but it’s not necessary for crispy fries.
  • Can I use other types of potatoes? Absolutely! White or purple potatoes can also be used, but the flavor and texture will vary.
  • How do I make them spicier? Add more cayenne pepper or a dash of hot sauce to the mix before baking.
  • What can I dip them in? Try ranch, BBQ sauce, or even a spicy mayo for a flavor explosion!
  • Are sweet potato fries healthier than regular fries? Generally, yes! They offer more vitamins and fiber, making them a better choice.
  • Can I bake them in an air fryer? Yes! Air fryers can produce even crispier fries in a shorter amount of time.
  • How can I achieve a uniform fry size? Use a mandoline slicer for consistent cuts that will cook evenly.

Equipment Recommendations

To create your sweet potato fries, here’s what you’ll need:

  • Sharp Knife: For cutting sweet potatoes into even strips.
  • Baking Sheet: A sturdy, flat surface for even cooking.
  • Parchment Paper: Helps to prevent sticking and makes cleanup a breeze.
  • Large Mixing Bowl: For tossing the fries with oil and seasonings.

Serving Suggestions

Now that you’ve crafted the ultimate sweet potato fries, here’s how to serve them:

  • As a Side Dish: Pair with grilled meats or veggie burgers for a hearty meal.
  • Snack Time: Serve as a stand-alone snack with your favorite dips!
  • At Parties: Offer them as an appetizer to impress your guests.

Conclusion

There you have it! A comprehensive guide to creating the best sweet potato fries that are not only delicious but also healthy. Embrace the creativity of cooking and feel empowered to make this recipe your own! Remember, cooking is about experimentation and joy, and with these sweet potato fries, you’re sure to ignite a fiery passion for food in your kitchen. So grab those sweet potatoes, unleash your inner chef, and dive into the adventure of flavor!

Easy Sweet Potato Fries (healthy)

Prep Time 10 minutes
Cook Time 25 minutes
Total Time 35 minutes
Servings 4 servings
Calories 150
Enjoy these crispy, healthy sweet potato fries baked to perfection with simple ingredients.

Ingredients

Sweet Potatoes

  • 2 large sweet potatoes
  • 2 tablespoons olive oil
  • 1 teaspoon paprika
  • 1/2 teaspoon garlic powder
  • 1/2 teaspoon salt
  • 1/4 teaspoon black pepper

Instructions 

  • Preheat oven to 425°F (220°C). Peel and cut sweet potatoes into strips.
  • Toss strips with olive oil, paprika, garlic powder, salt, and pepper.
  • Spread on a baking sheet lined with parchment paper.
  • Bake for 20-25 minutes, flipping halfway.
  • Let cool slightly before serving.

Notes

For extra crispiness, flip the fries halfway through baking.
Calories: 150kcal
Cost: $10
Course: Side Dish
Cuisine: American
Keyword: sweet potato

Nutrition

Calories: 150kcal | Carbohydrates: 30g | Protein: 2g | Fat: 5g | Sodium: 200mg

Loved this recipe? Save it to your favorite Pinterest board so you can easily find it later! It’s the perfect way to keep all your sweet ideas in one place. ✨

Textured sweet potato fries displayed artfully, illuminated by soft, warm lighting.

Unlock the Flavor: Your Ultimate Guide to a 5-Star Slow Cooker Pot Roast

Picture this: the tantalizing aroma of a perfectly seasoned pot roast, slowly simmering in a rich broth, filling your home with warmth and comfort. As the day winds down and the hustle of life fades away, you step into your kitchen to find a meal that practically cooks itself. This is the magic of a **5-Star Pot Roast Slow Cooker Recipe**—where minimal effort meets maximum flavor, making weeknight dinners a joy. In this guide, I’ll show you how to create a pot roast that’s not just a meal, but a celebration of the art of cooking with spice.

Why You’ll Love This Recipe

There are countless reasons to fall in love with this pot roast recipe, but here are five that stand out:

  • Effortless Cooking: Simply toss the ingredients into your slow cooker and let it do the magic while you go about your day.
  • Unforgettable Flavor: Each bite is a symphony of savory spices and tender meat, elevating your dinner experience.
  • Family Favorite: This dish is not just delicious; it’s a comforting classic that will please even the pickiest eaters.
  • Versatile Ingredients: Use whatever vegetables you have on hand for endless variations—this recipe adapts beautifully!
  • Make-Ahead Convenience: Perfect for meal prep, this pot roast saves you time and stress during busy weekdays.

Ingredient Breakdown

Tender beef chuck roast with vegetables, beautifully arranged in warm lighting.

To create this mouthwatering pot roast, you’ll need the following ingredients. And don’t worry if you’re missing something; I’ll provide substitutions to keep your cooking adventure alive.

  • 3-4 lbs beef chuck roast: This cut is ideal for slow cooking, as it becomes incredibly tender. If you prefer leaner meat, you can opt for a brisket.
  • 1 tablespoon olive oil: For searing the meat. Can be substituted with vegetable oil or butter.
  • 2 teaspoons salt: Essential for flavor enhancement. You can adjust to taste or use a low-sodium variety.
  • 1 teaspoon black pepper: Adds a kick. White pepper can be used for a subtler flavor.
  • 1 teaspoon garlic powder: For depth; fresh minced garlic works well, too.
  • 1 teaspoon onion powder: You can substitute with fresh onions, roughly chopped.
  • 4 carrots, chopped: Adds sweetness and color. Feel free to use parsnips for a unique twist.
  • 3 potatoes, diced: A classic addition that makes the dish hearty. Sweet potatoes are a fabulous alternative.
  • 1 onion, quartered: Enhances the overall flavor; shallots can add a different profile.
  • 3 cups beef broth: The foundation of your cooking liquid. Vegetable broth is a fantastic substitute for a lighter version.
  • 2 tablespoons Worcestershire sauce: For that umami punch. Soy sauce works in a pinch.
  • 2 tablespoons tomato paste: Adds richness; can be omitted if you prefer a lighter broth.
  • 1 teaspoon dried thyme: For aromatic notes; fresh thyme is even better.
  • 1 teaspoon dried rosemary: A little goes a long way; feel free to use Italian seasoning for a twist.
  • 1 bay leaf: To impart a subtle flavor; remember to remove it before serving!

Pro Tips for Pot Roast Perfection

Let’s elevate your pot roast game with these expert insights:

  • Consider Searing: Browning the meat before slow cooking adds a depth of flavor that’s well worth the extra step.
  • Layer Wisely: Place tougher vegetables like potatoes and carrots beneath the meat; they’ll soak up all the delicious juices while cooking.
  • Check for Tenderness: The roast is done when it easily shreds with a fork. Don’t rush the process—good things take time!
  • Adjust Seasonings: Taste your broth before serving; if it’s lacking, a pinch of salt or a splash of vinegar can brighten the flavors.
  • Make It Ahead: This dish tastes even better the next day, making it ideal for make-ahead meals.
  • Use Leftovers Creatively: Shred leftover meat for sandwiches, tacos, or soups—there’s no waste with this recipe!
  • Experiment with Spices: Don’t be afraid to add your favorite spices—cumin or smoked paprika can bring an exciting twist.
  • Let It Rest: After cooking, allow the roast to sit for 15 minutes before slicing to let the juices redistribute.

Avoiding Common Mistakes

Here’s how to sidestep some common pot roast pitfalls:

  • Don’t Skip the Browning: Searing the meat creates a crust that locks in moisture and flavor.
  • Overcrowding the Cooker: Ensure there’s enough space for the heat to circulate. If you have a large roast, consider cutting it in half.
  • Ignoring the Liquid: If your pot roast is too dry, it could be due to insufficient broth. Always check your liquid levels during cooking.
  • Cooking on High Too Long: While it’s tempting to speed things up, cooking on low yields a more tender result.

Delicious Variations to Try

Change things up with these tasty variations:

  • Herb-Infused Roast: Add fresh herbs like parsley and dill for a burst of freshness.
  • Spicy Kick: Toss in some chopped jalapeños or a pinch of cayenne pepper for a heat boost.
  • Asian Twist: Replace Worcestershire sauce with soy sauce, and add ginger and sesame oil for an Asian-inspired flavor.
  • Italian Flair: Incorporate diced tomatoes and Italian seasoning for a Mediterranean spin.

Storage and Make-Ahead Instructions

This pot roast is perfect for meal prep! Here’s how to store and reheat your delicious creation:

  • Refrigeration: Store leftovers in an airtight container in the fridge for up to 4 days.
  • Freezing: This pot roast freezes beautifully! Portion it out and freeze for up to 3 months.
  • Reheating: For best results, reheat in the oven covered with foil to retain moisture, or use the microwave in short bursts.

Frequently Asked Questions

Got questions about your pot roast? I’ve got answers:

  • Can I use other cuts of meat? Absolutely! Brisket or round roast can also work well, though cooking times may vary.
  • What if I don’t have beef broth? You can substitute with chicken broth or even water, though the flavor may be less rich.
  • How do I know when the pot roast is done? The roast should be fork-tender and easily pull apart. Aim for an internal temperature of 190°F to 205°F.
  • Can I cook this on high heat? Yes, but cooking on low is recommended for the best tenderness.
  • Is it necessary to sear the meat? While not mandatory, searing adds a wonderful depth of flavor.
  • Can I add more vegetables? Definitely! Feel free to experiment with veggies like bell peppers or mushrooms.
  • What’s the best way to serve pot roast? Serve with the cooking liquid as gravy and a side of crusty bread or over mashed potatoes.
  • Can I make this vegetarian? For a vegetarian version, use a plant-based roast or hearty vegetables and vegetable broth.

Nutritional Tips and Dietary Adaptations

This pot roast can fit into various dietary plans:

  • Low-Carb Option: Skip the potatoes and increase the amount of carrots and other non-starchy vegetables.
  • Gluten-Free: Ensure your Worcestershire sauce and broth are gluten-free, and you’re good to go!
  • Protein Boost: Add beans or legumes to the mix for extra protein and fiber.

Essential Equipment Recommendations

To make your pot roast experience seamless, here’s what you’ll need:

  • Slow Cooker: A 6-qt slow cooker is ideal for this recipe. Look for one with a programmable timer.
  • Searing Pan: A heavy-duty skillet helps achieve that perfect sear before slow cooking.
  • Meat Thermometer: To ensure your roast reaches the perfect temperature for tenderness.

Serving Suggestions

This pot roast pairs wonderfully with:

  • Crusty Breads: A warm baguette or sourdough to soak up the savory juices.
  • Mashed Potatoes: Creamy mashed potatoes make a classic and comforting side.
  • Steamed Green Beans: Bright green beans add a pop of color and freshness to the plate.

Now that you’re armed with all the knowledge to create a **5-Star Pot Roast**, it’s time to embrace your culinary adventure. Cooking should be bold, adventurous, and above all, enjoyable! So grab your skillet, gather your ingredients, and let that slow cooker work its magic. Because when you cook with love and a little bit of fire, every meal becomes a story worth telling.

5-Star Pot Roast Slow Cooker Recipe for Busy Nights

Prep Time 15 minutes
Cook Time 8 hours
Total Time 8 hours 15 minutes
Servings 6 servings
Calories 650
This hearty pot roast is perfect for busy evenings, offering tender meat and flavorful vegetables with minimal effort.

Ingredients

Meat

  • 3-4 lbs beef chuck roast
  • 1 tablespoon olive oil
  • 2 teaspoons salt
  • 1 teaspoon black pepper
  • 1 teaspoon garlic powder
  • 1 teaspoon onion powder

Vegetables

  • 4 carrots carrots, chopped
  • 3 potatoes potatoes, diced
  • 1 onion onion, quartered

Liquids & Sauces

  • 3 cups beef broth
  • 2 tablespoons worcestershire sauce
  • 2 tablespoons tomato paste
  • 1 teaspoon dried thyme
  • 1 teaspoon dried rosemary
  • 1 bay leaf bay leaf

Instructions 

  • Season the beef with salt, pepper, garlic powder, and onion powder.
  • Sear the beef in olive oil until browned on all sides.
  • Place vegetables in slow cooker, top with beef.
  • Mix broth, Worcestershire, tomato paste, thyme, rosemary, and bay leaf; pour over.
  • Cook on low 8-10 hours or high 4-6 hours until tender.
  • Slice and serve with gravy from cooking liquid.

Notes

For extra flavor, add fresh herbs or vegetables as desired.
Calories: 650kcal
Cost: $15
Course: Main Course
Cuisine: American
Keyword: Pot Roast

Nutrition

Calories: 650kcal | Carbohydrates: 40g | Protein: 60g | Fat: 30g | Sodium: 1500mg

Loved this recipe? Save it to your favorite Pinterest board so you can easily find it later! It’s the perfect way to keep all your sweet ideas in one place. ✨

Appetizing slow-cooked pot roast dish featuring carrots, potatoes, and herbs.