Author

Avery Collins

Browsing

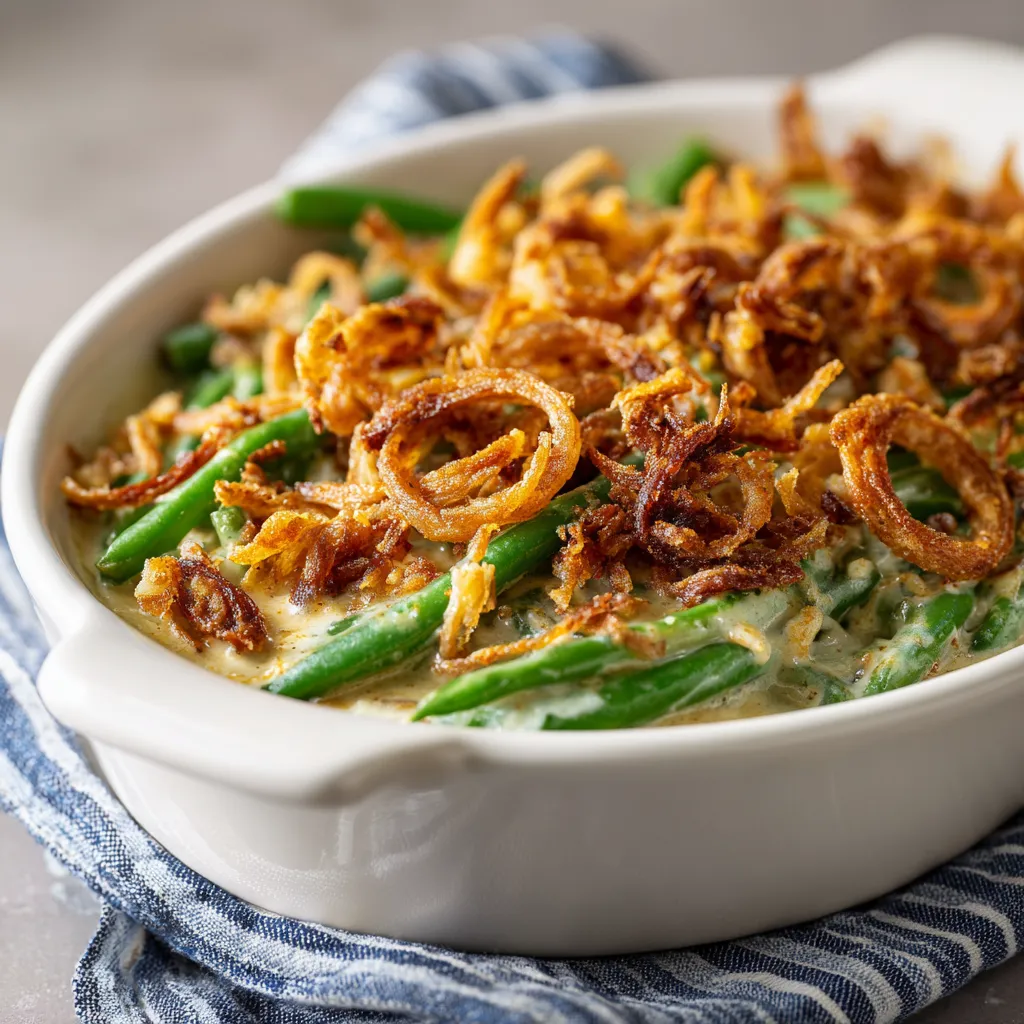
Unleashing the Flavor: The Ultimate Southern Green Bean Casserole

Welcome, fellow food adventurers! Today, we’re diving into a dish that embodies the warmth and heart of Southern cooking: the Green Bean Casserole. This isn’t just any casserole; it’s a celebration of flavors, a harmonious blend of creamy textures and crispy toppings that will make your taste buds dance. Ideal for family gatherings, especially during the Southern Thanksgiving, this casserole is a must-try. So grab your skillet, and let’s embark on this flavorful journey together!

Why You’ll Love This Recipe

  • Comfort in Every Bite: The creamy base and crunchy topping create a symphony of textures that’ll keep your loved ones coming back for seconds.
  • Quick and Easy Preparation: With just a few simple steps, you can whip up this dish in no time, making it perfect for busy holiday dinners.
  • Make-Ahead Convenience: Assemble your casserole a day in advance, pop it in the fridge, and bake it fresh on the big day!
  • Family-Friendly Flavors: The combination of green beans, creamy soup, and crispy fried onions appeals to both kids and adults alike.
  • Versatile and Customizable: This recipe is a blank canvas, allowing you to add your own twist with favorite ingredients or toppings.

Ingredients: Everything You Need for Southern Green Bean Casserole

A warm serving of Southern Green Bean Casserole in a dish, showcasing creamy texture and golden onion garnish.

Before we get cooking, let’s gather our ingredients. Here’s what you’ll need:

  • 2 cans (14.5 oz each) green beans, drained
  • 1 can (10.5 oz) cream of mushroom soup
  • 1 cup sour cream
  • 1 cup shredded cheddar cheese
  • 1 cup crispy fried onions
  • 1/2 teaspoon garlic powder
  • 1/2 teaspoon onion powder
  • Salt and pepper to taste
  • 1/2 cup milk

Let’s Make it Together

Now that we have our ingredients ready, let’s get started on this delightful casserole!

Step-by-Step Directions

  1. Preheat the Oven: Preheat your oven to 350°F (175°C).
  2. Mix the Base: In a large mixing bowl, combine the green beans, cream of mushroom soup, sour cream, milk, garlic powder, onion powder, and season with salt and pepper. Mix well until fully combined.
  3. Add Some Crunch: Stir in 3/4 cup of the shredded cheddar cheese and 1/2 cup of the crispy fried onions into the mixture.
  4. Transfer to Baking Dish: Pour the mixture into a greased 9×13 inch baking dish.
  5. Top It Off: Sprinkle the remaining cheddar cheese and crispy fried onions on top.
  6. Bake: Bake in the preheated oven for 25-30 minutes, or until the casserole is bubbly and the top is golden brown.
  7. Cool and Serve: Remove from oven and let it cool for a few minutes before serving. Your guests will be eager to dig in!

Chef’s Pro Tips for Perfection

  • Don’t Overcook the Beans: If you prefer fresh green beans, blanch them briefly before mixing to maintain their vibrant color and crispness.
  • Substitutions Welcome: Feel free to swap out the cream of mushroom soup for a homemade version or a different cream soup for a unique flavor twist.
  • Cheese Variations: Experiment with different types of cheese like Gruyère or pepper jack for an added kick.
  • Extra Crunch: For an even crunchier topping, mix in some crushed crackers or breadcrumbs with the fried onions.
  • Herbs and Spices: Sprinkle in some fresh herbs like thyme or rosemary to elevate the flavor profile.
  • Family-Friendly Adjustments: For picky eaters, omit the onions for a smoother texture while still delivering a deliciously creamy dish.
  • Serving Size: This recipe serves about 8-10 people, making it perfect for potlucks or family gatherings.
  • Leftover Magic: Leftover casserole can be transformed into a delightful soup by adding broth and simmering until warmed through.

Common Mistakes to Avoid

Even the best chefs stumble occasionally! Here’s what to watch out for:

  • Not Draining the Beans: Ensure your canned green beans are well-drained to prevent a watery casserole.
  • Overbaking: Keep a close eye on your casserole to avoid a dry texture; you want it bubbly and golden, not burnt!
  • Skipping the Rest Time: Allow it to rest for a few minutes after baking; this helps the layers set before serving.

Delicious Variations to Try

Let’s get your creativity flowing! Here are some variations to spice things up:

  • Spicy Cajun Twist: Add some diced jalapeños or a dash of cayenne pepper for a kick that’ll make your taste buds tingle!
  • Italian Flair: Incorporate sun-dried tomatoes and Italian seasoning for a Mediterranean twist.
  • Meaty Goodness: Mix in some cooked, crumbled sausage or bacon for a savory twist that meat-lovers will adore.
  • Vegan Version: Substitute the cream of mushroom soup with a homemade cashew cream and use vegan cheese for a plant-based delight.

Storing and Make-Ahead Instructions

Want to save time on the big day? Here’s how to make this casserole ahead of time:

  • Make-Ahead: Assemble the entire casserole without baking it. Cover and refrigerate for up to 24 hours. When ready to bake, remove from the fridge and add the crispy topping before putting it in the oven.
  • Storage: Leftovers can be stored in an airtight container in the fridge for up to 3 days. Reheat in the oven for best results.

Frequently Asked Questions

Curious minds want to know! Here are some FAQs:

  • Can I use fresh green beans? Yes! Just blanch them for a few minutes before mixing.
  • How do I make it vegetarian-friendly? Use vegetable broth and ensure all ingredients are plant-based.
  • Can I freeze the casserole? Yes, you can freeze it before baking. Just thaw in the fridge overnight before baking.
  • What can I serve with this casserole? This casserole pairs beautifully with roasted meats, mashed potatoes, or cornbread.
  • How do I make it gluten-free? Check that your cream soup and fried onions are gluten-free, or make your own version!
  • Is there a way to make it spicier? Absolutely! Add diced peppers or a hot sauce of your choice to the mix.
  • What if I don’t have fried onions? You can use crushed potato chips for a similar crunch!
  • How long does it take to bake? Bake for 25-30 minutes or until bubbly and golden brown.

Nutritional Tips and Dietary Adaptations

For those watching their diet, here are some tips:

  • Lower Calorie: Substitute sour cream with Greek yogurt for a lighter version.
  • Increase Fiber: Add in some cooked lentils or chickpeas for a protein boost.
  • Reduce Sodium: Use low-sodium cream of mushroom soup and rinse canned beans to cut back on salt.

Equipment Recommendations

To make your cooking experience seamless, here’s what you’ll need:

  • 9×13 inch Baking Dish: Essential for even cooking and easy serving.
  • Large Mixing Bowl: For combining all your ingredients smoothly.
  • Whisk: Handy for mixing creamy ingredients without lumps.

Serving Suggestions

Time to plate up! Here are some serving suggestions:

  • Garnish with Fresh Herbs: A sprinkle of fresh parsley or thyme can elevate the presentation.
  • Pair with a Salad: A crisp green salad with a tangy vinaigrette complements the richness of the casserole.
  • Offer a Variety of Sides: Include classic Southern sides such as cornbread, coleslaw, or collard greens for a feast!

In Conclusion

There you have it, my friends! A Green Bean Casserole that dances with flavor and soul, ready to steal the spotlight at your next gathering. This dish is more than just food; it’s a celebration of family, tradition, and the joy of cooking together. So roll up your sleeves, embrace the thrill of the kitchen, and let this casserole be your next culinary adventure. Remember, cooking isn’t just about following a recipe; it’s about creating memories and sharing love through food. Happy cooking!

Ultimate Southern Green Bean Casserole Recipe

Prep Time 10 minutes
Cook Time 30 minutes
Total Time 40 minutes
Servings 8 servings
Calories 250
A classic Southern side dish, this green bean casserole combines tender green beans with creamy mushroom soup, cheddar cheese, and crispy onions for a flavorful and easy-to-make dish.

Ingredients

Green Beans

  • 2 cans green beans, drained
  • 1 can cream of mushroom soup
  • 1 cup sour cream
  • 1 cup shredded cheddar cheese
  • 1 cup crispy fried onions
  • 1/2 teaspoon garlic powder
  • 1/2 teaspoon onion powder
  • to taste salt and pepper
  • 1/2 cup milk

Instructions 

  • Preheat oven to 350°F (175°C).
  • Mix green beans, mushroom soup, sour cream, milk, garlic powder, onion powder, salt, and pepper.
  • Stir in 3/4 cup cheese and 1/2 cup fried onions.
  • Pour into a greased 9x13 inch dish, top with remaining cheese and onions.
  • Bake for 25-30 minutes until bubbly and golden.
  • Let cool briefly before serving.

Notes

For extra flavor, add a dash of hot sauce or paprika on top before baking.
Calories: 250kcal
Cost: $15
Course: Side Dish
Cuisine: Southern
Keyword: Green Beans

Nutrition

Calories: 250kcal | Carbohydrates: 20g | Protein: 10g | Fat: 15g | Sodium: 600mg

Loved this recipe? Save it to your favorite Pinterest board so you can easily find it later! It’s the perfect way to keep all your sweet ideas in one place. ✨

Delicious Southern Green Bean Casserole displayed with a creamy layer and vibrant green beans.

Welcome to Flavor Town: The Zesty Low Carb Shrimp and Broccoli Dish That Sparks Joy in Every Bite

Are you ready to ignite your taste buds and elevate your dinner game? Dive into this low carb shrimp and broccoli recipe that’s not just quick and healthy, but also a vibrant celebration of flavor! Perfect for those evenings when you crave something light yet satisfying, this dish is your ticket to culinary bliss. Let’s embark on this delicious journey together, where spice meets simplicity and every bite is a joyous explosion of zest!

Why You’ll Love This Recipe

  • Quick Preparation: Ready in under 20 minutes, making it perfect for busy weeknights.
  • Low Carb Delight: Ideal for those following a low carb lifestyle without sacrificing flavor.
  • Health Benefits: Packed with protein from shrimp and nutrients from broccoli, this dish supports your wellness journey.
  • Versatile Ingredients: Easy to customize with your favorite vegetables or proteins, ensuring you never get bored!
  • Impress Your Guests: A stunning presentation that’s sure to wow family and friends at your dinner table.

Ingredients Breakdown

A vibrant plate of shrimp and broccoli, beautifully lit and showcasing textures.

Let’s gather the stars of our show! Here’s what you’ll need to whip up this garlic butter shrimp and broccoli masterpiece:

  • 1 pound shrimp: Peeled and deveined, these little beauties bring the protein punch.
  • 2 cups broccoli florets: Fresh, vibrant, and packed with vitamins!
  • 2 tablespoons olive oil: For that rich, flavorful base.
  • 3 cloves garlic: Minced to unleash that aromatic magic.
  • 1 teaspoon red pepper flakes: Optional, but trust me, a little kick makes all the difference!
  • Salt and pepper to taste: Always essential for seasoning.
  • Lemon wedges: For that zingy finish that ties everything together.

Substitutions

  • Protein Swap: Use chicken or tofu for a different protein experience.
  • Vegetable Options: Feel free to incorporate bell peppers, snap peas, or zucchini for added texture and color.
  • Butter Option: Swap olive oil for butter to create a richer, creamier dish.
  • Herb Infusion: Add fresh herbs like parsley or cilantro for that extra layer of flavor.

Pro Tips for Cooking Success

  • Don’t Overcook the Shrimp: Cook until they turn pink and opaque, usually about 2-3 minutes per side.
  • Use a Hot Skillet: Preheat your skillet to ensure that the shrimp sear nicely, locking in their juices.
  • Fresh Ingredients Matter: Opt for fresh garlic and vibrant broccoli for the best flavor and nutrients.
  • Season as You Go: Taste and adjust seasoning throughout the cooking process for a balanced dish.
  • Prep Ahead: Chop your ingredients in advance to streamline your cooking process.
  • Garnish with Lemon: A squeeze of fresh lemon juice right before serving brightens every bite.
  • Experiment with Heat: Adjust the amount of red pepper flakes to suit your spice tolerance.
  • Don’t Rush the Cooking: Allow the broccoli to become tender but not mushy; we want that crispiness!
  • Mix and Match: Don’t hesitate to switch up the ingredients based on what you have on hand.

Common Mistakes and Troubleshooting

Even the best chefs have their off days. Let’s ensure yours isn’t one of them:

  • Overcooked Broccoli: Keep a close eye on the broccoli to retain its vibrant green color and crunch.
  • Too Salty or Bland?: Balance is key! Taste as you go and adjust seasonings accordingly.
  • Sticky Shrimp: Make sure your skillet is hot enough to prevent sticking.
  • Too Much Liquid: If your dish seems watery, increase the heat to evaporate excess moisture.

Variations to Spice Things Up

Why stick to the basics when you can explore? Here are some delicious variations:

  • Garlic Butter Sausage and Broccoli: Add slices of your favorite sausage for a heartier meal.
  • Spicy Cajun Shrimp: Mix in Cajun seasoning for that Southern flair.
  • Asian-Inspired Stir Fry: Incorporate soy sauce and sesame oil for a different flavor profile.
  • Creamy Garlic Alfredo: Stir in a splash of cream and Parmesan cheese for a decadent twist.

Storage & Make-Ahead Instructions

Want to enjoy this dish later? Here’s how to keep it fresh:

  • Refrigeration: Store leftovers in an airtight container for up to 3 days.
  • Freezing: This dish can be frozen, but the texture of the broccoli may change. Consume within one month.
  • Reheating: Gently reheat in a skillet over low heat, adding a splash of water to restore moisture.
  • Meal Prep: Prepare all ingredients in advance and store separately until ready to cook.

Frequently Asked Questions

  • Can I use frozen shrimp? Yes, just ensure they are fully thawed and patted dry before cooking.
  • What can I serve with this dish? It pairs wonderfully with cauliflower rice or a fresh garden salad.
  • Is this recipe keto-friendly? Absolutely! It’s low in carbs and high in protein.
  • Can I add more vegetables? Yes! Feel free to mix in your favorites.
  • How do I know when the shrimp are done? Look for a pink and opaque appearance, which indicates they are fully cooked.
  • Is it gluten-free? Yes, all ingredients are naturally gluten-free.
  • Can I make this dish spicy? Definitely! Adjust the red pepper flakes to your liking.
  • What’s the best way to serve this dish? Serve hot with lemon wedges on the side for an extra zing!

Nutritional Tips and Dietary Adaptations

This dish is not only delicious but also nutritious. Here are some tips to keep it healthy:

  • Protein Power: Shrimp is a lean protein source that’s low in calories and high in nutrients.
  • Veggie Boost: Broccoli provides essential vitamins K and C, along with fiber.
  • Heart-Healthy Fats: Olive oil is a great source of monounsaturated fats that promote heart health.
  • Customizable for Diets: This recipe can easily be tailored for keto, paleo, and gluten-free diets.

Essential Equipment Recommendations

To make cooking this dish a breeze, here’s what you’ll need:

  • Large Skillet: A non-stick skillet is ideal for easy cooking and cleanup.
  • Spatula: For flipping shrimp and mixing ingredients seamlessly.
  • Measuring Spoons: Precision is key for seasoning and oil measurements.
  • Cutting Board: A sturdy board for chopping garlic and prepping other ingredients.

Serving Suggestions

Let’s make this dish not just delicious, but visually stunning!

  • Plate Presentation: Serve in a shallow bowl, garnished with lemon wedges and chopped parsley.
  • Complementary Sides: Pair with a refreshing cucumber salad or a bed of cauliflower rice.
  • Elevate the Experience: Drizzle with a balsamic reduction or sprinkle with toasted sesame seeds for added flair.

Conclusion: Embrace the Culinary Adventure

In the world of cooking, every dish is an adventure waiting to unfold. This zesty low carb shrimp and broccoli dish invites you to embrace the thrill of flavor, spice, and creativity. Whether you’re whipping it up for a quick family dinner or impressing friends at a gathering, this recipe is sure to spark joy in every bite. So grab your skillet, unleash your inner chef, and let’s make some magic happen in the kitchen!

Low Carb Shrimp And Broccoli Recipe – A Quick & Healthy Dinner

Prep Time 5 minutes
Cook Time 10 minutes
Total Time 15 minutes
Servings 4 servings
Calories 250
This quick and healthy low carb shrimp and broccoli dish is perfect for a nutritious weeknight dinner, packed with flavor and easy to prepare.

Ingredients

Protein

  • 1 pound shrimp, peeled and deveined

Vegetables

  • 2 cups broccoli florets

Oils & Condiments

  • 2 tablespoons olive oil

Garlic & Spices

  • 3 cloves garlic, minced
  • 1 teaspoon red pepper flakes (optional)
  • to taste salt and pepper

For Serving

  • as needed lemon wedges

Instructions 

  • Heat olive oil in a skillet over medium heat.
  • Sauté garlic and red pepper flakes for 1 minute.
  • Add broccoli and cook for 3-4 minutes until tender.
  • Add shrimp, season with salt and pepper, and cook until pink, about 2-3 minutes per side.
  • Mix shrimp with broccoli, cook for 1 minute, then serve with lemon wedges.

Notes

Feel free to add more lemon juice for extra flavor or adjust spice levels to taste.
Calories: 250kcal
Cost: $15
Course: Main Course
Cuisine: American
Keyword: Broccoli, Low Carb, shrimp

Nutrition

Calories: 250kcal | Carbohydrates: 12g | Protein: 30g | Fat: 10g | Sodium: 600mg

Loved this recipe? Save it to your favorite Pinterest board so you can easily find it later! It’s the perfect way to keep all your sweet ideas in one place. ✨

Delicious shrimp and broccoli meal arranged on a rustic table setting.

Ignite Your Culinary Adventure: Discover the Magic of Sweet Potato and Chickpea Curry

Welcome, fellow food lovers! If you’re looking to spice up your dinner routine and awaken your taste buds, you’ve landed in the right place. Today, we’re diving into the vibrant world of flavors with my Sweet Potato and Chickpea Curry. This dish is not just a meal; it’s a celebration of spice, warmth, and comfort — perfect for those seeking a delightful twist on everyday fare. So, grab your skillet and let’s embark on this thrilling culinary journey!

Why You’ll Love This Recipe

Here’s why this Sweet Potato and Chickpea Curry is a must-try:

  • Nutritious Powerhouse: Packed with vitamins A and C from the sweet potatoes and plant-based protein from chickpeas, this dish nourishes your body and soul.
  • Quick and Easy: Ready in just about 30-40 minutes, it’s the perfect solution for busy weeknights when you crave something wholesome without the fuss.
  • Flavor Explosion: The combination of spices and creamy coconut milk creates a symphony of flavors that will dance on your palate.
  • Versatile Ingredients: Customize the recipe with your favorite veggies or proteins for a unique twist every time you make it.
  • Vegan-Friendly Comfort Food: This curry is entirely plant-based, making it suitable for anyone, whether you’re a seasoned vegan or just looking to eat more greens!

Ingredient Breakdown

Bowl of sweet potato and chickpea curry with visible chunks of sweet potato, chickpeas, and herbs.

Let’s get down to the components of this delicious dish. Here’s what you’ll need:

  • 2 medium sweet potatoes: Peeled and diced — these provide natural sweetness and a creamy texture.
  • 1 can (15 oz) chickpeas: Drained and rinsed — a great source of protein and fiber.
  • 1 onion: Chopped — for that aromatic base that sets the flavor tone.
  • 2 cloves garlic: Minced — because garlic makes everything better!
  • 1 tablespoon ginger: Minced — adds a warm, zesty kick.
  • 1 can (14 oz) coconut milk: For richness and creaminess that balances the spices.
  • 1 can (14 oz) diced tomatoes: They provide acidity and a lovely texture.
  • 2 tablespoons curry powder: The star of the show, bringing all those warm spices together.
  • 1 teaspoon cumin: For that earthy depth.
  • 1 tablespoon olive oil: Used for sautéing — feel free to substitute with coconut oil for extra flavor.
  • Salt and pepper: To taste — never underestimate the power of seasoning!
  • Fresh cilantro: For garnish — it adds a fresh note that brightens the dish.

**Substitutions:** If you’re missing any ingredients, don’t sweat it! Here are some easy swaps:

  • Sweet potatoes: You can use regular potatoes or butternut squash for a different flavor.
  • Chickpeas: Any bean will do — kidney beans or black beans make great alternatives.
  • Coconut milk: Substitute with almond milk or vegetable broth for a lighter version.

Expert Tips for Mastering This Curry

Ready to take your curry to the next level? Here are some pro tips:

  • Layer your spices: Sauté spices with the aromatics (onion, garlic, and ginger) to release their essential oils and flavors before adding other ingredients.
  • Cook until tender: Ensure your sweet potatoes are fork-tender for the best texture — this usually takes about 20-25 minutes of simmering.
  • Tweak the spice level: Add more curry powder or a dash of cayenne for heat if you’re feeling adventurous!
  • Let it rest: Allowing the curry to sit for a few minutes after cooking will help the flavors meld together beautifully.
  • Make it a meal: Serve over fluffy rice or with warm naan to soak up all that delicious sauce.
  • Garnish generously: Fresh herbs like cilantro or a squeeze of lime can elevate the dish and add freshness.
  • Use fresh spices: Ensure your spices are fresh for the best flavor — old spices can dull the dish.
  • Don’t skip the acid: A squeeze of lemon or lime juice at the end can brighten the flavors significantly!

Common Mistakes and Troubleshooting

Even the best chefs make mistakes sometimes! Here’s how to avoid common pitfalls:

  • Overcooking the sweet potatoes: Keep an eye on them! You want them soft but not mushy — check them at the 20-minute mark.
  • Skipping the aromatics: Don’t rush through sautéing the onion, garlic, and ginger; they’re the flavor base!
  • Not seasoning properly: Always taste as you go! Adjust salt and spices according to your preference.

Flavor Variations

One of the beauties of this recipe is its adaptability. Here are some fun variations to try:

  • Spinach and Kale Twist: Stir in fresh spinach or kale during the last few minutes of cooking for added greens.
  • Protein Boost: Add cooked chicken, tofu, or tempeh for extra protein and heartiness.
  • Sweet and Savory: Toss in raisins or chopped dried apricots for a sweet contrast to the spices.
  • Thai-Inspired: Add a tablespoon of red curry paste for a spicy, aromatic twist.

Storage and Make-Ahead Instructions

Planning ahead? Here’s how to store and reheat your curry:

  • Refrigeration: Store in an airtight container in the fridge for up to 5 days. The flavors will deepen as it sits!
  • Freezing: Freeze in individual portions for up to 3 months. Thaw overnight in the fridge before reheating.
  • Reheating: Gently reheat on the stove over low heat, adding a splash of water or coconut milk to loosen it up if needed.

Comprehensive FAQ

Got questions? I’ve got answers! Here are some common queries about this recipe:

  • Can I make this curry in a slow cooker? Absolutely! Sauté the aromatics, then transfer everything to a slow cooker and cook on low for 4-6 hours.
  • Can I use regular potatoes instead of sweet potatoes? Yes, regular potatoes work fine, but they won’t provide the same sweetness.
  • Is this curry spicy? It’s mildly spiced but can be adjusted to your taste by adding more curry powder or fresh chilies.
  • Can I add other vegetables? Definitely! Carrots, bell peppers, or zucchini are great additions.
  • Is this dish gluten-free? Yes! All the ingredients are naturally gluten-free.
  • How can I make it creamier? Add more coconut milk or a dollop of plain yogurt when serving.
  • What can I serve with this curry? Serve it with rice, quinoa, or warm naan for a complete meal.
  • Can I double the recipe? Yes, just ensure you have a pot large enough to accommodate the extra ingredients!

Nutritional Information and Dietary Adaptations

This Sweet Potato and Chickpea Curry is not only delicious but also packed with nutrients:

  • Calories: Approximately 300 per serving (without rice)
  • Protein: 10g from chickpeas
  • Fiber: 8g from sweet potatoes and chickpeas

**Dietary adaptations:** This recipe is naturally vegan and gluten-free, making it suitable for a variety of diets. You can also modify it to be low-carb by serving it with cauliflower rice instead of traditional grain.

Essential Equipment Recommendations

To make this recipe, you’ll need:

  • Large pot or Dutch oven: Ideal for cooking and simmering the curry.
  • Wooden spoon: For stirring without scratching your pot.
  • Cutting board and knife: Essential for prepping your ingredients efficiently.

Serving Suggestions

Now, let’s talk about how to serve this beautiful curry:

  • Over Rice: Serve it hot over a bed of fluffy basmati or jasmine rice to soak up the flavors.
  • With Naan: Pair it with warm naan bread for dipping and scooping.
  • Garnished: Top with fresh cilantro and a squeeze of lime for brightness.

Embrace the thrill of cooking and let your taste buds embark on this unforgettable journey with my Sweet Potato and Chickpea Curry. Whether you’re preparing it for a cozy dinner at home or a gathering with friends, this dish is sure to impress. So grab your ingredients, unleash your inner chef, and let’s create something magical!

Sweet Potato and Chickpea Curry

Prep Time 10 minutes
Cook Time 25 minutes
Total Time 35 minutes
Servings 4 servings
Calories 350
A hearty and flavorful vegan curry combining sweet potatoes and chickpeas in a rich coconut tomato sauce.

Ingredients

Vegetables

  • 2 medium sweet potatoes (peeled and diced)
  • 1 can (15 oz) chickpeas (drained and rinsed)
  • 1 onion onion (chopped)
  • 2 cloves garlic (minced)
  • 1 tablespoon ginger (minced)
  • 1 can (14 oz) coconut milk
  • 1 can (14 oz) diced tomatoes
  • 2 tablespoons curry powder
  • 1 teaspoon cumin
  • 1 tablespoon olive oil
  • to taste salt and pepper
  • for garnish fresh cilantro

Instructions 

  • Heat olive oil in a large pot over medium heat.
  • Add chopped onion and cook until translucent, about 5 minutes. Stir in garlic and ginger, cooking for 1-2 minutes.
  • Add curry powder and cumin, stirring well. Add sweet potatoes, chickpeas, coconut milk, and tomatoes. Simmer for 20-25 minutes until sweet potatoes are tender.
  • Season with salt and pepper. Serve hot, garnished with cilantro.

Notes

This curry pairs well with rice or naan bread for a complete meal.
Calories: 350kcal
Cost: $15
Course: Main Course
Cuisine: Indian
Keyword: Curry, Vegan, Vegetarian

Nutrition

Calories: 350kcal | Carbohydrates: 60g | Protein: 10g | Fat: 12g | Sodium: 600mg

Loved this recipe? Save it to your favorite Pinterest board so you can easily find it later! It’s the perfect way to keep all your sweet ideas in one place. ✨

Delicious sweet potato and chickpea curry with a creamy texture, garnished with cilantro.

Unleash the Flavor: Your Guide to the Ultimate Korean Ground Beef Bowl

Welcome to a culinary adventure that’s all about bold flavors and vibrant spices! If you’re ready to take your taste buds on a thrilling ride, this Korean Ground Beef Bowl is your ticket to flavor town. Not only is it a quick and easy recipe that can be whipped up in under 30 minutes, but it also harnesses the power of spices to create a dish that’s better than takeout. So, grab your skillet and let’s dive into this explosive flavor experience!

Why You’ll Love This Recipe

This Korean Ground Beef Bowl isn’t just another meal; it’s a celebration of flavor, texture, and cultural richness. Here are five reasons you’ll come back to this recipe time and time again:

  • Quick and Easy: Perfect for busy weeknights, this dish takes just 20 minutes from start to finish.
  • Flavor Packed: The combination of soy sauce, sesame oil, and ginger creates a mouthwatering umami explosion.
  • Customizable: Whether you’re a spice lover or prefer it mild, you can easily adjust the heat level to suit your taste.
  • Healthy Ingredients: Made with lean ground beef, it’s a nutritious option that doesn’t skimp on flavor.
  • One-Pan Wonder: Minimal cleanup is required with this one-pan recipe, giving you more time to enjoy your meal!

Ingredient Breakdown

A vibrant Korean Ground Beef Bowl featuring ground beef in a delicious sauce, served over rice with fresh green onions and sesame seeds.

Let’s talk about the stars of this dish. Each ingredient plays a vital role in creating that unforgettable taste. Here’s what you’ll need:

  • 1 pound ground beef: Choose lean ground beef for a healthier option. You can substitute with ground turkey or chicken if you prefer.
  • 3 tablespoons soy sauce: This adds saltiness and depth. For a gluten-free option, use tamari.
  • 2 tablespoons brown sugar: Balances the savory flavors with a touch of sweetness. Feel free to use coconut sugar for a healthier alternative.
  • 1 tablespoon sesame oil: This gives the dish its signature nutty flavor. If you’re out, olive oil can work in a pinch.
  • 2 cloves garlic, minced: Fresh garlic adds aromatic flavor. Garlic powder can be used, but fresh is best!
  • 1 teaspoon grated ginger: A must for that zing! If you don’t have fresh ginger, ground ginger can be substituted.
  • 1/2 teaspoon red pepper flakes (optional): Adjust according to your heat preference.
  • 2 green onions, sliced: For garnish and a fresh crunch.
  • Cooked rice: Serve the beef mixture over your choice of rice; white, brown, or cauliflower rice work great.
  • Sesame seeds (for garnish): Adds a decorative touch and a nutty flavor.

Pro Tips for Perfecting Your Bowl

To elevate your Korean Ground Beef Bowl to the next level, keep these expert insights in mind:

  • Brown the Beef Properly: Ensure the beef is well-browned for maximum flavor. Don’t rush this step!
  • Mix Sauce Separately: Combine your sauce ingredients in a bowl before adding them to the beef to ensure even distribution.
  • Don’t Overcook: Once the beef is cooked through, remove it from heat to avoid drying it out.
  • Experiment with Toppings: Add a fried egg, kimchi, or pickled vegetables for added texture and flavor.
  • Make It Ahead: This dish is perfect for meal prep! Store it in the fridge for up to 3 days.
  • Adjust Spice Levels: If you’re unsure about the heat, start with less and add more as you taste.
  • Use Fresh Ingredients: Fresh herbs and vegetables always enhance the dish’s flavor.
  • Keep It Balanced: Taste as you go to find the perfect harmony between sweet, salty, spicy, and savory.

Avoiding Common Mistakes

Even the most seasoned cooks can make mistakes. Here’s how to ensure your bowl turns out perfectly:

  • Don’t Skip the Browning: Skipping the browning step can lead to a bland dish. Take your time!
  • Watch for Overcooking: Overcooking ground beef can make it tough. Cook just until browned and no pink remains.
  • Be Cautious with Salt: Soy sauce is naturally salty. Adjust other salty ingredients accordingly.
  • Don’t Forget Garnishes: They add flavor and visual appeal. Don’t skip the green onions or sesame seeds!

Variations to Spice Things Up

If you’re feeling adventurous, try these variations to keep your Korean Ground Beef Bowl exciting:

  • Spicy Kimchi Beef Bowl: Add chopped kimchi to the beef during the last few minutes of cooking for a spicy twist.
  • Vegetarian Option: Substitute ground beef with crumbled tofu or tempeh and add extra veggies.
  • Beef and Broccoli Bowl: Toss in steamed broccoli florets for a hearty addition.
  • Sweet and Spicy Bowl: Mix in some sweet chili sauce along with the soy sauce for a different flavor profile.

Storage and Make-Ahead Instructions

Planning ahead? Here’s how to store your Korean Ground Beef Bowl:

  • Refrigerate: Store leftovers in an airtight container for up to 3 days.
  • Freeze: For longer storage, freeze the beef mixture for up to 3 months. Thaw overnight in the fridge before reheating.
  • Reheat: Reheat in the microwave or on the stovetop until heated through. Add a splash of water or broth to loosen it up.

Frequently Asked Questions

Got questions? I’ve got answers! Here are some common queries about this recipe:

  • Can I use ground turkey instead of beef? Absolutely! Ground turkey or chicken will work beautifully.
  • What can I serve with this bowl? It pairs well with steamed vegetables, a side salad, or some crispy wontons.
  • How can I make this dish gluten-free? Use tamari instead of soy sauce and ensure your beef and other ingredients are gluten-free.
  • Can I use other types of meat? Yes! Ground pork or lamb can provide a different flavor profile.
  • Is this dish spicy? You can control the spice level by adjusting the red pepper flakes.
  • Can I make this dish vegan? Yes! Substitute ground beef with plant-based meat and adjust the sauce accordingly.
  • How do I make it less salty? Reduce the amount of soy sauce or use a low-sodium version.
  • Can I add more vegetables? Definitely! Bell peppers, carrots, or snap peas would be delicious additions.

Nutrition Tips and Dietary Adaptations

This dish is not only flavorful but also nutritious. Here are some tips to keep it healthy:

  • Lean Protein: Opt for lean ground beef or turkey to reduce fat content.
  • Increase Fiber: Serve over brown rice or quinoa for added fiber and nutrients.
  • Vegetable Boost: Add more vegetables to increase vitamins and minerals without adding many calories.
  • Portion Control: Serve it in smaller bowls to help manage portion sizes.

Equipment Recommendations

To make this recipe a breeze, here’s some essential equipment you’ll need:

  • Skillet: A large non-stick skillet or cast-iron pan works best for even cooking.
  • Mixing Bowl: For combining your sauce ingredients.
  • Spatula: To break apart the beef and stir it while cooking.
  • Measuring Cups and Spoons: Essential for accuracy in your ingredients.

Serving Suggestions

When it comes to serving your Korean Ground Beef Bowl, presentation matters! Try these ideas:

  • Add Color: Garnish with fresh herbs like cilantro or additional green onions for a pop of color.
  • Side Dishes: Serve with steamed broccoli or a light cucumber salad to complement the dish.
  • Serving Style: For a fun twist, serve it in a lettuce wrap for a low-carb option.

So there you have it! Your ultimate guide to making a Korean Ground Beef Bowl that will not only satisfy your cravings but also ignite your passion for cooking. Remember, cooking is about experimentation and joy, so don’t be afraid to add your own flair to this dish. Now, get out there and make some magic in your kitchen!

Quick & Easy Korean Ground Beef Bowl – Better Than Takeout!

Prep Time 10 minutes
Cook Time 10 minutes
Total Time 20 minutes
Servings 4 servings
Calories 350
This flavorful Korean ground beef bowl is quick to prepare and perfect for a satisfying meal. It combines savory, sweet, and spicy flavors over rice for a delicious, homemade takeout experience.

Ingredients

Meat

  • 1 pound ground beef
  • 3 tablespoons soy sauce
  • 2 tablespoons brown sugar
  • 1 tablespoon sesame oil
  • 2 cloves garlic, minced
  • 1 teaspoon grated ginger
  • 1/2 teaspoon red pepper flakes (optional)
  • 2 green onions sliced
  • cooked for serving rice
  • for garnish sesame seeds

Instructions 

  • Cook ground beef in a skillet until browned, then drain excess fat.
  • Mix soy sauce, brown sugar, sesame oil, garlic, ginger, and red pepper flakes.
  • Pour sauce over beef and cook for 2-3 minutes.
  • Serve over rice, garnished with green onions and sesame seeds.

Notes

You can add a fried egg on top for extra richness.
Calories: 350kcal
Cost: $10
Course: Main Course
Cuisine: Korean
Keyword: ground beef

Nutrition

Calories: 350kcal | Carbohydrates: 45g | Protein: 25g | Fat: 12g | Sodium: 900mg

Loved this recipe? Save it to your favorite Pinterest board so you can easily find it later! It’s the perfect way to keep all your sweet ideas in one place. ✨

A flavorful Korean Ground Beef Bowl showcasing minced beef, rice, green onions, and sesame seeds, captured in warm lighting.

Unleashing Flavor: The Green Bean Casserole That Will Set Your Holiday Table Ablaze

Get ready to elevate your holiday gatherings with a dish that’s not just a side, but a star: my unforgettable Green Bean Casserole. This isn’t your grandmother’s green bean casserole; it’s a bold and flavorful creation that transforms a classic into an explosion of taste that warms the heart and ignites the spirit. Perfect for any festive feast, this dish invites everyone to the table with its rich flavors and comforting textures. So, grab your skillet and let’s get cooking!

Why You’ll Love This Recipe

  • Bold Flavor: Packed with rich cream of mushroom soup, gooey cheddar cheese, and crispy fried onions, each bite is a symphony of savory goodness that will have your guests asking for seconds.
  • Easy to Make: With simple steps and minimal prep time, you’ll have this delicious casserole ready to go in under an hour, leaving you more time to enjoy the festivities.
  • Customizable: Whether you prefer a bit more spice or want to throw in some extra veggies, this recipe is a fantastic canvas for your culinary creativity.
  • Perfect for Make-Ahead: Make this casserole a day in advance and simply pop it in the oven before serving. It’s a great stress-reliever for busy holiday cooks!
  • Family Favorite: This dish is sure to please even the pickiest eaters and become a beloved staple at your holiday dinner table.

Ingredient Breakdown

A warm green bean casserole with creamy texture and cheese, served in a dish.

Let’s dive into the essential components that make this Green Bean Casserole a standout dish. Here’s what you’ll need:

  • Fresh Green Beans: 4 cups trimmed and cut into 2-inch pieces. Fresh beans add a vibrant color and snap to the dish. If you’re short on time, feel free to use frozen beans, but avoid canned ones for best texture.
  • Cream of Mushroom Soup: 1 can (10.5 oz). This creamy base is key for flavor. For a healthier twist, use homemade mushroom soup or low-sodium varieties.
  • Milk: 1/2 cup. Adds creaminess to the sauce. You can substitute with almond milk or oat milk if you prefer a dairy-free option.
  • Shredded Cheddar Cheese: 1 cup. The melting cheese layer is a must! Feel free to mix in other cheeses like Gruyère or pepper jack for a spicy kick.
  • Crispy Fried Onions: 1 cup. These provide that satisfying crunch. You can use store-bought or make your own by frying thinly sliced onions until golden.
  • Garlic Powder: 1/2 teaspoon. For that aromatic depth.
  • Black Pepper: 1/2 teaspoon. A touch of spice to elevate the flavors.
  • Salt: To taste. Always adjust to suit your palate.

Pro Tips for the Perfect Casserole

  • Blanch the Beans: Blanching the green beans for about 5 minutes keeps them bright and tender-crisp, enhancing their flavor in the casserole.
  • Mix Well: Ensure the green beans are thoroughly coated in the cream mixture for even flavor distribution.
  • Layer the Toppings: For a beautifully crispy top, add half of the fried onions before baking and the rest in the last 10 minutes.
  • Don’t Overbake: Keep an eye on the casserole in the oven. You want it bubbly and golden without overcooking the beans.
  • Serve Warm: This dish is best enjoyed fresh from the oven, so time it right to serve it hot and melty.
  • Experiment with Spices: Add a pinch of cayenne or smoked paprika to give the casserole an extra kick that your guests will love.
  • Cheese Variations: Try adding a blend of cheeses for a more complex flavor profile.
  • Fresh Herbs: Garnish with fresh thyme or parsley before serving for a pop of color and freshness.

Avoiding Common Mistakes

Even the best recipes can go awry. Here’s how to troubleshoot common issues:

  • Too Watery: If your casserole turns out runny, you may have added too much milk or not drained the beans properly. Next time, reduce the liquid or use fewer beans.
  • Dry Casserole: Ensure you don’t overbake it; keep an eye on the timer!
  • Bland Flavor: Always taste as you go! Adjust the seasoning to your liking before baking to ensure a flavorful result.
  • Burnt Topping: If you notice the onions browning too quickly, cover the dish loosely with foil until the last 10 minutes of baking.

Delicious Variations

Want to mix things up a bit? Here are some tasty variations on the classic recipe:

  • Spicy Green Bean Casserole: Add diced jalapeños or a teaspoon of chili powder to the cream mixture for a fiery twist.
  • Vegetarian Delight: Swap the cream of mushroom soup for a homemade vegan version using cashews and mushrooms.
  • Cheesy Bacon Casserole: Mix in crumbled bacon with the green beans for a smoky flavor, and top with extra cheese.
  • Herbed Green Bean Casserole: Stir in fresh herbs like rosemary or thyme for an earthy flavor profile.

Storage and Make-Ahead Instructions

This casserole is perfect for meal prep! Here’s how to store and reheat it:

  • Make-Ahead: Prepare the casserole up to the baking step, cover tightly with foil, and refrigerate for up to 2 days. Bake when ready!
  • Freezing: You can freeze the unbaked casserole for up to 2 months. Thaw in the refrigerator overnight before baking.
  • Reheating: To reheat leftovers, cover with foil and warm in the oven at 350°F (175°C) until heated through, about 20-25 minutes.

Comprehensive FAQ

  • Can I use frozen green beans? Yes! Frozen beans work well but may require slightly longer cooking time.
  • What can I use instead of cream of mushroom soup? You can make your own using sautéed mushrooms, cream, and broth, or use a different cream soup variety.
  • How long does the casserole last in the fridge? Store it in an airtight container for up to 4 days.
  • Can I make this vegan? Absolutely! Use a vegan cream of mushroom soup, non-dairy milk, and skip the cheese.
  • What’s the best way to reheat leftovers? Oven reheating is best to maintain texture; microwave works too but may make it soggy.
  • Can I add meat to this casserole? Yes! Cooked chicken or turkey can be mixed in for added protein.
  • Can I make this gluten-free? Use a gluten-free cream soup and ensure fried onions are gluten-free.
  • Is this casserole suitable for meal prep? Yes! It’s a great option for meal prep and can be made ahead of time.

Nutrition Tips and Dietary Adaptations

Looking to make this dish healthier? Here are a few tips:

  • Reduce Sodium: Use low-sodium cream of mushroom soup and limit added salt.
  • Increase Fiber: Add in some sautéed mushrooms or other vegetables like bell peppers or carrots.
  • Lower Fat Content: Substitute low-fat cheese and use less oil when frying onions.

Essential Equipment Recommendations

Here’s what you’ll need:

  • Large Pot: For blanching the green beans.
  • Mixing Bowl: To combine all ingredients easily.
  • Baking Dish: A 9×13 inch dish is perfect for this casserole.
  • Whisk: For mixing the sauce ingredients smoothly.

Serving Suggestions

Serve this Green Bean Casserole hot from the oven alongside your favorite holiday dishes:

  • With Roasted Meats: Pair it with roast turkey, ham, or beef for a complete meal.
  • Serve with Gravy: A drizzle of gravy over the casserole adds extra flavor and moisture.
  • As Part of a Buffet: This dish shines at potlucks and family gatherings as a beloved side dish.

In conclusion, this Green Bean Casserole isn’t just a dish; it’s an experience that ignites passion and warmth in every bite. So, gather your ingredients, embrace the thrill of cooking, and let this casserole take center stage at your next celebration!

Best Green Bean Casserole | Easy Cheap Meal Idea for Holidays

Prep Time 10 minutes
Cook Time 35 minutes
Total Time 45 minutes
Servings 6 servings
Calories 250
A classic holiday side dish that's easy to prepare, budget-friendly, and packed with flavor. Perfect for festive gatherings!

Ingredients

Green Beans

  • 4 cups fresh green beans, trimmed and cut into 2-inch pieces
  • 1 can cream of mushroom soup (10.5 oz can)
  • 0.5 cup milk
  • 1 cup shredded cheddar cheese
  • 1 cup crispy fried onions
  • 0.5 teaspoon garlic powder
  • 0.5 teaspoon black pepper
  • to taste salt salt

Instructions 

  • Preheat oven to 350°F (175°C). Blanch green beans for 5 minutes, drain.
  • Mix mushroom soup, milk, garlic powder, black pepper, and salt in a bowl.
  • Add green beans and half of fried onions to the mixture, stir well.
  • Transfer to a greased baking dish, bake for 25 minutes.
  • Top with cheese and remaining fried onions, bake for 10 more minutes.
  • Let cool briefly before serving. Enjoy!

Notes

For extra flavor, add a dash of soy sauce or hot sauce to the mixture.
Calories: 250kcal
Cost: $15
Course: Side Dish
Cuisine: American
Keyword: Green Beans

Nutrition

Calories: 250kcal | Carbohydrates: 20g | Protein: 10g | Fat: 15g | Sodium: 600mg

Loved this recipe? Save it to your favorite Pinterest board so you can easily find it later! It’s the perfect way to keep all your sweet ideas in one place. ✨

Delicious green bean casserole featuring layers of green beans, cream sauce, and cheese.

Embrace the Comfort of Ground Beef and Potatoes

Welcome to a culinary adventure where ground beef and potatoes come together in a sizzle of flavors and comfort! This Ground Beef Potato Dinner is not just a recipe; it’s an invitation to celebrate boldness in the kitchen. As someone who grew up with spices dancing through the air, I can assure you that the combination of these hearty ingredients will awaken your taste buds and make your kitchen feel like home. Let’s dive into a dish that balances richness and warmth, perfect for any day of the week!

Why You’ll Love This Recipe

  • Quick and Easy: With just a few simple ingredients and a one-pan approach, you can whip up this delicious meal in under 30 minutes!
  • Hearty and Satisfying: This dish is packed with protein and carbohydrates, making it a perfect comfort food that fills you up and warms your soul.
  • Versatile Ingredients: Customize the recipe with whatever vegetables you have on hand or swap out the ground beef for another protein—chicken, turkey, or even plant-based options!
  • Budget-Friendly: Using basic staples like ground beef and potatoes keeps your grocery bill in check while still delivering fantastic flavor.
  • Kid-Approved: It’s a family favorite! The savory flavors and appealing textures make it a hit with both kids and adults alike.

The Ingredients You’ll Need

A cozy, eye-level shot of a savory ground beef potato dish garnished with mixed vegetables and soft shadows.

Gather these simple yet powerful ingredients to create your masterpiece. Each element plays a significant role in building flavor, so let’s break it down:

  • 1 pound ground beef: Choose an 80/20 blend for the best flavor and moisture. You can substitute with ground turkey or chicken if preferred.
  • 4 medium potatoes: Russet potatoes work best for their fluffy texture. You can also use Yukon Gold or red potatoes for a creamier finish.
  • 1 medium onion: Chopped finely to add a sweet, aromatic base to the dish.
  • 2 cloves garlic: Minced, for that punch of flavor that ties everything together.
  • 1 cup beef broth: Use low-sodium if you want to control the saltiness. Vegetable broth can be a great alternative.
  • 1 teaspoon salt: Adjust to taste based on your broth’s salt content.
  • 1/2 teaspoon black pepper: Freshly cracked for a bit of spice.
  • 1 teaspoon paprika: This adds a lovely smokiness; feel free to experiment with smoked paprika for extra depth.
  • 1 cup frozen mixed vegetables: A colorful mix of peas, corn, and carrots adds nutrition and texture.
  • 2 tablespoons olive oil: For sautéing, but you can substitute with butter for a richer flavor.

How to Make Ground Beef Potato Dinner

Ready to cook? Follow these straightforward steps to create a dish that will become a staple in your home:

  1. Heat the olive oil in a large skillet over medium heat.
  2. Add the chopped onion and minced garlic, sautéing until the onion is translucent.
  3. Add the ground beef to the skillet, breaking it apart with a spoon. Cook until browned, about 5-7 minutes.
  4. Stir in the diced potatoes, beef broth, salt, pepper, and paprika. Bring to a boil.
  5. Reduce the heat, cover, and let it simmer for about 15 minutes, or until the potatoes are tender.
  6. Mix in the frozen mixed vegetables and cook for an additional 5 minutes. Stir well to combine.
  7. Serve hot, and enjoy the comforting flavors!

Pro Tips for Success

  • Chop evenly: Ensure that your potatoes and vegetables are cut into uniform pieces for even cooking.
  • Brown the meat: Don’t rush the browning step; it enhances the flavor through the Maillard reaction.
  • Use fresh spices: Freshly ground spices pack a punch compared to pre-ground versions. Invest in a spice grinder for maximum flavor.
  • Customize your veggies: Feel free to add bell peppers, zucchini, or any seasonal vegetables to elevate the dish.
  • Make it creamy: Stir in a splash of cream or a dollop of sour cream at the end for richness.
  • Layer flavors: Consider adding a splash of Worcestershire sauce or soy sauce to deepen the umami flavor.
  • Use leftovers: This dish is perfect for meal prep and can be enjoyed the next day as the flavors meld beautifully.
  • Don’t skip the herbs: Fresh herbs like parsley or cilantro brighten the dish when sprinkled on top before serving.

Common Mistakes to Avoid

  • Overcooking the potatoes: Keep an eye on cooking time; overcooked potatoes can turn mushy and lose their texture.
  • Not seasoning enough: Season at every step to build flavor layers, don’t wait until the end!
  • Skipping the browning: Skipping the browning of meat can lead to a less flavorful dish.
  • Choosing the wrong beef: Select the right fat content (80/20) for the best flavor and moisture balance.

Delicious Variations

This dish is versatile and can easily accommodate various preferences. Here are some creative twists:

  • Spicy Mexican Style: Add black beans, corn, and taco seasoning for a Tex-Mex flair.
  • Cheesy Delight: Top with shredded cheese and broil for a few minutes until bubbly and golden.
  • Herbaceous Comfort: Stir in fresh herbs like thyme, rosemary, or basil for an aromatic touch.
  • Asian-Inspired: Incorporate soy sauce, ginger, and sesame oil for a unique flavor profile.

Storage and Make-Ahead Instructions

This dish is perfect for meal prep! Here’s how to store and reheat:

  • Refrigeration: Store in an airtight container in the fridge for up to 4 days.
  • Freezing: Freeze in individual portions for up to 3 months. Thaw overnight in the fridge before reheating.
  • Reheating: Heat in a skillet over medium heat, adding a splash of broth to prevent sticking.

Frequently Asked Questions

  • Can I use ground turkey instead of beef? Absolutely! Ground turkey or chicken are great alternatives if you prefer a leaner option.
  • What spices can I add for extra flavor? Consider adding cumin, chili powder, or Italian seasoning for a flavor boost.
  • Can I make this dish in a slow cooker? Yes! Brown the meat first, then add all ingredients to a slow cooker and cook on low for 6-8 hours.
  • How do I prevent the potatoes from getting mushy? Cut them into bite-sized pieces and monitor the cooking time closely.
  • What can I serve with this dish? Pair it with a side salad, crusty bread, or steamed broccoli for a complete meal.
  • Is this recipe gluten-free? Yes, as long as you use gluten-free broth and check your seasonings.
  • Can I use fresh vegetables instead of frozen? Definitely! Just adjust the cooking time accordingly.
  • How do I enhance the flavor without adding calories? Use herbs and spices—they add tons of flavor without the extra calories.

Nutritional Tips and Dietary Adaptations

This recipe is not only delicious but can also be adapted to various dietary needs:

  • Low-Carb Option: Substitute potatoes with cauliflower for a low-carb version that still feels hearty.
  • Vegetarian Option: Swap ground beef for lentils or chickpeas, and add more veggies for a filling dish.
  • Protein Boost: Add a scoop of protein powder to the beef while cooking for an extra protein punch.

Essential Equipment Recommendations

To make this dish efficiently, here’s what you’ll need:

  • Large Skillet: A heavy-bottomed skillet ensures even cooking and browning.
  • Cutting Board: A sturdy cutting board is essential for chopping your ingredients.
  • Chef’s Knife: A good-quality knife will make prepping ingredients a breeze.
  • Measuring Cups and Spoons: For accurate ingredient measurements.

Serving Suggestions

Serve your Ground Beef Potato Dinner with:

  • Fresh Salad: A crisp green salad with a light vinaigrette complements the dish beautifully.
  • Crusty Bread: Perfect for soaking up the savory juices from the pan.
  • Grated Cheese: Sprinkle some cheese on top right before serving for an extra creamy finish.

Conclusion: Ignite Your Culinary Adventure

Cooking is an adventure, and this Ground Beef Potato Dinner is your gateway to exploring bold flavors and comforting textures. Whether you’re feeding a family or enjoying a cozy night in, this dish has the power to transform the ordinary into something extraordinary. So grab your skillet, embrace the heat, and let every bite tell a story worth sharing!

Easy Ground Beef Potato Dinner Recipe

Prep Time 10 minutes
Cook Time 25 minutes
Total Time 35 minutes
Servings 4 servings
Calories 650
A hearty and simple meal combining ground beef, potatoes, and vegetables for a satisfying dinner.

Ingredients

Meat

  • 1 pound ground beef

Vegetables

  • 4 medium potatoes diced potatoes
  • 1 medium onion, chopped
  • 2 cloves garlic, minced
  • 1 cup beef broth
  • 1 teaspoon salt
  • 0.5 teaspoon black pepper
  • 1 teaspoon paprika
  • 1 cup frozen mixed vegetables
  • 2 tablespoons olive oil

Instructions 

  • Heat olive oil in a skillet over medium heat.
  • Sauté onion and garlic until translucent.
  • Add ground beef and cook until browned.
  • Stir in potatoes, broth, salt, pepper, and paprika; simmer until potatoes are tender.
  • Add vegetables and cook for 5 minutes. Serve hot.

Notes

Feel free to add your favorite herbs for extra flavor.
Calories: 650kcal
Cost: $15
Course: Main Course
Cuisine: American
Keyword: ground beef, Potatoes

Nutrition

Calories: 650kcal | Carbohydrates: 70g | Protein: 40g | Fat: 25g | Sodium: 900mg

Loved this recipe? Save it to your favorite Pinterest board so you can easily find it later! It’s the perfect way to keep all your sweet ideas in one place. ✨

Detailed image of a hearty ground beef potato meal, showcasing tender diced potatoes and vibrant mixed veggies.

Picture this: a creamy, dreamy bowl of mac and cheese, straight from the crock pot, wafting rich aromas that beckon you closer. Welcome to the world of ultimate comfort food, where every bite is a warm hug from the inside. This crock pot mac and cheese recipe brings together the perfect blend of cheeses and a velvety texture that will light up your dinner table. Whether it’s a cozy night in, a family gathering, or just a craving for something delicious, this dish is your ticket to culinary bliss.

Let’s dive deep into the magic of this recipe, where I’ll not only share how to create this cheesy wonder but also sprinkle in some expert tips, variations, and a few secrets I’ve learned along the way. Ready to turn your kitchen into a cheesy paradise? Let’s get cooking!

Why You’ll Love This Recipe

Before we don the chef’s hat and get to the nitty-gritty, let’s explore why this crock pot mac and cheese is the dish you never knew you needed in your life:

  • Ultimate Creaminess: The combination of sharp cheddar, mozzarella, and parmesan creates a luscious sauce that clings to every noodle, making every bite a delight.
  • Convenience: With a crock pot, meal prep becomes a breeze. Just mix, pour, and let it do the work while you kick back and relax.
  • Customizable: Tweak the ingredients based on what you have. Add veggies, proteins, or even different cheeses to make it your own.
  • Perfect for Any Occasion: Whether it’s a casual dinner or a holiday feast, this dish fits right in. It’s especially great for potlucks!
  • Kid-Approved: Mac and cheese is a universally loved dish. With this recipe, you’ll have the kids (and adults) coming back for seconds.

Diving into Ingredients: The Building Blocks of Flavor

Creating the best crock pot mac and cheese starts with selecting the right ingredients. Here’s what you’ll need:

  • 16 oz elbow macaroni: The classic choice for mac and cheese. You can substitute with gluten-free pasta if needed.
  • 4 cups shredded sharp cheddar cheese: For that cheesy flavor punch. Feel free to mix in a mild cheddar for a balanced taste.
  • 2 cups shredded mozzarella cheese: Adds a creamy texture and helps stretch the cheese sauce.
  • 1 cup grated parmesan cheese: Introduces a nutty flavor that complements the other cheeses.
  • 4 cups milk: Whole milk gives the best creaminess, but you can use low-fat or non-dairy alternatives.
  • 1 cup heavy cream: Ensures that the cheese sauce is rich and velvety. Half-and-half can be a good substitute.
  • 1/2 cup unsalted butter, melted: Adds richness and depth to the flavor.
  • 1 tablespoon dijon mustard: This secret ingredient enhances the flavor without making it taste mustardy.
  • 1 teaspoon garlic powder and 1 teaspoon onion powder: These spices elevate the overall flavor profile.
  • Salt and pepper to taste: Essential for seasoning; adjust according to your preference.

Feel free to mix and match based on what’s in your pantry. For example, you can swap the elbow macaroni for shells or penne. The sky’s the limit!

Step-by-Step Guide to Making Crock Pot Mac and Cheese

Bowl of Ultimate Creamy Mac and Cheese with a rich, cheesy texture and golden-brown top.

Now that we have our ingredients ready, let’s get into the cooking process. Follow these steps to achieve the ultimate creamy mac and cheese:

  1. Cook the elbow macaroni according to package instructions until al dente; drain and set aside.
  2. In a large bowl, combine the cooked macaroni, cheddar cheese, mozzarella cheese, Parmesan cheese, milk, heavy cream, melted butter, Dijon mustard, garlic powder, onion powder, salt, and pepper.
  3. Stir until all ingredients are well combined, ensuring the macaroni is coated in cheese.
  4. Pour the mixture into the crock pot and spread evenly.
  5. Cover and cook on low for 2-3 hours, stirring occasionally. You want that cheese to melt and become creamy.
  6. If the mac and cheese is too thick, add a little more milk to reach the desired consistency.
  7. Serve hot and enjoy your creamy mac and cheese!

Pro Tips for Perfecting Your Mac and Cheese

Want to elevate your mac and cheese game? Here are some expert tips to keep in mind:

  • Use freshly grated cheese: Pre-shredded cheese often contains anti-caking agents that can affect the melting process. Grate your cheese fresh for the best results.
  • Don’t skip the stirring: Stirring occasionally helps to ensure even melting and prevents sticking.
  • Adjust the thickness: If you prefer a saucier mac and cheese, add more milk or cream until you reach your desired consistency.
  • Experiment with spices: Don’t be afraid to add a pinch of cayenne pepper or smoked paprika for an extra kick!
  • Let it rest: After cooking, let the mac and cheese sit for about 10-15 minutes before serving, allowing it to thicken up a bit.
  • Try different cheeses: Mixing in gouda, fontina, or even a little blue cheese can create a unique flavor profile.
  • Enhance with toppings: Add breadcrumbs mixed with melted butter and herbs on top for a crunchy texture.
  • Don’t rush it: Cooking on low is crucial for ensuring the cheeses melt perfectly and the flavors meld beautifully.

Avoiding Common Mistakes When Making Mac and Cheese

Even the best of us can make mistakes in the kitchen. Here’s how to avoid some common pitfalls when making crock pot mac and cheese:

  • Overcooking the pasta: Remember, you’re cooking the pasta twice. Cook it just until al dente to avoid mushy mac.
  • Using low-quality cheese: The flavor of your mac and cheese heavily depends on the quality of your cheese. Go for better brands!
  • Skipping the seasoning: Don’t forget to taste and season adequately. A little salt and pepper can make all the difference.
  • Not stirring enough: Stirring is key to ensuring everything melts together beautifully. Don’t leave it unattended!
  • Not letting it rest: Allowing the mac and cheese to rest helps it set up, making it easier to serve.

Delicious Variations to Try

Feeling adventurous? Here are some fun variations on the classic recipe that you can try:

  • Buffalo Chicken Mac: Add shredded cooked chicken and buffalo sauce for a spicy twist.
  • Vegetable Medley: Stir in cooked broccoli, spinach, or bell peppers for a colorful and nutritious addition.
  • Truffle Mac and Cheese: Drizzle with truffle oil before serving for an upscale flavor.
  • Italian Twist: Incorporate Italian sausage and sun-dried tomatoes for a hearty, flavorful dish.

Storage and Make-Ahead Instructions

Planning to make this dish ahead of time? Here’s how to store and reheat your mac and cheese:

  • Storing: Allow the mac and cheese to cool completely before transferring it to an airtight container. It can be stored in the refrigerator for up to 3 days.
  • Freezing: For longer storage, freeze in a freezer-safe container for up to 2 months. Thaw in the refrigerator overnight before reheating.
  • Reheating: Reheat in the microwave or on the stovetop. If it seems dry, add a splash of milk to restore creaminess.

Frequently Asked Questions

Got questions? I’ve got answers! Here are some common queries about this crock pot mac and cheese recipe:

  • Can I use gluten-free pasta? Absolutely! Just ensure it is cooked al dente before adding it to the mixture.
  • What can I substitute for heavy cream? You can use half-and-half or a non-dairy cream alternative.
  • How long does it keep in the fridge? It lasts about 3 days in the refrigerator if stored correctly.
  • Can I make this recipe ahead of time? Yes! Prepare it a day in advance and store it in the fridge until you’re ready to cook.
  • What’s the best way to reheat mac and cheese? The microwave or stovetop works well. Just add a little milk to keep it creamy.
  • Can I use different types of cheese? Yes! Mix and match your favorite cheeses for a unique flavor.
  • Is this recipe suitable for freezing? Yes, it freezes well. Just thaw and reheat when ready to enjoy.
  • What’s the best way to prevent clumping? Stir well during cooking and use freshly grated cheese to avoid clumping.

Nutritional Information and Dietary Adaptations

For those watching their dietary needs, here’s a quick breakdown of the nutritional information per serving (based on the recipe making 8 servings):

  • Calories: Approximately 600
  • Protein: 25g
  • Fat: 35g
  • Carbohydrates: 50g

Looking for dietary adaptations? Here are a few options:

  • Low-carb: Swap pasta for cauliflower or zucchini noodles.
  • Vegan: Use plant-based cheeses and non-dairy milk and cream.
  • Low-fat: Opt for low-fat cheese and milk alternatives.

Essential Equipment for Success

To make this crock pot mac and cheese shine, here’s the equipment you’ll need:

  • Crock pot: The star of the show! A 6-quart size is perfect for this recipe.
  • Large mixing bowl: For combining all your ingredients.
  • Measuring cups and spoons: Precision is key in cooking!
  • Colander: For draining the pasta after cooking.

Serving Suggestions to Elevate Your Dish

Want to make your mac and cheese experience even more delightful? Here are some serving suggestions:

  • Garnish with herbs: Fresh parsley or chives add a burst of color and freshness.
  • Pair with a salad: A crisp green salad balances the richness of the mac and cheese.
  • Serve with BBQ: This dish pairs beautifully with pulled pork or grilled chicken.
  • Offer hot sauce on the side: For those who crave a little extra kick!

There you have it! A comprehensive guide to making the ultimate crock pot mac and cheese that will not only satisfy your cravings but also impress your family and friends. Embrace the adventure in your kitchen, and remember: cooking is about creating memories and sharing joy. So, grab your skillet, turn on that crock pot, and let’s get cheesy!

Ultimate Creamy Crock Pot Mac and Cheese

Prep Time 10 minutes
Cook Time 2 hours 30 minutes
Total Time 2 hours 40 minutes
Servings 8 servings
Calories 850
A rich and creamy mac and cheese recipe perfect for the slow cooker, combining cheesy goodness with simple ingredients.

Ingredients

Pasta

  • 16 oz elbow macaroni

Cheese

  • 4 cups shredded sharp cheddar cheese
  • 2 cups shredded mozzarella cheese
  • 1 cup grated parmesan cheese

Liquids

  • 4 cups milk
  • 1 cup heavy cream
  • 0.5 cup unsalted butter, melted

Seasonings

  • 1 tablespoon dijon mustard
  • 1 teaspoon garlic powder
  • 1 teaspoon onion powder

To taste

  • salt and pepper

Instructions 

  • Cook the macaroni until al dente, then drain.
  • Combine cooked pasta, cheeses, milk, cream, melted butter, mustard, garlic, onion, salt, and pepper in a bowl.
  • Stir until well mixed, then transfer to crock pot.
  • Cook on low for 2-3 hours, stirring occasionally, until creamy.
  • Add more milk if needed for desired consistency, then serve hot.

Notes

For extra flavor, add a pinch of paprika or cayenne pepper.
Calories: 850kcal
Cost: $15
Course: Main Course
Cuisine: American
Keyword: Mac and Cheese

Nutrition

Calories: 850kcal | Carbohydrates: 90g | Protein: 40g | Fat: 45g | Sodium: 950mg

Loved this recipe? Save it to your favorite Pinterest board so you can easily find it later! It’s the perfect way to keep all your sweet ideas in one place. ✨

Delicious bowl of mac and cheese showcasing gooey cheese and soft pasta, illuminated by warm light.

Unleash the Flavor: Your Ultimate Guide to Homemade Butter Chicken

Dive into the world of flavor with my Quick & Easy Homemade Butter Chicken recipe! This dish is a celebration of spice and warmth, perfect for those who crave a little adventure in the kitchen. Get ready to awaken your senses and savor every bite!

Born and raised in San Antonio, Texas, I’ve spent my life chasing the vibrant flavors of spice. My grandmother taught me that cooking isn’t just about following a recipe; it’s about embracing the heat and depth that spices bring to each dish. Butter chicken, with its creamy sauce and tender chicken, captures that essence beautifully. Let’s embark on this culinary journey together!

Why You’ll Love This Recipe

  • Rich Flavor Explosion: This recipe combines spices and cream to create a sauce that’s both rich and comforting, making every bite unforgettable.
  • Quick Preparation: Ready in under 30 minutes, this meal is perfect for a weeknight dinner without sacrificing flavor.
  • Customizable Heat: Adjust the cayenne pepper to control the spice level, ensuring it’s perfect for everyone at your table.
  • Perfect Pairings: Serve with naan or rice to soak up that luscious sauce, elevating your meal to restaurant quality.
  • Impressive Presentation: Garnish with fresh parsley for a pop of color that pleases the eye and palate alike!

Ingredients You’ll Need

A plate of butter chicken featuring tender chicken pieces in a creamy sauce, served with naan and rice.

Gather these ingredients to create your very own homemade butter chicken:

  • 1 ½ pounds skinless boneless chicken thighs: Opt for thighs for their juiciness and flavor.
  • 1 teaspoon salt: The essential seasoning that pulls everything together!
  • 1 teaspoon garlic powder: Adds a subtle, background warmth to our marinade.
  • 1 teaspoon sweet paprika: For that beautiful color and mild sweetness.
  • ½ teaspoon curry powder: A hint of complexity without overwhelming the dish.
  • 1 tablespoon Greek yogurt: Tenderizes the chicken and adds a tangy flavor.
  • 3 tablespoons vegetable oil: For sautéing and allowing the spices to bloom.
  • 3 tablespoons butter (divided): Essential for that creamy sauce.
  • 6 garlic cloves, minced: Fresh garlic adds an aromatic punch.
  • 1 medium onion, diced: Sweetness from the onion balances the spices.
  • 1 15-ounce can tomato sauce: The base of our rich sauce.
  • 1 teaspoon sugar: Balances acidity and enhances flavor.
  • ½ teaspoon black pepper: Adds warmth and depth.
  • 2 cups heavy cream: For that creamy, luscious sauce.
  • ½ teaspoon cayenne pepper (optional): For those who like it hot!
  • 1 teaspoon garam masala: The secret spice blend that makes this dish truly special.
  • ¼ cup freshly chopped parsley (for garnish): A fresh finish to your dish.
  • Naan bread or steamed rice: Essential for serving!

How to Make Quick & Easy Homemade Butter Chicken

  1. In a bowl, mix the chicken with salt, garlic powder, paprika, curry powder, and Greek yogurt. Cover and refrigerate for at least 15 minutes.
  2. In a large skillet, heat vegetable oil and 1 tablespoon of butter. Sauté garlic and onion until fragrant and translucent.
  3. Add tomato sauce, sugar, salt, black pepper, heavy cream, cayenne pepper, garam masala, and curry powder. Simmer for a few minutes to combine flavors.
  4. In another pan, cook the marinated chicken until browned and cooked through. This step locks in that incredible flavor!
  5. Transfer the cooked chicken to the sauce. Stir in the remaining butter, letting it melt into the sauce. Simmer for a few more minutes.
  6. Garnish with chopped parsley and serve hot with naan bread and steamed rice for a complete meal.

Pro Tips for Perfect Butter Chicken

  • Marinate Longer: For even deeper flavor, marinate the chicken for 2-4 hours or overnight.
  • Use Fresh Spices: Freshly ground spices elevate the dish, bringing out vibrant flavors.
  • Adjust Creaminess: If you prefer a thicker sauce, reduce the cream or let it simmer longer to thicken.
  • Experiment with Proteins: Try substituting chicken with paneer or tofu for a vegetarian twist.
  • Blend the Sauce: For an extra smooth sauce, blend it after cooking and before adding the chicken.
  • Garnish Generously: Don’t skimp on garnishes! Additional cilantro or a squeeze of lime can brighten the dish.
  • Perfect Pairings: Consider serving a side of roasted vegetables or a simple cucumber salad for freshness.
  • Use Leftovers Wisely: Transform leftovers into a butter chicken wrap or pizza topping!

Common Mistakes & Troubleshooting

  • Overcooking Chicken: Avoid rubbery chicken by cooking until just done, then simmering in the sauce.
  • Too Spicy: If you’ve added too much heat, balance it with a splash of cream or yogurt.
  • Bland Sauce: Always taste and adjust seasonings as you go. A pinch of salt or a squeeze of lime can make a world of difference.
  • Thick Sauce: If your sauce is too thick, thin it out with chicken broth or water to reach your desired consistency.

Variations to Spice Up Your Butter Chicken

  • Butter Chicken with Spinach: Add fresh spinach to the sauce for a nutrient boost and beautiful color.
  • Coconut Butter Chicken: Substitute half the cream for coconut milk for a tropical twist.
  • Butter Chicken Pizza: Use the butter chicken as a topping on naan or pizza crust for a fusion delight.
  • Vegetarian Butter Chicken: Swap chicken for chickpeas or lentils for a hearty vegetarian option.

Storage & Make-Ahead Instructions

This butter chicken can be made ahead of time and stored in the refrigerator for up to 3 days. To reheat, warm gently on the stove, adding a splash of cream if it thickens. You can also freeze the butter chicken for up to 3 months. Just ensure it’s cooled completely before transferring it to airtight containers.

FAQs About Butter Chicken

  • Can I use chicken breast instead of thighs? Yes, but chicken thighs provide more flavor and juiciness.
  • What if I don’t have garam masala? You can make your own blend using cumin, coriander, and cardamom.
  • Is butter chicken spicy? The spice level can be adjusted based on your preference; simply modify the cayenne pepper.
  • Can I make this dish dairy-free? Substitute coconut cream for heavy cream and use dairy-free yogurt.
  • How can I make a lower-fat version? Use half-and-half instead of heavy cream and reduce the butter.
  • What sides go well with butter chicken? Naan, rice, or a simple salad complement the dish beautifully.
  • Is butter chicken authentic Indian cuisine? It’s a popular dish but varies widely in recipes and preparation across regions.
  • How can I enhance the flavor of my butter chicken? Use fresh spices, marinate the chicken longer, and don’t skip the sugar to balance acidity.

Nutritional Tips and Dietary Adaptations

This butter chicken recipe is rich in protein from the chicken and healthy fats from the cream and butter. To make it more nutritious, consider adding vegetables like spinach or peas. For those watching their calories, you can reduce the amount of cream or use a low-fat version. Always remember, cooking is about balance — it’s okay to indulge occasionally!

Equipment Recommendations

  • Non-stick skillet: Ideal for sautéing without sticking and for easy cleaning.
  • Mixing bowls: Use for marinating chicken and mixing sauces.
  • Wooden spoon: Perfect for stirring and scraping up those delicious browned bits.
  • Measuring cups and spoons: Accurate measurements ensure your flavors balance perfectly.

Serving Suggestions

Serve your homemade butter chicken with warm naan or fluffy basmati rice to soak up every drop of that creamy sauce. A side of cucumber salad or roasted vegetables can add a refreshing crunch to your meal. Don’t forget to sprinkle a little extra garam masala on top for that final touch of spice!

Conclusion: The Adventure Awaits!

Now that you have the ultimate guide to making homemade butter chicken, it’s time to embrace your inner chef! Cooking is not just about the end product; it’s about the joy of creating, experimenting, and sharing delicious meals with those you love. So grab your skillet, unleash your spices, and let the adventure begin! Thank you for joining me on this culinary journey — I can’t wait to hear about your delicious creations!

Quick & Easy Homemade Butter Chicken Recipe

Prep Time 20 minutes
Cook Time 30 minutes
Total Time 50 minutes
Servings 4 servings
Calories 550
A flavorful and creamy butter chicken made quickly at home, perfect for a satisfying meal.

Ingredients

Meat

  • 1.5 pounds skinless boneless chicken thighs, cut into bite-sized chunks
  • 1 teaspoon salt
  • 1 teaspoon garlic powder
  • 1 teaspoon sweet paprika
  • 0.5 teaspoon curry powder
  • 1 tablespoon greek yogurt
  • 3 tablespoons vegetable oil
  • 3 tablespoons butter, divided
  • 6 cloves garlic, minced
  • 1 medium onion, diced
  • 1 15-ounce can tomato sauce
  • 1 teaspoon sugar
  • 1 teaspoon salt (adjust to taste)
  • 0.5 teaspoon black pepper
  • 2 cups heavy cream
  • 0.5 teaspoon cayenne pepper (optional for heat)
  • 1 teaspoon garam masala
  • 0.25 cup freshly chopped parsley (optional, for garnish)

Naan bread

Steamed rice

Instructions 

  • Mix chicken with salt, garlic powder, paprika, curry powder, and yogurt; refrigerate 15 mins.
  • Sauté garlic and onion in oil and 1 tbsp butter; add tomato sauce, cream, spices; simmer briefly.
  • Cook marinated chicken until browned; add to sauce, stir in remaining butter, simmer.
  • Garnish with parsley; serve hot with naan and rice.

Notes

Adjust salt and spice levels to taste. For extra heat, add more cayenne pepper.
Calories: 550kcal
Cost: $15
Course: Main Course
Cuisine: Indian
Keyword: Butter Chicken

Nutrition

Calories: 550kcal | Carbohydrates: 45g | Protein: 35g | Fat: 30g | Sodium: 900mg

Loved this recipe? Save it to your favorite Pinterest board so you can easily find it later! It’s the perfect way to keep all your sweet ideas in one place. ✨

Eye-level view of butter chicken in a rustic dish, surrounded by cozy kitchen elements.

The Sweet Potato Symphony: Discovering Yaki Imo

Welcome, fellow culinary adventurers! Today, we’re diving deep into the world of Japanese sweet potatoes with a spotlight on the beloved Yaki Imo. This delightful dish, which translates to “baked sweet potato,” is a staple in Japanese cuisine, celebrated for its rich, earthy sweetness and creamy texture. If you’ve ever savored a perfectly roasted sweet potato, you know it’s not just food—it’s an experience. In this article, I’m excited to share everything you need to know about baked Japanese sweet potatoes and how to elevate your cooking game with these golden gems. So, grab your apron and let’s get cooking!

Why You’ll Love This Recipe

Yaki Imo is more than just a dish; it’s a celebration of flavor and texture. Here are five reasons you’ll fall head over heels for this recipe:

  • Earthy Sweetness: The natural sweetness of Japanese sweet potatoes shines through when roasted, offering a flavor that’s both comforting and satisfying.
  • Easy Preparation: With minimal ingredients and effortless steps, you can whip up this dish in no time, making it perfect for a busy weeknight or a cozy weekend gathering.
  • Healthy and Nutritious: Packed with vitamins, fiber, and antioxidants, these sweet potatoes are a guilt-free indulgence that nourishes your body.
  • Versatile Serving Options: Whether enjoyed plain, topped with butter, or transformed into an elegant dessert, Yaki Imo can adapt to any meal.
  • Impressive Presentation: The vibrant colors and enticing aroma will wow your guests, making it a showstopper at any gathering.

Ingredient Breakdown: What You’ll Need

Eye-level shot of Yaki Imo, highlighting the texture and warmth under soft, natural lighting.

To create the perfect Yaki Imo, you only need a few key ingredients:

  • Japanese sweet potatoes (Satsumaimo): Look for potatoes that are firm, with smooth skin. Satsumaimo is known for its rich flavor and creamy texture.
  • Aluminum foil (optional): This can help to create a tender, steamed texture if you prefer that style of cooking.

While the main star is the sweet potato, here are a few suggested substitutions and additions:

  • Olive oil: Drizzle some on before baking for an extra layer of flavor and moisture.
  • Sea salt: A sprinkle can elevate the natural sweetness and create a delightful contrast.
  • Cinnamon or nutmeg: For those who enjoy a hint of spice, these can be sprinkled on before baking for a warm, aromatic twist.

How to Prepare Baked Japanese Sweet Potatoes

Let’s get down to the nitty-gritty of making Yaki Imo. Follow these steps for a perfect bake:

  1. Gather all your ingredients. I’m using four Japanese sweet potatoes, and I’ll demonstrate two baking methods: wrapped in aluminum foil and unwrapped.
  2. Preheat your oven to 325ºF (163ºC). This low temperature allows the sweet potatoes to cook evenly and develop their sweetness.
  3. Gently wash the sweet potatoes with a brush to remove any dirt. Dry them thoroughly with a clean towel.
  4. Poke a few holes in each sweet potato with a skewer or fork to prevent them from exploding during baking.
  5. Wrap two of the sweet potatoes in foil (if you choose this method) and leave the other two unwrapped.
  6. Place the sweet potatoes on a baking sheet lined with parchment paper. Bake for 90 minutes or until a skewer inserts easily through the flesh.
  7. Once baked, remove from the oven. If you wrapped them in foil, unwrap them and let them stand for a few minutes. If you prefer a moist texture, leave the foil on until serving.
  8. Serve warm and enjoy the delicious aroma!

Pro Tips for Cooking Success

Now that you know how to prepare Yaki Imo, let’s take it up a notch with some pro tips:

  • Choose the Right Potatoes: Opt for Satsumaimo for the best flavor. Avoid any with blemishes or soft spots.
  • Experiment with Time: Depending on the size of your sweet potatoes, baking times may vary. Check for doneness by inserting a skewer.
  • Store Properly: Keep unbaked sweet potatoes in a cool, dark place to prolong freshness.
  • Garnish Wisely: Top your baked potatoes with butter, cinnamon, or even a drizzle of honey for an added sweet touch.
  • Try Different Cooking Methods: If you’re feeling adventurous, consider grilling or air-frying your sweet potatoes for a unique twist!

Common Mistakes and Troubleshooting

Even the best can have mishaps! Here are some common mistakes to avoid:

  • Not Cleaning Thoroughly: Always wash your sweet potatoes to remove any dirt or chemicals.
  • Skipping the Poking Step: Failing to poke holes can cause your sweet potatoes to burst in the oven.
  • Overbaking: Keep an eye on them; overbaked potatoes can become dry. Aim for that creamy interior!

Variations to Try

Feeling adventurous? Here are some variations to consider:

  • Sweet Potato Mash: Once baked, mash the sweet potatoes with butter and a sprinkle of brown sugar for a comforting side dish.
  • Stuffed Sweet Potatoes: After baking, slice them open and fill with sautéed vegetables or shredded chicken for a hearty meal.
  • Sweet Potato Fries: Cut raw sweet potatoes into fries, toss with olive oil and spices, and bake until crispy.
  • Sweet Potato Dessert: Blend baked sweet potatoes with coconut milk, cinnamon, and nutmeg for a creamy dessert.

Storage and Make-Ahead Instructions

Want to prepare ahead of time? Here’s how:

  • Storing Unbaked Sweet Potatoes: Keep them in a cool, dark place for up to a week.
  • Storing Baked Sweet Potatoes: Refrigerate in an airtight container for up to 5 days.
  • Reheating: Warm in the oven or microwave until heated through.

Frequently Asked Questions

Got questions? I’ve got answers! Here are some common FAQs:

  • Can I use regular sweet potatoes? Absolutely, but they won’t have the unique flavor profile of Japanese sweet potatoes.
  • How do I know when they’re done? Insert a skewer; it should slide in easily without resistance.
  • What’s the difference between foil-wrapped and unwrapped? Foil-wrapped potatoes tend to be creamier, while unwrapped ones develop a slightly crispier skin.
  • Can I freeze baked sweet potatoes? Yes, but they are best enjoyed fresh. If freezing, ensure they are fully cooled before freezing.
  • Can I add spices? Definitely! Cinnamon, nutmeg, or even chili powder can enhance the flavor.
  • Are they gluten-free? Yes, Yaki Imo is naturally gluten-free!
  • What’s the best way to serve them? They can be served as a side, dessert, or even as part of a main dish. Get creative!
  • Can I grill them instead of baking? Yes! Just wrap them in foil and place them on the grill for a smoky flavor.

Nutritional Benefits and Dietary Adaptations

Japanese sweet potatoes are not only delicious, but they also pack a nutritional punch:

  • Rich in Vitamins: They’re high in vitamin A, which is great for eye health.
  • High in Fiber: This aids digestion and keeps you feeling full longer.
  • Antioxidants: These help combat oxidative stress and inflammation in the body.

For dietary adaptations, consider:

  • Vegan Options: Use plant-based butter or coconut oil for a vegan-friendly version.
  • Low-Calorie Variations: Skip the added fats and enjoy them plain for a low-calorie side.

Equipment Recommendations

Here’s what you’ll need to make your Yaki Imo experience seamless:

  • Baking Sheet: A sturdy, flat baking sheet for even cooking.
  • Parchment Paper: This makes for easy cleanup and prevents sticking.
  • Brush: A vegetable brush will help you clean your sweet potatoes effectively.

Serving Suggestions

When it comes to serving Yaki Imo, the options are endless:

  • As a Snack: Enjoy them warm, straight out of the oven for a satisfying and healthy snack.
  • With Toppings: Try butter, a sprinkle of cinnamon, or even a drizzle of maple syrup for a decadent touch.
  • In Desserts: Incorporate them into cakes, pies, or even smoothies for a unique twist.

In conclusion, Yaki Imo is a culinary adventure waiting to be explored. Whether you’re a seasoned chef or a kitchen novice, this dish offers an opportunity to embrace the art of cooking with heat and creativity. So, roll up your sleeves, unleash your inner chef, and let the sweet potato symphony begin!

Baked Japanese Sweet Potatoes (Yaki Imo)

Prep Time 15 minutes
Cook Time 1 hour 30 minutes
Total Time 1 hour 45 minutes
Servings 4 pieces
Calories 180
Enjoy tender, naturally sweet Japanese sweet potatoes baked to perfection, showcasing their creamy texture and rich flavor.

Ingredients

Main

  • 4 pieces Japanese sweet potatoes (satsumaimo) (about 10 oz (300 g) each)

Instructions 

  • Preheat oven to 325ºF (163ºC). Wash and dry the sweet potatoes thoroughly.
  • Poke holes in each sweet potato with a fork. Wrap two in foil and leave two unwrapped.
  • Place on a baking sheet and bake for 90 minutes, until tender.
  • Remove from oven, unwrap foil if used, and let stand for a few minutes before serving.

Notes

Experiment with leaving the sweet potatoes wrapped or unwrapped to see which texture you prefer.
Calories: 180kcal
Cost: $15
Course: Side Dish
Cuisine: Japanese
Keyword: Sweet Potatoes

Nutrition

Calories: 180kcal | Carbohydrates: 42g | Protein: 3g | Sodium: 20mg

Loved this recipe? Save it to your favorite Pinterest board so you can easily find it later! It’s the perfect way to keep all your sweet ideas in one place. ✨

Deliciously baked Japanese sweet potatoes on a minimalist plate, with a blurred cozy background.

Discovering Ratatouille: A Culinary Adventure

Welcome to the vibrant and flavorful world of ratatouille, a dish that’s not just a recipe but a celebration of summer’s bounty! Originating from the sun-soaked fields of Provence, France, ratatouille is a colorful medley of fresh vegetables that dance together in harmony. It’s a dish that ignited my passion for cooking and transformed my dinner table into a canvas of culinary artistry. In this article, we’ll explore everything you need to know about making the perfect ratatouille, from the essential ingredients to pro tips that will elevate your cooking game.

As a chef who grew up immersed in the rich traditions of cooking, I’ve learned that food is more than just sustenance; it’s an experience that brings people together. With its robust flavors and comforting textures, ratatouille embodies that spirit. Are you ready to grab your skillet and embark on this flavorful journey? Let’s dive in!

Why You’ll Love This Ratatouille Recipe

This ratatouille recipe is a fantastic way to enjoy wholesome ingredients while embracing your culinary creativity. Here’s why you’ll adore it:

  • Healthful and Wholesome: Packed with antioxidants, vitamins, and minerals, this dish is a celebration of fresh produce that supports a balanced diet.
  • Vibrant Flavors: Each vegetable contributes its unique taste, creating a symphony of flavors that will awaken your palate.
  • Versatile Dish: Serve it as a main course, side dish, or even a topping for crusty bread. The possibilities are endless!
  • Perfect for Meal Prep: Make a big batch at the start of the week, and you’ll have delicious meals ready to go.
  • Great for All Diets: Whether you’re vegetarian, vegan, or simply looking to eat healthier, ratatouille welcomes everyone at the table.

Ingredient Breakdown: The Heart of Ratatouille

Let’s talk about the star ingredients of this dish, and how you can play with substitutions to make it your own.

  • Eggplant: The foundation of ratatouille. You can use Italian eggplant or Japanese eggplant for a slightly sweeter flavor.
  • Zucchini: Offers a mild taste and tender texture. If you want a crunchier alternative, try yellow squash.
  • Bell Pepper: Adds a pop of color and sweetness. Red, yellow, or orange bell peppers work best.
  • Onion: A flavor base that brings everything together. Shallots can be used for a milder, sweeter taste.
  • Garlic: A must for depth and aroma. You can increase the amount if you love that garlicky punch!
  • Tomatoes: Fresh, ripe tomatoes are essential. Canned tomatoes can also work if you’re in a pinch.
  • Olive Oil: Use high-quality extra virgin olive oil for drizzling and sautéing.
  • Herbs: Dried thyme and basil infuse the dish with aromatic notes. Fresh herbs can enhance the flavor even more.
  • Seasoning: Salt and pepper are key. Don’t be afraid to adjust to your taste!

Steps to Create Your Masterpiece

Now that we’ve covered the ingredients, let’s get cooking! Follow these simple steps to create your ratatouille:

  • Heat olive oil in a large skillet over medium heat.
  • Add the chopped onion and garlic, sauté until softened.
  • Stir in the diced eggplant and cook for about 5 minutes.
  • Add the zucchini and bell pepper, cooking for another 5 minutes.
  • Mix in the chopped tomatoes, thyme, and basil.
  • Season with salt and pepper to taste.
  • Cover and simmer for about 20-30 minutes, stirring occasionally, until vegetables are tender.
  • Serve hot, garnished with fresh basil if desired.

Pro Tips for Ratatouille Success

Want to take your ratatouille to the next level? Here are some expert insights:

  • Quality Ingredients: Use the freshest vegetables you can find; it truly makes a difference in flavor.
  • Layering Flavors: Don’t rush the sautéing process; allow the onions and garlic to become fragrant.
  • Texture Matters: Cut your vegetables into uniform sizes to ensure even cooking.
  • Cook with Love: Take your time and enjoy the process; cooking is an art!
  • Experiment with Spices: Feel free to add a pinch of red pepper flakes for a kick, or a dash of balsamic vinegar for depth.
  • Make It Ahead: Ratatouille tastes even better the next day as the flavors meld together.
  • Serving Temperature: Enjoy it warm, but it can also be served at room temperature for a refreshing summer dish.

Common Mistakes and Troubleshooting

Even seasoned cooks might run into a few hiccups. Here’s how to avoid common pitfalls:

  • Overcooking Vegetables: Keep an eye on your veggies; they should be tender but not mushy.
  • Underseasoning: Don’t be shy with salt and pepper. Taste as you go!
  • Wrong Vegetable Ratios: Balance your vegetables for a harmonious dish. Too much of one can overpower the others.
  • Skipping Fresh Herbs: Fresh herbs elevate this dish to new heights; always include them if possible.

Delicious Variations to Try

Ratatouille is incredibly versatile! Here are some fun variations to inspire your cooking:

  • Spicy Ratatouille: Add diced jalapeños or a sprinkle of cayenne pepper for a fiery twist.
  • Cheesy Delight: Top with shredded mozzarella or parmesan cheese before baking for a melty topping.
  • Grilled Ratatouille: Grill your vegetables for a smoky flavor that adds depth to the dish.
  • Ratatouille Pasta: Toss your ratatouille with pasta for a hearty and comforting meal.

Storage and Make-Ahead Instructions

Want to make ratatouille in advance? Here’s how to store and enjoy it later:

  • Refrigeration: Store leftovers in an airtight container in the fridge for up to 4 days.
  • Freezing: Freeze in portions for up to 3 months. Thaw in the fridge overnight before reheating.
  • Make-Ahead: You can prep the vegetables a day in advance and store them separately until you’re ready to cook.

Frequently Asked Questions

Got questions? I’ve got answers! Here are some common queries about ratatouille:

  • Can I use different vegetables? Yes! Feel free to incorporate other summer vegetables like squash or cherry tomatoes.
  • Is ratatouille served hot or cold? It’s delicious both ways! Serve warm as a main dish or cold as a salad.
  • How do I make it more filling? Pair it with grains like quinoa or serve it over rice for a hearty meal.
  • What’s the best way to reheat leftovers? Reheat in a skillet over low heat to preserve texture.
  • Can I add protein? Absolutely! Chickpeas or lentils can make this dish more robust.
  • How long does it take to cook? About 30-40 minutes total, depending on your vegetable preparation speed.
  • Can I make it vegan? This recipe is already vegan-friendly!
  • What’s the best way to serve ratatouille? Serve it warm with crusty bread, over polenta, or as a side to grilled meats.

Nutritional Tips and Dietary Adaptations

Ratatouille is naturally low in calories and high in nutrients, making it a fantastic choice for a healthy meal:

  • Low-Calorie Option: This dish is low in calories and high in fiber, making it great for weight management.
  • Gluten-Free: Naturally gluten-free, it’s a safe choice for those with gluten sensitivities.
  • Low-Carb Variation: Serve it over spiralized zucchini or cauliflower rice for a low-carb meal.

Essential Equipment for Making Ratatouille

Having the right tools can make your cooking experience smoother:

  • Large Skillet: A wide skillet allows for even cooking and browning of the vegetables.
  • Cutting Board: A sturdy cutting board is essential for prepping your ingredients.
  • Sharp Knife: A sharp knife will make chopping vegetables quick and easy.
  • Wooden Spoon: For stirring and mixing, a wooden spoon is gentle on your cookware.

Serving Suggestions

How you serve ratatouille can elevate your dining experience:

  • With Crusty Bread: Serve alongside a loaf of rustic bread for dipping and savoring.
  • Over Pasta: Toss with your favorite pasta for a filling meal.
  • As a Topping: Use it as a topping for grilled meats or fish for added flavor.
  • On a Bed of Greens: Serve it atop a bed of mixed greens for a refreshing salad.

Conclusion: Embrace the Flavor!

Cooking ratatouille is not just about following a recipe; it’s about embracing the vibrant flavors of fresh vegetables and letting your creativity run wild. Whether you’re enjoying it as a main dish or a side, this dish will surely impress your family and friends. I hope you feel inspired to grab your skillet, experiment with flavors, and, most importantly, enjoy the process. After all, cooking is an adventure, and every bite of ratatouille is a step into a world of culinary delight!