Author

Avery Collins

Browsing

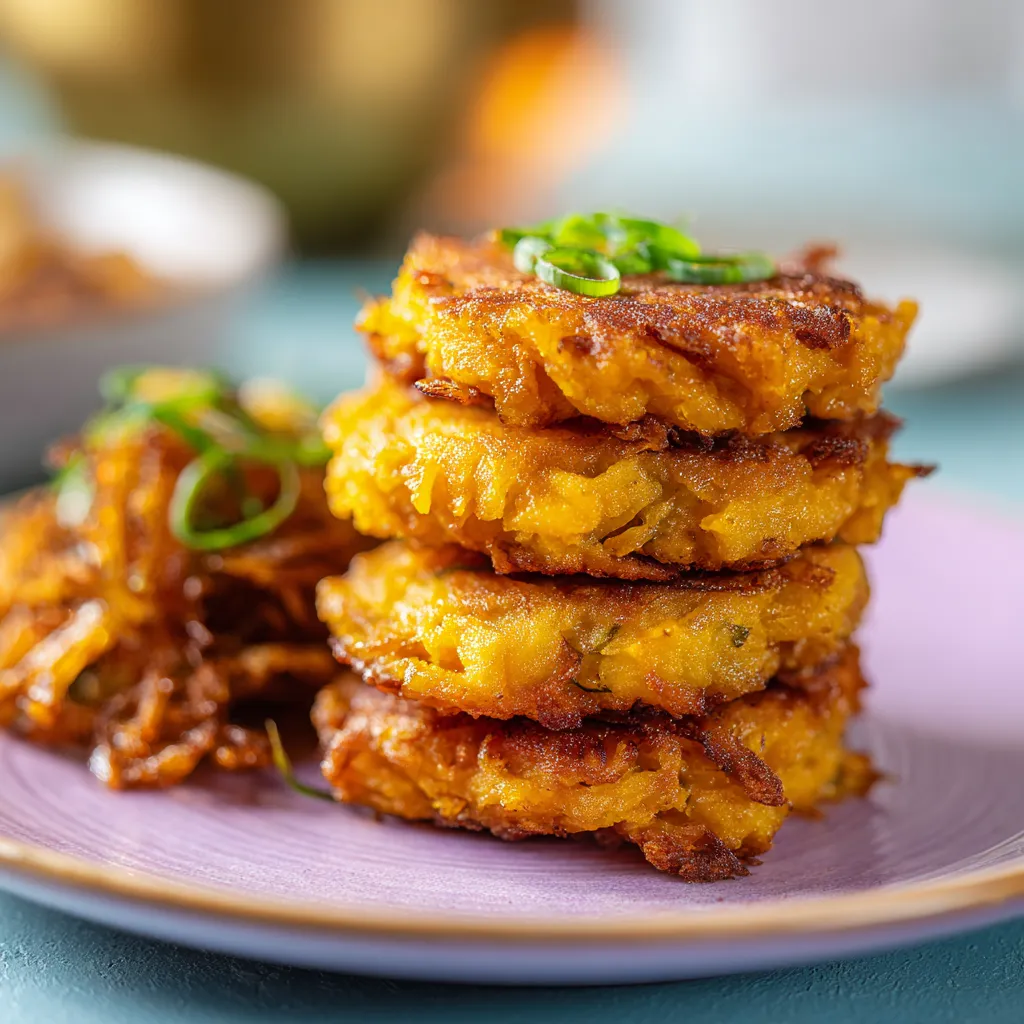
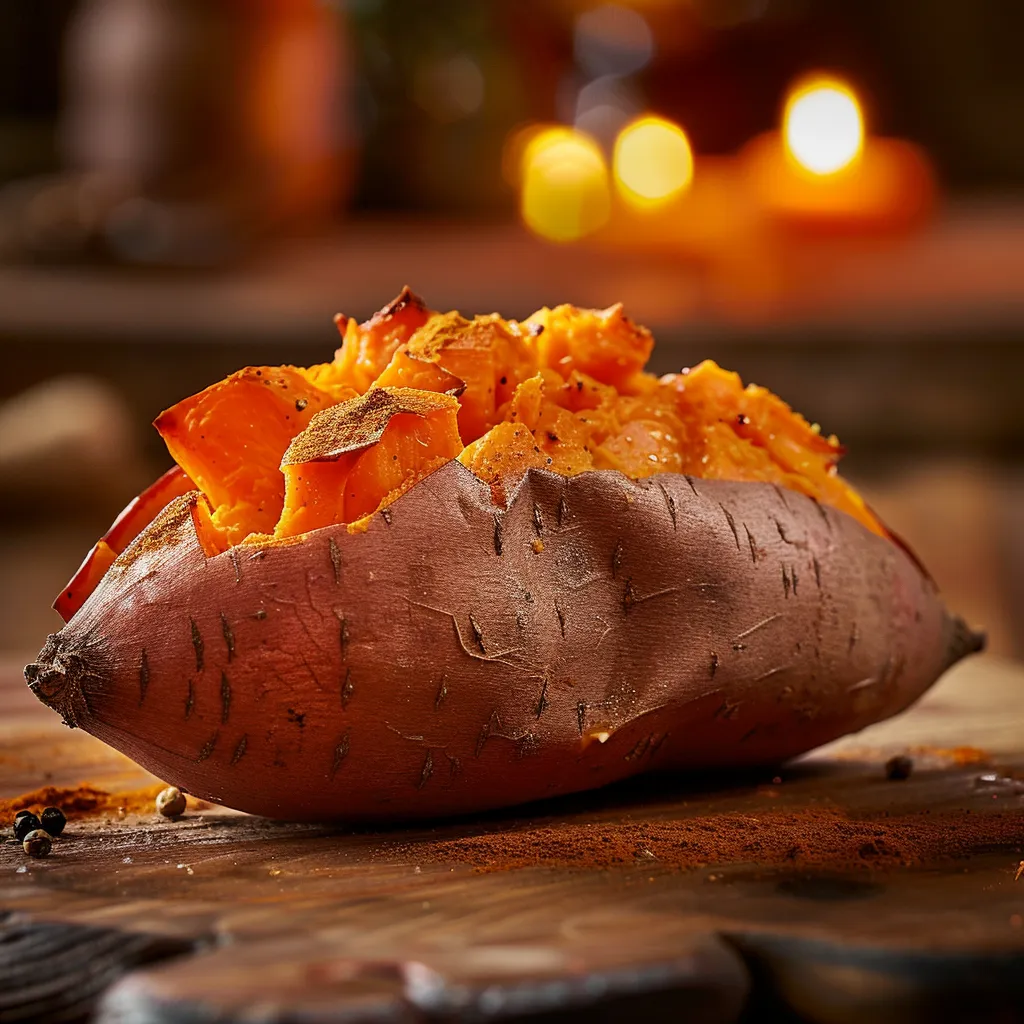
Unleash the Flavor: Discover My Irresistible Healthy Sweet Potato Hash Browns!

Welcome to the vibrant world of cooking, where every bite can take you on an unforgettable journey! If you’re craving a flavor explosion that packs both nutrition and taste, look no further than my Healthy Sweet Potato Hash Browns. These golden delights are not just your average breakfast fare; they’re a celebration of warmth, spice, and wholesome goodness. Perfect for any meal of the day, these crispy sweet potato hash browns will ignite your love for cooking and adventure in the kitchen. Get ready to embrace this delicious recipe that will transform your breakfast game!

Why You’ll Love This Recipe

  • Nutritious Twist: Swapping regular potatoes for sweet potatoes means you get extra vitamins and antioxidants, not to mention a naturally sweet flavor that regular hash browns can’t compete with.
  • Simple Ingredients: With just 6 basic ingredients, you’ll whip up a dish that feels special without breaking a sweat in the kitchen.
  • Quick and Easy: Ready in under 30 minutes, these hash browns are perfect for a busy morning or a leisurely brunch with friends.
  • Customizable: The recipe is versatile, allowing you to add your favorite spices or toppings to make these hash browns your own.
  • Perfect for Meal Prep: Make a batch ahead of time and store them in the fridge or freezer for quick, healthy breakfasts all week long.

Ingredient Breakdown

A plate of Healthy Sweet Potato Hash Browns, showcasing a textured surface and a sprinkle of chopped parsley.

Let’s dive into the star players of this recipe and explore some fabulous substitutions!

  • Sweet Potatoes: The backbone of this dish, sweet potatoes are rich in fiber and vitamins. If you want a bit of variety, you can use purple sweet potatoes for a stunning visual twist.
  • Onion: A small onion adds depth and sweetness. If you’re looking for a milder flavor, try green onions or shallots.
  • Garlic: Fresh minced garlic elevates the taste. Garlic powder can be used if fresh isn’t available, but fresh is always best!
  • Olive Oil: This is key for crisping up the hash browns. Feel free to substitute with avocado oil for a higher smoke point.
  • Paprika: Adds a beautiful color and a hint of smokiness. Experiment with smoked paprika for a deeper flavor!
  • Salt and Pepper: Essential for seasoning. Don’t be shy—season to taste!
  • Fresh Parsley: Optional garnish that adds a pop of color and freshness.

Pro Tips for Cooking Success

  • Grate and Drain: After grating your sweet potatoes, squeeze out excess moisture using a clean kitchen towel. This ensures your hash browns get crispy.
  • Preheat Your Pan: Make sure your skillet is hot enough before adding your sweet potato mixture. This is crucial for that perfect golden crust.
  • Don’t Crowd the Pan: Cook in batches if necessary. Overcrowding leads to steaming instead of crisping!
  • Monitor Heat Levels: Keep your skillet on medium heat. Too high and they’ll burn; too low and they’ll turn mushy.
  • Flip with Care: Use a spatula to gently flip the hash browns. If they stick, let them cook a bit longer!
  • Experiment with Spices: Don’t stop at paprika! Try adding cayenne for heat or cumin for an earthier flavor.
  • Keep Them Warm: If you’re making a large batch, keep them warm in a low oven until ready to serve.
  • Garnish Boldly: Fresh herbs like cilantro or chives can take your hash browns to the next level!

Avoiding Common Mistakes

Even the most seasoned chefs can encounter hiccups. Here are some common mistakes to avoid:

  • Not Draining Moisture: Excess moisture leads to soggy hash browns. Always drain after grating!
  • Skipping the Preheat: A cold pan will ruin your chances at achieving that crispy texture.
  • Using Too Much Oil: While oil is necessary for crispiness, too much can lead to greasy hash browns.
  • Flipping Too Soon: Wait until the bottom is golden brown before flipping for the best results.

Delicious Variations to Try

Ready to spice things up? Here are some fun variations to make this dish your own:

  • Spicy Sweet Potato Hash Browns: Add diced jalapeños or a sprinkle of cayenne for a kick!
  • Cheesy Hash Browns: Stir in some shredded cheese like cheddar or pepper jack before cooking for a melty delight.
  • Garden Veggie Hash Browns: Incorporate grated carrots, zucchini, or bell peppers for added flavor and nutrition.
  • Herbed Hash Browns: Mix in fresh herbs like basil or rosemary for a fragrant twist.

Storage and Make-Ahead Instructions

Want to prepare ahead of time? Here’s how to store and reheat your hash browns:

  • Refrigerating: Store leftovers in an airtight container in the fridge for up to 4 days.
  • Freezing: Place cooked hash browns in a single layer on a baking sheet to freeze. Once frozen, transfer them to a freezer-safe bag for up to 3 months.
  • Reheating: To reheat, simply pop them in a hot skillet for a few minutes until heated through and crispy again.

Frequently Asked Questions

  • Can I use regular potatoes instead of sweet potatoes? Absolutely! Just know that the flavor and nutrition will differ.
  • What’s the best way to serve these hash browns? They’re perfect topped with avocado, an egg, or even salsa for added flair.
  • How do I make my hash browns extra crispy? The key is to remove moisture and ensure your pan is hot before cooking.
  • Can I make these hash browns vegan? Yes! Omit the egg or use a flax egg as a binder.
  • What other spices can I add? Try garlic powder, onion powder, or even curry powder for a unique twist.
  • How long do they take to cook? Each side typically takes about 5-7 minutes on medium heat to get that perfect golden brown.
  • Are sweet potatoes healthier than regular potatoes? Yes! They’re lower in calories and carbs while offering more fiber and vitamins.
  • What can I serve with sweet potato hash browns? They pair wonderfully with eggs, a fresh salad, or even as a base for a hearty breakfast bowl.

Nutritional Tips and Dietary Adaptations

Sweet potatoes are not only delicious but also packed with nutrients!

  • Rich in Antioxidants: Sweet potatoes are high in beta-carotene, which is great for your skin and immune system.
  • Low Glycemic Index: They offer a slow release of energy, making them ideal for blood sugar levels.
  • Gluten-Free Option: This recipe is naturally gluten-free, perfect for those with dietary restrictions.
  • Vegan-Friendly: Easily adaptable by substituting eggs for a flaxseed meal or using only plant-based ingredients.

Essential Equipment for Cooking

Here’s what you’ll need to create these crispy delights:

  • Non-Stick Skillet: A good non-stick skillet is essential for easy flipping and crisping.
  • Grater or Food Processor: Grating sweet potatoes by hand can be a workout, so a food processor can save time and effort.
  • Spatula: A sturdy spatula helps with flipping the hash browns without breaking them apart.
  • Mixing Bowl: For combining all your ingredients before cooking.

Serving Suggestions

Ready to serve? Here are some ideas to make your dish shine:

  • Top with Avocado: Creamy avocado slices add richness and balance out the spice.
  • Fried or Poached Egg: A perfectly cooked egg on top makes for a satisfying meal.
  • Fresh Salsa: A zesty salsa or pico de gallo brings freshness and acidity.
  • Yogurt or Sour Cream: A dollop of yogurt or sour cream can add a creamy contrast and coolness.

Final Thoughts

There you have it, folks! My Healthy Sweet Potato Hash Browns are more than just a recipe; they’re an invitation to explore the world of flavor and spice. So, roll up your sleeves, grab your ingredients, and get ready to create something truly special. Remember, cooking is about adventure and experimentation, so don’t hesitate to make this dish your own. Enjoy every crispy bite, and may your kitchen be filled with warmth and joy!

Healthy Sweet Potato Hash Browns

Prep Time 10 minutes
Cook Time 15 minutes
Total Time 25 minutes
Servings 4 servings
Calories 150
A delicious and healthy breakfast option featuring crispy sweet potato hash browns, perfect for a quick and nutritious meal.

Ingredients

Vegetables

  • 2 medium sweet potatoes, peeled and grated
  • 1 small onion, finely chopped
  • 2 cloves garlic, minced
  • 1 tablespoon olive oil
  • 1 teaspoon paprika
  • to taste salt and pepper
  • optional fresh parsley for garnish

Instructions 

  • Combine grated sweet potatoes, chopped onion, and minced garlic in a bowl.
  • Add paprika, salt, and pepper; mix well.
  • Heat olive oil in a skillet over medium heat.
  • Cook mixture for 5-7 minutes until golden, flip, and cook another 5-7 minutes.
  • Garnish with parsley if desired, serve warm.

Notes

Ensure sweet potatoes are grated evenly for uniform cooking.
Calories: 150kcal
Cost: $10
Course: Breakfast
Cuisine: American
Keyword: sweet potato

Nutrition

Calories: 150kcal | Carbohydrates: 30g | Protein: 3g | Fat: 4g | Sodium: 150mg

Loved this recipe? Save it to your favorite Pinterest board so you can easily find it later! It’s the perfect way to keep all your sweet ideas in one place. ✨

Deliciously browned sweet potato hash browns on a wooden surface, illuminated by warm side lighting.

Welcome to the Fluffy Revolution of Zero Carb Yogurt Bread

Are you ready to embark on a culinary adventure that will redefine your baking experience? Look no further than this sensational Zero Carb Yogurt Bread. This soft, fluffy delight is not only keto-friendly but also an irresistible treat that proves you can enjoy bread without guilt. Whether you’re a seasoned chef or a novice in the kitchen, this recipe invites you to embrace the joy of cooking while keeping your carbs in check. Let’s dive into the world of flavors and textures that this zero carb wonder has to offer!

Why You’ll Love This Recipe

Why should this recipe have a prime spot in your kitchen? Here are five compelling reasons:

  • Zero Carb Delight: This bread is an excellent choice for those following a keto or low-carb lifestyle. With minimal carbs, you can enjoy bread without derailing your diet.
  • Protein-Packed: Made with high-protein ingredients like Greek yogurt and eggs, this bread not only satisfies your cravings but also fuels your body.
  • Quick and Easy: With just a few simple ingredients and minimal prep time, you can whip up a loaf in no time. Perfect for busy weeknights!
  • Versatile Use: Enjoy it plain, use it for sandwiches, or toast it for breakfast. The options are endless!
  • Flavorful and Satisfying: Despite being low in carbs, this bread delivers on taste and texture, making it a delightful addition to any meal.

Ingredient Breakdown

Eye-level shot of freshly baked yogurt bread with a golden crust, placed on a rustic table.

Let’s get down to the nitty-gritty of what makes this zero carb yogurt bread so special. Here’s what you’ll need:

  • 1 cup plain Greek yogurt: This creamy base adds moisture and protein. For a dairy-free option, consider using coconut yogurt.
  • 1 cup almond flour: The key player for achieving that soft, bread-like texture. If you’re allergic to nuts, you can substitute with sunflower seed flour.
  • 2 large eggs: Essential for binding and giving the bread its structure. If you want to make it vegan, use flax eggs instead.
  • 1 teaspoon baking powder: This helps the bread rise and gives it a light texture.
  • 1/2 teaspoon salt: Enhances flavor; feel free to adjust based on your dietary needs.
  • 1 teaspoon garlic powder (optional): Adds a savory kick that elevates the flavor profile.
  • 1 tablespoon olive oil (optional): For a richer taste, this can be omitted if you prefer a lighter version.

Step-by-Step Instructions

Ready to get baking? Follow these easy steps:

  1. Preheat your oven to 350°F (175°C) and grease a loaf pan to prevent sticking.
  2. Combine ingredients: In a large mixing bowl, combine the Greek yogurt, almond flour, eggs, baking powder, salt, and garlic powder (if using).
  3. Mix well: Stir until all ingredients are fully incorporated and a dough forms. If you’re using olive oil, mix it in at this stage.
  4. Pour the batter: Transfer the mixture into the prepared loaf pan and smooth the top with a spatula.
  5. Bake: Place in the oven and bake for 30-35 minutes, or until the top is golden brown and a toothpick inserted into the center comes out clean.
  6. Cool down: Let the bread cool in the pan for 10 minutes before transferring it to a wire rack to cool completely.
  7. Slice and enjoy: Once cooled, slice your zero carb yogurt bread and dig in!

Pro Tips for Perfecting Your Bread

Want to elevate your baking game? Here are some expert insights to ensure your bread turns out perfectly every time:

  • Mix thoroughly: Ensure all ingredients are well combined for a uniform texture.
  • Don’t overbake: Keep an eye on the bread; overbaking can lead to a dense texture.
  • Experiment with spices: Consider adding herbs or spices to customize the flavor to your liking.
  • Let it cool: Allow the bread to cool completely before slicing to achieve cleaner cuts.
  • Store properly: Keep leftovers in an airtight container in the refrigerator to maintain freshness.
  • Toast for breakfast: Enjoy slices toasted with butter or your favorite spread for a delightful morning treat.
  • Pair wisely: This bread goes wonderfully with soups, stews, or as a base for sandwiches.
  • Freezing options: Slice and freeze individual pieces for quick access to your favorite low-carb bread anytime.

Common Mistakes and Troubleshooting

Even the best chefs face challenges! Here are some common pitfalls and how to avoid them:

  • Dense texture: This can happen if the batter is overmixed or the baking powder is expired. Be gentle when mixing and check your ingredients.
  • Underbaking: If the bread is too soft in the center, give it a few more minutes in the oven, but keep an eye on it.
  • Flavorless bread: Ensure you’re using quality ingredients and consider adding more spices or herbs to enhance flavor.

Delicious Variations to Try

Mix things up with these creative variations of your zero carb yogurt bread:

  • Herb-Infused Bread: Add a tablespoon of mixed dried herbs like oregano or basil for a fragrant twist.
  • Cheesy Delight: Fold in a half cup of shredded cheese (cheddar or mozzarella) for a cheesy version that pairs perfectly with soups.
  • Sweet Cinnamon Bread: Add a tablespoon of cinnamon and a sweetener of your choice for a breakfast treat.
  • Spicy Kick: Toss in some crushed red pepper flakes for a bread that packs a punch.

Storage and Make-Ahead Instructions

Want to plan ahead? Here’s how to store and prep your zero carb yogurt bread:

  • Refrigeration: Store in an airtight container to keep it fresh for up to 5 days.
  • Freezing: Wrap individual slices in plastic wrap and place them in a freezer bag for easy access. They can be frozen for up to 2 months.
  • Make-ahead options: You can prepare the batter a day in advance and bake it fresh when you’re ready.

Comprehensive FAQ

Here are some frequently asked questions about zero carb yogurt bread:

  • Can I use a different type of yogurt? Yes, but ensure it’s thick and unsweetened for the best results.
  • What if I don’t have almond flour? You can substitute it with sunflower seed flour or another low-carb flour.
  • Is this bread gluten-free? Yes, as long as you use gluten-free certified almond flour.
  • Can I make this recipe vegan? Yes, use flax eggs instead of regular eggs and a dairy-free yogurt option.
  • How do I know when the bread is done? Insert a toothpick in the center; if it comes out clean, the bread is ready.
  • Can I add vegetables? Absolutely! Spinach or grated zucchini can be added for extra nutrition.
  • How do I reheat frozen bread? You can toast it directly from the freezer or let it thaw in the fridge overnight.
  • What’s the best way to serve this bread? It’s versatile! Enjoy it plain, topped with avocado, or as a sandwich base.

Nutritional Tips and Dietary Adaptations

This zero carb yogurt bread accommodates various dietary needs:

  • Keto-Friendly: With minimal carbs, it’s a great choice for those on a keto diet.
  • High Protein: The combination of Greek yogurt and eggs provides a protein boost, perfect for muscle recovery.
  • Low Sodium Option: Adjust the salt content based on your dietary restrictions.
  • Gluten-Free Option: Simply use gluten-free almond flour to make this bread suitable for those with gluten sensitivities.

Essential Equipment Recommendations

To make your baking experience seamless, here’s what you’ll need:

  • Mixing Bowl: A large bowl to combine your ingredients thoroughly.
  • Loaf Pan: A standard-sized loaf pan is essential for shaping the bread.
  • Oven Thermometer: Ensure your oven temperature is accurate for perfect baking.
  • Spatula: For smoothing the batter in the pan.
  • Toothpick or Cake Tester: To check for doneness.

Serving Suggestions

Looking for ways to enjoy your zero carb yogurt bread? Here are some scrumptious serving ideas:

  • Avocado Toast: Top with smashed avocado, salt, and pepper for a nutritious breakfast.
  • Sandwiches: Use slices for turkey or veggie sandwiches for a satisfying lunch.
  • French Toast: Dip slices in an egg mixture and fry for a delicious low-carb breakfast.
  • With Soup: Serve alongside a warm bowl of soup for a comforting meal.

Conclusion: The Adventure Awaits!

Now that you have unlocked the secrets to making the ultimate Zero Carb Yogurt Bread, it’s time to get cooking! This bread is more than just a recipe; it’s a celebration of flavor, creativity, and the joy of cooking. So grab your skillet, embrace the heat, and let every bite remind you that food is a thrilling adventure. Happy baking!

Zero Carb Yogurt Bread – Soft, Fluffy & Keto-Friendly

Prep Time 10 minutes
Cook Time 35 minutes
Total Time 45 minutes
Servings 8 slices
Calories 180
This keto-friendly yogurt bread is soft, fluffy, and perfect for a low-carb diet. Easy to make with simple ingredients, it’s a delicious alternative to traditional bread.

Ingredients

Dough

  • 1 cup plain greek yogurt
  • 1 cup almond flour
  • 2 large eggs
  • 1 teaspoon baking powder
  • 1/2 teaspoon salt
  • 1 teaspoon garlic powder (optional)
  • 1 tablespoon olive oil (optional)

Instructions 

  • Preheat oven to 350°F (175°C) and grease a loaf pan.
  • Mix yogurt, almond flour, eggs, baking powder, salt, and garlic powder in a bowl.
  • Add olive oil if desired and mix until smooth.
  • Pour batter into the pan and smooth the top.
  • Bake for 30-35 minutes until golden and a toothpick comes out clean.
  • Cool for 10 minutes, then slice and serve.

Notes

This bread is best enjoyed fresh. Store leftovers in an airtight container for up to 2 days.
Calories: 180kcal
Cost: $15
Course: Bread
Keyword: Keto, Low Carb, yogurt

Nutrition

Calories: 180kcal | Carbohydrates: 6g | Protein: 12g | Fat: 12g | Sodium: 250mg

Loved this recipe? Save it to your favorite Pinterest board so you can easily find it later! It’s the perfect way to keep all your sweet ideas in one place. ✨

Detailed view of a slice of fluffy yogurt bread, highlighting its airy interior and crisp edges.

Elevate Your Comfort Food: The Ultimate Crockpot Mac and Cheese Experience

Welcome to a culinary adventure that will transform your understanding of comfort food! Today, we’re diving into the world of Crockpot Mac and Cheese—a dish that marries creamy goodness with a hint of boldness. Imagine a rich, cheesy blend that warms your soul, all while simmering away in your slow cooker, allowing you to savor life’s other delights. This isn’t just any mac and cheese; it’s a revolution in a bowl! Let’s get started!

Why You’ll Love This Recipe

Here’s why this Crockpot Mac and Cheese will become your go-to dish:

  • Hands-off cooking: Just mix the ingredients and let your slow cooker do the magic—perfect for busy days!
  • Unforgettable flavor: The combination of sharp cheddar and mozzarella creates a depth of flavor that will have your taste buds dancing.
  • Customizable: This recipe is a blank canvas! Add your favorite spices or ingredients to make it your own.
  • Perfect for gatherings: Whether it’s game day or a cozy family dinner, this dish feeds a crowd with ease.
  • Leftover delight: Mac and cheese tastes even better the next day, making your fridge a treasure trove of flavor!

Ingredients Breakdown

A warm bowl of Crockpot Mac and Cheese showcasing melted cheese and elbow macaroni.

Let’s gather our ingredients for this cheesy masterpiece:

  • 2 cups elbow macaroni: The classic noodle that holds all that cheesy goodness.
  • 4 cups sharp cheddar cheese, shredded: A bold cheese that gives the dish its signature flavor.
  • 1 cup mozzarella cheese, shredded: Adds creaminess and a beautiful stretchy texture.
  • 3 cups milk: Provides a creamy base that ensures the noodles cook perfectly.
  • 1 cup heavy cream: For that luxurious texture that makes every bite heavenly.
  • 1/2 cup butter, melted: Enhances richness and flavor.
  • 1 teaspoon garlic powder: A hint of savory depth.
  • 1 teaspoon onion powder: Adds another layer of flavor.
  • Salt and pepper to taste: Essential for balancing all the flavors.

**Substitutions**: If you’re feeling adventurous or need a dairy-free option, you can use almond milk or coconut cream instead of regular milk and heavy cream. Or try mixing in some pepper jack cheese for a spicy kick!

How to Make Crockpot Mac and Cheese

Ready to create your cheesy dream? Follow these simple steps:

  1. In a crockpot, combine the uncooked elbow macaroni, shredded cheddar cheese, shredded mozzarella cheese, milk, heavy cream, melted butter, garlic powder, onion powder, salt, and pepper.
  2. Stir the mixture well until all ingredients are combined—make sure the noodles are submerged!
  3. Cover the crockpot and cook on low for 2 to 3 hours, stirring occasionally to prevent sticking.
  4. Once cooked, stir again and adjust seasoning if needed before serving. Enjoy that creamy goodness!

Pro Tips for Perfecting Your Mac and Cheese

Want to ensure your dish is nothing short of spectacular? Check out these expert insights:

  • Stir regularly: Stirring every 30 minutes helps to keep the noodles from clumping and ensures even cooking.
  • Don’t overcook: Keep an eye on cooking time; overcooking can lead to mushy noodles.
  • Cheese choice matters: Always opt for freshly shredded cheese! Pre-packaged cheese can contain anti-caking agents that affect melt quality.
  • Layer flavors: Experiment with spices like smoked paprika or cayenne for a subtle kick.
  • Make it meaty: Add cooked bacon or diced ham for a heartier meal.
  • Vegetable boost: Toss in some steamed broccoli or spinach for a healthier twist.
  • Keep it creamy: If it seems dry, add a splash of milk or cream during the cooking process.
  • Go gourmet: Try adding a dollop of truffle oil before serving for an upscale touch!

Avoiding Common Mistakes

Even the best chefs stumble! Here are common pitfalls to avoid:

  • Skipping the stirring: Not stirring can lead to uneven cooking and cheesy clumps.
  • Overloading on cheese: While cheese is essential, too much can make the dish overly greasy and heavy.
  • Ignoring the seasoning: Don’t forget to season appropriately—taste as you go!
  • Using low-quality cheese: Cheap cheese won’t melt properly and can ruin the dish’s texture.

Variations to Spice Up Your Dish

Bored of the same old mac and cheese? Try these fun variations!

  • Buffalo Chicken Mac: Stir in shredded rotisserie chicken and buffalo sauce for a spicy twist.
  • BBQ Pulled Pork Mac: Mix in some pulled pork and a splash of BBQ sauce for a smoky flavor.
  • Veggie Delight: Add in roasted veggies like zucchini, bell peppers, and carrots for a nutritious boost.
  • Spicy Jalapeño Mac: Mix in diced jalapeños and a sprinkle of cayenne for a fiery kick!

Storage and Make-Ahead Instructions

This mac and cheese is perfect for meal prep! Here’s how to store and reheat:

  • Fridge: Store in an airtight container for up to 4 days.
  • Freezer: Freeze for up to 2 months. Reheat in the oven or microwave, adding a splash of milk to restore creaminess.
  • Make-Ahead: Prepare the dish a day in advance and refrigerate. Cook in the slow cooker on the day of serving!

Frequently Asked Questions

Got questions? Here are some common ones:

  • Can I use gluten-free pasta? Yes! Just ensure it cooks thoroughly in the slow cooker.
  • How do I make it spicier? Add hot sauce or crushed red pepper to the mixture.
  • Can I double the recipe? Absolutely! Just ensure your crockpot can accommodate the larger volume.
  • Why is my mac and cheese dry? This can happen if you don’t stir enough or if the cooking time is too long.
  • Can I use different cheeses? Definitely! Experiment with gouda, fontina, or even blue cheese.
  • How can I make it healthier? Use low-fat cheese, non-fat milk, and add veggies to boost nutrition.
  • What’s the best way to reheat leftovers? Reheat in the microwave or oven with a splash of milk to keep it creamy.
  • Can I make this without a crockpot? Yes! You can bake it in the oven; just adjust the cooking time accordingly.

Nutritional Tips and Dietary Adaptations

Want to enjoy this dish while keeping an eye on your health? Here’s how:

  • Low-carb option: Substitute pasta with steamed cauliflower for a keto-friendly alternative.
  • Dairy-free adaptation: Use almond or soy milk and vegan cheese for a dairy-free version.
  • Lower calorie version: Opt for reduced-fat cheese and light cream to cut calories without sacrificing taste.

Equipment Recommendations

To make this dish a success, here’s what you’ll need:

  • Crockpot: A reliable slow cooker is essential for even cooking.
  • Mixing spoon: A sturdy spoon for mixing your ingredients well.
  • Measuring cups and spoons: Precision is key to perfecting your recipe.

Serving Suggestions

Once your Crockpot Mac and Cheese is ready, consider these serving ideas:

  • Garnish: Top with fresh herbs like parsley or chives for a pop of color and flavor.
  • Side dishes: Serve with a crisp salad or garlic bread to balance the richness.
  • Pairing: A chilled glass of white wine pairs beautifully with the creamy textures.

In conclusion, this Crockpot Mac and Cheese is not just a dish; it’s an experience that invites creativity and warmth into your kitchen. With every bite, you’ll feel the love and passion poured into it, just like my grandmother taught me. So grab your ingredients, fire up that slow cooker, and let’s make some magic happen! Happy cooking, amigos!

Crockpot Mac and Cheese

Prep Time 10 minutes
Cook Time 3 hours
Total Time 3 hours 10 minutes
Servings 6 servings
Calories 650
A creamy and cheesy comfort food perfect for easy weeknight dinners, cooked effortlessly in a crockpot.

Ingredients

Main ingredients

  • 2 cups elbow macaroni
  • 4 cups sharp cheddar cheese, shredded
  • 1 cup mozzarella cheese, shredded
  • 3 cups milk
  • 1 cup heavy cream
  • 1/2 cup butter, melted
  • 1 teaspoon garlic powder
  • 1 teaspoon onion powder
  • to taste salt and pepper

Instructions 

  • Combine all ingredients in the crockpot.
  • Stir well until combined.
  • Cook on low for 2-3 hours, stirring occasionally.
  • Stir again, adjust seasoning, and serve.

Notes

Stir before serving for best creaminess.
Calories: 650kcal
Cost: $15
Course: Main Course
Cuisine: American
Keyword: Mac and Cheese

Nutrition

Calories: 650kcal | Carbohydrates: 70g | Protein: 30g | Fat: 35g | Sodium: 800mg

Loved this recipe? Save it to your favorite Pinterest board so you can easily find it later! It’s the perfect way to keep all your sweet ideas in one place. ✨

Delicious serving of homemade Crockpot Mac and Cheese in natural light with soft shadows.

Ignite Your Palate with This Spicy Ground Beef Stir-Fry Bowl

Welcome to a culinary adventure where bold flavors meet the vibrant world of spices! My Spicy Ground Beef Stir-Fry Bowl is not just a meal; it’s a celebration of everything that makes cooking exciting. Bursting with garlic-infused veggies and succulent beef, all nestled over a bed of steamy white rice, this dish is perfect for those who crave a little kick in their kitchen. Let’s dive into this flavor explosion that promises to awaken your taste buds and elevate your weeknight dinners!

Why You’ll Love This Recipe

Here are five reasons this Spicy Ground Beef Stir-Fry Bowl will become your new go-to:

  • Quick and Easy: Ready in under 30 minutes, it’s perfect for busy weeknights when you want something delicious but don’t have hours to spare.
  • Flavor Packed: A perfect balance of savory and spicy, this dish combines ground beef with fresh veggies and aromatic garlic, creating a symphony of flavors.
  • Customizable: Swap in your favorite vegetables or proteins, making it a versatile dish that adapts to your cravings.
  • Healthy Ingredients: Packed with nutrients from mixed vegetables, this stir-fry offers a hearty meal without the guilt.
  • Meal Prep Friendly: Make a big batch for easy lunches or dinners throughout the week, ensuring you always have a spicy, satisfying option at your fingertips.

Ingredient Breakdown

A vibrant Spicy Ground Beef Stir-Fry Bowl featuring garlic veggies and steamy rice.

Let’s get into the ingredients that make this dish sing:

  • 1 lb ground beef: The core of your stir-fry; choose lean ground beef for a healthier option.
  • 2 cups mixed vegetables: Bell peppers, broccoli, and carrots are fantastic, but feel free to use any veggies you love.
  • 4 cloves garlic, minced: A must-have for that aromatic kick.
  • 1 tbsp ginger, minced: Adds warmth and depth to the flavor profile.
  • 2 tbsp soy sauce: Enhances umami and brings all the flavors together.
  • 1 tbsp sriracha or chili sauce: For those who like it hot, adjust to taste!
  • 2 tbsp vegetable oil: Essential for sautéing and achieving that perfect stir-fry texture.
  • 2 cups cooked rice: Steamed white rice is traditional, but feel free to get creative with brown rice or cauliflower rice.
  • Salt and pepper to taste: Simple seasonings that elevate the dish.
  • Green onions for garnish: Optional, but they add a fresh crunch and color!

Instructions: Cooking Your Stir-Fry

Ready to start cooking? Follow these simple steps for a delicious stir-fry:

  1. Heat vegetable oil in a large skillet or wok over medium-high heat.
  2. Add minced garlic and ginger, sauté for about 30 seconds until fragrant.
  3. Add ground beef to the skillet, breaking it apart with a spatula, and cook until browned.
  4. Stir in soy sauce and sriracha, mixing well to combine with the beef.
  5. Add mixed vegetables to the skillet and stir-fry for 5-7 minutes, until veggies are tender-crisp.
  6. Season with salt and pepper to taste.
  7. Serve the spicy ground beef stir-fry over a bed of cooked rice.
  8. Garnish with sliced green onions if desired.

Pro Tips for Stir-Fry Success

Want to elevate your stir-fry game? Here are some expert tips:

  • Prep Ahead: Chop your veggies and mince garlic and ginger in advance for a seamless cooking experience.
  • High Heat: Cooking on high heat ensures your veggies remain crisp and vibrant while the beef gets a nice sear.
  • Don’t Overcrowd: Cook in batches if necessary; overcrowding the pan can lead to steaming instead of stir-frying.
  • Use a Wok: If you have one, a wok is ideal for stir-frying because of its high, sloped sides, which help with tossing.
  • Fresh Ingredients: Using fresh, seasonal vegetables enhances flavor and nutrient content.
  • Adjust Seasoning: Taste as you go! Feel free to adjust seasoning and spice levels to suit your palate.
  • Leftover Love: This stir-fry is great for leftovers; just reheat and enjoy!
  • Pair with Extras: Consider serving with a side of pickled vegetables or a tangy dipping sauce for added flavor.

Common Mistakes and Troubleshooting

Even the best chefs make mistakes! Here’s how to avoid common pitfalls:

  • Overcooking Vegetables: Aim for tender-crisp. If they start to lose color, take them off the heat!
  • Soggy Beef: Make sure your pan is hot enough before adding the beef to get that beautiful browning.
  • Too Salty: If your stir-fry ends up too salty, add a little sugar or vinegar to balance the flavors.
  • Lack of Spice: Want more heat? Add additional sriracha or sprinkle in some chili flakes at the end.

Variations to Spice Things Up

Love to experiment? Here are some variations to try:

  • Beef and Broccoli: Swap out mixed veggies for broccoli florets, a classic combo!
  • Vegetarian Delight: Use tofu or tempeh instead of ground beef for a plant-based version.
  • Sweet and Spicy: Add pineapple chunks for a sweet twist that complements the heat.
  • Asian Fusion: Incorporate bok choy or snow peas for a refreshing crunch and vibrant color.

Storage and Make-Ahead Instructions

Want to save some for later? Here’s how to store your stir-fry:

  • Refrigerate: Store in an airtight container in the fridge for up to 4 days.
  • Freeze: For longer storage, freeze the stir-fry in a freezer-safe container for up to 3 months.
  • Reheat: Reheat in a skillet over medium heat until heated through, adding a splash of water if it seems dry.
  • Make-Ahead: Prepare the beef and veggie mixture in advance, then stir-fry just before serving for optimal freshness.

Frequently Asked Questions

Got questions? Here are some common queries about this recipe:

  • Can I use frozen vegetables? Yes, frozen veggies work well! Just add a few extra minutes to the cook time.
  • Is this stir-fry gluten-free? Use gluten-free soy sauce to make it suitable for those with gluten sensitivities.
  • What can I serve with this dish? Try serving with a side of egg rolls, spring rolls, or a simple cucumber salad.
  • Can I use a different protein? Absolutely! Chicken, shrimp, or even tempeh can be great substitutes.
  • How spicy is this dish? It can be as spicy as you want! Adjust the sriracha according to your heat preference.
  • Can I add nuts? Yes! Cashews or peanuts can add a delightful crunch and flavor.
  • What’s the best rice to use? Steamed white rice is traditional, but feel free to use brown rice or even quinoa for a twist.
  • Can I make this vegan? Yes! Substitute ground beef with lentils or a meat alternative and omit the sriracha or replace it with a vegan sauce.

Nutritional Tips and Dietary Adaptations

Want to make this dish healthier? Consider these tips:

  • Increase Fiber: Add more vegetables or choose brown rice over white for added fiber.
  • Lower Fat: Use lean ground beef or substitute with ground turkey or chicken.
  • Plant-Based Option: Opt for plant-based ground meat alternatives for a vegan-friendly dish.
  • Watch the Sauces: Use low-sodium soy sauce to keep sodium levels in check.

Equipment Recommendations

Here’s what you’ll need to whip up this stir-fry:

  • Large Skillet or Wok: A wide surface helps with even cooking and browning.
  • Spatula: For breaking apart the ground beef and stirring ingredients.
  • Knife and Cutting Board: Essential for prepping your vegetables and aromatics.
  • Measuring Cups and Spoons: To ensure accurate measurements of your ingredients.

Serving Suggestions

To make your meal even more special, consider these serving ideas:

  • Garnish: Top with fresh cilantro or sesame seeds for an extra layer of flavor.
  • Side Dishes: Serve with steamed dumplings or a refreshing Asian-style cucumber salad.
  • Drink Pairings: A crisp lager or a ginger ale complements the spice beautifully.
  • Presentation: Serve in vibrant bowls to enhance the visual appeal of your dish.

In conclusion, my Spicy Ground Beef Stir-Fry Bowl is more than just a recipe; it’s an invitation to explore the art of cooking with spice. As you pour your heart into this dish, remember that cooking is about joy, experimentation, and connection. So grab your skillet, ignite your passion, and embrace the thrill of creating something extraordinary. Let every bite remind you that the kitchen is where adventure begins!

Spicy Ground Beef Stir-Fry Bowl with Garlic Veggies & Steamy Rice

Prep Time 10 minutes
Cook Time 15 minutes
Total Time 25 minutes
Servings 4 servings
Calories 650
A quick and flavorful stir-fry combining seasoned ground beef with colorful vegetables, served over steaming rice for a satisfying meal.

Ingredients

Meat

  • 1 lb ground beef
  • 2 cups mixed vegetables (bell peppers, broccoli, carrots)
  • 4 cloves garlic, minced
  • 1 tbsp ginger, minced
  • 2 tbsp soy sauce
  • 1 tbsp sriracha or chili sauce
  • 2 tbsp vegetable oil
  • 2 cups cooked rice
  • to taste salt and pepper
  • optional green onions for garnish

Instructions 

  • Heat oil in a skillet, sauté garlic and ginger for 30 seconds.
  • Add ground beef, cook until browned, then stir in soy sauce and sriracha.
  • Add vegetables, stir-fry for 5-7 minutes until tender-crisp.
  • Season with salt and pepper, serve over rice, garnish with green onions if desired.

Notes

Feel free to adjust spice levels with more or less sriracha.
Calories: 650kcal
Cost: $15
Course: Main Course
Cuisine: Asian
Keyword: beef

Nutrition

Calories: 650kcal | Carbohydrates: 80g | Protein: 40g | Fat: 20g | Sodium: 1500mg

Loved this recipe? Save it to your favorite Pinterest board so you can easily find it later! It’s the perfect way to keep all your sweet ideas in one place. ✨

Detailed view of a stir-fry bowl with ground beef, mixed vegetables, and garnished rice.

Welcome to the vibrant world of baked sweet potatoes! If you’ve ever savored the comforting sweetness of these tubers, you know they have a magic all their own. Not only are they delicious, but they’re also packed with nutrients, making them a stellar choice for any meal. In this article, we’ll explore everything you need to know to make the perfect baked sweet potato — from preparation and cooking tips to creative toppings and variations that will tantalize your taste buds!

Are you ready to embark on this culinary adventure? Let’s dive into the heart of sweet potatoes and uncover why they are a must-have ingredient in your kitchen!

Why You’ll Love This Recipe

  • Health Benefits: Sweet potatoes are rich in vitamins A and C, fiber, and antioxidants, making them a powerhouse of nutrition.
  • Versatile Ingredient: Whether you enjoy them sweet or savory, sweet potatoes can be transformed into a myriad of dishes that cater to every palate.
  • Simple Preparation: With just a few steps, you can create a mouthwatering dish that can stand alone or complement your favorite meals.
  • Perfect for Meal Prep: Baked sweet potatoes store well and can be reheated, making them an ideal option for busy weeknights.
  • Customizable Toppings: From creamy butter to zesty salsa, the topping possibilities are endless!

Ingredient Breakdown

Let’s gather our ingredients and prepare to bake! Here’s what you’ll need:

  • 4 medium sweet potatoes: Choose firm, unblemished sweet potatoes for the best flavor and texture.
  • 2 tablespoons olive oil: This adds richness and helps to crisp up the skin.
  • 1 teaspoon salt: Essential for enhancing the natural sweetness.
  • 1/2 teaspoon black pepper: A touch of heat to balance the sweetness.
  • 1 teaspoon cinnamon (optional): For a warm, comforting flavor that complements the sweet potatoes.
  • Butter or toppings of choice (optional): Get creative with your favorite additions!

Pro Tips for Perfect Baked Sweet Potatoes

A deliciously baked sweet potato with a buttery top, highlighted in warm natural light.
  • Choose wisely: Select sweet potatoes that are similar in size for even cooking.
  • Pierce for perfection: Piercing the sweet potatoes allows steam to escape, preventing them from bursting in the oven.
  • Use parchment paper: Line your baking sheet to catch drips and make cleanup a breeze.
  • Don’t rush: Bake until tender, as undercooked potatoes can be starchy and unpalatable.
  • Experiment with spices: Feel free to mix in spices like cumin or paprika for a kick!
  • Check doneness: A fork should easily pierce the sweet potatoes when they’re done.
  • Let them breathe: Allow the sweet potatoes to cool slightly after baking to enhance their flavor.
  • Consider storage: If making in advance, store in an airtight container in the fridge.

Common Mistakes and Troubleshooting

Even the best chefs make mistakes! Here are some common pitfalls and how to avoid them:

  • Underbaking: If your sweet potatoes are still hard when you check, give them more time in the oven.
  • Overbaking: If they’re starting to caramelize too much, remove them sooner to avoid a burnt taste.
  • Not using enough oil: Insufficient oil can lead to a dry texture, so don’t skimp on this step!
  • Wrapping in foil: This can steam the potatoes instead of baking them, resulting in a less desirable texture.
  • Ignoring flavor balance: Make sure to season properly; a little salt can elevate the flavors immensely.

Variations to Excite Your Palate

Sweet potatoes are incredibly flexible. Here are some fun variations to try:

  • Stuffed Sweet Potatoes: Fill baked sweet potatoes with black beans, corn, and avocado for a hearty meal.
  • Sweet Potato Fries: Cut sweet potatoes into wedges, toss with olive oil and spices, and bake until crispy.
  • Sweet Potato Mash: Scoop out the flesh and mash it with cream cheese, butter, and garlic for a creamy side dish.
  • Spicy Sweet Potato Skins: Bake the skins crispy and fill them with a spicy bean mixture for a tasty appetizer.

Storage and Make-Ahead Instructions

Baked sweet potatoes can be made ahead and stored for convenience:

  • Storage: Allow baked sweet potatoes to cool, then store them in an airtight container in the fridge for up to a week.
  • Freezing: For longer storage, baked sweet potatoes can be frozen. Just wrap them tightly in plastic wrap and place them in a freezer bag.
  • Reheating: Reheat in the oven at 350°F (175°C) for about 15-20 minutes or in the microwave for 3-5 minutes until heated through.

Frequently Asked Questions

Let’s tackle some common questions about baked sweet potatoes:

  • How long do sweet potatoes take to bake? Typically, they take 45-60 minutes at 400°F (200°C) depending on their size.
  • Can I bake sweet potatoes without oil? Yes, you can, but they may not have the same crispy skin and rich flavor.
  • What’s the difference between sweet potatoes and yams? Sweet potatoes have smooth skin and are sweeter; yams are drier and starchier.
  • Are sweet potatoes good for diabetics? Yes, they have a lower glycemic index compared to regular potatoes.
  • Can I eat the skin? Absolutely! Sweet potato skins are nutritious and add texture.
  • Do I need to peel sweet potatoes before baking? No, baking with the skin on helps retain moisture and nutrients.
  • What toppings pair well with baked sweet potatoes? Try toppings like feta cheese, chives, or even a drizzle of tahini.
  • Can I microwave sweet potatoes instead of baking them? Yes, microwaving is a quicker method, but the texture may differ slightly.

Nutritional Tips and Dietary Adaptations

To maximize the health benefits of your baked sweet potatoes:

  • Go for whole foods: Pair them with lean proteins and fresh vegetables for a balanced meal.
  • Consider toppings: Use healthy toppings like Greek yogurt, nuts, or seeds instead of heavy creams or cheeses.
  • Vegan option: Skip butter and try avocado or nutritional yeast for a cheesy flavor without dairy.
  • Gluten-free: Naturally gluten-free, sweet potatoes are perfect for those with gluten sensitivities.

Essential Equipment Recommendations

Here’s what you’ll need to make your baked sweet potatoes:

  • Baking Sheet: A sturdy, flat baking sheet ensures even cooking.
  • Parchment Paper: For easy cleanup and to prevent sticking.
  • Fork: Use a fork to pierce the sweet potatoes before baking.
  • Oven Mitts: Safety first! Protect those hands when handling hot food.

Serving Suggestions

Once your baked sweet potatoes are ready, serve them up in style:

  • As a side dish: Pair with grilled meats or fish for a wholesome meal.
  • In salads: Chop and toss into salads for a pop of color and nutrition.
  • As a main dish: Top with protein-rich ingredients like beans, quinoa, or chicken for a satisfying entrée.
  • With dips: Serve as a snack with hummus or guacamole for a healthy treat.

So there you have it, my fellow culinary adventurers! Baked sweet potatoes are more than just a side dish; they’re a canvas for your imagination. With their vibrant flavor and endless possibilities, they’ll surely bring warmth and joy to your table. Embrace your inner chef, get creative with toppings, and enjoy every delicious bite!

Delicious Baked Sweet Potato

Prep Time 10 minutes
Cook Time 50 minutes
Total Time 1 hour
Servings 4 pieces
Calories 180
A simple and nutritious way to enjoy sweet potatoes baked to perfection, customizable with your favorite toppings.

Ingredients

Sweet Potatoes

  • 4 medium sweet potatoes
  • 2 tablespoons olive oil
  • 1 teaspoon salt
  • 1/2 teaspoon black pepper
  • 1 teaspoon cinnamon (optional)
  • butter or toppings of choice (optional) butter or toppings of choice (optional)

Instructions 

  • Preheat oven to 400°F (200°C).
  • Wash and pierce sweet potatoes, then rub with olive oil and season with salt, pepper, and cinnamon.
  • Place on a baking sheet and bake for 45-60 minutes until tender.
  • Let cool slightly, then slice open and add butter or toppings if desired.
  • Serve warm and enjoy!

Notes

For extra flavor, add a drizzle of honey or a sprinkle of chopped herbs.
Calories: 180kcal
Cost: $10
Course: Side Dish
Cuisine: American
Keyword: sweet potato

Nutrition

Calories: 180kcal | Carbohydrates: 41g | Protein: 2g | Fat: 0.5g | Sodium: 300mg

Loved this recipe? Save it to your favorite Pinterest board so you can easily find it later! It’s the perfect way to keep all your sweet ideas in one place. ✨

Soft, warm baked sweet potato displayed in an inviting setting with a blurred background.

Welcome to a culinary adventure that will awaken your taste buds and inspire your inner chef! With this mushroom lasagna, each layer is a celebration of bold flavors and comforting vibes. Trust me, this isn’t just another lasagna recipe; it’s a love letter to every passionate home cook out there. Let’s dive into the magic of transforming humble ingredients into an extraordinary dish that sings with flavor!

Why You’ll Love This Recipe

This mushroom and spinach lasagna is not just delicious; it’s a remarkable fusion of flavors that promises to delight everyone at your table. Here are five reasons why you’ll want to make it:

  • Comfort food classic: Lasagna is the ultimate comfort dish, perfect for family dinners or cozy nights in.
  • Vegetarian delight: Packed with nutritious spinach and hearty mushrooms, this recipe is ideal for meatless meals without sacrificing satisfaction.
  • Flavor explosion: The combination of rich marinara sauce, creamy ricotta, and melty mozzarella creates layers of flavor that dance on your palate.
  • Make-ahead option: Prep it in advance and pop it in the oven when you’re ready to feast—perfect for busy weeknights!
  • Customizable: Feel free to mix in your favorite vegetables or swap out cheeses for a dish that’s uniquely yours.

Ingredients Breakdown

Before we get cooking, let’s gather our ingredients. Here’s what you’ll need:

  • Lasagna noodles: 9 sheets (you can use gluten-free if needed)
  • Olive oil: 2 tablespoons for sautéing
  • Onion: 1, finely chopped for a sweet base flavor
  • Garlic: 3 cloves, minced to enhance the aroma
  • Mushrooms: 1 pound (cremini or button), sliced for that earthy goodness
  • Dried thyme: 1/2 teaspoon to elevate the flavor
  • Salt and pepper: to taste, essential for seasoning
  • Marinara sauce: 3 cups, the heart of our lasagna
  • Ricotta cheese: 2 cups for creaminess
  • Mozzarella cheese: 1 cup, shredded for melting
  • Parmesan cheese: 1/2 cup, grated for a nutty finish
  • Fresh spinach: 2 cups, chopped for added nutrition
  • Fresh basil: for garnish, optional but recommended!

Substitutions: Feel free to swap ricotta with cottage cheese or even a vegan alternative for a dairy-free version. You can also add in roasted red peppers or zucchini for extra texture!

How to Make Mushroom and Spinach Lasagna

An eye-level shot of a delicious Mushroom and Spinach Lasagna with melted cheese and fresh herbs on top.

Now that we have everything ready, let’s embark on this cooking journey. Follow these steps for a lasagna that will impress!

  • Preheat the oven: Begin by preheating your oven to a toasty 375°F (190°C).
  • Cook the noodles: In a large pot, fill it with water, season it with salt, and bring it to a rolling boil. Once bubbling, add in your lasagna noodles and cook them until al dente. Drain and set aside.
  • Sauté the aromatics: Heat a large skillet over medium flame and add a splash of olive oil. Toss in your chopped onion and sauté until translucent (about 3–4 minutes). Add minced garlic and let it mingle for another minute.
  • Add the mushrooms: Stir in your sliced mushrooms, along with dried thyme, salt, and pepper. Cook them until tender and any excess liquid has evaporated (around 5–7 minutes).
  • Incorporate spinach: Toss in the chopped spinach and cook until wilted (about 2–3 minutes). Remove from heat and set aside.
  • Layer it up: In a greased 9×13-inch baking dish, start by ladling a thin layer of marinara sauce on the bottom. Place three lasagna noodles on top, then spread half of the ricotta cheese over the noodles. Follow it with half of the mushroom mixture and sprinkle a third of the mozzarella and Parmesan cheeses.
  • Repeat the layers: Continue layering with the remaining noodles, ricotta, mushrooms, and cheeses. Finish with a final layer of marinara sauce on top.
  • Cover and bake: Cover the dish with aluminum foil and slide it into your preheated oven. Bake for 25 minutes, then remove the foil and bake for an additional 10–15 minutes until the cheese is bubbly and golden brown.
  • Let it rest: Once baked, remove the lasagna from the oven and let it cool for about 10 minutes before slicing. This helps the layers set and makes serving a breeze!

Pro Tips for Perfecting Your Lasagna

To ensure your mushroom and spinach lasagna turns out flawless, keep these expert insights in mind:

  • Use fresh ingredients: Opt for fresh spinach and high-quality mushrooms for the best flavor and texture.
  • Layer wisely: Make sure to spread each layer evenly to avoid a lopsided lasagna.
  • Let it rest: Allow the lasagna to cool for a few minutes after baking—this makes slicing much easier!
  • Extra sauce: If you like your lasagna saucy, don’t hesitate to add more marinara between layers.
  • Cheese variations: Feel free to mix different cheeses for more complex flavors—try adding gouda or feta for a twist!
  • Herb infusion: Adding fresh herbs like basil or parsley to the ricotta can elevate the taste.
  • Spice it up: For those who enjoy a bit of heat, a pinch of red pepper flakes in the mushroom mixture can add a delightful kick!
  • Storage tips: If you have leftovers, store them in an airtight container in the fridge for up to 3 days.

Common Mistakes to Avoid

We all make mistakes in the kitchen, but here are a few common pitfalls to dodge when making lasagna:

  • Overcooking noodles: Make sure to undercook the lasagna noodles slightly, as they will continue cooking in the oven.
  • Skipping the rest time: Don’t rush to slice it immediately after baking—let it rest for better texture.
  • Neglecting seasoning: Always taste and adjust seasoning as you go, especially with the mushroom filling!
  • Using too much cheese: While cheese is delicious, too much can make your lasagna overly greasy. Balance is key!

Delicious Variations

Want to mix things up? Here are some variations to consider:

  • Meaty addition: Incorporate cooked ground beef or Italian sausage for a heartier lasagna.
  • Roasted veggie lasagna: Swap out mushrooms for roasted zucchini, bell peppers, or eggplant.
  • White sauce lasagna: Instead of marinara, use a béchamel sauce for a creamy twist.
  • Pesto delight: Add a layer of basil pesto between the noodles for an herby burst of flavor.

Storage and Make-Ahead Instructions

This lasagna stores beautifully and can be made ahead of time:

  • Make-ahead: Assemble the lasagna a day in advance, cover tightly, and refrigerate. Bake it the next day, adding an extra 10 minutes of bake time.
  • Freezing: You can freeze unbaked lasagna for up to 3 months. Thaw in the fridge overnight before baking.
  • Leftover storage: Store leftovers in an airtight container in the fridge for up to 3 days, or freeze individual portions for easy meals later.

FAQs

Here are some common questions about making this mushroom and spinach lasagna:

  • Can I use no-boil lasagna noodles? Yes! Just layer them as directed, but add a bit more marinara sauce to account for the dry noodles.
  • How do I make it gluten-free? Substitute regular lasagna noodles with gluten-free varieties.
  • What’s the best way to reheat lasagna? Reheat in the oven at 350°F (175°C) for about 20 minutes or until heated through.
  • Can I make this vegan? Absolutely! Use vegan ricotta and mozzarella alternatives to keep it plant-based.
  • How long does it take to bake the lasagna? Typically, it’s about 35–40 minutes total, depending on your oven.
  • Can I prepare the filling ahead of time? Yes! You can sauté the mushroom and spinach filling a day ahead and store it in the fridge.
  • Can I add more vegetables? Yes! Feel free to add in roasted bell peppers, zucchini, or even kale for added nutrition.
  • What’s the best cheese for lasagna? A mix of ricotta, mozzarella, and parmesan gives the best flavor and texture.

Nutrition Tips and Dietary Adaptations

For those watching their nutrition, here are some insights:

  • Calorie control: Use low-fat cheese options to reduce calorie content without sacrificing flavor.
  • Gluten-free options: Use gluten-free noodles or even zucchini slices as an alternative.
  • Plant-based protein: Consider adding lentils or chickpeas to the filling for extra protein and fiber.

Equipment Recommendations

To make this mushroom and spinach lasagna, you’ll need the following:

  • 9×13 inch baking dish: Essential for layering your lasagna.
  • Large pot: For boiling the lasagna noodles.
  • Large skillet: For sautéing the filling ingredients.
  • Aluminum foil: To cover the baking dish while it bakes.

Serving Suggestions

Pair your mushroom and spinach lasagna with these delightful sides:

  • Garlic bread: A classic side that pairs perfectly with the saucy lasagna.
  • Mixed green salad: A light salad with a tangy vinaigrette complements the rich dish nicely.
  • Wine recommendations: A glass of Chianti or a light Pinot Grigio would enhance the flavors beautifully.

Now that you have all the tools and information you need, it’s time to get cooking! Embrace the adventure of layering flavors and celebrate the joy of cooking with this delicious mushroom and spinach lasagna. Remember, every bite is a story waiting to be told—so let’s make it unforgettable!

Mushroom And Spinach Lasagna Recipe

Prep Time 20 minutes
Cook Time 40 minutes
Total Time 1 hour
Servings 6 servings
Calories 450
A hearty and flavorful vegetarian lasagna layered with mushrooms, spinach, and cheeses, baked to perfection.

Ingredients

Noodles

  • 9 pieces lasagna noodles
  • 2 tablespoons olive oil
  • 1 unit onion, finely chopped
  • 3 cloves garlic, minced
  • 1 pound mushrooms (sliced)
  • 1/2 teaspoon dried thyme
  • to taste salt and pepper
  • 3 cups marinara sauce
  • 2 cups ricotta cheese
  • 1 cup shredded mozzarella cheese
  • 1/2 cup grated parmesan cheese
  • 2 cups fresh spinach leaves, chopped

Garnish

  • as needed fresh basil leaves for garnish

Instructions 

  • Preheat oven to 375°F (190°C). Cook noodles, then drain and set aside.
  • Sauté onion and garlic in olive oil until translucent. Add mushrooms, thyme, salt, and pepper; cook until tender. Stir in spinach until wilted.
  • Layer sauce, noodles, ricotta, mushroom mixture, and cheeses in a baking dish. Repeat layers and top with marinara sauce.
  • Cover with foil and bake for 25 minutes. Remove foil and bake an additional 10-15 minutes until bubbly and golden.

Notes

You can add extra basil for garnish or adjust seasoning to taste.
Calories: 450kcal
Cost: $15
Course: Main Course
Cuisine: Italian
Keyword: Lasagna, Vegetarian

Nutrition

Calories: 450kcal | Carbohydrates: 60g | Protein: 20g | Fat: 15g | Sodium: 800mg

Loved this recipe? Save it to your favorite Pinterest board so you can easily find it later! It’s the perfect way to keep all your sweet ideas in one place. ✨

A beautifully plated Mushroom and Spinach Lasagna, highlighting the gooey cheese and vibrant spinach layers.

Ignite Your Culinary Passion with This Green Bean Casserole Recipe

Welcome, fellow food adventurers! If you’re looking to add a fiery twist to a classic favorite, you’ve landed in the right place. Today, we’re diving into the world of green bean casserole, a dish that not only warms the heart but also tantalizes the taste buds. This green bean casserole is not just a side; it’s a celebration of flavor, texture, and nostalgia. Let’s transform this humble dish into something spectacular—ready to turn up the heat? Let’s get cooking!

Why You’ll Love This Recipe

  • Bold Flavors: With a blend of savory ingredients, this casserole brings a depth of flavor that elevates traditional recipes.
  • Comfort Food Classic: Perfect for Thanksgiving, Christmas, or any cozy dinner, it’s a crowd-pleaser that everyone loves.
  • Easy to Make: With a straightforward process, you can whip this up even on a busy weeknight.
  • Customizable: Feel free to experiment with various ingredients, making it a unique version each time.
  • Make-Ahead Friendly: Prepare it in advance for stress-free entertaining; just pop it in the oven when you’re ready!

Ingredients Breakdown

An appetizing dinner dish presented on a rustic table, accentuated by soft shadows and natural light.

Let’s get down to business! Here’s what you’ll need to create this delicious green bean casserole:

  • Fresh Green Beans: About 1.5 pounds, trimmed and cut into 2-inch pieces.
  • Cream of Mushroom Soup: 2 cans (about 10.5 oz each) or homemade for a fresher taste.
  • French Fried Onions: 1 can for that crunchy topping. Feel free to substitute with crispy shallots for a gourmet touch.
  • Milk: 1 cup, to add creaminess. You can use almond or soy milk for a dairy-free option.
  • Cheddar Cheese: 1 cup, shredded. This adds a rich flavor; try sharp cheddar for extra kick!
  • Seasonings: Salt, pepper, and a pinch of garlic powder for depth. Don’t be shy with the spices!

Pro Tips for Success

Before you dive into cooking, let’s cover some expert insights to ensure your casserole turns out perfectly:

  • Fresh is Best: Choose vibrant, fresh green beans for a crisp texture and flavor.
  • Don’t Overcook: Blanch the beans briefly before baking to keep them tender-crisp.
  • Layering Flavors: Mix in some sautéed onions or mushrooms for an added flavor dimension.
  • Crunch Factor: Add half of the fried onions to the mix for a surprise crunch when you dig in.
  • Cheese It Up: For a cheesy twist, blend in some grated Parmesan with your cheddar.
  • Spice It Right: A dash of cayenne or paprika can elevate the flavor profile beautifully.
  • Let It Rest: Allow the casserole to sit for a few minutes after baking for easier serving.
  • Presentation: Drizzle a bit of balsamic reduction over the top before serving for a gourmet touch.

Common Mistakes to Avoid

Every chef has stumbled—let’s learn from those missteps!

  • Overcooking the Beans: This can lead to a mushy texture. Remember, they continue to cook in the oven.
  • Skipping the Seasoning: Don’t forget to season adequately; bland casseroles are a missed opportunity.
  • Not Preheating: Always preheat your oven to ensure even cooking.
  • Too Many Ingredients: Simplicity can be key; avoid overloading on toppings that might mask the main flavors.
  • Rushing the Cooling: Let it cool slightly before serving; this helps with slicing and serving.

Variations to Explore

Feeling adventurous? Here are some delightful variations to try:

  • Cheesy Bacon Green Bean Casserole: Add crispy bacon bits and extra cheese for a smoky twist.
  • Vegan Green Bean Casserole: Use coconut milk and cashew cream instead of dairy to make it plant-based and rich in flavor.
  • Southwestern Style: Incorporate black beans, corn, and jalapeños for a spicy, zesty version.
  • Asian-Inspired: Toss in some sesame oil, shiitake mushrooms, and top with crispy wonton strips for an Asian flair.

How to Store and Make Ahead

Planning ahead? Here’s how to store or prep your casserole:

  • Make-Ahead Option: Assemble the casserole up to 24 hours in advance; just cover and refrigerate until ready to bake.
  • Freezing: You can freeze the unbaked casserole for up to 3 months. Thaw overnight in the fridge before baking.
  • Leftovers: Store in an airtight container for up to 3 days in the refrigerator. Reheat in the oven for the best texture.

Frequently Asked Questions

Here are some common questions about green bean casserole:

  • Can I use frozen green beans? Yes, but thaw and drain them before adding to the casserole for the best texture.
  • Is this casserole gluten-free? Use gluten-free cream of mushroom soup and ensure your fried onions are gluten-free.
  • How can I make it spicier? Add diced jalapeños or a sprinkle of cayenne pepper to the mix.
  • Can I use homemade cream of mushroom? Absolutely! It will add a fresh touch and enhance the flavor.
  • What sides pair well with this dish? Serve alongside roasted meats or a hearty salad for a balanced meal.
  • Can I prepare this without onions? Yes! Omit the onions and consider using a different crunchy topping like crushed crackers.
  • How do I know when it’s done? The casserole should be bubbly and golden on top, about 25-30 minutes in a preheated oven.
  • Can I add other vegetables? Feel free to mix in sautéed mushrooms, carrots, or even corn for added flavor and color.

Nutritional Tips and Dietary Adaptations

This dish can be adapted to meet various dietary needs:

  • Low-Calorie Option: Use reduced-fat soup and cheese, and skip the fried onions.
  • Gluten-Free: Ensure all products are gluten-free and substitute with gluten-free breadcrumbs.
  • Vegan Adaptation: Use plant-based substitutes for cream soup and cheese, and skip the fried onions for a lighter option.

Essential Equipment

Make sure you have these tools ready before you start cooking:

  • 9×13 Baking Dish: Perfect size for casseroles and allows even baking.
  • Mixing Bowl: For combining all your ingredients before baking.
  • Measuring Cups and Spoons: To get your proportions just right!
  • Whisk: Use it for blending together your soup and milk for a smooth mixture.

Serving Suggestions

Now that your masterpiece is cooked, here’s how to serve it:

  • Garnish: Top with fresh herbs like parsley or chives for a pop of color.
  • Pair It Up: This dish goes wonderfully with roasted turkey, ham, or as a vegetarian centerpiece.
  • Side Dishes: Serve with cranberry sauce, stuffing, or a fresh garden salad for a well-rounded meal.

Conclusion

There you have it, my friends! A green bean casserole that’s not just a dish but an experience, a journey through flavor and nostalgia. It’s time to embrace the boldness of cooking and make this recipe your own. Remember, every pinch of spice and dash of flavor tells a story—your story. So grab your skillet, gather your ingredients, and let’s make culinary magic happen! Happy cooking!

What Should I Make for Dinner Tonight?

Prep Time 10 minutes
Cook Time 20 minutes
Total Time 30 minutes
Servings 4 people
Calories 450
A versatile dinner recipe that combines your favorite ingredients into a satisfying meal. Perfect for a quick and delicious evening.

Ingredients

Main Ingredients

  • 1 cup my cookbooks!
  • 2 cups recipe index
  • 1 cup ingredient index
  • 1 tbsp tools
  • 1 tbsp about
  • 1 tsp recipe filter
  • 1 cup appetizers + snacks
  • 1 cup bread
  • 1 cup breakfast
  • 1 cup burgers, sandwiches, + paninis
  • 1 tbsp butter
  • 1 cup desserts
  • 1 cup dinners + entrees
  • 1 cup dips, dressings, + sauces
  • 1 cup drinks
  • 1 cup pastas
  • 1 cup pizzas + flatbreads
  • 1 cup salads
  • 1 tsp seasonings & spices
  • 1 cup side dishes
  • 1 cup soups
  • 1 cup tacos + nachos
  • 1 tbsp browse by method submenu air fryer, baking, casserole, cast iron, grilling, instant pot, no-bake, no-cook, one-dish, slow cooker, quick dinner ideas
  • 1 cup browse by cuisines submenu asian, creole, italian, mediterranean, mexican
  • 1 tbsp about submenu about savory experiments, cookbook, kitchen tools, privacy policy, subscribe
  • 1 cup video

Instructions 

  • Combine your ingredients in a large bowl.
  • Mix thoroughly until well blended.
  • Cook over medium heat for 15-20 minutes.
  • Serve hot with your favorite sides.
  • Enjoy your dinner!

Notes

Feel free to customize ingredients for variety.
Calories: 450kcal
Cost: $15
Course: Dinner
Cuisine: Mixed
Keyword: easy, main course, quick

Nutrition

Calories: 450kcal | Carbohydrates: 50g | Protein: 20g | Fat: 15g | Sodium: 800mg

Loved this recipe? Save it to your favorite Pinterest board so you can easily find it later! It’s the perfect way to keep all your sweet ideas in one place. ✨

A detailed view of a gourmet meal, featuring vibrant ingredients and a cozy blurred background.

Awaken Your Taste Buds with Sweet Potato and Chickpea Curry

Welcome to a culinary adventure that’s going to ignite your palate! My Sweet Potato and Chickpea Curry is not just a recipe; it’s a celebration of bold flavors and vibrant spices that promise to make your kitchen come alive. In under 30 minutes, you’ll create a dish that’s creamy, spicy, and oh-so-satisfying. Perfectly balancing the sweetness of the potatoes and the heartiness of chickpeas, this curry invites you to embrace the heat while indulging in a comforting meal. So grab your apron, and let’s dive into this irresistible journey!

Why You’ll Love This Recipe

There are countless reasons to fall in love with this chickpea curry. Here are just a few:

  • Nutritious Powerhouse: Packed with vitamins and minerals, sweet potatoes and chickpeas provide essential nutrients that support overall health.
  • Plant-Based Goodness: This recipe is a fantastic option for vegans and vegetarians, offering a hearty meal without any animal products.
  • Quick and Easy: Perfect for busy weeknights, this dish can be prepared in just 30 minutes, making it ideal for last-minute dinners.
  • Flavor Explosion: The combination of spices in this curry creates an unforgettable bouquet of flavors that will tantalize your taste buds.
  • Versatile and Customizable: Whether you prefer it mild or spicy, this recipe can be adjusted to suit your heat tolerance and personal preferences.

Ingredients Breakdown

A delicious Sweet Potato and Chickpea Curry displayed in a deep dish, showcasing colorful ingredients and garnished with fresh cilantro.

Let’s explore the ingredients that make this sweet potato chickpea curry a standout dish:

  • Sweet Potatoes: The star of the show! Use 2 medium sweet potatoes, peeled and diced. For a twist, try using butternut squash or pumpkin.
  • Chickpeas: One can (15 oz) of chickpeas, drained and rinsed, provides plant-based protein. You can substitute with lentils for a different texture.
  • Onion: One chopped onion adds depth and sweetness. Shallots can be an excellent alternative for a milder flavor.
  • Garlic and Ginger: Three cloves of minced garlic and one inch of grated ginger provide aromatic goodness that is essential to this recipe.
  • Coconut Milk: A can (14 oz) of coconut milk brings creaminess to the dish. For a lighter version, you can use low-fat coconut milk or almond milk.
  • Diced Tomatoes: One can (14 oz) of diced tomatoes adds acidity and balances the sweetness. Fresh tomatoes can also be utilized when in season.
  • Curry Powder and Cumin: Two tablespoons of curry powder and one teaspoon of cumin are pivotal for flavor. Feel free to experiment with different spice blends!
  • Olive Oil: Used for sautéing, two tablespoons of olive oil help bring out the flavors of the aromatics.
  • Fresh Cilantro: Use for garnish to add freshness and a pop of color.

Step-by-Step Instructions

Ready to create this culinary masterpiece? Here’s how to make it:

  1. Heat olive oil in a large pot over medium heat.
  2. Add chopped onion and sauté until translucent, about 5 minutes.
  3. Stir in minced garlic and grated ginger, cooking for another minute until fragrant.
  4. Add curry powder and cumin, stirring to coat the onions.
  5. Incorporate diced sweet potatoes, chickpeas, coconut milk, and diced tomatoes.
  6. Bring the mixture to a boil, then reduce heat to a simmer.
  7. Cover and cook for 20-25 minutes, or until sweet potatoes are tender.
  8. Season with salt and pepper to taste, and serve hot, garnished with fresh cilantro.

Pro Tips for Mastering This Curry

Elevate your cooking game with these expert insights:

  • Balance the Heat: Adjust the spice level by adding more or less curry powder based on your preference.
  • Don’t Rush the Aromatics: Sautéing the onion, garlic, and ginger until fragrant is key to developing rich flavors.
  • Texture Play: For a chunkier curry, add the chickpeas and tomatoes later in the cooking process.
  • Make it Creamier: For a richer flavor, stir in an extra splash of coconut milk before serving.
  • Leftover Magic: This curry tastes even better the next day as the flavors meld together.
  • Freezing: Consider freezing portions for a quick meal on busy nights.
  • Garnish Smartly: Top with toasted nuts or seeds for added crunch and nutrition.
  • Pairing Perfection: Serve with basmati rice, quinoa, or naan to soak up the delicious sauce.

Common Mistakes and Troubleshooting

Even the best chefs make mistakes! Here’s how to avoid common pitfalls:

  • Too Watery? If your curry is too thin, simmer it a little longer to reduce the liquid.
  • Not Enough Flavor? Always taste and adjust seasoning before serving; adding a pinch of salt can make a big difference.
  • Overcooked Vegetables? If sweet potatoes are mushy, try cutting them into larger pieces next time for a firmer texture.
  • Too Spicy? Balance out the heat with a spoonful of sugar or a dash of cream to mellow the flavors.

Variations to Spice Things Up

Want to switch things up? Here are some variations you can try:

  • Thai Twist: Add a tablespoon of red curry paste for a Thai-inspired version.
  • Protein Boost: Incorporate cooked chicken or tofu for added protein.
  • Vegetable Medley: Toss in other vegetables like spinach, peas, or bell peppers for extra nutrients.
  • Spicy Kick: Add fresh or dried chili peppers if you’re feeling adventurous!

Storage and Make-Ahead Instructions

This curry can be made ahead of time and stored for later enjoyment:

  • Refrigerate: Store leftovers in an airtight container for up to 5 days.
  • Freeze: Freeze cooled portions for up to 3 months. Thaw in the fridge before reheating.
  • Reheat: Gently reheat on the stove or microwave, adding a splash of water or coconut milk to loosen the consistency.

Nutrition Tips and Dietary Adaptations

Looking for a healthy twist? Here are some nutrition tips:

  • Increase Fiber: Add more legumes like lentils or black beans for a fiber boost.
  • Low-Carb Option: Substitute sweet potatoes with cauliflower for a low-carb version.
  • Gluten-Free: This recipe is inherently gluten-free, making it perfect for those with dietary restrictions.

Equipment Recommendations

To make this dish, you’ll need:

  • Large Pot: A heavy-bottomed pot is ideal for even cooking and preventing burning.
  • Wooden Spoon: Perfect for stirring and mixing ingredients without scratching your cookware.
  • Measuring Cups and Spoons: For accurate measurement of ingredients to ensure consistent results.

Serving Suggestions

How you serve this curry can take it to the next level:

  • With Rice: Serve over fluffy basmati rice or quinoa for a hearty meal.
  • With Bread: Pair with warm naan or pita to scoop up the curry.
  • With a Salad: A fresh cucumber salad adds a crisp contrast to the creamy curry.

Frequently Asked Questions

Here are some common questions about this recipe:

  • Can I make this curry in a slow cooker? Yes, sauté the aromatics first, then transfer to a slow cooker and cook on low for 4-6 hours.
  • Can I use regular potatoes instead of sweet potatoes? Absolutely! Regular potatoes will work, but the flavor will differ slightly.
  • Is this curry spicy? The spice level can be adjusted by using more or less curry powder and fresh chilies.
  • Can I use fresh tomatoes instead of canned? Yes! Use about 2-3 medium fresh tomatoes, diced.
  • How do I store leftovers? Refrigerate in an airtight container for up to 5 days or freeze for later use.
  • Can I make this recipe ahead of time? Yes, it can be made a day in advance and tastes even better the next day!
  • What can I serve with this curry? Great options include rice, quinoa, naan, or a fresh salad.
  • Is this dish vegan? Yes, it is completely plant-based and perfect for vegans!

So there you have it! This Sweet Potato and Chickpea Curry is not just a meal; it’s a flavor-packed experience waiting to happen. Whether you’re cooking for yourself or sharing with loved ones, this dish will leave a lasting impression. Now, don your apron and let’s bring some spice to life in your kitchen!

Sweet Potato and Chickpea Curry

Prep Time 10 minutes
Cook Time 25 minutes
Total Time 35 minutes
Servings 4 servings
Calories 350
A hearty and flavorful vegan curry combining sweet potatoes and chickpeas in a rich coconut tomato sauce.

Ingredients

Vegetables

  • 2 medium sweet potatoes (peeled and diced)
  • 1 can (15 oz) chickpeas (drained and rinsed)
  • 1 piece onion (chopped)
  • 3 cloves garlic (minced)
  • 1 inch ginger (grated)
  • 1 can (14 oz) coconut milk
  • 1 can (14 oz) diced tomatoes
  • 2 tablespoons curry powder
  • 1 teaspoon cumin
  • to taste salt and pepper
  • 2 tablespoons olive oil

Garnish

  • to taste fresh cilantro (for garnish)

Instructions 

  • Heat olive oil in a large pot over medium heat.
  • Sauté chopped onion until translucent, then add garlic and ginger, cooking for 1 minute.
  • Stir in curry powder and cumin, then add sweet potatoes, chickpeas, coconut milk, and tomatoes. Simmer for 20 minutes.
  • Season with salt and pepper, then serve garnished with cilantro.

Notes

This curry pairs well with rice or naan bread for a complete meal.
Calories: 350kcal
Cost: $15
Course: Main Course
Cuisine: Indian
Keyword: Curry, Vegan, Vegetarian

Nutrition

Calories: 350kcal | Carbohydrates: 60g | Protein: 12g | Fat: 10g | Sodium: 600mg

Loved this recipe? Save it to your favorite Pinterest board so you can easily find it later! It’s the perfect way to keep all your sweet ideas in one place. ✨

An eye-level capture of a hearty Sweet Potato and Chickpea Curry, highlighting the texture of the dish under warm natural lighting.

Unveiling the Ultimate Green Bean Casserole Experience

Welcome to a culinary journey where the humble green bean transforms into a star-studded dish that tantalizes your taste buds! This Homemade Green Bean Casserole isn’t just a side dish; it’s an adventure bursting with creamy textures and the perfect hint of spice. With memories of family gatherings and holiday feasts, this recipe embraces everything that makes food a shared experience. So, grab your skillet, and let’s dive into the vibrant world of flavor!

Why You’ll Love This Recipe

What sets this green bean casserole apart? Here are five reasons why you’ll want to make this dish a staple in your kitchen:

  • Comfort food redefined: This isn’t your average casserole. We’re talking layers of flavor and a creamy sauce that hugs every green bean.
  • Customizable: Whether you’re a meat lover or a vegan enthusiast, this recipe offers variations that cater to everyone.
  • Quick and easy: With a prep time of just 15 minutes, you can have this dish ready to bake in no time.
  • Perfect for gatherings: Bring it to potlucks and family dinners — it’s sure to be a hit!
  • Leftovers never tasted so good: This casserole actually gets better the next day, making it a fantastic option for meal prep.

Ingredient Breakdown

Delicious green bean casserole served in a dish, highlighting the golden fried onions and fresh green beans.

To create this delicious green bean casserole, you’ll need the following ingredients:

  • 1 pound fresh green beans: Trimmed and ready to shine. You can substitute with frozen green beans if fresh isn’t available.
  • 1 can (10.5 oz) cream of mushroom soup: A classic base for that creamy goodness. Feel free to use homemade soup for a richer flavor.
  • 1/2 cup milk: Use whole milk for creaminess or plant-based milk for a dairy-free option.
  • 1 cup grated cheddar cheese: Sharp or mild — it’s your call! This adds a delightful cheesy layer to the casserole.
  • 1 cup crispy fried onions: The pièce de résistance! You can make your own for a fresher taste.
  • 1/2 teaspoon garlic powder: Adds depth to the flavor profile.
  • Salt and pepper to taste: Essential for balancing flavors.

How to Make This Green Bean Casserole

Let’s unleash the heat and elevate this dish to new heights! Follow these steps for a flawlessly baked casserole:

  1. Preheat your oven to 350°F (175°C).
  2. Bring a pot of salted water to a boil and add the green beans. Blanch for 5 minutes, then drain and set aside.
  3. In a large bowl, mix together the cream of mushroom soup, milk, garlic powder, salt, and pepper until silky smooth.
  4. Add the blanched green beans to the soup mixture and stir until well combined.
  5. Transfer the mixture to a baking dish and sprinkle the grated cheddar cheese on top.
  6. Bake in the preheated oven for 25 minutes.
  7. Remove from the oven and sprinkle the crispy fried onions over the top.
  8. Return to the oven and bake for an additional 10 minutes, or until the onions are golden brown and crunchy.
  9. Let cool for a few minutes before serving. Enjoy the explosion of flavors!

Pro Tips for the Perfect Casserole

Ready to take your casserole to the next level? Here are some expert insights:

  • Choosing beans: Always opt for vibrant, fresh green beans. They should snap easily and be bright in color.
  • Make it your own: Consider adding sautéed mushrooms or cooked bacon for extra flavor depth.
  • Cheese options: Experiment with different cheeses like Gruyère or pepper jack for a spicy twist.
  • Herb infusion: Fresh thyme or rosemary can elevate the flavor profile significantly.
  • Casserole dish: Use a glass or ceramic dish for even cooking and to keep an eye on browning.
  • Texture balance: If you prefer a little crunch, add fried onions only during the last baking phase.
  • Layer it right: Layer your ingredients for even distribution of flavors.
  • Mind the timing: Watch the casserole closely during the final minutes to avoid over-browning the toppings.

Common Mistakes and Troubleshooting

Even the best chefs make mistakes. Here’s how to avoid common pitfalls:

  • Overcooking beans: Keep a close eye on your blanching time. You want them tender but still crisp.
  • Too much liquid: Ensure your soup mixture isn’t too watery; it should coat the beans without pooling.
  • Skipping salt: Don’t forget to season your mixture adequately. Taste as you go!
  • Cheese clumping: If using pre-shredded cheese, toss it with a bit of cornstarch to prevent clumping.

Variations to Spice Things Up

Here are four exciting variations you can explore to keep things fresh:

  • Vegan Delight: Substitute the cream of mushroom soup with a homemade cashew cream and skip the cheese.
  • Spicy Kick: Add diced jalapeños or a sprinkle of cayenne pepper to the soup mixture for a fiery twist!
  • Italian-Inspired: Mix in sun-dried tomatoes and a sprinkle of Italian herbs for a Mediterranean flair.
  • Mexican Fiesta: Use a can of diced green chiles instead of soup, and top with crumbled queso fresco.

How to Store and Make Ahead

Planning ahead? Here’s how to store and prepare:

  • Refrigeration: Store leftovers in an airtight container for up to 4 days.
  • Freezing: This casserole can be frozen before baking. Wrap tightly and store for up to 3 months.
  • Make-ahead tip: Assemble the casserole the day before, cover, and refrigerate. Bake before serving!

FAQs About Green Bean Casserole

Got questions? I’ve got answers! Here are some frequently asked questions:

  • Can I use frozen green beans? Yes, frozen green beans can be used. Just ensure they’re thawed and drained before adding.
  • How do I make this casserole gluten-free? Use gluten-free cream of mushroom soup and ensure your fried onions are gluten-free.
  • Can I prepare this dish a day in advance? Absolutely! Assemble it the day before, refrigerate, and bake when ready.
  • What can I serve with this casserole? It pairs beautifully with roasted meats, salads, or as part of a larger holiday spread.
  • Is this casserole spicy? The base recipe isn’t spicy, but you can add heat through spices or jalapeños.
  • How long does it take to bake? Approximately 35 minutes total, depending on your oven.
  • Can I substitute the cheese? Yes! Feel free to experiment with different cheeses for a unique flavor.
  • What’s the best way to reheat leftovers? Reheat in the oven at 350°F until warmed through for the best texture.

Nutritional Tips and Dietary Adaptations

For those mindful of dietary restrictions, here are some tips:

  • Low-calorie option: Use low-fat milk and reduced-fat cheese for a lighter version.
  • High-protein twist: Add cooked chicken or turkey to make it a heartier dish.
  • Fiber boost: Mix in other vegetables like carrots or bell peppers for added nutrition.

Equipment Recommendations

Gather the necessary tools to make your cooking experience smooth:

  • Large pot: For blanching your green beans efficiently.
  • Baking dish: A 2-quart dish works wonders for this casserole.
  • Mixing bowl: Choose a large bowl for combining ingredients comfortably.
  • Measuring cups and spoons: Precision is key in cooking, so don’t skip these!

Serving Suggestions

Finally, let’s talk about how to serve this dish:

  • Garnish: A sprinkle of fresh herbs like parsley or chives can brighten up the presentation.
  • Pairings: Serve alongside roasted meats, such as turkey or chicken, for a hearty meal.
  • Festive touch: For holiday gatherings, use decorative serving dishes to enhance the table setting.

There you have it! An unforgettable green bean casserole that not only brings comfort to your table but also invites everyone to embrace the adventure of cooking. So go on, make this dish, and let the flavors ignite your passion for cooking!

Homemade green bean casserole

Prep Time 10 minutes
Cook Time 35 minutes
Total Time 45 minutes
Servings 6 servings
Calories 250
A classic holiday side dish with tender green beans, creamy mushroom sauce, and crispy fried onions for added crunch.

Ingredients

Green Beans

  • 1 pound fresh green beans, trimmed
  • 1 can cream of mushroom soup (10.5 oz can)
  • 0.5 cup milk
  • 1 cup grated cheddar cheese
  • 1 cup crispy fried onions
  • 0.5 teaspoon garlic powder
  • to taste salt and pepper salt and pepper

Instructions 

  • Preheat oven to 350°F (175°C).
  • Blanch green beans in boiling salted water for 5 minutes, then drain.
  • Mix mushroom soup, milk, garlic powder, salt, and pepper. Add green beans and stir.
  • Transfer to a baking dish, sprinkle cheese, and bake for 25 minutes.
  • Top with fried onions and bake for 10 more minutes until golden.

Notes

For extra flavor, add a dash of soy sauce or hot sauce.
Calories: 250kcal
Cost: $12
Course: Side Dish
Cuisine: American
Keyword: Green Beans

Nutrition

Calories: 250kcal | Carbohydrates: 20g | Protein: 10g | Fat: 15g | Sodium: 600mg

Loved this recipe? Save it to your favorite Pinterest board so you can easily find it later! It’s the perfect way to keep all your sweet ideas in one place. ✨

Freshly baked homemade green bean casserole, emphasizing the melted cheese and rich mushroom sauce.

Unleashing the Magic of Valentine Ganache Cookies

Welcome to a culinary adventure where chocolate meets romance in the most delightful way! These Valentine ganache cookies are not just treats; they are little parcels of joy and love, perfect for sharing with someone special or indulging yourself. As you embark on this delicious journey, you’ll discover how simple ingredients can transform into a dessert that sings of rich flavors and sweet memories. Let’s dive into the enchanting world of ganache cookies and learn why they’re the ultimate sweet indulgence!

Why You’ll Love This Recipe

  • Decadent Delight: Each cookie is a perfect balance of chewy chocolate and rich ganache that melts in your mouth.
  • Perfect for Any Occasion: Whether it’s Valentine’s Day or just a Tuesday, these cookies are a sweet way to show love.
  • Simple Ingredients: With just a few pantry staples, you can create a dessert that impresses without the fuss.
  • Customizable Treats: Feel free to experiment with flavors and decorations to make these cookies uniquely yours!
  • Fun to Make: Involve friends or family in the process; baking together can create memories just as sweet as the cookies!

Ingredient Breakdown

A stack of Valentine-themed cookies drizzled in chocolate ganache.

Understanding your ingredients is key to mastering these ganache-filled cookies. Here’s what you’ll need:

  • 1 cup all-purpose flour: The backbone of your cookie, providing structure.
  • 1/2 cup unsweetened cocoa powder: Adds rich chocolate flavor. If you want a milder taste, try using Dutch-processed cocoa.
  • 1/2 teaspoon baking soda: Helps the cookies rise for a light texture.
  • 1/4 teaspoon salt: Enhances all the flavors and balances the sweetness.
  • 1/2 cup unsalted butter, softened: For a tender, melt-in-your-mouth texture. Make sure it’s at room temperature!
  • 1 cup granulated sugar: Sweetens the deal and helps create that perfect chewiness.
  • 1 large egg: Binds all ingredients together and adds moisture.
  • 1 teaspoon vanilla extract: A must-have for a warm, aromatic flavor.
  • 1/2 cup heavy cream: Essential for your ganache, giving it that luxurious texture.
  • 1 cup semi-sweet chocolate chips: The heart of the ganache, providing depth and sweetness.
  • Sprinkles or edible glitter: Optional, but who can resist a little sparkle?

Pro Tips for Cookie Perfection

  • Room Temperature Ingredients: Ensure butter and eggs are at room temperature for the best emulsification.
  • Chill the Dough: For thicker cookies, chill the dough for at least 30 minutes before baking.
  • Don’t Overmix: Mix the dough until just combined to keep cookies tender.
  • Use Quality Chocolate: The better the chocolate, the richer the ganache will taste.
  • Watch Your Bake Time: Keep an eye on your cookies; they’re done when the edges are set but the center is still soft.
  • Make Ahead: You can prepare the dough a day in advance and refrigerate it.
  • Experiment with Flavors: Try adding a pinch of cinnamon or chili powder for a unique twist!
  • Storage: Keep cookies in an airtight container to maintain freshness.

Common Mistakes to Avoid

Even the best bakers can make mistakes, so here’s what to watch out for:

  • Skipping the Chilling Step: This can lead to flat cookies. Always chill for a bit!
  • Using Cold Ingredients: Cold butter will not cream well with sugar, affecting texture.
  • Overbaking: Cookies continue to cook after coming out of the oven; aim for slightly underbaked.
  • Ignoring Measurements: Baking is a science; be precise with your measurements.

Delicious Variations of Ganache Cookies

These cookies are a canvas for creativity! Here are some variations to inspire your baking:

  • Mint Chocolate Ganache: Add peppermint extract to the ganache for a refreshing twist.
  • Nutty Surprise: Fold in chopped nuts like walnuts or pecans for added crunch.
  • Spicy Kick: Incorporate cayenne or chili powder into the cookie dough for a surprising heat.
  • Fruit Infusion: Add dried cherries or raspberries to the dough for a fruity explosion.

Storage and Make-Ahead Instructions

You can enjoy these cookies fresh out of the oven or prepare them in advance:

  • Room Temperature: Store cookies in an airtight container for up to 3 days.
  • Refrigeration: Cookies can last up to a week when kept in the fridge.
  • Freezing: Freeze unbaked cookie dough balls for up to 3 months. Just bake them straight from the freezer, adding a minute or two to the baking time.

Comprehensive FAQ

Got questions? Here are some answers to help you out:

  • Can I use gluten-free flour? Yes, a 1:1 gluten-free flour blend can work well!
  • What if I don’t have heavy cream? You can substitute with half-and-half or coconut cream for a dairy-free option.
  • How do I know when they’re done? Look for set edges and a slightly soft center. They will firm up as they cool.
  • Can I make the ganache in advance? Absolutely! Ganache can be stored in the fridge for up to a week; just reheat before using.
  • Will these cookies freeze well? Yes, they freeze beautifully and can be enjoyed later!
  • Can I add other flavors to the ganache? Definitely! Try orange zest or espresso powder for a gourmet touch.
  • Are these cookies suitable for kids? Yes! They’re perfect for family baking days.
  • What should I serve with these cookies? Pair them with a glass of milk, coffee, or even a scoop of vanilla ice cream!

Nutritional Tips and Dietary Adaptations

These cookies can be adapted to fit various dietary needs:

  • Low-Sugar Option: Substitute granulated sugar with a sugar alternative like erythritol.
  • Dairy-Free Version: Use vegan butter and coconut cream for the ganache.
  • Protein Boost: Add a scoop of protein powder to the dough for a nutritional upgrade.

Essential Equipment for Baking

Here’s what you’ll need to create these delightful cookies:

  • Mixing Bowls: A good set of various sizes will make mixing easier.
  • Whisk: For combining your dry ingredients seamlessly.
  • Measuring Cups and Spoons: Precision is key in baking!
  • Baking Sheet: A sturdy, non-stick baking sheet is essential.
  • Parchment Paper: Helps prevent sticking and makes cleanup a breeze.

Serving Suggestions

When it comes to presentation, here are some ideas:

  • Decorative Plate: Arrange cookies on a beautiful serving platter for an elegant touch.
  • Gift Packaging: Wrap them in clear bags tied with a ribbon for a thoughtful gift.
  • Pair with Beverages: Serve alongside coffee, tea, or even champagne for a luxurious experience.

So, what are you waiting for? Grab your ingredients and embark on this delicious journey with your Valentine ganache cookies. Remember, cooking is about exploration, and every cookie tells a story. Embrace the flavors, share the love, and create memories that last a lifetime. Happy baking!

Valentine ganache cookies

Prep Time 15 minutes
Cook Time 12 minutes
Total Time 27 minutes
Servings 12 cookies
Calories 150
Delight in these rich, chocolatey cookies topped with glossy ganache and festive sprinkles, perfect for Valentine's Day.

Ingredients

Dry ingredients

  • 1 cup all-purpose flour
  • 1/2 cup unsweetened cocoa powder
  • 1/2 teaspoon baking soda
  • 1/4 teaspoon salt

Wet ingredients

  • 1/2 cup unsalted butter, softened
  • 1 cup granulated sugar
  • 1 large egg
  • 1 teaspoon vanilla extract

Ganache

  • 1/2 cup heavy cream
  • 1 cup semi-sweet chocolate chips

Decoration

  • as needed sprinkles or edible glitter

Instructions 

  • Preheat oven to 350°F (175°C). Mix dry ingredients; set aside.
  • Cream butter and sugar; add egg and vanilla. Combine with dry ingredients to form dough.
  • Scoop dough onto baking sheet; bake 10-12 minutes. Cool cookies.
  • Heat cream until simmering; pour over chocolate chips, stir until smooth.
  • Dip cooled cookies in ganache; decorate with sprinkles or glitter.

Notes

Ensure cookies are completely cooled before dipping in ganache for best results.
Calories: 150kcal
Cost: $15
Course: Dessert
Cuisine: American
Keyword: chocolate

Nutrition

Calories: 150kcal | Carbohydrates: 20g | Protein: 2g | Fat: 8g | Sodium: 50mg

Loved this recipe? Save it to your favorite Pinterest board so you can easily find it later! It’s the perfect way to keep all your sweet ideas in one place. ✨

Soft, textured Valentine cookies adorned with colorful edible glitter.