Author

Avery Collins

Browsing

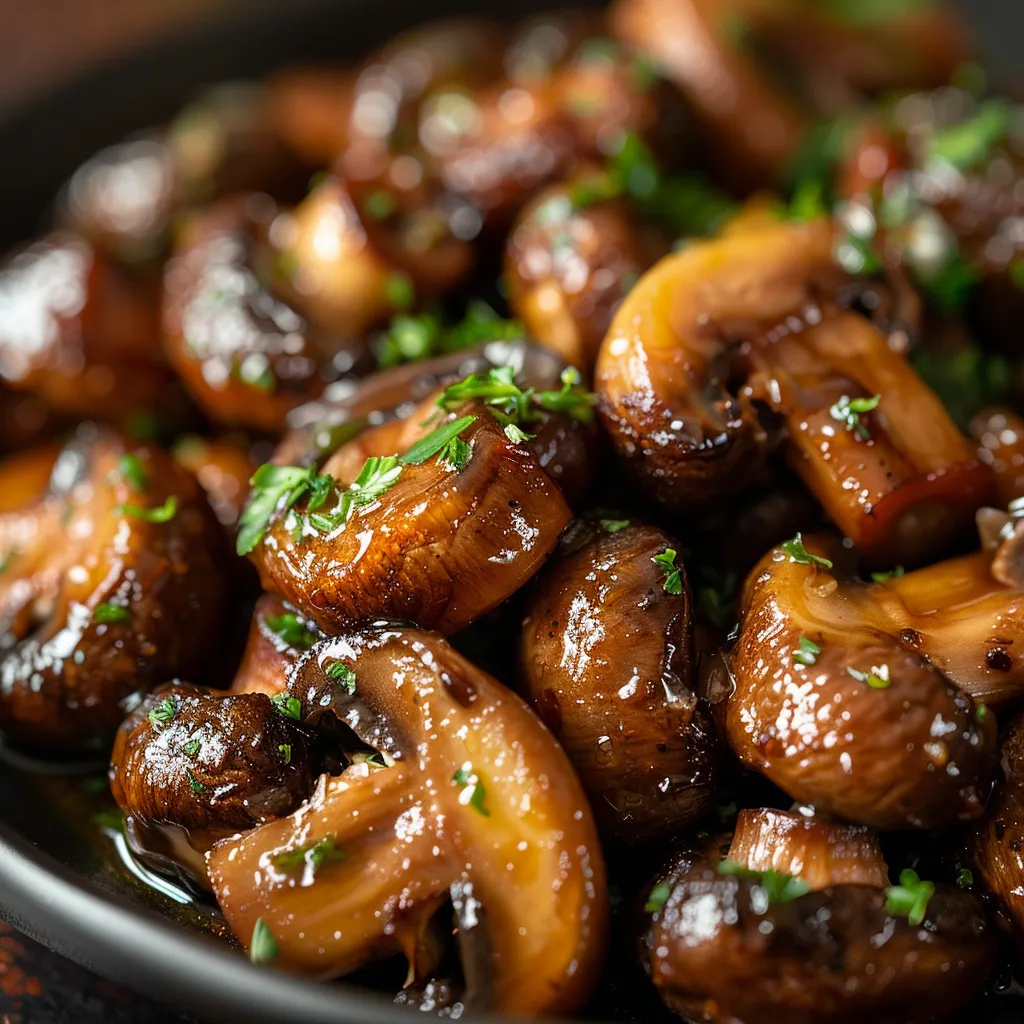
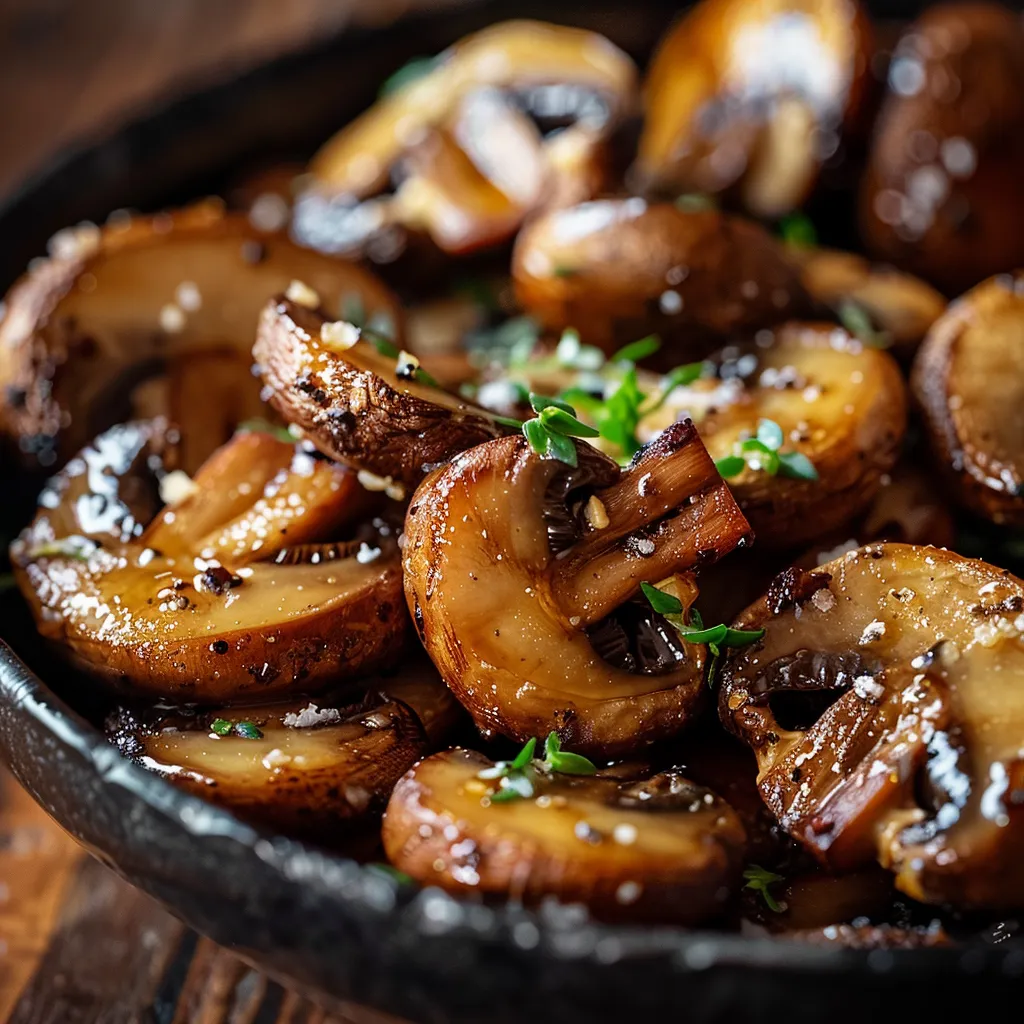
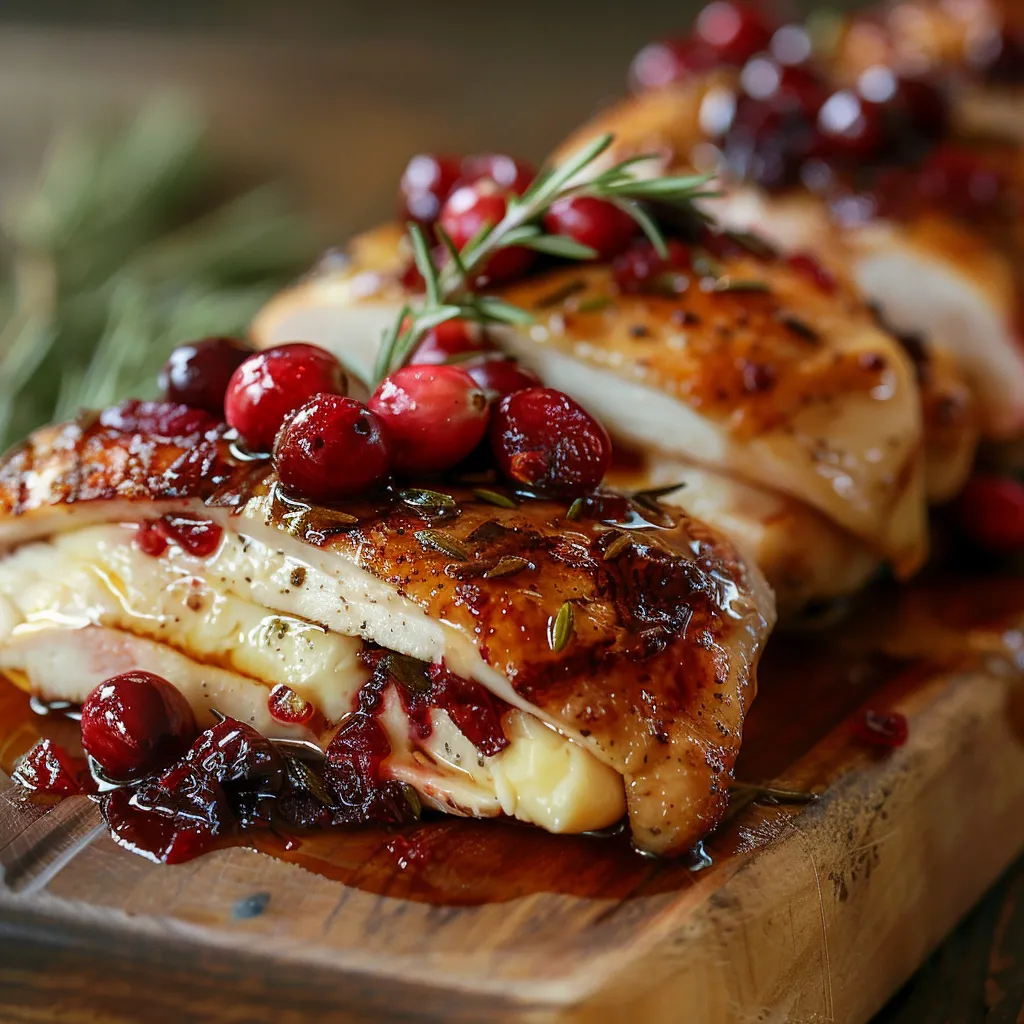
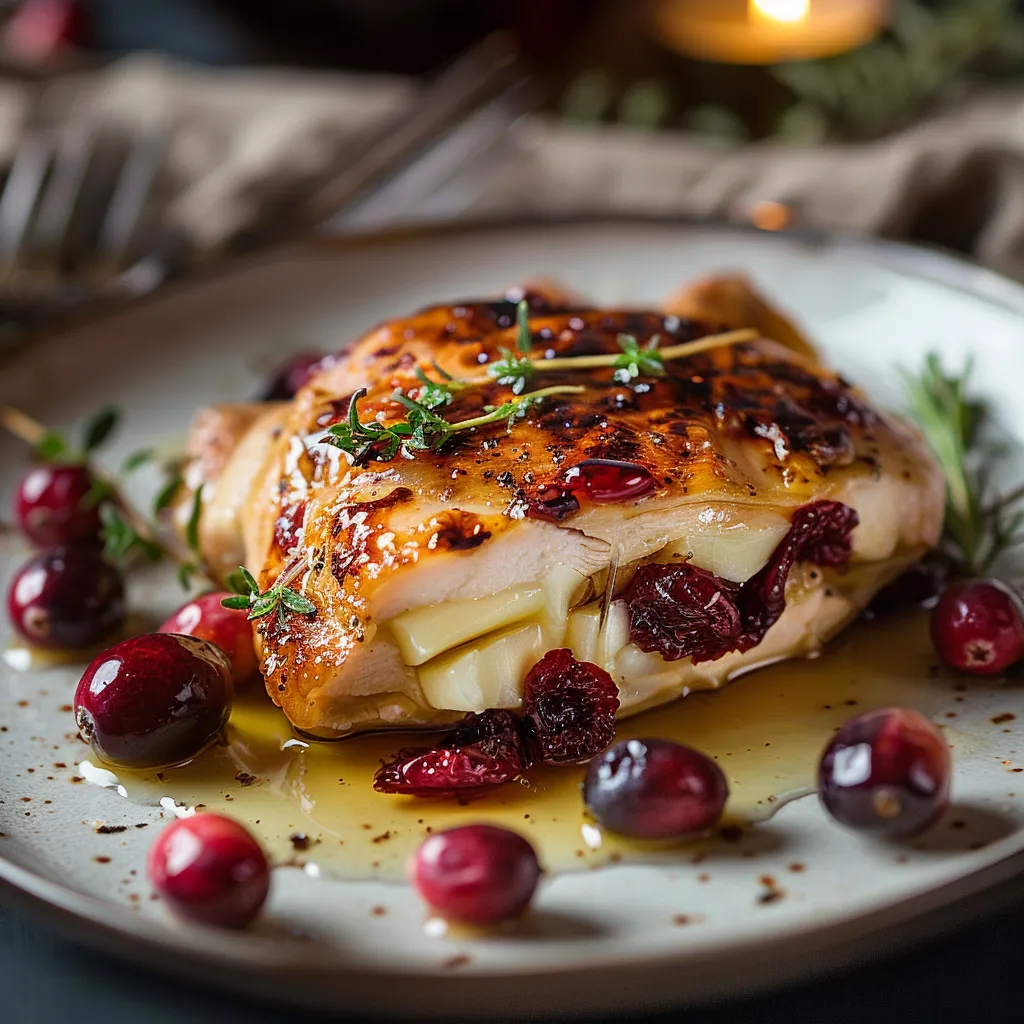
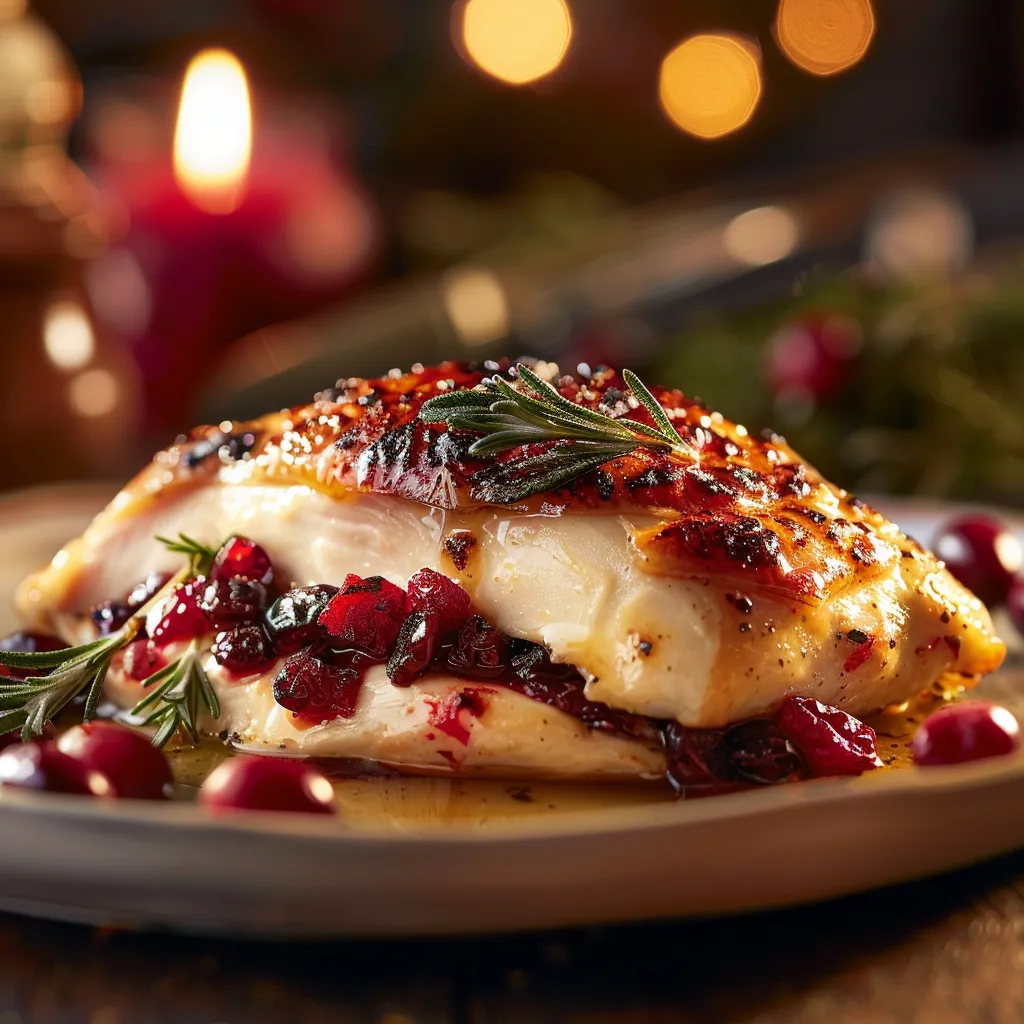
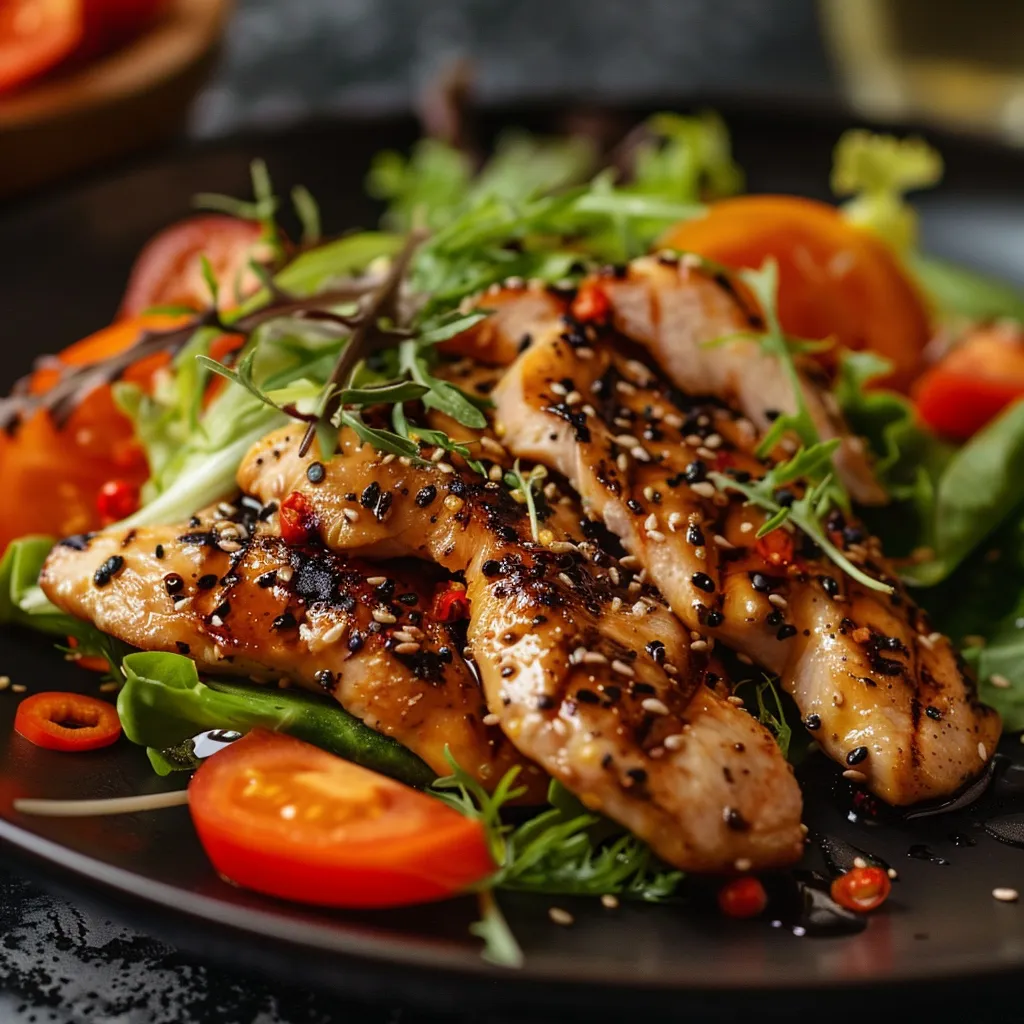
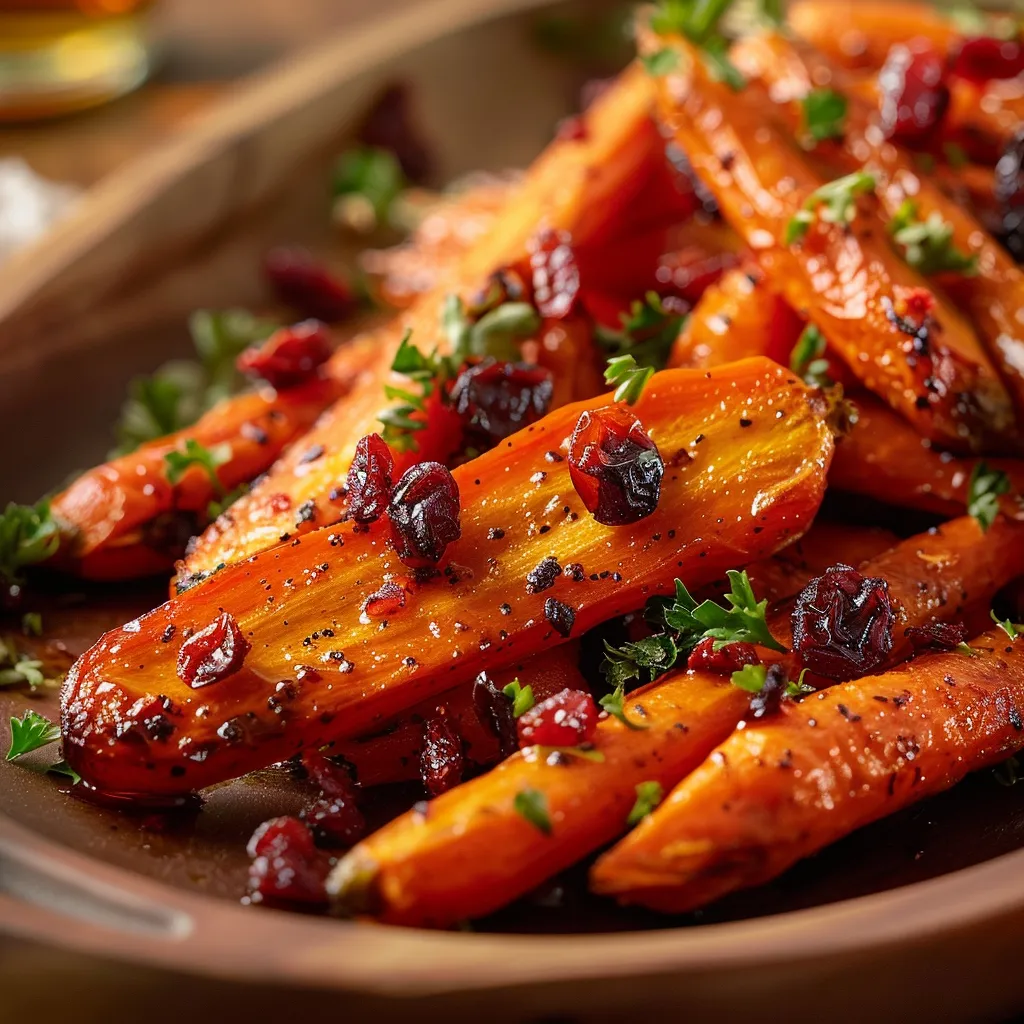
🔥 The Spicy Recipe That Proved Heat and Flavor Can Clash in the Best Way

Welcome, culinary adventurers! If you’re ready to turn up the heat in your kitchen and explore the exhilarating world of flavor, then you’ve landed in the right place. Today, we’re diving into a spicy recipe that proves heat and flavor can clash harmoniously. This dish not only tantalizes your taste buds but also warms your heart, creating a delightful experience that you’ll want to share with friends and family. So, grab your apron, and let’s embark on this flavorful journey together!

🍽️ What Makes This Recipe So Good

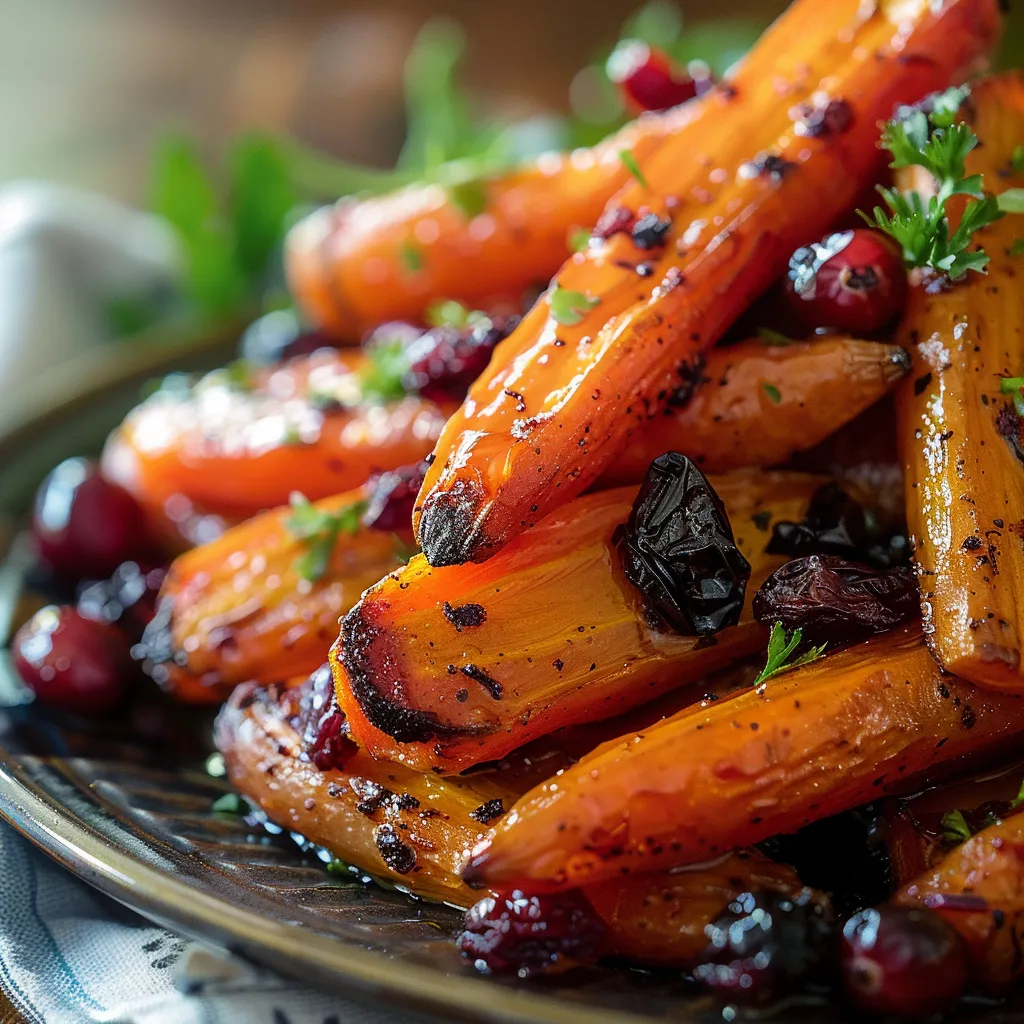
What makes the perfect dish? Is it the ingredients, the technique, or perhaps a dash of love? In the case of our spicy recipe, it’s all about the balance between heat and flavor. This recipe brings together simple yet vibrant ingredients that dance together in a symphony of taste. Each bite offers a delightful kick that is both exciting and comforting.

Imagine the aroma wafting through your kitchen — the sweet scent of sugar mingling with the earthy notes of flour and a hint of vanilla. This dish is perfect for anyone seeking adventure in their meals, whether you’re making it for a cozy dinner or a festive gathering. It’s versatile, too! You can easily customize it to suit your palate or dietary needs.

👨‍🍳 Chef’s Tips for Success

Eye-level shot of a flavorful spicy recipe showing detailed texture and warm lighting.

Before we get cooking, here are some expert tips to ensure your dish turns out spectacular:

  • Quality Ingredients: Always choose the best quality ingredients you can find. Freshness can make a world of difference in your dish.
  • Measure Accurately: Baking is a science, so be precise in your measurements for consistent results.
  • Don’t Rush: Take your time during the mixing process. Over-mixing can lead to a dense texture — we want light and fluffy!
  • Cooling Time: Allow your dish to cool before serving. This helps to set the flavors and makes it easier to slice or serve.

🥘 Ingredients You’ll Need

Let’s gather our ingredients before we dive into the cooking process! Here’s what you’ll need:

  • 1 cup of your favorite flour
  • 1/2 cup of sugar
  • 1/2 teaspoon of baking powder
  • 1/4 teaspoon of salt
  • 1/2 cup of milk
  • 1/4 cup of vegetable oil
  • 1 teaspoon of vanilla extract
  • 1 egg

🛠️ Equipment You’ll Need

To whip up this delightful dish, make sure you have the following equipment handy:

  • Mixing bowls
  • Whisk
  • Measuring cups and spoons
  • Greased baking pan
  • Oven

📋 Step-by-Step Instructions

Let’s get down to business! Here’s how to create this spicy masterpiece:

  1. Preheat your oven to 350°F (175°C). This is the perfect temperature to get that golden brown finish.
  2. In a mixing bowl, combine your flour, sugar, baking powder, and salt. Whisk them together until they’re well blended. Feel free to add a pinch of cayenne or your favorite spice here for a kick!
  3. In a separate bowl, whisk together the milk, vegetable oil, vanilla extract, and egg. Allow the warm aromas to swirl around you — this is where the magic begins!
  4. Pour the wet ingredients into the dry ingredients, stirring gently until just combined. Remember, we don’t want to over-mix; we’re looking for a batter that’s a little lumpy — that’s where the magic happens!
  5. Pour the batter into your greased baking pan, smoothing out the top with a spatula.
  6. Bake in the preheated oven for 25-30 minutes. You’ll know it’s done when a toothpick inserted in the center comes out clean, and your kitchen is filled with mouth-watering scents.
  7. Once baked, allow it to cool for a few minutes before serving. Trust me; the wait will be worth it!

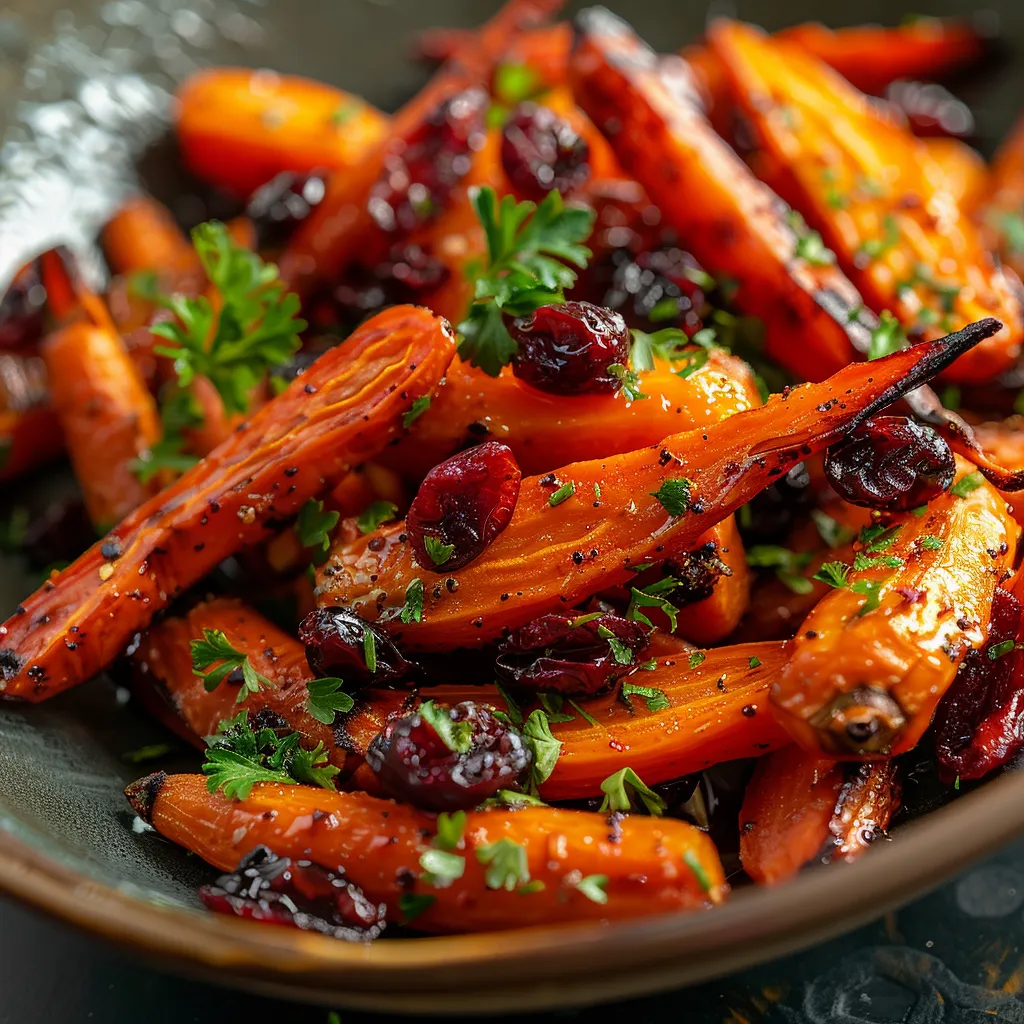
🍴 Variations to Spice It Up

Feeling adventurous? Here are a few variations to elevate your dish:

  • Spicy Chocolate: Add cocoa powder and chopped dark chocolate for a sweet and spicy kick.
  • Fruit Infusions: Toss in some chopped fresh fruit like apples or berries for added flavor and moisture.
  • Nuts and Seeds: Fold in some walnuts or sunflower seeds for added crunch and nutrition.

🔄 Substitutions You Can Make

Don’t have all the ingredients on hand? No problem! Here are some substitutions you can make:

  • Flour: You can use whole wheat flour or a gluten-free blend if needed.
  • Sugar: Substitute with honey or maple syrup for a healthier option.
  • Milk: Almond milk or any plant-based milk works perfectly in this recipe.

❄️ Storage and Freezing Tips

Want to save some for later? Here’s how to store and freeze your delicious creation:

  • Refrigeration: Store leftovers in an airtight container in the fridge for up to 3 days.
  • Freezing: Wrap the cooled dish tightly in plastic wrap and then in aluminum foil. It will keep well for up to 3 months. Thaw in the refrigerator overnight before serving.

🤔 FAQs About This Recipe

How to make this dish spicier?

If you’re looking for some heat, consider adding spices like cayenne pepper, chili powder, or even some finely chopped jalapeños to the batter.

Can I use a different type of sugar?

Absolutely! Brown sugar or coconut sugar can work wonderfully, lending a unique flavor profile to your dish.

What’s the best way to enjoy this dish?

This dish is delicious on its own, but you can serve it warm with a scoop of ice cream, a drizzle of honey, or even fresh fruit on top!

🌟 Conclusion

And there you have it! A spicy recipe that combines the thrill of heat with the comfort of flavor, perfect for any occasion. Whether you’re looking to impress guests at a dinner party or just want to treat yourself to something delightful, this dish will not disappoint. Remember, cooking is all about exploration and excitement — so don’t shy away from experimenting with flavors and spices. Embrace the adventure in your kitchen, and let every meal be a story waiting to be told. Now, go forth and create something spectacular! Happy cooking!

Pin by Melinda Snell on Recipes

Prep Time 10 minutes
Cook Time 30 minutes
Total Time 40 minutes
Servings 4 pieces
Calories 200
A simple and delicious homemade baked treat perfect for any occasion.

Ingredients

Dry ingredients

  • 1 cup flour
  • 1/2 cup sugar
  • 1/2 teaspoon baking powder
  • 1/4 teaspoon salt

Wet ingredients

  • 1/2 cup milk
  • 1/4 cup vegetable oil
  • 1 teaspoon vanilla extract
  • 1 egg egg

Instructions 

  • Preheat oven to 350°F (175°C).
  • Mix dry ingredients in a bowl.
  • Whisk wet ingredients separately.
  • Combine wet and dry, then pour into a greased pan.
  • Bake for 25-30 minutes, then cool.

Notes

Use fresh ingredients for best flavor.
Calories: 200kcal
Cost: $5
Course: Dessert
Cuisine: American
Keyword: baking

Nutrition

Calories: 200kcal | Carbohydrates: 30g | Protein: 4g | Fat: 8g | Sodium: 150mg

Loved this recipe? Save it to your favorite Pinterest board so you can easily find it later! It’s the perfect way to keep all your sweet ideas in one place. ✨

Appetizing spicy dish captured in natural light, highlighting its texture and rich colors.

Fire Up the Holiday: Unforgettable Christmas Dinner Ideas for 2020

Ah, the holiday season! It’s a time where joy fills the air and kitchens transform into workshops of love and flavor. Nothing quite compares to the warmth of a family gathering around a beautifully set table, each dish telling a story and igniting the spirit of togetherness. This Christmas, let’s turn up the heat and celebrate with a festive feast that’s not just delicious but unforgettable! We’re diving into a stunning Christmas Dinner 2020 that will have your guests raving long after the last bite has been savored. Are you ready to create a culinary masterpiece that will light up your holiday table? Let’s get started!

Why a Bold Christmas Dinner Matters

Christmas dinner is more than just a meal; it’s an experience. It’s about gathering with loved ones, sharing stories, and indulging in flavors that evoke memories. The heart of any holiday feast is the turkey—a golden brown centerpiece that beckons with its tantalizing aroma. But what’s a roast turkey without the perfect sides to complement its glory? The right combination of spices, textures, and colors can transform your meal from ordinary to extraordinary.

Ingredients for a Memorable Christmas Dinner

Close-up of a golden-brown holiday turkey surrounded by vegetables and cranberry sauce.

Before we roll up our sleeves, let’s gather our ingredients. Here’s what you’ll need to craft a Christmas dinner that will be the talk of the town:

  • 1 roast turkey (12-14 pounds)
  • Salt and black pepper to taste
  • 2 tablespoons olive oil or melted butter
  • Fresh rosemary and thyme sprigs
  • 4 cups stuffing (your choice)
  • 2 pounds potatoes (for mashed potatoes)
  • 1/2 cup milk
  • 4 tablespoons butter
  • Salt to taste
  • 1 cup cranberry sauce
  • Fresh vegetables (carrots, green beans, brussels sprouts)
  • 1 cup gravy

Step-by-Step Cooking Directions

Now that we have our ingredients, let’s dive into the steps of creating this holiday feast that will have everyone asking for seconds!

1. Preheat Your Oven

Start by preheating your oven to 325°F (165°C). This temperature is key for achieving that perfect roast, crispy skin, and juicy meat!

2. Season That Turkey

Season the turkey inside and out with a generous sprinkle of salt and black pepper. Don’t be shy! This seasoning is your first layer of flavor. Next, stuff the cavity with fresh rosemary and thyme sprigs. These herbs will infuse the turkey with fragrant aromas that will waft through your home, tantalizing your guests.

3. Oil It Up

Rub the outside of the turkey with olive oil or melted butter. This step is crucial for achieving that golden-brown skin. As you rub the oil or butter, take a moment to inhale the rich scents of the herbs mixing with the fat—it’s a beautiful prelude to the feast!

4. Roast to Perfection

Place the turkey in a roasting pan, breast side up. Roast it for about 13-15 minutes per pound, which means our 12-14 pound turkey will take approximately 2.5 to 3 hours. Keep an eye on the internal temperature; it should reach 165°F (75°C) in the thickest part of the thigh. Remember to baste occasionally to keep things moist and flavorful. The sizzle of the turkey in the oven will create an atmosphere of anticipation!

5. Prepare the Sides

While the turkey is roasting, it’s time to whip up the sides. Prepare your favorite stuffing according to your recipe. As the stuffing cooks, the aroma will mingle with the turkey, creating a heavenly scent that fills your kitchen.

6. Mashed Potatoes Magic

Don’t forget about the mashed potatoes! Boil your potatoes until tender, then mash them with milk, butter, and salt to taste. The creaminess of the potatoes paired with the savory turkey is a match made in holiday heaven!

7. Cook the Vegetables

Prepare your fresh vegetables next. Whether you choose carrots, green beans, or brussels sprouts, a simple sautĂŠ in olive oil or steam will keep them vibrant and crunchy. Season with a dash of salt and pepper for that extra zing!

8. Carving Time

Once the turkey is cooked, remove it from the oven and let it rest for 20 minutes before carving. This step allows the juices to redistribute, resulting in a tender and juicy turkey. Carve your turkey in slices, revealing the succulent meat!

9. Assemble and Serve

Now comes the fun part: serving! Plate your turkey slices alongside the stuffing, creamy mashed potatoes, fresh vegetables, and a generous scoop of cranberry sauce. Don’t forget the gravy—a must-have for drizzling over everything! The colors and aromas will create a feast for the eyes and the palate.

Tips for a Flawless Christmas Dinner

  • Brining the Turkey: For an extra juicy turkey, consider brining it overnight in a mixture of salt, sugar, and water. This will enhance flavor and moisture.
  • Make Ahead: You can prepare your mashed potatoes and stuffing a day in advance. Just reheat them before serving!
  • Don’t Rush: Take your time when carving the turkey. A sharp knife and a steady hand will ensure beautiful slices for your table.

Variations to Spice Things Up

While the classic Christmas dinner is always a hit, don’t be afraid to add your personal twist. Here are a few ideas:

  • Spicy Stuffing: Add diced jalapeĂąos or chorizo to your stuffing for a kick!
  • Creamy Garlic Mashed Potatoes: Incorporate roasted garlic for a deeper flavor in your mashed potatoes.
  • Maple-Glazed Vegetables: Toss your vegetables with a touch of maple syrup and balsamic vinegar before roasting for a sweet twist.

Common Substitutions

If you’re missing an ingredient or two, don’t sweat it! Here are some substitutions you can use:

  • Turkey: If you can’t find a turkey, a large chicken or even a roast beef can be a fantastic alternative.
  • Stuffing: Use cornbread stuffing or a gluten-free alternative if you have dietary restrictions.
  • Potatoes: For a lighter option, swap mashed potatoes for cauliflower puree.

Equipment You’ll Need

Before you start cooking, make sure you have these essential tools on hand:

  • Roasting pan
  • Meat thermometer
  • Sharp carving knife
  • Mixing bowls for sides
  • Pot for boiling potatoes

Storage & Freezing Tips

After the feast, you may find yourself with leftovers (if you’re lucky!). Here’s how to store them:

  • Store cooked turkey in an airtight container in the fridge for up to 4 days.
  • Mashed potatoes can be stored in the fridge for up to 3 days, or frozen for up to a month.
  • Stuffing and vegetables should also be refrigerated and consumed within 3 days for optimal freshness.

FAQs About Your Christmas Dinner

How do I make the turkey crispy?

Ensure your turkey skin is dry before roasting. Basting with butter or oil will also help achieve that golden crisp!

Can I substitute fresh herbs for dried herbs?

Absolutely! When using dried herbs, use about one-third the amount compared to fresh to avoid overpowering the dish.

What’s the best way to reheat mashed potatoes?

To reheat mashed potatoes, add a splash of milk and warm them slowly on the stove or in the microwave, stirring frequently to ensure even heating.

Conclusion: Celebrate with Flavor!

This Christmas Dinner 2020 isn’t just a meal; it’s a celebration of flavors, family, and the joy of cooking. With each step, you’re not just preparing food; you’re crafting memories that will linger long after the last bite. So fire up your kitchen, embrace the heat, and let your culinary creativity shine. Your holiday table awaits, and trust me, it’s going to be unforgettable!

Christmas Dinner 2020! Delicious ideas for the upcoming Holiday

Prep Time 30 minutes
Cook Time 3 hours
Total Time 3 hours 30 minutes
Servings 8 people
Calories 3500
Celebrate the holidays with a classic roast turkey served with stuffing, mashed potatoes, cranberry sauce, vegetables, and gravy. Perfect for a festive family gathering.

Ingredients

Main

  • 12-14 pounds roast turkey
  • salt and black pepper to taste salt and black pepper (for seasoning)
  • 2 tablespoons olive oil or melted butter
  • fresh rosemary and thyme sprigs fresh rosemary and thyme (for stuffing)
  • 4 cups stuffing (your choice)
  • 2 pounds potatoes (for mashed potatoes)
  • 1/2 cup milk
  • 4 tablespoons butter
  • salt to taste salt (for mashed potatoes)
  • 1 cup cranberry sauce
  • assorted fresh vegetables (carrots, green beans, brussels sprouts)
  • 1 cup gravy

Instructions 

  • Preheat oven to 325°F (165°C). Season the turkey with salt and pepper, stuff with herbs, and rub with oil or butter.
  • Roast the turkey for about 13-15 minutes per pound until internal temperature reaches 165°F (75°C). Baste occasionally.
  • Prepare stuffing and vegetables while turkey roasts. Boil potatoes until tender, then mash with milk, butter, and salt.
  • Let the turkey rest for 20 minutes before carving. Serve with stuffing, mashed potatoes, cranberry sauce, vegetables, and gravy.

Notes

Use a meat thermometer to ensure the turkey is fully cooked.
Calories: 3500kcal
Cost: $50
Course: Main Course
Cuisine: Holiday
Keyword: Turkey

Nutrition

Calories: 3500kcal | Carbohydrates: 400g | Protein: 250g | Fat: 180g | Sodium: 2500mg

Loved this recipe? Save it to your favorite Pinterest board so you can easily find it later! It’s the perfect way to keep all your sweet ideas in one place. ✨

Festive Christmas dinner featuring a perfectly cooked turkey with mashed potatoes and green beans.

The Irresistible Fire of Oven-Roasted Mushrooms with Soy Sauce & Honey

Welcome to a culinary adventure that will awaken your senses and ignite your passion for cooking! Today, we’re diving into the world of oven-roasted mushrooms—a dish that’s as simple as it is spectacular. With just a handful of ingredients, we’ll transform humble mushrooms into a bold, flavorful delight. So, grab your skillet, and let’s turn up the heat!

Why Mushrooms?

Mushrooms have a unique ability to absorb flavors, making them a versatile ingredient in any kitchen. Whether you’re a seasoned chef or just starting your culinary journey, these little fungi can elevate your meals to new heights. In this recipe, we’ll combine the umami-rich taste of soy sauce with the natural sweetness of honey, creating an irresistible glaze that perfectly complements the earthiness of the mushrooms.

Ingredients You’ll Need

Eye-level shot of mushrooms caramelized and coated in soy sauce and honey, with soft shadows.

To whip up this delightful dish, you’ll need:

  • 500g mushrooms (button or cremini)
  • 2 tablespoons soy sauce
  • 1 tablespoon honey
  • 1 tablespoon olive oil
  • 2 cloves garlic (minced)
  • Salt and pepper to taste

These ingredients come together to create a symphony of flavors that dance on your palate. Let’s break down why each component is essential:

  • Mushrooms: The stars of the show! Button or cremini mushrooms work beautifully, offering a tender texture that caramelizes perfectly in the oven.
  • Soy Sauce: This savory liquid adds depth and umami, enhancing the natural flavor of the mushrooms.
  • Honey: A touch of sweetness balances the saltiness of the soy sauce, creating a harmonious glaze.
  • Olive Oil: Helps to roast the mushrooms evenly, enhancing their flavor and providing a beautiful golden color.
  • Garlic: Because who can resist the aroma of roasted garlic? It adds richness and depth to our dish.
  • Salt and Pepper: Essential for seasoning—never underestimate the power of these two!

How to Make Oven-Roasted Mushrooms with Soy Sauce & Honey

Now that we have our ingredients lined up, let’s get cooking! Here’s a step-by-step guide to making this mouthwatering dish:

  1. Preheat the Oven: Start by preheating your oven to 400°F (200°C). This high temperature will help caramelize the mushrooms, giving them that irresistible golden-brown color.
  2. Prepare the Mushrooms: Clean the mushrooms gently with a damp cloth to remove any dirt. If you’re using larger mushrooms, like cremini, cut them in half to ensure even cooking.
  3. Mix the Sauce: In a mixing bowl, whisk together the soy sauce, honey, olive oil, minced garlic, salt, and pepper. This mixture is where the magic happens—each ingredient plays a crucial role in creating the flavor profile.
  4. Coat the Mushrooms: Add the cleaned mushrooms to the bowl and toss them gently to ensure they’re evenly coated in the sauce. This step is vital for flavor—every mushroom should be glistening and ready for the heat!
  5. Spread on a Baking Sheet: Transfer the coated mushrooms onto a baking sheet lined with parchment paper. Make sure they’re in a single layer to allow for even roasting.
  6. Roast: Place the baking sheet in the preheated oven and roast the mushrooms for 20-25 minutes, stirring halfway through. You’ll know they’re done when they’re tender and slightly caramelized, releasing an aroma that will have your mouth watering.
  7. Serve: These mushrooms can be served warm as a side dish, or you can elevate your meal by serving them over rice or noodles. The choice is yours!

Tips for Perfect Roasted Mushrooms

Before you dive into this culinary creation, here are a few tips to ensure your mushrooms turn out perfectly:

  • Don’t overcrowd the pan: Give your mushrooms space to breathe on the baking sheet. Overcrowding can lead to steaming instead of roasting, which won’t give you that lovely caramelization.
  • Experiment with flavors: Feel free to add spices like cayenne for heat or herbs like thyme for an earthy flavor. The beauty of this dish is in its adaptability!
  • Adjust the sweetness: If you prefer a sweeter glaze, increase the honey a bit. For those who like it spicier, add a pinch of red pepper flakes.

Variations to Try

This recipe is a canvas waiting for your culinary creativity. Here are some variations to consider:

  • Asian-Inspired: Add sesame oil instead of olive oil and sprinkle with sesame seeds before serving for an extra crunch.
  • Herbed Delight: Toss in fresh herbs like rosemary or parsley after roasting for a burst of freshness.
  • Cheesy Twist: Sprinkle with grated Parmesan cheese during the last few minutes of roasting for a rich, savory finish.

Substitutions You Can Make

Don’t have all the ingredients? No problem! Here are some easy substitutions:

  • Mushrooms: If you can’t find button or cremini mushrooms, try shiitake or portobello for a different texture and flavor.
  • Soy Sauce: Use tamari for a gluten-free option or coconut aminos for a slightly sweeter taste.
  • Honey: Agave nectar or maple syrup can work as a vegan alternative to honey.

Equipment You’ll Need

To make this dish, you’ll need a few basic kitchen tools:

  • A mixing bowl for combining ingredients
  • A whisk for blending the sauce
  • A baking sheet lined with parchment paper
  • A spatula for stirring the mushrooms

Storage and Freezing Tips

Leftovers? No worries! Here’s how to store and enjoy them later:

  • Refrigeration: Store any leftover roasted mushrooms in an airtight container in the fridge for up to 3 days.
  • Freezing: For longer storage, freeze the mushrooms in a single layer on a baking sheet, then transfer to a freezer-safe bag. They’ll keep for up to 3 months. Just remember, the texture may change slightly upon thawing.

FAQs

Can I substitute the mushrooms with other vegetables? Absolutely! While mushrooms are the star here, you can experiment with other vegetables like bell peppers, zucchini, or even cauliflower for a delightful twist.

How can I make this dish spicier? If you’re feeling adventurous, add a pinch of red pepper flakes or a dash of sriracha to the sauce for a fiery kick.

What’s the best way to serve these mushrooms? These roasted mushrooms shine as a side dish, but you can also toss them into salads, pasta, or grain bowls for added flavor and texture.

Conclusion: Embrace the Heat!

There you have it, my fellow culinary enthusiasts! Oven-roasted mushrooms with soy sauce and honey are not just a side dish; they’re a celebration of flavor, texture, and the joy of cooking. So, whether you’re hosting a dinner party or treating yourself to a cozy night in, these mushrooms are sure to impress. Remember, cooking is an adventure—embrace the heat, experiment with flavors, and most importantly, have fun! Happy cooking!

For more delicious recipes that will inspire your kitchen adventures, check out my everyday delights or indulge in joyful bites of bliss with my favorite baked treats!

Easy Oven-Roasted Mushrooms with Soy Sauce & Honey

Prep Time 10 minutes
Cook Time 25 minutes
Total Time 35 minutes
Servings 4 servings
Calories 150
Deliciously savory mushrooms roasted to perfection with a sweet and salty glaze, perfect as a side or over rice.

Ingredients

Main

  • 500 g mushrooms (button or cremini)
  • 2 tablespoons soy sauce
  • 1 tablespoon honey
  • 1 tablespoon olive oil
  • 2 cloves garlic (minced)
  • to taste salt and pepper

Instructions 

  • Preheat oven to 400°F (200°C).
  • Clean and halve large mushrooms.
  • Mix soy sauce, honey, olive oil, garlic, salt, and pepper.
  • Toss mushrooms in the mixture and spread on a baking sheet.
  • Roast for 20-25 minutes until tender and caramelized.
  • Serve warm as a side or over rice/noodles.

Notes

Stir halfway through roasting for even caramelization.
Calories: 150kcal
Cost: $10
Course: Side Dish
Cuisine: Fusion
Keyword: Mushrooms

Nutrition

Calories: 150kcal | Carbohydrates: 20g | Protein: 4g | Fat: 7g | Sodium: 600mg

Loved this recipe? Save it to your favorite Pinterest board so you can easily find it later! It’s the perfect way to keep all your sweet ideas in one place. ✨

Detailed view of roasted mushrooms with a glossy glaze, set against a cozy blurred background.

The Impressive Cranberry Brie Stuffed Chicken That Took My Dinner to the Next Level

If you’re looking to elevate your dinner game and impress your guests, look no further than this stunning Impressive Cranberry Brie Stuffed Chicken. This dish is an explosion of flavors and textures that dance on your palate, combining the savory richness of chicken with the creamy decadence of brie and the tart sweetness of cranberries. It’s a symphony of ingredients that turns an ordinary dinner into an extraordinary culinary experience.

As a chef who thrives on the thrill of cooking with spice and flavor, I can tell you that this recipe has it all. Whether it’s a cozy family gathering or a festive holiday dinner, this dish serves as the perfect centerpiece that will have everyone asking for seconds. So, let’s roll up our sleeves and dive into how to create this masterpiece.

Key Ingredients for Impressive Cranberry Brie Stuffed Chicken

Before we get into the cooking, let’s break down the essential ingredients that will bring this dish to life:

  • 4 boneless, skinless chicken breasts: The lean protein that serves as the canvas for our delicious stuffing.
  • 1 cup fresh cranberries (or ½ cup dried cranberries): They add a burst of tartness that contrasts beautifully with the rich brie.
  • 8 oz brie cheese, sliced: The star of the show, brie melts into a creamy delight that makes each bite irresistible.
  • 2 tbsp honey (optional): For those who enjoy a touch of sweetness that balances the tartness of the cranberries.
  • Salt and pepper to taste: Essential for seasoning and enhancing the flavors of the dish.
  • 2 tbsp olive oil: Used for searing the chicken to golden perfection.
  • Fresh thyme or rosemary for garnish (optional): A lovely touch that adds a pop of color and herbal brightness.

How to Make Impressive Cranberry Brie Stuffed Chicken

Detailed shot of a loaded stuffed chicken with cranberry and Brie filling, illuminated softly.

Now that we have our ingredients ready, let’s jump into the step-by-step process to make this exquisite dish.

Step 1: Preheat the Oven

Start by preheating your oven to 375°F (190°C). This ensures that your chicken cooks evenly and achieves that perfect golden exterior.

Step 2: Prepare the Chicken

Using a sharp knife, carefully cut a horizontal pocket into each chicken breast, being cautious not to slice all the way through. You want enough space to stuff in that luscious brie and cranberry mixture.

Step 3: Seasoning

Generously season the chicken breasts with salt and pepper on both sides. This simple step adds depth and enhances the overall flavor of the dish.

Step 4: Mix the Cranberries

In a small bowl, combine the fresh cranberries (or dried cranberries) with honey if you’re using it. This mixture is where the magic begins, as the tartness of the cranberries and the sweetness of the honey create a perfectly balanced filling.

Step 5: Stuff the Chicken

Now comes the fun part! Stuff each chicken breast with slices of brie cheese and spoon in the cranberry mixture. Don’t be shy; load it up, but be careful not to overstuff. Secure the opening with toothpicks if necessary to keep that gooey filling from spilling out while cooking.

Step 6: Sear the Chicken

Heat the olive oil in an ovenproof skillet over medium-high heat. Once hot, gently place the stuffed chicken breasts in the skillet. Sear each side for about 2-3 minutes until they are golden brown. This step not only locks in the flavors but creates a beautiful crust that adds texture to the dish.

Step 7: Bake to Perfection

Transfer the skillet to your preheated oven and bake for 20-25 minutes, or until the chicken is cooked through and reaches an internal temperature of 165°F (74°C). This ensures that your chicken is tender and juicy while the brie melts into a creamy filling.

Step 8: Rest and Serve

Once baked, remove the chicken from the oven and let it rest for a few minutes. This resting period allows the juices to redistribute, keeping your chicken moist. Carefully remove any toothpicks before serving, and garnish with fresh thyme or rosemary if desired.

Serving Suggestions for Impressive Cranberry Brie Stuffed Chicken

This dish is versatile and pairs beautifully with a variety of sides. Here are some ideas to elevate your meal:

  • Roasted Vegetables: Caramelized Brussels sprouts, sweet potatoes, or root vegetables add an earthy balance to the richness of the chicken.
  • Crisp Salad: A refreshing arugula or spinach salad with a zesty vinaigrette cuts through the richness perfectly.
  • Wine Pairing: A glass of Sauvignon Blanc or light Chardonnay complements the tangy cranberry sauce and creamy brie beautifully.

Tips for Success

To ensure your dish turns out flawlessly, keep these tips in mind:

  • Use a meat thermometer to check for doneness; it’s the most reliable way to ensure your chicken is cooked perfectly.
  • Let the chicken rest before slicing to maintain its juiciness.
  • Feel free to experiment with different herbs or spices based on your preferences!

Variations and Substitutions

Cooking is all about creativity, so here are some options to mix things up:

  • Cheese Alternatives: Swap out brie for goat cheese or cream cheese for a different flavor profile.
  • Cranberry Substitutes: Dried cherries or apricots can be used for a sweeter twist.
  • Herb Swaps: Try using sage or basil instead of thyme or rosemary for a unique flavor.

Storage and Freezing

Leftovers are a blessing! Here’s how to store your amazing dish:

  • Refrigerate: Allow the chicken to cool completely and store it in an airtight container in the fridge for up to 3-4 days.
  • Freeze: Wrap each chicken breast tightly in plastic wrap or foil, then place in a freezer-safe container. It can last for 2-3 months.
  • Reheat: To enjoy your leftovers, bake them at 350°F (175°C)10-15 minutes until warmed through.

Frequently Asked Questions (FAQs)

How do I ensure the stuffed chicken breasts stay closed during baking?

Using toothpicks is your best friend here! Just remember to remove them before serving.

Can I prepare this dish ahead of time?

Absolutely! You can assemble the stuffed chicken breasts and refrigerate them for up to 24 hours before cooking. Just allow a few extra minutes for baking.

Is it possible to make this recipe gluten-free?

Yes! Simply substitute the breadcrumbs with gluten-free options or crushed gluten-free crackers.

Can I substitute honey or orange juice with other ingredients?

Definitely! Maple syrup or agave nectar can replace honey, and you can use lemon juice for a citrus twist.

What are some suitable side dishes to serve with this stuffed chicken?

Try pairing it with roasted vegetables, a simple salad, or even a wild rice pilaf for a hearty meal.

Conclusion

And there you have it! The Impressive Cranberry Brie Stuffed Chicken is more than just a recipe; it’s an invitation to explore flavors, textures, and the joy of cooking. This dish beautifully marries the richness of brie, the tartness of cranberries, and the savory goodness of chicken, making it a true showstopper for any occasion. Whether you’re hosting a dinner party or treating yourself to a cozy weeknight meal, this recipe will undoubtedly impress and satisfy. So grab your ingredients, unleash your inner chef, and let the delicious adventure begin!

Feeling inspired? For more delightful recipes, check out Joyful bites of bliss: my favorite baked cranberry brie treats, or discover Nourish your soul: the clean eating recipe that transformed my health. Let’s keep cooking boldly!

Impressive Cranberry Brie Stuffed Chicken

Prep Time 15 minutes
Cook Time 25 minutes
Total Time 40 minutes
Servings 4 pieces
Calories 350
Delight in tender chicken breasts filled with creamy Brie and tangy cranberries, perfect for a special dinner.

Ingredients

Protein

  • 4 pieces boneless, skinless chicken breasts
  • 1 cup fresh cranberries (or ½ cup dried cranberries)
  • 8 oz brie cheese (sliced)
  • 1/2 cup dried cranberries
  • 2 tbsp honey (optional)
  • to taste salt and pepper
  • 2 tbsp olive oil
  • for garnish fresh thyme or rosemary (optional)

Instructions 

  • Preheat oven to 375°F (190°C).
  • Cut a horizontal pocket into each chicken breast and season with salt and pepper.
  • Mix cranberries with honey, stuff chicken with Brie and cranberry mixture, then secure with toothpicks.
  • Sear chicken in olive oil for 2-3 minutes per side, then bake for 20-25 minutes.
  • Rest briefly, remove toothpicks, garnish with herbs, and serve hot.

Notes

Use fresh cranberries for best flavor, and remove toothpicks before serving.
Calories: 350kcal
Cost: $15
Course: Main Course
Cuisine: American
Keyword: Brie, chicken, cranberry

Nutrition

Calories: 350kcal | Carbohydrates: 30g | Protein: 40g | Fat: 15g | Sodium: 600mg

Loved this recipe? Save it to your favorite Pinterest board so you can easily find it later! It’s the perfect way to keep all your sweet ideas in one place. ✨

Eye-level view of a sliced cranberry Brie stuffed chicken with a cozy background.

The Comforting Fire of Flavor: My Passion for Easy Roasted Garlic Soup

Ah, garlic! The very essence of flavor that dances on the palate, igniting a symphony of taste sensations that leaves you craving more. As someone who grew up in the vibrant culinary landscape of San Antonio, Texas, I can tell you that garlic is not just an ingredient; it’s a way of life. Today, I’m excited to share with you my beloved recipe for Easy Roasted Garlic Soup—a dish that’s as comforting as a warm embrace and as bold as a fiery sunset.

What Makes Roasted Garlic Soup Special?

Roasted Garlic Soup is a celebration of simplicity and flavor. Imagine the sweet, caramelized notes of roasted garlic mingling with the richness of cream, wrapped in the hearty embrace of broth and onions. This soup is perfect for those chilly evenings when you need something soothing to warm your soul.

Ingredients You’ll Need

Eye-level shot of warm, smooth garlic soup in a rustic bowl, highlighting its texture.
  • 1 head garlic
  • 2 tablespoons olive oil
  • 1 medium onion, chopped
  • 4 cups vegetable or chicken broth
  • 1 cup milk or cream
  • Salt and pepper to taste
  • Optional: fresh herbs for garnish

How to Make Easy Roasted Garlic Soup

Let’s dive into the heart of this recipe. The beauty of Easy Roasted Garlic Soup lies in its straightforward preparation and the incredible flavors that develop along the way.

Step-by-Step Instructions

  1. Preheat your oven: Set your oven to 400°F (200°C). This is where the magic begins, as roasting garlic transforms its flavor from pungent to sweet and mellow.
  2. Prepare the garlic: Cut the top off the garlic head to expose the cloves. Drizzle with 1 tablespoon of olive oil, wrap it in foil, and set it aside.
  3. Roast the garlic: Place the wrapped garlic in the oven and let it roast for about 40 minutes. The aroma wafting through your kitchen will have you dreaming of what’s to come.
  4. SautĂŠ the onions: In a large pot, heat the remaining 1 tablespoon of olive oil over medium heat. Add the chopped onion and cook until it turns translucent, about 5-7 minutes. This is where the soup starts to build its flavor base.
  5. Combine the garlic and onions: Squeeze the roasted garlic cloves out of their skins into the pot with the onions. Stir well to combine, and let the magic happen as the flavors meld together.
  6. Add the broth: Pour in the vegetable or chicken broth and bring the mixture to a boil. Once boiling, reduce the heat and let it simmer for 10 minutes, allowing the flavors to deepen.
  7. Blend the soup: Use an immersion blender or a regular blender to blend the soup until it’s smooth and creamy. This step is crucial for achieving that velvety texture that makes every spoonful a delight.
  8. Finish with cream: Stir in the milk or cream, season with salt and pepper, and heat through. This last touch adds richness and takes the soup to another level of indulgence.
  9. Serve and enjoy: Ladle the hot soup into bowls, and if you like, garnish with fresh herbs for a pop of color and flavor. Trust me, a sprinkle of fresh parsley or thyme elevates the dish beautifully.

Tips for Making the Best Roasted Garlic Soup

  • Don’t rush the roasting: The longer you roast the garlic, the sweeter it becomes. Aim for that golden-brown hue to unlock all its natural sugars.
  • Experiment with herbs: Feel free to add thyme, rosemary, or even a touch of smoked paprika to deepen the flavor profile.
  • Adjust the consistency: If you prefer a lighter soup, add more broth or use less cream. The beauty of this recipe lies in its adaptability.

Storing and Freezing Your Soup

Leftover Easy Roasted Garlic Soup makes for a fantastic meal prep option. Here’s how to store it:

  • Refrigeration: Allow the soup to cool completely before transferring it to airtight containers. It will keep in the refrigerator for up to 3 days.
  • Freezing: For longer storage, freeze the soup in freezer-safe containers, leaving room for expansion. It can be frozen for up to three months. Just remember to thaw it in the fridge overnight before reheating.

Variations and Substitutions

  • Herb Variations: Try adding fresh basil or dill for a different flavor twist. You might just fall in love with a new combination!
  • For a vegan option: Substitute the cream with coconut milk or a plant-based cream alternative, and use vegetable broth.
  • Adding protein: Toss in some cooked chicken or beans for added protein and heartiness.

FAQs About Roasted Garlic Soup

Can I use different herbs in the soup?

Absolutely! Feel free to experiment with your favorite herbs to customize the flavor profile of the soup. Fresh thyme, oregano, or even a pinch of nutmeg can create delightful variations.

Can I make roasted garlic soup ahead of time?

Yes, this soup reheats beautifully. Make it a day in advance and reheat on the stove over medium heat. The flavors will meld even more, making it taste even better!

Can I substitute heavy cream with a lighter alternative?

While heavy cream adds richness, you can use milk or a half-and-half for a slightly lighter version without compromising too much on texture.

You May Also Enjoy…

Conclusion

As you savor your bowl of Easy Roasted Garlic Soup, let the warmth embrace you, and allow the flavors to ignite your senses. Cooking is a passion, an adventure, and in this simple yet extraordinary dish, you’ll find all the comfort you need. So grab your apron, gather your ingredients, and let’s transform the humblest of ingredients into something magical. Remember, cooking is not just about following a recipe; it’s about expressing yourself through flavor. Enjoy every bite, my friends!

Easy Roasted Garlic Soup

Prep Time 10 minutes
Cook Time 50 minutes
Total Time 1 hour
Servings 4 servings
Calories 250
A creamy and comforting garlic soup that's simple to prepare and perfect for cozy days.

Ingredients

Main

  • 1 head garlic (whole head)
  • 2 tablespoons olive oil (divided)
  • 1 medium onion (chopped)
  • 4 cups vegetable or chicken broth
  • 1 cup milk or cream
  • to taste salt and pepper
  • optional fresh herbs for garnish

Instructions 

  • Preheat oven to 400°F (200°C). Wrap garlic in foil and roast for 40 minutes.
  • Cook chopped onion in 1 tablespoon olive oil until translucent.
  • Extract roasted garlic and add to the onions, then pour in broth and simmer for 10 minutes.
  • Blend the soup until smooth, then stir in milk or cream, season, and heat through.
  • Serve hot, garnished with fresh herbs if desired.

Notes

Roasting garlic enhances its sweetness and flavor.
Calories: 250kcal
Cost: $12
Course: Soup
Cuisine: International
Keyword: garlic

Nutrition

Calories: 250kcal | Carbohydrates: 30g | Protein: 8g | Fat: 12g | Sodium: 800mg

Loved this recipe? Save it to your favorite Pinterest board so you can easily find it later! It’s the perfect way to keep all your sweet ideas in one place. ✨

Delicious roasted garlic soup garnished with herbs, captured with soft natural lighting.

The Fire-Up Method to Lose Weight Quickly and Naturally—No Diet Needed!

Welcome to the culinary adventure of your life! If you’re tired of restrictive diets and endless calorie counting, I have something bold and invigorating for you. Let’s ignite your journey to weight loss with the Fire-Up Method. Inspired by my fiery passion for cooking, this method transforms the mundane into the extraordinary. It’s not just about losing weight; it’s about embracing a lifestyle that celebrates flavor, health, and joy. Ready to spice things up? Let’s dive in!

Why the Fire-Up Method?

Picture this: you wake up in the morning, sunlight streaming through the kitchen window, and the aroma of spices filling the air. You don’t feel deprived or bored; instead, you’re excited about what’s on your plate. The Fire-Up Method is about harnessing the power of your environment and habits to shed pounds effortlessly. It’s about making adjustments that fit seamlessly into your life, allowing you to lose weight naturally without the fuss of traditional dieting.

How to Lose Weight Easily and Quickly Without Dieting?

Appetizing meal with fresh vegetables, lean proteins, and hydration elements.

Let’s break it down into simple yet effective steps that anyone can incorporate into their daily routine. Here’s what you’ll need:

Ingredients for Success

  • Stay hydrated with plenty of water: Water is your best friend. It boosts metabolism and helps control hunger.
  • Increase daily physical activity: Think walking or stretching breaks. It doesn’t have to be a chore!
  • Practice mindful eating: Slow down and savor each bite. It’s a game changer.
  • Get sufficient sleep each night: Aim for 7-8 hours. Your body needs rest to repair and rejuvenate.
  • Reduce sugar and processed food intake: Swap out those empty calories for vibrant, whole foods.

Steps to Ignite Your Weight Loss Journey

Now that we have our ingredients, let’s fire up those engines and get cooking with these actionable steps:

  1. Start your day with a glass of water: Kickstart your metabolism right after you wake up. It’s like giving your body a refreshing splash of energy.
  2. Incorporate more movement into your daily routine: Take short breaks to walk or stretch. Even a quick dance party in the kitchen can do wonders for your body and mood.
  3. Eat slowly and listen to your body’s hunger cues: This is key to preventing overeating. Relish the flavors and textures of your food. Chew thoroughly and enjoy each bite.
  4. Limit consumption of sugary and processed foods: Replace them with whole foods that are nourishing and satisfying. Think colorful fruits and vibrant veggies!
  5. Ensure you get 7-8 hours of quality sleep each night: Sleep is vital for weight loss. It’s during this time that your body repairs itself, and hormones that regulate appetite are balanced.
  6. Maintain consistent habits and be patient with gradual progress: Weight loss is a journey, not a sprint. Celebrate small victories along the way!

Tips for Success

Incorporating these steps into your life doesn’t have to be overwhelming. Here are some additional tips to make the Fire-Up Method even more effective:

  • Create a water-drinking schedule: Set reminders to drink water throughout the day. Infuse it with lemon or mint for a refreshing twist.
  • Find fun ways to move: Join a dance class, hike with friends, or turn your chores into a workout. Movement should feel like joy, not a burden!
  • Practice mindful eating: Try to eat without distractions like TV or phones. Engage all your senses to truly appreciate your meal.
  • Plan your meals: Take the time to prepare healthy meals in advance. Having nutritious options ready will make it easier to resist temptation.
  • Establish a bedtime routine: Wind down with calming activities like reading or meditation to improve sleep quality.

Variations to Spice Up Your Routine

Weight loss isn’t one-size-fits-all, and that’s the beauty of the Fire-Up Method! Here are some variations you can try:

  • Hydration Variations: Experiment with herbal teas or infused waters. Chia seed water can also be a hydrating and nutritious option.
  • Activity Variations: Try yoga, pilates, or even martial arts to keep things exciting and fresh.
  • Mindful Eating Variations: Engage in cooking sessions with loved ones. Share recipes and enjoy the experience together.
  • Sleep Variations: Consider using sleep-tracking apps to monitor your sleep patterns and make adjustments.

Substitutions and Alternatives

Sometimes life gets in the way, and that’s okay! Here’s how to adapt the Fire-Up Method to suit your needs:

  • Water Alternatives: If plain water isn’t your favorite, opt for bubbly water or herbal teas.
  • Activity Substitutions: If you can’t walk, try chair exercises or gentle stretching routines.
  • Food Substitutions: If you find it tough to cut out sugar completely, start by reducing your intake gradually.

Equipment You Might Need

While this method is straightforward, having the right tools can enhance your experience:

  • Water Bottle: Keep a reusable water bottle handy to encourage hydration.
  • Fitness Tracker: A fitness tracker can help you monitor your movement and stay motivated.
  • Meal Prep Containers: Invest in good-quality containers for easy meal prep.

Storage & Freezing

While the Fire-Up Method is about daily habits, meal prepping can support your journey:

  • Meal Prep: Prepare your meals in advance and store them in the fridge for quick access.
  • Freezing: Many healthy meals can be frozen, such as soups or veggie-packed casseroles. Just remember to label them!

FAQs About the Fire-Up Method

Here are some common questions that might pop up during your journey:

  • Can I substitute water with other beverages? Absolutely! Herbal teas or infused water can be great alternatives.
  • What if I struggle with mindful eating? Start small. Try setting aside one meal a day to eat without distractions.
  • How quickly can I expect results? Weight loss varies for everyone, but consistency is key. Celebrate small milestones along the way!

Conclusion

The Fire-Up Method is more than just a technique for weight loss; it’s an invitation to embrace life with vigor and zest. Cooking, eating, and living boldly are at the heart of this journey. As you embark on this flavorful path, remember that the goal isn’t just to lose weight but to cultivate a lifestyle that nourishes your soul and ignites your passion for life. So grab your water, lace up those shoes, and let’s turn up the heat—because the adventure of cooking and eating well is just beginning!

For more delicious recipes and ideas to support your journey, check out my Everyday Delights or discover how to Nourish Your Soul. Let’s make healthy living a joy together!

How to lose weight easily and quickly without dieting?

Prep Time 5 minutes
Total Time 5 minutes
Servings 1 person
Calories 1500
Discover simple lifestyle changes that can help you shed pounds without strict dieting. Incorporate hydration, activity, mindful eating, and good sleep habits for effective weight management.

Ingredients

Hydration

  • 1 glass water (Start your day with a glass of water)

Physical activity

  • 1 session daily movement (e.g., walking, stretching) (Increase daily activity)

Mindful eating

  • 1 session mindful eating practice (Eat slowly and listen to hunger cues)

Sleep

  • 1 night sufficient sleep (Get 7-8 hours of quality sleep)

Dietary reduction

  • 1 day reduce sugar and processed foods (Limit intake of sugary and processed foods)

Instructions 

  • Start your day with a glass of water to boost metabolism.
  • Incorporate more movement into your routine, like walking or stretching.
  • Eat slowly and listen to your body's hunger cues.
  • Limit sugary and processed foods in your diet.
  • Ensure you get 7-8 hours of quality sleep each night.
  • Maintain consistent habits and be patient with gradual progress.

Notes

Consistency is key for effective weight loss without dieting.
Calories: 1500kcal
Cost: $15
Course: Lifestyle
Cuisine: Universal
Keyword: healthy habits, weight loss

Nutrition

Calories: 1500kcal | Carbohydrates: 200g | Protein: 50g | Fat: 40g | Sodium: 1500mg

Loved this recipe? Save it to your favorite Pinterest board so you can easily find it later! It’s the perfect way to keep all your sweet ideas in one place. ✨

Delicious, nutritious dish visually highlighting fresh ingredients and hydration tips.

Cooking Up a Storm: How Pinterest in 2025 Transforms My Flavor Game

Welcome to the bold new world of culinary inspiration! As a chef fueled by passion and creativity, I can’t help but be excited about the transformative power of technology in the kitchen. Pinterest in 2025 is not just a platform; it’s a vibrant culinary playground that ignites my cooking like never before! Imagine wearing augmented reality glasses that allow you to step into a realm where flavors come to life at your fingertips. Are you ready to dive into this tantalizing journey of innovation and flavor? Let’s go!

What You’ll Need to Get Started

Before we embark on this culinary adventure, let’s gather our tools and ingredients. No, I’m not talking about traditional spices or fresh produce. For this modern cooking experience, you’ll need:

  • Augmented Reality Glasses: These nifty gadgets will give you a seamless visual browsing experience, allowing you to explore recipes like never before.
  • Smartphone with 5G Connectivity: Fast internet is essential for accessing Pinterest and all its glorious content.
  • Creative Content Apps: These tools help you create stunning culinary content that you can pin and share with the world.
  • Personalized AI Assistant: Think of this as your culinary sidekick that provides tailored inspiration and organizes your recipe boards.

Diving Into the Flavor Pool

Detailed shot of a smartphone, AR glasses, and creative apps with warm lighting and soft shadows.

As you put on your AR glasses and connect to the Pinterest platform using your smartphone, a world of inspiration opens before you. The aroma of spices and the sizzle of ingredients almost waft through the air as you browse through colorful images of delicious dishes. The best part? Enhanced visual search and AI recommendations bring you ideas that align perfectly with your taste and cooking style.

How to Make the Most of Pinterest in 2025

Now that you’re equipped with your high-tech culinary toolkit, let’s explore how to make the most of this innovative platform:

1. Accessing Seamless Visual Browsing

When you wear your AR glasses, it’s like stepping into a cooking show where you control the content. You can see images of beautifully plated dishes, accompanied by step-by-step guides that pop up as you look at them. This visual browsing experience enhances your cooking journey, making it interactive and engaging.

2. Discovering New Flavor Ideas

With the power of 5G internet, you can quickly browse and discover new ideas that resonate with your culinary soul. Want to make a hearty winter dinner recipe? Just type in your search, and watch as a plethora of recipes flood your screen, each one begging to be explored. The AI recommendations ensure you find dishes that match your taste preferences, making cooking feel personal and exciting.

3. Creating and Saving Your Own Pins

Once you find a recipe that speaks to you, it’s time to unleash your creativity! With integrated content creation apps, you can create stunning pins that capture your culinary adventures. Whether it’s a mouthwatering lentil curry or a decadent dessert, these pins allow you to save your favorites and organize them in a way that suits your cooking style.

4. Interacting with Your Personalized AI Assistant

Your personalized AI assistant is like having a sous-chef that never tires. It helps you get tailored inspiration based on your cooking habits and preferences. Need to organize your boards? Want to find recipes that use specific ingredients? Just ask your AI assistant, and watch it work its magic!

Tips for Cooking with Pinterest in 2025

While the technology is fantastic, the heart of cooking still lies in the kitchen. Here are some tips to enhance your experience:

  • Experiment: Don’t be afraid to try new flavors and ingredients. Pinterest is all about exploration!
  • Engage with the Community: Share your culinary creations, engage with other cooks, and get feedback. It’s a great way to learn and grow.
  • Stay Organized: Use your boards wisely. Categorize your recipes based on meal types, occasions, or even the level of difficulty.
  • Embrace the Process: Cooking is an adventure. Enjoy the process just as much as the final dish!

Variations and Substitutions

When it comes to cooking, creativity knows no bounds! Here are some variations and substitutions to consider as you explore the recipes you find:

  • If you’re making a hearty red lentil curry, consider adding different vegetables like spinach or sweet potatoes to enhance flavor and nutrition.
  • For those with dietary restrictions, you can substitute regular dairy with plant-based alternatives in creamy dishes.
  • Feeling adventurous? Add a twist to classic recipes by incorporating international spices such as harissa or za’atar.

Essential Equipment

While your AR glasses and smartphone are essential for browsing, you’ll also need some practical kitchen equipment to bring those Pinterest recipes to life:

  • High-Quality Chef’s Knife: A sharp knife is crucial for all your chopping and dicing needs.
  • Cutting Board: A sturdy cutting board will make your prep work easier and more efficient.
  • Cast Iron Skillet: Perfect for searing meats and sautĂŠing vegetables, this versatile tool is a must-have.
  • Measuring Cups and Spoons: Precision matters in cooking, so make sure you have reliable measuring tools.

Storage & Freezing Tips

Once you’ve prepared your delicious meals, how do you store them? Here are some helpful tips:

  • Refrigeration: Most cooked dishes can be stored in an airtight container in the refrigerator for up to 3-4 days. Just make sure they cool down before sealing.
  • Freezing: If you want to save some for later, consider freezing portions in freezer-safe bags. Most hearty meals can last up to 3 months in the freezer.
  • Thawing: When ready to enjoy, thaw your meals in the refrigerator overnight or use the microwave for quicker results.

FAQs

Can I substitute ingredients in the recipes I find on Pinterest?

Absolutely! Cooking is all about personalization. If you have an ingredient you prefer or need to avoid, feel free to make substitutions that suit your taste and dietary needs.

What’s the best way to organize my Pinterest boards?

Consider categorizing your boards based on meal types, occasions, or even cooking techniques. This way, you’ll always know where to find your favorite recipes when you need them!

How can I ensure my recipes turn out as delicious as they look online?

Follow the recipes closely, but don’t be afraid to trust your instincts. Taste as you go, and adjust seasonings to your liking. Remember, cooking is an art and a science!

Conclusion

As we embrace the culinary revolution with Pinterest in 2025, we’re not just cooking; we’re creating, experimenting, and discovering new flavors that ignite our passion for food. From augmented reality glasses to personalized AI assistants, the tools at our disposal empower us to turn ordinary meals into extraordinary experiences. So, grab your smartphone, put on your AR glasses, and let’s embark on this flavorful journey together. Remember, every meal is a chance to tell a story, and with the right tools and inspiration, the possibilities are endless. Let’s get cooking!

Pinterest in 2025

Prep Time 5 minutes
Cook Time 10 minutes
Total Time 15 minutes
Servings 1 person
Experience the future of browsing with cutting-edge AR glasses and AI-powered tools to discover and create content seamlessly.

Ingredients

Devices

  • 1 pair augmented reality glasses
  • 1 smartphone smartphone with 5g connectivity
  • 1 set creative content apps
  • 1 unit personalized ai assistant

Instructions 

  • Wear your AR glasses for visual browsing.
  • Connect your smartphone to Pinterest via 5G.
  • Discover ideas with visual search and AI.
  • Create and save pins with content apps.
  • Use your AI assistant for inspiration and organization.

Notes

This is a conceptual recipe for a tech experience, not an edible dish.
Cost: $15
Course: Technology
Cuisine: Futuristic
Keyword: AI, AR, Pinterest

Loved this recipe? Save it to your favorite Pinterest board so you can easily find it later! It’s the perfect way to keep all your sweet ideas in one place. ✨

Intimate view of tech gadgets like AR glasses and smartphone with a textured background, highlighting textures.

The Garlic-Parmesan Roasted Cauliflower That Turns Up the Flavor and Fires Up Your Taste Buds

Welcome, fellow culinary adventurers! Today, we’re diving into a dish that will not only fire up your taste buds but also transform the humble cauliflower into a show-stopping side that even the most skeptical veggie eaters won’t be able to resist. This Garlic-Parmesan Roasted Cauliflower is a delightful fusion of crunch, creaminess, and a hint of caramelized goodness that will have you coming back for seconds – and maybe thirds!

Growing up in the spice-laden kitchens of San Antonio, I quickly learned that vegetables don’t have to be boring. The scent of roasting garlic, the rich flavor of melted Parmesan, and the satisfying crunch of perfectly roasted cauliflower are a testament to the magic that happens when you cook with passion and creativity. Ready to embark on this flavor journey? Let’s crank up the heat!

Table of Contents

How to Make Garlic-Parmesan Roasted Cauliflower

Eye-level shot of garlic Parmesan roasted cauliflower on a plate.

Let’s get into the nitty-gritty of how to make this culinary masterpiece. Don’t worry; it’s as simple as it is delicious!

The Ingredients

To whip up this tantalizing dish, you’ll need the following:

  • 1 large head of cauliflower, cut into florets
  • 3 tablespoons olive oil
  • 4 cloves garlic, minced
  • Salt and pepper to taste
  • 1/4 cup grated Parmesan cheese
  • Fresh parsley, chopped (optional)

These ingredients are straightforward, yet they pack a punch! The garlic adds a fragrant aroma, while the Parmesan introduces a nutty richness that elevates the entire dish.

The Directions

Now that you have everything you need, let’s get cooking!

  1. Preheat your oven: Set your oven to a fiery 400°F (200°C). The secret to achieving that golden-brown perfection lies in high heat. Trust me, your taste buds will thank you!
  2. Toss the cauliflower: In a large mixing bowl, combine your cauliflower florets with olive oil, minced garlic, salt, and pepper. Make sure each floret is well-coated; this is where the flavor begins to build.
  3. Spread and roast: Line a baking sheet with parchment paper for easy cleanup. Spread the seasoned cauliflower in a single layer on the baking sheet. Roast in the preheated oven for 25-30 minutes, or until the florets are golden brown and tender. Don’t forget to stir halfway through to ensure even roasting!
  4. Add the finishing touches: Once the cauliflower is beautifully roasted, remove it from the oven and immediately sprinkle the grated Parmesan cheese over the top. The residual heat will melt the cheese just enough to make it irresistible.
  5. Garnish and serve: For an extra burst of freshness, consider garnishing with chopped parsley before serving. This adds a lovely pop of color and a hint of herbal brightness.

Recipe Tips and Tricks

To achieve the best results with your Garlic-Parmesan Roasted Cauliflower, keep these tips in mind:

  • Choose the right cauliflower: Look for a head of cauliflower that is firm and has tightly packed florets. Avoid any with brown spots or soft areas.
  • Don’t overcrowd the pan: If you want those florets to roast rather than steam, make sure not to overcrowd the baking sheet. Give them plenty of space to breathe!
  • Experiment with spices: Feel free to add your favorite herbs and spices to the mix. A sprinkle of smoked paprika or a dash of red pepper flakes can bring an exciting twist to the flavor profile.
  • Try different cheeses: While Parmesan is the star of the show, consider mixing in some pecorino or even a sprinkle of feta for a unique flavor.

Health Benefits of Cauliflower

Cauliflower is not just delicious; it’s also packed with health benefits! This cruciferous vegetable is rich in dietary fiber, vitamins C, K, and B6, and provides a healthy dose of antioxidants. It’s low in calories yet filling, making it an excellent choice for anyone looking to maintain a healthy diet without sacrificing flavor.

Serving Suggestions

This Garlic-Parmesan Roasted Cauliflower can stand proudly on its own, but it also plays well with others. Here are some serving suggestions:

  • As a side dish: Pair it with grilled chicken, steak, or fish for a complete meal.
  • In a wrap or sandwich: Pile it into a pita or tortilla with some fresh greens and your choice of protein for a satisfying lunch.
  • On top of a salad: Add it to a bed of mixed greens, cherry tomatoes, and a light vinaigrette for a refreshing salad.

Make-Ahead and Storage Tips

If you’re looking to prep ahead, this dish can be made in advance and stored in the refrigerator for up to 3 days. Just reheat in the oven or microwave before serving. Here are some additional storage tips:

  • Freezing: While I recommend enjoying this dish fresh, you can freeze the roasted cauliflower in an airtight container for up to a month. Reheat it in the oven to restore some of that crispy texture.
  • Storing leftovers: Store any leftover roasted cauliflower in an airtight container in the fridge. It’s perfect for adding to soups, stews, or even breakfast omelets!

Variations and Substitutions

Getting creative in the kitchen is part of the fun! Here are some variations and substitutions you can try:

  • Herb-seasoned Roasted Cauliflower: Replace garlic with fresh herbs like rosemary or thyme for a fragrant twist.
  • Spicy Roasted Cauliflower: Add a pinch of cayenne or a drizzle of sriracha to the olive oil mixture for a spicy kick!
  • Vegan Option: Swap out Parmesan cheese for nutritional yeast to keep it plant-based while still delivering a savory flavor.

FAQs

Can I use frozen cauliflower?
Absolutely! Just be sure to thaw and drain any excess moisture before seasoning and roasting.

What’s the best way to prevent mushiness?
A high oven temperature and proper spacing on the baking sheet are key to preventing mushiness. Also, don’t skip the stirring halfway through!

Can I substitute other vegetables?
While cauliflower is the star here, you can absolutely try this recipe with broccoli or Brussels sprouts. Just adjust the cooking time as needed!

Conclusion

There you have it, my friends! This Garlic-Parmesan Roasted Cauliflower is a dish that tantalizes the senses and proves that vegetables can be anything but boring. Whether you’re serving it as a side for a weeknight dinner or as a standout dish for guests, this recipe is sure to impress. So grab your skillet, turn up the heat, and let’s make some culinary magic happen! Don’t forget to snap a pic and share your creations with the hashtag #CookingWithMarcus. Happy cooking!

Garlic-Parmesan Roasted Cauliflower Recipe

Prep Time 10 minutes
Cook Time 30 minutes
Total Time 40 minutes
Servings 4 servings
Calories 150
A delicious and healthy roasted cauliflower dish infused with garlic and topped with Parmesan cheese, perfect as a side or snack.

Ingredients

Cauliflower

  • 1 large head cauliflower, cut into florets
  • 3 tablespoons olive oil
  • 4 cloves garlic, minced
  • to taste salt and pepper
  • 1/4 cup grated parmesan cheese
  • optional fresh parsley, chopped (for garnish)

Instructions 

  • Preheat oven to 400°F (200°C).
  • Toss cauliflower with olive oil, garlic, salt, and pepper.
  • Spread on a baking sheet and roast for 25-30 minutes.
  • Sprinkle with Parmesan cheese and garnish with parsley if desired.

Notes

For extra flavor, add a squeeze of lemon or red pepper flakes.
Calories: 150kcal
Cost: $10
Course: Side Dish
Cuisine: American
Keyword: Cauliflower

Nutrition

Calories: 150kcal | Carbohydrates: 12g | Protein: 6g | Fat: 10g | Sodium: 200mg

Loved this recipe? Save it to your favorite Pinterest board so you can easily find it later! It’s the perfect way to keep all your sweet ideas in one place. ✨

Detailed image of seasoned cauliflower with cheese and herbs.

The Tropical Kick That Turns Up the Heat in My Pineapple Mango Kefir Smoothie

Ah, the morning ritual! There’s something magical about waking up, the sun’s rays streaming through the window, and the sweet aroma of tropical fruits in the air. As someone who thrives on vibrant flavors and bold adventures, I can’t resist the allure of a smoothie that not only tantalizes the taste buds but also fuels the body with health-boosting probiotics. Enter my Pineapple Mango Kefir Smoothie—a drink that promises to whisk you away to a tropical paradise with every sip, while giving your gut the love it deserves.

Why You’ll Love This Pineapple Mango Kefir Smoothie

This isn’t just any smoothie; it’s a celebration of flavor, health, and convenience! Imagine the lusciousness of ripe pineapples and mangoes blended into a creamy kefir base, offering a delightful balance of sweetness and tang. It’s perfect for those busy mornings when you need a quick nutritional boost without compromising on taste. Plus, the probiotics in kefir aid digestion, making this smoothie your new go-to for a healthy start to the day. Let’s dive into what makes this smoothie a must-try!

Ingredients You’ll Need

Eye-level shot of a creamy pineapple mango kefir smoothie with detailed textures and a blurred background.

Creating this smoothie is as easy as 1-2-3! Here’s what you’ll need:

  • Pineapple: Fresh or frozen, this tropical fruit adds sweetness, a hint of tartness, and an explosion of vitamins!
  • Mango: The king of fruits! Its buttery texture and sweetness are essential for that tropical flavor.
  • Kefir: This probiotic-rich fermented milk drink not only makes your smoothie creamy but also supports gut health.

How to Make Pineapple Mango Kefir Smoothie

Step 1 – Gather Your Ingredients

First things first! Gather all your ingredients and ensure you have the right tools on hand. A good blender is crucial here; you want something that can handle frozen fruits without breaking a sweat.

Step 2 – Prep Your Fruits

If you’re using fresh fruits, peel and chop your pineapple and mango into manageable pieces. If you’re like me and sometimes opt for convenience, frozen fruits work just as well—plus, they keep your smoothie chilled!

Step 3 – Blend It Up

Now comes the fun part! Toss your pineapple chunks, mango pieces, and kefir into the blender. Here’s where you can get creative—add a splash of coconut water for extra hydration or a handful of spinach for a nutrient boost without altering the flavor. Blend everything until smooth and creamy. Your kitchen should start smelling like a beach vacation!

Step 4 – Serve and Enjoy

Pour your smoothie into a tall glass—don’t forget to savor the vibrant color! For a finishing touch, consider garnishing with a sprinkle of chia seeds or a slice of fresh fruit on the rim. Enjoy it right away, and let the tropical flavors transport you to an island paradise.

Tips for Perfect Results

  • Choose Ripe Fruits: The riper your fruits, the sweeter your smoothie will be. Look for pineapples with a golden hue and mangoes that yield slightly to pressure.
  • Blend in Batches: If your blender struggles with frozen fruits, blend in batches or add a bit more kefir to help it along.
  • Taste as You Go: Always taste your smoothie before serving! Adjust sweetness with a little honey or agave syrup if needed.

Essential Equipment Needed

To whip up this delicious Pineapple Mango Kefir Smoothie, you’ll need:

  • A high-powered blender
  • A measuring cup
  • A cutting board and knife
  • A glass or mason jar for serving

Delicious Variations of Pineapple Mango Kefir Smoothie

Feeling adventurous? Here are some exciting twists you can try:

  • Spicy Kick: Add a small piece of fresh ginger or a pinch of cayenne pepper for a surprising heat that complements the fruit.
  • Nutty Delight: Toss in a tablespoon of almond or peanut butter for added creaminess and protein.
  • Superfood Boost: Include a scoop of protein powder or a tablespoon of flaxseed for a healthful punch.

Storage & Freezing

If you find yourself with leftovers (which is rare, but it happens!), store your smoothie in an airtight container in the refrigerator for up to 24 hours. However, keep in mind that the texture may change as it sits. For longer storage, consider freezing your smoothie in ice cube trays. Once frozen, pop them out and store in a zip-top bag for a quick smoothie base anytime.

Can I Substitute Ingredients?

Absolutely! Here are some substitutions you can make:

  • If you don’t have kefir, plain yogurt or a dairy-free alternative like coconut yogurt can work as a great substitute.
  • For a different flavor profile, swap out pineapple and mango for other fruits like strawberries or peaches.
  • Need a vegan option? Use plant-based kefir or yogurt made from almond or coconut milk.

FAQs About Pineapple Mango Kefir Smoothie

Can I use other fruits?

Yes! Feel free to experiment with other tropical fruits like papaya or banana for a unique twist.

How can I make this smoothie thicker?

For a thicker texture, add more frozen fruit or a handful of oats. You can also reduce the amount of kefir used.

Is this smoothie good for meal prep?

Yes! Prepare your fruits in advance and store them in the freezer. When you’re ready, just blend with kefir for a quick meal.

Final Thoughts on Pineapple Mango Kefir Smoothie

This Pineapple Mango Kefir Smoothie is more than just a refreshing drink; it’s a gateway to a vibrant, healthy lifestyle. With every sip, you’re not only indulging in the luscious flavors of the tropics but also nourishing your body with probiotics and nutrients. So why not make this your breakfast staple? It’s quick, easy, and brimming with adventure! I encourage you to experiment, adapt, and make it your own. Because the kitchen is your playground, and every smoothie is a new adventure. Cheers to sunny mornings and bold flavors!

Looking for more delicious meal ideas? Check out my Everyday Delights for simple dinners, or explore my Joyful Bites for delightful treats!

Pineapple Mango Kefir Smoothie

Prep Time 5 minutes
Total Time 5 minutes
Servings 2 cups
Calories 180
Enjoy a refreshing, probiotic-rich smoothie that combines tropical flavors for a healthy start to your day.

Ingredients

Fruits

  • 1 cup pineapple (fresh or frozen, chopped)
  • 1 cup mango (fresh or frozen, chopped)
  • 1 cup kefir (plain, unsweetened)

Instructions 

  • Add pineapple, mango, and kefir to a blender.
  • Blend until smooth.
  • Pour into glasses and serve immediately.

Notes

This smoothie is quick to prepare and packed with probiotics and tropical flavor.
Calories: 180kcal
Cost: $10
Course: Breakfast
Cuisine: Tropical
Keyword: pineapple

Nutrition

Calories: 180kcal | Carbohydrates: 40g | Protein: 8g | Fat: 2g | Sodium: 50mg

Loved this recipe? Save it to your favorite Pinterest board so you can easily find it later! It’s the perfect way to keep all your sweet ideas in one place. ✨

Beautifully presented pineapple mango kefir smoothie captured in natural light, showcasing its smooth surface.

How Maple Roasted Carrots with Cranberries Became My Sweet & Spicy Revelation

Hey there, fellow food adventurers! Today, I want to share a recipe that’s taken me on a delicious journey—maple roasted carrots with cranberries. Trust me, this dish is not just a side; it’s a sweet and spicy revelation that elevates your dining experience into something truly memorable. It’s a harmonious blend of earthy sweetness, tartness, and a touch of warmth, perfect for cozy dinners or festive gatherings. Let’s dive deep into this culinary escapade that will awaken your taste buds and ignite your passion for cooking!

The Allure of Maple Roasted Carrots

Carrots, those vibrant orange gems, are often overlooked, but when roasted, they transform into a sweet, caramelized delight. With every bite, you’ll experience their natural sweetness intensified by the magic of maple syrup. And when you toss in dried cranberries, it’s like fireworks of flavor explode on your palate! This dish has become a staple in my kitchen, especially during the holiday season, where it accompanies everything from hearty roasts to delicate vegan dishes.

Ingredients: What You’ll Need

Eye-level shot of caramelized carrots with cranberries and a sprig of parsley.
  • 1 pound carrots, peeled and sliced
  • 2 tablespoons maple syrup
  • 1/2 cup dried cranberries
  • 1 tablespoon olive oil
  • Salt and pepper to taste
  • Optional: fresh parsley for garnish

How to Make Maple Roasted Carrots with Cranberries

Ready to whip up this scrumptious side dish? Follow these simple steps to bring the magic of maple roasted carrots into your kitchen:

Step-by-Step Instructions

  1. Preheat Your Oven: Set your oven to 400°F (200°C). This is the perfect temperature to get those carrots tender and caramelized.
  2. Mix the Ingredients: In a mixing bowl, toss the sliced carrots with olive oil, maple syrup, salt, and pepper until they are well coated. Feel that slickness? That’s the secret to roasting perfection!
  3. Spread and Roast: Spread the carrots evenly on a baking sheet lined with parchment paper. This not only prevents sticking but also makes cleanup a breeze. Roast in the oven for about 20-25 minutes, or until they are tender and slightly caramelized. Keep an eye on them; you want that gorgeous golden-brown color!
  4. Add the Cranberries: During the last 5 minutes of roasting, sprinkle the dried cranberries over the carrots. This allows them to warm up and plump slightly, adding a beautiful burst of tartness.
  5. Serve: Once roasted to perfection, remove from the oven and transfer to a serving dish. If you’re feeling fancy, garnish with fresh parsley for a pop of color and freshness!

Why This Recipe Works

Now, you may be wondering why this particular combination of ingredients works so well together. It’s all about balance. The sweetness of the maple syrup plays beautifully against the natural earthiness of the carrots, while the cranberries introduce a tangy note that cuts through the sweetness. This sweet and spicy revelation is a testament to the beauty of cooking—where simple ingredients become extraordinary when treated with love and respect.

Tips for Perfect Maple Roasted Carrots

  • Uniform Sizing: Cut the carrots into similar sizes for even cooking. This ensures every piece caramelizes at the same rate, delivering that perfect texture.
  • Don’t Crowd the Pan: Give those carrots some space! Overcrowding can lead to steaming instead of roasting. Use two baking sheets if necessary.
  • Check for Doneness: Use a fork to pierce the carrots. They should be tender but still have a bit of bite; you don’t want mushy carrots!

Variations to Explore

This recipe is incredibly versatile. Here are a few variations to spice things up:

  • Spicy Kick: Add a pinch of cayenne pepper or a dash of harissa for a fiery twist!
  • Nutty Flavor: Toss in some toasted almonds or walnuts for extra crunch and nuttiness.
  • Herb Infusion: Experiment with herbs like thyme or rosemary for an aromatic twist that complements the sweetness beautifully.

Substitutions You Can Make

Don’t have maple syrup? No worries! Honey or agave syrup can be excellent substitutes, imparting their own unique sweetness. If you’re looking for a lower-sugar option, consider using a splash of balsamic vinegar to enhance the carrots’ natural flavors without the extra sweetness.

Equipment You’ll Need

Before you get started, make sure you have the following equipment handy:

  • Oven
  • Baking sheet
  • Parchment paper (optional)
  • Mixing bowl
  • Knife and cutting board

Storage and Freezing

If you’re lucky enough to have leftovers, here’s how to store them:

  • Refrigerator: Store the roasted carrots in an airtight container in the fridge for up to 4 days.
  • Freezing: For longer storage, freeze the roasted carrots in a single layer on a baking sheet, then transfer them to a freezer-safe bag. They can last up to 3 months. Just remember that the texture might change slightly after freezing.

FAQs

Can I make this dish ahead of time?

Absolutely! You can prep the carrots in advance and store them in the fridge. Simply roast them just before serving for that fresh-out-of-the-oven taste.

What can I serve with maple roasted carrots?

This dish pairs beautifully with roasted meats, hearty grain salads, or even as part of a festive vegan feast. It’s versatile enough to complement any main dish!

Can I substitute fresh cranberries instead of dried?

While fresh cranberries are delicious, they are quite tart and may not provide the same sweetness. If you choose to use fresh, consider adding a bit of sugar or maple syrup to balance the flavors.

Conclusion: Embrace the Spice of Life

There you have it, folks! Maple roasted carrots with cranberries—a dish that captures the essence of bold and adventurous cooking. Each bite is a celebration of flavors that dances on your tongue, reminding you that food is not just about nourishment; it’s about connection, adventure, and joy. So gather your ingredients, preheat that oven, and let the sweet and spicy magic unfold. Remember, cooking is an exploration—don’t be afraid to experiment and make this recipe your own! And if you’re looking for more culinary inspiration, check out my everyday delights or indulge in some joyful bites. Happy cooking!

Maple Roasted Carrots with Cranberries

Prep Time 10 minutes
Cook Time 25 minutes
Total Time 35 minutes
Servings 4 servings
Calories 150
A sweet and savory side dish featuring tender roasted carrots glazed with maple syrup and topped with warm dried cranberries.

Ingredients

Vegetables

  • 1 pound carrots, peeled and sliced
  • 2 tablespoons maple syrup
  • 1/2 cup dried cranberries
  • 1 tablespoon olive oil
  • to taste salt and pepper (as needed)
  • optional fresh parsley for garnish (for garnish)

Instructions 

  • Preheat oven to 400°F (200°C). Toss carrots with olive oil, maple syrup, salt, and pepper.
  • Spread carrots on a parchment-lined baking sheet and roast for 20-25 minutes.
  • Add cranberries during the last 5 minutes of roasting.
  • Remove from oven, transfer to a serving dish, and garnish with parsley if desired.

Notes

This dish pairs well with roasted meats or as a festive side for holidays.
Calories: 150kcal
Cost: $12
Course: Side Dish
Cuisine: American
Keyword: Carrots, cranberries, Maple Syrup

Nutrition

Calories: 150kcal | Carbohydrates: 35g | Protein: 2g | Fat: 4g | Sodium: 150mg

Loved this recipe? Save it to your favorite Pinterest board so you can easily find it later! It’s the perfect way to keep all your sweet ideas in one place. ✨

Detailed image of maple-roasted carrots garnished with cranberries and herbs.