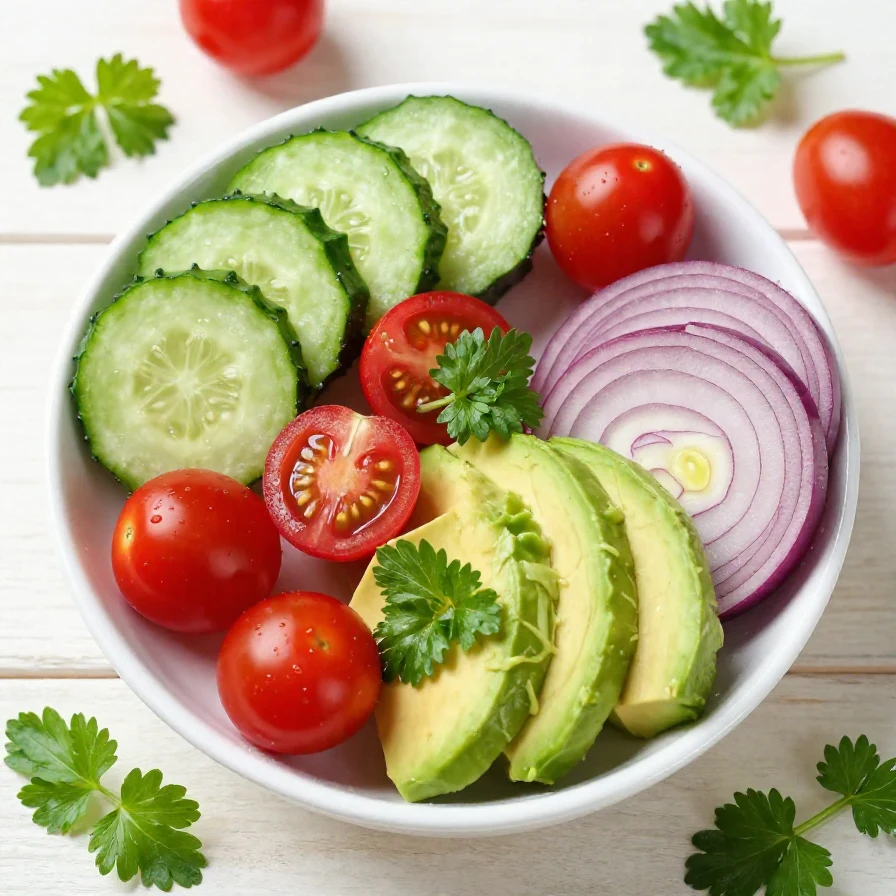
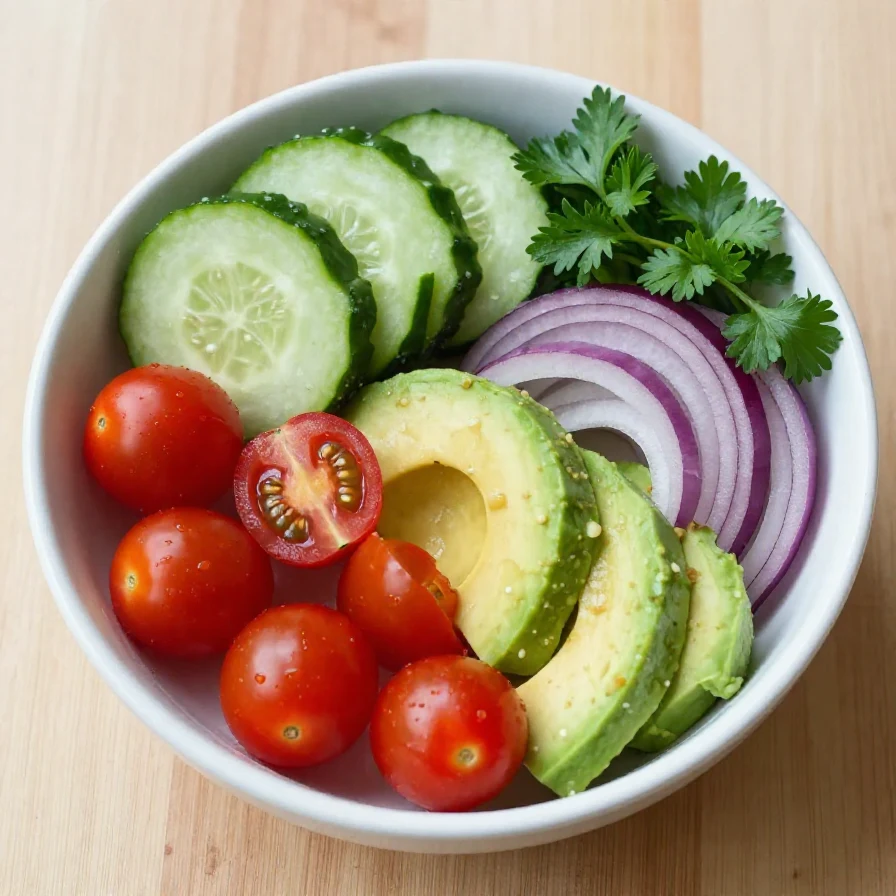
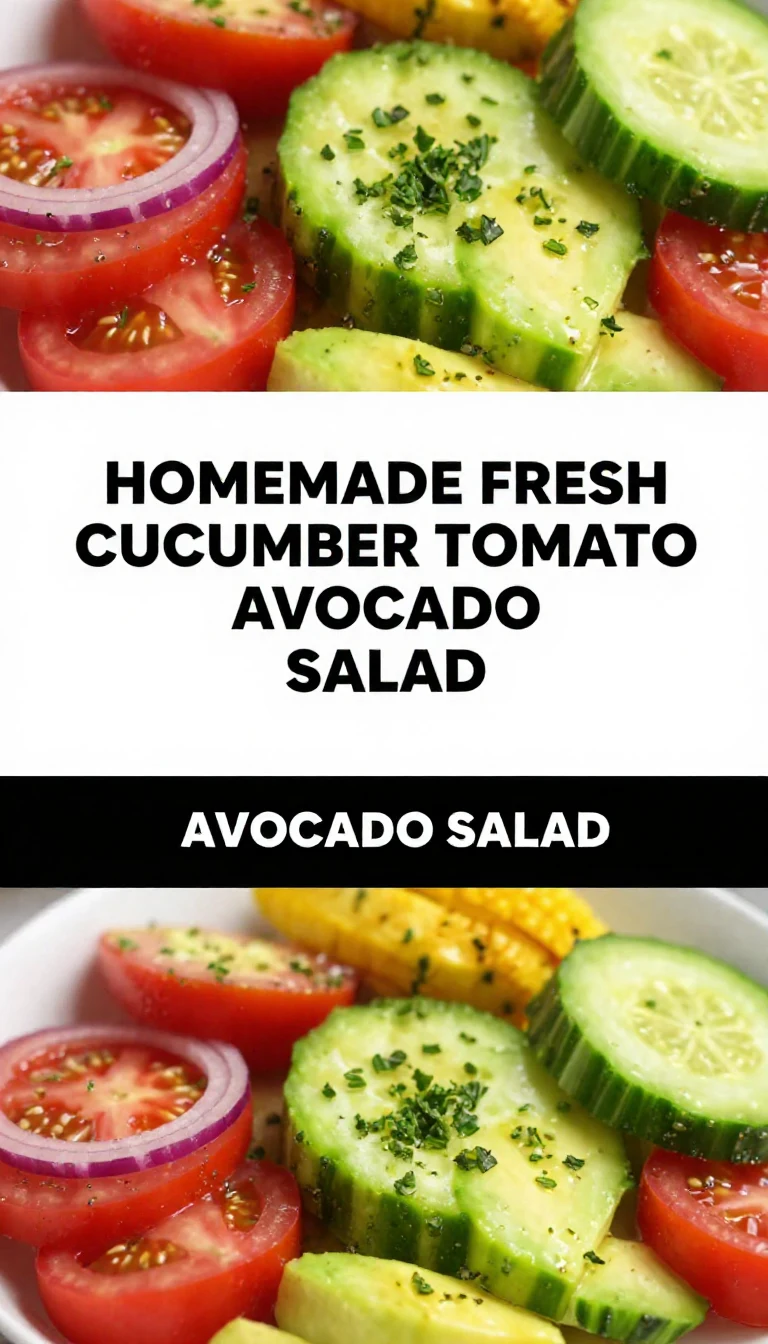
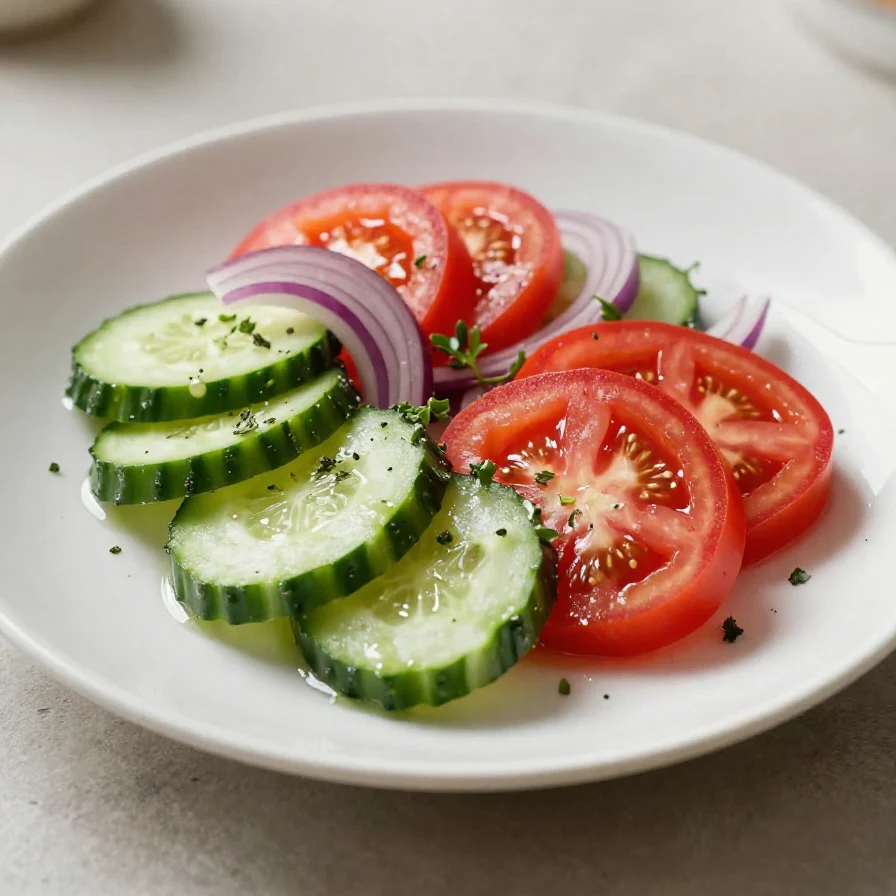
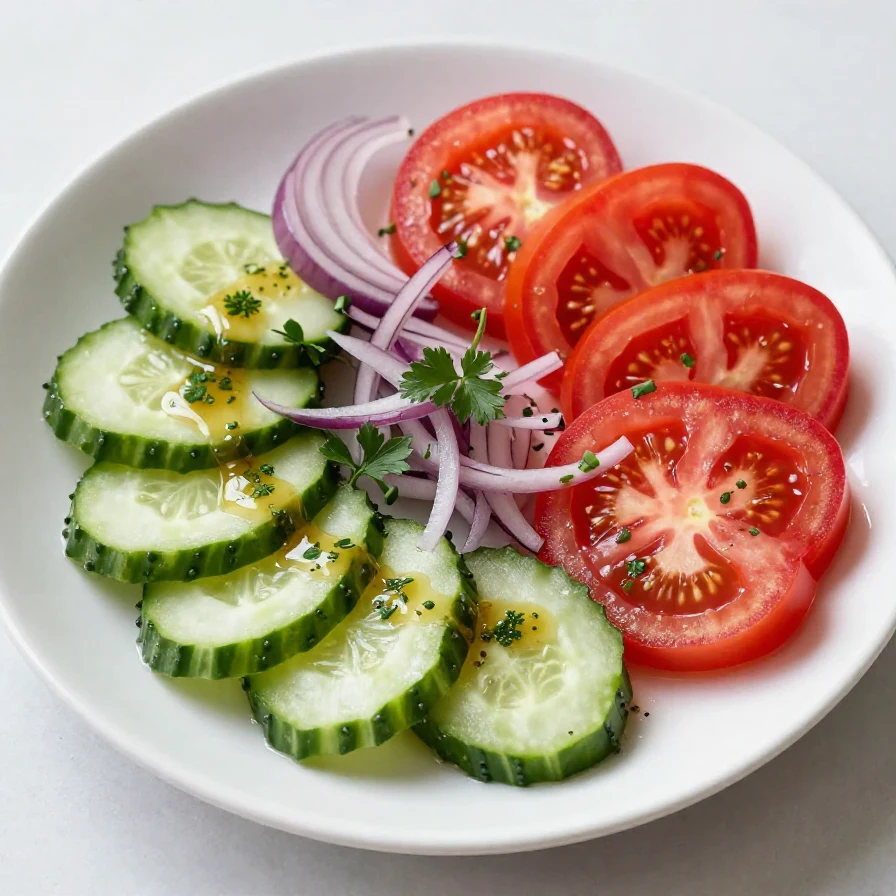
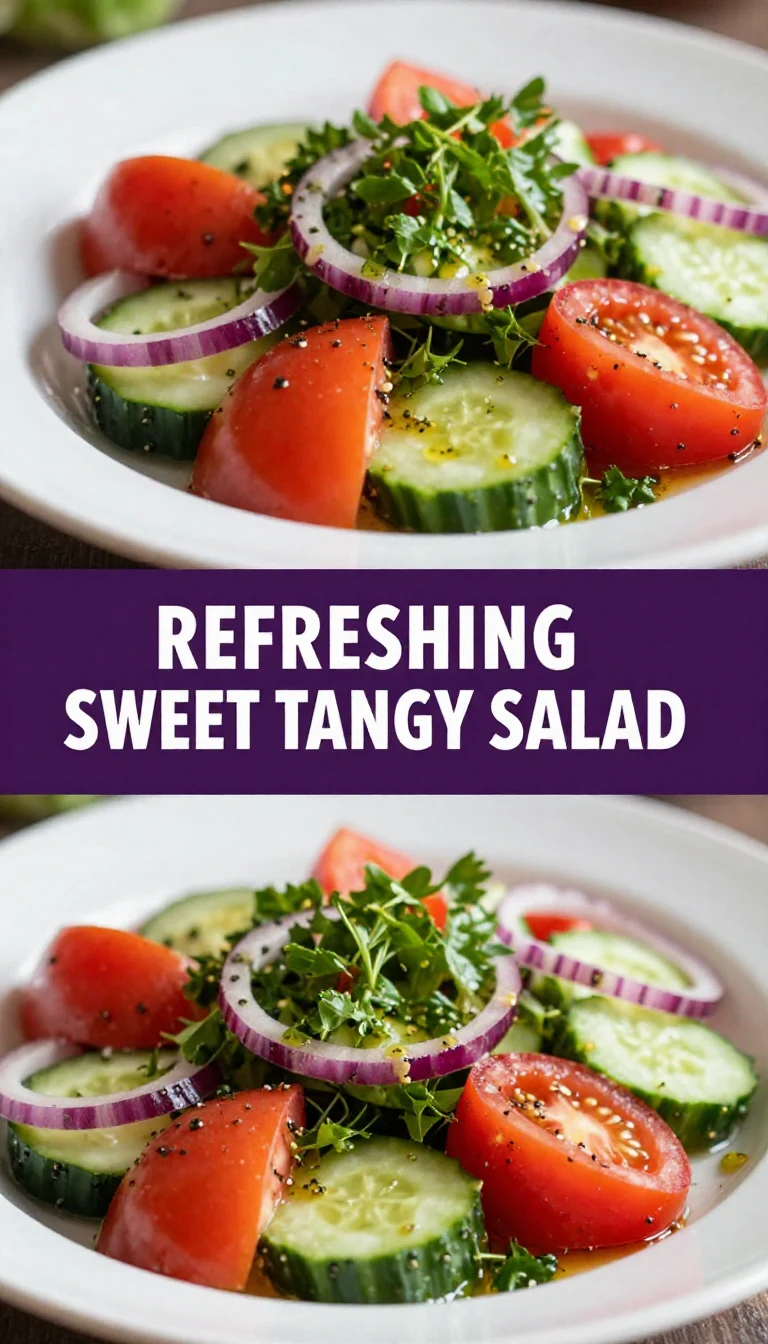
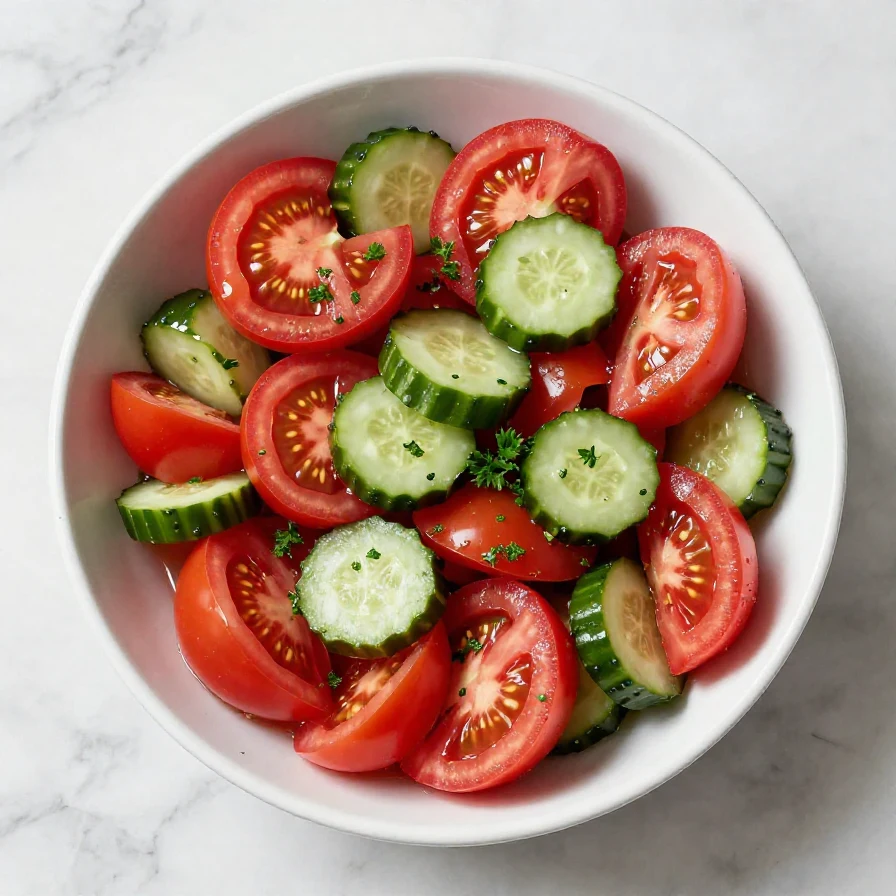
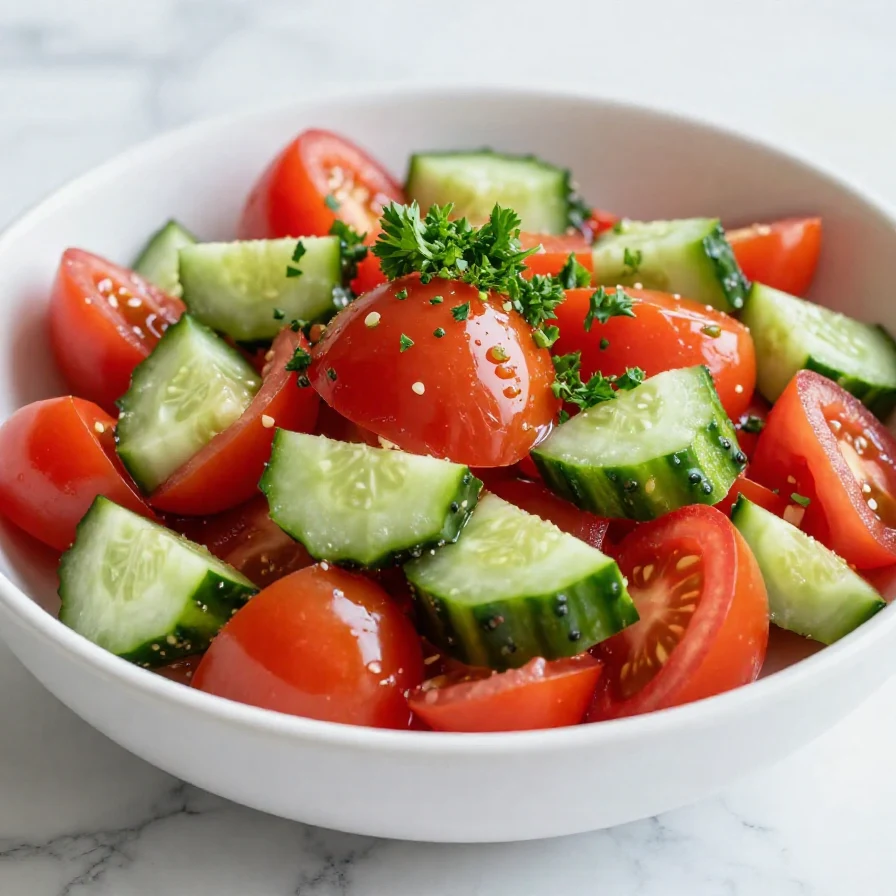
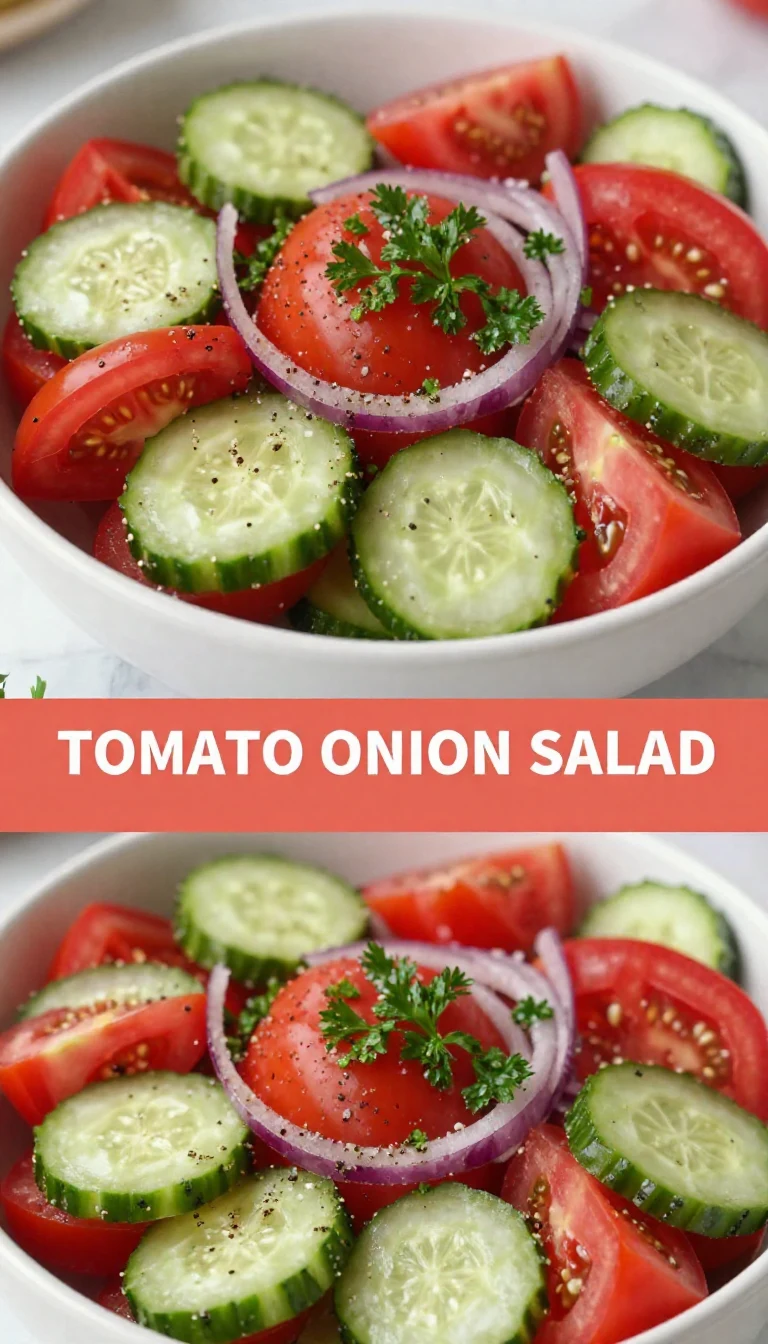
Author

Avery Collins

Browsing

The rain is drumming a soft rhythm against my window here in Portland, the kind of day that begs for comfort. And what’s more comforting than a creamy, dreamy bowl of Chicken Fettuccine Alfredo? This isn’t just a recipe; it’s a warm hug on a plate. My journey with food started with a need to nourish myself, and this dish, in its simple richness, embodies that spirit. It’s about taking humble ingredients and turning them into something truly satisfying.

Why You’ll Love This Chicken Fettuccine Alfredo

This Chicken Fettuccine Alfredo recipe is more than just delicious; it’s about bringing joy to your table with minimal fuss. I’m not about spending hours in the kitchen, especially on a weeknight. This recipe is designed for real life, for busy schedules, and for those moments when you crave something truly comforting.

  • Quick & Easy: Ready in under 30 minutes, perfect for a weeknight meal.
  • Creamy & Dreamy: The alfredo sauce is rich, decadent, and utterly irresistible.
  • Versatile: Easily customizable with your favorite vegetables or protein. If you prefer shrimp or sausage, you can substitute it for the chicken.
  • Crowd-Pleaser: A guaranteed hit with both kids and adults.
  • Comfort Food at its Finest: There’s nothing quite like a warm bowl of pasta to soothe the soul.

I’m so glad to share this recipe with you. It’s one of my go-to meals when I need something quick, comforting, and utterly satisfying. I think you’ll find it becomes a staple in your home too.

Ingredients for the Best Chicken Fettuccine Alfredo

Here’s what you’ll need to create this masterpiece:

  • 16 oz. fettuccine
  • 1 pound boneless, skinless chicken breast
  • 2 tablespoons olive oil, divided + more for tossing the pasta
  • 1 teaspoon Italian seasoning
  • 1/2 teaspoon paprika
  • 8 tablespoons butter
  • 2 cloves garlic, minced
  • 16 oz. heavy cream
  • 8 oz. freshly shredded Parmesan cheese
  • 1/2 teaspoon Kosher salt
  • 1/4 teaspoon nutmeg
  • 1/4 teaspoon fresh cracked black pepper
  • fresh chopped parsley for garnish

How to Make Chicken Fettuccine Alfredo: Step-by-Step Instructions

Let’s get cooking! This Chicken Fettuccine Alfredo recipe is straightforward, but follow these steps for the best results:

  1. Cook the pasta just until al dente. Toss with olive oil and season with salt and pepper.
  2. Cut the chicken breasts in half lengthwise, creating two thinner pieces out of each chicken breast. This will help them cook more quickly.
  3. Heat 1 tablespoon olive oil in a large sauté pan over medium-high heat.
  4. Add chicken breast to a medium bowl and drizzle with the remaining 1 tablespoon olive oil. Season with Italian seasoning, paprika, and a couple large pinches of salt and pepper. Toss to coat the chicken evenly.
  5. Sear chicken for about 4-7 minutes per side or until a golden brown crust forms on the outside and the chicken is cooked through on the inside. Let chicken rest for 5 minutes, then slice.
  6. Cut butter into 8 slices, add to the large sauté pan, and reduce heat to low.
  7. Add garlic and cook for 30-60 seconds, stirring frequently. Do not allow garlic to brown!
  8. Whisk in heavy cream and bring to a gentle simmer over medium heat.
  9. Reduce heat to low or medium-low and simmer gently (do not boil!), whisking frequently, for about 3-4 minutes or until it thickens slightly. It should easily coat the back of a spoon. This is where the magic of the alfredo sauce happens!
  10. Remove the pan from heat and stir in Parmesan cheese, nutmeg, salt, and pepper until the cheese melts.
  11. Add cooked pasta and toss to coat evenly. Season to taste with salt and pepper.
  12. Add chicken and return to medium-low heat for a couple minutes or until everything is warmed through.
  13. Garnish with parsley and serve!

Pro Tips for Perfect Chicken Fettuccine Alfredo

These little tips will elevate your Chicken Fettuccine Alfredo from good to extraordinary:

  • Use Fresh Parmesan: Pre-shredded Parmesan often contains cellulose, which can prevent it from melting smoothly. Freshly shredded Parmesan will give you the creamiest sauce.
  • Don’t Overcook the Garlic: Burnt garlic can ruin the entire sauce. Cook it gently over low heat until fragrant.
  • Simmer, Don’t Boil: Boiling the heavy cream can cause it to separate. Simmering gently allows it to thicken beautifully.
  • Cook Pasta Al Dente: Al dente pasta holds its shape better and absorbs the sauce without becoming mushy.
  • Season Generously: Don’t be afraid to season the chicken and the sauce generously with salt and pepper. It makes a world of difference. I’m so serious about this!

Common Mistakes to Avoid

Even with a simple recipe, it’s easy to make a few common mistakes. Here’s what to watch out for:

  • Using Cold Chicken: If you add cold chicken to the sauce, it can cool everything down and prevent the sauce from clinging to the pasta properly. Make sure the chicken is warmed through before serving.
  • Overcooking the Pasta: Mushy pasta is a no-go. Cook it al dente and toss it with olive oil to prevent sticking.
  • Adding Too Much Salt: Parmesan cheese is already salty, so be careful not to over-salt the sauce. Taste as you go and adjust accordingly.
  • Skipping the Nutmeg: A pinch of nutmeg adds a subtle warmth and depth of flavor to the alfredo sauce. Don’t skip it!

Chicken Fettuccine Alfredo Variations

Want to mix things up? Here are a few delicious variations:

  • Add Vegetables: Sautéed mushrooms, spinach, broccoli, or sun-dried tomatoes are all great additions.
  • Spice it Up: Add a pinch of red pepper flakes to the sauce for a little heat.
  • Use Different Protein: Shrimp, sausage, or tofu are all delicious alternatives to chicken.
  • Make it Lighter: Use half-and-half instead of heavy cream for a lighter version. Just be sure to simmer it gently to prevent curdling.
  • Lemon Chicken Alfredo: Add the zest and juice of one lemon to the sauce for a bright, citrusy twist.

If you’re looking for a different kind of pasta, you can try using penne, linguine, or even gluten-free pasta. This recipe is very forgiving!

How to Store and Reheat Chicken Fettuccine Alfredo

Got leftovers? Here’s how to store and reheat them properly:

  • Storage: Store leftover Chicken Fettuccine Alfredo in an airtight container in the refrigerator for up to 3 days.
  • Reheating: Reheat gently in a saucepan over low heat, adding a splash of milk or cream to loosen the sauce. You can also microwave it in 30-second intervals, stirring in between, until heated through. Be careful not to overheat, as the sauce can separate.

I’m so glad this recipe can be enjoyed even the next day!

Frequently Asked Questions (FAQ)

Here are some common questions about Chicken Fettuccine Alfredo:

  • Can I make this ahead of time? While the alfredo sauce is best served fresh, you can cook the pasta and chicken ahead of time and store them separately. Reheat the sauce and toss everything together just before serving.
  • Can I freeze Chicken Fettuccine Alfredo? Freezing is not recommended, as the sauce can separate and become grainy when thawed.
  • Can I use milk instead of heavy cream? While you can use milk, the sauce won’t be as rich and creamy. If you do use milk, add a tablespoon of butter to help thicken it.
  • Is this recipe gluten-free? No, this recipe is not naturally gluten-free because it contains fettuccine pasta. However, you can easily make it gluten-free by using gluten-free fettuccine.

Thanks for asking these great questions!

Serving Suggestions

Chicken Fettuccine Alfredo is a complete meal on its own, but here are a few serving suggestions to make it even more special:

  • Side Salad: A simple green salad with a vinaigrette dressing provides a refreshing contrast to the richness of the pasta.
  • Garlic Bread: Crusty garlic bread is perfect for soaking up the delicious alfredo sauce.
  • Roasted Vegetables: Roasted asparagus, broccoli, or Brussels sprouts are all great additions.
  • Wine Pairing: A crisp white wine like Pinot Grigio or Sauvignon Blanc pairs well with Chicken Fettuccine Alfredo.

I’m so happy to share this recipe with you, and I hope you enjoyed this. I’m sure you’ll love making this at home, and I can’t wait for you to leave a review! Thanks for taking the time to read and cook with me! I’m so glad you’re here. I hope you’ll enjoy this delicious chicken alfredo. It’s a fantastic way to use heavy cream and create a memorable chicken fettuccine. You’ll find this recipe is incredibly easy, and if you follow these steps, you can make the sauce perfectly every time. The chicken adds a wonderful protein element, making it a complete and satisfying meal. I’m so glad you’re trying this, and I hope you’ll agree that it’s a delicious and easy way to enjoy chicken alfredo. Remember, the key is to cook the pasta al dente and use freshly grated Parmesan for the best results. Thanks for taking the time to learn this recipe; I’m so glad to have you here!

Simple & Delicious Avocado Salad Recipe: A Taste of Sunshine in Every Bite

Hello, friends! Avery here, from my little kitchen in Portland. Today, I’m sharing a recipe that’s become a staple in my life – a simple yet utterly satisfying Avocado Salad. It’s one of those dishes that came about out of necessity, a craving for something fresh and vibrant during a particularly gray Oregon afternoon. And now, it’s my go-to lunch, a perfect side dish, or even a quick snack when I need a little pick-me-up.

This salad isn’t about complicated techniques or fancy ingredients; it’s about celebrating the pure, creamy goodness of avocados, brightened by a zesty lime dressing and a sprinkle of fresh herbs. Think of it as a little pocket of sunshine on your plate.

Why You’ll Absolutely Love This Avocado Salad

I know what you might be thinking: another avocado salad? But trust me, this one’s different. It’s not just about mashing some avocados and calling it a day. It’s about creating a harmonious blend of flavors and textures that will leave you feeling nourished and happy. Here’s why I think you’ll fall in love with this recipe:

  • It’s Incredibly Easy: Seriously, you don’t need any special skills or equipment to make this salad. It’s ready in minutes, making it perfect for busy weeknights or lazy weekend lunches.
  • It’s Packed with Nutrients: Avocados are a nutritional powerhouse, loaded with healthy fats, fiber, and vitamins. This salad is a guilt-free way to fuel your body with goodness.
  • It’s Versatile: You can enjoy this salad on its own, as a side dish, or as a topping for your favorite tacos, sandwiches, or grilled chicken. The possibilities are endless!
  • It’s Delicious: Of course, the most important reason to love this salad is because it tastes amazing! The creamy avocado, the tangy lime, the fresh cilantro – it’s a flavor explosion in every bite.

This avocado salad *is not* just another recipe; *it’s* a lifestyle. *You’re* not going to find anything complicated here, which is *real life*. I *don’t* want you to feel like you *need* *a plan*, because *it doesn’t* have to be perfect. *This is not* *keto done, done right*. It’s just about delicious food.

The Simple Ingredients You’ll Need

Here’s what you’ll need to whip up this delightful avocado salad:

  • 2 ripe avocados, diced: The star of the show! Make sure they’re perfectly ripe – soft to the touch but not mushy.
  • 1/4 cup red onion, finely chopped: Adds a little bit of bite and a beautiful pop of color.
  • 1/4 cup cilantro, chopped: Fresh cilantro is a must for that vibrant, herbaceous flavor. If you’re not a fan, you can substitute with parsley.
  • 1 lime, juiced: The lime juice not only adds a zesty tang but also helps to prevent the avocado from browning.
  • 1 tablespoon olive oil: Adds richness and helps to bind the flavors together.
  • Salt and pepper to taste: Don’t be afraid to season generously!

Let’s Make Some Magic: Step-by-Step Instructions

Ready to get started? Here’s how to make this incredibly easy avocado salad:

  1. Combine the Ingredients: In a medium bowl, gently combine the diced avocados, red onion, and cilantro.
  2. Make the Dressing: In a small bowl, whisk together the lime juice and olive oil.
  3. Dress the Salad: Pour the dressing over the avocado mixture and gently toss to combine. Be careful not to overmix, as you want to keep the avocado chunks intact.
  4. Season to Perfection: Season with salt and pepper to taste. Give it a good stir and adjust the seasoning as needed.
  5. Serve and Enjoy: Serve immediately or chill for later. This salad is best enjoyed fresh, but it can be stored in the refrigerator for a few hours.

*You don’t* *t need* anything fancy, *you need* to enjoy the *moment*.

Pro Tips for the Perfect Avocado Salad

Here are a few tips to help you make the best avocado salad ever:

  • Choose the Right Avocados: The key to a great avocado salad is using perfectly ripe avocados. Look for avocados that are slightly soft to the touch but not mushy. Avoid avocados that are rock hard or have bruises.
  • Don’t Overmix: Be gentle when mixing the salad, as you don’t want to mash the avocados. Just toss the ingredients together until they’re lightly coated with the dressing.
  • Add a Pinch of Spice: For a little extra kick, add a pinch of red pepper flakes to the dressing.
  • Taste and Adjust: Before serving, taste the salad and adjust the seasoning as needed. You may want to add more lime juice, salt, or pepper depending on your preference.

Common Mistakes to Avoid

Even though this recipe is super simple, here are a few common mistakes to watch out for:

  • Using Unripe Avocados: This is a big one! Unripe avocados will be hard and flavorless, and they won’t blend well with the other ingredients.
  • Overmixing the Salad: Overmixing will turn the avocados into a mushy mess. Be gentle when tossing the ingredients together.
  • Not Seasoning Enough: Salt and pepper are essential for bringing out the flavors of the avocados and other ingredients. Don’t be afraid to season generously.
  • Letting it Sit Too Long: Avocado salad is best enjoyed fresh. If you let it sit for too long, the avocados will start to brown and the salad will lose its flavor.

*If you* do *them in* the right order, *you get* a delicious result. I *ve tried* and tested it!

Variations to Spice Things Up

Want to add a little twist to your avocado salad? Here are a few fun variations to try:

  • Add Tomatoes: Diced tomatoes add a juicy sweetness to the salad.
  • Add Corn: Grilled or roasted corn adds a smoky flavor and a satisfying crunch.
  • Add Black Beans: Black beans add protein and fiber, making the salad more filling.
  • Add Jalapeño: For a spicy kick, add a finely chopped jalapeño pepper.
  • Add Feta Cheese: Crumbled feta cheese adds a salty, tangy flavor that complements the creamy avocado perfectly.

*You ve* *ve tried* other salads, but have you tried adding feta? *Because they* are delicious!

How to Store Leftover Avocado Salad

Avocado salad is best enjoyed fresh, but if you have leftovers, you can store them in an airtight container in the refrigerator for up to 24 hours. To prevent the avocados from browning, press a piece of plastic wrap directly onto the surface of the salad. It’s *the problem* everyone has!

Frequently Asked Questions (FAQ)

  • Can I make this salad ahead of time? While it’s best enjoyed fresh, you can make the dressing ahead of time and store it in the refrigerator. Just add the dressing to the avocado mixture right before serving.
  • Can I use a different type of onion? Yes, you can substitute the red onion with white onion, yellow onion, or even scallions.
  • Can I use dried cilantro? Fresh cilantro is always best, but if you don’t have any on hand, you can use dried cilantro. Use about 1 teaspoon of dried cilantro for every 1/4 cup of fresh cilantro.
  • Is this salad vegan? Yes, this salad is naturally vegan.
  • Is this salad gluten-free? Yes, this salad is naturally gluten-free.

I *don’t* think there’s *another* salad quite like it! *You get* *relief from* knowing it’s healthy.

Serving Suggestions: How to Enjoy Your Avocado Salad

Here are a few delicious ways to enjoy your avocado salad:

  • As a Side Dish: Serve it alongside grilled chicken, fish, or steak.
  • As a Topping: Top your favorite tacos, sandwiches, or burgers with a generous spoonful of avocado salad.
  • As a Dip: Serve it with tortilla chips or vegetable sticks for a healthy and flavorful dip.
  • As a Light Lunch: Enjoy it on its own with a side of whole-grain crackers or a piece of toast.
  • In a Bowl: Add it to a nourish bowl with quinoa, roasted vegetables, and a drizzle of tahini dressing.

I hope you enjoy this simple and delicious Avocado Salad as much as I do! It’s a little taste of sunshine that’s sure to brighten your day. And remember, healthy eating *doesn’t* have to be complicated or restrictive. It’s all about finding joy in the process and nourishing your body with whole, wholesome foods.

This *is not* *a plan* for *weight loss*; *it’s* a recipe for a happy life.

For more recipes like this, check out my green goddess salad-cucumber-avocado-recipe, tiktok-green-goddess-salad, and green-goddess-salad-a-vibrant-and-delicious-recipe!

Hey friends, Avery here! Remember those sweltering summer days when all you craved was something light, fresh, and bursting with flavor? Well, I’ve got just the recipe for you: Street Corn Creamy Cucumber Chicken Salad. This isn’t just another salad; it’s a vibrant medley of textures and tastes that’ll make you feel like you’re at a summer picnic, no matter where you are. Think sweet corn, crisp cucumber, tender chicken, and a creamy, tangy dressing that brings it all together. Trust me, this is one you’ll want to make again and again.

Why You’ll Love This Street Corn Cucumber Chicken Salad

This salad isn’t just about throwing ingredients together; it’s about creating an experience. It’s one of my favorite spring salad recipes that transitions beautifully into summer. Here’s why you will adore this dish:

  • Flavor Explosion: The combination of sweet corn, cool cucumber, and savory chicken creates a symphony of flavors that dance on your palate.
  • Texture Delight: From the crunch of the cucumber to the tenderness of the chicken, every bite is a textural adventure.
  • Easy to Make: This salad comes together in minutes, making it perfect for busy weeknights or impromptu gatherings.
  • Versatile: Enjoy it as a light lunch, a side dish, or even a main course.
  • Healthy and Satisfying: Packed with protein and veggies, this salad is a guilt-free way to indulge your cravings.

Ingredients for Street Corn Creamy Cucumber Chicken Salad

Here’s what you’ll need to whip up this amazing salad. Don’t worry if you don’t have everything on hand; feel free to substitute based on what’s fresh and available to you. Remember, cooking should be fun and forgiving!

  • 2 cups grilled or roasted chicken, diced: This forms the protein base of our salad. You can use leftover rotisserie chicken for convenience.
  • 1 cup sweet corn, grilled or canned: Grilled corn adds a smoky sweetness, but canned corn works just as well in a pinch.
  • 1 large cucumber, diced: Adds a refreshing crunch. English cucumbers are great because they have fewer seeds.
  • ½ cup red onion, finely chopped: Provides a zesty bite. If you find red onion too strong, soak it in cold water for 10 minutes to mellow the flavor.
  • ½ cup mayonnaise: Creates the creamy base of the dressing. I prefer using avocado mayo for a healthier twist.
  • 2 tablespoons Greek yogurt: Adds tanginess and creaminess while boosting the protein content.
  • 1 tablespoon lime juice: Brightens up the flavors and adds a zesty kick.
  • 1 tablespoon cilantro, chopped: Infuses the salad with a fresh, herbaceous note.
  • 1 teaspoon smoked paprika: Lends a smoky depth of flavor that complements the sweet corn.
  • 1 teaspoon salt (to taste): Enhances all the flavors.
  • ½ teaspoon black pepper: Adds a subtle warmth.
  • Optional: crumbled feta cheese for garnish: If you’re a cheese lover, a sprinkle of feta adds a salty, tangy finish.

How to Make Street Corn Creamy Cucumber Chicken Salad: Step-by-Step

The beauty of this salad is its simplicity. Here’s how to bring it all together:

  1. Prepare the Chicken: If you’re grilling your chicken, make sure it’s cooked through and slightly charred for extra flavor. Let it cool slightly before dicing. Roasted chicken works great too!
  2. Grill the Corn (Optional): If you’re using fresh corn, grill it until the kernels are slightly charred. This adds a wonderful smoky flavor. If using canned corn, drain it well.
  3. Combine the Ingredients: In a large bowl, combine the diced chicken, corn, cucumber, and red onion.
  4. Make the Dressing: In a separate small bowl, whisk together the mayonnaise, Greek yogurt, lime juice, cilantro, smoked paprika, salt, and pepper.
  5. Dress the Salad: Pour the dressing over the chicken and vegetable mixture. Gently toss to combine, ensuring everything is evenly coated.
  6. Chill (Optional): For the best flavor, chill the salad in the refrigerator for at least 30 minutes before serving. This allows the flavors to meld together.
  7. Garnish and Serve: Before serving, garnish with crumbled feta cheese (if using). Serve chilled and enjoy!

Pro Tips for the Best Street Corn Cucumber Chicken Salad

Want to take your salad to the next level? Here are some of my favorite tips:

  • Grill the Corn: Grilling the corn is a game-changer. The smoky char adds a depth of flavor that you just can’t get from canned corn.
  • Use Fresh Herbs: Fresh cilantro is a must for this salad. It adds a bright, herbaceous note that complements the other flavors perfectly.
  • Don’t Overdress: Start with a little dressing and add more as needed. You want the salad to be creamy, not drowning in dressing.
  • Chill Before Serving: Chilling the salad allows the flavors to meld together and makes it even more refreshing.
  • Make it Ahead: This salad can be made a day ahead of time. Just add the dressing right before serving to prevent the cucumber from getting soggy.

Common Mistakes to Avoid

Even the simplest recipes can have pitfalls. Here’s what to watch out for:

  • Overcooking the Chicken: Dry, overcooked chicken will ruin the texture of the salad. Make sure to cook it just until it’s done.
  • Using Too Much Red Onion: Red onion can be overpowering if you use too much. Finely chop it and soak it in cold water to mellow the flavor.
  • Not Draining the Corn: If you’re using canned corn, make sure to drain it well to prevent the salad from becoming watery.
  • Adding the Dressing Too Early: Adding the dressing too far in advance can make the cucumber soggy. Add it right before serving for the best texture.

Variations to Try

One of the best things about this salad is how easy it is to customize. Here are a few variations to try:

  • Spicy Kick: Add a pinch of cayenne pepper or a finely chopped jalapeño to the dressing for a spicy kick.
  • Avocado Addition: Dice an avocado and add it to the salad for extra creaminess and healthy fats.
  • Black Bean Boost: Add a can of drained and rinsed black beans for extra protein and fiber.
  • Bell Pepper Crunch: Add diced bell peppers (any color!) for additional crunch and sweetness.
  • Different Herbs: Experiment with different herbs like dill, parsley, or chives.
  • Add Some Heat: A dash of hot sauce or a sprinkle of red pepper flakes can add a fiery dimension.
  • Go Grain-Free: Serve it over a bed of lettuce for a lighter, grain-free option, similar to my green-goddess-salad-cucumber-avocado-recipe.

How to Store Leftovers

If you have any leftovers (which is unlikely!), store them in an airtight container in the refrigerator. The salad is best enjoyed within 2-3 days. Keep in mind that the cucumber may release some liquid as it sits, so you may want to drain off any excess liquid before serving.

Frequently Asked Questions (FAQ)

  • Can I make this salad ahead of time?: Yes, you can make the salad a day ahead of time. Just add the dressing right before serving to prevent the cucumber from getting soggy.
  • Can I use frozen corn?: Yes, you can use frozen corn. Just thaw it before adding it to the salad.
  • Can I use a different type of chicken?: Absolutely! Grilled, roasted, or even shredded chicken all work well.
  • Is this salad gluten-free?: Yes, this salad is naturally gluten-free.
  • Can I make this salad dairy-free?: Yes, you can make this salad dairy-free by using dairy-free mayonnaise and omitting the feta cheese.

Serving Suggestions

This Street Corn Creamy Cucumber Chicken Salad is incredibly versatile. Here are a few ways to enjoy it:

  • As a Light Lunch: Serve it on its own for a satisfying and healthy lunch.
  • As a Side Dish: Pair it with grilled fish, chicken, or burgers for a complete meal.
  • In a Sandwich or Wrap: Spoon it into a croissant, pita bread, or lettuce wrap for a portable meal.
  • On Crackers or Toast: Serve it as an appetizer on crackers or toasted baguette slices.
  • At a Picnic or Potluck: This salad is perfect for outdoor gatherings. Just keep it chilled until serving.

So there you have it – my Street Corn Creamy Cucumber Chicken Salad recipe! I hope you love it as much as I do. It’s a dish that brings so many flavors to your table and is incredibly easy to adapt based on your preferences. Remember, cooking should be about enjoyment, not perfection. So get in the kitchen, experiment with the ingredients, and create something that makes you smile. Happy cooking!

Keto Zucchini Rolls: A Taste of Italy, Guilt-Free

Hello, friends! Avery Collins here, from my cozy Portland kitchen. Today, we’re diving into a dish that’s close to my heart: Keto Zucchini Rolls. These aren’t just any rolls; they’re a celebration of fresh flavors, simple ingredients, and the joy of creating something nourishing with your own hands. If you’re like me and believe that healthy eating should feel good, not restrictive, then you’re in the right place.

My journey into the world of healthy cooking began out of necessity. After years of neglecting my well-being, my body finally demanded a change. That’s when I discovered the magic of the kitchen. These Keto Zucchini Rolls are a testament to how far I’ve come, and I’m so excited to share them with you.

Zucchini rollatini, as some call it, is a dish that evokes images of sunny Italian hillsides and rustic family dinners. But traditional rollatini is often laden with carbs and heavy cheeses. Our keto version captures the essence of the classic while keeping things light, healthy, and completely delicious.

Why You’ll Love This Keto Zucchini Rolls Recipe

Trust me, this recipe is a game-changer. Here’s why you’ll fall in love with it:

  • Low-Carb Goodness: Perfect for those following a keto or low-carb lifestyle, these rolls are packed with flavor without the guilt.
  • Plant-Based Power: This recipe is entirely plant-based, making it a fantastic option for vegetarians and vegans.
  • Easy to Make: Don’t let the fancy name fool you. These rolls are surprisingly simple to prepare, even on a busy weeknight.
  • Incredibly Flavorful: The combination of zucchini, vegan ricotta, spinach, and marinara sauce is a symphony of taste and texture.
  • Versatile: Feel free to customize this recipe with your favorite herbs, spices, or veggies. The possibilities are endless!

Ingredients You’ll Need

Let’s gather our ingredients. Remember, the quality of your ingredients will directly impact the flavor of your dish. Whenever possible, opt for fresh, organic produce.

  • 2 large zucchinis
  • 1 cup vegan ricotta cheese (almond or cashew based)
  • 1/2 cup chopped spinach
  • 1/4 cup grated vegan parmesan cheese
  • 1 clove garlic, minced
  • 1/4 teaspoon dried oregano
  • 1/4 teaspoon dried basil
  • Salt and pepper to taste
  • 1 cup marinara sauce (sugar-free)
  • Optional: Fresh basil for garnish

Step-by-Step Instructions

Now, let’s get cooking! Follow these simple steps to create your own batch of Keto Zucchini Rolls:

  1. Preheat: Preheat your oven to 375°F (190°C).
  2. Slice the Zucchini: Slice the zucchinis lengthwise into thin strips using a mandoline or vegetable peeler. This is crucial for creating rolls that are easy to handle and cook evenly.
  3. Draw Out Moisture: Lightly salt the zucchini slices and let them sit for 10 minutes to draw out excess moisture. Pat dry with paper towels. This step prevents the rolls from becoming soggy.
  4. Prepare the Filling: In a bowl, combine the vegan ricotta cheese, spinach, vegan parmesan cheese, minced garlic, oregano, basil, salt, and pepper. Mix well until everything is evenly combined.
  5. Assemble the Rolls: Spread a thin layer of the ricotta mixture onto each zucchini slice. Be generous but not too thick, or the filling will spill out.
  6. Roll ‘Em Up: Roll up each zucchini slice and place seam-side down in a baking dish. This helps them stay closed during baking.
  7. Add Sauce: Pour marinara sauce over the zucchini rolls, ensuring they are evenly coated.
  8. Bake: Bake for 20-25 minutes, or until the zucchini is tender and the sauce is bubbly. The zucchini should be easily pierced with a fork.
  9. Garnish and Serve: Garnish with fresh basil (optional) and serve hot.

Pro Tips for Perfect Zucchini Rolls

Here are a few extra tips to ensure your Keto Zucchini Rolls are a success:

  • Use a Mandoline: A mandoline is your best friend for slicing zucchini evenly and thinly. If you don’t have one, a vegetable peeler or a very sharp knife will also work.
  • Don’t Skip the Salting Step: Salting the zucchini and patting it dry is essential for removing excess moisture and preventing soggy rolls.
  • Taste as You Go: Adjust the seasoning of the ricotta filling to your liking. Don’t be afraid to add more garlic, herbs, or spices.
  • Use Quality Marinara: Choose a sugar-free marinara sauce that you love. The sauce is a key component of the dish, so pick one that complements the other flavors.
  • Broil for Extra Color: For a beautiful golden-brown finish, broil the rolls for a minute or two at the end of baking, keeping a close eye to prevent burning.

Common Mistakes to Avoid

Even the best cooks make mistakes. Here are a few common pitfalls to watch out for when making Keto Zucchini Rolls:

  • Overfilling the Rolls: Adding too much filling can cause the rolls to burst open during baking. Use a thin layer of filling for best results.
  • Using Thick Zucchini Slices: Thick slices of zucchini will be difficult to roll and may not cook through properly. Aim for thin, even slices.
  • Skipping the Salting Step: As mentioned earlier, salting the zucchini is crucial for removing excess moisture. Don’t skip this step!
  • Overbaking: Overbaking can result in dry, tough zucchini rolls. Keep an eye on them and remove them from the oven when the zucchini is tender but still slightly firm.

Variations and Customizations

The beauty of this recipe is its versatility. Feel free to experiment with different ingredients and flavor combinations. Here are a few ideas to get you started:

  • Add Protein: Incorporate cooked ground sausage (Italian or chorizo), shredded chicken, or crumbled tofu into the ricotta filling for an extra boost of protein.
  • Spice It Up: Add a pinch of red pepper flakes or a dash of hot sauce to the ricotta filling for a spicy kick.
  • Use Different Cheeses: Experiment with different types of vegan cheeses, such as mozzarella, provolone, or cheddar.
  • Add Veggies: Incorporate other veggies into the ricotta filling, such as chopped mushrooms, bell peppers, or sun-dried tomatoes.
  • Top with Pesto: Instead of marinara sauce, try topping the zucchini rolls with pesto for a fresh, herbaceous flavor.

How to Store and Reheat Zucchini Rolls

These Keto Zucchini Rolls are great for meal prepping or enjoying leftovers. Here’s how to store and reheat them:

  • Storage: Store leftover zucchini rolls in an airtight container in the refrigerator for up to 3 days.
  • Reheating: Reheat the rolls in the oven at 350°F (175°C) for 10-15 minutes, or until heated through. You can also microwave them for a quick and easy reheat.

Frequently Asked Questions (FAQ)

Here are some common questions about Keto Zucchini Rolls:

  • Are these rolls really keto-friendly? Yes! By using vegan ricotta cheese and sugar-free marinara sauce, these rolls are low in carbs and perfect for a keto diet.
  • Can I use regular ricotta cheese? Yes, if you’re not vegan, you can use regular ricotta cheese. Just be mindful of the carb count.
  • Can I freeze these rolls? I don’t recommend freezing them, as the zucchini may become mushy upon thawing.
  • Can I make these ahead of time? Yes, you can assemble the rolls ahead of time and store them in the refrigerator until ready to bake.
  • What is rollatini is? Rollatini is a method of preparing food, typically involving rolling a filling inside a slice of meat, fish, or, in this case, zucchini. Zucchini rollatini is a vegetarian favorite!

Serving Suggestions

These Keto Zucchini Rolls are delicious on their own, but they also pair well with a variety of side dishes. Here are a few ideas:

  • Salad: Serve with a simple green salad with a light vinaigrette.
  • Roasted Vegetables: Pair with roasted asparagus, broccoli, or Brussels sprouts.
  • Cauliflower Rice: Serve over a bed of cauliflower rice for a complete and satisfying meal.
  • Garlic Bread: Enjoy with a side of keto-friendly garlic bread for a truly indulgent experience.

That’s all for today, friends! I hope you enjoy making and savoring these Keto Zucchini Rolls as much as I do. Remember, cooking should be an act of self-care, a way to nourish your body and soul. So, put on some music, gather your ingredients, and let’s get cooking! And always, let me know what you think!

Chopped Thai Chickpea Salad with Curry Peanut Dressing: A Flavorful Journey

Hey friends! Avery here, from my little kitchen corner in Portland. Today, I’m so excited to share a recipe that’s become a staple in my life – my Chopped Thai Chickpea Salad with Curry Peanut Dressing. This isn’t just another salad; it’s a vibrant, nourishing bowl of goodness that I turn to when I need a pick-me-up, both in body and spirit. It’s a celebration of textures, flavors, and simple, wholesome ingredients.

If you are anything like me, you’ll appreciate a meal that is both healthy and satisfying. This salad ticks both boxes beautifully. It’s packed with plant-based protein from the chickpeas, tons of crunchy veggies, and a creamy, dreamy curry peanut dressing that ties it all together. It’s the perfect dish for a quick lunch, a light dinner, or even a meal prep superstar for busy weeks.

My journey with food started as a necessity, a way to heal and nourish myself. And what I discovered along the way was a deep appreciation for the power of simple ingredients. This salad is a testament to that – how a handful of vegetables, some humble chickpeas, and a flavorful dressing can create something truly special.

Why You’ll Absolutely Love This Chickpea Salad

So, why should you give this Chopped Thai Chickpea Salad a try? Let me count the ways! This is one of my favorite salad recipes.

  • Flavor Explosion: This salad is a symphony of flavors – the earthiness of chickpeas, the sweetness of carrots, the tang of lime, and the subtle spice of curry. It’s a party in your mouth!
  • Nutrient-Packed: We’re talking protein, fiber, vitamins, and minerals galore! This salad is a powerhouse of nutrients to fuel your body and keep you feeling energized.
  • Quick and Easy: From start to finish, this salad comes together in under 30 minutes. Perfect for those busy weeknights when you need a healthy meal on the table fast.
  • Meal Prep Friendly: This salad holds up incredibly well in the fridge, making it ideal for meal prepping. Make a big batch on Sunday, and you’ll have delicious lunches ready to go all week long.
  • Customizable: The beauty of this salad is that you can easily adapt it to your liking. Swap out veggies, add some grilled tofu, or adjust the dressing to your preferred level of spice.
  • Vegan and Gluten-Free: This salad is naturally vegan and gluten-free, making it a great option for those with dietary restrictions.

Gather Your Ingredients

Before we dive into the recipe, let’s gather our ingredients. I always find that having everything prepped and ready to go makes the cooking process so much smoother and more enjoyable.

  • ‘1 (15-ounce) can chickpeas, drained and rinsed’
  • ‘1 cup chopped cucumber’
  • ‘1 cup chopped red bell pepper’
  • ‘1/2 cup shredded carrots’
  • ‘1/2 cup chopped red onion’
  • ‘1/4 cup chopped cilantro’
  • ‘1/4 cup chopped peanuts’
  • ‘2 tablespoons lime juice’
  • ‘2 tablespoons peanut butter’
  • ‘1 tablespoon soy sauce’
  • ‘1 tablespoon honey or maple syrup’
  • ‘1 teaspoon curry powder’
  • ‘1/2 teaspoon sesame oil’
  • ‘1/4 teaspoon red pepper flakes (optional)’

Let’s Make This Salad! Step-by-Step Instructions

Alright, let’s get cooking! Here’s how to bring this vibrant Chopped Thai Chickpea Salad to life:

  1. Prep the Salad Base: In a large bowl, combine the chickpeas, cucumber, red bell pepper, carrots, red onion, cilantro, and peanuts. Make sure your veggies are nicely chopped for easy eating!
  2. Whisk Together the Dressing: In a small bowl, whisk together the lime juice, peanut butter, soy sauce, honey (or maple syrup), curry powder, sesame oil, and red pepper flakes (if using). Whisk until everything is smooth and creamy. If the dressing is too thick, add a tablespoon of water to thin it out.
  3. Combine and Toss: Pour the curry peanut dressing over the salad and toss gently to combine. Make sure all the ingredients are evenly coated in the delicious dressing.
  4. Serve and Enjoy: Serve the salad immediately for a fresh and crunchy experience, or chill it in the fridge for later. Chilling the salad allows the flavors to meld together even more.

And there you have it! A vibrant, flavorful, and nourishing Chopped Thai Chickpea Salad that’s ready to brighten your day. I’m so glad you gave this recipe a try!

Pro Tips for the Perfect Chickpea Salad

Want to take your Chickpea Salad game to the next level? Here are a few of my favorite pro tips:

  • Chickpea Prep: For the best texture, pat your chickpeas dry with a paper towel before adding them to the salad. This helps them absorb the dressing better. Roasting the chickpeas is also a great option for added flavor and crunch.
  • Veggie Size Matters: Make sure all your veggies are chopped into similar sizes. This ensures that every bite is balanced and enjoyable.
  • Taste as You Go: Don’t be afraid to taste the dressing and adjust the seasonings to your liking. Add more lime juice for tanginess, honey for sweetness, or red pepper flakes for heat.
  • Fresh Herbs are Key: Fresh cilantro adds a bright, aromatic flavor to this salad. If you’re not a fan of cilantro, you can substitute it with fresh mint or basil.
  • Toast Your Peanuts: Toasting the peanuts before adding them to the salad enhances their flavor and adds a delightful crunch.

Common Mistakes to Avoid

Even the most seasoned cooks make mistakes sometimes! Here are a few common pitfalls to avoid when making this salad:

  • Overdressing the Salad: Start with a little dressing and add more as needed. You can always add more, but you can’t take it away!
  • Using Bland Chickpeas: Make sure your chickpeas are well-seasoned. If they taste bland, they’ll drag down the whole salad.
  • Skipping the Acid: The lime juice is essential for balancing the flavors in this salad. Don’t skip it!
  • Not Storing Properly: If you’re not serving the salad immediately, store the dressing separately to prevent the salad from getting soggy.

Variations to Spice Things Up

One of the things I love most about this salad is how versatile it is. Feel free to experiment with different ingredients and flavors to create your own unique version.

  • Add Protein: Boost the protein content by adding grilled tofu, edamame, or shredded chicken.
  • Swap the Veggies: Get creative with your veggies! Try adding shredded cabbage, broccoli florets, or snap peas.
  • Spice it Up: Add a pinch of cayenne pepper or a dash of sriracha to the dressing for extra heat.
  • Make it Fruity: Add some chopped mango or pineapple for a touch of sweetness.
  • Add Noodles: Toss in some cooked rice noodles or glass noodles for a heartier salad.
  • Different Nut Butters: If you’re not a fan of peanut butter, try using almond butter, cashew butter, or sunflower seed butter instead.

How to Store Leftovers

This Chopped Thai Chickpea Salad is a meal prep dream! Here’s how to store it properly:

  • Store Separately: If possible, store the salad and the dressing separately to prevent the salad from getting soggy.
  • Airtight Container: Store the salad in an airtight container in the refrigerator.
  • Best Within 3 Days: This salad is best enjoyed within 3 days of making it. After that, the veggies may start to lose their crunch.
  • Dressing Storage: The curry peanut dressing can be stored in an airtight container in the refrigerator for up to a week.

Frequently Asked Questions (FAQ)

Got questions? I’ve got answers! Here are some of the most common questions I get about this salad:

  • Can I make this salad ahead of time? Absolutely! This salad is perfect for meal prepping. Just store the dressing separately and add it right before serving.
  • Can I use dried chickpeas instead of canned? Yes, you can. Just make sure to soak and cook the chickpeas before adding them to the salad.
  • Is this salad spicy? The red pepper flakes add a touch of heat, but you can easily omit them if you prefer a milder flavor.
  • Can I freeze this salad? I don’t recommend freezing this salad, as the veggies will lose their texture when thawed.
  • Can I add other toppings? Of course! Feel free to add any toppings you like, such as avocado, sprouts, or toasted sesame seeds.

Serving Suggestions: Complete the Meal

This Chopped Thai Chickpea Salad is delicious on its own, but it can also be paired with other dishes to create a complete and satisfying meal.

  • With Grilled Protein: Serve this salad alongside grilled chicken, fish, or tofu for a protein-packed meal.
  • As a Side Dish: This salad makes a great side dish for soups, sandwiches, or wraps.
  • In a Wrap: Wrap the salad in a whole-wheat tortilla or lettuce wrap for a quick and easy lunch.
  • With Rice: Serve the salad over a bed of brown rice or quinoa for a heartier meal.

And there you have it! My Chopped Thai Chickpea Salad with Curry Peanut Dressing – a vibrant, nourishing, and absolutely delicious dish that I hope you’ll love as much as I do. Give this recipe a try, and let me know what you think! I’m so happy to share this one with you. I’m sure you will love it. Thank you for being here!

Remember, cooking is about more than just following a recipe; it’s about connecting with your food, nourishing your body, and finding joy in the process. So, get in the kitchen, experiment with flavors, and most importantly, have fun!

Happy cooking, friends!

Avery

Creamy Chicken Alfredo: A Bowlful of Comfort and Connection

Hey friends, Avery here! Let’s be honest, sometimes we just need a big bowl of comfort. And what’s more comforting than creamy, dreamy Chicken Alfredo? This isn’t just a recipe; it’s a warm hug on a plate. It’s the kind of dish that brings everyone to the table, forks ready and smiles wide. I’m going to walk you through my version of this classic, sharing all my tips and tricks to make it truly special. No complicated techniques, no fancy ingredients – just honest-to-goodness deliciousness that you can whip up any night of the week.

My journey with Chicken Alfredo started like many of you, with a craving. But I quickly realized that the restaurant versions were often heavy and lacked that homemade touch. So, I set out to create a recipe that was both indulgent and satisfying, without leaving you feeling weighed down. And after many tweaks and taste tests (the best part!), I landed on this version that I’m so excited to share with you. Trust me, your family will thank you!

Why You’ll Love This Creamy Chicken Alfredo Recipe

Okay, let’s talk about why you’re going to fall head-over-heels for this Chicken Alfredo recipe. Beyond the obvious creamy goodness, there are so many reasons why this dish is a winner in my book. It’s quick, it’s easy, and it’s incredibly versatile. But most importantly, it’s a recipe that brings people together. Here’s a few reasons why I think you’ll love this:

  • Easy to Make: This chicken alfredo recipe is straightforward and simple, perfect for busy weeknights. You don’t need to be a culinary expert to whip up a batch of creamy, cheesy goodness.
  • Quick: From start to finish, this dish comes together in under 30 minutes. That’s faster than ordering takeout!
  • Customizable: Feel free to add your favorite veggies, change up the cheese, or use different types of pasta. The possibilities are endless!
  • Crowd-Pleaser: This recipe is always a hit with my family and friends. It’s the perfect dish to serve when you’re entertaining or just want to make a special meal for your loved ones.
  • Comfort Food at Its Finest: There’s just something about creamy pasta that soothes the soul. This Chicken Alfredo recipe is the ultimate comfort food, perfect for those days when you need a little extra love.
  • Uses Simple Ingredients: No need to hunt down obscure ingredients. This recipe uses everyday staples that you probably already have in your pantry and refrigerator.
  • The Sauce: The star of the show! This alfredo sauce is rich, creamy, and perfectly balanced. It’s made with simple ingredients but tastes like something you’d order at a fancy restaurant.

Creamy Chicken Alfredo Ingredients

Let’s gather our ingredients! The beauty of this recipe is that it uses simple, everyday ingredients that you can easily find at your local grocery store. Here’s what you’ll need:

  • 1 pound fettuccine pasta
  • 1.5 pounds boneless, skinless chicken breasts, cut into bite-sized pieces
  • 2 tablespoons olive oil
  • 4 cloves garlic, minced
  • 1 cup heavy cream
  • 1/2 cup grated Parmesan cheese, plus more for serving
  • 1/4 cup butter
  • Salt and black pepper to taste
  • Optional: Fresh parsley, chopped, for garnish

How to Make Creamy Chicken Alfredo: Step-by-Step Instructions

Alright, let’s get cooking! Follow these simple steps to create the most delicious Chicken Alfredo you’ve ever tasted. Don’t worry, I’ll be here to guide you every step of the way.

  1. Cook the Pasta: Cook fettuccine pasta according to package directions. Remember to reserve about 1 cup of pasta water before draining. This starchy water is liquid gold and will help create a perfectly creamy sauce.
  2. Cook the Chicken: While the pasta is cooking, heat olive oil in a large skillet over medium-high heat. Add the chicken and cook until browned and cooked through. Season generously with salt and pepper. The chicken should be cooked to an internal temperature of 165°F (74°C). Remove the chicken from the skillet and set aside.
  3. Sauté the Garlic: In the same skillet, melt butter over medium heat. Add minced garlic and cook until fragrant, about 1 minute. Be careful not to burn the garlic, as it can become bitter.
  4. Make the Alfredo Sauce: Pour in heavy cream and bring to a simmer. Reduce heat to low and let it gently simmer for 2-3 minutes to thicken slightly. This step is crucial for creating a rich and creamy sauce.
  5. Add the Parmesan: Stir in Parmesan cheese until melted and smooth. Season with salt and pepper to taste. Feel free to add more Parmesan cheese if you like a cheesier sauce.
  6. Combine Chicken and Sauce: Add the cooked chicken back to the skillet and toss to coat in the Alfredo sauce. Make sure the chicken is evenly coated in the luscious sauce.
  7. Combine Pasta and Sauce: Add the cooked fettuccine to the skillet and toss to combine. If the sauce is too thick, add a little of the reserved pasta water until desired consistency is reached. The pasta water will help emulsify the sauce and create a silky smooth texture.
  8. Serve and Garnish: Serve immediately, garnished with extra Parmesan cheese and fresh parsley, if desired. A sprinkle of red pepper flakes can also add a nice kick.

Pro Tips for the Best Chicken Alfredo

Want to take your Chicken Alfredo to the next level? Here are a few of my favorite pro tips to ensure your dish is a guaranteed success:

  • Use Freshly Grated Parmesan: Pre-grated Parmesan cheese often contains cellulose, which can prevent it from melting smoothly into the sauce. Freshly grated Parmesan will give you the best flavor and texture.
  • Don’t Overcook the Pasta: Overcooked pasta can become mushy and detract from the overall dish. Cook the pasta al dente, which means it should be firm to the bite.
  • Reserve Pasta Water: As I mentioned earlier, pasta water is a secret weapon for creating a creamy sauce. The starch in the water helps emulsify the sauce and gives it a silky smooth texture.
  • Simmer the Sauce Gently: Don’t boil the Alfredo sauce, as this can cause it to separate. Simmering the sauce gently allows it to thicken without losing its creamy consistency.
  • Season Generously: Don’t be afraid to season your Chicken Alfredo generously with salt and pepper. Taste as you go and adjust the seasoning to your liking.
  • Use High-Quality Ingredients: The better the ingredients, the better the final dish will taste. Use good quality Parmesan cheese, heavy cream, and fresh garlic for the best results.
  • Don’t Overcrowd the Skillet: When cooking the chicken, make sure not to overcrowd the skillet. Overcrowding can lower the temperature of the skillet and prevent the chicken from browning properly. Cook the chicken in batches if necessary.

Common Mistakes to Avoid When Making Chicken Alfredo

We all make mistakes in the kitchen, but knowing what to avoid can help you create the perfect Chicken Alfredo every time. Here are a few common pitfalls to watch out for:

  • Using Cold Cream: Adding cold cream to the hot garlic butter can cause the sauce to seize up. Make sure the cream is at room temperature before adding it to the skillet.
  • Burning the Garlic: Burnt garlic can ruin the entire dish. Keep a close eye on the garlic as it cooks and remove it from the heat as soon as it becomes fragrant.
  • Overcooking the Chicken: Overcooked chicken can be dry and tough. Cook the chicken until it is just cooked through, and then remove it from the skillet.
  • Not Seasoning Properly: Under-seasoning is a common mistake that can make the dish taste bland. Be sure to season the chicken, the sauce, and the pasta with salt and pepper to taste.
  • Adding Too Much Pasta Water: While pasta water is great for creating a creamy sauce, adding too much can make the sauce watery. Add the pasta water a little at a time until you reach the desired consistency.
  • Forgetting to Reserve Pasta Water: It’s easy to forget, but crucial!

Chicken Alfredo Variations: Make It Your Own!

One of the best things about this Chicken Alfredo recipe is how versatile it is. Feel free to get creative and add your own personal touch. Here are a few variations to inspire you:

  • Add Vegetables: Sauté some broccoli, spinach, mushrooms, or bell peppers and add them to the sauce along with the chicken.
  • Use Different Types of Pasta: While fettuccine is the classic choice, you can also use other types of pasta, such as penne, linguine, or spaghetti.
  • Add Some Spice: Add a pinch of red pepper flakes to the sauce for a little heat.
  • Use Different Types of Cheese: Experiment with different types of cheese, such as Asiago, Romano, or Fontina.
  • Make It Vegetarian: Omit the chicken and add some roasted vegetables, such as zucchini, eggplant, and tomatoes.
  • Lemon Chicken Alfredo: Add a squeeze of fresh lemon juice to the sauce for a bright and zesty flavor.
  • Shrimp Alfredo: Replace the chicken with shrimp for a delicious seafood twist.

How to Store and Reheat Chicken Alfredo

Got leftovers? Lucky you! Here’s how to properly store and reheat your Chicken Alfredo to enjoy it again later:

  • Storage: Store leftover Chicken Alfredo in an airtight container in the refrigerator for up to 3-4 days.
  • Reheating: To reheat, add the Chicken Alfredo to a skillet over medium heat. Add a splash of milk or cream to help loosen the sauce. Cook until heated through, stirring occasionally. You can also reheat it in the microwave, but be careful not to overcook it.
  • Freezing: Freezing Chicken Alfredo is not recommended, as the sauce can separate and become grainy when thawed.

Frequently Asked Questions (FAQ) About Chicken Alfredo

Got questions? I’ve got answers! Here are some of the most frequently asked questions about Chicken Alfredo:

  • Can I use milk instead of heavy cream? While you can use milk, the sauce won’t be as rich and creamy. If you do use milk, I recommend adding a tablespoon of butter to compensate for the lack of fat.
  • Can I make this recipe ahead of time? Yes, you can make the Alfredo sauce ahead of time and store it in the refrigerator for up to 2 days. When you’re ready to serve, cook the pasta and chicken, and then combine everything together.
  • Can I use pre-cooked chicken? Yes, you can use pre-cooked chicken to save time. Just add it to the sauce at the end to heat it through.
  • Why is my Alfredo sauce grainy? Grainy Alfredo sauce is usually caused by overheating the sauce or using pre-grated Parmesan cheese. Make sure to simmer the sauce gently and use freshly grated Parmesan cheese for the best results.
  • Can I add garlic powder instead of fresh garlic? While fresh garlic is always best, you can use garlic powder in a pinch. Use about 1/2 teaspoon of garlic powder in place of the fresh garlic.

Serving Suggestions for Creamy Chicken Alfredo

Chicken Alfredo is a complete meal on its own, but here are a few serving suggestions to make it even more special:

  • Side Salad: Serve with a simple side salad with a light vinaigrette to balance the richness of the Alfredo sauce.
  • Garlic Bread: A classic pairing! Serve with warm garlic bread for dipping into the creamy sauce.
  • Roasted Vegetables: Serve with roasted vegetables, such as asparagus, broccoli, or Brussels sprouts, for a healthy and flavorful side dish.
  • Wine Pairing: Pair with a crisp white wine, such as Pinot Grigio or Sauvignon Blanc, to complement the richness of the dish.

There you have it – my go-to recipe for Creamy Chicken Alfredo! I hope you love this recipe as much as my family and I do. Remember, cooking should be fun and enjoyable, so don’t be afraid to experiment and make it your own. And most importantly, savor every bite!

Thank you for joining me in the kitchen today. I hope this recipe brings you as much comfort and joy as it brings me. Happy cooking!

I’ve made this recipe countless times, and it’s always a hit. It’s easy and quick, which is perfect for busy weeknights. My family loved it, and I know yours will too. It’s the best chicken alfredo recipe I’ve ever made. This recipe is so easy to make, even a beginner can do it. I used this recipe just last night and I added some broccoli for extra nutrients. I’m so glad I found this recipe. It’s a keeper!

Fluffy & Light Scrambled Eggs: A Kitchen Ritual

The rain is drumming softly against the windowpane here in Portland, a perfect soundtrack for a slow morning. And what better way to start a slow morning than with a plate of perfectly fluffy and light scrambled eggs? Not those rubbery, sad excuses for eggs you sometimes find. I’m talking about the kind that practically melt in your mouth, the kind that whisper comfort and nourishment with every bite.

My journey with scrambled eggs started much like my overall journey with cooking: out of necessity. Years ago, stressed and depleted, I needed something simple, something nourishing, something I could actually make. Scrambled eggs were my gateway. And trust me, I’ve made my fair share of mistakes along the way. But through trial and error (and a whole lot of eggs!), I’ve landed on a method that delivers consistent, fluffy perfection.

This isn’t just a recipe; it’s a ritual. It’s about slowing down, connecting with simple ingredients, and creating something beautiful and nourishing for yourself (and maybe someone you love). So, grab your whisk, and let’s get scrambling!

Why You’ll Love This Scrambled Eggs Recipe

Beyond the delightful texture and taste, there are so many reasons to adore this recipe:

  • Quick and Easy: Seriously, from fridge to plate in under 10 minutes. Perfect for busy mornings or a lazy weekend brunch.
  • Simple Ingredients: You probably already have everything you need in your kitchen.
  • Versatile: A blank canvas for your culinary creativity! Add cheese, herbs, veggies, or whatever your heart desires.
  • Nourishing: Packed with protein and essential nutrients to fuel your day.
  • Comforting: There’s just something inherently comforting about a plate of warm, fluffy scrambled eggs.

I love how this recipe is completely forgiving. Even if you deviate slightly, you’ll still end up with delicious eggs. So if you are new to cooking, this is a great place to start.

Ingredients for the Best Scrambled Eggs

  • 2 large eggs: The foundation of our fluffy masterpiece. Use high-quality, fresh eggs if you can.
  • 1 tablespoon milk or cream: Adds moisture and richness. I often use whole milk, but cream will give you an even more luxurious texture.
  • 1/4 teaspoon salt: Enhances the flavor.
  • 1/8 teaspoon black pepper: Adds a touch of warmth and spice. Freshly ground is always best.
  • 1 tablespoon butter: For cooking the eggs. Butter adds a wonderful flavor and helps prevent sticking. You can use olive oil if you prefer, but the flavor will be different.

How to Make Fluffy & Light Scrambled Eggs: Step-by-Step

Ready to create some scrambled egg magic? Follow these simple steps:

  1. Whisk it up: In a bowl, whisk together the eggs, milk or cream, salt, and pepper until the mixture is light and frothy. You want to see some air incorporated. This is key to fluffy eggs!
  2. Melt the butter: Place a non-stick skillet over medium-low heat. Add the butter and let it melt completely, coating the bottom of the pan. Be sure the heat isn’t too high; you don’t want the butter to brown.
  3. Pour and cook: Pour the egg mixture into the skillet. Let it sit undisturbed for a few seconds to begin setting around the edges.
  4. Gentle folds: Using a spatula, gently push the cooked egg from the edges towards the center, allowing the uncooked egg to flow underneath. Continue this process until the eggs are mostly set but still slightly moist.
  5. Remove from heat: Take the skillet off the heat. The residual heat will continue to cook the eggs to the perfect consistency.
  6. Serve immediately: Transfer the scrambled eggs to a plate and serve immediately. Enjoy!

This is how to make the best scrambled eggs, if you ask me. If you want to make them even better, try some of the pro tips below.

Pro Tips for Scrambled Egg Perfection

Want to elevate your scrambled egg game? Here are a few extra tips:

  • Low and Slow: The key to fluffy eggs is cooking them over low heat. This prevents them from becoming dry and rubbery.
  • Don’t Overcook: Remove the eggs from the heat while they are still slightly moist. They will continue to cook from the residual heat.
  • Use a Non-Stick Skillet: This will prevent the eggs from sticking and make cleanup a breeze.
  • Whisk Vigorously: Incorporating air into the egg mixture is essential for fluffy eggs.
  • Add a Pinch of Baking Soda: Sounds weird, I know! But a tiny pinch of baking soda (about 1/8 teaspoon) can help create even fluffier eggs.

These tips will ensure you always love the results you get with your scrambled eggs.

Common Mistakes to Avoid

We all make mistakes in the kitchen, especially when we’re learning. Here are a few common scrambled egg pitfalls to avoid:

  • Overcooking: The biggest culprit! Overcooked eggs are dry, rubbery, and sad. Remember to remove them from the heat while they’re still slightly moist.
  • High Heat: Cooking eggs over high heat will result in tough, unevenly cooked eggs.
  • Not Whisking Enough: A well-whisked egg mixture is key to fluffy eggs. Don’t skimp on the whisking!
  • Using Cold Eggs: Let your eggs sit at room temperature for a few minutes before cooking. This will help them cook more evenly.
  • Adding Too Much Liquid: Too much milk or cream can make your eggs watery. Stick to the recommended amount.

I’m sharing these mistakes so you can avoid them. But even if you make one, don’t worry! Scrambled eggs are forgiving.

Scrambled Egg Variations: Get Creative!

The beauty of scrambled eggs is their versatility. Here are a few fun variations to try:

  • Cheesy Scrambled Eggs: Add shredded cheddar, mozzarella, or Parmesan cheese to the eggs while they’re cooking.
  • Herb Scrambled Eggs: Stir in fresh herbs like chives, parsley, or dill.
  • Veggie Scrambled Eggs: Sauté chopped vegetables like onions, peppers, mushrooms, or spinach and add them to the eggs.
  • Spicy Scrambled Eggs: Add a pinch of red pepper flakes or a dash of hot sauce to the eggs.
  • Smoked Salmon Scrambled Eggs: Fold in smoked salmon for a luxurious and flavorful breakfast.

You can also serve them with different sides, like toast, avocado, or salsa. If you want to, you can even add a dollop of sour cream.

How to Store Leftover Scrambled Eggs (If You Have Any!)

While scrambled eggs are best enjoyed fresh, you can store leftovers in an airtight container in the refrigerator for up to 24 hours. Keep in mind that they may become slightly rubbery when reheated.

To reheat, gently warm them in a skillet over low heat or microwave them in short intervals, stirring frequently.

Frequently Asked Questions (FAQ)

  • Can I use water instead of milk or cream? Yes, you can use water, but the eggs will be less rich and fluffy.
  • Can I make scrambled eggs in the microwave? Yes, but they won’t be as fluffy as when cooked in a skillet.
  • How do I prevent my eggs from sticking to the pan? Use a non-stick skillet and plenty of butter or oil.
  • Can I add cheese to the eggs while they’re cooking? Yes, add shredded cheese to the eggs while they’re still slightly moist.
  • What’s the best way to reheat scrambled eggs? Gently warm them in a skillet over low heat or microwave them in short intervals, stirring frequently.

I love to answer questions about cooking, so feel free to ask if you have any more!

Serving Suggestions: Complete Your Meal

Scrambled eggs are delicious on their own, but they’re even better when paired with other tasty dishes. Here are a few serving suggestions:

  • Toast: A classic pairing! Serve scrambled eggs with buttered toast, bagels, or English muffins.
  • Avocado: Add sliced avocado for a healthy and creamy topping.
  • Salsa: Top scrambled eggs with salsa for a flavorful and spicy kick.
  • Bacon or Sausage: A hearty and satisfying addition.
  • Fresh Fruit: Serve scrambled eggs with a side of fresh fruit for a balanced and nutritious meal.

This post is all about making scrambled eggs a delightful experience. I hope you to love this recipe as much as I do!

Hey friends! Avery here, from my cozy kitchen in Portland. It’s raining (surprise!), the rosemary outside my window smells divine, and I’m so excited to share one of my absolute favorite comfort food recipes with you: Creamy Mushroom Chicken. This isn’t just any chicken dish; it’s a hug in a pan, a weeknight wonder that’s both satisfying and good for you. This recipe is something I developed when I was searching for meals that felt nourishing and delicious, without being overly complicated. I hope you enjoy it as much as I do!

Why You’ll Love This Creamy Mushroom Chicken

This Creamy Mushroom Chicken recipe is more than just a meal; it’s an experience. It’s about taking simple ingredients and transforming them into something truly special. Here’s why I think you’re going to fall in love with it:

  • Quick & Easy: Ready in under an hour, perfect for busy weeknights.
  • Flavor Explosion: Savory mushrooms, sun-dried tomatoes, and garlic create a symphony of flavors.
  • Healthy-ish: Packed with protein and veggies, and you can easily customize it to your dietary needs.
  • Comfort Food: Creamy, rich, and utterly satisfying – without being heavy.
  • Versatile: Serve it over pasta, rice, quinoa, or enjoy it on its own with a side of roasted vegetables.

I’m so glad you are here! I made this for my family and they re so glad I did, and I want to share it with you. This creamy mushroom chicken is a recipe that can be adapted. You can use different veggies, different cheeses, and different herbs – I want you to make it your own!

Ingredients for Creamy Mushroom Chicken

Here’s what you’ll need to whip up this delectable dish. Don’t worry if you don’t have everything on hand; feel free to substitute based on what’s in your fridge. Cooking should be fun and forgiving!

  • 1/3 cup all-purpose flour
  • 1 teaspoon paprika
  • 2 teaspoons dried thyme (divided)
  • 2 teaspoons dried oregano (divided)
  • 1 teaspoon sea salt (divided)
  • 1 teaspoon freshly ground pepper (divided)
  • 1 teaspoon chili flakes (plus more or less to taste)
  • 4 boneless skinless chicken breasts (sliced in half)
  • 4 tablespoons olive oil (divided)
  • 3 cloves garlic (minced)
  • 1/2 cup sun-dried tomatoes
  • 1/3 cup Kalamata olives (sliced)
  • 2 cups mushrooms
  • 1/2 cup heavy cream
  • 1/2 cup chicken stock
  • 1 cup Parmesan cheese (freshly grated)
  • 2 cups fresh spinach

How to Make Creamy Mushroom Chicken: Step-by-Step

Alright, let’s get cooking! Here’s a simple breakdown of how to create this creamy, dreamy chicken dish. Remember, cooking is a journey, not a race. So, take your time, enjoy the process, and don’t be afraid to improvise.

  1. Prep the Flour Mixture: In a low bowl or on a clean workspace, combine the flour, paprika, 1 teaspoon thyme, 1 teaspoon oregano, 1/2 teaspoon salt, and 1/2 teaspoon black pepper. This is the first layer of flavor.
  2. Season the Chicken: Season the chicken with the remaining salt, pepper, oregano, thyme, and chili flakes. Don’t be shy; a well-seasoned chicken is a happy chicken!
  3. Dredge the Chicken: Dredge the chicken pieces through the flour mixture, coating them completely. Shake off any excess flour. This helps create a beautiful sear and thicken the sauce later.
  4. Sear the Chicken: Heat 2 tablespoons of olive oil in a large non-stick skillet over medium heat. Add the floured chicken and cook for 3-5 minutes on both sides until seared. Be careful not to overcook the chicken as it will be added back to the pan later. Transfer the chicken to a plate and set it aside.
  5. Toast the Aromatics: Add the remaining 2 tablespoons of olive oil to the skillet along with the minced garlic, sun-dried tomatoes, olives, and mushrooms Allow the ingredients to toast for 3-5 minutes until fragrant, stirring frequently. Be careful not to burn. The smell alone is worth the effort!
  6. Create the Sauce: Once fragrant, add the heavy cream, chicken stock, Parmesan cheese, spinach, and another pinch of salt and pepper. Stir to combine.
  7. Simmer and Thicken: Allow the sauce to simmer for a few minutes until it begins to thicken. Add the chicken back to the skillet and spoon some of the sauce on top. Continue to cook until the chicken reaches an internal temperature of 165 degrees Fahrenheit.
  8. Season and Serve: Adjust the seasonings to taste, and serve the dish warm.
  9. Store: Store any leftovers in an airtight container in the fridge for up to 3-4 days. Enjoy!

Pro Tips for Perfect Creamy Mushroom Chicken

Here are a few tricks I’ve learned over the years to ensure your Creamy Mushroom Chicken turns out perfectly every single time:

  • Don’t Overcrowd the Pan: Sear the chicken in batches to ensure even browning. Overcrowding lowers the pan temperature and results in steamed, not seared, chicken.
  • Use High-Quality Mushrooms: The better the mushrooms, the better the flavor. I love using a mix of cremini, shiitake, and oyster mushrooms for a complex, earthy taste.
  • Freshly Grated Parmesan is Key: Pre-shredded Parmesan often contains cellulose, which can prevent it from melting smoothly into the sauce.
  • Don’t Overcook the Chicken: Overcooked chicken is dry and tough. Use a meat thermometer to ensure it reaches 165°F (74°C) and pull it off the heat immediately.
  • Adjust the Sauce Consistency: If the sauce is too thick, add a splash of chicken stock. If it’s too thin, simmer it for a few more minutes to allow it to reduce.

The sauce is really important here. This creamy sauce is the key to a perfect dish. I hope you try this recipe soon, you re going to love it!

Common Mistakes to Avoid

We all make mistakes in the kitchen; it’s how we learn! Here are a few common pitfalls to watch out for when making Creamy Mushroom Chicken:

  • Burning the Garlic: Burnt garlic is bitter and can ruin the entire dish. Add the garlic towards the end of sautéing the vegetables and keep a close eye on it.
  • Using Low-Quality Cream: The quality of your cream will directly impact the richness and flavor of the sauce. Opt for a heavy cream with a high fat content for the best results.
  • Skipping the Deglazing Step: Deglazing the pan with chicken stock after searing the chicken and sautéing the vegetables is crucial for unlocking all those delicious browned bits stuck to the bottom.
  • Adding Cold Cream to a Hot Pan: This can cause the cream to curdle. Allow the cream to come to room temperature before adding it to the pan.

Variations to Make It Your Own

This Creamy Mushroom Chicken recipe is a fantastic base for experimentation. Here are a few ideas to get your creative juices flowing:

  • Swap the Protein: Use chicken thighs instead of breasts for a richer flavor. You could also try it with pork tenderloin or tofu for a vegetarian option.
  • Add More Veggies: Broccoli, asparagus, bell peppers, or zucchini would all be delicious additions.
  • Spice It Up: Add a pinch of red pepper flakes or a dash of hot sauce for a little kick.
  • Use Different Herbs: Fresh rosemary, sage, or parsley would all complement the flavors of this dish beautifully.
  • Make it Dairy-Free: Substitute coconut cream for heavy cream and nutritional yeast for Parmesan cheese.

Remember, this recipe is a starting point. Feel free to adjust it to your liking and make it your own!

How to Store and Reheat Leftovers

Got leftovers? Lucky you! Here’s how to properly store and reheat your Creamy Mushroom Chicken:

  • Storage: Store the leftovers in an airtight container in the refrigerator for up to 3-4 days.
  • Reheating: Reheat the chicken in a skillet over medium heat, adding a splash of chicken stock if the sauce has thickened too much. You can also reheat it in the microwave, but be careful not to overcook it.

Frequently Asked Questions

Here are some common questions I get asked about this recipe:

  • Can I use frozen mushrooms? Yes, but be sure to thaw them completely and squeeze out any excess moisture before using them.
  • Can I make this ahead of time? Yes, you can prepare the sauce ahead of time and store it in the refrigerator for up to 2 days. Add the chicken when you’re ready to cook.
  • Can I freeze this dish? I don’t recommend freezing it, as the cream sauce may separate upon thawing.
  • What can I serve this with? This dish is delicious served over pasta, rice, quinoa, mashed potatoes, or with a side of roasted vegetables.

Serving Suggestions

This Creamy Mushroom Chicken is incredibly versatile and pairs well with a variety of sides. Here are a few of my favorite serving suggestions:

  • Pasta: Toss it with your favorite pasta shape, like fettuccine, linguine, or penne.
  • Rice: Serve it over fluffy white rice, brown rice, or wild rice for a hearty and satisfying meal.
  • Quinoa: For a healthier option, serve it over quinoa.
  • Mashed Potatoes: Creamy mashed potatoes are the perfect complement to the rich and savory sauce.
  • Roasted Vegetables: Serve it with a side of roasted broccoli, asparagus, or Brussels sprouts for a complete and balanced meal.
  • Crusty Bread: Serve with a side of crusty bread for soaking up all that delicious sauce.

I hope you enjoy this Creamy Mushroom Chicken recipe as much as I do. It’s a comforting, flavorful, and relatively healthy meal that’s perfect for any night of the week. Thank you for joining me in my kitchen today. I’m so glad you re here! Happy cooking!

The rain is drumming a gentle rhythm against my window here in Portland, and the air smells faintly of wet earth and blooming jasmine. It’s mornings like these that call for something truly comforting – something that warms you from the inside out. That’s where this Cinnamon Apple Oatmeal Bowl comes in. It’s more than just a breakfast; it’s a hug in a bowl.

My journey with oatmeal started, ironically, when I was trying to find something that *wasn’t* oatmeal. I was searching for a breakfast that would be both satisfying and healthy. I have tried many different breakfast options and found myself back at oatmeal. Now, I make this apple oatmeal bowl all the time. After many tries, I feel like this recipe is something special. So grab your favorite mug, let’s get cooking, and let’s transform simple ingredients into something truly special.

Why You’ll Love This Cinnamon Apple Oatmeal Bowl

This isn’t your grandma’s bland, mushy oatmeal (though I have a soft spot for that, too!). This is a vibrant, flavorful bowl that’s packed with goodness and tastes like a treat. You’re going to love this recipe!

  • Quick & Easy: Ready in under 20 minutes, it’s perfect for busy mornings.
  • Healthy & Nourishing: Loaded with fiber, healthy fats, and antioxidants.
  • Plant-Based Power: A delicious and satisfying plant-based option.
  • Customizable: Easily adaptable to your dietary needs and preferences.
  • Comfort Food: A warm, cozy, and comforting way to start your day.

Whether you’re a seasoned oatmeal aficionado or a curious newbie, I promise this recipe will win you over. It’s the perfect way to embrace a little self-care and start your day on a positive note. It’s a warm embrace that you can eat!

Cinnamon Apple Oatmeal Bowl Ingredients

Here’s what you’ll need to create this delightful apple cinnamon oatmeal bowl:

  • 1 tsp olive oil
  • 1 small apple, diced
  • ¼ tsp cinnamon
  • 1 tsp vanilla extract
  • ½ cup rolled oats (I used Bob’s Red Mill)
  • 1 cup almond milk (I used Malk)
  • 1 tbsp almond butter
  • 1 tbsp maple syrup

How to Make Cinnamon Apple Oatmeal: Step-by-Step Instructions

Here’s how you make this delicious, comforting apple oatmeal bowl:

  1. Sauté the Apples: Heat olive oil in a pot on medium heat. Once hot add the apples, cinnamon and vanilla extract. Sauté about 3 minutes, until the apples are slightly softened and fragrant.
  2. Cook the Oatmeal: Remove a few apples from the pot (to save for toppings) then add the oats and almond milk to the pot. Bring to a boil and then reduce the heat to low for about 10-15 minutes to allow the liquid to cook off, stirring occasionally to prevent sticking.
  3. Serve & Enjoy: Serve your oatmeal topped with the reserved apples, almond butter and maple syrup.

That’s it! A simple and satisfying breakfast, ready in minutes. This recipe is so easy to make!

Pro Tips for the Perfect Oatmeal Bowl

Want to take your oatmeal bowl to the next level? Here are a few of my favorite tips:

  • Toast the Oats: For a nuttier flavor, toast the rolled oats in a dry pan for a few minutes before adding the liquid.
  • Use a Pinch of Salt: A tiny pinch of salt enhances the sweetness of the apples and maple syrup.
  • Don’t Overcook: Overcooked oatmeal can become gluey. Keep a close eye on it and add more almond milk if needed.
  • Get Creative with Toppings: The possibilities are endless! Try adding chopped nuts, seeds, shredded coconut, or a dollop of yogurt.
  • Quality Ingredients: Using high-quality oats, almond milk, and maple syrup will make a noticeable difference in the flavor.

Common Mistakes to Avoid

Even the simplest recipes can have pitfalls. Here’s what to watch out for when making your cinnamon apple oatmeal bowl:

  • Burning the Apples: Keep the heat on medium and stir frequently to prevent the apples from burning.
  • Using Too Much Liquid: Start with the recommended amount of almond milk and add more as needed. Too much liquid will result in a watery oatmeal.
  • Forgetting to Stir: Stirring prevents the oatmeal from sticking to the bottom of the pot and ensures even cooking.
  • Skipping the Toppings: Toppings add flavor, texture, and visual appeal. Don’t be afraid to get creative!

Cinnamon Apple Oatmeal Bowl Variations

One of the best things about oatmeal is its versatility. Here are a few variations to try:

  • Nut Butter Swirl: Use any nut butter you like. Peanut butter, cashew butter, or sunflower seed butter all work well.
  • Spice It Up: Add a pinch of nutmeg, ginger, or cardamom to the oatmeal for extra warmth.
  • Add Dried Fruit: Stir in some raisins, cranberries, or chopped dates for added sweetness and texture.
  • Chocolate Chip Oatmeal: Add some chocolate chips to the oatmeal.
  • Protein Boost: Add a scoop of protein powder to the oatmeal for a more filling and satisfying breakfast.

The great thing is that you can use almost anything that you want to create your own variations.

How to Store Leftover Oatmeal

If you happen to have any leftover oatmeal (though I doubt you will!), here’s how to store it:

  • Refrigerate: Store the oatmeal in an airtight container in the refrigerator for up to 3 days.
  • Reheat: Reheat the oatmeal in the microwave or on the stovetop with a splash of almond milk.
  • Freezing: Freezing is not recommended as the texture can become mushy.

Frequently Asked Questions (FAQ)

Here are some common questions about making cinnamon apple oatmeal:

  • Can I use quick oats instead of rolled oats? While you can, rolled oats provide a better texture and are less processed.
  • Can I use regular milk instead of almond milk? Absolutely! Use any milk you prefer.
  • Can I make this recipe ahead of time? Yes, you can cook the oatmeal ahead of time and reheat it in the morning.
  • Is this recipe gluten-free? Yes, if you use certified gluten-free rolled oats.
  • Can I add other fruits? Definitely! Berries, bananas, and peaches are all delicious additions.

Serving Suggestions

While this cinnamon apple oatmeal bowl is delicious on its own, here are a few serving suggestions to elevate your experience:

  • Add a sprinkle of granola: For added crunch and texture.
  • Drizzle with honey: For extra sweetness.
  • Top with chopped nuts: For healthy fats and a satisfying crunch.
  • Add a dollop of yogurt: For creaminess and probiotics.
  • Serve with a side of fruit: For a balanced and nutritious breakfast.

This oatmeal bowl is more than just a meal; it’s a ritual. It’s a moment to slow down, savor the flavors, and nourish your body. So, the next time you’re craving something warm, comforting, and healthy, give this Cinnamon Apple Oatmeal Bowl a try. I promise, you won’t be disappointed. Enjoy!

Hey friends! Avery here, from my little kitchen in Portland. Today, I’m sharing a recipe that’s become a weeknight staple in my house: Tomato Chicken Pasta. It’s quick, it’s easy, and most importantly, it’s delicious. And the best part? We’re skipping the heavy cream without sacrificing any of the flavor. This recipe is all about feel-good food that doesn’t keep you chained to the stove.

My Journey to Tomato Chicken Pasta

Like many of you, my relationship with cooking started with a need. Years ago, I was burned out and my body was screaming for nourishment. Takeout felt convenient but left me feeling empty. So, I started experimenting in the kitchen. This Tomato Chicken Pasta is a direct result of those early experiments – a blend of simple ingredients and techniques that I’ve refined over time. It’s a dish that makes me feel good from the inside out, and I hope it does the same for you.

Why You’ll Love This Tomato Chicken Pasta

This isn’t just another pasta recipe; it’s a hug in a bowl. Here’s why I think you’ll absolutely adore it:

  • Quick and Easy: Ready in under 30 minutes, perfect for busy weeknights.
  • No Cream Needed: We achieve a rich, satisfying sauce without any heavy cream.
  • Healthy-ish: Packed with veggies and lean protein, it’s a balanced meal.
  • Customizable: Easily adaptable to your taste preferences and dietary needs.
  • Crowd-Pleaser: Even picky eaters will love this dish!

I often find myself making it on those evenings when I crave something comforting but don’t have hours to spend in the kitchen. It’s a reliable recipe that always delivers.

Ingredients for Tomato Chicken Pasta (No Cream)

  • 1 pound boneless, skinless chicken breasts, cut into bite-sized pieces
  • 1 pound pasta (penne, rotini, or your favorite)
  • 1 (28 ounce) can crushed tomatoes
  • 1 (15 ounce) can tomato sauce
  • 1 onion, chopped
  • 2 cloves garlic, minced
  • 1 red bell pepper, chopped
  • 2 tablespoons olive oil
  • 1 teaspoon dried oregano
  • 1/2 teaspoon dried basil
  • 1/4 teaspoon red pepper flakes (optional)
  • Salt and pepper to taste
  • Fresh parsley, chopped (for garnish)
  • Grated Parmesan cheese (for serving)

How to Make Tomato Chicken Pasta: Step-by-Step

  1. Cook the Pasta: Cook the pasta according to package directions. Drain and set aside. Don’t overcook the pasta! Al dente is best.
  2. Cook the Chicken: While the pasta is cooking, heat olive oil in a large skillet over medium heat. Add chicken and cook until browned and cooked through. Remove chicken from skillet and set aside.
  3. Sauté the Vegetables: Add onion and bell pepper to the skillet and cook until softened, about 5 minutes. Add garlic and cook for 1 minute more.
  4. Make the Sauce: Stir in crushed tomatoes, tomato sauce, oregano, basil, red pepper flakes (if using), salt, and pepper. Bring to a simmer.
  5. Combine and Simmer: Return chicken to the skillet and simmer for 10 minutes, allowing the flavors to meld. This step is crucial for developing a rich, flavorful sauce.
  6. Toss with Pasta: Add cooked pasta to the skillet and toss to coat with the sauce. Make sure every strand of pasta is lovingly coated in that delicious tomato sauce.
  7. Serve: Serve immediately, garnished with fresh parsley and grated Parmesan cheese.

Pro Tips for the Best Tomato Chicken Pasta

  • Quality Tomatoes: Use good quality crushed tomatoes and tomato sauce for the best flavor. It makes a huge difference!
  • Don’t Overcook the Chicken: Overcooked chicken will be dry and tough. Cook just until cooked through.
  • Taste and Adjust: Taste the sauce and adjust seasonings as needed. Add more salt, pepper, or red pepper flakes to your liking.
  • Pasta Water: Reserve about 1/2 cup of pasta water before draining. If the sauce is too thick, add a little pasta water to thin it out.
  • Fresh Herbs: Fresh herbs add a burst of flavor. If you have fresh basil or oregano, use them instead of dried.

Common Mistakes to Avoid

  • Not Salting the Pasta Water: Salting the pasta water is essential for flavorful pasta.
  • Overcooking the Pasta: Overcooked pasta will be mushy. Cook until al dente.
  • Not Simmering the Sauce Long Enough: Simmering the sauce allows the flavors to meld and develop. Don’t rush this step.
  • Adding Cold Chicken to the Sauce: Let the chicken come to room temperature for a few minutes before adding it to the sauce.
  • Forgetting the Garnish: Fresh parsley and Parmesan cheese add a finishing touch that elevates the dish.

Variations to Try

One of the things I love most about this recipe is how adaptable it is. Here are a few variations you can try:

  • Spicy: Add more red pepper flakes or a pinch of cayenne pepper for extra heat.
  • Vegetarian: Omit the chicken and add more vegetables, such as zucchini, mushrooms, or spinach.
  • Creamy: For a creamier sauce, stir in a tablespoon or two of cream cheese or mascarpone cheese at the end. Though this recipe is designed to be a tomato chicken pasta (no cream!), sometimes a little indulgence is welcome.
  • Different Protein: Substitute the chicken with Italian sausage, shrimp, or ground beef.
  • Add Wine: Add a splash of red wine to the sauce while it simmers for a deeper flavor.

Feel free to experiment and make it your own! That’s the beauty of cooking, right?

How to Store Tomato Chicken Pasta

This pasta is even better the next day! Here’s how to store it:

  • In the Fridge: Store leftover pasta in an airtight container in the fridge for up to 3-4 days.
  • Reheating: Reheat in the microwave or on the stovetop until heated through. If the pasta seems dry, add a splash of water or chicken broth.
  • Freezing: While you can freeze this dish, the pasta texture may change. If freezing, allow the pasta to cool completely before transferring it to a freezer-safe container. Freeze for up to 2 months. Thaw overnight in the fridge before reheating.

Frequently Asked Questions (FAQ)

  • Can I use different pasta? Absolutely! Penne, rotini, spaghetti, or any pasta shape you like will work.
  • Can I make this ahead of time? Yes, you can make the sauce ahead of time and store it in the fridge for up to 2 days. Just cook the pasta fresh when you’re ready to serve.
  • Can I use canned chicken? While fresh chicken is best, you can use canned chicken in a pinch. Drain and rinse the chicken before adding it to the sauce.
  • Is this recipe gluten-free? Use gluten-free pasta to make this recipe gluten-free.
  • Can I add cheese to the sauce? Yes, you can add Parmesan cheese, mozzarella cheese, or ricotta cheese to the sauce for extra flavor. Stir it in while simmering.

Serving Suggestions

This Tomato Chicken Pasta is a complete meal on its own, but here are a few serving suggestions to round out your dinner:

  • Side Salad: Serve with a simple green salad with a vinaigrette dressing.
  • Garlic Bread: Crusty garlic bread is perfect for soaking up the sauce.
  • Roasted Vegetables: Serve with roasted broccoli, asparagus, or Brussels sprouts.
  • Wine Pairing: A light-bodied red wine, such as Pinot Noir or Chianti, pairs well with this dish.

Final Thoughts

I hope you enjoy this Quick & Easy Tomato Chicken Pasta as much as I do! It’s a recipe that embodies my philosophy of healthy cooking: simple, flavorful, and nourishing. Remember, cooking should be a joy, not a chore. So, put on some music, pour yourself a glass of wine, and have fun in the kitchen!

And don’t worry if things aren’t perfect. A little extra oregano? A slightly overcooked piece of chicken? It’s all part of the process. Just embrace the imperfections and savor the moment. That’s what cooking is all about. So, go ahead and give it a try. I bet you’ll love it!

The sauce is really the star of this dish, and what I find is that if you don’t let it simmer long enough, the flavors don’t fully develop. The pasta, of course, is key – don’t overcook it! I usually end up making it once a week. I find myself putting it in the fridge if there are any leftovers. The sauce and chicken taste even better the next day, after it has had time to sit in the fridge for up to 24 hours. That’s about the maximum time I would let it sit for up to, though. I prefer to use crushed tomatoes rather than diced, as they give the sauce and dish a smoother consistency. If you don’t have all of the ingredients, don’t sweat it! Just use what you have. That’s kind of how I approach most of my cooking, but not always! In my opinion, a little more basil never hurts, and you can always add chili powder or red pepper flakes if you like a kick. Stir it all together and you’re good to go! This is really a great and easy weeknight meal, and chicken is a great source of protein!