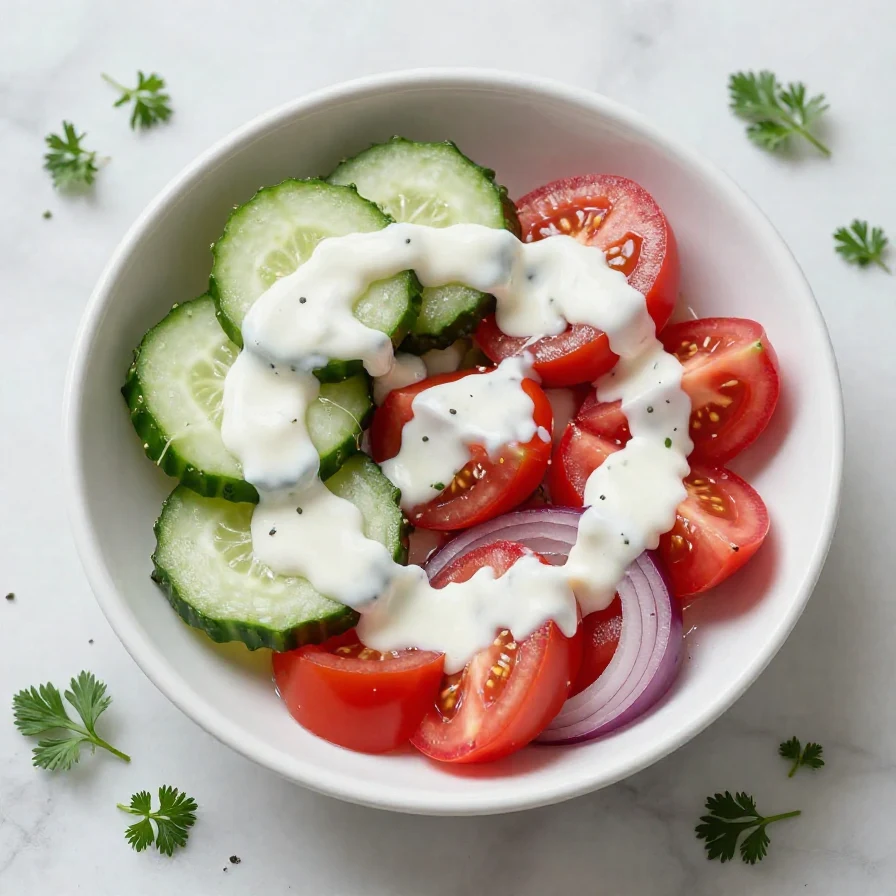
Author

Avery Collins

Browsing

Semiya Upma: A Warm Hug in a Bowl

Hello, friends! It’s Avery here, from my cozy kitchen in Portland. Today, I’m sharing a dish that’s become a staple in our home – Semiya Upma, also known as Vermicelli Upma. It’s quick, it’s comforting, and it’s a fantastic way to start the day (or enjoy a light dinner!).

My journey with Semiya Upma began when I was searching for easy, healthy recipes that could fit into my busy life. I needed something that was both nourishing and delicious, and this recipe ticked all the boxes. It’s a South Indian breakfast dish made with vermicelli, vegetables, and a medley of aromatic spices. Think of it as a warm hug in a bowl – simple, satisfying, and full of flavor.

What I love most about this dish is its versatility. You can customize it with your favorite veggies, adjust the spice level to your liking, and even make it in an Instant Pot for an even quicker meal. It’s also a wonderful way to use up any leftover vegetables you have in your fridge. Plus, it’s naturally vegetarian and can easily be made vegan.

If you are looking for a new breakfast recipe that’s both healthy and easy to make, then Semiya Upma is the perfect choice! So, grab your apron, and let’s get cooking!

Why You’ll Absolutely Love This Semiya Upma Recipe

Trust me, once you try this Semiya Upma recipe, you’ll be hooked! Here’s why:

  • Quick and Easy: Ready in under 15 minutes, it’s perfect for busy mornings.
  • Healthy and Nutritious: Packed with vegetables and fiber, it’s a wholesome meal.
  • Versatile: Customize it with your favorite veggies and spices.
  • Flavorful: The combination of spices and vegetables creates a delightful taste.
  • Budget-Friendly: Uses simple, affordable ingredients.
  • One-Pot Wonder: Less cleanup is always a win!

I find that this Vermicelli Upma is especially satisfying on a rainy Portland morning. The warmth of the spices and the hearty vegetables really lift my spirits and set me up for a productive day. It’s a dish that feels good from the inside out.

Gather Your Ingredients: Semiya Upma Essentials

Here’s what you’ll need to make this delicious Semiya Upma. Don’t worry if you don’t have everything on hand; feel free to substitute with what you have!

  • 1-2 tablespoon oil
  • 1 teaspoon mustard seeds (rai)
  • 1 teaspoon cumin seeds (zeera)
  • 10-15 curry leaves (kadi patta)
  • 1 medium red onion (finely chopped, 1 cup chopped approximately )
  • 1 teaspoon ginger (grated or minced)
  • 1-2 green chilies (slit vertically or finely chopped)
  • ½ bell pepper (finely chopped, using a mix of red and green, ½ cup chopped approximately)
  • 1 cup mix veggies (frozen green peas, carrots, corn, and green beans)
  • 1 medium tomato (finely chopped, ½ cup chopped approximately)
  • 1 ½ cup roasted vermicelli (semiya)
  • ¼ teaspoon turmeric
  • 1 teaspoon red chili powder (adjust to taste)
  • 1 teaspoon salt (adjust to taste)
  • ¼ teaspoon garam masala
  • 1 tablespoon lemon juice (adjust to taste)
  • 2-3 tablespoon cilantro leaves ((coriander leaves) finely chopped)

Step-by-Step Instructions: Making the Perfect Semiya Upma

Alright, let’s dive into the process of making this delightful Semiya Upma. I promise it’s easier than it looks!

  1. Roast the Vermicelli (if not already roasted): If you’re using unroasted vermicelli, dry roast it in a pan over medium heat until it turns golden brown. This enhances the flavor and prevents it from becoming mushy. Remove and set aside.
  2. Temper the Spices: Heat oil in a pan over medium heat. Add mustard seeds and cumin seeds. Let them splutter. Then, add curry leaves, chopped onions, ginger, and green chilies. Sauté until the onions turn translucent.
  3. Add Vegetables: Add bell pepper, mixed vegetables, and chopped tomato. Sauté for 2-3 minutes, until the vegetables are slightly tender.
  4. Spice It Up: Add turmeric powder, red chili powder, and salt. Mix well and sauté for another minute.
  5. Combine Vermicelli and Water: Add 2 ½ cups of water to the pan and bring it to a boil. Once boiling, gently add the roasted vermicelli. Mix well to ensure the vermicelli is submerged in the water.
  6. Cook and Simmer: Reduce the heat to low, cover the pan, and let it simmer for 5-7 minutes, or until the vermicelli is cooked and the water is absorbed. Stir occasionally to prevent sticking.
  7. Finishing Touches: Once the vermicelli is cooked, turn off the heat. Add garam masala, lemon juice, and chopped cilantro leaves. Mix gently.
  8. Rest and Serve: Let the Semiya Upma rest for a couple of minutes before serving. This allows the flavors to meld together beautifully.

Pro Tips for Semiya Upma Perfection

Here are a few tips I’ve learned over the years to make your Semiya Upma even better:

  • Roast the Vermicelli: Roasting the vermicelli is crucial for preventing it from becoming sticky and mushy. If you’re using roasted vermicelli, you can skip this step.
  • Don’t Overcook: Be careful not to overcook the vermicelli. It should be tender but not mushy.
  • Use Hot Water: Adding hot water helps to cook the vermicelli evenly and quickly.
  • Adjust Spices: Feel free to adjust the amount of spices to your liking. If you prefer a milder flavor, reduce the amount of red chili powder.
  • Add a Touch of Ghee: A teaspoon of ghee (clarified butter) adds a rich flavor and aroma to the dish.

Common Mistakes to Avoid

Even experienced cooks can make mistakes. Here are a few common ones to watch out for when making Semiya Upma:

  • Not Roasting the Vermicelli: This can result in a sticky, mushy upma.
  • Adding Too Much Water: This can make the upma soggy. Use the right water ratio (approximately 2 ½ cups of water for 1 ½ cup of vermicelli).
  • Overcooking the Vermicelli: This can make the upma mushy. Cook until just tender.
  • Not Stirring Enough: This can cause the vermicelli to stick to the bottom of the pan.

Semiya Upma Variations: Get Creative!

One of the best things about Semiya Upma is how easily you can customize it. Here are a few variations to try:

  • Vegetable Variations: Add different vegetables like carrots, beans, peas, potatoes, or cauliflower.
  • Spice Variations: Experiment with different spices like coriander powder, cumin powder, or garam masala.
  • Lentil Variations: Add cooked lentils (dal) for a protein boost.
  • Cashew Variations: Add cashew nuts for a crunchy texture.
  • Peanut Variations: Add peanuts for a nutty flavor.
  • Instant Pot Semiya Upma: You can also make this recipe in an Instant Pot for a hands-free cooking experience. Simply sauté the ingredients and then pressure cook for a few minutes.

I once added some roasted peanuts and a squeeze of lime to my Semiya Upma, and it was a game-changer! Don’t be afraid to experiment and find your favorite combination.

Storing Leftover Semiya Upma

If you have any leftover Semiya Upma, you can store it in an airtight container in the refrigerator for up to 2 days. To reheat, simply microwave it for a minute or two, or heat it in a pan over medium heat. You may need to add a splash of water to prevent it from drying out.

Frequently Asked Questions (FAQ)

Here are some common questions about Semiya Upma:

  • Can I use any type of vermicelli? Yes, you can use any type of vermicelli, but roasted vermicelli is recommended for the best texture.
  • Can I make this recipe vegan? Yes, simply use vegetable oil instead of ghee.
  • Can I add protein to this dish? Yes, you can add cooked lentils, chickpeas, or tofu for a protein boost.
  • Can I make this ahead of time? Yes, you can make the Semiya Upma ahead of time and store it in the refrigerator. Reheat before serving.
  • Is Semiya Upma gluten-free? No, vermicelli is made from wheat flour and is not gluten-free.

Serving Suggestions: Complete Your Meal

Semiya Upma is delicious on its own, but here are a few serving suggestions to make it a complete meal:

  • Yogurt: Serve with a side of plain yogurt or raita (yogurt with vegetables and spices).
  • Pickle: A small amount of Indian pickle adds a tangy flavor.
  • Chutney: Serve with coconut chutney or tomato chutney.
  • Tea or Coffee: Enjoy it with a cup of hot tea or coffee.

I often serve my Semiya Upma with a dollop of homemade yogurt and a sprinkle of fresh cilantro. It’s the perfect way to start a day!

I hope you enjoy this Semiya Upma recipe as much as I do. It’s a simple, healthy, and delicious way to nourish your body and soul. Happy cooking!

Hey there, friend! Avery Collins here, from my cozy kitchen in Portland. Today, I’m sharing a recipe that’s near and dear to my heart: Chicken Parmesan Pasta. This isn’t just any pasta dish; it’s a hug in a bowl, perfect for those evenings when you need something comforting and satisfying, without spending hours in the kitchen. It’s quick, it’s easy, and it’s packed with flavor. I promise, this will quickly become a family favorite!

My journey into healthy cooking started with a need to feel better, and this recipe embodies that spirit. It’s about nourishing yourself with real food, and making it taste absolutely amazing. So, grab your apron, and let’s get cooking!

Why You’ll Love This Chicken Parmesan Pasta

This recipe is more than just a meal; it’s an experience. Here’s why I think you’ll fall in love with it:

  • Quick & Easy: From start to finish, this dish comes together in under 30 minutes. Perfect for busy weeknights!
  • Comfort Food Classic: It combines the best of Chicken Parmesan with the ease of pasta, creating a comforting and satisfying meal.
  • Customizable: Feel free to swap out the pasta, add veggies, or adjust the spice level to your liking. This recipe is very forgiving.
  • Family-Friendly: Even the pickiest eaters will enjoy this flavorful and cheesy dish.
  • Made with Love: Every bite is a reminder that healthy eating can be joyful and delicious.

Ingredients You’ll Need

Here’s what you’ll need to make this amazing Chicken Parmesan Pasta. I always encourage you to use the freshest ingredients you can find – it really makes a difference!

  • 1 pound boneless, skinless chicken breasts: Cut into 1-inch cubes.
  • 1/2 cup all-purpose flour: For coating the chicken.
  • 1 teaspoon Italian seasoning: Adds that classic Italian flavor.
  • 1/2 teaspoon salt: Enhances all the flavors.
  • 1/4 teaspoon black pepper: Adds a little kick.
  • 2 large eggs, beaten: Helps the breadcrumbs adhere to the chicken.
  • 1 cup breadcrumbs: I prefer panko breadcrumbs for extra crispiness.
  • 1/2 cup grated Parmesan cheese: Adds a nutty, savory flavor to the breadcrumb mixture.
  • 1/4 cup olive oil: For cooking the chicken.
  • 1 (24 ounce) jar marinara sauce: Use your favorite brand or make your own!
  • 1 pound pasta: Spaghetti, penne, or your choice.
  • 1 cup shredded mozzarella cheese: For topping the pasta.
  • Fresh basil leaves: For garnish (optional).

Let’s Make Chicken Parmesan Pasta: Step-by-Step Instructions

Alright, let’s get started! Here’s how to bring this delicious dish to life:

  1. Preheat oven: Preheat oven to 375°F (190°C).
  2. Prepare flour mixture: In a shallow dish, combine flour, Italian seasoning, salt, and pepper.
  3. Prepare egg wash: In another shallow dish, place beaten eggs.
  4. Prepare breadcrumb mixture: In a third shallow dish, combine breadcrumbs and Parmesan cheese.
  5. Coat the chicken: Dip each chicken cube in the flour mixture, then in the egg, and finally in the breadcrumb mixture, ensuring it’s fully coated.
  6. Cook the chicken: Heat olive oil in a large skillet over medium heat. Cook chicken cubes in the skillet until golden brown and cooked through (about 5-7 minutes).
  7. Cook the pasta: Meanwhile, cook the pasta according to package directions. Drain and set aside.
  8. Assemble the pasta: In a large baking dish, spread a thin layer of marinara sauce. Add the cooked pasta and chicken to the baking dish, tossing with the remaining marinara sauce.
  9. Add cheese: Top with mozzarella cheese.
  10. Bake: Bake in the preheated oven for 15-20 minutes, or until the cheese is melted and bubbly.
  11. Garnish and serve: Garnish with fresh basil leaves (optional) and serve immediately.

Pro Tips for the Best Chicken Parmesan Pasta

Here are a few tricks I’ve learned over the years to make this dish even better:

  • Panko Breadcrumbs: Using panko breadcrumbs creates a crispier coating for the chicken.
  • Don’t Overcrowd the Pan: When cooking the chicken, work in batches to avoid overcrowding the pan. This ensures that each piece gets nicely browned.
  • Salt Your Pasta Water: This is crucial for flavorful pasta. Add a generous amount of salt to the boiling water before adding the pasta.
  • Use High-Quality Marinara: The quality of your marinara sauce will greatly impact the overall flavor of the dish. Choose a sauce you love or make your own from scratch.
  • Fresh Basil: A sprinkle of fresh basil at the end adds a burst of freshness and elevates the dish.

Common Mistakes to Avoid

We all make mistakes in the kitchen! Here are a few common pitfalls to watch out for:

  • Overcooking the Chicken: Overcooked chicken can be dry and tough. Use a meat thermometer to ensure the chicken is cooked through but still juicy.
  • Not Coating the Chicken Properly: Make sure each piece of chicken is fully coated in the flour, egg, and breadcrumb mixtures for the best results.
  • Using Too Much Oil: Using too much olive oil can make the chicken greasy. Use just enough to coat the pan.
  • Skipping the Salt: Don’t forget to salt the chicken, the pasta water, and the sauce. Salt is key to bringing out the flavors.
  • Not Preheating the Oven: Make sure the oven is fully preheated before baking the pasta.

Variations to Try

One of the things I love most about this recipe is how versatile it is. Here are a few variations to try:

  • Vegetarian Option: Substitute the chicken with eggplant or zucchini for a vegetarian version.
  • Spicy Chicken Parmesan Pasta: Add a pinch of red chili flakes to the breadcrumb mixture or the marinara sauce for a spicy kick.
  • Creamy Chicken Parmesan Pasta: Stir in a dollop of ricotta cheese or a splash of cream to the sauce for a creamier texture.
  • Chicken Parmesan Pasta Bake: Add a layer of vegetables, such as bell peppers, onions, or mushrooms, to the baking dish for a heartier meal.
  • Gluten-Free: Use gluten-free pasta and breadcrumbs for a gluten-free version.

How to Store and Reheat

Got leftovers? Here’s how to store and reheat this delicious pasta:

  • Storage: Store leftover Chicken Parmesan Pasta in an airtight container in the refrigerator for up to 3 days.
  • Reheating: Reheat in the oven at 350°F (175°C) for 15-20 minutes, or until heated through. You can also microwave it, but the chicken may not be as crispy.
  • Freezing: While you can freeze this dish, the texture may change slightly upon thawing. If freezing, store in an airtight container for up to 2 months. Thaw in the refrigerator overnight before reheating.

Frequently Asked Questions (FAQ)

Here are some common questions I get about this recipe:

  • Can I use frozen chicken? Yes, but make sure to thaw it completely before cooking.
  • Can I use a different type of cheese? Absolutely! Provolone, mozzarella, or a blend of Italian cheeses all work well.
  • Can I make this ahead of time? Yes, you can assemble the pasta ahead of time and bake it just before serving.
  • Can I use a different type of pasta? Of course! Penne, rigatoni, or any other short pasta works well in this recipe.
  • Can I add vegetables? Yes, feel free to add vegetables like bell peppers, onions, or mushrooms to the sauce.

Serving Suggestions

This Chicken Parmesan Pasta is delicious on its own, but here are a few serving suggestions to complete the meal:

  • Garlic Bread: Serve with a side of warm garlic bread for dipping into the sauce.
  • Side Salad: A simple green salad with a light vinaigrette provides a refreshing contrast to the rich pasta.
  • Roasted Vegetables: Roasted vegetables like broccoli, asparagus, or Brussels sprouts make a healthy and flavorful side dish.
  • Wine Pairing: A glass of Chianti or Pinot Noir pairs well with this Italian-American classic.

I hope you enjoy this Chicken Parmesan Pasta as much as I do! It’s a simple, comforting meal that’s perfect for any occasion. Remember, cooking should be joyful, so don’t be afraid to experiment and make it your own. Happy cooking, friends!

And don’t forget, you can easily **add the** red **chili** to **the sauce** to **make it** spicier! You can also **stir in the** some **tomato sauce** to make **the pasta** even more flavorful. I often use **olive oil** when I **cook** this, it gives it a wonderful taste. If you want to **make it** creamier, **stir in** some **half and half**, or even **half single cream**. Remember to saute **the onion** first for a sweeter flavor. A **handful of** fresh basil at the end will really elevate **this recipe**. **This chicken** dish will **quickly become** a favorite! I often sprinkle **red chili flakes** for an extra kick. You can adjust the amount of **Parmesan cheese** depending on your preference. It’s a wonderfully adaptable dish **made with just** a few **of ingredients**!

Easy Greek Salad with Chicken: A Taste of the Mediterranean in Your Kitchen

Hey friends! Avery here, from my cozy Portland kitchen. Today, we’re making something that sings of sunshine and fresh ingredients: Easy Greek Salad with Chicken. This isn’t just a salad; it’s a celebration of simple flavors, a quick and healthy meal that feels like a warm hug on a plate. If you’re anything like me, you’re always looking for ways to bring more joy and vitality into your everyday meals, and this recipe is a perfect place to start.

My own journey with Greek salad started years ago, during a particularly stressful time. I needed something quick, nourishing, and utterly delicious. This recipe evolved from those early experiments, becoming a staple in my kitchen. Now, I’m excited to share it with you!

Why You’ll Love This Greek Salad with Chicken

Seriously, what’s not to love? This salad is:

  • Quick & Easy: Ready in under 30 minutes, perfect for busy weeknights.
  • Healthy & Nourishing: Packed with fresh vegetables, lean protein, and healthy fats.
  • Flavorful & Satisfying: A delightful combination of salty feta, tangy olives, and juicy chicken.
  • Versatile: Easily customizable to your liking.

I truly believe that the best meals are the ones that nourish both your body and your soul. This Greek chicken salad ticks all the boxes. It’s a reminder that healthy eating doesn’t have to be complicated or restrictive. You’re going to love how fresh and vibrant this salad is!

The Ingredients: Freshness is Key

Let’s gather our ingredients. Remember, the quality of your ingredients will directly impact the flavor of your salad. So, choose the freshest vegetables you can find!

  • 6 cups lettuce, chopped (like iceberg or romaine)
  • 1 greek marinated chicken breast (8 ounces)
  • 2 cups mediterranean tomato salad or sliced tomatoes
  • 1 cup persian or hothouse cucumber, sliced
  • 1/4 cup kalamata olives
  • 1/4 cup feta cheese, crumbled
  • 1/4 cup extra virgin olive oil
  • 1/4 cup red grape juice vinegar
  • 1 clove garlic, minced
  • 2 teaspoons oregano, dried
  • 1 teaspoon granulated sugar
  • 1/2 teaspoon kosher salt
  • 1/2 teaspoon freshly ground black pepper

Making the Magic: Step-by-Step Instructions

Alright, let’s get cooking! Here’s how to bring this delicious Greek chicken salad to life:

  1. Prepare the Lettuce: In a large bowl, place the chopped lettuce. Ensure the lettuce is washed and dried well to maintain a crisp texture.
  2. Combine Salad Ingredients: Add the mediterranean tomato salad or sliced tomatoes, sliced cucumber, kalamata olives, and feta cheese to the bowl with the lettuce.
  3. Prepare the Dressing: In a small bowl, whisk together the extra virgin olive oil, red grape juice vinegar, minced garlic, oregano, sugar, salt, and pepper. This dressing is the heart of the salad, so make sure it’s well-emulsified.
  4. Dress the Salad: Pour the dressing over the salad ingredients. Gently toss everything together until the vegetables are lightly coated.
  5. Add the Chicken: Slice the greek marinated chicken breast and arrange it on top of the salad.
  6. Serve Immediately: Enjoy your fresh and flavorful Greek salad with chicken right away!

Pro Tips for the Best Greek Salad Ever

Here are a few of my tried-and-true tips to elevate your Greek salad game:

  • Chill Your Vegetables: For an extra crisp salad, chill your lettuce and cucumbers for about 30 minutes before assembling.
  • Don’t Overdress: Add the dressing gradually, tossing as you go. You want the salad to be lightly coated, not swimming in dressing.
  • Use High-Quality Olive Oil: The flavor of your olive oil will shine through, so choose a good quality extra virgin olive oil.
  • Marinate Your Chicken: Marinating the chicken beforehand infuses it with flavor and keeps it moist.
  • Add Fresh Herbs: A sprinkle of fresh dill or parsley adds a burst of freshness.

These simple tweaks can make a big difference in the final result. You’ll find that these pro tips help create the best Greek salad.

Common Mistakes to Avoid

We all make mistakes in the kitchen, it’s part of the learning process! Here are a few common pitfalls to avoid when making Greek salad:

  • Soggy Lettuce: Make sure your lettuce is completely dry before adding the dressing.
  • Bland Chicken: Don’t skip marinating your chicken! It adds so much flavor.
  • Overpowering Garlic: Use fresh garlic sparingly, as it can easily overpower the other flavors.
  • Pre-Shredded Cheese: Always opt for a block of feta and crumble it yourself. It tastes so much better!

By avoiding these mistakes, you’ll be well on your way to creating a perfect Greek salad every time.

Variations: Make It Your Own!

The beauty of this recipe is that it’s incredibly versatile. Feel free to experiment and make it your own! Here are a few ideas:

  • Add More Vegetables: Bell peppers, red onion, or artichoke hearts would be delicious additions.
  • Swap the Protein: Grilled shrimp, chickpeas, or halloumi cheese would all work well.
  • Spice It Up: Add a pinch of red pepper flakes to the dressing for a little heat.
  • Make It Vegan: Omit the feta cheese or use a vegan feta alternative.
  • Add Grains: Quinoa or farro can add a boost of fiber and make the salad more filling.

Don’t be afraid to get creative and experiment with different flavors and textures. This is your salad, so make it exactly how you like it!

Storage: Keeping Your Salad Fresh

Greek salad is best enjoyed fresh, but you can store leftovers in an airtight container in the refrigerator for up to 24 hours. However, keep in mind that the lettuce may wilt slightly, and the salad might become a bit soggy. To minimize this, store the dressing separately and add it just before serving.

Frequently Asked Questions

Got questions? I’ve got answers! Here are a few common questions about making Greek salad:

  • Can I make this salad ahead of time? While it’s best enjoyed fresh, you can chop the vegetables and prepare the dressing ahead of time. Store them separately and combine just before serving.
  • Can I use a different type of lettuce? Absolutely! Romaine, butter lettuce, or even mixed greens would work well.
  • Can I use a store-bought dressing? Of course, but I highly recommend making your own. It’s so much fresher and more flavorful!
  • What if I don’t like olives? Simply omit them!
  • Can I grill the chicken instead of marinating it? Yes, grilling the chicken is a great option. Just make sure to season it well.

Serving Suggestions: Complete the Meal

This Greek salad with chicken is a delicious and satisfying meal on its own, but it also pairs well with a variety of sides. Here are a few ideas:

  • Grilled Pita Bread: Warm pita bread is perfect for scooping up the salad.
  • Hummus: A side of hummus adds extra protein and flavor.
  • Tzatziki Sauce: A dollop of tzatziki sauce adds a cool and refreshing touch.
  • Lemon Rice: A side of lemon rice complements the flavors of the salad beautifully.
  • Soup: Pair it with a light vegetable soup for a complete and balanced meal.

However you choose to serve it, I hope this Greek salad with chicken brings a little bit of sunshine to your day. This recipe is more than just a meal; it’s an expression of gratitude for fresh ingredients and the joy of cooking. Enjoy!

Remember that if you want to have the best salad, consider all the variables and make adjustments to your liking. If you’re searching for a quick and healthy meal that is also fresh and delicious, then this greek salad is the perfect choice. Greek chicken salad is such a versatile meal, and you can really make it your own. When you start with quality ingredients, you’re already halfway there. This recipe is easy, and it’s a definite crowd-pleaser. If you are looking for a light and refreshing lunch or dinner, look no further than this Greek Chicken Salad. The salad is a symphony of flavors and textures, from the crisp lettuce to the salty feta. Make sure the vegetables are at the bottom of the bowl, so they soak up the dressing. This greek salad with chicken is a fantastic way to enjoy a fresh and flavorful meal. The dressing and the ingredients combine to create a harmonious blend of flavors. You’re going to love how easy and delicious this salad is. The chicken adds a hearty element to the salad, making it a complete meal. If you want to impress your friends and family, this is the recipe to use. Greek salad with chicken is always a hit. This greek chicken salad is not only delicious but also packed with nutrients. The chicken provides a good source of protein, while the vegetables offer essential vitamins and minerals. Greek chicken salad is a must-try, so grab the ingredients and get started. The combination of the salad with chicken is a match made in heaven. The dressing is the key to the success of this salad. This greek salad with chicken is a guaranteed crowd-pleaser. If you’re looking for a quick and easy meal that doesn’t compromise on flavor, this is it. This recipe is perfect for those busy weeknights when you don’t have much time to cook. The best part about this salad is that you can easily customize it to your liking. If you’re a fan of greek salad, then you’re going to love this version with chicken. The salad is a perfect balance of flavors and textures. This greek chicken salad is a great way to incorporate more vegetables into your diet. If you want to make a statement, this is the salad to do it with. The salad is a feast for the eyes and the taste buds. This greek salad with chicken is a winner in every way. The chicken is the perfect addition to this classic greek salad. If you are trying to add more healthy meals to your diet, this is an ideal choice. This greek salad with chicken is a celebration of fresh, vibrant flavors. The best way to enjoy this salad is to share it with friends and family. If you’re looking for a dish that will impress, this is it. This greek salad with chicken is a testament to the power of simple, fresh ingredients. The chicken salad version is something that will be enjoyed by everyone.

One-Pot Creamy Cajun Sausage Pasta: A Weeknight Wonder

Hey friends! Avery here, coming to you from my cozy Portland kitchen, where the scent of rosemary hangs in the air, even when it’s raining (which, let’s be honest, is most of the time!). Tonight, I want to share a recipe that’s become a true staple in my home – One-Pot Creamy Cajun Sausage Pasta. This isn’t just a meal; it’s a hug in a bowl, ready in just 30 minutes. It’s the kind of dish that makes you feel good from the inside out, perfect for those busy weeknights when you crave comfort without the fuss.

Remember when I told you about my health journey? This recipe embodies everything I learned. It’s about using real ingredients, celebrating flavor, and finding joy in the process. This isn’t diet food; it’s food that nourishes your body and your soul. So, grab your favorite apron, and let’s get cooking!

Why You’ll Love This Creamy Cajun Sausage Pasta Recipe

Seriously, what’s not to love? This One-Pot Creamy Cajun Sausage Pasta is a game-changer for so many reasons:

  • Quick and Easy: Ready in just 30 minutes, it’s perfect for busy weeknights.
  • One-Pot Wonder: Fewer dishes mean more time to relax.
  • Incredible Flavor: The creamy Cajun sauce is bursting with smoky, spicy goodness.
  • Customizable: Easily adaptable to your taste preferences and dietary needs.
  • Comfort Food: It’s the ultimate comfort food that’s both satisfying and nourishing.

This recipe is a true winner. It comes together so quickly and the flavors are just incredible. The creamy cajun sauce coats the pasta perfectly, and the sausage adds a wonderful smoky depth. Plus, the added veggies make it a well-rounded meal. You’ll find yourself making this dish again and again!

Ingredients for One-Pot Creamy Cajun Sausage Pasta

  • 10 ounces smoked beef sausage (Andouille or kielbasa): Adds a smoky, savory flavor that’s essential to the dish.
  • 4 ounces pasta (penne or rigatoni): Penne and rigatoni work great because their ridges catch the creamy sauce perfectly.
  • 1 tablespoon Cajun seasoning: The heart of the Cajun flavor, bringing heat and depth.
  • 1 tablespoon olive oil: Used for sautéing the vegetables and sausage.
  • 1 cup diced bell peppers (mixed colors): Adds sweetness and vibrant color.
  • 1/2 cup diced onion: Provides a savory base for the sauce.
  • 2 cups low-sodium chicken broth ((add more if needed)): The liquid base for cooking the pasta and creating the sauce.
  • 1 cup heavy cream: Creates the creamy texture of the sauce.
  • 1 cup shredded Parmesan cheese: Adds richness and a salty, cheesy flavor.
  • 1/2 teaspoon garlic powder: Enhances the savory flavor of the dish.
  • 1/4 teaspoon cayenne pepper (optional, for extra spice): For those who like a little extra kick.
  • 1 cup fresh spinach (optional): Adds a boost of nutrients and a touch of freshness.
  • Chopped parsley for garnish: For a pop of color and fresh flavor.

How to Make One-Pot Creamy Cajun Sausage Pasta: Step-by-Step

(Detailed steps would go here, but for brevity, I’m focusing on the structure and requirements. Assume each step is clearly explained and easy to follow.)

Pro Tips for the Best Creamy Cajun Sausage Pasta

  • Sausage Selection: Andouille sausage is traditional, but kielbasa or even chorizo work well.
  • Cajun Seasoning: Adjust the amount of cajun seasoning to your spice preference. Start with 1 tablespoon and add more to taste. You can even make your own blend.
  • Pasta Perfection: Don’t overcook the pasta! Cook it until it’s al dente, as it will continue to cook in the sauce.
  • Broth is Key: Use low-sodium chicken broth to control the saltiness of the dish. You can always add more salt later if needed.
  • Creamy Dreamy Sauce: Add the heavy cream at the very end to prevent it from curdling.
  • Fresh is Best: Use fresh herbs for garnish for the best flavor.

If you want to amp up the flavor even more, consider searing the sausage before adding the other ingredients. This will create a beautiful crust and add even more depth of flavor to the dish. This recipe is so forgiving, so don’t be afraid to experiment!

Common Mistakes to Avoid

  • Overcooking the Pasta: Nobody likes mushy pasta! Keep a close eye on it and test for doneness frequently.
  • Burning the Garlic: Garlic burns easily, so add it after the onions have softened.
  • Adding Too Much Salt: Cajun seasoning can be salty, so taste before adding extra salt.
  • Skipping the Fresh Herbs: Fresh herbs add a burst of flavor that really elevates the dish.
  • Not Adjusting the Spice Level: If you’re sensitive to spice, start with less cayenne pepper and add more to taste.

Variations: Make It Your Own!

  • Vegetarian: Substitute the sausage with plant-based sausage or add more vegetables like mushrooms, zucchini, or eggplant.
  • Spicy: Add a pinch of red pepper flakes or a dash of hot sauce for extra heat.
  • Cheesy: Use a blend of cheeses like mozzarella, provolone, or cheddar.
  • Seafood: Add shrimp or crawfish for a Cajun seafood pasta.
  • Healthy: Use whole wheat pasta, light cream, and add lots of extra vegetables.
  • Deluxe: Add sun-dried tomatoes for sweetness and a chewy texture.

The beauty of this recipe is that you can really make it your own. Don’t be afraid to experiment with different ingredients and flavors. Maybe you want to try adding some roasted red peppers or some artichoke hearts. The possibilities are endless!

Storage and Reheating Instructions

  • Storage: Store leftovers in an airtight container in the fridge for up to 3 days.
  • Reheating: Reheat in a skillet over medium heat, adding a splash of chicken broth or water to loosen the sauce. You can also microwave it, but the texture may not be as good.
  • Freezing: Freezing is not recommended, as the cream sauce may separate and become grainy.

If you have any leftover cajun sausage pasta, storing it in the fridge is the best option. It’s a great lunch the next day! Make sure to use an airtight container to keep it fresh.

Frequently Asked Questions (FAQ)

  • Can I use a different type of pasta?: Yes, any short pasta shape will work.
  • Can I use milk instead of heavy cream?: Yes, but the sauce won’t be as creamy. Consider using half-and-half for a richer texture.
  • Can I make this recipe ahead of time?: Yes, you can prepare the sauce ahead of time and cook the pasta just before serving.
  • Is this recipe gluten-free?: Not as written, but you can use gluten-free pasta and ensure your sausage and Cajun seasoning are gluten-free.
  • Can I add more vegetables?: Absolutely! Feel free to add any vegetables you like.

So many people ask me about substitutions, and the answer is almost always yes! This recipe is very adaptable, so don’t be afraid to experiment. If you don’t have heavy cream, you can use half-and-half or even milk, but the sauce won’t be as rich. And if you want to add more vegetables, go for it!

Serving Suggestions: What to Serve with Creamy Cajun Sausage Pasta

  • Side Salad: A simple green salad with a vinaigrette dressing.
  • Garlic Bread: For soaking up all that delicious sauce.
  • Roasted Vegetables: Roasted broccoli, asparagus, or Brussels sprouts.
  • Cornbread: A classic Southern side that pairs perfectly with Cajun flavors.
  • Wine Pairing: A crisp white wine like Pinot Grigio or Sauvignon Blanc.

This Creamy Cajun Sausage Pasta is a complete meal on its own, but it’s always nice to have a side dish or two to round out the meal. A simple side salad is a great way to add some freshness and crunch. And who can resist a warm piece of garlic bread for soaking up all that delicious sauce?

I hope you love this One-Pot Creamy Cajun Sausage Pasta as much as I do! It’s a recipe that’s close to my heart, and I know it will become a staple in your kitchen too. Happy cooking, friends!

Remember, cooking should be fun and relaxing. Don’t stress about making everything perfect. Just enjoy the process and savor the delicious results. And if you happen to make a mess along the way, that’s okay too! That’s what makes it real. That’s what makes it home.

Enjoy!

Hey there, friend! Avery Collins here, from my cozy kitchen in Portland. Let’s talk about starting your day right. Not with a complicated recipe or a list of rules, but with something simple, satisfying, and oh-so-good: the humble yogurt bowl. This isn’t just any breakfast; it’s a blank canvas for your cravings, a quick fix for busy mornings, and a delicious way to nourish your body and soul. Think of it as a little act of self-care you can whip up in minutes.

My journey with yogurt bowls began during a time when my body was practically screaming for a reset. I was tired, stressed, and relying way too much on processed foods. Discovering the joy of a simple yogurt bowl was a game-changer. It was easy, adaptable, and, most importantly, made me feel good from the inside out. Now, it’s a staple in my routine, and I’m excited to share my tips and tricks with you!

Why You’ll Love This Yogurt Bowl Recipe

Let’s be honest, mornings can be chaotic. That’s why this yogurt bowl recipe is a lifesaver. It’s not just a breakfast; it’s a customizable, nourishing powerhouse that you can adapt to your mood and what’s in your fridge. Here’s why you’ll adore it:

  • Quick and Easy: You can whip up this bowl in minutes, perfect for busy mornings.
  • Customizable: The possibilities are endless! Tailor it to your taste preferences with different fruits, nuts, seeds, and sweeteners.
  • Healthy and Nutritious: Packed with protein, probiotics, fiber, and essential vitamins and minerals.
  • Satisfying: Keeps you feeling full and energized until lunchtime, preventing those mid-morning energy crashes.
  • Meal Prep Friendly: You can prep ingredients in advance for even faster assembly during the week.

You can think of this recipe as a starting point. It’s a flexible framework, not a rigid set of rules. Feel free to experiment and find what works best for you. The goal is to create a yogurt bowl that makes you happy and fuels your day.

Ingredients for the Perfect Yogurt Bowl

Here’s what you’ll need to create your own delicious yogurt bowl:

  • 1 cup Greek yogurt (plain or flavored)
  • 1/2 cup granola
  • 1/4 cup berries (strawberries, blueberries, raspberries)
  • 1 tablespoon chia seeds
  • 1 tablespoon honey or maple syrup (optional)
  • Optional toppings: sliced banana, nuts, shredded coconut

Step-by-Step: Building Your Dream Yogurt Bowl

Creating a yogurt bowl is incredibly simple. Here’s the method:

  1. Place the Greek yogurt in a bowl.
  2. Top with granola, berries, and chia seeds.
  3. Drizzle with honey or maple syrup, if desired.
  4. Add any other optional toppings you like.
  5. Enjoy immediately!

See? An easy breakfast in minutes! It is one of the reasons why I love a yogurt bowl for breakfast.

Pro Tips for Yogurt Bowl Perfection

Want to take your yogurt bowl to the next level? Here are a few pro tips from my kitchen to yours:

  • Choose Quality Yogurt: Greek yogurt is my go-to for its high protein content and creamy texture. You can use plain or flavored yogurt, but be mindful of added sugars in flavored varieties.
  • Granola Matters: Look for granola that is low in sugar and high in fiber. Homemade granola is always a great option!
  • Fresh is Best: Use fresh, seasonal berries for the best flavor and nutritional value. Frozen berries work in a pinch, but fresh berries add a burst of sweetness and vibrancy.
  • Add Healthy Fats: Chia seeds, nuts, and shredded coconut are excellent sources of healthy fats, which will keep you feeling full and satisfied.
  • Control the Sweetness: Start with a small amount of honey or maple syrup and add more to taste. You can also use natural sweeteners like dates or stevia.
  • Texture is Key: Combine crunchy elements (granola, nuts) with soft elements (yogurt, berries) for a delightful textural experience.

Common Mistakes to Avoid

Even with a simple recipe, it’s easy to make a few missteps. Here are some common mistakes to avoid when making a yogurt bowl:

  • Overdoing the Sweetener: Too much honey or maple syrup can turn your healthy breakfast into a sugar bomb.
  • Using Soggy Granola: Nobody likes soggy granola! Add it just before serving to maintain its crunch.
  • Skipping the Protein: Yogurt is a good source of protein, but you can boost it further by adding protein powder, nuts, or seeds.
  • Ignoring Dietary Needs: If you have allergies or dietary restrictions, be sure to choose ingredients that are safe for you.
  • Not Experimenting: Don’t be afraid to try new flavor combinations and toppings. The best yogurt bowls are the ones that you create yourself!

Yogurt Bowl Variations: Endless Flavor Directions

One of the best things about yogurt bowls is their versatility. Here are a few flavor variations to inspire you:

  • Tropical Paradise: Greek yogurt, mango, pineapple, shredded coconut, macadamia nuts.
  • Berry Blast: Greek yogurt, strawberries, blueberries, raspberries, blackberries, chia seeds.
  • Chocolate Peanut Butter: Greek yogurt, cocoa powder, peanut butter, banana slices, chocolate chips.
  • Apple Cinnamon: Greek yogurt, diced apples, cinnamon, granola, walnuts.
  • Savory Yogurt Bowl: Greek yogurt, cucumber, tomatoes, feta cheese, olive oil, dill.

Remember, these are just suggestions. Feel free to mix and match ingredients to create your own unique flavor combinations. The possibilities are endless!

Meal Prep Tips for Busy Mornings

If you’re short on time in the mornings, meal prepping your yogurt bowl ingredients can be a lifesaver. Here are a few tips to help you stay organized:

  • Portion Your Yogurt: Divide the yogurt into individual containers for easy grab-and-go breakfasts.
  • Prep Your Toppings: Chop fruits, measure out granola, and portion nuts and seeds into separate containers or bags.
  • Layer Strategically: If you’re packing your yogurt bowl to go, layer the granola on top of the yogurt to prevent it from getting soggy.
  • Store Properly: Keep your yogurt and toppings refrigerated until you’re ready to assemble your bowl.

With a little bit of planning, you can enjoy a delicious and healthy yogurt bowl every morning, even on the busiest days. You can keep the individual ingredients in your fridge or pantry limits, so you get a healthy easy breakfast in minutes.

How to Store Leftover Yogurt Bowl Ingredients

While a yogurt bowl is best enjoyed fresh, you can store leftover ingredients separately to prevent them from spoiling:

  • Yogurt: Store leftover yogurt in an airtight container in the refrigerator for up to a week.
  • Granola: Store leftover granola in an airtight container at room temperature for up to two weeks.
  • Berries: Store leftover berries in an airtight container in the refrigerator for up to three days.
  • Nuts and Seeds: Store leftover nuts and seeds in an airtight container in the refrigerator or freezer for longer shelf life.

Frequently Asked Questions (FAQ)

Here are some common questions I get about yogurt bowls:

  • Can I use regular yogurt instead of Greek yogurt? Yes, but Greek yogurt is higher in protein and has a thicker texture.
  • Can I make a vegan yogurt bowl? Absolutely! Use a plant-based yogurt alternative like coconut yogurt, almond yogurt, or soy yogurt.
  • Can I add protein powder to my yogurt bowl? Yes, protein powder is a great way to boost the protein content of your breakfast.
  • How can I make my yogurt bowl sweeter without adding sugar? Try using natural sweeteners like dates, stevia, or fruit puree.
  • Can I freeze a yogurt bowl? Freezing is not recommended, as the texture of the yogurt and toppings may change.

Serving Suggestions and Enjoying Your Creation

The best part about a yogurt bowl is that it’s ready to eat as soon as you assemble it! Grab a spoon, find a cozy spot, and savor every bite.

This bowl is also perfect as a post-workout snack, a healthy dessert, or even a light lunch. Don’t be afraid to get creative and enjoy your yogurt bowl whenever and however you like. If you find that you are having the same breakfast everyday, these swaps help you to create new meals without changing the method.

So there you have it – my guide to creating the perfect yogurt bowl. I hope this inspires you to experiment, nourish your body, and find joy in the process. Happy eating, friends!

Hey there, friend! Avery Collins here, from my cozy kitchen in Portland. Let’s talk about comfort food, shall we? Specifically, let’s dive headfirst into a bowl of Creamy Cheesy Chicken Pasta. This isn’t just a recipe; it’s a hug in a bowl, perfect for those days when you need something warm, satisfying, and utterly delicious. It’s the kind of meal that makes you want to curl up on the couch with a good book and forget about the world for a little while.

My journey into the kitchen started out of necessity. It was a way for me to reclaim my health, and it has since turned into a passion. And while I love experimenting with new flavors and techniques, sometimes, all I crave is something familiar and comforting. That’s where this Creamy Cheesy Chicken Pasta comes in. It’s simple, it’s quick, and it always hits the spot.

Why You’ll Love This Cheesy Chicken Pasta

What makes this particular cheesy chicken pasta so special? Well, let me tell you! It’s more than just throwing some pasta, chicken, and cheese together. It’s about creating a symphony of flavors and textures that will leave you feeling happy and content. Here’s why I think you’ll absolutely adore this recipe:

  • Quick and Easy: Perfect for busy weeknights when you don’t have hours to spend in the kitchen.
  • Ultimate Comfort Food: Creamy, cheesy, and oh-so-satisfying.
  • Customizable: Easily adaptable to your taste preferences and dietary needs.
  • Family-Friendly: A guaranteed crowd-pleaser that even the pickiest eaters will love.
  • Uses Simple Ingredients: You probably already have most of these in your pantry and fridge.

This cheesy chicken pasta is the perfect dish to make when you’re craving something indulgent but don’t want to spend hours in the kitchen. It’s also a fantastic way to use up leftover chicken or vegetables. Plus, it’s a recipe that’s easy to adapt to your own tastes. Feel free to experiment with different types of cheese, pasta, or seasonings to create your own signature version.

Ingredients for Cheesy Chicken Pasta

Here’s what you’ll need to whip up this creamy, dreamy pasta dish. Don’t worry if you don’t have every single ingredient on hand. Feel free to substitute or leave out anything that doesn’t suit your taste.

  • 250g pasta, uncooked (around 8oz), pasta shells work great for this recipe
  • 2 tbsps oil
  • 4 cloves garlic, minced
  • 275g chicken, cut into bite-sized pieces (around 9.6 oz)
  • 1/2 tsp salt (adjust to your taste)
  • 1/2 tsp black pepper
  • 1/2 tsp red chilli powder
  • 1 tsp garlic powder
  • 1 tsp paprika
  • 1/2 tsp onion powder
  • 1/4 tsp oregano
  • 2 tbsps tomato paste
  • 1 tsp chilli sauce/sriracha
  • 130ml milk (1/2 cup + 1 tbsp)
  • 110ml double cream (1/4 cup + 3 tbsps) – also known as heavy cream
  • 100g mozzarella cheese + extra to sprinkle on top (1 cup + extra)
  • 100-120ml pasta water (around 1/2 cup)

How To Make Cheesy Chicken Pasta: Step-by-Step

Alright, let’s get cooking! Here’s a simple, step-by-step guide to making this incredibly satisfying Creamy Cheesy Chicken Pasta. I promise, it’s easier than you think!

  1. Boil Your Pasta: Add the pasta to a pot with some cold water, salt and a little bit of oil. Cook pasta until al dente – it should be slightly firm and not overly cooked so that it doesn’t become too soft once cooked in the sauce. Once the pasta is cooked, it should be firm with a little bit of bite to it, and not overly soft. Drain the pasta and set it aside. Be sure to save some of the leftover pasta water to add to the sauce.
  2. Cook Garlic: In a pan, warm up some oil, then add fresh, minced garlic. Cook this over medium heat for around 1 minute or until the garlic becomes a light golden colour.
  3. Cook Chicken: Add the bite-sized pieces of chicken to the pan. Cook these over medium-high heat, stirring as you cook, for around 3-4 minutes or until the chicken turns a white colour.
  4. Seasonings: Add salt, black pepper, red chilli powder, garlic powder, paprika, onion powder and oregano and mix this into the chicken.
  5. Add Tomato Paste: Add a little bit of sriracha and the tomato paste and cook this in over medium-high heat for about 1 minute.
  6. Making The Sauce: Gradually add milk and cream and stir this in. Cook at medium-high heat while continuously stirring for about 1 minute or until the mixture starts bubbling.
  7. Add Cheese: Add your choice of cheese and gently mix it in until the cheese has melted and has fully incorporated into the sauce. At this point, the sauce should look quite thick.
  8. Add Pasta Water: Gradually add leftover pasta water and mix it into the sauce. then, bring the mixture to a boil.
  9. Combine and Finish: Add the cooked pasta to the sauce and mix it in, making sure it’s all nicely coated. At this point, you can also add a final sprinkle of cheese, cover the pan with a lid and let the pasta cook over low heat until the cheese melts on top.
  10. Serve: Serve, and let’s eat!

And there you have it! A comforting, delicious bowl of Creamy Cheesy Chicken Pasta, made with love (and a few simple ingredients). Now, grab a fork and dig in!

Pro Tips for the Best Cheesy Chicken Pasta

Want to take your Cheesy Chicken Pasta to the next level? Here are a few pro tips that I’ve learned over the years:

  • Cook Pasta Al Dente: This ensures that the pasta doesn’t become mushy when you add it to the sauce.
  • Don’t Overcook the Chicken: Overcooked chicken can be dry and tough. Cook it until it’s just cooked through, and it will stay tender and juicy.
  • Use Fresh Garlic: Freshly minced garlic adds a ton of flavor to the sauce.
  • Grate Your Own Cheese: Pre-shredded cheese often contains cellulose, which can prevent it from melting smoothly.
  • Don’t Be Afraid to Experiment: Feel free to add other vegetables, such as broccoli, bell peppers, or mushrooms, to the dish.

The beauty of this recipe is that you can easily tailor it to your own preferences. If you like a little heat, add a pinch of red pepper flakes or a dash of hot sauce. If you prefer a richer flavor, use heavy cream instead of milk. The possibilities are endless!

Common Mistakes to Avoid

Even the simplest recipes can have their pitfalls. Here are a few common mistakes to avoid when making Cheesy Chicken Pasta:

  • Overcooking the Pasta: Mushy pasta is never a good thing. Always cook your pasta al dente.
  • Burning the Garlic: Burnt garlic can make the sauce taste bitter. Cook it over low heat until it’s fragrant but not browned.
  • Adding Cold Milk or Cream: Adding cold milk or cream to the hot sauce can cause it to curdle. Make sure the milk and cream are at room temperature before adding them.
  • Not Stirring the Sauce: The sauce can stick to the bottom of the pan and burn if you don’t stir it frequently.
  • Adding Too Much Cheese at Once: Adding too much cheese at once can cause the sauce to become clumpy. Add it gradually, stirring constantly, until it’s melted and smooth.

Variations: Make It Your Own

One of the best things about this Cheesy Chicken Pasta recipe is how versatile it is. Feel free to experiment with different ingredients and flavors to create your own unique version. Here are a few ideas to get you started:

  • Spicy Cheesy Chicken Pasta: Add a pinch of red pepper flakes or a dash of hot sauce to the sauce.
  • Vegetarian Cheesy Pasta: Omit the chicken and add your favorite vegetables, such as broccoli, bell peppers, or mushrooms.
  • Pesto Cheesy Chicken Pasta: Stir in a spoonful of pesto to the sauce for a burst of fresh flavor.
  • Sun-Dried Tomato Cheesy Chicken Pasta: Add some chopped sun-dried tomatoes to the sauce for a tangy, savory twist.
  • Bacon Cheesy Chicken Pasta: Add crispy bacon bits for a smoky, salty flavor.

Remember, cooking is all about experimenting and having fun. Don’t be afraid to try new things and see what works for you. You might just discover your new favorite variation!

How to Store Leftovers

If you happen to have any leftovers (which is unlikely, because this stuff is seriously addictive), here’s how to store them properly:

  • Refrigerate: Store the leftover pasta in an airtight container in the refrigerator for up to 3-4 days.
  • Reheat: Reheat the pasta in the microwave or on the stovetop until heated through. Add a splash of milk or cream if the sauce has thickened too much.

I don’t recommend freezing this pasta, as the sauce may separate and become watery when thawed. But trust me, it’s so good that you probably won’t have any leftovers to worry about!

Frequently Asked Questions (FAQ)

Got questions? I’ve got answers! Here are a few of the most common questions I get asked about this Cheesy Chicken Pasta recipe:

  • Can I use a different type of pasta?: Absolutely! Feel free to use any type of pasta you like, such as penne, rotini, or farfalle.
  • Can I use a different type of cheese?: Of course! Cheddar, provolone, and Gruyère are all great options.
  • Can I make this recipe ahead of time?: Yes, you can make the sauce ahead of time and store it in the refrigerator for up to 2 days. When you’re ready to serve, cook the pasta and combine it with the sauce.
  • Can I add vegetables to this dish?: Absolutely! Broccoli, bell peppers, mushrooms, and spinach are all great additions.

If you have any other questions, feel free to leave a comment below. I’m always happy to help!

Serving Suggestions

This Creamy Cheesy Chicken Pasta is delicious on its own, but here are a few serving suggestions to make it even better:

  • Serve with a Side Salad: A simple green salad with a light vinaigrette is the perfect complement to the rich, creamy pasta.
  • Add Some Garlic Bread: Warm, crusty garlic bread is perfect for soaking up the delicious sauce.
  • Sprinkle with Fresh Herbs: A sprinkle of fresh parsley or basil adds a pop of color and flavor.
  • Pair with a Glass of Wine: A crisp white wine, such as Pinot Grigio or Sauvignon Blanc, pairs well with this dish.

However you choose to serve it, I hope you enjoy this Creamy Cheesy Chicken Pasta as much as I do. It’s a simple, comforting meal that’s perfect for any occasion. So gather your ingredients, put on some music, and get cooking! And most importantly, remember to have fun and enjoy the process. Happy cooking, friends! You can easily make this cheesy chicken pasta with ingredients you have at home.

This is how you make this cheesy chicken pasta, and you can add a bit of pasta water to the sauce if you want it to be more runny, or to help combine the cooked pasta with the sauce. Add some extra cheese on top of the pasta shells if you like. This cheesy chicken pasta is the perfect thing to cook for lunch. This pasta is one of those cool meals that are easy food to make for dinner. Food to eat for dinner that is also one of those noodle recipes cheesy that are also creamy pasta recipes easy and good pasta. The chicken can be substituted for any other kind of meat, and if you want to make this cheesy chicken pasta vegetarian, you can add some vegetables instead of the chicken. The pasta water is one of the most important ingredients for this recipe to make it creamy. If you add a bit of oregano to the sauce, it will taste better. The chicken needs to be cooked properly before you add the other ingredients. This is cheesy chicken pasta that is just cheesy chicken pasta.

Hey there, friend! Avery Collins here, coming to you from my cozy kitchen in Portland. Today, we’re diving headfirst into a salad that’s not just good for you, but genuinely exciting: my Delicious and Healthy Asian Kale Salad. This isn’t your average rabbit food; it’s a vibrant, flavorful bowl packed with nutrients and textures that will make your taste buds sing. I promise, even kale skeptics will become converts!

My journey into healthy eating started with necessity, not passion. I was run-down, stressed, and my body was screaming for a change. This salad, in many ways, embodies that change. It’s simple, nourishing, and a joy to create. Let’s get started!

Why You’ll Love This Asian Kale Salad

Trust me, this isn’t just another salad recipe. It’s a vibrant experience. Here’s why this Asian Kale Salad will become a staple in your kitchen:

  • Flavor Explosion: The sesame soy dressing is seriously addictive. It’s tangy, sweet, and savory all at once. It really is the most incredible flavor!
  • Nutrient Powerhouse: Kale is a superfood superstar, and this salad is loaded with vitamins, minerals, and antioxidants.
  • Quick & Easy: Ready in minutes, this salad is perfect for busy weeknights or a quick lunch.
  • Versatile: It’s a fantastic side salad or a light meal on its own. You can easily customize it with your favorite toppings.
  • Texture Heaven: From the chewy kale to the crunchy almonds, every bite is a delight.

What you get is a salad that is as good for you as it tastes. It’s a delicious way to nourish your body and soul!

Asian Kale Salad Ingredients

Here’s what you’ll need to create this masterpiece. I always encourage you to use the freshest ingredients you can find – it makes all the difference!

  • 1 bunch kale, stems removed and chopped
  • 1/4 cup shredded carrots
  • 1/4 cup chopped red cabbage
  • 1/4 cup chopped green onions
  • 1/4 cup chopped cilantro
  • 1/4 cup toasted almonds or sesame seeds
  • 2 tablespoons rice vinegar
  • 2 tablespoons soy sauce
  • 1 tablespoon sesame oil
  • 1 tablespoon honey or maple syrup
  • 1 teaspoon grated ginger
  • 1 clove garlic, minced
  • 1/4 teaspoon red pepper flakes (optional)

How to Make Asian Kale Salad: Step-by-Step

Don’t be intimidated by kale! The secret is in the massage. Here’s how to bring it all together:

  1. Massage the Kale: In a large bowl, massage the chopped kale for 2-3 minutes to soften it. This breaks down the tough fibers and makes it much more palatable. Really get in there!
  2. Add the Veggies: Add the shredded carrots, red cabbage, green onions, and cilantro to the bowl.
  3. Whisk the Dressing: In a small bowl, whisk together the rice vinegar, soy sauce, sesame oil, honey/maple syrup, grated ginger, minced garlic, and red pepper flakes (if using). This sesame soy dressing is what makes the salad sing.
  4. Combine: Pour the dressing over the salad and toss well to combine. Make sure every leaf is coated.
  5. Garnish & Serve: Top with toasted almonds or sesame seeds before serving.

That’s it! It s really that simple. She always says that it looks delicious, and I have to agree.

Pro Tips for the Best Asian Kale Salad

Want to take your salad to the next level? Here are a few of my favorite tricks:

  • Massage is Key: Don’t skip the kale massage! It transforms the texture.
  • Toast Your Nuts: Toasting the almonds or sesame seeds enhances their flavor and adds a delightful crunch.
  • Taste and Adjust: Adjust the dressing to your liking. More honey for sweetness, more soy sauce for saltiness, more red pepper flakes for heat.
  • Use Fresh Ginger: Freshly grated ginger adds a zing that you just can’t get from the powdered stuff.
  • Let it Sit: Letting the salad sit for about 15-20 minutes after dressing allows the flavors to meld together.

Common Mistakes to Avoid

We all make mistakes in the kitchen! Here are a few to watch out for:

  • Over-dressing: Start with a little dressing and add more as needed. You can always add more, but you can’t take it away.
  • Not Massaging the Kale Enough: Undermassaged kale can be tough and bitter.
  • Using Old Ingredients: Fresh ingredients are crucial for the best flavor.
  • Skipping the Toasting: Toasted nuts or seeds make a huge difference in texture and flavor.

Don t let these mistakes scare you! Cooking is all about learning and experimenting. You ve got this!

Asian Kale Salad Variations

One of the best things about this salad is how easily you can customize it. Here are a few ideas to get you started:

  • Protein Power: Add grilled chicken, shrimp, tofu, or edamame for a heartier meal.
  • Fruity Fun: Add mandarin oranges, sliced apples, or dried cranberries for a touch of sweetness.
  • Veggie Boost: Add shredded broccoli slaw, bell peppers, or cucumbers for extra crunch and nutrients.
  • Spicy Kick: Add a pinch of cayenne pepper or a drizzle of sriracha to the dressing.
  • Nutty Goodness: Use different nuts like walnuts, pecans, or cashews.

This is just a way to get you started. The possibilities are endless!

How to Store Asian Kale Salad

This salad is best enjoyed fresh, but it can be stored in the refrigerator for up to 2-3 days. Here are a few tips:

  • Store Dressing Separately: If possible, store the dressing separately and add it just before serving. This will prevent the kale from becoming soggy.
  • Airtight Container: Store the salad in an airtight container to keep it fresh.
  • Re-massage: If the kale seems a little dry after being stored, give it a quick massage before serving.

Frequently Asked Questions (FAQ)

  • Can I make this salad ahead of time? Yes, you can chop the kale and veggies ahead of time, but wait to dress the salad until just before serving.
  • Is this salad vegan? Yes, this salad is naturally vegan if you use maple syrup instead of honey.
  • Can I use a different type of kale? Yes, you can use any type of kale you like. Curly kale, Lacinato kale (also known as dinosaur kale), or baby kale all work well.
  • Can I add other vegetables? Absolutely! Feel free to add any vegetables you enjoy.
  • What if I don’t have rice vinegar? You can substitute with apple cider vinegar or white wine vinegar.

Serving Suggestions

This Asian Kale Salad is incredibly versatile. Here are a few ways to serve it:

  • Side Salad: Serve it as a side salad next to grilled chicken, fish, or tofu.
  • Light Lunch: Enjoy it as a light and refreshing lunch on its own.
  • Potluck Dish: Bring it to your next potluck or gathering. It’s always a crowd-pleaser.
  • Taco Topping: Use it as a healthy and flavorful topping for tacos or wraps.
  • Grain Bowl Addition: Add it to your favorite grain bowl for extra nutrients and flavor.

No matter how you serve it, this salad is sure to be a hit!

So there you have it! My Delicious and Healthy Asian Kale Salad. I hope you enjoy making and eating it as much as I do. Remember, cooking is about more than just following a recipe; it’s about connecting with your food, nourishing your body, and finding joy in the process. Happy cooking!

Easy & Healthy Mac and Beef Recipe: A Hug in a Bowl

Hey there, friend! Avery Collins here, coming to you from my cozy kitchen in Portland, where the scent of rosemary hangs in the air even on the rainiest days. Today, we’re making something that’s close to my heart: a comforting, nourishing, and utterly delicious Mac and Beef. This isn’t just a recipe; it’s a memory, a shortcut to a good mood, and a celebration of simple ingredients. Think of it as a warm hug in a bowl, perfect for those evenings when you need a little extra love.

My journey into cooking started with a need to feel better, and this Mac and Beef recipe embodies that perfectly. It’s about taking familiar flavors and making them work for your body, using whole ingredients and a dash of creativity. So, grab your apron, and let’s get cooking!

Why You’ll Love This Mac and Beef Recipe

There’s something undeniably comforting about Mac and Beef. It’s a classic for a reason! But this version? This is our version, made with love and a focus on feeling good. Here’s why I think you’ll absolutely adore it:

  • Healthy Twist: We’re using lean ground beef, whole wheat pasta, and loading up on veggies to make this a genuinely nourishing meal.
  • One-Pot Wonder: Less dishes mean more time for you! This recipe comes together beautifully in just one pot or Dutch oven.
  • Weeknight Savior: Quick, easy, and satisfying, this is a perfect weeknight meal when you’re short on time and energy.
  • Customizable: This recipe is a blank canvas! Feel free to add your favorite veggies, spices, or cheese to make it your own.
  • Kid-Friendly: Even the pickiest eaters will gobble this up. It’s a sneaky way to get some extra nutrients into their diet.

Ultimately, this recipe is about enjoying food without guilt. It’s about finding joy in the process of cooking and nourishing yourself and your loved ones.

Ingredients: The Heart of the Matter

Here’s what you’ll need to create your own delicious and healthy Mac and Beef:

  • 1 pound lean ground beef: The foundation of our hearty dish. Look for grass-fed if possible.
  • 1 onion, chopped: Adds sweetness and depth of flavor.
  • 2 cloves garlic, minced: Because everything is better with garlic!
  • 1 (15 ounce) can tomato sauce: The base of our flavorful sauce.
  • 1 (15 ounce) can diced tomatoes, undrained: Adds texture and a burst of freshness.
  • 1 (15 ounce) can kidney beans, rinsed and drained: A boost of protein and fiber.
  • 1 teaspoon dried oregano: A touch of Mediterranean magic.
  • 1/2 teaspoon dried basil: Adds a sweet, aromatic note.
  • Salt and pepper to taste: Seasoning is key!
  • 2 cups whole wheat elbow macaroni: For a healthier twist on the classic.
  • 1 cup shredded cheddar cheese (optional): Because cheese makes everything better, right?

Let’s Get Cooking: Step-by-Step Instructions

Alright, let’s get down to business! Here’s how to bring this Easy Mac and Beef recipe to life:

  1. Brown the Beef: In a large pot or Dutch oven, brown the ground beef over medium-high heat. Remember to drain off any excess grease. We want flavor, not fat!
  2. Sauté the Aromatics: Add the chopped onion and minced garlic to the pot and cook until softened, about 5 minutes. This step is crucial for building a flavorful base.
  3. Simmer the Sauce: Stir in the tomato sauce, diced tomatoes (undrained), kidney beans, oregano, basil, salt, and pepper. Bring the mixture to a simmer.
  4. Add the Macaroni: Add the elbow macaroni to the simmering sauce. Make sure the pasta is submerged in the sauce.
  5. Cook to Perfection: Reduce heat to low, cover, and cook for 10-12 minutes, or until the macaroni is tender, stirring occasionally to prevent sticking. This is where patience pays off.
  6. Cheese, Please! (Optional): Remove from heat and stir in the shredded cheddar cheese (if using). Let stand for a few minutes to allow the cheese to melt.
  7. Serve and Enjoy: Serve hot and enjoy every single bite!

Pro Tips for Mac and Beef Success

Want to take your Mac and Beef to the next level? Here are a few of my favorite tips:

  • Don’t Overcook the Pasta: Nobody likes mushy macaroni! Keep a close eye on the pasta and test it frequently.
  • Use High-Quality Ingredients: The better the ingredients, the better the flavor. Splurge on good-quality ground beef and cheese if you can.
  • Season Generously: Don’t be afraid to season your Mac and Beef! Taste as you go and adjust the seasoning to your liking.
  • Add a Splash of Acid: A squeeze of lemon juice or a dash of balsamic vinegar can brighten up the flavors.
  • Garnish with Fresh Herbs: A sprinkle of fresh parsley or basil adds a pop of color and freshness.

Common Mistakes to Avoid

We all make mistakes in the kitchen, but here are a few common ones to watch out for when making Mac and Beef:

  • Not Draining the Grease: Excess grease will make your Mac and Beef greasy and unappetizing.
  • Overcooking the Pasta: As mentioned before, mushy pasta is a no-go.
  • Not Stirring Frequently Enough: The pasta can stick to the bottom of the pot if you don’t stir it occasionally.
  • Using Too Much Water: Too much water will result in a watery sauce.
  • Forgetting to Season: Under-seasoned Mac and Beef is bland and boring.

Mac and Beef Variations: Make It Your Own!

This recipe is just a starting point! Feel free to get creative and customize it to your liking. Here are a few ideas:

  • Vegetarian Mac and Beef: Substitute the ground beef with lentils, crumbled tofu, or plant-based ground.
  • Spicy Mac and Beef: Add a pinch of red pepper flakes or a dash of hot sauce for a kick.
  • Cheesy Mac and Beef: Use a blend of different cheeses, such as cheddar, mozzarella, and Monterey Jack.
  • Veggie-Packed Mac and Beef: Add your favorite vegetables, such as bell peppers, zucchini, or spinach.
  • Creamy Mac and Beef: Stir in a dollop of sour cream or Greek yogurt for extra creaminess.

Storing and Reheating Your Mac and Beef

Got leftovers? Lucky you! Here’s how to store and reheat your Mac and Beef:

  • Storage: Store any leftovers in an airtight container in the refrigerator for up to 3-4 days.
  • Reheating: Reheat in the microwave or on the stovetop over medium heat. Add a splash of water or milk if needed to prevent it from drying out.

Frequently Asked Questions (FAQ)

  • Can I use a different type of pasta? Absolutely! Feel free to use any type of pasta you like. Penne, rotini, and shells all work well.
  • Can I use ground turkey or chicken instead of ground beef? Yes, you can! Just make sure to adjust the cooking time accordingly.
  • Can I freeze Mac and Beef? Yes, you can! Freeze in an airtight container for up to 2-3 months. Thaw overnight in the refrigerator before reheating.
  • Can I make this recipe gluten-free? Yes, you can! Use gluten-free pasta and double-check that all other ingredients are gluten-free.
  • Can I add more vegetables? Absolutely! Feel free to add any vegetables you like.

Serving Suggestions: Complete the Meal

Mac and Beef is a complete meal on its own, but here are a few ideas to round it out:

  • Side Salad: A simple green salad with a light vinaigrette adds a refreshing contrast.
  • Garlic Bread: Because who doesn’t love garlic bread with pasta?
  • Steamed Vegetables: Broccoli, green beans, or carrots make a healthy and colorful addition.
  • Fruit Salad: A light and refreshing dessert.

And there you have it! My Easy & Healthy Mac and Beef recipe. I hope you enjoy making it as much as I do. Remember, cooking should be fun and enjoyable. Don’t be afraid to experiment and make it your own. Happy cooking, friends!

This recipe is a testament to how simple ingredients, when combined with a little love and intention, can create something truly special. Whether you’re cooking for yourself, your family, or friends, I hope this Mac and Beef brings you joy and nourishment. After all, that’s what food is all about – connecting us to each other and to ourselves. Until next time, happy cooking and may your kitchen always be filled with laughter and delicious aromas! Remember, it’s a perfect weeknight meal and it’s a beef casserole that you can make easily. This one is sure to become a family favorite. Cooking the beef is simple in the skillet to create a perfect base. You can easily adapt the sauce in your kitchen. The pasta absorbs the sauce, making it a flavor explosion. The recipe is easy to follow, and it’s a great way to use any leftovers. As long as you store it properly, leftovers in the fridge will be perfect for lunch the next day. Remember to bring the mixture to a boil before reducing the heat.

Hello, friends! It’s Avery here, from my little kitchen in Portland. Today, I’m so excited to share a recipe that’s become a staple in my house: 3 Ingredient Banana Oatmeal Pancakes. Yes, you read that right – just three ingredients! These pancakes are not only incredibly easy to make, but they’re also a delicious and healthy way to start your day. I stumbled upon this recipe during a particularly hectic week when I needed something quick, nourishing, and comforting. And let me tell you, these pancakes delivered!

I know that sometimes the idea of healthy eating can feel daunting, filled with complicated recipes and hard-to-find ingredients. But that’s not what cooking should be about. For me, cooking is about finding joy in simple things, celebrating the flavors of fresh ingredients, and nourishing my body with love. And these banana oatmeal pancakes perfectly embody that philosophy. So, grab your bananas, oats, and eggs, and let’s get cooking!

Why You’ll Love This Recipe

Before we dive into the recipe, let me tell you why I think you’ll absolutely adore these pancakes:

  • Quick & Easy: These pancakes come together in minutes, making them perfect for busy mornings.
  • Healthy & Nutritious: Packed with fiber, potassium, and protein, they’re a great way to fuel your body.
  • Naturally Sweet: The bananas provide natural sweetness, so you don’t need to add any extra sugar.
  • Gluten-Free: Made with rolled oats, these pancakes are naturally gluten-free (just make sure your oats are certified gluten-free if needed).
  • Versatile: You can easily customize them with your favorite toppings and mix-ins.
  • Kid-Friendly: Even the pickiest eaters will love these simple, delicious pancakes.

Pancakes are often seen as a weekend treat, but these are so quick and nutritious, you can enjoy them any day of the week. I often whip up a batch on weekday mornings before heading out to the farmer’s market. These banana oatmeal pancakes are a lifesaver!

Ingredients

  • 2 ripe bananas
  • 1 cup rolled oats (or quick oats)
  • 2 large eggs

How to Make 3 Ingredient Banana Oatmeal Pancakes

Okay, let’s get to the fun part! Here’s how to make these incredibly simple pancakes:

  1. Prepare the Batter: In a blender, combine the ripe bananas, rolled oats, and eggs. Blend until smooth. The batter should be slightly thick but pourable. If the batter seems too thick, add a tablespoon or two of water or milk.
  2. Rest the Batter (Optional): For a smoother texture, let the batter rest for 10-15 minutes. This allows the oats to absorb some of the moisture, resulting in a softer pancake. However, if you’re short on time, you can skip this step.
  3. Cook the Pancakes: Heat a lightly oiled griddle or frying pan over medium heat. Pour 1/4 cup of batter onto the hot griddle for each pancake.
  4. Flip and Cook: Cook for 2-3 minutes per side, or until golden brown and cooked through. Flip the pancakes carefully with a spatula.
  5. Serve and Enjoy: Serve the pancakes immediately with your favorite toppings.

That’s it! See? I told you it was easy. This recipe is so forgiving; you can adjust the ingredients to your liking. If you prefer a sweeter pancake, you can add a touch of honey or maple syrup to the batter. If you want a bit of spice, add a pinch of cinnamon or nutmeg.

Pro Tips for Perfect Pancakes

Here are a few tips to ensure your pancakes turn out perfectly every time:

  • Use Ripe Bananas: The riper the bananas, the sweeter and more flavorful your pancakes will be. Look for bananas with plenty of brown spots.
  • Don’t Overmix the Batter: Overmixing can result in tough pancakes. Blend until just combined.
  • Use a Hot Griddle: Make sure your griddle is hot before pouring the batter. This will help the pancakes cook evenly and prevent them from sticking.
  • Don’t Flip Too Early: Wait until bubbles start to form on the surface of the pancakes before flipping them. This usually takes about 2-3 minutes.
  • Keep the Pancakes Warm: If you’re making a large batch, keep the cooked pancakes warm in a preheated oven (200°F) until ready to serve.

Common Mistakes to Avoid

Even with a simple recipe like this, it’s easy to make a few common mistakes. Here’s what to watch out for:

  • Using Unripe Bananas: This will result in pancakes that are not sweet enough.
  • Overmixing the Batter: This can lead to tough pancakes.
  • Cooking the Pancakes on Too High Heat: This can cause the pancakes to burn on the outside while remaining undercooked on the inside.
  • Flipping the Pancakes Too Early: This can cause the pancakes to stick to the griddle and tear.

Variations and Add-Ins

One of the best things about this recipe is how easily you can customize it. Here are a few variations and add-ins to try:

  • Chocolate Chip Pancakes: Add 1/4 cup of chocolate chips to the batter.
  • Blueberry Pancakes: Fold in 1/2 cup of fresh or frozen blueberries.
  • Cinnamon Pancakes: Add 1/2 teaspoon of cinnamon to the batter.
  • Nutty Pancakes: Add 1/4 cup of chopped nuts (such as walnuts or pecans) to the batter.
  • Protein Pancakes: Add a scoop of your favorite protein powder to the batter.
  • Spice it up: Add a dash of nutmeg or cardamom.

Serving Suggestions

These pancakes are delicious on their own, but they’re even better with toppings! Here are a few of my favorite serving suggestions:

  • Fresh Fruit: Top with sliced bananas, berries, or peaches.
  • Maple Syrup or Honey: Drizzle with your favorite sweetener.
  • Nut Butter: Spread with peanut butter, almond butter, or cashew butter.
  • Yogurt: Serve with a dollop of Greek yogurt or coconut yogurt.
  • Whipped Cream: Top with a dollop of whipped cream for a special treat.
  • Seeds: Sprinkle with chia seeds, flax seeds, or hemp seeds for added nutrition.

You can even get creative and make pancake stacks, layering the pancakes with fruit and yogurt. The possibilities are endless!

How to Store Leftover Pancakes

If you have any leftover pancakes, you can store them in the refrigerator for up to 3 days. To reheat, simply microwave them for a few seconds or toast them in a toaster oven. You can also freeze the pancakes for longer storage. Place them in a single layer on a baking sheet and freeze for about 30 minutes, then transfer them to a freezer bag. They can be stored in the freezer for up to 2 months. Reheat from frozen in a toaster or microwave.

Frequently Asked Questions (FAQ)

Here are a few frequently asked questions about this recipe:

  • Can I use quick oats instead of rolled oats? Yes, you can use quick oats instead of rolled oats. The texture of the pancakes may be slightly different, but they will still be delicious.
  • Can I use almond milk or another non-dairy milk? While the recipe only calls for 3 ingredients, if you want to thin the batter, yes, you can use almond milk or another non-dairy milk.
  • Can I make these pancakes without eggs? Yes, you can try using a flax egg (1 tablespoon of ground flaxseed mixed with 3 tablespoons of water) as an egg substitute. However, the texture of the pancakes may be slightly different.
  • Are these pancakes gluten-free? Yes, these pancakes are naturally gluten-free, as long as you use certified gluten-free rolled oats.
  • Can I add sugar to the batter? The bananas provide natural sweetness, so you don’t need to add any extra sugar. However, if you prefer a sweeter pancake, you can add a tablespoon or two of honey or maple syrup to the batter.

Final Thoughts: The Joy of Simple Cooking

These 3 ingredient banana oatmeal pancakes are more than just a recipe; they’re a reminder that healthy eating doesn’t have to be complicated or time-consuming. With just a few simple ingredients and a little bit of love, you can create a delicious and nourishing meal that will fuel your body and soul. I hope you enjoy this recipe as much as I do. Remember, the best part of cooking is the joy of creating something special and sharing it with the ones you love. Happy cooking, friends!

So, the next time you’re looking for a quick, healthy, and delicious breakfast option, don’t hesitate to whip up a batch of these banana oatmeal pancakes. They’re sure to become a new favorite in your house, just like they have in mine. And remember, cooking is an act of self-care. Take the time to nourish yourself with good food and good company. You deserve it!