Author

Avery Collins

Browsing

Why This Dip Will Be Your New Favorite

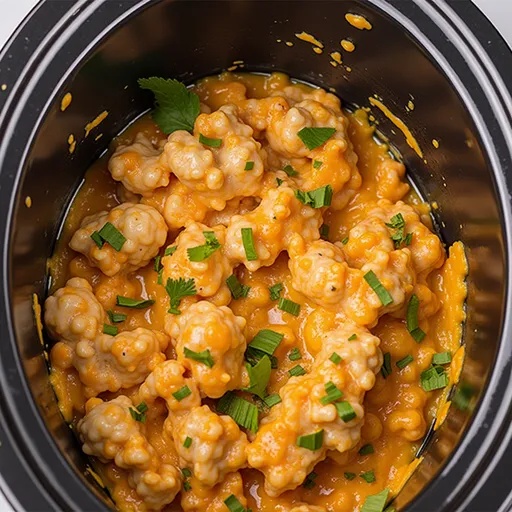
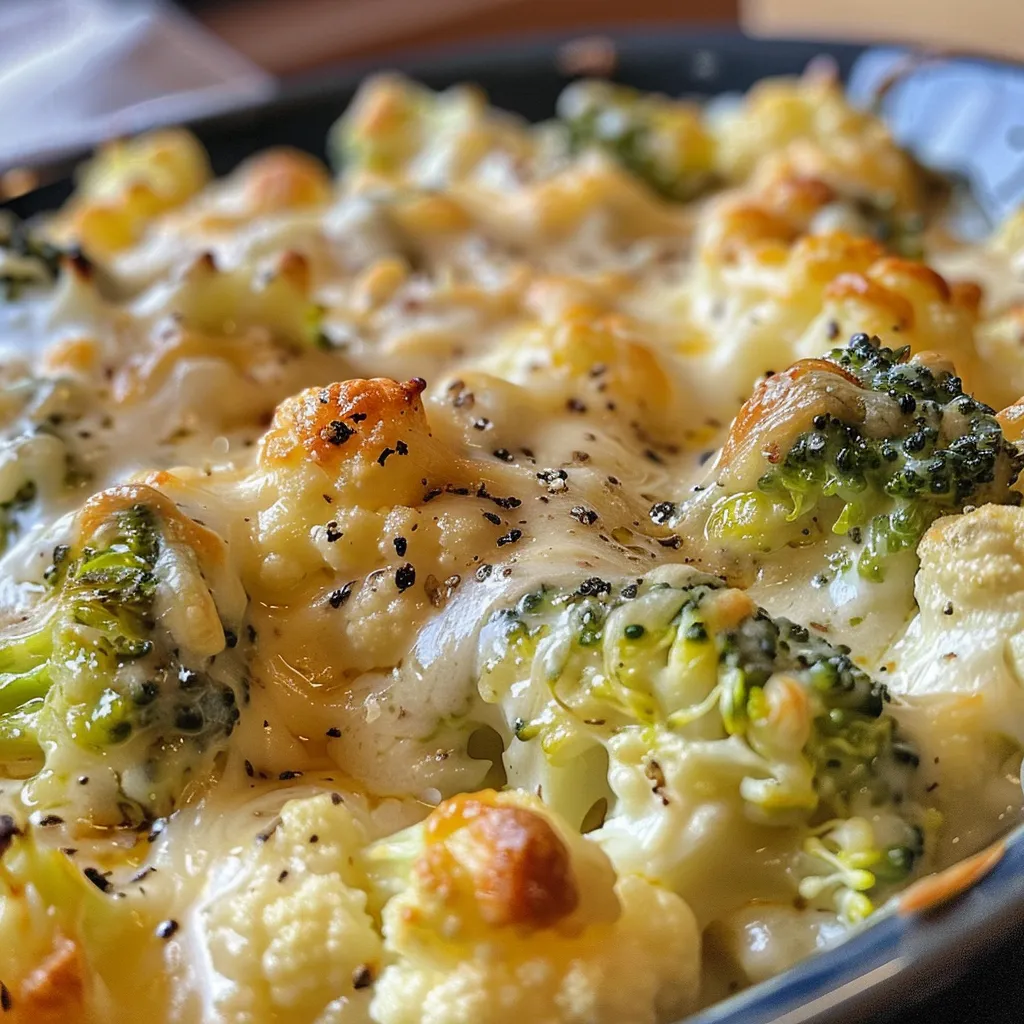
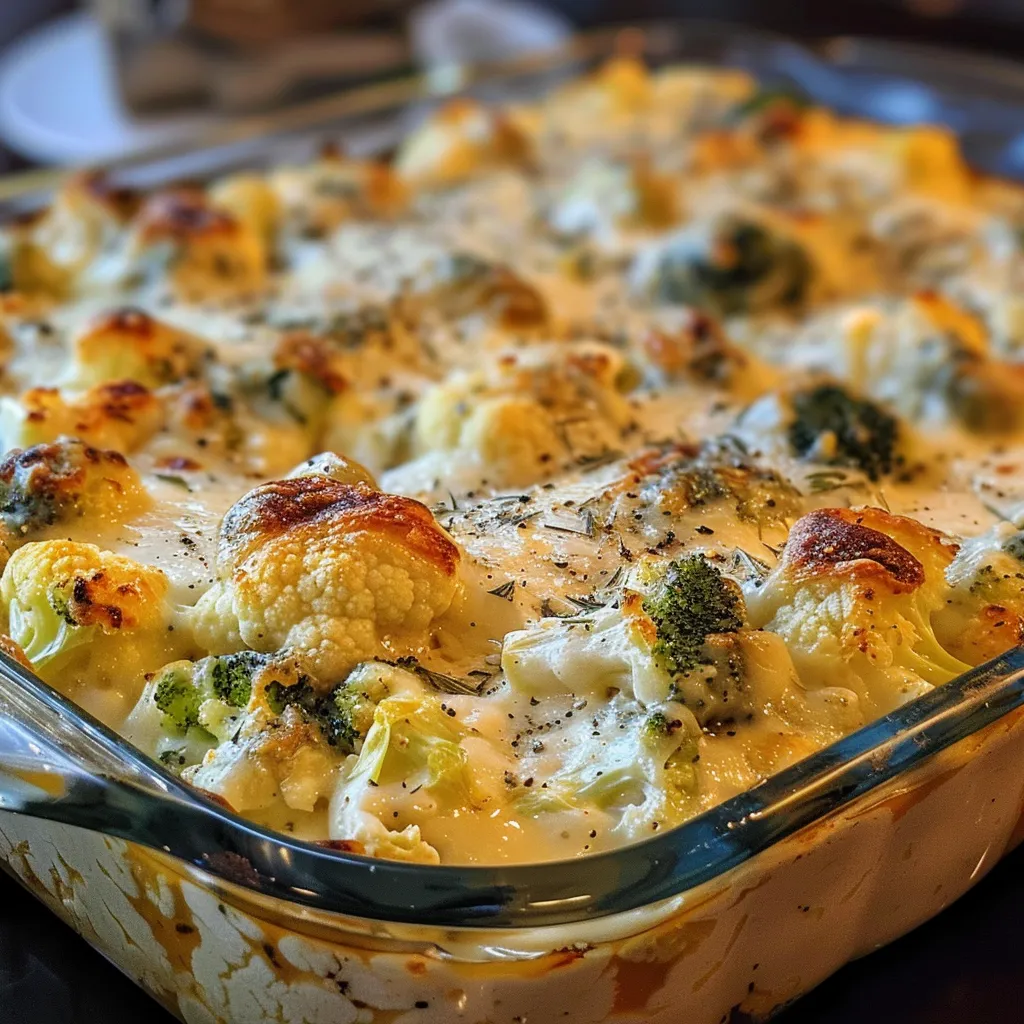
Let’s talk about the ultimate party pleaser: a creamy, dreamy Crockpot Crab Dip that’s bound to elevate any gathering. As someone who believes that cooking should be an adventure, I can assure you that this dip is not just rich and delicious; it’s also incredibly easy to whip up in your slow cooker. Imagine a warm, bubbling pot of crab goodness waiting for you at your next get-together, ready to make your taste buds dance with delight!

This isn’t just any crab dip; it’s a culinary hug that wraps you in layers of flavor. Each bite is a celebration of sweet crab meat, velvety cream cheese, and the bold kick of spices, all mingling together in a way that feels both indulgent and comforting. Whether you’re hosting a cozy game night, a festive holiday party, or just craving a delicious snack, this dip is here to impress.

Ingredients That Make Magic

Before we dive into the recipe, let’s take a moment to appreciate the ingredients that work together to create this dip masterpiece:

  • Cream Cheese: The foundation of our dip, providing that smooth, creamy texture that makes it irresistibly spreadable.
  • Cheddar Cheese: Adds a sharp, savory note that balances beautifully with the sweetness of the crab.
  • Sour Cream: Brings a tangy brightness that cuts through the richness, creating a perfect harmony.
  • Spices: A blend of your favorites to enhance the flavors — think garlic powder, onion powder, and perhaps a hint of cayenne for a little kick!
  • Lemon Juice: A splash of citrus lifts the entire dish, adding freshness and vibrancy.

How to Create This Indulgent Delight

Delicious, cheesy Crab Dip served warm in a Crockpot, showcasing rich textures and ingredients.

Now that we’ve gathered our ingredients, let’s get down to business. Here’s how to make your Crockpot Crab Dip:

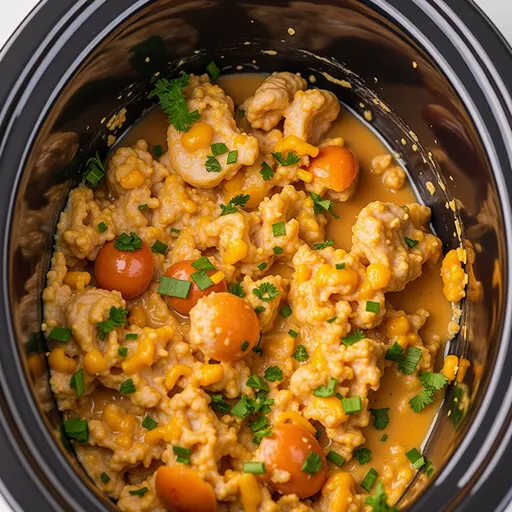
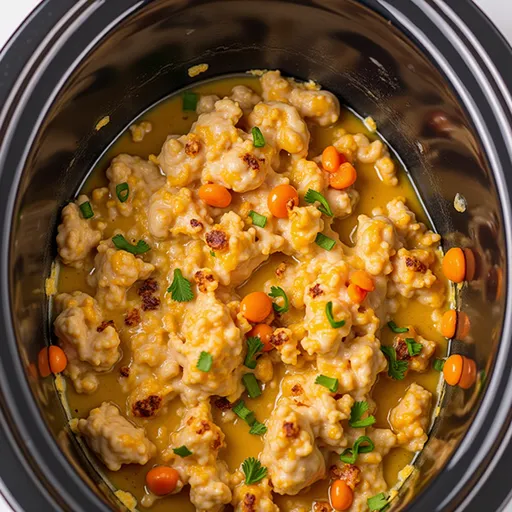
  1. Toss Everything Together: In a slow cooker, combine the cream cheese, cheddar cheese, sour cream, lemon juice, and your chosen spices. Give it a good stir to ensure everything is well mixed.
  2. Set It and Forget It: Cover and cook on low for about 2-3 hours, or until everything is melted together and bubbling. Stir occasionally to help blend the flavors.
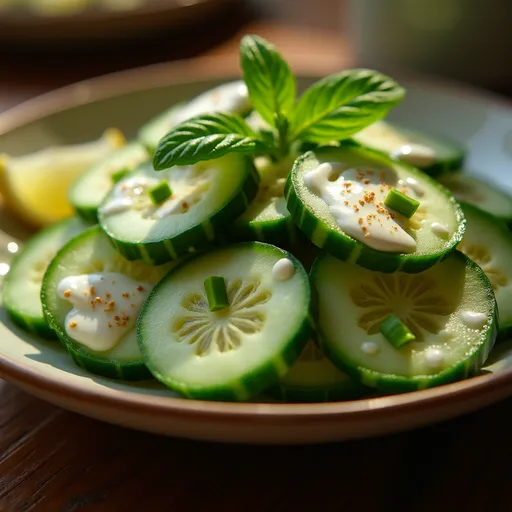
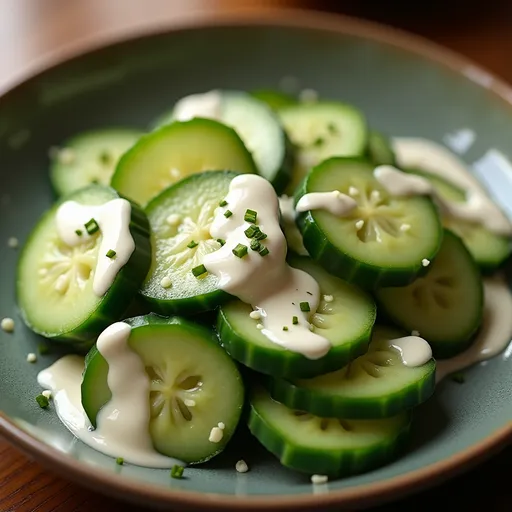
  3. Serve and Enjoy: Once your dip is ready, serve it warm with your favorite dippers — think crispy tortilla chips, toasted baguette slices, or fresh vegetable crudités.

Tips for the Perfect Dip

Creating the perfect dip is all about the details. Here are some tried-and-true tips to ensure your Crockpot Crab Dip shines:

  • Quality Crab: Use fresh or high-quality canned crab meat for the best flavor. A blend of lump and claw meat can add different textures.
  • Don’t Rush It: Allow the dip to cook low and slow. This helps all the flavors meld beautifully without burning the edges.
  • Customize Your Spice Level: If you love heat, feel free to add a pinch of cayenne or hot sauce! Just remember to taste as you go.
  • Garnish with Freshness: A sprinkle of fresh parsley or chives can add a pop of color and freshness just before serving.

Substitutions and Variations

The beauty of this recipe lies in its flexibility. Here are some ideas to customize your dip:

  • Cheese Variations: Swap out the cheddar for pepper jack for a spicy twist, or use a blend of mozzarella and parmesan for a different flavor profile.
  • Herbs and Spices: Consider adding dill or Old Bay seasoning for a classic seafood flavor.
  • Veggies: Fold in some sautéed spinach or artichoke hearts for a delicious twist on the traditional crab dip.

Serving Ideas That Wow

Your Crockpot Crab Dip deserves some fabulous company! Here are some serving suggestions that will make your spread even more appealing:

  • Crunchy Dippers: Serve with an assortment of dippers like pita chips, pretzel crisps, or crunchy vegetables like carrots and celery.
  • Spread it Out: Use it as a spread on a toasted baguette or crostini for an upscale appetizer.
  • Pair with Drinks: Complement this dish with a chilled white wine or a citrusy cocktail for a refreshing balance.

Storage and Freezing Tips

Leftovers? No problem! Here’s how to store your delicious dip:

  • Refrigeration: Store any leftover dip in an airtight container in the fridge for up to 3 days. Just reheat gently before serving again.
  • Freezing: You can freeze the dip for up to 2 months. Thaw it in the fridge the night before you plan to enjoy it and reheat slowly on the stove or in the microwave.

Frequently Asked Questions

Can I use imitation crab meat?

Absolutely! Imitation crab meat can be a budget-friendly option and still tastes great in this dip.

Can I make this dip ahead of time?

Yes! You can prepare everything in advance and store it in the fridge, then pop it in the slow cooker when you’re ready to serve.

What should I do if the dip is too thick?

If your dip turns out thicker than you’d like, simply stir in a splash of milk or cream to reach your desired consistency.

Conclusion: Dive Into Decadence

This Crockpot Crab Dip is more than just a recipe; it’s an experience — a celebration of flavors that brings people together. It’s perfect for cozy nights in or festive gatherings, and its simplicity means you can focus on making memories with friends and family rather than slaving away in the kitchen. So roll up your sleeves, grab those ingredients, and get ready to dive into decadence. Your taste buds will thank you!

Crockpot Crab Dip

Prep Time 10 minutes
Cook Time 2 hours
Total Time 2 hours 10 minutes
Servings 8 people
Calories 250
A creamy and flavorful crab dip perfect for parties, made easily in a slow cooker.

Ingredients

Dairy

  • 8 oz cream cheese
  • 1.5 cups cheddar (shredded)
  • 0.5 cup sour cream
  • 1 tsp spices (e.g., paprika, garlic powder)
  • 1 tbsp lemon (juice)

Instructions 

  • Toss all ingredients into the slow cooker.

Notes

Serve warm with crackers or bread for best flavor.
Calories: 250kcal
Cost: $12
Course: Appetizer
Cuisine: American
Keyword: crab

Nutrition

Calories: 250kcal | Carbohydrates: 8g | Protein: 12g | Fat: 20g | Sodium: 400mg

Loved this recipe? Save it to your favorite Pinterest board so you can easily find it later! It’s the perfect way to keep all your sweet ideas in one place. ✨

Appetizing Crockpot Crab Dip, featuring a blend of cream cheese and spices, displayed in a rustic setting.

Why You’ll Love This Dish

Every time I step into my kitchen, I feel that familiar rush of excitement — the thrill of transforming simple ingredients into something magical. And when it comes to effortless cooking, Slow Cooker Lemon Herb Chicken and Rice is the ultimate game-changer. This dish is not just about convenience; it’s a celebration of flavors that dances on your palate, inviting you to savor every bite. With tender chicken, fluffy rice, and a zesty lemon-herb infusion, it’s the perfect cozy dinner that will warm your heart and satisfy your cravings.

Imagine walking through your front door after a long day and being greeted by the intoxicating aroma of lemon and herbs wafting through the air. That’s the beauty of slow cooking — it allows the flavors to meld beautifully while you go about your day. Plus, it’s incredibly versatile, making it a favorite for busy families and culinary adventurers alike.

Preparation and Cooking Time

Getting this delicious meal on the table is a breeze:

  • Prep Time: 10 minutes
  • Cook Time: 4-6 hours on low or 2-3 hours on high
  • Total Time: About 4 hours 10 minutes to 6 hours 10 minutes

Ingredients

Tantalizing Slow Cooker Lemon Herb Chicken and Rice on a plate, featuring a vibrant lemon slice.

To whip up this flavorful dish, you’ll need the following ingredients:

  • 4 boneless, skinless chicken breasts
  • 1 cup long-grain white rice
  • 2 cups chicken broth
  • 1 lemon (zested and juiced)
  • 2 tablespoons olive oil
  • 1 teaspoon dried thyme
  • 1 teaspoon dried rosemary
  • 4 cloves garlic (minced)
  • Salt and pepper to taste
  • Fresh parsley for garnish

Step-by-Step Instructions

Let’s dive into the process of creating this culinary masterpiece! Follow these simple steps to ensure your dish turns out perfectly:

  1. Mix the Magic: In a mixing bowl, combine the olive oil, lemon juice, lemon zest, thyme, rosemary, minced garlic, salt, and pepper. Whisk them together until they’re well blended. This vibrant mixture is where the magic begins.
  2. Prepare the Chicken: Place the chicken breasts in your slow cooker, ensuring they’re spread out evenly. Pour the lemon herb mixture over the chicken, making sure each piece is well coated. This step is crucial for infusing flavor.
  3. Add the Rice: Carefully add the long-grain white rice and chicken broth to the slow cooker. Gently stir to combine the ingredients, ensuring the rice is submerged in the broth for optimal cooking.
  4. Set It and Forget It: Cover the slow cooker with its lid and set it to cook. You can choose to cook on low for 4-6 hours or on high for 2-3 hours, depending on your schedule. The longer it cooks, the more tender the chicken will become.
  5. Check for Doneness: About 30 minutes before serving, check the internal temperature of the chicken. It should reach 165°F (75°C) for safe consumption. If the chicken is cooked through, it’s time to move on!
  6. Fluff and Serve: Once cooked, remove the chicken and fluff the rice gently with a fork. This step adds air to the rice, making it light and fluffy. Serve the chicken over the rice, garnished with fresh parsley for a pop of color and freshness.

How to Serve

This dish shines on its own, but if you want to elevate the experience further, consider pairing it with a crisp green salad or some steamed vegetables. The bright flavors of the lemon herb chicken complement a variety of sides, creating a balanced meal that’s perfect for family dinners or impressing guests.

Additional Tips

To take your culinary adventure even further, here are some handy tips:

  • Marinate Ahead: For an extra burst of flavor, consider marinating the chicken in the lemon herb mixture for a few hours or overnight before cooking.
  • Experiment with Herbs: Feel free to mix and match herbs based on your preference. Fresh herbs like basil or cilantro can add a delightful twist to the dish.
  • Adjust the Rice: If you prefer a heartier meal, you can add more rice or even throw in some vegetables like peas or carrots for added nutrition.

Recipe Variations

One of the joys of cooking is the ability to tailor recipes to your liking. Here are a few variations to inspire your creativity:

  • Spicy Kick: Add a pinch of red pepper flakes to the lemon herb mixture for a spicy twist that will tantalize your taste buds.
  • Vegetarian Version: Substitute the chicken with hearty vegetables like portobello mushrooms or eggplant, and use vegetable broth instead of chicken broth.
  • Citrus Medley: Mix in the zest and juice of oranges or limes along with the lemon for a refreshing citrus medley that will brighten the dish even more.

Freezing and Storage

Got leftovers? This dish stores wonderfully! Here’s how to properly store your meal:

  • Refrigeration: Store any leftover chicken and rice in an airtight container in the fridge for up to 3 days.
  • Freezing: For longer storage, you can freeze the dish in an airtight container for up to 3 months. Just be sure to let it cool completely before freezing to maintain texture.
  • Reheating: When ready to enjoy again, thaw in the refrigerator overnight and reheat in the microwave or on the stovetop, adding a splash of broth to keep it moist.

Special Equipment

To create this dish, you’ll need a few essential kitchen tools:

  • Slow Cooker: This is the star of the show! A 6-quart slow cooker is ideal for this dish.
  • Mixing Bowl: For combining your ingredients before cooking.
  • Measuring Cups and Spoons: Accurate measurements will ensure your flavors shine.
  • Fork: For fluffing the rice once it’s cooked.

Frequently Asked Questions

Let’s address some common queries surrounding this delightful slow cooker recipe:

  • Can I use brown rice instead of white rice? Yes! However, you’ll need to adjust the cooking time and liquid amount, as brown rice takes longer to cook.
  • Is it possible to cook this dish without a slow cooker? Absolutely! You can use a stovetop pot, but the cooking method and time will vary. Just simmer on low heat, covered, until the chicken is tender.
  • Can I add more vegetables? Definitely! Feel free to add your favorite vegetables, such as bell peppers, peas, or spinach, to the slow cooker for a more complete meal.

Conclusion

Cooking should be an adventure, a chance to explore new flavors and create lasting memories around the table. With this Slow Cooker Lemon Herb Chicken and Rice recipe, you’re not just preparing a meal — you’re crafting a heartfelt experience that brings joy and warmth to your home. Whether you’re cooking for your family or hosting friends, this dish is sure to impress and satisfy. So roll up your sleeves, gather your ingredients, and let your kitchen become a haven of flavor and love. Happy cooking!

Slow Cooker Lemon Herb Chicken and Rice

Prep Time 10 minutes
Cook Time 4 hours
Total Time 4 hours 10 minutes
Servings 4 servings
Calories 450
A flavorful and easy slow cooker dish combining tender chicken with fragrant lemon and herbs served over rice.

Ingredients

Protein

  • 4 pieces boneless, skinless chicken breasts

Grain

  • 1 cup long-grain white rice

Broth

  • 2 cups chicken broth

Flavorings

  • 1 piece lemon (zested and juiced)
  • 2 tablespoons olive oil
  • 1 teaspoon dried thyme
  • 1 teaspoon dried rosemary
  • 4 cloves garlic (minced)

Seasoning

  • to taste salt and pepper

Garnish

  • fresh parsley for garnish

Instructions 

  • Mix olive oil, lemon juice, zest, herbs, garlic, salt, and pepper.
  • Place chicken in slow cooker and coat with mixture.
  • Add rice and chicken broth, stir gently.
  • Cook on low for 4-6 hours or high for 2-3 hours until cooked and tender.
  • Fluff rice, serve chicken over rice, garnish with parsley.

Notes

Use fresh herbs for best flavor and adjust seasoning as needed.
Calories: 450kcal
Cost: $15
Course: Main Course
Cuisine: American
Keyword: chicken, Herb, lemon

Nutrition

Calories: 450kcal | Carbohydrates: 50g | Protein: 40g | Fat: 10g | Sodium: 600mg

Loved this recipe? Save it to your favorite Pinterest board so you can easily find it later! It’s the perfect way to keep all your sweet ideas in one place. ✨

Delicious Slow Cooker Lemon Herb Chicken over fluffy rice, illuminated by natural light.

Ignite Your Culinary Adventure with Juicy Baked Chicken Bites

Welcome, fellow flavor adventurers! If you’re ready to transform your dinner routine into a vibrant fiesta of taste, then buckle up. Today, we’re diving into the tantalizing world of Juicy Baked Chicken Bites—a recipe that’s not just about satisfying hunger, but about celebrating the joy of cooking with spice! Whether you’re cooking for your family, prepping meals for the week, or just craving something delicious, these chicken bites are sure to light up your kitchen with flavor.

Imagine succulent pieces of chicken, infused with a symphony of spices, baked to perfection, and served with your favorite dipping sauces. It’s not just a meal; it’s an experience that invites everyone to the table. So gather your ingredients and let’s get cooking!

Why You’ll Love This Recipe

  • Family-Friendly: These baked chicken bites are sure to please even the pickiest eaters in your home, making them perfect for family dinners or gatherings.
  • Quick and Easy: Whipping up these chicken bites takes less than 30 minutes, so you can enjoy a home-cooked meal without spending hours in the kitchen.
  • Customizable: The beauty of this recipe is its versatility. Feel free to swap spices or add your favorite sauces to create a flavor profile that suits your taste.
  • Healthy Option: Unlike fried options, baking keeps the chicken juicy while reducing excess fats, making it a nutritious choice for any meal.
  • Perfect for Meal Prep: These chicken bites are ideal for meal prep. They store well, maintain their flavor, and can be added to salads, wraps, or served as a protein-packed snack.

Ingredient Breakdown

Let’s get into the nitty-gritty of what makes these chicken bites so incredible. Here’s what you’ll need:

  • 2 pounds boneless skinless chicken breast: The star of the show! Use high-quality chicken for the best flavor.
  • 1 tablespoon olive oil: This helps to coat the chicken and keeps it moist while baking.
  • 1 tablespoon chicken base: A concentrated flavor booster that adds depth to your chicken.
  • 1 teaspoon paprika: Adds a smoky warmth that elevates the overall taste.
  • ½ teaspoon garlic powder: For that aromatic punch we all love.
  • ½ teaspoon onion powder: Enhances the savory notes of the chicken.
  • ½ teaspoon black pepper: A classic seasoning that brings a slight kick.
  • ¼ teaspoon dried thyme: Adds an earthy undertone that balances the spices.
  • 1 tablespoon freshly chopped parsley: For a fresh finish and vibrant color.

Feel free to play around with these ingredients. For example, if you prefer a spicier kick, consider adding cayenne pepper or red pepper flakes. If you’re looking for a different flavor profile, try swapping the herbs for Italian seasoning or cumin.

Pro Tips for Unforgettable Chicken Bites

Succulent baked chicken pieces garnished with fresh parsley, showcasing texture.
  • Cut Evenly: Make sure your chicken pieces are uniform in size (about 1-2 inches) for consistent cooking.
  • Marinate: If you have the time, marinate the chicken in the spice mixture for up to an hour before baking for deeper flavor.
  • Don’t Overcrowd: Spread the chicken bites out in your baking dish to ensure they bake evenly and get that lovely golden color.
  • Use a Thermometer: To ensure perfectly cooked chicken, use a meat thermometer to check that the internal temperature reaches 165°F.
  • Resting Time: Let the chicken sit for a few minutes after baking before serving; this helps the juices redistribute.
  • Experiment with Dips: Pair these bites with your favorite sauces—ranch, honey mustard, or even a spicy chipotle aioli!
  • Batch Cooking: Double the recipe and freeze half for a quick meal later; just remember to adjust cooking time for frozen bites.
  • Herb Garnish: Add a sprinkle of fresh herbs right before serving for a pop of color and freshness.

Common Mistakes and Troubleshooting

Even seasoned cooks can hit a snag. Here’s how to avoid common pitfalls:

  • Overcooking: Keep a close eye on your chicken as it bakes. Overcooked chicken can become dry and chewy.
  • Undercooking: Use a thermometer to avoid foodborne illnesses; chicken should always reach at least 165°F.
  • Not Preheating: Always preheat your oven to ensure even cooking from the start.
  • Ignoring Rest Time: Cutting into the chicken too soon can cause juices to run out, leading to dryness. Let it rest!

Recipe Variations to Explore

Ready to shake things up? Here are some variations to take your baked chicken bites to the next level:

  • Buffalo Chicken Bites: Toss the cooked chicken in buffalo sauce for a spicy twist.
  • Italian Herb Chicken Bites: Use Italian seasoning and serve with marinara sauce for dipping.
  • Honey Garlic Chicken Bites: Drizzle honey and minced garlic over the chicken before baking for a sweet-savory flavor.
  • Thai Peanut Chicken Bites: Marinate in a mixture of soy sauce, peanut butter, and lime juice for an Asian-inspired dish.

Storage and Make-Ahead Instructions

Meal prep enthusiasts rejoice! Here’s how to store your chicken bites:

  • Refrigerator: Store leftover chicken bites in an airtight container for up to 4 days.
  • Freezer: Make a double batch and freeze them in a single layer. Once frozen, transfer to a freezer bag for up to 3 months.
  • Reheating: Reheat in the oven at 350°F until warmed through for best results.

FAQ: Your Burning Questions Answered

  • Can I use chicken thighs instead of breasts? Absolutely! Thighs will add extra flavor and juiciness.
  • What dipping sauces pair well with chicken bites? Ranch, BBQ, honey mustard, or a spicy aioli are all fantastic options.
  • Can I bake these at a different temperature? Yes, but cooking time may vary. Keep an eye on them!
  • How do I know when the chicken is done? Use a meat thermometer—look for an internal temperature of 165°F.
  • Can I make this gluten-free? Yes, just ensure your chicken base and any sauces are gluten-free.
  • What side dishes go well with these chicken bites? Try a fresh salad, roasted vegetables, or sweet potato fries for a complete meal.
  • How can I add more heat? Incorporate cayenne pepper or serve with a spicy dipping sauce.
  • Can these chicken bites be made ahead of time? Yes! You can prep them in advance and bake them when ready to serve.

Nutritional Information and Dietary Adaptations

These chicken bites are not only delicious but also nutritious! Here are some key points:

  • High in Protein: Perfect for a post-workout meal or for those looking to boost their protein intake.
  • Low in Carbs: An excellent choice for low-carb diets.
  • Customizable: Easily adjust seasonings to suit various dietary preferences (vegan alternatives available with tofu or chickpeas).

Essential Kitchen Equipment

To make these chicken bites, you’ll need:

  • 9×13 inch baking dish: Ideal for even cooking.
  • Sharp knife: For cutting chicken into bite-sized pieces.
  • Meat thermometer: To ensure perfect doneness.
  • Mixing bowls: For coating the chicken with spices.

Serving Suggestions

Serve these juicy baked chicken bites as a main dish or as part of a larger spread. Here are some ideas:

  • On a Platter: Arrange with an assortment of dipping sauces for a fun appetizer.
  • In a Wrap: Use in a tortilla with lettuce, tomato, and your choice of sauce for a flavorful wrap.
  • As a Salad Topping: Top a fresh salad with these bites for a protein boost.

In every bite, you’ll find a world of flavor waiting to be discovered. So what are you waiting for? Get cooking and let these Juicy Baked Chicken Bites ignite your culinary passion!

Juicy Baked Chicken Bites

Prep Time 10 minutes
Cook Time 20 minutes
Total Time 30 minutes
Servings 4 servings
Calories 250
Enjoy tender, flavorful chicken bites baked to perfection with simple spices and fresh parsley.

Ingredients

Protein

  • 2 pounds boneless skinless chicken breast
  • 1 tablespoon olive oil
  • 1 tablespoon chicken base
  • 1 teaspoon paprika
  • ½ teaspoon garlic powder
  • ½ teaspoon onion powder
  • ½ teaspoon black pepper
  • ¼ teaspoon dried thyme
  • 1 tablespoon freshly chopped parsley

Instructions 

  • Preheat oven to 400˚F (200˚C).
  • Cut chicken into 1-2 inch pieces and place in a baking dish.
  • Mix oil and chicken base, pour over chicken, and toss to coat.
  • Add spices, toss to coat evenly, and bake for 15-20 minutes.
  • Let sit for 5 minutes, then toss with parsley and serve.

Notes

Ensure chicken reaches an internal temperature of 165˚F for safety.
Calories: 250kcal
Cost: $15
Course: Main Course
Cuisine: American
Keyword: chicken

Nutrition

Calories: 250kcal | Carbohydrates: 4g | Protein: 45g | Fat: 5g | Sodium: 300mg

Why You’ll Love This Refreshing Salad

Ah, summer! The time when the sun shines bright, and our cravings shift toward lighter, fresher foods that invigorate our senses. If you’re looking for a dish that embodies the essence of summer, look no further than this Creamy Cucumber Salad with Greek Yogurt Dressing. Crisp, cool cucumbers meet a tangy, rich dressing that sings of sunny days and outdoor picnics. This salad isn’t just a side; it’s a celebration of vibrant flavors and textures that dance together on your palate. Let’s dive deeper into why this dish deserves a spot at your table, whether you’re hosting a backyard barbecue or simply enjoying a quiet dinner at home.

Ingredients You’ll Need

To whip up this delightful salad, you’ll need a handful of simple, wholesome ingredients that highlight the natural flavors of the cucumbers. Here’s what you’ll require:

  • 2 large cucumbers, thinly sliced
  • 1 cup Greek yogurt
  • 2 tablespoons olive oil
  • 1 tablespoon lemon juice
  • 1 clove garlic, minced
  • 1 teaspoon dill (fresh or dried)
  • Salt and pepper to taste
  • Fresh dill sprigs for garnish (optional)

These ingredients combine to create a salad that’s not only delicious but also packed with nutrients, making it a healthy addition to your meal rotation.

How to Make the Creamy Cucumber Salad

A vibrant salad featuring thinly sliced cucumbers and a rich Greek yogurt dressing.

Now that you have your ingredients gathered, let’s jump into the step-by-step process of creating this culinary masterpiece. Trust me, it’s easier than you think!

Step 1: Prepare the Cucumbers

Start by washing and slicing your cucumbers. Thinly sliced cucumbers are essential for this salad; they soak up the dressing beautifully and offer a delightful crunch. If you have a mandolin slicer, this is the perfect time to use it! Aim for about ¼ inch thickness for each slice to ensure consistent texture and flavor.

Step 2: Make the Dressing

In a separate bowl, combine the Greek yogurt, olive oil, lemon juice, minced garlic, and dill. Use a whisk to mix everything until it’s smooth and creamy. This dressing is what ties the salad together, adding a luscious texture and a burst of flavor. Don’t hesitate to taste it and adjust the seasoning with salt and pepper — it should be zesty and refreshing!

Step 3: Toss It All Together

Once your dressing is ready, pour it over the sliced cucumbers in a large bowl. Gently toss the cucumbers in the dressing, making sure every slice is coated in that creamy goodness. Remember, the key here is to be gentle to maintain the cucumber’s crunch.

Step 4: Chill and Serve

For the best flavor experience, cover the salad and let it chill in the refrigerator for at least 30 minutes. This waiting period allows the flavors to meld beautifully, enhancing the overall taste. When you’re ready to serve, give it a final toss, garnish with fresh dill sprigs if desired, and prepare for compliments!

Serving Suggestions

This Creamy Cucumber Salad is incredibly versatile and pairs well with a variety of dishes. Here are some serving suggestions that elevate your dining experience:

  • Grilled Meats: Serve alongside spicy grilled chicken or flavorful kebabs. The cooling effect of the salad complements the heat from the grill.
  • Seafood: Try it with grilled salmon or shrimp tacos for a refreshing contrast to the rich flavors of the fish.
  • Vegetarian Options: This salad also shines next to hearty roasted vegetables or as a side for grain bowls filled with quinoa and roasted chickpeas.
  • Picnic Perfect: Pack it up for a picnic! It’s a great dish to serve at gatherings and potlucks, bringing a touch of freshness to any spread.

Optional Add-ins & Substitutions

Feeling adventurous? Here are some fun variations and substitutions to customize your salad:

  • Swap the Yogurt: If Greek yogurt isn’t your thing, sour cream can be a delicious alternative. Just keep in mind that it might alter the flavor slightly.
  • Cheese It Up: Crumbled feta or goat cheese can add a creamy, tangy dimension to the salad. Just sprinkle it in before serving!
  • Herb Variations: While dill is a classic choice, feel free to experiment with fresh mint or parsley for a different flavor profile.
  • Add Crunch: For added texture, you can toss in some finely chopped bell peppers or radishes.
  • Avocado Lovers: Diced avocado can be a fantastic addition, lending creaminess and healthy fats to the salad.

Why You’ll Love This Recipe

Let’s face it: we all crave something refreshing, especially when the heat is on. This Creamy Cucumber Salad with Greek Yogurt Dressing isn’t just a dish; it’s a revelation in flavor and health. Here’s why you’ll fall head over heels for it:

  • Quick and Easy: With minimal prep time, this salad can be made in under 15 minutes, making it an ideal choice for busy weeknights or last-minute gatherings.
  • Healthy and Nutritious: Packed with protein from the Greek yogurt and fiber from the cucumbers, this salad is a guilt-free indulgence that keeps you feeling full and satisfied.
  • Versatile: Whether you’re serving it as a side dish or making it the star of your lunch, this salad adapts to any occasion.
  • Flavorful: The tangy dressing, combined with the crisp cucumbers, creates a harmonious balance that keeps you coming back for more!

Storage and Freezing Tips

If you happen to have leftovers (which is rare!), you can store them in an airtight container in the refrigerator for up to 2 days. However, keep in mind that the cucumbers will lose their crunch over time, so it’s best enjoyed fresh. Freezing is not recommended, as the texture of the cucumbers won’t hold up well once thawed.

FAQs

Can I make this salad ahead of time? Yes! You can prepare the dressing and slice the cucumbers a few hours in advance. Just toss them together right before serving to maintain the crunch.

What if I don’t have fresh dill? No problem! You can substitute dried dill, but use about one-third of the amount since dried herbs are more potent.

Is this salad suitable for meal prep? Absolutely! Just keep the dressing separate until you’re ready to eat to keep everything fresh and crisp.

Troubleshooting Common Issues

If you find your salad is too watery, try salting the cucumbers before mixing them with the dressing. This will draw out excess moisture and intensify their flavor. If your dressing is too thick, a splash of water or an extra squeeze of lemon juice can help loosen it up.

Final Thoughts

In the world of salads, this Creamy Cucumber Salad with Greek Yogurt Dressing stands out as a true gem. It’s refreshing, creamy, and bursting with flavor — a perfect companion for any meal or a delightful dish on its own. So, whether you’re grilling up a storm or simply enjoying a quiet evening at home, let this salad be your go-to recipe for a burst of flavor and health. Grab your ingredients and get ready to create a dish that will not only satisfy your hunger but also awaken your taste buds. Happy cooking!

Creamy Cucumber Salad with Greek Yogurt Dressing

Prep Time 10 minutes
Total Time 10 minutes
Servings 4 servings
Calories 150
A refreshing and creamy cucumber salad perfect for a light meal or side dish, featuring a tangy Greek yogurt dressing.

Ingredients

Vegetables

  • 2 large cucumbers (thinly sliced)

Dairy

  • 1 cup Greek yogurt

Oils

  • 2 tablespoons olive oil

Acid & Flavorings

  • 1 tablespoon lemon juice
  • 1 clove garlic (minced)
  • 1 teaspoon dill (fresh or dried)

Seasonings

  • to taste salt and pepper

Garnish

  • optional fresh dill sprigs (for garnish)

Instructions 

  • Combine sliced cucumbers in a large bowl.
  • Mix Greek yogurt, olive oil, lemon juice, garlic, and dill until smooth.
  • Pour dressing over cucumbers and toss gently.
  • Season with salt and pepper, then chill for 30 minutes.
  • Garnish with dill sprigs if desired and serve.

Notes

For extra flavor, add a pinch of paprika or fresh herbs.
Calories: 150kcal
Cost: $8
Course: Side Dish
Cuisine: Mediterranean
Keyword: Cucumber

Nutrition

Calories: 150kcal | Carbohydrates: 10g | Protein: 8g | Fat: 9g | Sodium: 80mg

Loved this recipe? Save it to your favorite Pinterest board so you can easily find it later! It’s the perfect way to keep all your sweet ideas in one place. ✨

Eye-level view of a refreshing cucumber salad with a creamy dressing and garnished with dill.

Why You’ll Love These Cookies

Have you ever craved a sweet treat that doesn’t come with a side of guilt? Well, let me introduce you to the magic of Healthy 3-Ingredient Peanut Butter Cookies. These little gems are not just delicious; they embody the philosophy that healthy can be indulgent. Imagine sinking your teeth into a cookie that’s chewy, satisfying, and bursting with peanut buttery goodness, all while being free from added sugars. With just three simple ingredients, this recipe makes it easy for anyone to whip up a batch of guilt-free cookies that can be enjoyed any time of day.

Born from the heart of my San Antonio kitchen, these cookies are influenced by my love for wholesome ingredients and bold flavors. They are a testament to the idea that the best recipes don’t need a long list of components; instead, they thrive on quality and simplicity. So let’s dive into the world of peanut butter cookies that prove healthy can be absolutely delicious!

The Ingredients That Make Magic Happen

The beauty of these cookies lies in their simplicity. Here’s what you need:

  • 1 cup natural peanut butter – Choose the creamy variety for smooth texture or crunchy for added bite.
  • 1 ripe banana – This acts as a natural sweetener and binder, bringing moisture and flavor.
  • 1/2 cup rolled oats – These provide structure, chewiness, and a hearty element to the cookies.

Now, you might be wondering, how can such few ingredients create something so satisfying? It all comes down to the natural properties of each ingredient. The peanut butter delivers healthy fats and protein, while the banana offers natural sweetness and moisture. Rolled oats add heartiness, making these cookies not only a treat but also a nourishing snack.

How to Bake These Delectable Treats

Eye-level image of healthy peanut butter cookies, highlighting their soft and inviting appearance.

Ready to get baking? Here’s a simple step-by-step guide to making your Healthy 3-Ingredient Peanut Butter Cookies:

  1. Preheat your oven: Set it to 350°F (175°C).
  2. Mash the banana: In a mixing bowl, mash the ripe banana until it’s smooth and creamy.
  3. Combine ingredients: Add the natural peanut butter and rolled oats to the mashed banana. Mix until everything is well combined.
  4. Scoop the dough: Using a tablespoon, scoop portions of the dough onto a baking sheet lined with parchment paper.
  5. Flatten cookies: Gently flatten each cookie slightly with a fork to create a classic cookie shape.
  6. Bake: Place the baking sheet in the preheated oven and bake for 10-12 minutes or until the edges are lightly golden.
  7. Cool: Allow the cookies to cool on the baking sheet for a few minutes before transferring them to a wire rack to cool completely.

Storage and Freshness Tips

Once you’ve baked your cookies, you’ll want to keep them fresh for as long as possible. Here’s how:

  • Room Temperature: Store them in an airtight container at room temperature for up to one week.
  • Freezer-friendly: For longer storage, freeze your cookies for up to three months. Just layer them with parchment paper in a freezer-safe container to prevent sticking.

When you’re ready to enjoy, a quick 10-second zap in the microwave will restore that fresh-from-the-oven warmth!

Variations and Customizations

The best part about this recipe? It’s incredibly versatile! Here are some fun ideas to customize your cookies:

  • Add spices: A pinch of cinnamon or nutmeg can elevate the flavor profile and bring warmth.
  • Chocolate chips: Fold in some sugar-free chocolate chips or dark chocolate chunks for an extra treat.
  • Nuts and seeds: Mix in chopped peanuts or seeds for crunch and additional nutrition.
  • Nut butters: Experiment with almond butter or cashew butter for a different nutty flavor.

Feel free to get creative! Remember, cooking is an adventure, and these cookies are the perfect canvas to express your culinary flair.

Health Benefits of These Cookies

Now, let’s talk about why these cookies are not just delicious but also a healthier alternative to traditional cookies:

  • Natural sweetness: The ripe banana provides sweetness without the need for added sugars, making these cookies a great option for those managing sugar intake.
  • Protein-packed: Peanut butter is a great source of protein and healthy fats, which means these cookies are more satisfying than your typical sugary treat.
  • Nutrient-dense: With ingredients like oats and peanut butter, you’re getting essential nutrients like fiber, vitamins, and minerals.

By enjoying these cookies, you’re not just indulging; you’re nourishing your body with wholesome ingredients!

Troubleshooting Common Issues

If you encounter any hiccups while making these cookies, here are some tips to set you straight:

  • Dough too sticky? If your dough is overly sticky, add a tablespoon of rolled oats to help balance the texture.
  • Cookies too dry? If they turn out dry, it could be due to over-baking. Keep an eye on them and adjust baking time as necessary.
  • Not sweet enough? If you prefer a sweeter cookie, consider adding a drizzle of honey or maple syrup to the dough.

Frequently Asked Questions

Here are some common questions you might have:

  • Can I use crunchy peanut butter? Absolutely! Crunchy peanut butter adds a delightful texture to the cookies.
  • Are these cookies gluten-free? They can be made gluten-free by ensuring your oats are certified gluten-free.
  • Can I substitute the banana? If you’re not a fan of banana, you can use unsweetened applesauce as a substitute, though it may alter the flavor slightly.

Why These Cookies Are Perfect for Every Occasion

Whether you’re looking for a quick snack, a healthy dessert, or a treat to share at gatherings, these cookies fit the bill. They’re perfect for lunchboxes, easy to make for potlucks, and a great way to satisfy your sweet tooth without the guilt. Plus, they’re a fantastic option for anyone on a low-sugar diet or managing diabetes.

Next time you’re in the mood for something sweet, skip the store-bought options filled with additives and preservatives. Instead, embrace the joy of baking from scratch with these Healthy 3-Ingredient Peanut Butter Cookies. They’re not just cookies; they’re a celebration of what wholesome ingredients can do when combined with a little love and creativity.

Conclusion

As you step into your kitchen to create these irresistible cookies, remember the thrill of cooking and the joy of sharing delicious food with loved ones. Baking is not just about following a recipe; it’s about infusing your personality and passion into every bite. So gather those three simple ingredients, and let’s make some cookies that will not only satisfy your sweet cravings but also remind you that healthy can be a delightful adventure. Happy baking!

Healthy 3-Ingredient Peanut Butter Cookies (No Added Sugar!) 🍪

Prep Time 10 minutes
Cook Time 12 minutes
Total Time 22 minutes
Servings 12 cookies
Calories 150
Enjoy these simple, healthy cookies made with just three ingredients—perfect for a quick, guilt-free treat.

Ingredients

Main ingredients

  • 1 cup natural peanut butter
  • 1 ripe banana banana
  • 1/2 cup rolled oats

Instructions 

  • Preheat oven to 350°F (175°C).
  • Mash the banana until smooth.
  • Mix in peanut butter and oats until combined.
  • Scoop onto a baking sheet and flatten with a fork.
  • Bake for 10-12 minutes until golden.
  • Cool before serving.

Notes

For a crunchier texture, bake a few extra minutes.
Calories: 150kcal
Cost: $5
Course: Dessert
Cuisine: Healthy
Keyword: peanut butter

Nutrition

Calories: 150kcal | Carbohydrates: 15g | Protein: 6g | Fat: 9g | Sodium: 50mg

Loved this recipe? Save it to your favorite Pinterest board so you can easily find it later! It’s the perfect way to keep all your sweet ideas in one place. ✨

Detailed view of three-ingredient peanut butter cookies, with a warm, blurred background.

Welcome to your new favorite dish: the Keto Mexican Chicken Casserole! This vibrant and hearty casserole is not just another recipe; it’s an experience, a celebration of flavors that will set your taste buds ablaze while keeping you firmly in the low-carb lane. Trust me, this is not just a meal; it’s a fiesta for your senses!

From the moment you take your first bite, you’ll be enveloped in a warm hug of shredded chicken, colorful bell peppers, and a medley of spices that dance on your palate. This dish embodies everything I love about cooking — it’s bold, it’s adventurous, and it’s layered with flavors that tell a story. Are you ready to turn up the heat in your kitchen?

Why You’ll Love This Recipe

This Keto Mexican Chicken Casserole is more than just a low-carb alternative; it’s a culinary adventure! Here are five reasons why this dish will quickly become a staple in your kitchen:

  • Flavor Explosion: Each ingredient adds its unique voice, from the richness of olive oil to the zest of taco seasoning. This casserole sings!
  • Quick and Easy: With only a few simple steps, you can whip up this dish in under an hour, making it perfect for busy weeknights.
  • Customizable: Want to spice things up? You can easily adjust the heat level or swap out ingredients based on your preferences.
  • Meal Prep Friendly: This casserole keeps well in the fridge, making it a perfect option for meal prepping and easy lunches.
  • Low-Carb Goodness: Packed with protein and healthy fats, this dish fits perfectly into any keto lifestyle without sacrificing satisfaction.

Ingredient Breakdown

Let’s dive into the key players that make this Keto Mexican Chicken Casserole a star of your dinner table:

  • 1 pound chicken breast, cooked and shredded: The star protein that keeps you full and satisfied. You can substitute with rotisserie chicken for a quicker option.
  • 1 cup diced bell peppers: Adds a splash of color and sweetness. Use a mix of red, green, and yellow for the best visual appeal!
  • 1 cup diced onions: Enhances the flavor profile, bringing a savory depth to the dish.
  • 1 cup shredded cheese (cheddar or Mexican blend): This gives the casserole a creamy, gooey texture that binds everything together. Feel free to swap for dairy-free cheese if needed.
  • 1 can diced tomatoes (14 oz): Provides moisture and acidity, balancing the richness of the cheese and chicken.
  • 1 can black olives, sliced: Adds a savory, briny kick that complements the sweetness of the peppers.
  • 2 teaspoons taco seasoning: The heart of the dish, bringing all those warm spices together. You can make your own or buy pre-made for convenience.
  • 1/4 cup sour cream: This adds a creamy tang that elevates the whole dish. Greek yogurt is a great substitute for a lighter option.
  • 2 tablespoons olive oil: Used for sautéing; it adds healthy fats to the mix.

How to Make Your Keto Mexican Chicken Casserole

Are you ready? Let’s get cooking!

  1. Preheat your oven to 375°F (190°C).
  2. In a large skillet, heat olive oil over medium heat. Add the diced onions and bell peppers, cooking until softened.
  3. Stir in the shredded chicken, diced tomatoes, taco seasoning, and black olives. Mix well to combine.
  4. Remove from heat and stir in the sour cream.
  5. Transfer the mixture to a greased casserole dish and top with shredded cheese.
  6. Bake in the preheated oven for 25-30 minutes, or until the cheese is melted and bubbly.
  7. Let it cool for a few minutes before serving. Enjoy the aroma that fills your kitchen!

Pro Tips for the Perfect Casserole

Side view of a deliciously layered Keto Mexican Chicken Casserole with bell peppers, chicken, and olives.

Let’s make sure your casserole turns out perfectly every time with these expert insights:

  • Don’t Overcook the Chicken: If you’re using raw chicken, make sure it’s cooked just right to keep it tender and juicy.
  • Layer Wisely: For even cooking, ensure ingredients are evenly distributed in the casserole dish.
  • Experiment with Spices: Feel free to add cayenne or jalapeños for an extra kick!
  • Use Quality Cheese: A good quality cheese will melt better and enhance the flavor of the dish.
  • Let It Rest: Letting the casserole sit for a few minutes before serving helps the flavors meld.
  • Don’t Skip the Sour Cream: It adds a creamy, tangy flavor that balances the spices perfectly.
  • Check the Cheese: If you like it extra cheesy, feel free to add more cheese on top before baking.
  • Serve with Fresh Herbs: Garnish with fresh cilantro or green onions for a pop of color and flavor.

Common Mistakes and Troubleshooting

Even the best chefs make mistakes! Here are some common pitfalls and how to avoid them:

  • Too Dry? If your casserole turns out dry, you may have overcooked it. Keep an eye on the baking time and consider adding more tomatoes or sour cream next time.
  • Not Enough Flavor? Ensure your taco seasoning is fresh! Additionally, taste and adjust your seasonings before baking.
  • Cheese Not Melting? Make sure your oven is fully preheated and consider using a broiler for the last few minutes for that gooey cheese finish.

Variations to Spice It Up

This dish is a canvas — feel free to paint it with your favorite flavors! Here are some variations you can try:

  • Vegetarian Version: Substitute chicken with cauliflower or zucchini for a delicious veggie-packed dish.
  • Spicy Twist: Add diced jalapeños or a splash of hot sauce for those who crave heat.
  • Cheesy Delight: Incorporate cream cheese for an even creamier texture.
  • Southwestern Flair: Mix in corn and black beans for a heartier casserole.

Storage and Make-Ahead Instructions

This casserole is perfect for meal prep! Here’s how to store and reheat it:

  • Fridge: Store leftovers in an airtight container for up to 3 days.
  • Freezer: You can freeze it before or after baking for up to 3 months. Just make sure to wrap it tightly!
  • Reheating: Reheat in the oven at 350°F (175°C) until heated through, or microwave individual portions for a quick meal.

Comprehensive FAQ

Got questions? I’ve got answers! Here are some common queries about this dish:

  • Can I use frozen chicken? Absolutely! Just make sure to thaw it before cooking.
  • Is this dish gluten-free? Yes, as long as you use gluten-free taco seasoning!
  • Can I make it dairy-free? Yes! Substitute cheese with a dairy-free alternative and use yogurt instead of sour cream.
  • How can I make it spicier? Add more taco seasoning, or mix in some diced jalapeños or hot sauce.
  • What can I serve it with? Try pairing it with a fresh salad, cauliflower rice, or avocado slices.
  • Can I make it ahead of time? Yes! Prepare it a day ahead and store it in the fridge until you’re ready to bake.
  • How do I know when it’s done? The cheese should be bubbly and golden brown, and the edges should be slightly crispy.
  • Can I double the recipe? Definitely! Just make sure you have a larger casserole dish.

Nutrition Tips and Dietary Adaptations

This casserole is not only delicious but also nutritious! Here are some tips to adapt it further:

  • Protein Power: Add more protein by including beans or lentils for a vegetarian-friendly option.
  • Healthy Fats: Top with avocado slices or a dollop of guacamole for added healthy fats and flavor.
  • Low-Carb Veggies: Feel free to add more low-carb vegetables like spinach or zucchini to boost nutrients.

Equipment Recommendations

To make your cooking experience smooth, here’s a list of must-have tools:

  • Large Skillet: Ideal for sautéing your veggies and mixing the casserole.
  • Casserole Dish: A good-quality dish ensures even baking and easy serving.
  • Sharp Knife: For chopping your ingredients efficiently and safely.
  • Measuring Cups and Spoons: Precision in cooking can make all the difference!

Serving Suggestions

This casserole is fantastic on its own, but here are some ideas to elevate your meal:

  • Fresh Avocado: Serve with sliced avocado or guacamole for a creamy contrast.
  • Crisp Salad: Pair with a light green salad dressed in vinaigrette for a refreshing balance.
  • Cauliflower Rice: Serve over cauliflower rice for a wholesome, low-carb base.
  • Hot Sauce: A drizzle of your favorite hot sauce can take the dish to a whole new level!

Now that you have all the tools to create this fiery Keto Mexican Chicken Casserole, grab your ingredients, put on your apron, and let’s ignite some passion in the kitchen! Remember, cooking is about experimenting, so don’t be afraid to make this dish your own. Bon appétit!

Keto Mexican Chicken Casserole

Prep Time 10 minutes
Cook Time 30 minutes
Total Time 40 minutes
Servings 4 servings
Calories 550
A flavorful low-carb casserole combining tender chicken, peppers, and cheese with Mexican spices, perfect for a quick and satisfying meal.

Ingredients

Protein

  • 1 pound chicken breast, cooked and shredded

Vegetables

  • 1 cup diced bell peppers
  • 1 cup diced onions

Dairy

  • 1 cup shredded cheese (cheddar or Mexican blend)

Canned Goods

  • 1 can diced tomatoes (14 oz)
  • 1 can black olives, sliced

Spices & Condiments

  • 2 teaspoons taco seasoning
  • 1/4 cup sour cream
  • 2 tablespoons olive oil

Instructions 

  • Preheat oven to 375°F (190°C).
  • Cook onions and peppers in olive oil until softened.
  • Mix in chicken, tomatoes, taco seasoning, and olives.
  • Stir in sour cream, transfer to a greased dish, top with cheese.
  • Bake for 25-30 minutes until bubbly and cheese is melted.
  • Let cool briefly before serving.

Notes

This dish is perfect for a quick weeknight dinner with low carbs and high flavor.
Calories: 550kcal
Cost: $15
Course: Main Course
Cuisine: Mexican
Keyword: chicken

Nutrition

Calories: 550kcal | Carbohydrates: 20g | Protein: 45g | Fat: 30g | Sodium: 900mg

Why You’ll Love This Casserole

There’s something magical about a dish that brings together vibrant flavors, comforting textures, and a spirit of togetherness. My Vegetarian Mexican Rice Casserole does just that! This vibrant creation is not just a meal; it’s a celebration in a baking dish. It’s hearty, colorful, and absolutely packed with bold spices that awaken your taste buds and fill your home with the tantalizing aroma of Mexican cuisine. The beauty of this casserole lies in its simplicity — one pan, minimal prep, and a burst of flavors that make it perfect for family dinners, gatherings, or even meal prep for the week. So roll up your sleeves, and let’s dive into this culinary fiesta!

Overview

Cooking should be an adventure, and this casserole is the perfect journey to embark on. With just a handful of ingredients, you can create a dish that feels like a warm hug, nourishing both body and soul. Imagine tender brown rice soaking up the savory broth, black beans adding their creamy richness, and sweet corn bringing a pop of color and sweetness. Toss in some diced tomatoes with green chilies for that fiery kick, and you’ve got a bowlful of magic! Plus, with the melty cheese on top, each bite is a delightful blend of comfort and flavor.

Gathering Your Flavor Party

Eye-level view of a baked Vegetarian Mexican Rice Casserole, featuring layers of beans, corn, and cheese.

Before we get cooking, let’s gather our ingredients. Here’s what you’ll need for this delightful dish:

  • 1 cup uncooked brown rice
  • 2 cups vegetable broth
  • 1 can (15 oz) black beans, rinsed and drained
  • 1 can (15 oz) corn, drained
  • 1 can (15 oz) diced tomatoes with green chilies
  • 1 bell pepper, diced
  • 1 small onion, chopped
  • 2 cloves garlic, minced
  • 1 teaspoon cumin
  • 1 teaspoon chili powder
  • 1 teaspoon paprika
  • Salt and pepper to taste
  • 1 cup shredded cheese (cheddar or Mexican blend)
  • Fresh cilantro for garnish (optional)

These ingredients represent the heart of this dish, but remember — cooking is about creativity! Feel free to swap in your favorites or what you have on hand.

Let’s Build This Flavor Layer Cake (Step-by-Step)

Ready to create your culinary masterpiece? Follow these simple steps to whip up your Vegetarian Mexican Rice Casserole:

  1. Preheat your oven to 350°F (175°C). This ensures that your casserole will bake evenly and come out perfectly bubbly and golden.
  2. Cook the brown rice. In a medium saucepan, combine the uncooked brown rice and vegetable broth. Cook according to package instructions until the rice is tender and fluffy. This fragrant base is where the magic begins!
  3. Mix it all together. In a large mixing bowl, combine the cooked rice with the black beans, corn, diced tomatoes, bell pepper, onion, garlic, cumin, chili powder, paprika, salt, and pepper. Stir until everything is well mixed and colorful — this is a party for your taste buds!
  4. Transfer to baking dish. Grease a 9×13 inch baking dish and pour the mixture into it, spreading it evenly.
  5. Add the cheese. Generously sprinkle the shredded cheese on top of the mixture, creating that irresistible cheesy crust we all love.
  6. Cover and bake. Cover the dish with aluminum foil and bake for 25 minutes. This will help to keep the moisture in, allowing the flavors to meld beautifully.
  7. Uncover and finish. Remove the foil and bake for an additional 10-15 minutes, or until the cheese is bubbly and golden. Your kitchen will smell heavenly at this point!
  8. Cool and serve. Let the casserole cool for a few minutes before serving. Garnish with fresh cilantro if desired, and prepare for compliments!

Tips for Perfecting Your Casserole

Here are some tips to ensure your casserole turns out perfectly every time:

  • Don’t rush the rice. Make sure to cook the rice thoroughly before mixing it with the other ingredients to avoid any crunchiness later.
  • Experiment with spices. If you’re feeling adventurous, add in some cayenne pepper for extra heat or smoked paprika for a deeper flavor.
  • Don’t skip the foil. Keeping the dish covered for the first part of baking helps steam the rice, ensuring it cooks evenly.

Variations to Spice Things Up

One of the best things about this casserole is its versatility. Here are some variations you can try:

  • Protein Boost: Add some cooked quinoa, lentils, or even shredded chicken for a heartier meal.
  • Vegetable Medley: Incorporate other vegetables such as zucchini, spinach, or carrots for added nutrition and color.
  • Different Cheeses: Experiment with different cheeses like pepper jack for a spicy kick or a blend of cheeses for extra creaminess.

Substitutions for a Custom Dish

If you’re missing some ingredients or want to cater to certain dietary needs, here are some easy substitutions:

  • Rice: Use white rice or cauliflower rice if you’re looking for a lower-carb option.
  • Beans: Swap black beans for kidney beans or pinto beans based on your preference.
  • Diced tomatoes: Fresh tomatoes or salsa can be used in place of canned diced tomatoes with green chilies.

Storage and Freezing Tips

Got leftovers? This casserole stores beautifully! Here’s how to keep it fresh:

  • Refrigerate: Store any leftovers in an airtight container in the fridge for up to 4 days.
  • Freeze: This dish freezes well! Just make it up to the point before adding cheese, cover tightly in plastic wrap, and foil, and freeze for up to 3 months. When ready to bake, thaw overnight in the fridge and then add cheese before baking.

FAQs & Troubleshooting

Here are some common questions and solutions to keep in mind:

  • My rice is still hard after baking. What happened? This usually means there wasn’t enough liquid or the foil wasn’t tight enough. Add a bit of hot water or broth, re-cover, and bake for another 10-15 minutes.
  • Can I make this ahead of time? Absolutely! You can assemble it a day in advance and bake it when you’re ready. Just add a few extra minutes to the baking time if it’s cold.
  • Is this dish gluten-free? Yes! All the ingredients are naturally gluten-free, making this a fantastic option for those with gluten sensitivities.

Final Thoughts

My journey through flavors and spices has led me to create this incredible Vegetarian Mexican Rice Casserole, and I can’t wait for you to experience it. Cooking is about more than just feeding ourselves; it’s about connecting with our roots, sharing stories, and creating memories around the table. This dish embodies all that and more, wrapping you in warmth and flavor with every bite. So gather your loved ones, serve up this delicious casserole, and enjoy the laughter and joy that comes from sharing a meal together. Happy cooking, friends! 🌮🧀🥄

Vegetarian Mexican Rice Casserole - Food Meld

Prep Time 10 minutes
Cook Time 35 minutes
Total Time 45 minutes
Servings 4 servings
Calories 450
A flavorful and hearty vegetarian casserole combining rice, beans, corn, and spices, topped with melted cheese and fresh cilantro.

Ingredients

Rice and Broth

  • 1 cup uncooked brown rice
  • 2 cups vegetable broth

Canned Goods

  • 15 oz black beans, rinsed and drained
  • 15 oz corn, drained
  • 15 oz diced tomatoes with green chilies

Vegetables and Aromatics

  • 1 diced bell pepper
  • 1 small onion, chopped
  • 2 cloves garlic, minced

Spices

  • 1 teaspoon cumin
  • 1 teaspoon chili powder
  • 1 teaspoon paprika

Seasoning

  • to taste salt and pepper

Cheese and Garnish

  • 1 cup shredded cheese (cheddar or Mexican blend)
  • as needed fresh cilantro for garnish (optional)

Instructions 

  • Preheat oven to 350°F (175°C). Cook rice in vegetable broth according to package instructions.
  • Mix cooked rice, beans, corn, tomatoes, peppers, onion, garlic, and spices in a bowl.
  • Transfer mixture to a greased 9x13 inch dish, top with cheese, cover, and bake for 25 minutes.
  • Remove foil, bake 10-15 minutes until cheese is bubbly and golden. Garnish with cilantro if desired.

Notes

Feel free to customize with your favorite toppings or add hot sauce for extra flavor.
Calories: 450kcal
Cost: $15
Course: Main Course
Cuisine: Mexican
Keyword: Vegetarian

Nutrition

Calories: 450kcal | Carbohydrates: 70g | Protein: 18g | Fat: 12g | Sodium: 900mg

Loved this recipe? Save it to your favorite Pinterest board so you can easily find it later! It’s the perfect way to keep all your sweet ideas in one place. ✨

A vibrant Vegetarian Mexican Rice Casserole displayed with fresh cilantro garnish, highlighting textures.

Why You’ll Love This Recipe

If your weeknight dinners have been lacking excitement, it’s time to shake things up with my Instant Pot Homestyle Chicken & Veggies! This dish is like an embrace from your favorite aunt, warm and comforting but with a delightful twist. Imagine succulent chicken, vibrant veggies, and a rich broth all coming together in a symphony of flavors — and the best part? It’s all done in a flash! The Instant Pot takes the stress out of dinner time, letting you spend less time cooking and more time enjoying the company of your loved ones. Are you ready to embark on this culinary adventure?

Ingredients You’ll Need

Gathering the right ingredients is half the battle in creating a memorable meal. Here’s what you’ll need for this delicious concoction:

  • 1.5 lbs boneless, skinless chicken breasts
  • 2 cups mixed vegetables (carrots, peas, and corn)
  • 1 cup chicken broth
  • 1 small onion, diced
  • 3 cloves garlic, minced
  • 1 teaspoon dried thyme
  • 1 teaspoon dried rosemary
  • Salt and pepper to taste
  • 2 tablespoons olive oil
  • 1 tablespoon cornstarch (optional, for thickening)

Step-by-Step Cooking Instructions

Plated Instant Pot Homestyle Chicken & Veggies featuring tender chicken and colorful mixed vegetables.

Now, let’s get cooking! Follow these steps to create a dish that will have everyone asking for seconds:

  1. Turn on the Sauté Setting: Start by firing up your Instant Pot and selecting the sauté function. Add the olive oil and let it heat up.
  2. Sauté Aromatics: Toss in the diced onion and minced garlic. Sauté for about 2-3 minutes until they’re softened and fragrant — this is where the magic begins!
  3. Season the Chicken: While the aromatics are working their wonders, season the chicken breasts generously with salt, pepper, thyme, and rosemary. Don’t be shy; this is your flavor base!
  4. Add the Chicken: Place the seasoned chicken breasts into the pot. No need to sear them; we’re going for all-in-one goodness here.
  5. Pour the Broth and Veggies: Add the chicken broth and mixed vegetables on top of the chicken. The broth will infuse the chicken with moisture and flavor, while the veggies will add color and nutrition.
  6. Seal and Cook: Close the lid of the Instant Pot, set the valve to sealing, and cook on high pressure for 10 minutes. It’s like setting the stage for an epic performance!
  7. Quick Release: Once the cooking time is up, perform a quick release of the pressure. Be careful with the steam; it’s hotter than a jalapeño in July!
  8. Thicken the Sauce (Optional): If you prefer a thicker sauce, mix cornstarch with a little water and stir it into the pot. Sauté for a few minutes until thickened.
  9. Serve and Enjoy: Dish out your homestyle chicken and veggies, and enjoy this heartwarming meal that feels like a hug in a bowl!

Tips for Success

Even the best recipes can have a few hiccups if you’re not careful. Here are some tips to ensure your dish turns out perfectly:

  • Don’t Skip the Sauté: Sautéing the onion and garlic is crucial for building flavor. Skipping this step could lead to a bland meal.
  • Watch Your Portions: Avoid overloading the Instant Pot. Too many ingredients can result in uneven cooking. Less is more!
  • Season Generously: Don’t be afraid to season your chicken well. This dish thrives on flavor, and a pinch of salt and pepper can make all the difference.

Variations to Try

Cooking is all about creativity! Feel free to make this recipe your own with these fun variations:

  • Change Up the Veggies: Got some broccoli, green beans, or even bell peppers lying around? Toss them in! This dish is as flexible as you want it to be.
  • Switch the Protein: Not in the mood for chicken? Swap it out for turkey, or make it a plant-based delight with chickpeas or tofu!
  • Add a Kick: If you love heat, sprinkle in some cayenne pepper or crushed red pepper flakes to spice things up.

Substitutions You Can Make

Sometimes, you might find yourself short on a few ingredients. No worries! Here are some easy substitutions:

  • Chicken Broth: If you’re out of chicken broth, vegetable broth or even water will do in a pinch.
  • Fresh Herbs: If you have fresh thyme or rosemary, feel free to use them instead of dried. Just double the amount, as fresh herbs are less potent.
  • Olive Oil: Any other cooking oil will work, such as avocado oil or canola oil.

Essential Equipment

To make this recipe, you’ll need:

  • Instant Pot or any electric pressure cooker
  • Measuring cups and spoons
  • Cutting board and knife
  • Mixing bowl (if thickening sauce)

Storage and Freezing

Leftovers? Yes, please! Here’s how to store and freeze your delicious creation:

  • Refrigeration: Store leftovers in an airtight container in the fridge for up to 4 days. Just reheat and enjoy!
  • Freezing: You can freeze this dish for up to 3 months. Just ensure it’s in a freezer-safe container. Thaw overnight in the fridge before reheating.

FAQs

Got questions? I’ve got answers!

  • Can I use frozen chicken? Absolutely! Just add a few extra minutes to the cooking time, and you’re good to go.
  • Do I need to sear the chicken first? Nope! The Instant Pot will keep it tender and juicy without that extra step.
  • Can I prep this dish ahead of time? For sure! Just store the prepped ingredients in the fridge, and dinner will be a breeze later on.
  • How long will leftovers last? In the fridge, they’re good for about 3-4 days — if they last that long!

Troubleshooting Common Issues

If you encounter any bumps along the way, here are some common issues and how to fix them:

  • Burning Smell: If you smell burning, check that there’s enough liquid in the pot. The Instant Pot needs liquid to create steam.
  • Undercooked Chicken: If the chicken isn’t fully cooked, simply seal the pot and cook for an additional 2-3 minutes.

Final Thoughts

There you have it! My Instant Pot Homestyle Chicken & Veggies is more than just a meal; it’s an experience waiting to happen. This dish encapsulates everything I love about cooking — simplicity, bold flavors, and the joy of sharing food with those you love. Whether you’re having a cozy night in or feeding the family, this recipe is sure to impress. So grab your Instant Pot and let’s make some flavorful memories together! Happy cooking, my friend!

Instant Pot Homestyle Chicken & Veggies: Easy Weeknight Dinner

Prep Time 10 minutes
Cook Time 10 minutes
Total Time 20 minutes
Servings 4 servings
Calories 350
A quick and hearty dinner featuring tender chicken and colorful vegetables cooked effortlessly in the Instant Pot.

Ingredients

protein

  • 1.5 lbs boneless, skinless chicken breasts

vegetables

  • 2 cups mixed vegetables (carrots, peas, and corn)
  • 1 cup chicken broth
  • 1 small onion, diced
  • 3 cloves garlic, minced
  • 1 teaspoon dried thyme
  • 1 teaspoon dried rosemary
  • to taste salt and pepper salt and pepper
  • 2 tablespoons olive oil
  • 1 tablespoon cornstarch (optional, for thickening)

Instructions 

  • Set Instant Pot to sauté and add olive oil.
  • Sauté onion and garlic for 2-3 minutes.
  • Season chicken with salt, pepper, thyme, and rosemary; add to the pot.
  • Pour in broth, add vegetables, close lid, and cook on high pressure for 10 minutes.
  • Quick release pressure; stir in cornstarch if desired and simmer until thickened.

Notes

For a richer flavor, use homemade chicken broth and fresh herbs.
Calories: 350kcal
Cost: $15
Course: Dinner
Cuisine: American
Keyword: chicken, instant pot, vegetables

Nutrition

Calories: 350kcal | Carbohydrates: 30g | Protein: 40g | Fat: 8g | Sodium: 600mg

Loved this recipe? Save it to your favorite Pinterest board so you can easily find it later! It’s the perfect way to keep all your sweet ideas in one place. ✨

A steaming bowl of chicken and vegetable stew from the Instant Pot, showing vibrant ingredients.

Embrace the Flavor Explosion: Discover the Magic of Broccoli & Cauliflower Casserole

Welcome to your new favorite dish: the **Broccoli and Cauliflower Casserole**! This vibrant casserole doesn’t just fill your belly; it ignites your taste buds with a luscious blend of fresh vegetables, creamy cheeses, and savory chicken. Imagine biting into a forkful of tender broccoli and cauliflower, enveloped in a rich, cheesy sauce that brings warmth to your soul. If you’re ready to elevate your cooking game and turn simple ingredients into a culinary masterpiece, then let’s dive right in!

Why You’ll Love This Recipe

This casserole is not just a side dish; it’s a celebration of flavors. Here are five reasons to love it:

  • Comforting and Satisfying: The creamy texture and cheesy goodness make this casserole a go-to for cozy dinners.
  • Nutritious Veggie Boost: Packed with broccoli and cauliflower, it’s a fantastic way to sneak in those essential nutrients without sacrificing flavor.
  • Easy to Make: With straightforward steps, you can whip this up even on a busy weeknight, making it a perfect meal for families.
  • Versatile Dish: This casserole pairs beautifully with a variety of main courses, or you can enjoy it as a standalone meal.
  • Meal Prep Friendly: It can be made ahead of time and stored for later, making weeknight dinners a breeze!

Ingredient Breakdown

Let’s get into the heart of the recipe — the ingredients! Here’s what you will need:

  • 1 large head of cauliflower: Cut into small florets; this will serve as the backbone of your casserole.
  • 1 large head of broccoli: Also cut into small florets; the vibrant green will add both color and nutrients.
  • 2 cups cooked chicken breast: Diced; feel free to use leftovers or rotisserie chicken for convenience.
  • 8 oz cream cheese: Softened; this adds a creamy depth to the sauce.
  • ½ cup half-and-half cream: For richness; you can substitute with milk or a plant-based option.
  • 2 cups mozzarella cheese: Shredded; save some for the topping to create that glorious cheesy crust!
  • ½ tsp garlic powder: For flavor; fresh minced garlic can be used for an extra kick.
  • ½ tsp onion powder: This enhances the overall taste profile.
  • Salt and freshly ground black pepper: To taste; essential for balancing flavors.

Feel free to experiment with substitutions. For a **gluten-free** option, ensure your ingredients are certified gluten-free. If you’re aiming for a **low-carb** version, you can exclude the chicken or use a meat alternative.

Pro Tips for Perfecting Your Casserole

Side view of a delicious casserole featuring broccoli and cauliflower, with a golden crust of cheese.

Before you dive into the cooking process, consider these expert tips to elevate your casserole:

  • Don’t Overcook the Vegetables: Steam them just until bright and tender. They will continue to cook in the oven.
  • Mix the Cheese While Warm: The heat from the vegetables will help melt the cream cheese more easily.
  • Customize the Toppings: Try adding breadcrumbs mixed with herbs for a crunchy topping, or sprinkle some extra cheese for a cheesier finish!
  • Use Fresh Ingredients: Fresh vegetables will always provide better flavor than frozen ones.
  • Experiment with Spices: Add a pinch of cayenne or smoked paprika for an extra layer of flavor that dances on the palate!
  • Broil for Extra Crisp: If you want a golden top, broil for a few minutes at the end, but watch carefully to prevent burning!
  • Let it Rest: Allow the casserole to rest for about 5 minutes before serving. This helps it set and makes serving easier.
  • Pair with a Fresh Salad: A light salad on the side complements the richness of the casserole beautifully.

Common Mistakes and Troubleshooting

Even the best chefs make mistakes! Here’s how to avoid common pitfalls:

  • Too Watery Casserole: Ensure your vegetables are properly drained after steaming before mixing.
  • Cheese Not Melting Properly: If your cheese is too cold, let it come to room temperature before mixing it in.
  • Overbaking: Keep an eye on the casserole towards the end of the baking time to avoid burning the cheese.
  • Flavorless Sauce: Always taste and adjust seasoning before baking! A little salt can go a long way.

Delicious Variations to Try

Don’t let the fun stop here! Mix it up with these variations:

  • Cheesy Spinach Addition: Fold in some fresh spinach for added nutrients and flavor.
  • Spicy Kick: Add diced jalapeños or a sprinkle of red pepper flakes for a spicy twist.
  • Mushroom Medley: Sautéed mushrooms can add an earthy depth to the dish.
  • Herb Infusion: Fresh herbs like thyme or parsley can brighten up the flavors.

Storage and Make-Ahead Instructions

This casserole is perfect for meal prepping! Here’s how to store it:

  • Refrigerator: Store in an airtight container for up to 4 days. Reheat in the oven or microwave.
  • Freezer: It can be frozen for up to 2 months. Thaw in the refrigerator overnight before reheating.
  • Make-Ahead: Prepare the casserole up to the baking stage, cover, and refrigerate for up to 24 hours before baking.

Frequently Asked Questions

Got questions? I’ve got answers! Here are some of the most common queries:

  • Can this casserole be made vegetarian? Yes! Simply omit the chicken and increase the amount of vegetables.
  • Is this dish suitable for gluten-free diets? Absolutely! Just ensure all your ingredients are gluten-free.
  • Can I freeze leftovers? Yes, it freezes well! Just ensure it’s in an airtight container.
  • How do I reheat the casserole? Reheat in the oven at 350°F until warmed through, about 20-25 minutes.
  • What’s the best way to serve it? Serve hot, garnished with fresh herbs or a sprinkle of paprika for color.
  • Can I use other cheeses? Definitely! Cheddar, gouda, or a blend would work beautifully.
  • What if I don’t have half-and-half? You can substitute with milk or a dairy-free alternative for a lighter option.
  • How long does it take to prepare? The total time is about 30-40 minutes, including prep and cooking.

Nutritional Tips and Dietary Adaptations

This casserole can be tailored to fit your dietary needs:

  • Low Carb: Omit the chicken or replace it with a low-carb protein option.
  • Vegan Option: Use plant-based cream cheese and chicken substitutes, along with nutritional yeast for a cheesy flavor.
  • Low-Fat Version: Swap out cream cheese for low-fat cream cheese and use less cheese overall.

Equipment Recommendations

To make this casserole a breeze, consider these essential tools:

  • Steamer Basket: Ideal for perfectly steamed veggies without losing nutrients.
  • Mixing Bowls: Use large bowls for easy mixing of ingredients.
  • Casserole Dish: A good-quality ceramic or glass dish will bake your casserole evenly.
  • Measuring Cups and Spoons: Precise measurements ensure consistency in flavor.

Serving Suggestions

This casserole shines on its own but can be paired with:

  • Garlic Bread: For that classic comfort meal feel.
  • Mixed Green Salad: A light salad balances the richness of the casserole.
  • Grilled Chicken: A protein-packed addition that complements the dish perfectly.
  • Roasted Vegetables: Enhance the veggie profile with seasonal roasted veggies.

So there you have it! The **Broccoli and Cauliflower Casserole** is more than a dish; it’s an experience. Embrace the adventure of cooking, and let each bite remind you that food is a journey meant to be shared and celebrated. Now, grab your ingredients and let’s get cooking — your taste buds are waiting!

Broccoli and Cauliflower Casserole

Prep Time 10 minutes
Cook Time 15 minutes
Total Time 25 minutes
Servings 4 servings
Calories 450
A creamy, cheesy casserole combining fresh broccoli and cauliflower with cooked chicken, perfect for a comforting meal.

Ingredients

Vegetables

  • 1 large head cauliflower (cut in small florets)
  • 1 head broccoli (cut in small florets)
  • 2 cups cooked chicken breast (diced)
  • 8 oz cream cheese (softened)
  • ½ cup half-half cream
  • 2 cups mozzarella (shredded (save some for topping))
  • ½ tsp garlic powder
  • ½ tsp onion powder
  • to taste Salt and freshly ground black pepper

Instructions 

  • Preheat oven to 425°F (220°C) and steam cauliflower and broccoli for 5 minutes.
  • Mix cooked chicken, cream cheese, cream, mozzarella, garlic, onion, salt, and pepper in a bowl.
  • Add steamed vegetables to the mixture and combine.
  • Spoon mixture into an oiled casserole dish, top with remaining cheese, and bake for 10-15 minutes.
  • Optional: broil for 3 minutes for a browned top, watching carefully.

Notes

Use fresh vegetables for best flavor and texture.
Calories: 450kcal
Cost: $15
Course: Main Course
Cuisine: American
Keyword: Broccoli, casserole, Cauliflower

Nutrition

Calories: 450kcal | Carbohydrates: 20g | Protein: 35g | Fat: 25g | Sodium: 800mg

Why You’ll Love This Zesty Zucchini Lasagna

If you’re on the hunt for a dish that marries comfort with health, look no further than this zesty zucchini lasagna! Imagine the warm embrace of a classic lasagna, but without the heft of traditional pasta. Instead, we’re swapping out those heavy noodles for fresh, crisp zucchini, creating a lighter, yet equally satisfying meal. Not only is this dish a feast for your taste buds, but it’s also a canvas for creativity, making it perfect for both vegans and non-vegans alike. Let’s dive into this culinary adventure and ignite your passion for plant-based cooking!

Overview of Ingredients

Before we roll up our sleeves and get cooking, let’s gather our ingredients. The beauty of this zucchini lasagna is in its simplicity and adaptability. Here’s what you’ll need:

  • 3–4 large zucchinis: Choose firm, medium-sized zucchinis for easy slicing.
  • 2 cups ricotta cheese: Use vegan ricotta for a vegan version.
  • 2 cups shredded mozzarella cheese: Use vegan mozzarella for a vegan version.
  • 1 cup grated parmesan cheese: Substitute with nutritional yeast for a vegan alternative.
  • 1 large egg: Optional; skip for vegan.
  • 2 cups marinara sauce: Ensure it’s vegan if needed.
  • 1 tablespoon olive oil: For sautéing the veggies.
  • 1 medium onion: Finely chopped.
  • 3 cloves garlic: Minced to add flavor.
  • 1 bell pepper: Diced for sweetness.
  • 1 cup mushrooms: Sliced for umami.
  • 1 cup spinach: Chopped for a nutrient boost.
  • 1 tablespoon dried Italian seasoning: To bring all the flavors together.
  • Salt and pepper: To taste.
  • Fresh basil: For garnish and fresh flavor.

How to Make Zucchini Lasagna

A delicious zucchini lasagna showcasing rich textures, with creamy ricotta and vibrant vegetables.

Now, let’s embark on the journey of creating this culinary masterpiece step by step. Cooking should be a joyful experience, so embrace the process and have fun with it!

Step 1: Prepping the Zucchini

First things first, let’s get that oven preheating to 375°F (190°C). While it warms up, grab your zucchinis. Using a mandoline slicer or a sharp knife, slice the zucchinis lengthwise into thin, even strips. This ensures they resemble lasagna noodles and will cook uniformly. Once sliced, lay the zucchini strips on a baking sheet lined with paper towels, lightly sprinkle them with salt, and let them sit for about 15 minutes. This step is crucial as it helps draw out excess moisture, preventing your lasagna from becoming watery.

Step 2: Preparing the Filling

While the zucchini is sweating out that moisture, let’s fire up our skillet. Heat the olive oil over medium heat and toss in the finely chopped onion. Sauté until it turns translucent—this should take about 5 minutes. Next, add the minced garlic and let it cook for another minute until fragrant. Now, bring in the diced bell pepper and sliced mushrooms. Sauté these veggies for about 7–10 minutes until they’re tender. Finally, add the chopped spinach and cook until it wilts. Season everything with salt, pepper, and Italian seasoning to elevate those flavors. Once done, remove the skillet from the heat and set it aside.

Step 3: Preparing the Cheese Mixture

In a large mixing bowl, combine the ricotta cheese, 1 cup of shredded mozzarella, grated parmesan, and the egg if you’re using it. For our vegan friends, opt for vegan ricotta, vegan mozzarella, and nutritional yeast, and skip the egg. Mix until everything is well combined, creating a rich and creamy filling that will bring this dish together.

Step 4: Assembling the Lasagna

Now comes the fun part: assembling your lasagna! Spread a thin layer of marinara sauce on the bottom of a 9×13-inch baking dish to prevent sticking. Next, lay down the zucchini strips over the sauce, slightly overlapping them. Then, spread a generous layer of the cheese mixture over the zucchini. Follow this with a layer of the sautéed vegetables. Repeat these layers—marinara sauce, zucchini strips, cheese mixture, and vegetables—until you have used all your ingredients. Finish with a final layer of marinara sauce topped with the remaining shredded mozzarella to create that beautifully bubbly, golden crust.

Step 5: Baking the Lasagna

Cover the baking dish with aluminum foil and place it in the preheated oven. Bake for 30 minutes, then remove the foil and bake for an additional 20–25 minutes. Keep an eye on it; you want that cheese to be bubbly and golden brown. Once it’s out of the oven, allow the lasagna to cool for about 10 minutes before slicing. This helps it set and makes serving a breeze.

Step 6: Garnishing and Serving

For that final touch, garnish your zucchini lasagna with fresh basil leaves. Not only does it add a pop of color, but it also infuses a burst of fresh flavor that complements the dish beautifully. Serve your lasagna warm and watch as your friends and family dive into this delightful meal.

Tips for Success

Here are a few pro tips to ensure your zucchini lasagna turns out perfectly:

  • Salt the Zucchini: Don’t skip the salting step! It’s essential for drawing out moisture, keeping your dish from becoming soggy.
  • Layer Lightly: Avoid overloading layers with sauce or filling; thin layers ensure even cooking and a stable structure.
  • Experiment with Spices: Feel free to add your favorite spices or herbs to the filling for an extra kick.

Variations and Substitutions

This recipe is incredibly versatile! Here are some variations to consider:

  • Meat Lovers: Add cooked ground beef, turkey, or sausage to the vegetable filling for a meaty twist.
  • Cheese Lovers: Experiment with different cheeses like gouda or feta for a unique flavor profile.
  • Veggie-Loaded: Incorporate other vegetables like zucchini, carrots, or eggplant for added nutrition.

Equipment You’ll Need

Here’s a quick list of what you’ll need for this recipe:

  • Mandoline slicer or sharp knife
  • 9×13-inch baking dish
  • Large skillet
  • Mixing bowls
  • Aluminum foil

Storage and Freezing

Leftovers can be stored in an airtight container in the refrigerator for up to 3 days. To reheat, cover the lasagna with foil and warm in the oven at 350°F (175°C) until heated through, about 20 minutes. If you want to freeze your zucchini lasagna, allow it to cool completely, then wrap it tightly in plastic wrap and aluminum foil. It can be frozen for up to 3 months. To reheat, bake from frozen, adding extra time as needed.

FAQs

Here are some common questions you might have while making this delightful dish:

  • Can I use other vegetables besides zucchini? Absolutely! Feel free to get creative with your favorite veggies.
  • Is this dish gluten-free? Yes, as long as you use gluten-free marinara sauce and ensure all other ingredients are gluten-free.
  • Can I make this ahead of time? Yes! You can assemble the lasagna and refrigerate it overnight before baking.

Troubleshooting

If your lasagna ends up too watery, remember to ensure that the zucchini was salted and patted dry before layering. You can also try using a thicker marinara sauce to help absorb moisture. If the top isn’t browning, simply broil it for a few minutes at the end of cooking—just keep a close eye on it!

Bringing It All Together

This zucchini lasagna is more than just a meal; it’s an invitation to explore the wonders of cooking with vegetables. With layers of flavor and a healthy twist on a classic favorite, it’s a dish that will awaken your taste buds and inspire your kitchen adventures. Whether you’re serving it up for a family dinner or a cozy gathering with friends, this dish is sure to impress and satisfy. So put on your apron, grab your ingredients, and let’s create some culinary magic together! What are you waiting for? Ignite your taste buds with this zesty zucchini lasagna adventure today!

Zucchini Lasagna Recipe (Adaptable for Vegans)

Prep Time 20 minutes
Cook Time 45 minutes
Total Time 1 hour 5 minutes
Servings 6 servings
Calories 350
A delicious and healthy zucchini lasagna that's easy to customize for vegans, packed with flavorful vegetables and cheesy layers.

Ingredients

Vegetables

  • 3–4 large zucchinis (choose firm, medium-sized zucchinis for easy slicing)
  • 2 cups ricotta cheese (use vegan ricotta for a vegan version)
  • 2 cups shredded mozzarella cheese (use vegan mozzarella for a vegan version)
  • 1 cup grated parmesan cheese (use nutritional yeast for a vegan version)
  • 1 large egg (optional, skip for vegan)
  • 2 cups marinara sauce (ensure it’s vegan if needed)
  • 1 tablespoon olive oil
  • 1 medium onion (finely chopped)
  • 3 cloves garlic (minced)
  • 1 diced bell pepper
  • 1 cup mushrooms (sliced)
  • 1 cup spinach (chopped)
  • 1 tablespoon dried Italian seasoning
  • to taste salt and pepper
  • for garnish fresh basil

Instructions 

  • Preheat oven to 375°F (190°C). Slice zucchinis into thin strips and let sit with salt for 15 minutes.
  • Sauté onion, garlic, bell pepper, and mushrooms until tender. Add spinach and seasonings.
  • Mix ricotta, mozzarella, Parmesan (or nutritional yeast), and egg (if using).
  • Layer sauce, zucchini, cheese mixture, and vegetables in a baking dish. Repeat layers.
  • Bake uncovered for 20–25 minutes after initial 30-minute bake. Garnish with basil before serving.

Notes

You can customize the cheese with vegan options and add more vegetables for extra flavor.
Calories: 350kcal
Cost: $15
Course: Main Course
Cuisine: Italian
Keyword: Vegan, Vegetarian, zucchini

Nutrition

Calories: 350kcal | Carbohydrates: 40g | Protein: 20g | Fat: 15g | Sodium: 800mg

Loved this recipe? Save it to your favorite Pinterest board so you can easily find it later! It’s the perfect way to keep all your sweet ideas in one place. ✨

Eye-level view of a hearty zucchini lasagna, highlighting the cheese layers and garnished with basil.