Author

Avery Collins

Browsing

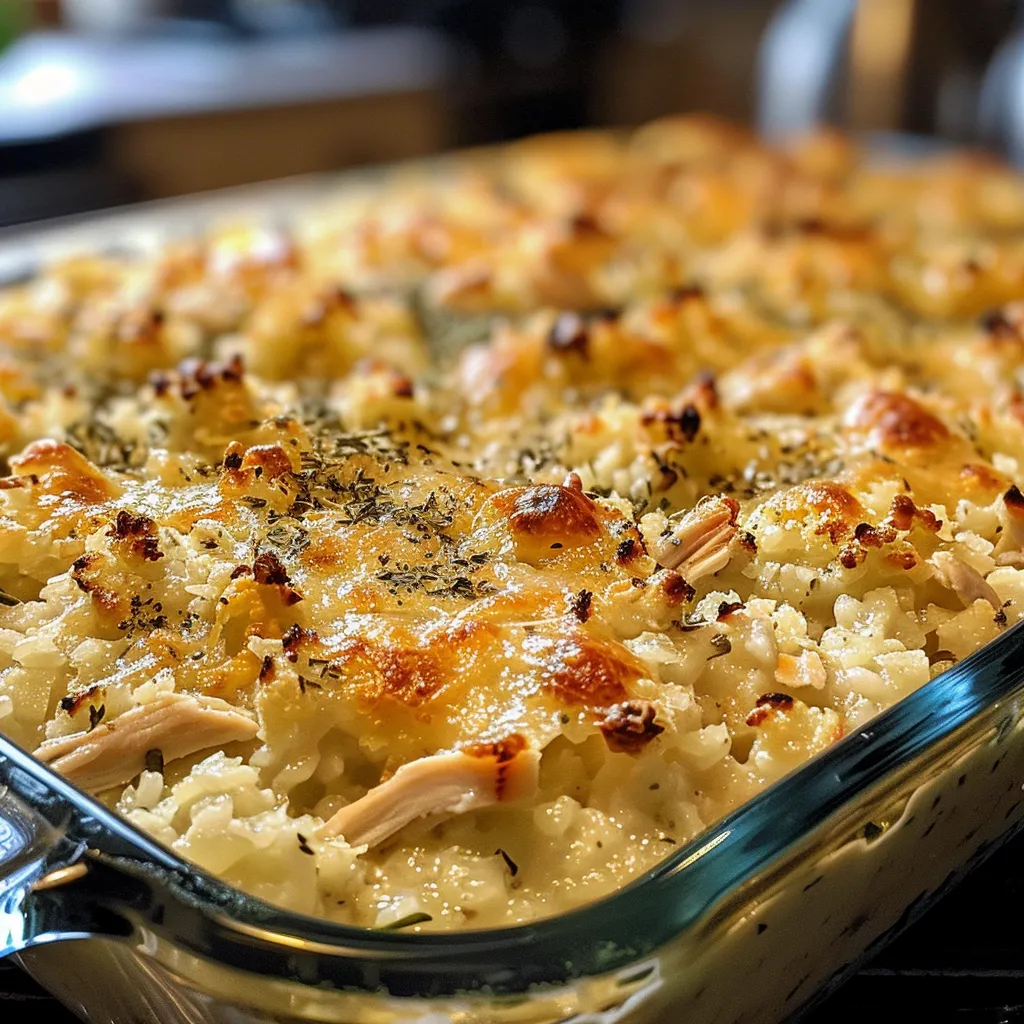
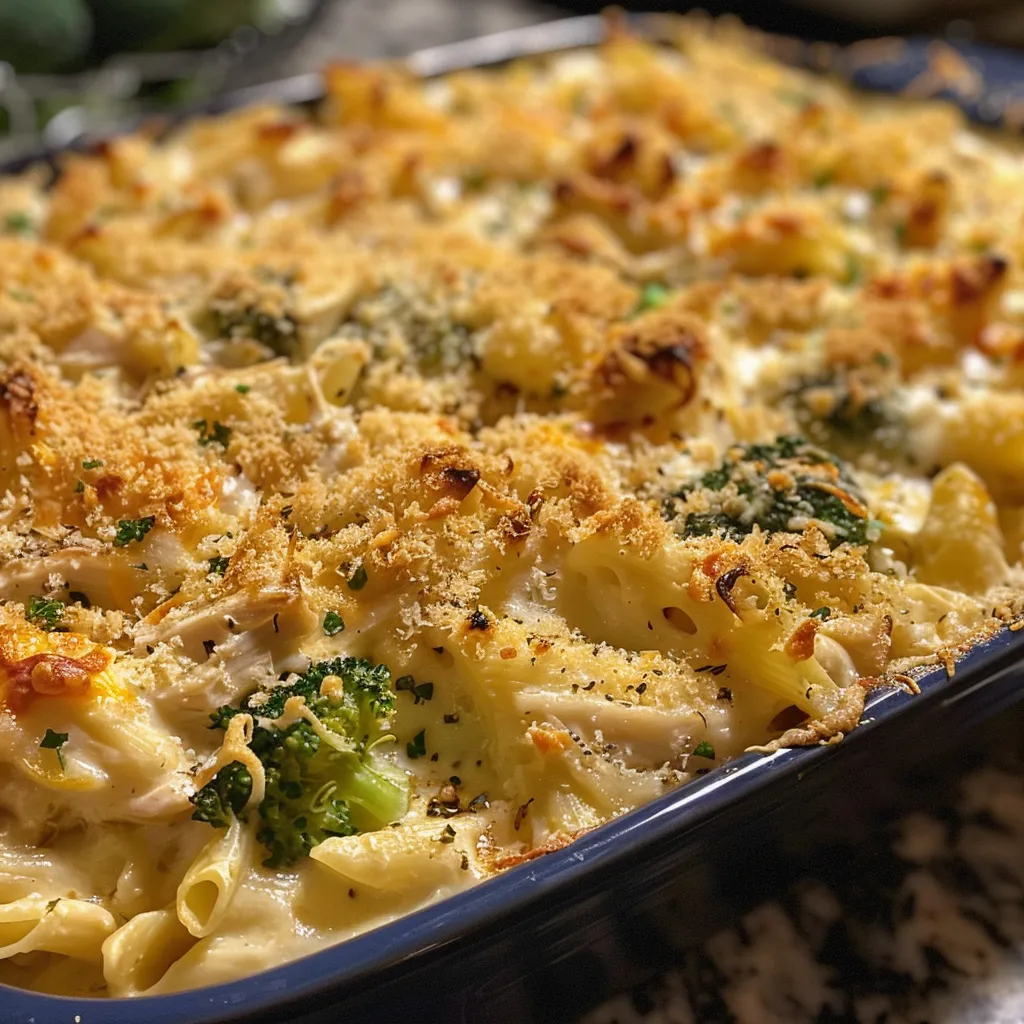
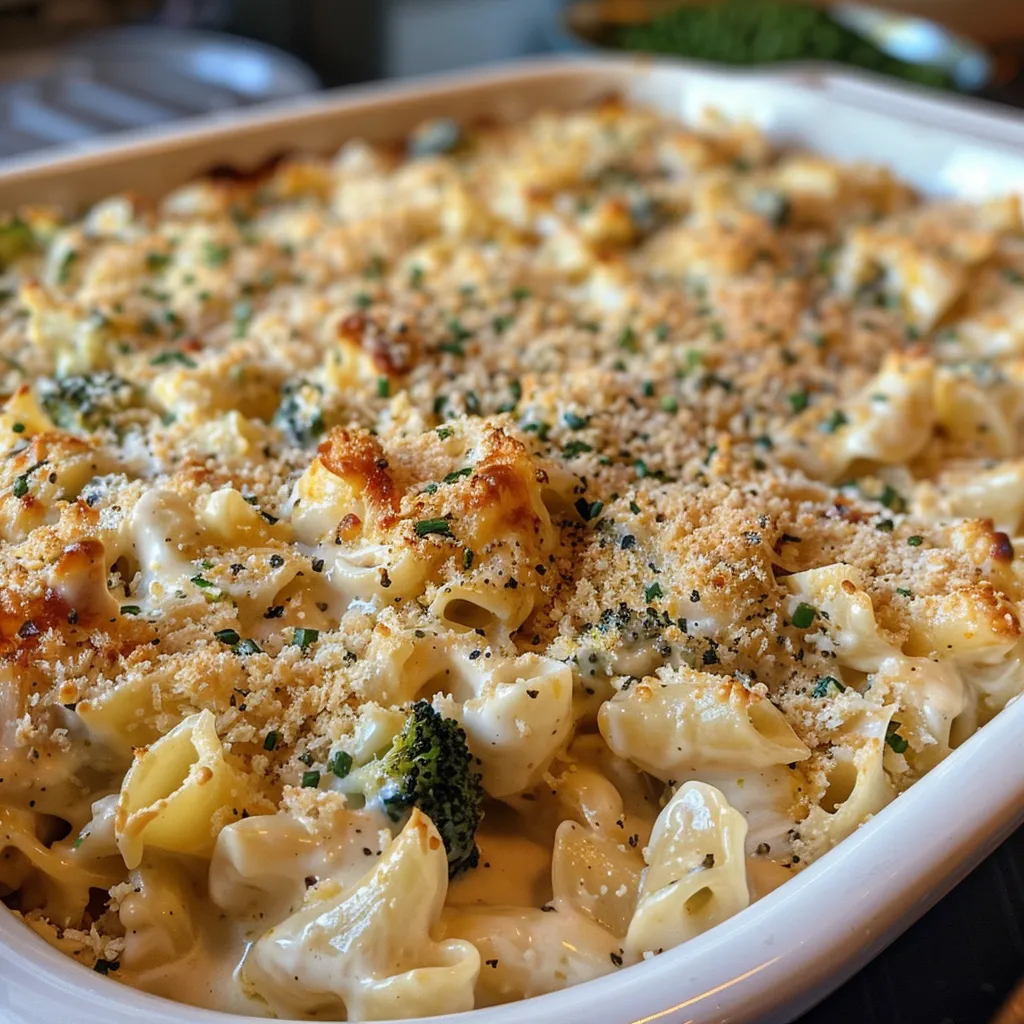
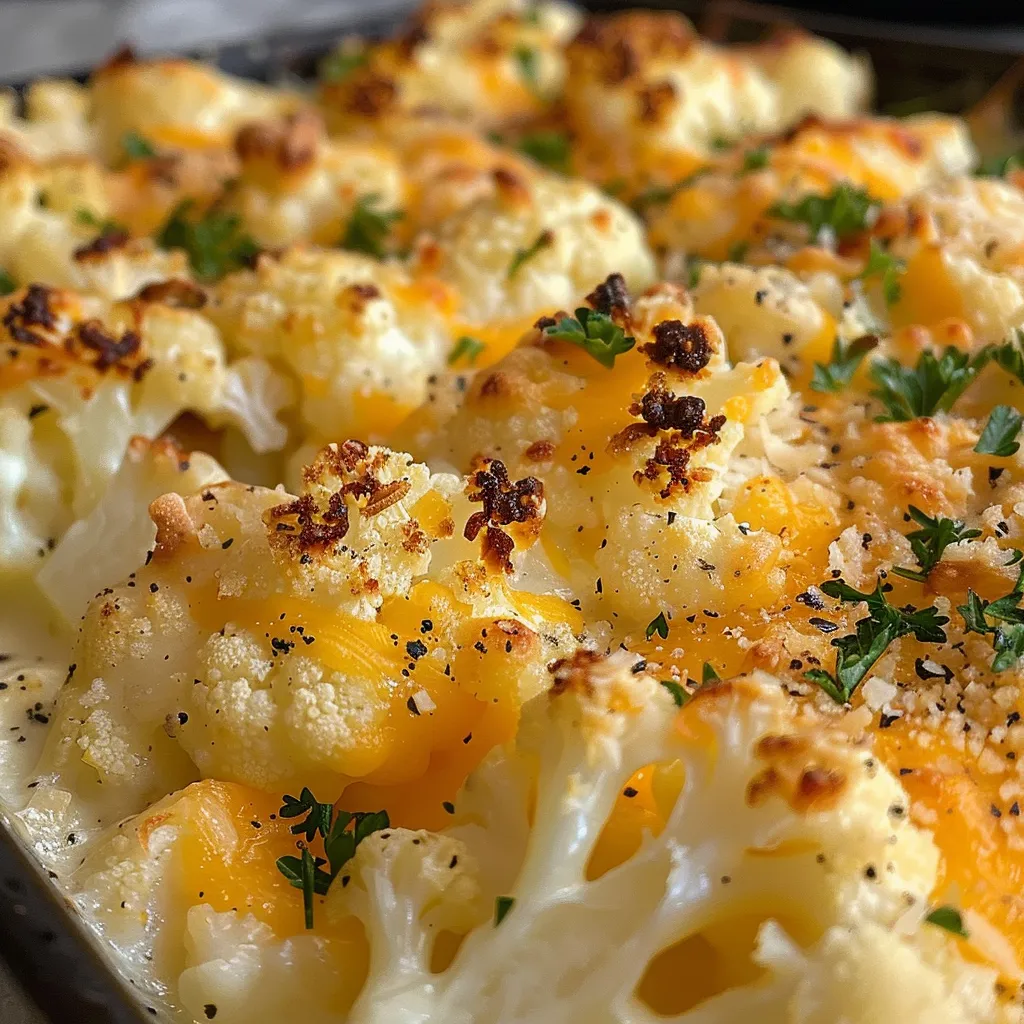
Dive into the delicious world of Cheesy Cauliflower Casserole, where creamy textures and bold flavors unite. This dish is not just comfort food; it’s an experience that will ignite your passion for cooking! Perfect for gatherings or a cozy night in, this keto-friendly masterpiece is sure to impress.

Why You’ll Love This Recipe

  • Easy to prepare: With a simple list of ingredients and straightforward steps, this casserole is perfect for both novice cooks and seasoned chefs looking to whip up a quick, satisfying meal.
  • Low carb goodness: Perfect for those on a keto diet, this casserole is packed with flavor while keeping the carbs low, making it a great option for anyone watching their intake.
  • Versatile dish: You can enjoy this cheesy delight as a main course or a side dish, complementing various proteins like chicken or beef.
  • Meal prep friendly: This casserole is perfect for making ahead of time, ensuring you have a delicious meal ready in a pinch.
  • Comfort food at its finest: The creamy cheese sauce and tender cauliflower create a dish that feels indulgent, comforting, and warm—exactly what you need after a long day.

Ingredients Breakdown

Here’s what you’ll need to get started:

  • 1 large head of cauliflower: Cut into florets. This is the foundation of our casserole, providing a mild flavor and tender-crisp texture that mimics pasta in a baked dish.
  • 1 cup heavy cream: For that rich, creamy base that elevates the entire dish.
  • 2 cups shredded cheddar cheese: This cheese adds a sharp, tangy flavor that pairs perfectly with the cauliflower.
  • 1/2 cup grated Parmesan cheese: A touch of nuttiness that enhances the overall flavor profile.
  • 1/4 cup cream cheese: Adding creaminess and depth to the sauce.
  • 2 cloves garlic, minced: For that aromatic punch that makes your taste buds dance.
  • 1 teaspoon onion powder: To add a subtle sweetness and depth of flavor.
  • Salt and pepper to taste: Essential for seasoning and enhancing all the flavors.
  • 1/2 teaspoon paprika (optional): For a hint of warmth and color.
  • Fresh parsley for garnish (optional): A pop of color and freshness that elevates the dish visually.

Step-by-Step Instructions for Casserole Perfection

Follow these simple steps to create your cheesy masterpiece:

  1. Preheat your oven: Set it to 375°F (190°C).
  2. Prepare the cauliflower: Steam or boil the cauliflower florets until tender, about 5-7 minutes. Drain and set aside.
  3. Mix the cheese sauce: In a large mixing bowl, combine heavy cream, cream cheese, garlic, onion powder, salt, pepper, and paprika. Mix until smooth.
  4. Add the cheese: Stir in the shredded cheddar and half of the Parmesan cheese.
  5. Combine with cauliflower: Add the cauliflower to the cheese mixture and stir until well coated.
  6. Transfer to a baking dish: Pour the mixture into a greased 9×13-inch baking dish. Top with the remaining Parmesan cheese.
  7. Bake: Place in the oven and bake for 25-30 minutes or until bubbly and golden on top.
  8. Garnish: Once out of the oven, sprinkle with fresh parsley before serving.

Pro Tips for the Best Casserole

A side view of a bubbling cheesy cauliflower casserole, showcasing gooey cheese and fresh herbs on top.
  • Don’t overcook the cauliflower: You want it tender but still firm; overcooked cauliflower can become mushy.
  • Experiment with cheeses: Feel free to mix in other cheeses like mozzarella or Gouda for unique flavors.
  • Make it your own: Add cooked bacon, sautéed mushrooms, or spinach for additional texture and flavor.
  • Use a food processor: For an ultra-smooth cheese sauce, blend the mixture in a food processor before adding the cauliflower.
  • Adjust seasonings: Taste the cheese mixture before adding the cauliflower and adjust the seasonings to your liking.
  • Let it rest: Allow the casserole to sit for a few minutes after taking it out of the oven to set up before serving.
  • Use the right dish: A glass baking dish can help you monitor the browning of the cheese.
  • Leftovers are golden: This casserole reheats beautifully, making it perfect for meal prep.

Common Mistakes and Troubleshooting

Even the best of us make mistakes in the kitchen. Here are some tips to ensure your casserole turns out perfectly:

  • If your casserole is too watery, it may be due to undercooking the cauliflower—make sure to drain it well.
  • If the cheese isn’t melting properly, check the quality of your cheese; fresh shredded cheese works best.
  • If it’s not as flavorful as you’d like, try adding a splash of hot sauce or additional spices to boost the flavor.
  • If the top isn’t browning as you’d like, switch to broil for the last few minutes, but watch it closely to avoid burning.

Variations to Try

Feel free to get creative! Here are some variations to keep things interesting:

  • Buffalo Cauliflower Casserole: Add buffalo sauce to the cheese mixture for a spicy kick.
  • Vegetable Medley: Mix in other vegetables like broccoli, bell peppers, or zucchini for a colorful twist.
  • Italian Style: Incorporate Italian seasonings and substitute mozzarella cheese for a different flavor profile.
  • Meat Lover’s Delight: Add cooked ground beef or sausage for a heartier meal.

Storage and Make-Ahead Instructions

This casserole is great for meal prep! Here’s how to store it:

  • Refrigeration: Store leftovers in an airtight container in the fridge for up to 4 days.
  • Freezing: To freeze, wrap the cooled casserole tightly in plastic wrap, then foil. It can be frozen for up to 3 months.
  • Reheating: Reheat in the oven at 350°F (175°C) until warmed through, about 20-30 minutes from frozen.

Comprehensive FAQ

Got questions? Here are some answers to common queries about this cheesy delight:

  • Can I use frozen cauliflower? Yes, just ensure to thaw and drain it well before mixing it into the cheese sauce.
  • What can I serve this casserole with? It pairs beautifully with grilled chicken, steak, or a green salad.
  • Is this casserole gluten-free? Absolutely! All the ingredients used are gluten-free.
  • Can I make this vegan? Yes, substitute the dairy with plant-based alternatives like coconut cream and nutritional yeast.
  • How do I make it spicier? Add diced jalapeños or a dash of cayenne pepper to the cheese sauce.
  • What is the best way to reheat leftovers? The oven works best to maintain the casserole’s texture, but the microwave is fine if you’re in a hurry.
  • Can I prepare this ahead of time? Yes, you can assemble it a day in advance and bake it just before serving.
  • How can I make it cheesier? Add additional cheese varieties or layers within the casserole.

Nutrition Tips and Dietary Adaptations

For those monitoring their nutrition, here’s what you need to know:

  • Low carb: This casserole fits perfectly into a low-carb or keto diet, making it a great choice for those looking to reduce carbohydrates.
  • Customizable: Adjust the cheese types and quantities based on your dietary preferences, whether it’s lower fat or lactose-free.

Equipment Recommendations

Here’s what you’ll need to make this casserole:

  • 9×13-inch baking dish: Ideal for even cooking and easy serving.
  • Mixing bowl: For combining your ingredients smoothly.
  • Steamer or pot: To prepare your cauliflower perfectly.
  • Spatula: For mixing and transferring your casserole.

Serving Suggestions

For an unforgettable meal, consider these serving ideas:

  • Pair with protein: Serve alongside grilled chicken or roasted pork for a balanced meal.
  • Add a salad: A fresh green salad can complement the richness of the casserole.
  • Offer sauces: Serve with a side of marinara or hot sauce for an extra flavor boost.

Embrace the adventure of cooking with this Cheesy Cauliflower Casserole. With its rich flavor, creamy texture, and low-carb benefits, it’s bound to become one of your favorite dishes. So grab your skillet, fire up your oven, and get ready to ignite your taste buds!

Cheesy Cauliflower Casserole

Prep Time 10 minutes
Cook Time 30 minutes
Total Time 40 minutes
Servings 6 servings
Calories 350
A creamy, cheesy cauliflower bake that's perfect for a comforting side dish or main course.

Ingredients

Cauliflower

  • 1 large head cauliflower, cut into florets
  • 1 cup heavy cream
  • 2 cups shredded cheddar cheese
  • 1/2 cup grated Parmesan cheese
  • 1/4 cup cream cheese, softened
  • 2 cloves garlic, minced
  • 1 teaspoon onion powder
  • to taste Salt and pepper
  • 1/2 teaspoon paprika (optional)
  • for garnish Fresh parsley (optional)

Instructions 

  • Preheat oven to 375°F (190°C). Steam cauliflower until tender, then drain.
  • Mix heavy cream, cream cheese, garlic, onion powder, salt, pepper, and paprika until smooth.
  • Stir in cheddar and half of Parmesan cheese, then add cauliflower and coat well.
  • Transfer to a greased baking dish, top with remaining Parmesan, and bake 25-30 minutes until bubbly and golden.

Notes

For extra flavor, sprinkle with fresh parsley before serving.
Calories: 350kcal
Cost: $15
Course: Side Dish
Cuisine: American
Keyword: Cauliflower

Nutrition

Calories: 350kcal | Carbohydrates: 20g | Protein: 15g | Fat: 25g | Sodium: 600mg

Why You’ll Love This Dish

Welcome to a culinary journey that brings together the vibrancy of shrimp and the crispness of broccoli in a dish that’s not only low in carbs but also bursting with flavor! If you’re looking for a quick and healthy dinner that doesn’t skimp on taste, then you’re in for a treat with this Low Carb Shrimp and Broccoli Recipe. This dish embodies the spirit of bold cooking—where every bite offers a delightful dance of textures and flavors, making it the perfect choice for those who want to eat well without sacrificing satisfaction.

This recipe is quick to prepare, taking only about 20 minutes from start to finish. It’s also incredibly versatile, allowing you to experiment with various seasonings and side dishes. Whether you’re on a keto diet, watching your carb intake, or simply seeking a delicious meal, this recipe checks all the boxes. Ready to dive in? Let’s get cooking!

Ingredients You’ll Need

Here’s what you’ll need to whip up this flavorful dish:

  • 1 pound shrimp, peeled and deveined
  • 2 cups broccoli florets
  • 3 tablespoons olive oil
  • 3 cloves garlic, minced
  • 1 teaspoon red pepper flakes (optional)
  • Salt and pepper to taste
  • Juice of 1 lemon
  • 1 tablespoon soy sauce (optional)
  • Fresh parsley for garnish

Each ingredient plays a vital role in creating a dish that bursts with flavor. The shrimp bring a delightful protein punch, while the broccoli adds a satisfying crunch. The olive oil and garlic form a rich base that elevates this dish to another level.

Step-by-Step Preparation Guide

Bowl of low carb shrimp and broccoli, garnished with parsley.

Getting Started

To get the most out of your cooking experience, gather all your ingredients and equipment beforehand. You’ll need a large skillet, a spatula, and a cutting board. Once you have everything ready, follow these simple steps:

Cooking the Base

1. In a large skillet, heat the olive oil over medium heat. The oil should shimmer slightly, indicating it’s ready for the next step.

2. Add the minced garlic to the skillet and sauté for about 1 minute until it becomes fragrant. This is where the magic begins as the aroma fills your kitchen!

Adding the Broccoli

3. Toss in the broccoli florets and sauté them for 3-4 minutes. You want them to become tender yet still crisp. This step ensures that they retain their vibrant color and nutrients, making your dish not just tasty but also healthy.

Incorporating the Shrimp

4. Push the broccoli to the side of the skillet to make room for the shrimp. Season the shrimp with salt, pepper, and red pepper flakes (if using). The shrimp will cook quickly, turning pink and opaque, signaling that they are done.

5. Cook the shrimp for about 2-3 minutes on each side until they are perfectly cooked through. Don’t walk away during this step; the shrimp can overcook quickly, turning rubbery if left too long!

Finishing Touches

6. Drizzle the lemon juice and soy sauce over the shrimp and broccoli, stirring to combine everything beautifully. This step adds a zesty brightness to the dish that will have your taste buds singing.

7. Cook for an additional minute to heat everything through, then remove from heat and garnish with fresh parsley. The final touch of green not only looks beautiful but adds a burst of freshness!

Serving Suggestions

This Low Carb Shrimp and Broccoli dish is incredibly flexible. Here are some serving ideas to complement your meal:

  • Serve it over a bed of cauliflower rice for a low-carb alternative.
  • Pair it with a light salad drizzled with a lemon vinaigrette.
  • For a heartier meal, consider serving it over whole grain pasta or quinoa.
  • A glass of chilled white wine or iced tea can elevate the dining experience, bringing a refreshing balance to the dish.

Health Benefits of Shrimp and Broccoli

Not only does this dish taste amazing, but it’s also packed with health benefits:

  • Shrimp: A fantastic source of protein, shrimp are low in calories and high in nutrients like selenium and vitamin B12.
  • Broccoli: Rich in vitamins C and K, fiber, and antioxidants, broccoli supports overall health and boosts your immune system.
  • Healthy Fats: The olive oil provides monounsaturated fats that are heart-healthy and help with nutrient absorption.

Customizing the Recipe

One of the best things about this dish is its adaptability. Feel free to make it your own by:

  • Adding other vegetables like bell peppers, snap peas, or carrots for extra color and nutrition.
  • Experimenting with different spices such as paprika or cumin to add a unique twist.
  • Incorporating different proteins—chicken or tofu can easily replace shrimp.

Common Mistakes to Avoid

To help you achieve the best results with your shrimp and broccoli, here are some common pitfalls to watch out for:

  • Overcooking the shrimp. Keep an eye on them; they should turn pink and opaque within a few minutes.
  • Neglecting to season adequately. Don’t be shy with the salt and pepper; it helps enhance the dish’s flavors.
  • Cooking at too high a temperature, leading to burnt garlic. A medium heat is ideal for sautéing without burning.

Tips for a Perfect Dish

Here are some pro tips to ensure your shrimp and broccoli dish is always a success:

  • Use fresh shrimp for the best flavor and texture. If using frozen, make sure to thaw them completely before cooking.
  • Prep all your ingredients before starting, so the cooking process flows smoothly.
  • Don’t hesitate to adjust the spiciness based on your preference. A little heat can go a long way in enhancing the flavor.

How to Store Leftovers

If you happen to have any leftovers (which is unlikely because it’s so delicious!), store them in an airtight container in the refrigerator for up to 2 days. Reheat gently in the microwave or on the stovetop to avoid overcooking the shrimp.

FAQs

Can I make this recipe ahead of time?
Yes! You can prep everything in advance and cook it just before serving for the freshest taste.

Is this dish suitable for meal prep?
Absolutely! It’s a perfect low-carb meal prep option. Just keep the shrimp and broccoli separate from any sauces until you’re ready to eat.

Can I use frozen broccoli?
While fresh broccoli is recommended for its texture, frozen broccoli can work too—just be sure to thaw and drain it before cooking.

Conclusion

Cooking should be an adventure, a dance of flavors that celebrates creativity and passion. This Low Carb Shrimp and Broccoli Recipe captures that spirit beautifully. From the first sizzle of garlic in the pan to the last bite of succulent shrimp, this dish is a testament to the vibrant and bold flavors that cooking can offer. So grab your skillet, gather your ingredients, and let the heat ignite your culinary passion! Whether you’re serving it for a weeknight dinner or impressing guests, this dish is sure to bring smiles and satisfaction to every table. Enjoy the journey, and most importantly, enjoy every bite!

Low Carb Shrimp And Broccoli Recipe – A Quick & Healthy Dinner

Prep Time 5 minutes
Cook Time 10 minutes
Total Time 15 minutes
Servings 4 servings
Calories 250
This quick and healthy low carb shrimp and broccoli dish is perfect for a nutritious weeknight dinner, packed with flavor and easy to prepare.

Ingredients

Protein

  • 1 pound shrimp, peeled and deveined

Vegetables

  • 2 cups broccoli florets

Fats & Oils

  • 3 tablespoons olive oil

Aromatics & Seasonings

  • 3 cloves garlic, minced
  • 1 teaspoon red pepper flakes (optional)
  • to taste salt and pepper
  • 1 unit lemon (juice of 1 lemon)
  • 1 tablespoon soy sauce (optional)

Garnish

  • fresh parsley for garnish

Instructions 

  • Heat olive oil in a skillet over medium heat.
  • Sauté garlic for 1 minute, then add broccoli and cook 3-4 minutes.
  • Push broccoli aside, add shrimp, season with salt, pepper, and red pepper flakes.
  • Cook shrimp 2-3 minutes per side until pink, then add lemon juice and soy sauce, stir.
  • Cook 1 more minute, then garnish with parsley before serving.

Notes

For extra flavor, add a pinch of red pepper flakes or fresh herbs.
Calories: 250kcal
Cost: $15
Course: Main Course
Cuisine: American
Keyword: Broccoli, Low Carb, shrimp

Nutrition

Calories: 250kcal | Carbohydrates: 12g | Protein: 30g | Fat: 10g | Sodium: 600mg

Loved this recipe? Save it to your favorite Pinterest board so you can easily find it later! It’s the perfect way to keep all your sweet ideas in one place. ✨

Vibrant dish of shrimp and broccoli, highlighted by natural light.

Why You’ll Love These Waffles

In a world where meals often feel rushed and uninspired, Easy Cheesy Carrot Waffles burst onto the scene as a delightful reminder of how food can be both fun and nutritious. These waffles are not just a meal; they’re an experience, a celebration of color, flavor, and texture that sparks joy in every bite. Packed with the vibrant goodness of grated carrots and the cheesy richness of your favorite melty cheese, they offer a perfect blend that caters to both kids and adults alike.

Whether you’re looking for a quick snack for preschoolers, a lunch recipe for toddlers, or even something to serve at your next family gathering, these waffles deliver on all fronts. They’re crispy on the outside, soft on the inside, and incredibly versatile. Plus, they can easily be customized to suit any taste, making them a go-to choice for healthy food kids will eat.

Ingredients You’ll Need

To create these scrumptious waffles, gather the following ingredients:

  • 1 cup grated carrots
  • 1 cup whole wheat flour
  • 1/2 cup shredded cheese (cheddar or mozzarella)
  • 1 cup milk (or plant-based milk)
  • 2 large eggs
  • 2 tablespoons olive oil or melted butter
  • 1 teaspoon baking powder
  • 1/2 teaspoon salt
  • 1/4 teaspoon black pepper (optional)
  • 1/2 teaspoon garlic powder (optional)

Instructions for Perfect Waffles

Delicious Easy Cheesy Carrot Waffles on a plate, showcasing grated carrots and cheese, illuminated by warm natural light.

Now that you have your ingredients ready, let’s dive into the steps that will lead you to waffle perfection!

  1. Preheat the waffle maker: Follow the manufacturer’s instructions to get your waffle maker ready. A well-heated waffle maker is key to achieving that golden-brown crispiness.
  2. Mix your dry ingredients: In a large mixing bowl, combine the grated carrots, whole wheat flour, shredded cheese, baking powder, salt, black pepper, and garlic powder. Stir well to ensure all the dry ingredients are evenly distributed.
  3. Combine the wet ingredients: In another bowl, whisk together the milk, eggs, and olive oil or melted butter until well combined.
  4. Bring it all together: Pour the wet ingredients into the dry ingredients and stir gently until just combined. Be careful not to overmix; a few lumps are perfectly fine!
  5. Grease the waffle maker: Lightly grease the waffle maker with cooking spray or oil to prevent sticking and to enhance that crispy exterior.
  6. Cook the waffles: Pour an appropriate amount of batter into the preheated waffle maker. Close the lid and cook until golden brown and crispy, about 3-5 minutes. Keep an eye on them; every waffle maker is different!
  7. Serve and enjoy: Carefully remove the waffles and serve them warm with your choice of toppings. Yogurt, fresh fruit, or a drizzle of honey are all fantastic options.

Tips for Success

To ensure your cheesy carrot waffles turn out perfectly every time, consider these helpful tips:

  • Grate the carrots finely: This helps the waffles hold together better, especially for younger eaters or those practicing baby-led weaning.
  • Choose the right cheese: Opt for a cheese that melts well, like cheddar or mozzarella. If you’re feeling adventurous, try a mix of cheeses for added flavor!
  • Mind the batter: Don’t overmix! A few lumps in the batter are okay. Overmixing can lead to tough waffles.
  • Adjust cooking times: Cooking times may vary depending on your waffle maker. Keep an eye on the waffles to avoid burning.

Creative Variations

One of the best aspects of these waffles is their versatility. Here are some ideas to mix things up:

  • Herb-infused waffles: Add fresh herbs like basil or cilantro to the batter for a fresh twist.
  • Spicy kick: If you love a bit of heat, consider adding a pinch of cayenne pepper or red chili flakes to the mix.
  • Sweet version: For a sweeter take, you can add a tablespoon of honey or maple syrup, and consider swapping out the cheese for a sweeter alternative like ricotta.

Substitutions and Additions

If you’re missing an ingredient or looking to customize your waffles, here are some substitutions you can make:

  • Flour: Use all-purpose flour or a gluten-free flour blend if you need a gluten-free option.
  • Cheese alternatives: For a dairy-free version, try using a plant-based cheese. There are many excellent options available that melt well.
  • Egg substitutes: For a vegan version, you can use a flax egg (1 tablespoon ground flaxseed mixed with 3 tablespoons of water) or a chia egg.

Essential Equipment

To whip up these delicious waffles, you’ll need:

  • A waffle maker (Belgian or classic, your choice!)
  • Mixing bowls
  • A whisk
  • A grater (for the carrots)
  • A spatula (to help remove the waffles safely)

Storage and Freezing Tips

These waffles are not only great fresh; they also store beautifully! Here’s how to keep them for later:

  • Refrigerating: Allow the waffles to cool completely. Store them in an airtight container in the fridge for up to 3-4 days. Reheat in the toaster or microwave when ready to eat.
  • Freezing: For longer storage, freeze the cooled waffles. Place them in a single layer on a baking sheet to freeze initially, then transfer them to a freezer-safe bag once solid. They can be frozen for up to 2 months. Reheat directly from the freezer in a toaster or oven.

Frequently Asked Questions

Here are some common questions about these delightful waffles:

  • Can I make these waffles ahead of time?
    Absolutely! You can prepare the batter the night before and store it in the fridge. Just give it a quick stir before cooking.
  • What can I serve with these waffles?
    They are delicious with yogurt, fruit, nut butter, or even a dollop of sour cream. For a sweet twist, drizzle with syrup or honey.
  • Can I add other vegetables?
    Yes! Zucchini, spinach, or even sweet potatoes can be fantastic additions. Just make sure to adjust the moisture accordingly.

Troubleshooting Tips

If you find yourself facing any issues while making your waffles, here are some troubleshooting tips:

  • Waffles sticking to the maker: Make sure to grease the waffle iron properly and ensure it’s preheated before adding the batter.
  • Waffles are too dense: If your waffles are coming out heavy, try reducing the flour slightly or ensuring you’re not overmixing the batter.
  • Waffles are soggy: Ensure that your grated carrots are well-drained, and don’t skip the baking powder!

Conclusion

With their cheerful color and delicious flavor, Easy Cheesy Carrot Waffles are a game-changer in the kitchen, turning every meal into an adventure. They’re not just a tasty treat; they’re a chance to get creative, to experiment, and to share something special with your loved ones. So, grab your ingredients, fire up that waffle maker, and enjoy the process of creating something truly delightful. Your taste buds (and your family) will thank you!

Easy Cheesy Carrot Waffles – Healthy Snack or Lunch for Kids & Families |Toddlers & Baby-Led Weaning

Prep Time 10 minutes
Cook Time 10 minutes
Total Time 20 minutes
Servings 4 servings
Calories 250
Delicious and nutritious carrot waffles perfect for kids and families, combining wholesome ingredients with cheesy goodness.

Ingredients

Main

  • 1 cup grated carrots
  • 1 cup whole wheat flour
  • 1/2 cup shredded cheese (cheddar or mozzarella)
  • 1 cup milk (or plant-based milk)
  • 2 large eggs
  • 2 tablespoons olive oil or melted butter
  • 1 teaspoon baking powder
  • 1/2 teaspoon salt
  • 1/4 teaspoon black pepper (optional)
  • 1/2 teaspoon garlic powder (optional)

Instructions 

  • Preheat the waffle maker according to the manufacturer's instructions.
  • Mix grated carrots, flour, cheese, baking powder, salt, black pepper, and garlic powder in a bowl.
  • Whisk milk, eggs, and oil in a separate bowl.
  • Combine wet and dry ingredients until just mixed.
  • Grease the waffle maker, pour batter, and cook until golden, about 3-5 minutes.
  • Serve warm with toppings like yogurt, fruit, or honey.

Notes

For a vegan version, use plant-based cheese and milk.
Calories: 250kcal
Cost: $15
Course: Lunch, Snack
Cuisine: Healthy
Keyword: Carrots

Nutrition

Calories: 250kcal | Carbohydrates: 30g | Protein: 12g | Fat: 10g | Sodium: 400mg

Loved this recipe? Save it to your favorite Pinterest board so you can easily find it later! It’s the perfect way to keep all your sweet ideas in one place. ✨

Tasty carrot waffles, lightly crispy, arranged beautifully with a warm, inviting background and soft shadows.

Unleash the Flavor: Discover the Cheesy Chicken Riced Cauliflower Casserole

Welcome to your next culinary adventure! If you’re ready to transform your weeknight dinners into something truly spectacular, you’re in the right place. This Cheesy Chicken Riced Cauliflower Casserole is not just a dish; it’s a celebration of bold flavors and heartwarming textures. Dive into the delightful world of creamy, cheesy goodness combined with the nutritious crunch of riced cauliflower. Let’s turn up the heat and make your taste buds dance!

Why You’ll Love This Recipe

  • Healthy Indulgence: This casserole is a low-carb dream, perfect for those watching their waistlines without sacrificing flavor.
  • Quick and Easy: With straightforward steps, you’ll have this dish ready in no time—ideal for busy weeknights!
  • Meal Prep Friendly: Make it ahead of time and refrigerate for a hassle-free dinner option that doesn’t skimp on taste.
  • Versatile Taste: Packed with ingredients that can be easily swapped based on what you have on hand, it’s a customizable canvas for your culinary creativity.
  • Family Favorite: With its creamy texture and cheesy delight, this dish is sure to please even the pickiest eaters at your table.

Ingredient Breakdown

Let’s take a closer look at the ingredients that make this casserole a flavor-packed masterpiece:

  • 1 tbsp avocado oil: A healthy fat that adds richness and helps sauté the onions.
  • ½ medium onion, diced: Provides aromatic depth and sweetness.
  • 12 oz frozen riced cauliflower: The star of the show, offering a low-carb base that soaks up all the flavors.
  • 3 cloves garlic, minced: Adds a pungent kick that elevates the entire dish.
  • ½ cup milk: Creaminess for the sauce; feel free to use almond or oat milk for a dairy-free option.
  • 4 tbsp cream cheese: The secret to a rich, velvety sauce.
  • ½ cup plain Greek yogurt: Adds tanginess and creaminess while boosting protein content.
  • 3 cups cooked and shredded chicken: Use rotisserie chicken for a quick option!
  • 1½ cups cooked white jasmine rice: Adds substance and texture, making it a filling meal.

Pro Tips for Casserole Success

Side view of a creamy, cheesy casserole featuring riced cauliflower and shredded chicken.

Before you dive into the cooking process, here are some pro tips to ensure your casserole turns out perfectly:

  • Dry Riced Cauliflower: Squeeze out excess moisture from the riced cauliflower to prevent a watery casserole.
  • Use Fresh Herbs: Add chopped fresh parsley or chives before serving for a burst of color and flavor.
  • Don’t Rush the Cheese: Allow your cheese to melt slowly into the sauce for that creamy texture.
  • Layer Flavors: Don’t hesitate to add your favorite spices or veggies—bell peppers, mushrooms, or spinach are great options!
  • Adjust Seasonings: Taste as you go! Everyone’s palate is different, so feel free to tweak salt and pepper levels.
  • Rest Before Serving: Let the casserole sit for 10-15 minutes after baking for the best texture.
  • Make Ahead: Assemble the casserole the night before and pop it in the oven when you’re ready to eat.
  • Experiment with Cheeses: Try different cheese blends for varied flavor profiles—smoked gouda or pepper jack can add a nice twist!

Common Mistakes and Troubleshooting

Even the best chefs face challenges. Here are some common pitfalls and how to avoid them:

  • Watery Casserole: Always ensure your riced cauliflower is thoroughly dried before mixing.
  • Cheese Not Melting: Make sure your cream cheese is at room temperature to help it blend smoothly into the sauce.
  • Overboiling the Casserole: Keep an eye on the baking time to avoid overcooking and drying out your dish.

Flavorful Variations

If you’re feeling adventurous, here are some variations to mix things up:

  • Mexican Twist: Add taco seasoning and diced jalapeños for a spicy kick.
  • Buffalo Chicken: Mix in buffalo sauce for a fiery version that’s perfect for game day.
  • Vegetarian Delight: Swap chicken for sautéed mushrooms and add extra veggies—zucchini or bell peppers work beautifully.
  • Italian Inspired: Incorporate Italian sausage and a sprinkle of parmesan cheese for a flavorful twist.

Storage and Make-Ahead Instructions

This casserole is perfect for meal prep. Here’s how to store it:

  • Refrigerator: Store leftovers in an airtight container for up to 4 days. Reheat in the oven or microwave.
  • Freezer: Freeze assembled (but uncooked) casserole for up to 2 months. Thaw overnight in the fridge before baking.
  • Make Ahead: Prepare the casserole up to the baking step, cover tightly with foil, and refrigerate for up to 24 hours. Add extra baking time if baking straight from the fridge.

Nutrition Tips and Dietary Adaptations

This Cheesy Chicken Riced Cauliflower Casserole not only satisfies cravings but can also fit various dietary needs:

  • Gluten-Free: All ingredients are naturally gluten-free, making this dish a great option for those with gluten sensitivities.
  • Keto-Friendly: With its low-carb content, it’s a perfect fit for keto dieters.
  • Dairy-Free Option: Substitute dairy products with plant-based alternatives to make it dairy-free.

Equipment Recommendations

Having the right tools can make your cooking experience smoother:

  • Large Skillet or Dutch Oven: For sautéing your aromatics and combining ingredients.
  • 9×13 Inch Baking Dish: Perfect size for this casserole and easy to serve from.
  • Measuring Cups and Spoons: Essential for accuracy in your ingredients.
  • Wooden Spoon or Spatula: For mixing and folding ingredients without scratching your cookware.

Serving Suggestions

This casserole is a complete meal on its own, but here are some ideas to elevate your dining experience:

  • Side Salad: Pair with a light vinaigrette salad for a refreshing contrast.
  • Steamed Vegetables: Broccoli or green beans add color and nutrients.
  • Crusty Bread: A slice of your favorite bread can make the perfect side for soaking up all that cheesy goodness.

FAQ: Your Questions Answered

  • Can I use fresh cauliflower instead of frozen? Yes, just make sure to rice it and remove excess moisture!
  • How do I make it spicier? Add red pepper flakes or diced jalapeños for an extra kick.
  • What can I substitute for chicken? Try chickpeas or lentils for a vegetarian option.
  • How long does it take to reheat? Reheat in the oven at 350°F (175°C) for about 20 minutes.
  • Can I freeze leftovers? Absolutely! Store in an airtight container for up to 2 months.
  • Is this recipe kid-friendly? Yes! The cheesy flavor is usually a hit with kids.
  • What’s the best cheese to use? A blend of sharp cheddar and Monterey Jack provides great flavor and melt.
  • Can I make this dish dairy-free? Yes! Use non-dairy cream cheese and yogurt alternatives.

Conclusion: Get Ready to Spice Up Your Dinner Table

Your culinary journey is just beginning with this Cheesy Chicken Riced Cauliflower Casserole. Embrace the adventure of cooking with spice and flavor, and watch as this dish becomes a beloved staple in your home. Remember, cooking is all about experimentation, so don’t hesitate to make it your own. Grab your skillet, turn up the heat, and let’s create some unforgettable meals together!

Cheesy Chicken Riced Cauliflower Casserole

Prep Time 20 minutes
Cook Time 40 minutes
Total Time 1 hour
Servings 6 servings
Calories 550
A creamy, cheesy casserole combining tender chicken, riced cauliflower, and spinach, perfect for a comforting meal.

Ingredients

Main ingredients

  • 1 tbsp avocado oil or neutral tasting oil (plus extra for greasing)
  • 0.5 medium onion (diced)
  • 340.2 g frozen riced cauliflower (approx. 3.5 cups)
  • 1 tsp kosher salt (or to taste)
  • 0.5 tsp ground black pepper (or to taste)
  • 3 cloves garlic (minced)
  • 118.29 ml milk
  • 0.5 tsp garlic powder
  • 1.5 tsp Italian seasoning
  • 1 tbsp Dijon mustard
  • 4 tbsp cream cheese (softened)
  • 118.29 ml plain Greek yogurt
  • 3 cups baby spinach (roughly chopped)
  • 3 cups cooked and shredded chicken breasts (or rotisserie chicken)
  • 1.5 cups cooked white jasmine rice

Instructions 

  • Preheat oven to 375°F (190°C). Grease a 9x13 inch dish.
  • Cook, shred, and dry chicken. Sauté or microwave cauliflower, then squeeze out moisture.
  • Sauté onions and garlic, then melt in cream cheese. Whisk in broth, milk, yogurt, and seasonings.
  • Stir in shredded cheese until melted. Combine chicken, cauliflower, and optional veggies in a bowl.
  • Pour sauce over mixture, fold in remaining cheese, then transfer to baking dish. Top with extra cheese.
  • Cover with foil, bake 25 minutes. Uncover and bake 15-20 minutes until golden. Rest before serving.

Notes

For best results, squeeze out excess moisture from cauliflower thoroughly to prevent sogginess.
Calories: 550kcal
Cost: $15
Course: Main Course
Cuisine: American
Keyword: Cauliflower, Cheese, chicken

Nutrition

Calories: 550kcal | Carbohydrates: 40g | Protein: 45g | Fat: 25g | Sodium: 900mg

Why You’ll Love This Wrap

Welcome to the vibrant world of culinary delight, where every bite tells a story and ignites your taste buds! The Chicken Avocado Wrap Recipe is not just a meal; it’s an adventure waiting to unfold in your kitchen. Imagine sinking your teeth into a soft, whole wheat tortilla filled with juicy shredded chicken, creamy avocado, and a crunch of fresh vegetables. This wrap combines textures and flavors that dance harmoniously on your palate, and it’s all packed in a convenient, portable wrap that’s perfect for any occasion.

Whether you’re enjoying a quick lunch at home, prepping for a picnic, or looking for a satisfying dinner option, this wrap ticks all the boxes. Plus, it’s loaded with protein, healthy fats, and a sprinkle of bold seasoning that will make you feel alive with every bite. Embrace the thrill of cooking with this easy-to-follow recipe that encourages creativity and experimentation in the kitchen. Let’s dive deeper into what makes this wrap a standout in your recipe collection!

Ingredients You’ll Need

Here’s what you’ll need to create this delicious Chicken Avocado Wrap:

  • 2 cooked chicken breasts, shredded
  • 1 ripe avocado, sliced
  • 1 cup lettuce, shredded
  • 1 medium tomato, diced
  • 1/4 cup red onion, thinly sliced
  • 2 whole wheat tortillas
  • 1/4 cup Greek yogurt or ranch dressing
  • Salt and pepper to taste

Gather these ingredients and prepare to transform them into a flavor-packed experience!

Steps to Create Your Wrap

An appetizing Chicken Avocado Wrap showcasing vibrant ingredients, captured in soft, natural light.

1. Prepare Your Ingredients

To kick things off, let’s put together our filling. In a large mixing bowl, combine the shredded chicken, diced tomato, and thinly sliced red onion. These ingredients will create a savory base that’s both satisfying and delicious. Don’t forget to season generously with salt and pepper to enhance the flavors. Give it a good mix and set it aside.

2. Warm the Tortillas

Next up, it’s time to warm those tortillas. This step is crucial as it makes the tortillas more pliable, preventing them from tearing when you roll them up. You can heat them in the microwave for about 10-15 seconds or on a dry skillet for a few seconds on each side until they’re warm and flexible.

3. Assemble the Wraps

Now comes the fun part! Lay the warm tortillas flat on a clean surface. Spread about 2 tablespoons of your Greek yogurt or ranch dressing on each tortilla. The creamy dressing acts as a flavor enhancer and helps hold everything together.

Next, layer the shredded lettuce, followed by the creamy avocado slices, and finally, the chicken mixture you prepared earlier. Each layer adds a different texture and flavor—crunchy, creamy, and savory—making every bite an explosion of taste!

4. Wrap It Up

To wrap it up (literally!), fold in the sides of the tortilla and roll it up tightly from the bottom to the top. This technique ensures that all the delicious fillings stay tucked inside, ready for a delightful bite.

5. Serve and Enjoy!

For a beautiful presentation, cut the wrap in half diagonally and serve immediately. You can also serve these wraps with your favorite sides, such as chips, salsa, or a refreshing salad. The combination of flavors will surely leave you and your guests craving more!

Serving Suggestions

To elevate your dining experience, here are some delectable serving suggestions:

  • Chips and Salsa: A classic combination that never disappoints! Serve your wraps with crispy tortilla chips and a zesty salsa for a delightful crunch.
  • Fresh Fruit: Add a refreshing touch by pairing your wraps with a side of fresh fruit like sliced strawberries or pineapple chunks.
  • Mixed Greens Salad: Balance the meal with a light mixed greens salad dressed with a simple vinaigrette.
  • Sweet Potato Fries: These crispy delights complement the wrap perfectly, adding a sweet and savory contrast.
  • Cucumber Tomato Salad: A light salad tossed with olive oil and lemon juice is a refreshing side that brightens the meal.

Cooking Tips for Perfection

Here are some essential tips to make your Chicken Avocado Wraps even more delicious:

  • Use Pre-Cooked Chicken: To save time, opt for rotisserie chicken or leftovers. It’s a great way to cut down on prep time while still enjoying tender chicken.
  • Choose Ripe Avocados: Look for avocados that yield slightly to gentle pressure. This ensures they’re creamy and perfect for your wraps.
  • Season Well: Don’t shy away from seasoning your chicken and veggies. A sprinkle of your favorite spices can elevate the flavor profile.
  • Wrap Tightly: A tight wrap helps keep everything together and makes for easier eating. Tuck in the sides as you roll!

Variations to Explore

Feeling adventurous? Here are some variations to try with your Chicken Avocado Wraps:

  • Spicy Kick: Add sliced jalapeños or a drizzle of sriracha for an extra kick.
  • Southwestern Twist: Incorporate black beans and corn for a hearty, southwestern-inspired wrap.
  • Vegetarian Option: Swap the chicken for grilled veggies or chickpeas for a plant-based version.

Storage and Freezing Tips

If you have leftovers (which is rare because they’re so good!), here’s how to store them:

  • Refrigeration: Wrap any leftover wraps tightly in plastic wrap or aluminum foil and store them in the refrigerator for up to 24 hours.
  • Freezing: For longer storage, you can freeze the wraps. Just make sure to assemble them without the dressing, as this can make them soggy. Wrap tightly and store in a freezer-safe bag for up to 2 months.

FAQs About Your Chicken Avocado Wrap

Can I make these wraps ahead of time?

Yes! Prepare the filling ingredients in advance and assemble them just before serving. This keeps the wraps fresh and crunchy.

How do I prevent the avocado from browning?

A squeeze of lemon or lime juice on the avocado slices before assembling helps prevent oxidation and keeps them looking fresh.

Are these wraps suitable for meal prep?

Absolutely! These wraps can be prepared in advance, just store the filling separately to avoid sogginess.

Conclusion

Cooking is all about exploration and creativity, and the Chicken Avocado Wrap Recipe embodies that adventurous spirit. With its simple ingredients and bold flavors, this wrap is not just a meal—it’s an invitation to experiment and enjoy the art of cooking. So whether you’re whipping it up for a casual lunch or impressing guests at dinner, let this wrap remind you that great food doesn’t have to be complicated. Grab your skillet, embrace the fire of your passion, and let every bite of this delicious wrap be a celebration of flavor and joy. Happy cooking!

Chicken Avocado Wrap Recipe

Prep Time 10 minutes
Total Time 10 minutes
Servings 2 servings
Calories 450
A delicious and healthy chicken avocado wrap perfect for a quick lunch or dinner. Fresh ingredients come together in a flavorful, portable meal.

Ingredients

Protein

  • 2 pieces cooked chicken breasts, shredded
  • 1 pieces ripe avocado, sliced

Vegetables

  • 1 cup lettuce, shredded
  • 1 medium tomato, diced
  • 0.25 cup red onion, thinly sliced

Wraps and Spreads

  • 2 pieces whole wheat tortillas
  • 0.25 cup greek yogurt or ranch dressing

Instructions 

  • Mix shredded chicken, diced tomato, and red onion.
  • Add salt and pepper, then mix well.
  • Spread dressing on each tortilla.
  • Layer lettuce, avocado, and chicken mixture on tortillas.
  • Fold sides and roll up tightly.
  • Cut in half and serve immediately.

Notes

Use ripe avocados for best flavor and texture.
Calories: 450kcal
Cost: $12
Course: Main Course
Cuisine: American
Keyword: Avocado, chicken

Nutrition

Calories: 450kcal | Carbohydrates: 40g | Protein: 35g | Fat: 15g | Sodium: 600mg

Loved this recipe? Save it to your favorite Pinterest board so you can easily find it later! It’s the perfect way to keep all your sweet ideas in one place. ✨

A detailed shot of a Chicken Avocado Wrap revealing its colorful filling and warm tortilla.

Why This Recipe is a Game-Changer

In a world where grocery prices seem to be climbing higher every day, finding a way to eat well without breaking the bank is not just a smart choice; it’s essential. This dish perfectly embodies the spirit of affordability while also delivering a flavor punch that will leave your taste buds dancing. Here’s how to make cheap meals without sacrificing flavor, bringing a culinary adventure to your table that proves you can enjoy delightful dinners, even on a budget.

Ingredients That Pack a Punch

Let’s break down the ingredients you’ll need for this vibrant and budget-friendly meal:

  • 2 cups of rice or pasta: Your choice here can set the stage for your meal. Rice is comforting and versatile, while pasta brings a delightful chewiness.
  • 1 can of beans: Opt for black, kidney, or chickpeas. Beans are a fantastic source of protein and fiber, making them an excellent addition to any meal.
  • 1 cup frozen mixed vegetables: These are a lifesaver! They add color, nutrition, and convenience — no chopping required.
  • 1 onion, chopped: The aromatic base of your dish, adding sweetness and depth.
  • 2 cloves garlic, minced: Because everything is better with garlic, right?
  • 2 tablespoons olive oil: For sautéing, it adds richness and a healthy fat component.
  • 1 teaspoon paprika: This spice adds warmth without overwhelming heat, a beautiful hue, and depth of flavor.
  • 1 teaspoon cumin: Earthy and aromatic, cumin is the spice that brings everything together.
  • Salt and pepper to taste: Simple, but necessary for balancing flavors.
  • Fresh herbs (optional): Parsley or cilantro work wonders as a garnish, bringing freshness and vibrancy to your dish.

Steps to Culinary Excellence

A vibrant mixture of rice, canned beans, and frozen vegetables in a cozy kitchen setting.

Ready to create a dish that’s not only easy to make but also packed with flavor? Follow these simple steps:

  1. In a large pot, heat the olive oil over medium heat.
  2. Add the chopped onion and minced garlic; sauté until soft and fragrant, about 3-5 minutes.
  3. Stir in the paprika and cumin, cooking for another minute to release the flavors.
  4. Add the rice or pasta to the pot, stirring well to coat with the onion and spices.
  5. Pour in 4 cups of water (or as directed for pasta) and bring to a boil.
  6. Once boiling, reduce the heat to low, cover, and let simmer until the rice or pasta is cooked (about 15-20 minutes for rice, or according to pasta package instructions).
  7. In the last 5 minutes of cooking, add the canned beans and frozen mixed vegetables to the pot, stirring to combine.
  8. Season with salt and pepper to taste, and cook until everything is heated through.
  9. Serve warm, garnished with fresh herbs if desired.

Tips for Success

Cooking is as much about technique as it is about flavor. Here are some tips to ensure your dish comes out perfectly:

  • Don’t rush the sauté: Allowing the onion and garlic to soften and become fragrant before adding spices is key to developing layers of flavor.
  • Experiment with spices: If you’re feeling adventurous, consider adding a pinch of cayenne or chili powder for a kick, or a dash of curry powder for a different flavor profile.
  • Use vegetable broth: If you’re cooking rice or pasta, substitute water with vegetable broth to enhance the flavor even further.
  • Stir occasionally: This helps to prevent sticking and ensures even cooking.

Variations to Inspire

The beauty of this recipe lies in its adaptability. Here are some variations to keep things exciting:

  • Protein Boost: Add cooked chicken, beef, or tofu to increase protein content and make it more filling.
  • Switch Up the Veggies: Feel free to use any frozen vegetables you have on hand. Peas, corn, or bell peppers work beautifully!
  • Herb Infusion: Try adding dried herbs like oregano or thyme during the cooking process for a different flavor dimension.

Substitutions You Can Make

No need to stress if you’re missing an ingredient. Here are some substitutions:

  • Rice: Quinoa or couscous can serve as great alternatives.
  • Beans: Lentils are a fantastic swap, just adjust the cooking time accordingly.
  • Olive oil: Any cooking oil, like sunflower or canola oil, will work.

Essential Equipment

You don’t need a fancy kitchen to whip up this dish, but here’s what you’ll need:

  • A large pot or Dutch oven for cooking.
  • A wooden spoon or spatula for stirring.
  • A measuring cup for the rice or pasta.

Storage and Freezing Tips

This dish is perfect for meal prep! Here’s how to store it:

  • Refrigeration: Store in an airtight container in the fridge for up to 4 days.
  • Freezing: This dish freezes well. Portion it into freezer-safe containers, and it will last for up to 3 months. Just reheat thoroughly when you’re ready to enjoy it again!

FAQs to Consider

Sometimes you might have questions while cooking. Here are a few common ones:

  • Can I use fresh vegetables instead of frozen? Absolutely! Just make sure to cook them a bit longer until they’re tender.
  • What if I want a creamier texture? Consider adding a splash of cream or a dollop of sour cream just before serving.

Troubleshooting Common Issues

If things don’t go as planned, don’t worry! Here are some solutions:

  • Too dry? Add a little more water or broth and let it cook for a few more minutes.
  • Too salty? Adding a bit more rice or pasta can help balance the flavors.

Conclusion: Your Budget-Friendly Adventure Awaits

This dish is more than just a meal; it’s an invitation to explore the world of flavors without emptying your wallet. With a handful of simple ingredients, you can craft something truly special that brings warmth and joy to your table. So gather your ingredients, unleash your inner chef, and remember: cooking is an adventure meant to be enjoyed. Embrace the spice, savor the flavors, and relish the satisfaction of creating something delicious on a budget. Happy cooking!

How to Make Cheap Meals Without Sacrificing Flavor

Prep Time 10 minutes
Cook Time 20 minutes
Total Time 30 minutes
Servings 4 servings
Calories 450
This budget-friendly recipe combines simple ingredients to create a flavorful and satisfying meal with rice or pasta, beans, and vegetables.

Ingredients

Main

  • 2 cups rice or pasta
  • 1 can beans (black, kidney, or chickpeas)
  • 1 cup frozen mixed vegetables
  • 1 piece onion, chopped
  • 2 cloves garlic, minced
  • 2 tablespoons olive oil
  • 1 teaspoon paprika
  • 1 teaspoon cumin
  • to taste salt and pepper
  • optional fresh herbs (parsley or cilantro) for garnish

Instructions 

  • Heat olive oil in a large pot over medium heat.
  • Sauté chopped onion and minced garlic until soft, about 3-5 minutes.
  • Add paprika and cumin, cook for 1 minute.
  • Stir in rice or pasta, then add water and bring to a boil.
  • Reduce heat, cover, and simmer until cooked (15-20 min). In last 5 min, add beans and vegetables, season, and heat through.

Notes

Using frozen vegetables and canned beans keeps costs low and preparation quick.
Calories: 450kcal
Cost: $10
Course: Main Course
Cuisine: Global
Keyword: Beans, Budget, vegetables

Nutrition

Calories: 450kcal | Carbohydrates: 80g | Protein: 15g | Fat: 10g | Sodium: 600mg

Loved this recipe? Save it to your favorite Pinterest board so you can easily find it later! It’s the perfect way to keep all your sweet ideas in one place. ✨

An appetizing dish featuring rice, beans, mixed vegetables, and spices, beautifully displayed in warm lighting.

Why You’ll Crave This Creamy Keto Chicken Alfredo Casserole

Are you ready to dive into a world where comfort food meets culinary adventure? This creamy keto chicken alfredo casserole does just that! With its luscious layers of tender chicken, velvety cream, and a symphony of cheeses, this dish is not just a meal; it’s an experience. Perfect for busy weeknights or impressing guests, this recipe is a testament to how low-carb can be anything but boring. Let’s uncover why you’ll love this dish and how it can become a staple in your kitchen.

  • Quick and Easy: Ready in just 40 minutes, this casserole is perfect for those hectic evenings when you need a delicious meal in a flash.
  • Low-Carb and Keto-Friendly: With minimal carbs, you can indulge without guilt, making it a great choice for anyone on a keto diet.
  • Flavor Explosion: The combination of garlic, cream, and cheese creates an unforgettable flavor profile that dances on your taste buds.
  • Versatile Meal: Serve it as a main dish or a side; it pairs beautifully with salads or roasted veggies.
  • Crowd-Pleaser: Even non-keto eaters will love the creamy texture and cheesy topping, making it a hit at gatherings.

Ingredients to Create Your Culinary Masterpiece

Let’s talk about the stars of the show: ingredients! Here’s what you’ll need to whip up this amazing keto chicken alfredo casserole:

  • 3 cups cooked and shredded chicken breast or thighs: Use leftover rotisserie chicken for a quick shortcut or any cooked chicken you have on hand.
  • 1 cup heavy cream: This is your creamy base, ensuring that every bite is rich and indulgent.
  • 4 ounces cream cheese, softened: Enhances the creaminess and adds a tang that elevates the dish.
  • 2 tablespoons unsalted butter: For sautéing the garlic and adding depth of flavor.
  • 2 cloves garlic, minced: Fresh garlic is a must for that aromatic kick.
  • 1 cup freshly grated Parmesan cheese: Freshly grated ensures a smooth and flavorful melt.
  • 1 cup shredded mozzarella cheese: For that gooey, cheesy top.
  • 2 cups broccoli florets, lightly steamed or blanched: Adds color, nutrients, and a lovely crunch.
  • Salt and pepper, to taste: Essential for bringing out all the flavors.
  • 1 teaspoon Italian seasoning (optional): A delightful addition for a hint of herby goodness.

Cooking Your Casserole to Perfection

Now that we have our ingredients lined up, let’s get to cooking! Follow these steps closely to ensure your casserole turns out perfectly:

  1. Preheat your oven to 375°F (190°C).
  2. Shred the cooked chicken and set aside in a large mixing bowl.
  3. Lightly steam or blanch the broccoli florets until tender-crisp. Drain and set aside.
  4. In a large skillet, melt the butter over medium heat. Add minced garlic and sauté until fragrant, about 1 minute.
  5. Stir in the cream cheese and heavy cream, whisking until smooth.
  6. Add grated Parmesan cheese and continue cooking until the sauce thickens, about 3-5 minutes. Season with salt, pepper, and Italian seasoning if using.
  7. Pour the Alfredo sauce over the shredded chicken and broccoli in the mixing bowl. Stir until evenly coated.
  8. Spread the mixture into a 9×13 casserole dish. Top with shredded mozzarella cheese.
  9. Bake uncovered for 20-25 minutes, or until the cheese is melted and golden brown.
  10. Allow the casserole to rest for 5 minutes before serving.

Pro Tips for Culinary Success

Side view of a delicious creamy chicken casserole with broccoli and a golden cheese topping.

Here’s where I share some insider secrets to elevate your casserole game:

  • Use fresh ingredients: Whenever possible, opt for fresh garlic and high-quality cheese for the best flavor.
  • Don’t overcook the broccoli: You want it tender-crisp to maintain a nice texture in the casserole.
  • Experiment with spices: Feel free to add a pinch of red pepper flakes for a little heat or fresh herbs like basil or parsley for brightness.
  • Make it ahead: Assemble the casserole in advance and refrigerate. Just pop it in the oven when you’re ready to eat!
  • Customize the protein: Swap chicken for shrimp or sausage if you’re feeling adventurous.
  • Perfect your sauce: If the sauce is too thick, a splash of chicken broth can help loosen it up.
  • Opt for a crispy topping: Mix some almond flour with parmesan for a crunchy topping that adds texture.
  • Check for doneness: Make sure the casserole is bubbling and the cheese is golden brown before pulling it out of the oven.

Common Mistakes to Avoid

Let’s ensure your casserole shines by avoiding these common pitfalls:

  • Overcooking: Keep an eye on the baking time; you want the cheese bubbly, not burnt!
  • Skipping the seasoning: Don’t forget to season your sauce well; otherwise, the flavor can fall flat.
  • Using pre-shredded cheese: It often contains anti-caking agents that affect the melting quality.
  • Not letting it rest: Allowing the casserole to sit for a few minutes after baking helps it set and makes serving easier.

Variations to Spice It Up

Feeling creative? Here are some exciting variations to keep your meals fresh:

  • Buffalo Chicken Alfredo: Mix in buffalo sauce for a spicy kick that pairs perfectly with creamy ranch dressing.
  • Mediterranean Twist: Add sun-dried tomatoes, olives, and feta cheese for a vibrant Mediterranean flavor.
  • Veggie-Packed: Swap half the chicken for more veggies like spinach, bell peppers, or zucchini for a nutrient boost.
  • Cheesy Italian Bake: Mix in Italian sausage and top with a mix of mozzarella and provolone for an Italian-inspired dish.

Storage and Make-Ahead Instructions

This casserole is perfect for meal prep! Here’s how to store it:

  • Refrigerate: Store in an airtight container for up to 3-4 days.
  • Freeze: Wrap tightly in plastic wrap and foil. It can be frozen for up to 3 months. Just make sure to thaw it in the fridge overnight before baking.
  • Reheat: For best results, reheat in the oven at 350°F (175°C) until warmed through, about 20-25 minutes.

FAQs: Your Questions Answered

Got questions? I’ve got answers! Here are some common queries about this recipe:

  • Can I use frozen chicken? Yes, just ensure it’s fully cooked before adding it to the casserole.
  • Can I substitute for heavy cream? You can use half-and-half or coconut cream, but the texture may vary.
  • What if I don’t have broccoli? Feel free to replace it with cauliflower or spinach!
  • Is this recipe gluten-free? Yes! It’s naturally gluten-free as long as you use gluten-free cheese and sauces.
  • Can I make this dairy-free? Use a dairy-free cream cheese and coconut cream as a substitute.
  • How can I add more flavor? Try adding herbs or spices that you love, like Italian herbs or smoked paprika.
  • What should I serve with this casserole? A fresh garden salad or low-carb garlic bread pairs wonderfully!
  • How can I ensure my casserole isn’t dry? Make sure to coat the chicken and broccoli well with the sauce before baking.

Nutritional Tips and Dietary Adaptations

This creamy keto chicken alfredo casserole isn’t just delicious—it’s also packed with nutrients! Here are some tips to keep it healthy:

  • Protein Power: The chicken provides an excellent source of protein, essential for muscle repair and growth.
  • Healthy Fats: Heavy cream and cheese are great sources of healthy fats, keeping you satiated longer.
  • Low-Carb Goodness: With minimal carbs, this dish fits perfectly into a keto lifestyle, helping maintain energy levels without the sugar crash.
  • Vegetable Boost: Don’t skip the broccoli! It adds fiber, vitamins, and minerals to your meal.

Essential Equipment for Success

To whip up this casserole, here’s what you’ll need:

  • 9×13 casserole dish: Perfect for baking and serving your delicious creation.
  • Large mixing bowl: For combining your ingredients easily.
  • Skillet: A good non-stick skillet will help with sautéing garlic and mixing the sauce.
  • Whisk: Essential for achieving a smooth sauce without lumps.

Serving Suggestions: Elevate Your Dining Experience

Presentation matters! Here are some tips to serve your casserole with flair:

  • Garnish with fresh herbs: Add a sprinkle of parsley or basil on top for a burst of color.
  • Serve with a side: Pair with a bright salad or roasted vegetables to balance the richness of the casserole.
  • Offer dipping sauces: A side of ranch or marinara can add additional flavor and fun.

Conclusion: Embrace the Flavor

There you have it! My irresistible creamy keto chicken alfredo casserole is not just a recipe; it’s a celebration of flavors and creativity in the kitchen. I hope this dish inspires you to embrace the thrill of cooking with heart and a little fire. So grab those ingredients, unleash your culinary spirit, and enjoy every delicious bite. Happy cooking!

Creamy Keto Chicken Alfredo Casserole

Prep Time 10 minutes
Cook Time 25 minutes
Total Time 35 minutes
Servings 4 servings
Calories 650
A delicious low-carb casserole combining tender chicken, broccoli, and a rich Alfredo sauce topped with melted cheese.

Ingredients

Protein

  • 3 cups cooked and shredded chicken breast or thighs
  • 1 cup heavy cream
  • 4 ounces cream cheese, softened
  • 2 tablespoons unsalted butter
  • 2 cloves garlic, minced
  • 1 cup freshly grated Parmesan cheese
  • 1 cup shredded mozzarella cheese
  • 2 cups broccoli florets, lightly steamed or blanched
  • to taste Salt and pepper
  • 1 teaspoon Italian seasoning (optional)

Instructions 

  • Preheat oven to 375°F (190°C). Shred cooked chicken and set aside.
  • Steam or blanch broccoli until tender; drain and set aside.
  • Melt butter in a skillet, sauté garlic, then whisk in cream cheese and heavy cream until smooth.
  • Add Parmesan cheese, cook until sauce thickens, then season with salt, pepper, and Italian seasoning.
  • Mix sauce with chicken and broccoli, transfer to a casserole dish, top with mozzarella, and bake for 20-25 minutes.

Notes

For extra flavor, sprinkle with fresh herbs before serving.
Calories: 650kcal
Cost: $15
Course: Main Course
Cuisine: American
Keyword: Alfredo, chicken, Keto

Nutrition

Calories: 650kcal | Carbohydrates: 12g | Protein: 55g | Fat: 42g | Sodium: 950mg

Why You’ll Love This Dish

Picture this: a bustling kitchen filled with the tantalizing aroma of spicy buffalo sauce, hearty pasta, and melted cheese wafting through the air. That’s the magic of Buffalo Chicken Pasta, a dish that seamlessly merges the bold flavors of buffalo wings with the comforting embrace of creamy pasta. It’s a culinary adventure that not only satisfies cravings but also brings a vibrant touch to your dining table. Whether you’re hosting game day, a family dinner, or just craving something special, this dish is here to ignite your taste buds and warm your heart.

This isn’t just pasta; it’s an experience — where every bite delivers a punch of flavor and a swirl of creamy goodness. With tender chunks of chicken enveloped in a spicy buffalo sauce, tossed with al dente pasta, and topped with gooey cheddar, this dish is a celebration of all things delicious. Plus, it’s quick to prepare, making it the perfect choice for busy weeknights or when you want to impress guests without spending hours in the kitchen.

Ingredients You’ll Need

Gathering your ingredients is the first step to embarking on this delicious journey. Here’s what you’ll need:

  • 8 oz pasta (penne or rotini)
  • 1 lb cooked chicken, shredded
  • 1/2 cup buffalo sauce
  • 1 cup ranch dressing
  • 1 cup shredded cheddar cheese
  • 1/2 cup celery, diced
  • 1/4 cup green onions, sliced
  • Salt and pepper to taste
  • 1 tbsp olive oil

These ingredients come together to create a dish that is not only flavorful but also surprisingly easy to make. The combination of creamy ranch and tangy buffalo sauce gives it that signature kick that lovers of spicy food cherish!

Pro Tips for Perfection

Delicious bowl of Buffalo Chicken Pasta featuring colorful ingredients like celery and green onions.

To ensure your Buffalo Chicken Pasta turns out perfectly every time, consider these pro tips:

  • Cook Your Pasta Al Dente: Make sure to cook your pasta just until al dente. This means it should have a slight bite to it, as it will continue to cook when mixed with the hot sauce.
  • Balance the Heat: Buffalo sauce can be quite spicy, so start with a smaller amount and gradually add more to suit your heat preference. Remember, it’s easier to add spice than to take it away!
  • Layer the Flavors: When adding the buffalo sauce and ranch dressing, do so gradually. This allows you to taste and adjust the flavors as you go. The key is to create a harmonious blend that excites the palate without overwhelming it.
  • Garnish Generously: Don’t skimp on the garnishes! Fresh green onions and a sprinkle of extra cheese make for a beautiful presentation and add a fresh crunch.

Step-by-Step Instructions

Ready to dive into the cooking process? Let’s get to it!

  1. Start by boiling a large pot of salted water. Cook the pasta according to the package instructions until al dente. Once cooked, drain and set aside.
  2. In a large skillet, heat olive oil over medium heat. This will help create a beautiful base for your chicken and sauce.
  3. Add the shredded chicken to the skillet along with the buffalo sauce, stirring well to combine. Cook until heated through, about 3-4 minutes.
  4. Once the chicken is hot, stir in the ranch dressing and mix thoroughly until well blended.
  5. Now, it’s time to introduce the pasta! Add the cooked pasta to the skillet, tossing everything together until the pasta is evenly coated with that delicious buffalo-chicken mixture.
  6. Mix in the diced celery and half of the green onions, giving it one last good stir.
  7. Top the dish with the shredded cheddar cheese and cover the skillet with a lid. Allow it to sit for 2-3 minutes until the cheese is melted and gooey.
  8. Finally, season with salt and pepper to taste, garnish with the remaining green onions, and serve hot!

Exploring Variations

One of the beauties of Buffalo Chicken Pasta is its versatility. Here are a few variations to keep things exciting:

  • Vegetarian Version: Replace the chicken with roasted cauliflower or chickpeas. Toss them in buffalo sauce for that spicy kick without the meat.
  • Baked Casserole: Prepare as directed, then transfer to a baking dish. Top with extra cheese and breadcrumbs for a crunchy, baked version. Bake at 375°F (190°C) for about 20-25 minutes.
  • Lightened-Up Option: Use whole wheat pasta, Greek yogurt instead of some of the ranch dressing, and add more veggies like spinach or bell peppers to create a healthier alternative.

Storage and Freezing Tips

Planning ahead? Here’s how to store and freeze your Buffalo Chicken Pasta for later:

  • Refrigeration: Store leftovers in an airtight container in the fridge for up to 3 days. The flavors will deepen, making it even more delicious upon reheating.
  • Freezing: You can freeze this dish for up to 2 months. Allow it to cool completely, then pack in freezer-safe containers. Thaw overnight in the refrigerator before reheating gently on the stovetop, adding a splash of cream to restore the sauce’s consistency.

FAQs

Can I make this ahead of time?

Absolutely! You can prepare the dish up to a day in advance. Just remember that the sauce may thicken in the fridge, so be sure to add a splash of cream or milk when reheating.

How spicy is this dish?

The spice level is adjustable. Start with 1/2 cup of buffalo sauce for a moderate kick, and adjust according to your preference. You can always add more heat!

Can I use rotisserie chicken?

Definitely! Using shredded rotisserie chicken is a fantastic time-saver. Just stir it in when the recipe calls for the chicken.

What are the best pasta shapes for this recipe?

Pasta shapes like penne, rotini, or cavatappi are ideal as their ridges and crevices hold the sauce beautifully, ensuring every bite is packed with flavor.

Conclusion

Your culinary adventure awaits with this Buffalo Chicken Pasta recipe! It’s more than just a meal; it’s a hearty embrace of flavors that brings friends and family together around the table. With its perfect balance of spice and creaminess, this dish is sure to become a new favorite in your rotation. So don your apron, let the kitchen fill with the scent of buffalo sauce, and get ready to savor every delicious bite. Remember, cooking is all about adventure, so don’t be afraid to add your own twist to this recipe. Enjoy!

Buffalo Chicken Pasta

Prep Time 10 minutes
Cook Time 15 minutes
Total Time 25 minutes
Servings 4 servings
Calories 650
A creamy, spicy pasta dish combining shredded chicken, buffalo sauce, and cheesy goodness for a quick and satisfying meal.

Ingredients

Pasta

  • 8 oz pasta (penne or rotini)

Cooked chicken

  • 1 lb cooked chicken, shredded

Sauces and dressings

  • 0.5 cup buffalo sauce
  • 1 cup ranch dressing

Cheese and vegetables

  • 1 cup shredded cheddar cheese
  • 0.5 cup celery, diced
  • 0.25 cup green onions, sliced

Other

  • 1 tbsp olive oil
  • to taste salt and pepper

Instructions 

  • Cook pasta according to package instructions; drain and set aside.
  • Heat olive oil in a skillet over medium heat.
  • Add shredded chicken and buffalo sauce; cook until heated through.
  • Stir in ranch dressing, then add cooked pasta and toss to coat.
  • Mix in diced celery and green onions, top with cheddar cheese, and season with salt and pepper before serving.

Notes

For extra flavor, sprinkle with additional green onions or hot sauce.
Calories: 650kcal
Cost: $15
Course: Main Course
Cuisine: American
Keyword: Buffalo Chicken, pasta

Nutrition

Calories: 650kcal | Carbohydrates: 70g | Protein: 45g | Fat: 30g | Sodium: 1500mg

Loved this recipe? Save it to your favorite Pinterest board so you can easily find it later! It’s the perfect way to keep all your sweet ideas in one place. ✨

Eye-level view of a hearty Buffalo Chicken Pasta dish, showcasing its rich textures and colors.

Why You’ll Love This Dish

In a world packed with culinary trends, sometimes all you need is a plate of vibrant flavors that sing with every bite. This Garlic Broccoli Stir Fry with Chickpeas is your ticket to an exhilarating dining experience! Imagine tender broccoli florets drenched in a luscious garlic sauce, perfectly complemented by the nutty crunch of chickpeas. It’s not just about feeding your body; it’s about igniting your senses and embarking on a culinary adventure that’s as exciting as it is healthy.

Whether you’re a seasoned chef or a kitchen novice, this stunning stir fry is a breeze to whip up. Packed with protein and bursting with flavor, it’s a fantastic vegan dish that even the meat lovers in your life will crave. So grab your skillet, turn up the heat, and let’s dive into the delectable world of garlic broccoli stir fry!

Overview of Ingredients

To make this vegan chickpea stir fry, you’ll need a handful of simple yet powerful ingredients. Each component plays a role in creating a harmonious balance of flavors:

  • 2 cups broccoli florets: Fresh, crisp, and vibrant, broccoli is the star of this dish, providing both texture and nutrients.
  • 1 can (15 oz) chickpeas: These little legumes are a powerhouse of protein and fiber, making this dish filling and satisfying.
  • 4 cloves garlic: The aromatic backbone of our stir fry, garlic infuses every bite with its bold, pungent flavor.
  • 2 tablespoons olive oil: For sautéing, olive oil adds richness and promotes the absorption of flavors.
  • 1 tablespoon soy sauce: This classic ingredient brings umami depth and a savory kick that elevates the dish.
  • 1 teaspoon sesame oil: A little goes a long way; this oil adds a nutty flavor that complements the stir fry beautifully.
  • Salt and pepper to taste: Essential for enhancing the natural flavors of the ingredients.
  • Red pepper flakes (optional): For those who dare to add a hint of heat, these flakes will spice up your dish.
  • Sesame seeds for garnish (optional): A delightful finishing touch that adds a nutty crunch and visual appeal.

How To Make Garlic Broccoli Stir Fry

An eye-level image of a colorful stir fry featuring garlic sautéed broccoli and chickpeas, garnished with sesame seeds.

Ready to unleash your inner chef? This recipe is designed for simplicity and flavor, making it perfect for a weeknight dinner. Let’s get cooking!

Step-by-Step Instructions

  1. Start by heating 2 tablespoons of olive oil in a large skillet over medium heat. Watch it shimmer, signaling that it’s time to add flavor.
  2. Add the minced garlic to the skillet. Sauté for about 1 minute until the garlic becomes fragrant. The aroma will be intoxicating, so enjoy it!
  3. Next, toss in the broccoli florets. Stir-fry for 3-4 minutes until they are bright green and slightly tender. You want them to retain a bit of crunch!
  4. Now, stir in the drained and rinsed chickpeas. Continue to cook for another 3-4 minutes, stirring occasionally. The chickpeas will warm up and soak in all that garlicky goodness.
  5. Pour in the soy sauce, sesame oil, and season with salt and pepper to taste. If you’re feeling adventurous, sprinkle in some red pepper flakes for a kick.
  6. Cook for an additional 2 minutes to heat everything through, then remove from heat.
  7. For the final touch, garnish with sesame seeds if desired and serve warm. Pair it with rice or enjoy it solo!

Tips for the Best Stir Fry

Here are some insider tips to elevate your stir fry game:

  • High Heat is Key: Stir frying works best at high temperatures, allowing you to cook quickly while retaining the vegetables’ crispness.
  • Prep Ahead: Chop your ingredients beforehand for a seamless cooking experience. This dish cooks fast, so you won’t want to scramble around looking for your ingredients.
  • Don’t Overcrowd: If you’re making a larger batch, consider cooking in two batches. Overcrowding the pan can result in steaming instead of frying.

Variations to Explore

Feeling adventurous? Here are some variations to keep things exciting:

  • Tofu Twist: Swap chickpeas for firm tofu for a delightful vegan protein boost. Simply cube the tofu and sauté it until golden before adding the remaining ingredients.
  • Veggie Medley: Introduce other colorful vegetables like bell peppers, snap peas, or carrots for a vibrant stir fry full of different textures and flavors.
  • Grains Galore: Serve it over quinoa, brown rice, or even cauliflower rice for a low-carb option that packs a punch.

Substitutions You Can Make

Don’t have something on hand? No problem! Here are some easy substitutions:

  • Use coconut aminos instead of soy sauce for a gluten-free option.
  • If you don’t have sesame oil, peanut oil or another neutral oil will work just fine.
  • Fresh garlic can be substituted with garlic powder if you’re in a pinch.

Storage and Freezing

This stir fry is perfect for meal prep! Here’s how to store it:

  • Refrigerator: Store leftovers in an airtight container in the fridge for up to 3 days.
  • Freezer: You can freeze this dish for up to one month. Just make sure to let it cool completely before transferring it to a freezer-safe container.

Frequently Asked Questions

Can I make this dish ahead of time?

Absolutely! You can prep all your ingredients and store them separately. When you’re ready to eat, just stir fry everything together.

What can I serve with garlic broccoli stir fry?

This dish pairs beautifully with rice, quinoa, or even a side of noodles. It’s versatile enough to complement any grain!

Is this recipe gluten-free?

To make this stir fry gluten-free, simply use tamari instead of soy sauce.

Troubleshooting Common Issues

If you find your stir fry turning out soggy or bland, here are some quick fixes:

  • For sogginess, ensure you’re cooking on high heat and not overcrowding the pan.
  • If the flavors aren’t strong enough, try adding more soy sauce or seasoning to taste.

In Conclusion

This Garlic Broccoli Stir Fry with Chickpeas is more than a meal; it’s an experience that will awaken your palate and fill your kitchen with vibrant aromas. Cooking is an adventure, and this dish is a testament to how simple ingredients can create something extraordinary. So, gather your loved ones, share this recipe, and let the flavors dance on your tongues. Remember, cooking is about exploration—so don’t hesitate to play around with flavors and make it your own. Happy cooking, and may your culinary journey be as fiery and flavorful as the dishes you create!

GARLIC BROCCOLI STIR FRY WITH CHICKPEAS

Prep Time 5 minutes
Cook Time 10 minutes
Total Time 15 minutes
Servings 4 servings
Calories 250
A quick and healthy stir-fry combining crisp broccoli, hearty chickpeas, and flavorful garlic for a satisfying meal.

Ingredients

Vegetables

  • 2 cups broccoli florets
  • 1 can (15 oz) chickpeas, drained and rinsed
  • 4 cloves garlic, minced
  • 2 tablespoons olive oil
  • 1 tablespoon soy sauce
  • 1 teaspoon sesame oil
  • to taste salt and pepper
  • optional red pepper flakes
  • optional sesame seeds for garnish

Instructions 

  • Heat olive oil in a skillet over medium heat.
  • Sauté garlic for 1 minute until fragrant.
  • Add broccoli and stir-fry 3-4 minutes until bright green and tender.
  • Mix in chickpeas and cook 3-4 minutes, stirring occasionally.
  • Stir in soy sauce, sesame oil, salt, pepper, and red pepper flakes; cook 2 minutes.
  • Garnish with sesame seeds and serve warm.

Notes

Feel free to add a squeeze of lemon for extra freshness.
Calories: 250kcal
Cost: $10
Course: Main Course
Cuisine: Asian-inspired
Keyword: Broccoli, Chickpeas, garlic

Nutrition

Calories: 250kcal | Carbohydrates: 35g | Protein: 10g | Fat: 8g | Sodium: 600mg

Loved this recipe? Save it to your favorite Pinterest board so you can easily find it later! It’s the perfect way to keep all your sweet ideas in one place. ✨

A detailed view of a Garlic Broccoli Stir Fry with Chickpeas, highlighting its textures and colors against a blurred background.

Unleashing Flavor: Cheesy Baked Chicken Tacos That Will Make You Dance

Welcome to your next culinary adventure! These Cheesy Baked Chicken Tacos are a celebration of flavor, combining tender shredded chicken, zesty spices, and gooey cheese. Picture this: a crispy tortilla hugging a savory filling, topped with a melty layer of cheese that pulls away in glorious strings. Whether you’re cooking for a weeknight feast or a lively gathering, these tacos are sure to ignite your passion for cooking!

Why You’ll Love This Recipe

Let’s dive into why these tacos are bound to become a staple in your kitchen:

  • Quick and Easy: Perfect for busy weeknights, these cheesy baked tacos come together in no time, allowing you to enjoy delicious home-cooked food without the stress.
  • Flavor Explosion: The combination of spices and the rich flavor of shredded chicken creates a mouthwatering experience that will leave your taste buds dancing.
  • Versatile Ingredients: Use rotisserie chicken for a time-saver or switch it up with ground turkey or beef. The choice is yours!
  • Make Ahead Friendly: Prepare the filling in advance and assemble the tacos when you’re ready to bake for a hassle-free meal.
  • Customizable: With endless topping options, each taco can be tailored to suit your family’s tastes — from spicy jalapeños to fresh cilantro.

Ingredients for Cheesy Baked Chicken Tacos

To create these delicious tacos, gather the following ingredients:

  • 3 cups cooked shredded chicken: Rotisserie works well for flavor and convenience.
  • 1 tbsp olive oil: A splash of this liquid gold helps sauté the aromatics to perfection.
  • 1 small onion, diced: Adds a sweet and savory base to the filling.
  • 2 cloves garlic, minced: For that aromatic kick that makes everything better.
  • 1 (10 oz) can diced tomatoes with green chilies: Adds moisture and a hint of spice (drained).
  • 1 packet taco seasoning: Store-bought is fine, but a homemade blend adds a personal touch.
  • ½ cup chicken broth: Keeps the filling moist and flavorful.
  • 8–10 flour or corn tortillas: Choose your favorite for wrapping up that delicious filling.
  • 2 cups shredded Mexican blend cheese: For the cheesy goodness that ties it all together.
  • ½ cup red onion, diced (optional): For added crunch and flavor.
  • ½ cup fresh cilantro, chopped: Brightens up the dish.
  • Sour cream, salsa, or guacamole: For serving, making each bite even more delightful.

How to Make Cheesy Baked Chicken Tacos

Delicious cheesy baked chicken tacos with toppings displayed on a wooden table.

Follow these simple steps to create your cheesy baked chicken tacos:

  1. Heat olive oil in a skillet over medium heat. Sauté the onion and garlic until softened, about 3–4 minutes.
  2. Stir in the shredded chicken, diced tomatoes, taco seasoning, and chicken broth. Cook for 5–6 minutes until the mixture is thickened and aromatic.
  3. Preheat your oven to 375°F (190°C).
  4. Lightly grease a 9×13-inch baking dish to prevent sticking.
  5. Fill each tortilla with the chicken mixture and a little cheese, then roll them up and place them seam-side down in the prepared dish.
  6. Sprinkle remaining cheese generously over the top of the tacos.
  7. Add diced red onion and cilantro on top, if desired.
  8. Bake uncovered for 15–20 minutes, or until the cheese is golden and bubbly.
  9. Garnish with fresh cilantro and serve with sour cream, salsa, or guacamole for an added kick.

Pro Tips for Success

To elevate your taco game, keep these expert insights in mind:

  • Use quality tortillas: Opt for fresh tortillas for the best texture and flavor.
  • Don’t overfill: This ensures the tacos hold together and don’t spill out in the oven.
  • Experiment with spices: If you love heat, add extra chili powder or a dash of cayenne to the filling.
  • Layer the cheese: For extra cheesiness, layer cheese between the filling and on top before baking.
  • Make it a feast: Serve with a variety of toppings to create a taco bar experience.
  • Check for doneness: Ensure the filling is heated through before serving.
  • Use a meat thermometer: If you’re using fresh chicken, ensure it reaches 165°F for safety.
  • Rest before serving: Allow the tacos to sit for a few minutes after baking to set the filling.

Common Mistakes and Troubleshooting

Even the best chefs can run into issues. Here’s how to avoid common pitfalls:

  • Soggy tortillas: Ensure your filling isn’t too wet. Drain canned ingredients thoroughly and avoid overloading the tortillas.
  • Burnt cheese: If your cheese is browning too quickly, cover the dish with foil for part of the baking time.
  • Dry filling: If your mixture seems dry, add a splash more chicken broth for moisture.
  • Too bland: Taste and adjust seasonings—don’t be shy with spices!

Variations to Spice Things Up

Want to switch things up? Here are some fun variations to try:

  • Spicy Chicken Tacos: Add diced jalapeños or a splash of hot sauce to the chicken filling for an extra kick.
  • Vegetarian Option: Substitute chicken with black beans or roasted veggies for a hearty, meat-free meal.
  • BBQ Chicken Tacos: Mix shredded chicken with BBQ sauce instead of taco seasoning for a smoky twist.
  • Breakfast Tacos: Use scrambled eggs, diced potatoes, and cheese for a delightful breakfast version.

Storage and Make-Ahead Instructions

You can make these tacos ahead of time for convenience:

  • To store: Keep leftovers in an airtight container in the fridge for up to 3 days.
  • To freeze: Assemble the tacos without baking, wrap tightly, and freeze for up to 2 months. Bake directly from frozen, adding a few extra minutes to the cooking time.
  • Make-ahead filling: Cook the chicken mixture and store in the fridge for up to 3 days before assembling and baking.

FAQs About Cheesy Baked Chicken Tacos

Let’s tackle some common questions:

  • Can I use corn tortillas instead of flour? Absolutely! Corn tortillas will add a lovely flavor and crunch.
  • What can I substitute for chicken? Ground beef, turkey, or even shredded veggies work well as alternatives.
  • Can I make these tacos gluten-free? Yes, use gluten-free tortillas and ensure your seasoning blend is also gluten-free.
  • How do I make this recipe spicier? Add hot sauce, more taco seasoning, or fresh peppers to the filling.
  • What toppings do you recommend? Try fresh avocado, diced tomatoes, or pickled onions for a burst of flavor.
  • What can I serve with these tacos? Pair them with a simple salad, Mexican rice, or refried beans.
  • Can I bake these tacos ahead of time? Yes, you can prepare and bake them, then reheat when ready to serve.
  • How do I know when the tacos are done baking? Look for bubbly, golden cheese and heated filling.

Nutrition Tips and Dietary Adaptations

Want to make your tacos even healthier? Consider these tips:

  • Lean protein: Use skinless chicken breast or turkey for a leaner option.
  • Load up on veggies: Add diced bell peppers or zucchini to the filling for extra nutrients and flavor.
  • Lower fat cheese: Opt for low-fat cheese options to reduce calories without sacrificing flavor.
  • Whole grain tortillas: Choose whole grain tortillas for added fiber and nutrients.

Equipment Recommendations

Make sure you have the right tools to create your taco masterpiece:

  • Skillet: A non-stick skillet is ideal for sautéing your filling.
  • Baking dish: A 9×13-inch dish is perfect for holding all your delicious tacos.
  • Measuring cups and spoons: Essential for accurate ingredient measurements.
  • Spatula: A sturdy spatula helps in flipping and serving your tacos.

Serving Suggestions

These cheesy baked chicken tacos are a hit on their own, but they shine even more with the right accompaniments:

  • Fresh salsa: A vibrant, homemade salsa adds a fresh kick and color.
  • Guacamole: Creamy guacamole complements the spices beautifully.
  • Chopped salad: A crisp salad with lime vinaigrette balances the richness of the tacos.
  • Mexican rice: Fluffy rice seasoned with cilantro and lime makes a perfect side.

Final Thoughts

So there you have it! These Cheesy Baked Chicken Tacos are not just a meal; they are an experience. With bold flavors, endless variations, and the joy of cooking, you’re invited to embrace the thrill of your culinary journey. Remember, spice is not just a heat; it’s a story waiting to be told. So grab your skillet and get started on this flavorful adventure — you won’t regret it!

Cheesy Baked Chicken Tacos: A Delicious Twist on Tacos!

Prep Time 10 minutes
Cook Time 20 minutes
Total Time 30 minutes
Servings 4 servings
Calories 450
Enjoy these flavorful baked chicken tacos filled with melted cheese, fresh herbs, and a hint of spice, perfect for a quick and satisfying meal.

Ingredients

Chicken and Filling

  • 3 cups cooked shredded chicken (rotisserie works well)
  • 1 tbsp olive oil
  • 1 small onion, diced
  • 2 cloves garlic, minced
  • 1 can diced tomatoes with green chilies (10 oz) (drained)
  • 1 packet taco seasoning (or homemade blend)
  • ½ cup chicken broth
  • 8–10 tortillas flour or corn tortillas
  • 2 cups shredded Mexican blend cheese (or cheddar + mozzarella mix)
  • ½ cup red onion, diced (optional)
  • ½ cup fresh cilantro, chopped

For Serving

  • sour cream, salsa, or guacamole (for serving)

Instructions 

  • Heat olive oil in a skillet and sauté onion and garlic until softened.
  • Add shredded chicken, tomatoes, taco seasoning, and broth; cook until thickened, about 5–6 minutes.
  • Preheat oven to 375°F (190°C) and grease a 9×13-inch dish.
  • Fill tortillas with chicken mixture and cheese, roll, and place seam-side down in dish. Top with remaining cheese.
  • Sprinkle diced red onion and cilantro, then bake for 15–20 minutes until cheese is golden and bubbly. Serve with toppings.

Notes

For extra flavor, add a squeeze of lime or hot sauce before serving.
Calories: 450kcal
Cost: $15
Course: Main Course
Cuisine: Mexican
Keyword: Cheese, chicken, Tacos

Nutrition

Calories: 450kcal | Carbohydrates: 40g | Protein: 35g | Fat: 20g | Sodium: 900mg