Author

Avery Collins

Browsing

Why You’ll Love This Recipe

Healthy sautéed vegetables are the unsung heroes of the culinary world. They are quick to prepare, bursting with flavor, and versatile enough to complement any meal. Whether you’re looking to elevate a simple weeknight dinner or searching for a vibrant side dish to impress your guests, this recipe is your new go-to. With the right blend of fresh produce, a dash of spice, and a drizzle of olive oil, you can create a dish that not only nourishes but also excites the palate.

Choosing the Right Vegetables

When it comes to sautéed vegetables, your choice of ingredients can make all the difference. Here’s a quick guide to selecting the best produce:

  • Bell Peppers: Sweet and colorful, they add a crunchy texture and vibrant hues.
  • Zucchini: Mild in flavor, zucchini absorbs spices beautifully, making it a fantastic base for sautéing.
  • Broccoli: This powerhouse veggie brings a hearty bite and is rich in nutrients.
  • Snap Peas: Their crispness and slight sweetness provide a delightful contrast to other vegetables.

Feel free to mix and match according to your preferences and what’s in season. Seasonal vegetables not only taste better but are also more nutritious.

Ingredient Highlights & Flavor Enhancers

A vibrant mix of healthy sautéed vegetables with a soft-focus background and natural light enhancing the textures.

Each ingredient in this dish plays a significant role. Here’s why they matter:

  • Olive Oil: A heart-healthy fat that enhances flavor and aids in nutrient absorption.
  • Garlic: Nothing compares to the aromatic punch of fresh garlic. It adds depth and warmth to the dish.
  • Dried Oregano: This herb brings a Mediterranean flair and pairs beautifully with the vegetables.
  • Lemon Juice: A splash at the end brightens the dish, cutting through the richness and adding a refreshing zing.

With these ingredients, your sautéed vegetables will be anything but ordinary!

Step-by-Step Cooking Instructions

Let’s get cooking! Follow these simple steps for perfectly sautéed vegetables:

  1. Heat the olive oil: In a large skillet, warm 2 tablespoons of olive oil over medium heat. The oil should shimmer but not smoke.
  2. Add garlic: Stir in the minced garlic and sauté for about 30 seconds until fragrant. This step lays the foundation for the flavor of the dish.
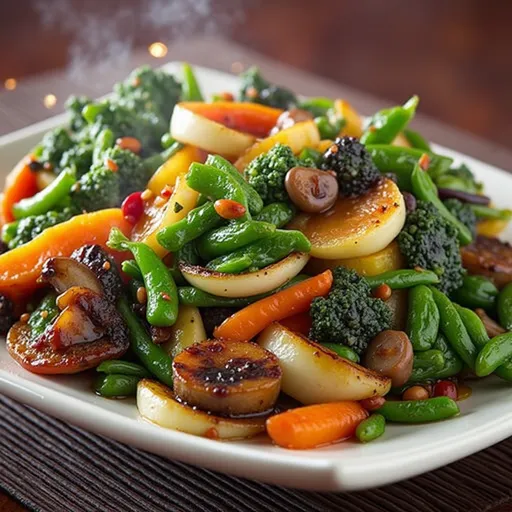
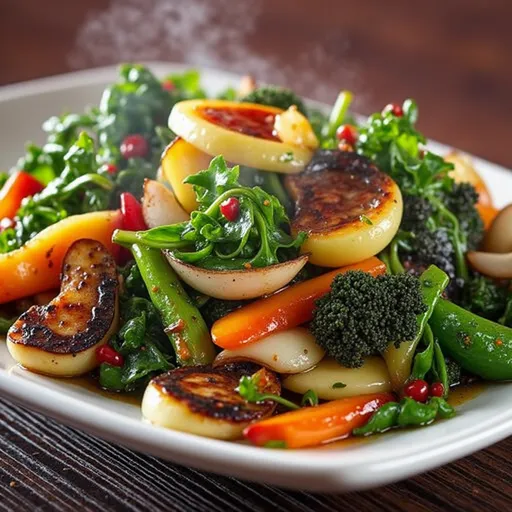
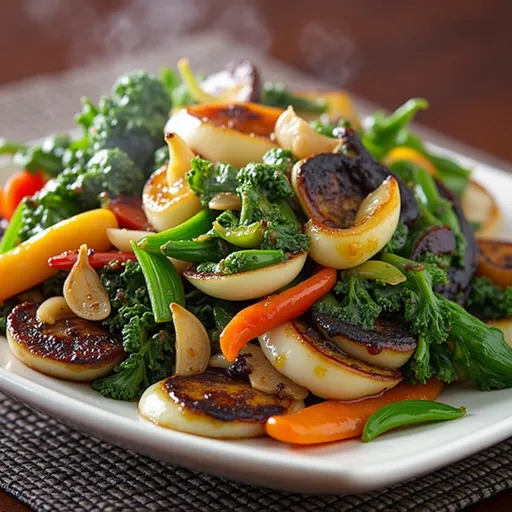
  3. Introduce the vegetables: Toss in the sliced bell pepper, zucchini, broccoli florets, and snap peas. The vibrant colors will start to create a feast for the eyes.
  4. Sauté: Cook the vegetables for about 5-7 minutes, stirring occasionally, until they are tender but still crisp. You want to maintain that delightful crunch!
  5. Season: Sprinkle with salt, pepper, and dried oregano, stirring to combine. These seasonings will elevate the flavors.
  6. Finish with lemon juice: Remove the skillet from heat and drizzle with lemon juice just before serving.

And voila! You’ve created a stunning side dish that’s not only healthy but also packed with flavor.

Delicious Flavor Variations

While this recipe is fantastic as-is, don’t hesitate to play around with flavors. Here are some variations to inspire your culinary creativity:

  • Spicy Kick: Add a pinch of red pepper flakes or a dash of hot sauce for a fiery finish.
  • Asian Fusion: Toss in soy sauce, sesame oil, and a sprinkle of sesame seeds for an Asian-inspired twist.
  • Herb Garden: Fresh herbs like basil, thyme, or parsley can be added at the end for a burst of freshness.
  • Cheesy Delight: Sprinkle some grated Parmesan cheese just before serving for a salty, savory touch.

These variations showcase how versatile sautéed vegetables can be, adapting to any cuisine you desire!

Serving Suggestions & Pairings

These sautéed vegetables are a perfect side to any protein, but they can also shine on their own. Here are some serving ideas:

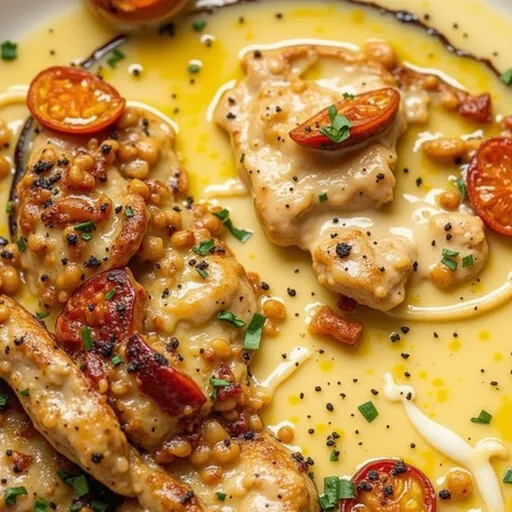
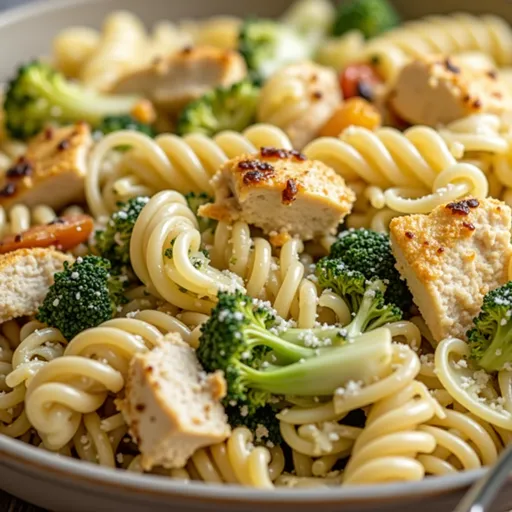
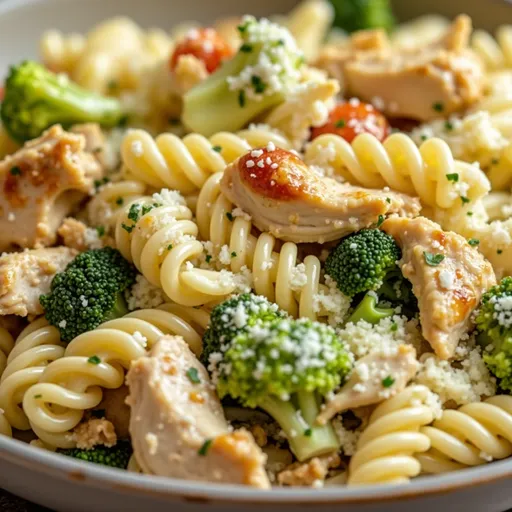
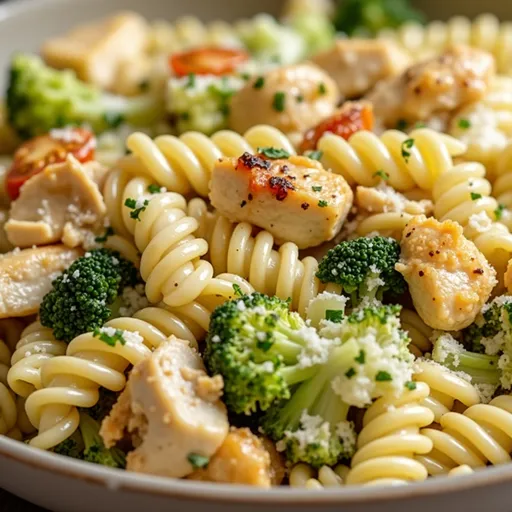
  • With Chicken: Pair with grilled or roasted chicken for a balanced meal.
  • Over Quinoa: Serve atop a bed of fluffy quinoa for a wholesome vegetarian dish.
  • Tossed into Pasta: Mix with whole grain pasta and your favorite sauce for a quick dinner.
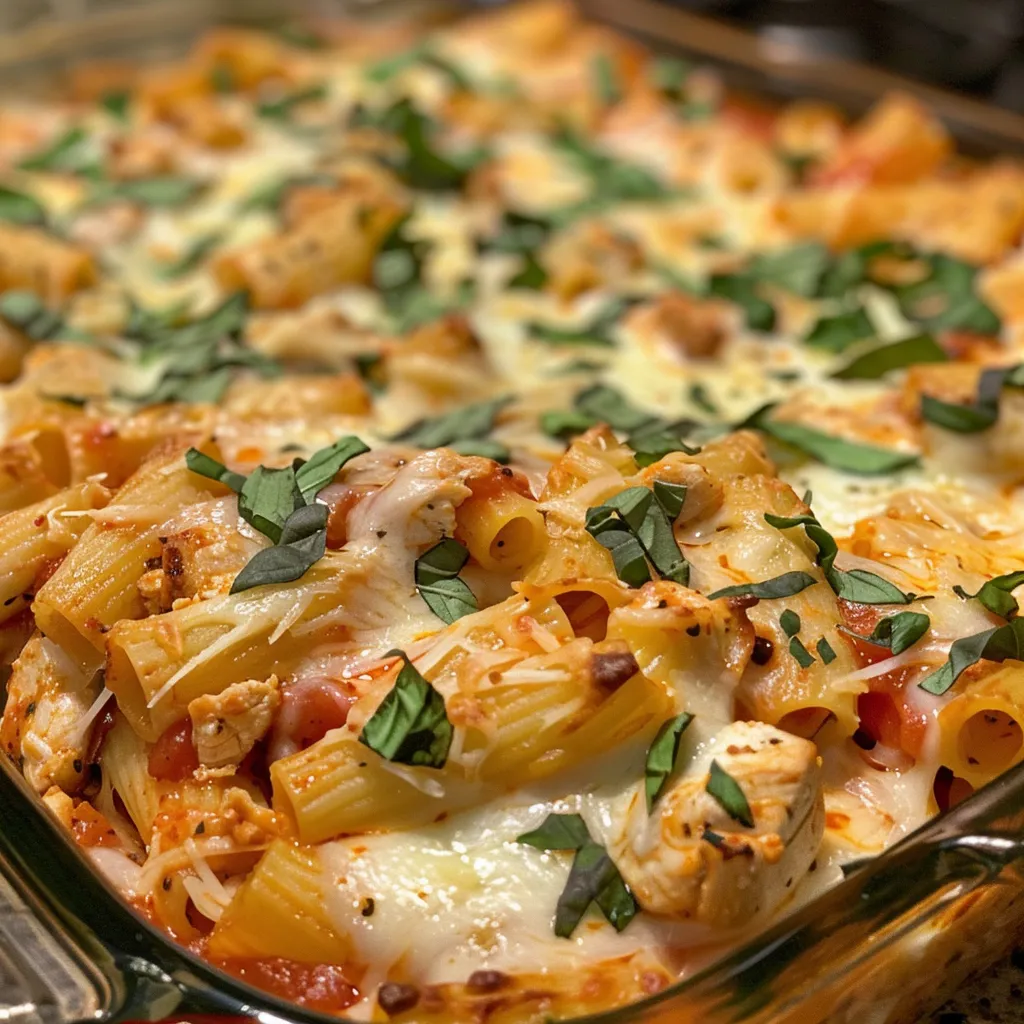
  • As a Topping: Use as a topping for pizzas or flatbreads for an extra veggie boost!

With these ideas, you can transform a humble side into a vibrant centerpiece for your meals.

Storage & Make-Ahead Tips

Want to meal prep? Here are some handy tips:

  • Storage: Keep leftovers in an airtight container in the fridge for up to 3-4 days.
  • Reheating: Briefly sauté in a pan with a splash of water or oil to restore moisture.
  • Freezing: While you can freeze cooked vegetables, it’s best to slightly undercook them before freezing to prevent mushiness.
  • Chop Ahead: You can chop vegetables a day in advance and store them in the fridge for quick cooking.

These strategies ensure that your sautéed veggies are not only fresh but also convenient to enjoy any night of the week!

Expert Tips for Perfect Sautéed Vegetables

To help you become a sautéing master, here are some expert tips:

  • Uniform Size: Cut vegetables into similar sizes to ensure even cooking.
  • Don’t Overcrowd: Give your veggies space in the pan. Overcrowding can lead to steaming instead of sautéing.
  • High Heat: Cooking on medium-high heat helps to achieve that lovely caramelization and crunch.
  • Finish with Acid: A splash of vinegar or citrus juice brightens the flavors and balances the dish.

With these tips, your sautéed vegetables will always turn out amazing!

Frequently Asked Questions (FAQs)

Let’s address some common queries:

  • Can I use frozen vegetables? Yes, frozen vegetables work well! Just make sure to thaw and pat them dry before cooking.
  • How long should I sauté the vegetables? Generally, 5-7 minutes is ideal for crisp-tender veggies, but it can vary based on the type.
  • Can I make this vegan? Absolutely! This recipe is naturally vegan; just skip any cheese or use dairy-free alternatives.
  • What’s the best oil for sautéing? Olive oil is excellent, but you can also use avocado oil or grapeseed oil for higher smoke points.

Conclusion & Final Thoughts

Healthy sautéed vegetables are a fantastic addition to any meal, bursting with flavor, color, and nutrition. This quick and easy recipe allows you to embrace the thrill of cooking while indulging in the vibrant tastes of fresh produce. So grab your skillet, turn up the heat, and let your culinary creativity shine! Whether you’re feeding a family or preparing a cozy dinner for yourself, this simple dish will add a kick of excitement to your table. Remember, cooking is not just about following a recipe; it’s about exploring, tasting, and enjoying the journey. Happy cooking!

Healthy Sautéed Vegetables – Quick, Flavorful & Nutritious Side

Prep Time 5 minutes
Cook Time 7 minutes
Total Time 12 minutes
Servings 4 servings
Calories 150
A vibrant and healthy side dish packed with fresh vegetables, perfect for a quick and nutritious meal.

Ingredients

olive oil

  • 2 tablespoons olive oil

vegetables

  • 1 bell pepper bell pepper, sliced
  • 1 zucchini zucchini, sliced
  • 1 cup broccoli florets
  • 1 cup snap peas
  • 2 cloves garlic, minced
  • to taste salt and pepper
  • 1 teaspoon dried oregano
  • 1 teaspoon lemon juice

Instructions 

  • Heat olive oil in a skillet over medium heat.
  • Sauté garlic for 30 seconds until fragrant.
  • Add vegetables and cook for 5-7 minutes until tender but crisp.
  • Season with salt, pepper, and oregano; stir well.
  • Remove from heat and drizzle with lemon juice before serving.

Notes

This dish is best served immediately for maximum freshness and crunch.
Calories: 150kcal
Cost: $10
Course: Side Dish
Keyword: vegetables

Nutrition

Calories: 150kcal | Carbohydrates: 25g | Protein: 5g | Fat: 7g | Sodium: 200mg

Loved this recipe? Save it to your favorite Pinterest board so you can easily find it later! It’s the perfect way to keep all your sweet ideas in one place. ✨

Delicious, colorful sautéed vegetables displayed in a bowl, showcasing their freshness and appetizing appearance.

Dive into a Flavorful Adventure with Chicken Baked Ziti

Welcome to a culinary journey that will awaken your taste buds and inspire your inner chef! Today, we’re embracing the vibrant world of baked ziti with my spicy twist on a classic Chicken Baked Ziti. This dish combines tender chicken, zesty marinara, and a hint of heat, all baked to golden perfection. If you’re tired of the same old pasta night, get ready to transform your dinner into an unforgettable experience that celebrates flavor, warmth, and comfort. In this article, we’ll explore everything from ingredients to storage tips, ensuring your baked ziti is a hit every time.

Why You’ll Love This Recipe

This Chicken Baked Ziti isn’t just a meal; it’s an adventure packed with flavor and comfort. Here are some reasons why you’ll fall in love:

  • Bold Flavors: The combination of spices and herbs elevates this dish beyond traditional pasta recipes.
  • Easy to Prepare: With straightforward steps, this recipe is perfect for both novice and experienced cooks.
  • Make-Ahead Friendly: Prep it in advance, pop it in the oven, and let the magic happen while you relax.
  • Kid-Approved: Everyone from picky eaters to adventurous foodies will enjoy this comforting dish.
  • Customizable: Adjust the heat levels and ingredients to suit your personal taste and dietary needs.

Ingredient Breakdown

Let’s dive into the ingredients that make this dish sing. Here’s what you’ll need:

  • 1 pound cooked ziti pasta: Save 1/2 cup of the pasta water for later use. It adds an incredible creaminess!
  • 2 pounds boneless, skinless chicken breasts: Cut into bite-sized cubes for even cooking.
  • 2 tablespoons olive oil: For sautéing the chicken and adding flavor.
  • 1 teaspoon Italian herb mix: A blend of oregano, basil, and thyme for aromatic depth.
  • 1 teaspoon salt: To enhance the natural flavors of the ingredients.
  • 1/2 teaspoon black pepper: A touch of warmth that balances the dish.
  • 1/2 teaspoon crushed red chili flakes (optional): For that extra kick! Adjust to your heat preference.
  • 32 ounces marinara sauce: Store-bought or homemade, it’s the heart of your baked ziti.
  • 1 1/2 cups ricotta cheese: Creamy and rich, it binds the flavors together.
  • 3 cups shredded mozzarella cheese: The melty goodness that pulls everything together.
  • 1 cup parmesan cheese: For a nutty finish that enhances the overall flavor.
  • 1 bunch fresh basil: Sliced into thin strips for a fresh, aromatic garnish.

Substitutions and Variations

Side view of a hearty baked ziti with melted cheese and chunks of chicken.

Cooking is all about creativity! Here are some substitutions and variations to consider:

  • Protein: Swap chicken for ground turkey, beef, or even sautéed mushrooms for a vegetarian option.
  • Cheese: Experiment with different cheeses like gouda or fontina for unique flavors.
  • Pasta Type: Use penne or fusilli if you don’t have ziti on hand.
  • Spice Level: Adjust the chili flakes or add jalapeños for those who crave extra heat!

Pro Tips for the Perfect Baked Ziti

To ensure your Chicken Baked Ziti turns out perfectly every time, keep these expert tips in mind:

  • Save that Pasta Water: The starchy water helps bind the sauce and pasta, giving it a creamy texture.
  • Don’t Overcook the Chicken: Sauté just until cooked through to keep it juicy and tender.
  • Layering is Key: Layer your ingredients thoughtfully to ensure even cooking and flavor distribution.
  • Cover with Foil: When baking, cover the dish with foil for the first part of cooking to retain moisture.
  • Let it Rest: Allow the dish to sit for 10 minutes after baking to let the flavors meld together.
  • Customize Your Herbs: Fresh herbs can elevate the dish; feel free to mix and match based on your taste.
  • Experiment with Marinara: Try different sauces like arrabbiata for a spicy twist or a creamy alfredo for a richer feel.
  • Use a Deep Baking Dish: A deep dish will help contain the layers and ensure even cooking.

Avoid These Common Mistakes

Even the best chefs make mistakes! Here’s how to avoid common pitfalls:

  • Not Salting Your Pasta Water: This is crucial for flavor; don’t skip it!
  • Overloading on Cheese: While cheese is delicious, too much can make the dish greasy instead of creamy.
  • Skipping the Fresh Basil: Fresh herbs add brightness; dried herbs won’t provide the same punch.
  • Not Saving Enough Pasta Water: You might need it to adjust the consistency, so keep an eye on it!

Storage and Make-Ahead Instructions

Want to prep ahead? Here’s how to store and reheat your Chicken Baked Ziti:

  • Refrigeration: Store leftovers in an airtight container for up to 3 days.
  • Freezing: Freeze in an airtight container for up to 3 months. Thaw in the fridge overnight before reheating.
  • Reheating: Warm in the oven at 350°F (175°C) for 20-30 minutes or until heated through.

Frequently Asked Questions

Here are some common questions about Chicken Baked Ziti:

  • Can I use whole wheat pasta? Absolutely! Whole wheat pasta offers a nutty flavor and more fiber.
  • Is this dish suitable for meal prep? Yes! It’s perfect for meal prep and can be made ahead of time.
  • How spicy is this recipe? The spice level can be adjusted by varying the amount of chili flakes used.
  • What can I serve with Chicken Baked Ziti? A simple side salad or garlic bread complements this dish beautifully.
  • Can I add vegetables? Yes! Spinach, bell peppers, or zucchini can be great additions.
  • What’s the best way to reheat it? The oven is best for reheating to maintain the texture, but the microwave can work in a pinch.
  • Can I use different cheeses? Yes! Feel free to experiment with different types of cheese for unique flavors.
  • How do I know when it’s done baking? The cheese should be bubbly and golden brown, and the dish should be heated through.

Nutritional Tips and Dietary Adaptations

For those mindful of nutrition, here are some tips:

  • Low-Calorie Option: Use lean chicken breast and reduced-fat cheese to cut calories.
  • Gluten-Free: Substitute traditional pasta with gluten-free pasta options.
  • Vegetarian Option: Replace chicken with mixed vegetables or plant-based protein.
  • High-Protein Option: Add extra chicken or use chickpeas for a protein boost.

Equipment Recommendations

Here’s what you’ll need to make this recipe:

  • Large Pot: For boiling the pasta.
  • Skillet: For sautéing the chicken and mixing the sauce.
  • Baking Dish: A deep baking dish is perfect for layering your ingredients.
  • Mixing Bowls: For combining ingredients and prepping.

Serving Suggestions

To elevate your Chicken Baked Ziti experience, consider these serving suggestions:

  • Fresh Basil Garnish: Add a sprinkle of fresh basil on top just before serving for a burst of flavor.
  • Parmesan Shavings: Top with fresh parmesan shavings for an elegant touch.
  • Side Salad: A light arugula or mixed greens salad pairs beautifully with the richness of the ziti.
  • Garlic Bread: Serve with warm garlic bread to soak up the delicious sauce.

In conclusion, this Chicken Baked Ziti recipe is not just a meal; it’s a celebration of flavor, warmth, and comfort. I invite you to embrace the adventure of cooking, to experiment with spices, and to make this dish your own. Grab your skillet, preheat that oven, and let’s turn a simple pasta night into a memorable feast!

Tasty Chicken Baked Ziti Recipe

Prep Time 15 minutes
Cook Time 30 minutes
Total Time 45 minutes
Servings 6 servings
Calories 650
A delicious baked ziti with tender chicken, rich marinara, and melty cheeses, perfect for a comforting meal.

Ingredients

Pasta and Water

  • 1 pound cooked ziti pasta (save 1/2 cup of the water)
  • 2 pounds boneless, skinless chicken breasts (cut into cubes)

Sauces and Cheeses

  • 2 tablespoons olive oil
  • 1 teaspoon italian herb mix
  • 1 teaspoon salt
  • 1/2 teaspoon black pepper
  • 1/2 teaspoon crushed red chili flakes (optional)
  • 32 ounces marinara sauce
  • 1.5 cups ricotta cheese
  • 3 cups shredded mozzarella cheese
  • 1 cup parmesan cheese
  • 1 bunch fresh basil (sliced into thin strips)

Instructions 

  • Preheat oven to 375°F (190°C). Cook ziti pasta and save 1/2 cup of water.
  • In a skillet, heat olive oil and cook chicken until browned. Mix in herbs, salt, pepper, and chili flakes.
  • Combine cooked pasta, chicken, marinara, ricotta, and half of mozzarella and parmesan cheeses. Add reserved pasta water.
  • Transfer mixture to a baking dish, top with remaining cheeses, and bake for 30 minutes until bubbly and golden.
  • Garnish with sliced basil before serving.

Notes

For extra flavor, let the baked ziti rest for 10 minutes before serving.
Calories: 650kcal
Cost: $15
Course: Main Course
Cuisine: Italian
Keyword: chicken

Nutrition

Calories: 650kcal | Carbohydrates: 70g | Protein: 45g | Fat: 25g | Sodium: 1200mg

Why You’ll Love This High Protein Dish

Welcome to a culinary adventure that promises to ignite your taste buds and transform your weeknight dinners into something truly extraordinary! This High Protein Rotisserie Chicken Broccoli Pasta is not just a meal; it’s a celebration of flavor, nutrition, and ease. In just 35 minutes, you can whip up a dish that’s packed with protein, vibrant vegetables, and a creamy sauce that will have everyone asking for seconds. If you’re tired of the same old boring dinners, this recipe is your ticket to deliciousness without the fuss!

Ingredients for High Protein Rotisserie Chicken Broccoli Pasta

Let’s dive right into what you’ll need to create this mouthwatering dish. Gather these ingredients:

  • 8 oz whole wheat pasta – A heartier choice that adds fiber and nutrients.
  • 2 cups broccoli florets – Fresh and vibrant, adding both color and crunch.
  • 2 cups shredded rotisserie chicken – A time-saver that’s full of flavor.
  • 1 cup cherry tomatoes, halved – Sweet bursts of flavor that brighten up the dish.
  • 2 cloves garlic, minced – The aromatic foundation for our sauce.
  • 1 tablespoon olive oil – For sautéing and adding richness.
  • 1 teaspoon Italian seasoning – A blend of herbs that brings everything together.
  • Salt and pepper to taste – Essential for seasoning.
  • 1/4 cup grated Parmesan cheese – To add that creamy, cheesy finish.
  • Fresh basil for garnish (optional) – A pop of freshness to top it all off.

Step-by-Step Instructions

Delicious high protein pasta dish featuring rotisserie chicken, broccoli, and garnished with parmesan.

Now that you have your ingredients ready, let’s get cooking! Follow these simple steps for a successful dinner:

  1. Boil the Pasta: Begin by bringing a large pot of salted water to a boil. Add the whole wheat pasta and cook according to package instructions until it reaches the al dente stage. This usually takes about 8-10 minutes. Remember, we’ll be adding the broccoli shortly, so keep an eye on the clock!
  2. Add the Broccoli: With about 3 minutes left in the pasta’s cooking time, toss in the broccoli florets. This will cook them to a tender-crisp perfection, allowing them to maintain their bright green color and nutritional value.
  3. Sauté the Garlic: While the pasta and broccoli are cooking, heat the olive oil in a large skillet over medium heat. Add the minced garlic and sauté for 1-2 minutes until it releases its fragrant aroma. Be careful not to let it brown, as burnt garlic can turn bitter.
  4. Combine Chicken and Tomatoes: To the skillet, stir in the shredded rotisserie chicken, halved cherry tomatoes, Italian seasoning, and season with salt and pepper. Cook for about 3-4 minutes, letting the flavors meld and the chicken heat through.
  5. Drain and Combine: Once the pasta and broccoli are done, drain them and add them to the skillet with the chicken mixture. Toss everything gently to combine. The heat from the pasta will help integrate the flavors.
  6. Finish with Cheese: Remove the skillet from heat and stir in the grated Parmesan cheese. This should melt beautifully into the warm pasta, creating a deliciously creamy sauce.
  7. Garnish and Serve: Serve warm, garnished with fresh basil if desired. This dish is best enjoyed immediately, while it’s hot and comforting.

What to Serve with High Protein Rotisserie Chicken Broccoli Pasta

This pasta dish is hearty enough to stand on its own, but if you want to elevate your meal further, consider serving it with some delightful sides:

  • Caesar Salad: The crisp romaine and tangy dressing provide a perfect contrast to the creamy pasta.
  • Garlic Bread: A classic pairing that’s always a hit! Opt for a protein-rich version for added nutrition.
  • Roasted Vegetables: Asparagus or Brussels sprouts are excellent choices that complement the dish nicely.
  • Simple Green Salad: A light salad with a lemon vinaigrette can help cleanse the palate and add a refreshing touch.

Storage & Freezing Tips

Got leftovers? No problem! Here’s how to store and reheat your delicious creation:

  • Refrigeration: Store leftover pasta in airtight containers in the fridge for up to 4 days. The flavors will deepen overnight, making it even more delectable the next day!
  • Reheating: For best results, gently reheat on the stovetop over low heat, adding a splash of cream or milk to maintain that creamy texture. Avoid the microwave if you can, as it can make the sauce grainy.
  • Freezing: While I recommend enjoying this dish fresh, it can be frozen for up to 3 months. Just be sure to store it in freezer-safe containers!

Tips for Success

To ensure that your High Protein Rotisserie Chicken Broccoli Pasta turns out perfectly every time, keep these tips in mind:

  • Fresh Ingredients: Use fresh broccoli and ripe cherry tomatoes for the best flavor and texture.
  • Don’t Overcook: Be mindful of the cooking times for both pasta and broccoli to keep them tender but not mushy.
  • Experiment with Cheese: If you want to mix things up, try adding different cheeses like mozzarella or feta for a flavor twist.
  • Spice it Up: Feeling adventurous? Add a pinch of red pepper flakes or a dash of hot sauce for a kick of heat!

Frequently Asked Questions

Let’s tackle some common questions about this dish:

  • Can I use a different type of pasta? Absolutely! Feel free to substitute with your favorite pasta shape, such as penne or fusilli.
  • What if I don’t have rotisserie chicken? You can cook your own chicken breasts or thighs and shred them, or even use canned chicken in a pinch.
  • Can I make this dish vegetarian? Yes! Simply omit the chicken and add more vegetables or some beans for protein.

Variations and Substitutions

Don’t be afraid to get creative! Here are some variations to consider:

  • Add Spice: Incorporate diced jalapeños or crushed red pepper for an extra kick.
  • Different Veggies: Zucchini, bell peppers, or spinach can be great additions or substitutes for broccoli.
  • Nutty Flavor: Top your pasta with toasted pine nuts or walnuts for a crunchy texture and a nutty taste.

Conclusion

This High Protein Rotisserie Chicken Broccoli Pasta is more than just a meal; it’s a reminder that cooking can be simple yet satisfying. In just 35 minutes, you can serve up a dish that’s bursting with flavor and nutrition, perfect for busy weeknights when you want something hearty and delicious without the hassle. So grab your ingredients, embrace the adventure of cooking, and let this dish become your new go-to for family dinners. Trust me, once you try it, you’ll be counting down the days until you can make it again. Enjoy every bite and remember: cooking is all about adding a little fire to your passion for food!

High Protein Rotisserie Chicken Broccoli Pasta (35-Minute Recipe)

Prep Time 10 minutes
Cook Time 25 minutes
Total Time 35 minutes
Servings 4 servings
Calories 550
This quick and nutritious pasta dish combines whole wheat pasta, tender rotisserie chicken, and fresh broccoli for a protein-packed meal in just 35 minutes.

Ingredients

Pasta and Vegetables

  • 8 oz whole wheat pasta
  • 2 cups broccoli florets
  • 2 cups shredded rotisserie chicken
  • 1 cup cherry tomatoes, halved
  • 2 cloves garlic, minced
  • 1 tablespoon olive oil
  • 1 teaspoon italian seasoning
  • to taste salt and pepper
  • 1/4 cup grated parmesan cheese
  • optional fresh basil for garnish

Instructions 

  • Cook pasta according to package instructions; add broccoli in last 3 minutes.
  • Heat olive oil in a skillet; sauté garlic for 1-2 minutes.
  • Add chicken, tomatoes, seasoning, salt, and pepper; cook 3-4 minutes.
  • Drain pasta and broccoli; toss with chicken mixture.
  • Stir in Parmesan cheese; serve garnished with basil if desired.

Notes

Using rotisserie chicken saves time and adds flavor.
Calories: 550kcal
Cost: $15
Course: Main Course
Cuisine: American
Keyword: Broccoli, chicken, pasta

Nutrition

Calories: 550kcal | Carbohydrates: 70g | Protein: 45g | Fat: 15g | Sodium: 800mg

Loved this recipe? Save it to your favorite Pinterest board so you can easily find it later! It’s the perfect way to keep all your sweet ideas in one place. ✨

Gourmet image of whole wheat pasta with shredded chicken, broccoli florets, and vibrant cherry tomatoes.

Why You’ll Love This Dish

When it comes to cooking, there’s something gloriously satisfying about a dish that combines vibrant colors and mouthwatering flavors, all packed neatly into a single serving. Enter the world of Stuffed Bell Peppers with Rice & Veggies! These beauties are not just a feast for the eyes; they’re a celebration of wholesome ingredients and culinary creativity. Perfect for busy weeknights or laid-back weekends, this recipe invites you to explore the endless possibilities of flavor and texture. Whether you’re a seasoned chef or a cooking novice, you’ll find that these stuffed peppers are as forgiving as they are delicious, making them a staple in any home kitchen.

Ingredients You’ll Need

Before we dive into the cooking process, let’s gather our vibrant ingredients. Here’s what you’ll need to embark on this culinary adventure:

  • 4 large bell peppers (any color, though I love the reds and yellows for their sweetness)
  • 1 cup cooked rice (brown rice or jasmine for a fragrant twist)
  • 1 cup diced tomatoes (fresh or canned—your choice!)
  • 1 cup black beans, drained and rinsed (for that hearty protein boost)
  • 1 cup corn (fresh off the cob, frozen, or canned will do)
  • 1 small onion, diced (for that aromatic base)
  • 2 cloves garlic, minced (because garlic makes everything better)
  • 1 tsp cumin (for that earthy depth)
  • 1 tsp chili powder (to add just the right amount of kick)
  • Salt and pepper to taste
  • 1 cup shredded cheese (optional, but highly recommended)
  • Fresh cilantro for garnish (optional, but it brightens everything up!)

How to Prepare Your Bell Peppers

Colorful stuffed bell peppers showcasing a mixture of rice, black beans, and corn, beautifully arranged on a plate.

First things first, let’s get those bell peppers ready to hold their flavorful treasures. Here’s how:

  1. Preheat your oven to 375°F (190°C). This ensures that your peppers will bake evenly and come out perfectly tender.
  2. Cut the tops off the bell peppers. Make sure to slice just below the stem to create a little lid you can set aside.
  3. Remove the seeds and membranes. This is crucial; you want to make sure your peppers are ready to fill with deliciousness without any bitter bits.

Your bell peppers are now ready for their flavorful filling! Don’t toss those tops. You can chop them up and throw them into the filling for extra flavor and texture.

Creating the Flavor-Packed Rice Filling

Now comes the fun part! Let’s whip up a filling that will make your taste buds sing. Follow these steps:

  1. Sauté the aromatics: In a skillet over medium heat, add a splash of olive oil. Once hot, toss in the diced onion and minced garlic. Sauté them until the onion turns translucent and fragrant, about 3-5 minutes.
  2. Mix the filling: In a large bowl, combine the cooked rice, sautéed onion and garlic, diced tomatoes, black beans, corn, cumin, chili powder, salt, and pepper. Give it a good stir until everything is well incorporated.

This step is where you can get creative! Want to amp up the spice? Add some diced jalapeños or a sprinkle of cayenne. Want to make it creamier? Stir in a dollop of sour cream or Greek yogurt. The world is your oyster, and the filling is your canvas!

Assembling and Baking Your Stuffed Peppers

With your filling ready, it’s time to stuff those peppers and get them baking:

  1. Stuff each bell pepper generously with the rice and veggie mixture. Don’t be shy! Pack it in there.
  2. Place the stuffed peppers in a baking dish. If you’re using cheese, sprinkle it on top of each pepper for that gooey goodness.
  3. Cover the baking dish with foil and pop it into the oven for 25-30 minutes. This helps steam the peppers, making them tender and delicious.
  4. Remove the foil and bake for an additional 10 minutes. This step allows the cheese to melt and get that golden-brown crust.

Once done, your stuffed bell peppers will emerge from the oven looking like little works of art—vibrant, colorful, and ready to impress!

Delicious Variations to Explore

Don’t be afraid to play with this recipe! Here are some variations that can take your stuffed peppers to the next level:

  • Mexican Fiesta: Swap out the chili powder for taco seasoning, add diced avocado, and top with salsa before serving.
  • Italian Twist: Use marinara sauce instead of diced tomatoes, and mix in Italian herbs like oregano and basil. Top with mozzarella cheese!
  • Quinoa Power: Substitute rice with quinoa for a protein-rich alternative that packs a punch!
  • Meaty Option: For those who enjoy a heartier meal, mix in ground turkey or beef with the filling before stuffing the peppers.

Serving Suggestions and Storage Tips

These stuffed peppers are wonderful as a main dish, but they can also be served alongside a simple salad, crusty bread, or a bowl of creamy soup. Here are a few tips for serving and storing:

  • Garnish: A sprinkle of fresh cilantro or a drizzle of sour cream can elevate your dish even further.
  • Storage: Leftovers can be stored in an airtight container in the refrigerator for up to 3 days.
  • Freezing: You can freeze the stuffed peppers before baking. Wrap each pepper individually in plastic wrap and store them in a freezer-safe bag for up to 3 months. Just bake them straight from the freezer, adding a little extra time to ensure they’re heated through.

FAQs About Stuffed Bell Peppers

Can I make these ahead of time?

Absolutely! You can prepare the filling and stuff the peppers in advance. Store them in the refrigerator for up to 24 hours and bake when ready.

Can I freeze stuffed bell peppers?

Yes, you can freeze them after baking. Wrap each pepper individually and store in an airtight container for up to 2 months. Reheat in the oven at 350°F (175°C) until warmed through.

Can I use different vegetables?

For sure! Feel free to add or substitute vegetables like carrots, zucchini, or spinach. The more colorful, the better!

What can I substitute for rice?

If rice isn’t your thing, consider quinoa, couscous, or even cauliflower rice as great alternatives.

Embrace the Adventure of Cooking

Cooking is not just about following a recipe; it’s about embracing an adventure. With these Stuffed Bell Peppers with Rice & Veggies, you have the perfect opportunity to explore flavors, textures, and colors. Each bite is a celebration of the ingredients you’ve chosen and the creativity you’ve infused into the dish. So, gather your ingredients, turn up your favorite tunes, and let the kitchen transform into your playground. Remember, food is meant to bring joy, and with every stuffed pepper, you’ll ignite that fire in your heart. Let’s get cooking!

Stuffed Bell Peppers with Rice & Veggies

Prep Time 15 minutes
Cook Time 35 minutes
Total Time 50 minutes
Servings 4 servings
Calories 350
A delicious and colorful vegetarian dish featuring bell peppers stuffed with seasoned rice and vegetables, perfect for a wholesome meal.

Ingredients

Bell Peppers

  • 4 large bell peppers (any color)
  • 1 cup cooked rice
  • 1 cup diced tomatoes
  • 1 cup black beans, drained and rinsed
  • 1 cup corn (fresh, frozen, or canned)
  • 1 small onion, diced
  • 2 cloves garlic, minced
  • 1 tsp cumin
  • 1 tsp chili powder
  • to taste salt and pepper
  • 1 cup shredded cheese (optional)
  • fresh cilantro for garnish (optional) fresh cilantro

Instructions 

  • Preheat oven to 375°F (190°C). Cut tops off peppers and remove seeds.
  • Sauté diced onion and garlic until soft. Mix with rice, tomatoes, beans, corn, cumin, chili powder, salt, and pepper.
  • Stuff peppers with the rice mixture. Top with cheese if using.
  • Place in baking dish, cover with foil, and bake for 25-30 minutes. Remove foil and bake 10 more minutes.
  • Garnish with cilantro and serve warm.

Notes

You can add more cheese or spice to suit your taste.
Calories: 350kcal
Cost: $15
Course: Main Course
Cuisine: American
Keyword: Vegetarian

Nutrition

Calories: 350kcal | Carbohydrates: 55g | Protein: 15g | Fat: 10g | Sodium: 600mg

Loved this recipe? Save it to your favorite Pinterest board so you can easily find it later! It’s the perfect way to keep all your sweet ideas in one place. ✨

A detailed shot of bell peppers stuffed with rice and veggies, highlighting their textures against a cozy backdrop.

Welcome to the Flavor Adventure of Salmon-Noodle Casserole!

Imagine diving into a world where creamy textures mingle with vibrant flavors, a world that invites you to embrace the thrill of cooking. That’s where my Salmon-Noodle Casserole comes in—a dish that tantalizes your taste buds and sets your kitchen ablaze. This recipe is not just about taste; it’s about the stories we tell through food, the memories we create, and the joy of cooking boldly. Let’s embark on this culinary adventure together!

Why You’ll Love This Recipe

  • Quick and Easy: Perfect for weeknight dinners, this casserole comes together in under an hour, allowing you to spend more time enjoying your meal.
  • Healthy Ingredients: With whole wheat pasta and canned salmon, you’re not just indulging; you’re nourishing your body with wholesome ingredients.
  • Versatile Dish: This casserole easily adapts to whatever you have on hand, making it a great way to use up leftovers or seasonal veggies.
  • Comfort Food Perfection: The creamy texture and rich flavors will make this dish a go-to recipe for cozy nights in.
  • Family-Friendly: Even the pickiest eaters will love this dish, as it’s packed with flavors that appeal to everyone.

Ingredient Breakdown and Substitutions

Let’s get into the heart of this recipe—the ingredients. Here’s what you’ll need to create your salmon-noodle casserole:

  • Cooking Spray: Use any non-stick cooking spray you prefer to prevent sticking.
  • Whole Wheat Pasta: I recommend elbow macaroni or penne, but feel free to swap for gluten-free pasta or any pasta shape you have on hand.
  • Onion: Yellow or white onion works best, but shallots can add a sweet touch.
  • Bell Peppers: Red and green bell peppers add color and crunch; feel free to use yellow or orange for a sweeter flavor.
  • Fat-Free Skim Milk: For a creamier texture, you could substitute almond milk or low-fat coconut milk.
  • Eggs: If you need a vegan option, flax eggs or silken tofu can be used as a binder.
  • Chives: Fresh chives provide a burst of flavor; green onions can be a great substitute.
  • Spices: Adjust the paprika, salt, and pepper to fit your taste, or experiment with your favorite herbs.
  • Canned Salmon: Opt for wild-caught salmon for a richer flavor, or replace it with canned tuna for a twist.

Pro Tips for Perfecting Your Casserole

Side view of salmon noodle casserole garnished with chives and red bell pepper slices.

Before you dive into cooking, here are some expert insights to elevate your salmon-noodle casserole:

  • Don’t Overcook the Pasta: Cook the pasta just until al dente; it will continue to cook in the oven and you want it to retain some bite.
  • Layer Your Flavors: Sauté the vegetables until they’re just tender to keep their vibrant colors and crunch.
  • Warm the Milk: Always warm your milk before adding it to the eggs to prevent curdling.
  • Mix Gently: When combining the salmon with the pasta, mix gently to avoid breaking up the fish too much.
  • Use a Deep Dish: Ensure your casserole dish is deep enough to hold all the ingredients without spilling over.
  • Let it Rest: Allow the casserole to rest for a few minutes after baking—this helps it set and makes serving easier.
  • Garnish Creatively: Top with fresh herbs or a sprinkle of cheese for an extra flavor boost just before serving.
  • Experiment with Spice: Feel free to add a dash of cayenne or crushed red pepper for a little kick!

Avoid These Common Mistakes

Even the best of us stumble sometimes! Here are some common pitfalls to avoid when making your casserole:

  • Skipping the Cooking Spray: Don’t skip this step; it’s crucial for preventing the casserole from sticking.
  • Using Cold Ingredients: Make sure your milk and eggs are at room temperature for a smooth mixture.
  • Overloading with Ingredients: While it’s tempting to add more veggies, be careful not to overcrowd the dish, as it can affect cooking time.
  • Not Checking for Bones: Always check the canned salmon for bones; you want a smooth texture.
  • Ignoring the Baking Time: Keep an eye on it while baking; you want a golden top without burning.

Variations to Spice Things Up

This recipe is a canvas for your creativity! Here are some delicious variations to consider:

  • Cheesy Delight: Add shredded cheddar or mozzarella on top before baking for a gooey, cheesy finish.
  • Veggie-Loaded: Toss in some frozen peas or spinach for added nutrition and color.
  • Spicy Twist: Incorporate diced jalapeños or a splash of hot sauce for an extra kick.
  • Herbaceous Flavor: Experiment with fresh dill or parsley mixed into the sauce for a refreshing twist.

Storage and Make-Ahead Instructions

Planning ahead? Here’s how to store your casserole and make it in advance:

  • Refrigeration: Store leftovers in an airtight container in the fridge for up to 3 days.
  • Freezing: This casserole freezes beautifully! Let it cool completely, then wrap tightly in plastic wrap and foil for up to 3 months.
  • Make-Ahead: You can assemble the casserole a day in advance; simply cover and refrigerate before baking. Increase baking time by 10-15 minutes if baking straight from the fridge.

Frequently Asked Questions

  • Can I use fresh salmon instead of canned? Absolutely! Just bake or poach the salmon first and then flake it into the mixture.
  • What can I serve with this casserole? Serve it with a simple green salad or steamed broccoli for a complete meal.
  • Can I use a different type of pasta? Yes, feel free to use any pasta shape you love. Just remember to adjust cooking times as needed.
  • Is this dish gluten-free? Yes, by substituting with gluten-free pasta, you can easily make this dish gluten-free.
  • How do I reheat leftovers? Reheat in the oven at 350°F until warmed through, or microwave in individual portions.
  • Can I add more vegetables? Yes! Broccoli, zucchini, or carrots can easily be added for extra flavor and nutrition.
  • What if I don’t have chives? Green onions or even a sprinkle of dried herbs will work in a pinch!
  • Is this casserole suitable for kids? Definitely! It’s a family favorite that kids tend to love due to its creamy texture and comforting flavors.

Nutritional Tips and Dietary Adaptations

This casserole is not only delicious but can also fit various dietary needs. Here are some tips to make it even healthier:

  • Lower Fat: Use low-fat or fat-free versions of milk and cheese to reduce calories.
  • Gluten-Free: Opt for gluten-free pasta to accommodate gluten sensitivities.
  • Vegan Option: Replace eggs with flaxseed meal and use almond milk for a plant-based version.
  • Increased Fiber: Add more vegetables or swap half the pasta for quinoa or brown rice for a fiber boost.

Essential Equipment for Your Casserole

To make your cooking experience smooth and enjoyable, here’s what you’ll need:

  • 3-Quart Casserole Dish: A deep dish is essential for this recipe to hold all the ingredients.
  • Nonstick Skillet: Perfect for sautéing your veggies without sticking.
  • Large Pot: For boiling the pasta and making sure it’s cooked to perfection.
  • Mixing Bowls: Have a few bowls on hand for mixing ingredients; a large bowl is ideal for the pasta and salmon.

Serving Suggestions to Elevate Your Dish

When it comes to serving your salmon-noodle casserole, presentation is key! Here are some creative ideas:

  • Garnish: Top with fresh herbs like parsley or dill for a pop of color and freshness.
  • Accompaniments: Pair with a tangy cucumber salad or a zesty coleslaw to balance the richness of the casserole.
  • Serving Style: Serve in individual ramekins or bowls for a fun, personal touch at your dinner table.
  • Side Dishes: A side of roasted vegetables or garlic bread complements the casserole beautifully.

Final Thoughts: Embrace the Flavor!

Your journey into the world of cooking doesn’t end here. This Salmon-Noodle Casserole is just one of many exciting dishes waiting to be discovered in your kitchen. So grab your skillet and let the adventure continue! With every bite, you’re not just tasting a meal; you’re savoring a story filled with warmth, love, and the thrill of cooking boldly. Now, go forth and create culinary magic!

Salmon-noodle casserole

Prep Time 10 minutes
Cook Time 20 minutes
Total Time 30 minutes
Servings 4 servings
Calories 420
A hearty and healthy baked casserole combining whole wheat pasta, fresh vegetables, and tender salmon for a satisfying meal.

Ingredients

Cooking spray

  • 6 oz Uncooked whole wheat pasta elbow macaroni or penne
  • 1 cup Chopped onion
  • 0.5 cup Chopped red bell pepper (plus some rings for garnish if desired)
  • 0.5 strip Chopped green bell pepper
  • 1 cup Fat free skim milk
  • 2 large Eggs
  • 2 Tbsp Fresh minced chives
  • 0.25 tsp Paprika
  • 0.75 tsp Table salt
  • 0.25 tsp Black pepper
  • 6 oz Canned salmon, drained and picked over for bones

Instructions 

  • Preheat oven to 350ºF (175ºC). Coat a 3-quart casserole dish with cooking spray.
  • Cook pasta in boiling water until tender, about 8-10 minutes; drain and set aside.
  • Sauté onion and peppers in cooking spray until browned, about 5 minutes; add to pasta.
  • Simmer milk, then slowly add to beaten eggs; cook until thickened. Mix in chives, paprika, salt, and pepper, then combine with pasta and vegetables.
  • Stir in salmon, transfer to casserole, and bake for 20 minutes until hot and browned. Garnish with red pepper rings if desired.

Notes

Use fresh vegetables for best flavor and texture.
Calories: 420kcal
Cost: $12
Course: Main Course
Cuisine: American
Keyword: pasta, Salmon

Nutrition

Calories: 420kcal | Carbohydrates: 50g | Protein: 30g | Fat: 10g | Sodium: 600mg

Why This Dish is a Game Changer

There’s a certain kind of magic that happens when you combine simple ingredients in a crockpot. The beauty of Garlic Parmesan Crockpot Chicken and Potatoes lies not only in its ease of preparation but also in the layers of flavor that develop over several hours of cooking. Picture this: you walk into your home after a busy day, and the rich scent of garlic mingling with the nutty aroma of Parmesan fills the air. Your stomach growls in anticipation, and you can’t help but smile. This dish is comfort food at its finest, effortlessly elevating your dinner game with minimal effort.

Gathering Your Ingredients

Before we dive into the cooking process, let’s talk about what you’ll need to create this culinary masterpiece. You don’t need a lot of fancy ingredients—just some quality staples that you can find in your pantry or local grocery store.

  • 4 boneless, skinless chicken breasts
  • 1 pound baby potatoes, halved
  • 4 cloves garlic, minced
  • 1 cup grated Parmesan cheese
  • 1 teaspoon Italian seasoning
  • 1 teaspoon salt
  • 1/2 teaspoon black pepper
  • 1/2 cup chicken broth
  • 2 tablespoons olive oil
  • Fresh parsley for garnish (optional)

How This Recipe Comes Together

A warm, inviting dish of Garlic Parmesan Chicken and baby potatoes, with a soft-focus background.

Now that you’ve gathered your ingredients, let’s get into the meat of the matter—how to assemble this delightful dish. The steps are straightforward, but I’ll sprinkle in some tips to make your meal even more special!

Step 1: Prepare the Flavor Mixture

Start by grabbing a large mixing bowl. In it, combine the minced garlic, grated Parmesan, Italian seasoning, salt, pepper, and olive oil. Stir it all together until you have a well-blended mixture. This is where the magic begins! The garlic will infuse the chicken and potatoes with its aromatic essence, while the Parmesan adds a creamy, cheesy richness that will have everyone asking for seconds.

Step 2: Coat the Chicken

Add the chicken breasts to the bowl and coat them evenly with the flavorful mixture. Make sure each piece is generously covered—this is where flavor meets moisture. If you want to give those breasts extra love, let them marinate for 30 minutes in the fridge. It’s not necessary, but it makes a difference!

Step 3: Assemble in the Crockpot

Now, let’s move to the crockpot. Begin by placing the halved baby potatoes at the bottom. They’ll soak up all the delicious juices from the chicken as it cooks. Next, lay the coated chicken breasts on top, creating a cozy layer of goodness.

Step 4: Add the Chicken Broth

Pour the chicken broth over the chicken and potatoes. This liquid is crucial for keeping everything moist and flavorful during the cooking process. It will create a lovely broth that you can spoon over your meal when serving.

Step 5: Set and Forget

Cover the crockpot and cook on low for 6-7 hours or on high for 3-4 hours. The slow cooking allows all the flavors to meld beautifully, while the chicken becomes so tender it practically shreds itself. Trust me, you’ll know it’s done when your kitchen smells like a warm hug!

Step 6: Serve and Garnish

Once cooked, use two forks to carefully shred the chicken and mix it with the potatoes. Serve hot, garnished with fresh parsley for a pop of color. You’ve transformed simple ingredients into a comforting feast that’s sure to impress.

What to Serve It With

This dish stands beautifully on its own, but let’s enhance the dining experience. Consider pairing it with a simple green salad featuring arugula, cherry tomatoes, and a light vinaigrette for a refreshing crunch. Or, if you want to cozy up even more, serve it alongside some crusty garlic bread to soak up those delicious juices. A glass of white wine, like a Chardonnay, will perfectly complement the creamy flavor profile of the dish!

Keeping Leftovers Fresh

Lucky you if you have leftovers! The flavors will only deepen as they sit, making tomorrow’s lunch even more delightful. Store your leftovers in an airtight container in the fridge for up to 3 days. If you want to save it for a rainy day, feel free to freeze it in a freezer-friendly container. When you’re ready to enjoy again, thaw it overnight in the fridge and reheat on the stovetop or microwave until warmed through.

Pro Chef Tips

Here are some insider secrets to ensure your Garlic Parmesan Crockpot Chicken and Potatoes comes out perfect every time:

  • Don’t Rush It: Cooking on low allows the flavors to mingle beautifully. If you’re short on time, you can cook it on high for about 3-4 hours, but I highly recommend the low-and-slow method.
  • Play with Flavors: Want a little zing? A splash of lemon juice before serving adds a refreshing twist. Or consider throwing in some chopped spinach at the end for an extra veggie boost.
  • Choose the Right Chicken: If you can find bone-in chicken thighs, use those! They’ll add an extra layer of rich flavor, but be sure to adjust cooking time accordingly.
  • Experiment with Potatoes: You can swap out baby potatoes for sweet potatoes for a hint of sweetness and added nutrition. And for a Mediterranean flair, try tossing in sun-dried tomatoes and olives.

Creative Twists

This recipe is versatile and can easily be adapted to suit your tastes. Here are a few ideas:

  • Herb Variations: If Italian seasoning isn’t your thing, try using a mix of rosemary and thyme for a different aromatic profile.
  • Cheese Options: Experiment with different cheeses like Asiago or Gruyère for a unique twist on the classic flavor.
  • Add Some Heat: For those who love a little kick, toss in some red pepper flakes or a diced jalapeño to the garlic mixture before coating the chicken.

FAQs

Let’s address some common questions about this recipe:

Can I use frozen chicken?

Yes, you can use frozen chicken, but make sure to increase the cooking time by about an hour or so to ensure it cooks thoroughly.

Is this recipe freezer-friendly?

Absolutely! You can freeze the leftovers for up to 3 months. Just make sure to thaw it properly before reheating.

Can I substitute other potatoes?

For sure! Feel free to use any type of potatoes you have on hand, such as red or Yukon gold potatoes.

What’s the best way to reheat?

You can reheat it on the stovetop or in the microwave, being careful not to overheat to avoid drying it out.

Can I add more vegetables?

Yes! Feel free to toss in vegetables like carrots, green beans, or bell peppers for added nutrition and flavor.

Conclusion

Cooking is more than just a means to an end; it’s an adventure that brings people together. With Garlic Parmesan Crockpot Chicken and Potatoes, you’re not just making a meal; you’re creating memories around the dinner table. Whether it’s a weeknight dinner or a gathering with friends, this dish will impress and delight everyone. So grab your apron, embrace the art of cooking, and let this comforting recipe warm your heart and home. I can’t wait to hear how your own culinary journey unfolds—happy cooking!

Garlic Parmesan Crockpot Chicken and Potatoes - Easy Quick Dinner Ideas

Prep Time 15 minutes
Cook Time 4 hours
Total Time 4 hours 15 minutes
Servings 4 servings
Calories 450
A delicious and easy crockpot dinner combining tender chicken, flavorful potatoes, and a cheesy garlic Parmesan sauce.

Ingredients

Protein

  • 4 pieces boneless, skinless chicken breasts

Vegetables

  • 1 pound baby potatoes, halved

Seasonings & Oils

  • 4 cloves garlic, minced
  • 1 cup grated parmesan cheese
  • 1 teaspoon italian seasoning
  • 1 teaspoon salt
  • 0.5 teaspoon black pepper
  • 0.5 cup chicken broth
  • 2 tablespoons olive oil

Garnish

  • fresh parsley for garnish (optional)

Instructions 

  • Mix garlic, Parmesan, Italian seasoning, salt, pepper, and olive oil.
  • Coat chicken with the mixture and place in crockpot over potatoes.
  • Add chicken broth and cook on low for 6-7 hours.
  • Shred chicken and mix with potatoes before serving.
  • Garnish with parsley if desired and serve hot.

Notes

For extra flavor, sprinkle additional Parmesan or herbs before serving.
Calories: 450kcal
Cost: $15
Course: Dinner
Keyword: chicken, garlic, Parmesan, Potatoes

Nutrition

Calories: 450kcal | Carbohydrates: 40g | Protein: 50g | Fat: 15g | Sodium: 900mg

Loved this recipe? Save it to your favorite Pinterest board so you can easily find it later! It’s the perfect way to keep all your sweet ideas in one place. ✨

Deliciously presented Garlic Parmesan Crockpot Chicken and Potatoes, showcasing tender chicken and halved potatoes.

Why This Recipe Will Change Your Dessert Game

Welcome to a culinary adventure that will transform your perspective on dessert! If you’ve ever found yourself indulging in a decadent bowl of cookie dough, dreaming of a guilt-free version that doesn’t skimp on flavor, then you’re in for a treat. My Greek Yogurt Cookie Dough is not just a recipe; it’s an invitation to embrace the deliciousness of healthy eating without sacrificing taste. With creamy Greek yogurt, nut butter, and chocolate chips, this dessert is not only nutritious but also bursting with flavor. Let’s dive into why this unique treat will ignite your passion for baking and inspire you to experiment in the kitchen!

Ingredients That Make It Irresistible

Before we get to the nitty-gritty of how to whip up this delightful dish, let’s talk about the star ingredients that make this cookie dough a true standout:

  • 1 cup Greek yogurt: The creamy base that adds protein and a tangy flavor, making this dessert both satisfying and nutritious.
  • 1/2 cup peanut butter or almond butter: Choose your favorite nut butter to add richness and healthy fats that keep you feeling full.
  • 1/4 cup honey or maple syrup: A touch of natural sweetness to balance the flavors without refined sugars.
  • 1 teaspoon vanilla extract: A dash of vanilla enhances the overall taste and aroma, making it irresistible.
  • 1 cup rolled oats: For a chewy texture that mimics traditional cookie dough while adding fiber.
  • 1/2 cup chocolate chips: Because what’s cookie dough without a generous sprinkle of chocolate?
  • 1/4 teaspoon salt: A pinch of salt amplifies all the flavors beautifully.

How to Make It: Step-by-Step Guide

Creamy Greek yogurt cookie dough in a bowl, featuring a rich texture and warm lighting.

Ready to roll up your sleeves and create this divine dessert? Follow these simple steps, and in no time, you’ll have a bowl of cookie dough that’s both delectable and guilt-free:

  1. In a mixing bowl, combine the Greek yogurt, peanut butter, honey, and vanilla extract until smooth. This creamy base is what sets this cookie dough apart, giving it a rich mouthfeel.
  2. Add the rolled oats, chocolate chips, and salt to the mixture, stirring until well combined. The oats provide texture, while the chocolate chips bring that classic cookie flavor.
  3. Chill the cookie dough in the refrigerator for about 30 minutes to firm up. This step is crucial for achieving the perfect consistency!
  4. Serve as a tasty snack or dessert, and store leftovers in the fridge for up to 3 days. You’ll want to keep this treat close at hand!

Why You’ll Want to Keep This Recipe on Hand

This Greek Yogurt Cookie Dough is a fantastic option for several reasons:

  • Quick and Easy: With just a few minutes of prep, you have a delicious treat waiting for you.
  • Healthier Alternative: Packed with protein and fiber, this dessert fits perfectly into a nutritious lifestyle.
  • Versatile: Customize it with your favorite mix-ins, such as dried fruits or nuts, to create your unique flair.

Serving Suggestions and Timing

This recipe yields about 4-6 servings, depending on your serving size. Pair it with fresh fruit like sliced bananas or berries, or enjoy it on its own as a delightful dessert at the end of a meal. It’s also a fantastic mid-afternoon snack when you need a little pick-me-up.

Delicious Variations to Explore

Feeling adventurous? Here are some variations to spice up your Greek Yogurt Cookie Dough:

  • Nutty Delight: Swap out the peanut butter for cashew or sunflower seed butter for a different flavor profile.
  • Protein Boost: Add a scoop of your favorite protein powder for an extra nutritional kick.
  • Fruit Forward: Fold in chopped dried fruits like cranberries or apricots for a chewy texture and a burst of sweetness.

Storage and Freezing Tips

To keep your cookie dough fresh:

  • Store leftovers in an airtight container in the refrigerator for up to 3 days. If the dough thickens, simply stir in a splash of milk to restore its creamy consistency.
  • While I don’t recommend freezing the dough, you can portion it out and freeze individual servings for a quick grab-and-go snack later on.

FAQs to Satisfy Your Curiosity

1. Can I make this recipe without whey protein powder?

Absolutely! This recipe is delicious as is, but adding protein powder can enhance its nutritional profile.

2. Can I use flavored Greek yogurt for this recipe?

Yes, flavored Greek yogurt can add an extra twist to your cookie dough. Just remember to adjust the sweetness accordingly!

3. Can I freeze this cookie dough?

While not recommended, you can refrigerate it for a cool treat, but freezing may affect the texture.

4. How do I make this recipe more indulgent?

Try adding more chocolate chips, chopped nuts, or a drizzle of melted chocolate on top for a decadent touch!

5. Is this recipe suitable for a low-carb diet?

Absolutely! Use a sugar-free sweetener and plain Greek yogurt to keep it low-carb-friendly.

6. Can I make a larger batch?

Of course! Just multiply the ingredients by the number of servings you desire.

7. Can I use a different nut butter instead of peanut butter?

Yes! Almond butter, cashew butter, or even sunflower seed butter work beautifully.

8. What can I use instead of chocolate chips?

You can use cacao nibs, chopped dark chocolate, or omit chocolate entirely for a plain cookie dough version.

9. Can I use a non-dairy protein powder for this recipe?

Absolutely! Plant-based protein powders like pea or rice protein will work just fine.

10. How can I make this recipe lower in calories?

Opt for a lower-calorie sweetener or reduce the amount of nut butter for a lighter treat.

Conclusion: A Sweet Revolution Awaits

There you have it! A simple yet delightful recipe that’s bound to become a staple in your dessert repertoire. With the perfect balance of creaminess, sweetness, and a touch of chew, this Greek Yogurt Cookie Dough is sure to please your palate and keep your health goals in check. So grab your ingredients, unleash your inner chef, and get ready to enjoy a treat that’s not just delicious but also empowering. Cooking is an adventure, and with this recipe, you’re well on your way to exploring new flavors and embracing the art of dessert. Happy cooking!

Greek Yogurt Cookie Dough

Prep Time 10 minutes
Total Time 40 minutes
Servings 4 pieces
Calories 180
A healthy and delicious no-bake treat made with Greek yogurt, oats, and chocolate chips.

Ingredients

Dairy

  • 1 cup Greek yogurt
  • 1/2 cup peanut butter or almond butter
  • 1/4 cup honey or maple syrup
  • 1 teaspoon vanilla extract

Oats

  • 1 cup rolled oats
  • 1/2 cup chocolate chips
  • 1/4 teaspoon salt

Instructions 

  • Mix Greek yogurt, peanut butter, honey, and vanilla until smooth.
  • Add oats, chocolate chips, and salt; stir well.
  • Chill in the fridge for 30 minutes.
  • Serve and enjoy; store leftovers in the fridge.

Notes

This recipe is quick, healthy, and perfect for a satisfying snack.
Calories: 180kcal
Cost: $10
Course: Dessert, Snack
Cuisine: Greek
Keyword: healthy, no bake

Nutrition

Calories: 180kcal | Carbohydrates: 20g | Protein: 8g | Fat: 8g | Sodium: 50mg

Loved this recipe? Save it to your favorite Pinterest board so you can easily find it later! It’s the perfect way to keep all your sweet ideas in one place. ✨

Eye-level shot of Greek yogurt cookie dough, showcasing chocolate chips and a hint of peanut butter.

Ignite Your Culinary Passion with Spaghetti Squash Baked Ziti

Welcome to a culinary adventure that promises to awaken your taste buds and transform your dinner table into a stage for bold flavors! Today, we dive into the world of Spaghetti Squash Baked Ziti — a dish that tantalizes with its hearty comfort and ignites excitement with a fiery twist. Whether you’re a seasoned chef or a kitchen newbie, this recipe invites you to embrace the thrill of cooking with heat. Let’s embark on this flavorful journey together!

Why You’ll Love This Recipe

  • Healthy Alternative: This dish swaps traditional pasta for spaghetti squash, lowering carbs without sacrificing flavor.
  • Flavor Explosion: The combination of roasted garlic, fresh basil, and a rich tomato sauce brings depth and warmth that dances on your palate.
  • Versatile Dish: Perfect as a main course or a side, it pairs beautifully with a side salad or crusty bread.
  • Quick to Prepare: With minimal prep time and a straightforward cooking process, you’ll have this dish ready to serve in under an hour!
  • Kid-Friendly: Kids love the fun texture of spaghetti squash, and you can sneak in veggies without them even noticing!

Ingredient Breakdown

Let’s get down to the essentials! Here’s what you’ll need to create this mouthwatering Spaghetti Squash Baked Ziti:

  • Spaghetti Squash: 1 small (about 2½ lb.), halved crosswise, seeds removed. Feel free to use a larger squash for more servings.
  • Extra-Virgin Olive Oil: ¼ cup, plus more for drizzling. Can substitute with avocado oil for a different flavor.
  • Kosher Salt: ¼ tsp., plus more to taste. Adjust according to your dietary needs.
  • Freshly Ground Black Pepper: To taste. Add a little cayenne for extra kick!
  • Whole Peeled Tomatoes: 1 (28-oz.) can. San Marzano tomatoes work beautifully for a sweeter flavor.
  • Garlic: 4 large cloves, smashed. Roast the garlic for a sweeter, mellower taste.
  • Sugar: A big pinch to balance acidity in the sauce.
  • Crushed Red Pepper Flakes: ¼ tsp., plus more for serving. Adjust based on your spice tolerance!
  • Parmesan Cheese: 1½ oz., finely grated. Pecorino Romano can be used for a sharper flavor.
  • Fresh Mozzarella: 6 oz., coarsely grated. Buffalo mozzarella adds a luxurious texture.
  • Basil Leaves: A handful, torn if large. Fresh herbs elevate the dish; feel free to mix with oregano!

Pro Tips for Perfecting Your Dish

Side view of a serving of baked ziti spaghetti squash, featuring layers of cheese and sauce.
  • Choosing the Right Squash: Look for a squash that feels heavy for its size with a firm rind. This means better flavor and texture!
  • Don’t Rush the Baking: Ensure the squash is tender by testing it with a fork; it should easily pierce the skin.
  • Enhance Your Sauce: Consider adding sautéed onions or bell peppers to your tomato sauce for added sweetness and depth.
  • Layering Flavors: Don’t forget to season every layer! Salt the squash, sauce, and cheese to ensure every bite is flavorful.
  • Let it Rest: Allow the baked ziti to sit for a few minutes before serving to let the flavors meld.
  • Experiment with Cheese: Mix different types of cheese for a complex flavor profile. Gouda or fontina can add a creamy richness.
  • Make it Vegan: Substitute cheese with cashew cream or nutritional yeast for a dairy-free version.
  • Leftover Magic: This dish tastes even better the next day! Store leftovers for a quick and satisfying meal.

Common Mistakes and Troubleshooting

Cooking can be a dance, and sometimes we trip up! Here are a few pitfalls to avoid:

  • **Squash Not Cooked Through**: If your squash is still hard, it needs more time in the oven. Check every 10 minutes until tender.
  • **Sauce Too Acidic**: If the sauce tastes too tangy, add a bit more sugar to balance it out. A splash of balsamic vinegar can also help!
  • **Too Much Water**: Spaghetti squash can release water. If your dish seems soupy, let it sit to absorb excess moisture or drain some sauce.
  • **Cheese Not Melting**: If your cheese isn’t bubbling, ensure your oven is fully preheated before broiling.

Delicious Variations

Feeling adventurous? Here are some scrumptious variations to try:

  • Mexican Twist: Add taco seasoning to your tomato sauce and top with jalapeños and cilantro.
  • Italian Sausage: Brown some Italian sausage before adding it to the sauce for a meaty version.
  • Veggie Loaded: Stir in sautéed zucchini, spinach, or mushrooms for a hearty vegetarian option.
  • Cheesy Pesto: Mix in a few tablespoons of pesto into the sauce for a herby flavor boost.

Storage and Make-Ahead Instructions

This dish is perfect for prepping ahead of time!

  • Make-Ahead: Prepare the sauce and bake the squash a day in advance. Assemble, top with cheese, and bake just before serving!
  • Storage: Store leftovers in an airtight container in the refrigerator for up to 4 days. Reheat in the oven or microwave until warmed through.
  • Freezing: This dish freezes beautifully. Freeze before baking for up to 3 months. Thaw in the refrigerator overnight before baking.

Frequently Asked Questions

Got questions? I’ve got answers! Here are some common queries about this recipe:

  • Can I use other types of squash? Absolutely! Butternut squash can work too, though it has a different texture.
  • How do I know when the squash is done? It’s done when you can easily pierce the skin with a fork and it collapses slightly under pressure.
  • Is spaghetti squash gluten-free? Yes! It’s a fantastic gluten-free alternative to pasta.
  • Can I prepare this dish in advance? Yes! You can prepare the sauce and roast the squash a day ahead for easy assembly.
  • What can I serve with this dish? A simple green salad, garlic bread, or roasted veggies make excellent companions.
  • How do I reheat leftovers? Reheat in the oven at 350°F or in the microwave until warm, adding a splash of water if it seems dry.
  • Can I make this dish vegan? Certainly! Use a vegan cheese alternative and skip the Parmesan.
  • What are the nutritional benefits of spaghetti squash? It’s low in calories, high in fiber, and packed with vitamins A and C!

Nutritional Tips and Dietary Adaptations

This recipe is not only delicious but also offers a host of nutritional benefits:

  • Low-Calorie: Spaghetti squash is significantly lower in calories compared to traditional pasta, allowing for a hearty meal without the guilt.
  • High in Fiber: The fiber from squash aids digestion and keeps you feeling full longer.
  • Rich in Vitamins: Squash is loaded with vitamins A and C, important for immune health and skin vitality.
  • Gluten-Free: Perfect for those with gluten intolerances or celiac disease.

Equipment Recommendations

Here’s what you’ll need to make this recipe shine:

  • Sharp Chef’s Knife: For slicing the squash effortlessly.
  • Rimmed Baking Sheet: Essential for roasting the squash and baking the dish.
  • Silicone Baking Mat or Parchment Paper: To prevent sticking and make cleanup a breeze.
  • 3-Quart Baking Dish: Perfect for mixing and baking your ziti-style goodness.

Serving Suggestions

Ready to serve? Here’s how to present your Spaghetti Squash Baked Ziti:

  • Garnish with Fresh Basil: A sprinkle of fresh basil leaves adds a pop of color and flavor.
  • Parmesan Cheese: Serve with extra grated Parmesan on the side for cheese lovers.
  • Red Pepper Flakes: A dash of red pepper flakes can elevate the heat for those who crave it.
  • Pair with Wine: A light red wine, like Chianti, complements the flavors beautifully.

So, my adventurous food lovers, are you ready to set your kitchen ablaze with flavors? This Spaghetti Squash Baked Ziti is not just a meal; it’s an experience, a celebration of spice, and a reminder that cooking is indeed an art. Embrace the fire, and let every bite tell a story worth sharing!

Baked Ziti-Style Spaghetti Squash

Prep Time 15 minutes
Cook Time 50 minutes
Total Time 1 hour 5 minutes
Servings 4 servings
Calories 350
A delicious low-carb twist on classic baked ziti, featuring roasted spaghetti squash topped with a rich tomato and cheese sauce.

Ingredients

Vegetables and Oils

  • 1 small spaghetti squash (about 2½ lb., halved, seeds removed)
  • 0.25 cup extra-virgin olive oil (plus more for drizzling)
  • 0.25 tsp kosher salt (plus more)
  • to taste black pepper
  • 1 28-oz. can whole peeled tomatoes
  • 4 large garlic cloves (smashed)
  • 1 big pinch sugar
  • 0.25 tsp crushed red pepper flakes (plus more for serving)
  • 1.5 oz. Parmesan (finely grated)
  • 6 oz. mozzarella (coarsely grated)
  • 1 handful basil leaves (torn if large)

Instructions 

  • Roast squash at 425°F (220°C) until tender, about 40-60 minutes. Meanwhile, prepare tomato sauce by squishing tomatoes in a baking dish, adding garlic, sugar, oil, red pepper flakes, salt, and black pepper; bake until bubbly, 35-40 minutes.
  • Cool squash slightly, then shred flesh with a fork and mix into the tomato sauce with Parmesan. Season with salt and top with mozzarella.
  • Return to oven and bake until cheese melts, 5-7 minutes. Broil until bubbly and browned, 1-2 minutes. Garnish with basil, red pepper flakes, and black pepper.

Notes

For extra flavor, add a drizzle of olive oil before serving.
Calories: 350kcal
Cost: $15
Course: Main Course
Cuisine: Italian
Keyword: Spaghetti Squash

Nutrition

Calories: 350kcal | Carbohydrates: 45g | Protein: 15g | Fat: 14g | Sodium: 600mg

Why You’ll Crave This Dish

Ah, the joy of a well-cooked meal! There’s something undeniably comforting about a bowl of food that bursts with flavor and warms your soul. This Spicy Ground Beef Stir-Fry Bowl is not just a dish; it’s a celebration of flavor, texture, and the kind of boldness that makes your taste buds dance. The marriage of juicy ground beef, vibrant garlic veggies, and fluffy, steamy rice creates a symphony of taste that will make you want to dive in headfirst.

But that’s not all! This dish is quick to whip up, making it a perfect choice for those busy weeknights when you want something satisfying without spending hours in the kitchen. Plus, it’s versatile—allowing you to use whatever vegetables you have on hand or to swap out proteins for a different twist. Ready to embark on this flavor adventure? Let’s dive into the details!

The Inspiration Behind This Bowl

This recipe was born from my own kitchen adventures, where creativity meets necessity. Picture this: a late-night craving strikes, and you’re staring at an almost-empty fridge. A pound of ground beef stares back at you, along with a colorful medley of vegetables waiting to be used. In moments like these, magic happens. A bit of soy sauce here, a splash of sriracha there, and suddenly, you’ve got a dish that not only satisfies your hunger but also ignites your passion for cooking.

Inspired by the vibrant street food culture of Asia, this stir-fry bowl embraces the essence of quick, bold cooking. It’s a dish that brings people together, whether it’s a family dinner or a meal prep for the week ahead. And trust me, once you try it, you’ll understand why it’s become a staple in my home!

Recipe Overview

A delicious bowl of spicy stir-fried ground beef and colorful veggies on rice.

This Spicy Ground Beef Stir-Fry Bowl with Garlic Veggies & Steamy Rice is not just about the ingredients; it’s about the experience. Here’s a quick look at what you can expect:

  • Prep Time: 15 minutes
  • Cook Time: 15 minutes
  • Total Time: 30 minutes
  • Servings: 4
  • Calories per Serving: ~550

Ingredients

For the Spicy Ground Beef

  • 1 pound ground beef
  • 3 cloves garlic, minced
  • 2 tablespoons soy sauce
  • 1 tablespoon sriracha (or to taste)
  • Salt and pepper to taste
  • 1 tablespoon vegetable oil

For the Garlic Veggies

  • 2 cups mixed vegetables (bell peppers, broccoli, and carrots work beautifully)

For the Base

  • 2 cups cooked rice (jasmine or basmati preferred)

Instructions

Step 1: Prepare the Ingredients

Before you even turn on the stove, let’s get organized! Wash and chop your mixed vegetables into bite-sized pieces. Mince the garlic and have your sauces ready to go. A little prep work goes a long way in stir-frying, as things move quickly once the heat is on!

Step 2: Cook the Ground Beef

Grab a large skillet or wok and heat the vegetable oil over medium-high heat. When the oil shimmers, it’s time to add your ground beef. Cook until it’s nicely browned, breaking it apart with a spatula. Season with salt and pepper, then stir in the minced garlic, soy sauce, and sriracha. Let the flavors meld together for about 2-3 minutes, ensuring the beef is coated in that spicy sauce.

Step 3: Stir-Fry the Garlic Veggies

Now, let’s add some color and crunch! Toss in your mixed vegetables into the skillet with the beef. Stir-fry for about 5-7 minutes or until the veggies are tender-crisp. You want them vibrant and full of life, not mushy. The key is to keep them moving in the pan!

Step 4: Assemble the Bowl

It’s time for the grand assembly! In a bowl, place a generous scoop of your cooked rice. Top it with the spicy ground beef and veggie mixture. Don’t forget to garnish with chopped green onions for that extra pop of flavor and color. Voila! You have a beautiful stir-fry bowl ready to be devoured.

Tips for Success

  • Use day-old rice for the best texture—it’s less sticky and holds up nicely in stir-fries.
  • Feel free to adjust the level of heat! If you’re sensitive to spice, use less sriracha. For those who crave more fire, add a splash more.
  • Make sure your veggies are cut uniformly so they cook evenly.

Variations & Substitutions

Protein Swaps

  • Ground turkey or chicken for a leaner option.
  • Tofu or tempeh for a plant-based alternative.
  • Shrimp or cubed chicken breast for different textures.

Vegetable Add-Ins

  • Snow peas, snap peas, or baby corn for crunch.
  • Spinach or bok choy for a nutrient boost.
  • Carrots or zucchini for extra color and sweetness.

Rice Alternatives

  • Brown rice for added fiber.
  • Quinoa or cauliflower rice for a low-carb option.

Storage and Freezing Tips

This dish is perfect for meal prep! Store each component separately in airtight containers:

  • Beef and Veggies: Up to 4 days in the fridge.
  • Rice: Up to 5 days in the fridge.

To reheat, microwave each component separately for even warming. Add a splash of water or soy sauce to keep things moist. If you want to freeze, do so before adding the rice for the best texture later on.

FAQs

Can I make this dish vegetarian?

Absolutely! Swap the ground beef for crumbled tofu or tempeh, and use vegetable broth instead of beef stock.

What if I don’t have sriracha?

No worries! You can substitute it with chili paste, hot sauce, or even a pinch of red pepper flakes for heat.

Final Thoughts

This Spicy Ground Beef Stir-Fry Bowl is more than just a meal; it’s an invitation to embrace the thrill of bold flavors and creativity in the kitchen. Whether you’re cooking for yourself, your family, or a gathering of friends, this dish promises satisfaction and joy in every bite. So, grab your skillet, heat things up, and let’s make some magic happen! Your taste buds will thank you, and so will your loved ones. Happy cooking!

Spicy Ground Beef Stir-Fry Bowl with Garlic Veggies & Steamy Rice

Prep Time 10 minutes
Cook Time 15 minutes
Total Time 25 minutes
Servings 4 servings
Calories 650
A quick and flavorful bowl combining spicy ground beef, crisp vegetables, and fluffy rice for a satisfying meal.

Ingredients

Meat

  • 1 pound ground beef

Vegetables

  • 2 cups mixed vegetables (bell peppers, broccoli, carrots)

Aromatics & Sauces

  • 3 cloves garlic, minced
  • 2 tablespoons soy sauce
  • 1 tablespoon sriracha (or to taste)
  • 1 tablespoon vegetable oil

Cooked Rice

  • 2 cups cooked rice

Seasonings

  • to taste salt and pepper
  • for garnish green onions, chopped

Instructions 

  • Heat oil in a skillet, cook beef until browned.
  • Add garlic, soy sauce, sriracha, salt, and pepper; stir well.
  • Stir-fry vegetables until tender-crisp, then remove from heat.
  • Serve beef and veggies over rice, garnish with green onions.

Notes

Adjust sriracha for desired spice level and add more vegetables if preferred.
Calories: 650kcal
Cost: $15
Course: Main Course
Cuisine: Asian
Keyword: beef, Spicy, Stir Fry

Nutrition

Calories: 650kcal | Carbohydrates: 80g | Protein: 40g | Fat: 20g | Sodium: 1500mg

Loved this recipe? Save it to your favorite Pinterest board so you can easily find it later! It’s the perfect way to keep all your sweet ideas in one place. ✨

Gourmet presentation of a beef stir-fry bowl featuring garlic veggies and steamed rice.

Why You’ll Fall for This Dish

Ah, love at first bite! There’s something undeniably magical about a meal that not only satisfies your hunger but also warms your heart. Enter Crock Pot Marry Me Chicken. This dish isn’t just a recipe; it’s a culinary experience designed to steal your heart and ignite your taste buds. Imagine tender, juicy chicken bathed in a creamy, sun-dried tomato sauce that dances with flavor and leaves you longing for just one more bite. Whether you’re cooking for a special someone or treating yourself to a cozy night in, this dish is sure to impress.

What Makes It Special?

The beauty of Crock Pot Marry Me Chicken lies in its simplicity and rich flavor profile. Using just a handful of ingredients, you can create a meal that feels indulgent yet effortless. The combination of sun-dried tomatoes, heavy cream, and Parmesan cheese creates a luscious sauce that clings to the chicken, making every forkful a delight. Plus, it’s a crowd-pleaser—perfect for family dinners or when you want to impress guests. And let’s not forget the ease of preparation. With the help of your trusty crockpot, you can set it and forget it while the magic happens.

Here’s What You Will Need

Detailed view of succulent chicken breasts in a creamy sauce served with basil and sun-dried tomatoes.
  • 4 boneless, skinless chicken breasts
  • 1 cup sun-dried tomatoes, chopped
  • 1 cup heavy cream
  • 1 cup chicken broth
  • 1 teaspoon garlic powder
  • 1 teaspoon Italian seasoning
  • Salt and pepper to taste
  • 1 cup grated Parmesan cheese
  • Fresh basil for garnish

How to Make This Irresistible Dish

Ready to dive into this flavorful journey? Let’s break down the process of making Crock Pot Marry Me Chicken.

Steps

  1. Place the chicken breasts in the crock pot.
  2. In a separate bowl, mix together the sun-dried tomatoes, heavy cream, chicken broth, garlic powder, Italian seasoning, salt, and pepper.
  3. Pour the mixture over the chicken in the crock pot.
  4. Cover and cook on low for 6-7 hours or on high for 3-4 hours, until the chicken is cooked through.
  5. During the last 30 minutes of cooking, stir in the Parmesan cheese.
  6. Once done, shred the chicken and mix well with the sauce.
  7. Serve hot, garnished with fresh basil.

Serving Suggestions

Crock Pot Marry Me Chicken is so rich and flavorful that it deserves to be paired with sides that complement its creaminess. Here are a few serving suggestions:

  • Pasta: Toss the chicken and sauce with your favorite pasta for a comforting dish.
  • Rice: Serve it over fluffy rice to soak up that decadent sauce.
  • Mashed Potatoes: Creamy mashed potatoes are perfect for a hearty meal.
  • Vegetables: Add a side of steamed broccoli or green beans for a pop of color and freshness.

Tips for Success

While this dish is pretty foolproof, here are a few tips to elevate your Crock Pot Marry Me Chicken experience:

  • Quality Ingredients: Use high-quality sun-dried tomatoes and fresh herbs for the best flavor.
  • Adjust Seasoning: Taste the sauce before serving and adjust the salt and pepper as needed.
  • Thickening the Sauce: If you prefer a thicker sauce, mix a tablespoon of cornstarch with a bit of cold water and stir it into the sauce during the last 30 minutes of cooking.

Variations to Spice It Up

If you’re feeling adventurous, try these variations:

  • Add Spice: A pinch of red pepper flakes can add a delightful kick.
  • Herb Swap: Experiment with fresh herbs like thyme or oregano for a different flavor profile.
  • Vegetarian Version: Substitute the chicken with hearty vegetables like zucchini and bell peppers, or use chickpeas for protein.

Substitutions You Can Make

Don’t have all the ingredients? No problem! Here are some substitutions:

  • Chicken: Turkey breasts or thighs can be used instead of chicken.
  • Heavy Cream: You can replace it with half-and-half or coconut cream for a lighter option.
  • Parmesan Cheese: Pecorino Romano or nutritional yeast can serve as a substitute for a different twist.

Equipment You’ll Need

To make this dish, you’ll need:

  • A reliable crockpot or slow cooker
  • A mixing bowl for the sauce
  • A whisk or spoon for mixing
  • A serving spoon for dish-up

Storage and Freezing

If you happen to have leftovers (although I doubt it!), Crock Pot Marry Me Chicken stores beautifully in the fridge for up to 3 days. Just let it cool completely before transferring it to an airtight container. As for freezing, this dish can be frozen for up to 3 months. To reheat, thaw overnight in the fridge and gently warm it on the stove or microwave, ensuring it heats through evenly.

FAQs

Can I cook this on high if I’m short on time?
Yes! Cook on high for 3-4 hours instead of low for 6-7 hours.

Is it necessary to shred the chicken?
Shredding the chicken helps it absorb the sauce better, but you can also serve the chicken whole if you prefer.

What can I do if the sauce is too thin?
You can thicken the sauce with a cornstarch slurry or by simmering it uncovered for a bit longer on the stove.

Troubleshooting Common Issues

While this recipe is straightforward, here are some troubleshooting tips for common issues:

  • Dry Chicken: Ensure you don’t overcook the chicken. If using chicken thighs, they are more forgiving than breasts.
  • Flavorless Sauce: Always taste and adjust seasonings before serving.

Conclusion

There you have it—Crock Pot Marry Me Chicken is not just a meal; it’s a celebration of flavors that will make your heart skip a beat. Packed with the richness of sun-dried tomatoes and the creaminess of Parmesan, every bite is a step closer to culinary bliss. So, gather your ingredients, fire up your crockpot, and get ready to fall in love with cooking all over again. Whether it’s a romantic dinner or a family feast, this dish is bound to win hearts and taste buds alike. Happy cooking!

CROCK POT MARRY ME CHICKEN

Prep Time 10 minutes
Cook Time 4 hours
Total Time 4 hours 10 minutes
Servings 4 servings
Calories 450
A creamy, flavorful chicken dish cooked effortlessly in the crock pot, perfect for a comforting meal.

Ingredients

Protein

  • 4 pieces boneless, skinless chicken breasts
  • 1 cup sun-dried tomatoes, chopped
  • 1 cup heavy cream
  • 1 cup chicken broth
  • 1 teaspoon garlic powder
  • 1 teaspoon italian seasoning
  • to taste salt and pepper
  • 1 cup grated parmesan cheese
  • for garnish fresh basil

Instructions 

  • Place chicken in crock pot.
  • Mix sun-dried tomatoes, cream, broth, garlic, seasoning, salt, and pepper; pour over chicken.
  • Cook on low 6-7 hours or high 3-4 hours.
  • Stir in Parmesan cheese during last 30 minutes.
  • Shred chicken, mix with sauce, garnish with basil, and serve.

Notes

For a richer flavor, let the chicken rest for a few minutes before serving.
Calories: 450kcal
Cost: $15
Course: Main Course
Cuisine: American
Keyword: chicken

Nutrition

Calories: 450kcal | Carbohydrates: 20g | Protein: 40g | Fat: 25g | Sodium: 800mg

Loved this recipe? Save it to your favorite Pinterest board so you can easily find it later! It’s the perfect way to keep all your sweet ideas in one place. ✨

Appetizing presentation of a Crock Pot dish showcasing chicken, creamy sauce, and vibrant garnishes.