Author

Avery Collins

Browsing

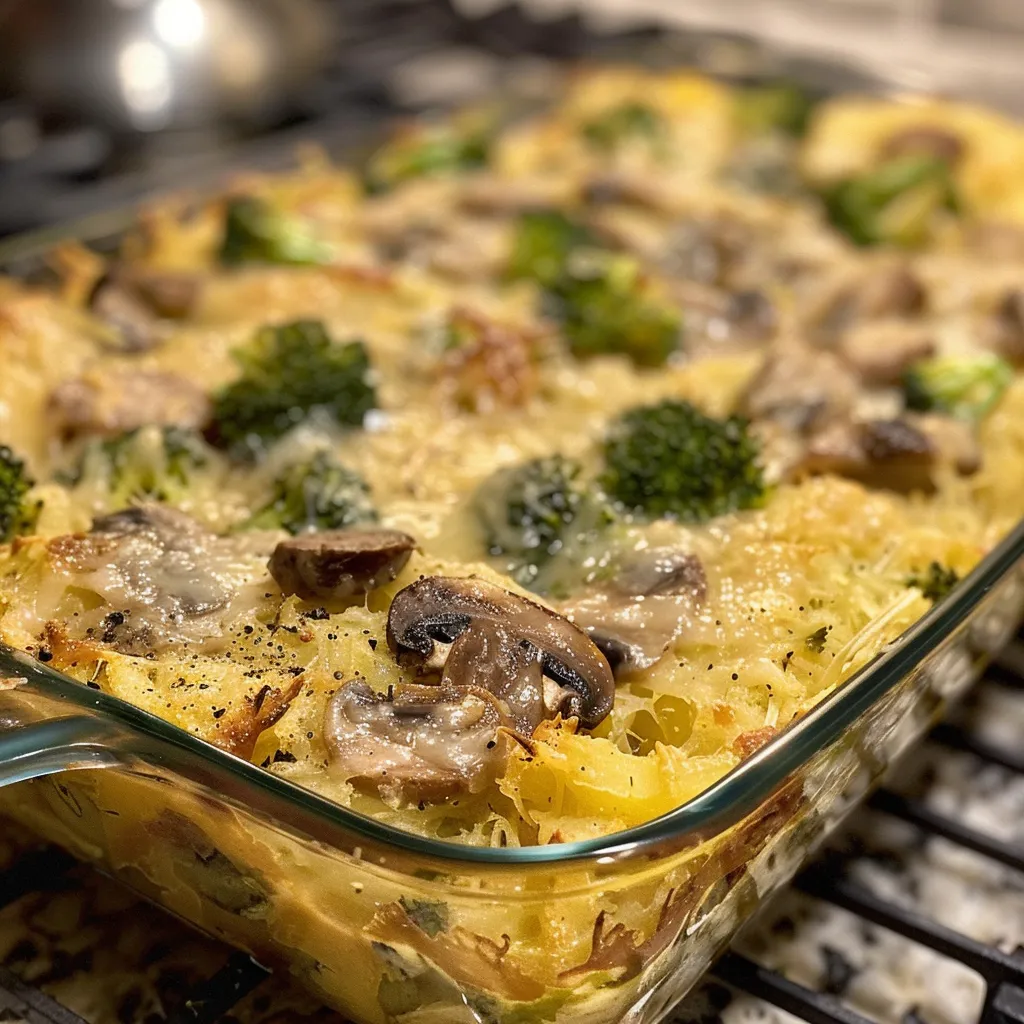
Welcome to Flavor Paradise: The Weight Watchers Tater Tot Casserole

Are you ready to embark on a culinary adventure that’s as fun to create as it is delicious to eat? Let’s dive into the delightful world of my Weight Watchers Tater Tot Casserole! This dish combines creamy goodness and crunchy tater tots while keeping it light at just 10 points per serving. Perfect for a family dinner or a cozy night in, this casserole is a celebration of flavors that will have you feeling like a culinary rockstar!

Why You’ll Love This Recipe

This isn’t just any casserole; it’s a dish bursting with personality and packed with benefits that will make you want to whip it up again and again. Here are five reasons why this recipe will become a staple in your kitchen:

  • Easy to Prepare: With simple ingredients and straightforward steps, you can have this casserole in the oven in less than 15 minutes, making it a perfect weeknight meal.
  • Family-Friendly: The creamy texture and crunchy topping appeal to all ages, ensuring that even picky eaters will clean their plates.
  • Health-Conscious: At just 10 Weight Watchers points per serving, you can indulge without guilt. Plus, it’s made with fat-free ingredients!
  • Customizable: Feel free to jazz it up with your favorite veggies or proteins, making it as unique as your culinary style.
  • Perfect for Meal Prep: This casserole keeps well, so you can make it ahead of time and enjoy leftovers throughout the week.

Ingredient Breakdown

Let’s take a closer look at the ingredients that make this tater tot casserole sing.

  • 1 can (10.5 oz) 98% fat-free condensed cream of mushroom soup: This creamy base adds richness while keeping it light.
  • 1 cup fat-free sour cream: Adds a tangy touch, making every bite creamy and luscious.
  • 1/4 teaspoon garlic powder: A must for flavor, bringing depth to the dish.
  • 1/4 teaspoon salt: Enhances all the flavors — don’t skip this!
  • 1/4 teaspoon black pepper: A little spice to balance the creaminess.
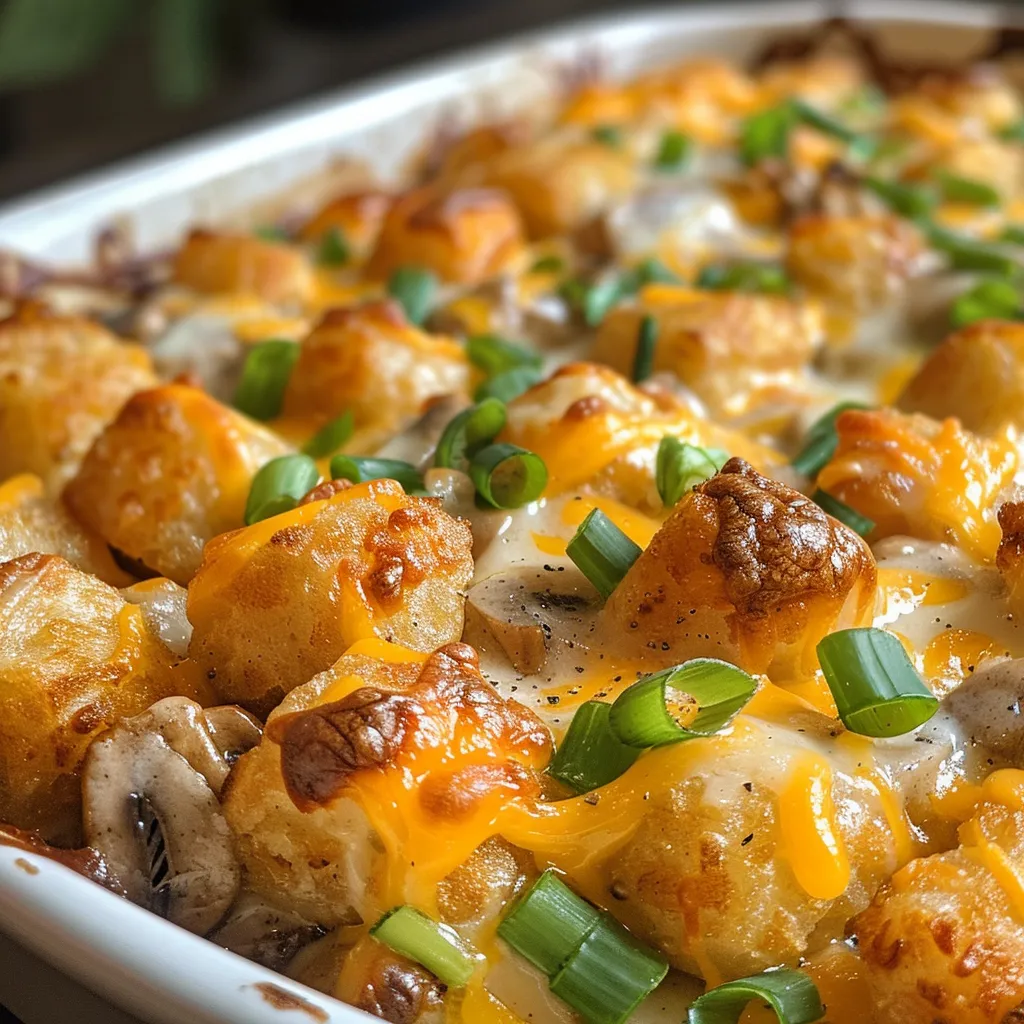
  • 1 cup light shredded Cheddar cheese: Melty and gooey, it’s the crown jewel of this casserole.
  • 3/4 cup sliced green onions: Fresh and vibrant, they add a pop of color and flavor.
  • 32 oz bag frozen tater tots: The star of the show — crispy on the outside, soft on the inside.
  • Optional: Chicken (for added protein): If you want to amp up the protein content, cooked chicken adds zero points!

Step-by-Step Instructions

Appetizing image of a serving of Weight Watchers Tater Tot Casserole with melted cheese and tater tots.

Ready to get cooking? Here’s how to create this flavor masterpiece:

  1. Preheat your oven to 350°F. Spray a large baking dish with cooking spray.
  2. In a mixing bowl, combine the condensed soup, 1/2 cup of sour cream, garlic powder, salt, pepper, and 1/2 cup of shredded cheese. Mix until well combined. Stir in chicken if you’re using it, along with 1/2 cup of green onions.
  3. Spread half of the frozen tater tots evenly over the bottom of the baking dish. Pour the creamy mixture over the tater tots, ensuring even coverage. Top with the remaining tater tots.
  4. Bake in the preheated oven for 45 minutes. After 45 minutes, sprinkle the remaining 1/2 cup of cheese on top and bake for an additional 10 minutes or until the cheese is bubbly and golden.
  5. Once out of the oven, dollop the remaining sour cream on top and garnish with the remaining 1/4 cup of sliced green onions. Serve hot and enjoy!

Pro Tips for Perfecting Your Casserole

Want to elevate your casserole game? Here are some pro tips to keep in mind:

  • Layer Wisely: Ensure even distribution of the creamy mixture for balanced flavor.
  • Experiment with Spice: Add a pinch of cayenne or chili powder for a kick!
  • Fresh Herbs: Toss in some fresh parsley or cilantro before serving for a burst of flavor.
  • Mix It Up: Try different cheese varieties like pepper jack or gouda for added flavor.
  • Don’t Overbake: Keep an eye on the casserole to prevent the tots from becoming too crispy.
  • Serve with a Side Salad: Balance the richness of the casserole with a fresh salad.
  • Make Ahead: Assemble the casserole a day in advance and bake when you’re ready to eat.
  • Freeze for Later: This casserole freezes beautifully; just thaw and reheat when hunger strikes!

Common Mistakes and Troubleshooting

Even the best chefs can run into a hiccup. Here’s how to avoid common pitfalls:

  • Too Dry: If your casserole comes out dry, try adding a bit more sour cream or soup next time.
  • Tots Not Crispy: Ensure your oven is at the right temperature and don’t cover the dish during baking to keep them crispy.
  • Overly Salty: If you find the casserole too salty, reduce the salt next time or use low-sodium versions of the soup and sour cream.
  • Not Enough Flavor: Boost flavor by adding more spices or herbs based on your taste preferences.

Delicious Variations

One of the best things about this tater tot casserole is how easy it is to customize. Here are some tasty variations:

  • Veggie-Loaded: Incorporate frozen mixed veggies or fresh sautéed bell peppers and mushrooms for added nutrients.
  • Tex-Mex Style: Add black beans, corn, and taco seasoning for a southwestern twist.
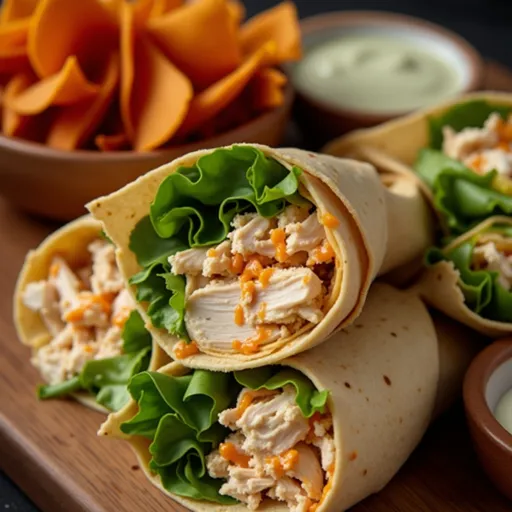
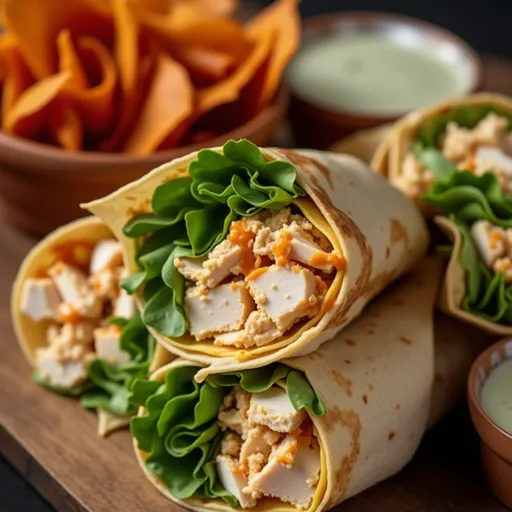
  • Buffalo Chicken: Mix in shredded buffalo chicken for a spicy kick!
  • Breakfast Casserole: Replace the chicken with scrambled eggs and add crumbled turkey sausage for a hearty breakfast option.

Storage and Make-Ahead Instructions

Planning ahead? Here’s how to store and reheat your casserole:

  • Refrigerate: Store any leftovers in an airtight container for up to 3 days.
  • Freezing: Freeze assembled casserole before baking for up to 3 months. Thaw in the fridge overnight before baking.
  • Reheat: Warm leftovers in the oven at 350°F for about 20-25 minutes until heated through.

Frequently Asked Questions

Got questions? I’ve got answers! Here are some FAQs about making this delicious casserole:

  • Can I use fresh vegetables instead of frozen? Yes! Just make sure they are cooked and chopped before adding.
  • Is this recipe suitable for meal prep? Absolutely! It stores well and makes for great leftovers.
  • Can I use a different type of cheese? Yes! Feel free to swap in your favorite cheese varieties.
  • How do I make this casserole gluten-free? Use gluten-free cream of mushroom soup and verify that your tater tots are gluten-free.
  • What can I serve with this casserole? A fresh green salad or steamed veggies pairs wonderfully!
  • How do I ensure my tater tots stay crispy? Avoid covering the dish while baking and bake at the recommended temperature.
  • Can I add more protein? Yes! Shredded chicken, turkey, or even beans are great additions!
  • What if I don’t have sour cream? Greek yogurt can be a great substitute for a similar tangy flavor.

Nutrition Tips and Dietary Adaptations

This casserole is not only delicious but can also be adapted to fit various dietary needs:

  • Low-Carb Option: Substitute tater tots with cauliflower tots for a low-carb version.
  • Vegetarian Delight: Omit chicken and load up on veggies for a filling vegetarian dish.
  • Dairy-Free: Use dairy-free cheese and sour cream alternatives to keep it dairy-free.

Equipment Recommendations

To whip up this amazing casserole, you’ll need some essential kitchen tools:

  • 9×13-inch Baking Dish: Ideal for even baking and ample servings.
  • Mixing Bowls: For combining ingredients smoothly.
  • Cooking Spray: To prevent sticking and ensure easy cleanup.

Serving Suggestions

Serve your Weight Watchers Tater Tot Casserole hot from the oven, garnished with extra green onions and a dollop of sour cream. Pair it with:

  • Fresh Side Salad: A crisp salad balances the richness of the casserole.
  • Steamed Vegetables: Broccoli or green beans make a colorful, nutritious side.
  • Garlic Bread: For those who love a bit of crunch with their meal.

In conclusion, this Weight Watchers Tater Tot Casserole is more than just a recipe; it’s an invitation to play with flavors and embrace the joy of cooking. So grab your skillet, fire up that oven, and let’s create some culinary magic that will leave everyone asking for seconds! Cooking should always be an adventure, and with this dish, you’re well on your way to infusing your kitchen with warmth, flavor, and a touch of boldness.

Weight Watchers Tater Tot Casserole - 10 Points per Serving

Prep Time 10 minutes
Cook Time 55 minutes
Total Time 1 hour 5 minutes
Servings 6 servings
Calories 450
A delicious and easy casserole that combines creamy mushroom soup, cheese, green onions, and crispy tater tots for a satisfying meal with controlled points.

Ingredients

Canned Goods

  • 1 can condensed cream of mushroom soup (10.5 oz, 98% fat free)
  • 1 cup fat free sour cream
  • 0.25 teaspoon garlic powder
  • 0.25 teaspoon salt
  • 0.25 teaspoon black pepper
  • 1 cup light shredded Cheddar cheese
  • 3/4 cup sliced green onions
  • 32 ounce frozen tater tots
  • optional chicken (for added protein) (0 points if used)

Instructions 

  • Preheat oven to 350°F (175°C). Spray baking dish with cooking spray.
  • Mix soup, 1/2 cup sour cream, garlic powder, salt, pepper, and 1/2 cup cheese. Stir in chicken (if using) and 1/2 cup green onions.
  • Layer half of the tater tots in dish. Spread mixture over, then top with remaining tots.
  • Bake for 45 minutes. Top with remaining cheese and bake 10 more minutes until melted. Garnish with remaining sour cream and green onions.

Notes

This casserole is perfect for a quick, satisfying meal with controlled points for weight watchers.
Calories: 450kcal
Cost: $15
Course: Main Course
Cuisine: American
Keyword: Tater Tots

Nutrition

Calories: 450kcal | Carbohydrates: 50g | Protein: 25g | Fat: 15g | Sodium: 900mg

Why You’ll Love This Flavor-Packed Bowl

Let’s be real: life can sometimes feel like a monotonous routine, especially when it comes to weeknight dinners. But what if I told you that you could turn your dinner table into a vibrant fiesta with just a few simple ingredients? Enter the Sweet Potato Taco Bowls! This dish is not just a meal; it’s an adventure! A delightful combination of warm, roasted sweet potatoes, hearty black beans, and a medley of fresh toppings creates a beautiful balance of flavors and textures that will make your taste buds sing.

This recipe is perfect for those who want to eat healthy without sacrificing taste. Each bite is a celebration of bold spices and colorful ingredients, making it an ideal choice for families, meal prepping, or even impressing guests. Ready to ignite your dinner routine? Let’s dive into the delicious details of these Sweet Potato Taco Bowls!

Overview of Ingredients

Before we jump into the cooking, let’s take a moment to appreciate the star players of our dish:

  • Sweet Potatoes: Naturally sweet and packed with nutrients, they form the hearty base of our bowls.
  • Black Beans: A fantastic source of protein and fiber, black beans add a satisfying creaminess.
  • Corn: Fresh or frozen, corn brings a pop of sweetness and color to each bite.
  • Avocado: Adding creaminess and healthy fats, diced avocado elevates the dish to new heights.
  • Cherry Tomatoes: Juicy and fresh, they brighten up the bowl with their vibrant flavor.
  • Red Onion: Adds a sharp yet sweet crunch for extra texture.
  • Cilantro: A fresh herb that ties all the flavors together.

Let’s Get Cooking: Your Foolproof Roadmap

A colorful Sweet Potato Taco Bowl showcasing sweet potatoes, fresh vegetables, and garnished with cilantro and lime wedges.

Cooking should be a joyful experience filled with adventure, and this recipe is no exception. Here’s how to create your Sweet Potato Taco Bowls:

Step 1: Preheat and Prepare

Begin by preheating your oven to 400°F (200°C). This is crucial for achieving perfectly roasted sweet potatoes that are tender on the inside and crispy on the outside.

Step 2: Season Those Sweet Potatoes

In a large mixing bowl, toss your 2 medium sweet potatoes (diced) with 1 tablespoon olive oil, 1 teaspoon chili powder, 1 teaspoon cumin, and season with salt and pepper to taste. The spices will create a fragrant coating that enhances the natural sweetness of the potatoes.

Step 3: Roast to Perfection

Spread the seasoned sweet potatoes on a baking sheet in a single layer. This allows them to roast evenly. Pop them in the oven and let them roast for about 25-30 minutes, or until they are tender and slightly caramelized. Don’t forget to stir halfway through to ensure they don’t stick and that you get that beautiful caramelization on all sides!

Step 4: Mix the Bean Medley

While the sweet potatoes are roasting, grab a large bowl and combine 1 can of black beans (rinsed and drained), 1 cup of corn (fresh or frozen), 1 cup cherry tomatoes (halved), and 1/2 cup red onion (diced). Mix well to ensure all the ingredients are evenly distributed. This medley will add layers of flavor and texture to your bowl.

Step 5: Combine and Serve

Once the sweet potatoes are roasted to perfection, add them to the bowl with the bean mixture and gently toss everything together. Now it’s time to serve! Divide the mixture into bowls and top each serving with 1 avocado (diced) and garnish with fresh cilantro. Serve with lime wedges on the side for that extra zesty kick, and if you’re feeling adventurous, drizzle some taco sauce or salsa over the top.

Tips for the Perfect Taco Bowl

Here are some pro tips to ensure your Sweet Potato Taco Bowls are a hit:

  • Choosing Sweet Potatoes: Opt for firm, unblemished sweet potatoes. They should feel heavy for their size and have a smooth skin.
  • Meal Prep Friendly: Roast extra sweet potatoes and prepare additional toppings on the weekend for quick assembly during the week.
  • Layering Flavors: Consider adding a touch of smoked paprika or cayenne for an extra layer of depth and heat.
  • Storing Leftovers: Keep leftover components in separate airtight containers in the fridge for up to 4 days. Assemble fresh bowls as needed!

Variations to Spice Things Up

If you’re looking to shake things up, here are some delicious variations you can try:

  • Protein Swap: Replace black beans with shredded chicken, ground turkey, or even grilled shrimp for a different flavor profile.
  • Vegetarian Delight: For a meatless option, swap the beans for lentils or chickpeas for added protein.
  • Extra Crunch: Add crushed tortilla chips or toasted pepitas on top for a delightful crunch.
  • Cheesy Goodness: Sprinkle some crumbled queso fresco, shredded cheddar, or nutritional yeast for a cheesy twist.

Common FAQs

Can I make this vegan?

Absolutely! Simply substitute the avocado for a dairy-free alternative like cashew cream and use plant-based proteins like lentils or tofu.

How do I prevent my sweet potatoes from getting mushy?

To achieve the perfect texture, make sure to spread the sweet potatoes in a single layer on the baking sheet and avoid overcrowding. Also, cutting them into uniform sizes will ensure even cooking.

Can I freeze the leftovers?

Yes! You can freeze the roasted sweet potatoes and bean mixture separately in airtight containers for up to 3 months. Thaw them in the fridge overnight before reheating.

Final Thoughts: Ignite Your Culinary Adventure!

In just a few simple steps, you’ve transformed everyday ingredients into a vibrant, mouthwatering meal that brings excitement to your dinner table. Sweet Potato Taco Bowls are not just a dish; they’re a canvas for your culinary creativity. Whether you stick to the classic recipe or explore the variations, you’re guaranteed a bowl that’s as nutritious as it is delicious. So grab your ingredients, invite some friends over, and celebrate the joy of cooking with flavors that ignite your spirit. Happy cooking, and may your taste buds always dance with delight!

Sweet Potato Taco Bowls | Easy, Healthy Weeknight Dinner!

Prep Time 10 minutes
Cook Time 30 minutes
Total Time 40 minutes
Servings 4 servings
Calories 350
Enjoy a quick and nutritious dinner with these flavorful sweet potato taco bowls, perfect for weeknights.

Ingredients

Vegetables

  • 2 medium sweet potatoes, diced
  • 1 tablespoon olive oil
  • 1 teaspoon chili powder
  • 1 teaspoon cumin
  • salt and pepper to taste salt and pepper
  • 1 can black beans, rinsed and drained
  • 1 cup corn (fresh or frozen)
  • 1 avocado diced avocado
  • 1 cup cherry tomatoes, halved
  • 1/2 cup red onion, diced

Garnish

  • fresh cilantro fresh cilantro (for garnish)
  • lime wedges lime wedges (for serving)
  • taco sauce or salsa (optional) taco sauce or salsa (optional)

Instructions 

  • Preheat oven to 400°F (200°C). Toss sweet potatoes with olive oil, chili powder, cumin, salt, and pepper.
  • Spread on a baking sheet and roast for 25-30 minutes, stirring halfway.
  • Mix black beans, corn, cherry tomatoes, and red onion in a large bowl.
  • Add roasted sweet potatoes to the bowl and toss gently.
  • Divide into bowls, top with diced avocado, garnish with cilantro, and serve with lime wedges and optional salsa.

Notes

Feel free to customize with your favorite toppings or add hot sauce for extra flavor.
Calories: 350kcal
Cost: $15
Course: Dinner
Cuisine: Mexican
Keyword: sweet potato

Nutrition

Calories: 350kcal | Carbohydrates: 60g | Protein: 12g | Fat: 10g | Sodium: 400mg

Loved this recipe? Save it to your favorite Pinterest board so you can easily find it later! It’s the perfect way to keep all your sweet ideas in one place. ✨

Delicious Sweet Potato Taco Bowl featuring vibrant ingredients like black beans, corn, and diced avocado on a rustic surface.

Why You’ll Love It

Let’s talk about a dish that strikes the perfect balance between affordability and flavor: chicken thighs. These sizzling chicken thighs are not just a meal; they are an experience that ignites your culinary passion, turning a simple dinner into a celebration of taste. Whether you’re a kitchen novice or a seasoned chef, this recipe will empower you to embrace the art of cooking with confidence. With just a handful of ingredients, you’ll create a dish that’s not only easy on the wallet but also a flavor explosion that will awaken your taste buds and bring excitement to your dinner table!

Ingredients

  • 4 chicken thighs (bone-in, skin-on)
  • 2 tablespoons olive oil
  • 1 teaspoon garlic powder
  • 1 teaspoon paprika
  • Salt and pepper to taste
  • 1 cup chicken broth
  • 1 cup mixed vegetables (frozen or fresh)
  • Fresh parsley for garnish (optional)

Each ingredient serves a purpose, transforming humble chicken thighs into a dish that sings with flavor. The skin-on, bone-in thighs deliver juiciness and a rich, crispy texture, while the spices add depth and warmth that are simply irresistible.

How to Make Sizzling Chicken Thighs

Juicy chicken thighs in a warm setting, showcasing a crispy skin and vibrant vegetable medley.

Cooking these chicken thighs is as straightforward as it is rewarding. Here’s how to create a beautiful dish that will impress your family and friends:

  1. Preheat your oven to 400°F (200°C).
  2. In a large oven-safe skillet, heat the olive oil over medium-high heat.
  3. Season the chicken thighs generously with garlic powder, paprika, salt, and pepper.
  4. Place the chicken thighs skin-side down in the skillet and sear for about 5-7 minutes until golden brown.
  5. Flip the chicken thighs and pour in the chicken broth.
  6. Add the mixed vegetables around the chicken in the skillet.
  7. Transfer the skillet to the preheated oven and bake for 25-30 minutes, or until the chicken is cooked through and reaches an internal temperature of 165°F (75°C).
  8. Remove from the oven and let rest for a few minutes before serving.
  9. Garnish with fresh parsley if desired and enjoy your cheap and delicious dinner!

Doesn’t that sound easy? The searing process locks in the flavors, and the chicken broth ensures that every bite is succulent and full of life. You can customize this dish with a variety of vegetables, making it a versatile option for any night of the week.

Top Tip

For an extra layer of flavor, consider marinating the chicken thighs in the olive oil, garlic powder, and paprika for a few hours before cooking. This will deepen the flavor profile and take your dish to the next level.

Tips and Tricks for Perfection

Cooking should be a joyful experience, and with these tips, you’ll master the art of sizzling chicken thighs:

  • Use a Cast Iron Skillet: If you have one, a cast iron skillet is ideal for searing and baking. It retains heat beautifully and gives your chicken a gorgeous crust.
  • Choose Fresh Ingredients: Fresh vegetables not only enhance the flavor but also add nutrition. Feel free to experiment with seasonal veggies.
  • Rest Before Serving: Allowing the chicken to rest before cutting into it helps retain its juices, resulting in a moist and tender bite.

Variations to Explore

Feeling adventurous? Here are a few variations you can try with this recipe:

  • Spice It Up: Add a pinch of cayenne pepper or red pepper flakes to the seasoning mix for an extra kick. Your taste buds will thank you!
  • Herb Infusion: Mix in fresh herbs like thyme or rosemary for a fragrant twist. Simply toss them into the skillet alongside the chicken.
  • Citrus Zing: Squeeze fresh lemon or lime juice over the chicken just before serving for a bright, zesty finish.

Substitutions

Don’t have all the ingredients? No problem! Here are some substitutions you can make:

  • Chicken Thighs: Bone-in chicken breasts or drumsticks will work, though cooking times may vary slightly.
  • Olive Oil: Feel free to use avocado oil or melted butter for a different flavor profile.
  • Mixed Vegetables: Use whatever veggies you have on hand, like bell peppers, zucchini, or green beans. The world is your oyster!

Equipment You’ll Need

To whip up these delicious chicken thighs, you’ll need the following equipment:

  • Oven-safe skillet (preferably cast iron)
  • Meat thermometer (to check doneness)
  • Cutting board and knife for prepping vegetables
  • Serving platter or plate for presentation

Storage and Freezing Tips

Planning ahead? Here’s how to store your delicious creation:

  • Refrigeration: Leftover chicken can be stored in an airtight container in the fridge for up to 4 days.
  • Freezing: If you want to save some for later, freeze the cooked chicken thighs in a freezer-safe container for up to 3 months. Thaw in the fridge overnight before reheating.

FAQs

Got questions? Let’s tackle some common ones:

Can I use boneless chicken thighs?

Absolutely! Just be mindful of the cooking time; boneless thighs may cook faster, so keep an eye on them to avoid drying out.

What if I don’t have chicken broth?

You can substitute it with vegetable broth or even water, but chicken broth will give you the best flavor.

How do I know when the chicken is done?

The internal temperature should reach 165°F (75°C). A meat thermometer is your best friend here!

Troubleshooting Common Issues

Here are some tips for resolving any hiccups along the way:

  • Chicken Not Browning: Ensure your skillet is hot enough before adding the chicken. A good sear is crucial for flavor.
  • Dry Chicken: If your chicken turns out dry, it may have been overcooked. Always check the internal temperature to prevent this.
  • Flavor Too Mild: If the dish lacks punch, consider adding more seasoning or a splash of vinegar or citrus for brightness.

Conclusion

Cooking sizzling chicken thighs is more than just preparing a meal; it’s about embracing the joy of culinary creativity and flavor exploration. With this recipe, you’ve unlocked a world of possibilities—affordable, delicious, and easy to prepare. Whether you’re cooking for yourself or a crowd, these chicken thighs will surely impress. So grab your skillet, turn up the heat, and let the adventure begin. Remember, cooking is about having fun, experimenting, and savoring every bite. Happy cooking, and may your dinner table always be filled with good food and great company!

This is a delicious chicken thighs recipe! If you need a cheap dinner idea to …

Prep Time 10 minutes
Cook Time 30 minutes
Total Time 40 minutes
Servings 4 servings
Calories 450
A flavorful and budget-friendly chicken thighs dish with vegetables, perfect for a quick dinner.

Ingredients

Main

  • 4 pieces chicken thighs (bone-in, skin-on)
  • 2 tablespoons olive oil
  • 1 teaspoon garlic powder
  • 1 teaspoon paprika
  • to taste salt and pepper
  • 1 cup chicken broth
  • 1 cup mixed vegetables (frozen or fresh)
  • optional fresh parsley for garnish

Instructions 

  • Preheat oven to 400°F (200°C).
  • Heat olive oil in an oven-safe skillet and sear chicken skin-side down for 5-7 minutes.
  • Flip chicken, add broth, and vegetables around it. Season with garlic powder, paprika, salt, and pepper.
  • Transfer skillet to oven and bake for 25-30 minutes until cooked through.
  • Rest for a few minutes, garnish with parsley if desired, and serve.

Notes

Ensure chicken reaches an internal temperature of 165°F (75°C) before serving.
Calories: 450kcal
Cost: $15
Course: Dinner
Keyword: chicken thighs

Nutrition

Calories: 450kcal | Carbohydrates: 20g | Protein: 50g | Fat: 20g | Sodium: 800mg

Loved this recipe? Save it to your favorite Pinterest board so you can easily find it later! It’s the perfect way to keep all your sweet ideas in one place. ✨

Appetizing chicken thighs with a rich glaze, featured with colorful mixed vegetables in the background.

Unleash the Flavor: Cheesy Keto Cauliflower Au Gratin Casserole

Welcome to the world of indulgent flavor where comfort food meets health-conscious choices! Today, we’re diving into the velvety richness of a Cheesy Keto Cauliflower Au Gratin Casserole. This dish is not just another recipe; it’s a culinary adventure that will awaken your taste buds and spark your creativity in the kitchen. With its creamy texture, cheesy goodness, and a hint of spice, this casserole is perfect for those following a low-carb diet without sacrificing flavor. Let’s get cooking!

Why You’ll Love This Recipe

Here are five irresistible reasons to embrace this cheesy keto masterpiece:

  • Decadent Comfort Food: Transform humble cauliflower into an indulgent dish that rivals even the richest casseroles.
  • Keto-Friendly: With low carbs and high satisfaction, this dish fits perfectly into your ketogenic lifestyle.
  • Versatile and Adaptable: Customize it with your favorite cheeses or spices to make it uniquely yours!
  • Easy Preparation: With straightforward steps, even novice cooks can impress with this restaurant-quality dish.
  • Leftover Friendly: This casserole tastes even better the next day, making it a fantastic option for meal prep!

Ingredients You’ll Need

Gather these ingredients for a dish that’s as simple as it is delicious:

  • 1 head cauliflower (or 4 cups), sliced thinly: The star of the dish, it absorbs all the creamy flavors.
  • 2 cups Swiss Gruyere cheese, shredded (or just Swiss cheese): For that authentic, nutty flavor that melts beautifully.
  • 4 green onions, sliced: Adds a fresh crunch and a pop of color.
  • Salt and black pepper, to taste: Essential for enhancing the flavors.
  • 1 1/2 cups heavy cream: The silky base that binds everything together.

How to Make Cheesy Keto Cauliflower Au Gratin Casserole

Side view of a cheesy keto casserole featuring baked cauliflower and Swiss cheese.

Ready to create a masterpiece? Follow these detailed steps:

  • Step 1: Preheat your oven to 375°F (190°C) and spray a baking dish with cooking spray to prevent sticking. Set the dish aside.
  • Step 2: Thinly slice the cauliflower head into rounds or slices approximately 1/4 inch thick.
  • Step 3: Arrange half of the sliced cauliflower in an even layer on the bottom of the prepared baking dish.
  • Step 4: Sprinkle half of the shredded Gruyere cheese evenly over the cauliflower layer. Then sprinkle all of the sliced green onions on top. Season with salt and black pepper to taste.
  • Step 5: Add the remaining cauliflower slices as a second even layer over the cheese and green onions.
  • Step 6: Pour the heavy cream evenly over the entire casserole. Then top with the remaining shredded Gruyere cheese.
  • Step 7: Cover the baking dish with foil and bake in the preheated oven for 30 minutes to allow the cauliflower to start cooking and the cream to heat through.
  • Step 8: Remove the foil and continue baking uncovered for an additional 40 minutes, or until the cauliflower is fork tender and the cheese on top is golden brown and bubbly. Check periodically, as oven times may vary.
  • Step 9: Let the casserole rest for 5 minutes after baking to allow it to thicken up. Serve warm. Store any leftovers in an airtight container.

Pro Tips for Perfecting Your Casserole

Take your cheesy keto casserole to the next level with these expert insights:

  • Cut Uniformly: For even cooking, make sure your cauliflower slices are consistent in thickness.
  • Cheese Variations: Experiment with different cheeses like cheddar or mozzarella for a unique twist!
  • Spice It Up: Add a pinch of cayenne or smoked paprika for an unexpected kick!
  • Layering Technique: Alternate layers of cauliflower and cheese for a beautiful presentation.
  • Fresh Herbs: Sprinkle fresh parsley or thyme on top before serving for a burst of freshness.
  • Storage Tip: To keep the casserole creamy, cover it tightly with foil or plastic wrap when refrigerating.
  • Reheat Wisely: Reheat in a low oven to avoid drying out the dish.
  • Make It Ahead: Prepare the casserole a day in advance, cover, and refrigerate until ready to bake.

Common Mistakes and Troubleshooting

Even seasoned cooks can stumble. Here’s how to avoid common pitfalls:

  • Overcooking Cauliflower: Keep an eye on your casserole to ensure the cauliflower doesn’t become mushy. It should be tender but still hold its shape.
  • Too Much Liquid: If your casserole seems too watery, try reducing the cream slightly and ensure you layer the cauliflower well to absorb moisture.
  • Cheese Not Melting: Ensure your oven is fully preheated and that you’re using good quality cheese for the best melting results.

Variations to Try

Make this casserole your own with these tasty variations:

  • Buffalo Cauliflower Au Gratin: Add buffalo sauce for a spicy twist that packs a punch!
  • Italian Style: Incorporate marinara sauce and Italian herbs for an Italian-inspired casserole.
  • Cheesy Broccoli Addition: Mix in steamed broccoli florets for added nutrition and color.
  • Mushroom Medley: Sauté mushrooms before adding them for an earthy flavor that complements the cheese.

Storage and Make-Ahead Instructions

Planning ahead? Here’s how to keep your casserole fresh:

  • Refrigeration: Store leftovers in an airtight container for up to 3 days.
  • Freezing: You can freeze the unbaked casserole for up to 2 months. Just thaw in the refrigerator overnight before baking.
  • Reheating: Reheat individual portions in the microwave or warm the entire casserole in the oven at 350°F (175°C) until heated through.

Frequently Asked Questions

Got questions? I’ve got answers!

  • Can I use frozen cauliflower? Yes, but thaw and drain it well to avoid excess moisture.
  • What if I don’t have Gruyere cheese? Swiss cheese is a great substitute, offering a similar melting quality.
  • Is this dish vegetarian? Absolutely! It’s a delicious vegetarian option for any meal.
  • Can I add meat to this casserole? Yes, cooked chicken or sausage can be a hearty addition!
  • How can I make this dairy-free? Substitute the cheese with dairy-free cheese and use coconut cream or almond milk.
  • What are some serving suggestions? Pair this casserole with a crisp salad or grilled protein for a complete meal.
  • How many servings does this recipe yield? This dish serves about 6, depending on portion size.
  • Can I prepare this casserole ahead of time? Yes, you can assemble it a day in advance and bake when ready!

Nutritional Tips and Dietary Adaptations

To make the most of your cheesy keto cauliflower au gratin, consider these dietary adaptations:

  • Low-Calorie Option: Use reduced-fat cheese and light cream to lower calories without sacrificing flavor.
  • High-Protein Boost: Incorporate cooked chicken or turkey for a protein-packed side dish.
  • Vegan Version: Replace heavy cream with cashew cream and cheese with nutritional yeast for a dairy-free delight.

Equipment Recommendations

Here’s what you’ll need to make this dish both easy and enjoyable:

  • Sharp Knife: For slicing the cauliflower evenly.
  • Cutting Board: A sturdy surface for all your chopping needs.
  • Baking Dish: A 9×13 inch dish works perfectly for this casserole.
  • Aluminum Foil: For covering the casserole during baking.
  • Whisk: To blend the cream and seasonings smoothly.

Serving Suggestions

Make your meal complete with these serving ideas:

  • Pair with Protein: Serve alongside grilled chicken or beef for a hearty meal.
  • Fresh Salad: A crisp green salad enhances the dish’s richness.
  • Garnish: Top with fresh herbs like parsley for added color and flavor.

Conclusion

There you have it! A Cheesy Keto Cauliflower Au Gratin Casserole that will not only satisfy your cravings but also ignite your passion for cooking. Embrace the adventure of flavors and enjoy every bite of this creamy, cheesy delight. Whether for a weeknight meal or a special gathering, this dish is sure to impress. So grab your skillet, let the cooking commence, and remember: food is an adventure waiting to be savored!

Cheesy Keto Cauliflower Au Gratin Casserole Recipe

Prep Time 10 minutes
Cook Time 1 hour 10 minutes
Total Time 1 hour 20 minutes
Servings 4 servings
Calories 350
A creamy, cheesy cauliflower casserole perfect for a keto-friendly meal that’s easy to prepare and full of flavor.

Ingredients

Vegetables

  • 1 head cauliflower (sliced thinly)
  • 2 cups Swiss Gruyere cheese (shredded)
  • 4 green onions green onions (sliced)
  • 1.5 cups heavy cream
  • to taste salt and black pepper

Instructions 

  • Preheat oven to 375°F (190°C) and prepare baking dish.
  • Slice cauliflower into 1/4 inch thick rounds.
  • Layer half of cauliflower in dish, sprinkle with half of cheese, green onions, salt, and pepper. Repeat with remaining cauliflower and cheese.
  • Pour heavy cream over casserole, cover with foil, and bake for 30 minutes.
  • Remove foil and bake uncovered for 40 minutes until golden and bubbly. Rest 5 minutes before serving.

Notes

This dish is best served warm and can be stored in an airtight container for leftovers.
Calories: 350kcal
Cost: $15
Course: Main Course
Cuisine: American
Keyword: Cauliflower

Nutrition

Calories: 350kcal | Carbohydrates: 12g | Protein: 20g | Fat: 28g | Sodium: 600mg

Why This Recipe Will Set Your Taste Buds on Fire

When it comes to weeknight meals, you want something that ignites excitement and satisfies those flavor cravings without keeping you chained to the kitchen for hours. Enter the Easy Beef and Broccoli recipe — a dish that is not only better than your favorite takeout but also a vibrant explosion of taste that dances on your palate. With succulent slices of beef, crisp broccoli florets, and a savory sauce that brings everything together, this recipe is your ticket to culinary adventure. Let’s dive into the details that make this dish so irresistible!

Ingredients That Sing

To create a dish that’s truly unforgettable, you need quality ingredients. Here’s what you’ll need:

  • 1 pound beef (sliced thin, flank or sirloin)
  • 2 cups broccoli florets
  • 1 tablespoon vegetable oil
  • 3 cloves garlic (minced)
  • 1/2 cup beef broth
  • 1/4 cup soy sauce
  • 2 tablespoons oyster sauce
  • 1 tablespoon cornstarch
  • 1 tablespoon water
  • 1 teaspoon sesame oil
  • Salt and pepper to taste
  • Cooked rice (for serving)

Each ingredient plays a vital role in elevating this dish. The beef brings a hearty richness, while the broccoli adds a crunchy texture that contrasts beautifully with the tender meat. The sauce, a harmonious blend of soy and oyster sauce with a hint of sesame oil, wraps everything in a warm embrace of flavor.

Cooking Steps to Flavor Paradise

A beautifully arranged plate of Beef and Broccoli, showcasing the rich colors and textures of the ingredients under natural light.

Ready to unleash your inner chef? Follow these steps for a beef and broccoli dish that will have everyone clamoring for seconds:

  1. In a bowl, mix together the soy sauce, oyster sauce, beef broth, and sesame oil. This will be your marinade — where all the magic begins!
  2. Add the sliced beef to the marinade and let it sit for at least 15 minutes. This step is crucial as it allows the flavors to penetrate the meat.
  3. In a large skillet or wok, heat the vegetable oil over medium-high heat. Make sure the oil is nice and hot — it’s time to get sizzling!
  4. Add the minced garlic, stirring quickly for about 30 seconds until it becomes aromatic. Be careful not to burn it; we want flavor, not bitterness!
  5. Now, add the marinated beef (reserve the marinade) to the skillet. Cook until browned, about 3-4 minutes. This is where you’ll start to see the color and flavor develop.
  6. It’s time to bring in the broccoli! Add the florets and stir-fry for another 3 minutes until they are bright green and tender-crisp. You want them to maintain their crunch for that perfect bite.
  7. In a small bowl, mix the cornstarch and water to create a slurry. Add this to the reserved marinade.
  8. Pour the marinade with the cornstarch slurry into the skillet, stirring well to coat the beef and broccoli. This is where the sauce thickens, creating that luscious glaze we all love.
  9. Cook for another 2-3 minutes until the sauce has thickened to your liking. Season with salt and pepper to taste.
  10. Serve hot over cooked rice and watch as your family digs in with delight!

Tips for the Perfect Dish

Now that you’re on your way to making this scrumptious Easy Beef and Broccoli, here are some tips to elevate your dish:

  • Choose Quality Meat: Flank steak or sirloin is ideal for this recipe. Look for cuts with good marbling for extra tenderness and flavor.
  • Don’t Overcook the Broccoli: The key to vibrant color and crunch is to stir-fry the broccoli just until tender-crisp. No one likes soggy vegetables!
  • Marination Matters: Letting the beef soak in the marinade for longer than 15 minutes can enhance the flavor even more. If you have time, an hour or two in the fridge would be fantastic.

Variations to Spice It Up

If you’re feeling adventurous, why not mix things up? Here are some tasty variations to try:

  • Spicy Kick: Add a teaspoon of red pepper flakes or a splash of sriracha to the marinade for a fiery twist.
  • Veggie Lovers: Incorporate other vegetables such as bell peppers, snap peas, or carrots for added color and nutrition.
  • Different Proteins: Swap the beef for chicken, shrimp, or even tofu to cater to different dietary preferences.

Substitutions for Every Kitchen

Don’t have every ingredient on hand? No worries — here are some substitutions that won’t compromise your dish:

  • Beef Broth: You can use chicken broth or vegetable broth if you prefer.
  • Oyster Sauce: If you’re looking for a vegetarian alternative, hoisin sauce works well in a pinch.
  • Sesame Oil: If you don’t have sesame oil, a dash of olive oil or peanut oil will do, though you’ll miss that nutty flavor.

Essential Equipment

To make this dish seamlessly, here’s what you’ll need:

  • A sharp knife for slicing the beef
  • A cutting board
  • A large skillet or wok for stir-frying
  • Measuring cups and spoons for accuracy
  • A mixing bowl for marinating

Storage and Freezing Tips

If you happen to have leftovers (which is rare because it’s that good), here’s how to store them:

  • Store in an airtight container in the refrigerator for up to 3 days.
  • To freeze, let it cool completely, then transfer to a freezer-safe container. It can last up to 3 months in the freezer.
  • When reheating, add a splash of broth or water to keep the sauce from thickening too much.

FAQs to Help You Out

Got questions? I’ve got answers!

  • Can I use frozen broccoli? Yes, but be sure to thaw it and drain excess moisture before cooking.
  • Is this recipe gluten-free? To make it gluten-free, use tamari instead of soy sauce and check that your oyster sauce is gluten-free.
  • What can I serve with this dish? This dish pairs beautifully with steamed rice, quinoa, or even cauliflower rice for a low-carb option.

Troubleshooting Common Issues

If you run into any hiccups while cooking, here are some solutions:

  • Too Salty: If your dish turns out too salty, balance it with a little sugar or honey.
  • Sauce Too Thin: If your sauce doesn’t thicken, add a bit more cornstarch slurry and cook for a few more minutes.
  • Overcooked Beef: If the beef is tough, it may have been cooked too long. Next time, keep an eye on it and remove from heat as soon as it’s browned.

Gather Around the Table

Cooking is more than just making food; it’s about creating moments and memories. This Easy Beef and Broccoli recipe invites you to gather around the table with family and friends, sharing stories over a meal that’s bursting with flavor. Whether you’re an experienced chef or just starting your culinary journey, this dish is your canvas for creativity. So grab your skillet, embrace the heat, and transform your weeknight dinners into extraordinary culinary adventures. Happy cooking!

Easy Beef and Broccoli Recipe (Better than takeout!)

Prep Time 10 minutes
Cook Time 15 minutes
Total Time 25 minutes
Servings 4 servings
Calories 350
This quick and flavorful beef and broccoli stir-fry is a perfect weeknight dinner that rivals takeout. Ready in under 30 minutes, it's a healthy and satisfying meal.

Ingredients

Meat

  • 1 pound beef (sliced thin, flank or sirloin)

Vegetables

  • 2 cups broccoli florets

Sauces & Oils

  • 1 tablespoon vegetable oil
  • 3 cloves garlic (minced)
  • 1/2 cup beef broth
  • 1/4 cup soy sauce
  • 2 tablespoons oyster sauce
  • 1 tablespoon cornstarch
  • 1 tablespoon water
  • 1 teaspoon sesame oil

Seasoning

  • to taste salt and pepper

For serving

  • cooked rice for serving

Instructions 

  • Mix soy sauce, oyster sauce, beef broth, and sesame oil. Marinate beef for 15 minutes.
  • Heat oil in a skillet, stir-fry garlic for 30 seconds.
  • Add beef and cook until browned, then add broccoli and stir-fry for 3 minutes.
  • Mix cornstarch with water to make slurry, add to marinade, then pour into skillet.
  • Cook until sauce thickens, season with salt and pepper, serve over rice.

Notes

Use thinly sliced beef for best results. Adjust seasoning to taste.
Calories: 350kcal
Cost: $15
Course: Main Course
Cuisine: Asian
Keyword: beef, Broccoli, Stir Fry

Nutrition

Calories: 350kcal | Carbohydrates: 40g | Protein: 30g | Fat: 10g | Sodium: 1500mg

Loved this recipe? Save it to your favorite Pinterest board so you can easily find it later! It’s the perfect way to keep all your sweet ideas in one place. ✨

An appetizing serving of Beef and Broccoli, highlighting the tender meat and fresh vegetables with a warm, inviting backdrop.

Why You’ll Love These Wraps

Welcome to a flavor explosion that’s about to transform your dinner routine! These High Protein Buffalo Chicken Wraps are not just a meal; they are an adventure waiting to happen in your kitchen. Imagine succulent, shredded chicken enveloped in a spicy buffalo sauce, paired with creamy Greek yogurt, and topped with a crispy crunch of fresh veggies. It’s a perfect mix of heat, texture, and boldness that will have your taste buds dancing! Whether you’re a busy parent, a student on the go, or simply someone who enjoys a quick, satisfying meal, these wraps are designed to please.

What’s more, they are high in protein, making them a fantastic option for anyone looking to maintain a healthy lifestyle without sacrificing flavor. You can whip them up in no time, making them ideal for a weeknight dinner or meal prep. Let’s dive into the details that make these wraps a must-try!

Essential Ingredients for the Recipe

To craft these delightful wraps, you’ll need:

  • 2 cups cooked shredded chicken – A rotisserie chicken works wonders here, saving you time!
  • 1/2 cup buffalo sauce – Choose your heat level—mild, medium, or hot—to ignite your taste buds.
  • 1/4 cup Greek yogurt – This creamy addition is a healthier alternative to mayo, adding richness without the extra calories.
  • 1/2 cup shredded lettuce – For that crunchy freshness.
  • 1/2 cup diced tomatoes – A juicy burst of flavor in each bite.
  • 1/4 cup shredded cheese – Cheddar or blue cheese adds a nice savory finish.
  • 4 whole wheat tortillas – A healthier wrap base, perfect for holding all the goodness inside.
  • Salt and pepper to taste – Don’t forget to season!

Step-by-Step Cooking Instructions

A delicious buffalo chicken wrap showcasing vibrant ingredients like lettuce, tomatoes, and cheese in a whole wheat tortilla.

Step 1 – Prepare the Chicken Mixture

In a large mixing bowl, combine the shredded chicken, buffalo sauce, and Greek yogurt. Mix them well until every shred of chicken is coated in that fiery sauce. This is where the magic begins—let the flavors meld together, and you’ll be ready to build your wraps!

Step 2 – Season to Perfection

Add salt and pepper to taste, adjusting according to your palate. Remember, the buffalo sauce will bring its own saltiness, so taste as you go!

Step 3 – Assemble the Wraps

Lay out the whole wheat tortillas on a clean surface. Divide the buffalo chicken mixture evenly among the tortillas, making sure to spread it out for even distribution. Top each wrap with shredded lettuce, diced tomatoes, and a sprinkle of shredded cheese. Now, here’s the fun part: wrap them tightly! Fold in the sides and roll from the bottom up to create a snug wrap that won’t spill its contents.

Step 4 – Serve or Store

Slice the wraps in half and serve immediately for a fresh meal. If you’re prepping for later, wrap each one in foil to enjoy on the go or heat up later. It’s that simple!

Tips for an Even Tastier Version

Want to elevate your wrap game? Here are some suggestions:

  • Mix in Extra Veggies: Throw in some diced bell peppers, sliced jalapeños, or even avocado for added flavor and nutrients.
  • Experiment with Cheese: Try different cheeses like pepper jack for an extra kick or goat cheese for a tangy twist.
  • Herbs and Spices: Add fresh herbs like cilantro or parsley for a burst of freshness. You can also sprinkle in some garlic powder or onion powder for added depth.

Recipe Variations and Adaptations

Not everyone has the same preferences, and that’s the beauty of cooking! Here’s how you can adapt the recipe to suit various diets or flavor profiles:

  • Vegetarian Option: Swap out the chicken for shredded jackfruit or chickpeas mixed with buffalo sauce for a satisfying meatless version.
  • Gluten-Free: Use gluten-free tortillas or lettuce wraps for a light, refreshing alternative.
  • Low-Carb: If you’re watching your carbs, try making a salad with the buffalo chicken mixture on top of mixed greens instead of a wrap.

Serving Suggestions

These wraps are delicious on their own, but pairing them with the right sides can elevate your meal:

  • Fresh Salad: A simple side salad with a light vinaigrette complements the richness of the wraps.
  • Soup: Consider a hearty tomato bisque or a spicy chili to warm up your meal.
  • Drinks: A refreshing iced tea or a glass of sparkling lemonade can help balance the spicy flavors.

Storage and Reheating Tips

If you find yourself with leftovers (though we doubt it!), here’s how to store and reheat your wraps:

  • Storing: Wrap leftovers tightly in foil or place them in an airtight container. They’ll keep well in the fridge for up to three days.
  • Reheating: To maintain that crispy exterior, pop them in an oven preheated to 350°F (175°C) for about 10-15 minutes. The microwave works in a pinch but may result in a softer wrap.

Nutritional Information and Benefits

Each wrap is packed with a punch of protein, approximately 350 calories, 35g of protein, and 5g of fiber. The Greek yogurt provides probiotics for gut health, while the chicken offers essential amino acids necessary for muscle repair. With all these wholesome ingredients, you can enjoy a meal that fuels your body while tantalizing your taste buds.

Common Mistakes to Avoid

To ensure your buffalo chicken wraps turn out perfectly, steer clear of these common pitfalls:

  • Overfilling the Wrap: It’s tempting to load up on the filling, but too much can lead to a messy wrap. Less is more!
  • Skipping the Tasting Step: Always taste your buffalo sauce mixture before wrapping. Adjust flavors as necessary for the best outcome.
  • Not Prepping Ingredients: Lay out all your components before you start assembling. It makes the process smoother and more enjoyable!

Inspiring Conclusion

Now that you’ve mastered the art of crafting High Protein Buffalo Chicken Wraps, it’s time to take a leap into your culinary adventure! With endless variations and the ability to customize each wrap to your liking, there’s no excuse not to get creative in the kitchen. Remember, cooking should be fun and liberating, a chance to express yourself and share delicious meals with those you love. So gather your ingredients, grab your loved ones, and let the spicy fun begin! Don’t forget to share your creations and inspire others to ignite their dinner adventures as well!

High Protein Buffalo Chicken Wraps Recipe Easy Dinner

Prep Time 10 minutes
Cook Time 10 minutes
Total Time 20 minutes
Servings 4 servings
Calories 350
Enjoy a quick and protein-packed dinner with these flavorful buffalo chicken wraps, perfect for a satisfying meal on the go.

Ingredients

Chicken

  • 2 cups cooked shredded chicken
  • 1/2 cup buffalo sauce
  • 1/4 cup greek yogurt
  • 1/2 cup shredded lettuce
  • 1/2 cup diced tomatoes
  • 1/4 cup shredded cheese (cheddar or blue cheese)
  • 4 whole wheat tortillas whole wheat tortillas
  • to taste salt and pepper

Instructions 

  • Mix shredded chicken with buffalo sauce and Greek yogurt.
  • Season with salt and pepper.
  • Lay out tortillas and divide chicken mixture evenly.
  • Add lettuce, tomatoes, and cheese, then roll up.
  • Slice in half and serve immediately.

Notes

For extra flavor, add a drizzle of ranch or blue cheese dressing.
Calories: 350kcal
Cost: $15
Course: Dinner
Cuisine: American
Keyword: chicken

Nutrition

Calories: 350kcal | Carbohydrates: 30g | Protein: 40g | Fat: 10g | Sodium: 900mg

Loved this recipe? Save it to your favorite Pinterest board so you can easily find it later! It’s the perfect way to keep all your sweet ideas in one place. ✨

Eye-level shot of a buffalo chicken wrap emphasizing the textures of shredded chicken and colorful toppings.

Transform Your Dinner with This Creamy Pasta Bake

Are you ready to embark on a culinary adventure that turns lazy nights into flavorful escapades? Look no further than my Ultra Lazy Creamy Chicken and Broccoli Pasta Bake. This simple yet indulgent dish combines tender chicken, vibrant broccoli, and creamy sauce, all enveloped in perfectly cooked pasta. It’s not just a meal; it’s a celebration of flavor and comfort that will have your taste buds dancing with joy!

Using accessible ingredients, this recipe ensures that you can whip up a delightful dinner without spending hours in the kitchen. Let’s dive into why this is the ultimate go-to recipe for busy weeknights and how you can make it your own!

Why You’ll Love This Recipe

Here are five reasons why this Ultra Lazy Creamy Chicken and Broccoli Pasta Bake will quickly become a favorite in your home:

  • Quick & Easy: With minimal prep and a simple assembly process, this dish comes together in under an hour, making it perfect for busy nights.
  • Flavor Explosion: The combination of creamy cheese, savory chicken, and fresh broccoli creates a mouthwatering flavor profile that hits all the right notes.
  • Versatile Recipe: Feel free to swap out ingredients or add your favorite spices to make it your own. This recipe is a canvas for your culinary creativity!
  • Great for Leftovers: This pasta bake tastes even better the next day, making it an excellent choice for meal prep or family gatherings.
  • Comfort Food Classic: Nothing brings people together like a creamy, cheesy pasta bake, and this recipe is sure to warm hearts and fill bellies.

Ingredient Breakdown

To create this mouthwatering dish, you will need the following ingredients:

  • 400g / 14 oz chicken tenderloin: Use breast or thigh, cut into 1.5cm / 3/5″ pieces. Feel free to substitute with rotisserie chicken for an even quicker option.
  • Salt and pepper: Essential for enhancing the flavors of the dish. Don’t be shy with seasoning!
  • 1 tsp dried thyme: This adds a lovely herbaceous note. You can also experiment with rosemary or Italian seasoning for a different twist.
  • 250g / 8 oz spiral pasta: Uncooked pasta is best for this bake. Other shapes like penne or fusilli work well too!
  • 1/4 cup flour: All-purpose flour helps thicken the sauce. You can substitute with cornstarch for a gluten-free option.
  • 1 1/2 cups chicken broth: Warmed broth adds depth to the sauce. Vegetable broth is a great alternative for a vegetarian version.
  • 2 cups milk: Any fat percentage works, but whole milk will yield a creamier texture.
  • 1 large garlic clove: Minced garlic infuses the dish with aromatic flavor.
  • 2 tbsp unsalted butter: Adding butter enhances the richness of the sauce, but you can skip it if you’re looking for a lighter option.
  • 1 large broccoli: Broken into small florets; you can also use cauliflower or a mix of both!
  • 1 1/2 cups shredded cheese: Cheddar or colby cheese works beautifully. Feel free to mix in mozzarella for that extra gooeyness.

Pro Tips for Perfecting Your Pasta Bake

Side perspective of a bubbling pasta bake with broccoli and shredded cheese, highlighting its creamy texture.

Unlock the full potential of your Ultra Lazy Creamy Chicken and Broccoli Pasta Bake with these expert tips:

  • Preheat the oven: Always preheat to ensure even cooking and a perfectly golden top.
  • Don’t skimp on seasoning: Generously season both the chicken and the sauce to enhance the depth of flavor.
  • Mix it well: Ensure all ingredients are well-combined before baking to avoid dry patches in the pasta.
  • Monitor baking time: Keep an eye on the dish; ovens can vary, and you want that golden top without overcooking.
  • Use a large baking dish: A 23 x 33cm / 9 x 13″ dish is ideal for even cooking and easy serving.
  • Let it rest: Allow the bake to stand for a few minutes before serving. This helps the sauce thicken and makes for easier servings.
  • Experiment with cheeses: Mixing different cheeses can add complexity to the flavor. Try a blend of sharp cheddar and creamy mozzarella!
  • Save some cheese for the top: Adding a bit of cheese on top during the last few minutes of baking gives you that irresistible, bubbling crust.

Avoiding Common Mistakes

Even the best cooks can run into hiccups! Here are some common mistakes to avoid when making this pasta bake:

  • Too little liquid: Ensure you have enough broth and milk to create a creamy sauce; dry pasta can absorb more liquid than expected.
  • Overcooked chicken: Chicken can dry out if baked too long; ensure it’s cut into small pieces for even cooking.
  • Not mixing thoroughly: Failing to mix everything well can lead to uneven flavor distribution.
  • Skipping the resting time: Serving immediately can make the dish runny; a few minutes of resting helps it set.
  • Ignoring the cheese: Cheese is key for that creamy texture. Don’t leave it out or skimp on the amount!

Delicious Variations to Try

This recipe is a fantastic base for experimentation! Here are some delicious variations to consider:

  • Veggie-packed version: Add bell peppers, carrots, or spinach for extra nutrition and color.
  • Spicy kick: Incorporate diced jalapeños or a sprinkle of red pepper flakes for a fiery twist.
  • Italian flair: Mix in sun-dried tomatoes and Italian herbs for a taste of Italy.
  • Cheesy broccoli version: Double the broccoli and cheese for an even creamier experience!

Storage and Make-Ahead Instructions

Planning ahead? Here’s how to store and reheat this delicious dish:

  • Storage: Store leftovers in an airtight container in the refrigerator for up to 3 days.
  • Freezing: This pasta bake freezes well! Place it in a freezer-safe container, and it can be stored for up to 2 months.
  • Reheating: To reheat, thaw overnight in the fridge. Reheat in the oven at 180°C/350°F until heated through, about 20-25 minutes.
  • Make-ahead option: Prepare the dish up to the baking step, cover, and refrigerate overnight. Bake directly from the fridge, adding a few extra minutes to the baking time.

Frequently Asked Questions

Got questions? Here are answers to some common queries about the Ultra Lazy Creamy Chicken and Broccoli Pasta Bake:

  • Can I use different types of pasta? Absolutely! Penne, rigatoni, or even gluten-free pasta can be used for this recipe.
  • What can I replace the chicken with? For a vegetarian option, consider using chickpeas, tofu, or additional vegetables.
  • Can I make this dairy-free? Yes! Substitute milk with plant-based milk and use dairy-free cheese.
  • Is it possible to add more vegetables? Definitely! Feel free to add any of your favorite veggies; just be sure to adjust cooking times accordingly.
  • How do I know when the dish is done? The pasta should be tender, the sauce thickened, and the top should be golden brown.
  • Can I prepare this dish in advance? Yes! You can assemble it the night before and bake it the next day.
  • How do I prevent the pasta from becoming mushy? Make sure not to overcook the pasta before baking, and ensure there’s enough liquid in the dish.
  • What should I serve with this pasta bake? A fresh green salad or garlic bread complements this dish beautifully.

Nutritional Tips and Dietary Adaptations

This dish can fit into various dietary needs with a few adjustments:

  • For a lighter version: Use low-fat milk, reduce cheese, and increase the amount of broccoli.
  • Gluten-free: Substitute regular pasta with a gluten-free alternative and use cornstarch instead of flour.
  • Vegetarian: Omit chicken and add more vegetables or plant-based protein sources.
  • Low-carb: Swap pasta for zucchini noodles or cauliflower rice for a lower-carb option.

Essential Equipment for Success

Having the right tools can make your cooking experience smoother and more enjoyable. Here’s what you’ll need:

  • Large baking dish: A 23 x 33cm / 9 x 13″ baking dish is perfect for even cooking.
  • Measuring cups and spoons: Accurate measurements are key to achieving the best results.
  • Mixing bowl: For combining the ingredients before baking.
  • Oven mitts: Safety first! Always use mitts when handling hot dishes.

Serving Suggestions to Elevate Your Meal

To make your dinner even more delightful, consider these serving suggestions:

  • Garnish with fresh herbs: A sprinkle of parsley or basil adds a fresh pop of flavor and color.
  • Pair with a crisp salad: A simple arugula or Caesar salad balances the richness of the bake.
  • Serve with garlic bread: Crunchy garlic bread complements the creaminess of the dish beautifully.
  • Enjoy with wine: A glass of white wine or sparkling water makes for a perfect dining experience.

So there you have it! The Ultra Lazy Creamy Chicken and Broccoli Pasta Bake is not just a recipe; it’s a ticket to flavor exploration. Embrace the adventure in your kitchen, and remember, cooking is all about having fun and sharing joy. Grab your skillet, unleash your inner chef, and let this dish inspire you to create something extraordinary!

Ultra Lazy Creamy Chicken and Broccoli Pasta Bake

Prep Time 10 minutes
Cook Time 35 minutes
Total Time 45 minutes
Servings 4 servings
Calories 650
A quick and creamy baked pasta dish combining tender chicken, broccoli, and cheese for a comforting meal.

Ingredients

Protein

  • 400 g chicken tenderloin (cut into 1.5cm pieces)
  • 1 tsp dried thyme (or other herbs/spices)

Pasta

  • 250 g spiral pasta (uncooked)
  • 1/4 cup flour (all purpose/plain)
  • 1.5 cups chicken broth (warmed)
  • 2 cups milk (warmed)
  • 1 large garlic clove (minced)
  • 2 tbsp unsalted butter (optional)

Vegetables

  • 1 large broccoli (or 2 medium, broken into florets)
  • 1.5 cups shredded cheddar or colby cheese (or tasty cheese, pizza mix)

Instructions 

  • Preheat oven to 200°C/390°F. Toss chicken with salt, pepper, thyme.
  • Spread pasta in a baking dish, sprinkle flour, then pour in milk and broth. Add garlic and butter, stir.
  • Top with chicken and broccoli, cover with foil, and bake for 15 minutes.
  • Remove foil, stir in most cheese, then top with remaining cheese. Bake for another 15-20 minutes until golden.
  • Let stand a few minutes, then serve immediately.

Notes

Ensure milk and broth are warmed for best results.
Calories: 650kcal
Cost: $15
Course: Main Course
Cuisine: American
Keyword: bake, chicken, pasta

Nutrition

Calories: 650kcal | Carbohydrates: 70g | Protein: 45g | Fat: 25g | Sodium: 900mg

Why This Recipe Will Ignite Your Taste Buds

Welcome to a culinary adventure that promises to take your taste buds on a thrilling journey! This isn’t just any meal; it’s a celebration of flavor, spice, and creativity. Imagine sitting down to a dinner that doesn’t just fill you up but excites you with every bite. Getting into the kitchen and whipping up a dish that combines simple, low-cost ingredients with the warmth of spice is an experience that can transform your evening. Whether you’re a seasoned cook or just starting your journey, this recipe will inspire you to embrace the boldness of flavor and the joy of cooking.

Overview: A Symphony of Flavors

This dish is perfect for those who are looking for easy carb-friendly meals that don’t compromise on taste or excitement. It provides the satisfaction of a hearty meal while keeping it light and healthy. With a balanced blend of spices and fresh ingredients, you’ll create a dish that is not only delicious but also nutritious. And the best part? You can do it all without breaking the bank!

The Ingredients That Make It Sing

A beautifully plated spicy meal, showcasing fresh ingredients and intricate details against a soft, blurred background.

Let’s dive into the heart of this recipe! It’s built on the foundation of delicious meals that focus on simple, low-cost ingredients. Here’s what you’ll need:

  • Fresh vegetables (think bell peppers, onions, and garlic for that aromatic base)
  • Your choice of protein (chicken is a fantastic option for healthy chicken dinners for family, but feel free to get creative)
  • A variety of spices (don’t shy away from the cayenne, paprika, and cumin that bring the heat!)
  • Cooking oil (extra virgin olive oil or avocado oil works beautifully)

Steps to Culinary Bliss

Ready to turn up the heat? Here’s a sneaky peek at how to make your dinner a showstopper:

  1. Start by gathering all your ingredients. Getting organized will make the cooking process smooth and enjoyable!
  2. Heat a tablespoon of cooking oil in a large skillet over medium heat. Add your choice of protein and cook until browned. If you’re using chicken, make sure it’s cooked through and juicy.
  3. Once your protein is ready, toss in chopped onions and garlic. Let them sauté until fragrant; this is where the magic starts!
  4. Next, add your fresh vegetables. Bell peppers are a great pick for color and crunch. Stir everything together, allowing the flavors to meld.
  5. Now, it’s time to bring on the spices! Sprinkle in your cayenne, paprika, and cumin, adjusting the amounts to your heat preference. Stir to coat everything evenly.
  6. Let the mixture cook for a few more minutes until everything is tender and the spices are aromatic. This is the moment you’ve been waiting for!
  7. Serve it hot, garnished with fresh herbs or a squeeze of lime for an extra zing!

Tips for Success

Cooking is an art, and like any artist, having a few tricks up your sleeve can elevate your dish to new heights. Here are some tips to ensure your culinary creation is a hit:

  • Prep Ahead: Chopping vegetables and marinating protein beforehand can save you time on busy evenings.
  • Balance is Key: While spice is essential, be mindful of balancing flavors. A touch of sweetness (like honey or a sprinkle of sugar) can counteract excessive heat.
  • Don’t Fear the Heat: Experiment with different spices and adjust the heat level according to your family’s preference. Remember, cooking is about fun and exploration!

Variations to Explore

Why stick to one flavor profile when you can create endless possibilities? Here are some variations to try:

  • Vegetarian Delight: Swap the protein for chickpeas or tofu to make a hearty vegetarian version.
  • Different Proteins: Experiment with shrimp, beef, or pork for a different take on the dish.
  • Spicy Twist: If you’re feeling adventurous, add some diced jalapeños or serrano peppers for an extra kick!

Substitutions for Flexibility

Sometimes, you may not have all the ingredients on hand. No worries! Here are some substitutions that won’t compromise the flavor:

  • If you’re out of cayenne, try red pepper flakes or chili powder.
  • For a dairy-free option, replace any creamy elements with coconut milk.
  • Use whatever vegetables you have in your fridge; zucchini, carrots, or even frozen mixed veggies work well!

Essential Equipment

To make this dish, you don’t need fancy gadgets. Here’s what you’ll need:

  • A large skillet or frying pan
  • A sharp knife for chopping
  • A cutting board
  • A spatula or wooden spoon for stirring

Storage and Freezing

Leftovers are a blessing! Here’s how to store and freeze your meal:

  • Refrigerate leftovers in an airtight container for up to 3 days.
  • To freeze, let the dish cool completely, then transfer it to freezer-safe containers. It can be stored for up to 3 months.
  • Reheat thoroughly before serving, adding a splash of water or broth to keep it moist.

FAQs: Your Burning Questions Answered

Got questions? Let’s tackle some of the most common queries surrounding this dish:

  • Can I make this dish ahead of time? Absolutely! You can prepare it in advance and reheat when you’re ready to serve.
  • What’s the best way to adjust the spice level? Start with less spice, taste as you go, and gradually add more until it’s to your liking.
  • Can I serve this with sides? Yes! It goes great with low-carb sides like cauliflower rice or a simple green salad.

Troubleshooting: Common Cooking Hiccups

Even the best chefs face challenges in the kitchen. Here’s how to troubleshoot common issues:

  • Too Spicy? Add a dollop of sour cream or yogurt to balance the heat.
  • Dry Chicken? Ensure you’re cooking at the right temperature and not overcooking.
  • Flavorless? Don’t forget to season generously; taste and adjust as needed!

Conclusion: Embrace the Adventure

As you take this journey into the world of spice and flavor, remember that cooking is all about exploration and enjoyment. This recipe is more than just a meal; it’s a canvas for your creativity and a way to bring loved ones together around the table. Don’t hesitate to experiment, and let your palate guide you. By sharing this simple yet exciting dish, you’re not just feeding your family; you’re creating memories filled with laughter, warmth, and a dash of spice! So grab your skillet, ignite your culinary adventure, and let’s make dinner extraordinary. And hey, don’t forget to check out my FREE budget-friendly cookbook for even more delicious ideas!

Free Cookbook

Prep Time 10 minutes
Cook Time 20 minutes
Total Time 30 minutes
Servings 4 people
Calories 250
Discover delicious meals with simple, low-cost ingredients using this free, budget-friendly cookbook.

Ingredients

Main Ingredients

  • 2 cups delicious meals (Prepared dishes)
  • 1 cup simple ingredients (Basic pantry items)
  • 0.5 cup low-cost ingredients (Affordable staples)

Instructions 

  • Get your hands on my FREE budget-friendly cookbook!
  • I’ve created a free, budget-friendly family cookbook to help you get started!

Notes

Use seasonal ingredients for best results.
Calories: 250kcal
Cost: $15
Course: Main Course
Cuisine: Various
Keyword: Budget

Nutrition

Calories: 250kcal | Carbohydrates: 45g | Protein: 10g | Fat: 5g | Sodium: 300mg

Loved this recipe? Save it to your favorite Pinterest board so you can easily find it later! It’s the perfect way to keep all your sweet ideas in one place. ✨

Eye-level shot of a flavorful spicy recipe, highlighting its appealing texture and colors in gentle lighting.

Why You’ll Love This Recipe

If you’re anything like me, the arrival of autumn stirs a deep desire to fill your kitchen with the aromas of cinnamon, nutmeg, and, of course, apples. The Healthy Apple Snack Cake is not just a dessert; it’s a warm embrace, a sweet reminder of cozy fall days, and an invitation to indulge without guilt. This cake captures the essence of the season with its moist texture and vibrant flavor, all while keeping it healthy and wholesome. With every bite, you’ll revel in the balance of sweetness from the applesauce and honey, complemented by the heartiness of whole wheat flour. Let’s dive into this culinary adventure together!

Ingredients for the Perfect Healthy Apple Snack Cake

To create this delightful treat, you’ll need the following ingredients:

  • 2 cups whole wheat flour
  • 1 teaspoon baking powder
  • 1/2 teaspoon baking soda
  • 1/2 teaspoon cinnamon
  • 1/4 teaspoon salt
  • 1/2 cup unsweetened applesauce
  • 1/3 cup honey or maple syrup
  • 1/4 cup coconut oil, melted
  • 2 large eggs
  • 1 teaspoon vanilla extract
  • 2 cups chopped apples (about 2 medium apples)
  • 1/4 cup chopped nuts or raisins (optional)

How to Make This Apple Snack Cake

A slice of moist apple snack cake with a golden-brown crust, presented with a blurred cozy background.

Time to roll up your sleeves and get that oven preheated! Here’s a step-by-step guide to whipping up this incredible cake:

  1. Preheat your oven: Set your oven to 350°F (175°C) and grease a 9×9-inch baking pan to prevent any sticking.
  2. Mix the dry ingredients: In a large bowl, whisk together the whole wheat flour, baking powder, baking soda, cinnamon, and salt. This blend is the foundation of your cake, bringing both structure and flavor.
  3. Combine the wet ingredients: In another bowl, mix together the applesauce, honey (or maple syrup), melted coconut oil, eggs, and vanilla extract. Ensure everything is well integrated; this is where the magic begins!
  4. Bring it all together: Pour the wet mixture into the dry ingredients and stir until just combined. Over-mixing can lead to a dense cake, so be gentle!
  5. Fold in the apples: Gently incorporate the chopped apples and any nuts or raisins if you’re feeling adventurous. Each piece of fruit adds moisture and flavor, making every bite a surprise.
  6. Prepare for baking: Pour the batter into your prepared pan, spreading it evenly. The anticipation is building!
  7. Bake it: Place your cake in the oven and bake for 25-30 minutes. You’ll know it’s ready when a toothpick inserted in the center comes out clean. Keep an eye on those edges—they should be lightly golden.
  8. Cool and serve: Allow your cake to cool before slicing. Trust me, patience pays off!

Tips for the Best Results

As you embark on this baking journey, here are a few tips to ensure your Healthy Apple Snack Cake turns out perfectly:

  • Fresh Ingredients: Use fresh apples for the best flavor. Granny Smith apples add a nice tartness, while Fuji or Honeycrisp will bring in sweetness.
  • Don’t Skip the Cinnamon: Cinnamon is the quintessential fall spice that elevates the whole cake. Feel free to add more if you love that warm, spicy flavor.
  • Let It Cool: Allow the cake to cool completely for easier slicing. It’s hard, but worth the wait!

Variations to Try

One of the greatest joys of baking is experimenting with flavors. Here are some delightful variations to consider:

  • Add Spice: Mix in a pinch of nutmeg or allspice for an extra kick of warmth.
  • Nutty Crunch: Swap out the chopped nuts for seeds like pumpkin or sunflower for a different texture.
  • Fruit Fusion: Incorporate other fruits like pears or cranberries for a unique twist. The possibilities are endless!

Substitutions You Can Make

Need to make some adjustments? Here are some substitutions that work beautifully:

  • Flour: If whole wheat isn’t your thing, feel free to use all-purpose flour or a gluten-free blend.
  • Sweeteners: Maple syrup can be replaced with agave nectar for a vegan option.
  • Eggs: For a vegan alternative, use flax eggs (1 tablespoon of ground flaxseed mixed with 2.5 tablespoons of water equals one egg) to bind your ingredients.

Essential Equipment

Before you start, make sure you have the following tools on hand:

  • Baking pan (9×9-inch)
  • Mixing bowls (large and medium)
  • Whisk
  • Spatula or wooden spoon
  • Measuring cups and spoons
  • Toothpick (for testing doneness)

Storage and Freezing Tips

Whether you want to save some for later or share with friends, here’s how to store your Healthy Apple Snack Cake:

  • Room Temperature: Keep it covered at room temperature for up to 2 days.
  • Refrigeration: For longer storage, wrap it tightly in plastic wrap or foil and refrigerate for up to a week.
  • Freezing: You can freeze the cake for up to 3 months. Just ensure it’s well-wrapped to prevent freezer burn. Thaw overnight in the fridge before enjoying!

Frequently Asked Questions

Let’s tackle some common queries regarding this recipe:

  • Can I make this cake vegan? Absolutely! Use flax eggs instead of regular eggs and maple syrup instead of honey.
  • What can I use if I don’t have applesauce? You can substitute with mashed bananas or pureed pumpkin for a different flavor profile.
  • How do I know when the cake is done? A toothpick inserted into the center should come out clean. If it’s sticky, give it a few more minutes in the oven.

Troubleshooting Common Issues

If your cake doesn’t turn out as expected, don’t worry! Here are some troubleshooting tips:

  • Cake is too dry: This could happen if you overbaked it. Make sure to check for doneness a few minutes early next time.
  • Cake is too wet: If your batter is too runny, you may need to add a bit more flour to achieve the right consistency.
  • Cake is dense: This could result from over-mixing the batter. Be gentle when combining the wet and dry ingredients.

Conclusion

There you have it, my friends! The Healthy Apple Snack Cake is not just a food; it’s a celebration of the beauty of fall flavors, healthy ingredients, and the joy of baking. This cake is perfect for a cozy afternoon treat or as a delightful dessert at your next gathering. So, roll up your sleeves, grab those apples, and let’s get baking! Remember, cooking is all about exploration and fun, so don’t be afraid to make it your own. Enjoy every moment, and may your kitchen always be filled with the warm aroma of fresh-baked goodness!

Healthy Apple Snack Cake

Prep Time 10 minutes
Cook Time 30 minutes
Total Time 40 minutes
Servings 9 pieces
Calories 180
A moist and wholesome snack cake packed with apples and warm spices, perfect for a healthy treat.

Ingredients

Dry ingredients

  • 2 cups whole wheat flour
  • 1 teaspoon baking powder
  • 1/2 teaspoon baking soda
  • 1/2 teaspoon cinnamon
  • 1/4 teaspoon salt

Wet ingredients

  • 1/2 cup unsweetened applesauce
  • 1/3 cup honey or maple syrup
  • 1/4 cup coconut oil, melted
  • 2 large eggs
  • 1 teaspoon vanilla extract

Main ingredients

  • 2 cups chopped apples (about 2 medium apples)
  • 1/4 cup chopped nuts or raisins (optional) (optional)

Instructions 

  • Preheat oven to 350°F (175°C) and grease a 9x9-inch pan.
  • Mix dry ingredients in a bowl; combine wet ingredients separately.
  • Combine wet and dry, then fold in apples and nuts if using.
  • Pour batter into pan and bake for 25-30 minutes.
  • Cool before slicing and serving.

Notes

For added flavor, sprinkle with a little cinnamon before baking.
Calories: 180kcal
Cost: $12
Course: Dessert, Snack
Cuisine: American
Keyword: apple, cake, healthy

Nutrition

Calories: 180kcal | Carbohydrates: 30g | Protein: 4g | Fat: 6g | Sodium: 150mg

Loved this recipe? Save it to your favorite Pinterest board so you can easily find it later! It’s the perfect way to keep all your sweet ideas in one place. ✨

Freshly baked healthy apple snack cake, highlighting its texture, served on a rustic wooden table.

Ignite Your Kitchen Adventure with Creamy Garlic Spaghetti Squash Casserole

Welcome, fellow food lovers! If you’re ready to take your cooking game to the next level, you’re in for a fiery treat. Today, we’re diving into the world of flavors with my Creamy Garlic Spaghetti Squash Casserole. This isn’t just another recipe; it’s a culinary experience that combines roasted spaghetti squash, savory Italian sausage, and a luscious coconut milk sauce that will set your taste buds ablaze. Perfect for those on a Paleo, Whole30, and dairy-free journey, this dish promises to ignite your senses and warm your heart.

Why You’ll Love This Recipe

Let’s talk about why this creamy casserole is destined to become a staple in your kitchen:

  • Comforting flavors: The rich combination of garlic and coconut milk creates a creamy texture that feels indulgent without the guilt.
  • Health-conscious ingredients: Packed with vegetables and free from gluten and dairy, this dish supports your dietary goals.
  • Easy to make: With straightforward steps and minimal prep, you’ll whip this up in no time, making it perfect for busy weeknights.
  • Versatile: Customize it with your favorite veggies or proteins to suit your taste and dietary preferences.
  • Meal prep friendly: This casserole is perfect for batch cooking, allowing you to enjoy delicious leftovers throughout the week.

Ingredient Breakdown and Substitutions

Let’s gather our ingredients and get ready to cook! Here’s what you need for this scrumptious casserole:

  • 1 medium spaghetti squash: This serves as the star of the dish, providing a healthy alternative to pasta. If you can’t find spaghetti squash, try zucchini noodles as a substitute.
  • 4 cups broccoli florets: A great source of vitamins and adds a beautiful crunch. Feel free to swap with spinach or kale if you prefer.
  • 1 lb ground Italian sausage: For flavor and protein; you can use turkey, chicken, or even a plant-based sausage for a lighter option.
  • 2 cups mushrooms, sliced: They bring an earthy flavor to the dish. If mushrooms aren’t your thing, consider bell peppers or zucchini.
  • 1/4 cup arrowroot flour: This helps thicken the sauce. You can substitute with coconut flour or tapioca flour if needed.
  • 2 tbsp minced garlic: A must for that aromatic flavor! Add more if you’re a garlic lover.
  • 16 oz coconut milk: This gives the sauce its creamy richness. Unsweetened almond milk can be used, but the flavor will differ slightly.
  • Salt and pepper: To taste, but don’t be shy! Seasoning is key to making flavors pop.

Step-by-Step Guide to Culinary Perfection

Close-up side view of a hearty casserole featuring spaghetti squash and Italian sausage.

Now that we have everything ready, let’s get cooking! Follow these steps to create your creamy masterpiece:

  1. Preheat your oven to 400° Fahrenheit.
  2. Slice the spaghetti squash lengthwise and scoop out the seeds. Place the two halves face-down on a baking sheet and bake for 25 minutes.
  3. While the squash is cooking, heat a large pan over medium heat and add in the ground sausage. Break it into pieces with a spatula and cook, stirring occasionally until browned and cooked through, about 8 minutes. Remove from the pan and set aside, reserving at least 1 tablespoon of fat in the pan.
  4. Once the squash is cooked, remove it from the oven and set aside to cool. Keep the oven on at 400°.
  5. Prepare the creamy garlic sauce by whisking together the coconut milk and arrowroot flour in a bowl or jar, then set aside.
  6. In the same pan used for the sausage, add the sliced mushrooms and cook until they begin to soften, about 2 minutes. Add in the minced garlic and mix well, cooking for another 1-2 minutes until fragrant.
  7. Whisk the coconut milk mixture again and add it to the pan, stirring constantly for about 2 minutes. The sauce will bubble and thicken; keep stirring to prevent burning. Stir in salt and pepper.
  8. Now, let’s put everything together! With a fork, scrape out the spaghetti squash “noodles” into a medium casserole dish. Add the cooked sausage, broccoli, and creamy garlic sauce. Mix everything together well.
  9. Place back in the oven and bake for an additional 15 minutes. Remove and serve hot!

Pro Tips to Elevate Your Casserole Game

Want to take this dish from great to unforgettable? Check out these expert insights:

  • Don’t rush the squash: Ensure the squash is fully roasted for perfect texture; it should be tender and easily shredded.
  • Experiment with spices: Add your favorite herbs like thyme, rosemary, or even a pinch of red pepper flakes for an extra kick.
  • Layer it up: Consider adding a layer of cheese or nutritional yeast on top before the final bake for a cheesy flavor without dairy.
  • Mix up the veggies: Don’t hesitate to throw in some seasonal veggies like zucchini, bell peppers, or even carrots for added nutrition.
  • Make it savory: A dash of soy sauce or tamari can add an umami punch if you’re feeling adventurous.
  • Use a baking dish: A ceramic or glass casserole dish promotes even cooking and makes for a beautiful presentation.
  • Let it rest: Allow the casserole to sit for a few minutes after baking; this helps the flavors meld and makes it easier to serve.
  • Share the love: Cooking is more fun when shared! Invite friends or family to enjoy this dish together.

Common Mistakes and Troubleshooting

Even the best chefs have off days! Here are some common pitfalls and how to avoid them:

  • Too watery?: If your casserole ends up too watery, you may have added too much coconut milk or not cooked the squash long enough. Next time, try using less liquid or ensuring the squash is fully baked.
  • Flavorless dish?: Be generous with your seasoning! Remember that salt brings out the flavors, and don’t be afraid to taste as you cook.
  • Burnt cheese topping?: If you add cheese on top, keep an eye on it to avoid burning. Consider covering the dish with foil until the last few minutes of baking.
  • Undercooked squash?: Ensure your squash is fork-tender before mixing it into the casserole. If it’s too firm, pop it back in the oven.

Creative Variations to Explore

This recipe is a fantastic base for creativity! Here are some variations to try:

  • Vegetarian Delight: Replace the sausage with chickpeas or lentils for a hearty vegetarian option.
  • Spicy Italian: Add crushed red pepper flakes or diced jalapeños for a spicy twist that’ll keep your taste buds dancing.
  • Cheesy Broccoli Version: Mix in a generous handful of shredded cheese right before baking for a cheesy casserole that’s hard to resist.
  • Asian-Inspired: Substitute coconut milk with sesame oil and add soy sauce, ginger, and chopped scallions for an Asian flair.

Storage and Make-Ahead Instructions

Want to enjoy this dish throughout the week? Here’s how to store and make it ahead:

  • Refrigeration: Store leftovers in an airtight container in the fridge for up to 5 days.
  • Freezing: This casserole freezes well! Portion it into freezer-safe containers and enjoy it for up to 3 months.
  • Make-ahead tip: Assemble the casserole a day in advance and bake it when you’re ready to serve.

Frequently Asked Questions

Got questions? I’ve got answers! Here are some common queries about this recipe:

  • Can I use a different type of squash? Yes! While spaghetti squash is the star, you can experiment with butternut or acorn squash for a different flavor.
  • How do I know when the squash is done? The squash is done when it’s fork-tender and easily shredded into strands.
  • Can I make this dish vegan? Absolutely! Substitute the sausage with a plant-based protein and use almond or cashew milk instead of coconut milk.
  • What can I serve with this casserole? Pair it with a fresh salad or some crusty bread to soak up the delicious sauce.
  • Is this recipe kid-friendly? Yes! The flavors are mild and the creamy sauce makes it appealing to little ones.
  • How do I reheat leftovers? Reheat in the microwave or in the oven at 350°F until warmed through.
  • Can I add more vegetables? Definitely! Feel free to add any veggies you have on hand.
  • How spicy is this dish? It’s not spicy at all, but you can easily add hot sauce or red pepper flakes if you want some heat.

Nutritional Benefits and Dietary Adaptations

This creamy casserole isn’t just delicious; it’s also packed with nutritional goodness:

  • High in fiber: Spaghetti squash and broccoli are great sources of dietary fiber, promoting digestive health.
  • Rich in vitamins: Broccoli is loaded with vitamins C and K, while spaghetti squash offers antioxidants.
  • Low in carbohydrates: This dish fits perfectly into low-carb lifestyles, making it an excellent choice for those watching their carb intake.

Essential Equipment Recommendations

Before you get started, make sure you have the following kitchen tools ready:

  • Sharp knife: For slicing the spaghetti squash and chopping vegetables.
  • Large baking sheet: To roast the squash evenly in the oven.
  • Large skillet: For cooking the sausage and making the sauce.
  • Casserole dish: A medium-sized dish works best for baking the casserole.
  • Whisk: For mixing the sauce ingredients smoothly.

Serving Suggestions That Make It Even Better

Ready to serve this creamy goodness? Here are some ideas to elevate your presentation:

  • Garnish with fresh herbs: A sprinkle of parsley or basil adds a pop of color and freshness.
  • Serve with a side salad: A light salad balances the richness of the casserole.
  • Pair with a crisp white wine: A chilled Sauvignon Blanc complements the flavors beautifully.
  • Top with toasted nuts: Add some crunch with pine nuts or slivered almonds on top for texture.

Final Thoughts: Embrace the Spice of Life!

Cooking is an adventure, and with this Creamy Garlic Spaghetti Squash Casserole, you’re ready to embrace it fully! Let the flavors dance on your palate and enjoy the process. Remember, every pinch of spice is a step towards a culinary masterpiece. So grab your skillet, unleash your creativity, and get ready to impress everyone at the table. Happy cooking!

Creamy Garlic Spaghetti Squash Casserole (Paleo, Whole30, GF + Dairy-Free)

Prep Time 15 minutes
Cook Time 40 minutes
Total Time 55 minutes
Servings 4 servings
Calories 450
A flavorful, dairy-free casserole combining spaghetti squash, sausage, broccoli, and a creamy garlic sauce, perfect for a healthy, paleo-friendly meal.

Ingredients

Vegetables

  • 1 medium spaghetti squash
  • 4 cups broccoli florets
  • 2 cups mushrooms, sliced

Meat

  • 1 lb ground Italian sausage

Pantry Items

  • 1/4 cup arrowroot flour
  • 2 tbsp minced garlic
  • 16 oz coconut milk
  • about 1 tsp salt
  • about 1 tsp pepper

Instructions 

  • Preheat oven to 400°F (200°C). Slice squash, remove seeds, and bake for 25 minutes.
  • Cook sausage in a pan until browned, then set aside. Reserve 1 tbsp fat.
  • Cool squash, then scrape out noodles. Prepare sauce by whisking coconut milk and arrowroot.
  • Sauté mushrooms and garlic in reserved fat until fragrant. Add coconut mixture, cook until thickened, then season with salt and pepper.
  • Combine squash noodles, sausage, broccoli, and sauce in a dish. Bake for 15 minutes and serve.

Notes

Ensure to scrape noodles thoroughly and adjust seasoning to taste.
Calories: 450kcal
Cost: $15
Course: Main Course
Cuisine: American
Keyword: Dairy-Free, Paleo, Spaghetti Squash

Nutrition

Calories: 450kcal | Carbohydrates: 40g | Protein: 25g | Fat: 25g | Sodium: 800mg