Author

Avery Collins

Browsing

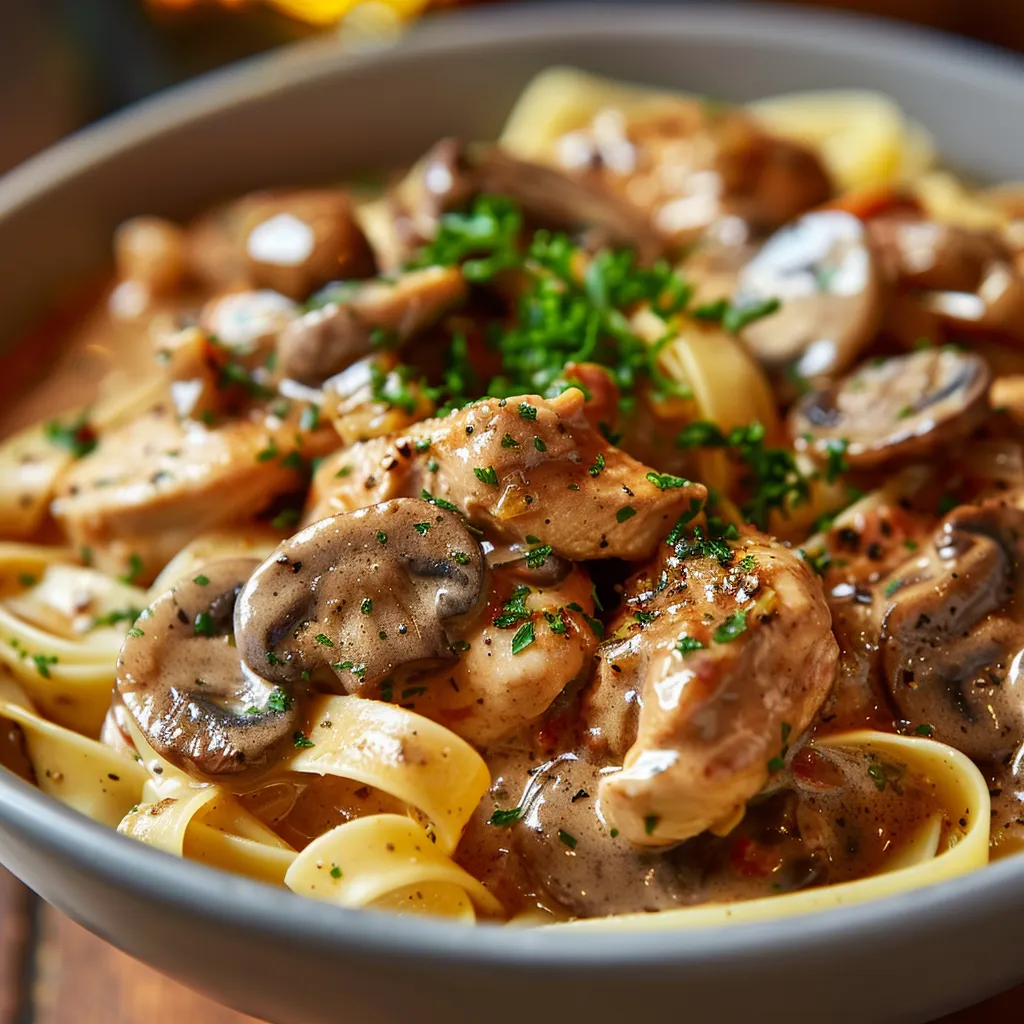
The Autumn Soup That Ignited My Passion for Cozy, Spicy Flavors

As the leaves begin to turn and the air carries that crisp, refreshing bite of autumn, I find myself yearning for a dish that wraps me in warmth and comfort. Enter my Autumn Soup – Sausage Tortellini Soup with Spinach, a dish that embodies everything I love about this season: the vibrant colors, the rich flavors, and the intoxicating aroma that fills my kitchen as it simmers on the stove. This isn’t just any soup; it’s a celebration of spices, a dance of textures, and a bowl of pure joy that ignites my passion for cooking every time I whip it up.

Why This Sausage Tortellini Soup Will Win Your Heart

This hearty soup is a symphony of flavors, combining the savory depth of Italian sausage with the delightful chew of tortellini and the freshness of spinach. It’s not just about filling your belly; it’s about creating an experience. As the sausage sizzles in the pot, releasing its aromatic oils, you can’t help but feel the anticipation building. Each ingredient is carefully selected to complement the others, creating a harmonious blend that warms you from the inside out. With the right balance of spice, creaminess, and nutrition, this soup quickly becomes a go-to recipe in your fall dinner rotation.

How to Make Sausage Tortellini Soup

Close-up of hearty Autumn Soup featuring sausage, tortellini, and fresh spinach.

Let’s dive into the heart of the matter, shall we? Making this Sausage Tortellini Soup is easier than you might think, and I promise you’ll feel like a culinary rockstar when it’s done. Here’s what you need:

Ingredients

  • 1 pound Italian sausage (mild or spicy)
  • 1 medium onion, diced
  • 2 cloves garlic, minced
  • 4 cups chicken broth
  • 1 can (14.5 oz) diced tomatoes
  • 1 package (9 oz) refrigerated tortellini (cheese or spinach-filled)
  • 2 cups fresh spinach, chopped
  • 1 tablespoon olive oil
  • Salt and pepper to taste

Step-by-Step Instructions

Now that you have your ingredients, let’s get cooking! Follow these steps to create your masterpiece:

  1. Heat the Olive Oil: In a large pot, pour in the olive oil and heat it over medium heat until it shimmers. This is your cue to add flavor!
  2. Brown the Sausage: Toss in the Italian sausage, using a wooden spoon to break it apart as it cooks. You want it browned and crumbled, about 5-7 minutes. Once cooked, remove it from the pot and set it aside. Trust me; this step is all about that flavor.
  3. Sauté the Aromatics: In the same pot, add the diced onion. Sauté for about 5 minutes until it turns translucent and fragrant. The smell will transport you to a cozy Italian kitchen!
  4. Add Garlic: Incorporate the minced garlic and cook for an additional minute. Be careful not to burn it; burnt garlic is not our friend.
  5. Pour in the Broth and Tomatoes: Now, pour in the chicken broth and add the diced tomatoes. Bring this aromatic mixture to a boil; feel that excitement!
  6. Add the Sausage Back: Return the browned sausage to the pot. Stir it in and let the flavors meld together.
  7. Cook the Tortellini: Add the tortellini to the pot and cook according to the package instructions, usually about 3-5 minutes, until tender. You’ll notice how they soak in all that delicious broth.
  8. Incorporate the Spinach: Finally, stir in the chopped spinach, cooking for about 2 minutes until it wilts beautifully. This is where the soup gets its vibrant green color.
  9. Season and Serve: Season with salt and pepper to taste, then serve hot. Enjoy every spoonful of this comforting creation!

Tips for Making the Best Sausage Tortellini Soup

  • Use Quality Ingredients: The flavor of your soup hinges on the quality of your ingredients. Choose fresh, high-quality sausage and good chicken broth for the best results.
  • Experiment with Spice: If you’re feeling adventurous, add a pinch of red pepper flakes for a kick or swap the spinach for kale for a different texture.
  • Make It Ahead: This soup tastes even better the next day! Make it ahead of time and let the flavors deepen in the fridge.

Variations and Substitutions

One of the best parts about cooking is the ability to make each dish your own. Here are some variations and substitutions you can try:

  • Using Different Proteins: Turkey sausage or chicken sausage are great alternatives if you’re looking for a lighter option.
  • Vegan Version: Substitute the sausage with plant-based sausage and use vegetable broth instead of chicken broth. For creaminess, add a splash of coconut milk!
  • Seasonal Vegetables: Feel free to toss in seasonal veggies like squash or carrots to add even more flavor and nutrition.

Storage and Freezing Tips

Let’s talk about leftovers because this soup is perfect for meal prep! Here’s how to store and freeze your Sausage Tortellini Soup:

  • Refrigeration: Store in an airtight container in the fridge for up to 4 days. Reheat gently on the stove.
  • Freezing: This soup freezes beautifully! Cool it completely, then transfer to freezer-safe containers. It will last for up to 3 months. When ready to eat, thaw overnight in the fridge and reheat on the stove.

Frequently Asked Questions

Can I substitute the tortellini?

Absolutely! You can use any pasta you have on hand, but keep in mind that cooking times may vary.

What’s the best way to reheat this soup?

The best way to reheat is on the stovetop over low heat. Add a splash of broth or water if it’s too thick.

Can I add more vegetables?

Yes! Feel free to add any vegetables you love. Just remember that cooking times may vary for different veggies.

Ready to Dive In?

There you have it, my friends! This Autumn Soup – Sausage Tortellini Soup with Spinach is a cozy embrace in a bowl, bringing together flavors that warm your heart and ignite your passion for cooking. Whether it’s a chilly evening or a gathering of friends, this dish is sure to impress and satisfy. So grab your pot, embrace the spice, and let the aromas weave their magic in your kitchen. Trust me; after one taste, you’ll be hooked! And if you’re looking for more delightful recipes, check out my posts on Everyday Delights and Nourish Your Soul. Happy cooking!

Autumn Soup - Sausage Tortellini Soup with Spinach

Prep Time 10 minutes
Cook Time 20 minutes
Total Time 30 minutes
Servings 4 servings
Calories 450
A hearty and flavorful soup combining sausage, tortellini, and fresh spinach, perfect for cozy autumn days.

Ingredients

Meat

  • 1 pound italian sausage (mild or spicy)
  • 1 medium onion, diced
  • 2 cloves garlic, minced
  • 4 cups chicken broth
  • 1 can (14.5 oz) diced tomatoes
  • 1 package (9 oz) refrigerated tortellini (cheese or spinach-filled)
  • 2 cups fresh spinach, chopped
  • 1 tablespoon olive oil
  • to taste salt and pepper

Instructions 

  • Heat olive oil in a large pot over medium heat.
  • Cook sausage until browned, remove and set aside.
  • Cook onion until translucent, add garlic, then pour in broth and tomatoes. Bring to boil.
  • Return sausage, add tortellini, cook until tender, then stir in spinach until wilted. Season with salt and pepper.

Notes

This soup is best served hot, garnished with extra spinach or cheese if desired.
Calories: 450kcal
Cost: $15
Course: Soup
Cuisine: American
Keyword: sausage, Spinach, tortellini

Nutrition

Calories: 450kcal | Carbohydrates: 50g | Protein: 25g | Fat: 20g | Sodium: 1500mg

Loved this recipe? Save it to your favorite Pinterest board so you can easily find it later! It’s the perfect way to keep all your sweet ideas in one place. ✨

Delicious sausage and spinach tortellini soup served in a rustic bowl.

The Roasted Broccoli and Carrots That Sparked My Passion for Flavor and Fire

Ah, roasted broccoli and carrots—two humble vegetables that, when treated with the right love and fire, can transform a simple meal into a bold culinary adventure! Growing up in San Antonio, Texas, my journey in the kitchen was always ignited by my fascination with spice, texture, and the sizzling sounds of perfectly roasted vegetables. Roasting is a magical process; it caramelizes the natural sugars in vegetables, enhancing their flavors and turning them into something extraordinary. Let me take you through this recipe that not only celebrates these beautiful veggies but also embodies my passion for cooking with heat.

Why You’ll Love Roasted Broccoli and Carrots

When it comes to roasted veggie dishes, this recipe for Roasted Broccoli and Carrots is a standout for several reasons:

  • Flavor Explosion: The roasting process brings out rich, sweet notes while maintaining a delightful crunch. The broccoli takes on a slightly smoky flavor, while the carrots become tender and caramelized.
  • Health Benefits: Packed with vitamins A, C, and K, these veggies are not just good for your taste buds; they’re also a powerhouse of nutrients, making it an ideal addition to your meals.
  • Ease and Convenience: With just a few ingredients and minimal prep time, this dish fits perfectly into any lunch ideas with vegetables or weeknight dinners.
  • Versatility: Whether serving with grilled meats, pasta, or as part of a hearty vegetarian feast, roasted broccoli and carrots are the perfect sidekick for any main dish.

Ingredients: What You’ll Need

Image of seasoned roasted broccoli florets and sliced carrots under natural light, with a blurred background.

Before diving into the cooking process, let’s gather our ingredients. Here’s what you’ll need to make this delicious roasted dish:

  • 1 head of broccoli, cut into florets
  • 2 large carrots, sliced
  • 2 tablespoons olive oil
  • Salt and pepper to taste
  • 1 teaspoon garlic powder (optional)
  • 1 teaspoon lemon juice (optional)

Let’s Get Cooking: Steps to Roasted Perfection

Ready to roast? Let’s turn up the heat and get started with this flavorful recipe!

Step 1: Preheat Your Oven

First things first, preheat your oven to 400°F (200°C). A hot oven is essential for achieving that perfect crispiness.

Step 2: Prepare the Vegetables

In a large bowl, toss the broccoli florets and sliced carrots with olive oil, salt, pepper, and garlic powder if you’re feeling adventurous. This is where you can start experimenting with flavors—add a pinch of cayenne for heat or a sprinkle of smoked paprika for depth.

Step 3: Spread and Roast

Spread the seasoned vegetables evenly on a baking sheet lined with parchment paper. This step ensures that the veggies roast rather than steam. Now, pop them into your preheated oven and roast for 20-25 minutes, or until they are tender and slightly caramelized. Make sure to toss them halfway through to encourage even browning.

Step 4: Finish with a Zing

Once the veggies are roasted to your liking, remove them from the oven. For an extra burst of flavor, drizzle with lemon juice before serving. The acidity of the lemon will brighten up the dish and elevate all those lovely roasted flavors!

Serving Suggestions: Elevate Your Meal

These roasted broccoli and carrots are incredibly versatile. Here are a few ways to serve them:

  • As a Side Dish: Pair them with roasted chicken or grilled steak for a comforting dinner.
  • Over Pasta: Toss these veggies with your favorite pasta and a drizzle of olive oil for a quick and satisfying meal.
  • With Rice: Serve them over a bed of rice, perhaps with a sprinkle of sesame seeds for added texture.

Tips for Roasting Success

Here are some of my favorite tips to ensure you get the most out of your roasted veggies:

  • Don’t Overcrowd: Give your veggies enough space on the baking sheet. Overcrowding can trap moisture and lead to steaming rather than roasting.
  • Experiment with Seasonings: Don’t be afraid to mix it up! Fresh herbs, a dash of balsamic vinegar, or a sprinkle of cheese can add delightful twists.
  • Prepping Ahead: You can chop your vegetables ahead of time and store them in the fridge. Just toss with oil and seasonings before roasting.

Variations: Make It Your Own

This recipe is just the beginning. Here are a few variations to inspire your creativity:

  • Add Other Vegetables: Feel free to incorporate other veggies like bell peppers, zucchini, or Brussels sprouts for a colorful mix.
  • Spice It Up: Want a little kick? Add red pepper flakes or your favorite hot sauce to the mix.
  • Cheesy Goodness: Sprinkle some Parmesan cheese over the veggies during the last five minutes of roasting for a melty, savory finish.

Storage and Freezing: Keep the Flavor Alive

Leftovers can be just as delicious! Here’s how to store and freeze your roasted veggies:

Storage

Store any leftover roasted broccoli and carrots in an airtight container in the fridge for up to three days. Reheat in the oven or on the stovetop to maintain that crispy texture.

Freezing

While it’s best to enjoy these veggies fresh, you can freeze them if needed. Allow them to cool completely, then place in a freezer-safe container for up to two months. When you’re ready to enjoy, reheat directly from frozen.

FAQs: Common Questions Answered

1. Can I use other vegetables?

Absolutely! This recipe is flexible. Feel free to substitute with your favorite veggies like cauliflower or sweet potatoes.

2. How do I make these veggies crispy?

The key to crispy roasted vegetables is ensuring they have enough space on the baking sheet. Also, high heat is essential for that golden-brown finish.

3. Can I use frozen vegetables?

Fresh vegetables work best for roasting, but if you only have frozen, be sure to thaw and pat them dry to prevent sogginess.

4. Can I add cheese?

Yes! Adding cheese towards the end of the roasting process can give your veggies a deliciously cheesy finish.

5. Can I make this ahead of time?

While roasted veggies are best served fresh, you can prep them in advance and roast just before serving.

Embrace the Adventure of Cooking!

This roasted broccoli and carrots recipe is not just about the food; it’s about the joy of cooking and the thrill of flavor. I encourage you to embrace the adventure in your kitchen, experiment with spices, and make this dish your own. Whether you serve it at a family dinner or as a delightful side at a gathering, it’s guaranteed to impress. So grab your skillet, turn up the heat, and let’s make cooking an exciting journey for you and your loved ones!

Happy roasting, my friends! If you enjoyed this recipe, check out my other articles like Everyday Delights and Joyful Bites of Bliss for more culinary inspiration!

Roasted Broccoli and Carrots - CookTune

Prep Time 10 minutes
Cook Time 25 minutes
Total Time 35 minutes
Servings 4 servings
Calories 150
A simple and healthy roasted vegetable dish featuring broccoli and carrots, perfect as a side or light meal.

Ingredients

Vegetables

  • 1 head broccoli (cut into florets)
  • 2 large carrots (sliced)
  • 2 tablespoons olive oil
  • to taste salt and pepper
  • 1 teaspoon garlic powder (optional)
  • 1 teaspoon lemon juice (optional)

Instructions 

  • Preheat oven to 400°F (200°C).
  • Toss broccoli and carrots with olive oil, salt, pepper, and garlic powder.
  • Spread on a baking sheet lined with parchment paper.
  • Roast for 20-25 minutes until tender and caramelized.
  • Drizzle with lemon juice if desired and serve warm.

Notes

For extra flavor, sprinkle with your favorite herbs before roasting.
Calories: 150kcal
Cost: $10
Course: Side Dish
Cuisine: American
Keyword: vegetables

Nutrition

Calories: 150kcal | Carbohydrates: 25g | Protein: 5g | Fat: 7g | Sodium: 150mg

Loved this recipe? Save it to your favorite Pinterest board so you can easily find it later! It’s the perfect way to keep all your sweet ideas in one place. ✨

Eye-level shot of colorful roasted vegetables, highlighting textures and warm tones, set against a cozy backdrop.

The Crispy Roast Potatoes with Rosemary and Garlic That Fired Up My Kitchen & Heart

Picture this: you step into your kitchen, the air thick with the tantalizing aroma of roasted garlic and fresh rosemary. The sound of potatoes sizzling in the oven is music to your ears. These are not just any potatoes; these are Crispy Roast Potatoes with Rosemary and Garlic, the dish that transformed my cooking game and ignited my passion for the culinary arts. They are fluffy on the inside, golden and crunchy on the outside, and bursting with flavor. Trust me, once you try them, they’ll become a staple in your kitchen, just like they are in mine.

Why You’ll Love Crispy Roast Potatoes with Rosemary and Garlic

These roast potatoes are more than just a side dish; they are an experience! With their perfect balance of textures and flavors, they elevate any meal from ordinary to extraordinary. Imagine pairing them with a succulent roast chicken or serving them alongside a vibrant salad. The crispy edges give way to a tender interior, while the aromatic rosemary and robust garlic dance on your palate, creating a symphony of taste that you’ll crave time and again.

Ingredients

Side view of roasted potatoes with a crispy exterior, fresh rosemary, and minced garlic.
  • 4 large potatoes, peeled and cut into chunks
  • 3 tablespoons olive oil
  • 3 cloves garlic, minced
  • 2 sprigs fresh rosemary, chopped
  • Salt and pepper to taste

Instructions

Ready to fire up your kitchen? Let’s dive into the steps to create these crispy delights:

  1. Preheat the Oven: Set your oven to 200°C (400°F). This high temperature is crucial for achieving that coveted crispy texture.
  2. Parboil the Potatoes: In a large pot, bring salted water to a boil. Add the potato chunks and parboil them for about 5 minutes. This step ensures your potatoes are tender inside while still allowing for that perfect crispiness on the outside.
  3. Drain and Dry: Once parboiled, drain the potatoes and let them dry. The drier the potatoes, the crispier they’ll become!
  4. Toss with Flavor: In a large bowl, combine the drained potatoes with the olive oil, minced garlic, chopped rosemary, salt, and pepper. Toss everything together until the potatoes are evenly coated in this fragrant mixture.
  5. Spread and Roast: Transfer the seasoned potatoes to a baking sheet, spreading them out in a single layer. Make sure they’re not crowded; this is key to achieving maximum crispiness. Roast in the preheated oven for 45-50 minutes, turning them halfway through to ensure even browning.
  6. Serve and Enjoy: Once golden brown and crispy, remove the potatoes from the oven. Serve hot, garnished with extra rosemary if desired. Trust me, this is the moment you’ve been waiting for!

Nutrition Facts

These crispy roast potatoes not only tantalize your taste buds but are also a wholesome side dish. A typical serving contains:

  • Calories: 190
  • Fat: 8g
  • Carbohydrates: 29g
  • Protein: 4g

How to Serve Crispy Roast Potatoes with Rosemary and Garlic

These potatoes are incredibly versatile. Pair them with:

  • Roast Meats: They make an ideal companion for rosemary garlic chicken or succulent beef. The flavors meld beautifully, creating a meal that’s both satisfying and memorable.
  • Vegetables: Serve them alongside a vibrant medley of roasted vegetables to create a colorful, healthful plate.
  • As a Snack: Yes, these crispy wonders can stand alone! Serve them with your favorite dipping sauce for a delightful snack or appetizer.

Additional Tips

To elevate your crispy roast potatoes even further, consider these tips:

  • Use the Right Potatoes: Russet potatoes are ideal for roasting due to their high starch content, which gives them that fluffy interior. However, Yukon Golds or baby potatoes can also work beautifully.
  • Experiment with Spices: Don’t hesitate to throw in a pinch of cayenne or smoked paprika to add a little kick. Spice is my secret weapon in the kitchen!
  • Storage: Leftover potatoes can be stored in an airtight container in the refrigerator for up to 3 days. Reheat them in the oven to regain their crispiness.

Variations

Want to switch it up? Here are a couple of variations to keep things interesting:

  • Herb Blend: Mix in other fresh herbs like thyme or oregano for a different flavor profile.
  • Cheesy Delight: Grate some Parmesan cheese over the potatoes in the last 10 minutes of roasting for a cheesy, crispy finish.

Substitutions

Can’t find an ingredient? Here are some substitutions:

  • Olive Oil: You can use melted butter or avocado oil if you prefer.
  • Fresh Garlic: If fresh garlic isn’t available, garlic powder can be used. About 1 teaspoon should suffice.
  • Fresh Rosemary: Dried rosemary can work in a pinch; just use one-third of the amount as it’s more concentrated.

Equipment You’ll Need

For this recipe, you’ll need:

  • A large pot for boiling
  • A baking sheet
  • A large bowl for mixing
  • A sharp knife and cutting board
  • A spatula for turning the potatoes

Storage & Freezing

These crispy roast potatoes can be stored easily:

  • Refrigerator: Store leftovers in an airtight container for up to 3 days.
  • Freezing: Allow the potatoes to cool completely, then place them in a freezer-safe container. They can be frozen for up to 2 months. Reheat them in the oven for that fresh-out-of-the-oven taste.

FAQs

Can I make these potatoes ahead of time?

Absolutely! You can parboil the potatoes a day in advance and store them in the refrigerator. When you’re ready to serve, simply toss them with oil and seasonings and roast them.

What’s the best way to ensure my potatoes get crispy?

The key is to make sure the potatoes are well-dried after boiling and to spread them in a single layer on the baking sheet. Avoid overcrowding, as this will trap steam and prevent crispiness.

Can I use other types of potatoes?

Yes! While russet potatoes are fantastic for their texture, Yukon Golds or even baby potatoes are delicious alternatives. Each type will offer a slightly different flavor and texture.

Conclusion

These Crispy Roast Potatoes with Rosemary and Garlic are more than just a side dish; they are a testament to the joy of cooking boldly and embracing flavors that dance on your palate. With just a handful of ingredients and a few simple steps, you can create a dish that brings warmth and satisfaction to your table. So, what are you waiting for? Grab your skillet, channel your inner chef, and get ready to fire up your kitchen! Remember, cooking is an adventure, and each bite is a story waiting to be told. Happy cooking!

Crispy Roast Potatoes with Rosemary and Garlic – recipestasteful in 2025

Prep Time 10 minutes
Cook Time 50 minutes
Total Time 1 hour
Servings 4 servings
Calories 250
Enjoy perfectly crispy roasted potatoes infused with fragrant rosemary and garlic, a simple yet flavorful side dish.

Ingredients

Potatoes

  • 4 large potatoes (peeled and cut into chunks)
  • 3 tablespoons olive oil
  • 3 cloves garlic (minced)
  • 2 sprigs fresh rosemary (chopped)
  • to taste salt and pepper

Instructions 

  • Preheat oven to 200°C (400°F).
  • Parboil potatoes in salted water for 5 minutes, then drain and dry.
  • Toss potatoes with olive oil, garlic, rosemary, salt, and pepper.
  • Spread on a baking sheet and roast for 45-50 minutes, turning halfway.
  • Serve hot, garnished with extra rosemary if desired.

Notes

For extra crispiness, increase roasting time slightly.
Calories: 250kcal
Cost: $15
Course: Side Dish
Cuisine: International
Keyword: Potatoes

Nutrition

Calories: 250kcal | Carbohydrates: 45g | Protein: 5g | Fat: 8g | Sodium: 300mg

Loved this recipe? Save it to your favorite Pinterest board so you can easily find it later! It’s the perfect way to keep all your sweet ideas in one place. ✨

Detailed shot of roasted potato chunks coated in herbs and herbs with a rustic background.

🔥 The Creamy Cajun Chicken Pasta Soup That Turned Up My Flavor Game to Eleven

Welcome to a culinary adventure where every spoonful is a celebration of bold flavors and creamy textures! If you ever thought comfort food was boring, let me introduce you to the Creamy Cajun Chicken Pasta Soup — a dish that not only warms your belly but ignites your taste buds and elevates your cooking game to a whole new level. This recipe is a reflection of my journey through the fiery landscapes of spice, capturing the vibrant essence of Cajun cuisine in a bowl. Are you ready to dive into this flavor-packed experience?

🍜 What Makes This Recipe So Good?

Why is the Creamy Cajun Chicken Pasta Soup one of my all-time favorites? The answer lies in the perfect balance of heat, creaminess, and the soul-satisfying harmony of ingredients. Picture this: tender pieces of chicken swimming in a rich, creamy broth infused with the bold spices of Cajun cuisine, complemented by perfectly cooked pasta that absorbs all that deliciousness.

The beauty of this dish is its adaptability. Whether you’re looking for a quick weeknight meal or something to impress your guests, this soup delivers. And the best part? It comes together in less than 30 minutes! So, let’s roll up our sleeves and get cooking!

👩🏼‍🍳 Chef’s Tips

Close-up of a rich, creamy Cajun chicken pasta soup with steam and garnishes.
  • Use Fresh Ingredients: Fresh herbs and quality chicken will elevate your soup. Don’t skimp on the spices — they are the backbone of Cajun flavors!
  • Adjust the Heat: If you’re sensitive to spice, start with less Cajun seasoning and add more to taste. Remember, it’s all about finding that balance that works for you.
  • Make It Ahead: This soup tastes even better the next day as the flavors meld together. Perfect for meal prep!
  • Finish with a Sprinkle: A sprinkle of fresh parsley or green onions on top adds a burst of color and freshness to your dish.

🥘 Creamy Cajun Chicken Pasta Soup Recipe

Equipment

  • Large pot or Dutch oven
  • Wooden spoon or ladle
  • Cutting board and knife
  • Measuring cups and spoons

Ingredients

  • 1 pound boneless, skinless chicken breasts, diced
  • 2 tablespoons Cajun seasoning (adjust to taste)
  • 1 tablespoon olive oil
  • 1 medium onion, diced
  • 2 cloves garlic, minced
  • 1 bell pepper, diced (any color)
  • 2 cups chicken broth
  • 1 cup heavy cream
  • 1 cup cooked pasta (your choice)
  • Salt and pepper to taste
  • Fresh parsley for garnish

Instructions

  1. Prepare the Chicken: In a large pot, heat the olive oil over medium heat. Add the diced chicken and sprinkle with Cajun seasoning. Cook until the chicken is browned and cooked through, about 5-7 minutes. Remove the chicken from the pot and set aside.
  2. Sauté the Vegetables: In the same pot, add the diced onion, garlic, and bell pepper. Sauté until the onion becomes translucent and the peppers are soft, about 3-4 minutes.
  3. Add the Broth: Pour in the chicken broth and bring to a simmer. Scrape the bottom of the pot to incorporate any flavorful bits left from the chicken.
  4. Make It Creamy: Lower the heat and stir in the heavy cream. Add the cooked chicken back to the pot, and let everything simmer together for another 5 minutes.
  5. Combine with Pasta: Add the cooked pasta to the soup, stirring well to combine. Season with salt and pepper to taste. Allow the soup to heat through for a couple more minutes.
  6. Garnish and Serve: Ladle the soup into bowls, garnish with fresh parsley, and enjoy your creamy, spicy creation!

💡 Tips for Perfecting Your Creamy Cajun Chicken Pasta Soup

Now that you’re armed with the basic recipe, let’s explore some variations and substitutions to make this dish truly yours!

Variations

  • Vegetarian Version: Swap the chicken for chickpeas or hearty vegetables like mushrooms and zucchini. Use vegetable broth instead of chicken broth for a delightful vegetarian option.
  • Spicy Kick: If you crave extra heat, toss in some diced jalapeños or a splash of hot sauce. You can also increase the Cajun seasoning for a bolder flavor.
  • Different Pasta: Feel free to experiment with different types of pasta such as penne, fusilli, or even gluten-free options!

Substitutions

  • Heavy Cream: For a lighter version, substitute with half-and-half or coconut milk. The latter will add a subtle sweetness and a hint of tropical flavor.
  • Cajun Seasoning: If you don’t have Cajun seasoning, a blend of paprika, cayenne pepper, garlic powder, and thyme will do the trick!
  • Chicken: Use rotisserie chicken for a quicker meal or even shrimp for a seafood twist!

🧊 Storage & Freezing

This creamy soup is not only a delightful meal but also a great option for meal prep. Here’s how to store it:

  • Refrigerator: Store leftovers in an airtight container for up to 3-4 days. When reheating, add a splash of chicken broth or water to restore the creamy texture.
  • Freezer: You can freeze this soup for up to 3 months. Let it cool completely before transferring to a freezer-safe container. To reheat, thaw overnight in the refrigerator and heat on the stove over low heat.

❓ FAQs

How to make the soup spicier?

To increase the spice level, add more Cajun seasoning or include diced chili peppers. You can even sprinkle in some red pepper flakes for an extra kick!

Can I substitute pasta for rice?

Absolutely! For a heartier soup, substitute pasta with cooked rice or quinoa. Just be mindful of the cooking times, as rice may absorb more liquid.

What if my soup is too thick?

If you find that your soup has thickened too much during cooking, simply stir in additional chicken broth or water until you reach your desired consistency.

✨ Conclusion

And there you have it! The Creamy Cajun Chicken Pasta Soup that will not only warm your heart but also awaken your passion for cooking. This dish embodies everything I love about food — the thrill of experimenting with flavors, the joy of sharing a meal with loved ones, and the comfort of a home-cooked bowl of goodness. So, gather your ingredients, channel your inner chef, and let this recipe inspire your culinary journey. Remember, cooking is an adventure, and every dish tells a story. What will yours be? Happy cooking, my friends!

Creamy Cajun Chicken Pasta Soup

Prep Time 10 minutes
Cook Time 20 minutes
Total Time 30 minutes
Servings 4 servings
Calories 350
A rich and flavorful Cajun chicken pasta soup that's quick to make and perfect for a comforting meal.

Ingredients

Main

  • 2 cups rich, flavorful cajun chicken pasta
  • 1 lb super simple ingredients

Instructions 

  • Combine ingredients and cook until heated through.

Notes

Use fresh herbs for extra flavor.
Calories: 350kcal
Cost: $12
Course: Soup
Cuisine: Cajun
Keyword: chicken, pasta

Nutrition

Calories: 350kcal | Carbohydrates: 40g | Protein: 25g | Fat: 15g | Sodium: 900mg

Loved this recipe? Save it to your favorite Pinterest board so you can easily find it later! It’s the perfect way to keep all your sweet ideas in one place. ✨

Eye-level view of Cajun chicken pasta soup showcasing textures and ingredients.

The Cranberry Roast Beef Recipe That Turns Up the Flavor and Fires Up the Spirit

As the holiday season approaches, you might find yourself searching for a standout dish that not only impresses your guests but also warms their hearts. Look no further than the Cranberry Roast Beef Recipe. This dish is a celebration of flavors, where tangy cranberries meet the deep, savory notes of perfectly cooked beef. Imagine slicing into a juicy roast that glistens with a luscious cranberry glaze, releasing a symphony of aromas that fill your kitchen with the spirit of the season. Whether it’s Christmas, Thanksgiving, or just a special gathering, this roast is bound to become your go-to dish for festive occasions!

Why This Recipe is a Must-Try

This isn’t just any roast beef; it’s a culinary adventure that combines sweet and tart cranberries with a hint of citrus from orange juice, creating a flavor profile that dances on your palate. With a touch of honey and garlic, this dish promises not only to satiate your hunger but also to ignite a passion for bold cooking. Inspired by my roots in San Antonio, Texas, where flavors are vibrant and cooking is an art, I encourage you to embrace this recipe and make it your own.

Ingredients for a Flavorful Experience

Close-up of a perfectly cooked beef roast glazed with cranberry sauce, with a blurred background.
  • 3 lb beef roast
  • 1 cup fresh cranberries
  • 1/2 cup orange juice
  • 2 tablespoons honey
  • 2 cloves garlic, minced
  • 1 teaspoon salt
  • 1/2 teaspoon black pepper
  • 1 tablespoon olive oil

Steps to Culinary Glory

Ready to dive into the cooking process? Let’s make this Cranberry Roast Beef shine!

  1. Preheat: Start by preheating your oven to 375°F (190°C). This ensures your roast begins cooking at the right temperature for that perfect, juicy finish.
  2. Make the Cranberry Sauce Mixture: In a small bowl, combine the fresh cranberries, orange juice, honey, minced garlic, salt, and black pepper. This mixture will serve as a zesty topping that sings with flavor.
  3. Sear the Beef: Heat the olive oil in a skillet over medium-high heat. Sear the beef roast on all sides until it’s beautifully browned. This step is crucial; it locks in the juices and adds a rich, caramelized flavor to the meat.
  4. Prepare for Roasting: Place the seared roast in a roasting pan and generously spread the cranberry sauce mixture over the top of the roast.
  5. Roast: Cover the roast with foil and place it in the preheated oven. Roast for about 1.5 to 2 hours, or until the desired doneness is reached. A meat thermometer is your best friend here—140°F for medium-rare perfection!
  6. Rest and Serve: Once out of the oven, allow the roast to rest for 10 minutes. This resting period lets the juices redistribute throughout the meat, ensuring every slice is tender and juicy. Slice and serve with that vibrant cranberry sauce drizzled on top.

Tips for the Perfect Roast

  • Choose the Right Cut: While this recipe calls for a beef roast, cuts like ribeye or sirloin work beautifully. Just remember that cooking times may vary depending on the cut and size of your roast.
  • Get Creative with Flavors: Feel free to add spices like rosemary or thyme to the cranberry mixture for an extra layer of flavor. A splash of red wine can also enhance the sauce’s richness.
  • Monitor the Temperature: Use a meat thermometer to avoid overcooking your roast. Aim for 140°F for medium-rare, and adjust according to your preference.

Variations to Spice Things Up

If you’re feeling adventurous, here are some variations to enhance this already fantastic dish:

  • Spicy Kick: Add a pinch of red pepper flakes to the cranberry mixture for a hint of heat that contrasts beautifully with the sweet cranberries.
  • Citrus Twist: Swap out the orange juice for apple or pineapple juice for a different fruity flavor that pairs well with beef.
  • Herb Infusion: Incorporate fresh herbs into the roasting pan, such as rosemary or sage, to infuse the meat with additional aroma and flavor.

Substitutions You Can Make

Cooking is all about flexibility! If you find yourself missing an ingredient, here are some simple substitutions:

  • Cranberries: If fresh cranberries aren’t available, feel free to use dried cranberries or cranberry sauce. Adjust the sweetness accordingly if using cranberry sauce.
  • Honey: Maple syrup or agave syrup can work as a great alternative to honey for a different sweetness.
  • Olive Oil: Any neutral oil, like canola or vegetable oil, can replace olive oil for searing the beef.

Essential Equipment for Success

To create this mouthwatering Cranberry Roast Beef, you will need:

  • A heavy skillet for searing the roast.
  • A roasting pan to catch all those delicious juices.
  • A meat thermometer for perfect doneness.
  • A sharp knife for slicing the roast.

Storage and Freezing Tips

After enjoying your feast, you might have some leftovers. Here’s how to store and freeze them:

  • Refrigeration: Store leftover roast beef in an airtight container in the refrigerator for up to 3-4 days. This will keep the meat juicy and flavorful for your next meal.
  • Freezing: For longer storage, wrap the sliced roast tightly in plastic wrap and aluminum foil, then freeze for up to 3 months. Thaw in the refrigerator before reheating.

Frequently Asked Questions

Can I make this Cranberry Roast Beef ahead of time?

Absolutely! You can marinate the beef roast overnight in the cranberry mixture for deeper flavor. Just sear and roast it on the day you plan to serve.

What should I serve with this roast?

This roast pairs beautifully with roasted vegetables, creamy mashed potatoes, or a fresh green salad. Don’t forget some crusty bread to soak up that delicious sauce!

Can I use a slow cooker for this recipe?

Yes! Sear the beef as directed, then transfer it to the slow cooker with the cranberry mixture. Cook on low for 6-8 hours for tender, melt-in-your-mouth beef.

Final Thoughts

Cooking is a journey, and this Cranberry Roast Beef Recipe is an invitation to explore the vibrant flavors that the holiday season has to offer. Each step is a chance to infuse your personality and creativity into the dish. So gather your family and friends around the table, share stories, and celebrate the joy of good food together. Remember, cooking should be fun, messy, and filled with love. I hope this recipe inspires you to embrace the fire in your cooking and create memories that will last a lifetime. Happy cooking!

Cranberry Roast Beef Recipe

Prep Time 15 minutes
Cook Time 2 hours
Total Time 2 hours 15 minutes
Servings 8 servings
Calories 550
A delicious holiday centerpiece combining tender roast beef with a tangy cranberry glaze for a festive touch.

Ingredients

Meat

  • 3 lb beef roast

Sauce

  • 1 cup fresh cranberries
  • 0.5 cup orange juice
  • 2 tablespoons honey
  • 2 cloves garlic, minced
  • 1 teaspoon salt
  • 0.5 teaspoon black pepper
  • 1 tablespoon olive oil

Instructions 

  • Preheat oven to 375°F (190°C).
  • Mix cranberries, orange juice, honey, garlic, salt, and pepper to make the sauce.
  • Sear beef in olive oil until browned on all sides.
  • Place beef in a pan, spread cranberry sauce on top.
  • Roast covered for 1.5-2 hours, then rest before slicing.

Notes

Use a meat thermometer to ensure perfect doneness.
Calories: 550kcal
Cost: $20
Course: Main Course
Cuisine: American
Keyword: beef, cranberry

Nutrition

Calories: 550kcal | Carbohydrates: 60g | Protein: 50g | Fat: 20g | Sodium: 900mg

Loved this recipe? Save it to your favorite Pinterest board so you can easily find it later! It’s the perfect way to keep all your sweet ideas in one place. ✨

Sliced beef roast with vibrant cranberry and orange sauce on a rustic plate.

The Flavor-Filled Journey of Chicken Spinach Artichoke Stuffed Shells That Ignite Your Soul

Ah, the allure of a cozy kitchen, where the air is thick with the promise of deliciousness and the clinking of pots and pans is music to your ears. If you’re anything like me, when you think of comfort food, your mind wanders to hearty meals that satisfy both the belly and the soul. Enter the Chicken Spinach Artichoke Stuffed Shells — a dish that combines creamy goodness with a delightful kick, making it the perfect meal for any occasion. Trust me, every bite of these stuffed wonders will ignite your culinary passion and leave you craving more!

What You’ll Love About This Stuffed Shells Recipe

Why should you dive headfirst into making these Chicken Spinach Artichoke Stuffed Shells? Here’s the scoop:

  • Flavor Explosion: Each shell is packed with a savory filling that marries tender chicken, fresh spinach, and artichokes in a creamy embrace.
  • Quick and Easy: With just a bit of prep, you can whip up this dish in no time. Perfect for busy weeknights or impressive dinner parties!
  • Family-Friendly: Kids and adults alike will be asking for seconds — it’s that good!
  • Versatile: You can easily customize the recipe to fit your dietary needs or flavor preferences.

Ingredients in Chicken Spinach Artichoke Stuffed Shells

Close-up of sauced chicken and vegetable stuffed shells with a creamy filling.

Let’s gather the essentials for our flavor-packed journey:

  • 20 large jumbo pasta shells
  • 1 lb cooked chicken, shredded
  • 1 cup chopped spinach (fresh or frozen, drained)
  • 1 cup canned artichoke hearts, chopped
  • 1 cup shredded mozzarella cheese
  • 1/2 cup grated Parmesan cheese
  • 1 cup ricotta cheese
  • 2 cloves garlic, minced
  • 1 cup marinara sauce
  • 2 tbsp olive oil
  • Salt and pepper to taste

How to Make Stuffed Shells

Ready to embark on this culinary adventure? Let’s get cooking!

  1. Preheat the Oven: Begin by preheating your oven to 375°F (190°C). This ensures that your stuffed shells will bake evenly and come out perfectly bubbly.
  2. Cook the Pasta: In a large pot, bring salted water to a boil. Cook the jumbo shells according to package instructions until they are al dente. Drain and set aside, allowing them to cool slightly. A tip: drizzle a little olive oil on them to prevent sticking.
  3. Prepare the Filling: In a large mixing bowl, combine the shredded chicken, chopped spinach, artichoke hearts, ricotta cheese, mozzarella, Parmesan, minced garlic, and a generous pinch of salt and pepper. Mix thoroughly until all ingredients are well incorporated. The aroma of garlic mingling with the cheeses is simply heavenly!
  4. Stuff the Shells: Grab a spoon and gently fill each cooked shell with the chicken and spinach mixture. Place them neatly in a greased baking dish, making sure they’re snug but not overcrowded.
  5. Top with Sauce: Pour marinara sauce over the stuffed shells, ensuring each one gets a luscious coating. Drizzle with olive oil and sprinkle additional cheese if you’re feeling indulgent.
  6. Bake to Perfection: Cover the dish with foil and bake for 25-30 minutes, until heated through and bubbly. For that golden touch, remove the foil and bake for an additional 5 minutes. The sight of bubbling cheese will make your heart skip a beat!
  7. Serve and Enjoy: Once out of the oven, let the shells cool for a few minutes. Serve hot, garnished with fresh herbs if desired. Dig in and savor every mouthful!

Tips for Making Stuffed Pasta Shell Recipes

Want to ensure your stuffed shells turn out perfectly? Here are a few expert tips:

  • Don’t Overcook the Shells: Aim for al dente. They will continue to cook in the oven, and you want them to hold their shape.
  • Experiment with Cheese: Feel free to mix and match cheeses! Add some pepper jack for a little heat or goat cheese for a tangy twist.
  • Herbs and Spices: Don’t shy away from adding fresh herbs like basil or oregano to your filling for an extra flavor boost.
  • Make Ahead: These stuffed shells are perfect for meal prep. Assemble them ahead of time and store them in the fridge or freezer until you’re ready to bake.

How to Serve Stuffed Shells

When it comes to serving these beauties, the options are endless. Pair them with a simple side salad drizzled with balsamic vinaigrette for a refreshing contrast. Garlic bread is a classic accompaniment as well, perfect for soaking up that luscious marinara sauce. And don’t forget a glass of your favorite wine to elevate the experience!

How to Store Chicken Spinach Artichoke Stuffed Shells

Leftovers? Yes, please! Here’s how to store them properly:

  • Refrigeration: Store in an airtight container in the fridge for up to 3 days. Reheat in the oven or microwave until warmed through.
  • Freezing: You can freeze the stuffed shells before baking. Just assemble, cover tightly, and freeze for up to 2 months. When you’re ready to enjoy, bake from frozen, adding a little extra time to ensure they’re heated through.

Variations and Substitutions

Feel like mixing things up? Here are some fun variations to consider:

  • Vegetarian Delight: Swap out the chicken for sautéed mushrooms or roasted red peppers for a delicious vegetarian option.
  • Different Greens: Use kale or Swiss chard instead of spinach for a different flavor profile.
  • Flavor Infusions: Try adding a bit of lemon zest or hot sauce to the filling for an unexpected zing.

FAQs

Can I substitute the chicken?

Absolutely! You can use shredded turkey or even canned tuna for a completely different flavor.

What’s the best way to reheat stuffed shells?

The oven is the best method to retain the texture. Preheat to 350°F (175°C) and cover with foil to prevent drying out for about 15-20 minutes.

Can I make these shells gluten-free?

Yes! Just look for gluten-free pasta shells, and you’re all set to enjoy this dish without the gluten.

More Delicious Recipes to Explore

If you’re hungry for more culinary adventures, check out these delightful recipes:

Conclusion

As you savor each bite of these Chicken Spinach Artichoke Stuffed Shells, remember that cooking is an adventure meant to be celebrated. Let the flavors dance on your palate and inspire you to get creative in the kitchen. So grab your apron, let your spirit soar, and don’t be afraid to add your own twist to this recipe. After all, the best meals are the ones that tell your own story. Happy cooking, amigos!

Chicken Spinach Artichoke Stuffed Shells

Prep Time 20 minutes
Cook Time 30 minutes
Total Time 50 minutes
Servings 6 servings
Calories 550
A delicious baked pasta dish filled with tender chicken, spinach, and artichokes, topped with cheese and marinara sauce.

Ingredients

Pasta

  • 20 large jumbo pasta shells

Protein

  • 1 lb cooked chicken, shredded

Vegetables & Dairy

  • 1 cup chopped spinach (fresh or frozen, drained)
  • 1 cup canned artichoke hearts, chopped
  • 1 cup shredded mozzarella cheese
  • 0.5 cup grated parmesan cheese
  • 1 cup ricotta cheese
  • 2 cloves garlic, minced
  • 1 cup marinara sauce
  • 2 tbsp olive oil

Seasonings

  • to taste salt and pepper

Instructions 

  • Preheat oven to 375°F (190°C). Cook shells until al dente, drain.
  • Mix shredded chicken, spinach, artichokes, ricotta, mozzarella, Parmesan, garlic, salt, and pepper.
  • Stuff shells with mixture, place in baking dish, cover with marinara.
  • Bake covered 25-30 mins, then uncover and bake 5 mins until bubbly and browned.

Notes

For extra flavor, add fresh herbs before serving.
Calories: 550kcal
Cost: $15
Course: Main Course
Cuisine: Italian
Keyword: baked, chicken, pasta

Nutrition

Calories: 550kcal | Carbohydrates: 60g | Protein: 45g | Fat: 20g | Sodium: 900mg

Loved this recipe? Save it to your favorite Pinterest board so you can easily find it later! It’s the perfect way to keep all your sweet ideas in one place. ✨

Delicious baked shells filled with chicken, spinach, and artichokes, garnished with cheese.

The Cozy Roast That Turned Up the Flavor and Warmed My Soul

When the chill of winter settles in, there’s nothing quite like the aroma of a cozy roast wafting through your kitchen. It’s more than just a meal; it’s a hug in a bowl, a warm embrace that invites you to gather around the table and share stories. Today, I’m thrilled to guide you through my Herb Roasted Chicken in Creamy White Sauce with Mushroom and Potatoes — a dish that embodies comfort, simplicity, and a splash of culinary adventure.

This isn’t just another chicken recipe; it’s a heartfelt creation born from my passion for bold flavors. Each layer of this dish tells a story, and I can’t wait for you to experience it. So, roll up those sleeves and let’s dive into this culinary journey together!

Exploring the Dish

Imagine this: tender chicken, perfectly roasted until golden brown, nestled among creamy potatoes and savory mushrooms, all enveloped in a luxurious white sauce. This dish is a celebration of flavors, textures, and the warmth of home-cooked meals. The magic happens when the chicken melds with the earthy tones of mushrooms and the creamy richness of the sauce, creating a symphony of taste that sings with every bite.

Why You’ll Love This Roasted Chicken in Creamy Sauce

Detailed view of a succulent chicken dish featuring herbs, mushrooms, potatoes, and a rich white sauce.
  • Flavor Explosion: The combination of herbs, garlic, and a rich creamy sauce elevates simple ingredients into something extraordinary.
  • Comfort Food Redefined: This dish is the ultimate comfort food, perfect for chilly evenings or when you need a little warmth.
  • Easy to Prepare: With straightforward steps and minimal fuss, this recipe is perfect for both novice and experienced cooks alike.
  • Perfect for Any Occasion: Whether it’s a casual family dinner or a fancy gathering, this dish impresses without requiring hours in the kitchen.

Ingredients & Substitutions

Here’s what you’ll need to bring this dish to life:

  • 4 chicken thighs or breasts
  • 2 tablespoons olive oil
  • 1 teaspoon dried thyme
  • 1 teaspoon dried rosemary
  • Salt and pepper to taste
  • 4 medium potatoes, sliced
  • 1 cup mushrooms, sliced
  • 2 cloves garlic, minced
  • 1 cup heavy cream
  • 1/2 cup chicken broth
  • 1 tablespoon butter
  • Fresh parsley for garnish

If you’re wondering about substitutions, here are a few ideas:

  • Chicken: Feel free to use boneless, skinless chicken breasts for a leaner option, though I highly recommend keeping the skin on for that irresistible crispiness.
  • Mushrooms: While I love using button or cremini mushrooms, feel free to experiment with shiitake or oyster mushrooms for a different flavor profile.
  • Heavy Cream: If you want a lighter sauce, half-and-half or a dairy-free alternative like coconut cream can work beautifully.

How to Make Herb Roasted Chicken in Creamy White Sauce with Mushroom and Potatoes

Now, let’s get cooking! Follow these steps to create a dish that will warm your heart and tantalize your taste buds:

  1. Preheat your oven: Set the temperature to 375°F (190°C) and let it warm up.
  2. Season the chicken: Rub the chicken pieces with olive oil, dried thyme, dried rosemary, salt, and pepper. Let those flavors mingle!
  3. Sear the chicken: In a skillet over medium-high heat, sear the chicken until golden brown on both sides. This step is crucial for locking in juices and flavor. Once golden, transfer them to a baking dish.
  4. Prepare the potatoes: Arrange the sliced potatoes around the chicken in the baking dish, creating a cozy nest for both.
  5. Roast it: Place the baking dish in the oven and let it roast for about 35-40 minutes until the chicken is cooked through (internal temperature should reach 165°F or 74°C) and the potatoes are tender.
  6. Make the sauce: While the chicken is roasting, melt butter in the same skillet used for the chicken. Sauté garlic and mushrooms until they soften and the kitchen fills with their savory aroma.
  7. Add cream and broth: Pour in the chicken broth and heavy cream, stirring to combine. Allow the sauce to simmer until it thickens slightly — this is where the magic happens.
  8. Combine: Once the chicken and potatoes are done, pour the creamy mushroom sauce over them, ensuring every piece is coated in that luscious goodness.
  9. Garnish: Finish with fresh parsley for a pop of color and serve hot. Enjoy!

Tips for Making Roasted Chicken in Cream Sauce

To ensure your dish turns out perfectly every time, consider these tips:

  • Let the chicken rest: After roasting, allow the chicken to rest for a few minutes before serving. This helps retain its juices and enhances flavor.
  • Don’t rush the sauce: Allowing the sauce to simmer is key for depth of flavor. The longer it simmers, the richer it becomes.
  • Experiment: Feel free to add seasonal vegetables like asparagus or peas during the last 10 minutes of cooking for a fresh touch.

Variations

Want to switch things up? Here are a few ideas to customize your dish:

  • Herb Variations: Swap out the thyme and rosemary for fresh herbs like dill or tarragon for a unique twist.
  • Vegetable Additions: Add in baby carrots or green beans for extra color and nutrition.
  • Spicy Kick: For those who enjoy a bit of heat, sprinkle in some crushed red pepper flakes for a fiery finish.

Serving Suggestions

This dish pairs beautifully with:

  • Pillowy Soft Dinner Rolls: Perfect for soaking up that creamy sauce.
  • Roasted Vegetables: A side of seasonal roasted veggies adds a delightful crunch.
  • Simple Green Salad: A light salad with vinaigrette balances the richness of the chicken and sauce.

Storage Instructions

Got leftovers? Here’s how to store them:

  • Place leftover chicken, potatoes, and sauce in an airtight container and refrigerate for up to 2-3 days.
  • To reheat, warm gently in the oven or on the stovetop over low heat, adding a splash of chicken broth or cream if needed.
  • For longer storage, freeze the chicken and sauce separately in airtight containers for up to 3 months. Thaw overnight in the refrigerator before reheating.

Frequently Asked Questions

Can I use boneless chicken for this recipe?

Absolutely! Boneless chicken thighs or breasts will work well, but be sure to adjust the cooking time to avoid drying them out.

What if I don’t want to cook with wine?

No problem! You can replace the wine with extra chicken broth plus a tablespoon of lemon juice or white wine vinegar for acidity.

Can I make this dairy-free?

Yes, simply swap the butter for olive oil and use full-fat coconut milk or a dairy-free cream substitute.

Conclusion

This Herb Roasted Chicken in Creamy White Sauce with Mushroom and Potatoes is more than just a meal; it’s a celebration of flavor, warmth, and togetherness. As you savor each glorious bite, remember that cooking is an adventure — a chance to explore, create, and share. So gather your ingredients, embrace the process, and let the cozy aromas fill your kitchen. Trust me, this dish will ignite your passion for cooking and warm your soul. Happy cooking!

Herb Roasted Chicken in Creamy White Sauce with Mushroom and Potatoes: Cozy Dinner Recipe — Under A Tin Roof

Prep Time 10 minutes
Cook Time 40 minutes
Total Time 50 minutes
Servings 4 servings
Calories 650
A comforting and flavorful dish featuring tender herb-seasoned chicken baked with potatoes and topped with a creamy mushroom sauce.

Ingredients

Main

  • 4 pieces chicken thighs or breasts
  • 2 tablespoons olive oil
  • 1 teaspoon dried thyme
  • 1 teaspoon dried rosemary
  • to taste salt and pepper
  • 4 medium potatoes, sliced
  • 1 cup mushrooms, sliced
  • 2 cloves garlic, minced
  • 1 cup heavy cream
  • 1/2 cup chicken broth
  • 1 tablespoon butter
  • for garnish fresh parsley

Instructions 

  • Preheat oven to 375°F (190°C). Rub chicken with olive oil, thyme, rosemary, salt, and pepper.
  • Seer chicken until golden, transfer to baking dish with sliced potatoes. Bake for 35-40 minutes.
  • In a skillet, melt butter, sauté garlic and mushrooms. Add chicken broth and cream, simmer until thickened.
  • Pour sauce over chicken and potatoes, garnish with parsley, and serve hot.

Notes

For extra flavor, add a sprinkle of fresh herbs before serving.
Calories: 650kcal
Cost: $15
Course: Dinner
Cuisine: American
Keyword: chicken

Nutrition

Calories: 650kcal | Carbohydrates: 50g | Protein: 45g | Fat: 35g | Sodium: 700mg

Loved this recipe? Save it to your favorite Pinterest board so you can easily find it later! It’s the perfect way to keep all your sweet ideas in one place. ✨

Plate showcasing herb-seasoned roasted chicken with creamy sauce, mushrooms, and potatoes, lit warmly.

The Citrus-Infused Firecracker: Cranberry Orange Chicken That Sparks Joy

Welcome to a culinary adventure that dances on your palate and sparks joy in your kitchen! Today, we’re diving into a vibrant dish that embodies the essence of flavor and creativity: Cranberry Orange Chicken. This dish is a delightful fusion of sweet and tangy notes, perfectly complemented by the tender juiciness of chicken. Whether you’re cooking for a cozy family dinner or looking to impress guests at a gathering, this recipe is bound to leave everyone craving more. Let’s ignite those taste buds!

Ingredients for Cranberry Orange Chicken

Before we roll up our sleeves and start cooking, let’s gather our magic ingredients. Here’s what you’ll need:

  • 4 boneless, skinless chicken breasts
  • 1 cup fresh cranberries
  • 1 cup orange juice
  • 1 tablespoon honey
  • 1 teaspoon orange zest
  • Salt and pepper to taste
  • 2 tablespoons olive oil

How to Make Cranberry Orange Chicken: Step-by-Step Guide

Close-up of tender chicken with a glossy cranberry-orange glaze, garnished with fresh cranberries.

Ready to embark on this flavorful journey? Let’s break down the steps to create this delicious dish:

Step 1: Season the Chicken

Start by seasoning the chicken breasts generously with salt and pepper. This simple step lays the foundation for flavor, ensuring each bite is as delectable as the last. Don’t be shy—let those seasonings work their magic!

Step 2: Sizzle in Olive Oil

Heat olive oil in a skillet over medium heat. As the oil shimmers, it’s time to add the seasoned chicken breasts. Listen for that satisfying sizzle as the chicken hits the pan. Cook the chicken for about 6-7 minutes on each side, or until it’s golden brown and cooked through. You want that beautiful caramelization to lock in all those flavors. Once done, remove the chicken and set aside.

Step 3: Create the Sauce

In the same skillet, add orange juice, honey, and orange zest. Bring the mixture to a simmer, letting the sweet and tangy aromas fill your kitchen. This is where the magic happens! As it simmers, the flavors will meld beautifully, creating a vibrant sauce that’s bursting with personality.

Step 4: Add the Cranberries

Now, toss in the fresh cranberries and let them cook until they burst and the sauce thickens slightly, which should take about 5 minutes. This step adds an irresistible texture and a pop of color to your dish. The cranberries will contribute a delightful tartness that balances the sweetness of the honey and orange juice.

Step 5: Combine and Heat Through

Return the cooked chicken to the skillet, coating it generously with the cranberry orange sauce. Let it heat through for another 2 minutes. This ensures the chicken absorbs all that glorious flavor. The vibrant colors and enticing smells will have everyone gathering around the table in anticipation!

Step 6: Serve and Enjoy

Your Cranberry Orange Chicken is now ready to be served! Plate the chicken and drizzle the sauce over the top. Don’t forget to garnish with some fresh herbs or additional orange zest for that extra flair. Enjoy the burst of flavors with each bite — it’s a guaranteed crowd-pleaser!

Best Ways to Serve Cranberry Orange Chicken

This dish is incredibly versatile and pairs beautifully with a variety of sides. Here are some of the best options to complement your Cranberry Orange Chicken:

  • Roasted Potatoes: Crispy on the outside and fluffy on the inside, they soak up the delicious sauce.
  • Wild Rice: The nuttiness of wild rice pairs perfectly with the tangy sauce.
  • Brussels Sprouts: Roasted or sautéed, they add a delightful crunch and earthy flavor.
  • Citrusy Salad: A mixed green salad with orange segments and a light vinaigrette brightens up the meal.

Tips for Storing and Reheating Cranberry Orange Chicken

Got leftovers? No problem! Here are some handy tips to ensure your Cranberry Orange Chicken stays delicious:

  • Storage: Store any leftovers in an airtight container in the refrigerator for up to 3 days. The flavors will continue to develop, making the dish even more delicious!
  • Reheating: Reheat gently in the microwave or on the stovetop over low heat. Add a splash of water or chicken broth if the sauce thickens too much.
  • Freezing: If you want to prepare this dish ahead of time, you can freeze the cooked chicken and sauce in an airtight container for up to 3 months. Thaw in the refrigerator overnight before reheating.

Variations and Dietary Modifications

This recipe can easily be adapted to suit various dietary preferences and tastes. Here are a few variations you might enjoy:

  • Chicken Thighs: Swap chicken breasts for thighs for a juicier, more flavorful option.
  • Turkey Substitute: Use turkey cutlets for a leaner alternative.
  • Vegan Option: Substitute chicken with firm tofu or seitan, and use vegetable broth instead of chicken broth.
  • Dried Cranberries: If fresh cranberries aren’t available, dried cranberries can work too. Just soak them in warm water for 10 minutes before using.

Recipe FAQs

How can I make this dish ahead of time?

You can prepare the cranberry orange sauce in advance and store it in the refrigerator for up to two days. Cook the chicken just before serving for the best flavor and texture.

What’s the best type of chicken cut to use?

Both chicken breasts and thighs work well for this recipe. Breasts are leaner, while thighs are juicier and more flavorful. Choose according to your preference!

Can I use dried cranberries instead of fresh?

While fresh cranberries give the best texture and flavor, you can use dried cranberries if fresh ones aren’t available. Just soak them in warm water for 10 minutes before using.

Get Creative in the Kitchen!

Cooking is all about experimentation and finding what ignites your passion. The Cranberry Orange Chicken is a perfect canvas for you to unleash your creativity. Feel free to add your favorite spices, herbs, or even a splash of balsamic vinegar for an extra depth of flavor. Each time you make this dish, think of it as a new opportunity to explore and celebrate the vibrant world of cooking.

Conclusion

In the end, food is more than just sustenance; it’s a celebration of life, flavor, and creativity. Your Cranberry Orange Chicken is not just a meal; it’s an experience that brings joy to your table. So, grab your skillet, turn up the heat, and let your culinary journey begin! Remember, spice should never scare anyone away from the table — it should invite them closer. Embrace the adventure, and enjoy every delicious bite!

Cranberry Orange Chicken

Prep Time 10 minutes
Cook Time 20 minutes
Total Time 30 minutes
Servings 4 servings
Calories 350
A flavorful chicken dish featuring a tangy cranberry orange sauce, perfect for a quick and elegant meal.

Ingredients

Protein

  • 4 pieces boneless, skinless chicken breasts
  • 1 cup fresh cranberries
  • 1 cup orange juice
  • 1 tablespoon honey
  • 1 teaspoon orange zest
  • to taste salt and pepper
  • 2 tablespoons olive oil

Instructions 

  • Season chicken with salt and pepper.
  • Heat olive oil and cook chicken until golden, about 6-7 minutes per side. Remove and set aside.
  • In the same pan, add orange juice, honey, and orange zest. Simmer until slightly thickened, about 5 minutes.
  • Add cranberries and cook until they burst, about 5 minutes.
  • Return chicken to pan, coat with sauce, and heat through for 2 minutes. Serve topped with sauce.

Notes

For extra flavor, garnish with fresh herbs or orange slices.
Calories: 350kcal
Cost: $15
Course: Main Course
Cuisine: American
Keyword: chicken

Nutrition

Calories: 350kcal | Carbohydrates: 45g | Protein: 30g | Fat: 8g | Sodium: 300mg

Loved this recipe? Save it to your favorite Pinterest board so you can easily find it later! It’s the perfect way to keep all your sweet ideas in one place. ✨

Mouthwatering chicken dish featuring a bright orange and deep red cranberry sauce, served on a wooden surface.

The Levain Chocolate Walnut Cookie That Turned My Baking Up to Eleven

Welcome to my kitchen, where every ingredient tells a story, and every recipe is a journey into flavor! Today, I’m thrilled to share a recipe that’s not just any cookie; it’s a bold statement of passion, warmth, and the kind of sweetness that makes life just a little brighter. Get ready for the Levain Chocolate Walnut Cookie, a treat that turned my baking game up to eleven!

Why This Cookie Stands Out

These cookies are legendary for a reason. They embody everything that’s amazing about baking: rich chocolate mingling with crunchy walnuts, a crispy edge that gives way to a soft, gooey center, and an aroma that could make even the most disciplined dieter weak at the knees. Imagine pulling a tray of these beauties from the oven, the chocolate chips glistening like jewels and the scent enveloping you like a warm hug. That’s the magic we’re creating today!

Gathering Your Ingredients

Eye-level shot of a soft, chocolate chip and walnut cookie with textured surface and warm lighting.

Before we dive into the baking, let’s take a moment to appreciate the star players of this recipe. Here’s what you’ll need to whip up these delightful cookies:

  • 1 cup all-purpose flour
  • 1/2 teaspoon baking soda
  • 1/4 teaspoon salt
  • 1/2 cup unsalted butter, softened
  • 1/2 cup granulated sugar
  • 1/2 cup packed brown sugar
  • 1 large egg
  • 1 teaspoon vanilla extract
  • 1/2 cup semi-sweet chocolate chips
  • 1/2 cup chopped walnuts

Let’s Get Baking!

Now that we have our ingredients laid out, let’s talk about how to make these magnificent cookies. You’ll want to preheat your oven to 375°F (190°C) before anything else, because timing is everything in the world of baking!

Step-by-Step Guide

  1. Mix the Dry Ingredients: In a medium bowl, whisk together the flour, baking soda, and salt. This step ensures that your leavening agent is evenly distributed, allowing your cookies to rise beautifully.
  2. Cream the Butters and Sugars: In a separate large bowl, cream together the softened unsalted butter, granulated sugar, and brown sugar until the mixture is light and fluffy. This usually takes about 2-3 minutes. You want to incorporate air into the butter, which will give your cookies that delightful texture.
  3. Add the Egg and Vanilla: Beat in the egg and vanilla extract until well combined. This is where the magic starts to happen – the flavors are beginning to meld!
  4. Combine Wet and Dry Ingredients: Gradually add the dry ingredients to the wet ingredients, mixing just until combined. Be careful not to overmix; we’re looking for a gentle blend here.
  5. Fold in Chocolate and Walnuts: Gently fold in the semi-sweet chocolate chips and chopped walnuts. The walnuts add a delightful crunch that contrasts perfectly with the rich chocolate.
  6. Shape the Cookies: Scoop generous amounts of dough onto a baking sheet lined with parchment paper, forming large cookies about 3-4 inches in diameter. Remember, these cookies are meant to be big and bold, so don’t be shy!
  7. Bake to Perfection: Bake for 10-12 minutes, or until the edges are golden brown. The centers will look slightly underbaked, and that’s exactly how we want them – they’ll firm up as they cool.
  8. Cool and Enjoy: Allow the cookies to cool on the baking sheet for a few minutes before transferring them to a wire rack to cool completely. This step is crucial because it allows the flavors to deepen and the texture to set.

Tips for the Ultimate Cookie Experience

Okay, my fellow bakers, let’s talk tips. Here are a few secrets to make sure your Levain Chocolate Walnut Cookies are nothing short of spectacular:

  • Use Quality Ingredients: The better the ingredients, the better the cookie. Opt for high-quality chocolate and fresh walnuts for the best flavor.
  • Don’t Skip the Chilling: If you have time, chill the dough for about 30 minutes before baking. This helps the flavors meld and results in a thicker cookie.
  • Experiment with Nuts: While walnuts are a classic choice, feel free to mix things up! Pecans or hazelnuts can add their unique flair.
  • Adding Spice: If you’re feeling adventurous, a pinch of cinnamon or espresso powder can elevate the chocolate flavor even further.

Variations to Spice Things Up

Baking is all about expressing yourself! Here are some variations that can take your cookies to different flavor realms:

  • Chocolate Chip Only: If you’re not a fan of nuts, simply leave them out and double up on the chocolate chips for a gooey chocolate explosion!
  • White Chocolate and Macadamia: Swap out the semi-sweet chocolate for white chocolate chips and the walnuts for macadamia nuts for a tropical twist.
  • Dried Fruits: Fold in some dried cranberries or cherries for a tart contrast to the sweet chocolate.

Substitutions for Different Diets

No need to miss out on these cookies if you have dietary restrictions! Here are some substitutions:

  • Gluten-Free: Substitute all-purpose flour with a gluten-free flour blend. Just make sure it contains xanthan gum for proper texture.
  • Vegan: Replace the butter with coconut oil or vegan butter and use a flax egg (1 tablespoon ground flaxseed + 2.5 tablespoons water) in place of the egg.
  • Lower Sugar: You can reduce the sugar by a third without compromising the cookie’s structure. Alternatively, use coconut sugar for a lower glycemic option.

Storing and Freezing Your Cookies

Now, if you’re like me, you might want to save some of these cookies for later – if they last that long! Here’s how to store and freeze them:

  • Room Temperature: Store cookies in an airtight container at room temperature for up to a week. They’ll stay soft and delicious!
  • Freezing: To freeze, place the cookies in a single layer on a baking sheet until solid. Then transfer them to a freezer-safe bag or container. They can last up to three months. Just thaw at room temperature before devouring!

Common FAQs

Can I substitute different nuts?

Absolutely! Feel free to use your favorite nuts. Just remember that each type will impart its unique flavor and texture.

What if my dough is too sticky?

If your dough feels too sticky, don’t panic! Just sprinkle a little extra flour on the surface and gently fold it in until you reach the desired consistency.

How do I know when my cookies are done?

The edges should be golden brown, and the centers will look slightly underbaked. They’ll firm up as they cool, giving you that perfect chewy center.

Wrapping It Up

This Levain Chocolate Walnut Cookie recipe is more than just a dessert; it’s an invitation to explore the wonderful world of baking and flavor. Whether you’re baking for yourself, a loved one, or hosting a gathering, these cookies are sure to impress. The combination of chocolate, walnuts, and a touch of passion creates a treat that’s simply unforgettable. So grab your apron, fire up that oven, and let’s make some magic happen in the kitchen! And remember, cooking is all about enjoying the journey, so take your time and savor each step along the way. Happy baking!

Levain Chocolate Walnut Cookie

Prep Time 15 minutes
Cook Time 12 minutes
Total Time 27 minutes
Servings 12 cookies
Calories 200
Enjoy these rich and chewy chocolate walnut cookies with a perfect balance of sweetness and crunch.

Ingredients

Dry ingredients

  • 1 cup all-purpose flour
  • 1/2 teaspoon baking soda
  • 1/4 teaspoon salt

Wet ingredients

  • 1/2 cup unsalted butter, softened
  • 1/2 cup granulated sugar
  • 1/2 cup packed brown sugar
  • 1 large egg
  • 1 teaspoon vanilla extract

Add-ins

  • 1/2 cup semi-sweet chocolate chips
  • 1/2 cup chopped walnuts

Instructions 

  • Preheat oven to 375°F (190°C). Mix dry ingredients.
  • Cream butter and sugars, then add egg and vanilla.
  • Combine dry and wet ingredients, then fold in chocolate chips and walnuts.
  • Scoop dough onto baking sheet and bake for 10-12 minutes.
  • Cool cookies on wire rack before serving.

Notes

For softer cookies, slightly underbake and cool on the baking sheet.
Calories: 200kcal
Cost: $15
Course: Dessert
Cuisine: American
Keyword: chocolate

Nutrition

Calories: 200kcal | Carbohydrates: 28g | Protein: 3g | Fat: 10g | Sodium: 70mg

Loved this recipe? Save it to your favorite Pinterest board so you can easily find it later! It’s the perfect way to keep all your sweet ideas in one place. ✨

Detailed view of a bakery-style chocolate walnut cookie, highlighting its rich texture and ingredients.

The Comfort Food That Sparks Fire: My Irresistible Slow Cooker Chicken Stroganoff

There’s something deeply comforting about the aroma of a slow cooker wafting through the house, isn’t there? It’s like a warm hug on a chilly evening, whispering promises of rich flavors and tender textures. Today, I’m thrilled to share with you my take on a classic dish that’s been given a spicy twist: Slow Cooker Chicken Stroganoff. This isn’t just any stroganoff; it’s a dish that brings the heart and soul of my Texan roots right to your dinner table.

The Magic of Slow Cooking

Slow cooking is an art form that allows flavors to meld together beautifully, creating a symphony of taste that can only be achieved with time and love. Imagine the sizzle of chicken breasts meeting the aromatic embrace of garlic and onion, mingling with the earthy notes of mushrooms, all while being gently coaxed into submission by the slow cooker. With each passing hour, the ingredients transform into a creamy, comforting delight that’s impossible to resist.

Why This Recipe Stands Out

Eye-level shot of Slow Cooker Chicken Stroganoff with chicken, mushrooms, and parsley on a rustic plate.

What sets my Slow Cooker Chicken Stroganoff apart from the rest? It’s simple: I believe in adding a bit of fire to traditional comfort food. This recipe combines the classic creamy goodness of stroganoff with a hint of paprika that kicks things up a notch. It’s about embracing that bold flavor without overwhelming the dish. Let’s dive into the ingredients and the cooking process, shall we?

Ingredients You’ll Need

  • 1 lb (450g) boneless, skinless chicken breasts, cut into strips
  • 1 medium onion, chopped
  • 3 cloves garlic, minced
  • 8 oz (225g) mushrooms, sliced
  • 1 cup (240ml) chicken broth
  • 1 tablespoon Worcestershire sauce
  • 1 teaspoon paprika
  • Salt and pepper to taste
  • 1 cup (240ml) sour cream
  • 2 tablespoons chopped fresh parsley (optional)

How to Make Slow Cooker Chicken Stroganoff

Ready to get cooking? Follow these steps for a dish that’s sure to impress:

  1. Layer the Chicken: Start by placing the chicken strips at the bottom of your slow cooker. This is the foundation of your stroganoff, so make sure they’re evenly spread out.
  2. Add the Vegetables: Next, sprinkle the chopped onion, minced garlic, and sliced mushrooms over the chicken. The combination of these ingredients adds a depth of flavor that’s hard to beat.
  3. Pour in the Goodness: Now, it’s time to pour in the chicken broth. Add the Worcestershire sauce and sprinkle the paprika, salt, and pepper over the top. Give everything a gentle stir to combine.
  4. Slow Cook to Perfection: Cover your slow cooker and set it to cook on low for 6 hours or on high for 3 hours. Let the magic happen as the flavors meld and the chicken becomes tender.
  5. Finish with Cream: About 15 minutes before serving, stir in the sour cream until everything is well combined. This will add a luscious creaminess that elevates the dish to a whole new level.
  6. Serve and Enjoy: Serve your stroganoff over cooked rice or noodles. Garnish with fresh parsley for a pop of color and flavor.

Tips for Success

  • Don’t Rush It: The beauty of slow cooking lies in its timing. If you can, opt for the low setting to allow the flavors to develop fully.
  • Layering is Key: Make sure to layer your ingredients as directed. This ensures even cooking and flavor distribution.
  • Taste and Adjust: Before serving, give your stroganoff a taste. Adjust the seasoning with additional salt, pepper, or paprika as needed.

Variations and Substitutions

This recipe is wonderfully versatile, allowing you to customize it to your liking. Here are a few suggestions:

  • Add More Veggies: Feel free to toss in some bell peppers, spinach, or even peas for an extra burst of color and nutrition.
  • Swap the Protein: If chicken isn’t your thing, try using turkey or even beef strips for a different take on stroganoff.
  • Gluten-Free Option: Substitute the standard noodles with gluten-free pasta or serve with quinoa for a hearty alternative.

Storage and Freezing

Got leftovers? Here’s how to store your delicious Slow Cooker Chicken Stroganoff:

  • Refrigeration: Store in an airtight container in the fridge for up to 3 days. Reheat gently on the stove or in the microwave.
  • Freezing: This dish freezes beautifully! Portion it out in freezer-safe containers and freeze for up to 3 months. To reheat, thaw overnight in the fridge and warm on the stove.

Troubleshooting Common Issues

Cooking is all about learning, and sometimes things don’t go as planned. Here are a few common issues and how to fix them:

  • Too Thick: If your stroganoff ends up thicker than you’d like, simply stir in a bit more chicken broth or water until you reach your desired consistency.
  • Too Salty: If you find the dish too salty, adding a splash of cream or a dollop of sour cream can help balance the flavors.

Frequently Asked Questions

Can I use frozen chicken?
Yes! If you’re using frozen chicken, there’s no need to thaw it first. Just add a bit more cooking time to ensure it’s fully cooked through.

What’s the best way to serve this dish?
While traditional stroganoff is served over egg noodles, you can also serve it over rice, mashed potatoes, or even zucchini noodles for a lighter option.

Can I make this dish ahead of time?
Absolutely! You can prepare everything in the slow cooker the night before, refrigerate it, and start cooking in the morning for an easy weeknight dinner.

Conclusion

There you have it, my friends! A Slow Cooker Chicken Stroganoff that not only warms your belly but also ignites your passion for cooking. This dish encapsulates everything I love about food—the bold flavors, the comforting textures, and the joy it brings when shared with loved ones. So, grab your slow cooker, get ready to spice things up, and let the aromas fill your kitchen. Trust me, this recipe will become a staple in your home, sparking joy and comfort with every bite. Happy cooking!

Slow Cooker Chicken Stroganoff 🍗

Prep Time 10 minutes
Cook Time 3 hours
Total Time 3 hours 10 minutes
Servings 4 servings
Calories 350
A comforting and easy-to-make chicken stroganoff cooked slowly to develop rich flavors, perfect served over rice or noodles.

Ingredients

Protein

  • 1 lb boneless, skinless chicken breasts, cut into strips

Vegetables

  • 1 medium onion, chopped
  • 3 cloves garlic, minced
  • 8 oz mushrooms, sliced

Liquids and Sauces

  • 1 cup chicken broth
  • 1 tablespoon worcestershire sauce
  • 1 teaspoon paprika
  • to taste salt and pepper
  • 1 cup sour cream
  • 2 tablespoons chopped fresh parsley (optional)

Instructions 

  • Place chicken strips in slow cooker, then add onion, garlic, and mushrooms on top.
  • Pour in chicken broth, add Worcestershire sauce, paprika, salt, and pepper.
  • Cover and cook on low for 6 hours or high for 3 hours.
  • Stir in sour cream and cook for 15 more minutes on low.
  • Serve over rice or noodles, garnished with parsley if desired.

Notes

For a creamier sauce, add a little more sour cream at the end.
Calories: 350kcal
Cost: $15
Course: Main Course
Cuisine: Russian
Keyword: chicken

Nutrition

Calories: 350kcal | Carbohydrates: 20g | Protein: 40g | Fat: 12g | Sodium: 800mg

Loved this recipe? Save it to your favorite Pinterest board so you can easily find it later! It’s the perfect way to keep all your sweet ideas in one place. ✨

Detailed view of Chicken Stroganoff showing chunks of chicken, sliced mushrooms, and a rich, creamy sauce.