Author

Avery Collins

Browsing

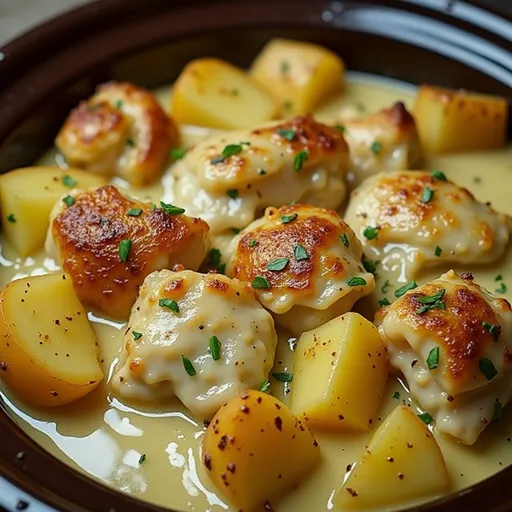
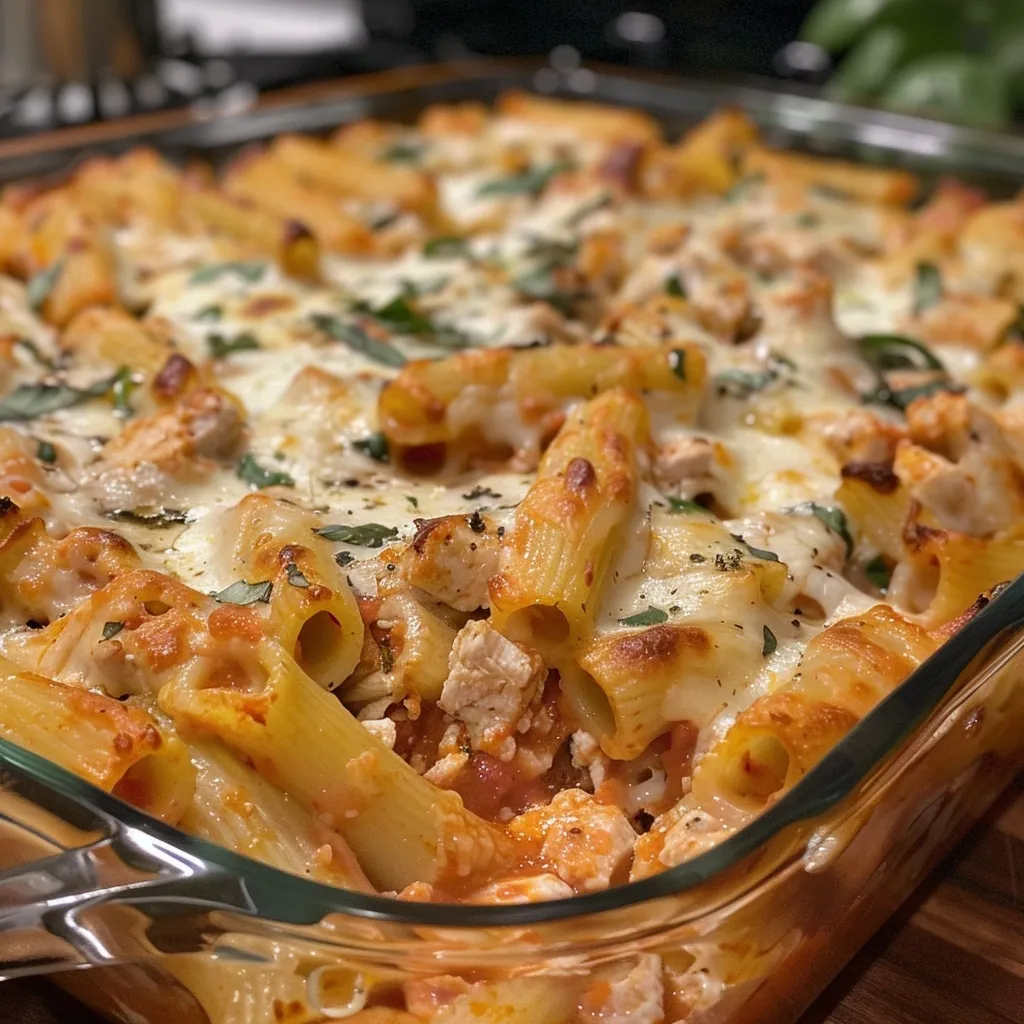
Ignite Your Culinary Adventure with Chicken Baked Ziti

Welcome to the vibrant world of Chicken Baked Ziti, where the heart of Italian comfort food meets the boldness of southwestern flavors. This dish is a glorious fusion of tender chicken, zesty marinara, and a cascade of gooey cheese that will awaken your taste buds and fill your home with irresistible aromas. Whether you’re a busy parent looking to satisfy hungry kids or a culinary adventurer seeking to impress guests, this recipe is your ticket to a deliciously successful meal.

In this article, we’ll take a deep dive into the nuances of crafting the perfect Chicken Baked Ziti. From understanding essential ingredients to mastering advanced techniques, I’m here to guide you every step of the way. So roll up your sleeves, crank up the heat, and let’s embrace the thrill of cooking!

Why You’ll Love This Recipe

  • Quick and Easy Preparation: With minimal prep time and straightforward steps, you can whip up this dish even on a busy weeknight.
  • Customizable Ingredients: Use whatever you have on hand! Swap chicken for turkey or add your favorite vegetables for a personal touch.
  • Perfect for Meal Prep: This Chicken Baked Ziti stores beautifully, making it a fantastic option for meal planning.
  • Great for Feeding a Crowd: With generous portions, it’s an ideal dish for gatherings, potlucks, or family dinners.
  • Delicious Leftovers: Enjoy the comforting taste of this dish the next day, as the flavors deepen and meld together beautifully.

Essential Ingredients for Chicken Baked Ziti

Let’s gather our ingredients to create this masterpiece. Here’s what you’ll need:

  • 1 lb. ziti pasta: The backbone of this dish; it holds the sauce and cheese beautifully.
  • 2 lb. boneless, skinless chicken breasts: Cubed for easy cooking and maximum flavor absorption.
  • 2 tablespoons olive oil: For sautéing the chicken and adding richness.
  • 1 teaspoon Italian seasoning: A blend of herbs that elevates the dish with classic Italian flavors.
  • 1 teaspoon salt: Essential for enhancing all the flavors.
  • 1/2 teaspoon pepper: Adds a touch of heat without overpowering the dish.
  • 1/2 teaspoon red pepper flakes (optional): For those who crave a little extra kick.
  • 32 oz. marinara sauce: The star of the show that brings everything together.
  • 1 1/2 cups ricotta cheese: This creamy layer adds richness and depth.
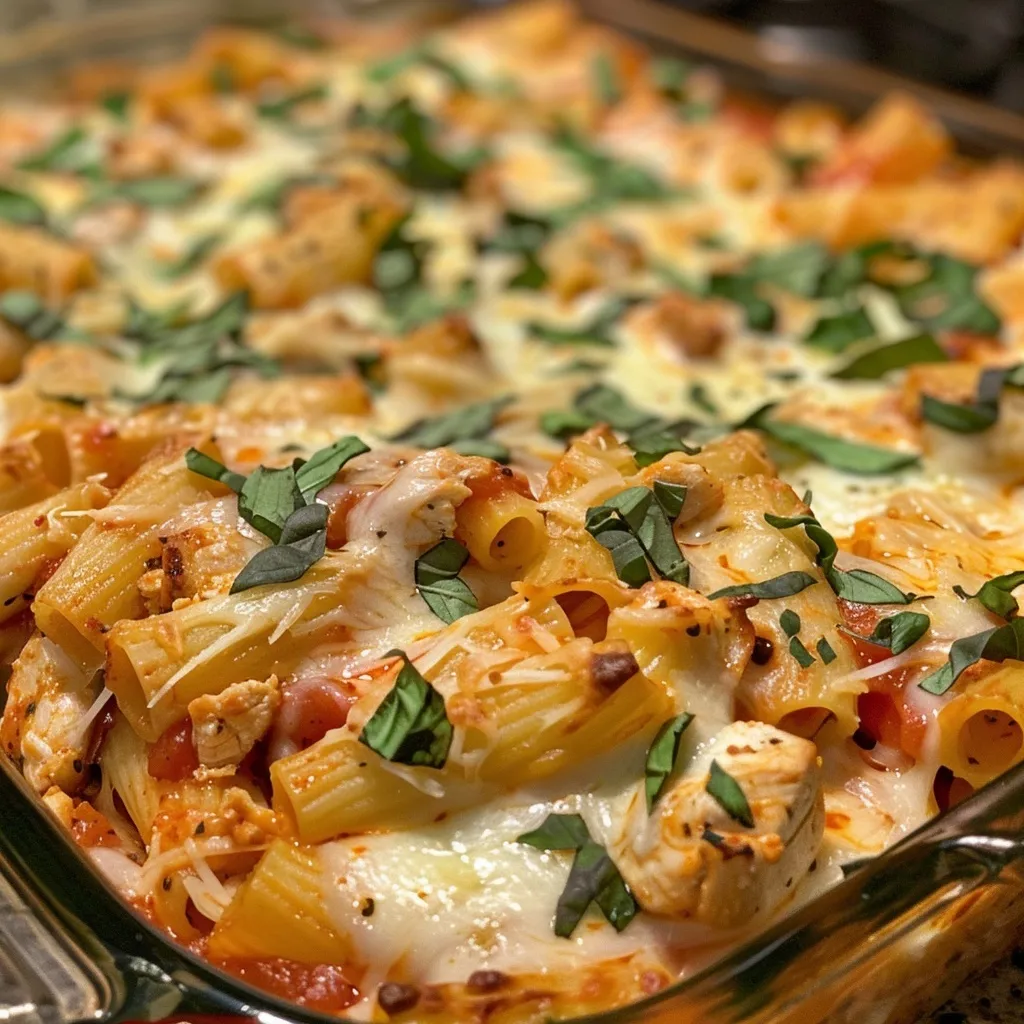
  • 3 cups shredded mozzarella cheese: The gooey, melty topping that makes every bite irresistible.
  • 1 cup Parmesan cheese: For an extra layer of flavor and a touch of sophistication.
  • 1 bunch basil, chiffonade: Fresh basil to brighten up the dish with a burst of freshness.

How to Prepare the Perfect Chicken Baked Ziti: Step-by-Step Guide

Juicy Chicken Baked Ziti layered with pasta and marinara sauce.

Now that we’ve got our ingredients, let’s get cooking! Follow these simple steps to create a Chicken Baked Ziti that will wow your family and friends.

Step 1: Preheat Your Oven

Start by preheating your oven to 400°F. This ensures that your dish bakes evenly, allowing the creamy sauce and melted cheese to meld perfectly.

Step 2: Cook the Ziti

Bring a large pot of water to a boil. Add the ziti pasta and cook until al dente, about 8-10 minutes. Reserve 1/2 cup of pasta water before draining the pasta. This trick keeps the dish moist and flavorful!

Step 3: Sauté the Chicken

In a nonstick skillet, heat 2 tablespoons of olive oil over medium heat. Add the cubed chicken, Italian seasoning, salt, pepper, and red pepper flakes, if using. Cook until the chicken is no longer pink, about 7-10 minutes.

Step 4: Create the Sauce

Stir in the marinara sauce and reserved pasta water into the skillet with the chicken, bringing it to a gentle simmer. This step enhances the flavors and creates a savory base.

Step 5: Combine Ingredients

In a large oven-safe baking dish, combine the chicken and sauce mixture with the cooked ziti. Add the ricotta cheese and half of the chiffonade basil, stirring gently to combine.

Step 6: Add the Cheesy Topping

Top the ziti mixture with shredded mozzarella and Parmesan cheese. This cheesy layer is what dreams are made of!

Step 7: Bake to Perfection

Cover the dish with foil (make sure to spray the underside with nonstick spray to prevent sticking) and bake for 20 minutes. Then, remove the foil and broil for 3-4 minutes until the cheese is golden and bubbly. Let it rest for a few minutes before serving.

Pro Tips for Mastering Chicken Baked Ziti

  • Use Fresh Ingredients: Fresh basil and quality marinara sauce make a world of difference in flavor.
  • Don’t Overcook the Pasta: Al dente pasta holds up better when baked, preventing it from turning mushy.
  • Experiment with Cheese: Mix different cheeses like provolone or gouda for a unique twist.
  • Make it Ahead: Assemble the ziti a day in advance and refrigerate it until you’re ready to bake.
  • Add Veggies: Sneak in some sautéed spinach, bell peppers, or mushrooms for added nutrition and flavor.
  • Use Leftover Chicken: Rotisserie chicken works great if you’re short on time.
  • Plan for Leftovers: This dish tastes even better the next day, so make extra!
  • Garnish Wisely: A sprinkle of fresh herbs or a drizzle of balsamic reduction elevates the dish.

Common Mistakes and Troubleshooting

Cooking is all about learning, and mistakes are a part of the journey. Here are some common pitfalls and how to avoid them:

  • Overbaking: Keep an eye on the broiler to avoid burning the cheese. You want golden, not charred!
  • Too Much Sauce: If your dish is too saucy, add more cheese or pasta to balance it out.
  • Underseasoning: Don’t forget to taste and adjust seasoning throughout the cooking process!

Variations to Explore

Chicken Baked Ziti is incredibly versatile. Here are some fun variations to try:

  • Buffalo Chicken Baked Ziti: Add buffalo sauce to the chicken for a spicy kick!
  • Vegetarian Baked Ziti: Replace chicken with grilled vegetables and extra ricotta.
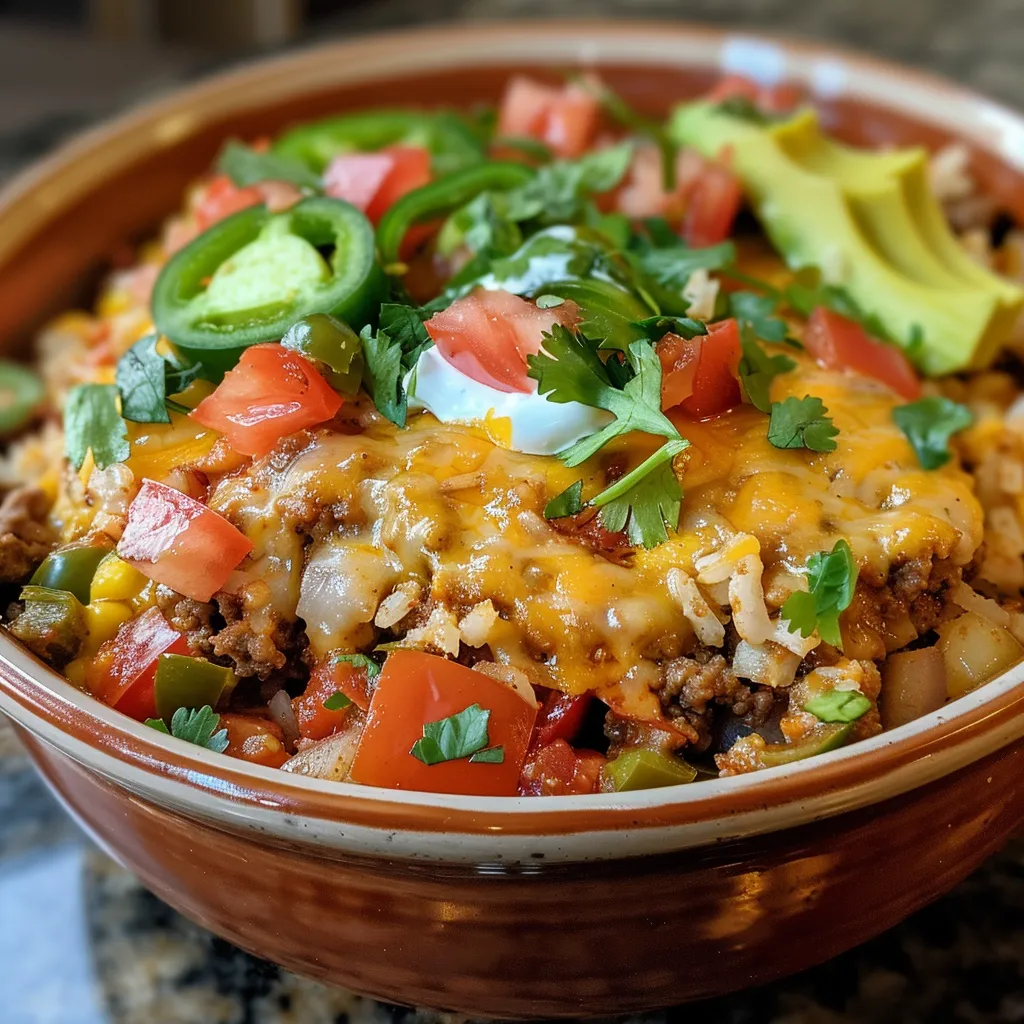
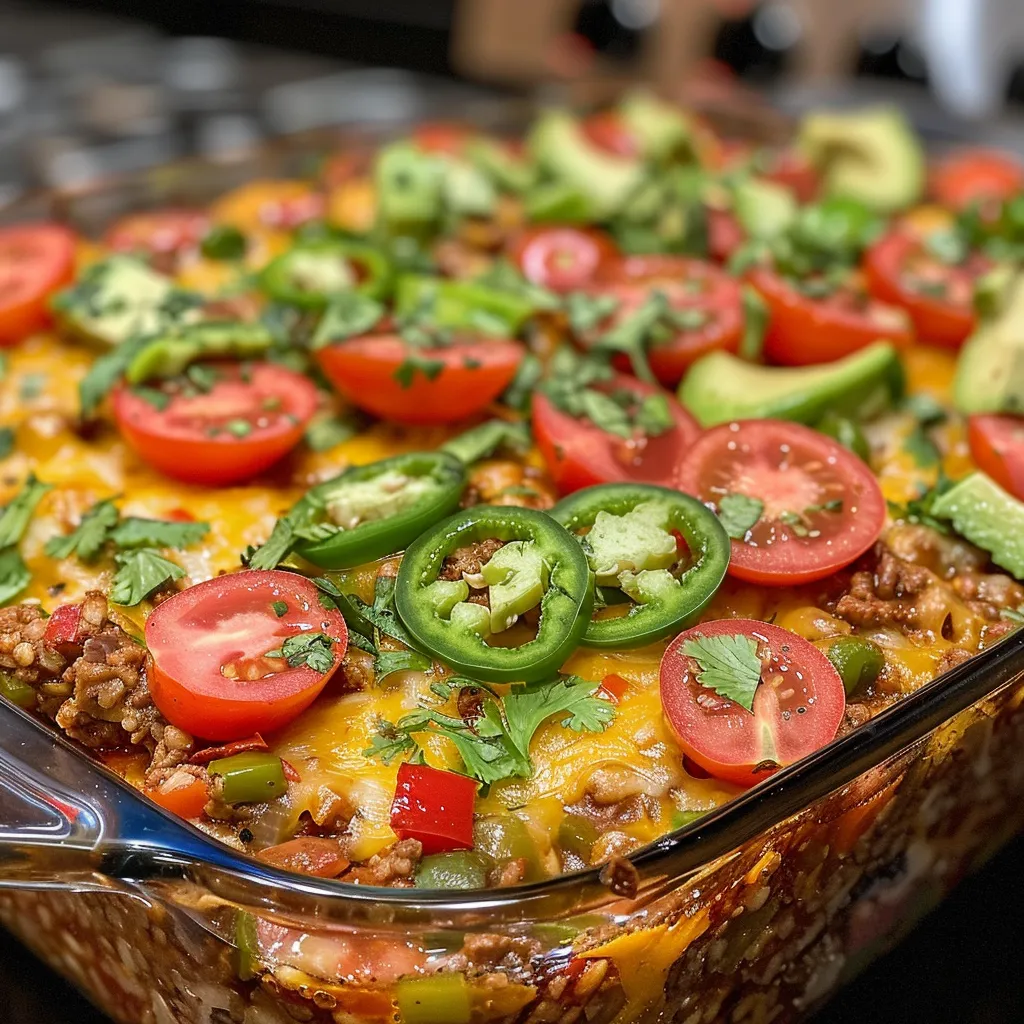
  • Mexican Chicken Baked Ziti: Incorporate black beans, corn, and taco seasoning for a southwest twist.
  • Cheesy Pesto Baked Ziti: Mix pesto with the marinara sauce for a fresh herbal flavor.

Storage and Make-Ahead Instructions

This Chicken Baked Ziti is perfect for meal prep! Here’s how to store and reheat it:

  • Refrigerate: Store leftovers in an airtight container in the fridge for up to 3 days.
  • Freeze: For longer storage, freeze in a sealed container for up to 3 months. Thaw overnight in the refrigerator before reheating.
  • Reheat: Warm in the oven at 350°F until heated through, about 20 minutes.

FAQs: Frequently Asked Questions About Chicken Baked Ziti

  • Can I use gluten-free pasta? Absolutely! Just adjust the cooking time according to the package instructions.
  • Can I make this dairy-free? Yes! Substitute dairy-free cheese and omit the ricotta.
  • How do I know when it’s done? Look for bubbly, golden cheese and ensure the chicken is fully cooked.
  • Can I add other meats? Definitely! Ground beef or sausage would be delicious additions.
  • How spicy is this recipe? That depends on the red pepper flakes! Feel free to adjust according to your taste.
  • What can I serve with Chicken Baked Ziti? A simple side salad or garlic bread pairs perfectly.
  • Can I use a different type of cheese? Yes! Feel free to mix and match your favorite cheeses.
  • Is this recipe kid-friendly? Absolutely! The cheesy goodness is a hit with kids of all ages.

Nutrition Tips and Dietary Adaptations

Cooking with health in mind doesn’t mean sacrificing flavor. Here are some tips:

  • Lean Proteins: Opt for chicken thighs instead of breasts for more flavor and moisture.
  • Whole Grain Pasta: Using whole grain or legume-based pasta increases fiber content.
  • Add Greens: Throw in spinach or kale for extra nutrients without altering the taste.
  • Control Portions: Serve with a side salad to balance out the meal and fill up on veggies.

Equipment Recommendations

To make your cooking experience seamless, here’s what you’ll need:

  • Large Pot: For boiling the pasta.
  • Nonstick Skillet: To sauté the chicken without sticking.
  • Oven-Safe Baking Dish: A glass or ceramic dish works best for even baking.
  • Measuring Cups and Spoons: For precise ingredient measurements.
  • Wooden Spoon: Perfect for stirring and mixing without scratching your pans.

Serving Suggestions

To elevate your Chicken Baked Ziti experience, consider these serving ideas:

  • Fresh Herbs: Garnish with freshly chopped basil or parsley for a pop of color.
  • Crusty Bread: A side of garlic bread or crusty baguette is perfect for savoring every last bit of sauce.
  • Wine Pairing: A light red wine like Chianti complements the flavors beautifully.
  • Side Salad: A crisp Caesar or arugula salad adds freshness and crunch.

As we wrap up this culinary journey, remember that cooking is about embracing flavors, experimenting boldly, and sharing joy with others. Your Chicken Baked Ziti is more than just a meal; it’s a celebration of comfort, warmth, and the vibrant spirit of gathering around the table. So go ahead, ignite your palate, and let the adventure begin!

Chicken Baked Ziti

Prep Time 15 minutes
Cook Time 30 minutes
Total Time 45 minutes
Servings 6 servings
Calories 650
A comforting and cheesy baked pasta dish featuring tender chicken, rich marinara, and melty cheeses, perfect for a family dinner or casual gathering.

Ingredients

Pasta

  • 1 lb ziti pasta (cooked and reserved 1/2 cup pasta water)

Chicken

  • 2 lb boneless, skinless chicken breasts (cubed)

Sauces and cheeses

  • 2 tablespoons olive oil
  • 1 teaspoon Italian seasoning
  • 1 teaspoon salt
  • 1/2 teaspoon pepper
  • 1/2 teaspoon red pepper flakes (optional)
  • 32 oz marinara sauce
  • 1 1/2 cups ricotta cheese
  • 3 cups shredded mozzarella cheese
  • 1 cup Parmesan cheese
  • 1 bunch basil (chiffonade)

Instructions 

  • Preheat oven to 400°F (200°C). Cook pasta until al dente, drain, and reserve 1/2 cup pasta water.
  • Heat olive oil, cook chicken with Italian seasoning, salt, pepper, and red pepper flakes until done. Add marinara and reserved pasta water, simmer.
  • Mix cooked chicken and sauce with cooked pasta, ricotta, and chopped basil. Transfer to baking dish.
  • Top with mozzarella and Parmesan cheeses. Cover with foil sprayed with nonstick spray and bake for 20 minutes.
  • Remove foil, broil for 3-4 minutes until bubbly and browned. Rest a few minutes before serving. Garnish with basil.

Notes

Spray foil with nonstick spray to prevent sticking during baking.
Calories: 650kcal
Cost: $15
Course: Main Course
Cuisine: Italian
Keyword: baked ziti, chicken, pasta

Nutrition

Calories: 650kcal | Carbohydrates: 70g | Protein: 45g | Fat: 25g | Sodium: 1500mg

Why You’ll Love This Recipe

Have you ever craved something that balances health and indulgence while being as easy to make as it is delicious? Let me introduce you to the joy of Air Fryer Cinnamon Banana Chips! These delightful little snacks are not just any ordinary chips; they are a crunchy, sweet explosion of flavor that will transform your snacking habits. Made with simple ingredients and cooked to perfection in an air fryer, they offer a guilt-free treat that’s bursting with personality and warmth, just like a cozy evening spent with family. Whether you need a quick snack while binge-watching your favorite show or a crunchy topping for your morning yogurt, these chips will not disappoint.

Tools and Preparation

Before diving into the world of crispy banana goodness, let’s gather the essential tools and prepare our workspace. Having the right equipment makes cooking smoother and more enjoyable.

Essential Kitchen Tools

Air Fryer banana chips coated with cinnamon, displayed with a warm, cozy background.
  • Air Fryer
  • Cutting Board
  • Sharp Knife or Mandoline Slicer
  • Mixing Bowl
  • Measuring Spoons
  • Tongs or a Fork

Why These Tools Matter

Your air fryer is the star of the show here, allowing for quick and even cooking without the need for excessive oil. A sharp knife or mandoline helps achieve those perfect, even banana slices that are crucial for even crisping. A mixing bowl is essential for combining the flavors that will coat your banana rounds, ensuring they are delectable bites of cinnamon goodness.

Ingredients

To create this quick and easy Air Fryer Cinnamon Banana Chips recipe, you’ll need the following ingredients:

  • 2 ripe bananas
  • 1 tablespoon cinnamon
  • 1 tablespoon coconut oil (melted)
  • 1 tablespoon honey or maple syrup (optional)
  • Pinch of salt

How to Make Air Fryer Cinnamon Banana Chips

Creating these cinnamon banana chips is a breeze! Follow these simple steps to crunchy perfection.

Step 1: Prep the Bananas

Start by peeling your ripe bananas. The riper they are, the sweeter your chips will be! Slice the bananas into thin, even rounds—aim for about 1/8 inch thick. A mandoline slicer is great for achieving uniformity, but a sharp knife will work just fine.

Step 2: Coat the Slices

In a mixing bowl, combine the melted coconut oil, cinnamon, optional honey or maple syrup, and a pinch of salt. Stir well to create a flavorful coating. This mixture will enhance the sweetness of the bananas while giving them that irresistible cinnamon kick.

Step 3: Toss the Banana Slices

Gently toss the banana slices in the cinnamon mixture until they are evenly coated. Make sure every slice gets its fair share of that sweet, spicy goodness. This step is crucial for ensuring that every bite is bursting with flavor!

Step 4: Preheat the Air Fryer

Before you start cooking, preheat your air fryer to 350°F (175°C). This ensures that your chips will cook evenly and achieve that perfect crunch.

Step 5: Arrange the Chips

Carefully arrange the banana slices in a single layer in the air fryer basket. It’s important not to overcrowd the basket; otherwise, your chips may not crisp up properly. Give them some space to breathe!

Step 6: Air Fry

Now comes the exciting part! Air fry the banana slices for 10-15 minutes, shaking the basket halfway through to ensure even cooking. Keep a close eye on them toward the end of the cooking time to prevent burning—nobody wants charred banana chips!

Step 7: Cool and Crisp

Once the chips are golden and crispy, carefully remove them from the air fryer. Let them cool for a few minutes on a wire rack or plate. As they cool, they’ll become even crispier, so be patient—it’s worth the wait!

Step 8: Enjoy!

Your homemade cinnamon banana chips are now ready to be devoured! Snack on them as they are or use them to elevate your other dishes. The possibilities are endless!

How to Serve Air Fryer Cinnamon Banana Chips

These crispy delights are incredibly versatile. Here are a few delicious ways to enjoy them:

As a Snack

Enjoy them straight from the bowl for a quick, healthy snack that satisfies your sweet tooth without the guilt.

With Yogurt

Crush them up and sprinkle over your favorite yogurt for added texture and flavor. It’s like a healthy granola!

On Top of Salads

Use them as a crunchy topping on salads to add a sweet twist. They’ll pair beautifully with leafy greens and vinaigrettes.

Mixed with Nuts

Combine them with your favorite nuts for a satisfying trail mix that’s perfect for on-the-go snacking.

In Smoothie Bowls

Blend them into your smoothie bowls for a delightful crunch. They add an extra layer of flavor and texture that’s simply irresistible.

As a Dessert Topping

Top your ice cream or sorbet with these crunchy chips for a delightful contrast of textures and flavors.

How to Perfect Air Fryer Cinnamon Banana Chips

To ensure your chips turn out perfectly every time, keep these tips in mind:

  • Even Slicing: Aim for uniform slices to guarantee even cooking.
  • Watch the Time: Keep an eye on your chips in the last few minutes to prevent burning.
  • Cooling Time: Allow them to cool after cooking to achieve maximum crispiness.

Best Side Dishes for Air Fryer Cinnamon Banana Chips

Pair these delightful chips with other delicious dishes:

  • Nut butter toast
  • Fruit salads
  • Pancakes or waffles

Common Mistakes to Avoid

Even the best of us can make mistakes in the kitchen. Here are a few common pitfalls to avoid when making your banana chips:

Refrigerator Storage

Don’t store them in the fridge. These chips are best kept at room temperature in an airtight container.

Freezing Air Fryer Cinnamon Banana Chips

If you want to store them longer, consider freezing them. However, they may lose some crispiness. Simply freeze in a single layer and then transfer to a zip-top bag.

Reheating Air Fryer Cinnamon Banana Chips

When reheating, use the air fryer to restore their crunch; avoid the microwave, which will make them soggy.

Frequently Asked Questions

What are Air Fryer Cinnamon Banana Chips?

These are crispy snacks made from thinly sliced bananas coated with cinnamon and other flavorings, cooked in an air fryer.

How do I make Air Fryer Cinnamon Banana Chips healthier?

Reduce the sugar or use alternatives like stevia or monk fruit sweetener while keeping the delicious cinnamon flavor intact.

Can I use other fruits for cinnamon chips?

Absolutely! Apples or pears would work beautifully. Just adjust the cooking times based on thickness.

How do I store leftover Air Fryer Cinnamon Banana Chips?

Store in an airtight container at room temperature for up to three days or freeze for longer storage.

Can I customize my Air Fryer Cinnamon Banana Chips?

Of course! Feel free to experiment with different spices like nutmeg or add a sprinkle of sea salt for extra flavor.

Conclusion

Embrace the adventure of cooking and transform your snacking game with these Air Fryer Cinnamon Banana Chips! They are not just a treat; they’re a celebration of flavor, simplicity, and the joy of creating something wonderful in your kitchen. So grab those ripe bananas and let your air fryer work its magic. Whether enjoyed solo or as part of a larger meal, these chips are sure to bring a smile to your face. Get ready to savor the crunch and make every bite count!

This Quick Air Fryer Cinnamon Banana Chips Recipe is a Game Changer!

Prep Time 5 minutes
Cook Time 15 minutes
Total Time 20 minutes
Servings 4 servings
Calories 120
Enjoy crispy, sweet cinnamon banana chips made effortlessly in your air fryer—perfect for a healthy snack or topping.

Ingredients

Bananas

  • 2 pieces ripe bananas
  • 1 tablespoon cinnamon
  • 1 tablespoon coconut oil (melted)
  • 1 tablespoon honey or maple syrup (optional)
  • pinch salt

Instructions 

  • Peel and thinly slice bananas.
  • Mix coconut oil, cinnamon, honey (if using), and salt.
  • Toss banana slices in the mixture until coated.
  • Preheat air fryer to 350°F (175°C). Arrange slices in a single layer.
  • Air fry for 10-15 minutes, shaking halfway.
  • Cool and enjoy your crispy banana chips!

Notes

Use ripe bananas for best flavor and crispiness.
Calories: 120kcal
Cost: $5
Course: Snack
Cuisine: American
Keyword: air fryer, Banana, Cinnamon

Nutrition

Calories: 120kcal | Carbohydrates: 30g | Protein: 1g | Fat: 4g | Sodium: 1mg

Loved this recipe? Save it to your favorite Pinterest board so you can easily find it later! It’s the perfect way to keep all your sweet ideas in one place. ✨

Golden-brown banana chips sprinkled with cinnamon, highlighted by soft natural lighting.

Why You’ll Love This Recipe

Let’s talk about those days when the hustle of life leaves you feeling like you need to hit pause but dinner is still looming on the horizon. That’s exactly where my Garlic Parmesan Crockpot Chicken and Potatoes swoops in like a culinary superhero. With its bold flavors and comforting textures, this dish will not only fill your stomach but warm your soul.

Imagine returning home after a long day, greeted by the intoxicating aroma of garlic and Parmesan wafting through the air. You didn’t have to slave over the stove, my friend; this beauty does all the heavy lifting while you go about your day. Toss it all in the crockpot, set it, and forget it! You’ll love the tender chicken that falls apart with a fork and the creamy potatoes that practically melt in your mouth. Trust me; it’s a dish that will ignite your passion for home cooking all over again.

Ingredients You’ll Need

Before we dive into the magic of cooking, let’s gather our ingredients. Here’s what you need to create this flavor-packed masterpiece:

  • 4 boneless, skinless chicken breasts
  • 1 pound baby potatoes, halved
  • 4 cloves garlic, minced
  • 1 cup grated Parmesan cheese
  • 1 teaspoon Italian seasoning
  • 1 teaspoon salt
  • 1/2 teaspoon black pepper
  • 1/4 cup chicken broth
  • 2 tablespoons olive oil
  • Fresh parsley, chopped (for garnish)

Each ingredient plays a vital role in this dish. The chicken is the star, but the garlic and Parmesan? They’re the supporting cast that elevates it to the next level. Don’t skimp on the cheese, and definitely don’t forget the fresh parsley—it’s the finishing touch that makes your meal pop!

How to Make This Dish: Step-by-Step

Deliciously plated Garlic Parmesan Chicken with baby potatoes in warm lighting.

Alright, let’s get down to the nitty-gritty of cooking. Follow these simple steps, and you’ll have dinner ready in no time:

  1. In a mixing bowl, combine the minced garlic, grated Parmesan cheese, Italian seasoning, salt, and black pepper. This mixture is where the magic begins!
  2. Next, place the halved baby potatoes at the bottom of your crockpot. They’ll soak up all the savory goodness while they cook.
  3. Lay the chicken breasts on top of the potatoes like a cozy blanket. Trust me; they’ll be grateful.
  4. Drizzle the olive oil and chicken broth over the chicken and potatoes. This will keep everything moist and flavorful.
  5. Now, sprinkle that glorious garlic Parmesan mixture evenly over the chicken. Don’t be shy—give your chicken a good coating!
  6. Cover the crockpot and set it to cook on low for 6-7 hours or on high for 3-4 hours. The chicken should be cooked through, and those potatoes should be tender enough to pierce with a fork.
  7. When it’s done, take a moment to appreciate the aroma before garnishing with fresh parsley. Serve it up, and watch your family dig in!

Tips for Perfecting Your Dish

Cooking is an art, and like any art form, there are a few tricks to help you master it:

  • Don’t Rush It: For the best results, low and slow is the way to go. Cooking on low allows the flavors to meld beautifully.
  • Use Fresh Ingredients: Fresh garlic and high-quality Parmesan will elevate your dish. Trust me; your taste buds will thank you.
  • Don’t Skip the Broth: A little chicken broth goes a long way in keeping everything moist. Don’t leave it out!
  • Check for Doneness: Always check that your chicken is cooked through (165°F) and that your potatoes are tender. A meat thermometer is a handy tool for this.

Variations to Spice Things Up

Feeling adventurous? Here are a few variations to keep things exciting:

  • Add Veggies: Throw in some carrots, green beans, or bell peppers for an extra dose of color and nutrition.
  • Switch the Cheese: If you’re not a huge Parmesan fan, try using mozzarella or cheddar for a different flavor profile.
  • Herb Swap: Experiment with fresh herbs like rosemary or thyme instead of Italian seasoning for a different twist.

What If You Don’t Have a Crockpot?

No crockpot? No problem! You can still whip up this delightful dish using an oven-safe pot. Just follow these steps:

  1. Preheat your oven to 300°F.
  2. Prepare the dish just as you would for the crockpot, layering the potatoes and chicken.
  3. Cover the pot with a lid (or aluminum foil) and pop it in the oven.
  4. Cook for about 2-3 hours, checking occasionally for doneness.

How to Store and Freeze

Let’s talk leftovers. If you’re lucky enough to have some of this deliciousness left over, here’s how to store it:

  • Transfer leftovers to an airtight container and store them in the fridge for up to three days.
  • You can freeze this dish as well! Just let it cool completely, then store in a freezer-safe container. It should keep well for about 2-3 months.
  • When you’re ready to enjoy again, simply thaw in the refrigerator overnight and reheat in the oven or microwave until heated through.

Frequently Asked Questions

Got questions? I’ve got answers. Here are some common queries about this recipe:

  • Can I use chicken thighs instead of breasts? Absolutely! Just keep in mind that they may take slightly longer to cook due to their higher fat content, which can also make them even juicier.
  • Do I need to use fresh garlic? While fresh is always best, pre-minced garlic will work in a pinch. Just be sure to adjust the amount to taste.
  • Can I make it dairy-free? Yes! Swap the butter for olive oil and try nutritional yeast for a cheesy flavor. It won’t taste the same, but it can be delicious in its own right!
  • Is it okay to prep the night before? Absolutely! You can assemble everything and pop it in the fridge. Just remember to let the cold ceramic insert sit out for a bit before placing it in the hot crockpot to avoid breaking it.

Final Thoughts: Ignite Your Culinary Passion

So there you have it, folks—my Garlic Parmesan Crockpot Chicken and Potatoes recipe! It’s more than just a meal; it’s an experience, a journey into the heart of comfort food that’s easy enough for any weeknight yet impressive enough for a gathering. Cooking doesn’t have to be intimidating; it can be a joyful adventure, a way to connect with loved ones, and a means to express your creativity.

So grab your skillet, grab your spices, and let’s turn up the heat together. This dish is waiting to set your culinary heart on fire, one flavorful bite at a time. Don’t forget to share your own twists and stories with me. Happy cooking!

Garlic Parmesan Crockpot Chicken and Potatoes

Prep Time 10 minutes
Cook Time 4 hours
Total Time 4 hours 10 minutes
Servings 4 servings
Calories 450
A flavorful and easy crockpot dish featuring tender chicken breasts, crispy potatoes, and a savory garlic Parmesan sauce.

Ingredients

Protein

  • 4 pieces boneless, skinless chicken breasts

Vegetables

  • 1 pound baby potatoes, halved

Aromatics & Seasonings

  • 4 cloves garlic, minced
  • 1 cup grated parmesan cheese
  • 1 teaspoon italian seasoning
  • 1 teaspoon salt
  • 0.5 teaspoon black pepper
  • 0.25 cup chicken broth
  • 2 tablespoons olive oil

Garnish

  • fresh parsley, chopped (for garnish)

Instructions 

  • Mix garlic, Parmesan, Italian seasoning, salt, and pepper.
  • Place potatoes in crockpot, then add chicken on top.
  • Drizzle with olive oil and chicken broth, then sprinkle garlic Parmesan mixture over chicken.
  • Cover and cook on low for 6-7 hours or high for 3-4 hours.
  • Garnish with chopped parsley before serving.

Notes

Ensure chicken is cooked through and potatoes are tender before serving.
Calories: 450kcal
Cost: $15
Course: Main Course
Cuisine: American
Keyword: chicken, garlic, Potatoes

Nutrition

Calories: 450kcal | Carbohydrates: 35g | Protein: 50g | Fat: 15g | Sodium: 900mg

Loved this recipe? Save it to your favorite Pinterest board so you can easily find it later! It’s the perfect way to keep all your sweet ideas in one place. ✨

A mouthwatering serving of Garlic Parmesan Crockpot Chicken and Potatoes with a soft background.

Ignite Your Culinary Passion with Vegan Stuffed Eggplant Parmesan

Welcome, flavor enthusiasts! Today, we’re diving into a dish that’s not just a meal; it’s an experience. My Vegan Stuffed Eggplant Parmesan will awaken your senses and invite you into the vibrant world of plant-based cooking. This isn’t just about satisfying your hunger; it’s about celebrating the rich tapestry of flavors that come with every bite. Roasted garlic mingles with sun-kissed cherry tomatoes, and a sprinkle of vegan cheese creates a comforting, cheesy embrace. Let’s embark on this culinary adventure together, where we transform humble eggplant into a star that dazzles on your plate!

Why You’ll Love This Recipe

  • Flavor Explosion: The combination of roasted garlic, fresh basil, and sweet cherry tomatoes creates a medley that’s as comforting as it is exciting.
  • Health-Conscious Choice: Packed with nutrients, this dish is not only delicious but also a great way to incorporate more vegetables into your diet.
  • Easy to Prepare: With simple steps and everyday ingredients, this recipe can be a weeknight staple or a showstopper for gatherings.
  • Customizable: Feel free to play with the ingredients based on what you have on hand, making it perfect for any pantry!
  • Vegan and Allergy-Friendly: This dish is naturally vegan and can easily be made gluten-free, ensuring everyone can enjoy it.

Ingredient Breakdown

Let’s take a closer look at the ingredients that come together to create this hearty dish:

  • 1 large eggplant: The star of the show! Choose one that’s firm and heavy for its size.
  • 1 cup cherry tomatoes (~200 g): These sweet gems burst with flavor and add a juicy contrast to the dish.
  • 1 whole head of garlic: Roasting garlic mellows its flavor and adds a creamy texture that’s irresistible.
  • 3-4 tbsp olive oil: Essential for roasting and infusing the dish with richness.
  • Salt and black pepper, to taste: These enhance the natural flavors of the ingredients.
  • 1/2 cup shredded vegan cheese (~50 g): Choose your favorite brand for a melty finish.
  • A handful of fresh basil leaves: Fresh herbs brighten the dish and bring it all together.

**Substitutions**: If you’re in a pinch, feel free to substitute the cherry tomatoes with diced regular tomatoes or even roasted red peppers. For the vegan cheese, nutritional yeast can be a great alternative for that cheesy flavor without the melt.

How to Make Vegan Stuffed Eggplant Parmesan

Side view of a delicious vegan stuffed eggplant parmesan, with colorful ingredients peeking through melted cheese.

Ready to get cooking? Follow these straightforward steps to whip up your Vegan Stuffed Eggplant Parmesan:

  1. Prep the veggies: Preheat your oven to 390°F (200°C). Slice the eggplant in half lengthwise and score the flesh in a criss-cross pattern, being careful not to cut through the skin.
  2. Arrange on tray: Place the eggplant halves cut side up on a baking tray. Add the cherry tomatoes and the garlic bulb (cut side up) next to them. Drizzle everything with olive oil and season generously with salt and pepper.
  3. Roast: Roast for 25–35 minutes, until the eggplant is soft, the tomatoes are blistered, and the garlic is tender.
  4. Mash the insides: Use a fork to mash the flesh of each eggplant half while keeping the skins intact. In a small bowl or directly on the tray, mash the roasted tomatoes and squeeze out the soft garlic cloves. Mix together.
  5. Assemble & bake again: Spoon the tomato-garlic mash over the eggplant halves and sprinkle the vegan cheese on top. Return to the oven for another 5-10 minutes, until the cheese is melted and bubbly.
  6. Garnish & serve: Top with fresh basil leaves before serving. Enjoy warm with toasted bread, couscous, or a simple salad.

Expert Tips for Perfect Vegan Stuffed Eggplant Parmesan

  • Choose the right eggplant: Opt for a firm, heavy eggplant for the best texture and flavor.
  • Don’t rush the roasting: Allow the eggplant and tomatoes to roast until they’re soft and flavorful; this enhances the dish significantly.
  • Experiment with spices: Add a pinch of red pepper flakes or Italian seasoning to elevate the flavor profile.
  • Let it rest: Allow the dish to sit for a few minutes after baking; this helps the flavors meld beautifully.
  • Save the skins: The eggplant skins are nutritious and add texture, so keep them intact for a heartier dish.
  • Make it a meal: Pair with a hearty grain like quinoa or farro for a complete, balanced meal.
  • Store leftovers well: Keep in an airtight container in the fridge for up to 3 days; the flavors intensify as it sits.
  • Reheat gently: Use a low oven to reheat leftovers, ensuring the eggplant remains tender.

Common Mistakes and Troubleshooting

Even the best chefs have their off days. Here are some common pitfalls and how to avoid them:

  • Eggplant too bitter: If your eggplant is bitter, try salting it before cooking. This helps draw out excess moisture and bitterness.
  • Cheese not melting: If your vegan cheese isn’t melting well, try a brand that’s known for good meltability or add a splash of plant-based milk for creaminess.
  • Dish too dry: Make sure to drizzle enough olive oil and don’t skimp on the tomatoes. They add moisture and flavor.

Variations on Vegan Stuffed Eggplant Parmesan

Let your creativity shine with these delicious variations:

  • Mexican Twist: Add black beans, corn, and taco seasoning for a zesty, south-of-the-border flair.
  • Italian Herb Infusion: Incorporate fresh oregano and thyme for an aromatic touch.
  • Mediterranean Style: Swap the tomatoes for diced olives and sun-dried tomatoes, and sprinkle with feta-style vegan cheese.
  • Spicy Kick: Mix in some chopped jalapeños for a fiery touch that’ll awaken your taste buds.

Storage and Make-Ahead Instructions

This dish is perfect for meal prep! Here’s how to store it:

  • Refrigerate: Store in an airtight container for up to 3 days.
  • Freeze: You can freeze the stuffed eggplant before baking. Just wrap tightly in foil or place in a freezer-safe container for up to 2 months. Thaw in the fridge before baking.
  • Reheat: To reheat, place in a preheated oven at 350°F (175°C) until warmed through, about 20 minutes.

Comprehensive FAQ

Got questions? I’ve got answers! Here are some frequently asked questions about Vegan Stuffed Eggplant Parmesan:

  • Can I use other vegetables? Absolutely! Zucchini or bell peppers work wonderfully as substitutes.
  • Is this dish gluten-free? Yes, just ensure your vegan cheese and any other ingredients are certified gluten-free.
  • Can I make this ahead of time? Yes, you can prepare the stuffing and eggplant in advance and bake when ready to serve.
  • What can I serve with it? This dish pairs beautifully with a side salad, crusty bread, or a grain like quinoa.
  • How do I know when the eggplant is done? It should be soft and tender with a slightly caramelized exterior.
  • Can I use dried herbs? Yes, but use half the amount since dried herbs are more concentrated.
  • What’s the best way to reheat leftovers? Reheat in the oven to maintain the texture; microwave may make it soggy.
  • Can I add protein? Definitely! Consider adding lentils or chickpeas for an extra protein boost.

Nutritional Benefits and Dietary Adaptations

This Vegan Stuffed Eggplant Parmesan is not just a flavorful dish; it’s packed with nutrients:

  • Rich in Antioxidants: Eggplant and tomatoes are loaded with antioxidants, which are great for overall health.
  • High in Fiber: This dish is a great source of dietary fiber, promoting digestive health.
  • Plant-Based Protein: With the addition of vegan cheese and optional legumes, you’ll have a protein-rich meal.

Equipment Recommendations

Here are a few kitchen essentials to help you master this dish:

  • Sharp Knife: For easy slicing of the eggplant and tomatoes.
  • Baking Tray: A sturdy tray ensures even roasting.
  • Mixing Bowl: For mashing the garlic and tomatoes.
  • Oven Mitts: Safety first—protect those hands when pulling out hot dishes!

Serving Suggestions

Ready to plate up? Here are some serving ideas:

  • With Toasted Bread: Serve alongside crusty, toasted bread for a delightful crunch.
  • Over Quinoa: Place your stuffed eggplant over a bed of fluffy quinoa for a filling meal.
  • With a Simple Salad: A fresh green salad with a light vinaigrette complements the richness of this dish.

Now that you’re armed with everything you need to create this mouthwatering Vegan Stuffed Eggplant Parmesan, it’s time to get cooking! Embrace the flavors, add your own twist, and enjoy every delicious bite. Remember, cooking is an adventure—so don’t be afraid to spice things up and make this dish your own!

Vegan Stuffed Eggplant Parmesan

Prep Time 10 minutes
Cook Time 30 minutes
Total Time 40 minutes
Servings 2 servings
Calories 250
A delicious plant-based twist on classic eggplant Parmesan, featuring roasted eggplant stuffed with tomato-garlic mash and vegan cheese.

Ingredients

Vegetables

  • 1 large eggplant
  • 1 cup cherry tomatoes ((~200 g))
  • 1 whole head garlic ((top sliced off))
  • 3-4 tbsp olive oil
  • 1/2 cup shredded vegan cheese ((~50 g))
  • A handful fresh basil leaves

Instructions 

  • Preheat oven to 390°F (200°C). Slice eggplant in half lengthwise and score the flesh. Arrange on a baking tray with cherry tomatoes and garlic, drizzle with olive oil, and season.
  • Roast for 25–35 minutes until soft. Mash the eggplant flesh, tomatoes, and garlic together.
  • Spoon the mash into the eggplant halves, sprinkle with vegan cheese, and bake for another 5–10 minutes until bubbly.
  • Garnish with fresh basil leaves and serve warm.

Notes

For extra flavor, add a splash of balsamic vinegar before serving.
Calories: 250kcal
Cost: $15
Course: Main Course
Cuisine: Vegan
Keyword: Eggplant

Nutrition

Calories: 250kcal | Carbohydrates: 30g | Protein: 8g | Fat: 12g | Sodium: 300mg

Why You’ll Love These Cookies

Welcome to a sweet culinary adventure, my friends! If you’re searching for a recipe that combines the nostalgic flavors of banana bread with the delightful simplicity of cookies, you’ve hit the jackpot! These Easy Banana Bread Cookies are not just a treat; they are a joyous celebration of what happens when ripe bananas meet peanut butter and a sprinkle of sugar. Perfectly chewy and bursting with flavor, these cookies are a testament to the magic that occurs when you embrace the art of baking with just a handful of ingredients. Plus, they’re a fantastic way to use up those overripe bananas sitting on your counter shouting for attention. Let’s dive into this delicious journey together!

Key Ingredients & Their Importance

To make these banana bread cookies, you’ll need just six simple ingredients that you likely already have in your pantry. Here’s why each one is essential:

  • 2 ripe bananas: The star of the show! Ripe bananas add natural sweetness and moisture, making the cookies soft and chewy. Look for bananas with plenty of brown spots for maximum flavor.
  • 1/2 cup peanut butter: This ingredient not only introduces a rich, nutty flavor but also binds the cookies together beautifully, giving them a satisfying texture.
  • 1/2 cup brown sugar: This adds sweetness and a hint of caramel flavor that perfectly complements the bananas. You can use light or dark brown sugar based on your preference.
  • 1 teaspoon vanilla extract: A splash of vanilla elevates the overall flavor of the cookies, bringing warmth and depth.
  • 1 teaspoon baking soda: This is your leavening agent, ensuring that the cookies rise to perfection, creating that delightful texture we all crave.
  • 1 1/2 cups rolled oats: Oats add heartiness to the cookies, making them more filling and providing a slight chewiness that pairs wonderfully with the other ingredients.

Step-by-Step Instructions

Delicious banana bread cookies on a rustic surface, showcasing a blend of oats and a rich golden color.

Ready to bake? Gather your ingredients and let’s transform those bananas into a batch of happiness! Here’s how to whip up these delightful cookies:

  1. Preheat your oven: Set your oven to 350°F (175°C) and line a baking sheet with parchment paper. This will prevent your cookies from sticking and make cleanup a breeze.
  2. Mash the bananas: In a large bowl, mash the ripe bananas until they are smooth and creamy. A fork works perfectly for this task — just channel your inner banana whisperer!
  3. Mix in the wet ingredients: To the mashed bananas, add the peanut butter, brown sugar, and vanilla extract. Mix everything together until well combined and creamy. You’re creating a luscious base for your cookies!
  4. Add the dry ingredients: Stir in the baking soda and rolled oats. Mix gently until everything is fully incorporated. Be careful not to overmix; we want those cookies to stay soft and chewy.
  5. Shape the cookies: Using a spoon or cookie scoop, drop spoonfuls of the cookie dough onto the prepared baking sheet. Make sure to leave about 2 inches between each scoop to allow for spreading during baking.
  6. Bake to perfection: Place the baking sheet in the preheated oven and bake for 10-12 minutes or until the edges are golden brown and the centers are set. The aroma wafting through your kitchen will be nothing short of heavenly!
  7. Cool and enjoy: Once baked, remove the cookies from the oven and let them cool on the baking sheet for a few minutes before transferring them to a wire rack to cool completely. Then, grab a glass of milk and indulge!

Tips for Perfect Cookies

Here are some handy tips to ensure your banana bread cookies come out perfectly every time:

  • Use overripe bananas: The riper they are, the sweeter and more flavorful your cookies will be! They should be soft and brown, but free from any signs of mold.
  • Mix gently: To maintain that soft texture, mix the wet and dry ingredients until just combined. Overmixing can lead to tough cookies.
  • Don’t skip the cooling step: Allowing the cookies to cool on the baking sheet helps them firm up a bit and makes them easier to transfer without breaking.

Variations to Try

Feeling adventurous? Here are some fun variations to customize your cookies:

  • Chocolate chips: Add a handful of chocolate chips for a decadent twist. Who can resist chocolate and banana together?
  • Dried fruits: Chopped dried apricots or raisins can add a delightful chew and a burst of flavor.
  • Nuts: Walnuts or pecans can add a satisfying crunch and extra nutrients.

Substitutions You Can Make

Don’t have all the ingredients on hand? No problem! Here are some substitutions you can try:

  • Nut butter: If peanut butter isn’t your thing, try almond butter or sunflower seed butter for a nut-free option.
  • Sweeteners: You can replace brown sugar with coconut sugar or maple syrup. If using syrup, adjust the dry ingredients slightly for consistency.

Equipment You’ll Need

Before you start baking, make sure you have the following equipment handy:

  • Baking sheet
  • Parchment paper
  • Large mixing bowl
  • Fork (for mashing bananas)
  • Spoon or cookie scoop (for shaping the cookies)

Storage and Freezing Tips

Want to save some deliciousness for later? Here’s how to store your cookies:

  • Room temperature: Store any leftover cookies in an airtight container at room temperature for up to 3 days.
  • Freezing: For longer storage, freeze the cookies! Place them in a freezer-safe bag or container, and they’ll stay fresh for up to 3 months. Thaw at room temperature when you’re ready to enjoy them again.

FAQs About Banana Bread Cookies

Here are some common questions about this mouthwatering recipe:

  • Can I use two ripe bananas? Absolutely! This recipe is designed for two ripe bananas, so you’re all set to go! It’s a perfect way to use those leftover bananas.
  • What if I don’t have brown sugar? You can substitute with granulated sugar, but your cookies may lack that rich caramel flavor. Consider using honey or agave syrup instead, adjusting the flour slightly.
  • Can I add other ingredients? Yes! Feel free to get creative by adding chocolate chips, nuts, or even a sprinkle of cinnamon for an extra flavor kick.

Troubleshooting Common Issues

Even the best bakers encounter hiccups now and then. Here’s how to troubleshoot common issues:

  • Cookies are too dry: Make sure your bananas are very ripe and well mashed. If the dough feels too dry, a splash of milk or a bit more peanut butter can help.
  • Cookies spread too much: If your cookies spread excessively, try chilling the dough for 30 minutes before baking. This can help them hold their shape better.

Conclusion

There you have it! A delicious recipe for Easy Banana Bread Cookies that’s sure to bring joy to your kitchen and smiles to your table. With just six simple ingredients, you’re on your way to creating a delightful treat that’s perfect for any occasion. Whether you enjoy them fresh from the oven or stored for later, these cookies invite you to savor the sweetness of life, one bite at a time. So go ahead, embrace your inner baker, and let those bananas shine! Happy baking, and may your kitchen always be filled with warmth and laughter!

Easy Banana Bread Cookies with 6 Simple Ingredients

Prep Time 10 minutes
Cook Time 12 minutes
Total Time 22 minutes
Servings 12 cookies
Calories 150
Delight in these quick and healthy banana bread cookies made with just six simple ingredients. Perfect for a wholesome snack or dessert!

Ingredients

Bananas

  • 2 pieces ripe bananas
  • 1/2 cup peanut butter
  • 1/2 cup brown sugar
  • 1 teaspoon vanilla extract
  • 1 teaspoon baking soda
  • 1 1/2 cups rolled oats

Instructions 

  • Preheat oven to 350°F (175°C) and line a baking sheet.
  • Mash bananas until smooth in a large bowl.
  • Mix in peanut butter, brown sugar, and vanilla until combined.
  • Stir in baking soda and oats until fully incorporated.
  • Drop spoonfuls onto baking sheet, spacing 2 inches apart.
  • Bake for 10-12 minutes until edges are golden. Cool before serving.

Notes

For a richer flavor, add a handful of chocolate chips or nuts.
Calories: 150kcal
Cost: $8
Course: Dessert
Cuisine: American
Keyword: Banana

Nutrition

Calories: 150kcal | Carbohydrates: 22g | Protein: 3g | Fat: 6g | Sodium: 50mg

Loved this recipe? Save it to your favorite Pinterest board so you can easily find it later! It’s the perfect way to keep all your sweet ideas in one place. ✨

Eye-level shot of softly baked banana bread cookies, highlighting their oatmeal texture and inviting appearance.

Why You’ll Love This Recipe

Get ready to embark on a culinary adventure that will transform your snack game! This delightful recipe for banana sushi is not just a treat for the taste buds; it’s a celebration of creativity, fun, and health. Imagine a perfectly ripe banana swathed in creamy peanut butter, coated in crunchy oats, and adorned with your choice of toppings. Each bite is a playful explosion of flavors and textures that will make snack time an exciting experience for both kids and adults alike. Not only is this an excellent way to introduce healthy eating to children, but it’s also a fantastic opportunity for families to bond in the kitchen. So roll up your sleeves, grab your bananas, and let’s dive into this whimsical world of culinary creativity!

Ingredients

Before we get started, let’s gather our ingredients. This recipe is straightforward and requires minimal prep time, making it a perfect choice for busy parents or anyone looking to whip up a quick and healthy snack. Here’s what you’ll need:

  • 2 ripe bananas
  • 1/4 cup peanut butter (or any nut butter of your choice)
  • 1/4 cup rolled oats
  • 1/4 cup mini chocolate chips (optional)
  • 1/4 cup shredded coconut (optional)
  • Honey or maple syrup (for drizzling, optional)

Step-by-Step Instructions

A vibrant plate featuring Banana Sushi, with a soft, blurred background and warm lighting.

Preparing the Bananas

First things first, let’s get those bananas ready for their sushi transformation!

  1. Peel the bananas and place them on a cutting board. Make sure they are ripe but not overly soft; you want them to hold their shape when rolling.

Spreading the Peanut Butter

Next, we’ll add that delicious peanut butter layer.

  1. Spread a layer of peanut butter evenly over each banana. Don’t be shy here! The more, the merrier – it adds a luxurious creaminess that complements the sweetness of the banana.

Coating with Rolled Oats

Now, let’s add some crunch!

  1. Roll the bananas in rolled oats until they are fully coated. This will give your banana sushi a hearty texture and a boost of nutrition.

Enhancing with Toppings

Here’s where the fun begins – toppings galore!

  1. If desired, roll the bananas in mini chocolate chips or shredded coconut for added flavor and flair. Get creative! You can mix and match toppings to create your own unique flavor combinations.

Slicing and Serving

It’s almost time to dig in!

  1. Slice the coated bananas into bite-sized pieces. Aim for about 1-inch thick slices, perfect for popping into your mouth!

Drizzling for Extra Sweetness

To elevate this already delightful dish, let’s finish it off.

  1. Arrange the slices on a plate and drizzle with honey or maple syrup if desired. This extra touch of sweetness really brings everything together.

Enjoying Your Creation

Serve immediately and enjoy your fun and healthy banana sushi! Each piece is a mini adventure waiting to be savored.

Tips for Success

To ensure your banana sushi turns out perfectly every time, keep these tips in mind:

  • Choose the Right Bananas: Ripe bananas are key for optimal sweetness and creaminess. Look for bananas with a few brown spots for the best flavor.
  • Peanut Butter Alternatives: If you or your kids have nut allergies, consider using sunflower seed butter or soy nut butter for an equally delicious alternative.
  • Experiment with Toppings: The possibilities are endless! Try using crushed pretzels for a salty crunch or dried fruits for a burst of flavor. Don’t limit yourself to just chocolate chips and coconut!

Variations and Substitutions

If you want to mix things up, here are some variations and substitutions to consider:

  • Nut-Free Version: Swap out the peanut butter for a nut-free spread, like tahini or yogurt, to accommodate dietary restrictions.
  • Vegan Option: Use maple syrup instead of honey and ensure your toppings are vegan-friendly.
  • Make it Chocolatey: For a chocolate lover’s dream, drizzle melted dark chocolate over the finished rolls instead of honey or syrup.

Equipment You’ll Need

Before diving into this fun recipe, make sure you have the following equipment handy:

  • Cutting Board: A stable surface for preparing your bananas.
  • Knife: For slicing the bananas into bite-sized pieces.
  • Spreading Knife: To spread the peanut butter smoothly over the bananas.
  • Serving Plate: To display your beautifully crafted banana sushi.

Storage and Freezing Tips

While these banana sushi rolls are best enjoyed fresh, you can store leftovers if you have any:

  • Refrigeration: Store any leftover banana sushi in an airtight container in the fridge for up to one day. The bananas may brown slightly, but they will still taste delicious.
  • Freezing: While freezing isn’t recommended due to texture changes, you can freeze the uncoated bananas and then prepare the sushi-style snack when you’re ready.

FAQs

Here are some common questions about this delightful snack:

  • Can I use other fruits? Absolutely! Try using apples or pears as alternatives for a different flavor profile.
  • Is this snack healthy? Yes! This snack is packed with healthy fats, fiber, and natural sugars, making it a nutritious option for both kids and adults.
  • Can I make these ahead of time? While best fresh, you can prep the bananas and toppings in advance and assemble them just before serving.

Troubleshooting Common Issues

If you encounter any issues while making your banana sushi, check out these troubleshooting tips:

  • Bananas too ripe: If your bananas are overly soft, try chilling them in the fridge for a bit before assembling to firm them up.
  • Toppings not sticking: Ensure you have a generous layer of peanut butter to help the toppings adhere better.

Conclusion

This whimsical banana sushi is more than just a snack; it’s a celebration of creativity and fun in the kitchen. Whether you’re making them for a fun daycare snack, a quick after-school treat, or an adventurous breakfast, this recipe is sure to become a favorite. I encourage you to get involved in the kitchen with your kids, explore different toppings, and most importantly, have fun! Cooking should always be an adventure, and with this banana sushi, you’re one step closer to embracing that culinary thrill. Share your creations and variations with me – I can’t wait to see what delicious ideas you come up with! Happy rolling!

Banana Sushi: Fun & Healthy Snack for Kids (and Adults!)

Prep Time 10 minutes
Total Time 10 minutes
Servings 4 pieces
Calories 150
Enjoy a fun and healthy treat with these banana sushi rolls, perfect for kids and adults alike.

Ingredients

Fruits and Nuts

  • 2 pieces ripe bananas
  • 0.25 cup peanut butter (or any nut butter)
  • 0.25 cup rolled oats
  • 0.25 cup mini chocolate chips (optional)
  • 0.25 cup shredded coconut (optional)
  • honey or maple syrup for drizzling honey or maple syrup (optional)

Instructions 

  • Peel bananas and spread peanut butter over each.
  • Roll bananas in oats, then in chocolate chips or coconut if desired.
  • Slice into bite-sized pieces and drizzle with honey or syrup if desired.
  • Serve immediately and enjoy!

Notes

Use ripe bananas for best flavor and texture.
Calories: 150kcal
Cost: $5
Course: Snack
Cuisine: Healthy
Keyword: Banana

Nutrition

Calories: 150kcal | Carbohydrates: 25g | Protein: 4g | Fat: 6g | Sodium: 2mg

Loved this recipe? Save it to your favorite Pinterest board so you can easily find it later! It’s the perfect way to keep all your sweet ideas in one place. ✨

Detailed view of sliced Banana Sushi with rolled oats, coconut, and a drizzle of honey.

Get Ready to Dive into the World of Flavor with My Ultimate Mexican Ground Beef Casserole!

If you’re looking to spice up your dinner game, you’ve come to the right place! This Mexican Ground Beef Casserole is a fiesta for your taste buds, blending savory ground beef, zesty tomatoes, and a medley of spices that will warm your soul and delight your senses. Whether you’re hosting a gathering or just wanting to treat yourself to something special, this dish is your ticket to a culinary adventure!

With its hearty ingredients and vibrant flavors, you’ll find that this casserole is perfect for any occasion. It’s not just a meal; it’s an experience that invites you to embrace the thrill of cooking with heat. Let’s dive into why you’ll love this recipe!

Why You’ll Love This Recipe

  • Flavor Explosion: This casserole is packed with bold flavors, thanks to a harmonious blend of spices, ground beef, and fresh vegetables.
  • Easy to Make: With simple steps and minimal prep work, you can whip up this dish in no time, making it perfect for busy weeknights.
  • Customizable: Feel free to mix and match ingredients based on your preferences. Don’t like a particular vegetable? Swap it out!
  • Meal Prep Friendly: This casserole stores well, making it a great option for meal prep. Just reheat and enjoy throughout the week!
  • Kid-Approved: With its comforting flavors and cheesy goodness, this dish is sure to be a hit with the whole family!

Ingredient Breakdown and Substitutions

Before we get cooking, let’s take a closer look at the ingredients that make this casserole sing. Each component plays a vital role in creating that perfect balance of flavor and texture.

  • 4 cups Cooked cauliflower rice: A low-carb alternative to traditional rice. You can also use cooked white or brown rice for a heartier option.
  • 1 10-oz can Diced tomatoes with green chilies: Adds a zesty kick. If you prefer less heat, opt for plain diced tomatoes.
  • 1 tbsp Avocado oil: A healthy fat that enhances flavor. Substitute with olive oil if necessary.
  • 2 large Bell peppers: These provide sweetness and crunch. Feel free to use any color you like!
  • 1/2 large Onion: Adds depth to the dish. Shallots or green onions can be used as alternatives.
  • 1/2 tsp Sea salt and 1/4 tsp Black pepper: Essential for seasoning. Adjust to taste.
  • 1 cup Sour cream: For creaminess. Also, Greek yogurt is a great substitute if you’re looking for a lighter option.
  • 2 lb Ground beef: The star of the show! You can use turkey or chicken for a leaner option.
  • 1/2 cup Water: Helps to combine the flavors. You can also use beef broth for an extra punch.
  • 1/4 cup Taco seasoning: A blend of spices that brings everything together. You can make your own or use a store-bought mix.
  • 2 cups Mexican cheese blend: For that gooey, cheesy topping. Feel free to mix in other cheeses like cheddar or Monterey Jack.
  • Optional toppings: Diced tomatoes, sliced jalapeños, sliced avocados, and fresh cilantro to garnish.

Let’s Get Cooking: Step-by-Step Instructions

Side view of a delicious Mexican Ground Beef Casserole served in a baking dish.

Ready to bring this delicious casserole to life? Follow these easy steps!

  1. In a large skillet, cook the cauliflower rice according to the package instructions, or prepare your rice using your preferred method.
  2. Stir the drained diced tomatoes with green chilies into the rice mixture. Transfer to the bottom of a large casserole dish and set aside.
  3. Wipe down the skillet to remove any cauliflower pieces. Heat another tablespoon of avocado oil over medium heat, then add the diced bell peppers and onions. Sauté for 10-15 minutes, until softened and starting to brown. Season with salt and pepper to taste.
  4. Layer the sautéed vegetables over the cauliflower rice in the casserole dish. Spread the sour cream evenly on top with a spatula.
  5. Preheat your oven to 400 degrees F (204 degrees C).
  6. Add the ground beef to the skillet and increase the heat to medium-high. Cook for about 10 minutes, breaking it apart with a spatula until browned.
  7. Pour in the water and taco seasoning, bringing it to a boil. Then, reduce to a simmer for 2-5 minutes until the extra moisture is absorbed.
  8. Spread the beef mixture evenly over the casserole. Sprinkle the shredded Mexican cheese on top.
  9. Bake the Mexican ground beef casserole for 10-15 minutes, until it’s hot and the cheese is melted and bubbly.

Pro Tips for Cooking Success

  • Use Fresh Ingredients: Fresh vegetables and quality meat will enhance the overall flavor of your casserole.
  • Don’t Overcook: Keep an eye on the baking time to prevent the casserole from drying out. The cheese should be melted but not burnt.
  • Layering Matters: Layering your ingredients properly helps to maintain the dish’s structure and flavor balance.
  • Customize Your Spices: Don’t hesitate to adjust the taco seasoning according to your heat preference. Add more for a spicier kick!
  • Keep Leftovers Fresh: Store any leftover casserole in an airtight container in the fridge for up to 4 days.
  • Freezing for Later: You can freeze an unbaked casserole for up to 2 months. Just thaw it overnight in the fridge before baking.
  • Garnish Generously: Fresh toppings like cilantro, avocado, and jalapeños make your casserole visually appealing and add extra flavor.

Common Mistakes and Troubleshooting

Even the best recipes can run into hiccups. Here are some common mistakes to avoid:

  • Not Draining Ingredients: Failing to drain the diced tomatoes properly can make your casserole watery.
  • Overcrowding the Pan: Cooking too much ground beef at once can prevent it from browning properly. Work in batches if necessary.
  • Skipping the Seasoning: Don’t skimp on salt and pepper; they’re essential for elevating flavors!
  • Ignoring Texture: The casserole should have a mix of textures. Avoid overcooking the vegetables to keep them crunchy.

Variations to Try

Get creative with your casserole! Here are some delightful variations:

  • Tex-Mex Twist: Add black beans and corn for a heartier, more filling casserole.
  • Vegetarian Delight: Substitute the ground beef with lentils or a meat alternative for a vegetarian option.
  • Spicy Kick: Include diced jalapeños in the beef mixture for an extra layer of heat.
  • Cheesy Broccoli: Mix in steamed broccoli for a nutritious boost and vibrant color.

Storage and Make-Ahead Instructions

Planning ahead? Here’s how to store and reheat your Mexican Ground Beef Casserole:

  • Refrigerate: Keep leftovers in an airtight container in the fridge for up to 4 days.
  • Freeze: You can freeze the casserole for up to 2 months. Wrap it tightly with plastic wrap and aluminum foil.
  • Reheating: To reheat, thaw in the fridge overnight and bake at 350 degrees F (175 degrees C) for 20-30 minutes until heated through.

Frequently Asked Questions

Got questions? I’ve got answers! Here are some of the most common inquiries about this recipe:

  • Can I use ground turkey instead of beef? Yes! Ground turkey or chicken are great alternatives if you prefer leaner meat.
  • How do I make it spicier? Add more taco seasoning or diced jalapeños to enhance the heat level.
  • Can I use different types of cheese? Absolutely! Feel free to mix in your favorites, like cheddar or pepper jack.
  • Is this casserole gluten-free? Yes, as long as you use gluten-free taco seasoning and check your ingredients.
  • Can I make this ahead of time? Yes! You can prepare the casserole a day in advance and bake it right before serving.
  • What can I serve with this casserole? Consider serving it with a fresh salad, guacamole, or tortilla chips for a complete meal.
  • How long does it take to bake? Bake for 10-15 minutes, just until the cheese is melted and bubbly.
  • Can I use frozen cauliflower rice? Yes! Just make sure to thaw and drain any excess moisture before using it in the recipe.

Nutritional Tips and Dietary Adaptations

This casserole can be adapted to fit various dietary needs:

  • Keto-Friendly: Use cauliflower rice and omit high-carb ingredients like beans.
  • Low-Carb: Stick to vegetables and lean meats to keep carbs in check.
  • High-Protein: Add beans or choose a leaner cut of meat to elevate protein content.

Equipment Recommendations

Here’s what you’ll need to make this delicious casserole:

  • Large Skillet: For sautéing vegetables and browning the beef.
  • Casserole Dish: A 9×13-inch dish works perfectly for this recipe.
  • Spatula: For mixing and spreading layers evenly.
  • Measuring Cups and Spoons: Ensure accuracy for perfect results.

Serving Suggestions

This casserole is already a complete meal on its own, but here are some ideas to elevate your serving experience:

  • Fresh Cilantro: A sprinkle of chopped cilantro adds freshness and color.
  • Sour Cream: A dollop of sour cream on top provides creaminess and tang.
  • Avocado Slices: Creamy avocado pairs perfectly with the spicy flavors of the casserole.
  • Hot Sauce: For those who like an extra kick, have hot sauce on the table!

Now that you’ve got all the tools and tips, it’s time to roll up your sleeves and create a masterpiece in your kitchen! Embrace the fire, enjoy the process, and remember: cooking is an adventure. Your Mexican Ground Beef Casserole is waiting to steal the show!

Mexican Ground Beef Casserole

Prep Time 15 minutes
Cook Time 25 minutes
Total Time 40 minutes
Servings 6 servings
Calories 650
A flavorful and hearty casserole combining seasoned ground beef, vegetables, and cheese, perfect for a quick family dinner.

Ingredients

Vegetables

  • 4 cups Cooked cauliflower rice (or cooked white or brown rice)
  • 1 10-oz can Diced tomatoes with green chilies (drained very well)
  • 1 tbsp Avocado oil
  • 2 large Bell peppers (diced)
  • 0.5 large Onion (diced)
  • 0.5 tsp Sea salt (to taste)
  • 0.25 tsp Black pepper (to taste)
  • 1 cup Sour cream
  • 2 lb Ground beef
  • 0.5 cup Water
  • 0.25 cup Taco seasoning
  • 2 cups Mexican cheese blend (shredded)
  • Tomatoes Diced tomatoes
  • Jalapenos Sliced jalapenos
  • Avocados Sliced avocados
  • Fresh cilantro Chopped cilantro

Instructions 

  • Cook cauliflower rice or white/brown rice, then stir in drained diced tomatoes with chiles. Transfer to a casserole dish.
  • Saute bell peppers and onions in oil until soft, then season with salt and pepper.
  • Spread vegetables over rice, top with sour cream, then set aside.
  • Cook ground beef until browned, add water and taco seasoning, simmer until absorbed.
  • Spread beef over vegetables, sprinkle cheese, then bake at 400°F (204°C) for 10-15 minutes until hot and melted.

Notes

For extra flavor, garnish with fresh tomatoes, jalapenos, avocados, and cilantro before serving.
Calories: 650kcal
Cost: $15
Course: Main Course
Cuisine: Mexican
Keyword: ground beef

Nutrition

Calories: 650kcal | Carbohydrates: 50g | Protein: 45g | Fat: 35g | Sodium: 900mg

Why You’ll Love This Recipe

Are you ready to take your lunch game to the next level? The Sizzling Tuna Melt Wrap is not just another meal; it’s a vibrant and exciting adventure for your taste buds. This dish strikes the perfect balance between comfort and thrill, combining creamy tuna, gooey cheese, and a touch of heat that will leave you craving more. Whether you’re a busy professional looking for easy meals for work lunch, a university student short on time, or someone who simply loves a good meal, this recipe is your new best friend.

Overview of the Sizzling Tuna Melt Wrap

Picture this: a perfectly grilled tortilla cradling a savory mixture of tuna, cheese, and crunchy veggies, all coming together in a warm embrace. Each bite of this wrap bursts with flavor, taking you on a culinary journey that is both satisfying and exciting. It’s quick to prepare, taking only about 10 minutes from start to finish, making it perfect for those busy days when you still want something delicious. And let’s face it—who doesn’t love a good tuna melt? But this wrap elevates the classic dish into a handheld delight!

Key Ingredients and Their Benefits

A delicious Tuna Melt Wrap cut in half, displaying the creamy filling and grilled tortilla.

Let’s dive into the heart of this recipe. Here’s what you’ll need:

  • 1 can of tuna, drained: A lean protein powerhouse that’s also packed with omega-3 fatty acids, crucial for heart health.
  • 2 tablespoons mayonnaise: Adds creaminess and richness, tying all the flavors together.
  • 1 tablespoon Dijon mustard: A zesty touch that elevates the flavor profile.
  • 1/4 cup shredded cheese (cheddar or mozzarella): Because let’s be honest—melted cheese makes everything better!
  • 1/4 cup diced celery: For that satisfying crunch and freshness.
  • 1/4 cup diced onion: Adds a savory depth that enhances the overall taste.
  • Salt and pepper to taste: Essential for seasoning and bringing out the flavors.
  • 2 large tortillas: The perfect vehicle for all your delicious fillings.
  • Butter or oil for grilling: To achieve that golden-brown exterior that makes each bite irresistible.

How to Make the Sizzling Tuna Melt Wrap

Ready to get cooking? Let’s go through the simple steps to create this mouthwatering wrap:

  1. In a mixing bowl, combine the drained tuna, mayonnaise, Dijon mustard, shredded cheese, diced celery, diced onion, salt, and pepper. Mix well until all ingredients are evenly incorporated.
  2. Spread half of the tuna mixture onto one side of each tortilla, ensuring you don’t overfill them.
  3. Carefully fold the tortillas over the filling, creating a wrap.
  4. Heat a skillet over medium heat and add a little butter or oil to the pan.
  5. Place the wraps seam-side down in the skillet and cook for 3-4 minutes until golden brown.
  6. Flip the wraps and cook for another 3-4 minutes until the other side is golden and the cheese has melted beautifully.
  7. Remove from the skillet, slice in half, and serve warm. Enjoy!

Tips for Perfecting Your Wrap

Here are a few expert tips to ensure your Sizzling Tuna Melt Wrap turns out perfectly:

  • Don’t rush the grilling process! Cooking it slowly over medium heat allows the cheese to melt properly and the tortilla to achieve that satisfying crunch.
  • Feel free to customize the filling! Add jalapeños for heat or fresh herbs like dill for a pop of flavor.
  • If you’re looking for an extra layer of flavor, sprinkle some smoked paprika or chili powder into the tuna mixture.

Variations to Explore

This recipe is incredibly versatile! Here are a few variations to consider:

  • Spicy Tuna Melt: Add chopped green chilies or a dash of hot sauce to the tuna mixture for an extra kick.
  • Veggie Lover’s Wrap: Toss in some diced bell peppers, shredded carrots, or spinach to add color and nutrients.
  • Avocado Twist: Incorporate mashed avocado into the tuna mixture for creaminess without the extra mayo.

Substitutions You Can Make

If you’re missing some ingredients or looking for healthier options, consider these substitutions:

  • Use Greek yogurt instead of mayonnaise for a lighter, protein-packed option.
  • Swap tuna for canned salmon or shredded chicken if you want a different flavor profile.
  • Whole grain or spinach tortillas can be a great alternative for a healthier wrap.

Equipment You’ll Need

Before you start cooking, gather the following equipment:

  • A mixing bowl for combining your ingredients.
  • A skillet for grilling the wraps.
  • A spatula for flipping the wraps.
  • A knife for slicing the finished product.

Storage and Freezing Tips

Got leftovers? Here’s how to store them:

  • Wrap any uneaten portions tightly in foil or plastic wrap and store them in the fridge for up to two days.
  • Reheat in a skillet over medium heat, in the air fryer at 380°F for 3-4 minutes, or in the microwave for a quick fix.
  • This wrap is best enjoyed fresh, but if you want to make it ahead of time, assemble the filling and store it separately from the tortillas, then put it together before grilling.

Frequently Asked Questions

Here are some common queries regarding the Sizzling Tuna Melt Wrap:

  • Can I make this wrap vegan? Absolutely! Substitute the tuna with chickpeas or a store-bought vegan tuna alternative, and use vegan mayonnaise and cheese.
  • Is this recipe kid-friendly? You bet! Kids love the gooey cheese and the fun of eating a wrap. You can even let them customize their own with their favorite ingredients!
  • How spicy is it? The heat level can easily be adjusted based on your preferences. Omit the mustard for a milder flavor or add extra spices for more kick.

Troubleshooting Common Issues

If you run into any hiccups while making your wraps, here are some solutions:

  • If the wraps are falling apart, make sure you’re not overstuffing them. A little filling goes a long way!
  • If the cheese isn’t melting as you’d like, lower the heat slightly and cover the skillet for a minute or two to help it along.
  • If the tortillas are tearing while you’re grilling, try warming them up slightly in the microwave before filling and folding.

Conclusion: Your Next Flavor Adventure Awaits

The Sizzling Tuna Melt Wrap is not just a recipe; it’s an invitation to explore the exciting world of cooking. With its bold flavors and endless customization options, this dish empowers you to get creative in the kitchen. Whether you’re preparing a quick lunch or impressing friends at a gathering, this wrap is sure to become a favorite. So grab your skillet, unleash your inner chef, and dive into this flavor adventure today! Don’t forget to share your creations with me—I can’t wait to see how you make this recipe your own!

TUNA MELT WRAP

Prep Time 10 minutes
Cook Time 8 minutes
Total Time 18 minutes
Servings 2 servings
Calories 430
A quick and delicious lunch option, these tuna melt wraps are crispy, cheesy, and packed with flavor.

Ingredients

Canned Goods

  • 1 can tuna, drained
  • 2 tablespoons mayonnaise
  • 1 tablespoon dijon mustard
  • 1/4 cup shredded cheese (cheddar or mozzarella)
  • 1/4 cup diced celery
  • 1/4 cup diced onion
  • to taste salt and pepper
  • 2 large tortillas
  • for grilling butter or oil

Instructions 

  • Mix tuna, mayonnaise, mustard, cheese, celery, onion, salt, and pepper.
  • Spread half of the mixture onto each tortilla and fold to form wraps.
  • Heat a skillet with butter or oil, then cook wraps seam-side down for 3-4 minutes until golden.
  • Flip and cook for another 3-4 minutes until cheese melts and sides are golden.
  • Slice in half and serve warm.

Notes

You can customize the cheese and add your favorite herbs for extra flavor.
Calories: 430kcal
Cost: $10
Course: Lunch
Cuisine: American
Keyword: Tuna

Nutrition

Calories: 430kcal | Carbohydrates: 30g | Protein: 30g | Fat: 20g | Sodium: 800mg

Loved this recipe? Save it to your favorite Pinterest board so you can easily find it later! It’s the perfect way to keep all your sweet ideas in one place. ✨

Eye-level shot of a Tuna Melt Wrap, emphasizing the texture and vibrant colors of the ingredients.

Why You’ll Love This Dish

When you think of a quick and nourishing meal, Easy Chicken Breast and Green Beans should be at the forefront of your mind. This dish is not just a meal; it’s an experience that marries simplicity with flavor. The tender chicken, kissed with just the right amount of seasoning, pairs beautifully with vibrant, crisp green beans that add a delightful crunch with every bite. It’s a meal that feels familiar yet invites you to dance with flavors and textures, making it a perfect choice for busy weeknights or a relaxed weekend dinner.

Imagine serving this dish to your family or guests, the aroma wafting through your kitchen, drawing them closer to the table. The best part? It all comes together on a single baking sheet, minimizing cleanup and maximizing flavor. This is not just cooking; it’s a celebration of what can be achieved with a few quality ingredients and a little creativity. So, let’s dive into the details of how to make this tantalizing dish that promises to ignite your culinary passion!

Ingredients You’ll Need

Before you begin your culinary adventure, gather the following ingredients:

  • 2 boneless, skinless chicken breasts
  • 1 pound fresh green beans, trimmed
  • 2 tablespoons olive oil
  • 2 cloves garlic, minced
  • Salt and pepper to taste
  • 1 teaspoon paprika (optional)
  • Lemon wedges for serving (optional)

Step-by-Step Instructions

Juicy chicken breast served with fresh green beans on a white plate.

Let’s get cooking! Follow these straightforward steps to create a dish that’s bursting with flavor:

  1. Preheat Your Oven: Start by preheating your oven to 400°F (200°C). This high heat is essential for getting that perfect roast on your chicken and green beans.
  2. Prepare the Chicken: Place the chicken breasts on a baking sheet and drizzle 1 tablespoon of olive oil over them. Season generously with salt, pepper, and paprika if you’re feeling adventurous.
  3. Toss the Green Beans: In a mixing bowl, toss the green beans with the remaining olive oil, minced garlic, salt, and pepper. This step infuses the beans with flavor and makes them shine in the oven.
  4. Arrange and Bake: Arrange the seasoned green beans around the chicken on the baking sheet. This allows them to soak up the chicken’s juices while they bake together. Place the baking sheet in the preheated oven.
  5. Cooking Time: Bake for 20-25 minutes or until the chicken is cooked through and the green beans are tender yet crisp. A meat thermometer should read 165°F (74°C) when the chicken is done.
  6. Serve: Once cooked, serve your Easy Chicken Breast and Green Beans with a squeeze of fresh lemon juice for an extra zing. Enjoy!

Tips for Perfecting Your Dish

While this recipe is simple, a few tips can elevate your dish to new heights:

  • Uniform Size: Ensure your chicken breasts are of similar size for even cooking. If they’re uneven, consider pounding them to a consistent thickness.
  • Don’t Overcrowd: Give your chicken and green beans room to breathe on the baking sheet. Overcrowding can lead to steaming rather than roasting, affecting the texture.
  • Freshness Matters: Always opt for fresh green beans, as they provide a bright flavor and a satisfying crunch. If you’re using frozen, be sure to thaw and drain them well.

Variations to Explore

Cooking should be an adventure! Here are some variations to try:

  • Add Heat: If you like a little kick, sprinkle some red pepper flakes over the chicken before baking or toss in some sliced jalapeños with the green beans.
  • Herb it Up: Fresh herbs like rosemary, thyme, or parsley can add an aromatic touch. Simply chop and sprinkle them over the chicken before baking.
  • Vegan Twist: Replace the chicken with firm tofu or tempeh, and marinate them in soy sauce or teriyaki sauce for a plant-based option.

Substitutions to Consider

Sometimes, you may not have all the ingredients on hand. Here are some substitutions:

  • Olive Oil: Feel free to use avocado oil or melted coconut oil instead.
  • Green Beans: Asparagus or broccoli can be great alternatives for a different flavor and texture.
  • Garlic: If you’re not a fan of garlic, you can omit it or replace it with garlic powder for a milder flavor.

Equipment You’ll Need

To create this meal, you’ll need the following equipment:

  • Baking sheet
  • Mixing bowl
  • Meat thermometer
  • Sharp knife and cutting board

Storage and Freezing Tips

This dish is perfect for meal prep! Here’s how to store and freeze it:

  • Refrigeration: Store leftovers in an airtight container in the refrigerator for up to 4 days. The flavors will only get better as they meld.
  • Freezing: Allow the dish to cool completely and transfer it to a freezer-safe container. It can be frozen for up to 3 months. Just know that the green beans may lose some crunch once thawed.
  • Reheating: Reheat leftovers in the microwave or on the stovetop. If the sauce thickens too much, add a splash of water or broth for a smoother consistency.

FAQs About Your Chicken and Green Beans

Why does my garlic turn brown too quickly when cooking?

Garlic can easily burn if added too early. It’s best to add it after the chicken has cooked for a few minutes, giving it just enough time to become fragrant without burning.

How do I prevent my sauce from being too runny?

Mix cornstarch with a bit of cold broth before adding it to the pan. This prevents lumps and helps achieve the desired thickness.

Why do my green beans sometimes turn out tough?

Overcooking can lead to tough green beans. Blanch them briefly before adding them to the baking sheet to ensure they remain tender-crisp.

Troubleshooting Common Issues

Even seasoned cooks encounter bumps along the road. Here are some common issues and how to overcome them:

  • Chicken Not Cooking Evenly: If your chicken pieces vary in size, they may cook unevenly. Consider cutting them into smaller, uniform chunks for consistent cooking.
  • Green Beans Overcooked: Monitor the green beans closely during baking. If you notice them becoming too soft, take them out of the oven a minute or two early.
  • Sauce Lumps: If your sauce turns lumpy, whisk it vigorously while cooking or blend it in a blender for a smooth consistency.

Conclusion

Your journey into the world of cooking with this Easy Chicken Breast and Green Beans recipe has only just begun! This dish isn’t just about nourishing the body; it’s about igniting a passion for cooking that can transform your kitchen into a haven of creativity and flavor. With each bite, you’re not just tasting a meal; you’re savoring the love and care that went into preparing it.

So grab your apron, put on your favorite tunes, and let the sizzle and spice of this dish inspire you to explore even more culinary adventures. Cooking is about experimenting, making mistakes, and ultimately discovering the joy of sharing a meal with those you love. Now, go forth and embrace the thrill of cooking with heat! Your taste buds will thank you.

Easy Chicken Breast and Green Beans

Prep Time 10 minutes
Cook Time 25 minutes
Total Time 35 minutes
Servings 4 servings
Calories 350
A quick and healthy dish featuring tender chicken breasts roasted with fresh green beans, perfect for a nutritious weeknight dinner.

Ingredients

Protein

  • 2 pieces boneless, skinless chicken breasts

Vegetables

  • 1 pound fresh green beans, trimmed

Fats & Oils

  • 2 tablespoons olive oil

Aromatics & Seasonings

  • 2 cloves garlic, minced
  • to taste salt and pepper
  • 1 teaspoon paprika (optional)

For Serving

  • as desired lemon wedges (optional)

Instructions 

  • Preheat oven to 400°F (200°C).
  • Place chicken on a baking sheet, drizzle with 1 tablespoon olive oil, and season with salt, pepper, and paprika.
  • Toss green beans with remaining olive oil, garlic, salt, and pepper.
  • Arrange green beans around chicken and bake for 20-25 minutes until cooked and tender.
  • Serve with lemon wedges if desired.

Notes

Ensure chicken is cooked through for safety.
Calories: 350kcal
Cost: $15
Course: Main Course
Cuisine: American
Keyword: chicken, Green Beans, healthy

Nutrition

Calories: 350kcal | Carbohydrates: 15g | Protein: 45g | Fat: 10g | Sodium: 400mg

Loved this recipe? Save it to your favorite Pinterest board so you can easily find it later! It’s the perfect way to keep all your sweet ideas in one place. ✨

Eye-level photo of Easy Chicken Breast and green beans, showcasing texture and color.

Welcome to a culinary experience that will transform your mornings from mundane to magnificent! This Breakfast Casserole isn’t just a dish; it’s an exciting journey into the world of flavors where lean turkey sausage meets vibrant vegetables, making it the perfect choice for those embracing the Weight Watchers Freestyle program. Get ready to kickstart your day with a hearty meal that’s not only delicious but also packed with nutrition. Let’s dive into why this recipe is truly a game-changer!

Why You’ll Love This Recipe

  • Time-Saver: Prep this casserole in under 15 minutes, and let the oven do the hard work while you sip your coffee.
  • Flavor Explosion: The combination of spices and fresh ingredients delivers a taste that dances on your palate.
  • Weight Watchers Friendly: With low points, you can enjoy a satisfying meal without guilt.
  • Versatile Dish: Customize it with your favorite veggies or proteins for a new twist every time.
  • Great for Meal Prep: Make it ahead of time and simply reheat for an easy breakfast throughout the week.

Ingredient Breakdown

Let’s explore the ingredients that make this Breakfast Casserole a must-try!

  • 6 Jennie-O lean turkey breakfast sausage links: A lean option that adds protein and flavor without excess fat.
  • 6 eggs: The base for a fluffy texture. If you’re looking for alternatives, egg whites or a flaxseed mixture can be used.
  • 1/2 cup skim milk: For that creamy consistency. Unsweetened almond milk is a great substitute.
  • 2 cups frozen hash browns: Use cubed hash browns for more texture; sweet potatoes can be a nutritious alternative.
  • 1/2 green pepper, chopped: Adds freshness and crunch. Feel free to swap for red or yellow peppers.
  • 1/2 onion, chopped: A flavor powerhouse; shallots can be used for a milder taste.
  • 1/2 cup reduced fat cheddar cheese: Melts perfectly into the casserole. Try pepper jack for a little heat!
  • Salt and pepper to taste: Essential for seasoning, but don’t hesitate to experiment with your favorite spices!

Pro Tips for Success

  • Brown Your Sausage: Ensure that you cook the sausage until browned for maximum flavor.
  • Mix Well: When combining the hash browns, veggies, and cheese, make sure everything is well distributed for even cooking.
  • Check for Doneness: The casserole should be set in the center. If it jiggles, give it a few more minutes in the oven.
  • Let It Rest: Allow the casserole to sit for about 5 minutes after baking. This helps it set and makes serving easier.
  • Experiment with Cheese: Try different cheeses like feta or mozzarella for unique flavor profiles.
  • Spice It Up: Add some red pepper flakes or hot sauce to the egg mixture for a kick!
  • Use Fresh Herbs: Sprinkle fresh parsley or cilantro on top before serving for a burst of freshness.
  • Make It Your Own: Don’t be afraid to change the ingredients based on what you have on hand or what you love.

Common Mistakes and Troubleshooting

A delicious breakfast casserole featuring turkey sausage, hash browns, and vibrant vegetables.

Even the best chefs make mistakes! Here are some potential pitfalls and how to avoid them:

  • Underbaking: If you find your casserole is still liquid in the middle, it needs more time in the oven. Keep an eye on it!
  • Overbaking: If it’s too dry, reduce the baking time slightly next time.
  • Ingredient Substitution: If you substitute too many ingredients, you may compromise the texture. Stick to one or two changes at a time.

Delicious Variations

Get creative in the kitchen! Here are some variations of this Breakfast Casserole to keep your taste buds excited:

  • Southwestern Casserole: Add black beans, corn, and diced tomatoes with green chilies for a spicy twist.
  • Italian Style: Incorporate Italian sausage, spinach, and sun-dried tomatoes for a Mediterranean flair.
  • Veggie Lover’s Delight: Load it up with your favorite vegetables like zucchini, mushrooms, and asparagus.
  • Meat Lovers: Add bacon or ham for a heartier version that satisfies the carnivores!

Storage and Make-Ahead Instructions

Planning ahead? Here’s how to store and prepare your casserole for future breakfasts:

  • Refrigeration: Store leftovers in an airtight container in the fridge for up to 4 days.
  • Freezing: Freeze portions in freezer-safe bags for up to 3 months. Just thaw overnight in the fridge before reheating!
  • Reheating: Microwave or bake in the oven at 350°F until heated through. Cover with foil to prevent drying out.

Frequently Asked Questions (FAQs)

  • Can I make this casserole vegetarian? Absolutely! Simply omit the sausage and add more vegetables or plant-based protein.
  • What if I don’t have frozen hash browns? Freshly grated potatoes work just as well; just make sure to squeeze out excess moisture.
  • How can I adjust the recipe for more servings? Simply double the ingredients and use a larger baking dish.
  • Can I use egg substitutes? Yes, egg substitutes or flax eggs can be used for a vegan option.
  • Is this casserole gluten-free? Yes, as long as you ensure your hash browns and any additional ingredients are gluten-free.
  • What’s the best way to serve this casserole? This dish pairs wonderfully with a fresh fruit salad or a side of avocado slices.
  • Can I add more cheese? Go for it! Cheese lovers can never have too much cheese.
  • How long does it take to bake? Bake for about 60 minutes, or until the center is set.

Nutritional Tips and Dietary Adaptations

Eating well doesn’t mean sacrificing flavor! Here are some tips to keep your breakfast healthy and aligned with your dietary needs:

  • Low-Calorie Options: Use egg whites and lean turkey sausage to reduce calories.
  • Increase Fiber: Add chopped spinach or kale for an extra boost of nutrition.
  • Watch Your Sodium: Use low-sodium cheese and sausage to keep salt levels in check.

Equipment Recommendations

Here’s what you’ll need to make this incredible Breakfast Casserole:

  • 8×8 Baking Dish: Perfect for the quantity of this recipe.
  • Mixing Bowls: To combine all your ingredients seamlessly.
  • Frying Pan: For browning the sausage before mixing.
  • Whisk: Essential for mixing eggs and milk smoothly.

Serving Suggestions

Enhance your Breakfast Casserole experience with these serving ideas:

  • Fresh Herbs: A sprinkle of cilantro or parsley adds a pop of color and flavor.
  • Hot Sauce: A drizzle of your favorite hot sauce can elevate the dish to new heights.
  • Side Dishes: Pair it with a flavorful fruit salad or a light yogurt for a balanced meal.

Ready to Spice Up Your Mornings?

Cooking is an adventure, and this Breakfast Casserole is just the beginning! I encourage you to embrace the thrill of experimenting with flavors and spices. Remember, food is not merely about sustenance; it’s about crafting stories and creating memories around the table. So grab your skillet, gather your ingredients, and let’s make every breakfast a culinary adventure!

Breakfast Casserole - Weight Watchers Freestyle

Prep Time 10 minutes
Cook Time 1 hour
Total Time 1 hour 10 minutes
Servings 4 servings
Calories 350
A delicious and healthy breakfast casserole perfect for meal prep and family mornings.

Ingredients

Meat

  • 6 links Jennie-O lean turkey breakfast sausage links
  • 6 eggs eggs
  • 1/2 cup skim milk
  • 2 cups frozen hash browns (cubed)
  • 1/2 green pepper green pepper, chopped
  • 1/2 onion onion, chopped
  • 1/2 cup reduced fat cheddar cheese

Seasonings

  • to taste salt and pepper

Instructions 

  • Preheat oven to 350°F (175°C).
  • Remove sausage casings, break up, and brown in a pan.
  • Whisk eggs, milk, salt, and pepper in a bowl.
  • Mix hash browns, vegetables, sausage, and cheese in a bowl.
  • Layer mixture in a sprayed 8×8 pan, pour egg mixture on top, and bake for 60 minutes.

Notes

For a lower sodium option, reduce added salt.
Calories: 350kcal
Cost: $15
Course: Breakfast
Cuisine: American
Keyword: turkey sausage

Nutrition

Calories: 350kcal | Carbohydrates: 20g | Protein: 30g | Fat: 18g | Sodium: 600mg