Author

Avery Collins

Browsing

Why This Dish Will Ignite Your Culinary Passion

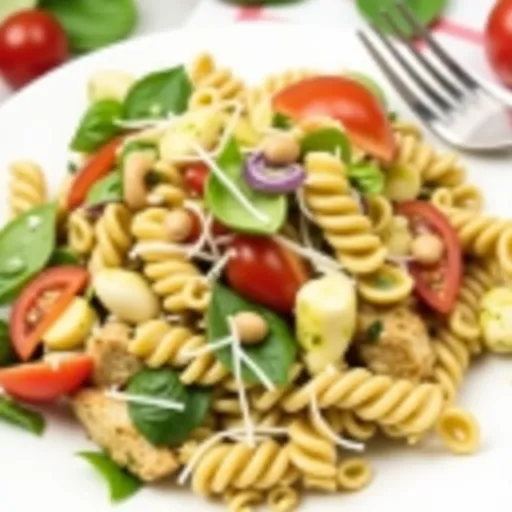
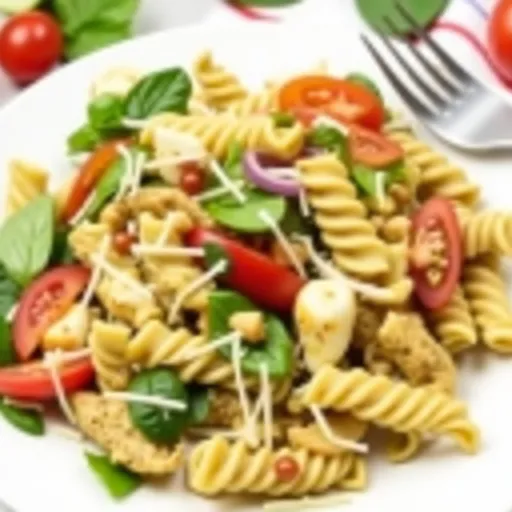
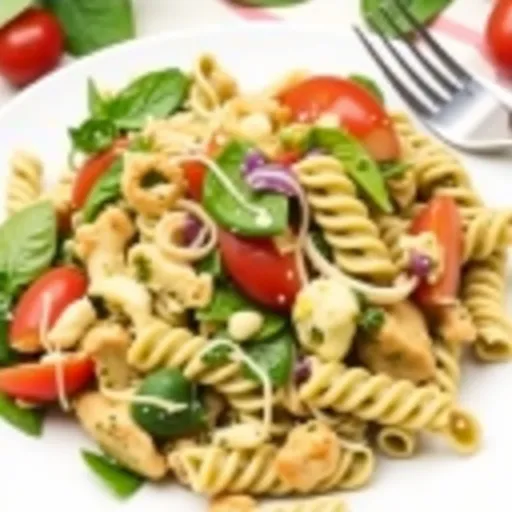
Let me take you on a flavor journey with my Chicken Pesto Pasta Salad, a dish that has become a staple in my kitchen and for good reason! This vibrant, colorful, and utterly delicious salad is not just a meal; it’s an invitation to explore the beautiful, bold world of cooking. It’s a dish that marries the zest of fresh basil pesto with tender chicken and a medley of textures from pasta, cheese, and tomatoes, creating a symphony of taste that dances on your palate.

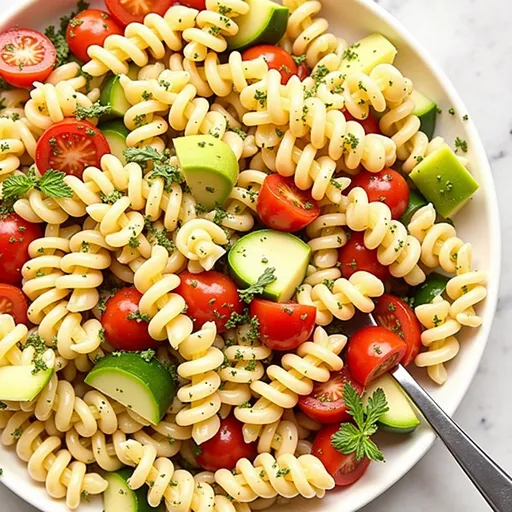
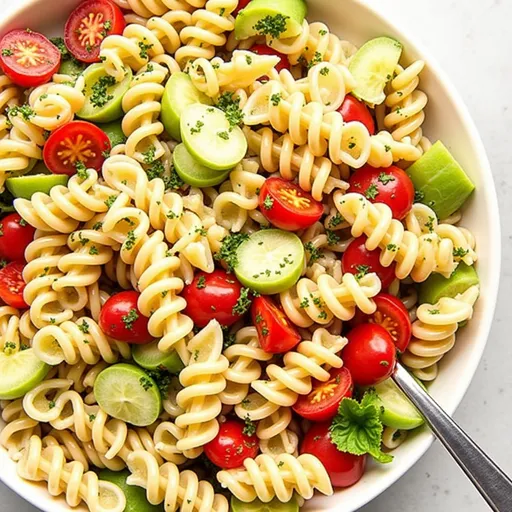
Imagine biting into the silky, herbaceous goodness of pesto swirling around perfectly cooked pasta, punctuated by the sweetness of cherry tomatoes and the creaminess of mozzarella. Each forkful is a reminder that cooking should be an adventure, and this Chicken Pesto Pasta Salad is your ticket to flavor-packed escapades!

Equipment You’ll Need

  • Large mixing bowl
  • Wooden spoon or spatula
  • Measuring cups
  • Knife and cutting board

Ingredients for a Flavor Explosion

A delicious Chicken Pesto Pasta Salad presented with fresh basil and colorful ingredients on a rustic table.

Gather these vibrant ingredients to create your own culinary masterpiece:

  • 2 cups cooked pasta (e.g., rotini or penne)
  • 1 cup cooked chicken breast, shredded or diced
  • 1/2 cup pesto sauce
  • 1 cup cherry tomatoes, halved
  • 1/2 cup mozzarella balls, halved
  • 1/4 cup grated parmesan cheese
  • 1/4 cup fresh basil leaves, chopped
  • Salt and pepper to taste
  • 1 tablespoon olive oil (optional)

Step-by-Step Instructions to Flavor Town

It’s time to roll up your sleeves and dive into this simple yet profoundly delicious recipe. Follow these steps for a salad that’s bound to impress!

  1. In a large mixing bowl, combine the cooked pasta and shredded chicken. Make sure the pasta is cooled, allowing it to absorb all the flavors to come!
  2. Add the pesto sauce and mix well until the pasta and chicken are evenly coated. Don’t be shy with that pesto — it’s the star of the show!
  3. Stir in the cherry tomatoes, mozzarella balls, and chopped basil. This is where the magic happens; the colors alone will make your heart sing!
  4. Sprinkle with grated Parmesan cheese, and season with salt and pepper to taste. Remember, seasoning is key!
  5. If desired, drizzle with olive oil for extra flavor and richness. It’s like a warm hug for your salad!
  6. Toss everything together gently until well combined. You want to keep those ingredients intact while ensuring every bite is bursting with flavor.
  7. Chill in the refrigerator for at least 30 minutes before serving for the best flavor. Trust me, your patience will be rewarded!

Tips for a Perfect Pasta Salad

  • Cook your pasta al dente: This will ensure your pasta maintains a nice bite and doesn’t become mushy when mixed with the other ingredients.
  • Use homemade pesto: If you have the time, whipping up your own pesto can elevate this salad to new heights! Fresh basil, garlic, and nuts blended with olive oil create a flavor that store-bought can’t compete with.
  • Let it chill: Allowing the salad to chill lets the flavors meld together beautifully. If you can, prepare it a few hours ahead of time or even the night before!

Variations to Spice It Up

Don’t be afraid to experiment! Here are some fun variations to add your personal touch:

  • Vegetarian Delight: Swap out the chicken for grilled vegetables or chickpeas for a hearty vegetarian option.
  • Cheesy Goodness: Try adding feta or goat cheese for a tangy twist.
  • Nutty Crunch: Toss in some pine nuts or walnuts for an extra crunch and nutty flavor.
  • Extra Heat: If you’re like me and love a little kick, add red pepper flakes or diced jalapeños for some spice!

Substitutions for Dietary Needs

Cooking should be accessible to everyone! Here are some substitutions for common dietary restrictions:

  • Gluten-Free: Use gluten-free pasta to make this dish suitable for those with gluten intolerance.
  • Dairy-Free: Substitute mozzarella and Parmesan with dairy-free cheese alternatives.
  • Low-Carb: Zucchini noodles or spaghetti squash can be a fantastic alternative to traditional pasta!

Storage and Freezing Tips

Want to make this dish ahead of time? Or have leftovers? Here’s how to store it:

  • Refrigerator: Store in an airtight container in the fridge for up to 3 days. The flavors will continue to develop, making it even tastier!
  • Freezing: While I recommend enjoying this salad fresh, you can freeze the chicken pesto mixture (sans pasta) for up to a month. Just thaw and mix with freshly cooked pasta when you’re ready to enjoy!

FAQs: Your Questions Answered

  • Can I use leftover chicken? Absolutely! Leftover rotisserie chicken works wonderfully in this recipe.
  • Is this salad good for meal prep? Yes! It’s perfect for meal prep and makes for a great lunch option throughout the week.
  • Can I add other vegetables? Definitely! Feel free to add bell peppers, cucumbers, or even arugula for added freshness.

Troubleshooting Common Issues

Here are some tips to troubleshoot common pasta salad problems:

  • Salad is too dry: Add a splash of olive oil or a bit more pesto to bring the flavors back to life!
  • Flavor is bland: Always taste and adjust the seasoning! A pinch of salt or a squeeze of lemon can elevate this dish dramatically.
  • Pasta is mushy: Make sure to cook your pasta al dente to prevent it from becoming mushy in the salad.

Conclusion: Your Next Flavor Adventure Awaits

And there you have it, folks! My Chicken Pesto Pasta Salad is not just a recipe; it’s an experience waiting to happen. Filled with fresh ingredients, vibrant flavors, and endless possibilities for customization, this dish is sure to excite your taste buds and become a favorite in your kitchen. So, grab your ingredients and let the adventure begin! Cooking is all about exploration, and with each bite of this salad, you’ll find yourself wanting to try new things and push the boundaries of flavor. So, what are you waiting for? Set the table, invite some friends, and let’s celebrate the joy of cooking with passion and a little bit of fire!

Chicken Pesto Pasta Salad (Easy, Fresh & Flavor-Packed)

Prep Time 10 minutes
Cook Time 10 minutes
Total Time 20 minutes
Servings 4 servings
Calories 450
A quick and delicious pasta salad combining tender chicken, fresh vegetables, and flavorful pesto for a satisfying meal or side dish.

Ingredients

Pasta and Chicken

  • 2 cups cooked pasta (rotini or penne)
  • 1 cup cooked chicken breast, shredded or diced
  • 1/2 cup pesto sauce
  • 1 cup cherry tomatoes, halved
  • 1/2 cup mozzarella balls, halved
  • 1/4 cup grated parmesan cheese
  • 1/4 cup fresh basil leaves, chopped
  • to taste salt and pepper
  • 1 tablespoon olive oil (optional)

Instructions 

  • Combine cooked pasta and shredded chicken in a large bowl.
  • Mix in pesto sauce until evenly coated.
  • Add cherry tomatoes, mozzarella, and basil; toss gently.
  • Sprinkle with Parmesan, season with salt and pepper.
  • Optional: drizzle with olive oil, then toss again.
  • Chill for 30 minutes before serving.

Notes

For extra flavor, add a squeeze of lemon or a sprinkle of red pepper flakes.
Calories: 450kcal
Cost: $15
Course: Salad
Cuisine: Italian
Keyword: pasta

Nutrition

Calories: 450kcal | Carbohydrates: 60g | Protein: 25g | Fat: 15g | Sodium: 600mg

Loved this recipe? Save it to your favorite Pinterest board so you can easily find it later! It’s the perfect way to keep all your sweet ideas in one place. ✨

An appetizing Chicken Pesto Pasta Salad with cooked chicken, pesto sauce, and a variety of fresh vegetables.

Why This Dish Will Be Your New Favorite

Picture this: you’re hosting a gathering, the air is filled with laughter, and your friends are all eagerly anticipating the next delicious bite. You’ve got a spread of snacks, but as the evening unfolds, there’s one dish that steals the spotlight—your Crockpot Crab Dip. This isn’t just any dip; it’s a luxurious blend of creamy goodness, savory crab, and a hint of zest that dances on your palate. With each scoop, you invite everyone to dive deep into the flavors, creating a memorable experience that keeps them coming back for more. If you’re on the hunt for easy dinner ideas keto or want to impress your guests with a dish that’s both simple and sophisticated, this recipe is your golden ticket.

Ingredients That Make Waves

To create this show-stopping dip, you won’t need to scour the globe for exotic ingredients. Instead, you’ll find everything you need right in your pantry, allowing you to whip up this masterpiece in no time. Here’s what you’ll need:

  • Cream cheese: The base of our dip, providing that rich, velvety texture.
  • Cheddar cheese: For a delightful sharpness that complements the creaminess.
  • Sour cream: Adds a tangy kick and makes the dip even creamier.
  • Spices: A mix of your favorites to elevate the flavor profile. Think garlic powder, onion powder, and maybe a hint of cayenne for those who like a bit of heat.
  • Lemon juice: Brightens up the whole dish, adding a refreshing zest that balances the richness.

How to Create Your Culinary Masterpiece

A warm and inviting Crockpot Crab Dip displayed with various ingredients nearby.

Ready to dive into the cooking process? It’s as simple as tossing everything into your slow cooker and letting the magic happen! Here’s how:

  1. In a large mixing bowl, combine the cream cheese, cheddar cheese, sour cream, and your choice of spices. Mix until well incorporated.
  2. Transfer the mixture to your slow cooker.
  3. Add a splash of lemon juice to brighten the flavors.
  4. Set your slow cooker on low for about 2 to 3 hours, stirring occasionally until everything is melted and bubbly.
  5. Once done, serve hot with your favorite dippers, like tortilla chips, fresh veggies, or even toasted baguette slices.

Tips for the Perfect Dip

To ensure your Crockpot Crab Dip is a hit, consider these tips:

  • Don’t Rush the Cooking: Slow cooking allows the flavors to meld beautifully. Resist the urge to crank up the heat!
  • Experiment with Spices: Feel free to adjust the spices based on your preference. A little smoked paprika can add depth, while fresh herbs can bring freshness.
  • Use Quality Crab Meat: For the best flavor, opt for lump crab meat. It’s worth the splurge!

Variations to Explore

Don’t hesitate to put your own twist on this dip! Here are some variations to consider:

  • Spicy Kick: Add diced jalapeños or a splash of hot sauce for a fiery version.
  • Herb Infusion: Incorporate fresh chives or dill for an aromatic touch.
  • Cheesy Delight: Swap out the cheddar for pepper jack for an extra cheesy, spicy dip.

Substitutions to Fit Your Needs

If you’re missing an ingredient or looking for alternatives, here’s what you can do:

  • Non-Dairy Option: Use vegan cream cheese and sour cream for a plant-based dip.
  • Different Cheeses: Try a blend of mozzarella and parmesan for a unique flavor profile.

Essential Equipment

To create this dip, you’ll need:

  • A Slow Cooker: The star of the show, allowing for hands-off cooking.
  • A Mixing Bowl: For combining your ingredients before they go into the cooker.
  • A Spatula: For stirring and serving the dip.

Storage and Freezing Tips

Made too much dip? No problem! Here’s how to store and freeze:

  • Refrigeration: Store leftovers in an airtight container in the fridge for up to 4 days.
  • Freezing: This dip can be frozen! Just make sure it’s in a freezer-safe container. Thaw overnight in the fridge before reheating.

Frequently Asked Questions

Curious minds often have questions! Here are some common ones:

  • Can I use fresh crab instead of canned? Absolutely! Just ensure it’s properly cooked and shredded.
  • How can I make it gluten-free? Serve with gluten-free dippers, and you’re good to go!

Troubleshooting Common Issues

If your dip isn’t turning out quite right, here are some quick fixes:

  • Too Thick: Add a splash of milk or additional sour cream to reach your desired consistency.
  • Not Flavorful Enough: A bit more lemon juice or a pinch of salt can elevate the taste.

Conclusion: Dive In!

Your Crockpot Crab Dip is more than just a recipe; it’s an invitation to create connections and share moments. Whether you’re throwing a party or having a cozy night in, this dip is sure to impress and delight. So, grab your slow cooker and let the flavors swirl—your taste buds are in for an adventure! Remember, cooking is about exploration and joy, so don’t be afraid to experiment and make it your own. Enjoy every bite, and let the fun begin!

Crockpot Crab Dip

Prep Time 10 minutes
Cook Time 2 hours
Total Time 2 hours 10 minutes
Servings 8 pieces
Calories 250
A creamy and flavorful crab dip perfect for parties, easily made in a slow cooker.

Ingredients

Dairy

  • 8 oz cream cheese
  • 1.5 cups cheddar (shredded)
  • 0.5 cup sour cream

Spices & Seasonings

  • 1 tsp spices (to taste)
  • 1 tsp lemon (juice)

Seafood

  • 1 cup crab meat (lump or shredded)

Instructions 

  • Add all ingredients into the slow cooker.
  • Stir to combine well.
  • Cook on low for 2 hours, stirring occasionally.
  • Serve warm with chips or bread.

Notes

For extra flavor, add chopped green onions or hot sauce.
Calories: 250kcal
Cost: $12
Course: Appetizer
Cuisine: American
Keyword: crab

Nutrition

Calories: 250kcal | Carbohydrates: 8g | Protein: 15g | Fat: 20g | Sodium: 600mg

Loved this recipe? Save it to your favorite Pinterest board so you can easily find it later! It’s the perfect way to keep all your sweet ideas in one place. ✨

A detailed shot of rich Crockpot Crab Dip with a creamy texture and spices visible.

Discover the Heart and Soul of Zucchini Casserole

Welcome, fellow food adventurers! Today, we’re diving into a dish that’s as warm as a Texas sunset and as comforting as a grandma’s hug: the Bisquick Zucchini Casserole. This recipe is a delightful fusion of fresh zucchini, savory cheeses, and aromatic herbs that transforms the humble vegetable into a standout dish that’s perfect for family gatherings or a cozy weeknight dinner. Get ready to embrace the flavors of summer and the comfort of home cooking!

Why You’ll Love This Recipe

Before we get our hands dirty, let’s talk about why this zucchini casserole is more than just a side dish:

  • Simple Ingredients: With just a handful of pantry staples like Bisquick and fresh zucchini, you can whip up a delicious meal in no time.
  • Versatile Dish: This casserole works as a hearty side or a main dish, making it perfect for any occasion.
  • Family-Friendly: Even picky eaters will be delighted with the cheesy goodness and flavorful spices that make every bite exciting.
  • Healthy and Wholesome: Packed with zucchini, this dish is a great way to sneak in some veggies without sacrificing taste.
  • Make-Ahead Friendly: Prep it in advance and pop it in the oven when you’re ready to eat—perfect for busy weeknights!

Ingredient Breakdown: What You Need to Make This Zucchini Casserole

Let’s gather our ingredients! Here’s what you’ll need:

  • 4 cups or 3 Medium Zucchini (Shredded): The star of our dish. Look for fresh, firm zucchinis for the best flavor.
  • 4 Large Eggs: These will bind everything together and add richness.
  • 1 cup Bisquick: This baking mix is the secret to achieving that fluffy texture.
  • ¼ cup Olive Oil: Adds moisture and enhances flavor.
  • 1 Onion (Chopped): For that aromatic base that makes your kitchen smell heavenly.
  • 1 cup Cheddar Cheese: Because cheese makes everything better! Feel free to use sharp or mild based on your preference.
  • ½ cup Parmesan Cheese: Adds a nutty depth and helps with browning.
  • 1 teaspoon Italian Seasoning: A blend of herbs that elevates the flavor profile.
  • Salt and Pepper (To Taste): Essential for balancing all the flavors.

Expert Substitutions

Side angle of a cheesy Bisquick Zucchini Casserole with a crisp top and chunks of zucchini peeking through.

If you’re missing some ingredients or want to make this dish your own, here are some clever substitutions:

  • Cheese Alternatives: Swap out cheddar for mozzarella or feta for a different flavor profile.
  • Gluten-Free Option: Use a gluten-free baking mix instead of Bisquick.
  • Vegetable Variations: Add in bell peppers, mushrooms, or spinach for extra nutrition and flavor.
  • Herb Swaps: Experiment with fresh herbs like basil or parsley for a burst of freshness.

Steps to Create Your Bisquick Zucchini Casserole

Now, let’s get cooking! Follow these simple steps to make your casserole:

  1. Preheat the oven to 350°F (175°C).
  2. Grease a 9×13-inch baking dish with cooking spray, ensuring it’s ready for the delicious mixture.
  3. Prepare your veggies: Grate the zucchini and chop the onions. Set them aside for later.
  4. Mix the wet ingredients: In a large bowl, combine the eggs, olive oil, and Bisquick until smooth.
  5. Add the veggies and cheese: Fold in the zucchini, onion, cheddar, parmesan, and Italian seasoning. Mix until well combined.
  6. Transfer to the dish: Pour the mixture into the prepared baking dish, spreading it evenly.
  7. Bake for 40 minutes, or until golden brown and set in the center.
  8. Cool and Serve: Let it rest for a few minutes before cutting into squares. Enjoy your masterpiece!

Pro Tips for the Perfect Casserole

To ensure your Bisquick Zucchini Casserole turns out perfectly every time, keep these expert insights in mind:

  • Grate Zucchini Properly: Use a box grater for even shreds. Too fine, and it may turn mushy; too thick, and it may not cook through.
  • Don’t Skip the Rest: Allow the casserole to cool slightly before cutting—it helps it hold its shape.
  • Experiment with Cheese: Try a mix of cheeses for a flavor explosion!
  • Check for Doneness: Insert a toothpick; if it comes out clean, it’s done!
  • Season Generously: Don’t be shy with the salt and pepper; they enhance the flavors significantly.
  • Layer Flavors: Consider sautéing the onions before adding them for a deeper, caramelized flavor.
  • Try Different Herbs: Fresh herbs can elevate the dish—experiment with thyme or oregano.
  • Use Fresh Ingredients: Fresh zucchini and quality cheese will make a noticeable difference in flavor.

Avoid These Common Mistakes

Even seasoned cooks can run into a few pitfalls. Here’s how to avoid common mistakes:

  • Overcrowding the Dish: If you add too many veggies, the casserole can become watery. Stick to the recommended amounts.
  • Not Mixing Enough: Ensure even distribution of ingredients for consistent flavor in every bite.
  • Baking at the Wrong Temperature: Make sure your oven is preheated; inconsistent temperatures can affect cooking times.
  • Skipping the Cool Down: Cutting too soon can lead to a mushy casserole. Patience is key!

Variations to Spice Up Your Casserole

Feeling adventurous? Here are some delicious variations to try:

  • Mexican-Inspired Casserole: Add diced jalapeños, corn, and a sprinkle of cumin for a spicy twist.
  • Italian Zucchini Bake: Incorporate marinara sauce and top with fresh basil and mozzarella.
  • Cheesy Broccoli Casserole: Mix in steamed broccoli florets for added nutrition and color.
  • Herbed Mushroom Casserole: Sauté mushrooms with garlic before adding them to the mix for an earthy flavor.

Storing Your Zucchini Casserole

Leftovers? No problem! Here’s how to store your casserole:

  • In the Fridge: Store covered in an airtight container for up to 3 days.
  • Freezing: Wrap individual portions in plastic wrap and then in foil. Freeze for up to 3 months.
  • Reheating: To reheat, thaw in the fridge overnight and then bake at 350°F until warmed through.

Frequently Asked Questions

Got questions? We’ve got answers! Here are some common inquiries about the Bisquick Zucchini Casserole:

  • Can I freeze this casserole? Yes! It freezes well. Just ensure it’s sealed properly.
  • How long does it last in the fridge? Up to 3 days in an airtight container.
  • Can I use other vegetables? Absolutely! Feel free to add or substitute your favorites.
  • Is there a gluten-free option? Yes, use a gluten-free baking mix instead of Bisquick.
  • How do I know when it’s done? The top should be golden brown, and a toothpick inserted in the center should come out clean.
  • What can I serve with this casserole? Pair it with a fresh salad or grilled chicken for a complete meal.
  • Can I add meat to this recipe? Yes! Cooked ground beef or sausage can be mixed in for added protein.
  • What’s the best way to reheat it? Bake at 350°F until heated through for best results.

Nutritional Insights and Dietary Adaptations

This casserole is not only delicious but also offers some nutritional benefits:

  • Rich in Vitamins: Zucchini is packed with vitamins A and C, promoting overall health.
  • High in Protein: The eggs and cheese provide a good source of protein, perfect for muscle repair and growth.
  • Low in Calories: This dish is relatively low in calories compared to many casseroles, making it a guilt-free indulgence.
  • Dairy-Free Option: Substitute the cheese with dairy-free alternatives to accommodate lactose intolerance.
  • Vegetarian-Friendly: This recipe is naturally vegetarian, making it suitable for various diets.

Essential Equipment You’ll Need

Before you start cooking, here’s a quick list of kitchen essentials:

  • 9×13-inch Baking Dish: Perfect size for this casserole.
  • Box Grater: For shredding zucchini.
  • Mixing Bowls: To combine your ingredients effortlessly.
  • Cooking Spray: For easy cleanup and to prevent sticking.

Serving Suggestions

Ready to serve? Here are some ideas to elevate your dining experience:

  • Garnish with Fresh Herbs: A sprinkle of parsley or basil adds a fresh touch.
  • Serve with a Side Salad: A crisp green salad pairs beautifully with the rich casserole.
  • Drizzle with Hot Sauce: For those who like a kick, hot sauce adds an exciting flavor layer.
  • Pair with Grilled Meats: This casserole complements grilled chicken or fish perfectly.

Final Thoughts: An Invitation to Spice Up Your Kitchen

And there you have it, my friends! A Bisquick Zucchini Casserole that’s not just a meal but a celebration of flavors and creativity. I invite you to embrace the adventure of cooking with spice and experimentation. Remember, every dish tells a story, and with this casserole, you’re writing a delicious chapter that your family will cherish. So grab your skillet, add a little fire to your food, and enjoy every bite of this flavorful journey. Happy cooking!

Bisquick Zucchini Casserole Recipe

Prep Time 15 minutes
Cook Time 40 minutes
Total Time 55 minutes
Servings 6 servings
Calories 250
A delicious and easy zucchini casserole perfect for a quick family dinner or meal prep.

Ingredients

Vegetables

  • 4 cups Shredded Zucchini (3 medium zucchinis shredded)
  • 1 cup Bisquick
  • 4 large Eggs
  • ¼ cup Olive Oil
  • 1 piece Onion (Chopped)
  • 1 cup Cheddar Cheese
  • ½ cup Parmesan Cheese
  • 1 teaspoon Italian Seasoning
  • to taste Salt and Pepper Salt and Pepper

Instructions 

  • Preheat oven to 350°F and grease a 9x13-inch dish.
  • Mix eggs, olive oil, and Bisquick in a bowl.
  • Add zucchini, onion, cheeses, and seasonings; mix well.
  • Pour into dish and bake for 40 minutes until golden.
  • Cool slightly, then cut into squares and serve.

Notes

For a creamier texture, add a splash of milk or cream before baking.
Calories: 250kcal
Cost: $12
Course: Main Course
Cuisine: American
Keyword: zucchini

Nutrition

Calories: 250kcal | Carbohydrates: 20g | Protein: 12g | Fat: 15g | Sodium: 400mg

Why You’ll Love These Irresistible Bars

Let’s talk about a culinary adventure that’s sweeter than a pop song on a warm day and just as satisfying as a perfectly executed flip in the air. These Banana Bars are more than just a snack; they’re a celebration of flavor and texture, a delightful way to transform overripe bananas into a treat that’ll have everyone coming back for more. Imagine the warm, rich aroma of baked goods wafting through your kitchen, an invitation that’s hard to resist. Each bite is soft, chewy, and just a little bit sweet, creating a balance that dances on your palate.

What makes these bars so special? They’re crafted with love, warmth, and just a touch of adventure. With only a handful of simple ingredients, you can whip up a batch that’s perfect for breakfast, snack time, or even as a lunchbox surprise. Let’s dive deeper into this recipe and explore how these bars can become a family favorite!

Ingredients You’ll Need

To embark on this baking journey, gather the following ingredients:

  • 2 ripe bananas, mashed
  • 1/2 cup sugar
  • 1/4 cup melted butter
  • 1 teaspoon vanilla extract
  • 1 egg, beaten
  • 1 cup all-purpose flour
  • 1/2 teaspoon baking soda
  • 1/2 teaspoon baking powder
  • 1/4 teaspoon salt
  • 1/2 teaspoon cinnamon (optional)
  • 1/2 cup chopped nuts or chocolate chips (optional)

Each ingredient plays a role in creating that deliciously sweet adventure. The ripe bananas are the stars of the show, bringing natural sweetness and moisture. The sugar adds just the right amount of sweetness, while the melted butter provides richness. Don’t forget the optional cinnamon, which adds a warm depth that pairs beautifully with bananas — it’s like a hug in a bar!

How to Make These Banana Bars

Warm banana bars with chunks of nuts, presented in soft natural light.

Ready to bring some magic to your kitchen? Follow these simple steps for banana bliss:

  1. Preheat the oven to 350°F (175°C) and grease a 9×9 inch baking pan. This will be the vessel for your delicious creation!
  2. In a large bowl, combine the mashed bananas, sugar, and melted butter. Don’t be shy; get in there and mix it up!
  3. Stir in the vanilla extract and beaten egg until well combined. This will add a lovely flavor that elevates your bars.
  4. In another bowl, whisk together the flour, baking soda, baking powder, salt, and optional cinnamon. This is where the magic of baking begins!
  5. Gradually add the dry ingredients to the banana mixture, stirring until just combined. Be careful not to overmix; we want those bars to be tender and fluffy.
  6. Fold in the nuts or chocolate chips if using. This is your chance to get creative! Imagine the joy of biting into a chocolate chip surprise.
  7. Pour the batter into the prepared baking pan and spread it evenly. This is where the anticipation begins!
  8. Bake for 20-25 minutes or until a toothpick inserted in the center comes out clean. Your kitchen will smell divine during this time!
  9. Allow to cool in the pan before cutting into bars and serving. Patience is a virtue, my friend!

Tips for Perfect Banana Bars

Here are some extra nuggets of wisdom to ensure your baking adventure goes off without a hitch:

  • Use Overripe Bananas: The riper the bananas, the sweeter and more flavorful your bars will be. Look for bananas with brown spots — they’re perfect!
  • Don’t Overmix: Just mix until the ingredients are combined. Overmixing can lead to dense bars instead of the light, fluffy texture we want.
  • Check for Doneness: Ovens vary, so keep an eye on your bars. If they start to brown too quickly, cover them with aluminum foil.

Variations to Spice Things Up

Feeling adventurous? Here are some variations to take your banana bars to the next level:

  • Nutty Delight: Add chopped walnuts or pecans for an extra crunch.
  • Choco-Banana Bliss: Use dark chocolate chips instead of regular for a richer flavor.
  • Fruit Fusion: Incorporate dried fruits like cranberries or apricots for a different texture and flavor.
  • Spiced Up: Add a pinch of nutmeg or ginger for a warming spice kick.

Substitutions You Can Make

Cooking is all about creativity! Here are some substitutions in case you’re missing an ingredient:

  • Butter: Use coconut oil or applesauce for a dairy-free option.
  • Flour: Whole wheat flour or gluten-free flour blends can be used for a healthier twist.
  • Sugar: Honey or maple syrup can be substituted for sugar if you prefer a natural sweetener.

Equipment You’ll Need

Before you start, make sure you have the right tools on hand:

  • 9×9 inch baking pan
  • Mixing bowls (large and medium)
  • Whisk
  • Spatula
  • Measuring cups and spoons
  • Toothpick (for testing doneness)

Storing and Freezing Your Banana Bars

These bars are not just a one-time treat! Here’s how to store them:

  • Room Temperature: Keep them in an airtight container for up to 3 days.
  • Refrigerator: They can last up to a week when stored in the fridge.
  • Freezing: Wrap individual bars in plastic wrap or aluminum foil and freeze for up to 3 months. Thaw at room temperature or reheat in the microwave for a quick snack.

Common Questions About Banana Bars

Can I make these bars gluten-free?

Absolutely! Simply substitute the all-purpose flour with a gluten-free flour blend, and you’re good to go!

How ripe should the bananas be?

The riper, the better! Look for bananas with lots of brown spots — they’ll provide the best flavor and sweetness.

Can I make them nut-free?

Yes! Just omit the nuts or chocolate chips, or replace them with seeds like sunflower seeds for a delightful crunch.

More Healthy Snack Ideas for Kids

If your family loves these banana bars, they might enjoy these other healthy snacks:

Conclusion: Embrace the Sweet Adventure!

These Banana Bars are more than just a recipe — they’re an invitation to explore the kitchen, experiment with flavors, and share something delicious with your loved ones. They remind us that cooking can be a joyous adventure, filled with creativity and discovery. So, grab those ripe bananas, put on your apron, and let your culinary spirit soar! Whether you’re making them for yourself, your kids, or a gathering of friends, these bars are sure to bring smiles and satisfaction. Happy baking, and remember — every great dish starts with a bold spark of inspiration!

Banana Bars | Easy Snack Recipe

Prep Time 10 minutes
Cook Time 25 minutes
Total Time 35 minutes
Servings 9 bars
Calories 180
Delicious and moist banana bars perfect for a quick snack or dessert. Simple to make with ripe bananas and optional mix-ins.

Ingredients

Fruits

  • 2 pieces ripe bananas, mashed
  • 1/2 cup sugar
  • 1/4 cup melted butter
  • 1 teaspoon vanilla extract
  • 1 egg beaten egg
  • 1 cup all-purpose flour
  • 1/2 teaspoon baking soda
  • 1/2 teaspoon baking powder
  • 1/4 teaspoon salt
  • 1/2 teaspoon cinnamon (optional)
  • 1/2 cup chopped nuts or chocolate chips (optional)

Instructions 

  • Preheat oven to 350°F (175°C). Grease a 9x9 inch pan.
  • Mix mashed bananas, sugar, and melted butter in a bowl.
  • Add vanilla and beaten egg; stir until combined.
  • Whisk together flour, baking soda, baking powder, salt, and cinnamon.
  • Combine dry ingredients with banana mixture; fold in nuts or chips if using.
  • Pour batter into pan, bake 20-25 mins. Cool before cutting.

Notes

For extra flavor, add a dash of cinnamon or mix in chocolate chips.
Calories: 180kcal
Cost: $10
Course: Snack
Cuisine: American
Keyword: Banana

Nutrition

Calories: 180kcal | Carbohydrates: 30g | Protein: 3g | Fat: 7g | Sodium: 150mg

Loved this recipe? Save it to your favorite Pinterest board so you can easily find it later! It’s the perfect way to keep all your sweet ideas in one place. ✨

A slice of moist banana bars with a blurred cozy background, highlighting their appeal.

Why You’ll Love These Portobello Mushroom Pizzas

If you’re looking to elevate your pizza night, then let me introduce you to a game-changer: Portobello Mushroom Pizzas! These delightful creations are not only quick and easy to make, but they also pack a punch of flavor that will satisfy your cravings without the guilt of traditional pizza. Imagine the hearty, umami-rich texture of portobello mushrooms serving as the base for your favorite toppings, melding together in a melty, cheesy masterpiece. In just 30 minutes, you can whip up a dish that’s not only delicious but also packed with nutrients. Plus, they’re perfect for those following a low-carb lifestyle or anyone looking to switch things up in the kitchen!

A Culinary Journey with Portobello Mushrooms

Growing up in San Antonio, I learned that every ingredient has its story. The portobello mushroom, with its deep, earthy flavor and meaty texture, is a beautiful testament to nature’s artistry. It’s not just a vegetable; it’s a canvas waiting to be painted with vibrant colors and bold flavors. When I first experimented with portobellos as a pizza base, it felt like unlocking a door to a new culinary world. Each bite is a celebration of flavors; the savory mushrooms harmonize with the tomato sauce, melty cheeses, and your favorite toppings, creating a dish that is both satisfying and exciting.

Gather Your Ingredients

Delicious baked Portobello mushroom pizzas with melted cheese and fresh basil.

To create these amazing Portobello Mushroom Pizzas, you’ll need just a handful of ingredients, many of which you might already have in your kitchen. Here’s what to gather:

  • 4 large portobello mushroom caps, stems removed
  • 1 tablespoon olive oil
  • Salt and pepper to taste
  • 1/2 cup low-sugar tomato sauce or pizza sauce
  • 1 cup shredded mozzarella cheese
  • 1/4 cup grated parmesan cheese
  • Your favorite low-carb toppings (e.g., sliced bell peppers, onions, olives, cooked sausage)
  • Fresh basil leaves for garnish

With these simple ingredients, you’re well on your way to creating a delicious meal that is as beautiful as it is tasty.

Step-by-Step Guide to Making Portobello Mushroom Pizzas

Are you ready to dive into this flavor adventure? Let’s break down the process step-by-step to ensure you achieve pizza perfection!

Preparing the Mushrooms

First things first, preheat your oven to 400°F (200°C). This is where the magic happens! While your oven warms up, gently wipe the mushroom caps clean with a damp cloth. This method removes any dirt without damaging the delicate flesh of the mushrooms.

Brushing and Seasoning

Next, place the mushroom caps gill-side up on a baking sheet lined with parchment paper. Brush the tops and undersides of the mushroom caps lightly with olive oil. This not only adds flavor but also helps to crisp them up in the oven. Season generously with salt and pepper, allowing the mushrooms to soak in those flavors.

Pre-Baking the Caps

Now, pop those mushroom caps in the oven for 10 minutes. This step is crucial as it allows the mushrooms to release some moisture, ensuring your pizzas don’t turn soggy. After the timer beeps, take them out and get ready for the fun part!

Assembling Your Pizzas

Spoon the tomato sauce evenly inside each mushroom cap. Don’t be shy with it! Next, sprinkle a generous amount of shredded mozzarella and grated parmesan cheese over the sauce. This melty duo is what dreams are made of! Now, go wild with your toppings. Whether you prefer the crunch of bell peppers or the richness of cooked sausage, pile them on any way you like. The beauty of these pizzas is their versatility!

Baking to Perfection

Return the loaded mushroom caps to the oven and bake for another 10-15 minutes. You’re looking for that glorious moment when the cheese is melted and bubbly, and the mushrooms are tender yet intact. The aroma wafting through your kitchen will have your taste buds tingling with anticipation!

Garnishing and Serving

Once they’re out of the oven, don’t forget to garnish with fresh basil leaves for that pop of freshness. Serve immediately and watch everyone dive in. Trust me, they won’t be able to resist!

Tips for Perfect Portobello Mushroom Pizzas

Here are some insider tips to help you nail this recipe every single time:

  • Choose Fresh Mushrooms: Ensure your portobello mushrooms are fresh and firm. Avoid any that feel slimy or have dark spots.
  • Don’t Skip Pre-Baking: This step is essential for removing excess moisture and achieving a better texture.
  • Experiment with Toppings: Feel free to mix and match toppings. Try adding spinach, artichokes, or even pineapple for a twist!
  • Make It Your Own: For a spicy kick, sprinkle some red pepper flakes on top before serving.

Variations and Substitutions

While this recipe is fantastic as-is, don’t hesitate to switch things up! Here are some variations:

  • Cheese Lovers: Swap out mozzarella for gouda or fontina for a richer flavor.
  • Vegan Option: Use cashew cheese or nutritional yeast instead of dairy cheese for a vegan-friendly version.
  • Meat Lovers: Add cooked bacon or pepperoni slices for an extra hearty meal.

Equipment You’ll Need

Before you get started, make sure you have the following equipment on hand:

  • Baking sheet
  • Parchment paper
  • Brush for olive oil
  • Measuring cups and spoons
  • Mixing spoon

Storage and Freezing

If you have leftovers (which is rare because they’re so good!), store them in an airtight container in the refrigerator for up to 3 days. You can reheat them in the oven to maintain that delicious texture. If you want to freeze them, bake the pizzas, let them cool completely, then wrap them tightly in plastic wrap and foil. They’ll keep for about a month. Just pop them in the oven straight from the freezer when you’re ready to enjoy again!

Frequently Asked Questions

Can I use other types of mushrooms?
Yes! While portobello mushrooms are perfect for this recipe, you can also use large shiitake or even large button mushrooms.

How do I know when the mushrooms are cooked?
They’ll be tender and the cheese should be melted and bubbly. If the edges of the mushrooms start to brown slightly, that’s a good indicator too!

Are these pizzas gluten-free?
Absolutely! Since they use mushrooms instead of traditional crust, they’re naturally gluten-free.

Troubleshooting Common Issues

Mushrooms are soggy: This usually happens if they weren’t pre-baked long enough. Make sure to give them that 10-minute head start.

Cheese isn’t melting: If your cheese isn’t melting as expected, try using a different cheese or ensuring your oven is properly preheated.

Conclusion

There you have it, folks! A simple yet sensational way to enjoy pizza that’s bursting with flavor and creativity. These 30-Minute Portobello Mushroom Pizzas are not just a meal; they’re an experience, a celebration of what cooking is all about. So grab your mushrooms, unleash your culinary spirit, and embark on this scrumptious adventure. Don’t forget to share your delicious creations with me — I can’t wait to see what toppings you choose! Let’s keep the fire of cooking alive together!

Amazing 30-Minute Portobello Mushroom Pizzas

Prep Time 10 minutes
Cook Time 20 minutes
Total Time 30 minutes
Servings 4 pieces
Calories 250
Enjoy a quick and healthy pizza alternative with savory portobello mushrooms topped with cheese and your favorite low-carb toppings.

Ingredients

Portobello Mushrooms

  • 4 large portobello mushroom caps (stems removed)
  • 1 tablespoon olive oil
  • salt and pepper to taste salt and pepper
  • 1/2 cup low-sugar tomato sauce or pizza sauce
  • 1 cup shredded mozzarella cheese
  • 1/4 cup grated parmesan cheese
  • your favorite low-carb toppings (e.g., sliced bell peppers, onions, olives, cooked sausage) low-carb toppings
  • fresh basil leaves for garnish fresh basil leaves (for garnish)

Instructions 

  • Preheat oven to 400°F (200°C).
  • Clean mushroom caps, place gill-side up on a parchment-lined baking sheet, brush with olive oil, and season with salt and pepper.
  • Bake for 10 minutes to release moisture, then remove from oven.
  • Spread tomato sauce inside each mushroom, top with cheese, add toppings, and bake for another 10-15 minutes until cheese melts and mushrooms are tender.
  • Garnish with fresh basil and serve immediately.

Notes

Feel free to customize toppings for variety and flavor.
Calories: 250kcal
Cost: $15
Course: Main Course
Cuisine: American
Keyword: Low Carb, Pizza, Portobello Mushroom

Nutrition

Calories: 250kcal | Carbohydrates: 15g | Protein: 15g | Fat: 15g | Sodium: 600mg

Loved this recipe? Save it to your favorite Pinterest board so you can easily find it later! It’s the perfect way to keep all your sweet ideas in one place. ✨

Gourmet presentation of individual Portobello mushroom pizzas with vibrant toppings.

Transform Your Dinner with a Hearty Cabbage and Ground Beef Casserole

Welcome to the bold and flavorful world of Cabbage and Ground Beef Casserole! This dish isn’t just another recipe; it’s an invitation to a culinary adventure where savory ground beef meets tender cabbage in a delightful symphony of flavors. Whether you’re seeking comfort on a chilly evening or simply craving something hearty and nourishing, this casserole is your ticket to satisfaction. Let’s dive into the vibrant essence of this dish, where every bite tells a story and every ingredient plays a vital role.

Why You’ll Love This Recipe

This Cabbage and Ground Beef Casserole is not just a meal; it’s a celebration of flavors and textures that will keep you coming back for more. Here are five reasons why this recipe will steal the spotlight at your dinner table:

  • Comfort Food Classic: This dish encapsulates the essence of home-cooked meals, providing warmth and comfort in every bite.
  • Easy Preparation: With straightforward steps, you’ll have this casserole ready to bake in no time, making it perfect for busy weeknights.
  • Nutritious Ingredients: Packed with protein from the ground beef and vitamins from the cabbage, this casserole is as healthy as it is delicious.
  • Versatile Flavor Profile: Customize this dish to your liking by adding different spices or veggies, creating a unique twist every time.
  • Make-Ahead Friendly: Prep it in advance and simply bake when you’re ready to serve, allowing you to enjoy your time with family and friends.

Detailed Ingredient Breakdown

Let’s explore the key ingredients that make this casserole a winner, along with some handy substitutions:

  • Ground Beef: 1 lb of lean ground beef forms the hearty base. You can substitute with ground turkey or chicken for a lighter option.
  • Onion: 1/2 cup of chopped onion adds depth to the flavor. Shallots or leeks can also bring a different but delightful taste.
  • Brown Rice: 1/2 cup of brown rice serves as a filling agent. Quinoa or cauliflower rice can be used for a gluten-free alternative.
  • Tomato Sauce: 1 cup of tomato sauce enhances the dish’s moisture and flavor. You can swap it for diced tomatoes or marinara sauce.
  • Beef Bouillon: 1 1/2 tsp of beef bouillon enriches the taste. Vegetable bouillon is a great substitute for a vegetarian version.
  • Worcestershire Sauce: 1 tbsp adds a tangy punch. Soy sauce or tamari can work well for a similar effect.
  • Swiss Cheese: 6 oz of shredded Swiss cheese adds creaminess. Feel free to use cheddar or mozzarella for a different cheesy flavor.
  • Cabbage: 4 1/2 cups of coarsely chopped cabbage is the star of the show. Savoy or Napa cabbage can also be used for a twist.

Pro Tips for Perfect Cabbage and Ground Beef Casserole

Close-up view of a hearty cabbage and ground beef casserole, showcasing its rich ingredients.

To elevate your casserole game, consider these expert insights:

  • Layering is Key: Make sure to layer the ingredients properly for even cooking and flavor distribution.
  • Don’t Rush the Browning: Take your time to brown the meat and onions thoroughly; this adds a rich flavor base to the dish.
  • Adjust for Spice: Feel free to add red pepper flakes or cayenne for a kick that will wake up your taste buds.
  • Covering is Crucial: Bake the casserole covered initially to lock in moisture, then uncover for the last few minutes to melt the cheese perfectly.
  • Allow to Rest: Let the casserole sit for a few minutes after baking. This helps the flavors meld together beautifully.
  • Experiment with Herbs: Fresh or dried herbs like thyme, oregano, or basil can enhance the flavor profile significantly.
  • Perfect Pairings: Serve with crusty bread or a side salad to balance the meal.
  • Make it a Meal Prep Star: Double the recipe for easy lunches throughout the week!

Common Mistakes and Troubleshooting

Even the best chefs have their off days. Here are common pitfalls to avoid:

  • Overcooking the Cabbage: Cook until just tender; overcooked cabbage can become mushy and lose its vibrant flavor.
  • Insufficient Seasoning: Don’t shy away from seasoning your layers. Taste as you go to ensure your dish is flavorful.
  • Ignoring Texture: Ensure your rice is cooked just right—not too firm or too soft—so it complements the beef and cabbage.
  • Rushing the Bake: Allow the casserole to bake fully for the best results. Underbaking can leave the rice and cabbage raw.

Delicious Variations to Try

Feeling adventurous? Here are some delightful variations to switch things up:

  • Vegetarian Delight: Replace ground beef with lentils and add more vegetables like bell peppers and zucchini.
  • Spicy Southwest Twist: Add jalapeños and corn for a zesty kick, and top with pepper jack cheese.
  • Italian-Inspired: Mix in Italian sausage and season with Italian herbs, then top with mozzarella for a cheesy finish.
  • Asian Fusion: Incorporate soy sauce, sesame oil, and ginger for a unique flavor profile, topping with scallions.

Storage and Make-Ahead Instructions

This casserole is as easy to store as it is to make:

  • Refrigeration: Store leftover casserole in an airtight container in the fridge for up to 3 days.
  • Freezing: Freeze in portions for up to 3 months. Thaw overnight in the fridge before reheating.
  • Make-Ahead: Assemble the casserole a day in advance and bake it when ready to serve for a stress-free meal.

Comprehensive FAQ

Got questions? We’ve got answers!

  • Can I use a different meat? Absolutely! Ground turkey or chicken works well.
  • Is this dish gluten-free? Yes, if you use gluten-free rice and bouillon.
  • How do I make it spicier? Add hot sauce or chili flakes to the meat while browning.
  • Can I add more vegetables? Definitely! Carrots, peas, or even mushrooms can elevate the dish.
  • What if I don’t have Swiss cheese? Any melty cheese like cheddar or mozzarella will do.
  • How can I make it lower in calories? Opt for leaner ground meat and reduce the cheese.
  • How long does it take to bake? Bake for about 1.5 hours covered, then uncover to melt the cheese.
  • Can it be made in a slow cooker? Yes! Cook on low for 4-6 hours or high for 2-3 hours.

Nutrition Tips and Dietary Adaptations

This casserole can be tailored to fit various dietary needs:

  • Low-Carb Option: Substitute rice with cauliflower rice for a lower carb count.
  • High-Protein Boost: Add beans or lentils for additional protein without extra calories.
  • Vegetarian/Vegan Adaptation: Use plant-based ground meat and omit cheese or use vegan cheese.

Essential Equipment Recommendations

To nail this recipe, gather the following:

  • Large Skillet: For browning your meat and onions.
  • 9×13 Baking Dish: The perfect size for the casserole.
  • Wooden Spoon: For mixing and layering ingredients.
  • Sharp Knife and Cutting Board: Essential for chopping vegetables efficiently.

Serving Suggestions

Ready to plate? Here’s how to make it shine:

  • Garnish: Fresh parsley or chives can add a pop of color and flavor.
  • Side Dishes: Pair with a crisp green salad or garlic bread to balance the meal.
  • Drinks: Serve with a glass of red wine or a refreshing iced tea for the perfect complement.

So, there you have it! This Cabbage and Ground Beef Casserole is not just a recipe; it’s an experience. Whether you’re cooking for family, friends, or just yourself, this dish will ignite your passion for cooking and bring warmth to your table. Get ready to savor the flavors, and remember: cooking is all about embracing the adventure. Let the fire of creativity guide you, and most importantly, enjoy every delicious bite!

Cabbage and Ground Beef Casserole

Prep Time 15 minutes
Cook Time 1 hour 30 minutes
Total Time 1 hour 45 minutes
Servings 6 servings
Calories 650
A hearty casserole combining ground beef, cabbage, and rice, baked to perfection with cheesy topping.

Ingredients

Meat and Onion

  • 1 lb lean ground beef
  • 1/2 cup onion chopped

Rice

  • 1/2 cup brown rice

Sauces and Seasonings

  • 1 cup tomato sauce
  • 1 1/2 tsp beef bouillon
  • 1 tbsp Worcestershire sauce
  • 1 tsp sugar
  • 1/2 tsp dried dill
  • 3/4 cup water

Cabbage

  • 4 1/2 cup cabbage coarsely chopped

Cheese

  • 6 oz Swiss cheese shredded

Instructions 

  • Brown ground beef and chopped onion, season to taste.
  • Layer cabbage in greased 9x13 pan, sprinkle rice, then meat mixture.
  • Mix tomato sauce, bouillon, Worcestershire, sugar, dill, and water; pour over layers.
  • Bake covered at 350°F (175°C) for 1.5 hours, then sprinkle cheese and let melt.

Notes

Ensure rice is cooked through before baking for best texture.
Calories: 650kcal
Cost: $15
Course: Main Course
Cuisine: American
Keyword: beef, cabbage

Nutrition

Calories: 650kcal | Carbohydrates: 70g | Protein: 45g | Fat: 30g | Sodium: 900mg

Why You’ll Love This Italian Pasta Salad

When it comes to summer gatherings, potlucks, or a simple weeknight dinner, pasta salad is a quintessential dish that never fails to please. But this isn’t just any pasta salad; this is the The Best Pasta Salad With Italian Dressing. Picture a vibrant medley of fresh vegetables, tender pasta, and a tangy dressing that dances on your taste buds. It’s a celebration of flavors, colors, and textures, reflecting the heart of Italian cuisine. Let’s dive into the essence of this dish, its key ingredients, and how to bring it to life in your kitchen.

About This Recipe

As a chef who grew up amidst the rich culinary traditions of San Antonio, Texas, I’ve always believed that food is about connection — with culture, with family, and most importantly, with flavor. This Italian pasta salad is not just a recipe; it’s an experience. It’s about the crunch of fresh vegetables, the creaminess of mozzarella, and the zing of homemade Italian dressing. Each bite is a reminder that cooking should be fun, adventurous, and above all, delicious.

Key Ingredients

A bowl of pasta salad with cherry tomatoes, cucumbers, and olives, drizzled with Italian dressing.

For this pasta salad, the quality of your ingredients matters. Here’s what you’ll need:

  • 8 ounces of pasta: Fusilli or rotini are perfect for this dish. Their shapes are ideal for holding onto the dressing and the other ingredients.
  • 1 cup cherry tomatoes: Halved, these juicy gems add sweetness and color.
  • 1 cup cucumber: Diced for a refreshing crunch.
  • 1 bell pepper: Diced, for a pop of sweetness and color.
  • 1/2 red onion: Thinly sliced, to provide a bit of sharpness.
  • 1/2 cup black olives: Sliced, for a briny depth of flavor.
  • 1/2 cup mozzarella: Either mozzarella balls or cubed mozzarella, adding creamy goodness.
  • 1/4 cup grated parmesan cheese: For that rich, umami kick.
  • 1/2 cup Italian dressing: A good quality dressing or homemade for the best flavor.
  • Salt and pepper: To taste, because seasoning is key.
  • Fresh basil: For garnish, bringing a touch of freshness.

Instructions

Ready to get cooking? Here’s how to whip up this delightful salad:

  1. Cook the pasta according to package instructions until al dente. This usually means boiling it for about 8-10 minutes, but check your package for specifics.
  2. Once cooked, drain the pasta and rinse it under cold water to stop the cooking process and cool it down.
  3. In a large mixing bowl, combine the cooled pasta, cherry tomatoes, cucumber, bell pepper, red onion, black olives, and mozzarella.
  4. Pour the Italian dressing over the pasta salad and gently toss to coat all ingredients evenly.
  5. Add salt and pepper to taste, mixing well to ensure every bite is seasoned beautifully.
  6. For the best flavor, chill the salad in the refrigerator for at least 30 minutes before serving. This allows all the flavors to meld together.
  7. Before serving, garnish with fresh basil if desired, adding a burst of color and aroma.

Tips for the Perfect Pasta Salad

Here are some insider tips to elevate your pasta salad game:

  • For a better texture, slightly undercook your pasta by a minute or two. It will absorb the dressing without becoming mushy.
  • Experiment with different vegetables based on what’s in season or what you love. Bell peppers can be swapped for zucchini or carrots, and fresh herbs like parsley or oregano can add another layer of flavor.
  • If you’re a cheese lover, don’t hesitate to add more mozzarella or incorporate crumbled feta for a tangy twist.
  • Make your own Italian dressing for a fresher taste! Combine olive oil, red wine vinegar, a touch of honey, Italian seasoning, and minced garlic for a zesty homemade version.

Variations

This pasta salad is incredibly versatile. Here are a few variations to consider:

  • Protein Boost: Add grilled chicken, shrimp, or chickpeas to make it a heartier main dish.
  • Different Pasta Shapes: While fusilli and rotini are great, try penne or farfalle for a different look and texture.
  • Spicy Kick: Add sliced jalapeños or a sprinkle of red pepper flakes for a bit of heat.

Substitutions

If you’re missing some ingredients, don’t fret! Here are some easy substitutions:

  • Swap the cherry tomatoes for sun-dried tomatoes for an intense flavor.
  • Any type of olives can work in a pinch. Green olives or kalamata olives can add a different flavor profile.
  • Use any cheese you have on hand — gouda or cheddar can work well too!

Equipment You’ll Need

To prepare this dish, you’ll need:

  • A large pot for boiling pasta.
  • A strainer for draining the pasta.
  • A large mixing bowl for combining ingredients.
  • A cutting board and knife for chopping vegetables.
  • A whisk or jar for mixing your dressing if you decide to make it from scratch.

Storage and Freezing

Leftovers? No problem! Here’s how to store your Italian pasta salad:

  • Refrigerate it in an airtight container for up to 3-4 days. The flavors can continue to develop, but the pasta will absorb some of the dressing, so you may want to add a splash more before serving again.
  • This dish is not ideal for freezing, as the texture of the pasta and vegetables can become mushy when thawed.

FAQs

Got questions? Here are some answers to common queries:

  • Can I make this pasta salad ahead of time? Absolutely! In fact, it tastes even better after sitting in the fridge for a few hours or overnight.
  • Is this dish suitable for vegetarians? Yes! It’s completely vegetarian-friendly and can easily be made vegan by omitting the cheese.
  • Can I use gluten-free pasta? Yes! Gluten-free pasta works just as well, and it will still be delicious.

Troubleshooting

If you encounter any hiccups while making your pasta salad, here are some solutions:

  • Too dry: If your salad seems dry, add a little more dressing or a splash of olive oil to moisten it up.
  • Overly salty: If you accidentally oversalted, add more pasta or vegetables to balance it out.

Final Thoughts

Cooking is a journey, and this The Best Pasta Salad With Italian Dressing is a perfect stop along the way. It’s vibrant, flavorful, and oh-so-easy to prepare. Whether you’re serving it at a gathering or enjoying it as a quick lunch, this pasta salad will surely bring smiles and satisfaction. So grab your ingredients, put on your favorite cooking playlist, and let the magic happen. Food is not just about sustenance; it’s about connection, joy, and adventure. Enjoy every bite!

The Best Pasta Salad With Italian Dressing

Prep Time 15 minutes
Cook Time 10 minutes
Total Time 25 minutes
Servings 4 servings
Calories 350
A vibrant and easy-to-make pasta salad perfect for picnics and gatherings, bursting with fresh vegetables and flavorful Italian dressing.

Ingredients

Pasta

  • 8 ounces pasta (fusilli or rotini)

Vegetables and cheese

  • 1 cup cherry tomatoes, halved
  • 1 cup cucumber, diced
  • 1 diced bell pepper
  • 0.5 red onion red onion, thinly sliced
  • 0.5 cup black olives, sliced
  • 0.5 cup mozzarella balls or cubed mozzarella
  • 0.25 cup grated parmesan cheese
  • 0.5 cup italian dressing

Seasonings

  • to taste salt and pepper salt and pepper

Garnish

  • optional fresh basil fresh basil for garnish

Instructions 

  • Cook pasta until al dente, then rinse with cold water and drain.
  • Combine cooled pasta with cherry tomatoes, cucumber, bell pepper, red onion, olives, and mozzarella in a large bowl.
  • Pour Italian dressing over the mixture and toss gently to coat.
  • Add salt and pepper to taste, then chill for at least 30 minutes before serving.
  • Garnish with fresh basil if desired before serving.

Notes

For best flavor, let the salad chill to meld the flavors before serving.
Calories: 350kcal
Cost: $15
Course: Salad
Cuisine: Italian
Keyword: pasta

Nutrition

Calories: 350kcal | Carbohydrates: 50g | Protein: 14g | Fat: 12g | Sodium: 600mg

Loved this recipe? Save it to your favorite Pinterest board so you can easily find it later! It’s the perfect way to keep all your sweet ideas in one place. ✨

Detailed view of a delicious pasta salad, showcasing various fresh ingredients and a sprinkle of parmesan.

Why You’ll Love This Dish

Let me take you on a culinary journey with my Easy Coconut Chicken Rice Bowl. As someone who was raised amidst the vibrant spices and traditions of San Antonio, I’ve always believed that food should be an adventure—a thrilling invitation to explore flavors and textures. This dish is a testament to that philosophy, combining the creamy richness of coconut milk with tender chicken and colorful vegetables. Each bite is a tropical escape, transporting you to sun-kissed beaches, all from the comfort of your kitchen.

This bowl isn’t just about taste; it’s a celebration of simplicity and versatility. Ready in under 30 minutes, it’s perfect for busy weeknights or casual gatherings with friends. Plus, it’s easily customizable—whether you’re a meat lover, vegetarian, or just looking to add more veggies to your plate, this recipe is your canvas. So, roll up your sleeves and let’s dive into this flavor-packed adventure!

Ingredients You’ll Need

Here’s what you’ll need to create your own coconut chicken masterpiece:

  • 2 cups cooked jasmine rice
  • 1 pound boneless, skinless chicken thighs
  • 1 can (13.5 oz) coconut milk
  • 1 tablespoon soy sauce
  • 1 tablespoon olive oil
  • 2 cloves garlic, minced
  • 1 tablespoon ginger, grated
  • 1 teaspoon salt
  • 1/2 teaspoon black pepper
  • 1 cup mixed vegetables (e.g., bell peppers, peas, carrots)
  • Fresh cilantro for garnish
  • Lime wedges for serving

Step-by-Step Instructions

Delicious Easy Coconut Chicken Rice Bowl featuring tender chicken thighs and fresh cilantro.

Ready to get cooking? Follow these simple steps to whip up your coconut chicken rice bowl:

  1. Heat the Oil: In a large skillet, heat the olive oil over medium heat. Watch as it shimmers, signaling the perfect moment to start cooking.
  2. Saute Aromatics: Add the minced garlic and grated ginger to the skillet. Sauté for 1-2 minutes until aromatic, filling your kitchen with an irresistible scent.
  3. Cook the Chicken: Season the chicken thighs with salt and black pepper. Add them to the skillet, cooking for about 5-7 minutes on each side, until they’re golden brown and cooked through. Ensure the internal temperature reaches 165°F for safety.
  4. Add the Coconut Sauce: Pour in the coconut milk and soy sauce, stirring well to combine. This is where the magic happens! The sauce will start to bubble and thicken, enveloping the chicken in creamy goodness.
  5. Incorporate the Veggies: Toss in your mixed vegetables, letting them simmer for 5-10 minutes until tender and vibrant. This step is crucial for adding texture and nutrition to your bowl.
  6. Serve and Garnish: Spoon the coconut chicken mixture over a bed of fluffy jasmine rice. Garnish with fresh cilantro and serve with lime wedges for that zesty kick!

Expert Tips for Maximum Flavor

To elevate your dish, keep these tips in mind:

  • Choose Quality Chicken: I recommend using boneless, skinless chicken thighs for their tenderness and flavor. They hold up beautifully in the creamy sauce.
  • Fresh Ingredients: Whenever possible, use fresh garlic and ginger. They add a depth of flavor that dried versions simply can’t match.
  • Adjust the Heat: If you like a little kick, consider adding red pepper flakes or a splash of sriracha to the coconut sauce while it simmers.
  • Texture Matters: Don’t overcook your vegetables! You want them to be tender yet still vibrant and crunchy for the perfect contrast in your bowl.

Delicious Variations to Try

Your Easy Coconut Chicken Rice Bowl can be tailored to your preferences. Here are some delightful variations:

  • Seafood Twist: Swap the chicken for shrimp or scallops. They cook quickly and pair wonderfully with the coconut sauce.
  • Vegetarian Option: Replace chicken with firm tofu or chickpeas for a hearty, plant-based meal.
  • Cauliflower Rice: For a low-carb alternative, serve your coconut chicken over cauliflower rice instead of jasmine rice.
  • Extra Veggies: Feel free to add extra vegetables like snap peas, baby corn, or zucchini to amp up the nutritional value.

Storage and Freezing Tips

Got leftovers? Here’s how to store your coconut chicken rice bowl properly:

  • Refrigeration: Store leftovers in an airtight container in the fridge for up to 3 days. Reheat gently on the stovetop or in the microwave.
  • Freezing: For longer storage, freeze the bowl in a freezer-safe container for up to 3 months. When ready to enjoy, thaw it overnight in the fridge and reheat.

What to Serve with Your Bowl

This dish is a star on its own, but it pairs beautifully with:

  • Crispy Spring Rolls: Perfect for an appetizer, they add a delightful crunch to your meal.
  • Mango Salad: A refreshing salad with lime dressing enhances the tropical vibes.
  • Grilled Pineapple: The sweetness of grilled pineapple makes for a fantastic side dish that complements the savory chicken.

FAQs About Coconut Chicken Rice Bowl

Here are some common questions I get about this recipe:

  • Can I use chicken breast instead of thighs? Absolutely! Boneless, skinless chicken breasts work well too, just be careful not to overcook them.
  • What if my coconut sauce is too thin? If your sauce isn’t thickening as desired, mix a tablespoon of cornstarch with water and stir it into the sauce.
  • Is this dish gluten-free? Yes! Just substitute soy sauce with tamari or coconut aminos to keep it gluten-free.

Troubleshooting Common Issues

Let’s face it, sometimes cooking doesn’t go as planned. Here are a few tips to troubleshoot:

  • Too Salty: If your dish turns out too salty, add a splash of coconut milk or a squeeze of lime juice to balance the flavors.
  • Overcooked Chicken: If your chicken is dry, try adding a bit more coconut milk to the sauce to help keep it moist when reheating.

Conclusion: Embrace the Adventure!

Creating a bowl of Easy Coconut Chicken Rice is not just about following a recipe; it’s about embracing the adventure of cooking. It’s about the aromas that fill your kitchen, the vibrant colors that dance on your plate, and the joy of sharing a meal with loved ones. So whether you’re preparing this dish for a cozy dinner or a festive gathering, remember that the best ingredient is the love and passion you put into it. Now, grab your ingredients and get ready to savor every delicious bite. Happy cooking, amigos!

Easy Coconut Chicken Rice Bowl Recipe

Prep Time 10 minutes
Cook Time 20 minutes
Total Time 30 minutes
Servings 4 servings
Calories 550
A quick and flavorful dish combining tender chicken, coconut milk, and vegetables served over jasmine rice.

Ingredients

Main

  • 2 cups cooked jasmine rice
  • 1 pound boneless, skinless chicken thighs
  • 1 can (13.5 oz) coconut milk
  • 1 tablespoon soy sauce
  • 1 tablespoon olive oil
  • 2 cloves garlic, minced
  • 1 tablespoon ginger, grated
  • 1 teaspoon salt
  • 0.5 teaspoon black pepper
  • 1 cup mixed vegetables (e.g., bell peppers, peas, carrots)
  • to taste fresh cilantro for garnish
  • to taste lime wedges for serving

Instructions 

  • Heat olive oil in a skillet over medium heat.
  • Sauté garlic and ginger for 1-2 minutes until fragrant.
  • Season chicken with salt and pepper, then cook for 5-7 minutes per side until browned and cooked through.
  • Pour in coconut milk and soy sauce, add vegetables, and simmer for 5-10 minutes until sauce thickens and vegetables are tender.
  • Serve over jasmine rice, garnished with cilantro and lime wedges.

Notes

For extra flavor, add a dash of lime juice before serving.
Calories: 550kcal
Cost: $15
Course: Main Course
Cuisine: Asian
Keyword: chicken, coconut, Rice

Nutrition

Calories: 550kcal | Carbohydrates: 70g | Protein: 35g | Fat: 20g | Sodium: 900mg

Loved this recipe? Save it to your favorite Pinterest board so you can easily find it later! It’s the perfect way to keep all your sweet ideas in one place. ✨

Colorful bowl of jasmine rice topped with coconut chicken, mixed vegetables, and lime wedges.

Welcome to my kitchen, where comfort food meets culinary adventure! If you’re looking for a dish that brings warmth and joy to your dinner table, then you’ve landed in the right place. This Cheesy Broccoli Cauliflower Casserole is not just a recipe; it’s a celebration of flavor, texture, and the simple pleasures of home cooking. Bursting with creamy goodness and vibrant veggies, this casserole is perfect for cozy nights or festive gatherings. Let’s transform these humble ingredients into a heartwarming masterpiece that’s sure to spice up your weeknight dinners!

Why You’ll Love This Recipe

  • Comfort Food Classic: This dish combines creamy, cheesy sauce with crunchy breadcrumb topping, making it irresistible for any dinner table.
  • Family Friendly: Even the pickiest eaters in your household will be asking for seconds, ensuring you get those greens into their diet!
  • Quick and Easy: With minimal prep and cooking time, you can whip this up in no time, making it a go-to for busy weeknights.
  • Versatile Dish: Enjoy it as a main course or as a delightful side dish that pairs beautifully with any protein — chicken, beef, or fish!
  • Make-Ahead Friendly: You can prepare this casserole in advance and store it in the fridge or freezer, making it ideal for meal prepping.

Ingredients You’ll Need

Let’s break down our star cast of ingredients. Each component plays a vital role in crafting that perfect flavor profile. Here’s what you’ll need:

  • 1/2 head broccoli (large sized): A powerhouse of nutrients and vibrant color.
  • 1/2 head cauliflower (large sized): Adds a lovely texture and mild flavor, complementing the broccoli.
  • 1/2 can cream of mushroom soup: This adds creaminess and a rich umami flavor.
  • 1/2 cup mayonnaise: For that extra creaminess; light mayonnaise works fine too!
  • 2 cups shredded sharp cheddar cheese: The star of the show that brings all the flavors together with its rich, tangy taste.
  • 1 egg: Helps bind the ingredients together.
  • 1 sleeve Ritz crackers: For a crispy topping that adds texture and flavor.
  • 2 Tbsp butter: Melted, to drizzle over the cracker topping for that golden crunch.
  • Salt and pepper: To taste, enhancing all the flavors beautifully.

How to Make Cheesy Broccoli Cauliflower Casserole

Now that we have our ingredients, it’s time to dive into the cooking process! Follow these simple steps to create your delicious casserole:

  1. Preheat the oven: Set it to 350ºF (175ºC) to get it nice and hot.
  2. Prep the veggies: Rinse the broccoli and cauliflower, chopping them into bite-sized pieces. Boil them in a pot of water until tender, then drain in a colander and set aside.
  3. Prepare the casserole dish: Coat a casserole dish with non-stick cooking spray for easy cleanup later.
  4. Mix the base: In a large mixing bowl, crack the egg and lightly scramble it. Add the cream of mushroom soup and mayonnaise, mixing until well combined.
  5. Add the cheese: Stir in the shredded cheddar cheese, melding it into your creamy mixture.
  6. Combine veggies: Gently fold the cooked broccoli and cauliflower into the cheese mixture, ensuring everything is well-coated. Season with salt and pepper to taste.
  7. Transfer to the dish: Pour the mixture into the greased casserole dish, spreading it evenly.
  8. Top it off: Crush the Ritz crackers and sprinkle them over the casserole, distributing evenly for that crunchy topping.
  9. Melt the butter: In a microwave-safe dish, heat the butter for 30 seconds or until melted, then drizzle over the cracker topping.
  10. Bake: Place the casserole in the oven and bake for 30-35 minutes or until bubbly and golden brown on top.

Pro Tips for Making the Best Casserole

A detailed image showcasing a serving of cheesy broccoli and cauliflower casserole.
  • Don’t overcook the veggies: Aim for tender but still vibrant vegetables to ensure they hold their shape and color.
  • Experiment with cheese: Feel free to mix in other cheeses like mozzarella or Gruyère for a different flavor profile.
  • Add spices: Spice things up with a pinch of cayenne or smoked paprika — it’ll add a nice kick!
  • Let it rest: Allow the casserole to cool for about 10 minutes after baking; it makes serving easier and the flavors meld beautifully.
  • Mix-in options: Consider adding cooked chicken or ham for a heartier meal.
  • Use fresh herbs: Garnish with fresh parsley or chives for a pop of color and fresh flavor.
  • Batch cooking: Double the recipe and freeze half for a quick meal later on!
  • Tweaking the sauce: If you prefer a creamier texture, add more cream of mushroom soup, or even a splash of milk!

Common Mistakes and Troubleshooting

Even the best of us can run into hiccups in the kitchen. Here’s how to avoid common pitfalls:

  • Overcooking the casserole: Be cautious of baking times; every oven is different. Keep an eye on it to prevent burning.
  • Too dry: If your casserole turns out dry, it may have baked too long. Next time, check it earlier or add a little more sauce.
  • Flavorless dish: Don’t skimp on seasoning! Taste and adjust as you go for the best flavor.
  • Cracker topping too soggy: Ensure the crackers are evenly distributed and that the butter is properly melted and drizzled.

Variations to Try

One of the great things about this casserole is its versatility! Here are some fun variations:

  • Mexican Twist: Add diced jalapeños and swap cheddar for pepper jack cheese for a spicy kick.
  • Herbed Delight: Incorporate fresh thyme or rosemary into the mix for an aromatic twist.
  • Meat Lover’s: Toss in cooked bacon or sausage for an extra protein punch.
  • Veggie Medley: Mix in other vegetables like carrots, peas, or corn for added color and nutrition.

Storage and Make-Ahead Instructions

Planning ahead? This casserole can be prepared in advance:

  • Refrigerator: Assemble the casserole, cover tightly, and store in the fridge for up to 2 days before baking.
  • Freezer: You can freeze the unbaked casserole for up to 3 months. Just make sure to cover it well to prevent freezer burn.
  • Reheating: Bake from frozen at 375ºF (190ºC) for about 1 hour, or until heated through. If refrigerated, bake at 350ºF (175ºC) for 30-40 minutes.

Frequently Asked Questions

Here are some common questions about our Cheesy Broccoli Cauliflower Casserole:

  • Can I use fresh broccoli and cauliflower? Absolutely! Fresh veggies will work wonderfully; just make sure to steam them until tender.
  • What can I substitute for cream of mushroom soup? You can use cream of chicken soup or even a homemade white sauce for a different flavor.
  • Is this casserole gluten-free? To make it gluten-free, use gluten-free crackers or omit the topping altogether.
  • How can I make this dairy-free? Use dairy-free cheese and cream substitutes to enjoy a dairy-free version.
  • Can I add other vegetables? Yes! Feel free to incorporate your favorite veggies for additional nutrition and flavor.
  • How long will leftovers last? Store leftovers in an airtight container in the fridge for up to 3 days.
  • Can I double the recipe? Yes, simply double all ingredients and use a larger casserole dish.
  • What should I serve with this casserole? It pairs beautifully with grilled meats, salads, or fresh bread for a complete meal.

Nutrition Tips and Dietary Adaptations

For those conscious of their health, here are some tips:

  • Low-calorie option: Use low-fat cheese and mayonnaise to reduce calories without sacrificing flavor.
  • Incorporate whole grains: Use whole grain crackers for added fiber and nutrients.
  • Boost nutrition: Add cooked quinoa or brown rice to the mixture for a heartier dish.

Equipment Recommendations

To make your cooking experience smoother, here are a few must-have tools:

  • Casserole Dish: A sturdy glass or ceramic dish that can withstand the oven’s heat is essential.
  • Mixing Bowls: A set of various sizes for all your mixing needs will make preparation easy.
  • Cutting Board and Knife: A sharp knife and a solid cutting board will make chopping vegetables a breeze.
  • Measuring Cups and Spoons: Precision is key in cooking, so have these handy for accurate measuring.

Serving Suggestions

To elevate your dining experience, consider these serving ideas:

  • Garnish: Top with fresh herbs like parsley or chives for a pop of color and fresh flavor.
  • Pair with Protein: Serve alongside grilled chicken, steak, or fish for a balanced meal.
  • Add a Salad: A light, crisp salad can balance the richness of the casserole beautifully.

In conclusion, this Cheesy Broccoli Cauliflower Casserole is more than just a side dish; it’s an adventure that brings everyone together. With its creamy texture, cheesy goodness, and delightful crunch, it’s bound to become a family favorite. So grab your apron, unleash your inner chef, and get ready to embrace the thrill of cooking with fire! Whether you’re enjoying it on a cozy night in or serving it at your next gathering, this casserole is sure to warm hearts and fill bellies. Happy cooking!

Cheesy Broccoli Cauliflower Casserole

Prep Time 15 minutes
Cook Time 35 minutes
Total Time 50 minutes
Servings 6 servings
Calories 350
A creamy, cheesy casserole combining broccoli and cauliflower, topped with buttery Ritz crackers for a comforting meal.

Ingredients

Vegetables

  • 1/2 head broccoli (large sized)
  • 1/2 head cauliflower (large sized)
  • 1/2 can cream of mushroom soup
  • 1/2 cup mayonnaise (light is fine)
  • 2 cups shredded sharp cheddar cheese
  • 1 egg egg
  • 1 sleeve Ritz crackers
  • 2 Tbsp butter
  • to taste salt salt
  • to taste pepper pepper

Instructions 

  • Boil chopped broccoli and cauliflower until tender, then drain.
  • Mix egg, cream of mushroom soup, mayonnaise, cheese, salt, and pepper.
  • Combine cooked vegetables with the mixture and pour into a greased casserole dish.
  • Crush Ritz crackers, drizzle with melted butter, and sprinkle on top.
  • Bake at 350ºF for 30-35 minutes until bubbly and golden.

Notes

For a crunchier topping, broil for an additional 2 minutes.
Calories: 350kcal
Cost: $15
Course: Main Course
Cuisine: American
Keyword: casserole, Cheese, vegetables

Nutrition

Calories: 350kcal | Carbohydrates: 20g | Protein: 18g | Fat: 25g | Sodium: 600mg

Why You’ll Love This Chicken Avocado Melt

Let me tell you, when it comes to sandwiches, this Chicken Avocado Melt Sandwich is a game changer. Imagine biting into a crispy, golden exterior only to be greeted by a warm, creamy interior that sings with flavor. It’s a culinary hug on a plate! With every mouthful, you’re treated to the satisfying crunch of perfectly toasted bread, the luscious richness of ripe avocado, and the hearty goodness of well-seasoned chicken, all wrapped up with a gooey layer of melted cheese. Are you drooling yet?

This sandwich isn’t just any ordinary creation; it’s a celebration of textures and flavors. Whether you’re preparing a quick lunch, a cozy dinner, or even a brunch feast, this melt is versatile enough to shine in any setting. Plus, the cooling avocado perfectly balances the spicy kick from the chicken, making it an irresistible choice for spice lovers and comfort seekers alike.

The Magic of Ingredients

To craft this masterpiece, you only need a handful of ingredients. Let’s take a closer look at what makes this sandwich sing:

  • 2 slices of bread: Choose your favorite! Sourdough, whole grain, or even a hearty ciabatta will do wonders.
  • 1 cooked chicken breast: Shredded, juicy, and seasoned to perfection. Leftover rotisserie chicken works beautifully here.
  • 1 ripe avocado: Mashed to creamy perfection, adding richness and flavor.
  • 1/2 cup shredded cheese: Cheddar or mozzarella are top choices, but feel free to experiment!
  • 1 tablespoon mayonnaise: This adds a touch of creaminess and moisture.
  • Salt and pepper: Essential for seasoning.
  • Butter: For grilling, ensuring a golden brown crust.
  • Optional: Lettuce or tomato slices for added freshness and crunch.

How to Create Your Chicken Avocado Melt

A delicious Chicken Avocado Melt Sandwich featuring shredded chicken, creamy avocado, and cheese, beautifully plated.

Ready to dive in? Follow these simple steps to create a sandwich that’ll set your taste buds on fire:

Ingredients

Here’s what you’ll need:

  • 2 slices of bread (your choice)
  • 1 cooked chicken breast, shredded
  • 1 ripe avocado, mashed
  • 1/2 cup shredded cheese (cheddar or mozzarella)
  • 1 tablespoon mayonnaise
  • Salt and pepper to taste
  • Butter for grilling
  • Optional: lettuce or tomato slices

Instructions

  1. In a bowl, mix the shredded chicken, mashed avocado, mayonnaise, salt, and pepper until well combined.
  2. Spread the chicken and avocado mixture evenly on one slice of bread.
  3. Top with shredded cheese and optional lettuce or tomato slices.
  4. Place the second slice of bread on top to form a sandwich.
  5. Heat a skillet over medium heat and add butter.
  6. Once the butter is melted, place the sandwich in the skillet and grill until golden brown, about 3-4 minutes.
  7. Flip the sandwich and grill the other side until the cheese is melted and the bread is golden brown, about another 3-4 minutes.
  8. Remove from skillet, slice in half, and serve warm.

Tips & Tricks for the Perfect Melt

Ah, the art of sandwich making! Here are some insider tips to elevate your avocado melt experience:

  • Use Fresh Ingredients: The fresher your avocado and produce, the better your sandwich will taste. Look for ripe avocados that yield slightly when pressed.
  • Perfectly Cooked Chicken: If you’re using freshly cooked chicken, let it rest before shredding. This helps lock in the juices, keeping your sandwich moist.
  • Customize Your Cheese: Experiment with different cheeses. Pepper jack adds a spicy twist, while gouda offers a smoky flavor.
  • Crispy Bread: Don’t skimp on the butter! A good layer of butter will give you that irresistible crunch.
  • Avocado Tips: To prevent browning, squeeze a bit of lemon or lime juice on your mashed avocado.
  • Watch the Heat: Keep the skillet on medium heat. This ensures even cooking without burning the bread.
  • Panini Press: If you have one, it’s a great way to achieve a perfectly grilled sandwich every time!
  • Spice it Up: Add a dash of hot sauce or crushed red pepper flakes to the mayo for an extra kick.

Serving Suggestions

Now that you’ve crafted this beauty, how do you want to serve it? Here are some delicious ideas:

  • With a Side Salad: A fresh green salad with a light vinaigrette complements the richness of the sandwich perfectly.
  • Sweet Potato Fries: Baked sweet potato fries add a delightful crunch and sweetness.
  • Coleslaw: A tangy coleslaw provides a refreshing contrast to the creamy avocado.
  • Soup: Pair with a bowl of tomato or chicken soup for a comforting meal.
  • Potato Chips: Classic chips add that satisfying crunch alongside your sandwich.
  • Fresh Fruit: A side of juicy grapes or apple slices adds a refreshing touch.
  • Pasta Salad: A chilled pasta salad makes for a great side dish.
  • Roasted Vegetables: Serve with a side of seasonal roasted veggies for added nutrition.

Variations to Consider

This avocado melt sandwich is highly customizable! Here are a few variations to consider:

  • Spicy Southwest: Mix in some diced jalapeños or a sprinkle of taco seasoning to the chicken for a Southwest twist.
  • Italian Style: Add pesto and mozzarella, and grill with a sprinkle of Italian seasoning.
  • Veggie Delight: Load it up with extra veggies like spinach, roasted red peppers, or cucumbers for added crunch and nutrition.

Storage and Freezing

If you happen to have leftovers (which is rare!), here’s how to store them:

  • Refrigerator: Store any uneaten sandwiches in an airtight container for up to 2 days.
  • Freezing: It’s best to freeze the components separately. You can freeze the shredded chicken and avocado mixture, then assemble and grill the sandwich when ready to eat.

FAQs

What other seasonings can I use for the chicken?

Feel free to play with seasonings! Paprika, cumin, or Italian herbs can enhance the flavor of your chicken.

Can I use leftover chicken for this sandwich?

Absolutely! Leftover grilled or roasted chicken is perfect for this recipe. Just make sure it’s well-seasoned!

Can I add more vegetables to the sandwich?

You bet! Adding sliced bell peppers, cucumbers, or even pickled jalapeños can elevate your sandwich.

Conclusion

So there you have it — the Chicken Avocado Melt Sandwich is not just a meal; it’s an adventure. With its bold flavors and satisfying textures, it’s a dish that invites you to dive in, explore, and savor every bite. Whether you’re cooking for yourself or sharing with friends, this sandwich is sure to impress. So grab your ingredients, embrace your inner chef, and let this melt ignite your culinary passion. You deserve to enjoy food that excites your taste buds and warms your heart. Happy cooking!

Chicken Avocado Melt Sandwich

Prep Time 10 minutes
Cook Time 8 minutes
Total Time 18 minutes
Servings 2 servings
Calories 450
A delicious and easy-to-make grilled sandwich combining shredded chicken, creamy avocado, and melted cheese for a satisfying meal.

Ingredients

Bread

  • 2 slices bread (your choice)
  • 1 cup shredded cooked chicken
  • 1 ripe avocado ripe avocado, mashed
  • 0.5 cup shredded cheese (cheddar or mozzarella)
  • 1 tablespoon mayonnaise
  • to taste salt and pepper
  • for grilling butter
  • optional lettuce or tomato slices

Instructions 

  • Mix shredded chicken, mashed avocado, mayonnaise, salt, and pepper.
  • Spread mixture on one bread slice.
  • Add cheese and optional lettuce or tomato, then top with second bread slice.
  • Grill the sandwich in a buttered skillet until golden brown, about 3-4 minutes per side.
  • Remove, slice, and serve warm.

Notes

For extra flavor, add a dash of hot sauce or herbs.
Calories: 450kcal
Cost: $10
Course: Lunch
Cuisine: American
Keyword: Avocado, chicken, Sandwich

Nutrition

Calories: 450kcal | Carbohydrates: 40g | Protein: 35g | Fat: 20g | Sodium: 600mg

Loved this recipe? Save it to your favorite Pinterest board so you can easily find it later! It’s the perfect way to keep all your sweet ideas in one place. ✨

An inviting Chicken Avocado Melt Sandwich, showcasing golden toasted bread filled with chicken and avocado, expertly lit.