Author

Avery Collins

Browsing

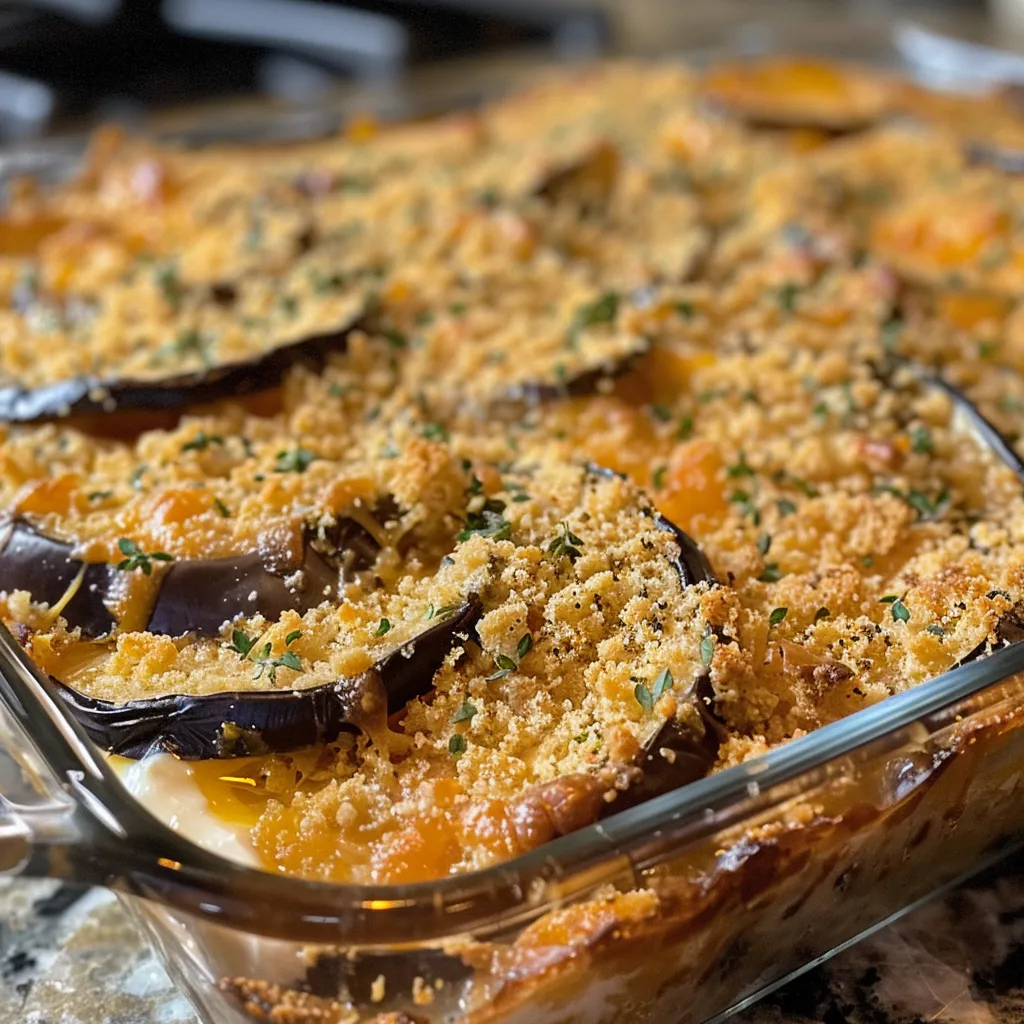
Ignite Your Culinary Adventure with Spaghetti Squash

Welcome to the vibrant world of spaghetti squash, where comfort meets excitement in the kitchen! This easy baked spaghetti squash recipe is not just a dish; it’s an adventure! Imagine the aroma of roasted garlic mingling with fresh herbs, culminating in a dish that’s both comforting and boldly flavorful. Ready to dive into this culinary journey? Let’s explore why this recipe is a must-try!

Why You’ll Love This Recipe

  • Versatile base: Spaghetti squash is a fantastic low-carb alternative to traditional pasta, perfect for those looking to reduce carbs without sacrificing flavor.
  • Easy preparation: With just a few simple steps, you’ll have a delicious meal on the table in no time. This recipe allows even novice cooks to shine!
  • Flavor explosion: The combination of olive oil, garlic, and fresh herbs elevates the dish, ensuring every bite is bursting with flavor.
  • Health benefits: Packed with vitamins, fiber, and antioxidants, spaghetti squash is not only tasty but also a nutritious choice for any meal.
  • Customizable: This dish can easily be adapted to fit any diet or taste preference, making it a great addition to your collection of recipes!

Ingredient Breakdown

Let’s take a closer look at the ingredients that make this baked spaghetti squash recipe a standout:

  • Spaghetti squash: Choose a medium-sized squash (about 2-3 pounds) for the best results. Look for a firm squash with a smooth, yellow skin.
  • Extra virgin olive oil: A must-have for drizzling and enhancing flavors. You can substitute it with avocado oil for a different taste.
  • Salt and pepper: Essential seasonings that bring out the natural sweetness of the squash.
  • Garlic: Freshly minced garlic adds depth and flavor. Feel free to adjust the amount based on your preference.
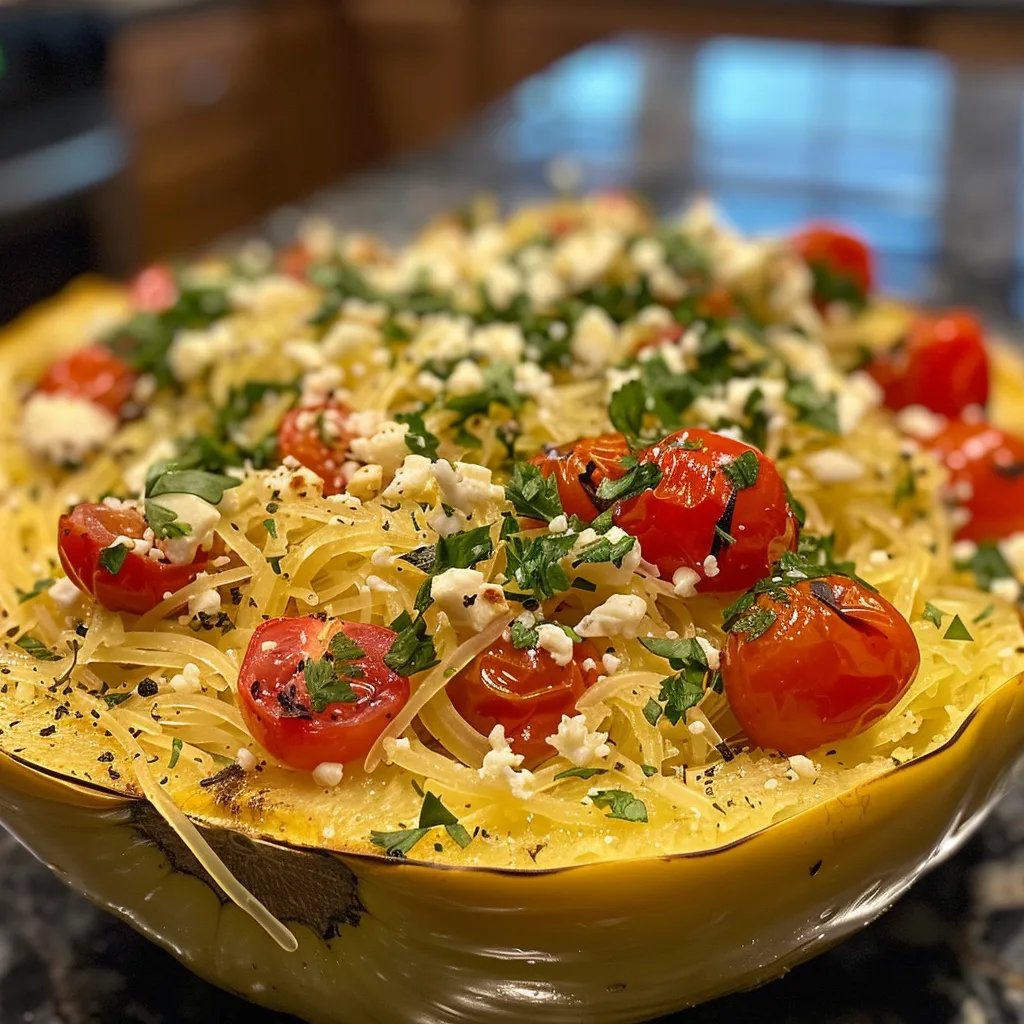
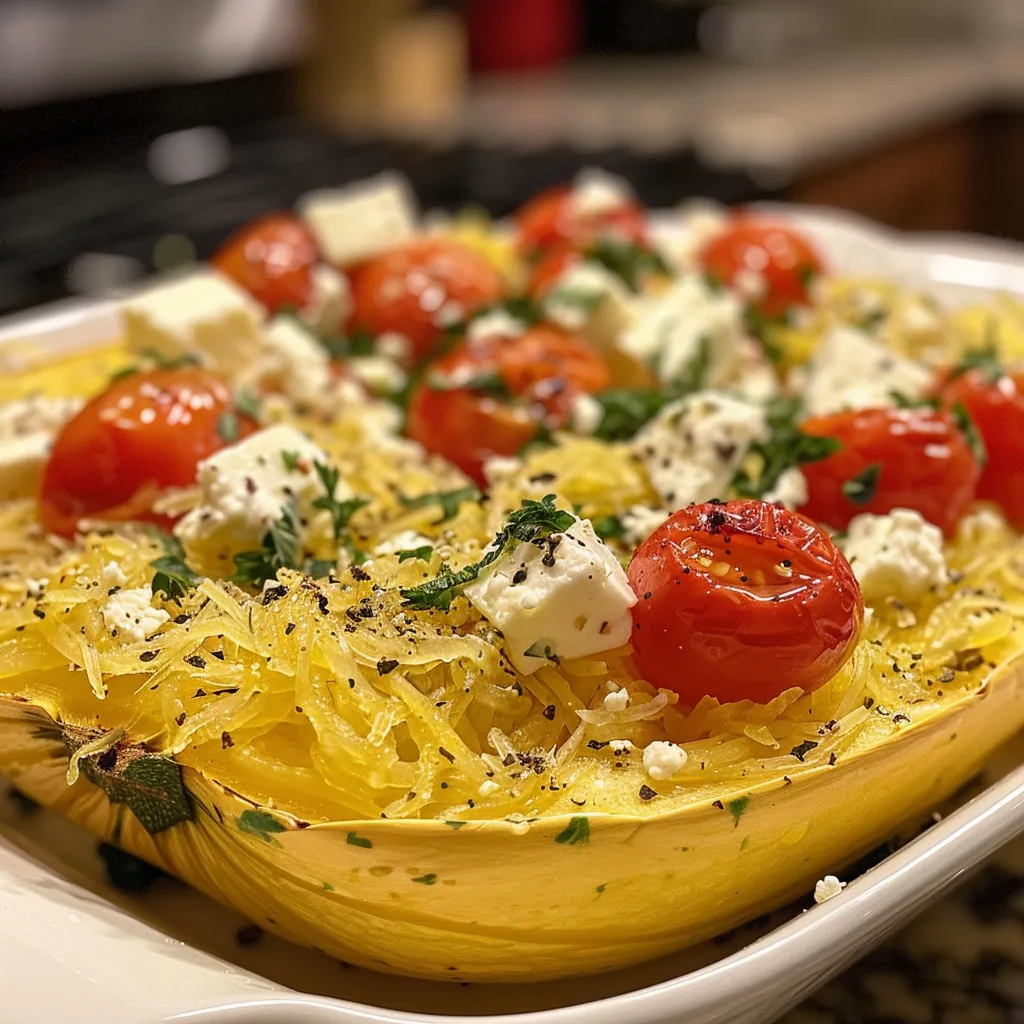
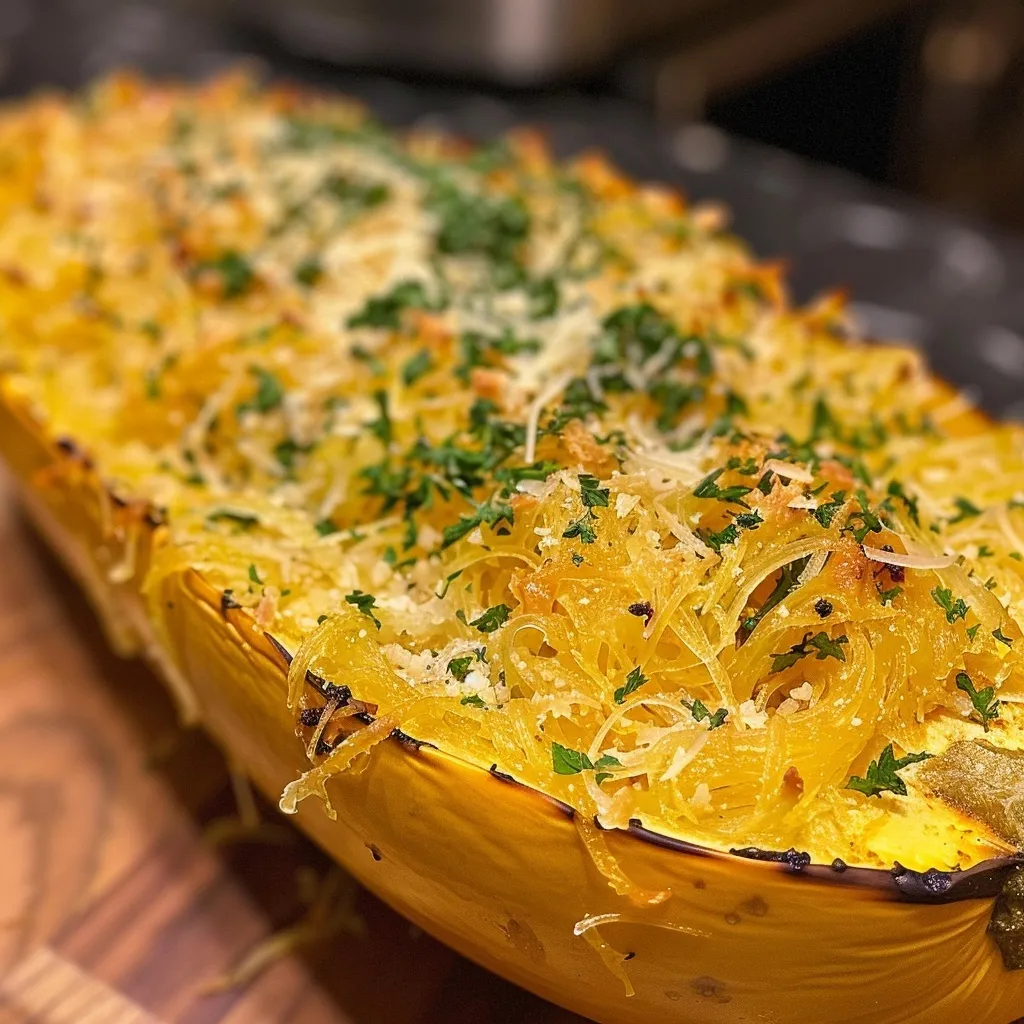
  • Fresh herbs: Parsley or basil works beautifully here. They not only add freshness but also vibrant color!
  • Parmesan cheese: Optional, but highly recommended for an umami kick. You can also use nutritional yeast for a vegan option.

Step-by-Step Instructions

Side view of a juicy spaghetti squash with a glistening texture, garnished with garlic and herbs.

Let’s get cooking! Follow these easy steps to create your delicious spaghetti squash:

  1. Preheat the oven to 400°F (200°C).
  2. Slice the spaghetti squash in half lengthwise and scoop out the seeds with a spoon.
  3. Season the inside of each squash half with 2 tablespoons of olive oil (1 tablespoon for each half), then sprinkle with salt, pepper, and minced garlic.
  4. Place the squash halves cut-side down on a baking sheet lined with parchment paper.
  5. Roast in the oven for about 40 minutes, or until the flesh easily shreds into noodles with a fork.
  6. Once cooked, use a fork to scrape the flesh into spaghetti-like strands.
  7. Toss the spaghetti squash with the remaining olive oil and garnish with fresh herbs and a sprinkle of Parmesan cheese, if desired.

Pro Tips for Perfect Spaghetti Squash

  • Selecting the squash: Look for a heavy squash with a firm exterior. It should feel dense when you lift it.
  • Cutting technique: Use a sharp chef’s knife and apply even pressure to ensure a clean cut. If it’s tough, microwave the whole squash for a minute to soften it slightly.
  • Cooking time: Keep an eye on the squash while baking; every oven is different, and you may need to adjust the time slightly.
  • Flavor enhancements: Experiment with different spices and herbs like thyme or rosemary for a unique twist.
  • Make it cheesy: For a creamy version, mix in some cream cheese or ricotta after scraping the flesh.
  • Batch cooking: Make extra and refrigerate or freeze for quick meals later in the week.
  • Serving options: Pair with your favorite sauces, sautéed vegetables, or proteins for a complete meal.
  • Storage: Store any leftovers in an airtight container in the fridge for up to 5 days.

Common Mistakes and Troubleshooting

Even the best chefs make mistakes! Here are some common pitfalls and how to avoid them:

  • Squash too hard: If your squash is tough to cut, it’s likely not ripe. Choose a squash that feels heavy and has a firm skin.
  • Undercooked flesh: If the flesh isn’t shredding easily after cooking, it may need more time in the oven. Check for tenderness with a fork.
  • Flavorless dish: Ensure you season generously with salt, pepper, and herbs. Don’t skimp on the olive oil; it’s a flavor enhancer!
  • Too mushy: Overcooking can lead to a mushy texture. Keep a close eye on the cooking time.

Delicious Variations

Feeling adventurous? Here are some fun variations to elevate your baked spaghetti squash:

  • Mexican-inspired: Top with black beans, corn, avocado, and salsa for a fiesta in your mouth!
  • Italian-style: Toss with marinara sauce, sautéed spinach, and Italian sausage for a hearty meal.
  • Asian twist: Add soy sauce, sesame oil, and veggies like bell peppers and carrots for a stir-fry vibe.
  • Breakfast bowl: Serve with fried eggs, spinach, and a sprinkle of feta cheese for a nutritious brunch option.

Storage and Make-Ahead Instructions

Want to prepare ahead? Here’s how:

  • Make-ahead: You can prepare the baked spaghetti squash and store it in the fridge for up to 5 days. Just reheat before serving.
  • Freezing: Cooked spaghetti squash can be frozen in airtight containers for up to 3 months. Thaw overnight in the fridge before reheating.
  • Storage tips: Keep the spaghetti squash in an airtight container to maintain freshness and flavor.

Frequently Asked Questions

Curious about spaghetti squash? Here are some FAQs to guide you:

  • What does spaghetti squash taste like? It has a mild, slightly nutty flavor that absorbs the taste of whatever you cook it with.
  • How do I know when it’s cooked? The flesh should be tender and easy to shred with a fork when fully cooked.
  • Can I eat the seeds? Yes! Just roast them for a crunchy snack.
  • How can I tell if my squash is ripe? Look for a firm skin and a deep yellow color. Avoid any soft spots.
  • What can I serve with spaghetti squash? It pairs well with sauces, proteins, or as a base for stir-fries and salads.
  • Is it gluten-free? Absolutely! Spaghetti squash is a great gluten-free pasta alternative.
  • Can I cook it in the microwave? Yes! Pierce the squash with a knife and microwave for 10-15 minutes until tender.
  • How do I store leftovers? Keep in an airtight container in the fridge for up to 5 days or freeze for longer storage.

Nutrition Tips and Dietary Adaptations

This dish is not only delicious but also packed with nutrition:

  • Low-carb option: Perfect for those on a keto or low-carb diet. A serving of spaghetti squash contains only about 42 calories!
  • Vegan-friendly: Omit the cheese and use plant-based olive oil to keep it vegan.
  • High fiber: A great source of dietary fiber, which aids in digestion and keeps you feeling full longer.

Essential Equipment Recommendations

To make your cooking experience smooth, here’s what you need:

  • Sharp chef’s knife: For cutting through the tough skin of the squash.
  • Baking sheet: A sturdy, rimmed baking sheet to catch any drippings.
  • Parchment paper: To line your baking sheet for easy cleanup.
  • Fork: Essential for scraping out the spaghetti strands!

Serving Suggestions

Now that your spaghetti squash is ready, how do you serve it?

  • As a side dish: Pair it with roasted veggies or a protein of choice for a wholesome meal.
  • With sauce: Top with marinara, pesto, or even a creamy alfredo for a comforting dish.
  • In salads: Toss with fresh greens, nuts, and a tangy vinaigrette for a refreshing salad.
  • Garnished: Sprinkle with fresh herbs, nuts, or seeds to add texture and flavor.

This boldly baked spaghetti squash is more than just a meal; it’s an experience that brings joy and flavor to your table. So, grab your skillet, embrace the adventure, and let’s make cooking a story worth telling!

Easy Baked Spaghetti Squash

Prep Time 10 minutes
Cook Time 40 minutes
Total Time 50 minutes
Servings 4 servings
Calories 150
A simple and healthy way to enjoy spaghetti squash baked to perfection, topped with fresh herbs and Parmesan cheese.

Ingredients

Main

  • 1 medium spaghetti squash (about 2-3 pounds)
  • 2 tablespoons extra virgin olive oil
  • to taste none Salt and pepper
  • 2 cloves garlic (minced)
  • optional none Fresh herbs like parsley or basil (finely chopped)
  • optional none Grated Parmesan cheese (for serving)

Instructions 

  • Preheat oven to 400°F (200°C).
  • Slice the squash in half, scoop out seeds, and brush with 1 tbsp olive oil. Season with salt, pepper, and garlic.
  • Place cut-side down on a baking sheet and bake for 40 minutes until flesh shreds easily.
  • Scrape flesh into noodles with a fork, toss with remaining olive oil, and garnish with herbs and Parmesan if desired.

Notes

For extra flavor, add a squeeze of lemon or red pepper flakes.
Calories: 150kcal
Cost: $15
Course: Main Course
Cuisine: American
Keyword: Spaghetti Squash

Nutrition

Calories: 150kcal | Carbohydrates: 30g | Protein: 4g | Fat: 7g | Sodium: 150mg

Why You’ll Love Making These Butter Cookies

There’s something magical about the simplicity of homemade cookies. They transport you to a cozy kitchen, filled with warmth and the delightful aroma of baked goods. Imagine soft, buttery bites melting in your mouth, each cookie a little piece of joy. This is exactly what you get with these 3 Ingredient Butter Cookies. With just three simple ingredients, you can create a sweet treat that’s perfect for any occasion, whether you’re hosting a gathering, enjoying a quiet evening at home, or simply indulging in a little self-care.

These cookies are not just an everyday dessert; they are a celebration of comfort and nostalgia. The combination of butter, sugar, and flour results in a cookie that is incredibly versatile. You can enjoy them plain, or easily jazz them up with your favorite add-ins. Let’s dive into the details of this delightful recipe that brings joy with every bite!

Ingredients You Will Need

  • 1 cup unsalted butter, softened
  • 1 cup granulated sugar
  • 2 cups all-purpose flour

Instructions to Make 3 Ingredient Butter Cookies

A plate of freshly baked butter cookies, glistening in natural light with soft shadows highlighting their shape.

Step 1: Preheat the Oven

Start by preheating your oven to 350°F (175°C). This step is crucial as it ensures that your cookies bake evenly and come out perfectly golden brown.

Step 2: Cream Together Butter and Sugar

In a mixing bowl, combine the softened butter and granulated sugar. Using either a hand mixer or a stand mixer, cream them together until the mixture is light and fluffy. This step is essential as it incorporates air into the batter, giving your cookies that delightful texture.

Step 3: Add the Flour

Next, gradually add the all-purpose flour to the butter and sugar mixture. Mix until a dough forms. Be careful not to overmix; just combine until you see no flour streaks. This will help keep your cookies tender.

Step 4: Shape the Dough

Roll the dough into small balls, about 1 inch in diameter. Place them on a baking sheet lined with parchment paper. This helps prevent sticking and makes for easy cleanup.

Step 5: Flatten the Balls

Gently flatten each ball with a fork or your fingers. This not only shapes your cookies but also creates a lovely pattern on top that makes them look inviting.

Step 6: Bake to Golden Perfection

Now, it’s time to bake! Place the baking sheet in the preheated oven and bake for 10-12 minutes or until the edges are golden. Keep an eye on them, as baking times may vary depending on your oven.

Step 7: Cool and Enjoy

Once baked, remove the cookies from the oven and allow them to cool on the baking sheet for a few minutes. This helps them set before transferring them to a wire rack to cool completely. And just like that, you have a batch of irresistible butter cookies!

Tips for Perfect Butter Cookies

To ensure your cookies turn out perfectly every time, here are some handy tips:

  • Room Temperature Butter: Make sure your butter is softened but not melted. It should be at room temperature to create that fluffy texture when creamed with sugar.
  • Don’t Overmix: When adding flour, mix just until combined. Overmixing can result in tough cookies.
  • Chill the Dough: If you find your dough is too soft to handle, chill it in the refrigerator for about 30 minutes. This will make shaping easier and reduce spreading during baking.

Variations to Spice Things Up

Feeling adventurous? Here are some easy variations to customize your butter cookies:

  • Chocolate Chip Delight: Add a cup of chocolate chips to the dough for a decadent twist.
  • Nutty Goodness: Incorporate chopped nuts, such as pecans or walnuts, for added crunch and flavor.
  • Citrus Zest: Grate some lemon or orange zest into the dough for a refreshing citrus aroma.
  • Spiced Cookies: For a warm touch, add a pinch of cinnamon or nutmeg to the dough.

Substitutions You Can Make

If you’re missing an ingredient or need to make adjustments, here are some substitutions:

  • Butter Alternatives: You can use margarine or a dairy-free butter alternative for a vegan version.
  • Sugar Swap: Try using brown sugar instead of granulated sugar for a richer flavor.
  • Flour Options: For a gluten-free version, substitute all-purpose flour with a gluten-free flour blend, but check for a suitable binder addition.

Equipment You Will Need

Before you get started, gather these essential tools:

  • Mixing bowls
  • Hand mixer or stand mixer
  • Baking sheet
  • Parchment paper
  • Wire rack for cooling

Storage and Freezing Tips

These cookies are best enjoyed fresh, but they can be stored for later enjoyment:

  • Room Temperature: Store the cookies in an airtight container at room temperature for up to a week.
  • Freezing: You can freeze the baked cookies for up to a month. Place them in a single layer in an airtight container. Thaw at room temperature before enjoying.
  • Dough Freezing: If you want to prepare ahead, you can freeze the cookie dough. Shape into balls, freeze on a baking sheet, then transfer to a container. Bake directly from frozen, adding a couple of minutes to the baking time.

Frequently Asked Questions

Can I use salted butter instead of unsalted?

Yes, you can use salted butter, but consider reducing or eliminating any additional salt in the recipe to maintain balance.

Why did my cookies turn out dry or crumbly?

This can happen due to overmixing the dough or using too much flour. Make sure to measure accurately and mix just until combined.

Can I refrigerate the cookie dough overnight?

Absolutely! Chilling the dough can enhance the flavors and make it easier to handle.

My air fryer temperature settings are different; how should I adjust the baking time?

Monitor your cookies closely as they bake. Adjust the time based on your air fryer’s settings, checking for that delicious golden color.

Can I freeze these cookies after baking?

Yes! Freeze the baked cookies in an airtight container for up to a month. They can be thawed at room temperature or briefly reheated in the oven.

How can I prevent the cookies from spreading too much during baking?

Chilling the dough before baking can help control spreading. Also, ensure you’re placing the cookies far enough apart on the baking sheet.

Conclusion

These 3 Ingredient Butter Cookies are more than just a quick treat; they are a gateway to creativity in the kitchen. With their simple yet delightful flavor, they capture the essence of home-baked goodness. Whether you enjoy them as is or customize them to your liking, each bite is a reminder that sometimes the simplest things in life bring the greatest joy. So, gather your ingredients, unleash your inner baker, and let these cookies bring a touch of happiness to your day. Happy baking!

3 Ingredient Butter Cookies

Prep Time 10 minutes
Cook Time 12 minutes
Total Time 22 minutes
Servings 24 cookies
Calories 150
These simple and delicious butter cookies require just three ingredients and are perfect for a quick treat.

Ingredients

Dough

  • 1 cup unsalted butter, softened
  • 1 cup granulated sugar
  • 2 cups all-purpose flour

Instructions 

  • Preheat oven to 350°F (175°C).
  • Cream butter and sugar until light and fluffy.
  • Add flour and mix to form dough.
  • Shape into balls, place on baking sheet, and flatten slightly.
  • Bake for 10-12 minutes until edges are golden.
  • Cool cookies on a wire rack before serving.

Notes

For softer cookies, do not flatten too much before baking.
Calories: 150kcal
Cost: $5
Course: Dessert
Cuisine: American
Keyword: butter

Nutrition

Calories: 150kcal | Carbohydrates: 20g | Protein: 2g | Fat: 8g | Sodium: 50mg

Loved this recipe? Save it to your favorite Pinterest board so you can easily find it later! It’s the perfect way to keep all your sweet ideas in one place. ✨

Three ingredient butter cookies arranged beautifully, with a blurred kitchen background enhancing their appeal.

Why You’ll Love This Cake

Life is too short for lackluster desserts! This Apple Layer Cake is an ode to flavors that dance on your palate and a celebration of healthy indulgence. Imagine a cake that feels as light as a cloud yet is packed with the wholesome goodness of apples and whole wheat flour. This recipe is not just about satisfying a sweet tooth; it’s about creating a moment of joy, a slice of happiness that can be shared with loved ones over coffee or tea. The gentle sweetness from honey or maple syrup combined with the warm embrace of cinnamon makes this cake a versatile choice for any occasion, from cozy family gatherings to elegant brunches.

Overview of Ingredients

Let’s dive into the heart of this recipe. The ingredients are simple yet powerful. Each element plays a crucial role in building flavor and texture.

  • Whole Wheat Flour: Provides a nutty flavor and a hearty texture while keeping the cake healthy.
  • Baking Powder and Baking Soda: The dynamic duo that helps the cake rise, creating a fluffy texture.
  • Cinnamon: The spice that warms the soul, adding depth and a comforting aroma.
  • Salt: Enhances all the flavors, a small yet mighty ingredient.
  • Applesauce: Acts as a moistening agent, replacing oil while adding natural sweetness.
  • Honey or Maple Syrup: Nature’s sweeteners that bring a unique flavor and health benefits.
  • Coconut Oil: Adds richness and a hint of tropical flavor.
  • Eggs: The binding agent that holds everything together.
  • Vanilla Extract: A fragrant note that elevates the overall flavor.
  • Grated Apples: The star of the show, giving moisture and a burst of fresh apple flavor.
  • Chopped Walnuts (optional): For those who crave a little crunch, adding texture and nuttiness.

Step-by-Step Instructions

Eye-level shot of a delectable Apple Layer Cake, highlighting its rich texture and soft shadows.

Let’s roll up our sleeves and get to baking! Follow these steps to create your own masterpiece.

  1. Preheat the Oven: Set your oven to 350°F (175°C) and grease two 9-inch round cake pans. This is crucial for ensuring our cake comes out easily after baking.
  2. Mix Dry Ingredients: In a large bowl, whisk together 2 cups of whole wheat flour, 1 teaspoon of baking powder, 1 teaspoon of baking soda, 1 teaspoon of ground cinnamon, and 1/2 teaspoon of salt. This mixture sets the foundation for our cake.
  3. Prepare Wet Ingredients: In another bowl, combine 1/2 cup of unsweetened applesauce, 1/2 cup of honey or maple syrup, 1/4 cup of melted coconut oil, 2 large eggs, and 1 teaspoon of vanilla extract. Mix until well combined, allowing those flavors to meld.
  4. Combine Wet and Dry: Gradually add the wet ingredients to the dry ingredients, stirring gently until just combined. Don’t overmix; we want our cake to be light and fluffy!
  5. Add Apples and Walnuts: Fold in 2 cups of grated apples and, if you’re feeling adventurous, 1/2 cup of chopped walnuts. This is where the magic happens!
  6. Divide and Bake: Pour the batter evenly into the prepared cake pans. Bake in the preheated oven for 25-30 minutes, or until a toothpick inserted in the center comes out clean.
  7. Cool Down: Let the cakes cool in the pans for 10 minutes before transferring them to a wire rack to cool completely. Patience is key here!
  8. Layer and Serve: Once cooled, you can layer the cakes with your choice of frosting or serve them plain. The natural sweetness makes it delightful on its own!

Tips for Success

Here are some handy tips to ensure your Apple Layer Cake turns out perfect every time:

  • Use Fresh Apples: Opt for crisp, tart apples like Granny Smith or Honeycrisp for the best flavor.
  • Don’t Skip the Cooling: Allowing the cake to cool properly helps maintain its structure and prevents it from crumbling.
  • Experiment with Spices: Feel free to add a pinch of nutmeg or allspice for an extra flavor kick.
  • Storage: Store any leftovers in an airtight container at room temperature for up to 3 days, or refrigerate for up to a week.

Variations to Consider

The beauty of this recipe lies in its adaptability. Here are some variations to try:

  • Gluten-Free Option: Substitute the whole wheat flour with a gluten-free blend to cater to dietary preferences.
  • Add Dried Fruits: Incorporate raisins or cranberries for an added layer of flavor and chewiness.
  • Frosting Ideas: Consider a light cream cheese frosting or a simple glaze made from powdered sugar and milk for a sweet finish.

Substitutions You Can Make

If you find yourself short on an ingredient, don’t fret! Here’s how to improvise:

  • Applesauce: Unsweetened yogurt can work as a great substitute, adding moisture without overpowering sweetness.
  • Coconut Oil: Any neutral oil can replace coconut oil, though it might slightly alter the flavor.
  • Honey or Maple Syrup: You can use agave nectar or brown sugar as alternatives for sweetening.

Essential Equipment

Before you start, make sure you have the right tools:

  • Two 9-inch round cake pans
  • A mixing bowl
  • A whisk and spatula
  • A wire rack for cooling
  • A toothpick for testing doneness

Storing and Freezing Your Cake

This cake can be enjoyed fresh, but it also stores beautifully:

  • Refrigeration: Wrap the cooled cake in plastic wrap and store it in the refrigerator for up to a week.
  • Freezing: To freeze, slice the cake and wrap individual pieces in plastic, then place them in a freezer bag. It can last for up to 3 months. Just thaw in the fridge overnight when you’re ready to enjoy!

FAQs

Let’s address some common questions:

  • Can I make this cake vegan? Yes! Substitute eggs with flax eggs (1 tablespoon ground flaxseed mixed with 2.5 tablespoons of water per egg) and use maple syrup instead of honey.
  • Is there a way to make this cake more decadent? Absolutely! Add a layer of caramel sauce between the layers or top it with a rich frosting for a special treat.
  • How can I make this cake more visually appealing? Dust the top with powdered sugar or add fresh apple slices and a sprinkle of cinnamon before serving.

Troubleshooting Common Issues

If you run into problems, don’t worry! Here are some quick solutions:

  • Dry Cake: Overbaking can lead to dryness; keep an eye on it towards the end of the baking time.
  • Cake Sticking to the Pan: Make sure to grease and flour the pans well before adding the batter.
  • Too Sweet: If the cake turns out too sweet, serve it with a dollop of unsweetened whipped cream to balance the flavors.

Conclusion

The Apple Layer Cake is more than just a dessert; it’s an experience. Each slice is a testament to the beauty of healthy baking, showcasing how simple ingredients can transform into something extraordinary. So, gather those apples, fire up your oven, and let’s create something magical together. Whether it’s a weekday treat or a special occasion, this cake is sure to impress and satisfy your sweet cravings without the guilt. Remember, cooking is a journey — so embrace the process, trust your instincts, and enjoy every delicious bite. Happy baking!

Apple Layer Cake: A Moist, Quick, and Healthy Treat

Prep Time 15 minutes
Cook Time 30 minutes
Total Time 45 minutes
Servings 8 slices
Calories 250
This apple layer cake is a moist, healthy, and quick-to-make dessert perfect for any occasion.

Ingredients

Dry ingredients

  • 2 cups whole wheat flour
  • 1 teaspoon baking powder
  • 1 teaspoon baking soda
  • 1 teaspoon ground cinnamon
  • 1/2 teaspoon salt

Wet ingredients

  • 1/2 cup unsweetened applesauce
  • 1/2 cup honey or maple syrup
  • 1/4 cup coconut oil, melted
  • 2 large eggs
  • 1 teaspoon vanilla extract

Main ingredients

  • 2 cups grated apples (about 2 medium apples)
  • 1/2 cup chopped walnuts (optional) (optional)

Instructions 

  • Preheat oven to 350°F (175°C). Grease and flour two 9-inch pans.
  • Mix dry ingredients in a bowl. Combine wet ingredients in another.
  • Combine wet and dry, then fold in apples and walnuts.
  • Divide batter into pans and bake for 25-30 minutes.
  • Cool, then layer or serve plain.

Notes

Using whole wheat flour adds fiber and nutrients to this delicious cake.
Calories: 250kcal
Cost: $15
Course: Dessert
Cuisine: Healthy
Keyword: apple

Nutrition

Calories: 250kcal | Carbohydrates: 45g | Protein: 6g | Fat: 7g | Sodium: 150mg

Loved this recipe? Save it to your favorite Pinterest board so you can easily find it later! It’s the perfect way to keep all your sweet ideas in one place. ✨

Delicious Apple Layer Cake displayed in natural light, emphasizing its fluffy layers and fresh apple ingredients.

Discover the Comfort of Southern Eggplant Casserole

Welcome to my kitchen, where we’re about to embark on a culinary journey that celebrates the rich, comforting flavors of Southern eggplant casserole. This recipe doesn’t just fill your belly; it warms your heart and brings friends and family together. With layers of cheesy goodness and the subtle earthiness of eggplant, this dish is a nostalgic nod to my roots in San Antonio, Texas. Prepare to dive deep into a world of flavor where each bite tells a story.

Why You’ll Love This Recipe

This isn’t just any casserole; it’s a dish that embodies the essence of comfort food. Here are five reasons why you’ll want to make this recipe your go-to:

  • Simple Ingredients: Using basic pantry staples, this recipe transforms humble ingredients into a standout dish.
  • Quick Preparation: In less than an hour, you can whip this up, making it perfect for busy weeknights.
  • Versatile Dish: Whether as a side or a main course, this casserole adapts beautifully to your meal planning needs.
  • Family-Friendly: With its cheesy, savory flavors, even the pickiest eaters will be asking for seconds.
  • Meal Prep Friendly: This casserole can be made ahead, frozen, and baked later, making it a lifesaver for meal prep.

Ingredient Breakdown

Let’s talk about what makes this Southern eggplant casserole truly special. Here’s what you’ll need:

  • 1 large eggplant (or two small): Approximately 1 1/2 to 2 cups diced eggplant. This is the star of our dish, bringing a subtle flavor and texture that pairs beautifully with cheese.
  • 2 eggs, beaten: These will help bind the casserole, ensuring every bite is cohesive.
  • 1 cup milk: Adds creaminess and depth to the flavor profile.
  • 2 cups crushed crackers: Use your favorite brand for a crunchy topping. They add a delightful texture that contrasts with the soft eggplant.
  • 2 cups shredded cheddar cheese: The gooey goodness of cheese is irresistible and elevates the dish to another level.
  • 1/4 cup butter, melted: This adds richness and helps everything come together beautifully.
  • Salt and pepper, to taste: Essential for enhancing all the flavors.

If you’re feeling adventurous, you can substitute the cheddar with other cheeses like mozzarella or pepper jack for a different flavor punch!

How to Make Southern Eggplant Casserole: Step-by-Step Instructions

Side view of a baked eggplant casserole, revealing layers of eggplant, cheese, and cracker topping.

Ready to create a masterpiece? Let’s get cooking!

  1. Preheat your oven to 400 degrees F. Spray a 2-quart baking dish (or 8×8 inch) with nonstick cooking spray.
  2. Cook the peeled and diced eggplant in boiling water until fork-tender; drain well to remove excess moisture.
  3. In a large bowl, combine the cooked eggplant, beaten eggs, crushed crackers, milk, shredded cheese, melted butter, and season with salt and pepper.
  4. Pour the mixture into the prepared baking dish.
  5. Bake in the preheated oven for 30 minutes or until golden brown on top.

Pro Tips for Perfecting Your Casserole

To elevate your eggplant casserole to new heights, consider these expert insights:

  • Drain Well: Ensure your eggplant is well-drained after boiling to avoid a watery casserole.
  • Cracker Choice: Experiment with different types of crackers for varied textures —think buttery Ritz or whole-grain options!
  • Cheese Variations: Mixing cheeses can add complexity; consider adding Parmesan or feta for a unique twist.
  • Batch Cooking: Double the recipe for easy meal prep; it’s just as delicious reheated!
  • Flavor Boost: Add herbs like thyme or basil to the egg mixture for an aromatic upgrade.
  • Layering Technique: For a visually stunning presentation, layer half the eggplant mixture, then cheese, and repeat.
  • Cover During Baking: If the top browns too quickly, cover with foil for the first 20 minutes.
  • Serve with Style: This casserole pairs beautifully with a fresh salad or crusty bread.

Common Mistakes and Troubleshooting

Even the best chefs can make mistakes. Here’s how to avoid common pitfalls:

  • Too Watery: If your casserole turns out watery, it’s likely due to under-drained eggplant. Always drain thoroughly!
  • Overcooked Eggplant: Cooking the eggplant too long before mixing can make it mushy. Aim for fork-tender but not falling apart.
  • Uneven Baking: Make sure to stir the mixture well before baking to ensure even cooking.
  • Flavorless Casserole: Don’t skimp on seasoning! Salt and pepper are crucial for enhancing flavors.

Variations to Spice Up Your Casserole

Feeling adventurous? Here are some variations to try:

  • Spicy Kick: Add diced jalapeños or crushed red pepper for a fiery twist.
  • Meat Lover’s Delight: Incorporate cooked ground beef or sausage for a heartier meal.
  • Vegetable Medley: Mix in other vegetables like zucchini or bell peppers for added nutrition and flavor.
  • Herbed Delight: Use fresh herbs like parsley, chives, or dill to brighten the dish.

Storage and Make-Ahead Instructions

This casserole is perfect for meal prep! Here’s how to store it:

  • Refrigerate: Store leftovers in an airtight container in the fridge for up to 5 days.
  • Freeze: To freeze, cool the casserole completely, cover tightly, and freeze for up to 3 months.
  • Reheat: When you’re ready to enjoy, thaw overnight in the refrigerator, then reheat in the oven at 350 degrees F until heated through.

Frequently Asked Questions

Here are some common questions about making Southern eggplant casserole:

  • Can I use frozen eggplant? Yes, but make sure to thaw and drain it well before using.
  • Is it possible to make this dish vegan? Absolutely! Substitute eggs with flaxseed meal and use plant-based milk and cheese.
  • What can I serve with this casserole? It pairs wonderfully with a crisp green salad or some garlic bread.
  • Can I prepare this in advance? Yes! Assemble the casserole, cover, and refrigerate for up to 24 hours before baking.
  • How do I know when it’s done? The casserole is ready when it’s golden brown and bubbly around the edges.
  • Can I add more cheese? Of course! Cheese is always a welcome addition; just ensure it doesn’t overpower the eggplant.
  • What’s the best way to serve it? Allow it to cool for a few minutes before serving to let the flavors meld perfectly.
  • How can I make it gluten-free? Use gluten-free crackers or breadcrumbs for the topping.

Nutritional Tips and Dietary Adaptations

Cooking isn’t just about taste; it’s also about health. Here are some tips for making this casserole more nutritious:

  • Whole Grain Crackers: Switch to whole grain for added fiber and nutrients.
  • Low-Fat Cheese: Opt for reduced-fat cheese to cut down on calories without sacrificing flavor.
  • Additional Vegetables: Load it up with more vegetables to boost the fiber content.
  • Plant-Based Options: Use plant-based alternatives for a lighter and vegan-friendly dish.

Essential Equipment Recommendations

Before diving into this delicious adventure, make sure you have the right tools:

  • Sharp Knife: For peeling and dicing the eggplant with ease.
  • Large Pot: For boiling the eggplant until fork-tender.
  • Baking Dish: A 2-quart or 8×8 inch baking dish is ideal for this casserole.
  • Mixing Bowl: A large bowl for combining all your ingredients.
  • Measuring Cups and Spoons: Essential for precise ingredient measurements.

Serving Suggestions

Now that your Southern eggplant casserole is ready, here are some delightful ways to serve it:

  • Fresh Salad: Pair with a light, refreshing salad to balance the richness of the casserole.
  • Garlic Bread: Crusty garlic bread complements the casserole perfectly.
  • Pickled Vegetables: Serve with a side of pickled vegetables for a tangy contrast.
  • Wine Pairing: A light white wine or a fruity red can enhance the flavors beautifully.

Embrace the warmth of your kitchen and create memories that linger long after the last bite. This Southern eggplant casserole is more than just food; it’s a celebration of love, tradition, and the joy of cooking. So, roll up those sleeves, grab your skillet, and let’s add a little fire to your table!

Old Fashioned Eggplant Casserole - A Southern Eggplant Casserole Recipe

Prep Time 15 minutes
Cook Time 30 minutes
Total Time 45 minutes
Servings 4 servings
Calories 350
A comforting Southern-style eggplant casserole that's easy to prepare and full of flavor.

Ingredients

Eggplant

  • 1.5 cups diced eggplant (from 1 large eggplant)
  • 2 eggs beaten eggs
  • 1 cup milk
  • 2 cups crushed crackers
  • 2 cups shredded cheddar cheese
  • 0.25 cup melted butter
  • to taste salt and pepper

Instructions 

  • Preheat oven to 400°F (200°C). Spray a baking dish with nonstick spray.
  • Cook diced eggplant in boiling water until tender; drain.
  • Mix cooked eggplant, eggs, crackers, milk, cheese, butter, salt, and pepper.
  • Pour mixture into prepared dish and bake for 30 minutes until golden.

Notes

For extra flavor, add a pinch of paprika or garlic powder.
Calories: 350kcal
Cost: $15
Course: Main Course
Cuisine: Southern
Keyword: Eggplant

Nutrition

Calories: 350kcal | Carbohydrates: 30g | Protein: 15g | Fat: 20g | Sodium: 600mg

Why You’ll Love This Dish

If you’re looking for a way to spice up your weeknight dinners without sacrificing flavor, then let me introduce you to a culinary gem that’s about to become your new favorite: my High-Protein Creamy Buffalo Chicken Pasta. Imagine this: a creamy, dreamy sauce that dances with spicy buffalo goodness, enveloping tender pasta and succulent shredded chicken. This dish is not just a meal; it’s an experience. A whirlwind of flavors that will ignite your passion for cooking and leave you craving more. In just 25 minutes, you can whip up a protein-packed feast that’s both hearty and healthy, making it the perfect choice for those busy nights when you need something delicious and satisfying.

The Heartwarming Story Behind the Recipe

Growing up in San Antonio, Texas, my culinary journey has always been intertwined with the bold flavors of my heritage. Buffalo sauce has a special place in my heart, often reminding me of festive family gatherings where laughter filled the air, and the smell of spicy wings wafted through the backyard. I vividly recall the first time I tried buffalo-flavored anything. My uncle prepared wings for a family barbecue, slathered in a sauce so fiery and tangy that it sparked a love affair with flavor that has only deepened over the years. This recipe is a tribute to those joyful moments, bringing together the zest of buffalo sauce with the comfort of creamy pasta in one satisfying bowl.

Ingredients: The Flavor Crew

High-protein creamy buffalo chicken pasta presented in a bowl, highlighting its vibrant colors and creamy sauce.

To create this masterpiece, gather the following ingredients:

  • 8 oz whole wheat pasta – For a hearty base that’s packed with fiber.
  • 1 lb cooked chicken breast, shredded – Protein-rich and tender, this is the star of the dish.
  • 1/2 cup Greek yogurt – Adds creaminess while boosting the protein content.
  • 1/2 cup buffalo sauce – The fiery element that brings the heat.
  • 1/4 cup cream cheese, softened – For that velvety texture that enhances the sauce.
  • 1/2 cup shredded mozzarella cheese – Melts beautifully into the dish, adding richness.
  • 1/4 cup chopped green onions – A fresh garnish that brightens everything up.
  • Salt and pepper to taste – Essential for elevating flavors.
  • 1 tbsp olive oil – For sautéing and adding depth.

Let’s Get Cooking: Step-by-Step Guide

Ready to ignite your culinary passion? Follow these simple steps to create your High-Protein Creamy Buffalo Chicken Pasta:

  1. Cook the whole wheat pasta according to the package instructions. Once cooked, drain and set aside.
  2. In a large skillet, heat the olive oil over medium heat.
  3. Add the shredded chicken to the skillet and pour in the buffalo sauce, stirring to combine and heat through.
  4. In a separate bowl, mix together the Greek yogurt and cream cheese until smooth and creamy.
  5. Reduce the heat to low and stir the yogurt mixture into the chicken until well combined, creating a luscious sauce.
  6. Now, add the cooked pasta to the skillet, tossing everything together to coat the pasta in the creamy buffalo sauce.
  7. Gently stir in the mozzarella cheese, allowing it to melt and create a gooey texture.
  8. Season with salt and pepper to taste, and finish with a sprinkle of chopped green onions before serving.

Serving Suggestions: Make It a Meal

This pasta dish stands beautifully on its own, but if you want to take it to the next level, consider pairing it with some crunchy sides. Fresh celery sticks and carrot batons are perfect for that satisfying crunch, transporting you back to those family gatherings where we dunked everything in buffalo sauce. And for those who crave a little extra creaminess, a side of ranch or blue cheese dressing can elevate your experience, creating that delightful hot-and-cool contrast on your palate.

Tips for Success

Here are some insider tips to ensure your dish comes out perfectly every time:

  • Don’t skip the pasta water: Reserve a bit of the starchy cooking water. It’s a magical ingredient that can help loosen the sauce if it becomes too thick.
  • Adjust the spice level: If you prefer a milder dish, reduce the amount of buffalo sauce to suit your taste.
  • Get creative: Feel free to toss in some veggies like spinach or bell peppers for added nutrition and flavor.
  • Mix your cheeses: Experiment with different cheeses! A blend of cheddar or pepper jack can add a unique twist.

Variations to Try

One of the beauties of cooking is the ability to adapt recipes to fit your mood or what you have on hand. Here are a few variations to consider:

  • Vegetarian Buffalo Pasta: Swap the chicken for grilled tofu or chickpeas for a meatless option that’s just as satisfying.
  • Buffalo Shrimp Pasta: Replace chicken with sautéed shrimp for a lighter, seafood-inspired twist.
  • Cheesy Buffalo Baked Pasta: Transfer the pasta to a baking dish, top with more cheese, and bake until bubbly and golden brown.

Equipment You’ll Need

Having the right tools can make all the difference in your cooking experience. Here’s what you’ll need:

  • A large pot for boiling pasta
  • A large skillet for combining and cooking the sauce
  • A mixing bowl for blending the Greek yogurt and cream cheese
  • A colander for draining the pasta
  • Measuring cups and spoons for accuracy
  • A spatula or wooden spoon for stirring

Storage and Freezing Tips

If you find yourself with leftovers (which is a rarity when this dish is on the table), here’s how to store them:

  • Refrigeration: Store any leftovers in an airtight container in the fridge for up to 3 days.
  • Freezing: For longer storage, you can freeze the pasta for up to 2 months. Just be aware that the texture may change slightly after thawing. When you’re ready to enjoy, thaw it in the fridge overnight and reheat on the stovetop.

Frequently Asked Questions

Here are some common questions and answers to help you navigate your cooking adventure:

  • Can I use a different type of pasta? Absolutely! Feel free to use any pasta shape you love. Just adjust the cooking time as needed.
  • Is this dish gluten-free? Yes, you can easily make it gluten-free by using a gluten-free pasta option.
  • How can I make it dairy-free? Substitute the cream cheese and Greek yogurt with dairy-free alternatives like cashew cream or dairy-free yogurt.

Troubleshooting Common Issues

If your pasta doesn’t turn out as expected, here’s how to troubleshoot:

  • Too thick sauce? Add a splash of reserved pasta water to loosen it up.
  • Too spicy? Balance the heat with a dollop of sour cream or Greek yogurt on top before serving.
  • Chicken not shredding easily? Ensure it’s cooked properly and let it rest for a few minutes before shredding.

Final Thoughts: Embrace the Flavor Adventure

As you embark on this culinary adventure, remember that cooking is all about exploration and joy. My High-Protein Creamy Buffalo Chicken Pasta isn’t just a recipe; it’s an invitation to embrace the warmth of home-cooked meals and the excitement of bold flavors. Whether you’re cooking for family, friends, or just yourself, this dish is sure to deliver a satisfying and delicious experience. So gather your ingredients, fire up that skillet, and let’s create something memorable together. And don’t forget to share your delicious results with me! I can’t wait to see how you make this dish your own!

High-Protein Creamy Buffalo Chicken Pasta | 25-Minute Meal

Prep Time 10 minutes
Cook Time 15 minutes
Total Time 25 minutes
Servings 4 servings
Calories 650
A quick and delicious high-protein pasta dish with a creamy buffalo chicken sauce, perfect for a satisfying meal in under 30 minutes.

Ingredients

Pasta

  • 8 oz whole wheat pasta

Protein

  • 1 lb cooked chicken breast, shredded

Dairy

  • 1/2 cup greek yogurt
  • 1/4 cup cream cheese, softened

Sauces and Cheese

  • 1/2 cup buffalo sauce
  • 1/2 cup shredded mozzarella cheese

Vegetables

  • 1/4 cup chopped green onions
  • 1 tbsp olive oil

Seasonings

  • to taste salt and pepper

Instructions 

  • Cook pasta according to package; drain.
  • Heat olive oil in a skillet; add chicken and buffalo sauce, stir.
  • Mix Greek yogurt and cream cheese until smooth; stir into chicken.
  • Add cooked pasta, toss to coat, then stir in mozzarella until melted.
  • Season with salt and pepper; top with green onions before serving.

Notes

For extra flavor, add a dash of garlic powder or hot sauce.
Calories: 650kcal
Cost: $15
Course: Main Course
Cuisine: American
Keyword: Buffalo Chicken, High Protein, pasta

Nutrition

Calories: 650kcal | Carbohydrates: 70g | Protein: 50g | Fat: 20g | Sodium: 900mg

Loved this recipe? Save it to your favorite Pinterest board so you can easily find it later! It’s the perfect way to keep all your sweet ideas in one place. ✨

A detailed shot of pasta mixed with shredded chicken and buffalo sauce, with a blurred cozy background.

Why This Recipe Will Ignite Your Taste Buds

Welcome to a culinary adventure that will leave your palate dancing with joy! If you’re on the lookout for a dish that elegantly balances sweet and savory flavors, then look no further than the exquisite Honey Garlic Tofu. This recipe is not just about cooking—it’s about creating a memorable experience in your kitchen that you’ll want to relive time and again. The beauty of this dish lies in its simplicity; with just a handful of ingredients, you can unleash a whirlwind of flavor that will transform tofu from a humble ingredient into a star of the show.

Tofu often gets a bad rap, but I’m here to tell you that when cooked right, it can be downright addictive. The honey garlic sauce clings to the crispy tofu cubes, creating a dish that’s as delightful to eat as it is to make. Whether you’re a seasoned chef or just starting out, this recipe is your gateway to creating bold, flavorful meals that will impress anyone at your table. Let’s dive into why you’ll love this dish!

What You’ll Need: Ingredients

Gathering the right ingredients is the first step to success in any recipe. Here’s what you’ll need to conjure up this delectable dish:

  • 1 block firm tofu
  • 2 tablespoons honey
  • 3 cloves garlic, minced
  • 2 tablespoons soy sauce
  • 1 tablespoon olive oil
  • 1 teaspoon sesame oil
  • Salt and pepper to taste
  • Green onions, sliced (for garnish)
  • Sesame seeds (optional, for garnish)

With these ingredients, you’ll create a meal that’s not only healthy but also bursting with flavor. The use of firm tofu is crucial, as it holds its shape and absorbs the sauce beautifully, elevating your dish to new heights.

How to Get Crispy Tofu

A detailed shot of honey garlic tofu dish, showcasing its golden-brown exterior and glossy glaze.

One of the keys to making this Honey Garlic Tofu truly shine is achieving that perfect crispy exterior. Here’s how you can do it:

  • Press the Tofu: Start by pressing your tofu to remove excess moisture. This step is essential because it allows the tofu to soak up the flavors of the marinade and become crispy when cooked. Simply wrap the block in a clean kitchen towel and place a heavy object on top for about 15–20 minutes.
  • Cut the Tofu: Once pressed, cut the tofu into cubes. Aim for uniform sizes to ensure even cooking.
  • Coat the Tofu: Lightly dust the tofu cubes with cornstarch before frying. This not only helps achieve crispy edges but also adds a delightful texture that complements the sauce.

How To Make The Honey Garlic Tofu

Now, let’s break down the steps to creating this flavor-packed dish:

Step 1: Prepare the Tofu

After pressing the tofu, cut it into bite-sized cubes. In a small bowl, combine the honey, minced garlic, soy sauce, olive oil, and sesame oil. Whisk these ingredients together until well blended; this will be your magic sauce!

Step 2: Cooking the Tofu

Heat a non-stick skillet over medium heat and add a splash of olive oil. Once the oil shimmers, add the tofu cubes in a single layer. Let them cook undisturbed for about 5-7 minutes or until golden brown on all sides. This step is crucial for achieving that irresistible crispiness.

Step 3: Making Your Honey Garlic Sauce

Once the tofu is golden, it’s time to pour the honey garlic sauce over the crispy tofu. Cook for an additional 3-5 minutes, stirring gently to ensure each cube is coated evenly in that glossy, delicious sauce. The aroma will be heavenly, and you’ll find it hard to resist sneaking bites!

Step 4: Finishing Touches

Season with salt and pepper to taste. Remove the skillet from heat and garnish with sliced green onions and sesame seeds if desired. This not only adds a pop of color but also enhances the dish with a bit of crunch.

Can I Make Honey Garlic Tofu in the Air Fryer?

Absolutely! If you prefer a lighter version with less oil, using an air fryer is a fantastic option. Simply follow the same steps for preparing the tofu, but instead of pan-frying, place the coated tofu cubes in the air fryer basket. Spray lightly with oil and cook at 200°C (about 400°F) for 15 minutes, shaking the basket halfway through. After air frying, toss the tofu in the honey garlic sauce as you would with the pan-fried version. The result will be crispy tofu with a slightly different texture but equally delicious flavor!

What’s The Best Way to Reheat The Tofu?

Reheating your leftover Honey Garlic Tofu is simple and can be done in a few ways:

  • Microwave: Place the tofu in a microwave-safe dish and heat in 30-second intervals until warm.
  • Oven: Preheat your oven to 350°F (175°C). Spread the tofu on a baking sheet and heat for about 10-15 minutes.
  • Air Fryer: For a quick option, pop the tofu in the air fryer for about 5-7 minutes at 180°C (356°F) until heated through.

What Tofu to Use?

When selecting your tofu, opt for firm or extra-firm varieties. Soft or silken tofu won’t hold up well during cooking and can fall apart. Brands like Tofoo or any local brand that offers firm tofu will work wonders in this recipe.

How to Serve Your Honey Garlic Tofu

This dish shines when served warm over a bed of fluffy rice. The rice absorbs the luscious sauce, making each bite a delight. You can also serve it alongside steamed vegetables or a fresh salad to balance the flavors. For an extra touch, consider adding a squeeze of fresh lemon juice or lime to brighten the dish.

Storing This Recipe

If you have leftovers, store your Honey Garlic Tofu in an airtight container in the fridge for up to 3-5 days. Reheat as mentioned above for the best results. You can also freeze the tofu, but it may alter the texture slightly.

Tips for Perfect Honey Garlic Tofu

  • Don’t skip the pressing step; it’s crucial for achieving that crispy texture.
  • Feel free to adjust the sweetness of the sauce by adding more or less honey according to your taste.
  • If you’re looking for a bit of heat, add a pinch of red pepper flakes to the sauce.

Variations and Substitutions

  • Vegetable Add-ins: Stir in some sautéed bell peppers, broccoli, or snap peas for added nutrition and color.
  • Protein Boost: For those looking for extra protein, consider adding edamame or chickpeas.
  • Gluten-Free: Use tamari instead of soy sauce for a gluten-free option.

FAQs

Can I use maple syrup instead of honey?
Yes! Maple syrup is a great vegan alternative that will provide a similar sweetness.

What if I’m allergic to soy?
Look for soy-free tofu made from chickpeas or other alternatives, and use coconut aminos instead of soy sauce.

Troubleshooting

My tofu is sticking to the pan.
Ensure you’re using enough oil and allow the tofu to cook undisturbed for a while to form a crust before flipping.

The sauce is too thick.
Add a splash of water or broth to loosen it up as it cooks.

Embrace the Adventure in Your Kitchen

Cooking is not just about feeding our bodies; it’s about feeding our souls. With this Honey Garlic Tofu recipe, you’re not only creating a delicious meal but also experiencing the joy of cooking with bold flavors. So, don your apron, grab your skillet, and let the sweet and savory aromas of honey garlic fill your kitchen. Whether you’re cooking for yourself, family, or friends, this dish is sure to impress and ignite a passion for cooking in everyone who takes a bite. Ready to turn up the heat? Let’s make it happen!

Honey Garlic Tofu

Prep Time 10 minutes
Cook Time 10 minutes
Total Time 20 minutes
Servings 4 servings
Calories 250
A quick and flavorful vegan dish featuring crispy tofu coated in a sweet and savory honey garlic sauce.

Ingredients

Main

  • 1 block firm tofu
  • 2 tablespoons honey
  • 3 cloves garlic, minced
  • 2 tablespoons soy sauce
  • 1 tablespoon olive oil
  • 1 teaspoon sesame oil
  • to taste salt and pepper
  • green onions, sliced green onions (for garnish)
  • sesame seeds sesame seeds (optional, for garnish)

Instructions 

  • Press and cube the tofu.
  • Mix honey, garlic, soy sauce, olive oil, and sesame oil.
  • Cook tofu in a skillet until golden, about 5-7 minutes.
  • Add sauce and cook for 3-5 minutes, stirring.
  • Garnish with green onions and sesame seeds, then serve.

Notes

Ensure tofu is pressed well for best texture.
Calories: 250kcal
Cost: $12
Course: Main Course
Cuisine: Asian
Keyword: Tofu

Nutrition

Calories: 250kcal | Carbohydrates: 30g | Protein: 12g | Fat: 10g | Sodium: 700mg

Loved this recipe? Save it to your favorite Pinterest board so you can easily find it later! It’s the perfect way to keep all your sweet ideas in one place. ✨

Eye-level view of honey garlic tofu on a rustic plate, highlighted by natural light and a blurred background.

Ignite Your Culinary Adventure with Ritz Cracker Eggplant Casserole

Welcome to a world where comfort food meets bold, adventurous flavors! My Ritz Cracker Eggplant Casserole is not just a dish; it’s a celebration of culinary creativity and a journey into the heart of Southern cuisine. This casserole is a harmonious blend of creamy goodness and crispy crunch that will set your taste buds ablaze. Whether you’re a seasoned cook or just starting your kitchen journey, this recipe is your passport to a flavorful adventure, filled with warmth and spice.

There’s something truly magical about the way this dish transforms humble ingredients into a show-stopping meal. If you’re ready to embrace the thrill of cooking with heat and flavor, let’s dive into the ingredients, techniques, and tips that make this casserole a cherished favorite!

Why You’ll Love This Recipe

This isn’t just any eggplant casserole; it’s a dish that brings together the best of both worlds. Here are five compelling reasons to add this recipe to your culinary repertoire:

  • Comforting Flavors: The combination of creamy soup, rich mayonnaise, and melty cheese creates a velvety texture that warms your soul.
  • Crunchy Topping: The Ritz cracker topping adds an irresistible crunch that contrasts beautifully with the smooth filling.
  • Versatile Dish: Perfect as a side for barbecues or as a hearty main dish, this casserole adapts to any meal.
  • Easy to Prepare: With straightforward steps and common ingredients, you can whip this up even on a busy weeknight!
  • Vegetable Power: Packed with eggplant, this dish helps you incorporate more veggies into your diet while still being utterly delicious.

Ingredient Breakdown

Let’s explore the ingredients that make this casserole shine and how you can customize them to suit your taste!

  • Eggplant: The star of the show! Choose a medium-sized eggplant for the best texture. If you want a milder flavor, try using Japanese or Chinese eggplants.
  • Golden Mushroom Condensed Soup: This brings a rich umami flavor. You can substitute it with cream of celery or homemade cream sauce if desired.
  • Mayonnaise: Adds creaminess. If you’re looking for a lighter option, Greek yogurt works wonders too!
  • Shredded Cheese: I recommend a blend of cheddar and Monterey Jack for a perfect melt. You can also experiment with pepper jack for a spicy kick!
  • Crushed Ritz Crackers: The crunchy topping that makes this dish special. Feel free to use any buttery crackers or even breadcrumbs for a different texture.
  • Butter: A dollop of melted butter adds richness to the topping. Olive oil can be a great substitute for a healthier option.

Step-by-Step Instructions

Side view of a layered eggplant casserole with a crispy Ritz cracker topping.

Ready to create a masterpiece? Follow these simple steps for an unforgettable eggplant casserole!

  1. Prepare the Eggplant: Peel and dice the eggplant into bite-sized pieces. Cook in boiling, salted water for about 10 minutes until tender. Drain well.
  2. Mix the Filling: In a large bowl, combine the golden mushroom soup, mayonnaise, beaten egg, grated onion, and shredded cheese. Stir in the cooked eggplant until well-coated.
  3. Assemble the Casserole: Transfer the eggplant mixture into a greased 1.5-quart casserole dish. Evenly cover with crushed Ritz crackers, then drizzle with melted butter.
  4. Bake: Preheat your oven to 350°F (175°C) and bake for 25 minutes, or until the top is golden and bubbly.

Pro Tips for Success

To ensure your casserole turns out perfectly every time, keep these expert tips in mind:

  • Salting Eggplant: If you want to reduce bitterness, sprinkle diced eggplant with salt and let it sit for 30 minutes before rinsing.
  • Cheese Variations: Mix in some feta or gouda for a unique flavor twist that elevates your casserole.
  • Make It Spicy: Add diced jalapeños or a sprinkle of red pepper flakes to the filling for an extra kick.
  • Layering Flavors: Enhance the depth by sautéing garlic and onions before mixing them with the eggplant.
  • Cooking Time: Keep an eye on the casserole during baking; oven temperatures can vary, and you want a golden topping without burning.
  • Let It Rest: Allow the casserole to sit for 5-10 minutes after baking. This helps it set and makes serving easier.
  • Serving Size: This recipe serves about 4-6 people, making it ideal for family dinners or potlucks.
  • Freezing Instructions: Prepare the casserole ahead of time, freeze before baking, and simply pop it in the oven when you’re ready to serve.

Common Mistakes and Troubleshooting

If you’re new to making casseroles, here are some common pitfalls and how to avoid them:

  • Overcooking Eggplant: Overcooked eggplant can become mushy. Aim for tender but not falling apart when boiling.
  • Too Much Liquid: If your casserole turns out watery, ensure you drain the eggplant thoroughly and consider using less soup.
  • Top Crust Not Crisping: If the crackers don’t crisp up, broil the casserole for 1-2 minutes at the end of baking.
  • Flavor Lacking: Always taste your filling before assembling. Adjust seasoning as needed with salt, pepper, or herbs.

Variations to Try

One of the best parts about this casserole is how easily it can be customized. Here are a few variations to spark your creativity:

  • Italian Twist: Add Italian seasonings, such as basil and oregano, and swap in marinara sauce for the soup.
  • Mexican Flair: Incorporate black beans, corn, and taco seasoning, and top with queso fresco.
  • Vegetarian Delight: Mix in spinach or kale for a nutrient boost and vibrant color.
  • Meat Lover’s Casserole: Fold in cooked ground beef or sausage for a heartier version that’s sure to satisfy.

Storage and Make-Ahead Instructions

Planning ahead? Here’s how to store and prepare your casserole:

  • Refrigeration: Store leftovers in an airtight container for up to 3 days. Reheat in the oven or microwave for best results.
  • Freezing: To freeze, prepare the casserole without baking, cover tightly, and freeze for up to 3 months. Thaw overnight in the fridge before baking.
  • Make-Ahead Option: Assemble the casserole a day in advance and refrigerate. Just bake when you’re ready!

Comprehensive FAQ

Got questions? Here are some common inquiries about the Ritz Cracker Eggplant Casserole:

  • Can I use fresh herbs? Absolutely! Fresh basil or parsley adds a burst of flavor.
  • What can I substitute for eggplant? Zucchini or yellow squash can work well in this recipe.
  • How do I know when it’s done? Look for a golden, crispy topping and bubbling filling.
  • Can I make it gluten-free? Yes! Use gluten-free crackers and ensure all other ingredients are gluten-free.
  • Is this dish suitable for kids? Yes! The flavors are mild and appealing to most palates.
  • What should I serve with this casserole? It pairs beautifully with a side salad or crusty bread.
  • Can I double this recipe? Definitely! Just use a larger baking dish and increase the cooking time slightly.
  • How spicy is this recipe? It’s mild, but you can adjust the heat by adding more spices if desired.

Nutrition Tips and Dietary Adaptations

To make this dish even more nutritious, consider these tips:

  • Reduce Calories: Use low-fat mayonnaise and cheese for a lighter version without sacrificing flavor.
  • Increase Fiber: Add lentils or beans to the filling for an extra fiber boost.
  • Low-Carb Option: Substitute the crackers with crushed pork rinds or almond flour topping.

Equipment Recommendations

Here’s what you’ll need to make this casserole:

  • Medium Pot: For boiling the eggplant.
  • Mixing Bowl: A large bowl for combining ingredients.
  • Baking Dish: A 1.5-quart casserole dish works perfectly.
  • Measuring Cups and Spoons: Essential for accuracy in your ingredients.
  • Oven Mitts: Safety first when handling hot dishes!

Serving Suggestions

This Ritz Cracker Eggplant Casserole is versatile and can be served in many delightful ways:

  • As a Side Dish: Pair it with grilled meats or fish for a complete meal.
  • For Brunch: Serve alongside fresh salads and crusty bread for a lovely brunch spread.
  • At Potlucks: Bring it to gatherings where it’s sure to be a hit!

With this comprehensive guide, you’re not just cooking a dish; you’re creating an experience! Embrace the adventure of cooking with me as we transform simple ingredients into a flavorful Ritz Cracker Eggplant Casserole that will leave your guests wanting more. Get ready to ignite your culinary passions and savor every delicious bite!

Ritz Cracker Eggplant Casserole

Prep Time 15 minutes
Cook Time 25 minutes
Total Time 40 minutes
Servings 4 servings
Calories 450
A delicious and easy casserole combining eggplant, creamy sauce, and crunchy Ritz crackers for a comforting meal.

Ingredients

Vegetables

  • 1/2 container golden mushroom condensed soup
  • 1/2 cup mayonnaise
  • 1 egg beaten egg
  • 1 tablespoon onion, grated
  • 1 cup shredded cheese
  • 1 medium eggplant
  • 3/4 cup crushed Ritz crackers (about 15 crackers)
  • 1 tablespoon butter

Instructions 

  • Peel, dice, and boil eggplant in salted water for 10 minutes.
  • Mix soup, mayonnaise, beaten egg, grated onion, and cheese with cooked eggplant.
  • Transfer mixture to a greased 1.5-quart casserole and top with crushed crackers and butter.
  • Bake at 350°F (175°C) for 25 minutes.

Notes

For a crispier topping, broil for an additional 2 minutes before serving.
Calories: 450kcal
Cost: $12
Course: Main Course
Cuisine: American
Keyword: Eggplant

Nutrition

Calories: 450kcal | Carbohydrates: 40g | Protein: 20g | Fat: 25g | Sodium: 900mg

Why This Garlic Parmesan Chicken Fillet Will Become Your New Favorite

If you’re looking for a dish that combines indulgence with ease, look no further than this Garlic Parmesan Chicken Fillet with a Kick! This recipe takes the classic combination of garlic and Parmesan cheese and adds a fiery twist that will tantalize your taste buds. Imagine the aroma of sautéed garlic filling your kitchen, the creamy sauce enveloping perfectly cooked chicken fillets, and just the right amount of heat to keep things exciting. This dish is not just food; it’s an experience that brings warmth and vibrancy to your dinner table.

Every bite tells a story, and when you cook this meal, you’re not just preparing dinner — you’re inviting your family or friends to share in a culinary adventure. Whether it’s a weeknight dinner or a special occasion, this recipe fits the bill by being both quick to prepare and utterly satisfying.

Ingredients You’ll Need

Gathering the right ingredients is the first step in creating a memorable meal. Here’s what you’ll need for this spectacular dish:

  • 2 chicken fillets
  • 4 cloves garlic, minced
  • 1/2 cup grated Parmesan cheese
  • 1/2 cup heavy cream
  • 1 tablespoon olive oil
  • 1 teaspoon red pepper flakes
  • Salt and pepper to taste
  • Fresh parsley for garnish

How to Make Garlic Parmesan Chicken Fillet with a Kick

Eye-level shot of a succulent Garlic Parmesan Chicken Fillet with red pepper flakes, highlighting rich creaminess.

This recipe comes together in a few simple steps, making it perfect for both novice cooks and seasoned chefs. Let’s dive into the cooking process:

  1. Season the Chicken: Start by seasoning the chicken fillets generously with salt, pepper, and the red pepper flakes. This initial seasoning is crucial, as it sets the foundation for the flavor profile.
  2. Cook the Chicken: In a skillet, heat the olive oil over medium heat. Once the oil is hot, add the seasoned chicken fillets. Cook for about 5-7 minutes on each side until they are golden brown and fully cooked through. The goal here is to achieve a beautiful sear that locks in the juices.
  3. Remove and Set Aside: Once the chicken is cooked, remove it from the skillet and set it aside to rest. This resting period allows the juices to redistribute, ensuring the chicken remains moist.
  4. Sauté the Garlic: In the same skillet, add the minced garlic. Sauté for about 1 minute until fragrant. This step is where the magic begins — the aroma of garlic will start to fill your kitchen and get everyone excited for what’s coming!
  5. Make the Creamy Sauce: Pour in the heavy cream and bring it to a simmer. Stir the mixture gently to combine the flavors, and then add the grated Parmesan cheese. Keep stirring until the cheese melts and the sauce becomes smooth and creamy.
  6. Combine and Heat: Return the chicken to the skillet, coating it thoroughly in the creamy sauce. Allow it to cook for an additional 2-3 minutes to heat through and absorb some of that delicious sauce.
  7. Garnish and Serve: Finally, garnish with freshly chopped parsley before serving. This adds a pop of color and a touch of freshness that elevates the dish even further.

Helpful Tips for Perfecting Your Dish

Cooking is as much about the details as it is about the ingredients. Here are some tips to enhance your Garlic Parmesan Chicken Fillet:

  • Quality Ingredients: Use high-quality chicken and fresh garlic for the best flavor. Organic chicken fillets can make a noticeable difference in taste and texture.
  • Adjust the Spice Level: If you’re cooking for kids or those sensitive to heat, feel free to reduce or omit the red pepper flakes. You can always serve the spicy sauce on the side for those who enjoy a kick!
  • Use Fresh Herbs: Fresh parsley is a great garnish, but you can also experiment with other herbs like basil or thyme for a different flavor profile.

Variations to Try

This recipe is versatile, allowing you to play around with flavors and ingredients. Here are a few variations:

  • Add Vegetables: Include sautéed spinach, sun-dried tomatoes, or mushrooms in the sauce for added nutrition and flavor.
  • Cheese Choices: If you don’t have Parmesan, try Pecorino Romano or even a blend of Italian cheeses for a different twist.
  • Make It Zesty: Squeeze a bit of lemon juice into the sauce for a refreshing zing that beautifully complements the creaminess.

Equipment You’ll Need

Before you start cooking, make sure you have the following equipment handy:

  • A large skillet or frying pan for cooking the chicken and making the sauce.
  • A wooden spoon or spatula for stirring.
  • A sharp knife for mincing garlic and cutting chicken.
  • A cutting board for food prep.

Storage and Freezing Tips

If you find yourself with leftovers (which is rare because everyone loves this dish), here’s how to store them:

  • Refrigeration: Store the chicken and sauce in an airtight container in the refrigerator for up to 3 days. Reheat gently over low heat on the stove, adding a splash of cream or broth to loosen the sauce.
  • Freezing: This dish can be frozen, but the sauce may separate upon thawing. To freeze, let the dish cool completely, then portion it into freezer-safe containers. Use within 2 months for best flavor.

Frequently Asked Questions

Let’s address some common queries about this recipe:

  • Can I use milk instead of cream? Yes, but keep in mind that the sauce will be thinner. For a creamier texture, consider adding a little butter to help thicken it.
  • What if I don’t have Parmesan cheese? You can substitute it with any hard, aged cheese that has a salty flavor, like Grana Padano or aged Gouda.
  • Is this dish suitable for meal prep? Absolutely! Just make sure to store it properly and reheat it gently to maintain the creamy texture.

Troubleshooting Tips

If you encounter any hiccups while cooking, here are some troubleshooting tips:

  • Too Thick Sauce: If your sauce becomes too thick, simply whisk in a little more cream or chicken broth to reach your desired consistency.
  • Too Salty: If the sauce turns out too salty, try adding a splash of lemon juice or a bit of sugar to balance the flavors.

Conclusion

There you have it — a delightful recipe for Garlic Parmesan Chicken Fillet with a Kick that’s bound to ignite your dinner routine. This dish is not just food; it’s an opportunity to connect, share stories, and create memories around the table. The blend of creamy garlic, zesty Parmesan, and just the right amount of heat makes it not only satisfying but also incredibly versatile.

So, what are you waiting for? Grab your skillet, turn up the heat, and let this dish bring a spark to your next meal. Whether you’re cooking for family, friends, or just treating yourself, this recipe promises to deliver bold flavors and a satisfying experience. Enjoy, and happy cooking!

Garlic Parmesan Chicken Fillet with a Kick – Quick & Creamy

Prep Time 10 minutes
Cook Time 15 minutes
Total Time 25 minutes
Servings 2 servings
Calories 550
A flavorful and creamy chicken dish with a spicy kick, perfect for a quick dinner.

Ingredients

Protein

  • 2 pieces chicken fillets
  • 4 cloves garlic, minced
  • 1/2 cup grated parmesan cheese
  • 1/2 cup heavy cream
  • 1 tablespoon olive oil
  • 1 teaspoon red pepper flakes
  • to taste salt and pepper
  • for garnish fresh parsley

Instructions 

  • Season chicken with salt, pepper, and red pepper flakes.
  • Cook chicken in heated olive oil for 5-7 minutes per side until golden and cooked through.
  • Sauté garlic in the same skillet for 1 minute.
  • Pour in heavy cream, add Parmesan, and simmer until smooth.
  • Return chicken to skillet, coat with sauce, and cook 2-3 minutes. Garnish with parsley.

Notes

Serve with your favorite side for a complete meal.
Calories: 550kcal
Cost: $15
Course: Main Course
Cuisine: American
Keyword: chicken, garlic, Parmesan

Nutrition

Calories: 550kcal | Carbohydrates: 8g | Protein: 45g | Fat: 35g | Sodium: 600mg

Loved this recipe? Save it to your favorite Pinterest board so you can easily find it later! It’s the perfect way to keep all your sweet ideas in one place. ✨

Detailed view of a cooked Garlic Parmesan Chicken Fillet with warm lighting, featuring minced garlic and a sprinkle of cheese.

Why This Recipe is a Must-Try

If you’re on the lookout for a dish that embodies the perfect balance of flavors, textures, and colors, look no further than my Beef and Broccoli recipe. This delightful classic is not just a staple in Chinese take-out menus; it’s a celebration of culinary adventure that you can whip up in the comfort of your own kitchen. Imagine tender slices of beef mingling with vibrant green broccoli, all swimming in a savory sauce that’s a touch sweet, a hint salty, and packed with umami. It’s a dish that not only satisfies your hunger but also ignites your passion for cooking.

The beauty of this recipe lies in its simplicity and the ability to customize it to your liking. Whether you’re a novice in the kitchen or a seasoned chef looking for a quick weeknight meal, Beef and Broccoli is a dish that speaks to your soul and invites you to play with flavors and ingredients. Plus, it’s healthier than take-out, making it an excellent choice for those who want to enjoy delicious food without the guilt. So, roll up your sleeves, grab that skillet, and let’s dive into this culinary journey!

Ingredients You’ll Need

To create this masterpiece, you’ll need the following ingredients:

  • 1 pound beef sirloin, thinly sliced
  • 2 cups broccoli florets
  • 3 tablespoons soy sauce
  • 2 tablespoons oyster sauce
  • 1 tablespoon cornstarch
  • 1 tablespoon vegetable oil
  • 3 cloves garlic, minced
  • 1 teaspoon ginger, minced
  • 1/2 cup beef broth
  • Salt and pepper to taste
  • Cooked rice for serving

These ingredients not only come together to create a flavor explosion but also represent the essence of Chinese cuisine — fresh, vibrant, and full of life.

Choosing the Right Cut of Beef

Delicious Beef and Broccoli displayed in a bowl, featuring rich colors and inviting textures under soft lighting.

One of the secrets to achieving tender beef in this dish is selecting the right cut. While beef sirloin is my personal favorite for its balance of flavor and tenderness, you can also opt for flank steak or skirt steak for a delicious result. Avoid using overly expensive cuts like filet mignon; they don’t hold up well in stir-frying and can lead to a less enjoyable texture. If you find yourself with a tougher cut, don’t fret! I’ll share tips on how to make it tender later in this article.

Creating Tender Beef: The Marinade Magic

To ensure your beef is melt-in-your-mouth tender, a quick marinade is essential. Combine soy sauce, oyster sauce, cornstarch, and a pinch of pepper in a bowl. Add your thinly sliced beef and let it marinate for about 15 minutes. This not only infuses flavor but also helps to break down the proteins in the meat, leading to a more tender bite. If you’re using a tougher cut, consider adding a dash of baking soda to the marinade. This is a common trick in Chinese restaurants to achieve that juicy, tender result.

Vegetable Alternatives to Spice Things Up

While broccoli is the star of this dish, feel free to get creative! You can add vibrant bell peppers, crunchy snap peas, or even carrots for a pop of color and additional nutrients. Just be sure to adjust cooking times accordingly to ensure everything is perfectly tender yet still has a delightful crunch. The versatility of this dish allows you to tailor it to your taste preferences and what you have on hand.

Mise en Place: The Key to Smooth Cooking

Before you start cooking, it’s crucial to have all your ingredients prepped and within arm’s reach — a concept known as mise en place. Chop your vegetables, mince your garlic and ginger, and have your sauces ready to go. Stir-frying is a quick process, and having everything ready will prevent any mishaps and ensure your beef and broccoli comes out perfectly cooked.

Wok vs. Skillet: What’s the Best Choice?

While traditional Chinese cooking often calls for a wok, I’m a firm believer that a good skillet can do the job just as well, if not better. A large, flat skillet allows for even heat distribution and makes it easier to sear the beef properly, especially on electric stoves. If you do choose to use a wok, make sure it’s a heavy-bottomed one that can accommodate your stove’s heating element. In either case, the goal is to achieve that beautiful sear on your beef and a vibrant color on your vegetables.

Cooking Steps: Let’s Get Sizzling!

Now that you have everything prepped and ready, follow these steps to bring your Beef and Broccoli to life:

  1. In a bowl, mix the soy sauce, oyster sauce, cornstarch, and pepper. Add the sliced beef and marinate for 15 minutes.
  2. In a large skillet or wok, heat the vegetable oil over medium-high heat. Add the minced garlic and ginger, stir-frying for about 30 seconds until fragrant.
  3. Add the marinated beef to the skillet and cook until browned, about 3-4 minutes. Remove the beef from the skillet and set aside.
  4. In the same skillet, add the broccoli florets and stir-fry for 2-3 minutes until bright green and slightly tender.
  5. Return the beef to the skillet, pour in the beef broth, and stir everything together. Cook for another 2-3 minutes until the sauce thickens and the broccoli is cooked but still crunchy.
  6. Serve your sizzling beef and broccoli over a bed of hot, fluffy rice.

Storage and Freezing: Keep the Flavor Alive

If you find yourself with leftovers (though I doubt you will!), you can store them in an airtight container in the refrigerator for up to three days. To reheat, simply warm it in a skillet over medium heat, adding a splash of beef broth if needed to loosen the sauce. For longer storage, you can freeze the dish for up to three months. Just be aware that the broccoli may lose a bit of its crunch upon reheating, but the flavors will still be delicious.

Variations and Customizations

Now that you’ve mastered the basic recipe, here are a few variations to spark your creativity:

  • Spicy Beef and Broccoli: If you crave a bit of heat, add a splash of chili oil or a teaspoon of sriracha to the sauce.
  • Vegetarian Version: Swap out the beef for tofu or tempeh, and use vegetable broth instead of beef broth for a delicious plant-based meal.
  • Noodle Delight: Serve the beef and broccoli over cooked noodles instead of rice for a delightful twist.

Frequently Asked Questions

1. Can I use frozen broccoli?
Yes, you can use frozen broccoli. Just be sure to thaw and drain it before adding it to the skillet to avoid excess moisture in your dish.

2. What can I substitute for oyster sauce?
If you don’t have oyster sauce, you can use hoisin sauce or a mushroom-based sauce for a similar flavor profile.

3. Can I make this dish ahead of time?
While this dish is best enjoyed fresh, you can prep the ingredients ahead of time and store them separately in the refrigerator until you’re ready to cook.

Troubleshooting Common Issues

Every cook has faced challenges in the kitchen! If your beef is tough, it may not have marinated long enough, or the cut may not have been ideal. Always ensure you’re using the right cut and giving it ample time to absorb the flavors. If your sauce is too thin, simply cook it a bit longer to reduce it to your desired consistency. And remember, practice makes perfect!

Final Thoughts: Embrace the Flavor

Cooking is more than just a task; it’s an opportunity to express yourself and connect with those you love. My Beef and Broccoli recipe is a gateway into the world of flavor, offering a chance to experiment with different ingredients and techniques. So, don’t be afraid to make this dish your own. Invite friends over, share your culinary triumphs, and let the flavors ignite your passion for cooking. Because at the end of the day, it’s not just about the food; it’s about the stories we create around the table. Now, go forth and get sizzling! You’ve got this!

Beef and Broccoli: Easy Chinese Take-Out Recipe

Prep Time 10 minutes
Cook Time 10 minutes
Total Time 20 minutes
Servings 4 servings
Calories 350
A quick and delicious homemade beef and broccoli stir-fry that captures the flavors of Chinese take-out.

Ingredients

Meat

  • 1 pound beef sirloin, thinly sliced
  • 2 cups broccoli florets
  • 3 tablespoons soy sauce
  • 2 tablespoons oyster sauce
  • 1 tablespoon cornstarch
  • 1 tablespoon vegetable oil
  • 3 cloves garlic, minced
  • 1 teaspoon ginger, minced
  • 1/2 cup beef broth
  • to taste salt and pepper
  • for serving cooked rice

Instructions 

  • Mix soy sauce, oyster sauce, cornstarch, salt, and pepper. Marinate beef for 15 minutes.
  • Heat oil in a skillet, stir-fry garlic and ginger for 30 seconds.
  • Add beef, cook until browned (3-4 min), then remove from skillet.
  • Stir-fry broccoli 2-3 min until bright green and tender.
  • Return beef, add broth, cook 2-3 min until sauce thickens and broccoli is crunchy.
  • Serve over cooked rice.

Notes

Use high heat for stir-frying to prevent steaming the vegetables.
Calories: 350kcal
Cost: $15
Course: Main Course
Cuisine: Chinese
Keyword: beef, Broccoli

Nutrition

Calories: 350kcal | Carbohydrates: 40g | Protein: 30g | Fat: 10g | Sodium: 1200mg

Loved this recipe? Save it to your favorite Pinterest board so you can easily find it later! It’s the perfect way to keep all your sweet ideas in one place. ✨

A detailed view of Beef and Broccoli with garlic and ginger, emphasizing the dish's fresh ingredients and appetizing look.

Welcome to a culinary adventure where every bite sings with flavor! Today, we’re diving into the world of baked feta spaghetti squash, a dish that’s not only delicious but also brings a vibrant explosion of colors and textures to your table. Imagine roasted spaghetti squash, creamy feta cheese, and bursting cherry tomatoes coming together in harmony. This is a meal that not only satisfies your hunger but also excites your taste buds!

In this article, I’ll guide you through every aspect of this recipe, from ingredient breakdown to troubleshooting tips, ensuring that you can confidently create this masterpiece in your own kitchen. So grab your apron, and let’s get cooking!

Why You’ll Love This Recipe

Before we jump into the nitty-gritty, let’s explore why this feta spaghetti squash dish deserves a spot on your dinner table:

  • Healthful & Low-Carb: Spaghetti squash is a fantastic low-carb alternative to traditional pasta, making this dish a great option for those watching their carb intake.
  • Quick & Easy: This recipe is straightforward and quick to prepare, making it perfect for busy weeknights.
  • Flavor Explosion: The combination of roasted tomatoes and melted feta creates a creamy, rich sauce that elevates the spaghetti squash to new heights.
  • Customizable: You can easily tailor this recipe to include your favorite vegetables or spices, allowing for endless variations.
  • Impressive Presentation: The vibrant colors of this dish make it a showstopper at any dinner party.

Detailed Ingredient Breakdown

Here’s what you’ll need to make this vibrant dish:

  • 1 medium spaghetti squash: The star of the show, this squash will transform into noodle-like strands.
  • 1 block (8 oz) of feta cheese: Creamy and tangy, this cheese melts beautifully and adds depth to the dish.
  • 1 pint of cherry or grape tomatoes: These juicy little gems burst with flavor when roasted, adding a sweet contrast to the feta.
  • 3 tablespoons olive oil: A good-quality olive oil enhances the flavors and aids in roasting.
  • 2 cloves garlic, minced: Fresh garlic brings an aromatic kick that complements the other ingredients perfectly.
  • 1 teaspoon dried oregano: This herb adds a Mediterranean touch to the dish.
  • 1 teaspoon dried basil: Another aromatic herb that enhances the overall flavor profile.
  • Salt and pepper, to taste: Essential for seasoning and bringing out the flavors of the ingredients.
  • Fresh parsley, chopped for garnish: A sprinkle of fresh herbs adds a pop of color and freshness.

Expert Tips for Perfecting This Recipe

Let’s take your cooking game to the next level with these pro tips:

  • Choosing the Right Squash: Look for a firm, heavy spaghetti squash. Ensure it’s free of soft spots or blemishes.
  • Oven Temperature: Preheating your oven to the right temperature is crucial for even roasting.
  • Don’t Skip the Oil: A generous drizzle of olive oil helps the squash roast evenly and enhances flavor.
  • Timing is Key: Keep an eye on your squash while it’s roasting. Every oven is different, so adjust the time as needed.
  • Mixing it Up: Feel free to add other vegetables, like bell peppers or spinach, for added nutrition and flavor.
  • Breaking Up the Feta: When mixing the baked feta and tomatoes, break it up gently to make a creamy sauce.
  • Season to Taste: Always taste your dish before serving and adjust the seasoning as necessary.
  • Garnish Right Before Serving: Adding fresh herbs at the end retains their vibrant flavor and color.

Common Mistakes and Troubleshooting

Side view of a serving of baked feta spaghetti squash with herbs and cheese.

Even the best of us make mistakes in the kitchen! Here are some common pitfalls and how to avoid them:

  • Overcooking the Squash: If your spaghetti squash is overcooked, it can become mushy. Check for doneness with a fork and remove it promptly.
  • Feta Too Firm: If your feta doesn’t soften, it might not have been in the oven long enough. Ensure it’s exposed to the heat properly.
  • Lack of Flavor: If the dish tastes bland, it might need more salt, pepper, or herbs. Don’t be afraid to adjust!
  • Not Using Enough Oil: Insufficient oil can lead to dry squash. Ensure you coat it well before roasting.

Variations to Try

Now that you’ve mastered the basic recipe, let’s explore some delicious variations:

  • Spicy Feta Blitz: Add red pepper flakes or diced jalapeños to the feta for a spicy kick.
  • Herbed Delight: Use fresh herbs like thyme or rosemary for a fragrant twist.
  • Protein Boost: Toss in grilled chicken or chickpeas to make it a more substantial meal.
  • Cheesy Goodness: Mix in a handful of shredded mozzarella cheese for an extra cheesy texture.

Storage and Make-Ahead Instructions

This dish can be prepared in advance, making it a fantastic option for meal prep:

  • Storage: Store leftovers in an airtight container in the refrigerator for up to 3 days.
  • Reheating: Reheat in the oven or microwave until warmed through. Add a splash of olive oil to keep it moist.
  • Make-Ahead: You can roast the spaghetti squash and prepare the feta-tomato mixture a day in advance. Assemble and bake just before serving.

Comprehensive FAQ

Here are some frequently asked questions to help you master this recipe:

  • Can I use other types of cheese? Absolutely! Goat cheese or ricotta work beautifully in this recipe.
  • What if I can’t find spaghetti squash? Zucchini noodles can be a great substitute, though the texture will differ.
  • Is this dish vegan-friendly? You can omit the feta for a vegan version or use a plant-based cheese alternative.
  • Can I grill the squash instead of roasting it? Yes, grilling adds a lovely smoky flavor!
  • How do I know when the squash is done? It’s done when the flesh is tender and can be easily scraped into strands with a fork.
  • Can I freeze leftovers? While it’s best fresh, you can freeze it in an airtight container for up to a month.
  • What can I serve with this dish? Pair it with a side salad or grilled protein for a complete meal.
  • How can I enhance the flavor? Consider adding a squeeze of lemon juice or balsamic vinegar just before serving for brightness.

Nutritional Tips and Dietary Adaptations

This dish is not only delicious but also nutritious:

  • Low-Carb Friendly: The spaghetti squash makes this a great choice for low-carb diets.
  • Gluten-Free: Naturally gluten-free, it’s a safe option for those with gluten sensitivities.
  • Vegetarian Delight: Packed with nutrients, it’s a wholesome vegetarian option.
  • Boost Fiber Intake: Adding more veggies increases the fiber content, making it even healthier.

Equipment Recommendations

Here’s what you’ll need to whip up this recipe:

  • Sharp Chef’s Knife: For cutting through the hard skin of the spaghetti squash.
  • Baking Sheet: A sturdy baking sheet lined with parchment paper for easy cleanup.
  • Mixing Bowl: To combine the feta, tomatoes, and seasoning before roasting.
  • Fork: Essential for scraping the squash into strands once cooked.

Serving Suggestions

For a complete meal experience, here are some serving ideas:

  • Pair with Protein: Serve alongside grilled chicken, shrimp, or chickpeas for added protein.
  • Salad Side: A light arugula or spinach salad pairs perfectly with this dish.
  • Wine Pairing: A crisp white wine like Sauvignon Blanc complements the flavors beautifully.
  • Leftover Transformation: Use leftovers as a filling for wraps or stuffed into bell peppers for a new meal.

There you have it! A comprehensive guide to creating a delightful Baked Feta Spaghetti Squash that will make your taste buds dance. Remember, cooking is an adventure, so don’t be afraid to experiment and make this dish your own. The thrill of flavor awaits you — now go ignite your dinner!

Baked Feta Spaghetti Squash

Prep Time 10 minutes
Cook Time 50 minutes
Total Time 1 hour
Servings 4 servings
Calories 350
A delicious and healthy dish combining roasted spaghetti squash with creamy feta and cherry tomatoes for a flavorful meal.

Ingredients

Spaghetti Squash

  • 1 medium spaghetti squash

Feta Cheese

  • 8 oz feta cheese

Cherry or Grape Tomatoes

  • 1 pint cherry or grape tomatoes

Olive Oil

  • 3 tablespoons olive oil

Garlic

  • 2 cloves garlic, minced

Dried Oregano

  • 1 teaspoon dried oregano

Dried Basil

  • 1 teaspoon dried basil

Salt and Pepper

  • to taste Salt and pepper

Fresh Parsley

  • for garnish Fresh parsley, chopped

Instructions 

  • Preheat oven to 400°F (200°C). Cut squash in half, scoop seeds, drizzle with olive oil, season, and roast for 35-40 minutes.
  • Place feta and tomatoes in a baking dish, drizzle with olive oil, season, and bake for 15-20 minutes until feta melts and tomatoes soften.
  • Scrape roasted squash into strands, then mix with baked feta and tomatoes to create a creamy sauce. Combine with squash and serve garnished with parsley.

Notes

For extra flavor, add a squeeze of lemon or red pepper flakes.
Calories: 350kcal
Cost: $15
Course: Main Course
Cuisine: Mediterranean
Keyword: Vegetarian

Nutrition

Calories: 350kcal | Carbohydrates: 45g | Protein: 12g | Fat: 18g | Sodium: 600mg