Author

Avery Collins

Browsing

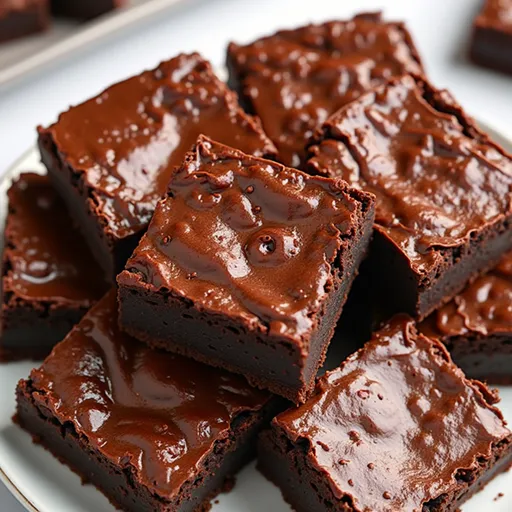
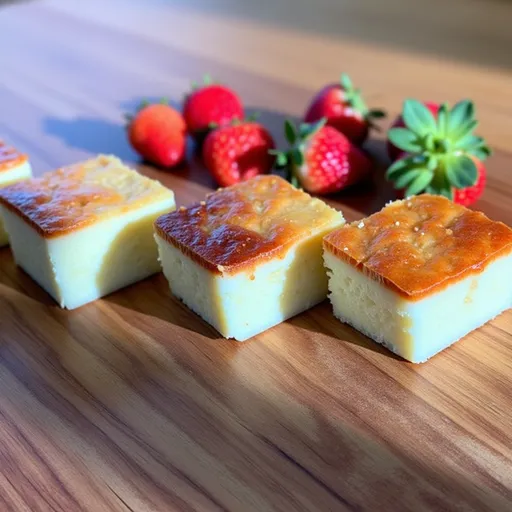
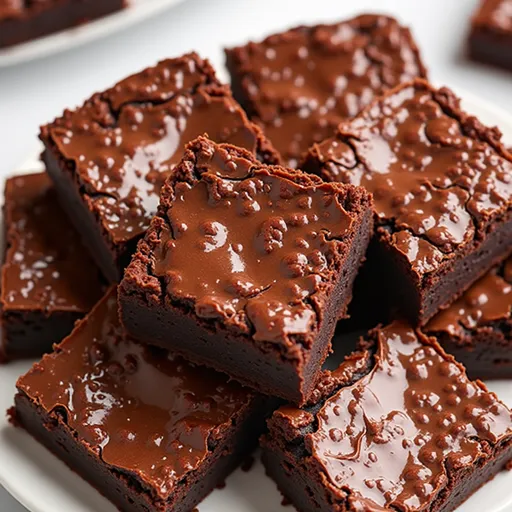
Why You’ll Love These Brownies

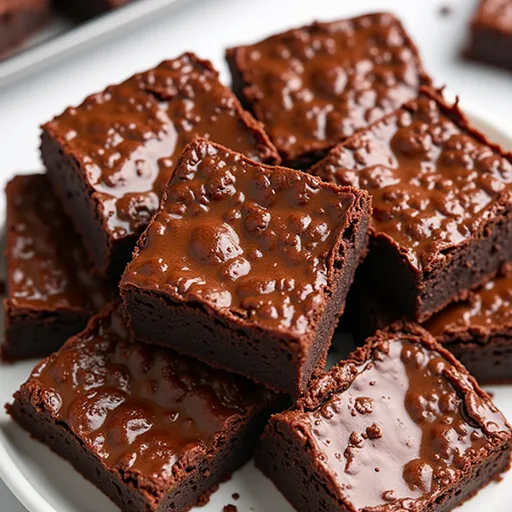
When cravings strike, nothing hits the spot quite like a rich, chocolate brownie. But what if I told you that you could indulge in this heavenly treat without the guilt? Enter the Flourless Greek Yogurt Brownies — a delectable fusion of healthy ingredients and mouthwatering flavors that redefine the dessert experience. These brownies are not just a sweet treat; they’re a celebration of texture and taste, all while keeping your health goals intact. With a fudgy interior and a hint of sweetness, they’re perfect for satisfying your cravings without compromising on nutrition.

Ingredients You’ll Need

Before we roll up our sleeves and dive into the baking process, let’s gather what we need. This recipe calls for simple, wholesome ingredients that you probably already have in your pantry:

  • 1 cup unsweetened cocoa powder
  • 1 cup Greek yogurt
  • 1/2 cup honey or maple syrup
  • 2 large eggs
  • 1 teaspoon vanilla extract
  • 1/2 teaspoon baking powder
  • 1/4 teaspoon salt
  • 1/2 cup chocolate chips (optional)

Essential Tools for Baking

A slice of flourless Greek yogurt brownies on a plate, highlighting its fudgy interior and sprinkled chocolate chips.

Having the right tools makes any cooking endeavor a breeze. Here’s what you’ll need to whip up these brownies:

  • 8×8 inch baking dish
  • Mixing bowls
  • Whisk or spatula
  • Parchment paper (for easy removal)
  • Measuring cups and spoons

Let’s Get Baking!

Ready to embark on this delicious journey? Follow these straightforward steps to create your Flourless Greek Yogurt Brownies:

Step 1: Preheat the Oven

First things first, preheat your oven to 350°F (175°C). This ensures that your brownies bake evenly and achieve that perfect gooey texture.

Step 2: Combine the Wet Ingredients

In a large mixing bowl, combine the Greek yogurt, honey (or maple syrup), eggs, and vanilla extract. Whisk these ingredients together until they form a creamy mixture. This is where the magic begins as the yogurt adds moisture and richness to the brownies.

Step 3: Add the Dry Ingredients

Next, sift in the cocoa powder, baking powder, and salt. Sifting is crucial as it helps to avoid lumps, ensuring a smooth batter. Stir the mixture until everything is fully incorporated. Be careful not to overmix; we want to keep that fudgy texture intact!

Step 4: Fold in the Chocolate Chips

If you’re feeling indulgent, now’s the time to fold in the chocolate chips. These little gems will melt into the brownie, creating pockets of gooey goodness that you won’t want to miss.

Step 5: Pour and Spread

Pour the batter into your greased 8×8 inch baking dish and spread it out evenly. This will help ensure that all parts of the brownie cook uniformly.

Step 6: Bake to Perfection

Slide the baking dish into your preheated oven and bake for 20-25 minutes. To check for doneness, insert a toothpick into the center of the brownies. It should come out mostly clean with a few moist crumbs attached — that’s the sweet spot!

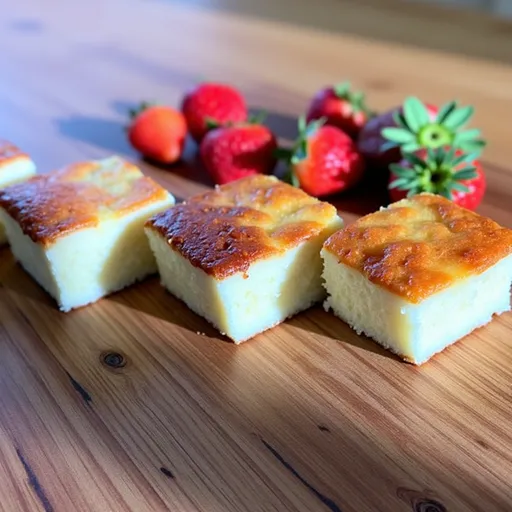
Step 7: Cool and Slice

Once baked, remove the brownies from the oven and let them cool in the pan for about 10 minutes. This cooling time is essential for setting the brownies, making them easier to slice. After they’ve cooled, lift them out using the parchment paper, slice them into squares, and get ready to enjoy!

Tips for the Perfect Brownies

Cooking is an art, and like any artist, you want to get it right. Here are some tips to ensure your Flourless Greek Yogurt Brownies turn out perfect every time:

  • Use high-quality cocoa powder: The flavor of your brownies largely depends on the cocoa powder. Invest in a good brand for the best results.
  • Let them cool completely: Cooling is crucial for achieving the right texture. Don’t rush this step!
  • Customize your sweetness: If you prefer a less sweet brownie, adjust the honey or maple syrup to your taste.
  • Double up: Feel free to double the recipe to share with friends or for meal prep. These brownies keep well in the fridge!

Creative Variations

Why stick to the basics when you can explore endless possibilities? Here are a few ideas to spice up your brownie game:

  • Nutty Delight: Fold in chopped nuts like walnuts or pecans for an added crunch.
  • Fruit Fusion: Add a handful of raspberries or chopped bananas to the batter for a fruity twist.
  • Spiced Up: A pinch of cinnamon or a dash of espresso powder can enhance the chocolate flavor.
  • Dairy-Free Option: Substitute Greek yogurt with a plant-based yogurt to make these brownies dairy-free!

Storage and Freezing Tips

These brownies not only taste amazing fresh from the oven, but they also store well:

  • Refrigerator: Keep them in an airtight container in the fridge for up to 5 days.
  • Freezer: Wrap them individually in plastic wrap or parchment paper and store in a freezer-safe container. They’ll last for up to 3 months. Just thaw in the fridge or microwave when you’re ready to indulge.

Frequently Asked Questions

Got questions? Let’s clear up some common queries about these delightful brownies:

  • Can I make these brownies vegan? Yes! Use flax eggs instead of regular eggs and plant-based yogurt to keep them vegan-friendly.
  • Are they gluten-free? Absolutely! Since there’s no flour involved, these brownies are naturally gluten-free. Just check your cocoa and baking powder brands for gluten-free certification.
  • What if I don’t have Greek yogurt? You can substitute with plain yogurt, but Greek yogurt provides a creamier texture.

Troubleshooting Common Issues

If your brownies don’t turn out as expected, don’t worry! Here’s how to fix common problems:

  • Too dry: This can happen if they’re overbaked. Make sure to check for doneness a few minutes early.
  • Too gooey: If they’re too undercooked, bake them a little longer until the toothpick comes out with a few moist crumbs.

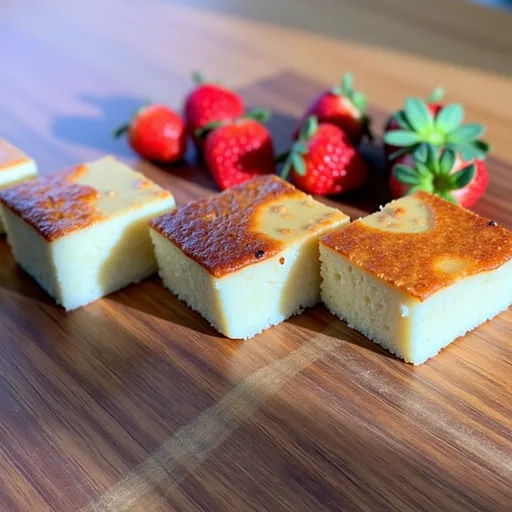
Conclusion: Join the Brownie Revolution!

The Flourless Greek Yogurt Brownies are not just a recipe; they’re an invitation to indulge guilt-free. With each bite, you’re celebrating the balance of health and flavor. Whether you’re sharing them with friends at a gathering, enjoying them as an afternoon snack, or treating yourself after a long day, these brownies will elevate your dessert game. So grab your ingredients, embrace the delicious adventure of baking, and let’s make every bite a celebration! Don’t forget to share your creations with me — I can’t wait to see how you make these brownies your own!

Flourless Greek Yogurt Brownies

Prep Time 10 minutes
Cook Time 25 minutes
Total Time 35 minutes
Servings 9 pieces
Calories 180
These rich and fudgy brownies combine Greek yogurt and cocoa for a healthier twist on a classic treat.

Ingredients

Dried ingredients

  • 1 cup unsweetened cocoa powder
  • 1 cup greek yogurt
  • 1/2 cup honey or maple syrup
  • 2 large eggs
  • 1 teaspoon vanilla extract
  • 1/2 teaspoon baking powder
  • 1/4 teaspoon salt
  • 1/2 cup chocolate chips (optional)

Instructions 

  • Preheat oven to 350°F (175°C) and grease an 8x8 inch baking dish.
  • Mix Greek yogurt, honey, eggs, and vanilla until smooth.
  • Add cocoa powder, baking powder, and salt; stir until combined.
  • Fold in chocolate chips if using.
  • Pour batter into dish and bake for 20-25 minutes.
  • Cool for 10 minutes before slicing and serving.

Notes

For extra flavor, add a pinch of cinnamon or top with fresh berries.
Calories: 180kcal
Cost: $10
Course: Dessert
Cuisine: Greek
Keyword: brownies

Nutrition

Calories: 180kcal | Carbohydrates: 20g | Protein: 6g | Fat: 9g | Sodium: 50mg

Loved this recipe? Save it to your favorite Pinterest board so you can easily find it later! It’s the perfect way to keep all your sweet ideas in one place. ✨

An inviting view of flourless Greek yogurt brownies, emphasizing soft shadows and the depth of rich cocoa color.

Welcome to Your Flavorful Adventure!

Are you ready to indulge your taste buds with a dish that balances health and flavor? Buckle up because I’m about to take you on a culinary journey with my Weight Watchers Deep Dish Pizza. This isn’t just any pizza; it’s a celebration of taste, crafted to support your health goals while satisfying your cravings. Packed with lean ground beef, chunky tomato sauce, and gooey mozzarella, this recipe is designed to make your taste buds dance with joy!

Why You’ll Love This Recipe

Let’s dive into the magic of this pizza! Here are five compelling reasons why this dish should be your next kitchen adventure:

  • Easy to Make: With just a handful of ingredients and simple steps, you can whip up this deep dish pizza in no time!
  • Health-Conscious: This recipe fits seamlessly into your Weight Watchers plan, making it a guilt-free indulgence.
  • Customizable: Feel free to swap out ingredients based on your preferences or what you have on hand.
  • Family-Friendly: Even picky eaters won’t be able to resist this flavorful dish, making it perfect for family dinners.
  • Meal Prep Friendly: Make it ahead of time, freeze it, and enjoy it on busy nights!

Ingredients Breakdown

Let’s gather our ingredients! Here’s what you’ll need to create this delicious deep dish pizza:

  • 1 lb Lean Ground Beef: A great source of protein; feel free to use turkey or plant-based alternatives for a healthier twist.
  • 15 oz Tomato Sauce (Italian Chunky Style): Adds rich flavor; for a spicy kick, consider adding crushed red pepper flakes.
  • 10 oz Pizza Dough: Use refrigerated dough for convenience or make your own for a personal touch.
  • 6 oz Mozzarella Cheese (shredded): The gooey goodness that brings everything together; try low-fat cheese for an even healthier option.

Pro Tips for Perfecting Your Pizza

A juicy portion of Weight Watchers Deep Dish Pizza with visible ground beef, tomato sauce, and a golden crust.

Before you dive into the cooking process, here are some expert tips to elevate your deep dish pizza:

  • Preheat Properly: Ensure your oven is fully preheated to 425°F for the best crust.
  • Don’t Rush the Cooking: Allow the ground beef to brown fully for a deeper flavor.
  • Layer Wisely: Spread the tomato sauce evenly over the meat for balanced flavor in every bite.
  • Watch the Cheese: Add cheese in the last few minutes of baking to achieve that perfect melt.
  • Let it Rest: Allow the pizza to cool for a few minutes before cutting so the layers set nicely.
  • Consider Toppings: Feel free to add veggies like bell peppers or mushrooms for added nutrition and texture.
  • Use Fresh Ingredients: Fresh herbs can elevate the flavor profile significantly!
  • Experiment with Spices: Add your favorite spices like oregano or basil to the meat mixture for an extra flavor kick.

Common Mistakes and Troubleshooting

Even the best chefs make mistakes! Here’s how to avoid common pitfalls:

  • Overcooking the Beef: Ensure you’re cooking it just until browned; overcooking can lead to dryness.
  • Using Too Much Sauce: While flavor is key, too much sauce can make the crust soggy.
  • Not Greasing the Pan: A light spray of cooking oil prevents sticking and helps achieve a crispy crust.

Delicious Variations to Try

Change it up! Here are some creative variations to keep things exciting:

  • Vegetarian Option: Substitute ground beef with lentils or mushrooms for a hearty yet meat-free version.
  • Spicy Kick: Add jalapeños or spicy sausage to the meat mixture for a fiery twist.
  • Cheesy Delight: Incorporate different cheeses like cheddar or pepper jack for a flavor-packed experience.
  • Herbed Crust: Mix dried herbs into the pizza dough for an aromatic base.

Storage and Make-Ahead Instructions

Want to prepare in advance? Here’s how you can make this pizza ahead of time and store leftovers:

  • Make-Ahead: Prepare the pizza up to the baking step, cover tightly with plastic wrap, and refrigerate for up to 24 hours.
  • Freezing: Bake and cool completely, then wrap tightly in aluminum foil and freeze for up to 3 months. Reheat in the oven when ready to enjoy.
  • Storing Leftovers: Store any leftovers in an airtight container in the fridge for up to 3 days. Reheat in the oven for the best texture.

FAQs About Weight Watchers Deep Dish Pizza

Got questions? I’ve got answers! Here are some frequently asked questions:

  • Can I use a different type of meat? Absolutely! Ground turkey or chicken work well, or you can use vegetarian alternatives.
  • How can I make this recipe gluten-free? Use a gluten-free pizza dough and ensure your sauce is gluten-free.
  • What can I serve with this pizza? A fresh salad or steamed veggies make great sides to complement the pizza.
  • Is this pizza suitable for meal prep? Yes! It freezes well and can be made in advance for busy days.
  • How many servings does this recipe yield? This recipe serves about 6 people, depending on slice size.
  • Can I add more cheese? Of course! Just be mindful of the added calories if you’re tracking.
  • What’s the best way to reheat leftovers? Reheat in the oven at 350°F until warmed through for the best texture.
  • Can I use homemade pizza dough? Definitely! Homemade dough can add a personal touch and enhance flavor.

Nutrition Tips and Dietary Adaptations

This pizza can fit into a balanced diet with a few tweaks:

  • Lower the Calories: Use leaner ground beef or turkey, and opt for low-fat cheese.
  • Add Vegetables: Incorporate veggies for added nutrients and fiber.
  • Watch Portion Sizes: Enjoy your pizza, but be mindful of portions to stay within your dietary goals.

Equipment Recommendations

Here’s what you’ll need to create this pizza masterpiece:

  • Nonstick Skillet: Ideal for browning the meat without sticking.
  • 9 x 13 Baking Dish: Perfect size for this deep dish pizza.
  • Measuring Cups and Spoons: Essential for accuracy in your ingredients.
  • Oven Mitts: Safety first—protect those hands when handling hot dishes!

Serving Suggestions

How you serve your pizza can elevate the whole experience! Here are some serving suggestions:

  • Fresh Herbs: Top with fresh basil or parsley for a burst of color and freshness.
  • Side Salad: A crisp side salad can balance out the richness of the pizza.
  • Personal Touch: Encourage guests to add their own toppings at the table for a fun, interactive meal!

Conclusion: Embrace the Adventure!

With this Weight Watchers Deep Dish Pizza, you’re not just cooking; you’re creating a culinary adventure! It’s a dish that invites you to embrace flavor while keeping health in balance. So grab your skillet, ignite your passion for cooking, and let’s make this passionate pizza together. Remember, spice is not just flavor; it’s about the thrill of the adventure. Enjoy every bite and keep exploring the delicious world of cooking!

Weight Watchers Deep Dish Pizza

Prep Time 10 minutes
Cook Time 17 minutes
Total Time 27 minutes
Servings 4 servings
Calories 550
A delicious and healthier deep dish pizza made with lean ground beef and fresh mozzarella, perfect for a satisfying meal.

Ingredients

Meat

  • 1 lb Lean Ground Beef
  • 15 oz Tomato Sauce (Italian Chunky Style)

Dough

  • 10 oz Pizza Dough

Cheese

  • 6 oz Mozzarella Cheese (shredded)

Instructions 

  • Preheat oven to 425°F (220°C). Grease a 9x13 dish.
  • Cook ground beef until browned; drain excess fat.
  • Add tomato sauce to beef and heat through.
  • Press dough into dish, top with meat mixture.
  • Bake for 12 minutes, add cheese, bake 5 more minutes.

Notes

For a healthier option, use reduced-fat cheese and lean beef.
Calories: 550kcal
Cost: $15
Course: Main Course
Cuisine: Italian
Keyword: Pizza

Nutrition

Calories: 550kcal | Carbohydrates: 50g | Protein: 40g | Fat: 20g | Sodium: 900mg

Why You Need This Chili in Your Life

Let’s talk about comfort food, shall we? You know, the kind that wraps around you like a warm hug on a chilly evening. My Healthy White Chicken Chili is not just any ordinary soup; it’s a vibrant celebration of flavors, textures, and wholesome ingredients that will ignite your passion for cooking and make your taste buds dance. Whether it’s a cozy dinner for two or a festive gathering with friends, this dish is the perfect companion, and it comes together in a snap!

Imagine diving into a bowl of this creamy, spicy delight, the flavors of rotisserie chicken mingling with the crunch of fresh vegetables and the richness of spices. It’s hearty yet light, satisfying yet guilt-free—exactly what we crave when the temperature drops. Plus, with a few clever substitutions and a sprinkle of creativity, you can easily adapt this recipe to fit different dietary needs or to just switch things up a bit. So, grab your apron, and let’s embark on this culinary adventure together!

Ingredients That Pack a Punch

Before we get cooking, let’s gather our ingredients. This chili is all about balance, and each component plays a crucial role in building that rich, complex flavor profile that will have everyone asking for seconds.

  • 3 cups of rotisserie or cooked chicken breast (shredded): The heart of the chili, delivering protein and flavor.
  • 4 cups of chicken stock or broth (low-sodium): Use a good-quality broth to boost the overall taste.
  • 2 cans of white beans (drained & rinsed): These add creaminess and help thicken the chili naturally.
  • 2 tablespoons of olive oil: For sautéing the veggies to bring out their natural sweetness.
  • 1 medium onion (chopped): A foundational flavor that enhances the entire dish.
  • 3 garlic cloves (minced): Because garlic makes everything better.
  • 1 jalapeño pepper (seeded & chopped): A touch of heat to awaken your senses.
  • 2 poblano peppers (seeded & chopped): These mild peppers add depth, with a slight smokiness.
  • 1/2 cup of fresh cilantro (chopped): Brightens the dish and adds freshness.
  • 1 lemon (squeezed): A zesty finish that brightens up all the flavors.
  • 1/2 cup of corn (optional): Sweet pops of corn for added texture.
  • 1 teaspoon of chili powder: This is where the magic begins—rich and earthy.
  • 1 teaspoon of ground cumin: A warm spice that complements the chili beautifully.
  • 1 teaspoon of smoked paprika: Adds a smoky depth that takes this chili to the next level.

Crafting Your Culinary Masterpiece

A warm bowl of white chicken chili filled with beans and chicken, captured in natural light.

Now that we’ve assembled our ingredients, it’s time to get cooking! Follow these simple steps to create a Healthy White Chicken Chili that will have everyone at the table raving.

Step-by-Step Instructions

  1. Heat the Oil: In a large soup pot, heat the olive oil over medium-high heat. Once hot, add the chopped onion and sauté for about 5 minutes until it becomes translucent.

  2. Add Garlic: Stir in the minced garlic and sauté for about 30 seconds, just until fragrant. Be careful not to burn it!

  3. Incorporate the Peppers: Toss in the chopped jalapeño and poblano peppers. Let them sauté for an additional minute, soaking up all those delicious flavors.

  4. Mix in the Stock: Pour in 3 cups of chicken stock, followed by the shredded chicken, corn (if using), chili powder, cumin, and smoked paprika. Stir well to combine.

  5. Bring to a Boil: Half-cover the pot with a lid and increase the heat to high. Bring your chili to a boil.

  6. Blend the Beans: In a blender, combine one can of white beans with the remaining cup of chicken stock and blend until smooth. Once the chili is boiling, reduce the heat and stir in the pureed beans along with the second can of whole beans.

  7. Simmer: Allow the chili to simmer for about 20 minutes. Make sure to stir occasionally to prevent sticking.

  8. Finish It Off: Cut off the heat and stir in half of the chopped cilantro and the freshly squeezed lemon juice. Taste and adjust with more salt and black pepper as needed.

  9. Serve and Enjoy: Transfer your chili to bowls, garnish with lemon wedges, remaining cilantro, and any additional toppings you desire!

Top It Off: Topping Ideas

Now that you’ve created a beautiful bowl of Healthy White Chicken Chili, let’s talk toppings. While the chili is already bursting with flavor, a few carefully chosen toppings can elevate your dish even further. Here are some ideas:

  • Chopped green onions for a fresh crunch.
  • Avocado slices to add creaminess.
  • Shredded cheese for a melty touch (if you’re feeling indulgent).
  • Crushed tortilla chips for that satisfying crunch.
  • Extra cilantro for those who can’t get enough.

Tips for Success

Cooking should be an adventure, but a little guidance can go a long way. Here are some tips to help you nail this recipe:

  • Don’t skip the blending step with the beans—it’s key for achieving that creamy texture without adding heavy cream.
  • Feel free to adjust the spice level by adding more jalapeño or even a dash of cayenne pepper if you like it hot!
  • If you’re short on time, use a rotisserie chicken to save on prep. It adds fantastic flavor and makes this a quick weeknight meal.

Variations and Substitutions

One of the joys of cooking is the ability to personalize a recipe to your tastes or dietary needs. Here are some variations and substitutions you can consider:

  • Beans: If you’re not a fan of white beans, feel free to use black beans or chickpeas instead.
  • Vegetarian Version: Ditch the chicken and use a hearty mix of vegetables like zucchini, corn, and bell peppers. You could also add some plant-based chicken to keep that texture!
  • Low-Calorie Options: For an even lighter version, opt for low-calorie chicken broth and skip the corn.

Storing and Freezing Your Chili

One of the best things about this Healthy White Chicken Chili is that it stores beautifully! Here’s how to keep it fresh:

  • Refrigerate: Transfer any leftovers to an airtight container and store them in the refrigerator for up to 5 days.
  • Freeze: If you want to save some for later, pour the chili into freezer-safe containers and freeze for up to 3 months. Just make sure to leave some space at the top for expansion.
  • Reheating: To reheat, let the chili thaw in the refrigerator overnight, then warm it on the stovetop over low heat. If it’s too thick, add a splash of chicken stock or water to reach your desired consistency.

FAQs About Healthy White Chicken Chili

Can I make this chili in a slow cooker?

Absolutely! Just sauté the onions, garlic, and peppers in a pan first, then transfer everything to your slow cooker. Cook on low for 6-8 hours or high for 4 hours.

Is this chili gluten-free?

Yes! All the ingredients used in this recipe are gluten-free, making it a safe option for those with gluten sensitivities.

How can I make this chili spicier?

If you’re feeling adventurous, add some chopped serrano peppers or a splash of hot sauce right before serving!

Conclusion: A Bowl of Comfort Awaits

There you have it! My Healthy White Chicken Chili is not just food; it’s a warm embrace in a bowl, a celebration of spices and flavors that will leave you feeling satisfied and inspired. Each spoonful is a reminder that cooking can be an adventure, filled with creativity, warmth, and a touch of spice. So, whether you’re cooking for yourself or sharing with loved ones, this chili is bound to bring everyone closer together. Don’t hesitate to experiment and make it your own. I can’t wait for you to dive in and savor the delightful flavors. Happy cooking, friends!

Healthy White Chicken Chili Recipe

Prep Time 15 minutes
Cook Time 30 minutes
Total Time 45 minutes
Servings 4 servings
Calories 350
A flavorful and nutritious white chicken chili packed with beans, peppers, and fresh herbs, perfect for a comforting meal.

Ingredients

Protein

  • 3 cups rotisserie or cooked chicken breast (shredded)
  • 4 cups chicken stock or broth (low-sodium)
  • 2 cans white beans (drained & rinsed)

Vegetables & Herbs

  • 1 medium onion (chopped)
  • 3 cloves garlic (minced)
  • 1 seeded & chopped jalapeño pepper
  • 2 seeded & chopped poblano peppers
  • 0.5 cup fresh cilantro (chopped)
  • 1 lemon squeezed lemon juice
  • 0.5 cup corn (optional)

Spices

  • 1 teaspoon chili powder
  • 1 teaspoon ground cumin
  • 1 teaspoon smoked paprika

Instructions 

  • Saute onions in olive oil for 5 minutes until translucent.
  • Add garlic and cook for 30 seconds.
  • Add peppers and saute for 1 minute.
  • Stir in chicken, beans, spices, and broth; bring to boil, then simmer for 20 minutes.
  • Finish by stirring in cilantro and lemon juice, then serve garnished with lemon wedges and cilantro.

Notes

For extra flavor, top with additional cilantro or a squeeze of lemon.
Calories: 350kcal
Cost: $15
Course: Main Course
Cuisine: American
Keyword: chicken, chili, healthy

Nutrition

Calories: 350kcal | Carbohydrates: 45g | Protein: 30g | Fat: 8g | Sodium: 900mg

Loved this recipe? Save it to your favorite Pinterest board so you can easily find it later! It’s the perfect way to keep all your sweet ideas in one place. ✨

Delicious white chicken chili with visible ingredients like beans, chicken, and peppers, on a wooden table.

Why This Cake Will Change Your Dessert Game

Welcome, fellow food adventurers! Whether you’re a dedicated health enthusiast or just looking to indulge your sweet tooth without the guilt, this 140 Calorie Sugar Free Yogurt Cake is your new best friend. Imagine a cake that’s not only low in calories but also loaded with protein—yes, you heard that right! At just 140 calories per slice and a satisfying 16 grams of protein, this cake is a game changer for anyone who loves desserts but wants to keep it healthy. Today, I’m thrilled to guide you through this flavor-packed recipe, so grab your apron and let’s get baking!

The Magic Behind the Ingredients

This yogurt cake is a testament to how a few simple ingredients can come together to create something truly special. Let’s break down what makes this cake stand out:

  • Non-Fat Greek Yogurt: This is the star of our show, bringing moisture and a creamy texture without the added fat. Plus, it’s packed with protein!
  • Almond Flour: A fantastic gluten-free alternative to traditional flour, almond flour adds a nutty flavor and a tender crumb to our cake.
  • Unsweetened Cocoa Powder: This isn’t just for color; it’s the secret weapon that gives our cake its rich, chocolatey goodness without the sugar.
  • Sugar Substitute: Using erythritol or stevia means you can enjoy the sweetness without the calories. It’s a win-win!
  • Baking Powder and Salt: These two are essential for that perfect rise and balance of flavors.
  • Vanilla Extract: Nothing elevates a cake quite like the warm, inviting aroma of vanilla. It rounds out the flavors beautifully.
  • Egg Whites: They provide structure and stability, ensuring your cake rises perfectly.

Step-by-Step Guide to Deliciousness

A detailed shot of a sugar-free yogurt cake topped with a light dusting of cocoa powder, highlighting its creamy layers.

Ready to get your hands dirty? Let’s dive into the baking process!

  1. Preheat Your Oven: Set your oven to 350°F (175°C) and lightly grease an 8-inch round cake pan. This ensures your cake releases easily once it’s baked.
  2. Mix the Wet Ingredients: In a mixing bowl, combine the Greek yogurt, egg whites, and vanilla extract. Whisk until the mixture is smooth and creamy.
  3. Combine the Dry Ingredients: In a separate bowl, whisk together the almond flour, cocoa powder, sugar substitute, baking powder, and salt. This step is crucial for even distribution of the leavening agents and cocoa.
  4. Mix Wet and Dry: Gradually fold the dry ingredients into the wet mixture, stirring just until combined. Be careful not to overmix—this is a gentle dance, not a wrestling match!
  5. Pour and Spread: Transfer the batter into your prepared cake pan, spreading it evenly. You want it to rise beautifully and have an even texture.
  6. Bake: Pop that bad boy in the oven and bake for about 25-30 minutes. Keep an eye on it; you want a toothpick inserted in the center to come out clean.
  7. Cool: Once baked, allow the cake to cool in the pan for 10 minutes before transferring it to a wire rack to cool completely. This helps it maintain its structure.
  8. Slice and Serve: Once cooled, slice your cake and enjoy! Whether you eat it plain, top it with fresh berries, or add a dollop of whipped cream, the choice is yours!

Tips for Success

To elevate your baking experience, consider these tips:

  • Make sure your ingredients are at room temperature for better mixing.
  • Do not skip the cooling step—this allows the cake to set properly.
  • Feel free to experiment with different flavorings; almond or orange zest can add a delightful twist.

Variations to Try

Once you master the basic recipe, why not mix things up? Here are a few delicious variations:

  • Fruit-Infused: Add a cup of your favorite berries or even mashed bananas to the batter for a fruity twist.
  • Nutty Delight: Toss in some chopped nuts like walnuts or pecans for added crunch and flavor.
  • Chocolate Chips: If you’re feeling extra indulgent, fold in some sugar-free chocolate chips for a decadent treat.

Substitutions You Can Make

Cooking should be a flexible adventure! If you’re missing an ingredient or have dietary restrictions, here are some substitutions:

  • Almond Flour: You can use oat flour or coconut flour, but be cautious with the measurements as they absorb moisture differently.
  • Sugar Substitute: If you prefer a natural sweetener, consider using honey or maple syrup—just adjust the liquid in your recipe accordingly.
  • Greek Yogurt: If you’re not a fan of Greek yogurt, regular plain yogurt works, but it may alter the protein content slightly.

Essential Equipment

To create this masterpiece, you’ll need some basic kitchen tools:

  • A mixing bowl for combining ingredients.
  • A whisk for mixing wet and dry ingredients.
  • A measuring cup and spoons for precise measurements.
  • An 8-inch round cake pan—essential for the perfect cake shape!
  • A wire rack for cooling—trust me, it’s worth it.

Storage and Freezing Tips

Want to save some for later? Here’s how:

  • Storage: Keep your cake in an airtight container at room temperature for up to 3 days. If you want it to last longer, refrigerate it for about a week.
  • Freezing: You can freeze slices of the cake for up to 3 months. Just wrap them tightly in plastic wrap and place them in a freezer bag. Thaw overnight in the fridge when you’re ready to enjoy.

Frequently Asked Questions

Got questions? I’ve got answers!

  • Can I make this cake vegan? Absolutely! Replace the egg whites with flaxseed meal mixed with water (1 tbsp flaxseed + 2.5 tbsp water per egg) and use a plant-based yogurt.
  • Is almond flour necessary? While it gives a lovely texture, you can substitute it with any flour you prefer. Just remember that it might change the final taste and texture.
  • What can I serve with this cake? This cake is delightful on its own, but you can enhance it with fresh fruit, a sprinkle of nuts, or a drizzle of sugar-free syrup.

Troubleshooting Common Issues

If your cake doesn’t turn out as expected, don’t worry! Here are some common problems and solutions:

  • Dry Cake: This could be due to overbaking. Keep an eye on your cake in the last few minutes of baking.
  • Dense Texture: Make sure you’re not overmixing the batter. Gentle folding is key!
  • Not Rising: Check that your baking powder is fresh. Old leavening agents can lead to flat cakes.

Conclusion: Join the Sweet Revolution!

There you have it, my friends! The 140 Calorie Sugar Free Yogurt Cake is not just a recipe; it’s a celebration of flavor, health, and creativity in the kitchen. With this cake in your repertoire, you can indulge your cravings without the guilt, proving that healthy desserts can be just as satisfying as their sugary counterparts. So, gather your ingredients, embrace the process, and let the sweet revolution begin! Your taste buds—and your waistline—will thank you. Happy baking!

140 Calorie Sugar Free Yogurt Cake (16g Protein!)

Prep Time 10 minutes
Cook Time 25 minutes
Total Time 35 minutes
Servings 8 pieces
Calories 140
A delicious and healthy sugar-free yogurt cake packed with protein, perfect for a guilt-free treat.

Ingredients

wet ingredients

  • 1 cup non-fat greek yogurt
  • 2 large egg whites

dry ingredients

  • 1/2 cup almond flour
  • 1/4 cup unsweetened cocoa powder
  • 1/2 cup sugar substitute (like erythritol or stevia)
  • 1/2 teaspoon baking powder
  • 1/4 teaspoon salt
  • 1 teaspoon vanilla extract

Instructions 

  • Preheat oven to 350°F (175°C) and grease an 8-inch pan.
  • Mix yogurt, egg whites, and vanilla until smooth.
  • Combine dry ingredients in a bowl.
  • Gradually add dry to wet, mix well.
  • Pour batter into pan and bake 25-30 mins.
  • Cool, slice, and enjoy!

Notes

This cake is low in calories and sugar, making it a perfect healthy dessert option.
Calories: 140kcal
Cost: $15
Course: Dessert
Keyword: protein, sugar free, yogurt

Nutrition

Calories: 140kcal | Carbohydrates: 12g | Protein: 16g | Fat: 3g | Sodium: 80mg

Loved this recipe? Save it to your favorite Pinterest board so you can easily find it later! It’s the perfect way to keep all your sweet ideas in one place. ✨

Eye-level view of a yogurt cake, emphasizing its soft interior and inviting appearance in natural light.

Unleashing the Flavor: The Ultimate Zucchini Casserole with Stuffing Mix

Welcome to a culinary adventure that celebrates the humble zucchini, transforming it into a dish that will dance on your taste buds! This Zucchini Casserole with Stuffing Mix is not just a recipe; it’s an invitation to elevate your dinner game with fresh veggies and comforting flavors. Ready to embark on a flavor journey? Let’s get cooking!

Why You’ll Love This Recipe

This casserole is a symphony of textures and flavors, blending creamy with crunchy, and mild with savory. Here’s why you’ll want to whip this up:

  • Effortless Elegance: Perfect for both weeknight dinners and special occasions, this dish impresses without the stress.
  • Versatile Ingredients: The recipe allows you to customize based on what you have on hand, making it a great way to minimize waste.
  • Hearty and Satisfying: Packed with vegetables and flavor, this casserole is a soul-warming dish that feels like a hug on a plate.
  • Family-Friendly: A dish that even the pickiest eaters will love, thanks to the delicious blend of textures and flavors.
  • Make Ahead Magic: Easily prepped in advance, making busy weeknights a breeze.

Ingredients Breakdown and Substitutions

Before we dive into cooking, let’s gather our ingredients and check out some substitutions that can take this dish to the next level!

  • 6 cups zucchini (sliced): Fresh zucchini offers the best flavor, but yellow squash can be used for a twist.
  • 1 cup onion (chopped): Yellow onions bring sweetness; swap for shallots for a milder flavor.
  • 1 cup carrots (shredded): Add color and nutrition; feel free to use frozen carrots if in a pinch.
  • 1 cup sour cream: Greek yogurt works as a tangy substitute, adding a protein boost.
  • 10.5 ounce can cream of chicken soup: For a vegetarian option, use cream of mushroom soup instead.
  • 6 ounce box Stove Top stuffing (chicken flavor): Experiment with different flavors of stuffing mix for unique twists.
  • 1/2 cup butter (softened): Coconut oil or olive oil can serve as dairy-free alternatives.

How to Make Your Zucchini Casserole

Side angle of a baked zucchini casserole garnished with stuffing mix.

Now, let’s bring this gorgeous dish to life! Follow these steps for a casserole that will have everyone begging for seconds.

Step 1: Boil the Zucchini and Onions

In a large pot, boil the zucchini and onions in salted water for 3 – 5 minutes. Drain well and let cool.

Step 2: Mix the Creamy Base

In a medium mixing bowl, combine the shredded carrots, sour cream, and cream of chicken soup. Add the softened zucchini and onions, mixing until well combined.

Step 3: Prepare the Stuffing

In another bowl, mix the stuffing and butter until it’s crumbly yet evenly coated.

Step 4: Layer It Up!

In a 9 x 13-inch baking dish, spread half of the stuffing mixture. Top with the vegetable mixture, then sprinkle the remaining stuffing on top.

Step 5: Bake to Perfection

Bake at 350°F for 25 minutes or until the top is golden brown and crispy. The aroma will have your family flocking to the kitchen!

Pro Tips for a Flawless Casserole

To ensure your zucchini casserole turns out perfectly every time, keep these expert insights in mind:

  • Drain Thoroughly: Make sure to drain the zucchini and onions well to prevent a watery casserole.
  • Experiment with Spices: Add a pinch of garlic powder, onion powder, or even some Italian seasoning to the stuffing for an extra flavor kick.
  • Cheese Lovers Unite: For a creamier texture, sprinkle some shredded cheese between the layers or on top before baking.
  • Watch the Bake Time: Ovens can vary, so keep an eye on the casserole in the last few minutes to avoid over-browning.
  • Let It Rest: Allow the casserole to sit for 5-10 minutes after baking for easier serving.
  • Perfect Pairings: This casserole pairs beautifully with a crisp green salad or roasted vegetables.
  • Make It Your Own: Feel free to add cooked chicken or sausage for a heartier meal.
  • Freezing Friendly: This dish freezes well; just ensure it’s stored in an airtight container before freezing.

Common Mistakes to Avoid

Even the best chefs can encounter snags! Here are common pitfalls and how to sidestep them:

  • Too Watery: Avoid overcooking the zucchini and onions, and ensure they are fully drained.
  • Bland Flavor: Season each layer as you go to build layers of flavor.
  • Burnt Edges: If the edges start to brown too fast, cover with aluminum foil until cooked through.

Creative Variations to Try

Bored with the standard recipe? Here are some variations to ignite your creativity:

  • Mexican Twist: Use taco seasoning instead of traditional spices and add corn and black beans.
  • Italian Style: Incorporate marinara sauce and mozzarella for a cheesy Italian-inspired dish.
  • Herb-Infused: Mix in fresh herbs like basil, parsley, or dill for a fragrant dish.
  • Breakfast Casserole: Add scrambled eggs and breakfast sausage for a delightful brunch option.

Storage and Make-Ahead Instructions

This casserole is perfect for meal prep! Here’s how to store and reheat:

  • Refrigerate: Store leftovers in an airtight container in the fridge for up to 4 days.
  • Freeze: For longer storage, freeze portions in airtight containers or freezer bags for up to 3 months.
  • Reheat: To reheat, bake in a preheated oven at 350°F until warmed through, about 15-20 minutes.

FAQs About Zucchini Casserole with Stuffing Mix

Got questions? I’ve got answers! Here are some frequently asked questions:

  • Can I use other vegetables? Absolutely! Feel free to add bell peppers, spinach, or even mushrooms.
  • Is this dish suitable for vegetarians? Yes, just substitute the cream of chicken soup with cream of mushroom soup.
  • How do I make it gluten-free? Use gluten-free stuffing mix and ensure your cream soup is also gluten-free.
  • Can I add meat? Yes! Cooked chicken or ground beef can be mixed in with the vegetables.
  • What can I serve with this casserole? This dish pairs well with a simple salad or roasted veggies.
  • Can I prepare this dish ahead of time? Yes, you can assemble it and refrigerate before baking. Just add a few extra minutes to the bake time.
  • How long does it take to cook? Total cook time is about 30 minutes, including prep!
  • Can I use frozen zucchini? While fresh is best, you can use frozen, just ensure it’s thawed and drained well.

Nutritional Tips and Dietary Adaptations

Looking to tweak the healthiness of this dish? Here are some tips:

  • Low-Fat Options: Use low-fat sour cream and soup for a lighter version.
  • Increase Fiber: Add beans or quinoa for a fiber boost.
  • Low-Carb Version: Swap out the stuffing mix for riced cauliflower or almond flour.

Essential Equipment Recommendations

Here’s what you need to get started:

  • 9 x 13-inch Baking Dish: Ideal for perfect layering and even baking.
  • Medium Mixing Bowls: For preparing your ingredients.
  • Large Pot: For boiling your vegetables.
  • Wooden Spoon or Spatula: Essential for mixing and layering the casserole.

Serving Suggestions

To make your meal even more delightful, consider pairing this casserole with:

  • Garlic Bread: A crunchy side to complement the creamy casserole.
  • Simple Green Salad: Fresh greens provide a light contrast to the richness of the casserole.
  • Pickled Vegetables: A tangy side that cuts through the richness.

Now that you have the ultimate guide to creating your own Zucchini Casserole with Stuffing Mix, it’s time to grab those ingredients and unleash your inner chef! Remember, cooking is about passion and creativity. So, get in there, make it your own, and enjoy every bite of your delicious creation!

Zucchini Casserole with Stuffing Mix

Prep Time 10 minutes
Cook Time 25 minutes
Total Time 35 minutes
Servings 6 servings
Calories 350
A delicious and easy zucchini casserole topped with savory stuffing, perfect for a comforting family meal.

Ingredients

Vegetables

  • 6 cups zucchini (sliced)
  • 1 cup onion (chopped)
  • 1 cup carrots (shredded)

Dairy & Canned Goods

  • 1 cup sour cream
  • 10.5 ounce can cream of chicken soup

Stuffing & Butter

  • 6 ounce box Stove Top stuffing (chicken flavor)
  • 1/2 cup butter (softened)

Instructions 

  • Boil zucchini and onions in salted water for 3-5 minutes, then drain.
  • Mix shredded carrots, sour cream, and cream of chicken soup; add zucchini and onions, then combine.
  • Mix stuffing with softened butter; spread half in a 9x13-inch dish.
  • Layer vegetable mixture over stuffing, then top with remaining stuffing. Bake at 350°F for 25 minutes.

Notes

For a healthier option, use low-sodium soup and reduce butter slightly.
Calories: 350kcal
Cost: $15
Course: Main Course
Cuisine: American
Keyword: zucchini

Nutrition

Calories: 350kcal | Carbohydrates: 45g | Protein: 12g | Fat: 18g | Sodium: 900mg

Why You’ll Adore These Flavor-Packed Dinners

Life is too short for bland meals, especially if you’re living a vegan lifestyle and watching your carbs! Say goodbye to the same old salad routine and get ready to ignite your culinary creativity with these easy vegan low-carb dinners. Each dish is a burst of flavor, designed to keep your taste buds dancing while nourishing your body. You’ll discover how simple ingredients can come together to create vibrant, satisfying meals that are not only visually stunning but also a delight to eat.

Unleashing the Power of Fresh Ingredients

Cooking is an adventure, and the joy of creating something delicious lies in the ingredients you choose. This recipe for Easy Vegan Low-Carb Dinners is the perfect canvas to explore the bright colors and textures of fresh produce. With just a handful of key ingredients, you can whip up a dish that’s as healthy as it is satisfying. Let’s take a look at what you’ll need:

  • 1 medium zucchini, spiralized
  • 1 cup cherry tomatoes, halved
  • 1 cup fresh spinach
  • 1/2 cup diced bell pepper
  • 1/4 cup finely chopped red onion
  • 2 tablespoons olive oil
  • 1 tablespoon balsamic vinegar
  • 1 teaspoon garlic powder
  • Salt and pepper to taste
  • Fresh basil for garnish

Crafting Your Flavorful Masterpiece

An appetizing bowl of vegan low-carb dinner with zucchini noodles, diced bell peppers, and vibrant cherry tomatoes, captured in warm, soft light.

Now that we have our ingredients ready, let’s dive into the cooking process. This is where the magic happens! Follow these simple steps to create a dish bursting with flavor:

  1. In a large skillet, heat the olive oil over medium heat.
  2. Add the red onion and bell pepper, sautéing until softened, about 3-5 minutes.
  3. Stir in the cherry tomatoes and cook for another 2-3 minutes until they start to soften.
  4. Add the spinach and spiralized zucchini to the skillet, tossing to combine.
  5. Sprinkle garlic powder, salt, and pepper over the mixture, cooking for an additional 3-4 minutes until the zucchini is tender.
  6. Remove from heat and drizzle with balsamic vinegar.
  7. Serve warm, garnished with fresh basil.

Tips for Perfecting Your Dish

As you step into the kitchen with your ingredients, keep these tips in mind to elevate your cooking game and ensure your meals are bursting with flavor:

  • Use Fresh Produce: The quality of the vegetables you choose can make a world of difference. Opt for organic and seasonal produce when possible.
  • Experiment with Spices: While garlic powder adds a nice touch, don’t hesitate to get creative! A pinch of red pepper flakes or a dash of smoked paprika could give your dish an extra kick.
  • Don’t Overcook the Zucchini: Zucchini releases moisture quickly, so cooking it just until tender will maintain its texture and prevent it from becoming mushy.
  • Garnishing Matters: Fresh basil isn’t just for looks; it adds a refreshing aroma and flavor that will elevate your dish.

Variations to Spice Things Up

If you’re feeling adventurous and want to add your personal twist to this recipe, consider the following variations:

  • Add Protein: Incorporate plant-based proteins like chickpeas, lentils, or tofu for added nutrition and heartiness.
  • Mix Up the Greens: Swap spinach for kale or arugula for a different flavor profile and texture.
  • Change the Sauce: Instead of balsamic vinegar, try a splash of lemon juice or a drizzle of tahini to create a new flavor dimension.
  • Incorporate Nuts: Add toasted pine nuts or walnuts for a satisfying crunch.

Substitutions for Every Pantry

Sometimes you might not have every ingredient on hand, and that’s perfectly okay! Here are some substitutions you can use:

  • Zucchini: If you can’t find zucchini, try spiralizing carrots or using spaghetti squash for a different but equally delicious base.
  • Cherry Tomatoes: Substitute with diced tomatoes or even sun-dried tomatoes for a robust flavor.
  • Olive Oil: Avocado oil or coconut oil can work well in place of olive oil, providing a unique taste.
  • Red Onion: Yellow or white onions can be used if red onions aren’t available; just be mindful of the flavor intensity.

Essential Equipment

Before you start cooking, make sure you have the right tools at hand:

  • Spiralizer: For creating those beautiful zucchini noodles. If you don’t have one, a vegetable peeler will also do the trick.
  • Large Skillet: A non-stick skillet is ideal to prevent sticking and make cleanup easier.
  • Wooden Spoon or Tongs: For stirring and tossing your ingredients together without damaging your skillet.
  • Measuring Cups and Spoons: Precision is key to balancing flavors!

Storing and Freezing for Later

Cooking in bulk? You can easily store your leftovers:

  • Refrigeration: Store any leftovers in an airtight container in the fridge for up to 3 days.
  • Freezing: If you want to save your dish for later, it freezes well! Just make sure to let it cool completely before transferring it to a freezer-safe container. It can be frozen for up to 3 months.
  • Reheating: When ready to enjoy, thaw in the fridge overnight and reheat in a skillet over medium heat until warmed through.

FAQs About Vegan Low-Carb Cooking

To help you navigate your culinary journey, here are some frequently asked questions:

  • Is this recipe suitable for meal prep? Absolutely! This dish holds up well in the fridge and makes for a quick lunch option.
  • Can I make this dish gluten-free? Yes! All the ingredients listed are naturally gluten-free, making it perfect for those with gluten sensitivities.
  • How can I increase the protein content? Add some cooked quinoa or beans, or sprinkle nutritional yeast on top for a cheesy flavor boost!
  • Can I use frozen vegetables? Yes, frozen veggies can be a convenient alternative, but fresh ones will provide better texture and flavor.

Troubleshooting Common Issues

If you encounter any bumps along the way, here are some troubleshooting tips:

  • Dish too watery? This can happen if the zucchini releases too much moisture. Drain off excess liquid before serving.
  • Vegetables overcooked? Keep a close eye on cooking times, especially with zucchini, to avoid mushiness.
  • Flavor lacking? Don’t hesitate to adjust seasoning to your palate. Adding a bit more salt, pepper, or vinegar can really enhance flavors.

Wrap-Up: Your Culinary Adventure Awaits

There you have it, folks! A deliciously vibrant and easy recipe that is sure to brighten your dinner table. With the right balance of fresh ingredients and spices, Easy Vegan Low-Carb Dinners can take your meals from ordinary to extraordinary. As you dive into this cooking adventure, remember that every dish tells a story. So grab your skillet, let your creativity flow, and don’t be afraid to add a little fire to your food! Your taste buds will thank you, and so will your body. Happy cooking!

Easy Vegan Low-Carb Dinners

Prep Time 10 minutes
Cook Time 10 minutes
Total Time 20 minutes
Servings 2 servings
Calories 250
A quick and healthy vegan dinner featuring spiralized zucchini and fresh vegetables, perfect for a low-carb meal.

Ingredients

Vegetables

  • 1 medium zucchini, spiralized
  • 1 cup cherry tomatoes, halved
  • 1 cup spinach, fresh
  • 1/2 cup bell pepper, diced
  • 1/4 cup red onion, finely chopped
  • 2 tablespoons olive oil
  • 1 tablespoon balsamic vinegar
  • 1 teaspoon garlic powder
  • to taste salt and pepper
  • for garnish fresh basil

Instructions 

  • Heat olive oil in a skillet over medium heat.
  • Sauté red onion and bell pepper until softened, about 3-5 minutes.
  • Add cherry tomatoes and cook for 2-3 minutes until they soften.
  • Stir in spinach and zucchini, then season with garlic powder, salt, and pepper. Cook for 3-4 minutes until zucchini is tender.
  • Remove from heat, drizzle with balsamic vinegar, and garnish with basil. Serve warm.

Notes

Use fresh basil for the best flavor and adjust salt and pepper to taste.
Calories: 250kcal
Cost: $12
Course: Dinner
Cuisine: Vegan
Keyword: Low Carb

Nutrition

Calories: 250kcal | Carbohydrates: 30g | Protein: 6g | Fat: 14g | Sodium: 150mg

Loved this recipe? Save it to your favorite Pinterest board so you can easily find it later! It’s the perfect way to keep all your sweet ideas in one place. ✨

An eye-level shot showcasing a healthy vegan meal with spiralized zucchini, fresh spinach, and cherry tomatoes in a cozy setting.

Why You’ll Love This Butter Chicken

Have you ever wanted to transport your taste buds to a bustling Indian bazaar, where the air is thick with the aroma of spices and sizzling meats? Let me tell you, my Quick & Easy Homemade Butter Chicken recipe does just that! This dish is a celebration of flavor, a delightful embrace of spices that wraps around tender chicken, all swimming in a rich, creamy sauce. It’s perfect for those cozy weeknights or when you want to impress your friends with your culinary skills without spending hours in the kitchen.

The beauty of this recipe lies in its simplicity. You only need a handful of ingredients to create a dish that tastes like it’s straight out of a five-star restaurant. No need for fancy equipment or exotic spices that will sit in your pantry gathering dust. This butter chicken transforms everyday staples into a feast that will have your family and friends singing your praises.

Ingredients You’ll Need

Let’s gather the essentials to make this buttery, spicy delight:

  • 1 ½ pounds skinless boneless chicken thighs, cut into bite-sized chunks
  • 1 teaspoon salt
  • 1 teaspoon garlic powder
  • 1 teaspoon sweet paprika
  • ½ teaspoon curry powder
  • 1 tablespoon Greek yogurt
  • 3 tablespoons vegetable oil
  • 3 tablespoons butter, divided
  • 6 garlic cloves, minced
  • 1 medium onion, diced
  • 1 15-ounce can tomato sauce
  • 1 teaspoon sugar
  • 1 teaspoon salt (adjust to taste)
  • ½ teaspoon black pepper
  • 2 cups heavy cream
  • ½ teaspoon cayenne pepper (optional for heat)
  • 1 teaspoon garam masala
  • ½ teaspoon curry powder
  • ¼ cup freshly chopped parsley (optional, for garnish)
  • Naan bread and steamed rice for serving

How to Make Quick & Easy Homemade Butter Chicken

Beautifully plated Homemade Butter Chicken in a warm natural light, showcasing spices and garnishes.

Step 1: Marinate the Chicken

Begin your culinary adventure by marinating the chicken. In a large bowl, combine the chicken chunks with salt, garlic powder, sweet paprika, curry powder, and a generous dollop of Greek yogurt. This quick marinade is essential as it infuses the chicken with flavor and keeps it moist during cooking. Cover the bowl and let it sit in the refrigerator for at least 15 minutes. If you have more time, let it marinate for up to an hour!

Step 2: Sear the Chicken

Heat 3 tablespoons of vegetable oil and 1 tablespoon of butter in a large skillet over medium-high heat. Once the oil is shimmering, add the marinated chicken in a single layer. Be sure not to crowd the pan; you want that beautiful golden-brown sear! Cook the chicken for about 4-5 minutes, turning occasionally until browned and almost cooked through. Once done, remove the chicken from the skillet and set it aside on a plate.

Step 3: Build the Sauce Base

In the same skillet, add the remaining 2 tablespoons of butter. Toss in the minced garlic and diced onion, sautéing until the onion becomes translucent and fragrant—about 3-4 minutes. This is where the magic begins to happen! Add the canned tomato sauce, sugar, salt, black pepper, and the second dose of curry powder. If you’re feeling adventurous, sprinkle in the cayenne pepper for an extra kick. Stir everything well and bring it to a gentle simmer, allowing the flavors to mingle.

Step 4: Creamy Upgrade

Now, let’s elevate that sauce to creamy perfection! Slowly pour in the heavy cream while stirring constantly. Watch as the sauce transforms into a velvety, orange-hued concoction that looks as good as it smells! Lower the heat to avoid scorching, and let the sauce simmer for about 5-7 minutes. This is the moment when the flavors deepen and the sauce thickens beautifully.

Step 5: Bring It All Together

It’s time to reunite the chicken with its flavorful sauce! Add the seared chicken back into the skillet, along with any juices that have accumulated on the plate. Sprinkle in the garam masala and give everything a gentle stir. Let it simmer together for another 8-10 minutes, allowing the chicken to soak in that luscious sauce. Taste and adjust for salt or sugar as needed. Just before serving, garnish with freshly chopped parsley for a burst of color and freshness.

How to Serve This Flavorful Dish

Garnishes

Presentation is key when it comes to serving butter chicken! A sprinkle of freshly chopped parsley or cilantro adds a vibrant touch that draws the eye and enhances the flavors. If you want to add a luxurious touch, swirl in a little extra cream right before serving.

Side Dishes

This dish is a showstopper on its own, but pairing it with the right sides can elevate the experience even more. Here are some ideas:

  • Pillowy Naan Bread: Perfect for scooping up that rich sauce.
  • Steamed Basmati Rice: The soft grains will catch every drop of that creamy goodness.
  • Cucumber Salad: A refreshing balance to the richness of the butter chicken.
  • Vegetable Slaw: Adds a crunchy, fresh element to your meal.

Creative Ways to Present

Why not turn dinner into an experience? Create individual butter chicken bowls over rice, topped with crunchy onion strings or toasted almonds for added texture. Or arrange a “build-your-own” naan platter with colorful bowls of sauce, chicken, and garnishes—great for dinner parties or fun family nights!

Make Ahead and Storage

Storing Leftovers

If you find yourself with leftovers (which isn’t likely because it’s that good!), don’t worry! Your butter chicken will keep beautifully in the fridge for up to three days. Store it in an airtight container to maintain freshness and creaminess.

Freezing

This recipe is also freezer-friendly! Allow it to cool completely before portioning into airtight, freezer-safe containers. You can freeze it for up to two months. When you’re ready to enjoy it again, simply thaw overnight in the fridge.

Reheating

For the best results, gently reheat your butter chicken in a saucepan over low heat. If the sauce seems too thick, add a splash of cream or water to loosen it up. You can also warm individual servings in the microwave, but be sure to stir frequently to avoid separation of the cream.

FAQs

Can I use chicken breast instead of thighs?

Absolutely! Chicken breast can work, but be cautious not to overcook it as it can dry out faster than thighs. Thighs are my go-to for their juiciness and flavor.

Is there a way to make this dairy-free?

Yes! You can swap the Greek yogurt for a plant-based alternative and use coconut cream instead of heavy cream. Just keep in mind that it will impart a subtle coconut flavor.

How spicy is this dish?

The heat level is customizable! Made as written, it has a mild warmth. For more heat, simply increase the cayenne or add your favorite hot sauce at the table. You control the spice!

Can I prepare the chicken or sauce ahead of time?

Definitely! You can marinate the chicken overnight or prepare the sauce base up to two days in advance. Just combine and finish cooking when you’re ready to eat.

What can I substitute for garam masala?

If you’re out of garam masala, a blend of ground cumin, coriander, cinnamon, and a pinch of cloves can mimic its aromatic profile. The flavor will differ slightly, but it will still taste delicious!

Final Thoughts

Once you’ve experienced the enchantment of this Quick & Easy Homemade Butter Chicken, you’ll find yourself returning to it time and again. With its bold flavors, creamy texture, and simple preparation, it’s not just a meal; it’s a culinary adventure waiting to unfold in your kitchen. So roll up your sleeves, invite your friends, and let the aromas dance through your home. Trust me, this dish will ignite your passion for cooking and leave your taste buds begging for more!

Quick & Easy Homemade Butter Chicken Recipe

Prep Time 20 minutes
Cook Time 30 minutes
Total Time 50 minutes
Servings 4 servings
Calories 650
A flavorful and creamy butter chicken made quickly at home, perfect for a satisfying meal.

Ingredients

Meat

  • 1.5 pounds skinless boneless chicken thighs, cut into bite-sized chunks
  • 1 teaspoon salt
  • 1 teaspoon garlic powder
  • 1 teaspoon sweet paprika
  • 0.5 teaspoon curry powder
  • 1 tablespoon greek yogurt
  • 3 tablespoons vegetable oil
  • 3 tablespoons butter, divided
  • 6 cloves garlic, minced
  • 1 medium onion, diced
  • 1 15-ounce can tomato sauce
  • 1 teaspoon sugar
  • 1 teaspoon salt (adjust to taste)
  • 0.5 teaspoon black pepper
  • 2 cups heavy cream
  • 0.5 teaspoon cayenne pepper (optional for heat)
  • 1 teaspoon garam masala
  • 0.25 cup freshly chopped parsley (optional, for garnish)

Naan bread

Steamed rice

Instructions 

  • Mix chicken with salt, garlic powder, paprika, curry powder, and Greek yogurt. Refrigerate for 15 minutes.
  • Sauté garlic and onion in oil and 1 tbsp butter. Add tomato sauce, cream, spices, and simmer.
  • Cook marinated chicken until browned. Add to sauce and stir in remaining butter. Simmer briefly.
  • Garnish with parsley. Serve hot with naan and rice.

Notes

Adjust salt and spice levels to taste. For extra heat, add more cayenne pepper.
Calories: 650kcal
Cost: $15
Course: Main Course
Cuisine: Indian
Keyword: Butter Chicken

Nutrition

Calories: 650kcal | Carbohydrates: 50g | Protein: 40g | Fat: 35g | Sodium: 900mg

Loved this recipe? Save it to your favorite Pinterest board so you can easily find it later! It’s the perfect way to keep all your sweet ideas in one place. ✨

Eye-level view of luscious Homemade Butter Chicken with fluffy naan and a hint of green parsley on top.

Ignite Your Culinary Adventure with Chicken Enchilada Casserole

Welcome to a fiesta of flavors that will set your taste buds ablaze! This Chicken Enchilada Casserole isn’t just a meal; it’s a celebration of bold spices, tender chicken, and layers of comfort that will keep your family and friends coming back for more. With every bite, you’ll discover the perfect blend of zesty enchilada sauce, hearty black beans, and gooey cheese that transforms a simple dish into a culinary masterpiece. Let’s dive into the world of enchilada casseroles, and I promise you’ll never look at a casserole the same way again!

Why You’ll Love This Recipe

This Chicken Enchilada Casserole is brimming with reasons to fall in love:

  • Flavor Explosion: Each layer is infused with spices that dance on your palate, from garlic powder to chili powder.
  • Easy to Prepare: With minimal prep time, you can have dinner ready in under an hour, perfect for busy weeknights!
  • Customizable: Whether you prefer extra veggies or a different protein, this casserole can easily adapt to your tastes.
  • Meal Prep Friendly: Make it ahead of time and store it in the fridge for a quick reheat on those hectic days.
  • Family Favorite: This dish is a guaranteed crowd-pleaser, making it ideal for gatherings, potlucks, or cozy family dinners.

The Ingredients You’ll Need

Here’s what you’ll need to make this irresistible Chicken Enchilada Casserole:

  • 12 corn tortillas: Halved to create layers that soak up all the delicious flavors.
  • 1 1/2 lbs boneless skinless chicken breast: The star protein that provides heartiness.
  • 30 oz canned black beans: A great source of fiber and protein, enhancing the dish’s texture.
  • 1 cup canned corn: Adds a touch of sweetness to balance the spices.
  • 3 cups enchilada sauce: The flavorful base that ties everything together.
  • 2 cups shredded Mexican cheese: For that gooey, melty goodness.
  • 6 green onions, chopped: A fresh garnish that adds crunch and flavor.
  • 1/3 cup cilantro, chopped: For a burst of freshness.
  • 2 tsp garlic powder: To amplify the savory notes.
  • 2 tsp chili powder: For a kick of warmth.
  • 2 tsp ground cumin: Adds earthiness.
  • 1 tsp paprika: For a hint of smokiness.
  • 1/2 tsp salt and 1/2 tsp black pepper: Basic seasonings that enhance all the flavors.

Pro Tips for Perfecting Your Casserole

A side view of a juicy Chicken Enchilada Casserole, showcasing layers of tortillas, chicken, and enchilada sauce.

Before you dive into cooking, check out these expert insights that will elevate your Chicken Enchilada Casserole:

  • Use Rotisserie Chicken: For a quick and easy shortcut, grab a pre-cooked rotisserie chicken from the grocery store. This saves time and adds great flavor.
  • Layer with Love: Ensure even distribution of ingredients in each layer to create a balanced flavor profile throughout the casserole.
  • Let it Rest: Allow the casserole to sit for 5-10 minutes after baking. This helps the layers set and makes serving easier.
  • Experiment with Sauces: Feel free to mix red and green enchilada sauces or even try a chipotle sauce for a smoky twist.
  • Cheese Choices: Monterey Jack cheese is a great alternative to Mexican cheese for a creamier melt. Feel free to mix cheeses for added flavor.
  • Add Veggies: Toss in some diced bell peppers or zucchini for added nutrition and color.
  • Adjust the Spice Level: If you like it hot, add diced jalapeños or use a spicier enchilada sauce.
  • Make it Ahead: Assemble the casserole and refrigerate it overnight. Just add a few extra minutes to the baking time.
  • Freezing Tips: You can freeze individual portions to enjoy later—just make sure to cool completely before wrapping.
  • Serve with Sides: Pair it with a fresh salad or guacamole for a complete meal experience.

Avoid These Common Mistakes

Even the best chefs make mistakes. Here’s how to avoid common pitfalls while making your Chicken Enchilada Casserole:

  • Overcrowding Ingredients: Don’t skimp on layering; ensure each ingredient has enough room to shine.
  • Skipping the Seasoning: Don’t forget to season your chicken well; bland chicken can take away from the dish.
  • Using Stale Tortillas: Fresh tortillas hold up better and offer a better texture.
  • Not Covering the Dish: Cover your casserole with foil to prevent it from drying out during the initial baking.
  • Ignoring Cooling Time: Cutting into the casserole too soon can lead to a messy serving. Patience is key!

Delicious Variations

Why stick to just one version? Here are some exciting twists on the classic Chicken Enchilada Casserole:

  • Vegetarian Delight: Swap chicken for roasted vegetables like zucchini, bell peppers, and mushrooms, and use black beans for protein.
  • Spicy Beef Casserole: Substitute shredded beef for chicken and add extra jalapeños for a fiery kick.
  • Cheesy Spinach Casserole: Incorporate fresh spinach and ricotta cheese for a creamy, earthy version.
  • Southwestern Quinoa Casserole: Replace tortillas with cooked quinoa for a gluten-free option, adding layers of flavor and protein.

Storage and Make-Ahead Instructions

This casserole is perfect for meal prep! Here’s how to store and reheat:

  • Refrigerate: Store leftovers in an airtight container in the fridge for up to 4 days.
  • Freeze: Wrap tightly in plastic wrap and foil to freeze for up to 3 months. Thaw overnight in the fridge before reheating.
  • Reheating: Reheat in the oven at 350°F (175°C) for about 20-25 minutes or until heated through. You can also microwave individual portions.

Frequently Asked Questions

Got questions? I’ve got answers! Here are some FAQs that might help:

  • Can I use flour tortillas instead of corn? Absolutely! Just keep in mind that flour tortillas may become softer.
  • How can I make it less spicy? Choose a mild enchilada sauce and omit any added jalapeños or chili powder.
  • Can I use fresh chicken instead of cooked? Yes, but ensure it’s fully cooked before layering it into the casserole.
  • What can I serve with this casserole? Serve with a side salad, guacamole, or sour cream for dipping.
  • Can I make this gluten-free? Yes! Ensure your corn tortillas and enchilada sauce are labeled gluten-free.
  • How long does it take to cook? The total time is about 50-60 minutes, including baking time.
  • Is it okay to substitute different beans? Yes, feel free to experiment with pinto beans or kidney beans!
  • What’s the best way to reheat leftovers? The oven is best for reheating to maintain texture, but the microwave works in a pinch.

Nutritional Tips and Dietary Adaptations

Want to keep it healthy? Here’s how to adapt the recipe:

  • Low-Calorie Swap: Use low-fat cheese and reduced-sodium enchilada sauce to cut calories without sacrificing flavor.
  • Dairy-Free Option: Substitute cheese with vegan cheese and use coconut or cashew cream for a creamy texture.
  • Protein Boost: Add lentils or chickpeas to increase protein content without adding too many calories.
  • Whole Grain Goodness: Opt for whole grain or sprouted corn tortillas for added fiber.

Essential Equipment

Ready to roll? Here’s what you’ll need to whip up this delicious casserole:

  • 9 x 13 Baking Dish: Perfect for layering all your delicious ingredients.
  • Mixing Bowls: For combining your ingredients and spices.
  • Meat Thermometer: Ensures your chicken is cooked to perfection.
  • Sharp Knife: For shredding the chicken and chopping veggies.

Serving Suggestions

Now that your casserole is ready, here’s how to serve it up:

  • Garnish Generously: Top with extra cilantro, green onions, or a dollop of sour cream for added flavor.
  • Pair with Sides: A side of Mexican rice or refried beans rounds out the meal nicely.
  • Offer Fixings: Create a taco bar with salsa, guacamole, and fresh lime wedges for a fun dining experience.

In conclusion, this Chicken Enchilada Casserole is more than just a dish; it’s an experience waiting to happen. With its layers of flavor and opportunities for customization, you’ll find that cooking with spice is not just an art but a joyous adventure. So grab your skillet, unleash your inner chef, and let the flavors of this casserole ignite your passion for cooking! Embrace the heat, and remember: every meal is a story worth telling!

Chicken Enchilada Casserole

Prep Time 20 minutes
Cook Time 40 minutes
Total Time 1 hour
Servings 8 pieces
Calories 550
A flavorful and hearty casserole layered with chicken, beans, corn, and cheese, perfect for a satisfying meal.

Ingredients

Tortillas

  • 1.5 lbs boneless skinless chicken breast
  • 12 pieces corn tortillas, halved

Beans and Corn

  • 30 oz canned black beans, drained and rinsed
  • 1 cup canned corn

Sauces and Cheese

  • 3 cups enchilada sauce
  • 2 cups shredded Mexican cheese

Vegetables and Herbs

  • 6 green onions chopped green onions
  • 1/3 cup cilantro, chopped

Spices

  • 2 tsp garlic powder
  • 2 tsp chili powder
  • 2 tsp ground cumin
  • 1 tsp paprika
  • 1/2 tsp salt
  • 1/2 tsp black pepper

Instructions 

  • Preheat oven to 400°F. Mix spices, season chicken, and roast for 20-25 minutes. Shred chicken and set aside.
  • Mix black beans and corn. Layer 1/2 cup enchilada sauce in a prepared casserole dish, add tortillas, then black bean mixture, chicken, cheese, green onions, and cilantro. Repeat layers.
  • Top with remaining cheese, cover, and bake for 20 minutes. Uncover, bake 10 more minutes until cheese melts. Garnish with green onions and cilantro before serving.

Notes

Let the casserole rest for 5-10 minutes before slicing for easier serving.
Calories: 550kcal
Cost: $15
Course: Main Course
Cuisine: Mexican
Keyword: chicken

Nutrition

Calories: 550kcal | Carbohydrates: 60g | Protein: 45g | Fat: 20g | Sodium: 1500mg

Why You’ll Adore These Cookies

There’s something special about baking that makes my heart race with excitement, and these almond flour shortbread cookies are a perfect example of that thrill! With just three simple ingredients, you can create a mouthwatering treat that boasts a delightful crunch and a nutty sweetness that will have your taste buds dancing. These cookies are not just easy to whip up; they’re also gluten-free and perfect for any occasion—from cozy afternoon teas to festive holiday gatherings. Let’s embark on this baking adventure together, where simplicity meets sensational flavor!

Ingredients You’ll Need

To embark on this culinary journey, gather the following ingredients:

  • 1 cup almond flour
  • 1/4 cup butter, softened
  • 1/4 cup powdered sugar

Each of these ingredients plays a crucial role in creating a cookie that is rich, buttery, and utterly satisfying. Almond flour serves as the base, providing a nutty flavor and a tender crumb, while the butter adds richness and helps bind everything together. The powdered sugar sweetens the mixture and gives it that melt-in-your-mouth quality we all crave in a cookie.

Notes About the Ingredients

A plate of Almond Flour Shortbread Cookies with a soft focus background.

Before you dive into mixing, let’s talk about a few notes regarding our ingredients:

  • Almond Flour: This is a vital ingredient that gives the cookies their unique texture and flavor. Make sure to use finely ground almond flour for the best results. If you’re in Australia or the UK, you might find it labeled as blanched almond meal.
  • Butter: For a truly authentic flavor, use unsalted butter. If you prefer a vegan version, you can substitute with vegan butter, which works beautifully in this recipe.
  • Powdered Sugar: This sugar dissolves quickly and gives the cookies a smooth texture. You can make your own powdered sugar by blending granulated sugar in a blender until fine, if you prefer.

Preparing the Cookie Dough

Now that we have our ingredients ready, let’s get to the exciting part—making the dough!

  1. Preheat your oven to 350°F (175°C) and line a baking sheet with parchment paper. This step is crucial; it prevents the cookies from sticking and ensures they bake evenly.
  2. In a mixing bowl, combine the almond flour, softened butter, and powdered sugar.
  3. Using a spatula or your hands, mix until a dough forms. It should be pliable and slightly sticky, not too crumbly. If it feels too dry, add a tiny splash of water or a bit more butter until you reach the right consistency.

Shaping the Shortbread Cookies

Time to shape our cookies! This part is where you can let your creativity shine, but here’s a simple way to do it:

  1. Scoop out small portions of dough (about a tablespoon) and roll them into balls between your palms.
  2. Place the dough balls on your lined baking sheet, leaving enough space between each one.
  3. Using your fingers or the bottom of a glass, gently flatten each ball slightly. This will help them spread and bake evenly.

Tips for Baking

As you prepare to bake your cookies, keep these tips in mind:

  • Watch the Time: Bake in the preheated oven for about 10-12 minutes, but keep an eye on them! The edges should turn a lovely golden color, signaling they’re ready to come out.
  • Cooling Time: Allow the cookies to cool on the baking sheet for a few minutes before transferring them to a wire rack. This helps them set and makes them less likely to crumble.
  • Don’t Rush: Patience is key! Letting them cool completely ensures they’ll have the perfect texture.

Customizing Your Shortbread

Feeling adventurous? Let’s mix things up! Here are some ideas to customize your almond flour shortbread:

  • Add Flavor: Incorporate a teaspoon of vanilla extract or almond extract into your dough for an extra layer of flavor.
  • Mix in Extras: Consider adding chopped nuts, chocolate chips, or dried fruit to the dough for added texture and flavor.
  • Glaze or Frost: After baking, drizzle the cookies with melted chocolate or top them with a light frosting made from powdered sugar and a splash of almond milk.

Ingredient Substitutions

If you find yourself short on any of the ingredients, don’t worry! Here are some substitutions that work well:

  • Butter: You can replace it with coconut oil or a vegan butter alternative for a dairy-free treat.
  • Powdered Sugar: If you’re out of powdered sugar, regular granulated sugar can work in a pinch, but the texture may be slightly different.
  • Almond Flour: For those with nut allergies, try using oat flour or a gluten-free all-purpose blend. Keep in mind that the texture will vary.

Storage and Freezing

Once your cookies have cooled, it’s essential to store them properly to maintain their deliciousness:

  • Storage: Keep the cookies in an airtight container at room temperature for up to a week. They make for a perfect snack with coffee or tea!
  • Freezing: To freeze, place the baked cookies in a single layer in a freezer-safe container. They can last up to three months in the freezer. When ready to enjoy, simply thaw at room temperature.

FAQs

Here are some common questions about making these delightful cookies:

  • Can I make these cookies vegan? Absolutely! Just substitute the butter with a vegan alternative, and you’re good to go!
  • Why are my cookies too crumbly? If your dough is too dry, try adding a little more butter or a tiny splash of water to bind it together.
  • Can I use coconut flour instead of almond flour? I recommend sticking with almond flour, as coconut flour absorbs a lot more moisture and would require recipe adjustments.

Troubleshooting Tips

Even the best bakers encounter hiccups. Here’s how to troubleshoot common issues:

  • Cookies spreading too much: Ensure your butter isn’t too warm when mixing. Also, chilling the dough for 30 minutes before baking can help.
  • Cookies burning: Keep an eye on the baking time. Ovens can vary, so check on them a minute or two earlier.

Conclusion

There you have it! The sweet simplicity of almond flour shortbread cookies that can set any baking heart on fire. With just three ingredients, you create a delightful treat that’s perfect for any occasion. Whether you enjoy them plain, dressed up with extra flavors, or share them with loved ones, these cookies are a testament to the beauty of simplicity in the kitchen. So roll up those sleeves, grab your mixing bowl, and let’s make some magic happen—one cookie at a time!

3-ingredient Almond Flour Shortbread Cookies

Prep Time 10 minutes
Cook Time 12 minutes
Total Time 22 minutes
Servings 12 cookies
Calories 150
Delight in these simple, buttery shortbread cookies made with just three ingredients, perfect for a quick treat.

Ingredients

Main

  • 1 cup almond flour
  • 1/4 cup butter, softened
  • 1/4 cup powdered sugar

Instructions 

  • Preheat oven to 350°F (175°C) and line a baking sheet with parchment paper.
  • Mix almond flour, softened butter, and powdered sugar until a dough forms.
  • Roll dough into small balls, place on baking sheet, and flatten slightly.
  • Bake for 10-12 minutes until edges are golden.
  • Cool briefly on the sheet, then transfer to a wire rack to cool completely.

Notes

Store in an airtight container for up to a week.
Calories: 150kcal
Cost: $5
Course: Dessert
Cuisine: American
Keyword: almond, Cookies, shortbread

Nutrition

Calories: 150kcal | Carbohydrates: 12g | Protein: 4g | Fat: 11g | Sodium: 20mg

Loved this recipe? Save it to your favorite Pinterest board so you can easily find it later! It’s the perfect way to keep all your sweet ideas in one place. ✨

Delicious Almond Flour Shortbread Cookies arranged attractively with warm lighting.

Why You’ll Love This Wholesome Dish

There’s something truly special about a comforting bowl of mac and cheese, isn’t there? It hugs your soul with every creamy bite, wrapping you in nostalgia and warmth. Now, imagine taking that beloved classic and giving it a nourishing twist with vibrant veggies. That’s exactly what you get with this Healthy One Pot Broccoli Mac & Cheese! This dish isn’t just about indulgence; it’s about celebrating the spirit of cooking with heart and health. Here, we blend the creamy goodness of cheese with the crunch of broccoli, all in one pot for minimal mess and maximum flavor.

This recipe is a game-changer for weeknight dinners, whether you’re cooking for picky eaters, health-conscious adults, or just indulging yourself after a long day. With easy-to-find ingredients and a cooking method that keeps it simple, you’ll find yourself coming back to this delightful dish time and time again. The rich, cheesy sauce enveloping whole wheat macaroni and fresh broccoli florets is not only satisfying but also packed with nutrients that will leave you feeling good.

Ingredients You’ll Need

Gathering the ingredients for this dish is part of the joy of cooking. Here’s what you’ll need:

  • 8 oz whole wheat macaroni: This adds fiber and a nutty flavor.
  • 2 cups broccoli florets: Fresh, vibrant, and full of vitamins.
  • 2 cups vegetable broth: The base of our creamy sauce.
  • 1 cup milk (or almond milk): For that extra creaminess.
  • 1 cup shredded cheddar cheese: The star of the show!
  • 1/2 cup grated parmesan cheese: Adds depth and a bit of zing.
  • 1 tablespoon olive oil: Helps sauté and enhance flavors.
  • 1 teaspoon garlic powder: For that aromatic kick.
  • 1/2 teaspoon onion powder: A subtle sweetness.
  • Salt and pepper to taste: Essential for balancing flavors.

How to Create This Culinary Delight

Delicious One Pot Broccoli Mac & Cheese in a bowl, highlighting melted cheese and broccoli florets.

Now that you have your ingredients ready, let’s dive into the cooking process. This one-pot method minimizes cleanup and maximizes flavor in a delightful, creamy dish.

Step-by-Step Instructions

  1. In a large pot, heat the olive oil over medium heat, allowing it to warm up and release its flavor.
  2. Add the whole wheat macaroni and broccoli florets to the pot, stirring them together for about a minute.
  3. Pour in the vegetable broth and milk, stirring to combine all the ingredients.
  4. Sprinkle in the garlic powder, onion powder, salt, and pepper, mixing well.
  5. Bring the mixture to a boil, then reduce the heat to low and cover the pot. Let it cook for about 8-10 minutes, stirring occasionally until the pasta is tender.
  6. Once cooked, remove the pot from heat and stir in the shredded cheddar and parmesan cheese, allowing it to melt and create a creamy sauce.
  7. Serve warm, and enjoy your Healthy One Pot Broccoli Mac & Cheese!

Tips for Success

Cooking is all about experimentation, but here are some tips to ensure your dish turns out perfectly:

  • For the best flavor, use freshly shredded cheese instead of pre-packaged options, as they melt better.
  • Don’t rush the cooking process; letting the flavors meld is crucial for the best taste.
  • If you like a bit of spice, consider adding a pinch of red pepper flakes to the pot for a nice kick!

Variations & Add-Ins

The beauty of this dish is its versatility. Here are some fun variations you can try:

  • Protein Boost: Add cooked chicken, turkey, or even chickpeas for an extra protein punch.
  • Cheese Lovers: Experiment with different cheeses like gouda or pepper jack for unique flavor profiles.
  • Veggie Extravaganza: Toss in other vegetables like spinach, peas, or bell peppers to enhance the nutritional value.

Substitutions to Consider

Don’t have everything on hand? No problem! Here are some easy substitutions:

  • Whole wheat macaroni: Use gluten-free pasta or any other pasta shape you prefer.
  • Milk: Any plant-based milk works well, such as oat milk or soy milk.
  • Vegetable broth: Chicken broth can be used for a richer flavor.

Equipment You’ll Need

Cooking this dish is straightforward, but you’ll need a few essential kitchen tools:

  • A large pot for cooking everything together.
  • A stirring spoon to mix your delightful ingredients.
  • A measuring cup for accurate ingredient portions.

Storage & Freezing Tips

If you happen to have leftovers (though I can’t imagine that happening!), here’s how to store them:

  • Refrigerate leftovers in an airtight container for up to 3 days.
  • To freeze, place in freezer-safe containers and enjoy within 2 months. Reheat in the microwave or on the stove, adding a splash of milk for creaminess.

FAQs About This Recipe

Here are some common questions and answers to help you along the way:

  • Can I make this dish vegan? Absolutely! Use a plant-based cheese and milk, and you’re good to go.
  • How can I make it spicier? Add some jalapeños or hot sauce when mixing in the cheese.
  • What can I serve with it? A side salad or some crusty bread pairs beautifully with this creamy dish!

Troubleshooting Common Issues

If you encounter any hiccups, don’t worry! Here’s how to troubleshoot:

  • Too thick: If the sauce is too thick, add a little more milk or broth to loosen it up.
  • Not cheesy enough: Increase the amount of cheddar or parmesan for a cheesier experience.
  • Overcooked pasta: Keep an eye on your pasta; it should be al dente to ensure the best texture.

Conclusion: A Dish to Delight

There you have it, friends! A wholesome, comforting bowl of Healthy One Pot Broccoli Mac & Cheese that’s not just a meal but an experience. It’s about the joy of cooking, the thrill of experimenting with flavors, and the satisfaction of serving something nutritious and delicious to those you love. I invite you to embrace the adventure in your kitchen, grab your skillet, and ignite those taste buds! You won’t just fill your stomach; you’ll create memories around the table. So get ready to serve up some joy, and don’t forget to share your creations with me! Happy cooking!

Healthy One Pot Broccoli Mac & Cheese

Prep Time 5 minutes
Cook Time 10 minutes
Total Time 15 minutes
Servings 4 servings
Calories 450
A nutritious and easy one-pot meal combining whole wheat pasta, broccoli, and cheesy goodness for a quick, wholesome dinner.

Ingredients

Main Ingredients

  • 8 oz whole wheat macaroni
  • 2 cups broccoli florets
  • 2 cups vegetable broth
  • 1 cup milk (or almond milk)
  • 1 cup shredded cheddar cheese
  • 1/2 cup grated parmesan cheese
  • 1 tablespoon olive oil
  • 1 teaspoon garlic powder
  • 1/2 teaspoon onion powder
  • to taste salt and pepper

Instructions 

  • Heat olive oil in a large pot over medium heat.
  • Add pasta and broccoli, then pour in broth and milk. Stir well.
  • Season with garlic powder, onion powder, salt, and pepper. Bring to a boil.
  • Reduce heat, cover, and simmer 8-10 minutes until pasta is tender.
  • Remove from heat and stir in cheeses until melted. Serve warm.

Notes

Use fresh broccoli for best flavor and add extra cheese if desired.
Calories: 450kcal
Cost: $15
Course: Main Course
Cuisine: American
Keyword: Broccoli, healthy, One Pot

Nutrition

Calories: 450kcal | Carbohydrates: 60g | Protein: 20g | Fat: 15g | Sodium: 800mg

Loved this recipe? Save it to your favorite Pinterest board so you can easily find it later! It’s the perfect way to keep all your sweet ideas in one place. ✨

Eye-level shot of a hearty bowl of Healthy Mac & Cheese with broccoli, featuring rich colors and textures.