Author

Avery Collins

Browsing

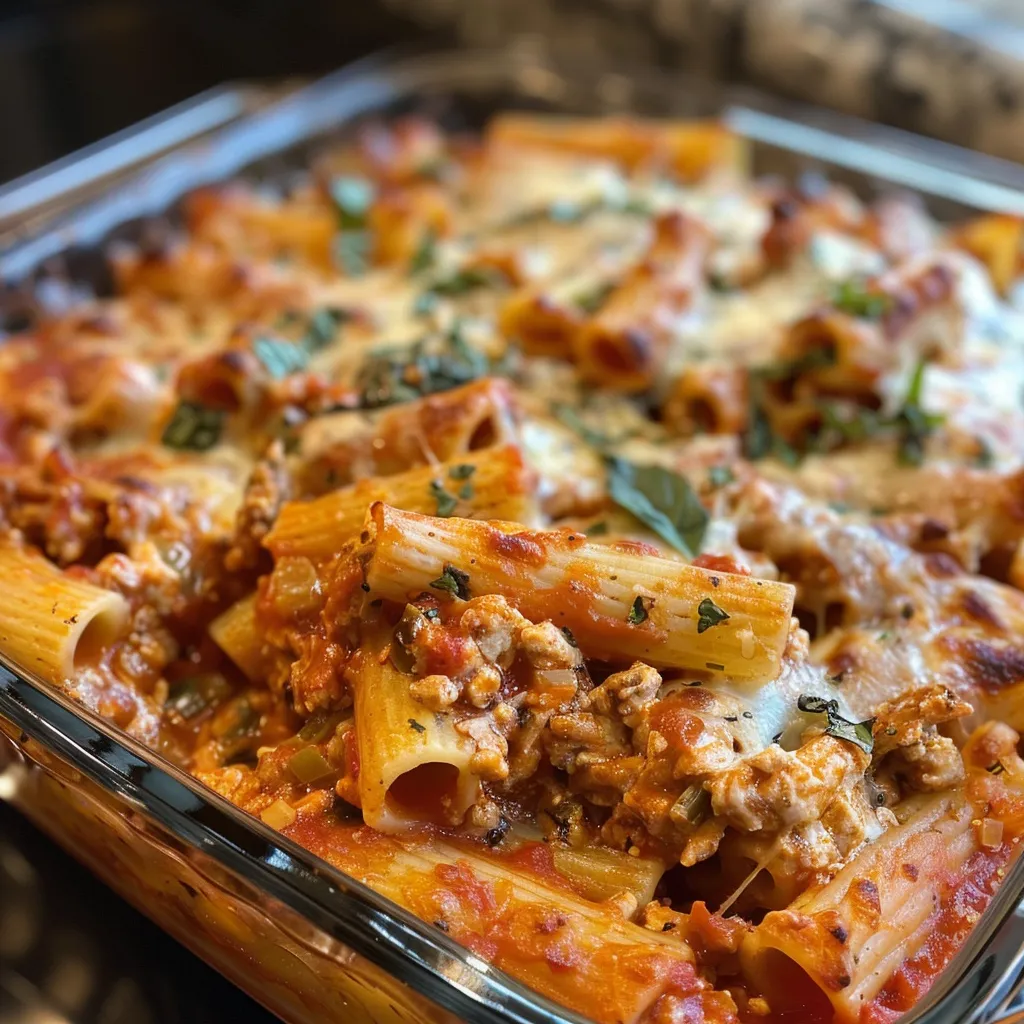
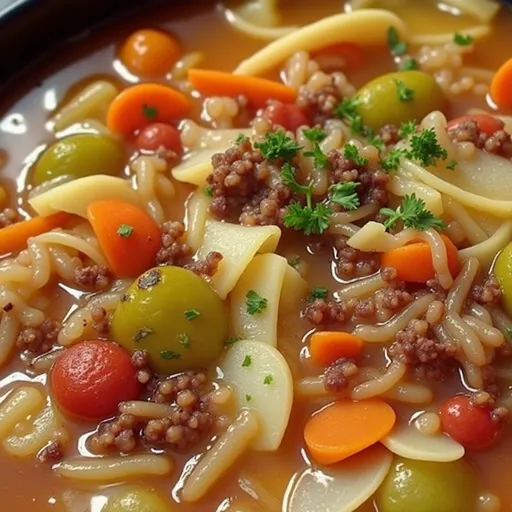
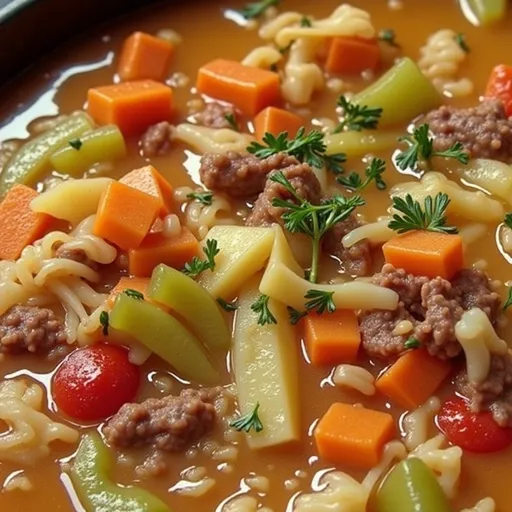
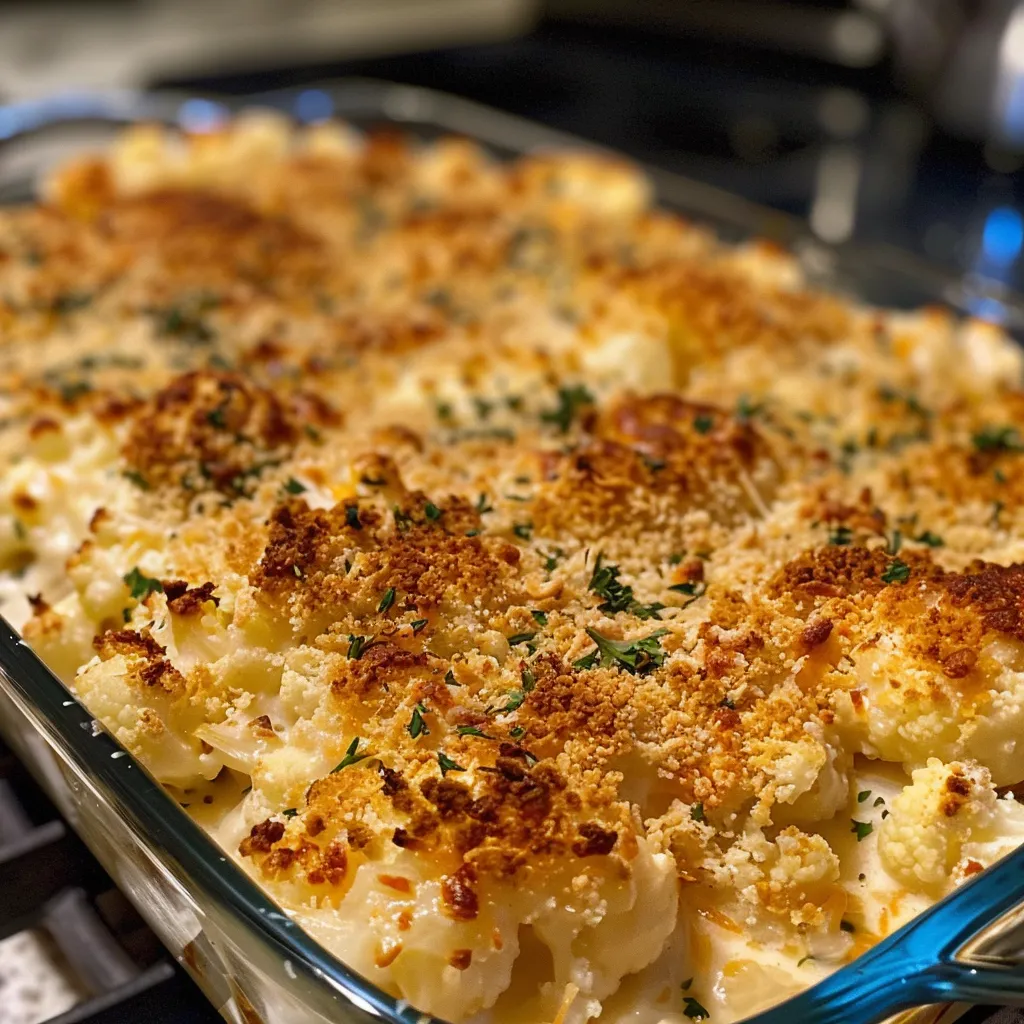
Experience a Flavor Explosion with Our Creamy Ranch Ground Beef and Potato Bake

If you’re looking for a dish that offers pure comfort and flavor, look no further than this Creamy Ranch Ground Beef and Potato Bake. In every layer, you’ll discover how the richness of ground beef melds beautifully with creamy ranch seasoning and tender potatoes. This recipe isn’t just about feeding the family; it’s about creating memories around the dinner table, where every bite is a celebration of bold flavors. Let’s embark on this culinary adventure that’s guaranteed to become a family favorite!

Why You’ll Love This Recipe

Here are some irresistible reasons to whip up this Creamy Ranch Ground Beef and Potato Bake:

  • Ultimate Comfort Food: This casserole is the epitome of comfort food, bringing warmth and satisfaction with every bite.
  • Easy Preparation: With straightforward steps, this recipe is perfect for weeknight dinners when time is of the essence.
  • Kid-Friendly: Even the pickiest eaters will love this creamy, cheesy dish, making it a hit for family meals.
  • Make-Ahead Friendly: Prep it in advance and bake when you’re ready, allowing for stress-free entertaining.
  • Versatile Ingredients: With simple ingredients, you can easily customize the dish to suit your family’s tastes or dietary needs.

Ingredient Breakdown

Here’s what you’ll need to create this mouthwatering bake:

  • 1 lb ground beef: Choose lean ground beef for a healthier option without sacrificing flavor.
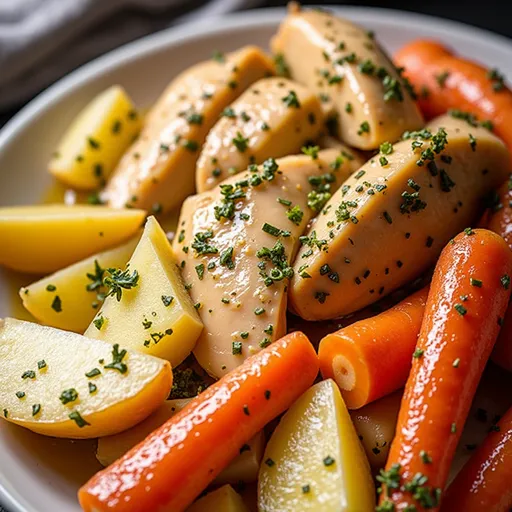
  • 4 cups diced potatoes: Russet or gold potatoes work best for a fluffy texture.
  • 1 cup sour cream: This adds richness and creaminess that will elevate the dish.
  • 1 can (10.5 oz) cream of mushroom soup: Provides a savory base that ties all the flavors together.
  • 1 packet ranch seasoning mix: The star of the show, bringing a burst of flavor that’s hard to resist.
  • 1½ cups shredded cheddar cheese: Melts beautifully, adding a gooey texture that complements the beef.
  • ½ cup milk: Ensures a creamy consistency throughout the casserole.
  • 1 tbsp butter: A touch of richness to enhance the overall flavor.
  • Salt and pepper, to taste: Essential for seasoning and enhancing all the flavors.
  • Chopped parsley, for garnish: Adds a fresh touch and a pop of color to your dish.

Pro Tips for the Perfect Bake

Side view of a baked dish featuring ground beef, potatoes, and melted cheese.

Want to elevate your Creamy Ranch Ground Beef and Potato Bake? Here are some expert insights:

  • Brown the Beef Properly: Take your time browning the ground beef to develop deeper flavors. Don’t rush this step!
  • Layering is Key: For even cooking, layer your ingredients in the order listed in the recipe. This ensures that the flavors meld perfectly.
  • Experiment with Cheeses: While cheddar is classic, feel free to mix in Monterey Jack or pepper jack for a spicy twist.
  • Spice it Up: Add a pinch of cayenne or red pepper flakes to the beef mixture for those who like a little heat.
  • Rest Before Serving: Let the casserole sit for a few minutes post-baking. This helps the layers set and makes serving easier.
  • Garnish Generously: A sprinkle of fresh herbs or crispy bacon bits on top before serving can elevate the presentation.
  • Use Fresh Ingredients: Whenever possible, opt for fresh potatoes and herbs to maximize flavor.
  • Check for Doneness: Ensure that your potatoes are tender before serving; they should pierce easily with a fork.
  • Customize for Dietary Needs: Substitute ground turkey or chicken for a lighter alternative, or use dairy-free products for lactose intolerance.
  • Freeze for Later: This dish freezes beautifully! Prepare it ahead of time, bake, and freeze leftovers in individual portions.

Common Mistakes and Troubleshooting

Even the best cooks can encounter hiccups. Here are some common mistakes and how to avoid them:

  • Too Much Liquid: If your casserole seems soupy, you may have added too much milk or soup. Use a little less next time.
  • Undercooked Potatoes: Make sure to cut your potatoes uniformly and check for tenderness before serving.
  • Overbaking: Keep an eye on your casserole toward the end of baking. You want it bubbly and golden, not dried out.
  • Not Enough Flavor: Ensure you’re seasoning well. Taste your beef mixture before layering to adjust seasoning as necessary.

Variations to Spice Things Up

Want to mix things up? Here are some delicious variations:

  • Mexican Twist: Add black beans, corn, and taco seasoning to the beef mixture for a southwest flair.
  • Vegetarian Version: Swap the beef for lentils or a plant-based meat alternative, and add more veggies like bell peppers and spinach.
  • Cheesy Broccoli Addition: Mix in steamed broccoli florets for added nutrition and a pop of color.
  • Curry Flavor: Incorporate curry powder into the beef mixture for an exotic twist that’s unexpected yet delightful.

Storage and Make-Ahead Instructions

This casserole not only tastes fantastic but also stores well:

  • Refrigeration: Store leftovers in an airtight container in the refrigerator for up to 3 days.
  • Freezing: Freeze the unbaked casserole covered tightly for up to 3 months. Thaw overnight in the fridge before baking.
  • Reheating: To reheat, bake in a preheated oven at 350°F (175°C) until heated through, about 20-25 minutes.

Comprehensive FAQs

Here are some frequently asked questions about this delicious recipe:

  • Can I use ground turkey instead of beef? Absolutely! Ground turkey is a fantastic lean alternative.
  • What can I substitute for ranch seasoning? You can use a mix of dried herbs like dill, parsley, and garlic powder for a homemade ranch flavor.
  • Can I add other vegetables? Yes! Feel free to mix in your favorite vegetables, such as carrots or green beans.
  • How do I know when it’s done baking? The casserole should be bubbly and golden on top, and the potatoes should be fork-tender.
  • Can I make this recipe in advance? Yes! Prepare it up to the baking stage, refrigerate, and bake when ready.
  • Is this recipe gluten-free? Use a gluten-free cream of mushroom soup and check the ranch seasoning for gluten.
  • How spicy is this dish? It’s mild, but you can add spices to suit your heat preference.
  • What’s the best side dish to serve with this? A simple green salad or steamed veggies works wonderfully.

Nutrition Tips and Dietary Adaptations

If you’re conscious about your dietary choices, here are some adaptations:

  • Low-Carb: Substitute potatoes with cauliflower for a low-carb alternative.
  • High-Protein: Use lean beef and add beans for extra protein.
  • Dairy-Free: Swap out sour cream and cheese for plant-based alternatives.
  • Gluten-Free: Ensure all products used are gluten-free.

Equipment Recommendations

To make your cooking experience seamless, here are some must-have kitchen tools:

  • 9×13-inch Baking Dish: Perfect size for casseroles, ensuring even cooking.
  • Skillet: A heavy-bottomed skillet for browning the beef evenly.
  • Mixing Bowls: For combining your ingredients effortlessly.
  • Measuring Cups and Spoons: Accurate measurements for consistent results.

Serving Suggestions

For an unforgettable experience, here’s how to serve your Creamy Ranch Ground Beef and Potato Bake:

  • Fresh Herbs: Garnish with chopped parsley or chives for a fresh finish.
  • Side Salads: Pair with a refreshing garden salad for a balanced meal.
  • Crusty Bread: Serve alongside warm crusty bread to soak up all the creamy goodness.
  • Pickles or Relish: A tangy side can balance the richness of the casserole deliciously.

In conclusion, the Creamy Ranch Ground Beef and Potato Bake is not just a recipe; it’s an experience waiting to happen. Every bite tells a story of flavor, comfort, and home. So, roll up your sleeves and get ready to create a dish that will warm hearts and satisfy appetites. Let’s make some memories around the dinner table!

Creamy Ranch Ground Beef and Potato Bake

Prep Time 15 minutes
Cook Time 50 minutes
Total Time 1 hour 5 minutes
Servings 6 servings
Calories 650
A hearty and creamy casserole combining seasoned ground beef, potatoes, and cheese, perfect for a comforting family dinner.

Ingredients

Meat and Potatoes

  • 1 lb ground beef
  • 4 cups diced potatoes (russet or gold)

Dairy and Soup

  • 1 cup sour cream
  • 1 can (10.5 oz) cream of mushroom soup
  • 1 packet ranch seasoning mix
  • cups shredded cheddar cheese
  • ½ cup milk
  • 1 tbsp butter
  • to taste Salt and pepper
  • for garnish Chopped parsley

Instructions 

  • Preheat oven to 375°F (190°C) and grease a 9×13-inch dish.
  • Cook ground beef until browned; drain excess fat.
  • Mix beef with ranch seasoning, milk, and mushroom soup; simmer 3 minutes.
  • Layer potatoes and beef mixture in dish, then top with sour cream and cheese.
  • Cover with foil and bake 35 minutes; uncover and bake 15 more until bubbly. Rest 5 minutes, garnish with parsley.

Notes

For a lighter version, use reduced-fat cheese and sour cream.
Calories: 650kcal
Cost: $15
Course: Main Course
Cuisine: American
Keyword: ground beef

Nutrition

Calories: 650kcal | Carbohydrates: 50g | Protein: 45g | Fat: 35g | Sodium: 900mg

Why You’ll Love This Korean Ground Beef Bowl

When it comes to quick and easy weeknight dinners, few dishes can compete with the vibrant and flavor-packed Korean Ground Beef Bowl. This dish is a celebration of bold flavors, perfectly balancing the sweet and savory elements that make Korean cuisine so beloved. With just a handful of ingredients and minimal prep time, you can create a culinary masterpiece that will have your taste buds dancing and your kitchen filled with irresistible aromas.

Imagine the sizzle of ground beef hitting a hot skillet, the fragrant garlic and ginger melding together in a sweet and savory sauce, and the satisfying crunch of fresh vegetables on top. This dish not only nourishes your body but also ignites your senses, inviting you to savor every bite. Whether you’re feeding a hungry family or prepping for the week ahead, this Korean Ground Beef Bowl is your ticket to flavor town.

Essential Ingredients for Your Korean Ground Beef Bowl

Before we dive into the cooking process, let’s gather the ingredients that will make this dish sing. Here’s what you’ll need:

  • 1 pound ground beef – The star of the show, providing a rich base for the dish.
  • 2 tablespoons soy sauce – Adds umami and a salty depth that enhances the beef.
  • 1 tablespoon brown sugar – Balances the savory notes with a touch of sweetness.
  • 1 tablespoon sesame oil – Gives the dish a nutty flavor and enhances the overall aroma.
  • 2 cloves garlic, minced – A must-have for that aromatic kick.
  • 1/2 teaspoon grated ginger – Infuses the dish with warmth and spice.
  • 1/2 teaspoon black pepper – Adds a subtle heat and depth of flavor.
  • 2 green onions, chopped – For garnish and a fresh crunch.
  • 1 cup cooked rice – The perfect base to soak up all those delicious flavors.
  • Sesame seeds for garnish – A finishing touch that adds texture and flair.
  • Sliced cucumbers or carrots (optional) – For a refreshing crunch and added nutrition.

How to Prepare the Ground Beef

Detailed view of a Korean dish featuring ground beef, served with rice and garnished with sesame seeds and vegetables.

Now that we have our ingredients lined up, it’s time to get cooking! Here’s how to prepare the ground beef:

  1. In a skillet over medium heat, add the ground beef and cook until browned, breaking it apart with a spatula. The key here is to ensure the beef is cooked evenly and fully, so keep stirring!
  2. Once the beef is browned, drain the excess fat from the skillet. This step is crucial to avoid a greasy dish and to allow the flavors to shine through.
  3. Add the soy sauce, brown sugar, sesame oil, minced garlic, grated ginger, and black pepper to the skillet. Stir well to combine all the ingredients into a harmonious blend of flavors.
  4. Cook for another 2-3 minutes until everything is heated through and well combined. You want the sauce to cling to the beef, creating a glossy finish that makes your mouth water.

Making the Perfect Rice Base

While the beef is simmering to perfection, let’s talk about the rice. A great bowl starts with a great base!

Use 1 cup of cooked rice for your bowl. You can choose your favorite type of rice—white, brown, or even jasmine for a fragrant twist. Just make sure to cook it according to package instructions, and fluff it up just before serving. The rice will soak up the delicious sauce from the beef, making each bite an explosion of flavor.

Assembly: Bringing It All Together

Once your beef and rice are ready, it’s time to assemble your bowl. Here’s how to do it:

  1. Start by placing a generous scoop of cooked rice in a bowl.
  2. Top the rice with the flavorful ground beef mixture, ensuring you get all the delicious sauce.
  3. Garnish with chopped green onions and a sprinkle of sesame seeds for that extra pop of flavor and crunch.
  4. If you’re feeling adventurous, add some sliced cucumbers or carrots on the side for a refreshing contrast to the savory beef.

Variations and Customizations

This Korean Ground Beef Bowl is incredibly versatile, allowing you to customize it to your liking. Here are some variations you might want to try:

  • Add veggies: Stir in some chopped bell peppers, carrots, or broccoli while cooking the beef for an extra dose of nutrition.
  • Spice it up: If you like heat, add a splash of sriracha or a pinch of red pepper flakes to the sauce for a fiery kick.
  • Switch up the protein: Ground turkey or chicken can be used as lean alternatives to beef, offering a different flavor profile while maintaining the dish’s essence.
  • Make it a meal prep: Prepare multiple servings and store them in airtight containers for a quick grab-and-go meal during the week.

Serving Suggestions

This dish pairs beautifully with a variety of sides. Here are some suggestions to elevate your meal:

  • Kimchi: A traditional Korean side dish that adds a spicy crunch and probiotic benefits.
  • Pickled vegetables: These add a tangy contrast to the savory beef.
  • Fresh salad: A light cucumber or carrot salad can balance the richness of the dish.
  • Asian beverages: Pair your meal with a refreshing iced green tea or a light Asian beer for a complete dining experience.

Storage and Freezing Tips

If you happen to have leftovers (though I doubt it!), here’s how to store them:

  • Refrigeration: Place any leftovers in an airtight container and store in the refrigerator for up to 3 days.
  • Freezing: You can also freeze the cooked beef mixture for up to 3 months. Just make sure to cool it completely before transferring it to a freezer-safe container.
  • Reheating: To reheat, simply place the beef in a skillet over medium heat until warmed through, or microwave in short intervals until hot.

FAQs

Can I use ground turkey or chicken instead of beef?

Absolutely! Ground turkey or chicken works beautifully in this recipe, offering a leaner option without sacrificing flavor.

What should I serve with the Korean Ground Beef Bowl?

This dish pairs well with pickled vegetables, a fresh salad, or even kimchi for an authentic experience. Serve it with a refreshing drink like iced tea to complete your meal.

How can I store leftovers?

Store any leftovers in an airtight container in the refrigerator for up to 3 days, or freeze for up to 3 months for future meals.

Final Thoughts

In just a few simple steps, you’ve created a vibrant and satisfying Korean Ground Beef Bowl that is sure to become a family favorite. This dish isn’t just about the food; it’s about the experience of cooking, sharing, and savoring bold flavors. So grab your skillet, unleash your inner chef, and let the flavors ignite your passion for cooking! Trust me, once you try this recipe, you’ll want to make it over and over again. Happy cooking!

Korean Ground Beef Bowl

Prep Time 10 minutes
Cook Time 15 minutes
Total Time 25 minutes
Servings 4 servings
Calories 450
A quick and flavorful Korean-inspired dish featuring savory ground beef served over rice, garnished with green onions and sesame seeds.

Ingredients

Meat

  • 1 pound ground beef
  • 2 tablespoons soy sauce
  • 1 tablespoon brown sugar
  • 1 tablespoon sesame oil
  • 2 cloves garlic, minced
  • 0.5 teaspoon grated ginger
  • 0.5 teaspoon black pepper
  • 2 green onions chopped green onions
  • 1 cup cooked rice
  • to taste sesame seeds for garnish
  • to taste sliced cucumbers or carrots (optional)

Instructions 

  • Cook ground beef in a skillet until browned, then drain excess fat.
  • Add soy sauce, brown sugar, sesame oil, garlic, ginger, and pepper; stir and cook for 2-3 minutes.
  • Serve beef over rice, garnish with green onions and sesame seeds, and add sliced vegetables if desired.

Notes

For extra flavor, add a drizzle of sesame oil just before serving.
Calories: 450kcal
Cost: $12
Course: Main Course
Cuisine: Korean
Keyword: ground beef

Nutrition

Calories: 450kcal | Carbohydrates: 50g | Protein: 25g | Fat: 15g | Sodium: 900mg

Loved this recipe? Save it to your favorite Pinterest board so you can easily find it later! It’s the perfect way to keep all your sweet ideas in one place. ✨

Delicious Korean Ground Beef Bowl showcasing glossy beef, vibrant green onions, and a side of rice in warm lighting.

Why You’ll Love This Creamy Treat

When it comes to desserts, few things can ignite your taste buds like a scoop of silky, rich ice cream. Now, imagine that same creamy goodness without the dairy and guilt — that’s the magic of Vegan Cookie Dough Nice Cream. This sensational treat is a symphony of flavors and textures, blending naturally sweet frozen bananas with the nutty essence of almond flour and the indulgent joy of chocolate chips. Whether you’re a devoted vegan or just someone looking to indulge in a healthier dessert, this recipe is your ticket to a blissful experience that sets your heart on fire!

Overview of the Ingredients

Before we dive into the delightful world of making your own Vegan Cookie Dough Nice Cream, let’s explore the star players of this recipe. Each ingredient plays a vital role in creating the perfect balance of taste and texture.

  • Frozen Bananas: The base of our nice cream, frozen bananas lend a naturally sweet flavor and creamy consistency, making them a perfect substitute for traditional ice cream.
  • Almond Milk: This non-dairy milk adds creaminess while keeping the dessert light and refreshing. You can use any non-dairy milk of your choice!
  • Almond Flour: This ingredient brings a nutty flavor that mimics cookie dough. It also adds a bit of protein, making this treat even more satisfying.
  • Maple Syrup: A natural sweetener that enhances the flavor profile without overpowering the other ingredients.
  • Vegan Chocolate Chips: Because no cookie dough is complete without chocolate! These little morsels of joy provide bursts of rich flavor in every bite.
  • Vanilla Extract: A touch of vanilla elevates the entire dish, adding warmth and depth to the flavor.
  • Pinch of Salt: Don’t underestimate the power of salt! A small amount enhances the sweetness and rounds out the flavors beautifully.

Steps to Create Your Vegan Cookie Dough Nice Cream

A bowl of Vegan Cookie Dough Nice Cream filled with chocolate chips, showcasing a smooth texture and warm lighting.

Ready to embark on this culinary adventure? Let’s get to it! Making your own Vegan Cookie Dough Nice Cream is not only easy but also incredibly satisfying. Here’s how to do it:

  1. In a blender or food processor, combine the 2 frozen bananas with the 1/4 cup almond milk. Blend until smooth and creamy.
  2. Add in the 1/3 cup almond flour, 1/4 cup maple syrup, 1 tsp vanilla extract, and a pinch of salt to the banana mixture. Blend again until everything is well combined and you achieve a thick, cookie dough-like consistency.
  3. Stir in the 1/4 cup vegan chocolate chips gently, ensuring they’re evenly distributed throughout the mixture.
  4. Transfer the delightful mixture to a container and freeze for about 1-2 hours until firm enough to scoop.
  5. When you’re ready to indulge, scoop out your Vegan Cookie Dough Nice Cream and enjoy immediately or store any leftovers in the freezer for later.

Tips for Perfecting Your Nice Cream

Cooking is all about experimentation, and this recipe is no different! Here are some tips to ensure your Vegan Cookie Dough Nice Cream turns out perfectly:

  • Make sure your bananas are ripe before freezing them; the riper they are, the sweeter your nice cream will be!
  • For a creamier texture, let the bananas thaw for a few minutes before blending.
  • Adjust the sweetness by adding more or less maple syrup according to your taste preferences.
  • If the mixture is too thick to blend, add a splash more almond milk to help it along.

Variations to Spice It Up

Feeling adventurous? Here are some fun variations to make this recipe your own:

  • Nut Butters: Add a tablespoon of almond or peanut butter for a rich, nutty flavor that pairs perfectly with chocolate.
  • Different Mix-ins: Swap out the chocolate chips for dried fruits, nuts, or even shredded coconut for a tropical twist.
  • Flavor Extracts: Consider experimenting with different extracts like almond or hazelnut to change the flavor profile.
  • Spices: A sprinkle of cinnamon or nutmeg can add an interesting warmth to the nice cream.

Substitutions You Can Make

Don’t have all the ingredients? No problem! Here are some substitutions you can try:

  • Almond Milk: Use oat milk, coconut milk, or soy milk if you prefer.
  • Maple Syrup: Agave nectar or date syrup can work as a substitute for sweetness.
  • Almond Flour: If you don’t have almond flour, oat flour or all-purpose flour can be used, but keep in mind that it may alter the flavor and texture slightly.

Essential Equipment

To whip up your Vegan Cookie Dough Nice Cream, you’ll need a few key pieces of equipment:

  • Blender or Food Processor: A powerful blender or food processor is essential for achieving that creamy texture.
  • Container: A freezer-safe container to store your nice cream while it firms up.
  • Spoon or Ice Cream Scoop: For serving up your delicious creation!

Storage and Freezing Tips

If you manage to have any leftovers (which is quite unlikely!), here’s how to store your nice cream:

  • Transfer any uneaten nice cream to an airtight container and place it in the freezer.
  • To enjoy later, let it sit at room temperature for a few minutes before scooping to soften.
  • For best results, consume within 1-2 weeks to enjoy the freshest flavor and texture.

FAQs About Vegan Cookie Dough Nice Cream

Can I use fresh bananas instead of frozen?
While fresh bananas can be used, freezing them is what gives this nice cream its creamy texture, so be sure to freeze them first.

Is this recipe nut-free?
To make it nut-free, substitute almond flour with oat flour and choose a nut-free milk alternative like coconut milk.

How can I make this recipe lower in sugar?
You can reduce the amount of maple syrup or opt for a sugar-free sweetener like stevia or erythritol.

Can I add protein powder?
Absolutely! Add a scoop of your favorite protein powder to make this treat even more nutritious.

Troubleshooting Common Issues

If your nice cream isn’t turning out as expected, don’t fret! Here are some common issues and how to fix them:

  • Too Thick: If the mixture is too thick to blend, add a little more almond milk until you reach the desired consistency.
  • Too Sweet: If it’s overly sweet for your taste, add a little more banana or a pinch of salt to balance it out.
  • Ice Crystals: If you notice ice crystals forming, it may be due to a longer freezing time. Let it sit at room temperature for a few minutes to soften before scooping.

Final Thoughts

Creating your own Vegan Cookie Dough Nice Cream is more than just a recipe; it’s an act of love for yourself and a step towards healthier, more indulgent desserts. Each scoop invites you to savor the rich, velvety texture and the delightful crunch of chocolate chips. So go ahead — embrace your inner chef, gather your ingredients, and let your creativity flow. This is your chance to craft a treat that not only satisfies your sweet tooth but also fuels your passion for cooking boldly. Dive into this plant-based adventure and let every bite remind you that food is not just about sustenance; it’s about joy, exploration, and connection. Enjoy every moment!

Vegan Cookie Dough Nice Cream 🍪

Prep Time 10 minutes
Cook Time 2 hours
Total Time 2 hours 10 minutes
Servings 4 servings
Calories 180
A delicious and creamy vegan treat that combines the flavors of cookie dough with frozen bananas for a healthy dessert.

Ingredients

Fruits

  • 2 pieces frozen bananas
  • 1/4 cup almond milk (or any non-dairy milk)
  • 1/3 cup almond flour
  • 1/4 cup maple syrup
  • 1/4 cup vegan chocolate chips
  • 1 tsp vanilla extract
  • pinch salt

Instructions 

  • Blend frozen bananas and almond milk until smooth.
  • Add almond flour, maple syrup, vanilla, and salt; blend again.
  • Stir in vegan chocolate chips.
  • Transfer to a container and freeze for 1-2 hours.
  • Scoop and enjoy immediately or store leftovers.

Notes

For a creamier texture, blend longer and freeze for a bit longer before serving.
Calories: 180kcal
Cost: $10
Course: Dessert
Cuisine: Vegan
Keyword: Banana, cookie dough, Vegan

Nutrition

Calories: 180kcal | Carbohydrates: 40g | Protein: 3g | Fat: 2g | Sodium: 10mg

Loved this recipe? Save it to your favorite Pinterest board so you can easily find it later! It’s the perfect way to keep all your sweet ideas in one place. ✨

Delicious Vegan Cookie Dough Nice Cream in a cozy setting, highlighting its creamy consistency and chocolate chip pieces.

Ignite Your Dinner with Bold Flavors

Welcome to the delicious world of my Baked Ziti with Chicken! This recipe is not just a meal; it’s an adventure into the heart of Italian comfort food blended with a Texan twist. Imagine perfectly cooked pasta, savory ground chicken, and a zesty marinara sauce that dances on your taste buds. This dish is perfect for those who want to spice up their dinner routine and embrace the thrill of cooking. Let’s dive into this culinary journey and explore how to make a baked ziti that’s not just good but unforgettable!

Why You’ll Love This Recipe

  • Comforting and Hearty: This baked ziti is a warm hug in a casserole dish, perfect for cozy family dinners or gatherings.
  • Flavor Explosion: The combination of ground chicken, marinara, and spices creates a symphony of flavors that will have everyone asking for seconds.
  • Simple Ingredients: With just a handful of pantry staples and fresh ingredients, you can whip up this meal without breaking a sweat.
  • Customizable: Whether you want to add more veggies or switch proteins, this recipe is easy to adapt to your taste.
  • Make-Ahead Friendly: Prep it ahead of time and pop it in the oven when you’re ready for a hassle-free dinner.

Gather Your Ingredients

Before we get cooking, let’s gather what you’ll need for this mouthwatering dish. Here’s the complete ingredient list:

  • 1 pound Ziti pasta
  • 2 tablespoons olive oil
  • 1 1/2 pounds ground chicken
  • 1 cup chopped onion
  • 2 garlic cloves (chopped)
  • 5 cups marinara sauce (I used Prego, tomato basil & garlic)
  • 1 teaspoon Italian seasoning
  • 3/4 to 1 teaspoon salt
  • 1/2 teaspoon red pepper flakes
  • 1/2 teaspoon ground black pepper
  • 1/2 teaspoon sugar
  • 15 ounces ricotta cheese
  • 1/2 cup chopped fresh basil
  • 2 to 3 cups shredded mozzarella cheese
  • 1/2 to 3/4 cup grated parmesan cheese

Perfect the Technique: Step-by-Step Instructions

Side angle of baked ziti with ground chicken, garnished with fresh basil.

Now that you have your ingredients ready, let’s get cooking! Follow these steps for a mouthwatering baked ziti that will impress:

  • Boil the Ziti: Cook the ziti according to the package instructions, but subtract 2 minutes from the cooking time to ensure it stays firm.
  • Sauté the Chicken: In a large sauté pan, heat the olive oil over high heat. Add the ground chicken, chopped onion, and garlic. Sauté until the chicken is no longer pink, about 5 minutes.
  • Add the Sauce: Stir in the marinara sauce, salt, Italian seasoning, red pepper flakes, black pepper, and sugar. Reduce the heat to medium and let it simmer for about 4 to 5 minutes until slightly thickened.
  • Combine Pasta and Chicken: Add the cooked ziti to the pan, mixing well until everything is evenly coated.
  • Incorporate Ricotta: Gently fold in the ricotta cheese and basil leaves, being careful not to fully mix it in; you want those creamy pockets of ricotta in every bite!

Assemble and Bake

Now comes the fun part: assembling your baked ziti!

  • Layer it Up: In a baking dish, layer half of the pasta mixture, then sprinkle half of the mozzarella and parmesan cheese on top.
  • Finish Strong: Add the remaining pasta mixture and top with the rest of the cheeses.
  • Cover with Foil: Tent the dish with aluminum foil to keep moisture in and prevent burning.
  • Bake to Perfection: Bake in a preheated oven at 375°F (190°C) for about 25 minutes. Then uncover and bake for an additional 15 minutes until the cheese is melted and bubbly.

Pro Tips for Success

Want to elevate your baked ziti to legendary status? Here are some expert insights:

  • Use Quality Ingredients: Opt for fresh, high-quality ingredients to enhance the flavors of your dish.
  • Don’t Overcook the Pasta: Remember, the pasta will continue to cook while baking, so keep it slightly undercooked.
  • Experiment with Cheese: Mix different cheeses like cheddar or gouda for a unique flavor profile.
  • Spice Level: Adjust the red pepper flakes according to your spice tolerance; you can even add jalapeños for an extra kick!
  • Herbs Galore: Fresh herbs like parsley or oregano can add a burst of freshness that brightens the dish.
  • Let it Rest: Allow the baked ziti to cool for about 10 minutes before serving; this helps it set and makes for easier slicing.

Common Mistakes and Troubleshooting

Even the best chefs make mistakes. Here are some common pitfalls and how to avoid them:

  • Dry Ziti: If your ziti comes out dry, add a splash of chicken broth or more marinara before baking.
  • Cheese Burnt on Top: If you notice the cheese browning too quickly, cover it with foil for the remainder of the baking time.
  • Too Watery: If your sauce is too runny, let it simmer longer to thicken before combining with the pasta.

Delicious Variations to Try

If you’re feeling adventurous, here are some variations to spice things up:

  • Veggie Delight: Swap out the ground chicken for sautéed vegetables like zucchini, bell peppers, and mushrooms for a hearty vegetarian option.
  • Meat Lover’s Paradise: Add cooked Italian sausage or pepperoni for an even meatier baked ziti.
  • Cheesy Spinach: Mix in fresh spinach for added nutrition and a beautiful pop of color.
  • Mexican Twist: Add taco seasoning and black beans to the mix for a fun, Tex-Mex version!

Storage and Make-Ahead Instructions

Planning ahead? Here’s how to store and prepare your baked ziti:

  • Refrigerate: Store leftovers in an airtight container in the fridge for up to 3 days.
  • Freeze for Later: Baked ziti freezes beautifully! Just assemble but do not bake. Cover tightly and freeze for up to 3 months. When ready to eat, thaw overnight in the fridge and bake as usual.
  • Reheat: To reheat, cover with foil and bake at 350°F (175°C) until heated through.

Frequently Asked Questions

Got questions? I’ve got answers! Here are some FAQs about baked ziti:

  • Can I use another type of pasta? Absolutely! Any pasta shape works, but ziti holds the sauce well.
  • Is it possible to make this gluten-free? Yes! Use gluten-free pasta and check your marinara for gluten-free ingredients.
  • How do I make it spicier? Add more red pepper flakes or even a dash of hot sauce to the sauce!
  • Can I add more cheese? More cheese is always a good idea! Feel free to overload it!
  • What should I serve with baked ziti? A fresh salad or garlic bread pairs perfectly with this dish.
  • Can I use ground turkey instead of chicken? Yes, ground turkey is a great alternative and can be just as flavorful.
  • How long can I keep leftovers? Leftovers are best eaten within 3 days but can be frozen for future enjoyment.
  • Can I make this in a slow cooker? While not traditional, a slow cooker can work! Layer ingredients and cook on low for 4-6 hours.

Nutritional Tips and Dietary Adaptations

For those watching their nutrition, here are some tips:

  • Whole Wheat Pasta: Use whole wheat ziti for added fiber and nutrients.
  • Low-Fat Cheese: Opt for low-fat mozzarella or ricotta to reduce calories without sacrificing flavor.
  • Extra Veggies: Bulk up your baked ziti with spinach, kale, or other vegetables for added vitamins and minerals.

Essential Equipment Recommendations

To make your cooking experience smooth and enjoyable, here’s what you’ll need:

  • Large Pot: For boiling the ziti.
  • Large Sauté Pan: To cook the chicken and sauce.
  • Baking Dish: A 9×13 inch dish works perfectly for this recipe.
  • Spatula: For mixing and serving.

Serving Suggestions

Presentation matters! Here are some tips for serving your baked ziti:

  • Garnish with Fresh Herbs: Sprinkle fresh basil or parsley on top for a vibrant finish.
  • Serve with Salad: Complement the richness of baked ziti with a light, refreshing salad.
  • Pair with Bread: Warm garlic bread or a crunchy baguette makes for a delightful addition.

Conclusion: Your Culinary Adventure Awaits

And there you have it, my unforgettable Baked Ziti with Chicken recipe! This dish is more than just a meal; it’s an experience that brings people together around the table. So grab your ingredients, embrace the flavors, and get ready to impress your family and friends. Remember, cooking is not just about following a recipe — it’s about exploring and having fun in the kitchen. Let’s keep the fire alive in our cooking adventures!

Baked Ziti with Chicken

Prep Time 15 minutes
Cook Time 30 minutes
Total Time 45 minutes
Servings 6 servings
Calories 650
A hearty baked pasta dish combining tender ziti, seasoned ground chicken, and melty cheeses for a satisfying meal.

Ingredients

Pasta

  • 1 pound Ziti pasta
  • 2 tablespoons olive oil
  • 1.5 pounds ground chicken
  • 1 cup chopped onion
  • 2 garlic cloves garlic (chopped)
  • 5 cups marinara sauce (e.g., Prego, tomato basil & garlic)
  • 1 teaspoon Italian seasoning
  • 0.75 teaspoon salt (adjust to taste)
  • 0.5 teaspoon red pepper flakes
  • 0.5 teaspoon ground black pepper
  • 0.5 teaspoon sugar
  • 15 ounce ricotta cheese
  • 0.5 cup chopped fresh basil
  • 2 to 3 shredded mozzarella cheese
  • 0.5 to 0.75 grated parmesan cheese

Instructions 

  • Cook ziti according to package minus 2 minutes, then drain.
  • Heat olive oil in a large skillet, add ground chicken, onion, and garlic; cook until chicken is no longer pink, about 5 minutes.
  • Add marinara sauce, seasonings, and simmer for 4-5 minutes until slightly thickened. Remove from heat.
  • Mix cooked pasta into the sauce, then gently fold in ricotta and basil, keeping ricotta distinct.
  • Transfer to a baking dish, top with mozzarella and parmesan, then bake until bubbly and golden.

Notes

For a creamier texture, add a splash of milk or more cheese before baking.
Calories: 650kcal
Cost: $15
Course: Main Course
Cuisine: Italian-American
Keyword: baked, chicken, pasta

Nutrition

Calories: 650kcal | Carbohydrates: 80g | Protein: 45g | Fat: 20g | Sodium: 900mg

Why You’ll Fall Head Over Heels for These Muffins

Let’s be honest: who doesn’t love a warm, fluffy muffin fresh out of the oven? Now, imagine that same muffin, but with a delicious twist — made effortlessly in an air fryer! These Air Fryer Blueberry Muffins are not just a treat; they’re a revelation! With juicy blueberries bursting in every bite and a delightful crunch on the outside, they elevate your breakfast game to a whole new level. Plus, they come together in just 15 minutes! You heard me right — 15 minutes! Perfect for those busy mornings when you crave something special but don’t have the time to spare.

Cooking with an air fryer is like having a culinary superpower. You can achieve that perfect golden-brown crust without the long preheating times associated with traditional ovens. The best part? You get to indulge in homemade goodness without the fuss. So, grab your apron, and let’s dive into the magic of these muffins!

Ingredients You’ll Need for Muffin Magic

Here’s what you’ll need to whip up these delightful muffins. Don’t worry; it’s super simple, and you probably have most of these ingredients in your pantry already!

  • 1 cup all-purpose flour
  • 1/2 cup granulated sugar
  • 1/2 teaspoon baking powder
  • 1/2 teaspoon baking soda
  • 1/4 teaspoon salt
  • 1/2 cup milk
  • 1/4 cup vegetable oil
  • 1 large egg
  • 1 cup fresh blueberries

Make sure to grab those fresh blueberries if you can! They really make a difference in flavor and juiciness. If you only have frozen blueberries on hand, don’t fret! Just toss them in a little bit of flour before adding them to the batter to prevent them from sinking to the bottom of the muffins.

How to Prepare Your Air Fryer Blueberry Muffins

Delicious Air Fryer Blueberry Muffins with a soft texture, captured in warm natural light.

Step-by-Step Instructions for Muffin Bliss

Alright, let’s get our hands a little messy and dive into the steps for making these scrumptious muffins! Trust me, you’ll be amazed at how easy it is to create such fluffy little treats. Just follow along, and I’ll guide you through each step!

  1. Preheat the Air Fryer: Start by preheating your air fryer to 320°F (160°C). This usually takes about 3-5 minutes, depending on your model. Preheating is crucial for ensuring that your muffins cook evenly from the get-go.
  2. Mixing the Dry Ingredients: In a large mixing bowl, combine 1 cup of all-purpose flour, 1/2 cup of granulated sugar, 1/2 teaspoon of baking powder, 1/2 teaspoon of baking soda, and 1/4 teaspoon of salt. Use a whisk to get everything evenly distributed; this step is key for achieving that light and fluffy texture we all adore!
  3. Whisking Wet Ingredients: In another bowl, whisk together 1/2 cup of milk, 1/4 cup of vegetable oil, and 1 large egg until well blended. Make sure the egg is fully incorporated — nobody wants a surprise egg chunk in their muffin!
  4. Combining the Mixtures: Now, pour the wet ingredients into the bowl with the dry ingredients. Mix gently until just combined. You should still see a few flour streaks remaining. Over-mixing can lead to tough muffins, and we want fluffy goodness!
  5. Folding in the Blueberries: Carefully fold in 1 cup of fresh blueberries using a spatula. Be gentle, so you don’t smash those beautiful berries. They should be evenly distributed throughout the batter.
  6. Fill the Muffin Cups: Spoon the batter into silicone muffin cups, filling each about 3/4 full. This allows for lovely rising without overflowing. Silicone muffin trays work wonderfully in the air fryer!
  7. Cooking Time: Place the muffin cups in your preheated air fryer basket. Cook for about 10-12 minutes, or until a toothpick inserted into the center comes out clean. Keep an eye on them, as air fryers can vary in intensity. Don’t open the air fryer too soon, or you might interrupt that lovely rising action!
  8. Cooling Off: Once they’re done, let the muffins cool in the tray for a few minutes before transferring them to a wire rack. This helps them set and makes them easier to handle.

And there you have it! Just a few simple steps to homemade muffin bliss. The smell wafting through your kitchen is just divine. Enjoy every bite!

Pro Tips for Muffin Mastery

Let’s talk about some pro tips to ensure your Air Fryer Blueberry Muffins turn out absolutely perfect every time! Trust me, these nuggets of wisdom will make all the difference.

  • Always check the doneness of your muffins a couple of minutes before the timer goes off. Air fryers can vary quite a bit in heating, so when the timer hits around 10 minutes, give them a gentle poke or use a toothpick. If it comes out clean, you’re golden! If not, just pop them back in for a couple more minutes.
  • If you’re using a different air fryer model, keep an eye on the cooking time. Some models may cook faster or slower, so adjusting the time might be necessary. It’s all about finding that sweet spot!
  • When using muffin cups, silicone ones work fabulously in air fryers, but if you’re using paper liners, ensure they’re sturdy enough to hold the batter.
  • Let your muffins cool in the pan for a few minutes before transferring them to a wire rack. This helps them set properly and prevents them from falling apart.

Variations to Spice Things Up

Feeling adventurous? Here are some fun variations to try with your muffins:

  • Chocolate Chip Blueberry Muffins: Add a handful of semi-sweet or dark chocolate chips for a delicious twist. The sweetness of the chocolate pairs beautifully with the tartness of the blueberries!
  • Lemon Zest: Add a teaspoon of lemon zest to the batter for a bright, citrusy flavor that complements the blueberries perfectly.
  • Nuts Galore: Toss in some chopped walnuts or pecans for added crunch and texture.
  • Spice It Up: Consider adding a pinch of cinnamon or nutmeg for a warm, comforting flavor.

Storage and Reheating Instructions

Once you’ve baked a batch of these delightful muffins, you’ll want to make sure they stay fresh and tasty! After they’ve cooled down, store any leftovers in an airtight container at room temperature. They’ll be good for about 3 days. If you want to keep them longer, pop them in the fridge or freeze them for a later treat!

To reheat, simply pop them back in the air fryer at 300°F (150°C) for about 5-7 minutes until they’re warmed through. You can also use the microwave for a quick fix — just heat them for about 15-20 seconds but keep an eye on them, so they don’t get too chewy.

FAQs: Common Queries About Air Fryer Blueberry Muffins

Got questions about these delightful muffins? No problem! Here are some common queries I often hear, along with my answers to help you out:

  • Can I use frozen blueberries instead of fresh? Absolutely! Frozen blueberries work just fine. Just remember to toss them in a bit of flour before adding them to the batter to help prevent them from sinking to the bottom!
  • What if I don’t have an air fryer? You can definitely bake these muffins in a traditional oven! Preheat your oven to 350°F (175°C) and bake for about 18-20 minutes, checking for doneness with a toothpick.
  • Can I add other ingredients like nuts or chocolate chips? Yes, feel free to mix in some chopped nuts or chocolate chips for a fun twist on these muffins. Just keep the overall amount of add-ins to about 1 cup, similar to the blueberries.
  • How do I know when the muffins are done? Check for doneness by inserting a toothpick into the center of a muffin. If it comes out clean or with just a few crumbs, they’re ready to come out of the air fryer!

Final Thoughts: Elevate Your Breakfast with Adventure

These Air Fryer Blueberry Muffins are not just breakfast; they are an experience! With every bite, you’re treated to a burst of flavor that makes you feel alive. Whether you’re whipping them up for a lazy Sunday brunch or as a quick snack during a busy week, they are versatile enough to brighten up any meal of the day. Pair them with a steaming cup of coffee or a refreshing glass of orange juice, and you’ve got a breakfast that feels like a celebration.

So, what are you waiting for? Dust off that air fryer and get ready to enjoy the thrill of cooking with heat! These muffins are waiting to bring joy to your mornings, one delightful bite at a time. Happy baking!

Air Fryer Blueberry Muffins in Just 15 Minutes!

Prep Time 5 minutes
Cook Time 10 minutes
Total Time 15 minutes
Servings 6 muffins
Calories 180
Enjoy quick and delicious blueberry muffins made effortlessly in your air fryer in just 15 minutes.

Ingredients

Dry ingredients

  • 1 cup all-purpose flour
  • 1/2 cup granulated sugar
  • 1/2 teaspoon baking powder
  • 1/2 teaspoon baking soda
  • 1/4 teaspoon salt

Wet ingredients

  • 1/2 cup milk
  • 1/4 cup vegetable oil
  • 1 large egg

Add-ins

  • 1 cup fresh blueberries

Instructions 

  • Preheat air fryer to 320°F (160°C).
  • Mix dry ingredients; whisk wet ingredients.
  • Combine wet and dry; fold in blueberries.
  • Spoon batter into silicone cups, fill 3/4 full.
  • Air fry for 10-12 minutes; cool slightly before serving.

Notes

Use fresh blueberries for best flavor.
Calories: 180kcal
Cost: $8
Course: Breakfast
Cuisine: American
Keyword: Blueberries

Nutrition

Calories: 180kcal | Carbohydrates: 30g | Protein: 3g | Fat: 7g | Sodium: 150mg

Loved this recipe? Save it to your favorite Pinterest board so you can easily find it later! It’s the perfect way to keep all your sweet ideas in one place. ✨

Eye-level shot of golden Air Fryer Blueberry Muffins, highlighting their blueberry-filled interiors.

Why You’ll Love This Recipe

Welcome to a culinary experience that transforms the ordinary into the extraordinary! The Delicious Slow Cooker Garlic Butter Chicken & Veggies is not just another recipe; it’s a celebration of flavor and a game-changer for your weeknight dinners. Imagine coming home after a long day, greeted by the irresistible aroma of savory garlic and rich butter wafting through your kitchen. This dish encapsulates the essence of comfort food, all while being incredibly simple to prepare.

There’s something magical about slow cooking that allows flavors to meld beautifully, creating a dish that’s not only satisfying but also nourishing. The chicken becomes tender and juicy, while the vegetables retain their vibrant colors and textures, soaking up all that delicious garlic butter goodness. Whether you’re a busy parent, a culinary novice, or a seasoned chef looking for an effortless meal, this recipe is a fantastic option that promises to delight your taste buds without keeping you chained to the stove.

Ingredients You’ll Need

Before we dive into the cooking process, let’s gather our ingredients. Here’s what you’ll need:

  • 4 boneless, skinless chicken breasts
  • 4 tablespoons garlic butter
  • 1 cup baby carrots
  • 1 cup broccoli florets
  • 1 cup diced potatoes
  • 1 teaspoon dried thyme
  • 1 teaspoon paprika
  • Salt and pepper to taste
  • Fresh parsley for garnish

With these simple yet flavorful ingredients, you’ll be well on your way to creating a dish that’s sure to impress.

Preparation – Getting Started

Delicious Slow Cooker Garlic Butter Chicken garnished with parsley, surrounded by vibrant veggies on a wooden table.

To set yourself up for success, a little prep work goes a long way. Start by washing and chopping your vegetables. The baby carrots can be used whole, while the potatoes should be diced into bite-sized pieces for even cooking. Broccoli florets should be cut to size, ensuring they cook evenly alongside the chicken.

In a small bowl, blend together the garlic butter, dried thyme, paprika, salt, and pepper. This mixture is the heart of the recipe, infusing every bite with rich flavor. If you want to amp up the garlic flavor, feel free to add a bit more garlic butter or even freshly minced garlic for that extra punch.

Assembling the Slow Cooker Garlic Butter Chicken And Veggies

Now that our ingredients are prepped, it’s time to assemble everything in the slow cooker. Begin by placing the chicken breasts at the bottom of the slow cooker. This layer is crucial because it allows the juices from the chicken to drip down and flavor the vegetables as they cook.

Next, layer the baby carrots, broccoli florets, and diced potatoes on top of the chicken. The order matters! The veggies need to be on top so they can steam perfectly while absorbing the delicious flavors from the chicken and garlic butter.

Finally, pour that heavenly garlic butter mixture evenly over the chicken and vegetables. It’s like a warm hug for your ingredients, promising a delightful meal.

The Slow Cooking Process

Cover your slow cooker and set it to cook on low for 6-7 hours or on high for 3-4 hours. The beauty of slow cooking is that it allows you to go about your day while your meal is being prepared. You can run errands, help the kids with homework, or just relax with a good book, all while the tantalizing aroma fills your home.

As the hours pass, the chicken will become incredibly tender, practically falling apart when you shred it with two forks. The vegetables will be perfectly cooked, vibrant, and full of flavor. This is the time to sneak a taste – the combination of garlic, butter, and herbs will have you swooning!

Finishing Touches and Serving

Once your slow cooker has worked its magic and the cooking time is up, it’s time for the grand reveal! Carefully remove the lid, allowing the steam to escape, and take a moment to bask in the delicious aroma. Next, use two forks to shred the chicken directly in the slow cooker, mixing it with the veggies and juices. This step helps to amalgamate all those rich flavors into one harmonious dish.

Garnish with fresh parsley before serving for a pop of color and a hint of freshness. Serve this delightful creation in bowls or on plates, and watch as your family and friends dive in with eager forks, ready to experience the comforting embrace of this meal.

Tips for Success

  • Choose Quality Ingredients: The better the quality of your chicken and vegetables, the better the dish will taste. Aim for fresh, organic produce when possible.
  • Don’t Skip the Seasoning: Taste as you go! Adjust the salt and pepper to your preference, and don’t hesitate to add extra herbs or spices you love.
  • Let It Rest: If you have time, allow the dish to sit for a few minutes after cooking before serving. This helps the flavors meld even more.

Variations to Explore

While this recipe is absolutely fantastic as is, don’t be afraid to get creative! Here are a few variations to consider:

  • Spicy Kick: Add a pinch of red pepper flakes or diced jalapeños to the garlic butter mixture for a spicy twist.
  • Different Veggies: Feel free to swap in your favorite vegetables. Zucchini, bell peppers, or green beans can add new flavors and textures.
  • Creamy Addition: For a richer sauce, stir in a splash of heavy cream or a dollop of cream cheese just before serving.

Substitutions

If you’re missing some ingredients or looking for healthier options, here are a few substitutions:

  • Instead of chicken breasts, you can use thighs for a juicier flavor.
  • Swap garlic butter for regular butter or olive oil if you want a lighter option.
  • Use sweet potatoes instead of regular potatoes for a slightly sweet twist.

Equipment You’ll Need

To make this recipe, you’ll need:

  • A slow cooker
  • Measuring cups and spoons
  • A cutting board and knife
  • A small bowl for mixing
  • Two forks for shredding the chicken

Storage and Freezing

Leftovers of this Delicious Slow Cooker Garlic Butter Chicken & Veggies are fantastic! Allow the dish to cool completely before transferring it to airtight containers. It will keep well in the refrigerator for up to 3-4 days. To reheat, use the microwave for individual portions, or gently warm it on the stovetop over low heat, adding a splash of chicken broth or water if the sauce has thickened too much.

If you want to freeze it, portion the leftovers into freezer-safe containers. It will keep well for up to 3 months. Just remember to label your containers with the date!

FAQs

Can I use frozen chicken? Yes, you can use frozen chicken breasts, but you may need to increase the cooking time by an hour or so. Make sure they reach an internal temperature of 165°F.

Can I make this recipe in advance? Absolutely! You can prep all the ingredients the night before, place them in the slow cooker insert, and store it in the fridge. In the morning, simply set it to cook.

What can I serve this with? This dish pairs beautifully with rice, mashed potatoes, or even quinoa. Don’t forget some crusty bread to soak up those delicious juices!

Troubleshooting

If your chicken is not shredding easily, it may need more time in the slow cooker. Simply cover and let it cook for an additional 30 minutes to an hour until it reaches tenderness. Always ensure you’re using the right heat settings for your specific slow cooker model, as cooking times can vary.

Conclusion

As we wrap up this culinary journey, I hope you feel inspired to try out this Delicious Slow Cooker Garlic Butter Chicken & Veggies in your own kitchen. It’s not just a meal; it’s an experience that brings warmth and joy to the dinner table. The beauty of this recipe lies in its simplicity and the incredible flavors that come together with minimal effort. So, gather your loved ones, serve up this comforting dish, and enjoy the magic of home-cooked meals. Happy cooking, and I can’t wait to hear about your delicious creations!

Delicious Slow Cooker Garlic Butter Chicken & Veggies: Your New Favorite Easy & Healthy Dinner!

Prep Time 10 minutes
Cook Time 6 hours
Total Time 6 hours 10 minutes
Servings 4 servings
Calories 350
This hearty and healthy slow cooker dish combines tender chicken with flavorful vegetables, all infused with garlic butter and herbs for a satisfying meal.

Ingredients

Protein

  • 4 pieces boneless, skinless chicken breasts

Dairy

  • 4 tablespoons garlic butter

Vegetables

  • 1 cup baby carrots
  • 1 cup broccoli florets
  • 1 cup diced potatoes

Spices & Seasonings

  • 1 teaspoon dried thyme
  • 1 teaspoon paprika
  • to taste salt and pepper

Garnish

  • for garnish fresh parsley

Instructions 

  • Place chicken breasts in slow cooker.
  • Add vegetables on top of chicken.
  • Mix garlic butter, thyme, paprika, salt, and pepper; pour over ingredients.
  • Cook on low 6-7 hours or high 3-4 hours until cooked and tender.
  • Shred chicken, mix with veggies, garnish with parsley before serving.

Notes

Shredding the chicken allows it to absorb more flavors from the vegetables and seasonings.
Calories: 350kcal
Cost: $15
Course: Dinner
Cuisine: American
Keyword: chicken, Slow Cooker, vegetables

Nutrition

Calories: 350kcal | Carbohydrates: 30g | Protein: 40g | Fat: 15g | Sodium: 600mg

Loved this recipe? Save it to your favorite Pinterest board so you can easily find it later! It’s the perfect way to keep all your sweet ideas in one place. ✨

Appetizing dish featuring tender chicken breasts in garlic butter with a medley of carrots and broccoli, softly illuminated.

Unlock the Flavor: Your Go-To Keto Crunchwrap Recipe

Let’s be honest—when you think of a delicious crunchwrap, you might picture a guilty pleasure from your favorite fast-food joint. But what if I told you that you can enjoy that savory, satisfying crunch with a guilt-free twist? Welcome to the world of keto cooking! Today, I’m sharing my ultimate Keto Crunchwrap recipe, a delightful dish that’s not just low-carb but bursting with flavor, spice, and personality. Whether you’re on a keto journey or simply looking to spice up your weeknight dinners, this recipe is your passport to culinary adventure.

In this guide, we’ll delve into the magic of creating the perfect crunchwrap, with tips, variations, and everything you need to make this dish your own. So grab your skillet, and let’s turn up the heat!

Why You’ll Love This Keto Crunchwrap Recipe

This isn’t just another recipe; it’s a celebration of flavor and creativity. Here’s why you’ll fall in love with it:

  • Quick and Easy: This recipe takes less than 30 minutes from start to finish, making it a perfect choice for busy weeknights.
  • Customizable: You can easily swap ingredients to match your dietary preferences, whether you’re vegetarian, vegan, or just looking for a lighter option.
  • Flavor-Packed: The combination of spices, cheese, and fresh veggies creates a symphony of taste that will keep you coming back for more.
  • Low-Carb Delight: Enjoy the satisfaction of a crunchy wrap without the carbs, making it perfect for your keto lifestyle.
  • Family-Friendly: Even the picky eaters will love these crunchy, cheesy wraps—it’s a meal everyone can agree on!

Ingredients You’ll Need for This Recipe

Let’s gather our ingredients and get ready to create some deliciousness! Here’s what you’ll need:

  • 2 tablespoons Butter: Unsalted for better control of seasoning.
  • 4 ounces Cream Cheese: Can substitute with dairy-free cream cheese for a vegan version.
  • 1/4 cup Heavy Whipping Cream: Use coconut cream as a low-carb alternative.
  • 1 cup Shredded Cheddar Cheese: Sharp cheddar for a more robust flavor.
  • 1 pound Ground Beef: Can substitute with ground chicken or turkey for a leaner option.
  • 2 tablespoons Taco Seasoning: Use homemade or low-sodium versions for the best flavor.
  • 4 pieces Low-Carb Tortillas: Brands like Mission Carb Balance or almond flour tortillas work well.
  • 1 cup Sour Cream: Substitute with Greek yogurt for a lighter version.
  • 1 cup Lettuce: Shredded iceberg or romaine for crunch.
  • 1 medium Tomato: Can replace with bell peppers or omit for fewer carbs.
  • 1 cup Extra Cheddar Cheese: Consider adding pepper jack for extra spice.
  • 1/4 cup Cilantro: Substitute with parsley if you’re not a fan.
  • 1/2 cup Jalapeño Slices: Optional spicy addition for those who like a kick.
  • 1 tablespoon Olive Oil: Any cooking oil can work.

Step-By-Step Instructions for Keto Crunchwraps Recipe

Side view of a delicious Keto Crunchwrap filled with meats and cheeses.

Ready to embark on your crunchwrap adventure? Let’s break it down step-by-step:

  1. Prep Your Ingredients: Start by gathering all your ingredients. This will make the cooking process smoother and more enjoyable.
  2. Cook the Meat: In a skillet over medium heat, add olive oil and ground beef. Season with taco seasoning and cook until browned (about 7-10 minutes). Drain excess fat if necessary.
  3. Create the Cheese Sauce: In a separate saucepan, melt butter over low heat. Mix in cream cheese and heavy whipping cream until smooth. Stir in shredded cheddar cheese until melted and creamy.
  4. Assemble Your Crunchwrap: On a low-carb tortilla, layer the cooked meat, cheese sauce, lettuce, tomato, and any additional toppings you desire.
  5. Fold and Cook: Carefully fold the edges of the tortilla towards the center, creating a wrap. In the same skillet, heat a little olive oil and place the crunchwrap seam-side down. Cook for about 3-4 minutes on each side until golden brown and crispy.

Expert Tips to Ensure Keto Cooking Success

Let’s add some spice to your game with these expert tips:

  • Use Quality Ingredients: Fresh, high-quality ingredients make a world of difference in flavor. Opt for organic when possible.
  • Don’t Rush the Cheese Sauce: Allow the cheese sauce to melt slowly to achieve that perfect creamy texture.
  • Customize the Heat: Adjust the amount of jalapeños or add hot sauce to suit your spice tolerance. Spice is your friend!
  • Experiment with Fillings: Try different proteins or veggies—think shredded chicken, black beans, or sautéed peppers.
  • Keep it Covered: When cooking the crunchwrap, cover the skillet to help the cheese melt evenly.
  • Check for Doneness: Ensure the meat is cooked to a safe temperature (165°F for chicken/turkey, 160°F for beef).
  • Let it Rest: Allow the crunchwrap to cool for a minute before cutting to avoid spilling the delicious fillings.
  • Use a Non-Stick Skillet: This makes flipping and cooking easier without sticking.

Common Mistakes and Troubleshooting

Even seasoned cooks can hit a snag. Here are common mistakes and how to avoid them:

  • Too Much Filling: Overstuffing can lead to messy wraps. Stick to a balanced amount of ingredients.
  • Burnt Tortilla: Keep an eye on the skillet—overcooking can make tortillas tough. Aim for golden brown.
  • Cheese Not Melting: If your cheese sauce isn’t smooth, try gradually adding more cream or cheese.
  • Flavor Lacking: If it’s bland, consider adding more seasoning or spice to enhance the flavor profile.

Delicious Variations to Try

Feeling adventurous? Here are some variations to spice up your Keto Crunchwrap:

  • Vegetarian Crunchwrap: Substitute ground beef for black beans or lentils and load up on veggies.
  • Buffalo Chicken Crunchwrap: Use shredded buffalo chicken and blue cheese dressing for a spicy twist.
  • Breakfast Crunchwrap: Fill with scrambled eggs, cheese, and bacon or sausage for a hearty breakfast option.
  • Tex-Mex Crunchwrap: Add guacamole, pico de gallo, and refried beans for a fiesta in every bite!

Storage and Make-Ahead Instructions

Want to prepare ahead of time? Here’s how to store and reheat your crunchwraps:

  • Storing: Place cooked crunchwraps in an airtight container in the fridge for up to 3 days.
  • Reheating: To reheat, place in a skillet over medium heat for 5-7 minutes, flipping halfway through.
  • Make-Ahead: Prepare all fillings in advance, store separately, and assemble the crunchwraps right before cooking.

Comprehensive FAQ

Got questions? I’ve got answers! Here are some frequently asked questions about Keto Crunchwraps:

  • Can I freeze these crunchwraps? Yes! Wrap tightly in foil and store in a freezer-safe bag for up to 2 months. Thaw before reheating.
  • What can I substitute for ground beef? Ground turkey, chicken, or even plant-based meat alternatives work great.
  • Can I make this recipe dairy-free? Absolutely! Use dairy-free cheese and cream substitutes.
  • What kind of toppings can I use? Get creative! Try avocado, salsa, or hot sauce for a flavorful kick.
  • How do I prevent my crunchwrap from getting soggy? Ensure all ingredients are dry before assembling, and don’t overload the fillings.
  • What are some side dishes to serve with crunchwraps? Consider a fresh salad, guacamole, or a side of spicy salsa.
  • How can I make this more kid-friendly? Reduce the spice level and let kids choose their own toppings for a fun twist.
  • Can I use a different type of tortilla? Yes! Experiment with low-carb or gluten-free options that fit your dietary needs.

Nutritional Tips and Dietary Adaptations

This Keto Crunchwrap is not only delicious but can also be tailored to fit various dietary needs:

  • Low-Carb: Each crunchwrap is designed to be low in carbs, making it perfect for ketogenic diets.
  • High-Protein: Packed with protein from beef and cheese, it boosts satiety and energy levels.
  • Gluten-Free: Use gluten-free tortillas to make this dish suitable for those with gluten sensitivity.
  • Vegetarian/Vegan Options: Easily adapt by swapping meat for beans or lentils and using plant-based cheese.

Essential Kitchen Tools for This Keto Recipe

To create the perfect crunchwrap, here are some kitchen essentials:

  • Non-Stick Skillet: A must-have for easy cooking and flipping.
  • Spatula: For flipping and serving your beautifully crispy crunchwraps.
  • Mixing Bowls: Essential for preparing your filling and cheese sauce.
  • Measuring Cups and Spoons: For accuracy when measuring out ingredients.

Serving Suggestions

Serve your Keto Crunchwraps with these delicious sides to elevate the meal:

  • Fresh Salsa: A zesty salsa adds a bright flavor contrast to the rich crunchwrap.
  • Guacamole: Creamy and rich, guacamole pairs perfectly for a satisfying bite.
  • Side Salad: A simple green salad can add a refreshing crunch to your meal.
  • Pickled Jalapeños: For those who crave an extra kick, these are the perfect accompaniment.

Conclusion: Embrace the Flavor Adventure

Cooking is an adventure, and this Keto Crunchwrap recipe is your ticket to exploring bold flavors and satisfying textures without the guilt. Embrace the thrill of the kitchen—experiment, adjust, and find your perfect balance of spice and flavor. So gather your ingredients, fire up that skillet, and let your culinary creativity run wild. Remember, the best meals are those made with passion, heart, and a touch of adventure. Happy cooking!

Delicious Keto Crunchwraps Recipe for Guilt-Free Indulgence

Prep Time 10 minutes
Cook Time 15 minutes
Total Time 25 minutes
Servings 4 pieces
Calories 650
Enjoy these flavorful keto-friendly crunchwraps that are perfect for a guilt-free indulgence, combining rich cheeses, seasoned meat, and fresh toppings.

Ingredients

Dairy

  • 2 tablespoons Butter (Unsalted for better control of seasoning)
  • 4 ounces Cream Cheese (Can substitute with dairy-free cream cheese)
  • 1/4 cup Heavy Whipping Cream (Use coconut cream as a low-carb alternative)
  • 1 cup Shredded Cheddar Cheese (Sharp cheddar for a more robust flavor)

Meat & Protein

  • 1 pound Ground Beef (Can substitute with ground chicken or turkey)
  • 2 tablespoons Taco Seasoning (Use homemade or low-sodium versions)

Bread & Wraps

  • 4 pieces Low-Carb Tortillas (Brands like Mission Carb Balance or almond flour tortillas)

Dairy & Condiments

  • 1 cup Sour Cream (Substitute with Greek yogurt for a lighter version)
  • 1 cup Lettuce (Shredded iceberg or romaine)
  • 1 medium Tomato (Can replace with bell peppers or omit for fewer carbs)
  • 1 cup Extra Cheddar Cheese (Consider adding pepper jack for extra spice)
  • 1/4 cup Cilantro (Substitute with parsley if you’re not a fan)
  • 1/2 cup Jalapeño Slices (Optional spicy addition)
  • 1 tablespoon Olive Oil (Any cooking oil can work)

Instructions 

  • Cook ground beef with taco seasoning until browned.
  • Warm tortillas and spread cream cheese mixture on each.
  • Layer cooked beef, cheese, lettuce, tomato, cilantro, and jalapeños on tortillas.
  • Wrap tortillas tightly and cook in a skillet with olive oil until golden brown.
  • Serve hot with sour cream or Greek yogurt.

Notes

For extra spice, add more jalapeños or pepper jack cheese.
Calories: 650kcal
Cost: $15
Course: Main Course
Cuisine: American
Keyword: Crunchwraps, Keto, Low Carb

Nutrition

Calories: 650kcal | Carbohydrates: 20g | Protein: 45g | Fat: 45g | Sodium: 900mg

Why You’ll Love Baked Cottage Cheese Eggs

There are mornings when you need a breakfast that not only fuels your body but also excites your taste buds. Enter Baked Cottage Cheese Eggs! This dish is more than just a meal; it’s a celebration of flavors, textures, and the sheer joy of cooking. Imagine sinking your fork into a fluffy, golden delight that is both creamy and comforting, all while packing a mighty punch of protein. With about 28 grams of protein per serving, this breakfast is the perfect way to kickstart your day, keeping you satisfied and energized for hours.

This recipe is incredibly versatile, allowing you to infuse your personal touch and creativity. Whether you want to keep it simple or jazz it up with herbs and spices, Baked Cottage Cheese Eggs can easily become your go-to breakfast. Plus, it’s a perfect dish for meal prep, making your busy mornings a breeze. Let’s dive into the magic of this wonderful recipe!

Ingredients for Baked Cottage Cheese Eggs

To whip up this delicious breakfast, you’ll need the following ingredients:

  • 1 cup cottage cheese
  • 4 large eggs
  • 1/2 cup shredded cheese (cheddar or mozzarella)
  • 1/4 cup chopped spinach (fresh or frozen)
  • 1/4 teaspoon salt
  • 1/4 teaspoon black pepper
  • 1/4 teaspoon garlic powder
  • 1/4 teaspoon onion powder
  • Optional: chopped herbs (like chives or parsley) for garnish

How to Make Baked Cottage Cheese Eggs

Delicious baked cottage cheese eggs with golden edges, garnished with fresh herbs, illuminated by soft natural light.

Creating this tasty dish is as easy as pie! Follow these simple steps:

  1. Preheat the oven: Start by preheating your oven to 375°F (190°C). This is crucial for achieving that perfect bake.
  2. Mix the ingredients: In a large mixing bowl, combine the cottage cheese, eggs, shredded cheese, chopped spinach, salt, black pepper, garlic powder, and onion powder. Whisk until all the ingredients are well blended.
  3. Prepare the baking dish: Grease a baking dish with a bit of oil or cooking spray. This will prevent sticking and make cleanup a breeze.
  4. Pour and bake: Pour the egg mixture into the prepared baking dish. Bake in the preheated oven for 25-30 minutes. You want the eggs to be set and the top to have a lovely golden finish.
  5. Cool and serve: Once done, remove the dish from the oven and let it cool for a few minutes. Garnish with fresh herbs if desired, and serve warm. Enjoy this protein-packed delight!

Expert Tips for Perfect Baked Cottage Cheese Eggs

Getting the perfect texture and flavor takes a little finesse, so here are some expert tips:

  • Blend well: Ensure to mix the cottage cheese thoroughly with the eggs to avoid any lumps. A food processor can make this step even easier, giving you that creamy texture.
  • Watch the baking time: Keep an eye on your dish while it bakes. Overbaking can lead to a rubbery texture. Aim for that delicate jiggle in the center to ensure a perfect result.
  • Drain excess moisture: If using frozen spinach, make sure to squeeze out excess moisture. Too much liquid can affect the overall texture of the dish.
  • Customize your toppings: Feel free to add your favorite spices or herbs to the mix for an extra flavor boost. Dill, thyme, or even a pinch of cayenne can elevate the dish.

What to Serve with Baked Cottage Cheese Eggs

This dish stands beautifully on its own, but pairing it with the right sides can elevate your breakfast experience. Here are some delightful pairing ideas:

  • Fresh avocado slices: The creamy richness of avocado adds a buttery texture that complements the baked eggs.
  • Whole grain toast: This classic option provides a hearty crunch and is perfect for soaking up any extra egg goodness.
  • Mixed green salad: A light salad with crisp greens and a tangy vinaigrette balances the richness of the eggs.
  • Sautéed mushrooms: Earthy sautéed mushrooms add depth and umami, making every bite even more satisfying.
  • Herbed quinoa: A protein-packed side, quinoa mixed with herbs can provide a nutty flavor that contrasts beautifully with the creamy eggs.

How to Store and Freeze Baked Cottage Cheese Eggs

Planning to make this dish ahead of time? Here’s how to store and freeze your leftovers:

  • Refrigerator: Store any leftovers in an airtight container in the fridge for up to 3 days. Simply reheat in the microwave or oven before serving.
  • Freezer: For longer storage, freeze individual servings in airtight containers for up to 2 months. To enjoy, thaw overnight in the fridge and reheat gently.

Make Ahead Options

This recipe is a lifesaver for those busy mornings. You can prepare the entire mixture up to 24 hours in advance. Just store the uncooked mixture in the fridge, and pour it into a baking dish right before you’re ready to bake. Alternatively, bake it in advance and reheat for a quick breakfast option throughout the week.

Variations & Substitutions

The beauty of Baked Cottage Cheese Eggs is the endless possibilities for customization. Here are some variations and substitutions to consider:

  • Cheese options: Swap out the cheddar or mozzarella for feta, goat cheese, or pepper jack for a different flavor profile.
  • Add extra veggies: Bell peppers, zucchini, or even sun-dried tomatoes can add a punch of flavor and nutrition. Just ensure they are well-drained to avoid excess moisture.
  • Herbs and spices: Experiment with spices like cumin, smoked paprika, or Italian seasoning for a unique twist.
  • Gluten-free option: This recipe is naturally gluten-free, making it suitable for those with dietary restrictions.

FAQs about Baked Cottage Cheese Eggs

Let’s tackle some common questions about this protein-packed breakfast:

  • Can I use low-fat cottage cheese? Absolutely! Low-fat cottage cheese works just as well and can help reduce calories while still providing a creamy texture.
  • What type of baking dish should I use? A standard 9-inch pie dish or an 8×8-inch baking dish works perfectly. For individual servings, consider using ramekins.
  • Can I make this vegetarian? Yes! This recipe is vegetarian-friendly as it contains no meat. Just ensure any added ingredients are also vegetarian.
  • How can I add more protein? Consider adding cooked bacon, sausage, or even protein powder to the egg mixture for an extra boost.
  • What if my eggs are watery? If you find your eggs are too watery, it may be due to excess moisture from ingredients. Adding more cottage cheese or baking longer can help absorb some of that liquid.

Troubleshooting Common Issues

Even the most seasoned cooks run into issues now and then. Here’s how to troubleshoot common problems:

  • Rubbery texture: This usually occurs from overbaking. Keep an eye on your dish, and remove it once it’s set with a slight jiggle in the center.
  • Flavor lacking: If your dish seems bland, consider increasing the seasoning or adding more flavorful ingredients like sun-dried tomatoes or cheese.
  • Stuck to the pan: If you forget to grease the dish, it can stick. Always ensure your baking dish is well-greased before adding the mixture.

Conclusion: A Breakfast Adventure Awaits!

As you embark on your culinary journey with Baked Cottage Cheese Eggs, remember that cooking is more than just following a recipe; it’s about exploring flavors, textures, and the joy of creating something delicious. This dish is a testament to the power of simple ingredients coming together to create a meal that’s not only satisfying but also nourishing. So whether you’re gearing up for a busy day ahead or taking a leisurely morning, these baked eggs will be your trusty companion. Embrace the adventure, make it your own, and let every bite remind you of the joy that cooking can bring. Happy cooking!

Baked Cottage Cheese Eggs: Your Go-To Protein Breakfast!

Prep Time 10 minutes
Cook Time 25 minutes
Total Time 35 minutes
Servings 4 servings
Calories 250
Start your day with this protein-packed baked cottage cheese and eggs dish, perfect for a quick and nutritious breakfast.

Ingredients

Dairy

  • 1 cup cottage cheese
  • 4 large eggs
  • 1/2 cup shredded cheese (cheddar or mozzarella)
  • 1/4 cup chopped spinach (fresh or frozen)
  • 1/4 teaspoon salt
  • 1/4 teaspoon black pepper
  • 1/4 teaspoon garlic powder
  • 1/4 teaspoon onion powder

Optional Garnish

  • to taste chopped herbs (like chives or parsley) (for garnish)

Instructions 

  • Preheat oven to 375°F (190°C).
  • Mix cottage cheese, eggs, shredded cheese, spinach, salt, pepper, garlic powder, and onion powder.
  • Pour mixture into a greased baking dish.
  • Bake for 25-30 minutes until set and golden.
  • Let cool briefly, garnish with herbs, and serve warm.

Notes

Use fresh herbs for best flavor and adjust seasoning to taste.
Calories: 250kcal
Cost: $12
Course: Breakfast
Keyword: cottage cheese, Eggs, protein

Nutrition

Calories: 250kcal | Carbohydrates: 8g | Protein: 20g | Fat: 15g | Sodium: 600mg

Loved this recipe? Save it to your favorite Pinterest board so you can easily find it later! It’s the perfect way to keep all your sweet ideas in one place. ✨

Eye-level shot of baked cottage cheese eggs in a rustic dish, showcasing a creamy texture and a warm, inviting scene.

Why This Soup Will Ignite Your Taste Buds

Let’s talk cabbage, my friends! Cabbage often gets a bad rap as the wallflower of vegetables, but I’m here to tell you that it’s a star in its own right, especially when it comes to the Zero Point Veggie Cabbage Soup for Weight Watchers. This soup is not just a dish; it’s an experience, a burst of vibrant flavors that will awaken your senses and warm your soul. With every spoonful, you’ll find yourself transported to a cozy kitchen filled with laughter and the delightful aroma of simmering vegetables.

This soup is designed to be as satisfying as it is healthy—perfect for those of you who are on a Weight Watchers journey, looking to maintain a healthy lifestyle without sacrificing taste. Low in calories yet rich in flavor, this dish is a testament that healthy eating can be delicious and exciting. The best part? It’s a zero-point wonder, meaning you can enjoy it guilt-free while keeping your points in check!

What Makes This Cabbage Soup a Must-Try

So, what’s the secret behind the energizing power of this soup? Let’s break it down:

  • Loaded with Veggies: This soup is packed with a medley of colorful vegetables. We’re talking about fresh cabbage, carrots, celery, and bell peppers, all contributing to a nutritional powerhouse.
  • Simple Ingredients: You won’t need a lengthy grocery list. Just a handful of fresh veggies, some pantry staples, and a sprinkle of herbs turn this into a delightful dish.
  • Quick and Easy: With a straightforward cooking process, you can whip up a steaming pot of this soup in under an hour, making it perfect for busy weeknights.
  • Customizable: Not a fan of one of the veggies? No problem! You can easily swap in your favorites or whatever you have on hand.
  • Perfect for Meal Prep: Make a big batch and enjoy it throughout the week. It’s an ideal companion for lunch or dinner, and it also freezes beautifully!

Ingredients You’ll Need

Eye-level view of a steaming bowl of cabbage soup with diced vegetables and herbs.

Ready to dive into the kitchen? Gather these ingredients for the Zero Point Veggie Cabbage Soup:

  • 1 small head of green cabbage, chopped
  • 1 large onion, diced
  • 3 cloves garlic, minced
  • 2 carrots, sliced
  • 2 celery stalks, sliced
  • 1 bell pepper, chopped
  • 1 can (14.5 oz) diced tomatoes, undrained
  • 6 cups vegetable broth
  • 1 teaspoon dried thyme
  • 1 teaspoon dried oregano
  • Salt and pepper to taste
  • Optional: fresh herbs for garnish

How to Make This Delectable Soup

Let’s get cooking! Here’s your step-by-step guide to creating this delicious Weight Watchers Zero Point Soup:

Step-by-Step Directions

  1. In a large pot, sauté the diced onion and minced garlic over medium heat until the onion is translucent. This step is crucial; it builds the foundation of flavor that will make your soup sing!
  2. Add the sliced carrots, celery, and bell pepper to the pot, and cook for another 5 minutes. The vibrant colors of the veggies are already starting to brighten your kitchen!
  3. Stir in the chopped cabbage, diced tomatoes, vegetable broth, thyme, and oregano. This is where the magic happens, as all the ingredients come together to create a beautifully fragrant mix.
  4. Bring the mixture to a boil, then reduce heat and let it simmer for about 30 minutes, or until the vegetables are tender. Your kitchen will soon be filled with an enticing aroma that will have everyone eagerly anticipating dinner!
  5. Season with salt and pepper to taste. It’s always best to taste and adjust to your liking at this stage!
  6. Serve hot, garnished with fresh herbs if desired. A sprinkle of parsley or cilantro adds a pop of color and freshness that takes this soup to the next level.

Serving Suggestions

This soup is a meal in itself, but if you’re looking to elevate your dining experience, consider pairing it with:

  • A slice of crusty whole-grain bread for dipping
  • Some zesty whole-grain crackers for a satisfying crunch
  • A light salad topped with a zesty vinaigrette to complement the flavors of the soup

Tips for the Best Cabbage Soup

Here are some insider tips to ensure your Weight Watchers Cabbage Soup turns out perfectly every time:

  • Use Fresh Vegetables: Fresh veggies not only taste better, but they also pack more nutrients. Aim for the freshest ingredients you can find.
  • Adjust Seasonings: Don’t be afraid to play with the seasonings! If you prefer a bit more heat, add some crushed red pepper flakes or a dash of hot sauce.
  • Texture Matters: If you enjoy a creamier soup, you can blend a portion of it after cooking and return it to the pot. This creates a delightful texture that’s still packed with all the goodness.

Storage and Freezing

Planning on leftovers? Here’s how to store or freeze your amazing soup:

  • Allow the soup to cool completely before transferring it to an airtight container. It can be stored in the fridge for up to 5 days.
  • For longer storage, freeze the soup in freezer-safe containers or bags for up to 3 months. Thaw in the fridge overnight before reheating on the stove.

Recipe Variations

This Zero Point Cabbage Soup is versatile, and here are some fun variations to consider:

  • Protein Boost: Add cooked chicken, turkey, or even beans to make it heartier.
  • Swap the Broth: Use chicken broth or beef broth for a different flavor profile.
  • Different Veggies: Feel free to toss in other vegetables like zucchini, green beans, or even kale to change things up!

FAQs About This Delightful Soup

Got questions? I’ve got answers! Here are some frequently asked questions about this soup:

Can I add protein to this soup?

Absolutely! Adding cooked chicken, turkey, or beans can make the soup even heartier and more satisfying.

Is this soup freezer-friendly?

You bet! This soup freezes beautifully. Just make sure to thaw it in the fridge before reheating.

How long does it take to cook?

The entire cooking process takes about 45 minutes, including prep time. Quick and easy!

Troubleshooting Tips

If you run into any issues while making your soup, here are some troubleshooting tips:

  • If the soup tastes bland, it may need more seasoning. Don’t be shy about adding salt, pepper, or your favorite herbs!
  • If the soup is too thick, simply add a bit more vegetable broth or water until you reach your desired consistency.
  • If you accidentally added too much salt, a splash of vinegar can help balance out the flavors.

Conclusion

There you have it—a vibrant, hearty, and utterly delightful Zero Point Veggie Cabbage Soup that’s bound to spark joy in every spoonful. This dish encapsulates everything I love about cooking—fresh ingredients, bold flavors, and the ability to bring people together around the table. So, gather your friends and family, ladle up some soup, and let the warmth of this dish create unforgettable memories. Remember, cooking is not just about nourishment; it’s about creating experiences filled with love, laughter, and a little heat. Now, go forth and conquer that kitchen! Your taste buds are in for a treat!

Zero Point Veggie Cabbage Soup for Weight Watchers

Prep Time 10 minutes
Cook Time 30 minutes
Total Time 40 minutes
Servings 6 cups
Calories 80
A hearty, low-calorie soup perfect for weight watchers, packed with fresh vegetables and herbs.

Ingredients

Vegetables

  • 1 small head green cabbage, chopped
  • 1 large onion, diced
  • 3 cloves garlic, minced
  • 2 carrots sliced
  • 2 celery stalks sliced
  • 1 bell pepper chopped
  • 1 can (14.5 oz) diced tomatoes, undrained
  • 6 cups vegetable broth
  • 1 teaspoon dried thyme
  • 1 teaspoon dried oregano
  • to taste salt and pepper salt and pepper
  • optional fresh herbs for garnish

Instructions 

  • Sauté diced onion and minced garlic until translucent.
  • Add carrots, celery, and bell pepper; cook for 5 minutes.
  • Stir in cabbage, tomatoes, broth, thyme, and oregano; bring to a boil.
  • Reduce heat and simmer for 30 minutes until vegetables are tender.
  • Season with salt and pepper; serve hot with optional herbs.

Notes

This soup is very low in points and perfect for weight loss plans.
Calories: 80kcal
Cost: $10
Course: Soup
Cuisine: Healthy
Keyword: vegetables

Nutrition

Calories: 80kcal | Carbohydrates: 15g | Protein: 3g | Fat: 1g | Sodium: 600mg

Loved this recipe? Save it to your favorite Pinterest board so you can easily find it later! It’s the perfect way to keep all your sweet ideas in one place. ✨

A hearty bowl of vegetable soup featuring cabbage, tomatoes, and spices, captured in warm light.

Dive into the World of Cauliflower Gratin

Welcome, fellow culinary adventurers! Today, we’re taking a humble vegetable and transforming it into a dish that’s bursting with flavor and comfort: Cauliflower Gratin. This isn’t just any cauliflower dish; it’s a luscious blend of creamy cheese sauce and a golden, buttery Ritz topping that elevates this vegetable to new heights. Whether you’re looking for a side dish that steals the spotlight or a comforting main course that warms the soul, this recipe is your ticket to flavor town!

As we embark on this culinary journey, you’ll discover how to embrace the art of cooking with heat and flavor. So, grab your apron and let’s turn those cauliflower florets into a gratin that even your dad will rave about!

Why You’ll Love This Recipe

This Cauliflower Gratin is more than just a side dish; it’s a celebration of flavor and texture. Here are five reasons why this recipe will become a staple in your kitchen:

  • Comfort Food Delight: This dish combines the rich creaminess of cheese with the satisfying crunch of a buttery topping, making it the ultimate comfort food.
  • Easy to Prepare: With simple ingredients and straightforward steps, you can whip up this gratin without breaking a sweat.
  • Versatile Dish: Perfect for any occasion, from a cozy family dinner to a festive holiday feast, this gratin fits right in.
  • Healthier Twist: Cauliflower is packed with nutrients, making this dish a wholesome option that doesn’t skimp on flavor.
  • Customizable Recipe: You can easily modify ingredients to suit dietary preferences or experiment with different flavors!

Ingredient Breakdown

Let’s dig into what makes this Cauliflower Gratin shine. Here’s a detailed look at the ingredients, along with some substitution ideas to help you make this recipe your own:

  • Olive oil spray: Use this to prevent sticking. Alternatively, you can brush the dish with melted butter for added richness.
  • 5 cups chopped cauliflower florets: Fresh cauliflower is optimal, but you can also use frozen florets—just make sure to thaw and drain them well.
  • 4 ounces cream cheese: This adds creaminess. If you want a lighter version, you can substitute with Greek yogurt.
  • 1 1/2 cups whole milk: For a richer sauce, use half-and-half or heavy cream. Lactose-free milk is also a good option.
  • 1 teaspoon Frank’s RedHot sauce: Adds a kick! Feel free to use your favorite hot sauce for a personal touch.
  • Spices: Onion powder, garlic powder, salt, Worcestershire sauce, Dijon mustard, and black pepper all contribute to a flavorful base. Adjust according to your taste preferences.
  • 8 ounces Mac and Cheese Shredded Cheese Blend: This is the star of the cheese sauce. You can mix it up with cheddar, gouda, or a vegan cheese alternative.
  • 20 Ritz crackers: These create a crunchy topping. If you prefer gluten-free, try crushed rice crackers or gluten-free breadcrumbs.
  • 1 teaspoon minced fresh thyme: Elevates the flavor profile; you can substitute with dried thyme or Italian seasoning.
  • 2 tablespoons unsalted butter (melted): A finishing touch for that golden crust. You can also use olive oil for a lighter option.

How to Make Cauliflower Gratin

Side view of a cheesy cauliflower gratin with a golden Ritz cracker crust, highlighting its rich color.

Ready to get cooking? Here’s a step-by-step guide to creating this delicious Cauliflower Gratin:

  1. Preheat your oven to 400°F (200°C). Spray the inside of a 1.5-quart casserole dish with olive oil spray.
  2. Bring a large pot of water to a boil and cook the cauliflower florets for about 3 minutes. Drain well and set aside.
  3. In a medium saucepan over medium heat, whisk together the cream cheese and whole milk until smooth. Add in the Frank’s RedHot sauce, onion powder, garlic powder, salt, Worcestershire sauce, Dijon mustard, and black pepper. Stir until combined.
  4. Gradually whisk in the shredded cheese, a handful at a time, until the sauce is creamy and smooth.
  5. In a zip-top plastic bag, crush the Ritz crackers. Mix in the thyme, black pepper, and melted butter, and shake to combine.
  6. In a large bowl, combine the cauliflower florets with the cheese sauce, stirring until the florets are well coated.
  7. Transfer the mixture into your prepared casserole dish and sprinkle the cracker topping evenly over the top.
  8. Bake for 15 minutes, or until the casserole is bubbling and the topping is golden brown.

Pro Tips for Perfecting Your Gratin

Here are some expert insights to ensure your Cauliflower Gratin turns out perfectly every time:

  • Don’t Overcook the Cauliflower: You want it tender but still firm. Overcooked cauliflower can become mushy in the gratin.
  • Layer Flavors: Consider adding sautéed onions or leeks for extra depth in the cheese sauce.
  • Test Your Sauce: Before mixing with cauliflower, taste the cheese sauce to adjust seasoning according to your liking.
  • Let It Rest: Allow the gratin to sit for a few minutes after baking to help it set up nicely.
  • Experiment with Cheeses: Mix different cheeses like Gruyère or pepper jack for exciting flavor combinations.
  • Add Greens: Spinach or kale can be mixed in for added nutrition and a pop of color.
  • Make It Ahead: Prepare the dish a day in advance, cover it, and refrigerate. Just bake it when you’re ready to serve!
  • Garnish Wisely: Fresh herbs like parsley or chives sprinkled on top before serving add a nice touch.

Common Mistakes and Troubleshooting

Even the best chefs make mistakes! Here’s how to troubleshoot common issues you might encounter:

  • Too Watery: If your gratin turns out watery, ensure the cauliflower is well-drained after boiling. You can also thicken your cheese sauce with a cornstarch slurry.
  • Burnt Topping: If your topping browns too quickly, cover the dish with aluminum foil for part of the baking time, then remove it to crisp up the top.
  • Flavor Lacking: Taste your cheese sauce before combining with cauliflower. Adjust seasoning as needed.
  • Overcooked Cauliflower: If you find your cauliflower mushy, reduce the boiling time next time and keep an eye on it.

Variations to Spice Up Your Gratin

Feeling adventurous? Here are some variations to customize your gratin:

  • Spicy Addition: Add diced jalapeños or a dash of cayenne pepper to the cheese sauce for a kick.
  • Herbed Delight: Mix in fresh herbs like rosemary or basil for a fragrant twist.
  • Meaty Version: Incorporate cooked bacon or ham for a hearty addition that brings depth.
  • Vegetable Medley: Add other vegetables like broccoli or carrots for a colorful and nutritious boost.

Storage and Make-Ahead Instructions

This gratin is great for meal prep! Here’s how to store and reheat:

  • Refrigeration: Store leftovers in an airtight container in the fridge for up to 3 days.
  • Freezing: You can freeze the unbaked gratin for up to 2 months. Just thaw overnight in the fridge before baking.
  • Reheating: Reheat in the oven at 350°F (175°C) until heated through, about 20 minutes. You can cover it with foil to prevent over-browning.

Comprehensive FAQs

Here are some frequently asked questions to help you navigate your Cauliflower Gratin journey:

  • Can I use frozen cauliflower? Yes, just make sure to thaw and drain it well before using.
  • What’s the best cheese for this gratin? A blend of cheeses like cheddar and mozzarella works beautifully!
  • Can I make this dish vegetarian? Absolutely! This recipe is naturally vegetarian-friendly.
  • How can I make this dish gluten-free? Substitute Ritz crackers with gluten-free options like crushed rice crackers.
  • Is there a dairy-free version? Yes! Use a dairy-free cream cheese and plant-based milk.
  • How do I make this a main dish? Add protein like shredded chicken or chickpeas to make it more filling.
  • Can I prepare it ahead of time? Yes, prepare it a day in advance and bake when ready to serve!
  • What’s the best way to serve this gratin? It pairs well with roasted meats, salads, or can be enjoyed on its own!

Nutrition Tips and Dietary Adaptations

This dish can be adapted to fit various dietary needs:

  • Low-Carb Option: Stick to the original recipe, as cauliflower is naturally low in carbs.
  • High-Protein Addition: Add cooked chicken or turkey for an extra protein boost.
  • Vegan Version: Use plant-based cream cheese and a vegan cheese alternative.
  • Low-Fat Recipe: Substitute whole milk with skim or almond milk and use reduced-fat cheese.

Equipment Recommendations

To ensure your cooking experience is seamless, here are a few essential tools:

  • Casserole Dish: A 1.5-quart dish is perfect for baking this gratin.
  • Medium Saucepan: For cooking your cheese sauce to creamy perfection.
  • Zip-Top Bags: Great for crushing Ritz crackers easily.
  • Whisk: Essential for mixing the cheese sauce smoothly.

Serving Suggestions

This Cauliflower Gratin is versatile enough to complement a variety of dishes. Here are some serving ideas:

  • With Roasted Meats: Serve alongside roast chicken, beef, or pork for a hearty meal.
  • As a Vegetarian Main: Pair it with a fresh salad for a light yet satisfying dinner.
  • Comforting Lunch: Enjoy a generous portion with some crusty bread for a cozy lunch.
  • For Gatherings: This dish is a hit at potlucks and family gatherings—everyone loves a good gratin!

Conclusion

There you have it, my friends! A Cauliflower Gratin that’s not only delicious but also a canvas for your culinary creativity. Remember, cooking is all about embracing flavors and experimenting without fear. Whether you keep it classic or make it your own, this gratin is sure to impress. Now, go forth and grab that skillet—let’s make some magic happen in the kitchen! Happy cooking!

Cauliflower Gratin Recipe with Buttery Ritz Topping

Prep Time 10 minutes
Cook Time 15 minutes
Total Time 25 minutes
Servings 4 servings
Calories 420
A creamy cauliflower gratin topped with crunchy Ritz crackers and herbs, perfect for a comforting side dish.

Ingredients

Main

  • 5 cups chopped cauliflower florets
  • 4 ounces cream cheese
  • 1.5 cups whole milk
  • 1 teaspoon Frank’s RedHot sauce
  • 1 teaspoon onion powder
  • 0.5 teaspoon garlic powder
  • 0.5 teaspoon salt
  • 0.5 teaspoon Worcestershire sauce
  • 0.5 teaspoon Dijon mustard
  • 0.25 teaspoon black pepper
  • 8 ounces Mac and Cheese Shredded Cheese Blend
  • 20 Ritz crackers Ritz crackers
  • 1 teaspoon minced fresh thyme
  • 0.25 cups coarsely ground black pepper
  • 2 tablespoons unsalted butter (melted)

Instructions 

  • Preheat oven to 400°F. Spray a 1.5-quart casserole dish with olive oil spray.
  • Cook cauliflower in boiling water for 3 minutes, then drain.
  • Make cheese sauce by whisking cream cheese, milk, hot sauce, spices, Worcestershire, and mustard; add shredded cheese until smooth.
  • Crush Ritz crackers, mix with thyme, black pepper, and melted butter.
  • Combine cauliflower with cheese sauce, pour into dish, top with cracker mixture, and bake until bubbling and golden, about 15 minutes.

Notes

For extra flavor, add a sprinkle of Parmesan cheese on top before baking.
Calories: 420kcal
Cost: $15
Course: Side Dish
Cuisine: American
Keyword: Cauliflower

Nutrition

Calories: 420kcal | Carbohydrates: 35g | Protein: 18g | Fat: 25g | Sodium: 650mg