Author

Avery Collins

Browsing

The Festive Fire: How Christmas Salmon with Pomegranate Sauce Became My Holiday Favorite

Ah, the holiday season—a time of warmth, joy, and of course, food that brings us together. As a chef with roots deep in the heart of San Antonio, where the air is thick with the scent of spices and tradition, my holiday table is never complete without a dish that ignites the senses. Enter my Christmas Salmon with Pomegranate Sauce, a dish that has transformed my festive gatherings into unforgettable culinary adventures.

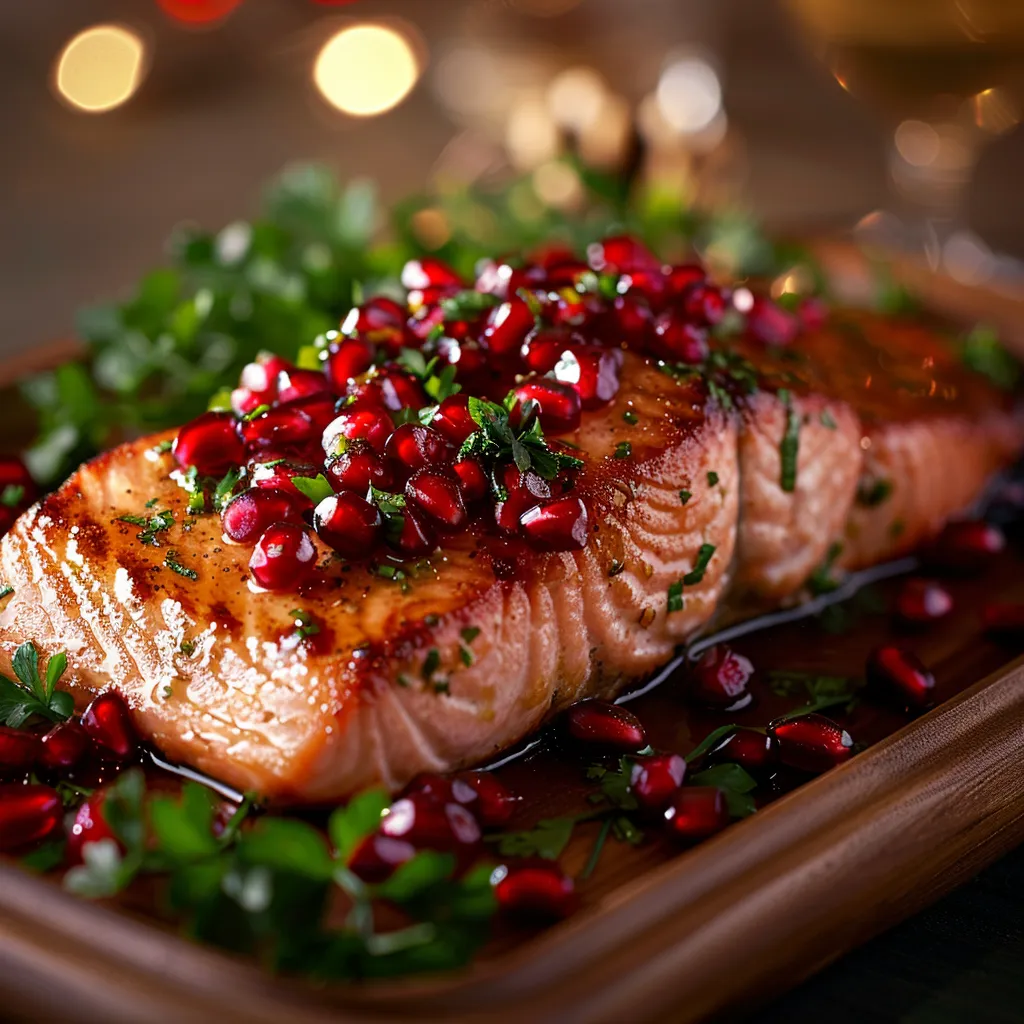
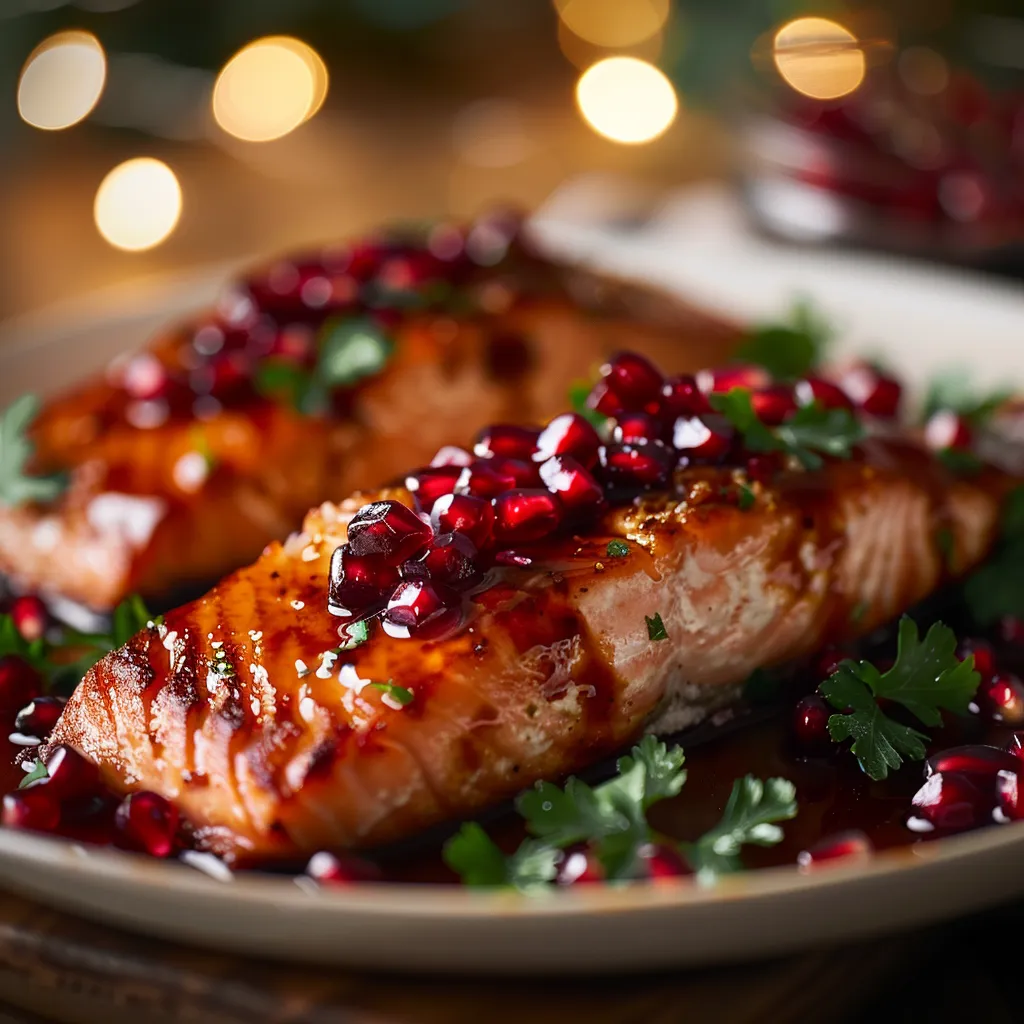
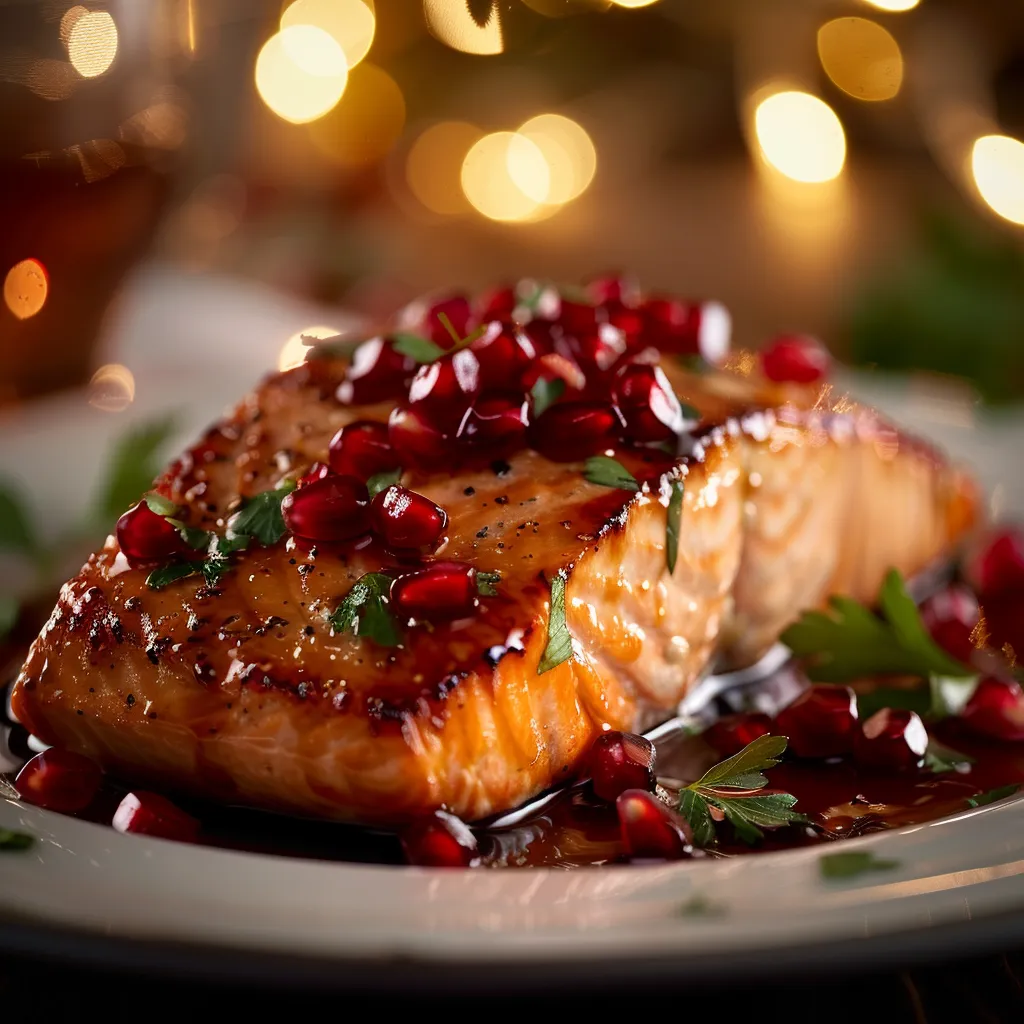
Imagine this: tender, flaky salmon fillets drizzled with a luscious, tangy-sweet pomegranate sauce that glistens with every bite. The combination of flavors is nothing short of a holiday miracle! Join me as we explore the magic of this dish and how it can elevate your holiday spread.

Why You’ll Love This Christmas Salmon

This Christmas Salmon with Pomegranate Sauce is not just a meal; it’s an experience. Here’s why you’ll adore it:

  • Bold Flavors: The sweet-tart pomegranate sauce dances harmoniously with the rich, buttery salmon, creating a balance that excites the palate.
  • Festive Presentation: With its vibrant colors, this dish will steal the show on your holiday table. The ruby-red pomegranate seeds against the golden salmon create a visual feast.
  • Quick and Easy: Ready in under 30 minutes, this recipe is perfect for those busy holiday evenings when you want to impress without the stress.
  • Health-Conscious: Packed with omega-3s and lean protein, this dish is a guilt-free indulgence that keeps you feeling good.

Christmas Salmon Ingredients

Eye-level shot of a gourmet Christmas salmon dish garnished with fresh parsley and pomegranate.

Before diving into the cooking magic, let’s gather our ingredients. You’ll need:

  • 4 salmon fillets
  • 1 cup pomegranate seeds
  • 1/2 cup orange juice
  • 2 tablespoons honey
  • 1 tablespoon balsamic vinegar
  • Salt and pepper to taste
  • Fresh parsley for garnish

How to Cook Christmas Salmon

Let’s get cooking! This recipe is straightforward, making it perfect for both seasoned chefs and kitchen newcomers. Here’s how to create this masterpiece:

Step 1: Prepare the Salmon

Start by seasoning your salmon fillets generously with salt and pepper. This simple step enhances the natural flavors of the fish. Don’t be shy—give it a good rub!

Step 2: Create the Pomegranate Sauce

In a small saucepan, combine the pomegranate seeds, orange juice, honey, and balsamic vinegar. Bring this vibrant mixture to a simmer over medium heat. As it cooks, the sauce will reduce and thicken, about 10 minutes. The aroma of pomegranate and citrus fills the kitchen, making it hard to resist a taste!

Step 3: Cook the Salmon

While the sauce works its magic, heat a skillet over medium-high heat. Place the seasoned salmon fillets in the skillet and cook for about 4-5 minutes per side, until golden brown and cooked through. The sizzling sound is music to any chef’s ears—there’s nothing quite like the sound of food coming to life in a hot pan.

Step 4: Combine and Serve

Once your salmon is beautifully cooked, remove it from the skillet and let it rest for a minute. This allows the juices to redistribute, ensuring every bite is moist and flavorful. Now, pour that gorgeous pomegranate sauce over the salmon, letting it cascade like a festive waterfall. Garnish with fresh parsley, and voilà! Your Christmas Salmon is ready to shine.

Tips for Perfecting Your Christmas Salmon

  • Choose the Right Salmon: Opt for fresh, wild-caught salmon if possible. Sockeye or king salmon works beautifully for this recipe.
  • Watch the Cooking Time: Salmon cooks quickly, so keep an eye on it. You want it to flake easily with a fork without being dry.
  • Experiment with Heat: If you like a little kick, try adding a pinch of cayenne or red pepper flakes to the sauce for an unexpected twist!

Variations and Substitutions

Feel free to get creative! Here are some ideas:

  • Honey Alternatives: If you don’t have honey, maple syrup or agave nectar can work as a substitute, adding a different layer of sweetness.
  • Fruit Variations: Consider adding other fruits, like mango or kiwi, to the sauce for a tropical flair.
  • Herb Substitutions: Fresh dill or cilantro can replace parsley for a different flavor profile.

Storage and Freezing

After the festivities, you might have some leftovers. Here’s how to store them:

  • Refrigeration: Store any leftovers in an airtight container in the fridge for up to 3 days.
  • Freezing: While it’s best enjoyed fresh, you can freeze cooked salmon for later use. Wrap it tightly in plastic wrap and aluminum foil, and it will last in the freezer for up to 3 months.

Recipe FAQs

What’s the best type of salmon to use?

Opt for fresh, wild-caught salmon if you can find it. Sockeye and king salmon are top choices for their rich flavor and texture.

How long do leftovers keep?

Leftovers can be stored in the refrigerator for up to three days. Make sure they’re in an airtight container to maintain freshness.

Can I substitute the pomegranate molasses?

While pomegranate molasses is a unique flavor, you can use balsamic glaze in a pinch for a similar sweet-tart experience.

Is Christmas salmon healthy?

Absolutely! This dish is packed with omega-3 fatty acids and is a lean protein option, making it a nutritious choice for your holiday meals.

What to Serve with Christmas Salmon

Now that your main dish is ready, let’s talk sides. Here are some delicious pairings:

  • Roasted Vegetables: A medley of seasonal veggies drizzled with olive oil and herbs makes a vibrant accompaniment.
  • Quinoa Salad: A light quinoa salad with citrus dressing balances the richness of the salmon.
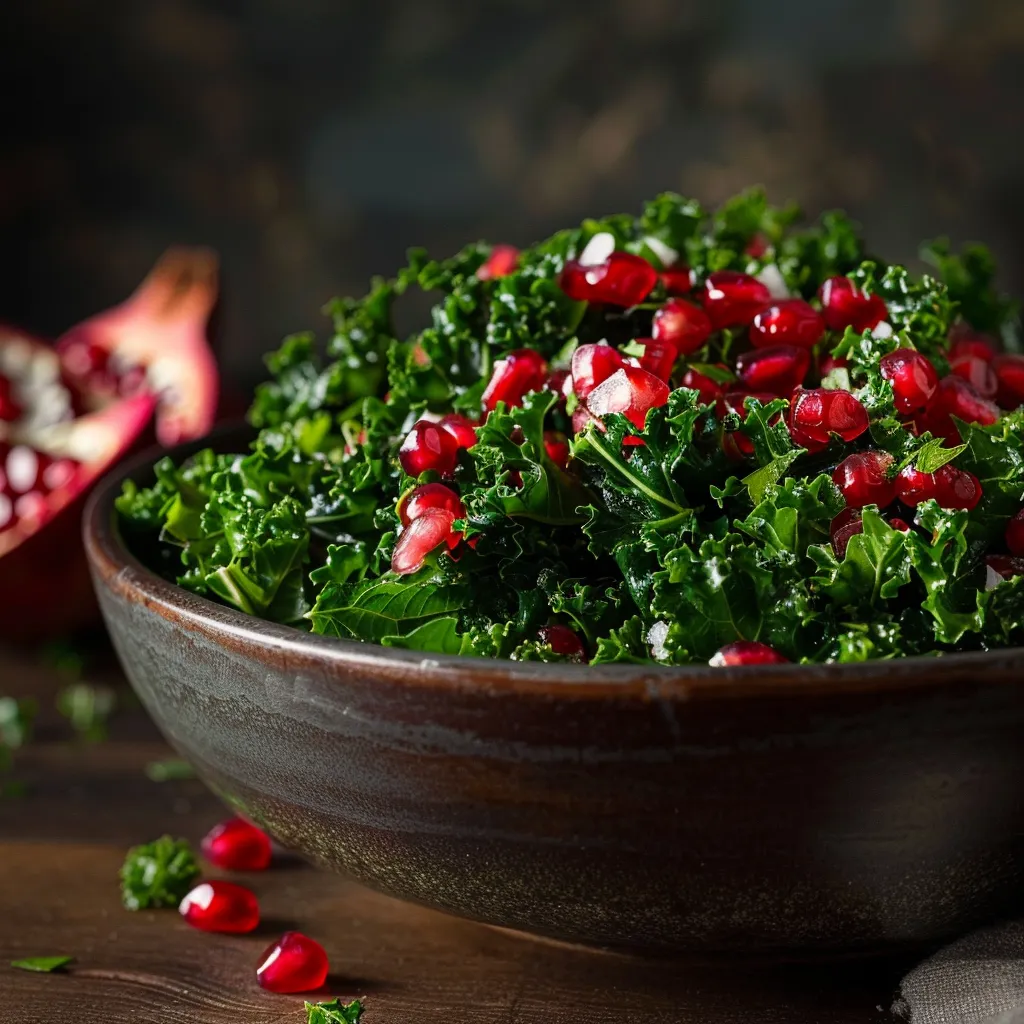
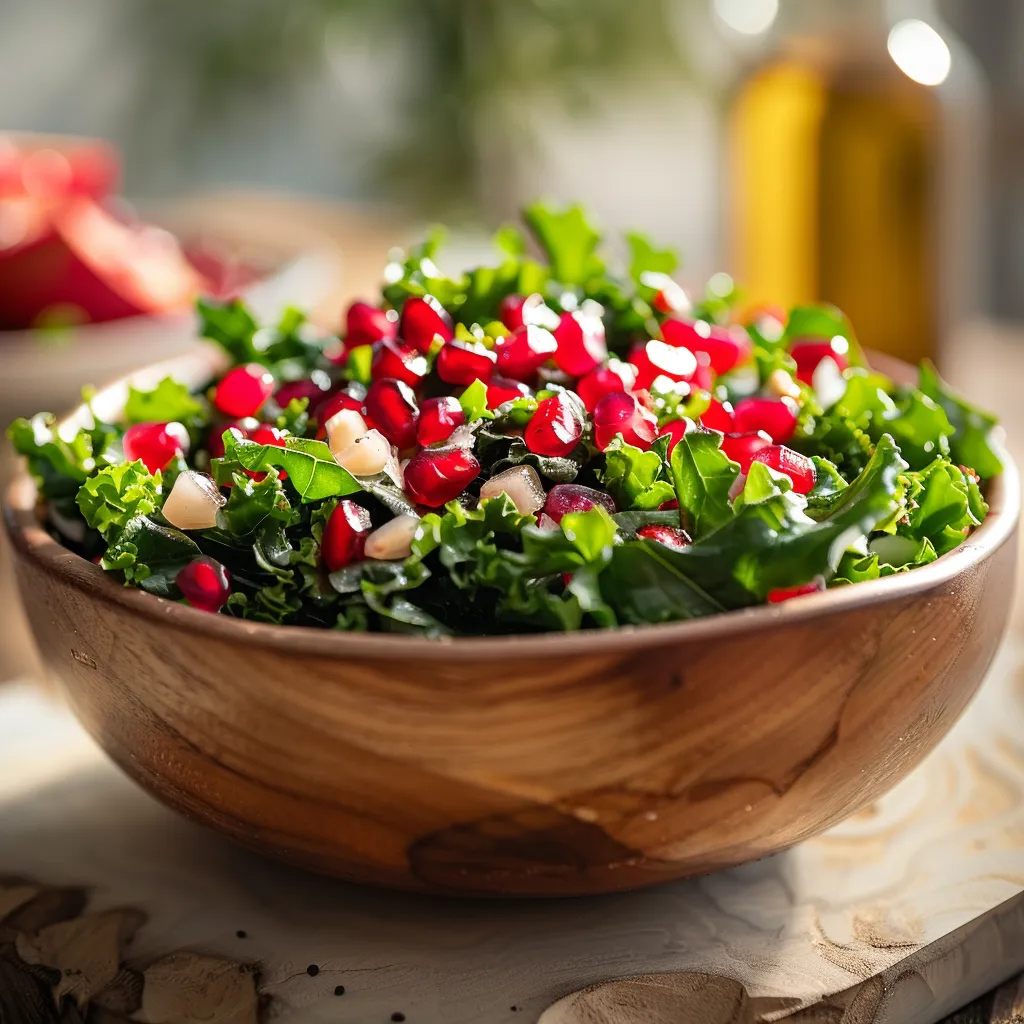
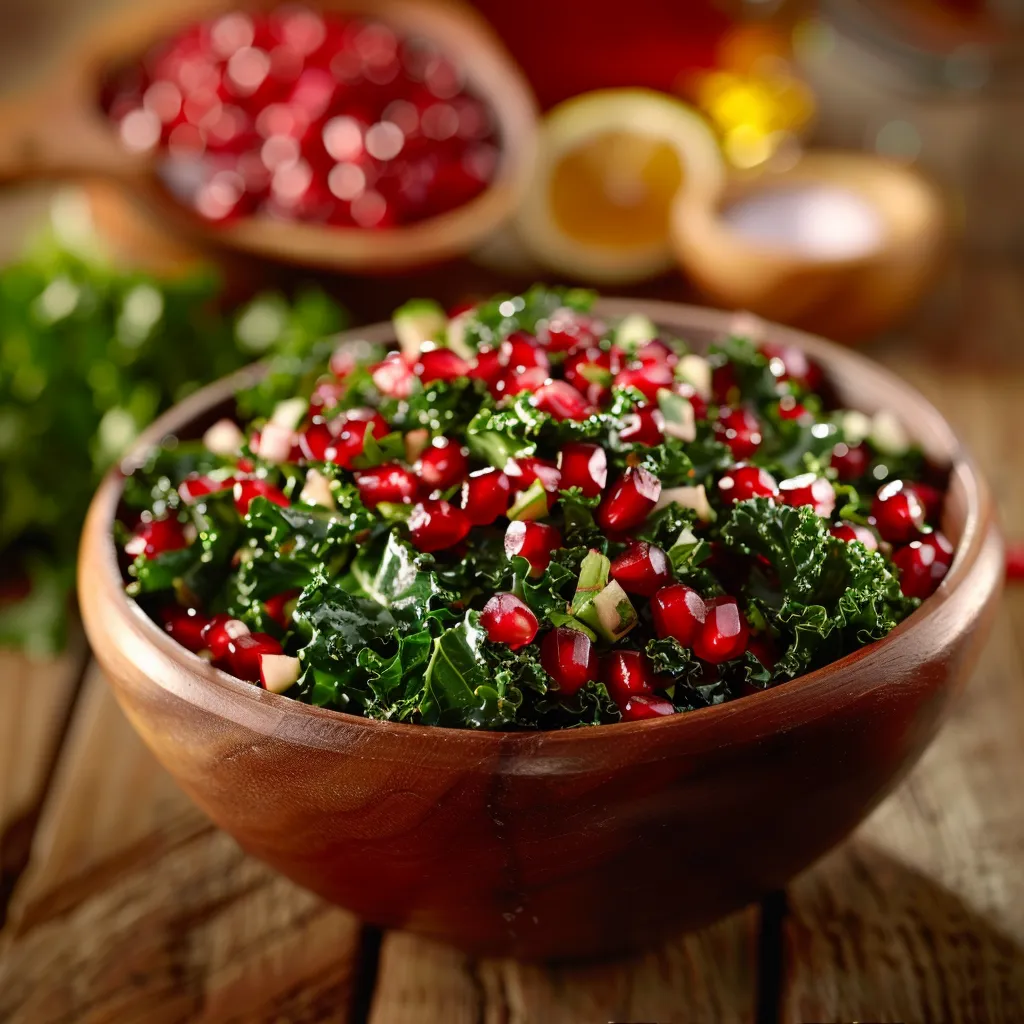
  • Simple Greens: A fresh salad with mixed greens, nuts, and cranberries adds a festive crunch.

More Christmas Mains

If you’re looking to expand your holiday menu, consider these festive dishes:

Conclusion

As you gather around the table this holiday season, let the warmth of good food and great company fill your heart. My Christmas Salmon with Pomegranate Sauce is more than just a dish; it’s a celebration of flavors, a spark of joy, and a testament to the magic of cooking boldly. I invite you to embrace the adventure of cooking with spice and sweetness this holiday season. Let every bite tell a story and every meal create memories. Grab your skillet, unleash your inner chef, and let’s make this Christmas unforgettable together!

Christmas Salmon with Pomegranate Sauce

Prep Time 10 minutes
Cook Time 15 minutes
Total Time 25 minutes
Servings 4 servings
Calories 350
A festive and flavorful dish featuring tender salmon fillets topped with a sweet and tangy pomegranate sauce, perfect for holiday celebrations.

Ingredients

Main Ingredients

  • 4 fillets salmon fillets
  • 1 cup pomegranate seeds
  • 0.5 cup orange juice
  • 2 tablespoons honey
  • 1 tablespoon balsamic vinegar
  • to taste salt and pepper (for seasoning)
  • for garnish fresh parsley (for garnish)

Instructions 

  • Season the salmon fillets with salt and pepper.
  • Combine pomegranate seeds, orange juice, honey, and balsamic vinegar in a saucepan and simmer until thickened, about 10 minutes.
  • Cook the salmon in a skillet over medium-high heat for 4-5 minutes per side until golden and cooked through.
  • Let the salmon rest briefly, then pour the pomegranate sauce over the fillets.
  • Garnish with fresh parsley and serve immediately.

Notes

Use fresh pomegranate seeds for the best flavor and presentation.
Calories: 350kcal
Cost: $15
Course: Main Course
Cuisine: Festive
Keyword: Holiday, Pomegranate, Salmon

Nutrition

Calories: 350kcal | Carbohydrates: 30g | Protein: 30g | Fat: 15g | Sodium: 400mg

Loved this recipe? Save it to your favorite Pinterest board so you can easily find it later! It’s the perfect way to keep all your sweet ideas in one place. ✨

Detailed view of baked salmon fillets topped with a glossy pomegranate sauce and colorful seeds.

The Roasted Garlic Chicken and Vegetables That Turn Up the Flavor and Fire

Welcome to a culinary adventure that’s about to ignite your taste buds! If you’re searching for a dish that’s not only easy to prepare but bursts with flavor and warmth, you’ve landed in the right place. This roasted garlic chicken and vegetables recipe is your ticket to a hearty meal that transforms your kitchen into a symphony of aromas and textures. Grab your apron, because we’re diving headfirst into a world where spice meets comfort.

Why You’ll Love Roasted Garlic Chicken and Vegetables

This dish encapsulates everything I adore about cooking: simplicity, bold flavors, and the ability to create something truly special with minimal effort. The beauty of roasted garlic chicken and vegetables lies in its versatility and the way it draws people together. Imagine the scene: a golden-brown chicken, glistening with fragrant garlic, nestled among vibrant, roasted vegetables that are caramelized to perfection. It’s more than just a meal; it’s an invitation to enjoy life’s simple pleasures.

Perfect for a busy weekday dinner or a gathering of friends, this dish promises to deliver satisfaction on every level. Plus, it’s an easy roasted chicken dinner that even the busiest of moms can whip up without breaking a sweat. Ready to embrace the bold and the beautiful? Let’s get cooking!

Ingredients Needed

Close-up of crispy roasted chicken with garlic and vibrant vegetables in warm natural light.
  • 4 chicken thighs or breasts
  • 4 cloves garlic, minced
  • 2 tablespoons olive oil
  • 1 teaspoon salt
  • 1/2 teaspoon black pepper
  • 1 teaspoon dried thyme (optional)
  • 2 cups mixed vegetables (carrots, bell peppers, zucchini, etc.)

Step-by-Step Instructions for the Perfect Roast

1. Prepare Your Chicken

Start by preheating your oven to 400°F (200°C). This temperature is crucial for achieving that golden, crispy skin we all crave. While the oven warms up, let’s focus on our chicken. In a small bowl, combine the minced garlic, olive oil, salt, pepper, and if you’re feeling adventurous, the dried thyme. This garlic mixture is the secret sauce that will elevate your chicken from ordinary to extraordinary.

Rub this flavorful concoction all over the chicken pieces. Make sure to get under the skin if you’re using thighs or breasts with skin on. It’s this attention to detail that brings out the best in your dish, infusing every bite with rich garlic goodness.

2. Prep the Vegetables

Now it’s time to prep your vegetables. Choose your favorites—carrots, bell peppers, and zucchini are fantastic options. Wash, peel, and chop them into bite-sized pieces. The goal is to have them roast evenly alongside the chicken while soaking up all that delicious garlic flavor.

3. Assemble the Pan

Grab a baking sheet and line it with parchment paper for easy cleanup. Place the seasoned chicken in the center of the pan, then surround it with your prepped vegetables. Make sure they are spread out evenly, giving them room to roast and caramelize beautifully. You want to create a symphony of flavors and textures that will have everyone at the table singing your praises!

4. Roast to Perfection

Slide your baking sheet into the preheated oven and let the magic happen. Roast for about 35-40 minutes, or until the chicken is cooked through, reaching an internal temperature of 165°F (74°C). The vegetables should be tender and slightly caramelized, a beautiful medley of colors and flavors. Your kitchen will be filled with the intoxicating aroma of roasted garlic, and trust me, your neighbors will be knocking at your door, wondering what’s cooking!

5. Garnish and Serve

Once out of the oven, let your masterpiece rest for a few minutes before serving. This resting time allows the juices to redistribute throughout the chicken, ensuring it’s juicy and tender. Serve hot, garnished with fresh herbs if you have them on hand. Your roasted garlic chicken and vegetables are now ready to be devoured—enjoy the applause!

Customizing Your Roasted Garlic Chicken and Vegetables

The beauty of this recipe is its flexibility. Want to switch up the flavor profile? Here are some ideas:

  • Spice it Up: Add a pinch of red pepper flakes for a kick.
  • Herbaceous Notes: Swap dried thyme for rosemary or oregano.
  • Vegetable Variations: Try adding sweet potatoes, asparagus, or Brussels sprouts for seasonal variations.

Tips for Meal Prep and Storage

This roasted garlic chicken and vegetables recipe is perfect for meal prep! Here’s how to make it work for you:

  • Meal Prep: You can prep the chicken and vegetables in advance, storing them separately in the refrigerator. When you’re ready for dinner, assemble and roast!
  • Storage: Leftovers can be stored in an airtight container in the fridge for up to 3 days. Reheat gently in the oven to retain that crispy texture.
  • Freezing: You can freeze the cooked chicken and vegetables for up to 3 months. Thaw in the fridge overnight before reheating.

Nutritional Benefits of Roasted Garlic Chicken and Vegetables

This dish isn’t just a treat for the taste buds; it’s also packed with nutritional goodness. Chicken is an excellent source of lean protein, essential for muscle health and repair. The colorful array of vegetables brings a wealth of vitamins, minerals, and antioxidants to the table, supporting overall health and wellness. Plus, garlic is known for its immune-boosting properties—what’s not to love?

Recipe FAQ’s

Can I use boneless, skinless chicken?

Absolutely! Boneless, skinless chicken cooks faster, so reduce the cooking time to about 25-30 minutes. Just make sure to check the internal temperature to ensure it reaches 165°F (74°C).

What other vegetables can I use?

Feel free to experiment! Zucchini, sweet potatoes, asparagus, and even Brussels sprouts can shine in this dish. The key is to choose vegetables that can roast well and complement the flavors of garlic and chicken.

Can I make this ahead of time?

Yes! You can prep the chicken and vegetables ahead of time and store them separately in the refrigerator. When you’re ready to eat, just assemble and roast!

Final Thoughts: Let’s Embrace the Fire

Cooking is not just about following a recipe; it’s about embracing creativity, flavor, and even a bit of fire! This roasted garlic chicken and vegetables dish is a wonderful way to awaken your culinary spirit and share the joy of cooking with those you love. So next time you’re craving something comforting yet bold, remember this recipe. Let it inspire you to experiment, taste, and savor every moment spent in the kitchen.

Now, go ahead and create your masterpiece. And remember, every meal is an opportunity to tell a story—let yours be one of flavor, warmth, and shared joy. Happy cooking!

Roasted Garlic Chicken and Vegetables

Prep Time 10 minutes
Cook Time 40 minutes
Total Time 50 minutes
Servings 4 servings
Calories 350
A flavorful and easy-to-make roasted chicken dish with garlic and colorful vegetables, perfect for a wholesome meal.

Ingredients

Protein

  • 4 pieces chicken thighs or breasts

Seasonings

  • 4 cloves garlic, minced
  • 2 tablespoons olive oil
  • 1 teaspoon salt
  • 1/2 teaspoon black pepper
  • 1 teaspoon dried thyme (optional)

Vegetables

  • 2 cups mixed vegetables (carrots, bell peppers, zucchini, etc.)

Instructions 

  • Preheat oven to 400°F (200°C).
  • Mix garlic, olive oil, salt, pepper, and thyme.
  • Rub mixture over chicken and place on a baking sheet.
  • Arrange vegetables around chicken.
  • Roast for 35-40 minutes until cooked and tender.
  • Serve hot and enjoy!

Notes

Using fresh garlic enhances flavor; adjust seasoning to taste.
Calories: 350kcal
Cost: $15
Course: Main Course
Cuisine: American
Keyword: chicken, garlic, vegetables

Nutrition

Calories: 350kcal | Carbohydrates: 20g | Protein: 40g | Fat: 15g | Sodium: 600mg

Loved this recipe? Save it to your favorite Pinterest board so you can easily find it later! It’s the perfect way to keep all your sweet ideas in one place. ✨

Plate of golden roasted garlic chicken breasts with assorted vegetables, captured at eye level.

The Autumn-Spiced Roasted Pumpkin Soup That Warmed My Soul and Spiced My Spirit

As the leaves begin to turn and the air carries a crispness that beckons cozy evenings, there’s no better time to dive into the warm embrace of a bowl of Autumn-Spiced Roasted Pumpkin Soup. This isn’t just any soup; it’s a celebration of the season, packed with rich flavors, and a touch of spice that dances on your palate. Trust me, this recipe will transform your approach to comfort food, inviting you to embrace the vibrant essence of fall.

Why Pumpkin Soup?

Pumpkin soup holds a special place in my heart. Growing up in San Antonio, I learned early on that food is more than sustenance; it’s an experience, a story filled with spices that awaken the senses. Pumpkin, with its earthy sweetness, becomes a canvas to paint with bold spices that elevate it from humble to extraordinary. This spiced pumpkin soup is the perfect embodiment of that philosophy, inviting you to explore the warmth and depth of autumn flavors.

Ingredients for Autumn-Spiced Roasted Pumpkin Soup

Eye-level shot of a steaming bowl of spiced roasted pumpkin soup with soft lighting.

To create this masterpiece, gather the following ingredients:

  • 1 medium pumpkin (about 2 pounds), peeled and cubed
  • 2 tablespoons olive oil
  • 1 onion, chopped
  • 3 cloves garlic, minced
  • 1 teaspoon ground cinnamon
  • 1/2 teaspoon ground nutmeg
  • 1/2 teaspoon ground ginger
  • 4 cups vegetable broth
  • Salt and pepper to taste
  • Optional: cream or coconut milk for serving

This combination is simple yet powerful. The pumpkin is the star, while the spices add layers of flavor, bringing the warmth of fall into your kitchen.

How to Make Autumn-Spiced Roasted Pumpkin Soup

Are you ready to embark on this culinary adventure? Let’s get cooking!

  1. Preheat your oven: Set it to 400°F (200°C). The heat will coax out the natural sweetness of the pumpkin.
  2. Prepare the pumpkin: Toss the cubed pumpkin with 1 tablespoon of olive oil, a sprinkle of salt, and a dash of pepper. Spread it out on a baking sheet, making sure it’s in a single layer. This allows for even roasting and caramelization. Roast for 30-40 minutes until the pumpkin is tender and slightly caramelized. The smell will transport you to a pumpkin patch on a sunny autumn day!
  3. Cook the aromatics: In a large pot, heat the remaining tablespoon of olive oil over medium heat. Add the chopped onion and cook until it’s translucent, about 5 minutes. This step is crucial; the onions provide a sweet base for our soup.
  4. Add the garlic and spices: Stir in the minced garlic, cinnamon, nutmeg, and ginger, cooking for another minute until fragrant. The aroma of spices swirling together is nothing short of magic.
  5. Combine and simmer: Add the roasted pumpkin to the pot, pour in the vegetable broth, and bring it to a boil. Reduce the heat and let it simmer for 10 minutes. This is where the flavors meld together, creating a warm hug in a bowl.
  6. Blend it up: Use an immersion blender or transfer the soup to a regular blender and puree until smooth. You want a creamy texture that glides effortlessly from spoon to mouth.
  7. Season to taste: Give it a good taste and adjust the seasoning with salt and pepper as needed. If you want to add a luxurious touch, swirl in some cream or coconut milk before serving.

Tips for Perfecting Your Soup

Here are a few tips to ensure your roasted pumpkin soup turns out just right:

  • Choose the right pumpkin: Look for a medium pumpkin that feels heavy for its size. Sugar pumpkins are ideal for soups due to their sweet, dense flesh.
  • Don’t skip the roasting: Roasting enhances the natural sweetness of the pumpkin and adds depth to the flavor. Trust me, the caramelization is worth the wait!
  • Experiment with textures: If you prefer a chunkier soup, reserve some roasted pumpkin cubes before blending and stir them back in.
  • Spice it up: Feeling adventurous? Add a pinch of cayenne pepper or a splash of hot sauce for an extra kick!

Variations to Explore

One of the best parts of cooking is the freedom to experiment! Here are a few variations to consider:

  • Herb-infused: Toss in fresh herbs like thyme or sage during the cooking process for a fragrant twist.
  • Crème fraîche or yogurt: For a tangy contrast, serve your soup with a dollop of crème fraîche or Greek yogurt.
  • Nutty finish: Sprinkle roasted pumpkin seeds or a drizzle of pumpkin seed oil on top for added texture and flavor.

Can I Substitute Ingredients?

Absolutely! Cooking is all about making it your own. Here are some substitutions you can try:

  • Pumpkin: If you can’t find a pumpkin, butternut squash or sweet potatoes work beautifully.
  • Broth: Use chicken broth instead of vegetable broth for a richer flavor.
  • Spices: Feel free to adjust the spices based on your preference. A dash of allspice or cloves can add a unique touch.

Storage and Freezing

One of the best things about this pumpkin soup recipe is that it stores beautifully. Here’s how to keep it fresh:

  • Refrigerator: Store in an airtight container for up to 5 days. Reheat gently on the stove or in the microwave.
  • Freezer: This soup freezes well! Portion it into freezer-safe containers and store for up to 3 months. Thaw overnight in the refrigerator before reheating.

FAQs About Autumn-Spiced Roasted Pumpkin Soup

Can I make this soup vegan?

Yes! This recipe is naturally vegan as it uses vegetable broth and can be made cream-free if you skip the optional cream or coconut milk.

What can I serve with pumpkin soup?

Pair it with crusty bread, a fresh salad, or even a pumpkin gnocchi casserole for a hearty meal. Check out my recipe for cozy up with my favorite pumpkin gnocchi casserole to complete your autumn feast!

How can I adjust the thickness of the soup?

If you prefer a thicker soup, reduce the amount of broth. For a thinner consistency, simply add more broth or water until it reaches your desired texture.

Conclusion

As you ladle this Autumn-Spiced Roasted Pumpkin Soup into your favorite bowl, take a moment to appreciate the colors, the aromas, and the warmth it offers. This soup is more than just a dish; it’s an invitation to savor the season, to gather around the table with loved ones, and to let the spices ignite your spirit. So go ahead, embrace your culinary adventurous side — let each spoonful remind you that cooking is not just about feeding the body, but also feeding the soul. Enjoy every fiery, flavorful bite!

Autumn-Spiced Roasted Pumpkin Soup

Prep Time 10 minutes
Cook Time 40 minutes
Total Time 50 minutes
Servings 4 servings
Calories 180
A warm, flavorful soup perfect for fall, combining roasted pumpkin with aromatic spices.

Ingredients

Pumpkin

  • 1 medium pumpkin (about 2 pounds), peeled and cubed
  • 2 tablespoons olive oil
  • 1 onion onion, chopped
  • 3 cloves garlic, minced
  • 1 teaspoon ground cinnamon
  • 1/2 teaspoon ground nutmeg
  • 1/2 teaspoon ground ginger
  • 4 cups vegetable broth
  • to taste salt and pepper (to taste)
  • optional cream or coconut milk for serving (optional garnish)

Instructions 

  • Preheat oven to 400°F (200°C). Toss pumpkin with 1 tbsp olive oil, salt, and pepper. Roast 30-40 mins until tender.
  • Heat remaining 1 tbsp olive oil in a large pot. Cook onion until translucent, about 5 mins.
  • Add garlic and spices; cook 1 min until fragrant. Add roasted pumpkin and vegetable broth. Simmer 10 mins.
  • Puree the soup until smooth using an immersion blender or blender. Season with salt and pepper.
  • Serve hot, garnished with cream or coconut milk if desired.

Notes

This soup is perfect for cozy autumn days and can be stored in the fridge for leftovers.
Calories: 180kcal
Cost: $15
Course: Soup
Cuisine: American
Keyword: pumpkin

Nutrition

Calories: 180kcal | Carbohydrates: 35g | Protein: 3g | Fat: 4g | Sodium: 600mg

Loved this recipe? Save it to your favorite Pinterest board so you can easily find it later! It’s the perfect way to keep all your sweet ideas in one place. ✨

Detailed view of pumpkin soup garnished with spices, highlighting its texture and warmth.

The Festive Stuffed Shells That Ignite Holiday Joy and Flavor

Ah, the holiday season! It’s that magical time of year when the air is filled with the aroma of spiced cider, the laughter of family and friends, and, of course, the mouthwatering scents wafting from the kitchen. As someone who believes that food is not just a necessity but a celebration, I’m excited to share my Best Christmas Stuffed Shells Recipe with you. This dish is not just about filling pasta; it’s about creating a cozy gathering around the table, bringing warmth and joy to your holiday festivities.

Ingredients

To create these delectable stuffed shells that will brighten your holiday table, gather the following ingredients:

  • 20 large pasta shells
  • 1 lb ricotta cheese
  • 1 cup shredded mozzarella cheese
  • 1/2 cup grated parmesan cheese
  • 1 egg
  • 2 cups marinara sauce
  • 1 tsp dried basil
  • 1 tsp dried oregano
  • Salt and pepper to taste
  • Fresh parsley for garnish

Step 1: Preheat the Oven and Prepare Your Ingredients

Delicious stuffed shells with melted cheese and marinara sauce, shot at eye level.

First things first, preheat your oven to 375°F (190°C). This step is crucial as it ensures your stuffed shells will bake evenly and come out perfectly gooey and bubbly. While that’s heating up, let’s prepare the pasta shells and filling!

Step 2: Cook the Pasta Shells

Bring a large pot of salted water to a rolling boil. The salt is key; it’s your chance to flavor the pasta from the inside out. Once the water is bubbling happily, gently add the large pasta shells and cook them until they are al dente—usually about 8 to 10 minutes. Remember, they’ll continue to cook a bit in the oven, so don’t overdo it! Drain the shells and set them aside. A quick drizzle of olive oil will prevent them from sticking together. Trust me, you don’t want a clump of shells when you’re ready to stuff them!

Step 3: Prepare the Filling

Now, let’s make the filling that will turn these ordinary shells into a spectacular dish. In a mixing bowl, combine the ricotta cheese, half of the shredded mozzarella, grated Parmesan, and that glorious egg. The egg acts as a binder, holding everything together. Next, sprinkle in the dried basil and oregano, along with a generous pinch of salt and pepper. Mix it all together until it’s a beautiful, creamy concoction that smells like a dream.

Step 4: Assemble the Dish

It’s time to bring it all together! In a greased baking dish, pour in about a cup of marinara sauce—this will be the cozy blanket for our stuffed shells. Now, take each cooked shell and stuff it generously with your ricotta mixture. Don’t be shy; fill them up! Place each stuffed shell seam side up in the baking dish, nestled in the comforting embrace of the marinara sauce.

Once all the shells are snug in their sauce, pour the remaining marinara over the top. Finish it off by sprinkling the remaining mozzarella cheese all over the shells. This is where the magic happens—when it bakes, that cheese will melt and create a bubbly, golden crust that you just can’t resist!

Step 5: Bake and Serve

Cover the baking dish with foil and pop it into your preheated oven. Let it bake for about 25-30 minutes. The aroma that fills your kitchen will be nothing short of intoxicating. Once the cheese is melted and the sauce is bubbling, you know it’s time to take it out. Remove the foil for the last few minutes of baking to let the cheese get that perfect golden hue. When it’s done, garnish with freshly chopped parsley for a pop of color and freshness.

Tips for Perfect Stuffed Shells

  • Don’t rush the filling: Make sure to mix your filling thoroughly to ensure every bite is packed with flavor.
  • Experiment with cheese: Feel free to swap out cheeses! Try adding some feta or goat cheese for a tangy twist.
  • Let them cool: Allow the shells to cool for a few minutes before serving. This helps the filling set and makes it easier to eat.

Variations to Spice It Up

While the classic Christmas Stuffed Shells are absolutely delightful, let’s not shy away from a little creativity. Here are a few variations to keep your holiday table exciting:

  • Spinach and Artichoke: Mix in some chopped spinach and artichoke hearts for a creamy, savory twist.
  • Meat Lovers: Brown some Italian sausage or ground beef and mix it in with the cheese filling for a heartier dish.
  • Spicy Kick: Add a pinch of red pepper flakes to the cheese mixture for those who love a little heat!

Substitutions You Can Make

Don’t have all the ingredients? No problem! Here are some easy substitutions:

  • Ricotta Cheese: Cottage cheese works well in a pinch. Just blend it until smooth for a similar texture.
  • Pasta Shells: If you can’t find large shells, try using manicotti or even cannelloni.
  • Marinara Sauce: Homemade is best, but store-bought works just fine. Consider using Alfredo sauce for a creamy twist.

Equipment You’ll Need

To make this delicious dish, gather these essential kitchen tools:

  • Large pot for boiling pasta
  • Colander for draining pasta
  • Mixing bowls
  • Baking dish (9×13 inches works perfectly)
  • Aluminum foil

Storage & Freezing Tips

These stuffed shells are perfect for meal prep! Here’s how to store and freeze:

  • Refrigerate: Store leftover stuffed shells in an airtight container in the fridge for up to 3 days.
  • Freeze: You can freeze the assembled shells before baking. Just cover tightly and freeze for up to 2 months. When ready to cook, bake straight from frozen, adding an additional 10-15 minutes to the cook time.

FAQs

Can I make the filling ahead of time?

Absolutely! You can prepare the filling a day in advance and store it in the refrigerator. Just be sure to bring it back to room temperature before stuffing your shells.

What’s the best way to serve these stuffed shells?

Serve them hot, straight from the oven, with a side of garlic bread and a fresh salad for a complete meal. A sprinkle of extra cheese or fresh herbs on top can elevate the presentation even more!

Can I use gluten-free pasta?

Yes! Gluten-free pasta shells are widely available and can be used in the same way as traditional pasta shells.

Conclusion

There you have it, my friends! A festive, flavorful dish that’s sure to ignite joy and warmth at your holiday gatherings. These Christmas Stuffed Shells are not just a meal; they’re an invitation to share, celebrate, and create memories around the table. So grab your ingredients, gather your loved ones, and let’s make this holiday season one to remember. Happy cooking, and may your kitchen be filled with laughter and love!

For more festive ideas, check out my Colorful Stuffed Peppers or explore Joyful Bites of Bliss for sweet holiday treats. Let’s keep the spirit of cooking alive!

Best Christmas Stuffed Shells Recipe

Prep Time 15 minutes
Cook Time 30 minutes
Total Time 45 minutes
Servings 6 servings
Calories 450
A delicious and festive dish perfect for Christmas gatherings, featuring tender pasta shells filled with cheesy goodness and topped with marinara sauce.

Ingredients

Pasta

  • 20 large pasta shells
  • 1 lb ricotta cheese
  • 1 cup shredded mozzarella cheese
  • 1/2 cup grated parmesan cheese
  • 1 egg egg
  • 2 cups marinara sauce
  • 1 tsp dried basil
  • 1 tsp dried oregano
  • to taste salt and pepper
  • for garnish fresh parsley

Instructions 

  • Preheat oven to 375°F (190°C). Cook shells until al dente, then drain.
  • Mix ricotta, half of mozzarella, Parmesan, egg, basil, oregano, salt, and pepper.
  • Stuff shells with cheese mixture and place in a greased dish.
  • Top with marinara and remaining mozzarella, then bake 25-30 mins.
  • Garnish with parsley and serve hot.

Notes

For best results, use fresh parsley for garnish and ensure shells are cooked al dente.
Calories: 450kcal
Cost: $15
Course: Main Course
Cuisine: Italian
Keyword: Stuffed Shells

Nutrition

Calories: 450kcal | Carbohydrates: 50g | Protein: 25g | Fat: 20g | Sodium: 900mg

Loved this recipe? Save it to your favorite Pinterest board so you can easily find it later! It’s the perfect way to keep all your sweet ideas in one place. ✨

Appetizing pasta shells filled with ricotta, garnished with parsley, under warm lighting.

The Vibrant Pomegranate Kale Salad That Brightens Every Bite

Welcome, culinary adventurers! If there’s one salad that can make your taste buds dance and the holiday table shine, it’s this Pomegranate Kale Salad. Imagine a dish that captures the essence of winter freshness while offering a delightful balance of sweet and tart in every forkful. This isn’t just a salad; it’s a celebration of flavor, a burst of color, and a nod to the vibrant ingredients that make our meals memorable.

As we dive into the heart of this recipe, prepare to embark on a journey that transcends the ordinary. Whether you’re hosting a festive gathering or simply craving something refreshing, this salad is your ticket to culinary bliss. Let’s get started!

Why You Will Love This Recipe

Picture this: A bed of hearty kale, tender yet robust, topped with jewel-like pomegranate seeds that pop with every bite. The dressing, a harmonious blend of olive oil, lemon juice, and honey, elevates the kale’s earthy flavor while allowing the sweet-tart pomegranate to shine. This salad is not only visually stunning but also packed with nutrients, making it the perfect addition to your holiday table or a fabulous meal prep option for the week ahead.

This is the kind of salad that makes you want to dive in headfirst. It’s crunchy, refreshing, and bursting with flavors that play beautifully together. Plus, it’s a breeze to whip up, leaving you more time to enjoy your gathering rather than spending hours in the kitchen. And let’s not forget, it’s a fantastic way to get your daily dose of greens while impressing your guests with minimal effort.

Ingredients for This Recipe

Eye-level shot of a colorful kale and pomegranate salad with detailed textures.

Here’s what you’ll need to create this kale masterpiece:

  • 4 cups kale, chopped
  • 1 cup pomegranate seeds
  • 1/4 cup olive oil
  • 2 tablespoons lemon juice
  • 1 teaspoon honey
  • Salt and pepper to taste

Each ingredient plays a crucial role in crafting that perfect balance of flavors. Kale, the star of the show, offers a sturdy base that holds up beautifully against the dressing and toppings. The pomegranate seeds add a burst of sweetness and a touch of holiday cheer, making this salad not only delicious but also festive!

How to Make This Recipe

Step-by-Step Instructions

Ready to get cooking? Let’s break it down into easy-to-follow steps:

  1. Prepare the Dressing: In a small bowl, whisk together the olive oil, lemon juice, honey, salt, and pepper until fully combined. The dressing should have a nice balance of tangy and sweet. Taste and adjust the seasoning if needed.
  2. Toss the Kale: In a large bowl, add the chopped kale. Pour the dressing over the kale and toss until every leaf is well coated. This step is crucial – massaging the kale with the dressing helps to soften the leaves and enhances the flavor.
  3. Add the Pomegranate: Gently fold in the pomegranate seeds, being careful not to crush them. You want those little gems to remain whole and provide that delightful pop of flavor.
  4. Serve and Enjoy: Serve immediately to keep the kale crisp and the pomegranate seeds glistening. Enjoy your vibrant creation!

Recipe Variations

While this Pomegranate Kale Salad is already a showstopper, don’t hesitate to experiment with ingredients to make it your own. Here are a few variations to consider:

  • Nutty Crunch: Add 1/4 cup of chopped walnuts or pecans for an added crunch and richness.
  • Cheesy Delight: Crumble some feta cheese or goat cheese on top for a creamy contrast. (For a vegan option, try using almond feta!)
  • Fruity Twist: Incorporate slices of apple or pear for an additional layer of sweetness.
  • Herbaceous Touch: Toss in some fresh herbs like mint or cilantro to elevate the freshness.

Tips for Making This Recipe

To help you create the perfect salad, here are my top tips:

  • Choose Fresh Kale: Look for vibrant, dark green leaves. Avoid any that are wilted or yellowed.
  • Massage the Kale: Don’t skip this step! Massaging the kale makes it tender and less bitter, allowing it to absorb the dressing better.
  • Prep Ahead: You can prepare the dressing in advance and store it in the fridge. Just add the pomegranate and kale right before serving.
  • Storage: If you have leftovers, store them in an airtight container in the fridge for up to two days. Note that the kale will soften over time, but it will still taste great!

Storage & Freezing

Speaking of leftovers, here’s how to store your Pomegranate Kale Salad:

  • Short-Term Storage: Seal in an airtight container and refrigerate. This salad is best enjoyed fresh but will last for 1-2 days.
  • Freezing: I don’t recommend freezing this salad. The kale and pomegranate seeds will lose their texture and flavor when thawed. However, you can freeze the dressing separately and use it later!

FAQs

Can I substitute kale for another green?

Absolutely! If kale isn’t your thing, try using spinach, arugula, or even mixed greens. Just keep in mind that the texture and flavor will change slightly.

How do I make this salad vegan?

This salad is already vegan-friendly if you omit cheese. Just ensure your honey is replaced with maple syrup if strict vegan compliance is desired.

What pairs well with pomegranate?

Pomegranate works beautifully with flavors like citrus, nuts, and creamy cheeses. It complements dishes like roasted vegetables, grain salads, or even as a topping for yogurt.

Can I add protein to this salad?

Yes! Grilled chicken, chickpeas, or even shrimp can be excellent additions for a hearty meal.

More Salad Recipes

If you’re loving this Pomegranate Kale Salad and are looking for more fresh and exciting salad ideas, check out:

Conclusion

There you have it, my culinary comrades! This Pomegranate Kale Salad is not just another side dish; it’s a vibrant expression of flavor that will leave you craving more. With its delightful crunch, sweet-tart pomegranate, and nourishing kale, it’s perfect for any occasion, especially during the holiday season. Embrace the colors, the flavors, and the joy of cooking something that truly speaks to your adventurous spirit. Grab your ingredients, roll up your sleeves, and create something magical in your kitchen today! Your taste buds will thank you, and your guests will be raving about this dish long after the last bite. Enjoy!

Pomegranate Kale Salad Recipe

Prep Time 10 minutes
Total Time 10 minutes
Servings 4 servings
Calories 150
A fresh and vibrant salad combining crunchy kale with sweet pomegranate seeds, perfect for a healthy snack or side dish.

Ingredients

Main

  • 4 cups kale, chopped
  • 1 cup pomegranate seeds
  • 0.25 cup olive oil
  • 2 tablespoons lemon juice
  • 1 teaspoon honey
  • to taste salt and pepper

Instructions 

  • Whisk together olive oil, lemon juice, honey, salt, and pepper to make the dressing.
  • Toss chopped kale with the dressing until well coated.
  • Add pomegranate seeds and gently toss again.
  • Serve immediately and enjoy!

Notes

For extra flavor, add some crumbled feta cheese or toasted nuts.
Calories: 150kcal
Cost: $12
Course: Salad
Cuisine: Healthy
Keyword: Kale, Pomegranate

Nutrition

Calories: 150kcal | Carbohydrates: 20g | Protein: 3g | Fat: 8g | Sodium: 50mg

Loved this recipe? Save it to your favorite Pinterest board so you can easily find it later! It’s the perfect way to keep all your sweet ideas in one place. ✨

Close-up of a fresh kale and pomegranate seeds salad with soft lighting.

This Vegan Stuffed Acorn Squash Recipe That Sets My Heart on Fire

Welcome, fellow food adventurers! Today, I’m thrilled to share a dish that’s not just a feast for the eyes but a celebration of flavors that’ll ignite your taste buds. Say hello to my Vegan Stuffed Acorn Squash Recipe! This dish marries the earthy sweetness of roasted acorn squash with a hearty, savory stuffing that begs to be devoured. Whether you’re preparing for a cozy family dinner or a festive gathering, this recipe is the perfect embodiment of warmth and nourishment — and it’s sure to impress anyone who graces your table.

Healthy Stuffed Acorn Squash Recipe

Acorn squash is the unsung hero of the vegetable world — its vibrant green skin and golden flesh are a sight to behold, and its flavor is simply divine. Stuffing it with a medley of wholesome ingredients transforms it into a meal that’s not just healthy but utterly satisfying. Let’s dive right in and explore how to bring this culinary masterpiece to life!

The Easiest Way to Cut an Acorn Squash

Eye-level shot of vegan stuffed acorn squash topped with chopped nuts and dried fruit, with a blurred cozy background.

Now, before we embark on this delicious adventure, let’s tackle the often-dreaded task of cutting the acorn squash. Here’s my foolproof method:

  • Wash: Rinse your acorn squash under cool water to remove any dirt. A clean canvas is essential!
  • Stabilize: Place the squash on a sturdy cutting board. For extra stability, you can slice a thin sliver off the bottom to create a flat surface.
  • Cut: Using a sharp knife, slice the squash in half from stem to tip. Apply even pressure and let the knife do the work. Don’t rush; patience is key!
  • Scoop: With a spoon, scoop out the seeds and stringy bits from the center. You want the squash to be ready for its cozy stuffing!

And just like that, you’ve conquered the acorn squash! Easy, right?

How to Bake Acorn Squash

Once your squash is cut and cleaned, it’s time to roast it to perfection. Roasting not only enhances the natural sweetness of the squash but also gives it a caramelized, rich flavor that will have your mouth watering.

Preheat your oven to 400°F (200°C). While it’s heating up, brush the insides of the acorn squash halves with 1 tablespoon of olive oil and sprinkle a pinch of salt and pepper inside each half. This simple seasoning is the first step toward flavor town!

Place the squash halves cut side up on a baking sheet and pop them into the oven. Let them roast for 40-45 minutes, or until the flesh is tender and easily pierced with a fork. The edges should be beautifully caramelized — this is where the magic happens. Your kitchen will be filled with an irresistible aroma that will have everyone gathering around!

How to Make the Best Stuffed Acorn Squash

While the squash is roasting, it’s time to prepare the stuffing that will elevate this dish to star status. Here’s how to make the best stuffing for your acorn squash:

In a skillet over medium heat, add a small drizzle of olive oil. Once it’s hot, toss in 1 small chopped onion. Sauté until the onion is translucent, about 5 minutes. The sweet aroma of onion sizzling in oil is enough to make anyone hungry!

Next, add 2 cloves of minced garlic to the pan and cook for an additional minute. Don’t walk away — garlic browns quickly and we want it just fragrant, not burnt!

Now, stir in 1 cup of cooked quinoa or rice, 1 cup of chopped kale or spinach, 1/2 cup of dried cranberries or raisins, and 1/2 cup of chopped walnuts or pecans. This combination of savory and sweet is where the dish truly shines! Stir everything together and let it cook for about 3-5 minutes until it’s heated through and well combined. Season with salt and pepper to taste, and feel free to get creative — this is your dish after all!

How to Make a Balsamic Glaze Without Sugar

If you want to take your stuffed acorn squash to the next level, consider drizzling it with a homemade balsamic glaze. It’s surprisingly easy to make and adds a beautiful depth of flavor. Here’s a quick recipe:

  • In a small saucepan, pour in 1 cup of balsamic vinegar and bring it to a gentle simmer over medium-low heat.
  • Allow it to reduce by half, stirring occasionally, which should take about 10-15 minutes.
  • Once it’s thickened to a syrupy consistency, remove it from heat and let it cool. It will continue to thicken as it cools.

Drizzle this luscious glaze over your stuffed squash just before serving for a sweet and tangy finish that’ll have everyone begging for seconds!

Serving Suggestions for Stuffed Acorn Squash

This Vegan Stuffed Acorn Squash is a versatile dish that can stand alone or shine as part of a larger spread. Here are some serving suggestions:

  • As a Main Dish: Serve it alongside a fresh green salad or a warm bowl of soup, like my Vegan French Onion Soup.
  • As a Side Dish: Pair it with roasted root vegetables or a hearty grain like farro or barley for a complete meal.
  • For the Holidays: This dish is perfect for Thanksgiving or any festive gathering. It’s colorful, healthy, and utterly satisfying.

Tips for Perfect Stuffed Acorn Squash

  • Pick the Right Squash: Look for acorn squashes that are heavy for their size and have a matte finish. Shiny skin usually indicates they’ve been picked too early.
  • Don’t Skip the Roasting: Roasting the squash not only enhances its flavor but also softens it, making it easier to scoop and stuff.
  • Customize Your Filling: Feel free to swap out ingredients based on what you have on hand. Substitute brown rice for quinoa or kale for spinach. Get creative!

Variations and Substitutions

This is a flexible recipe that welcomes creativity!

  • Nuts: If you have nut allergies, try using seeds like pumpkin or sunflower seeds instead.
  • Fruits: Dried apricots or figs can be a delicious alternative to cranberries or raisins.
  • Greens: Swap out kale or spinach for Swiss chard or even sautéed mushrooms for an umami kick.

Storage & Freezing

Got leftovers? No problem! Your stuffed acorn squash can be stored in the fridge for up to 3-4 days. To reheat, simply place it in a preheated oven at 350°F (175°C) until warmed through.

If you’d like to freeze them, I recommend freezing the stuffed squash and the filling separately to maintain the best texture. Wrap the squash tightly in foil and freeze it for up to 3 months. When you’re ready to enjoy, thaw overnight in the fridge, then reheat as mentioned above.

FAQs

Can I substitute the quinoa for another grain?

Absolutely! Brown rice, wild rice, or even couscous can work just as well. Choose what you love!

How do I know when the squash is done roasting?

The squash is ready when it’s fork-tender and the edges are caramelized. A little poke with a fork should tell you everything you need to know.

Is this recipe gluten-free?

Yes! As long as you use gluten-free grains like quinoa or rice, this dish is gluten-free and perfect for those with dietary restrictions.

Conclusion

There you have it, folks! My Vegan Stuffed Acorn Squash Recipe is not just a dish; it’s a celebration of ingredients, flavors, and the joy of cooking. It’s a reminder that plant-based meals can be vibrant, exciting, and downright delicious. So grab your skillet, ignite your passion for cooking, and let this dish inspire you to add a little fire to your food. Don’t forget to share your creations with me—tag @cookwithhealth on Instagram and let’s connect! Happy cooking, and may your kitchen always be filled with warmth and flavor!

Vegan Stuffed Acorn Squash Recipe

Prep Time 15 minutes
Cook Time 55 minutes
Total Time 1 hour 10 minutes
Servings 4 servings
Calories 350
A delicious and healthy vegan dish featuring roasted acorn squash filled with a flavorful quinoa and vegetable stuffing.

Ingredients

Vegetables and Grains

  • 2 pieces acorn squashes, halved and seeded
  • 1 tablespoon olive oil
  • 1 small onion, chopped
  • 2 cloves garlic, minced
  • 1 cup cooked quinoa or rice
  • 1 cup chopped kale or spinach
  • 0.5 cup dried cranberries or raisins
  • 0.5 cup chopped walnuts or pecans
  • to taste salt and pepper
  • optional maple syrup or balsamic glaze (for drizzling)

Instructions 

  • Preheat oven to 400°F (200°C). Brush squash halves with 1 tbsp olive oil, season with salt and pepper, and roast for 40-45 minutes.
  • Cook onion until translucent, add garlic, then stir in cooked grains, greens, cranberries, and nuts. Heat through.
  • Fill roasted squash halves with the stuffing mixture.
  • Bake stuffed squash for an additional 10 minutes. Drizzle with maple syrup or balsamic glaze if desired, then serve.

Notes

For extra flavor, add a splash of lemon juice or your favorite herbs.
Calories: 350kcal
Cost: $15
Course: Main Course
Cuisine: Vegan
Keyword: Acorn Squash

Nutrition

Calories: 350kcal | Carbohydrates: 60g | Protein: 10g | Fat: 15g | Sodium: 300mg

Loved this recipe? Save it to your favorite Pinterest board so you can easily find it later! It’s the perfect way to keep all your sweet ideas in one place. ✨

Detailed view of a vegan stuffed acorn squash showing colorful ingredients and textured filling on a rustic plate.

The Shrimp with Lobster Sauce That Turned Up the Heat and Elevation in My Kitchen

Ah, the delightful world of seafood! There’s something magical about the union of fresh shrimp and a rich, savory lobster sauce that transforms any meal into a culinary masterpiece. This isn’t just another recipe; it’s a celebration of flavors and textures that dance on your palate, like a spicy waltz on a summer evening. If you’ve ever craved something better than takeout, you’re in for a treat. Join me as we dive into the captivating journey of making Shrimp with Lobster Sauce — a dish that promises to awaken your taste buds and elevate your seafood game.

Why You’ll Love This Shrimp with Lobster Sauce

What makes this dish stand out? It’s the perfect balance of succulent shrimp and a luscious, creamy lobster sauce that’s infused with just the right amount of heat. Picture this: juicy shrimp, tender and perfectly cooked, bathed in a sauce that’s both rich and savory, with a hint of spice that ignites your senses. It’s a comfort food classic that’s deceptively easy to prepare, taking just 20 minutes from start to finish. Trust me, whether it’s a weeknight dinner or a special occasion, this dish will dazzle your guests and leave them craving more.

Ingredients You’ll Need

Close-up of succulent shrimp with a flavorful lobster sauce glaze.

Before we get started, let’s gather our ingredients. This Shrimp with Lobster Sauce features:

  • Juicy shrimp
  • Rich savory sauce

These ingredients may seem simple, but the magic lies in the preparation and the love you put into cooking. Each component plays a vital role in crafting a dish that’s not just food, but a flavorful experience.

Getting Everything Ready for Cooking

The beauty of cooking is in the preparation. Having everything prepped and ready to go will make your cooking experience seamless and enjoyable. First, let’s talk shrimp:

  • Choose fresh, high-quality shrimp. If you can, go for wild-caught for the best flavor.
  • Peel and devein the shrimp, ensuring they’re clean and ready to soak up all that delicious sauce.

Next, let’s prepare the sauce. A rich lobster sauce typically involves a few key elements:

  • Butter: For richness and flavor.
  • Garlic: Because what dish isn’t better with garlic?
  • Stock: Chicken or seafood stock will work wonders here.
  • Heavy cream: For that luxurious texture.
  • Seasonings: Salt, pepper, and a dash of red pepper flakes for heat.

With your ingredients prepped, you’ll be ready to unleash a storm of flavor in your kitchen!

Cooking Your Shrimp with Lobster Sauce

Now comes the fun part — cooking! Here’s how to bring it all together:

  1. Start by heating a large skillet over medium-high heat. Add a generous pat of butter and let it melt, filling your kitchen with an irresistible aroma.
  2. Once the butter is sizzling, toss in minced garlic. Sauté it for about 30 seconds, just until fragrant, being careful not to let it burn.
  3. Now, add the shrimp to the skillet. Cook them for about 2-3 minutes on each side until they turn pink and opaque. This is where the magic happens — the shrimp will soak up the buttery goodness!
  4. Once the shrimp are cooked, remove them from the skillet and set them aside. In the same skillet, pour in your stock and bring it to a simmer. This will deglaze the pan, capturing all those flavorful bits left behind.
  5. Next, stir in the heavy cream, allowing it to thicken into a luxurious sauce. Add red pepper flakes, salt, and pepper to taste.
  6. Finally, return the shrimp to the skillet, tossing them in the rich sauce until they’re well coated and heated through.

When Your Kitchen Starts to Smell Amazing

As you cook, the aroma wafting from your skillet will be nothing short of intoxicating. The buttery garlic mingling with the sweet scent of shrimp and the richness of the lobster sauce will have everyone in your home drifting into the kitchen, eagerly anticipating the feast to come. Cooking is not just about nourishment; it’s about creating an experience — one that tantalizes the senses and makes mouths water.

Plating Like a Pro

When it comes to serving, presentation is key. Here’s how to plate your Shrimp with Lobster Sauce like a seasoned chef:

  1. Choose a wide, shallow bowl or plate to showcase the dish.
  2. Use a ladle to carefully pour the shrimp and sauce into the center of the plate.
  3. Garnish with fresh herbs, such as parsley or chives, to add a pop of color and freshness.
  4. For an extra touch, serve with a lemon wedge on the side for a zesty squeeze just before diving in.

Your guests will be impressed by not only the flavors but also the visual appeal of the dish.

Storage and Reinventing Leftovers

Leftovers? Yes, please! This Shrimp with Lobster Sauce holds up beautifully in the fridge. Here’s how to store it right:

  • Transfer any leftovers to an airtight container and refrigerate them. They should keep well for up to 2 days.
  • When reheating, do so gently on the stovetop over low heat, adding a splash of stock or cream to revive the sauce’s creamy texture.

Feeling adventurous? Use the leftovers in a seafood pasta or a seafood risotto for a quick, gourmet meal the next day.

Quick Takeaway Tips and Common Questions

How to Make Shrimp with Lobster Sauce

Follow the steps outlined above for a quick and easy dish that’s ready in just 20 minutes!

Best Way to Cook Shrimp

For perfectly cooked shrimp, avoid overcooking. As soon as they turn pink and opaque, they’re done. Remove them from the heat to prevent rubbery texture.

Can I Substitute Ingredients?

Absolutely! If you don’t have heavy cream, you can use coconut milk for a dairy-free version. For a different flavor, try adding a splash of white wine to the sauce.

Storage & Freezing

Store in an airtight container in the fridge for up to 2 days. Unfortunately, I wouldn’t recommend freezing this dish, as the sauce may separate upon thawing.

Troubleshooting

If your sauce is too thick, simply whisk in a little more stock or cream to reach your desired consistency.

Conclusion

There you have it — a bold, adventurous recipe for Shrimp with Lobster Sauce that will transform your dining experience. With just a few simple ingredients and 20 minutes, you can create a dish that’s both luxurious and comforting. So, what are you waiting for? Grab your skillet, ignite your passion for cooking, and let the flavors take you on a journey. Your kitchen is about to become the heart of your home, where every meal is a celebration. Bon appétit!

Shrimp with Lobster Sauce

Prep Time 5 minutes
Cook Time 15 minutes
Total Time 20 minutes
Servings 4 servings
Calories 350
Enjoy a delicious and quick seafood dish featuring juicy shrimp in a rich, savory lobster sauce, perfect for a satisfying meal in just 20 minutes.

Ingredients

Seafood

  • 1 lb pounds juicy shrimp (peeled and deveined)
  • 1 cup cups rich savory sauce (lobster sauce)

Instructions 

  • Heat a pan and cook the shrimp until pink, about 3-4 minutes.
  • Add the lobster sauce and simmer for 5 minutes.
  • Combine and cook for another 2-3 minutes until heated through.
  • Serve hot with rice or noodles.

Notes

For extra flavor, add a splash of soy sauce or chopped green onions.
Calories: 350kcal
Cost: $15
Course: Main Course
Cuisine: Asian
Keyword: shrimp

Nutrition

Calories: 350kcal | Carbohydrates: 20g | Protein: 30g | Fat: 10g | Sodium: 900mg

Loved this recipe? Save it to your favorite Pinterest board so you can easily find it later! It’s the perfect way to keep all your sweet ideas in one place. ✨

Tempting shrimp dish with creamy lobster sauce, detailed textures.

The Deliciously Healthy Spinach and Ricotta Stuffed Shells That Spark Joy and Flavor

Welcome, fellow culinary adventurers! Today, we’re diving deep into a dish that’s as comforting as it is vibrant — Easy Spinach and Ricotta Stuffed Shells. This delightful recipe is perfect for a cozy family dinner or a gathering with friends, bringing together fresh, wholesome ingredients that pack a flavorful punch. So grab your favorite apron, crank up the music, and let’s set the stage for a meal that will tantalize your taste buds and nourish your body!

Why Stuffed Shells?

Stuffed shells are like little edible hugs, wrapping creamy goodness in a tender embrace of pasta. They’re a celebration of flavor and texture, and the best part? They’re incredibly versatile! Whether you’re looking for a healthy dinner recipe without chicken or a non-meat dinner idea that doesn’t compromise on taste, these shells are the answer. Plus, they’re a fantastic way to sneak in some veggies without anyone batting an eye!

Ingredients That Spark Joy

Eye-level shot of stuffed shells with spinach, ricotta, and cheese in a cozy setting.

Before we jump into the cooking magic, let’s gather the stars of our culinary show:

  • 12 large pasta shells
  • 2 cups fresh spinach, chopped
  • 1 cup ricotta cheese
  • 1/2 cup grated parmesan cheese
  • 1 egg
  • 2 cups marinara sauce
  • Salt and pepper to taste
  • Olive oil (optional)

Each ingredient plays a crucial role in this symphony of flavors, from the creamy ricotta to the vibrant spinach. Together, they create a dish that sings with freshness and comfort!

How to Make Easy Spinach and Ricotta Stuffed Shells

Now, let’s get our hands dirty and create this masterpiece step by step. The aroma of melting cheese and bubbling marinara sauce is about to fill your kitchen, so let’s get started!

Step 1: Preheat the Oven

First things first, preheat your oven to a toasty 375°F (190°C). This is the perfect temperature for achieving golden, bubbly perfection.

Step 2: Cook the Pasta Shells

In a large pot, bring salted water to a rolling boil. Once it’s bubbling, toss in those large pasta shells and cook according to the package instructions until they’re al dente. We want them firm enough to hold their shape when stuffed! Once cooked, drain and set aside to cool slightly.

Step 3: Create the Filling

In a mixing bowl, combine the ricotta cheese, chopped spinach, grated parmesan cheese, egg, salt, and pepper. Mix until everything is beautifully blended. The vibrant green of the spinach against the creamy white of the ricotta is a sight to behold — a true feast for the eyes!

Step 4: Stuff the Shells

Now comes the fun part! Take each cooled pasta shell and generously fill it with the spinach and ricotta mixture. Don’t be shy — let it overflow a bit! This is where the joy truly begins. Once filled, set them aside on a plate or in a baking dish.

Step 5: Assemble and Bake

Spread a thin layer of marinara sauce on the bottom of your baking dish. This not only adds flavor but also prevents the shells from sticking. Carefully place the stuffed shells in the dish, and then cover them with the remaining marinara sauce. Bake uncovered for 25-30 minutes, until everything is heated through and bubbling with excitement!

Step 6: Serve and Enjoy

Once out of the oven, let them sit for a few moments (if you can resist the temptation!). Serve hot, garnished with extra parmesan if you’d like. The first bite is pure bliss — creamy, cheesy, and bursting with flavor!

Tips for Perfect Stuffed Shells

  • Don’t Overcook the Pasta: Make sure to cook the shells al dente. They will continue to cook in the oven, and overcooked shells can become mushy.
  • Experiment with Cheeses: Feel free to swap out the cheeses! Try adding mozzarella for a gooey texture or even feta for a tangy twist.
  • Make Ahead: You can prepare these stuffed shells ahead of time. Just assemble them, cover, and refrigerate until you’re ready to bake — perfect for busy weeknights!

Variations to Spice Things Up

If you’re feeling adventurous, there are countless ways to customize your stuffed shells:

  • Add Protein: For a heartier meal, consider adding cooked ground turkey or beef to the ricotta filling.
  • Use Different Greens: Kale or Swiss chard can be fantastic substitutes for spinach, adding a different flavor profile and texture.
  • Spice It Up: Want to add a kick? Incorporate red pepper flakes into the marinara sauce for a touch of heat!

Substitutions You Can Make

Cooking is all about improvisation! Here are some easy substitutions if you’re missing an ingredient:

  • Ricotta Cheese: Cottage cheese or cream cheese can work in a pinch, though the flavor will be a bit different.
  • Parmesan: Grana Padano or Pecorino Romano are excellent alternatives that still bring that cheesy goodness.
  • Marinara Sauce: If you’re short on time, store-bought sauce is a lifesaver. Or try pesto for a unique flavor twist!

Equipment You’ll Need

Before you get started, make sure you have the following tools ready:

  • A large pot for boiling pasta
  • A baking dish
  • A mixing bowl
  • A spoon or spatula for mixing
  • An oven mitt (trust me, you’ll need it!)

Storage and Freezing Tips

If you have leftovers (which is rare because they’re that good!), here’s how to store them:

  • In the Refrigerator: Keep stuffed shells in an airtight container for up to 3 days.
  • Freezing: You can freeze uncooked stuffed shells before baking for up to 3 months. Just be sure to cover them tightly. When ready to bake, cook directly from frozen, adding an extra 10-15 minutes to the baking time.

Frequently Asked Questions

Can I make stuffed shells without egg?

Absolutely! You can omit the egg and still achieve a delicious filling. Try adding a bit more cheese to help bind it together.

How do I know when the stuffed shells are done?

Look for bubbling sauce and melted cheese on top. If you have a food thermometer, the filling should reach at least 165°F (74°C).

What can I serve with stuffed shells?

A simple side salad with a light vinaigrette or some garlic bread complements the richness of the stuffed shells perfectly.

Conclusion: A Meal to Remember

There you have it, my friends! These Easy Spinach and Ricotta Stuffed Shells are not just a meal; they’re a celebration of flavors, a testament to the joy of cooking, and an invitation to gather around the table with those you love. So whether you’re cooking for family or prepping for a cozy night in, let these shells light up your dinner table. Remember, cooking is about exploration and joy — don’t be afraid to experiment and make this dish your own. Happy cooking, and may your kitchen always be filled with spice and warmth!

For more delightful recipes and tips, check out my other posts like Everyday Delights: My Simple Dinners That Make Healthy Living a Joy, Joyful Bites of Bliss: My Favorite Baked Cranberry Brie Treats, and Delightfully Simple: My Go-To Cottage Cheese Flatbreads Recipe. Let’s keep the adventure going!

Easy Spinach and Ricotta Stuffed Shells – A Healthy Veggie Dinner

Prep Time 15 minutes
Cook Time 30 minutes
Total Time 45 minutes
Servings 4 servings
Calories 400
A delicious and healthy vegetarian dish featuring pasta shells filled with spinach and ricotta, baked in marinara sauce for a comforting meal.

Ingredients

Pasta

  • 12 large pasta shells
  • 2 cups fresh spinach, chopped
  • 1 cup ricotta cheese
  • 1/2 cup grated parmesan cheese
  • 1 egg egg
  • 2 cups marinara sauce
  • to taste salt and pepper
  • optional olive oil

Instructions 

  • Preheat oven to 375°F (190°C). Cook shells in salted boiling water, drain, and set aside.
  • Mix ricotta, spinach, Parmesan, egg, salt, and pepper in a bowl.
  • Stuff each shell with the mixture, then place in a baking dish with marinara sauce.
  • Cover with remaining sauce and bake for 25-30 minutes until bubbly.
  • Serve hot, garnished with extra Parmesan if desired.

Notes

For a richer flavor, drizzle with olive oil before baking.
Calories: 400kcal
Cost: $15
Course: Main Course
Cuisine: Italian
Keyword: pasta, Spinach, Vegetarian

Nutrition

Calories: 400kcal | Carbohydrates: 50g | Protein: 20g | Fat: 15g | Sodium: 800mg

Loved this recipe? Save it to your favorite Pinterest board so you can easily find it later! It’s the perfect way to keep all your sweet ideas in one place. ✨

Delicious stuffed shells with spinach and cheese, highlighting texture and warm lighting.

The Creamy Garlic Parmesan Mushrooms That Turn Up the Flavor and Fire

Welcome to a culinary adventure where every bite tells a story! If you’ve ever craved comfort food that doesn’t shy away from flavor, you’re in for a treat. Today, we’re diving deep into the world of Creamy Garlic Parmesan Mushrooms — a dish that embodies the bold, passionate spirit of cooking with spice. This isn’t just food; it’s an experience that ignites the senses and warms the heart. Get ready to turn up the heat and embrace the flavor!

Why Creamy Garlic Parmesan Mushrooms?

Oh, let me tell you why this dish deserves a spot on your table! Imagine the aroma of sizzling garlic mingling with earthy mushrooms, all enveloped in a rich, creamy sauce that clings to every morsel. These mushrooms are not just a side dish; they’re the star of the show, ready to steal the spotlight at your next gathering or cozy dinner. Perfect as a Thanksgiving side dish or a casual weeknight delight, they pair beautifully with everything from cottage cheese flatbreads to baked cranberry brie.

Ingredients You’ll Need

Close-up of savory garlic parmesan mushrooms with a rich, creamy sauce and fresh parsley garnish.

Let’s get down to the essentials. Here’s what you’ll need to whip up this decadent dish:

  • 1 lb mushrooms (button or cremini), sliced
  • 3 tbsp unsalted butter
  • 4 cloves garlic, minced
  • 1/2 cup heavy cream
  • 1/2 cup grated Parmesan cheese
  • Salt and pepper to taste
  • Chopped fresh parsley (optional)

How to Make Creamy Garlic Parmesan Mushrooms

Ready to take a culinary leap? Follow these steps to create a dish that’s as comforting as it is flavorful:

  1. Melt the Butter: In a large skillet, melt the butter over medium heat. As it melts, let the intoxicating aroma of butter fill your kitchen — a sure sign that something delicious is about to happen.
  2. Sauté the Garlic: Add the minced garlic and sauté for about 1 minute until fragrant. This is where the magic starts; the smell will transport you to a cozy Italian kitchen.
  3. Add the Mushrooms: Toss in the sliced mushrooms and cook, stirring occasionally, until they are tender and golden brown, about 8-10 minutes. Watch them shrink and caramelize, soaking up that buttery goodness.
  4. Pour in the Cream: Now, pour in the heavy cream and stir to combine. This is where the dish transforms into a creamy dream! Feel free to take a moment to admire the silky texture.
  5. Mix in the Cheese: Add the grated Parmesan cheese and stir until the sauce is creamy and the cheese is melted. The combination of sharp cheese and rich cream creates a flavor explosion that you won’t want to miss.
  6. Season to Perfection: Season with salt and pepper to taste. Remember, balance is key! Taste as you go to ensure every bite is perfect.
  7. Garnish and Serve: Optional: Garnish with chopped parsley before serving. This adds a splash of color and freshness that elevates the dish beautifully.

Tips for Perfecting Your Mushrooms

Every chef has their secrets, and I’m excited to share mine with you! Here are some tips to elevate your Creamy Garlic Parmesan Mushrooms:

  • Choose the Right Mushrooms: While button mushrooms are classic, cremini or even shiitake mushrooms can add depth and flavor. Experiment and discover your favorite!
  • Don’t Rush the Sauté: Allowing the mushrooms to brown properly enhances their flavor. Patience is key — let them caramelize for that rich, earthy taste.
  • Customize Your Cheese: Try adding a blend of cheeses! A sprinkle of mozzarella or gouda can create a delightful flavor profile.
  • Spice It Up: Feeling adventurous? Add a pinch of red pepper flakes or a dash of hot sauce for an extra kick if you like a bit of heat.

Variations to Try

This recipe is versatile enough to suit your cravings and dietary needs. Here are a few variations to consider:

  • Vegan Option: Swap out the butter for olive oil, use coconut cream instead of heavy cream, and nutritional yeast in place of Parmesan for a plant-based version.
  • Herb Infusion: Add fresh herbs like thyme or rosemary during the sautéing process for an aromatic twist.
  • Protein Boost: Stir in cooked chicken, shrimp, or even sausage for a heartier meal. This elevates the dish and makes it a complete dinner.

Substitutions You Can Make

If you find yourself missing an ingredient, don’t panic! Here are some simple substitutions:

  • Heavy Cream: Substitute with half-and-half or a non-dairy milk plus a tablespoon of cornstarch for thickness.
  • Parmesan Cheese: Grana Padano or Pecorino Romano work well if you’re out of Parmesan.
  • Butter: Use ghee or a plant-based butter if you’re looking for a healthier option.

Storage and Freezing Tips

Let’s talk leftovers! Here’s how to store your Creamy Garlic Parmesan Mushrooms:

  • Refrigeration: Store in an airtight container in the fridge for up to 3-4 days. Reheat gently on the stovetop or in the microwave.
  • Freezing: You can freeze the dish, but the texture may change slightly. Store in a freezer-safe container for up to 3 months. Thaw overnight in the fridge before reheating.

FAQs About Creamy Garlic Parmesan Mushrooms

Got questions? I’ve got answers! Here are some common queries about this dish:

  • Can I make this dish ahead of time?
    Absolutely! You can prepare the mushrooms a few hours in advance and reheat them just before serving.
  • What can I serve with these mushrooms?
    They pair wonderfully with steak, roasted chicken, or even over pasta as a decadent sauce.
  • How do I make it spicier?
    Incorporate some diced jalapeños or a splash of hot sauce right as you add the cream for a fiery kick!

Conclusion

There you have it, my fellow culinary adventurers! The Creamy Garlic Parmesan Mushrooms are a celebration of flavors that invites you to embrace the heat and richness of cooking. Whether you’re enjoying them as a side dish at a family gathering or whipping them up for a cozy date night, these mushrooms promise to impress and delight. So grab your skillet, gather your ingredients, and let’s create something unforgettable together! Remember, cooking is about exploration, joy, and a little bit of fire — and every time you step into the kitchen, you’re crafting your own delicious story. Happy cooking!

Creamy Garlic Parmesan Mushrooms

Prep Time 5 minutes
Cook Time 15 minutes
Total Time 20 minutes
Servings 4 servings
Calories 250
A rich and creamy mushroom dish perfect for indulgence without guilt. Quick to prepare and bursting with flavor.

Ingredients

Main

  • 1 lb mushrooms (button or cremini), sliced
  • 3 tbsp unsalted butter
  • 4 cloves garlic, minced
  • 1/2 cup heavy cream
  • 1/2 cup grated parmesan cheese
  • to taste salt and pepper
  • chopped fresh parsley (optional) parsley (for garnish)

Instructions 

  • Melt butter in a skillet over medium heat.
  • Sauté garlic for 1 minute until fragrant.
  • Add mushrooms and cook until tender and golden, about 8-10 minutes.
  • Stir in heavy cream and Parmesan until sauce is creamy and cheese melts.
  • Season with salt and pepper, garnish with parsley if desired, and serve.

Notes

This dish pairs well with grilled meats or as a standalone vegetarian side.
Calories: 250kcal
Cost: $15
Course: Side Dish
Cuisine: American
Keyword: Mushrooms

Nutrition

Calories: 250kcal | Carbohydrates: 10g | Protein: 8g | Fat: 20g | Sodium: 150mg

Loved this recipe? Save it to your favorite Pinterest board so you can easily find it later! It’s the perfect way to keep all your sweet ideas in one place. ✨

Appetizing creamy mushroom dish with detailed textures, lit softly to highlight their juicy appearance.

The Cottage Cheese Flatbreads That Turned Up the Flavor and Fired Up My Kitchen

Welcome, fellow food adventurers! If you’re like me, the kitchen is your playground—a place where the ordinary transforms into the extraordinary with just a pinch of creativity and a splash of spice. Today, I want to share with you a recipe that not only ignited my passion for experimenting but also filled my home with the irresistible aroma of freshly baked flatbreads. Yes, we’re diving into the world of Cottage Cheese Flatbreads!

These delightful flatbreads are more than just a delicious snack; they’re a canvas for your culinary imagination! With a simple mix of cottage cheese, eggs, and a couple of spices, you can whip up these beauties in no time. Let’s get started, shall we?

Why Cottage Cheese Flatbreads?

Now, you might be wondering, why cottage cheese? Well, let me tell you—it’s a miracle ingredient that adds moisture, richness, and a punch of protein to your flatbreads. Plus, they’re easy to make and incredibly versatile. Whether you’re looking for a quick appetizer, a light lunch, or a cozy side dish for your winter hosting food, these flatbreads are here to impress. And trust me, once you try them, you’ll be dreaming up new variations!

Gather Your Ingredients

Eye-level shot of freshly baked cottage cheese flatbreads with textured surface and warm lighting.

Before we roll up our sleeves and get into the kitchen, let’s make sure we have all the ingredients ready. Here’s what you’ll need:

  • 2 eggs
  • 1 cup cottage cheese
  • A pinch of salt
  • Pepper (to taste)
  • Garlic powder (to taste)

Simple, right? Just a handful of ingredients that pack a flavorful punch. You can also tweak the spices to suit your taste. Maybe a dash of paprika or a sprinkle of cayenne? The world is your oyster, my friends!

Step-by-Step Guide to Making Cottage Cheese Flatbreads

Let’s get into the fun part—making these flatbreads. Follow these simple steps, and you’ll have a batch ready to enjoy in no time!

Step 1: Preheat Your Oven

First things first, preheat your oven to 350°F (175°C). This is crucial because a properly heated oven ensures that your flatbreads will cook evenly and come out beautifully golden.

Step 2: Prepare Your Baking Sheet

Next, line a baking sheet with parchment paper. This not only prevents sticking but also makes for easy cleanup. We all love a low-maintenance cooking experience!

Step 3: Blend the Ingredients

In a food processor, add the two eggs, 1 cup of cottage cheese, a pinch of salt, pepper, and garlic powder. Blend the mixture for just a few seconds until smooth. You want it to be creamy and luscious—like the perfect pool of flavor waiting to be transformed into flatbreads!

Step 4: Spread the Mixture

Now, the fun part! Spread the mixture evenly onto the prepared baking sheet, forming a thin layer. This will ensure that your flatbreads cook through properly without becoming too doughy in the middle.

Step 5: Bake to Perfection

Pop the baking sheet into the oven and let them bake for about 10-15 minutes, or until they are set and lightly golden. The aroma wafting from your oven will surely have your taste buds tingling with anticipation!

Step 6: Cool and Fill

Once out of the oven, let the flatbreads cool slightly. This is key! If you try to fill them while they’re too hot, they might fall apart. Once they’re cool enough to handle, it’s time to get creative with toppings. I love filling mine with a mix of fresh arugula, juicy tomatoes, creamy avocado, or whatever else strikes my fancy at the moment!

Step 7: Roll and Serve

Roll them up, cut them into bite-sized pieces, and serve! They’re perfect for dipping into your favorite sauces or as a side dish for your main meal.

Tips for Perfect Cottage Cheese Flatbreads

Here are a few tips to ensure your flatbreads turn out perfectly:

  • Don’t Overmix: When blending your ingredients, a few seconds is all you need. Overmixing can lead to a denser texture.
  • Experiment with Flavors: Feel free to add herbs or spices to the mixture. Fresh dill or chives can elevate these flatbreads to a whole new level!
  • Watch the Baking Time: Every oven is different. Keep an eye on your flatbreads as they bake to avoid overcooking.

Variations to Try

The beauty of these flatbreads lies in their versatility. Here are a few variations you can try:

  • Cheesy Spinach Flatbreads: Add a handful of chopped spinach and a sprinkle of mozzarella cheese to the mixture before baking.
  • Spicy Southwest Flatbreads: Mix in jalapeños, cumin, and cheddar cheese for a kick of flavor.
  • Herbed Flatbreads: Incorporate fresh herbs like basil or oregano to give your flatbreads a fragrant twist.

Substitutions You Can Make

If you find yourself short on an ingredient, don’t sweat it! Here are some substitutions that work just as well:

  • Cottage Cheese: If you don’t have cottage cheese, ricotta works beautifully for a rich texture.
  • Eggs: For a vegan option, try using flax eggs (1 tablespoon of ground flaxseed mixed with 2.5 tablespoons of water) or unsweetened applesauce.

Storage and Freezing Tips

These flatbreads are perfect for meal prep! Here’s how to store and freeze them:

  • Refrigerator: Store any leftovers in an airtight container in the fridge for up to 3 days.
  • Freezing: You can freeze the baked flatbreads for up to a month. Just make sure to separate them with parchment paper to prevent sticking.

Frequently Asked Questions

How to make cottage cheese flatbreads crispy?

For crispier flatbreads, spread the mixture thinner and bake for a few extra minutes. Just keep an eye on them to prevent burning!

Can I substitute cottage cheese for something else?

Yes! Ricotta or Greek yogurt can be used as a substitute for cottage cheese, though the flavor and texture may vary slightly.

What can I serve with these flatbreads?

These flatbreads are fantastic on their own, but they also pair beautifully with dips like hummus, tzatziki, or even a spicy salsa for some added zing!

Conclusion: Ignite Your Kitchen Adventure!

So there you have it—my passionate take on Cottage Cheese Flatbreads that are sure to fire up your kitchen and elevate your meals. Cooking is all about exploration, and these flatbreads are the perfect platform for your culinary creativity. Don’t forget to experiment with toppings and flavors, and make this recipe your own!

If you’re hungry for more ideas, check out my Delightfully Simple My Go-To Cottage Cheese Flatbreads Recipe for additional twists and inspiration! Also, if you’re looking for more healthy options, my post on Nourish Your Soul: The Clean Eating Recipe That Transformed My Health is a must-read.

Now, go forth, grab your skillet, and let the flavors dance! Happy cooking!

Cottage Cheese Flatbreads

Prep Time 5 minutes
Cook Time 15 minutes
Total Time 20 minutes
Servings 4 pieces
Calories 150
Enjoy these quick and savory cottage cheese flatbreads, perfect for a healthy snack or light meal.

Ingredients

Dairy

  • 2 pieces eggs
  • 1 cup cottage cheese
  • a pinch salt (to taste)
  • pepper to taste pepper
  • garlic powder to taste garlic powder

Instructions 

  • Preheat oven to 350°F (175°C) and line a baking sheet.
  • Blend eggs, cottage cheese, salt, pepper, and garlic powder until smooth.
  • Spread mixture evenly on the baking sheet as a thin layer.
  • Bake for 10-15 minutes until set and lightly golden.
  • Let cool, then fill with toppings and roll up to serve.

Notes

Use fresh ingredients for best flavor.
Calories: 150kcal
Cost: $8
Course: Appetizer, Snack
Cuisine: International
Keyword: cottage cheese

Nutrition

Calories: 150kcal | Carbohydrates: 8g | Protein: 12g | Fat: 8g | Sodium: 350mg

Loved this recipe? Save it to your favorite Pinterest board so you can easily find it later! It’s the perfect way to keep all your sweet ideas in one place. ✨

Delicious cottage cheese flatbreads showcasing a rustic, appetizing appearance on a neutral background.